HDR – High Dynamic Range. Light on our planet covers about 30 stops (1 stop =2X the light) or 2 ^...
16
HDR – High Dynamic Range. Light on our planet covers about 30 stops (1 stop =2X the light) or 2 ^ 30. The human eye can cover about 12 -15 stops. Negative film about 8 stops. Digital cameras run 6 -8 stops of dynamic range. By using bracketed exposures you can use a program that selects the detail from each exposure and builds a photograph that shoehorns the information into a single picture. HDR Presentation for Goddard Photo Club November 14, 2012
-
Upload
bryan-stevenson -
Category
Documents
-
view
214 -
download
1
Transcript of HDR – High Dynamic Range. Light on our planet covers about 30 stops (1 stop =2X the light) or 2 ^...

HDR – High Dynamic Range. Light on our planet covers about 30 stops (1 stop =2X the light) or 2 ^ 30. The human eye can cover about 12 -15 stops. Negative film about 8 stops. Digital cameras run 6 -8 stops of dynamic range. By using bracketed exposures you can use a program that selects the detail from each exposure and builds a photograph that shoehorns the information into a single picture.
HDR Presentation for Goddard Photo Club November 14, 2012

HDR Photography Definitions• HDR is the acronym for High Dynamic Range.
– Actually a misnomer, because you are compressing the dynamic range at exposure to make the image fit onto the output media.
• HDR, in it’s digital incarnation, is still a relative young art form. (1)
– Because of the amount of controls, you can get some really bad HDR results, some photographers absolutely despise HDR photography and think it is the work of the devil.
– If done right, HDR can give you some very amazing pictures.• HDR requires Software for post-processing
– There are many software products that do HDR post processing.– We use Photomatix Pro.
• 1. Ansel Adams addressed the disparity between the dynamic range of film and paper by developing the Zone system, which allowed the photographer to know before exposure how the print would look.)

NormalOver +2
Under -2
Example: Three Exposures and the Result
HDR Photography Practical
• To create an HDR image, you need a camera that can – Shoot in “Auto-bracketing mode”– And/or, shoot in RAW (You can also create an HDR image out
of a single RAW photo)• Although you can make a decent HDR from a single RAW file, it is
recommend that you use a camera that has “auto-bracketing” or “Exposure Bracketing”. This is the ability for your camera to take at least 3 pictures right after one another, each at different exposures.
• Because you are taking multiple shots and then combining them, it helps to use a tripod to ensure the images match. The more solid your tripod is the better results you are going to get.(1)
• What? You don’t want to carry around a tripod? If you are going out to shoot beautiful pictures, you better get serious and use a tripod.
(1): The software will match features and overlay and trim the images to match, if you shoot free hand. But a tripod means that you will get more in the final image, especially at the edges.
How to create HDR, Step #1• Set up your camera in Aperture Priority mode. This is important
because you don’t want the multiple photos to have different depth of field.
• Turn on Autobracketing. If you have 3 pics in the autobracket, set it up at -2, 0, +2.
• For 95% of situations, going from +2 to -2 is enough light range.• Shoot in RAW, if you can. JPG is okay, but RAW gives your more
flexibility later in the processing. RAW photos contain a lot more light information than a JPEG. Please note that when processing in Photomatix later, the RAWs are no better than JPEGs.
• Use a tripod if possible.• If you don’t use a tripod, Photomatix will try to align the images for
you.
How to create HDR, Step #2• Use Photomatix to take your photos and convert them into an HDR
image. Photomatix has several ways of combining the images. One is Tonemaping, one is exposure fusion. For this presentation we will just call it Magic. Just as you don’t need to be a mechanic to use a car, you don’t need to how it does it, just use it.
• You can run Photomatix in a few ways:– To generate an single HDR from some autobraketed shots – To do a huge batch of HDRs after you come back from a shoot– To convert a single RAW photo into an HDR
• You can use Photomatix to open up JPG or RAW photos. Photomatix itself will do the RAW conversion on its own. Some experts claim it is a little better to do the RAW conversion on your own.
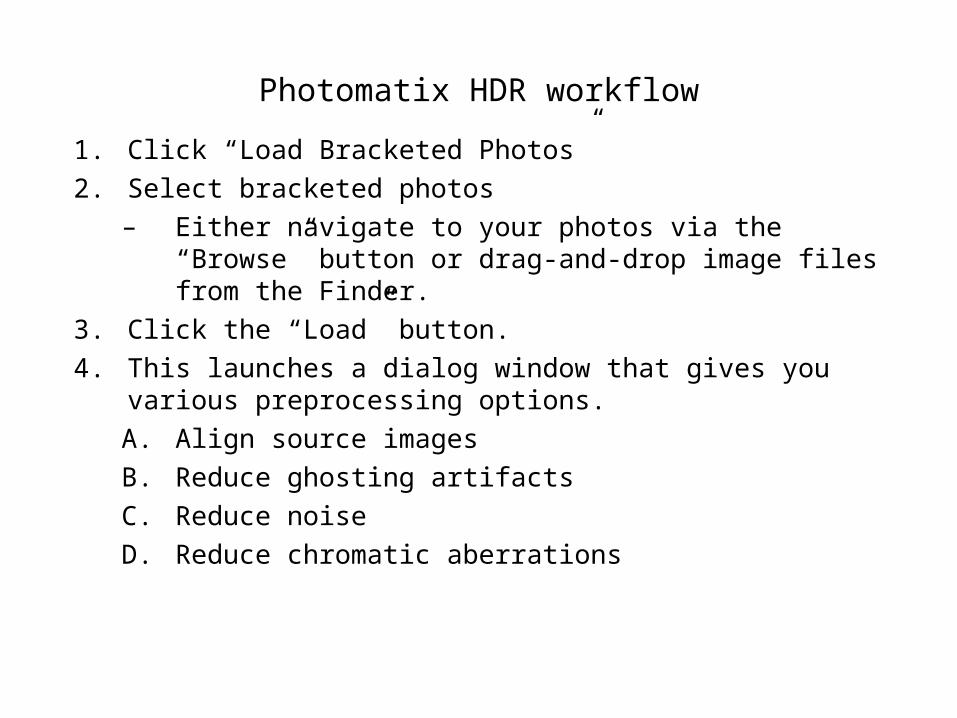
Photomatix HDR workflow
1. Click “Load Bracketed Photos”
2. Select bracketed photos– Either navigate to your photos via the “Browse” button or drag-
and-drop image files from the Finder.
3. Click the “Load” button.
4. This launches a dialog window that gives you various preprocessing options.
A. Align source images
B. Reduce ghosting artifacts
C. Reduce noise
D. Reduce chromatic aberrations
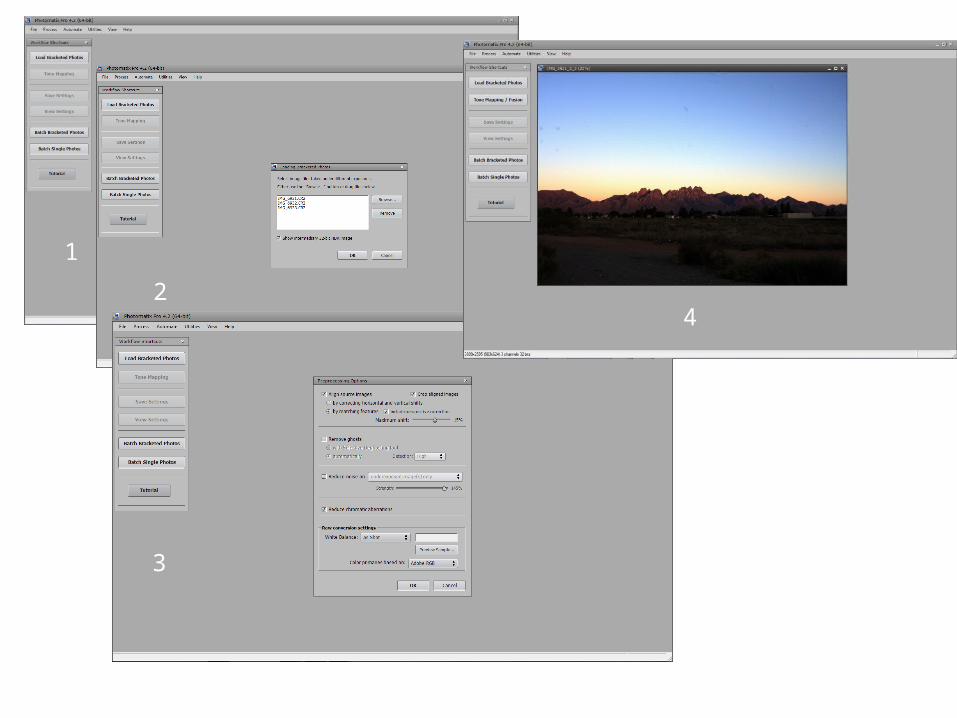
1
2
3
4

Preprocessing Options
• If you feel like you had some camera shake, choose “Align Source Images”• If there was movement or “ghosting”, chose “Reduce ghosting artifacts”
– This will take you to another screen where you can then select the area of the photo that has the ghosting. After that, you can select which component photo to use instead of the ghost.
• If you shot at a high ISO or anticipate a lot of noise, chose “Reduce noise”• If you have the sort of lens or situation that gives you annoying chromatic
aberrations (those nasty purple and green outlines you see at 100% sometimes), then choose this option to help minimize those.
• There are not many wrong choices you can make on this dialog, so don’t panic.
• Once you have selected your preprocessing options, click the “Preprocess” button.
• Then some wizard waves their wand and Magic happens.
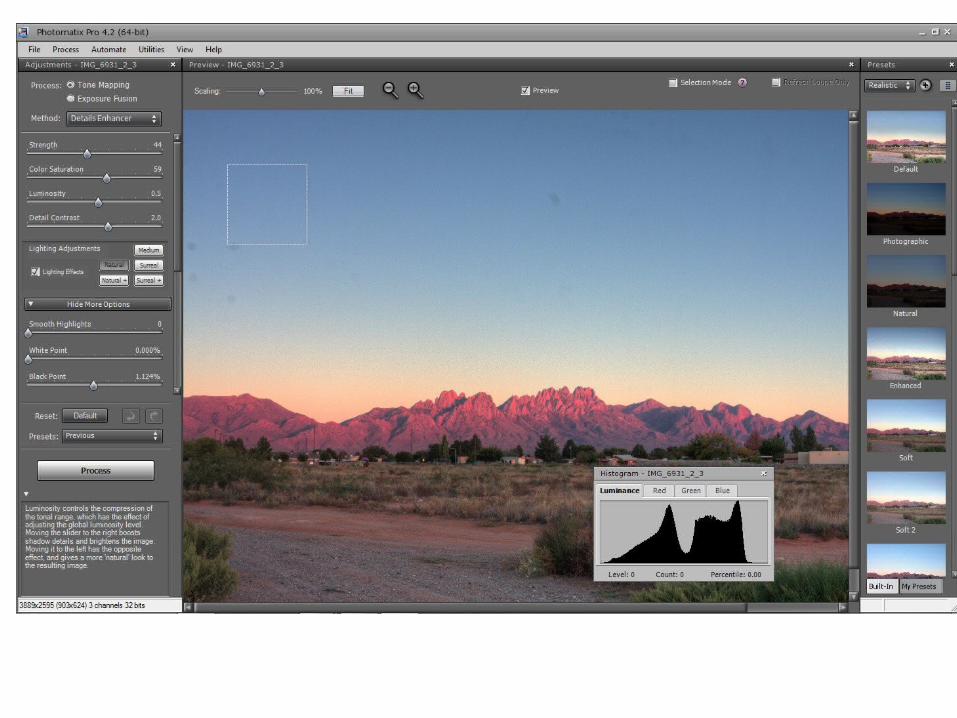
Photomatix Processing
• Every picture is different. There is no “right way” to set these sliders. There is certainly a “wrong” way to do it, though. It is very easy to “over do” some of the slider settings.
• The suggested processing options are nice to look at but I usually don’t use them.
• Many sliders, so little time. I find the best way to start is with the White point and Black point. Tweek the gamma, then move to the strength, saturation, etc. If you’ve shot many images at a single location Save the Settings so that you have a good starting point for the rest of the images.
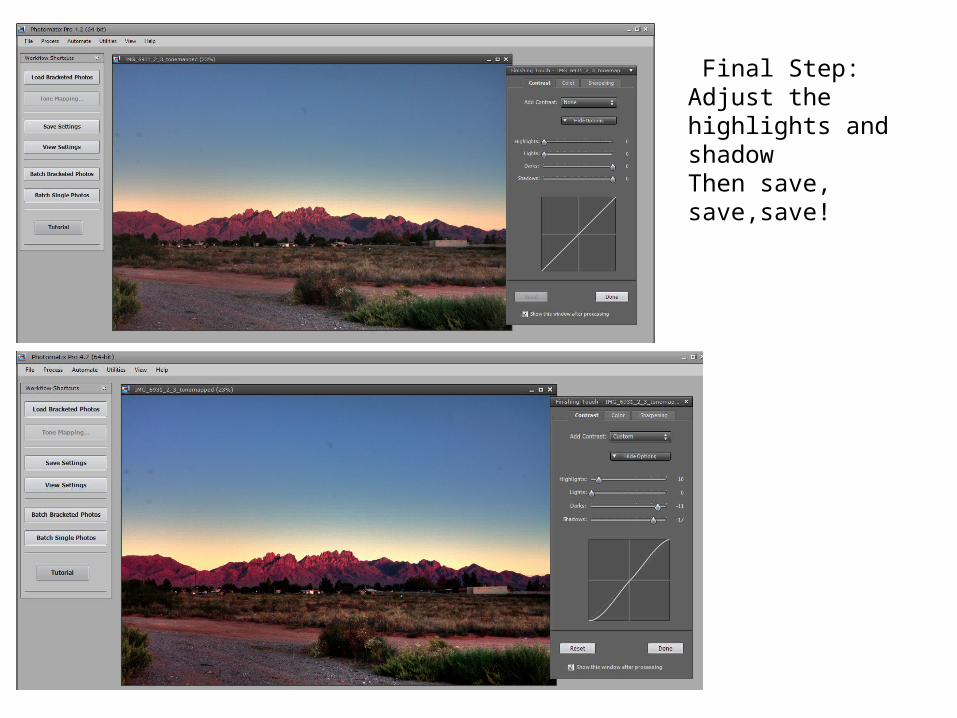
FFinal Step: Adjust the highlights and shadowThen save, save,save!
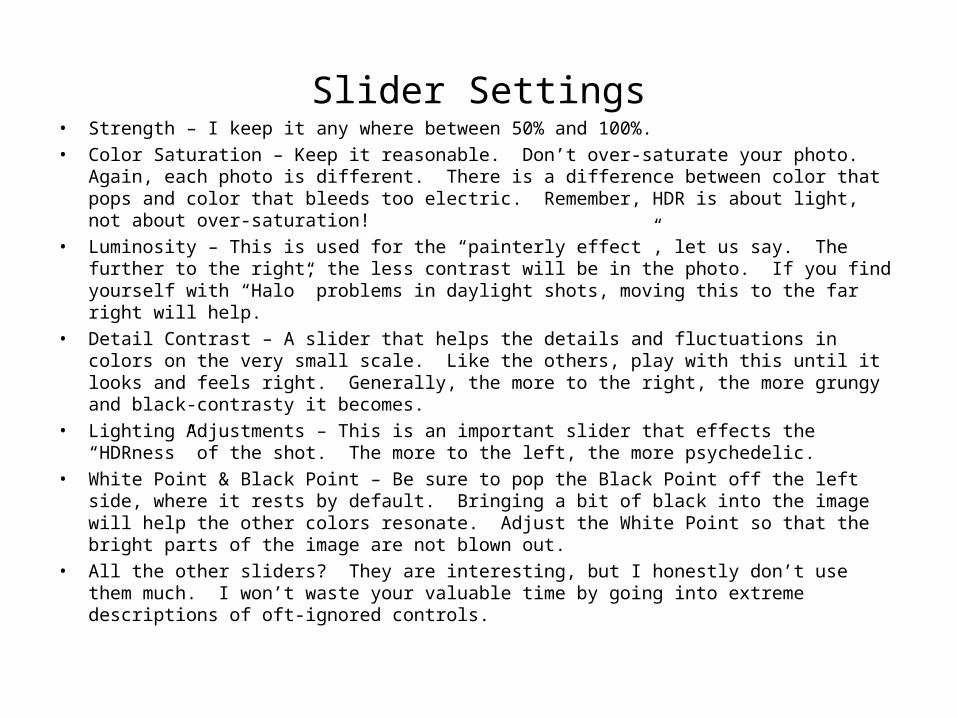
Slider Settings• Strength – I keep it any where between 50% and 100%.• Color Saturation – Keep it reasonable. Don’t over-saturate your photo. Again, each
photo is different. There is a difference between color that pops and color that bleeds too electric. Remember, HDR is about light, not about over-saturation!
• Luminosity – This is used for the “painterly effect”, let us say. The further to the right, the less contrast will be in the photo. If you find yourself with “Halo” problems in daylight shots, moving this to the far right will help.
• Detail Contrast – A slider that helps the details and fluctuations in colors on the very small scale. Like the others, play with this until it looks and feels right. Generally, the more to the right, the more grungy and black-contrasty it becomes.
• Lighting Adjustments – This is an important slider that effects the “HDRness” of the shot. The more to the left, the more psychedelic.
• White Point & Black Point – Be sure to pop the Black Point off the left side, where it rests by default. Bringing a bit of black into the image will help the other colors resonate. Adjust the White Point so that the bright parts of the image are not blown out.
• All the other sliders? They are interesting, but I honestly don’t use them much. I won’t waste your valuable time by going into extreme descriptions of oft-ignored controls.

Finish Processing
• Once you have set everything up with the sliders, click “Process”.
• Your HDR image will now be available.• Photomatix allows you to make additional tweaks to the
final HDR image.– Contrast– Color– Sharpness
• Save your image.

Go to Youtube.com and search for HDR to see tutorials by the different manufacturers on pros using their products.
I used the Photomatix the most. DynamicPhoto was alright.
Below are links. They all have trial downloads. The first two companies are not timed, they watermark your output file. Give them all a try and let me know.
Photomatix www.hdrsoft.com/Dynamic Photo HDR http://www.mediachance.com/hdri/index.htmlHDR Darkroom http://www.hdrdarkroom.com/HDR Expose http://www.unifiedcolor.com/
Following are screenshots from Photomatix.
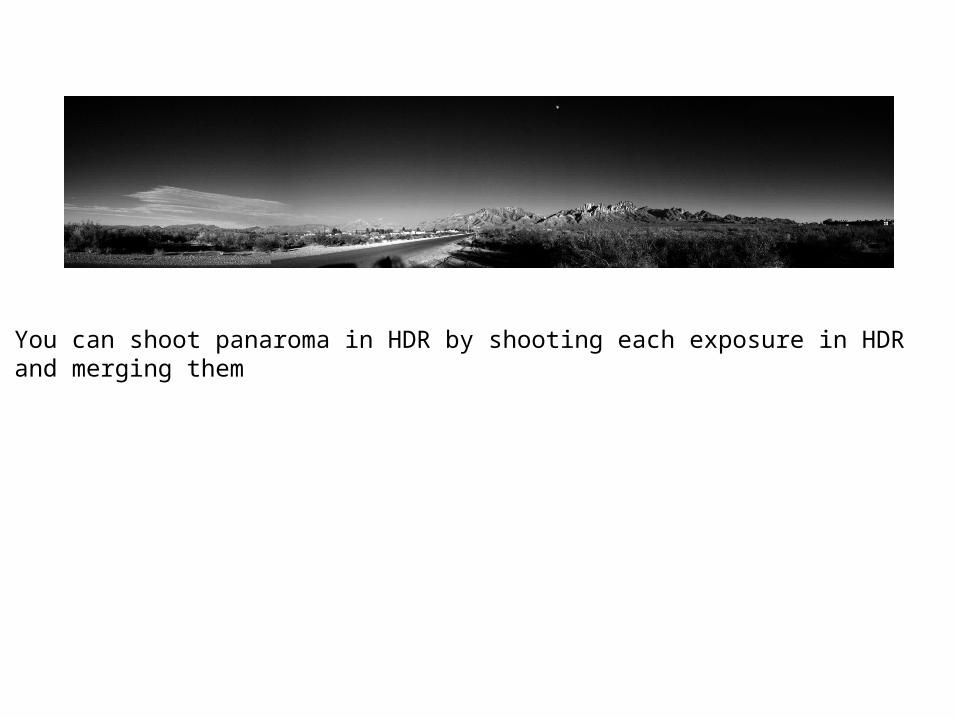
You can shoot panaroma in HDR by shooting each exposure in HDR and merging them