Hadoop installation steps
11
Hadoop installation procedure document (Document version 1.0) Hello Technocrates.... This is the tutorial document about how to install hadoop (2.6.0) in your linux (Ubuntu 12.04 LTS) machine. (Hope you are aware about linux environment) 1. First open the terminal by Ctrl+Alt+T. 2. Run the update command: sudo apt-get update First it will prompt for your password, and then it may take time depending upon your internet speed and system update status. 3. Then install java in your sytem using $ sudo apt-get install openjdk-6-jdk 4. check java version by using: $ java -version CBSE@ABES Designed by: Mayank Sharma Center for Building Skills and Employability ABES Engineering College, Ghaziabad, India
-
Upload
mayank-sharma -
Category
Data & Analytics
-
view
44 -
download
0
Transcript of Hadoop installation steps

Hadoop installation procedure document
(Document version 1.0)
Hello Technocrates....
This is the tutorial document about how to install hadoop (2.6.0) in your linux (Ubuntu 12.04 LTS) machine. (Hope you are aware about linux environment)
1. First open the terminal by Ctrl+Alt+T.
2. Run the update command: sudo apt-get update First it will prompt for your password, and then it may take time depending upon your internet speed and system update status.
3. Then install java in your sytem using $ sudo apt-get install openjdk-6-jdk
4. check java version by using: $ java -version
CBSE@ABES
Designed by: Mayank SharmaCenter for Building Skills and Employability
ABES Engineering College, Ghaziabad, India
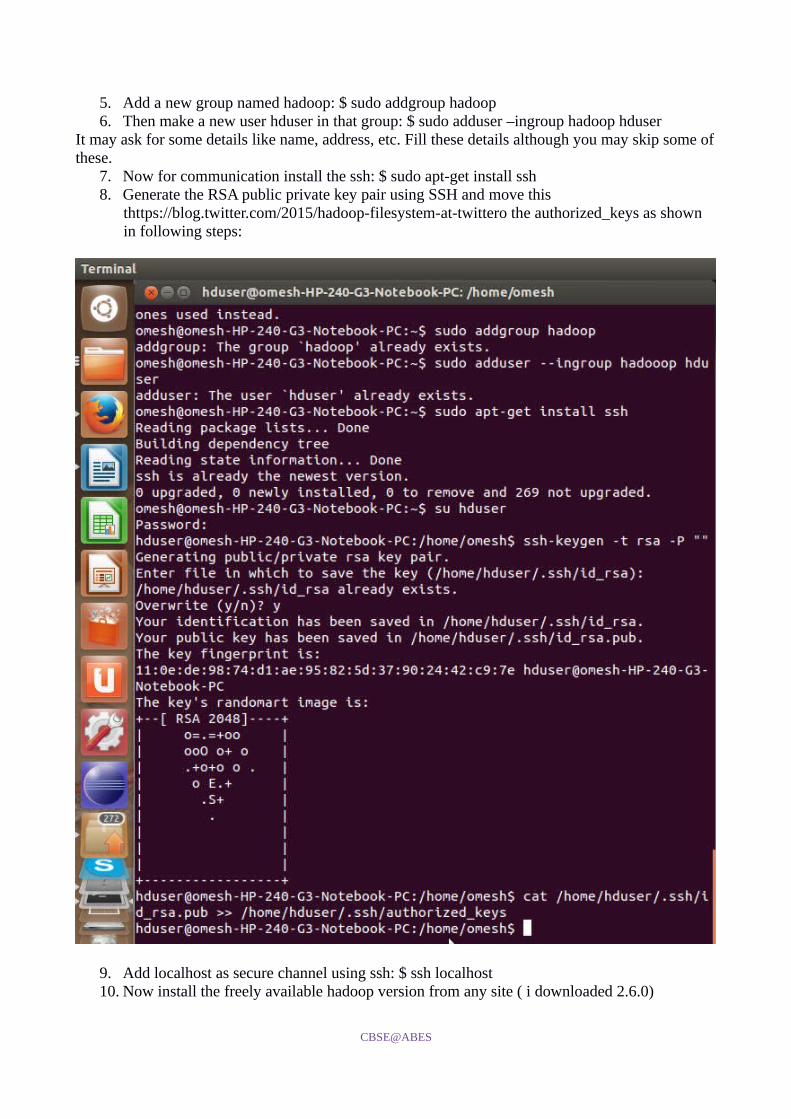
5. Add a new group named hadoop: $ sudo addgroup hadoop6. Then make a new user hduser in that group: $ sudo adduser –ingroup hadoop hduser
It may ask for some details like name, address, etc. Fill these details although you may skip some of these.
7. Now for communication install the ssh: $ sudo apt-get install ssh8. Generate the RSA public private key pair using SSH and move this
thttps://blog.twitter.com/2015/hadoop-filesystem-at-twittero the authorized_keys as shown in following steps:
9. Add localhost as secure channel using ssh: $ ssh localhost10. Now install the freely available hadoop version from any site ( i downloaded 2.6.0)
CBSE@ABES

11. Untar the downloaded package using the command: $ tar xvzf hadoop-2.6.0.tar.gz12. Now change directory to this folder using: $ cd hadoop-2.6.013. Now move all content of this directory to the usr/local/hadoop
14. This may through an error like:
hduser is not in the sudoers file. This incident will be reported......
15. Now add hduser to the sudoers file as shown
16. Now again move the folder as tried previously and change its ownership to the hduser as shown:
17. Now we are almost done, and just need to change the configuration file. The following files needs to be changed1. ~/.bashrc2. hadoop-env.sh3. core-site.xml4. mapred-site.xml5. hdfs-site.xml
18. Open bashrc and change its content as shown
CBSE@ABES

Now add the hadoop path to the directory:
19. Now open and update hadoop-env.sh as shown
Now update java path in this file:
20. Now open and update core-site.xml as shown:
CBSE@ABES
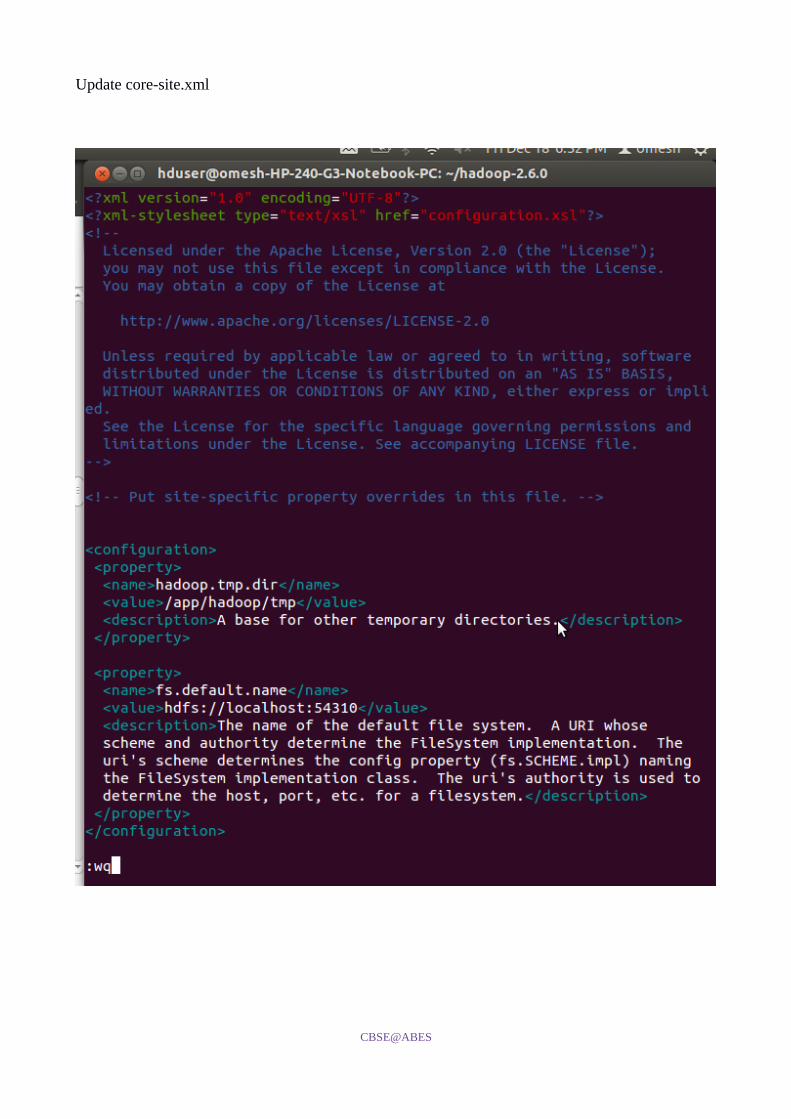
Update core-site.xml
CBSE@ABES

21. Now open and update mapred-site.xml
now update this file as shown
CBSE@ABES
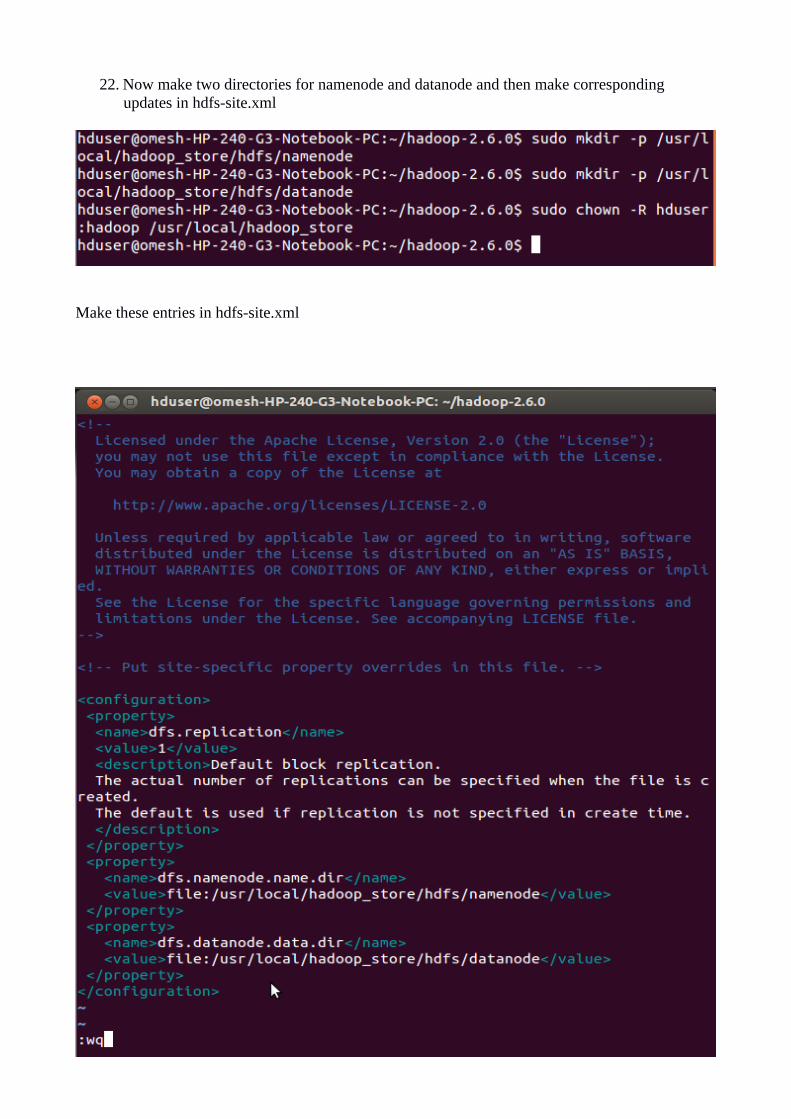
22. Now make two directories for namenode and datanode and then make corresponding updates in hdfs-site.xml
Make these entries in hdfs-site.xml
CBSE@ABES
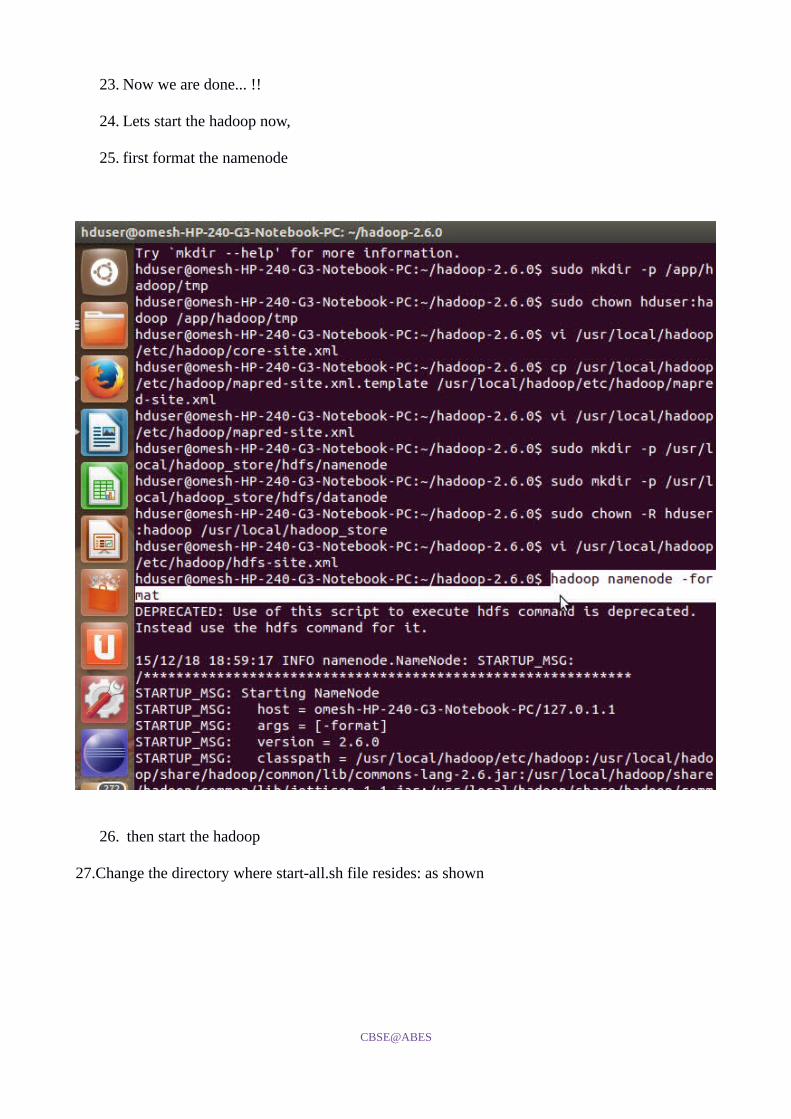
23. Now we are done... !!
24. Lets start the hadoop now,
25. first format the namenode
26. then start the hadoop
27.Change the directory where start-all.sh file resides: as shown
CBSE@ABES

28. Now start hadoop : $ start-all.sh and check the status of the node using the command $ jps
CBSE@ABES
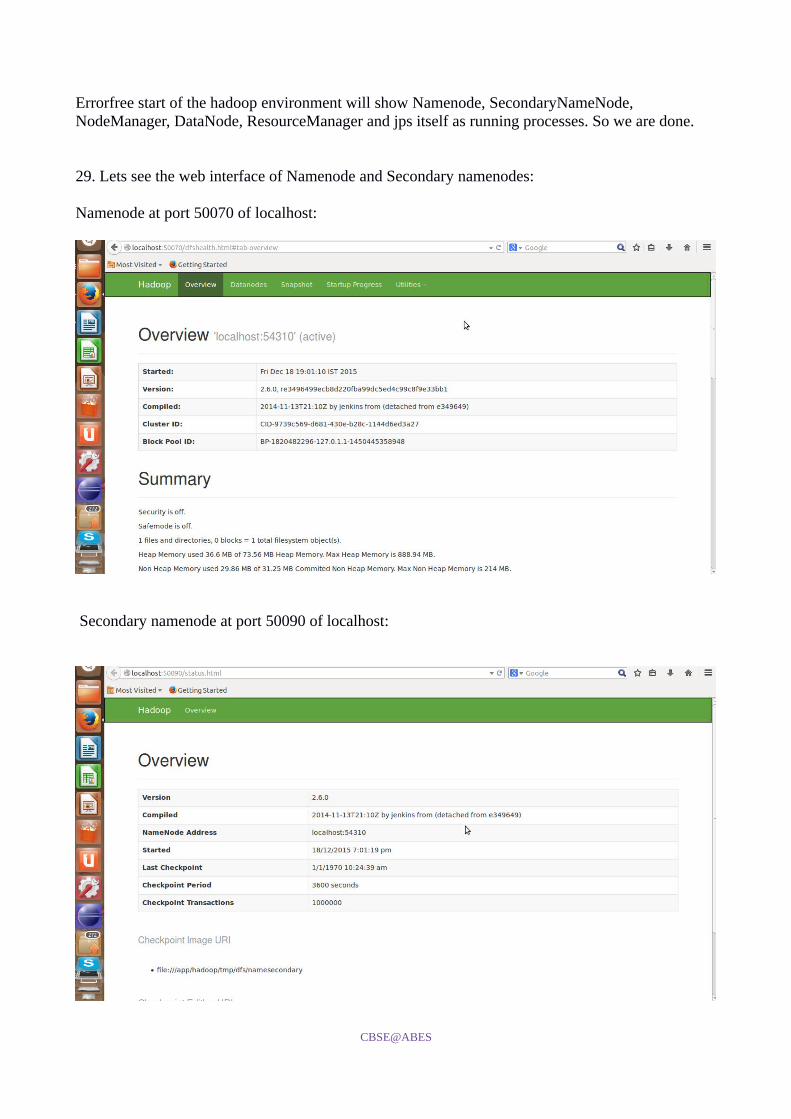
Errorfree start of the hadoop environment will show Namenode, SecondaryNameNode, NodeManager, DataNode, ResourceManager and jps itself as running processes. So we are done.
29. Lets see the web interface of Namenode and Secondary namenodes:
Namenode at port 50070 of localhost:
Secondary namenode at port 50090 of localhost:
CBSE@ABES

We are done.... All components are working fine.
30. Last one.... Dont forget to leave hadoop cluster without stoping the services by the following commands:
************************** Wish you all the best **************************
CBSE@ABES