Guitar Combos Manual English
49
Operation Manual GUITAR COMBOS
-
Upload
weduckworth -
Category
Documents
-
view
385 -
download
4
Transcript of Guitar Combos Manual English

Operation Manual
GUITAR COMBOS

The information in this document is subject to change without notice and does not represent a commitment on the part of NATIVE INSTRUMENTS GmbH. The software described by this document is subject to a License Agreement and may not be copied to other media. No part of this publication may be copied, reproduced or otherwise transmitted or recorded, for any purpose, without prior written permission by NATIVE INSTRUMENTS GmbH, hereinafter referred to as NATIVE INSTRUMENTS. All product and company names are trademarks of their respective owners.
Furthermore, the fact that you are reading this text means you are the owner of legal version rather than an illegal, pirated copy. It is only through the loyalty and honesty of people like yourself that NATIVE INSTRUMENTS GmbH can continue to develop and create innovative audio software. On behalf of the entire company, thank you very much.
Users Guide written by Craig Anderton and Sascha Kubiak.
Special thanks to the Beta Test Team, who were invaluable not just in tracking down bugs, but in making this a better product.
© NATIVE INSTRUMENTS GmbH, 2007. All rights reserved.
Germany USANATIVE INSTRUMENTS GmbH NATIVE INSTRUMENTS North America, Inc.
Schlesische Str. 28 5631 Hollywood Boulevard
D-10997 Berlin Los Angeles, CA 90028
Germany USA
[email protected] [email protected]
www.native-instruments.de www.native-instruments.com

GUITAR COMBOS – III
Table of ContentsWelcome to GUITAR COMBOS .......................................................................6
Instant Gratification.....................................................................................8Please read this before you start ....................................................... 8Computer Setup for GUITAR COMBOS............................................... 9Check out the presets .....................................................................13Basic Preset Tweaking ....................................................................14
GUITAR COMBOS Features .......................................................................... 15Metronome ....................................................................................15Tapedeck ......................................................................................16Standard Playback..........................................................................16Looped Playback ............................................................................17Changing Playback Pitch and/or Tempo .............................................17The Tuner ......................................................................................18The View Menu ..............................................................................19
AC BOX COMBO Parameters .......................................................................21Input Level Meter ...........................................................................21Noise Gate On/Off (Button) .............................................................21Input Volume (Knob) ...................................................................... 22Treble Booster On/Off (Button)........................................................ 22Treble Booster Boost (Knob) ........................................................... 22Treble Booster Bright (Knob) ........................................................... 23AC Box Volume (Knob) ................................................................... 23AC Box Treble (Knob) ..................................................................... 23AC Box Bass (Knob) ...................................................................... 23AC Box Tone Cut (Knob) ..................................................................24Tremolo On/Off (Button) ..................................................................24Tremolo Intensity (Knob) .................................................................24Tremolo Rate (Knob) .......................................................................25Spring Reverb On/Off (Button) .........................................................25Spring Reverb Reverb (Knob) ...........................................................25Spring Reverb Time (Knob) ............................................................. 26Output Volume (Knob) ................................................................... 26Output Level Meter ........................................................................ 26
TWANG COMBO Parameters .......................................................................27Input Level Meter ...........................................................................27Noise Gate On/Off (Button) .............................................................27Input Volume (Knob) ...................................................................... 28

IV – GUITAR COMBOS
Skreamer On/Off (Button) .............................................................. 28Skreamer Volume (Knob) ................................................................ 28Skreamer Tone (Knob) ................................................................... 29Skreamer Drive (Knob) ................................................................... 29Chorus On/Off (Button) .................................................................. 29Chorus Intensity (Knob) .................................................................. 29Twang Volume (Knob) .................................................................... 30Twang Treble (Knob) ...................................................................... 30Twang Mid (Knob) ......................................................................... 30Twang Bass (Knob) ........................................................................ 30Bright (Switch) ...............................................................................31Vibrato On/Off (Button) ...................................................................31Vibrato Amount (Knob) ....................................................................31Vibrato Speed (Knob) ..................................................................... 32Reverb On/Off (Button) .................................................................. 32Reverb Amount (Knob) ................................................................... 32Reverb Time (Knob) ....................................................................... 33Output Volume (Knob) ................................................................... 33Output Level Meter ........................................................................ 33
PLEX COMBO Parameters ...........................................................................34Input Level Meter .......................................................................... 34Noise Gate On/Off (Button) ............................................................ 34Input Volume (Knob) ...................................................................... 35Big Fuzz On/Off (Button) ................................................................ 35Big Fuzz Volume (Knob) ................................................................. 35Big Fuzz Sustain (Knob) ................................................................. 35Big Fuzz Tone (Knob) ..................................................................... 36Cat On/Off (Button) ....................................................................... 36Cat Volume (Knob) ........................................................................ 36Cat Distortion (Knob) ..................................................................... 36Cat Filter (Knob) ............................................................................37Plex Volume (Knob) ........................................................................37Plex Bass (Knob) ............................................................................37Plex Middle (Knob) .........................................................................37Plex Treble (Knob) ......................................................................... 38Plex Presence (Knob) ..................................................................... 38Delay On/Off (Button) .................................................................... 38Delay Dry-Wet (Knob) .................................................................... 38Delay Time (Knob) ......................................................................... 39Delay Feedback (Knob) .................................................................. 39
GUITAR COMBOS – V
Delay Reverse (Switch) ................................................................... 39Output Volume (Knob) ................................................................... 40Output Level Meter ........................................................................ 40
Preset management ................................................................................... 41
MIDI Control .............................................................................................44
Index ........................................................................................................48
6 – GUITAR COMBOS
Welcome to GUITAR COMBOS
The GUITAR COMBOSs series includes three virtual guitar amps, each targeted toward specific musical genres:
• AC BOX COMBO provides the classic sounds of British pop and alterna-tive music. The bright, distinctive character of this amp has powered hit music since the 60s.
• TWANG COMBO is ideal for blues, pop, country, and soft rock. Its authentic “crunch” adds just the right amount of character to your guitar’s natural sound.
• PLEX COMBO is a rock and roll machine for metal, psychedelic, hard rock, and other musical styles that demand powerful, “high-defini-tion” distortion.
Best of all, GUITAR COMBOSs have the “feel” of the real thing, including accurate effects modeling – close your eyes, and it’s hard to believe you’re playing through a virtual amp.
Each member of the GUITAR COMBOS results from painstaking analysis of the distinctive sonic characteristics of speakers, tubes, transformers, com-ponents, cabinets, and more. The same love of the guitar and its seemingly infinite potential that drove us to create the acclaimed Guitar Rig system has gone into the GUITAR COMBOSs series. We thank you for your support, and hope you enjoy playing through these amps as much as we do!
— Your Native Instruments Team

GUITAR COMBOS – 7

8 – GUITAR COMBOS
Instant GratificationYou don’t want to read a manual. You want to start making cool sounds, so let’s start. We’ll fill in the details later.
• To simplify matters we’ll use GUITAR COMBOS in stand-alone mode, not as a plug-in with a host program.
• The screen shots show the Windows version, but Mac fans will have no trouble figuring out how to do these steps on a Mac.
Please read this before you startThe following gives vital information on getting optimum results with GUITAR COMBOSs. If you need more detailed information about these concepts, please refer to Appendix A: Setup Details.
• You cannot plug a guitar into a standard sound card or computer audio interface input and obtain acceptable results. Use a high-quality, low latency audio interface (ASIO, Core Audio) with an Instrument input especially designed for guitar. For an overview of suitable products, check out www.ni-guitar-combos.com. You can also patch a guitar-oriented DI (direct injection) box or preamp between your guitar and a standard audio interface input.
• We recommend audio interfaces with 24-bit A/D converters. This is vital for minimum noise.
• If your interface has a direct monitoring option, turn it off. You’ll find this option in any “mixer-type” application that came with your in-terface. Otherwise GUITAR COMBOS will not be in the signal path.
• Patch your interface output into a suitable monitoring system (or use headphones) and make sure the volume is turned down for now. GUITAR COMBOS has a lot of gain, and may blast your ears if the volume is up initially.
• GUITAR COMBOS is designed to feed a flat frequency response amplification system, like a PA system, mixer, recorder, etc. It is not designed to feed into a guitar amp, because it already includes guitar amp and cabinet characteristics.

GUITAR COMBOS – 9
Computer Setup for GUITAR COMBOS1. Open the GUITAR COMBOS program (double-click on the GUITAR
COMBOS desktop shortcut, or on the GUITAR COMBOS.exe pro-gram).
You may now see a dialog box that complains about something, like
how your audio is set up. If so, click on OK and a screen should appear where you can adjust your audio setup. Otherwise, go File > Audio+MIDI Settings.
3. Click on the SoundCard tab. Interface will show the interface options installed on your computer. Choose ASIO or Core Audio as the interface type. Anything else is not recommended.

10 – GUITAR COMBOS
4. Select the Sample Rate. Make sure it’s supported by your audio in-
terface – start with 44100, because virtually all sound cards support that rate. Experiment later with higher sample rates, which give better fidelity.
5. Choose the Output Device. Caution: If you’re not using Core Audio,
select a driver written specifically for your sound card or audio inter-face. A “generic” driver, like “ASIO DirectX” or “ASIO Multimedia” is not satisfactory. If a driver name includes the sound card or audio interface model number, or the name of the interface’s manufacturer, choose that one.

GUITAR COMBOS – 11
6. Click on the Routing tab. It will probably already have defaulted to
setting the Inputs and Outputs to the left and right channels of your audio interface. If not, click on Inputs and assign the Left input to Input 1, and the Right input to Input 2. Then click on Outputs, and as-sign the Left output to Output 1, and the Right output to Output 2.

12 – GUITAR COMBOS
7. MIDI is used for selecting presets and changing parameters by remote control. Please see Appendix B on MIDI for more information. The MIDI inputs default to “off.” To enable a MIDI input, click on its “off” label, and it will change to “on.” Note that it is not essential to use MIDI with GUITAR COMBOS.
8. Click on OK. You’re set up and ready to play!

GUITAR COMBOS – 13
Check out the presetsThe best way to discover GUITAR COMBOS’s range of sounds is to audition the various presets, which were created by a team of expert sound program-mers. The ones marked SC are optimized for single coil pickups, and HB, for humbuckers. However, you can still obtain some interesting sounds by using the “wrong” presets, so feel free to experiment.If you do not see a bank with several presets overlaid on the speaker grille, move your mouse cursor anywhere within the amp graphic, and the list will appear. Note: The ability to have the preset list disappear if you’re not ac-tively editing the amp is called “Preset List Fade Out.” This can be disabled if you’d prefer the preset list to be always visible (go View > Disable Preset List Fading).
Click on a preset to load it into GUITAR COMBOS. Play away, and have fun!

14 – GUITAR COMBOS
Other preset selection methods include: • A MIDI controller that sends program changes can select individual
presets directly.• Use your computer keyboard’s Up/Down arrow cursors to browse
through the list or presets (note: this doesn’t work with some sequenc-ers).
• (Advanced) Sending a MIDI Continuous Controller 10 message chooses the next higher-numbered preset. Sending a MIDI Continuous Control-ler 11 message chooses the next lower-numbered preset.
Basic Preset Tweaking• To change the setting of a virtual knob, click on it, then drag up to
increase the value and down to decrease. Drag at an angle for finer resolution.
• To activate an effect, click on the small “LED” in the upper left corner of the effect. A red LED indicates the effect is on. If the LED is off, the effect is off. For example, the following picture shows where to turn the GUITAR COMBO II Skreamer effect on and off.
GUITAR COMBOS – 15
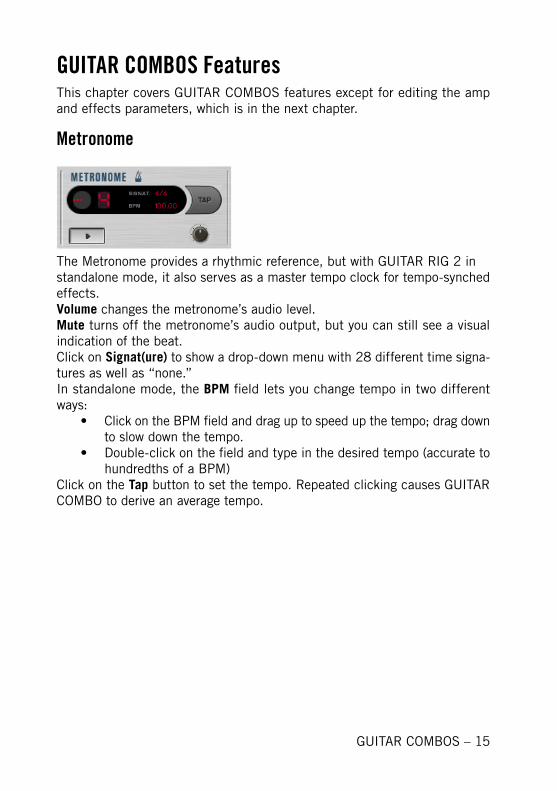
GUITAR COMBOS FeaturesThis chapter covers GUITAR COMBOS features except for editing the amp and effects parameters, which is in the next chapter.
Metronome
The Metronome provides a rhythmic reference, but with GUITAR RIG 2 in standalone mode, it also serves as a master tempo clock for tempo-synched effects. Volume changes the metronome’s audio level.Mute turns off the metronome’s audio output, but you can still see a visual indication of the beat.Click on Signat(ure) to show a drop-down menu with 28 different time signa-tures as well as “none.”In standalone mode, the BPM field lets you change tempo in two different ways:
• Click on the BPM field and drag up to speed up the tempo; drag down to slow down the tempo.
• Double-click on the field and type in the desired tempo (accurate to hundredths of a BPM)
Click on the Tap button to set the tempo. Repeated clicking causes GUITAR COMBO to derive an average tempo.

16 – GUITAR COMBOS
Tapedeck
Okay, it doesn’t use tape. But it’s much cooler than a tape deck. This handy module can play back files as well as record your playing…and more, like change tempo during playback without changing pitch, change pitch without changing tempo, or change both. This is great for learning licks by slowing them down, or changing the tempo on backing drum loops and similar parts.
With Tapedeck, instead of describing each control individually, we’ll cover the function you want to accomplish with the Tapedeck, and describe how to do it.
Standard PlaybackTo play back a file, like a backing track or drum loop:
• Click on the Load button, navigate to the file you want to load, and click on Open. Tapedeck accepts WAV, AIF, AIFF, and MP3 format files but does not accept bit resolutions greater than 16 bits.
• With the Play Mode button, select either Play at Input (any processing affects playback) or Play at Output (applies no processing).
• Click on the Transport Play button to start playback. Click on the Stop button to stop. To loop the selection so that it plays repeatedly, click on the loop button (the button to the right of the Stop button). To start at a specific point in the file, drag the Play Start Slider to the desired start point.
• Adjust Volume to set the desired level. If the output meter’s red (distortion) “LEDs” light up, reduce the Volume to prevent overload conditions.

GUITAR COMBOS – 17
Looped PlaybackYou can create a loop from your recording so that a certain portion of the recording repeats over and over. This is great for practicing, or creating a rhythm track. There are two basic ways to set up a loop:
• Click on the Loop button (located between the Stop and Record but-tons); this can be done while the Tapedeck is playing back or stopped. Two “handles” appear above the playback indicator. If desired, drag these to fine-tune the loop points.
• While the Tapedeck is playing, click on the Loop In button when you want the loop to start, and click on the Loop Out button when you want the loop to end. Handles will appear at these points, which again, you can drag around as desired.
• The diagram shows Tapedeck set up to loop. Note the “pushed in”
Loop button, and the two handles that show the Loop In and Loop Out points.
Changing Playback Pitch and/or TempoTranspose transposes pitch –12 semitones to +12 semitones.Tune provides fine tuning over the range of –50 cents to +50 cents.Tempo changes the playback speed from 50% of the original tempo to 150% of the original tempo.

18 – GUITAR COMBOS
The TunerGUITAR COMBOS includes a tuner where you’ve always wanted it – right on the front panel!
• To enable the tuner, click on the Tuner button.• Play a note. The note name nearest to the detected pitch will show
up to the right of the Tuner button. The scale to the right of the note name shows if the note is sharp (LED lights to the right of the middle calibration) or flat (LED lights to the left of the middle calibration). The note is in tune when the LED lines up with the middle calibration.
For the best tuner performance:
• Play single notes only. • Use the neck (bass) pickup and turn down the tone control to minimize
display “jitter.”• Picking very forcefully produces attack transients with lots of har-
monics. So, the tuner takes longer to “settle down” and extract the pitch.
GUITAR COMBOS – 19
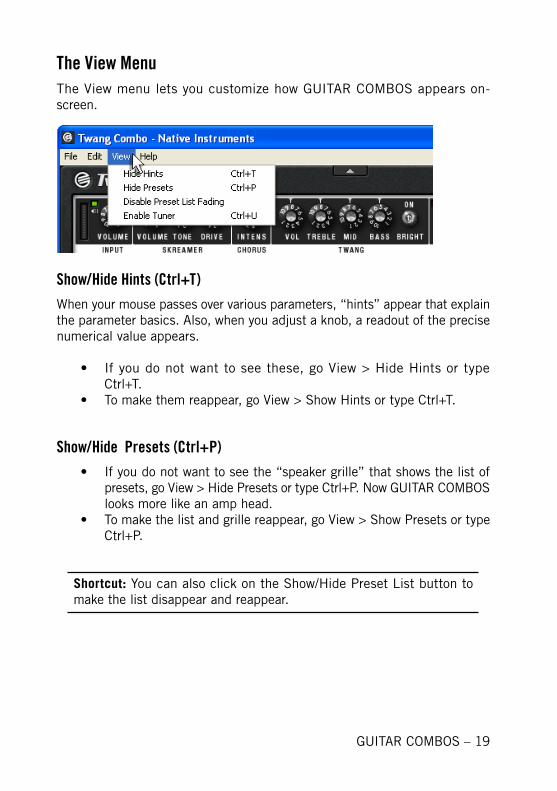
The View MenuThe View menu lets you customize how GUITAR COMBOS appears on-screen.
Show/Hide Hints (Ctrl+T)When your mouse passes over various parameters, “hints” appear that explain the parameter basics. Also, when you adjust a knob, a readout of the precise numerical value appears.
• If you do not want to see these, go View > Hide Hints or type Ctrl+T.
• To make them reappear, go View > Show Hints or type Ctrl+T.
Show/Hide Presets (Ctrl+P)• If you do not want to see the “speaker grille” that shows the list of
presets, go View > Hide Presets or type Ctrl+P. Now GUITAR COMBOS looks more like an amp head.
• To make the list and grille reappear, go View > Show Presets or type Ctrl+P.
Shortcut: You can also click on the Show/Hide Preset List button to make the list disappear and reappear.

20 – GUITAR COMBOS
Enable/Disable Preset List Fading• To have the preset list fade out if the mouse doesn’t move for 10
seconds, then reappear when the mouse moves again, go View > Enable Preset List Fading.
• To have the presets never fade out, go View > Disable Preset List Fading.

GUITAR COMBOS – 21
AC BOX COMBO ParametersThe AC BOX COMBO is a flexible amp modeler that also models tremolo and spring reverb effects. It emulates a 2 x 12” British 60s cabinet, miked off-axis, by an “87”-type vintage condenser microphone.Here is what each control, switch, and parameter does, going from left to right (the way the signal flows).
Input Level Meter
Adjust your audio interface, preamp, or DI level so that the peaks of your playing hit just below maximum level. If the top-most (red) light illuminates, this indicates the onset of distortion. Reduce the level slightly.
Noise Gate On/Off (Button)
A noise gate shuts off the audio when you’re not playing, and only residual noise is present. This is an “intelligent” noise gate that sets levels automati-cally. With your guitar not being played and picking up whatever noise it’s going to pick up, turn the noise gate function on. It will analyze the existing noise level, and set the gate threshold just above this level.To reset the level if something changes, turn the noise gate off, and repeat the same procedure.

22 – GUITAR COMBOS
Input Volume (Knob)
AC BOX COMBO has three volume controls. This first one adjusts the level of the audio coming into the amp. Assuming that your interface delivers the right amount of level to the amp, this would normally be set at 0.00. You can turn it up if you want to overload subsequent stages, or turn it down for a somewhat cleaner sound.
Treble Booster On/Off (Button)
The Treble Booster was used by Brian May (lead guitarist for Queen) to boost his AC. This effect adds a distinctive brightness that can really make a solo stand out, or add “bite” to rhythm parts. When enabled, this light glows red.
Treble Booster Boost (Knob)
This adjusts the amount of treble boost. The further you turn the knob clock-wise, the greater the amount of boost.

GUITAR COMBOS – 23
Treble Booster Bright (Knob)
Use this to change the timbre of the brightness. Turning the knob clockwise emphasizes the treble. Counterclockwise reduces the trebly quality of the brightness somewhat.
AC Box Volume (Knob)
This is the preamp Volume control – at higher levels, it provides more distor-tion. Overloading this stage with the Input volume control can add even more distortion.
AC Box Treble (Knob)
At the middle position, this control has no effect. Turn it clockwise for a brighter sound, and counterclockwise to mellow out the sound a bit.
AC Box Bass (Knob)
At the middle position, this control has no effect. Turn clockwise for a bigger bottom, and counterclockwise to reduce bass.
24 – GUITAR COMBOS
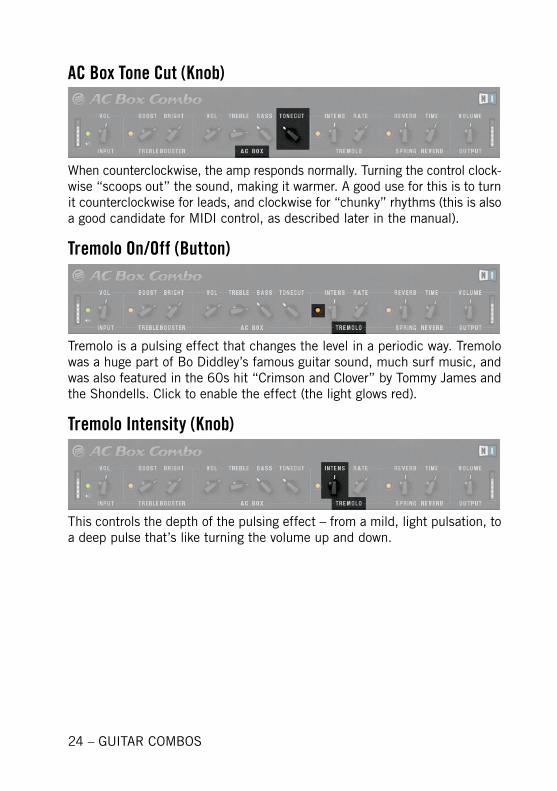
AC Box Tone Cut (Knob)
When counterclockwise, the amp responds normally. Turning the control clock-wise “scoops out” the sound, making it warmer. A good use for this is to turn it counterclockwise for leads, and clockwise for “chunky” rhythms (this is also a good candidate for MIDI control, as described later in the manual).
Tremolo On/Off (Button)
Tremolo is a pulsing effect that changes the level in a periodic way. Tremolo was a huge part of Bo Diddley’s famous guitar sound, much surf music, and was also featured in the 60s hit “Crimson and Clover” by Tommy James and the Shondells. Click to enable the effect (the light glows red).
Tremolo Intensity (Knob)
This controls the depth of the pulsing effect – from a mild, light pulsation, to a deep pulse that’s like turning the volume up and down.

GUITAR COMBOS – 25
Tremolo Rate (Knob)
Turn clockwise for a faster pulsing effect, and counterclockwise for a slower pulsing effect.
Spring Reverb On/Off (Button)
The spring reverb in many vintage amps provided a distinctive “concert hall” sound unlike any other kind of reverb effect. AC BOX COMBO accurately models a vintage spring reverb — but this time, without the noise and hum pickup of mechanical units. Click to enable the reverb effect; when on, the light glows red. Like all good software reverbs, the reverb uses a fair amount of processing power — turn it off when not in use.
Spring Reverb Reverb (Knob)
This sets the balance of the reverb (wet) sound compared to the dry sound. Turn Amount clockwise for more reverb effect, and counterclockwise for less reverb.

26 – GUITAR COMBOS
Spring Reverb Time (Knob)
The reverb effect in a larger space takes longer to die out than in a smaller space. This control models the size of that space. Turn clockwise for a longer-lasting reverb decay, and counterclockwise for a shorter reverb decay.
Output Volume (Knob)
This is like an amp’s “Master Volume” control, as it allows matching the output of AC BOX COMBO to your monitor amplifier, PA system, or other “flat response” amplification system (i.e., not a guitar amp or other amp that colors the sound). Use this control to set the final output level, not to create overdrive or other tonal effects.
Output Level Meter
This monitors the overall level coming out of AC BOX COMBO. Set the Output Volume control for the maximum Output Level Meter reading short of clipping (as indicated by the meter’s highest red LED lighting). Any clipping at the output is caused by digital distortion, which unlike smooth analog distortion, should be avoided because it creates nasty harmonics.

GUITAR COMBOS – 27
TWANG COMBO ParametersThe TWANG COMBO is a flexible amp modeler that also models effects. It emulates a 2 x 12” Tweed Green cabinet, miked by an on-axis, vintage tube condenser microphone.Here is what each control, switch, and parameter does, going from left to right (the way the signal flows).
Input Level Meter
Adjust your audio interface, preamp, or DI level so that the peaks of your playing hit just below maximum level. If the top-most (red) light illuminates, this indicates the onset of distortion. Reduce the level slightly.
Noise Gate On/Off (Button)
A noise gate shuts off the audio when you’re not playing, and only residual noise is present. This is an “intelligent” noise gate that sets levels automati-cally. With your guitar not being played and picking up whatever noise it’s going to pick up, turn the noise gate function on. It will analyze the existing noise level, and set the gate threshold just above this level.To reset the level if something changes, turn the noise gate off, and repeat the same procedure.
28 – GUITAR COMBOS
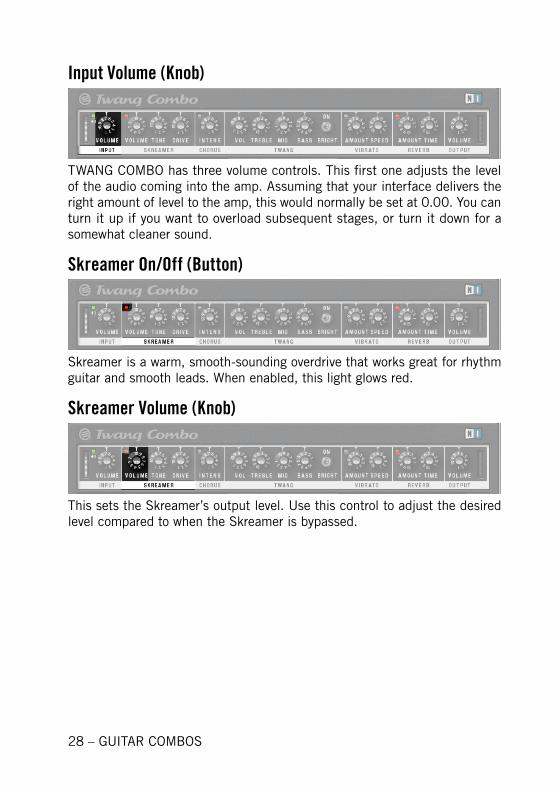
Input Volume (Knob)
TWANG COMBO has three volume controls. This first one adjusts the level of the audio coming into the amp. Assuming that your interface delivers the right amount of level to the amp, this would normally be set at 0.00. You can turn it up if you want to overload subsequent stages, or turn it down for a somewhat cleaner sound.
Skreamer On/Off (Button)
Skreamer is a warm, smooth-sounding overdrive that works great for rhythm guitar and smooth leads. When enabled, this light glows red.
Skreamer Volume (Knob)
This sets the Skreamer’s output level. Use this control to adjust the desired level compared to when the Skreamer is bypassed.

GUITAR COMBOS – 29
Skreamer Tone (Knob)
Turn clockwise for bright, screaming leads and biting rhythms. Counterclock-wise gives a mellower, darker sound.
Skreamer Drive (Knob)
This determines the Skreamer’s “crunch factor.” Clockwise gives more distor-tion. If you turn down “Drive” and set “Tone” to a fairly neutral value (e.g., between 4 and 6), it works like a “booster” for the Twang effect and provides some crunchy, but “polite,” sounds.
Chorus On/Off (Button)
Click to enable the chorus effect (the light glows red).
Chorus Intensity (Knob)
Turning up the Intensity control makes the chorusing effect more notice-able.

30 – GUITAR COMBOS
Twang Volume (Knob)
This is the preamp Volume control – at higher levels, it provides more crunch. However, as TWANG COMBO is designed to be a fairly “clean” amp, use this mostly to add a little saturation; the Skreamer effect is the key to serious distortion.
Twang Treble (Knob)
At the middle position, this control has no effect. Turn it clockwise for a brighter sound, and counterclockwise to mellow out the sound a bit.
Twang Mid (Knob)
At the middle position, this control has no effect. Turn it clockwise for a beefier sound, and counterclockwise for a thinner sound.
Twang Bass (Knob)
At the middle position, this control has no effect. Turn clockwise for a bigger bottom, and counterclockwise to reduce bass.
GUITAR COMBOS – 31
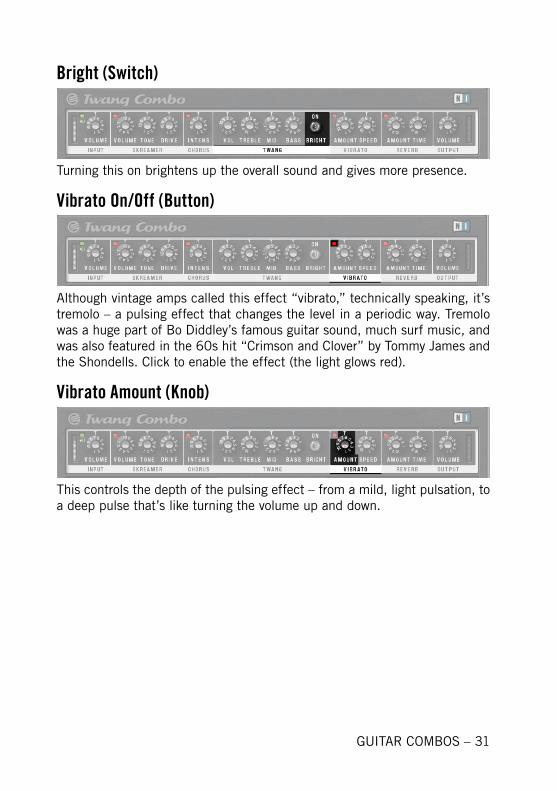
Bright (Switch)
Turning this on brightens up the overall sound and gives more presence.
Vibrato On/Off (Button)
Although vintage amps called this effect “vibrato,” technically speaking, it’s tremolo – a pulsing effect that changes the level in a periodic way. Tremolo was a huge part of Bo Diddley’s famous guitar sound, much surf music, and was also featured in the 60s hit “Crimson and Clover” by Tommy James and the Shondells. Click to enable the effect (the light glows red).
Vibrato Amount (Knob)
This controls the depth of the pulsing effect – from a mild, light pulsation, to a deep pulse that’s like turning the volume up and down.

32 – GUITAR COMBOS
Vibrato Speed (Knob)
Turn clockwise for a faster pulsing effect, and counterclockwise for a slower pulsing effect.
Reverb On/Off (Button)
The spring reverb in many vintage amps provided a distinctive “concert hall” sound unlike any other kind of reverb effect. TWANG COMBO accurately models a vintage spring reverb (except, of course, for its annoying tendency to pick up hum!). Click to enable the reverb effect; when on, the light glows red. Like all good software reverbs, the reverb uses a fair amount of processing power – turn it off if you’re not using it.
Reverb Amount (Knob)
This sets the balance of the reverb (wet) sound compared to the dry sound. Turn Amount clockwise for more reverb effect, and counterclockwise for less reverb.

GUITAR COMBOS – 33
Reverb Time (Knob)
The reverb effect in a larger space takes longer to die out than in a smaller space. This control models the size of that space. Turn clockwise for a longer-lasting reverb decay, and counterclockwise for a shorter reverb decay.
Output Volume (Knob)
This is like an amp’s “Master Volume” control, as it allows matching the output of TWANG COMBO to your monitor amplifier, PA system, or other “flat response” amplification system (i.e., not a guitar amp or other amp that colors the sound). Use this control to set the final output level, not to create overdrive or other tonal effects.
Output Level Meter
This monitors the overall level coming out of TWANG COMBO. Set the Output Volume control for the maximum Output Level Meter reading short of clipping (as indicated by the meter’s highest red LED lighting). Any clipping at the output is caused by digital distortion, which unlike smooth analog distortion, should be avoided because it creates nasty harmonics.

34 – GUITAR COMBOS
PLEX COMBO ParametersThe PLEX COMBO is a shredder’s delight that sounds great on hard rock, metal, grunge, and psychedelic rock. Not only does it have two distortion sections, but also check out the cool delay.This model emulates a 2 x 12” custom cabinet, miked on-axis with a “609”-type dynamic mic. Here is what each control, switch, and parameter does, going from left to right (the way the signal flows).
Input Level Meter
Adjust your audio interface, preamp, or DI level so that the peaks of your playing hit just below maximum level. If the top-most (red) light illuminates, this indicates the onset of distortion. Reduce the level slightly.
Noise Gate On/Off (Button)
A noise gate shuts off the audio when you’re not playing, and only residual noise is present. This is an “intelligent” noise gate that sets levels automati-cally. With your guitar not being played and picking up whatever noise it’s going to pick up, turn the noise gate function on. It will analyze the existing noise level, and set the gate threshold just above this level.To reset the level if something changes, turn the noise gate off, and repeat the same procedure.
GUITAR COMBOS – 35
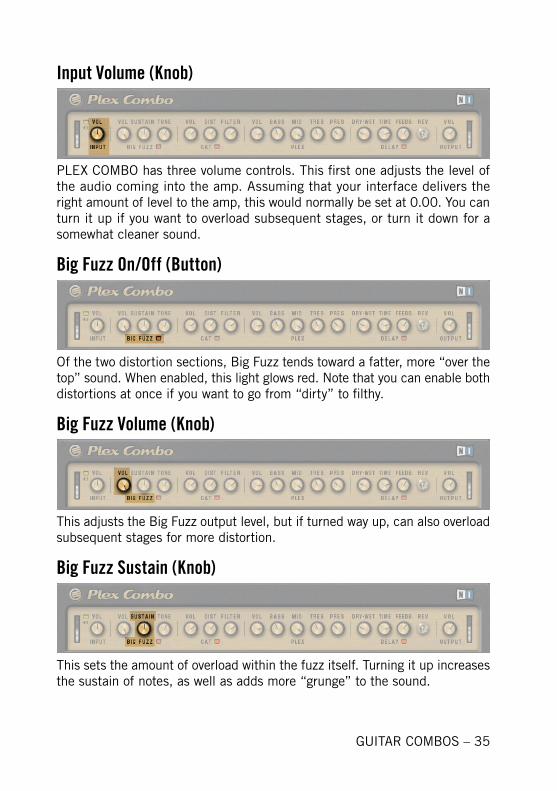
Input Volume (Knob)
PLEX COMBO has three volume controls. This first one adjusts the level of the audio coming into the amp. Assuming that your interface delivers the right amount of level to the amp, this would normally be set at 0.00. You can turn it up if you want to overload subsequent stages, or turn it down for a somewhat cleaner sound.
Big Fuzz On/Off (Button)
Of the two distortion sections, Big Fuzz tends toward a fatter, more “over the top” sound. When enabled, this light glows red. Note that you can enable both distortions at once if you want to go from “dirty” to filthy.
Big Fuzz Volume (Knob)
This adjusts the Big Fuzz output level, but if turned way up, can also overload subsequent stages for more distortion.
Big Fuzz Sustain (Knob)
This sets the amount of overload within the fuzz itself. Turning it up increases the sustain of notes, as well as adds more “grunge” to the sound.

36 – GUITAR COMBOS
Big Fuzz Tone (Knob)
This is a very sophisticated tone control. When fully counterclockwise, it gives a peaked, cutting sound. Turning Tone clockwise increases the brightness of the peak, but past about 2/3 of the way up, the sound “opens up” and becomes more full range. Experiment with these settings, but also note their effect changes as you change the Sustain knob.
Cat On/Off (Button)
The Cat distortion provides a more defined, detailed distortion than the Big Fuzz. When enabled, this light glows red.
Cat Volume (Knob)
This adjusts the Cat output level, but if turned up, can also overload subse-quent stages for more distortion.
Cat Distortion (Knob)
This sets the amount of overload within the distortion’s “virtual circuitry.” Turning it fully clockwise gives the dirtiest sound, but also mellows the tone a bit. Note: Don’t overlook some of the great sounds you can get out of this section with low to moderate amounts of distortion, especially for rhythm guitar parts.

GUITAR COMBOS – 37
Cat Filter (Knob)
Turning this knob counterclockwise adds a trebly edge to the sound, while turning it clockwise takes off some of this edge. Note that this control has no effect if the Cat Vol control is set to maximum.
Plex Volume (Knob)
This is the preamp Volume control – at higher levels, it provides more of a vintage, crunchy tone than a high-gain distortion. Overloading this stage with the Input volume control, or the distortion Output controls, can increase the amount of distortion.
Plex Bass (Knob)
At the middle position, this control has no effect. Turn clockwise for a bigger bottom, and counterclockwise to reduce bass.
Plex Middle (Knob)
At the middle position, this control has no effect. Turn clockwise for a more aggressive sound, and counterclockwise for a more sedate tone.

38 – GUITAR COMBOS
Plex Treble (Knob)
At the middle position, this control has no effect. Turn it clockwise for a brighter sound, and counterclockwise to mellow out the sound a bit.
Plex Presence (Knob)
This is sort of like a subtler version of the Treble knob. At the middle posi-tion, this control has no effect. Turn it clockwise to “lift” the sound up a bit and make it more prominent; counterclockwise buries the sound in a track a bit more.
Delay On/Off (Button)
The Delay effect takes the input signal and plays it back, but delayed by up to 2 seconds. The output can feed back to the input, thus producing a series of echoes that can be mixed with the straight signal. Click to enable the effect (the light glows red).
Delay Dry-Wet (Knob)
This sets the balance of the delayed (wet) and straight (dry) signals; you rarely want to hear the sound of the delayed signal by itself. With longer echoes, the amount of delayed sound will depend on how “murky” a sound you want.

GUITAR COMBOS – 39
Increasing the amount of delayed sound (turning the knob clockwise) gives a swimming-in-echo effect, while adding in only a little delayed sound provides more of an ambience effect.
Delay Time (Knob)
Sets the elapsed time between hitting a note and hearing the delayed version. The time is variable from 10 milliseconds to 2 seconds.
Delay Feedback (Knob)
This determines how much of the output feeds back into the input. Minimum feedback gives a single echo; turning the control more clockwise adds more repeats, until at maximum, the repeats continue indefinitely.
Delay Reverse (Switch)
Enabling reverse plays back subsequent echoes in reverse, like the reverse tape sounds commonly heard on many albums from 60s (especially Jimi Hendrix). It’s a really great effect, so check it out.
40 – GUITAR COMBOS
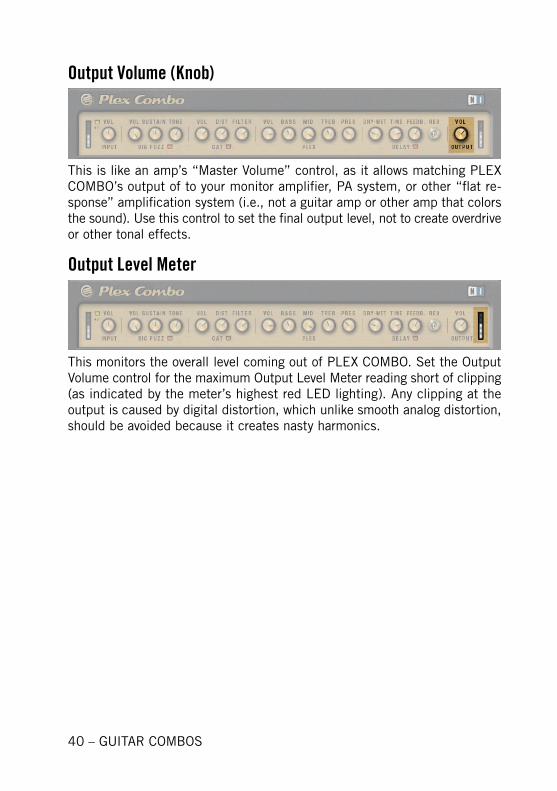
Output Volume (Knob)
This is like an amp’s “Master Volume” control, as it allows matching PLEX COMBO’s output of to your monitor amplifier, PA system, or other “flat re-sponse” amplification system (i.e., not a guitar amp or other amp that colors the sound). Use this control to set the final output level, not to create overdrive or other tonal effects.
Output Level Meter
This monitors the overall level coming out of PLEX COMBO. Set the Output Volume control for the maximum Output Level Meter reading short of clipping (as indicated by the meter’s highest red LED lighting). Any clipping at the output is caused by digital distortion, which unlike smooth analog distortion, should be avoided because it creates nasty harmonics.
GUITAR COMBOS – 41
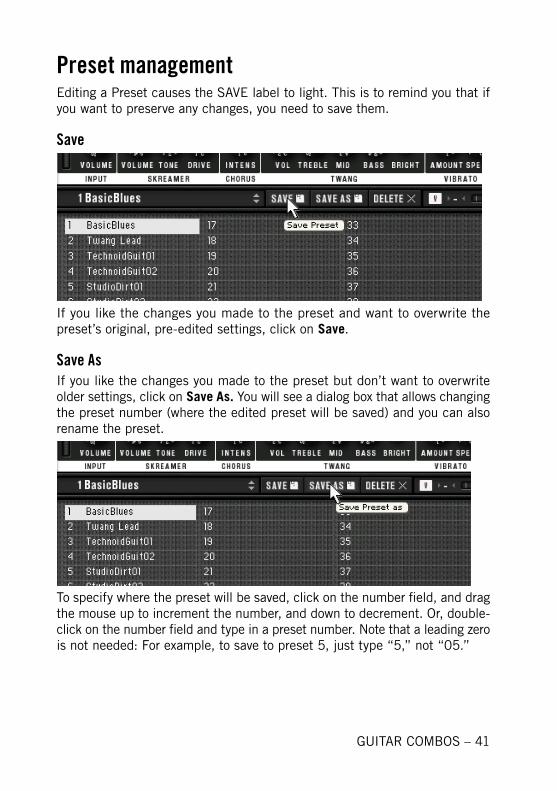
Preset managementEditing a Preset causes the SAVE label to light. This is to remind you that if you want to preserve any changes, you need to save them.
Save
If you like the changes you made to the preset and want to overwrite the preset’s original, pre-edited settings, click on Save.
Save AsIf you like the changes you made to the preset but don’t want to overwrite older settings, click on Save As. You will see a dialog box that allows changing the preset number (where the edited preset will be saved) and you can also rename the preset.
To specify where the preset will be saved, click on the number field, and drag the mouse up to increment the number, and down to decrement. Or, double-click on the number field and type in a preset number. Note that a leading zero is not needed: For example, to save to preset 5, just type “5,” not “05.”

42 – GUITAR COMBOS
To edit the preset name:• Click and drag over the section you want to change, and type in the
changes. Or…• Double-click in the name field and type in the new name. Or…• Hit the Space bar to clear the name, and type in a new name.
After doing your edits, you can:• Hit return or click on Save. The preset will be saved, and the dialog
box will close. Or…• Click on Cancel if you change your mind about saving. The dialog box
will close.
Delete
To delete a preset, click on the Delete button.
Save All Presets as Bank
To save all Presets as a Bank file, go File > Save Bank+Presets or type Ctrl+S. This will be saved as GUITAR COMBOS.bnk within the folder Native Instruments > GUITAR COMBOS > Presets.

GUITAR COMBOS – 43
Advanced Preset FunctionsRight-click on a Preset to bring up a menu of advanced functions.
Please note: In the list below, functions marked with an asterisk (*) can also be accessed from the Edit menu.
• Rename. Start typing to clear the existing name and enter the new name, or click and drag over the section you want to change, and type in the changes. You can also hit the Space bar or double-click to clear the name before typing in a new one. Hit return when you’re done, or click on another preset.
• Cut. Removes the preset data and stores it on the clipboard. You can then paste this data into a different preset location. This is handy when you want to rearrange the preset order.
• Copy. Copies the preset data to the clipboard and leaves the original preset data intact.
• Paste. Pastes the clipboard data to the preset,• Delete. Removes the preset data, but does not store it to the clipboard.
Deleted data cannot be pasted or retrieved.• Select All. Selects all non-empty presets.• Clean-Up. “Closes up” presets so there are no empty presets in be-
tween other presets. Example: If you have presets in slots 1, 2, 3, 5, 7, 8, and 9 (no preset in slots 4 or 6), and select Clean-Up, the preset in slot 5 will move down into slot 4, and the presets in slots 7, 8, and 9 will move down to occupy slots 5, 6, 7. Now all presets are located in slots 1-7.

44 – GUITAR COMBOS
MIDI Control If you’re not familiar with the basic principles of MIDI, please refer to Ap-pendix B on MIDI. This explains how MIDI works, and why it’s useful to guitar players.
Assigning Parameters to MIDI ControllersIt’s very easy to assign a GUITAR COMBOS parameter to a MIDI continu-ous controller, such as the kind generated by a MIDI hardware fader box, footpedal, and the like. Each preset can have its own controller setup (e.g., continuous controller #1 could control Input Volume in one preset, and Bass in a different preset).
1. Right-click on the GUITAR COMBOS parameter to be linked to a controller. The Learn/Clear menu appears.
2. Click on Learn.3. Move the controller you want to use to control the parameter. 4. GUITAR COMBOS will analyze the incoming signal, and assign the
parameter to that controller.5. Save the preset, or the controller assignments will be lost when you
switch to a different preset.
Note: If you later assign that same controller to a different parameter, the original assignment will be removed in favor of the newer assignment.

GUITAR COMBOS – 45
Clearing a Parameter MIDI Assignment1. Right-click on the GUITAR COMBOS parameter to be cleared. The
Learn/Clear menu appears. If more than one controller is listed, the top one is the controller assigned to the selected parameter.
2. Click on Clear.3. Save the preset, or any cleared parameters will return to their original
assignments when you switch to a different preset.
The Controller Assignment Shortcut Menu
As you assign more controllers to various parameters, GUITAR COMBOS builds a list of these controllers. You see this list when you right-click on a knob or switch.
Each controller is numbered, and shows the actual controller number. For example, if you see “Controller 1 (MIDI CC: #14),” this means that the first controller you assigned was MIDI continuous controller #14. The top-most entry pertains to the knob or switch on which you right-clicked.
This menu also provides a shortcut to reassigning controls. Instead of having to clear and then re-learn a control, you can simply select one of the control-lers from the list.

46 – GUITAR COMBOS
In the following example, the Twang Combo Skreamer Drive control has been right-clicked. The top entry of the controller list shows that it is currently assigned to Controller 3 (MIDI CC: #77). However, it is being reassigned to Controller 4 (MIDI CC: #78), as shown by the cursor clicking on it.

GUITAR COMBOS – 47
Assigning Parameters to MIDI NotesIn addition to responding to continuous controllers, GUITAR COMBOS param-eters can also respond to MIDI notes. This is an obvious control choice for parameters with two states (e.g., on/off) as “note up” means off and “note down” means on. However, notes can also be used with controls where key up selects the control’s minimum value, and key down selects the maximum value.
1. Right-click on the parameter to be linked to a MIDI controller.2. Click on Learn.3. Play the note you want to use to control the parameter.4. GUITAR COMBOS will analyze the incoming signal, and assign the
parameter to that note or switch.5. Save the preset, or any assignments will be lost when you switch to
a different preset.
Assigning Programs to Program Change CommandsIt is not necessary to do anything. GUITAR COMBOS’s 64 presets are “hard wired” to 64 MIDI program change commands (e.g., Program Change com-mand 15 will call up GUITAR COMBOS Preset 15).

48 – GUITAR COMBOS
Index
Symbols
24-bit ........................................ 8
A
A/D converter ............................. 8Advanced Functions (Presets) ..... 42ASIO ......................................... 9Assign .....................................44Assignments, Shortcut menu ...... 45Assignments, Storing .................44Audio+MIDI Settings ................... 9
B
Bank ................................. 13, 42
C
Clean-Up (Preset) .....................43Clear .......................................44Clear Controller ......................... 45
D
DI ............................................. 8Direct Injection ........................... 8
F
Fader Box ................................44Footpedal .................................44
H
Harmonics ............. 18, 26, 33, 40Hints ....................................... 19Humbucker .............................. 13
L
Leading Zero ............................ 41Learn, MIDI ..............................44Learn Controller ........................44List Fading ............................... 20Looped Playback ....................... 17
M
Management (Preset) ................ 41Metronome ............................... 15MIDI
Program Change ..................... 47MIDI, Fader Box ........................44MIDI, Learn ..............................44MIDI Controllers ........................44MIDI Notes Assigning to Parameters ..........................44
N
Noise Gate ....................21, 27, 34
O
Overwrite ................................. 41

GUITAR COMBOS – 49
P
Pickup ............................... 13, 18Pitch ....................................... 17Presets .................................... 41Program Change ....................... 47
S
Select All .................................43Shortcut menu, Controller Assignment............... 45Single Coil................................ 13SoundCard tab ........................... 9Space bar .......................... 42, 43Spring Reverb ........................... 25Standard Playback .................... 16
T
Tempo ..................................... 17Transpose ................................ 17Tune ........................................ 17Tuner ....................................... 18