
guide_MailChimpForEtsySellers
15
-
Upload
connecus-communications -
Category
Documents
-
view
212 -
download
0
description
MailChimp For Etsy Sellers 1
Transcript of guide_MailChimpForEtsySellers


1
MailChimp For Etsy Sellers

2
Introduction by Tina Seamonster ............................................................................................................................... 3Build Your Mailing List ............................................................................................................................................. 4 Create a signup form ...............................................................................................................................................................4
Add a signup form to your Facebook fan page ............................................................................................................................5
Gather signups from your iPad or computer ...............................................................................................................................6Create A Beautiful Newsletter ................................................................................................................................... 7 Etsy template .........................................................................................................................................................................7
Start from scratch ...................................................................................................................................................................8
Pre-designed templates ...........................................................................................................................................................9Get Social ............................................................................................................................................................. 10 Auto-post to Facebook and Twitter ..........................................................................................................................................10
Add a Facebook Like button to your campaigns .......................................................................................................................10
Enable Facebook comments ..................................................................................................................................................11
Social Share button ..............................................................................................................................................................11
Sharing with merge tags ........................................................................................................................................................12Tracking And Reporting .......................................................................................................................................... 13 Standard reports ...................................................................................................................................................................13
Social tracking .....................................................................................................................................................................13Additional Resources ............................................................................................................................................. 14
Table Of Contents

3
Why Should I Care About Email?by Tina Seamonster of Hello! Craft
I’ve had an online business for the last five years and only recently began to send email marketing. It’s not that I didn’t know how—sending email newsletters is a big part of my day job. I think a lot of small businesses mistakenly dismiss email marketing as a tool because they don’t want to “bother people.” I know that was how I felt. This past year, I finally got over that feeling and have learned to love email marketing. Need to be talked into using email as a marketing tool? Here’s my take on it.
1. If you already have a customer or fanbase, your emails will be welcomed. Have you seen multiple customers come back year after year to purchase holiday gifts from you? Those people like you! They want to hear from you and know about new products or sales. People who like you want to hear from you if you can present your information in a genuine and meaningful way, they will be excited to see what you are doing.
2. If you don’t currently have a customer or fanbase, you DO have family and friends. And likely you are the most creative person you know and the people around you want to hear about it! They are inspired by you, so go forth and inspire! Seriously. You likely don’t know how much people around you believe in what you are doing and want to know more about it. The people who already love you are the best word of mouth you’ve got. So present them with something awesome that they can forward on.
3. Mailchimp has amazing features just for people like us. I’m currently enjoying the Paypal integration that allows all of my customers to sign up for my newsletter upon check out when they make a purchase with me. The RSS to email feature allows you to automatically send a newsletter to your list when you update your Etsy shop. And pushing your newsletter out to social media has never been easier.
So don’t be afraid to bother people. You’re awesome. Let Mailchimp help you tell everyone about it.
Tina Seamonster is a podcaster, blogger and mom to twins. She’s the Communications Director for Hello Craft, a non-profit dedicated to the advancement of independent crafters and the handmade movement, where she hosts a podcast that collects stories of making and buying handmade. Her Etsy shop is full of zombies.

4
Build Your Mailing List
First thing’s first: If you want to send out email newsletters, you’ve got to have a list of subscribers. Don’t worry if you haven’t been collecting email addresses at craft fairs or online. MailChimp makes creating a signup form, collecting and managing subscribers a piece of cake.
One thing you should know—there are laws that guide how someone can send bulk email (email sent from one person to many people). These laws are called the CAN-SPAM Act. The most important thing for you to know is that you shouldn’t add someone to your email list unless they specifically agreed to receive this kind of email from you. We’ll handle the other stuff, like unsubscribes and preventing duplicates.
Create A Signup Form
MailChimp makes creating a signup form and managing your subscribers super easy. Log in to MailChimp to create your first list. This list will hold all your new subscribers. To create your list, click Lists from your MailChimp dashboard. Then click Create new list.
Enter the requested info about this list and your company. The permission reminder is particularly important. Reminding subscribers why they’re re-ceiving emails from you helps prevent them from clicking the This is spam button and falsely reporting you as a spammer. It’s just a short sentence or two, explaining how a recipient joined your list. For example, this list’s permission reminder says “You are receiving this email because you opted-in at my website or at my booth at a craft fair.”
Once you’ve entered your list information, click Save and your list will be created. Now it’s time to customize the signup form for this list. Click Forms to get started.
Use the Build It tab to determine what information you want to collect from your subscribers. Of course you’ll grab the email address, but you may want to collect first name, last name, address, birthdays and more.
Use the Design It tab to change your form’s colors, header design and more. You may want to import your Etsy header into your signup form as your form’s header image or skin your form with colors that reflect your Etsy shop’s branding.
Once you’ve finished creating your signup form, you can add the form to your site and link to it in as many places as possible. If you want to link to your sign up form (for example, from your Etsy store page or your Twitter home page) just copy the shortened eepurl link.

5
You can easily add your form to your website or blog by embedding it. Embedding your signup form means that people will be able to sign up for your mailing list without going to a separate website. Your form will simply show up within your web page where ever you add the embed code.
Start by clicking Create embed code for small form.
Here you can design a smaller version of your signup form. You can also customize the form label and set the form width. If you don’t set a specific form width, it’ll be determined by the parameters within the page where you embed the form code.
Once your embed code is customized, MailChimp will give you the html code that you can copy and paste into your site or blog’s existing html.
Add a Signup Form To Your Facebook Fan Page
Facebook fans who aren’t on your mailing list might be missing out on your newsletter content. But you can also add your signup form to your Facebook profile and fan page using our Facebook Integration. It’’s more effective than linking them to an outside form, because sometimes it’s more comfortable for people to stay within Facebook than go to an un-known website. Here’s how to add a signup for to your Facebook business or fan page.
First, open your browser with one tab logged into your MailChimp account and another tab logged into your Facebook account.
From your Facebook homepage, click Account and scroll down to select Manage Pages.
This will open a box with a list of the pages for which you have admin status. You business page should be one of these. Click the Go To Page button next to your business page.
Once you’re on your business page, click Edit Page under your business page’s profile picture.
Scroll down to the bottom of the Edit Page page. Under More Applica-tions, click Browse More. Search for MailChimp and click. You’ll be asked to select which page you wish to add the MailChimp application to. Click the Add the Page button next to your business page.
Once you’ve done that, go back to the Account tab at the top right of your Facebook page and scroll down to select the Manage Pages link again.
Next, go back to your Facebook business page. From there, click Edit Page again. Now you should see the MailChimp Application listed. Click to Edit.
Facebook will then ask you for permission to allow the MailChimp applica-tion to access your Facebook. Click to Allow.
Next you’ll be able to choose from which of your MailChimp lists to pull the signup form. Select the appropriate list and click Submit.
Head back over to your Facebook business page using the Account > Man-age Pages > Go To Page path we’ve been using. You should see a new tab on your business page that says Email Signup. If you don’t see this tab, just click the plus sign and select Email Signup to add it to your page as its own tab.

6
Gather Signups From Your iPad or Computer
Even if you put your digital signup form on all your sites and blogs, it’s a good idea to collect email addresses at craft shows. You can use a physi-cal list and import it into MailChimp, or you can use one of our signup apps to simplify the process. Chimpadeedoo is an iPad app that collects signups and imports them into your MailChimp account. Chimpadeedee is a desktop app that does the same.
Here’s it is in action (thanks for sharing, Naked Pizza).
Once you’ve downloaded the app and connected it with your MailChimp account, just touch the top right corner (regardless of whether your iPad is oriented horizontally or vertically) to access the control panel. There, you can change your theme, choose the list you’d like to add people to, edit your on-screen details and more.
And the best part is, Chimpadeedoo can collect signups while you’re offline and import them into your MailChimp account when you have internet access.
Chimpadeedoo is available for free in the iTunes app store.
If you don’t have an iPad, you can collect signups on location from your computer, using our Chimpadeedoo desktop app.
Just like Chimpadeedoo, click the top right corner to access your settings. You can select a theme, enter descriptive text, and lock it with a password.
Chimpadeedee is available for download from MailChimp Labs.

7
Create A Beautiful Newsletter
Etsy Autoconnect Template
We’re not just email geeks here at MailChimp—we’re crafty email geeks. So crafty, in fact, that our developers crafted an awesome integration with Etsy that allows you to create an email newsletter with your Etsy header and store items already added. All you have to do is add a nice note to your subscribers and click send. Now you don’t have to worry about mak-ing sure your campaign looks just right, because our crafty developers automated that part for you. Yay crafts! Yay developers!
To set up the Etsy template, start by setting up a campaign as your nor-mally would. Go to your MailChimp dashboard. Click Create Campaign and select Regular ol’ campaign. Select your list, and enter the requested info.
In the next step, we’ll ask you to select a template. Click the Autoconnect category and choose the template called (you guessed it) Etsy.
Once you select the template, we’ll ask for your store name. Enter it and click Connect.
Then we’ll ask you to decide if you’d like MailChimp to pull in your featured listings or a specific category of listings. After you make those choices, MailChimp will auto-magically create an email template for you, with your own content and Etsy’s look and feel.
You’ll notice that your Etsy Store header is the email template’s header.
You’ll also notice that your Etsy items’ images, names and prices have been populated in the template content. You can easily add or delete squares and rows as desired.
To see what your email will look like when it is rendered in an email ap-plication, click Popup preview.

8
Popup preview is a quick and easy way to make sure everything is just right before you send the email to your subscribers.
You can also send a test to yourself if you want to see what the email’s really going to look like in the inbox.
There you have it. If you want to send a professional email newsletter to update your Etsy fans when you have new items, but you don’t have lots of time to customize it, then give our Etsy template a try. We think you’ll love it.
Start From Scratch
You might not want to use our extremely cool Etsy Template, and we understand that. We’ve got a ton of templates available so you can come up with something that looks exactly the way you want.
If you’re up for doing all the designing and customizing yourself, check out our start-from-scratch templates.
Select a layout, and then you can use our Template Designer to design the header image and colors of your template. After you choose one of the start from scratch templates, just click Design header.
Then select from the options in our header gallery.
9
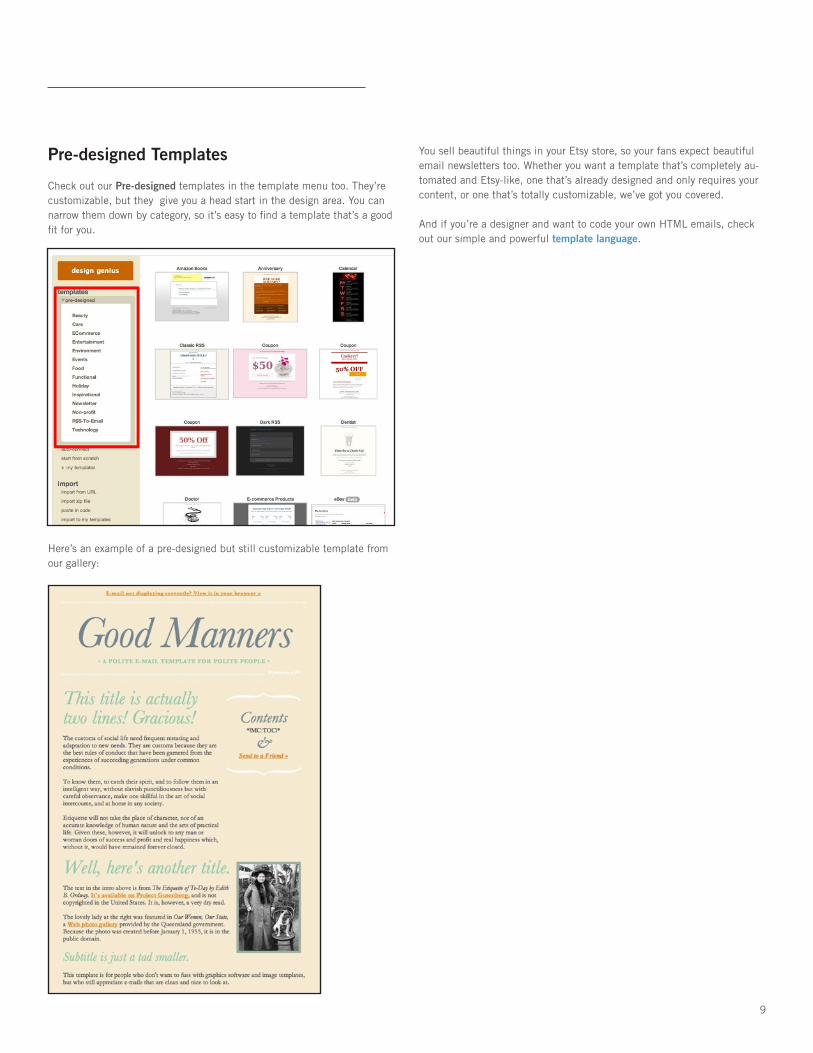
Pre-designed Templates
Check out our Pre-designed templates in the template menu too. They’re customizable, but they give you a head start in the design area. You can narrow them down by category, so it’s easy to find a template that’s a good fit for you.
Here’s an example of a pre-designed but still customizable template from our gallery:
You sell beautiful things in your Etsy store, so your fans expect beautiful email newsletters too. Whether you want a template that’s completely au-tomated and Etsy-like, one that’s already designed and only requires your content, or one that’s totally customizable, we’ve got you covered.
And if you’re a designer and want to code your own HTML emails, check out our simple and powerful template language.

10
Get SocialSocial networking sites like Facebook and Twitter provide excellent op-portunities to promote your Etsy store and connect with your audience on a more personal level. Facebook and Twitter allow you to create conversa-tions with your customers, so they can get to know you better.
MailChimp is integrated with Facebook and Twitter, making it super easy for you to meet your fans where they are.
Auto-post To Facebook And Twitter
If you’ve already connected the Facebook integration by adding your sign-up form to your business page, you can to choose to have your campaign auto-post to Facebook during the campaign creation process. You can also connect the Twitter integration at this point, to allow us to auto-tweet your campaigns every time one goes out.
Set it up by selecting Send To Twitter and checking the Auto-post to Facebook box.
We’ll create a shortened version of your campaign archive link called an EepUrl. Plus we’ll measure retweets, shares and clicks on these posts. Auto-posting to Facebook and Twitter is an easy way to share your newslet-ter content and new Etsy store items with all your fans and followers.
Add A Facebook Like Button To Your Campaigns
Our Facebook Like merge tag allows your readers to like your campaign and share it with all their Facebook friends. Place this merge tag any-where in your campaign, just like regular text:
*|FACEBOOK:LIKE|*
And it’ll turn into a handy little image that says “Like.”
When a subscriber clicks the Like button, they’ll go to your campaign archive page. A window will pop up, showing the friends in their network that also liked the campaign. They’ll confirm that they do indeed like your newsletter, and we’ll give them the option to add a comment to the like.
Then they’ll click Post to Facebook, and the like will appear in your subscriber’s Facebook feed for all their friends to marvel at.

11
Enable Facebook Comments
All MailChimp campaigns have a Facebook Comments functionality. If you’re sending out engaging newsletters, your subscribers are probably going have thoughts or responses after reading them. Maybe they have comments on some of the new products you announced in your newsletter. But sometimes, people just don’t care enough to reply to your email—Facebook Comments are familiar to your subscribers, and they allow you to keep the conversation going with your fans even after you’ve hit Send.
Activate Facebook Comments for a campaign in your campaign setup screen. All you have to do is check Allow comments.
Then, simply insert our *|FACEBOOK:COMMENTS|* merge tag anywhere in your campaign, like this:
When your subscribers receive your newsletter, they’ll see a neat little comment button.
And when they click that button, they’ll go to your campaign archive page with the Facebook comments window open.
There’s a checkbox option for them to post the comment to their Facebook profile and share your newsletter with their friends. They can also see comments from other subscribers within this window, and if they want, comment to each other, just like you’d see on a blog post or news article.
You’ll receive email notifications from MailChimp as people comment on your newsletter, so you can keep track of the conversation and join in.
Social Share Button
If you want to tweet your campaign after it’s been sent or promote it on a social network other than Twitter, use the Social Share button that appears beside your sent campaign in the Campaigns dashboard.
When you click Social Share, you’ll have the option to share your cam-paign on Twitter, Facebook, MySpace, StumbleUpon, Digg and Delicious.

12
Sharing With Merge Tags
In addition to sharing your own campaign, MailChimp allows you to offer your readers a way to share your campaigns. We’ve got lots of options for sharing on social sites with merge tags—all you have to do is place the merge tag anywhere in your campaign, and the sharing options will appear
when the newsletter goes out.
When you place the *|MC:SHARE|* merge tag in your template, MailChimp will add links to more than 20 social networks. If you want to limit the net-works in the social share merge tag, you can use *|SHARE:SITE_NAME1, SITE_NAME2|* to specify which sites are included. For example, *|SHARE:Facebook,Twitter,Digg|*.
We’ve covered Facebook like, comments and the Social Share Merge Tags already. Here’s a directory of all our social merge tags.
Twitter merge tags
If you want to include some Twitter content in your email but theTwitter-themed template is a little much for you, try mixing andmatching these options:
*|TWITTER:FULLPROFILE|*
This merge tag brings in the background from your Twitter page, youravatar, your follower count, a follow button and recent tweets.
*|TWITTER:PROFILE|*
This one brings in your background, avatar, follower count and a followbutton. It will not pull in recent tweets.
*|TWITTER:TWEETS(NUM)|*
Remove (NUM) from this tag and replace it with the number of tweetsyou want to see on your campaign. So if you want five recent tweets,use *|TWITTER:TWEETS5|*. You can use this in combination with*|TWITTER:PROFILE|* to really customize what you’re sharing.
Facebook merge tags
Try out these Facebook merge tags for a customized Facebook campaign:
*|FACEBOOK:FULLPROFILE|*
This tag pulls your Facebook profile and wall posts, just as ourFacebook template would.
*|FACEBOOK:PROFILE|*
This one pulls your Facebook profile without wall posts.
*|FACEBOOK:POSTS(NUM)|*
And this one includes your Facebook posts. Just replace the NUM withthe number of posts you’d like to include.
SocialConnect merge tags
Chances are, some of your newsletter subscribers have Twitter andFacebook accounts but aren’t following you there. You can place thismerge tag anywhere in your campaign to give your subscribers links tofollow you on Twitter and Facebook:
*|MC:SOCIALCONNECT|*
It’ll look like this:
Use this merge tag to link to Twitter only:
*|SOCIALCONNECT:TWITTER|*
And this one for Facebook only:
*|SOCIALCONNECT:FACEBOOK|*
And remember, merge tags might look confusing, but they’re so simple. You place the tag in your campaign when you’re adding content, and we take care of the rest. Take advantage of our powerful options for making your newsletters more effective with merge tags.

13
Tracking and ReportingFor a lot of email marketers, the best part of sending email newsletters is looking at the stats after a campaign goes out—it’s kind of like viewing your sold orders and feedback on Etsy. How many people opened your newsletter? How many clicked? What did they click? What didn’t they click on? Did they like the content?
Once you’ve sent a campaign, it is time to sit back, relax, and wait for your stats to come in. MailChimp offers insightful tracking and reporting. Review this information for every campaign you send—it’s full of clues and feedback that will help make your newsletters better and better. Just like when you receive feedback on Etsy, you make adjustments or keep doing what you’re doing accordingly.
Standard Reports
MailChimp’s standard reports use neat, easy-to-read graphs, tables and maps to show you things like opens, clicks, bounces and unsubscribes. To access your reports, go to the Reports tab from your MailChimp dashboard and click View report next to the desired campaign.
We even offer maps that allow you to see where in the world the people opening your emails are located.
Social Tracking
MailChimp’s Social Stats allow you to watch your campaigns make their way around Facebook. To find out how many people like your campaigns, click Reports in your MailChimp dashboard. Select a campaign and click Social Stats.
Facebook stats
The Like stats are located under Facebook Activity and organized by sub-scriber. You can see how many times each subscriber liked your campaign, and how many other likes they generated. For example, if Ben liked your campaign once, and five of his friends saw your campaign in his feed and liked it too, then you’ll see one Like for Ben, and five Friends Who Liked by his name.
We also keep track of all comments on your campaigns via our Facebook Comments integration.
Twitter stats
MailChimp lets you watch your campaigns travel around the Twittersphere. Twitter stats are located in the same place as Facebook stats.
Under Twitter Activity, you’ll see how many times your campaign has been tweeted and retweeted, who did the tweeting and a timeline of all tweets.
Only tweets that include our EepURL like for your campaign are included in this report, so you might have even more tweeting going on than you thinkif people are writing their own tweets and linking to your campaign.

14
Additional ResourcesWe’re glad you’ve taken the time to learn more about how you as an Etsy seller can use MailChimp to your advantage. If you’re looking for more information or have questions along the way, we’ve got a lot more re-sources available to you.
Watch our Getting Started videos
Attend a free Getting Started webinar
Check out the MailChimp blog
Email or live chat with MailChimp’s support team


