Gourd Coiling Instructions for a Purse - Arizona Gourds · Gourd Coiling Instructions for a Purse...
8
1 Gourd Coiling Instructions for a Purse Gourd coiling has many applications. You will be completing a simple gourd coiled bowl or vase. Coiling can also be used to create a beautiful purse. These instructions begin with info on creating a closed coiled bowl or vase. Additional instructions are included to create an open coiled vase or bowl followed by instructions to create a purse following the standard cleaning and cutting of the gourd. 1. To start you will need a gourd that will sit well on a table, or be able to sand the bottom of the gourd in order for it to sit flat on a table. 2. You will need to draw a line around the gourd in order to saw the gourd before coiling. 3. Using an awl, poke a small hole into the side of the gourd along the line you drew, this will enable you to place the saw into the gourd in order to saw around the gourd. 4. Once the gourd has been cut in two, you will need to clean out your gourd. Make sure you wear a mask if you clean the gourd inside, as very good ventilation is needed. If you clean your gourd outside, make sure the wind doesn’t throw the pith and dust back to you.
Transcript of Gourd Coiling Instructions for a Purse - Arizona Gourds · Gourd Coiling Instructions for a Purse...
1
Gourd Coiling Instructions for a Purse
Gourd coiling has many applications. You will be completing a simple gourd coiled bowl or vase. Coiling can
also be used to create a beautiful purse. These instructions begin with info on creating a closed coiled bowl or
vase. Additional instructions are included to create an open coiled vase or bowl followed by instructions to
create a purse following the standard cleaning and cutting of the gourd.
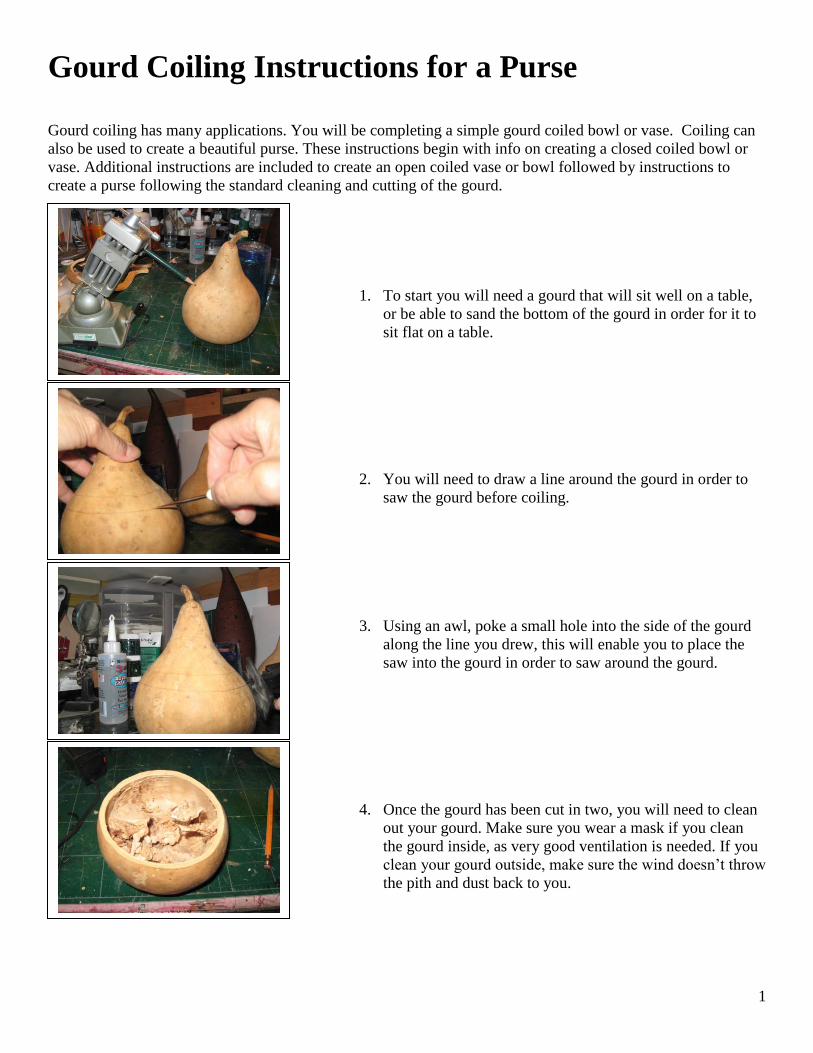
1. To start you will need a gourd that will sit well on a table,
or be able to sand the bottom of the gourd in order for it to
sit flat on a table.
2. You will need to draw a line around the gourd in order to
saw the gourd before coiling.
3. Using an awl, poke a small hole into the side of the gourd
along the line you drew, this will enable you to place the
saw into the gourd in order to saw around the gourd.
4. Once the gourd has been cut in two, you will need to clean
out your gourd. Make sure you wear a mask if you clean
the gourd inside, as very good ventilation is needed. If you
clean your gourd outside, make sure the wind doesn’t throw
the pith and dust back to you.

2
5. There are several tools that you can use to clean out your
gourd
6. When you have finished cleaning your gourd, the inside
should look like the gourd at the left.
7. You will need to sand off the rim of the gourd to make sure
that it is smooth all the way around the gourd.
Note: See step 15 for purse instructions
8. Next you will need to make your holes for coiling on
around the top rim of the gourd. You will need to use an
awl or small drill for this step. The holes should be about a
½ inch apart. Don’t worry if you damage the top of the
gourd, or if a chuck of the gourd breaks off on thin gourds.
You can use that break to create interesting textures with
your gourd. After this step you can paint, or stain your
bowl, just make sure it is dry before coiling.
Note: The opening in the
gourd front was created
by sanding off an area
where the thin sided
gourd broke, and
weaving the coiling
material over the break.

3
9. You can make your own coiling materials from just about
anything. Yarn or string work well. Yarn warning: yarn
should NOT be the first material you use for coiling. It has
a tendency to snag – patience is required.
10. Start your coiling by placing your coil material on the edge
of your gourd. Thread your way through the first hole and
tie off your thread and take your needle and place it in
through the next hole to secure the end of your coiling
material. Continue threading your way around the top of
the gourd, securing the next section of your coiling material
in place. When you reach the place where you started, place
your needle under the “thread” between the first and second
hole and bring the “thread” up and over the coiling
material. Continue this step around the gourd until you
reach your starting point again.
11. For each “row” of added coiling material, you need to put
your needle between the “thread” spaces and under the
previous row.
12. As you become comfortable in your coiling skills, you can
tackle offsetting your coils, by shortening your coiling
material between rows to form an arch between pre-made
gaps in your gourd. This is called open coiling.
o
This drawing below gives you
an idea of how the “stitching”
should look. From the bottom
hole over the coiling material
around the gourds, followed by
the next row where the
“thread” goes in between the
space between the previous
rows. As you coil this will
become clearer.
12a. To finish off your work, work in the
coiling material at the end by tying the
material into the previous row. Or you can
make the end into a tassel, and drape the end
over your work.
12b. At this point you can add any
embellishment to create your own unique
signature piece.
4
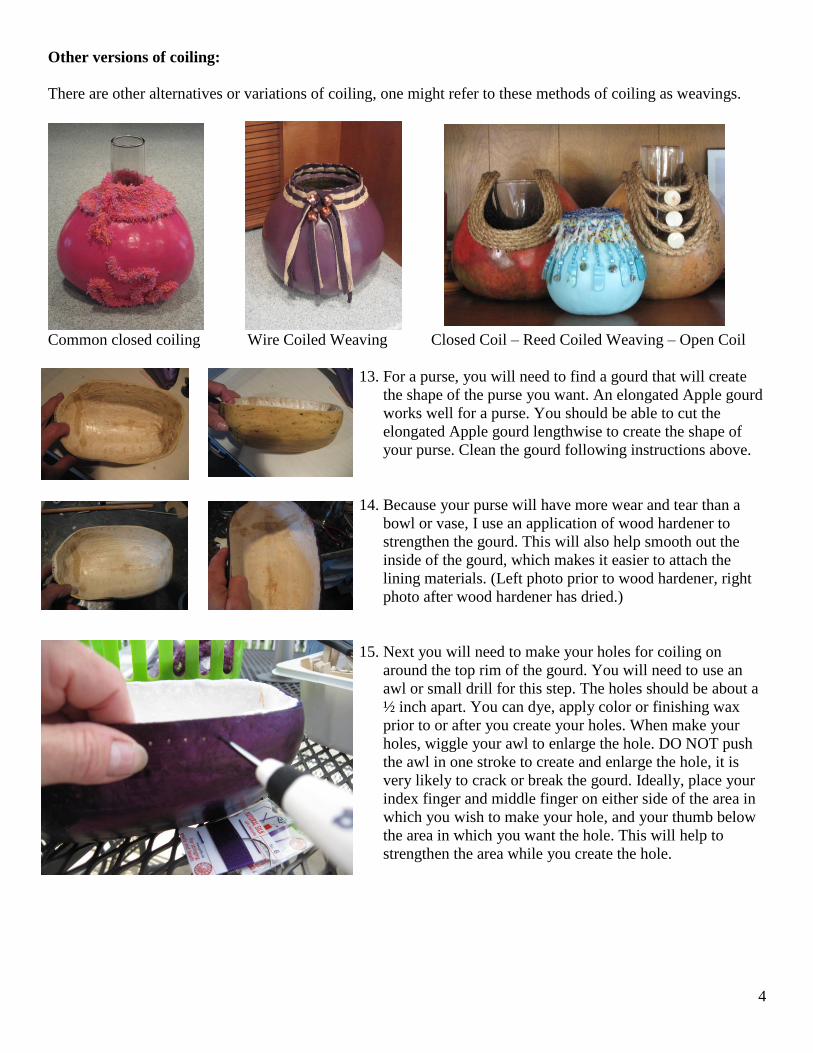
Other versions of coiling:
There are other alternatives or variations of coiling, one might refer to these methods of coiling as weavings.
Common closed coiling Wire Coiled Weaving Closed Coil – Reed Coiled Weaving – Open Coil
13. For a purse, you will need to find a gourd that will create
the shape of the purse you want. An elongated Apple gourd
works well for a purse. You should be able to cut the
elongated Apple gourd lengthwise to create the shape of
your purse. Clean the gourd following instructions above.
14. Because your purse will have more wear and tear than a
bowl or vase, I use an application of wood hardener to
strengthen the gourd. This will also help smooth out the
inside of the gourd, which makes it easier to attach the
lining materials. (Left photo prior to wood hardener, right
photo after wood hardener has dried.)
15. Next you will need to make your holes for coiling on
around the top rim of the gourd. You will need to use an
awl or small drill for this step. The holes should be about a
½ inch apart. You can dye, apply color or finishing wax
prior to or after you create your holes. When make your
holes, wiggle your awl to enlarge the hole. DO NOT push
the awl in one stroke to create and enlarge the hole, it is
very likely to crack or break the gourd. Ideally, place your
index finger and middle finger on either side of the area in
which you wish to make your hole, and your thumb below
the area in which you want the hole. This will help to
strengthen the area while you create the hole.

5
16. Once the holes are created its time to apply the lining to
your purse. I have found that thin quilt batting works well
as padding for under the purse lining. You will need to fit
the lining in the purse – have patience, and have clothes
pins handy. Follow the photos to help you understand how
to fit the lining so that it will create a smooth area for your
lining.
17. Start by laying the batting in the gourd, so that you can cut
a rough outline of the area. Pin the padding to the gourd
and work your way around the gourd from the middle to
the ends.
18. Once you get to the end, fold the fabric to create a flat view
shape and mark the edges of the view to use as a cutting
line.
19. Cut down the line to the flat end of the v shape, cutting
away the excess fabric.
20. Before you glue the padding in place, drill your holes for
the handle connections at both ends.
21. Now it’s time to glue the padding in place. You can take
off your clothes pins or leave them in place and take them
off as you glue it in place. You can trim the padding easily
with a scissors after the glue has dried.
6
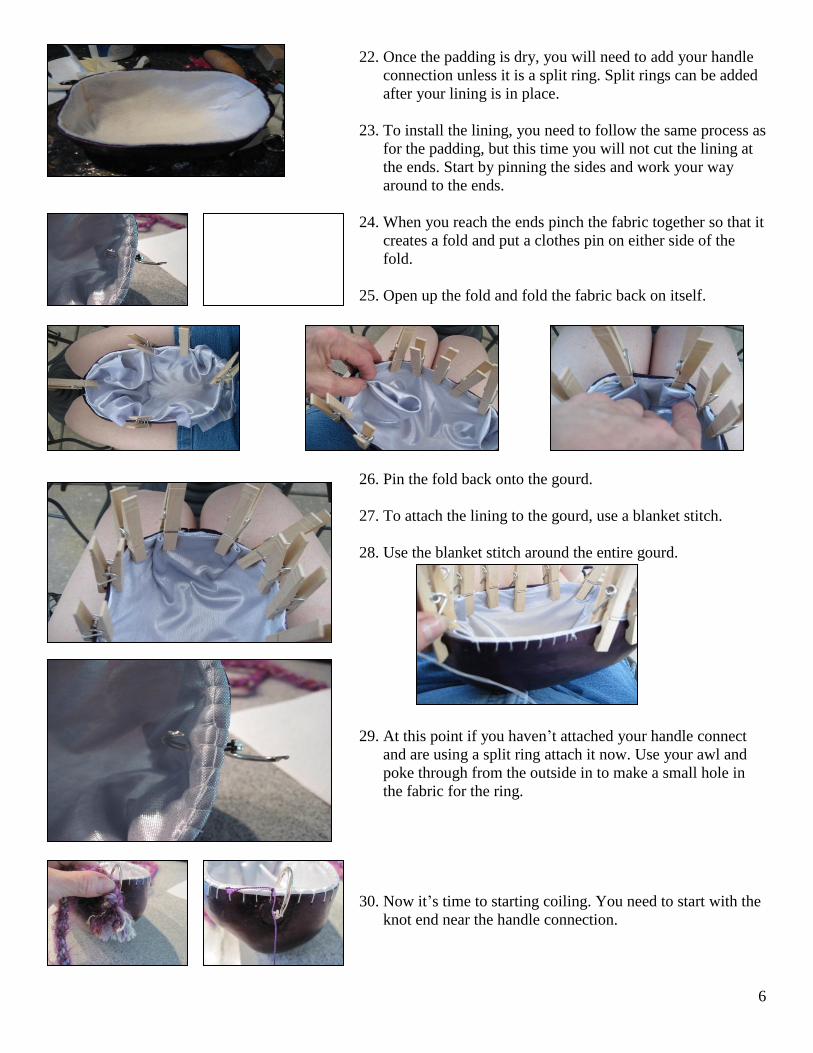
22. Once the padding is dry, you will need to add your handle
connection unless it is a split ring. Split rings can be added
after your lining is in place.
23. To install the lining, you need to follow the same process as
for the padding, but this time you will not cut the lining at
the ends. Start by pinning the sides and work your way
around to the ends.
24. When you reach the ends pinch the fabric together so that it
creates a fold and put a clothes pin on either side of the
fold.
25. Open up the fold and fold the fabric back on itself.
26. Pin the fold back onto the gourd.
27. To attach the lining to the gourd, use a blanket stitch.
28. Use the blanket stitch around the entire gourd.
29. At this point if you haven’t attached your handle connect
and are using a split ring attach it now. Use your awl and
poke through from the outside in to make a small hole in
the fabric for the ring.
30. Now it’s time to starting coiling. You need to start with the
knot end near the handle connection.

7
31. To attach the coil, you will use the blanket stitch* for the
first row only. Start through the first hole and thread the
cord through the coil just above the knot, and tie the end of
the thread to the thread just pulled through the hole and the
top of the knot.
An alternative is to weave the thread through the hole
and then through the coil weave starting at the first row.
NOTE: I use a curved needle for the first threading of the
needle, which makes it easier to go through the coil and the
holes. When the thread runs out, simply tie the end the old
thread to the new piece of thread AFTER you have gone
through the next hole.
32. When you reach the first handle connection attach the knot
end of your strap/handle.
33. Continue coiling around the top of the gourd. When you
reach the start of the coil, make sure you pas the coil
through the split ring. If you are using a pull connection,
just continue coiling. Instead of the blanket stitch you will
weave your thread through the coil to connect the coil to
the previous row.
34. The weave stitch goes through the top coil and down into
the previous row and up through the top coil again.

8
35. Once you have coiled high enough so that the top of the
purse can come to a comfortable closure, you can end your
coiling at a side near either one of the handle end sides or
work until your coil runs out. The purse in the photo took
17.5 yards of coiling to complete.
36. You will need to run handle cord up the sides of your purse
and attaché the handle cord to the side of our purse.
37. To secure the top of the purse, you can either use a snap
closure or Velcro.
38. Your purse is now finished. ENJOY!
NOTES:
You can add
embellishments
to create a
more dramatic
look for your
purse.