Google photo of the day
15
{ How to Create a Photo of the day in Google Presentation And then embed in Wikis or Blogs
-
Upload
jacqui-sharp -
Category
Education
-
view
13.759 -
download
1
Transcript of Google photo of the day

{
How to Create a Photo of the day in Google Presentation
And then embed in Wikis or Blogs
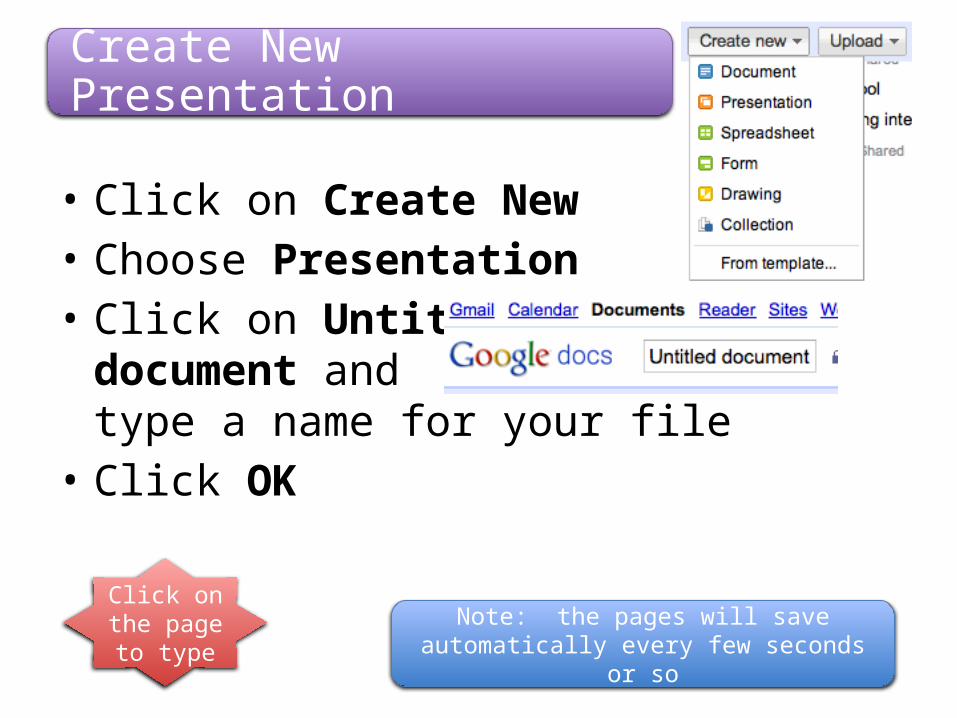
Create New Presentation
• Click on Create New• Choose Presentation• Click on Untitled
document and type a name for your file
• Click OK
Note: the pages will save automatically every few seconds or so
Click on the page to type

First slide
• Type in Title and Subtitle
• Click on to add another slide
• Choose a slide Caption

Change the Theme
• Click on Format – Presentation Settings• Click on Change
Theme• Choose a Theme

Insert an Image
Go to Insert – ImageClick on Browse to find an image in your computer

Insert an Image

Add a new slide
• Click on to add another slide
• Click on to duplicate the slide
• Click on to delete a slide

Play Presentation
• Click on• If you click on Actions, then you have some
other choices

Get Link
• Click on Private to only me
• Click on Change
• Click on Public on the web
• Click on Select Allowanyone
• Click Save

Get Link
• Click on the link, highlight and copy• Click Done• Go to your wiki
or blog• Type a sentence
like…Click on this linkto add a photo

Get Link for Wiki
• Highlight the word ‘link’ and Wiki• Click on • Click External
Link• Paste in code• Click in New
Window• Click Add Link

Get Link for Blog
• Highlight the word ‘link’ and Blog• Click on • Paste in code• Click OK

Get Embed Code
Back on Photo of the Day• Click the arrow next to Share• Click on Publish/embed
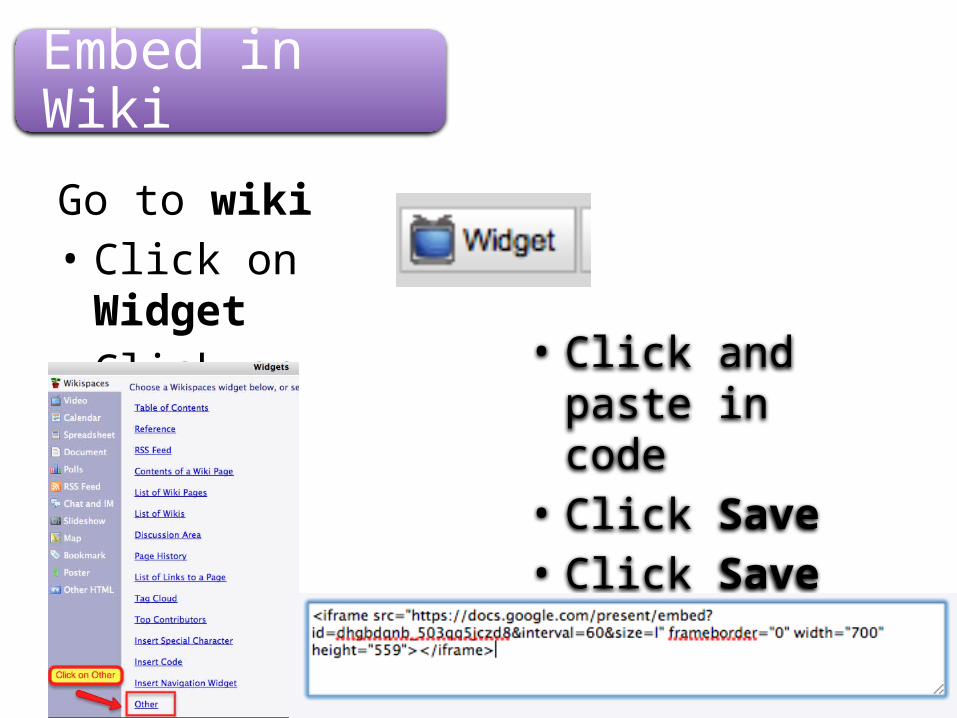
Embed in Wiki
Go to wiki• Click on Widget• Click on Other
• Click and paste in code
• Click Save• Click Save again

Embed in Blog
Go to Blog• Click on HTML• Click on the page where the Photo of the day
will go• Paste in code• Click on Compose• Click on Publish