GL250 Enterprise Linux Systems Administration
84
Enterprise Linux Systems Administration Student Workbook EVALUATION COPY Unauthorized Reproduction or Distribution Prohibited
Transcript of GL250 Enterprise Linux Systems Administration

Enterprise Linux
SystemsAdministration
Student Workbook
EVALUATION COPY
Unauthorized Reproduction or Distribution Prohibited
GL250ENTERPRISELINUX SYSTEMSADMINISTRATIONRHEL7 SLES12
The contents of this course and all its modules and related materials, including handouts toaudience members, are copyright ©2017 Guru Labs L.C.
No part of this publication may be stored in a retrieval system, transmitted or reproduced in anyway, including, but not limited to, photocopy, photograph, magnetic, electronic or other record,without the prior written permission of Guru Labs.
This curriculum contains proprietary information which is for the exclusive use of customers of GuruLabs L.C., and is not to be shared with personnel other than those in attendance at this course.
This instructional program, including all material provided herein, is supplied without any guaranteesfrom Guru Labs L.C. Guru Labs L.C. assumes no liability for damages or legal action arising fromthe use or misuse of contents or details contained herein.
Photocopying any part of this manual without prior written consent of Guru Labs L.C. is a violationof federal law. This manual should not appear to be a photocopy. If you believe that Guru Labstraining materials are being photocopied without permission, please email [email protected] orcall 1-801-298-5227.
Guru Labs L.C. accepts no liability for any claims, demands, losses, damages, costs or expensessuffered or incurred howsoever arising from or in connection with the use of this courseware. Alltrademarks are the property of their respective owners.
Version: GL250S-R7S12-P06
EVALUATION COPY
Unauthorized Reproduction or Distribution Prohibited

EVALUATION COPY
Unauthorized Reproduction or Distribution Prohibited
ii
Table of ContentsChapter 1
LINUX KERNEL & DEVICES 1Hardware Discovery Tools 2Configuring New Hardware with hwinfo 3Kernel Hardware Info – /sys/ 4/sys/ Structure 5udev 6Managing Linux Device Files 8List Block Devices 11SCSI Devices 13USB Devices 15USB Architecture 17Kernel Modules 19Configuring Kernel Components and Modules 21Handling Module Dependencies 22Configuring the Kernel via /proc/ 23Console 25Virtual Terminals 27Keyboard & locale configuration 29Serial Ports 31Random Numbers and /dev/random 32
Lab Tasks 341. Adjusting Kernel Options 352. Linux Kernel Driver Compilation 413. Introduction to Troubleshooting Labs 454. Troubleshooting Practice: Kernel Modules 50
Chapter 2SYSTEMD OVERVIEW 1
System Boot Method Overview 2systemd System and Service Manager 3Modifying systemd services 5Systemd Service Sandboxing Features 6systemd Targets 7Using systemd 8Linux Runlevels Aliases 10Legacy Support for SysV init 11
Lab Tasks 121. Managing Services With Systemd's systemctl 132. Creating a systemd unit file 19
Chapter 3GRUB2/SYSTEMD BOOT PROCESS 1
Booting Linux on PCs 2GRUB 2 4GRUB 2 Configuration 6GRUB 2 Security 8Boot Parameters 10Initial RAM Filesystem 12init 15Systemd local-fs.target and sysinit.target 16Systemd basic.target and multi-user.target 18Legacy local bootup script support 20System Configuration Files 21RHEL7 Configuration Utilities 22SLES12 Configuration Utilities 23Shutdown and Reboot 24
Lab Tasks 251. Boot Process 262. Booting directly to a bash shell 303. GRUB Command Line 334. Basic GRUB Security 365. Troubleshooting Practice: Boot Process 39
Chapter 4SOFTWARE MAINTENANCE 1
Managing Software 2RPM Features 3RPM Architecture 4RPM Package Files 5Working With RPMs 6Querying and Verifying with RPM 7Updating the Kernel RPM 9Dealing With RPM & Yum Digest Changes 10Yum Plugins & RHN Subscription Manager 11YUM Repositories 12YUM Repository Groups 13Compiling/Installing from Source 14Manually Installed Shared Libraries 16Rebuilding Source RPM Packages 17
Lab Tasks 191. Managing Software with RPM 20
EVALUATION COPY
Unauthorized Reproduction or Distribution Prohibited
iii
2. Creating a Custom RPM Repository 243. Querying the RPM Database 284. Installing Software via RPM & Source and RebuildingSRPMs 325. Troubleshooting Practice: Package Management 36
Chapter 5LOCAL STORAGE ADMINISTRATION 1
Partitioning Disks with fdisk & gdisk 2Resizing a GPT Partition with gdisk 5Partitioning Disks with parted 8Non-Interactive Disk Partitioning with sfdisk 9Filesystem Creation 10Persistent Block Devices 11Mounting Filesystems 12Resizing Filesystems 14Filesystem Maintenance 15Managing an XFS Filesystem 18Swap 20Filesystem Structures 21Determining Disk Usage With df and du 22Configuring Disk Quotas 23Setting Quotas 24Viewing and Monitoring Quotas 25Filesystem Attributes 26
Lab Tasks 271. Creating and Managing Filesystems 282. Hot Adding Swap 353. Setting User Quotas 37
Chapter 6LVM & RAID 1
Logical Volume Management 2Implementing LVM 3Creating Logical Volumes 4Activating LVM VGs 5Exporting and Importing a VG 6Examining LVM Components 7Changing LVM Components 8Advanced LVM Overview 10Advanced LVM: Components & Object Tags 11Advanced LVM: Automated Storage Tiering 12Advanced LVM: Thin Provisioning 14
Advanced LVM: Striping & Mirroring 16Advanced LVM: RAID Volumes 17SLES Graphical Disk Tool 18RAID Concepts 19Array Creation with mdadm 20Software RAID Monitoring 21Software RAID Control and Display 22
Lab Tasks 231. Creating and Managing LVM Volumes 242. Creating LVM Thin Volumes 343. Troubleshooting Practice: LVM 414. Creating and Managing a RAID-5 Array 42
Chapter 7REMOTE STORAGE ADMINISTRATION 1
Remote Storage Overview 2Remote Filesystem Protocols 4Remote Block Device Protocols 5File Sharing via NFS 7NFSv4+ 8NFS Clients 9NFS Server Configuration 10YaST NFS Server Administration 12Implementing NFSv4 13AutoFS 15AutoFS Configuration 16Accessing Windows/Samba Shares from Linux 18SAN Multipathing 19Multipath Configuration 20Multipathing Best Practices 22iSCSI Architecture 24Open-iSCSI Initiator Implementation 27iSCSI Initiator Discovery 29iSCSI Initiator Node Administration 31Mounting iSCSI Targets at Boot 33iSCSI Multipathing Considerations 34
Lab Tasks 361. Using autofs 372. NFS Server Configuration 423. iSCSI Initiator Configuration 474. Multipathing with iSCSI 55
EVALUATION COPY
Unauthorized Reproduction or Distribution Prohibited
iv
Chapter 8USER/GROUP ADMINISTRATION 1
Approaches to Storing User Accounts 2User and Group Concepts 3User Administration 4Modifying Accounts 6Group Administration 7Password Aging 9Default User Files 11Controlling Login Sessions 12RHEL DS Client Configuration 14SLES DS Client Configuration 16System Security Services Daemon (SSSD) 18
Lab Tasks 201. User and Group Administration 212. Using LDAP for Centralized User Accounts 243. Troubleshooting Practice: Account Management 30
Chapter 9PLUGGABLE AUTHENTICATION MODULES (PAM) 1
PAM Overview 2PAM Module Types 3PAM Order of Processing 4PAM Control Statements 6PAM Modules 7pam_unix 9pam_nologin.so 10pam_limits.so 11pam_wheel.so 12pam_xauth.so 13
Lab Tasks 141. Restricting superuser access to wheel group membership 152. Using pam_nologin to Restrict Logins 173. Setting Limits with the pam_limits Modules 214. Using pam_limits to Restrict Simultaneous Logins 25
Chapter 10SECURITY ADMINISTRATION 1
Security Concepts 2Tightening Default Security 4SuSE Security Checker 6Security Advisories 7Fine Grained Authorizations with Polkit 8
File Access Control Lists 10Manipulating FACLs 11Viewing FACLs 12Backing Up FACLs 13File Creation Permissions with umask 14User Private Group Scheme 16Alternatives to UPG 18AppArmor 19SELinux Security Framework 20SELinux Modes 22SELinux Commands 24Choosing an SELinux Policy 25SELinux Booleans 27Permissive Domains 28SELinux Policy Tools 29SUSE Basic Firewall Configuration 31FirewallD 32
Lab Tasks 331. User Private Groups 342. Using Filesystem ACLs 393. Exploring AppArmor [S12] 484. Exploring SELinux Modes 535. SELinux File Contexts [R7] 596. SELinux Contexts in Action [R7] 61
Chapter 11BASIC NETWORKING 1
IPv4 Fundamentals 2TCP/UDP Fundamentals 3Linux Network Interfaces 4Ethernet Hardware Tools 6Network Configuration with ip Command 8Configuring Routing Tables 9IP to MAC Address Mapping with ARP 12Starting and Stopping Interfaces 13NetworkManager 15DNS Clients 17DHCP Clients 19SUSE YaST Network Configuration Tool 21Network Diagnostics 22Information from ss and netstat 25Hardware and System Clock 27Managing Network-Wide Time 29
EVALUATION COPY
Unauthorized Reproduction or Distribution Prohibited

v
Continual Time Sync with NTP 31Configuring NTP Clients 32Useful NTP Commands 34
Lab Tasks 351. Network Discovery 362. Basic Client Networking 393. NTP Client Configuration 43
Chapter 12ADVANCED NETWORKING 1
Multiple IP Addresses 2Configuring a DHCP server 4IPv6 6Interface Aggregation 8Interface Bonding 9Network Teaming 11Interface Bridging 15802.1q VLANS 17Tuning Kernel Network Settings 19
Lab Tasks 201. Multiple IP Addresses Per Network Interface 212. Configuring IPv6 263. Troubleshooting Practice: Networking 30
Chapter 13LOG FILE ADMINISTRATION 1
System Logging 2systemd Journal 4systemd Journal's journalctl 6Secure Logging with Journal's Log Sealing 8gnome-system-log 10Rsyslog 11/etc/rsyslog.conf 12Log Management 15Log Anomaly Detector 16Sending logs from the shell 17
Lab Tasks 181. Using the systemd Journal 192. Setting up a Full Debug Logfile 243. Remote Syslog Configuration 264. Remote Rsyslog TLS Configuration 32
Chapter 14MONITORING & TROUBLESHOOTING 1
System Status – Memory 2System Status – I/O 3System Status – CPU 4Performance Trending with sar 6Determining Service to Process Mapping 7Real-time Monitoring of Resources — Cgroups 8Troubleshooting Basics: The Process 9Troubleshooting Basics: The Tools 11strace and ltrace 15Common Problems 17Troubleshooting Incorrect File Permissions 18Inability to Boot 19Typos in Configuration Files 20Corrupt Filesystems 21RHEL7 Rescue Environment 22SUSE Rescue Environment 24
Lab Tasks 261. System Activity Reporter 272. Cgroup for Processes 323. Recovering Damaged MBR 38
Appendix APRE-INSTALLATION CONSIDERATIONS 1
Pre-Installation Considerations 2Hardware Compatibility 3Multi-OS Booting 4Partition Considerations 5Filesystem Planning 6Selecting a Filesystem 7
Appendix BINSTALLING RHEL7 1
Anaconda: An Overview 2Anaconda: Booting the System 5Anaconda: Common Boot Options 6Anaconda: Loading Anaconda and Packages 7Anaconda: Storage Options 8Anaconda: Troubleshooting 9FirstBoot 10Kickstart 11Network Booting with PXE 13
EVALUATION COPY
Unauthorized Reproduction or Distribution Prohibited
vi
A Typical Install 15Lab Tasks 21
1. Linux Installation [R7] 222. Automating Installation with Kickstart [R7] 27
Appendix CINSTALLING SLES12 1
YaST Install Program Interface 2Network Installation 3SLP for SUSE Linux Installation 5Installation Choices 6Kernel Crash Dump Configuration 7Network Booting with PXE 8Creating AutoYaST2 Files 10Using AutoYaST2 files 11linuxrc Automation 12Installation Diagnostics 13After The First Reboot 14A Typical Install 15
Lab Tasks 211. SUSE Linux Enterprise Server Installation [S12] 222. Automating Installation with AutoYaST [S12] 28
Appendix DMANAGE VIRTUAL MACHINES 1
Virtualization: What and Why? 2Introducing libvirt 4libvirt: Basic Concepts 5libvirt: Storage Architecture 6libvirt: Network Architecture 8libvirt: Graphical Tools 10libvirt: Command Line Tools 12virsh: Basics 13virsh: Common Tasks 15virt-install 17Virtual Machine Guest Tools & Drivers 19libguestfs and guestfish 21
Lab Tasks 231. Installing a Virtual Machine 24
Appendix EBACKUPS 1
Backup Software 2
Managing Optical Media 4Tape Libraries 7Backup Examples 9
Lab Tasks 101. Using rsync and ssh for Backups 112. Using tar for Backups 153. Using cpio for Backups 174. Creating ISO Images for Backups 195. Using dump and restore for Backups 21
EVALUATION COPY
Unauthorized Reproduction or Distribution Prohibited
vii
Typographic Conventions
The fonts, layout, and typographic conventions of this book have beencarefully chosen to increase readability. Please take a moment tofamiliarize yourself with them.
A Warning and Solution
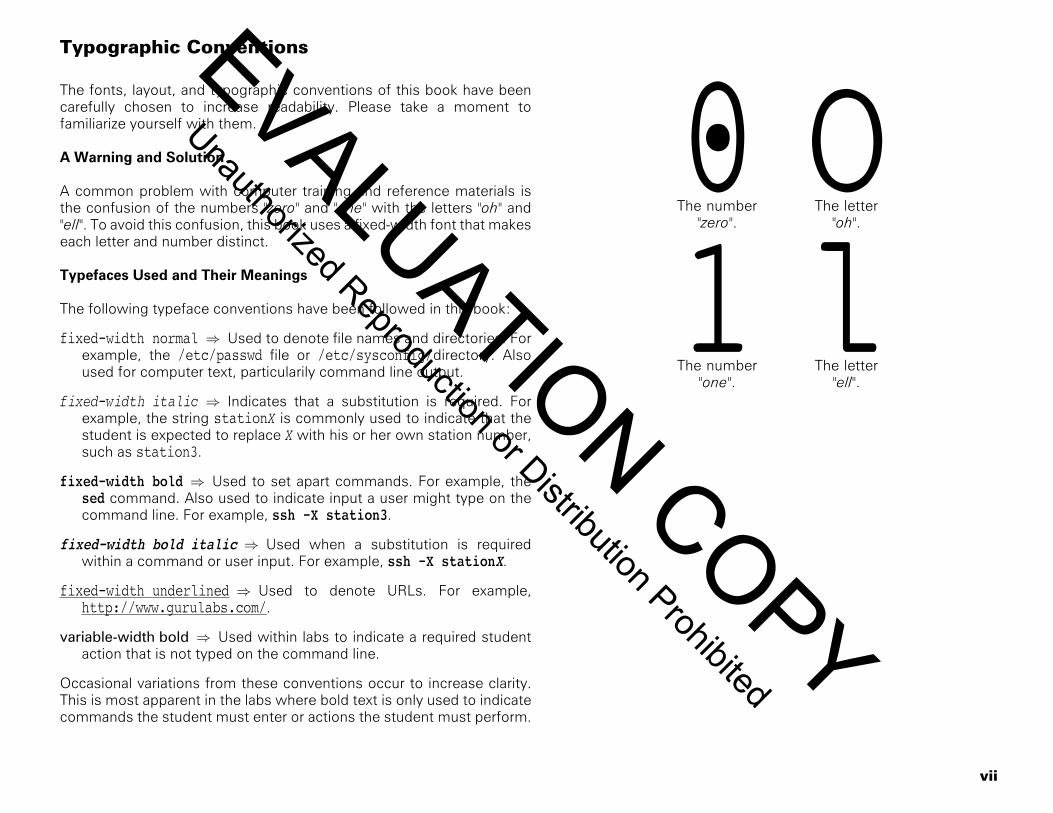
A common problem with computer training and reference materials isthe confusion of the numbers "zero" and "one" with the letters "oh" and"ell". To avoid this confusion, this book uses a fixed-width font that makeseach letter and number distinct.
Typefaces Used and Their Meanings
The following typeface conventions have been followed in this book:
fixed-width normal ⇒ Used to denote file names and directories. Forexample, the /etc/passwd file or /etc/sysconfig/directory. Alsoused for computer text, particularily command line output.
fixed-width italic ⇒ Indicates that a substitution is required. Forexample, the string stationX is commonly used to indicate that thestudent is expected to replace X with his or her own station number,such as station3.
fixed-width bold ⇒ Used to set apart commands. For example, thesed command. Also used to indicate input a user might type on thecommand line. For example, ssh -X station3.
fixed-width bold italic ⇒ Used when a substitution is requiredwithin a command or user input. For example, ssh -X stationX.
fixed-width underlined ⇒ Used to denote URLs. For example,http://www.gurulabs.com/.
variable-width bold ⇒ Used within labs to indicate a required studentaction that is not typed on the command line.
Occasional variations from these conventions occur to increase clarity.This is most apparent in the labs where bold text is only used to indicatecommands the student must enter or actions the student must perform.
0 OThe number
"zero".The letter
"oh".
1 lThe number
"one".The letter
"ell".
EVALUATION COPY
Unauthorized Reproduction or Distribution Prohibited

viii
Typographic Conventions
Terms and Definitions
The following format is used to introduce and define a series of terms:
deprecate ⇒ To indicate that something is considered obsolete, withthe intent of future removal.
frob ⇒ To manipulate or adjust, typically for fun, as opposed to tweak.grok ⇒ To understand. Connotes intimate and exhaustive knowledge.hork ⇒ To break, generally beyond hope of repair.hosed ⇒ A metaphor referring to a Cray that crashed after the
disconnection of coolant hoses. Upon correction, users were assuredthe system was rehosed.
mung (or munge) ⇒ Mash Until No Good: to modify a file, oftenirreversibly.
troll ⇒ To bait, or provoke, an argument, often targeted towards thenewbie. Also used to refer to a person that regularly trolls.
twiddle ⇒ To make small, often aimless, changes. Similar to frob.
When discussing a command, this same format is also used to show anddescribe a list of common or important command options. For example,the following ssh options:
-X ⇒ Enables X11 forwarding. In older versions of OpenSSH that donot include -Y, this enables trusted X11 forwarding. In newer versionsof OpenSSH, this enables a more secure, limited type of forwarding.
-Y ⇒ Enables trusted X11 forwarding. Although less secure, trustedforwarding may be required for compatibility with certain programs.
Representing Keyboard Keystrokes
When it is necessary to press a series of keys, the series of keystrokeswill be represented without a space between each key. For example, thefollowing means to press the "j" key three times:jjj
When it is necessary to press keys at the same time, the combination willbe represented with a plus between each key. For example, the followingmeans to press the "ctrl," "alt," and "backspace" keys at the same time:Ó¿Ô¿×. Uppercase letters are treated the same:Ò¿A
Line Wrapping
Occasionally content that should be on a single line, such as commandline input or URLs, must be broken across multiple lines in order to fiton the page. When this is the case, a special symbol is used to indicateto the reader what has happened. When copying the content, the linebreaks should not be included. For example, the following hypotheticalPAM configuration should only take two actual lines:
password required /lib/security/pam_cracklib.so retry=3a type= minlen=12 dcredit=2 ucredit=2 lcredit=0 ocredit=2
password required /lib/security/pam_unix.so use_authtok
Representing File Edits
File edits are represented using a consistent layout similar to the unifieddiff format. When a line should be added, it is shown in bold with aplus sign to the left. When a line should be deleted, it is shown struckout with a minus sign to the left. When a line should be modified, itis shown twice. The old version of the line is shown struck out with aminus sign to the left. The new version of the line is shown below theold version, bold and with a plus sign to the left. Unmodified lines areoften included to provide context for the edit. For example, the followingdescribes modification of an existing line and addition of a new line tothe OpenSSH server configuration file:
File: /etc/ssh/sshd_config #LoginGraceTime 2m- #PermitRootLogin yes+ PermitRootLogin no+ AllowUsers sjansen #StrictModes yes
Note that the standard file edit representation may not be used when itis important that the edit be performed using a specific editor or method.In these rare cases, the editor specific actions will be given instead.
EVALUATION COPY
Unauthorized Reproduction or Distribution Prohibited
ix
Lab Conventions
Lab Task Headers
Every lab task begins with three standard informational headers:"Objectives," "Requirements," and "Relevance". Some tasks also include a"Notices" section. Each section has a distinct purpose.
Objectives ⇒ An outline of what will be accomplished in the lab task.Requirements ⇒ A list of requirements for the task. For example,
whether it must be performed in the graphical environment, orwhether multiple computers are needed for the lab task.
Relevance ⇒ A brief example of how concepts presented in the labtask might be applied in the real world.
Notices ⇒ Special information or warnings needed to successfullycomplete the lab task. For example, unusual prerequisites or commonsources of difficulty.
Command Prompts
Though different shells, and distributions, have different promptcharacters, examples will use a $ prompt for commands to be run asa normal user (like guru or visitor), and commands with a # promptshould be run as the root user. For example:
$ whoamiguru$ su -Password: password# whoamiroot
Occasionally the prompt will contain additional information. For example,when portions of a lab task should be performed on two different stations(always of the same distribution), the prompt will be expanded to:
stationX$ whoamigurustationX$ ssh root@stationYroot@stationY’s password: passwordstationY# whoamiroot
Variable Data Substitutions
In some lab tasks, students are required to replace portions of commandswith variable data. Variable substitution are represented using italic fonts.For example, X and Y.
Substitutions are used most often in lab tasks requiring more than onecomputer. For example, if a student on station4 were working with astudent on station2, the lab task would refer to stationX and stationY
stationX$ ssh root@stationY
and each would be responsible for interpreting the X and Y as 4 and 2.
station4$ ssh root@station2
Truncated Command Examples
Command output is occasionally omitted or truncated in examples. Thereare two type of omissions: complete or partial.
Sometimes the existence of a command’s output, and not its content, isall that matters. Other times, a command’s output is too variable toreliably represent. In both cases, when a command should produceoutput, but an example of that output is not provided, the followingformat is used:
$ cat /etc/passwd. . . output omitted . . .
In general, at least a partial output example is included after commands.When example output has been trimmed to include only certain lines,the following format is used:
$ cat /etc/passwdroot:x:0:0:root:/root:/bin/bash. . . snip . . .clints:x:500:500:Clint Savage:/home/clints:/bin/zsh. . . snip . . .
EVALUATION COPY
Unauthorized Reproduction or Distribution Prohibited
x
Lab Conventions
Distribution Specific Information
This courseware is designed to support multiple Linux distributions.When there are differences between supported distributions, eachversion is labeled with the appropriate base strings:
R ⇒ Red Hat Enterprise Linux (RHEL)S ⇒ SUSE Linux Enterprise Server (SLES)U ⇒ Ubuntu
The specific supported version is appended to the base distributionstrings, so for Red Hat Enterprise Linux version 6 the complete stringis: R6.
Certain lab tasks are designed to be completed on only a sub-set ofthe supported Linux distributions. If the distribution you are using is notshown in the list of supported distributions for the lab task, then youshould skip that task.
Certain lab steps are only to be performed on a sub-set of the supportedLinux distributions. In this case, the step will start with a standardizedstring that indicates which distributions the step should be performed on.When completing lab tasks, skip any steps that do not list your chosendistribution. For example:
[R4] This step should only be performed on RHEL4.1)Because of a bug in RHEL4's Japanese fonts...
Sometimes commands or command output is distribution specific. Inthese cases, the matching distribution string will be shown to the left ofthe command or output. For example:
$ grep -i linux /etc/*-release | cut -d: -f2Red Hat Enterprise Linux Server release 6.0 (Santiago)[R6]
SUSE Linux Enterprise Server 11 (i586)[S11]
Action Lists
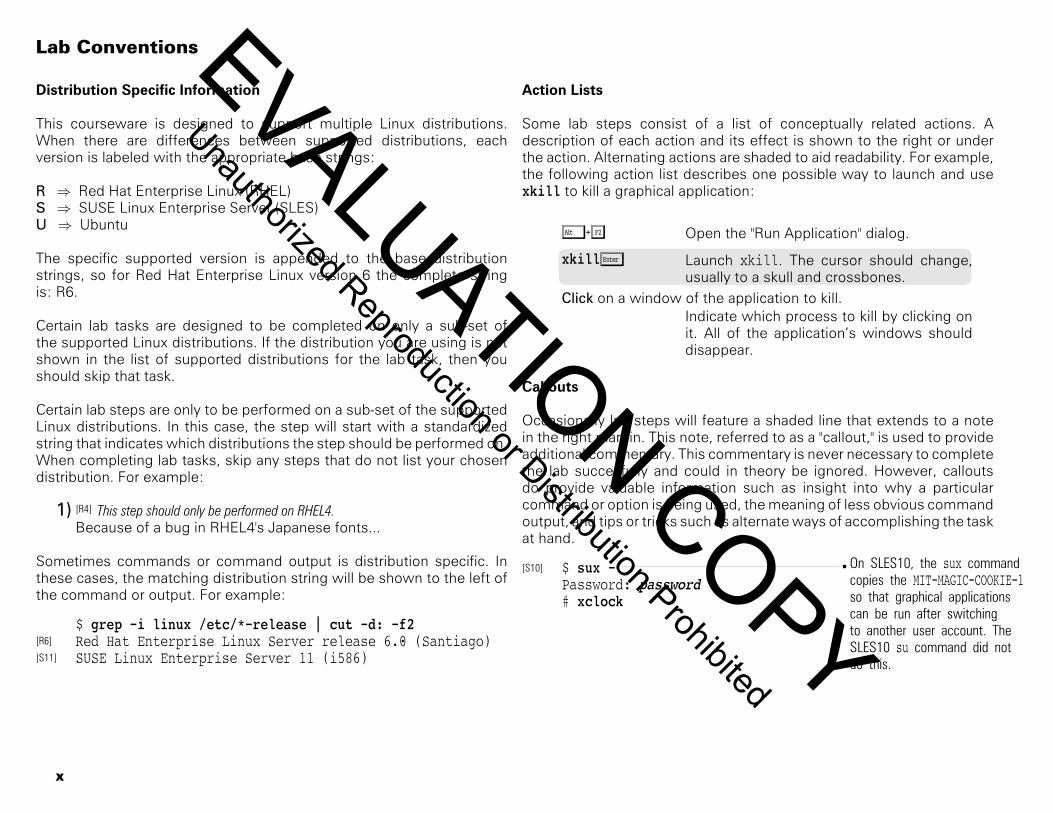
Some lab steps consist of a list of conceptually related actions. Adescription of each action and its effect is shown to the right or underthe action. Alternating actions are shaded to aid readability. For example,the following action list describes one possible way to launch and usexkill to kill a graphical application:
Ô¿Å Open the "Run Application" dialog.
xkillÕ Launch xkill. The cursor should change,usually to a skull and crossbones.
Click on a window of the application to kill.Indicate which process to kill by clicking onit. All of the application’s windows shoulddisappear.
Callouts
Occasionally lab steps will feature a shaded line that extends to a notein the right margin. This note, referred to as a "callout," is used to provideadditional commentary. This commentary is never necessary to completethe lab succesfully and could in theory be ignored. However, calloutsdo provide valuable information such as insight into why a particularcommand or option is being used, the meaning of less obvious commandoutput, and tips or tricks such as alternate ways of accomplishing the taskat hand.
On SLES10, the sux commandcopies the MIT-MAGIC-COOKIE-1so that graphical applicationscan be run after switchingto another user account. TheSLES10 su command did notdo this.
$ sux -[S10]
Password: password# xclock
EVALUATION COPY
Unauthorized Reproduction or Distribution Prohibited
Chapter
1LINUX KERNEL &DEVICES
ContentHardware Discovery Tools . . . . . . . . . . . . . . . . . . . . . . . . . . . 2Configuring New Hardware with hwinfo . . . . . . . . . . . . . . . 3Kernel Hardware Info – /sys/ . . . . . . . . . . . . . . . . . . . . . . . . . 4/sys/ Structure . . . . . . . . . . . . . . . . . . . . . . . . . . . . . . . . . . . . . . 5udev . . . . . . . . . . . . . . . . . . . . . . . . . . . . . . . . . . . . . . . . . . . . . . 6Managing Linux Device Files . . . . . . . . . . . . . . . . . . . . . . . . . 8List Block Devices . . . . . . . . . . . . . . . . . . . . . . . . . . . . . . . . . 11SCSI Devices . . . . . . . . . . . . . . . . . . . . . . . . . . . . . . . . . . . . . . 13USB Devices . . . . . . . . . . . . . . . . . . . . . . . . . . . . . . . . . . . . . . 15USB Architecture . . . . . . . . . . . . . . . . . . . . . . . . . . . . . . . . . . 17Kernel Modules . . . . . . . . . . . . . . . . . . . . . . . . . . . . . . . . . . . 19Configuring Kernel Components and Modules . . . . . . . . 21Handling Module Dependencies . . . . . . . . . . . . . . . . . . . . . 22Configuring the Kernel via /proc/ . . . . . . . . . . . . . . . . . . . . . 23Console . . . . . . . . . . . . . . . . . . . . . . . . . . . . . . . . . . . . . . . . . . 25Virtual Terminals . . . . . . . . . . . . . . . . . . . . . . . . . . . . . . . . . . . 27Keyboard & locale configuration . . . . . . . . . . . . . . . . . . . . . 29Serial Ports . . . . . . . . . . . . . . . . . . . . . . . . . . . . . . . . . . . . . . . 31Random Numbers and /dev/random . . . . . . . . . . . . . . . . . 32
Lab Tasks 341. Adjusting Kernel Options . . . . . . . . . . . . . . . . . . . . . . . . . 352. Linux Kernel Driver Compilation . . . . . . . . . . . . . . . . . . . 413. Introduction to Troubleshooting Labs . . . . . . . . . . . . . . 454. Troubleshooting Practice: Kernel Modules . . . . . . . . . 50
EVALUATION COPY
Unauthorized Reproduction or Distribution Prohibited
1-2
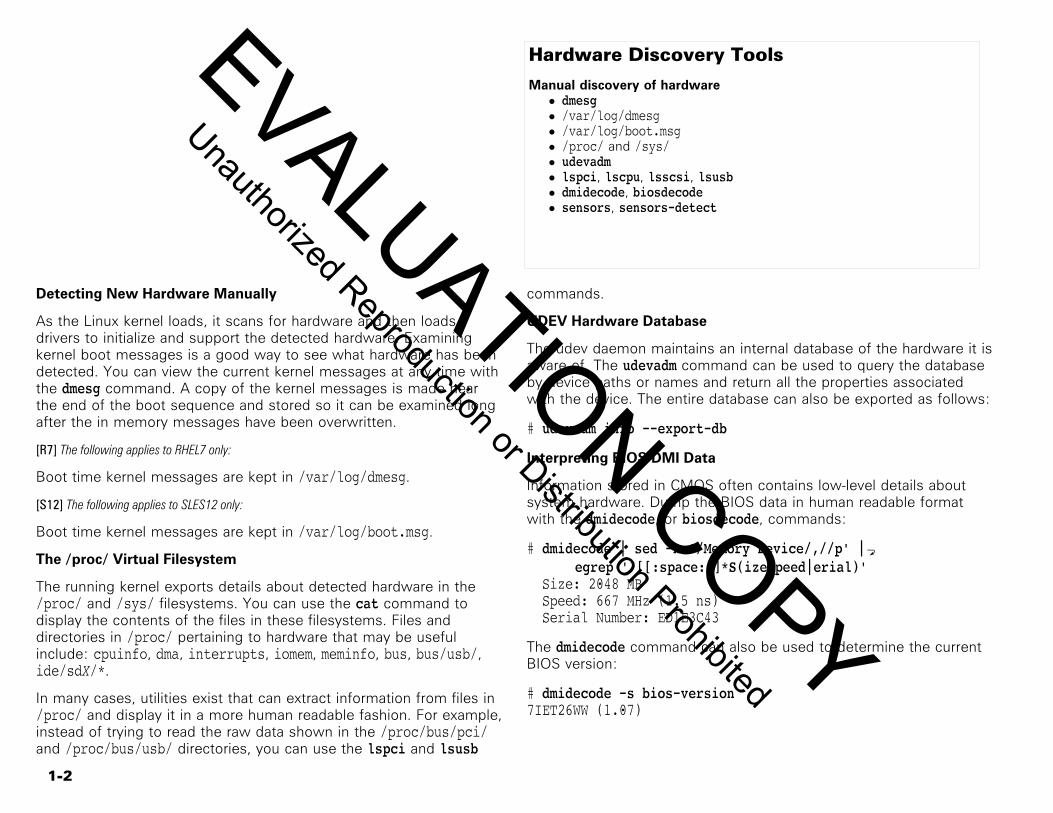
Hardware Discovery Tools
Manual discovery of hardware• dmesg• /var/log/dmesg• /var/log/boot.msg• /proc/ and /sys/• udevadm• lspci, lscpu, lsscsi, lsusb• dmidecode, biosdecode• sensors, sensors-detect
Detecting New Hardware Manually
As the Linux kernel loads, it scans for hardware and then loadsdrivers to initialize and support the detected hardware. Examiningkernel boot messages is a good way to see what hardware has beendetected. You can view the current kernel messages at any time withthe dmesg command. A copy of the kernel messages is made nearthe end of the boot sequence and stored so it can be examined longafter the in memory messages have been overwritten.
[R7] The following applies to RHEL7 only:
Boot time kernel messages are kept in /var/log/dmesg.
[S12] The following applies to SLES12 only:
Boot time kernel messages are kept in /var/log/boot.msg.
The /proc/ Virtual Filesystem
The running kernel exports details about detected hardware in the/proc/ and /sys/ filesystems. You can use the cat command todisplay the contents of the files in these filesystems. Files anddirectories in /proc/ pertaining to hardware that may be usefulinclude: cpuinfo, dma, interrupts, iomem, meminfo, bus, bus/usb/,ide/sdX/*.
In many cases, utilities exist that can extract information from files in/proc/ and display it in a more human readable fashion. For example,instead of trying to read the raw data shown in the /proc/bus/pci/and /proc/bus/usb/ directories, you can use the lspci and lsusb
commands.
UDEV Hardware Database
The udev daemon maintains an internal database of the hardware it isaware of. The udevadm command can be used to query the databaseby device paths or names and return all the properties associatedwith the device. The entire database can also be exported as follows:
# udevadm info --export-db
Interpreting BIOS DMI Data
Information stored in CMOS often contains low-level details aboutsystem hardware. Dump the BIOS data in human readable formatwith the dmidecode, or biosdecode, commands:
# dmidecode | sed -n '/Memory Device/,//p' |aegrep 'ˆ[[:space:]]*S(ize|peed|erial)'
Size: 2048 MB Speed: 667 MHz (1.5 ns) Serial Number: ED1E3C43
The dmidecode command can also be used to determine the currentBIOS version:
# dmidecode -s bios-version7IET26WW (1.07)
EVALUATION COPY
Unauthorized Reproduction or Distribution Prohibited
1-3
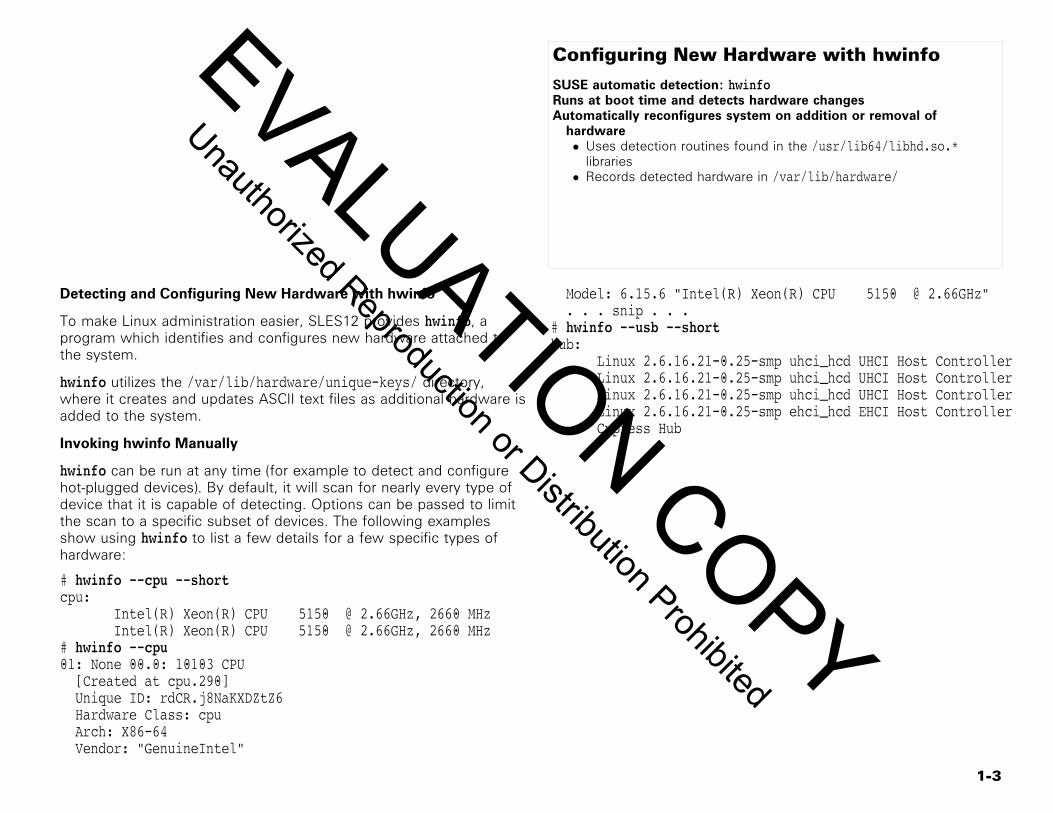
Configuring New Hardware with hwinfo
SUSE automatic detection: hwinfoRuns at boot time and detects hardware changesAutomatically reconfigures system on addition or removal of
hardware• Uses detection routines found in the /usr/lib64/libhd.so.*
libraries• Records detected hardware in /var/lib/hardware/
Detecting and Configuring New Hardware with hwinfo
To make Linux administration easier, SLES12 provides hwinfo, aprogram which identifies and configures new hardware attached tothe system.
hwinfo utilizes the /var/lib/hardware/unique-keys/ directory,where it creates and updates ASCII text files as additional hardware isadded to the system.
Invoking hwinfo Manually
hwinfo can be run at any time (for example to detect and configurehot-plugged devices). By default, it will scan for nearly every type ofdevice that it is capable of detecting. Options can be passed to limitthe scan to a specific subset of devices. The following examplesshow using hwinfo to list a few details for a few specific types ofhardware:
# hwinfo --cpu --shortcpu: Intel(R) Xeon(R) CPU 5150 @ 2.66GHz, 2660 MHz Intel(R) Xeon(R) CPU 5150 @ 2.66GHz, 2660 MHz# hwinfo --cpu01: None 00.0: 10103 CPU [Created at cpu.290] Unique ID: rdCR.j8NaKXDZtZ6 Hardware Class: cpu Arch: X86-64 Vendor: "GenuineIntel"
Model: 6.15.6 "Intel(R) Xeon(R) CPU 5150 @ 2.66GHz" . . . snip . . .# hwinfo --usb --shorthub: Linux 2.6.16.21-0.25-smp uhci_hcd UHCI Host Controller Linux 2.6.16.21-0.25-smp uhci_hcd UHCI Host Controller Linux 2.6.16.21-0.25-smp uhci_hcd UHCI Host Controller Linux 2.6.16.21-0.25-smp ehci_hcd EHCI Host Controller Cypress Hub
EVALUATION COPY
Unauthorized Reproduction or Distribution Prohibited
1-4
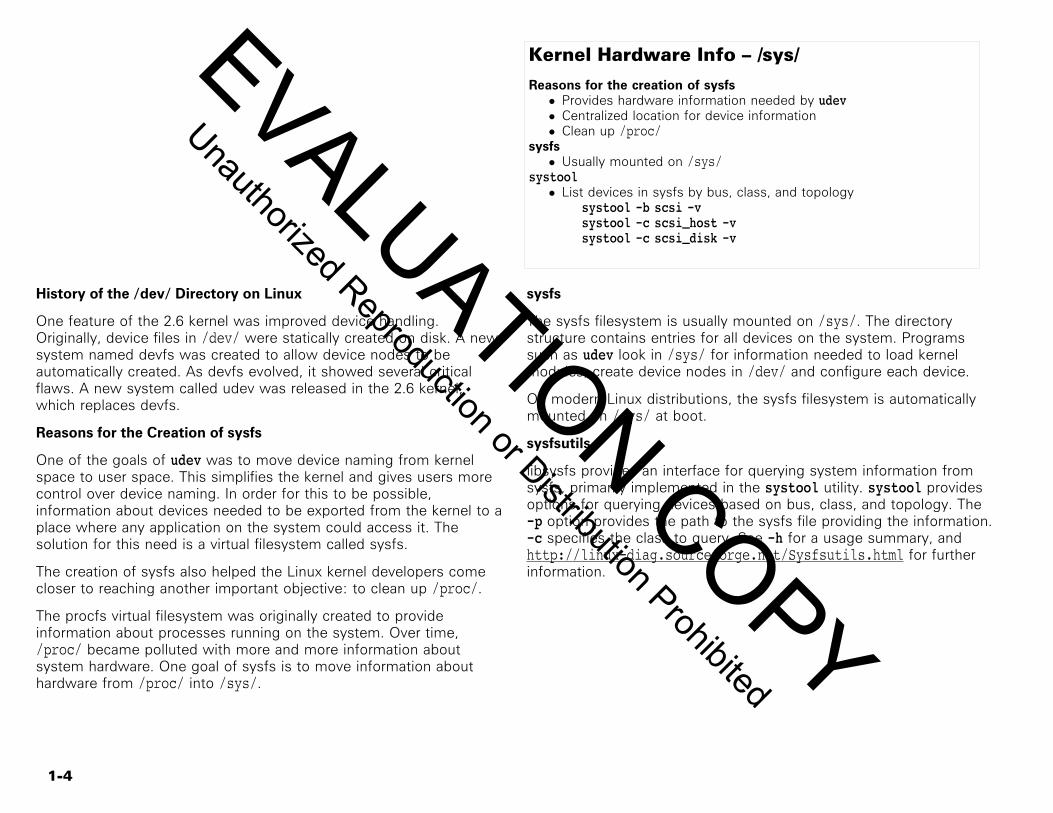
Kernel Hardware Info – /sys/
Reasons for the creation of sysfs• Provides hardware information needed by udev• Centralized location for device information• Clean up /proc/
sysfs• Usually mounted on /sys/
systool• List devices in sysfs by bus, class, and topology
systool -b scsi -vsystool -c scsi_host -vsystool -c scsi_disk -v
History of the /dev/ Directory on Linux
One feature of the 2.6 kernel was improved device handling.Originally, device files in /dev/ were statically created on disk. A newsystem named devfs was created to allow device nodes to beautomatically created. As devfs evolved, it showed several criticalflaws. A new system called udev was released in the 2.6 kernel,which replaces devfs.
Reasons for the Creation of sysfs
One of the goals of udev was to move device naming from kernelspace to user space. This simplifies the kernel and gives users morecontrol over device naming. In order for this to be possible,information about devices needed to be exported from the kernel to aplace where any application on the system could access it. Thesolution for this need is a virtual filesystem called sysfs.
The creation of sysfs also helped the Linux kernel developers comecloser to reaching another important objective: to clean up /proc/.
The procfs virtual filesystem was originally created to provideinformation about processes running on the system. Over time,/proc/ became polluted with more and more information aboutsystem hardware. One goal of sysfs is to move information abouthardware from /proc/ into /sys/.
sysfs
The sysfs filesystem is usually mounted on /sys/. The directorystructure contains entries for all devices on the system. Programssuch as udev look in /sys/ for information needed to load kernelmodules, create device nodes in /dev/ and configure each device.
On modern Linux distributions, the sysfs filesystem is automaticallymounted on /sys/ at boot.
sysfsutils
libsysfs provides an interface for querying system information fromsysfs, primarily implemented in the systool utility. systool providesoptions for querying devices based on bus, class, and topology. The-p option provides the path to the sysfs file providing the information.-c specifies the class to query. See -h for a usage summary, andhttp://linux-diag.sourceforge.net/Sysfsutils.html for furtherinformation.
EVALUATION COPY
Unauthorized Reproduction or Distribution Prohibited
1-5
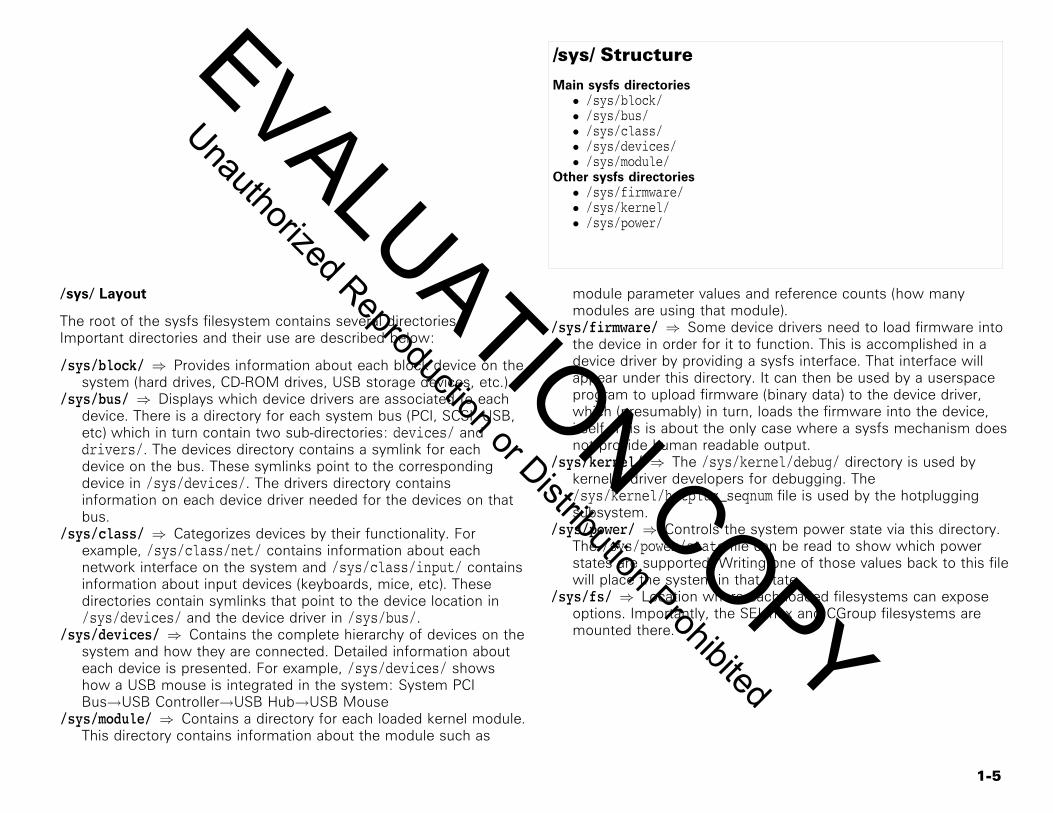
/sys/ Structure
Main sysfs directories• /sys/block/• /sys/bus/• /sys/class/• /sys/devices/• /sys/module/
Other sysfs directories• /sys/firmware/• /sys/kernel/• /sys/power/
/sys/ Layout
The root of the sysfs filesystem contains several directories.Important directories and their use are described below:
/sys/block/ ⇒ Provides information about each block device on thesystem (hard drives, CD-ROM drives, USB storage devices, etc.).
/sys/bus/ ⇒ Displays which device drivers are associated to eachdevice. There is a directory for each system bus (PCI, SCSI, USB,etc) which in turn contain two sub-directories: devices/ anddrivers/. The devices directory contains a symlink for eachdevice on the bus. These symlinks point to the correspondingdevice in /sys/devices/. The drivers directory containsinformation on each device driver needed for the devices on thatbus.
/sys/class/ ⇒ Categorizes devices by their functionality. Forexample, /sys/class/net/ contains information about eachnetwork interface on the system and /sys/class/input/ containsinformation about input devices (keyboards, mice, etc). Thesedirectories contain symlinks that point to the device location in/sys/devices/ and the device driver in /sys/bus/.
/sys/devices/ ⇒ Contains the complete hierarchy of devices on thesystem and how they are connected. Detailed information abouteach device is presented. For example, /sys/devices/ showshow a USB mouse is integrated in the system: System PCIBus→USB Controller→USB Hub→USB Mouse
/sys/module/ ⇒ Contains a directory for each loaded kernel module.This directory contains information about the module such as
module parameter values and reference counts (how manymodules are using that module).
/sys/firmware/ ⇒ Some device drivers need to load firmware intothe device in order for it to function. This is accomplished in adevice driver by providing a sysfs interface. That interface willappear under this directory. It can then be used by a userspaceprogram to upload firmware (binary data) to the device driver,which (presumably) in turn, loads the firmware into the device,itself. This is about the only case where a sysfs mechanism doesnot provide human readable output.
/sys/kernel/ ⇒ The /sys/kernel/debug/ directory is used bykernel & driver developers for debugging. The/sys/kernel/hotplug_seqnum file is used by the hotpluggingsubsystem.
/sys/power/ ⇒ Controls the system power state via this directory.The /sys/power/state file can be read to show which powerstates are supported. Writing one of those values back to this filewill place the system in that state.
/sys/fs/ ⇒ Location where each loaded filesystems can exposeoptions. Importantly, the SELinux and CGroup filesystems aremounted there.
EVALUATION COPY
Unauthorized Reproduction or Distribution Prohibited
1-6
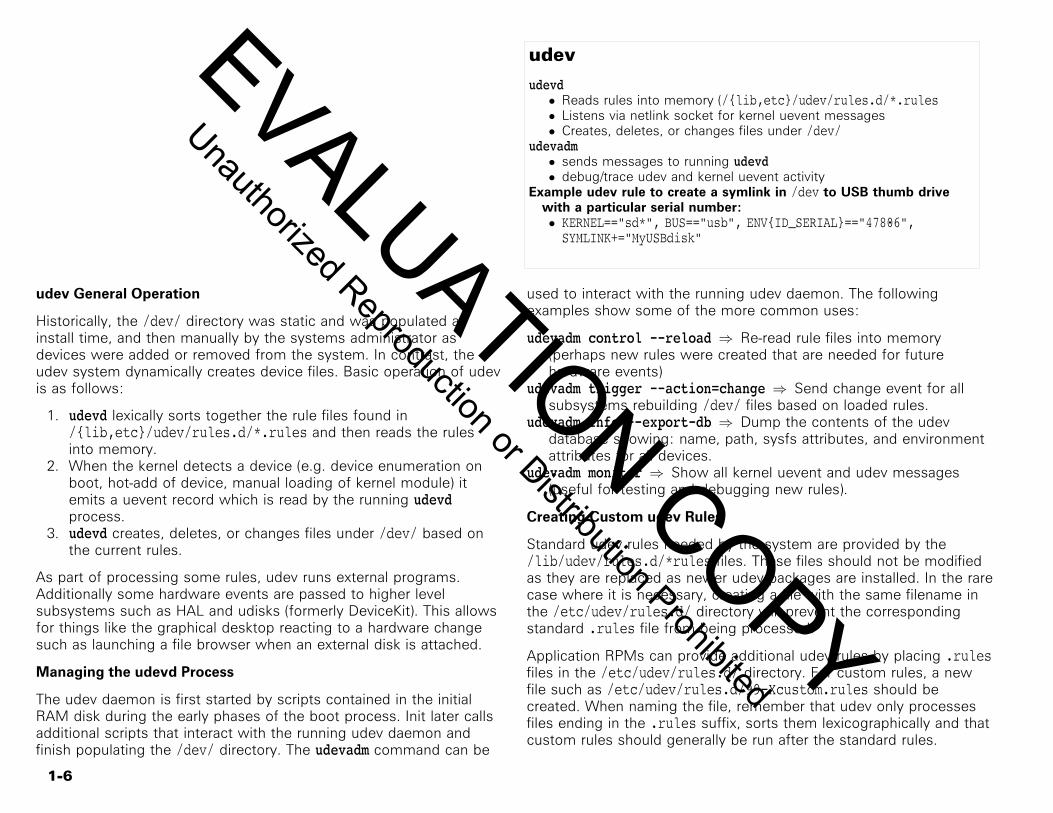
udev
udevd• Reads rules into memory (/{lib,etc}/udev/rules.d/*.rules• Listens via netlink socket for kernel uevent messages• Creates, deletes, or changes files under /dev/
udevadm• sends messages to running udevd• debug/trace udev and kernel uevent activity
Example udev rule to create a symlink in /dev to USB thumb drivewith a particular serial number:• KERNEL=="sd*", BUS=="usb", ENV{ID_SERIAL}=="47806",SYMLINK+="MyUSBdisk"
udev General Operation
Historically, the /dev/ directory was static and was populated atinstall time, and then manually by the systems administrator asdevices were added or removed from the system. In contrast, theudev system dynamically creates device files. Basic operation of udevis as follows:
1. udevd lexically sorts together the rule files found in/{lib,etc}/udev/rules.d/*.rules and then reads the rulesinto memory.
2. When the kernel detects a device (e.g. device enumeration onboot, hot-add of device, manual loading of kernel module) itemits a uevent record which is read by the running udevdprocess.
3. udevd creates, deletes, or changes files under /dev/ based onthe current rules.
As part of processing some rules, udev runs external programs.Additionally some hardware events are passed to higher levelsubsystems such as HAL and udisks (formerly DeviceKit). This allowsfor things like the graphical desktop reacting to a hardware changesuch as launching a file browser when an external disk is attached.
Managing the udevd Process
The udev daemon is first started by scripts contained in the initialRAM disk during the early phases of the boot process. Init later callsadditional scripts that interact with the running udev daemon andfinish populating the /dev/ directory. The udevadm command can be
used to interact with the running udev daemon. The followingexamples show some of the more common uses:
udevadm control --reload ⇒ Re-read rule files into memory(perhaps new rules were created that are needed for futurehardware events)
udevadm trigger --action=change ⇒ Send change event for allsubsystems rebuilding /dev/ files based on loaded rules.
udevadm info --export-db ⇒ Dump the contents of the udevdatabase showing: name, path, sysfs attributes, and environmentattributes for all devices.
udevadm monitor ⇒ Show all kernel uevent and udev messages(useful for testing and debugging new rules).
Creating Custom udev Rules
Standard udev rules needed by the system are provided by the/lib/udev/rules.d/*rules files. These files should not be modifiedas they are replaced as newer udev packages are installed. In the rarecase where it is necessary, creating a file with the same filename inthe /etc/udev/rules.d/ directory will prevent the correspondingstandard .rules file from being processed.
Application RPMs can provide additional udev rules by placing .rulesfiles in the /etc/udev/rules.d/ directory. For custom rules, a newfile such as /etc/udev/rules.d/99-Xcustom.rules should becreated. When naming the file, remember that udev only processesfiles ending in the .rules suffix, sorts them lexicographically and thatcustom rules should generally be run after the standard rules.
EVALUATION COPY
Unauthorized Reproduction or Distribution Prohibited
1-7
Rule File Syntax
Within the rules files, each rule is a single line, and each line has thebasic form of:
key==value_to_compare, key=value_to_assign
Comparisons match the device in question, and then assignmentsdetermine the actions taken for that device such as the name of thefile to be created in /dev/. Example of common keys that arecompared include: KERNEL, the kernel name for the device;ATTRS{filename}, a sysfs attribute for the device; ENV{key}, a deviceproperty value. Examples of common assignments include: NAME(network interfaces only) or SYMLINK, filename to be created in /dev/;OWNER|GROUP|MODE, permissions and ownership for the created devicefile. Full documentation is found in the udev(7) man page.
Using += adds the value to a key that may contain a list of entries.
Creating new rules generally start with determining the correct set ofcomparisons needed to uniquely identify the device in question. Usethe udevadm info command to find useful keys and values in the/sys/ filesystem that can be matched by ATTRS or ENV keys:
First get a list of the currently attached storage devices and identifywhich device to query:
# lsscsi. . . snip . . .# lsscsi -t. . . snip . . .
Then use udevadm to query sysfs attributes and device properties thatwould be good candidates to uniquely identify the device:
# udevadm info /dev/sde | grep SERIALE: ID_SCSI_SERIAL=956a7ebc-962a-1cd8dbf902bbE: ID_SERIAL=3600140597b4ab8962a1cd8dE: ID_SERIAL_SHORT=6001cb7cb4ab8962a1cd8d# udevadm info --attribute-walk /dev/sde. . . snip . . . KERNEL=="sde" SUBSYSTEM=="block". . . snip . . .
Poor vs Good UDEV Rule
For instance, a simple rule might create a symlink to a device nodename based on the original block device:
File: /etc/udev/rules.d/99-usbdrive.rulesKERNEL=="sdb", SYMLINK+="MyUSBdisk"
This will create a block device /dev/usb0 file, with a symbolic link of/dev/MyUSBdisk pointing to it. However, block device names canchange, and are therefore not persisent. Something unique, like aserial number or manufacturer's name, are a better target to matchagainst:
File: /etc/udev/rules.d/99-usbdrive.rulesBUS=="usb", SYMLINK+="MyUSBdisk"a
ENV{ID_SERIAL}=="36001405"
Advanced Rule Example
Besides controlling properties of the device node file in /dev, UDEVrules can run arbitrary commands and set attributes. For example,here is rule to set I/O scheduler, the number of I/O requests that canbe outstanding, and the read ahead amount on Netgear SCSI disks:
File: /etc/udev/rules.d/99-netgear-tuning.rulesKERNEL=="sd[a-z]", ACTION=="add|change", BUS=="scsi",a
SYSFS{vendor}=="NETGEAR",a ATTR{queue/scheduler}="noop",a ATTR{queue/nr_requests}="1024",a ATTR{bdi/read_ahead_kb}="512"
Debug logging
Change the default log level from err to debug when troubleshootingudev rules and behavior:
# udevadm control --log-priority=debug
Messages are sent to /var/log/messages. Set the udev log priorityback to err after debugging.
EVALUATION COPY
Unauthorized Reproduction or Distribution Prohibited
1-8
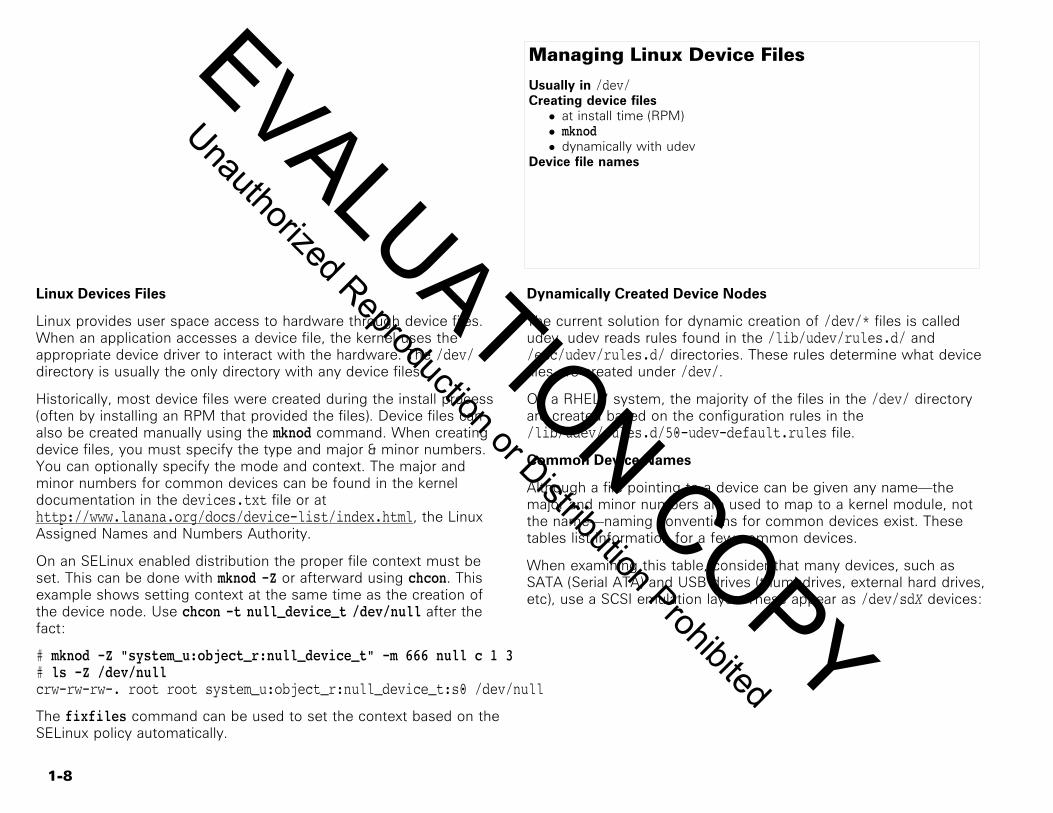
Managing Linux Device Files
Usually in /dev/Creating device files• at install time (RPM)• mknod• dynamically with udev
Device file names
Linux Devices Files
Linux provides user space access to hardware through device files.When an application accesses a device file, the kernel uses theappropriate device driver to interact with the hardware. The /dev/directory is usually the only directory with any device files.
Historically, most device files were created during the install process(often by installing an RPM that provided the files). Device files canalso be created manually using the mknod command. When creatingdevice files, you must specify the type and major & minor numbers.You can optionally specify the mode and context. The major andminor numbers for common devices can be found in the kerneldocumentation in the devices.txt file or athttp://www.lanana.org/docs/device-list/index.html, the LinuxAssigned Names and Numbers Authority.
On an SELinux enabled distribution the proper file context must beset. This can be done with mknod -Z or afterward using chcon. Thisexample shows setting context at the same time as the creation ofthe device node. Use chcon -t null_device_t /dev/null after thefact:
# mknod -Z "system_u:object_r:null_device_t" -m 666 null c 1 3# ls -Z /dev/nullcrw-rw-rw-. root root system_u:object_r:null_device_t:s0 /dev/null
The fixfiles command can be used to set the context based on theSELinux policy automatically.
Dynamically Created Device Nodes
The current solution for dynamic creation of /dev/* files is calledudev. udev reads rules found in the /lib/udev/rules.d/ and/etc/udev/rules.d/ directories. These rules determine what devicefiles are created under /dev/.
On a RHEL7 system, the majority of the files in the /dev/ directoryare created based on the configuration rules in the/lib/udev/rules.d/50-udev-default.rules file.
Common Device Names
Although a file pointing to a device can be given any name—themajor and minor numbers are used to map to a kernel module, notthe name—naming conventions for common devices exist. Thesetables list information for a few common devices.
When examining this table, consider that many devices, such asSATA (Serial ATA) and USB drives (thumbdrives, external hard drives,etc), use a SCSI emulation layer. These appear as /dev/sdX devices:
EVALUATION COPY
Unauthorized Reproduction or Distribution Prohibited
1-9
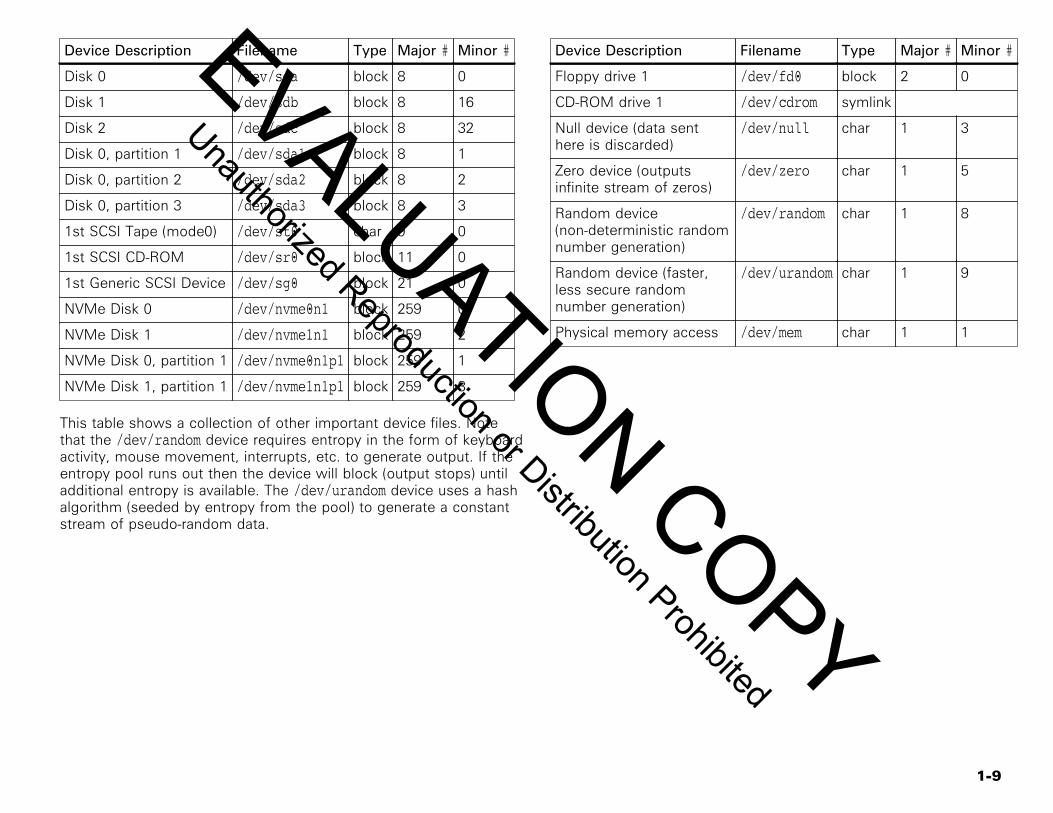
Device Description Filename Type Major # Minor #
Disk 0 /dev/sda block 8 0
Disk 1 /dev/sdb block 8 16
Disk 2 /dev/sdc block 8 32
Disk 0, partition 1 /dev/sda1 block 8 1
Disk 0, partition 2 /dev/sda2 block 8 2
Disk 0, partition 3 /dev/sda3 block 8 3
1st SCSI Tape (mode0) /dev/st0 char 9 0
1st SCSI CD-ROM /dev/sr0 block 11 0
1st Generic SCSI Device /dev/sg0 block 21 0
NVMe Disk 0 /dev/nvme0n1 block 259 0
NVMe Disk 1 /dev/nvme1n1 block 259 2
NVMe Disk 0, partition 1 /dev/nvme0n1p1 block 259 1
NVMe Disk 1, partition 1 /dev/nvme1n1p1 block 259 3
This table shows a collection of other important device files. Notethat the /dev/random device requires entropy in the form of keyboardactivity, mouse movement, interrupts, etc. to generate output. If theentropy pool runs out then the device will block (output stops) untiladditional entropy is available. The /dev/urandom device uses a hashalgorithm (seeded by entropy from the pool) to generate a constantstream of pseudo-random data.
Device Description Filename Type Major # Minor #
Floppy drive 1 /dev/fd0 block 2 0
CD-ROM drive 1 /dev/cdrom symlink
Null device (data senthere is discarded)
/dev/null char 1 3
Zero device (outputsinfinite stream of zeros)
/dev/zero char 1 5
Random device(non-deterministic randomnumber generation)
/dev/random char 1 8
Random device (faster,less secure randomnumber generation)
/dev/urandom char 1 9
Physical memory access /dev/mem char 1 1
EVALUATION COPY
Unauthorized Reproduction or Distribution Prohibited

1-10
Persistent Disk Name
The traditional block device filename assigned to a specific disk (e.g./dev/sda) can change depending on the order in which the kerneldetects devices. Therefore, referencing disks via these names inconfiguration files or commands is an unsafe practice. udev providespersistent names for each disk under the /dev/disk/ directory by:device id, by filesystem label, by physical path, and by UUID. Customudev rules can also be created to assign arbitrary persistent names ofthe administrator's choosing.
If installed, the tree command is a good way to view these:
# tree /dev/disk/dev/disk|-- by-id| |-- ata-HDS728080PLA380_PFDBU0SDUSRE3X -> ../../sdb| |-- ata-ST3160318AS_6VM6K43J -> ../../sda| |-- ata-ST3160318AS_6VM6K43J-part1 -> ../../sda1| |-- ata-ST3160318AS_6VM6K43J-part2 -> ../../sda2| |-- dm-name-vg0-lv_root -> ../../dm-0. . . snip . . .| |-- wwn-0x5000c5001b3fc5ad-part2 -> ../../sda2| \-- wwn-0x5000cca302f50f38 -> ../../sdb|-- by-path| |-- pci-0000:00:1f.1-scsi-0:0:0:0 -> ../../sr0| |-- pci-0000:00:1f.2-scsi-0:0:0:0 -> ../../sda| |-- pci-0000:00:1f.2-scsi-0:0:0:0-part1 -> ../../sda1| |-- pci-0000:00:1f.2-scsi-0:0:0:0-part2 -> ../../sda2| \-- pci-0000:00:1f.2-scsi-0:0:1:0 -> ../../sdb\-- by-uuid |-- 069cbe84-f9a2-476e-9dfd-affd2979e41b -> ../../sda1 |-- 16f34d14-0312-482a-8da8-ca653c336a77 -> ../../dm-2 |-- 4f57e937-19dc-478b-9f38-ad3e2d06340c -> ../../dm-4 |-- 7735dc34-45d2-446a-b32c-84fe688b12da -> ../../dm-1 |-- 7cca50b4-d3ec-425b-b784-a7301145f46e -> ../../dm-0 \-- fec5c254-a664-40e6-a674-224b8a4995d0 -> ../../dm-3
3 directories, 33 files
EVALUATION COPY
Unauthorized Reproduction or Distribution Prohibited
1-11
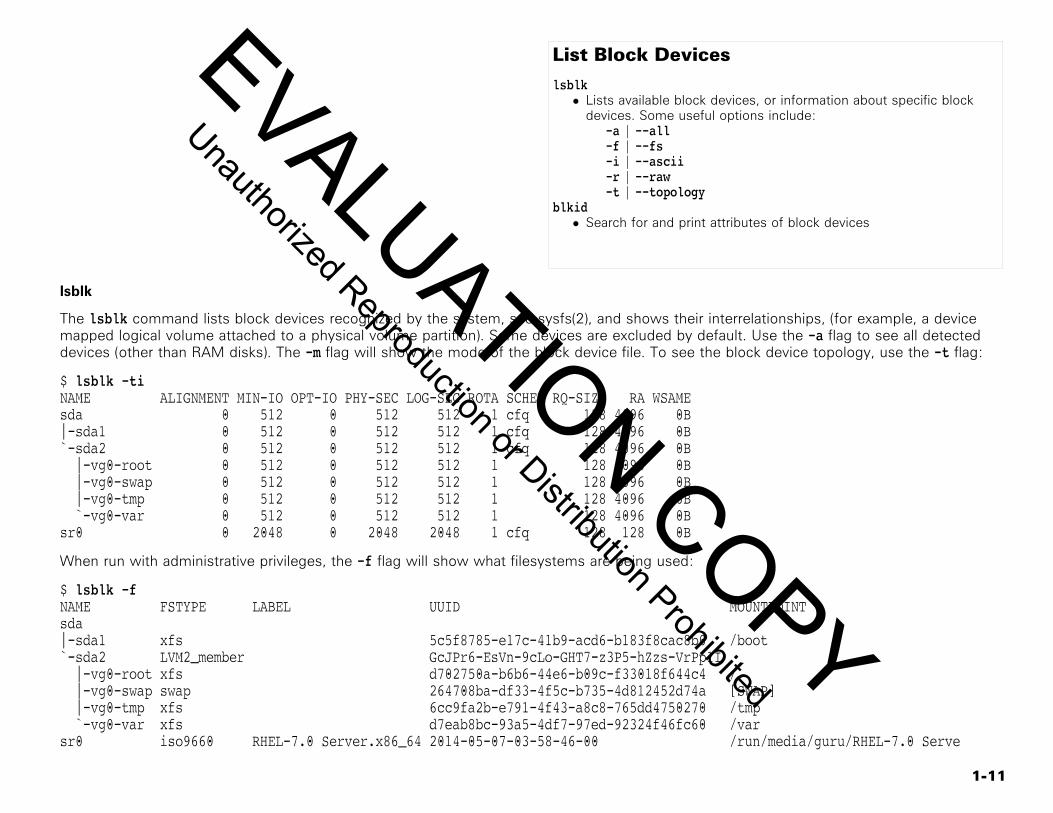
List Block Devices
lsblk• Lists available block devices, or information about specific block
devices. Some useful options include:-a | --all-f | --fs-i | --ascii-r | --raw-t | --topology
blkid• Search for and print attributes of block devices
lsblk
The lsblk command lists block devices recognized by the system, see sysfs(2), and shows their interrelationships, (for example, a devicemapped logical volume attached to a physical volume partition). Some devices are excluded by default. Use the -a flag to see all detecteddevices (other than RAM disks). The -m flag will show the mode of the block device file. To see the block device topology, use the -t flag:
$ lsblk -tiNAME ALIGNMENT MIN-IO OPT-IO PHY-SEC LOG-SEC ROTA SCHED RQ-SIZE RA WSAMEsda 0 512 0 512 512 1 cfq 128 4096 0B|-sda1 0 512 0 512 512 1 cfq 128 4096 0B`-sda2 0 512 0 512 512 1 cfq 128 4096 0B |-vg0-root 0 512 0 512 512 1 128 4096 0B |-vg0-swap 0 512 0 512 512 1 128 4096 0B |-vg0-tmp 0 512 0 512 512 1 128 4096 0B `-vg0-var 0 512 0 512 512 1 128 4096 0Bsr0 0 2048 0 2048 2048 1 cfq 128 128 0B
When run with administrative privileges, the -f flag will show what filesystems are being used:
$ lsblk -fNAME FSTYPE LABEL UUID MOUNTPOINTsda|-sda1 xfs 5c5f8785-e17c-41b9-acd6-b183f8cac8b0 /boot`-sda2 LVM2_member GcJPr6-EsVn-9cLo-GHT7-z3P5-hZzs-VrPp1I |-vg0-root xfs d702750a-b6b6-44e6-b09c-f33018f644c4 / |-vg0-swap swap 264708ba-df33-4f5c-b735-4d812452d74a [SWAP] |-vg0-tmp xfs 6cc9fa2b-e791-4f43-a8c8-765dd4750270 /tmp `-vg0-var xfs d7eab8bc-93a5-4df7-97ed-92324f46fc60 /varsr0 iso9660 RHEL-7.0 Server.x86_64 2014-05-07-03-58-46-00 /run/media/guru/RHEL-7.0 Serve
EVALUATION COPY
Unauthorized Reproduction or Distribution Prohibited
1-12
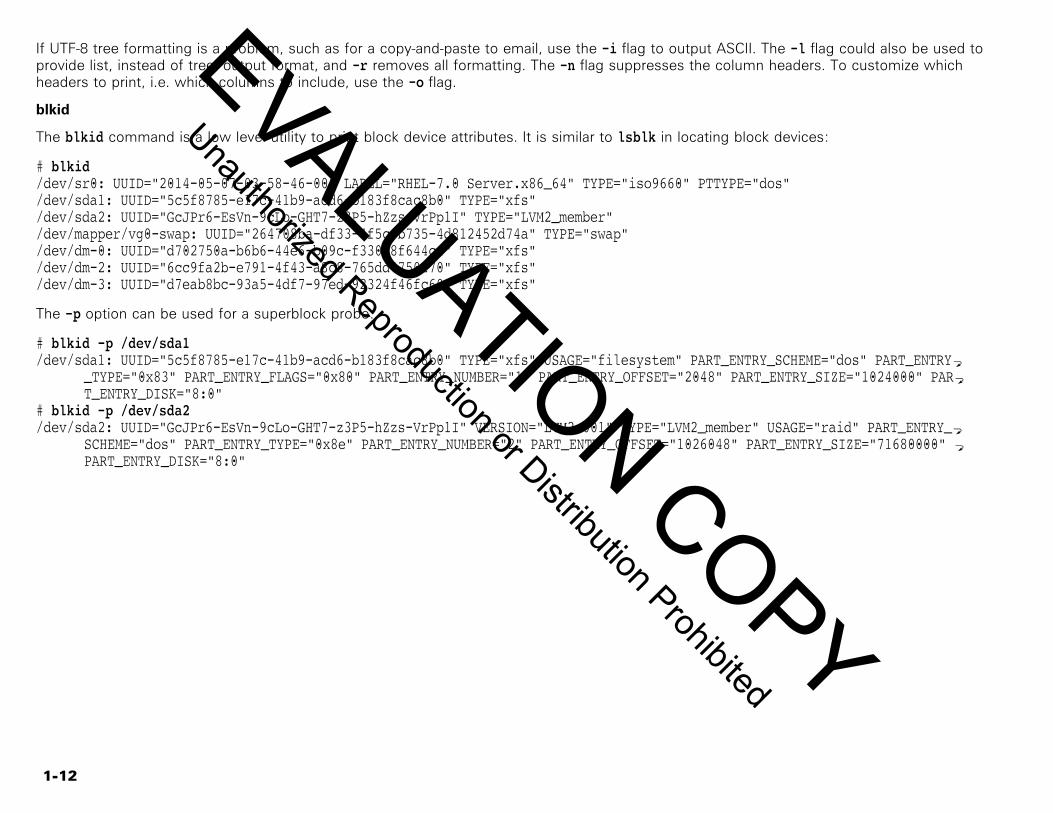
If UTF-8 tree formatting is a problem, such as for a copy-and-paste to email, use the -i flag to output ASCII. The -l flag could also be used toprovide list, instead of tree, output format, and -r removes all formatting. The -n flag suppresses the column headers. To customize whichheaders to print, i.e. which columns to include, use the -o flag.
blkid
The blkid command is a low level utility to print block device attributes. It is similar to lsblk in locating block devices:
# blkid/dev/sr0: UUID="2014-05-07-03-58-46-00" LABEL="RHEL-7.0 Server.x86_64" TYPE="iso9660" PTTYPE="dos"/dev/sda1: UUID="5c5f8785-e17c-41b9-acd6-b183f8cac8b0" TYPE="xfs"/dev/sda2: UUID="GcJPr6-EsVn-9cLo-GHT7-z3P5-hZzs-VrPp1I" TYPE="LVM2_member"/dev/mapper/vg0-swap: UUID="264708ba-df33-4f5c-b735-4d812452d74a" TYPE="swap"/dev/dm-0: UUID="d702750a-b6b6-44e6-b09c-f33018f644c4" TYPE="xfs"/dev/dm-2: UUID="6cc9fa2b-e791-4f43-a8c8-765dd4750270" TYPE="xfs"/dev/dm-3: UUID="d7eab8bc-93a5-4df7-97ed-92324f46fc60" TYPE="xfs"
The -p option can be used for a superblock probe:
# blkid -p /dev/sda1/dev/sda1: UUID="5c5f8785-e17c-41b9-acd6-b183f8cac8b0" TYPE="xfs" USAGE="filesystem" PART_ENTRY_SCHEME="dos" PART_ENTRYa
_TYPE="0x83" PART_ENTRY_FLAGS="0x80" PART_ENTRY_NUMBER="1" PART_ENTRY_OFFSET="2048" PART_ENTRY_SIZE="1024000" PARaT_ENTRY_DISK="8:0"
# blkid -p /dev/sda2/dev/sda2: UUID="GcJPr6-EsVn-9cLo-GHT7-z3P5-hZzs-VrPp1I" VERSION="LVM2 001" TYPE="LVM2_member" USAGE="raid" PART_ENTRY_a
SCHEME="dos" PART_ENTRY_TYPE="0x8e" PART_ENTRY_NUMBER="2" PART_ENTRY_OFFSET="1026048" PART_ENTRY_SIZE="71680000" aPART_ENTRY_DISK="8:0"
EVALUATION COPY
Unauthorized Reproduction or Distribution Prohibited

1-13
SCSI Devices
Identifying devices• /proc/scsi/scsi• lsscsi
Adding / Removing devices with /sys/class/scsi_*SCSI Command Protocol• Commands supported by SCSI devices• Carried across many transports: ATAPI, PATA, SATA, SPI, SAS,
FCP, USB, Fireware SBP-2, IP (for iSCSI), etc.Viewing and setting options• sdparm• sg_map
Device Identification
Every SCSI device is assigned an ID (used to differentiate commandsand responses sent by devices on a shared SCSI bus). The address isin the form host (SCSI adapter number), bus (channel number),target (id number), lun (logical unit number). The lsscsi commandcan display information about what SCSI hosts and devices are seenby the kernel as shown in this example:
$ lsscsi -l[0] megaraid_sas$ lsscsi[0:0:8:0] enclosu DP BACKPLANE 1.05 -[0:2:0:0] disk HP RAID CONTRLR 1.03 /dev/sda
The lsscsi command gets its data from files in /sys/class/scsi_*which can also be read directly as an alternative.
Scanning for New SCSI Devices
In addition to the methods already discussed, a list of all SCSIdevices known to the kernel can be seen by reading the/proc/scsi/scsi file. Newly added SCSI devices will not be visible tothe kernel until either a reboot, or a rescan of the correspondinghost. A rescan can be initiated via the/sys/class/scsi_host/host_num/scan file. If the new device is aSAN device, a loop initialization protocol (LIP) command may need tobe issued to the HBA card to rescan the Fiber Channel bus as well.The following example uses the wildcard "-" (dash character) in placeof bus, target, and lun and would cause the kernel to detect any
new devices on the specified SCSI host:
# cat /proc/scsi/scsi #see current devicesAttached devices:Host: scsi0 Channel: 00 Id: 08 Lun: 00 Vendor: DP Model: BACKPLANE Rev: 1.05 Type: Enclosure ANSI SCSI revision: 05Host: scsi0 Channel: 02 Id: 00 Lun: 00 Vendor: HP Model: RAID CONTRLR Rev: 1.03 Type: Direct-Access ANSI SCSI revision: 05# echo 1 > /sys/class/fc_host/host_num/issue_lip && sleep 15# echo "- - -" > /sys/class/scsi_host/host0/scan# dmesg #view results of rescan. . . snip . . .Vendor: SEAGATE Model: ST3300655SS Rev: S515Type: Direct-Access ANSI SCSI revision: 05Vendor: SEAGATE Model: ST3300655SS Rev: S515Type: Direct-Access ANSI SCSI revision: 05
EVALUATION COPY
Unauthorized Reproduction or Distribution Prohibited
1-14
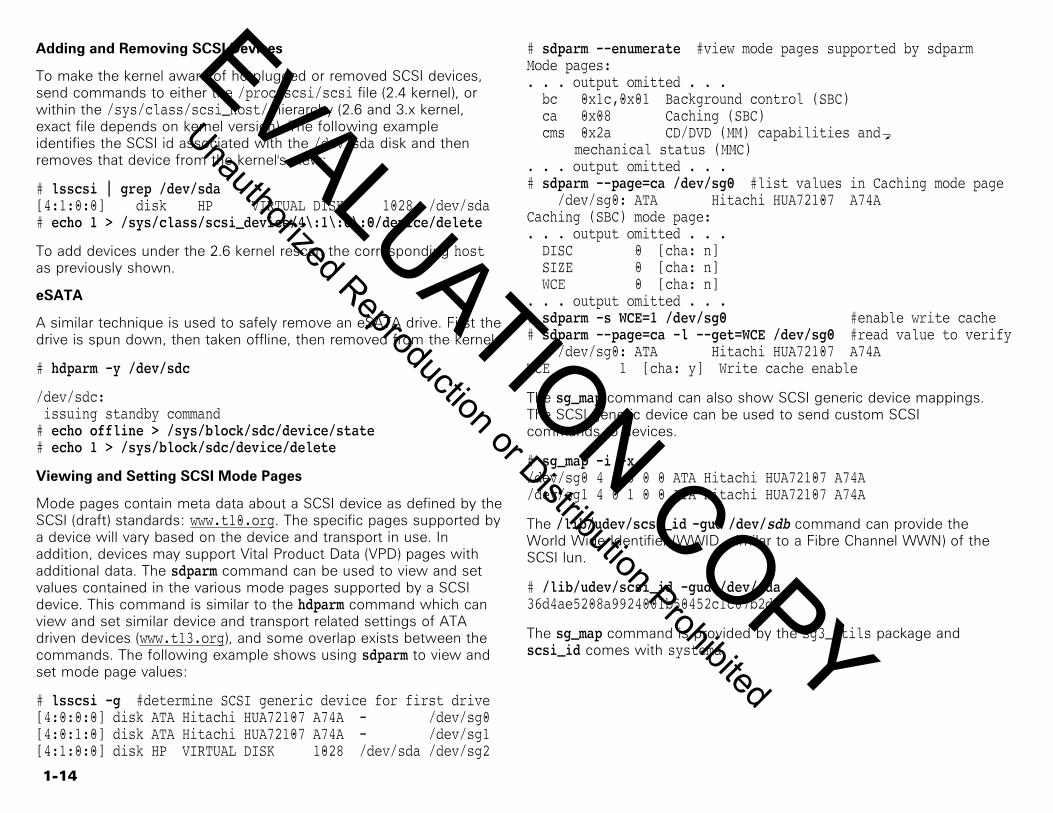
Adding and Removing SCSI Devices
To make the kernel aware of hotplugged or removed SCSI devices,send commands to either the /proc/scsi/scsi file (2.4 kernel), orwithin the /sys/class/scsi_host/ hierarchy (2.6 and 3.x kernel,exact file depends on kernel version). The following exampleidentifies the SCSI id associated with the /dev/sda disk and thenremoves that device from the kernel's view:
# lsscsi | grep /dev/sda[4:1:0:0] disk HP VIRTUAL DISK 1028 /dev/sda# echo 1 > /sys/class/scsi_device/4\:1\:0\:0/device/delete
To add devices under the 2.6 kernel rescan the corresponding hostas previously shown.
eSATA
A similar technique is used to safely remove an eSATA drive. First thedrive is spun down, then taken offline, then removed from the kernel:
# hdparm -y /dev/sdc
/dev/sdc: issuing standby command# echo offline > /sys/block/sdc/device/state# echo 1 > /sys/block/sdc/device/delete
Viewing and Setting SCSI Mode Pages
Mode pages contain meta data about a SCSI device as defined by theSCSI (draft) standards: www.t10.org. The specific pages supported bya device will vary based on the device and transport in use. Inaddition, devices may support Vital Product Data (VPD) pages withadditional data. The sdparm command can be used to view and setvalues contained in the various mode pages supported by a SCSIdevice. This command is similar to the hdparm command which canview and set similar device and transport related settings of ATAdriven devices (www.t13.org), and some overlap exists between thecommands. The following example shows using sdparm to view andset mode page values:
# lsscsi -g #determine SCSI generic device for first drive[4:0:0:0] disk ATA Hitachi HUA72107 A74A - /dev/sg0[4:0:1:0] disk ATA Hitachi HUA72107 A74A - /dev/sg1[4:1:0:0] disk HP VIRTUAL DISK 1028 /dev/sda /dev/sg2
# sdparm --enumerate #view mode pages supported by sdparmMode pages:. . . output omitted . . . bc 0x1c,0x01 Background control (SBC) ca 0x08 Caching (SBC) cms 0x2a CD/DVD (MM) capabilities anda
mechanical status (MMC). . . output omitted . . .# sdparm --page=ca /dev/sg0 #list values in Caching mode page /dev/sg0: ATA Hitachi HUA72107 A74ACaching (SBC) mode page:. . . output omitted . . . DISC 0 [cha: n] SIZE 0 [cha: n] WCE 0 [cha: n]. . . output omitted . . .# sdparm -s WCE=1 /dev/sg0 #enable write cache# sdparm --page=ca -l --get=WCE /dev/sg0 #read value to verify /dev/sg0: ATA Hitachi HUA72107 A74AWCE 1 [cha: y] Write cache enable
The sg_map command can also show SCSI generic device mappings.The SCSI generic device can be used to send custom SCSIcommands to devices.
# sg_map -i -x/dev/sg0 4 0 0 0 0 ATA Hitachi HUA72107 A74A/dev/sg1 4 0 1 0 0 ATA Hitachi HUA72107 A74A
The /lib/udev/scsi_id -gud /dev/sdb command can provide theWorld Wide Identifier (WWID, similar to a Fibre Channel WWN) of theSCSI lun.
# /lib/udev/scsi_id -gud /dev/sda36d4ae5208a9924001b50452c1c07b2d3
The sg_map command is provided by the sg3_utils package andscsi_id comes with systemd.
EVALUATION COPY
Unauthorized Reproduction or Distribution Prohibited
1-15
USB Devices
lsusb• -v display verbose details
e.g. bcdUSB field shows max USB version a devicesupports
• -t display physical USB device hierarchyKernel Messages• dmesg• journalctl -k• RHEL7/SLES12: /var/log/messages
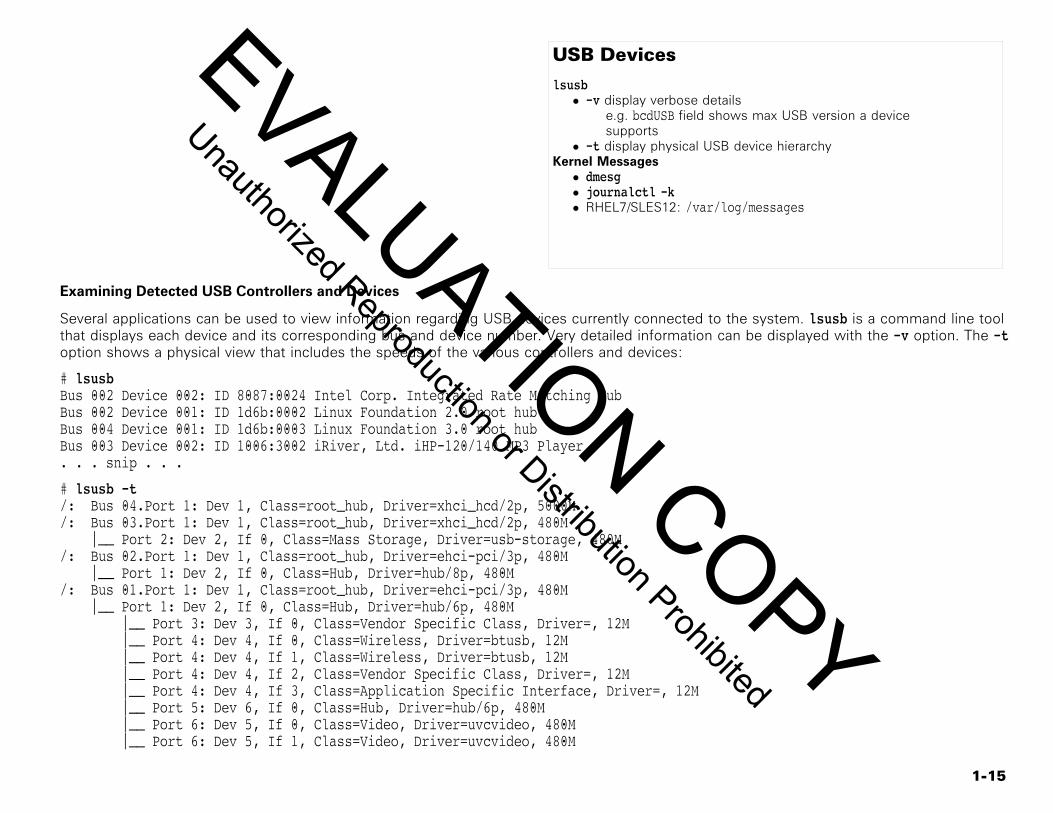
Examining Detected USB Controllers and Devices
Several applications can be used to view information regarding USB devices currently connected to the system. lsusb is a command line toolthat displays each device and its corresponding bus and device number. Very detailed information can be displayed with the -v option. The -toption shows a physical view that includes the speeds of the various controllers and devices:
# lsusbBus 002 Device 002: ID 8087:0024 Intel Corp. Integrated Rate Matching HubBus 002 Device 001: ID 1d6b:0002 Linux Foundation 2.0 root hubBus 004 Device 001: ID 1d6b:0003 Linux Foundation 3.0 root hubBus 003 Device 002: ID 1006:3002 iRiver, Ltd. iHP-120/140 MP3 Player. . . snip . . .
# lsusb -t/: Bus 04.Port 1: Dev 1, Class=root_hub, Driver=xhci_hcd/2p, 5000M/: Bus 03.Port 1: Dev 1, Class=root_hub, Driver=xhci_hcd/2p, 480M |__ Port 2: Dev 2, If 0, Class=Mass Storage, Driver=usb-storage, 480M/: Bus 02.Port 1: Dev 1, Class=root_hub, Driver=ehci-pci/3p, 480M |__ Port 1: Dev 2, If 0, Class=Hub, Driver=hub/8p, 480M/: Bus 01.Port 1: Dev 1, Class=root_hub, Driver=ehci-pci/3p, 480M |__ Port 1: Dev 2, If 0, Class=Hub, Driver=hub/6p, 480M |__ Port 3: Dev 3, If 0, Class=Vendor Specific Class, Driver=, 12M |__ Port 4: Dev 4, If 0, Class=Wireless, Driver=btusb, 12M |__ Port 4: Dev 4, If 1, Class=Wireless, Driver=btusb, 12M |__ Port 4: Dev 4, If 2, Class=Vendor Specific Class, Driver=, 12M |__ Port 4: Dev 4, If 3, Class=Application Specific Interface, Driver=, 12M |__ Port 5: Dev 6, If 0, Class=Hub, Driver=hub/6p, 480M |__ Port 6: Dev 5, If 0, Class=Video, Driver=uvcvideo, 480M |__ Port 6: Dev 5, If 1, Class=Video, Driver=uvcvideo, 480M
EVALUATION COPY
Unauthorized Reproduction or Distribution Prohibited
1-16
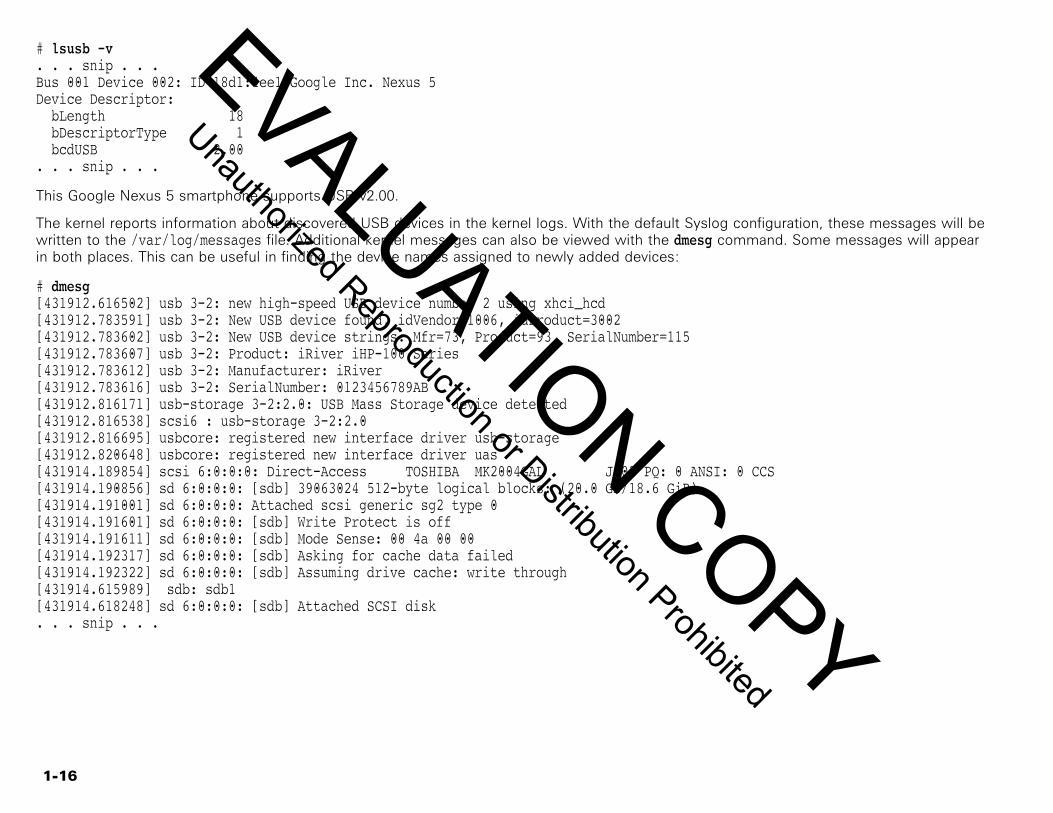
# lsusb -v. . . snip . . .Bus 001 Device 002: ID 18d1:4ee1 Google Inc. Nexus 5Device Descriptor: bLength 18 bDescriptorType 1 bcdUSB 2.00. . . snip . . .
This Google Nexus 5 smartphone supports USB v2.00.
The kernel reports information about discovered USB devices in the kernel logs. With the default Syslog configuration, these messages will bewritten to the /var/log/messages file. Additional kernel messages can also be viewed with the dmesg command. Some messages will appearin both places. This can be useful in finding the device names assigned to newly added devices:
# dmesg[431912.616502] usb 3-2: new high-speed USB device number 2 using xhci_hcd[431912.783591] usb 3-2: New USB device found, idVendor=1006, idProduct=3002[431912.783602] usb 3-2: New USB device strings: Mfr=73, Product=93, SerialNumber=115[431912.783607] usb 3-2: Product: iRiver iHP-100 Series[431912.783612] usb 3-2: Manufacturer: iRiver[431912.783616] usb 3-2: SerialNumber: 0123456789AB[431912.816171] usb-storage 3-2:2.0: USB Mass Storage device detected[431912.816538] scsi6 : usb-storage 3-2:2.0[431912.816695] usbcore: registered new interface driver usb-storage[431912.820648] usbcore: registered new interface driver uas[431914.189854] scsi 6:0:0:0: Direct-Access TOSHIBA MK2004GAL JA02 PQ: 0 ANSI: 0 CCS[431914.190856] sd 6:0:0:0: [sdb] 39063024 512-byte logical blocks: (20.0 GB/18.6 GiB)[431914.191001] sd 6:0:0:0: Attached scsi generic sg2 type 0[431914.191601] sd 6:0:0:0: [sdb] Write Protect is off[431914.191611] sd 6:0:0:0: [sdb] Mode Sense: 00 4a 00 00[431914.192317] sd 6:0:0:0: [sdb] Asking for cache data failed[431914.192322] sd 6:0:0:0: [sdb] Assuming drive cache: write through[431914.615989] sdb: sdb1[431914.618248] sd 6:0:0:0: [sdb] Attached SCSI disk. . . snip . . .
EVALUATION COPY
Unauthorized Reproduction or Distribution Prohibited
1-17
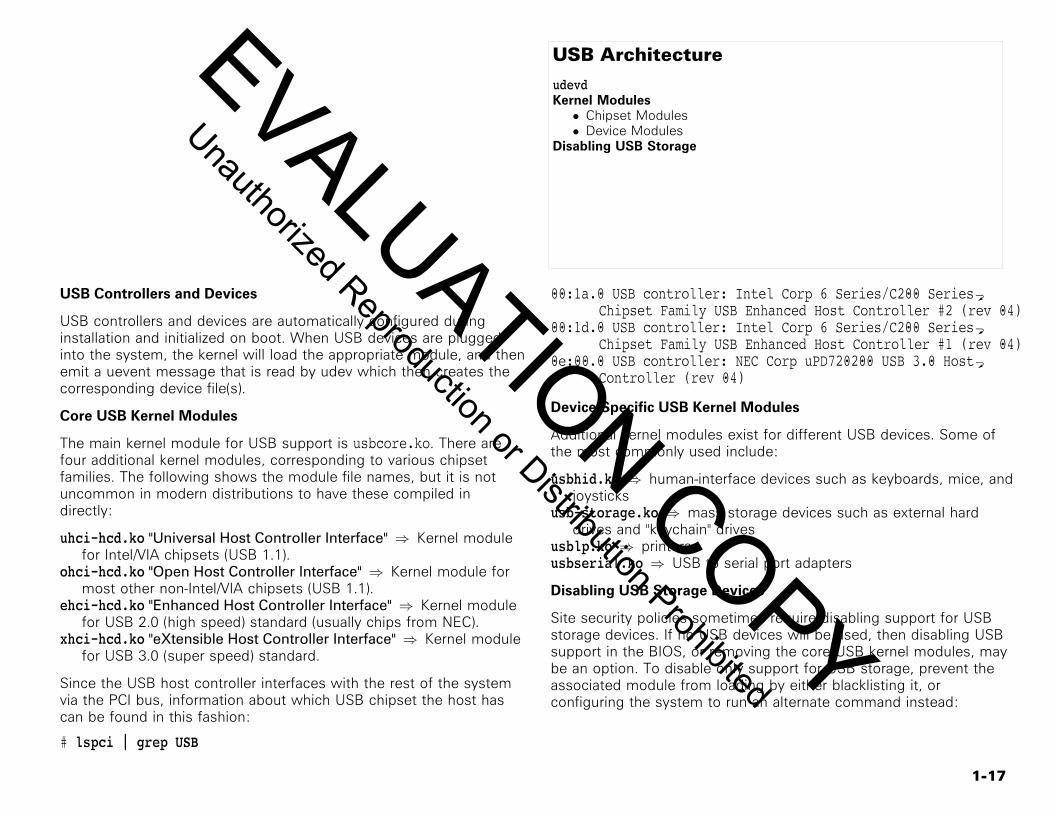
USB Architecture
udevdKernel Modules• Chipset Modules• Device Modules
Disabling USB Storage
USB Controllers and Devices
USB controllers and devices are automatically configured duringinstallation and initialized on boot. When USB devices are pluggedinto the system, the kernel will load the appropriate module, and thenemit a uevent message that is read by udev which then creates thecorresponding device file(s).
Core USB Kernel Modules
The main kernel module for USB support is usbcore.ko. There arefour additional kernel modules, corresponding to various chipsetfamilies. The following shows the module file names, but it is notuncommon in modern distributions to have these compiled indirectly:
uhci-hcd.ko "Universal Host Controller Interface" ⇒ Kernel modulefor Intel/VIA chipsets (USB 1.1).
ohci-hcd.ko "Open Host Controller Interface" ⇒ Kernel module formost other non-Intel/VIA chipsets (USB 1.1).
ehci-hcd.ko "Enhanced Host Controller Interface" ⇒ Kernel modulefor USB 2.0 (high speed) standard (usually chips from NEC).
xhci-hcd.ko "eXtensible Host Controller Interface" ⇒ Kernel modulefor USB 3.0 (super speed) standard.
Since the USB host controller interfaces with the rest of the systemvia the PCI bus, information about which USB chipset the host hascan be found in this fashion:
# lspci | grep USB
00:1a.0 USB controller: Intel Corp 6 Series/C200 SeriesaChipset Family USB Enhanced Host Controller #2 (rev 04)
00:1d.0 USB controller: Intel Corp 6 Series/C200 SeriesaChipset Family USB Enhanced Host Controller #1 (rev 04)
0e:00.0 USB controller: NEC Corp uPD720200 USB 3.0 HostaController (rev 04)
Device Specific USB Kernel Modules
Additional kernel modules exist for different USB devices. Some ofthe most commonly used include:
usbhid.ko ⇒ human-interface devices such as keyboards, mice, andjoysticks
usb-storage.ko ⇒ mass storage devices such as external harddrives and "keychain" drives
usblp.ko ⇒ printersusbserial.ko ⇒ USB to serial port adapters
Disabling USB Storage Devices
Site security policies sometimes require disabling support for USBstorage devices. If no USB devices will be used, then disabling USBsupport in the BIOS, or removing the core USB kernel modules, maybe an option. To disable only support for USB storage, prevent theassociated module from loading by either blacklisting it, orconfiguring the system to run an alternate command instead:
EVALUATION COPY
Unauthorized Reproduction or Distribution Prohibited
1-18
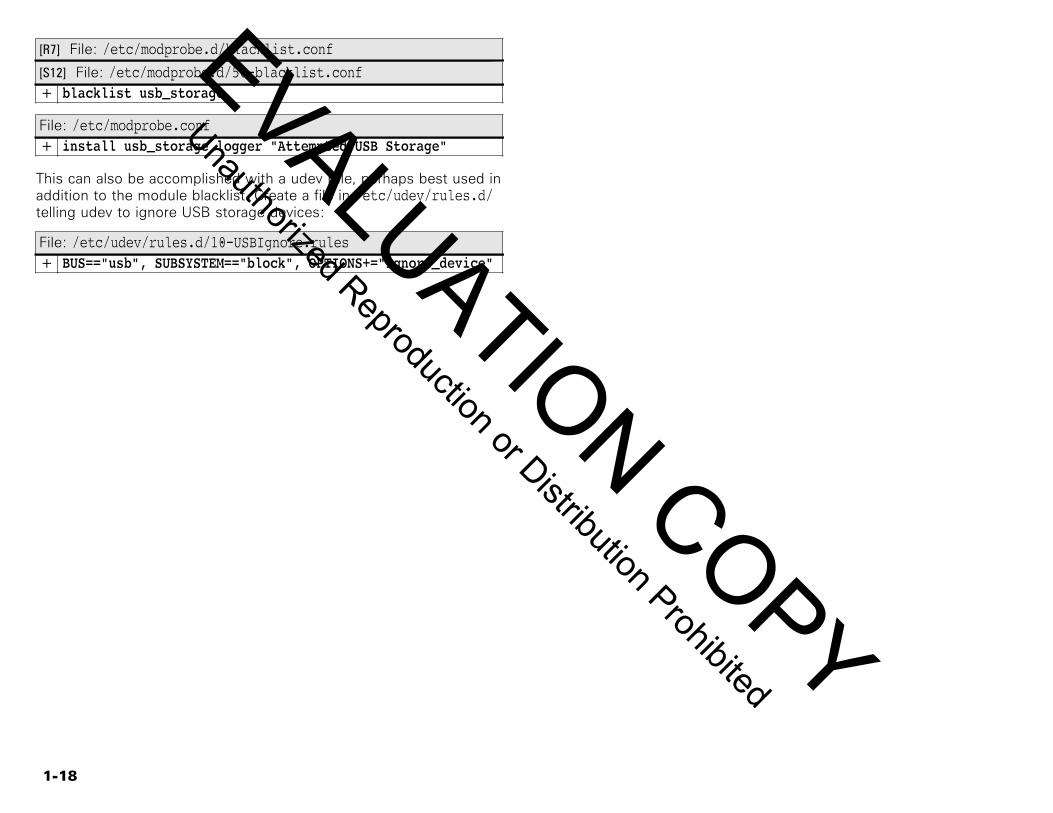
[R7] File: /etc/modprobe.d/blacklist.conf
[S12] File: /etc/modprobe.d/50-blacklist.conf+ blacklist usb_storage
File: /etc/modprobe.conf+ install usb_storage logger "Attempted USB Storage"
This can also be accomplished with a udev rule, perhaps best used inaddition to the module blacklist. Create a file in /etc/udev/rules.d/telling udev to ignore USB storage devices:
File: /etc/udev/rules.d/10-USBIgnore.rules+ BUS=="usb", SUBSYSTEM=="block", OPTIONS+="ignore_device"
EVALUATION COPY
Unauthorized Reproduction or Distribution Prohibited
1-19
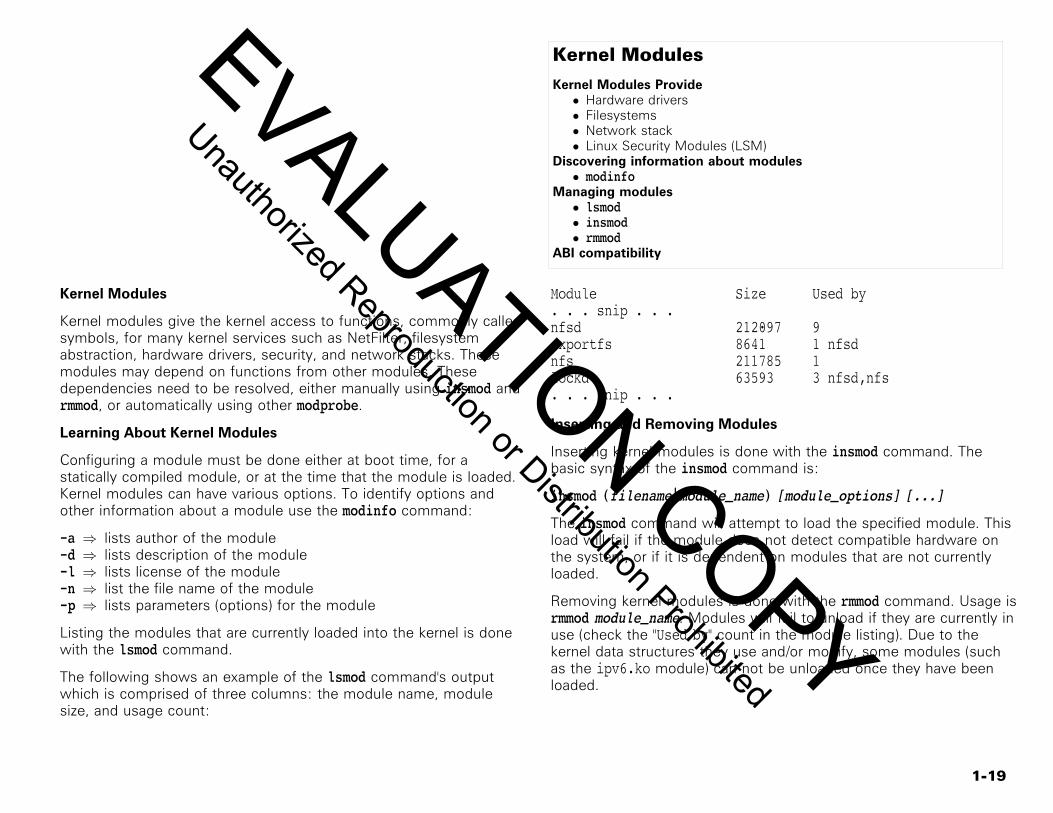
Kernel Modules
Kernel Modules Provide• Hardware drivers• Filesystems• Network stack• Linux Security Modules (LSM)
Discovering information about modules• modinfo
Managing modules• lsmod• insmod• rmmod
ABI compatibility
Kernel Modules
Kernel modules give the kernel access to functions, commonly calledsymbols, for many kernel services such as NetFilter, filesystemabstraction, hardware drivers, security, and network stacks. Thesemodules may depend on functions from other modules. Thesedependencies need to be resolved, either manually using insmod andrmmod, or automatically using other modprobe.
Learning About Kernel Modules
Configuring a module must be done either at boot time, for astatically compiled module, or at the time that the module is loaded.Kernel modules can have various options. To identify options andother information about a module use the modinfo command:
-a ⇒ lists author of the module-d ⇒ lists description of the module-l ⇒ lists license of the module-n ⇒ list the file name of the module-p ⇒ lists parameters (options) for the module
Listing the modules that are currently loaded into the kernel is donewith the lsmod command.
The following shows an example of the lsmod command's outputwhich is comprised of three columns: the module name, modulesize, and usage count:
Module Size Used by. . . snip . . .nfsd 212097 9exportfs 8641 1 nfsdnfs 211785 1lockd 63593 3 nfsd,nfs. . . snip . . .
Inserting and Removing Modules
Inserting kernel modules is done with the insmod command. Thebasic syntax of the insmod command is:
insmod (filename|module_name) [module_options] [...]
The insmod command will attempt to load the specified module. Thisload will fail if the module does not detect compatible hardware onthe system, or if it is dependent on modules that are not currentlyloaded.
Removing kernel modules is done with the rmmod command. Usage isrmmod module_name. Modules will fail to unload if they are currently inuse (check the "Used by" count in the module listing). Due to thekernel data structures they use and/or modify, some modules (suchas the ipv6.ko module) can not be unloaded once they have beenloaded.
EVALUATION COPY
Unauthorized Reproduction or Distribution Prohibited
1-20
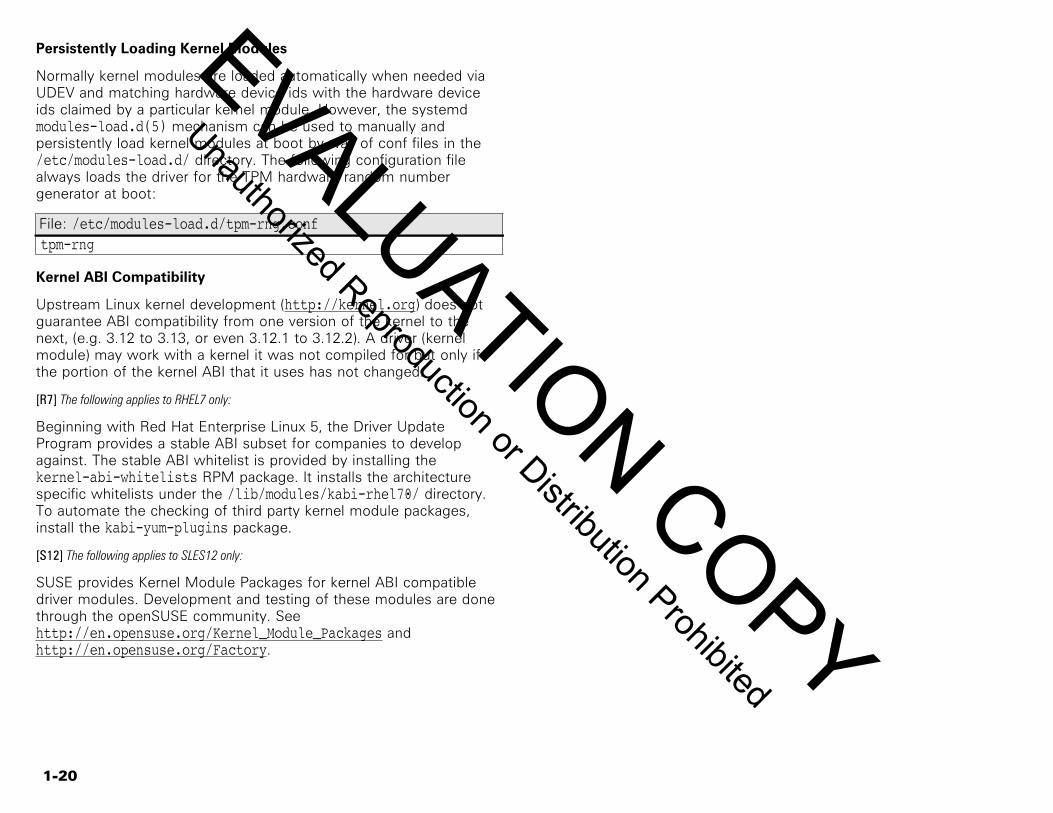
Persistently Loading Kernel Modules
Normally kernel modules are loaded automatically when needed viaUDEV and matching hardware device ids with the hardware deviceids claimed by a particular kernel module. However, the systemdmodules-load.d(5) mechanism can be used to manually andpersistently load kernel modules at boot by way of conf files in the/etc/modules-load.d/ directory. The following configuration filealways loads the driver for the TPM hardware random numbergenerator at boot:
File: /etc/modules-load.d/tpm-rng.conftpm-rng
Kernel ABI Compatibility
Upstream Linux kernel development (http://kernel.org) does notguarantee ABI compatibility from one version of the kernel to thenext, (e.g. 3.12 to 3.13, or even 3.12.1 to 3.12.2). A driver (kernelmodule) may work with a kernel it was not compiled for but only ifthe portion of the kernel ABI that it uses has not changed.
[R7] The following applies to RHEL7 only:
Beginning with Red Hat Enterprise Linux 5, the Driver UpdateProgram provides a stable ABI subset for companies to developagainst. The stable ABI whitelist is provided by installing thekernel-abi-whitelists RPM package. It installs the architecturespecific whitelists under the /lib/modules/kabi-rhel70/ directory.To automate the checking of third party kernel module packages,install the kabi-yum-plugins package.
[S12] The following applies to SLES12 only:
SUSE provides Kernel Module Packages for kernel ABI compatibledriver modules. Development and testing of these modules are donethrough the openSUSE community. Seehttp://en.opensuse.org/Kernel_Module_Packages andhttp://en.opensuse.org/Factory.
EVALUATION COPY
Unauthorized Reproduction or Distribution Prohibited
1-21
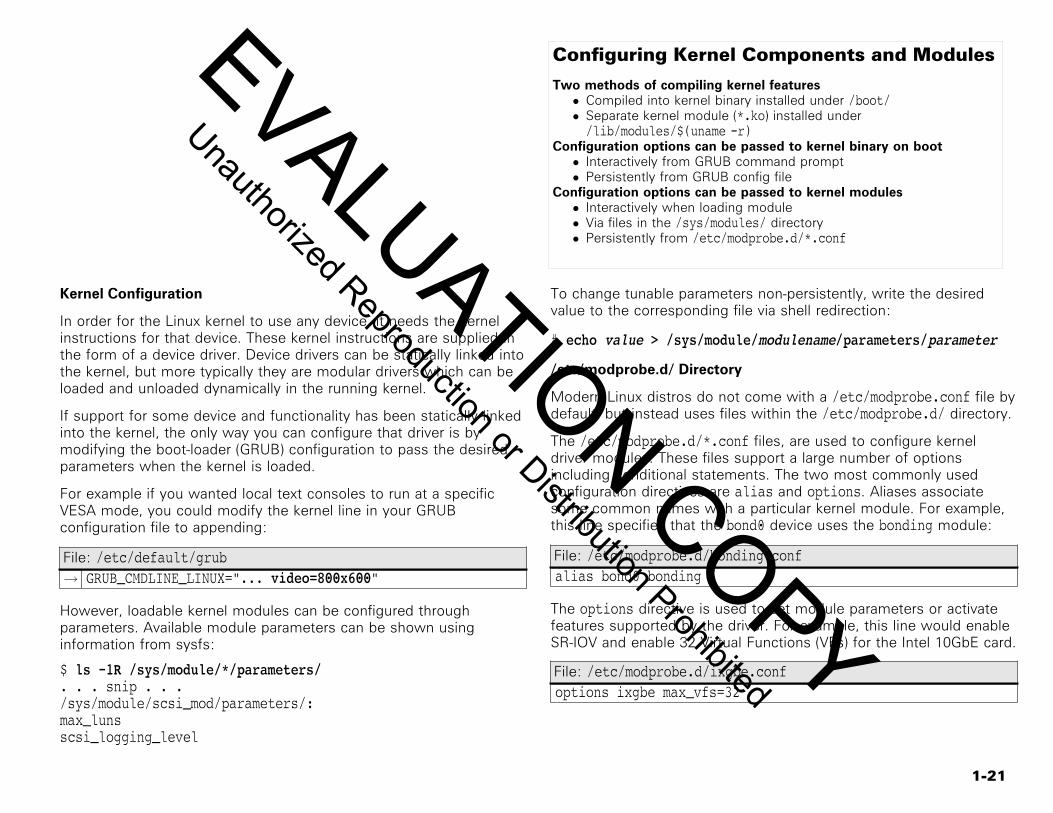
Configuring Kernel Components and Modules
Two methods of compiling kernel features• Compiled into kernel binary installed under /boot/• Separate kernel module (*.ko) installed under/lib/modules/$(uname -r)
Configuration options can be passed to kernel binary on boot• Interactively from GRUB command prompt• Persistently from GRUB config file
Configuration options can be passed to kernel modules• Interactively when loading module• Via files in the /sys/modules/ directory• Persistently from /etc/modprobe.d/*.conf
Kernel Configuration
In order for the Linux kernel to use any device, it needs the kernelinstructions for that device. These kernel instructions are supplied inthe form of a device driver. Device drivers can be statically linked intothe kernel, but more typically they are modular drivers which can beloaded and unloaded dynamically in the running kernel.
If support for some device and functionality has been statically linkedinto the kernel, the only way you can configure that driver is bymodifying the boot-loader (GRUB) configuration to pass the desiredparameters when the kernel is loaded.
For example if you wanted local text consoles to run at a specificVESA mode, you could modify the kernel line in your GRUBconfiguration file to appending:
File: /etc/default/grub→ GRUB_CMDLINE_LINUX="... video=800x600"
However, loadable kernel modules can be configured throughparameters. Available module parameters can be shown usinginformation from sysfs:
$ ls -1R /sys/module/*/parameters/. . . snip . . ./sys/module/scsi_mod/parameters/:max_lunsscsi_logging_level
To change tunable parameters non-persistently, write the desiredvalue to the corresponding file via shell redirection:
# echo value > /sys/module/modulename/parameters/parameter
/etc/modprobe.d/ Directory
Modern Linux distros do not come with a /etc/modprobe.conf file bydefault, but instead uses files within the /etc/modprobe.d/ directory.
The /etc/modprobe.d/*.conf files, are used to configure kerneldriver modules. These files support a large number of optionsincluding conditional statements. The two most commonly usedconfiguration directives are alias and options. Aliases associatesome common names with a particular kernel module. For example,this line specifies that the bond0 device uses the bonding module:
File: /etc/modprobe.d/bonding.confalias bond0 bonding
The options directive is used to set module parameters or activatefeatures supported by the driver. For example, this line would enableSR-IOV and enable 32 Virtual Functions (VFs) for the Intel 10GbE card.
File: /etc/modprobe.d/ixgbe.confoptions ixgbe max_vfs=32
EVALUATION COPY
Unauthorized Reproduction or Distribution Prohibited
1-22
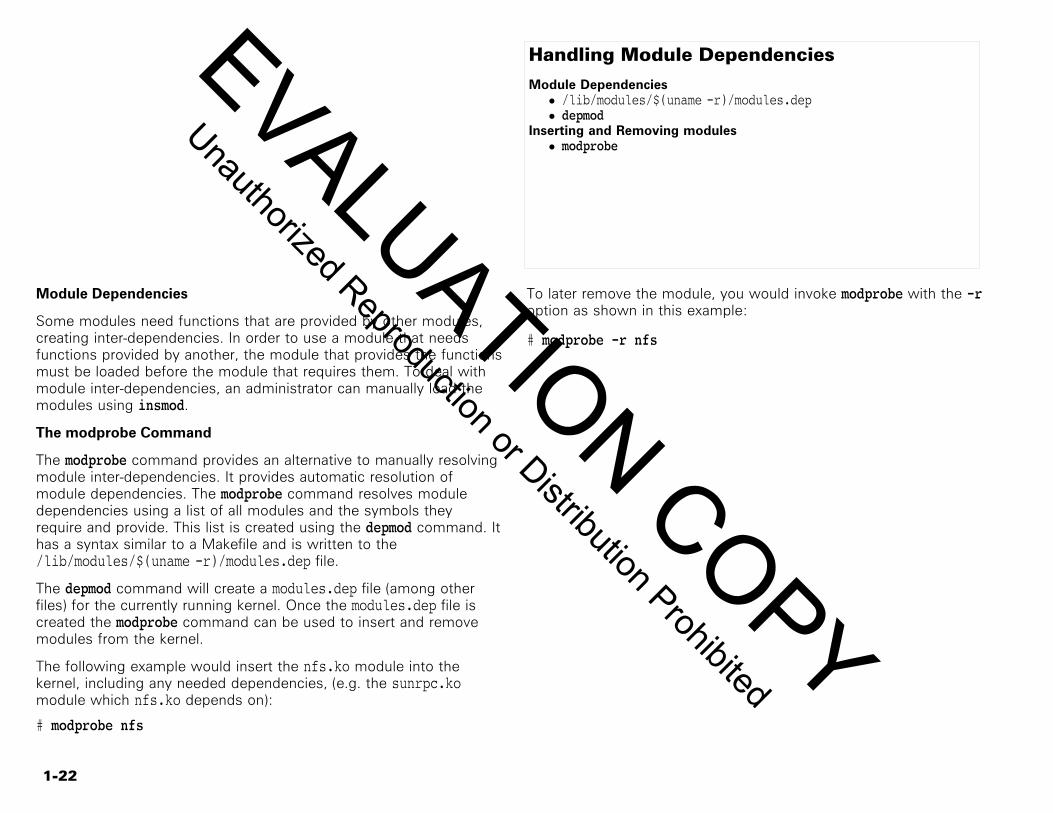
Handling Module Dependencies
Module Dependencies• /lib/modules/$(uname -r)/modules.dep• depmod
Inserting and Removing modules• modprobe
Module Dependencies
Some modules need functions that are provided by other modules,creating inter-dependencies. In order to use a module that needsfunctions provided by another, the module that provides the functionsmust be loaded before the module that requires them. To deal withmodule inter-dependencies, an administrator can manually load themodules using insmod.
The modprobe Command
The modprobe command provides an alternative to manually resolvingmodule inter-dependencies. It provides automatic resolution ofmodule dependencies. The modprobe command resolves moduledependencies using a list of all modules and the symbols theyrequire and provide. This list is created using the depmod command. Ithas a syntax similar to a Makefile and is written to the/lib/modules/$(uname -r)/modules.dep file.
The depmod command will create a modules.dep file (among otherfiles) for the currently running kernel. Once the modules.dep file iscreated the modprobe command can be used to insert and removemodules from the kernel.
The following example would insert the nfs.ko module into thekernel, including any needed dependencies, (e.g. the sunrpc.komodule which nfs.ko depends on):
# modprobe nfs
To later remove the module, you would invoke modprobe with the -roption as shown in this example:
# modprobe -r nfs
EVALUATION COPY
Unauthorized Reproduction or Distribution Prohibited
1-23
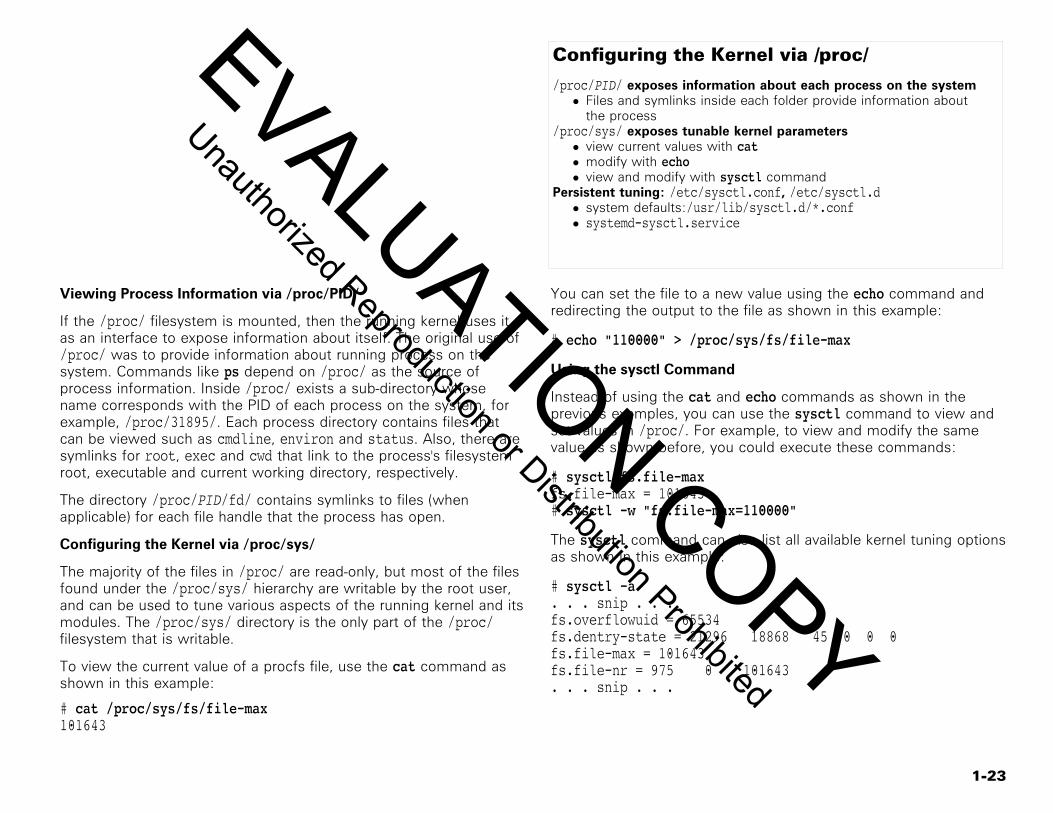
Configuring the Kernel via /proc/
/proc/PID/ exposes information about each process on the system• Files and symlinks inside each folder provide information about
the process/proc/sys/ exposes tunable kernel parameters• view current values with cat• modify with echo• view and modify with sysctl command
Persistent tuning: /etc/sysctl.conf, /etc/sysctl.d• system defaults:/usr/lib/sysctl.d/*.conf• systemd-sysctl.service
Viewing Process Information via /proc/PID/
If the /proc/ filesystem is mounted, then the running kernel uses itas an interface to expose information about itself. The original use of/proc/ was to provide information about running process on thesystem. Commands like ps depend on /proc/ as the source ofprocess information. Inside /proc/ exists a sub-directory whosename corresponds with the PID of each process on the system, forexample, /proc/31895/. Each process directory contains files thatcan be viewed such as cmdline, environ and status. Also, there aresymlinks for root, exec and cwd that link to the process's filesystemroot, executable and current working directory, respectively.
The directory /proc/PID/fd/ contains symlinks to files (whenapplicable) for each file handle that the process has open.
Configuring the Kernel via /proc/sys/
The majority of the files in /proc/ are read-only, but most of the filesfound under the /proc/sys/ hierarchy are writable by the root user,and can be used to tune various aspects of the running kernel and itsmodules. The /proc/sys/ directory is the only part of the /proc/filesystem that is writable.
To view the current value of a procfs file, use the cat command asshown in this example:
# cat /proc/sys/fs/file-max101643
You can set the file to a new value using the echo command andredirecting the output to the file as shown in this example:
# echo "110000" > /proc/sys/fs/file-max
Using the sysctl Command
Instead of using the cat and echo commands as shown in theprevious examples, you can use the sysctl command to view andset values in /proc/. For example, to view and modify the samevalue as shown before, you could execute these commands:
# sysctl fs.file-maxfs.file-max = 101643# sysctl -w "fs.file-max=110000"
The sysctl command can also list all available kernel tuning optionsas shown in this example:
# sysctl -a. . . snip . . .fs.overflowuid = 65534fs.dentry-state = 21296 18868 45 0 0 0fs.file-max = 101643fs.file-nr = 975 0 101643. . . snip . . .
EVALUATION COPY
Unauthorized Reproduction or Distribution Prohibited
1-24
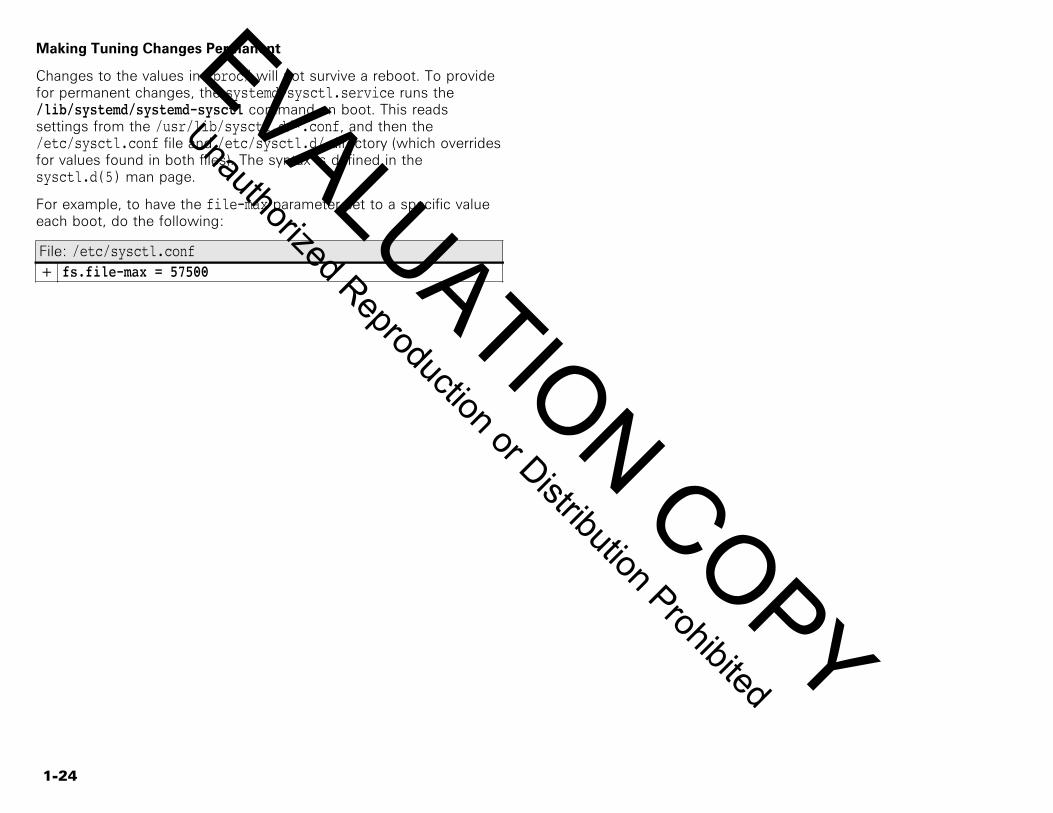
Making Tuning Changes Permanent
Changes to the values in /proc/ will not survive a reboot. To providefor permanent changes, the systemd-sysctl.service runs the/lib/systemd/systemd-sysctl command on boot. This readssettings from the /usr/lib/sysctl.d/*.conf, and then the/etc/sysctl.conf file and /etc/sysctl.d/ directory (which overridesfor values found in both files). The syntax is defined in thesysctl.d(5) man page.
For example, to have the file-max parameter set to a specific valueeach boot, do the following:
File: /etc/sysctl.conf+ fs.file-max = 57500
EVALUATION COPY
Unauthorized Reproduction or Distribution Prohibited
1-25
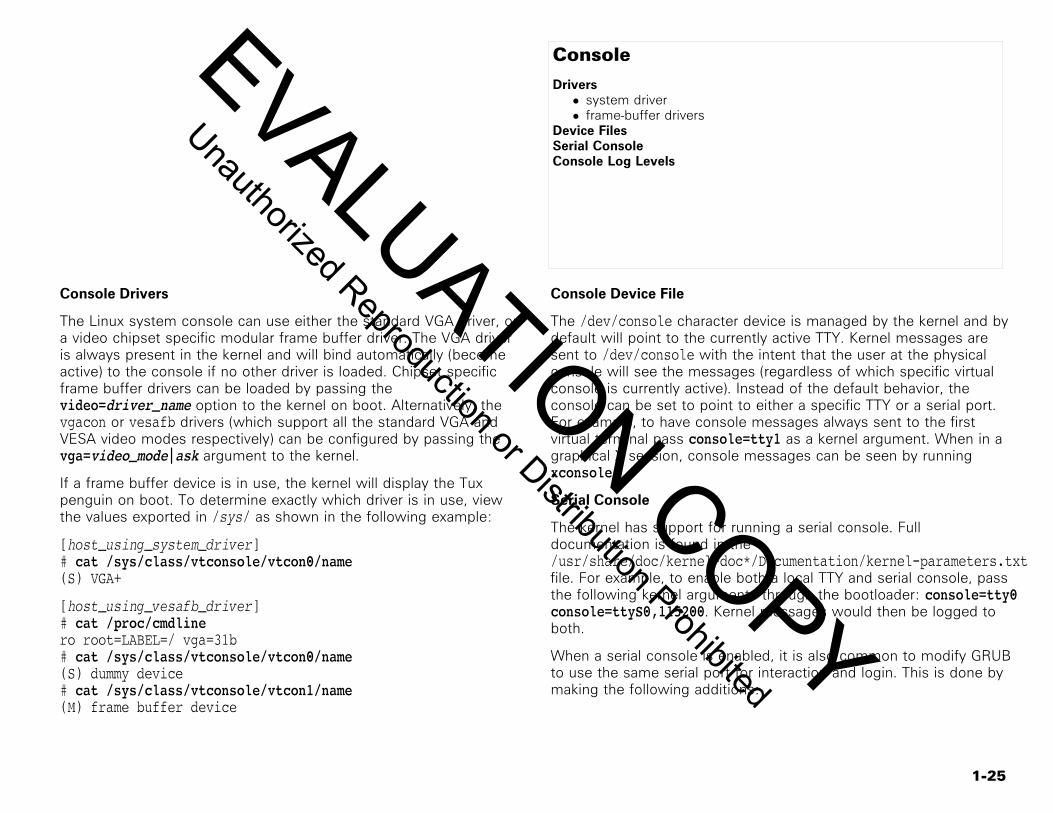
Console
Drivers• system driver• frame-buffer drivers
Device FilesSerial ConsoleConsole Log Levels
Console Drivers
The Linux system console can use either the standard VGA driver, ora video chipset specific modular frame buffer driver. The VGA driveris always present in the kernel and will bind automatically (becomeactive) to the console if no other driver is loaded. Chipset specificframe buffer drivers can be loaded by passing thevideo=driver_name option to the kernel on boot. Alternatively, thevgacon or vesafb drivers (which support all the standard VGA andVESA video modes respectively) can be configured by passing thevga=video_mode|ask argument to the kernel.
If a frame buffer device is in use, the kernel will display the Tuxpenguin on boot. To determine exactly which driver is in use, viewthe values exported in /sys/ as shown in the following example:
[host_using_system_driver]# cat /sys/class/vtconsole/vtcon0/name(S) VGA+
[host_using_vesafb_driver]# cat /proc/cmdline ro root=LABEL=/ vga=31b# cat /sys/class/vtconsole/vtcon0/name(S) dummy device# cat /sys/class/vtconsole/vtcon1/name(M) frame buffer device
Console Device File
The /dev/console character device is managed by the kernel and bydefault will point to the currently active TTY. Kernel messages aresent to /dev/console with the intent that the user at the physicalconsole will see the messages (regardless of which specific virtualconsole is currently active). Instead of the default behavior, theconsole can be set to point to either a specific TTY or a serial port.For example, to have console messages always sent to the firstvirtual terminal pass console=tty1 as a kernel argument. When in agraphical X session, console messages can be seen by runningxconsole.
Serial Console
The kernel has support for running a serial console. Fulldocumentation is found in the/usr/share/doc/kernel-doc*/Documentation/kernel-parameters.txtfile. For example, to enable both a local TTY and serial console, passthe following kernel arguments through the bootloader: console=tty0console=ttyS0,115200. Kernel messages would then be logged toboth.
When a serial console is enabled, it is also common to modify GRUBto use the same serial port for interaction and login. This is done bymaking the following additions:
EVALUATION COPY
Unauthorized Reproduction or Distribution Prohibited
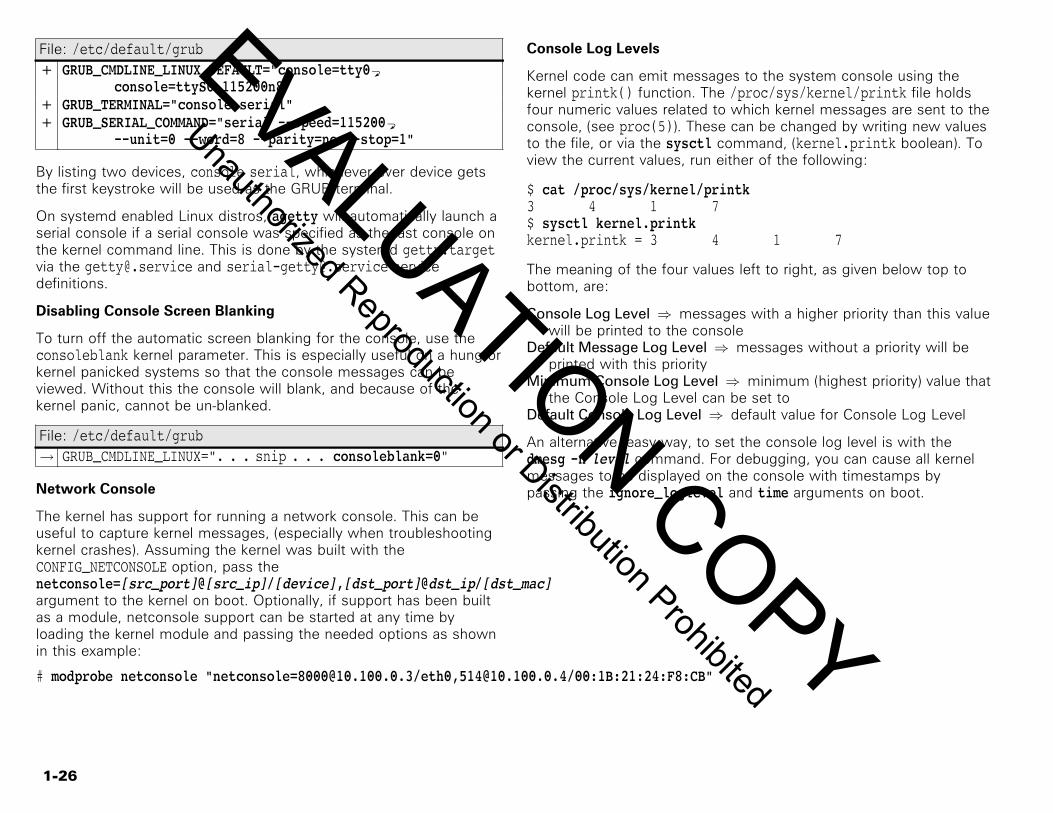
1-26
File: /etc/default/grub+ GRUB_CMDLINE_LINUX_DEFAULT="console=tty0a
console=ttyS0,115200n8"+ GRUB_TERMINAL="console serial"+ GRUB_SERIAL_COMMAND="serial --speed=115200a
--unit=0 --word=8 --parity=no --stop=1"
By listing two devices, console serial, whichever ever device getsthe first keystroke will be used as the GRUB terminal.
On systemd enabled Linux distros, agetty will automatically launch aserial console if a serial console was specified as the last console onthe kernel command line. This is done by the systemd getty.targetvia the [email protected] and [email protected] servicedefinitions.
Disabling Console Screen Blanking
To turn off the automatic screen blanking for the console, use theconsoleblank kernel parameter. This is especially useful on a hung orkernel panicked systems so that the console messages can beviewed. Without this the console will blank, and because of thekernel panic, cannot be un-blanked.
File: /etc/default/grub→ GRUB_CMDLINE_LINUX=". . . snip . . . consoleblank=0"
Network Console
The kernel has support for running a network console. This can beuseful to capture kernel messages, (especially when troubleshootingkernel crashes). Assuming the kernel was built with theCONFIG_NETCONSOLE option, pass thenetconsole=[src_port]@[src_ip]/[device],[dst_port]@dst_ip/[dst_mac]argument to the kernel on boot. Optionally, if support has been builtas a module, netconsole support can be started at any time byloading the kernel module and passing the needed options as shownin this example:
# modprobe netconsole "[email protected]/eth0,[email protected]/00:1B:21:24:F8:CB"
Console Log Levels
Kernel code can emit messages to the system console using thekernel printk() function. The /proc/sys/kernel/printk file holdsfour numeric values related to which kernel messages are sent to theconsole, (see proc(5)). These can be changed by writing new valuesto the file, or via the sysctl command, (kernel.printk boolean). Toview the current values, run either of the following:
$ cat /proc/sys/kernel/printk3 4 1 7$ sysctl kernel.printkkernel.printk = 3 4 1 7
The meaning of the four values left to right, as given below top tobottom, are:
Console Log Level ⇒ messages with a higher priority than this valuewill be printed to the console
Default Message Log Level ⇒ messages without a priority will beprinted with this priority
Minimum Console Log Level ⇒ minimum (highest priority) value thatthe Console Log Level can be set to
Default Console Log Level ⇒ default value for Console Log Level
An alternative, easy way, to set the console log level is with thedmesg -n level command. For debugging, you can cause all kernelmessages to be displayed on the console with timestamps bypassing the ignore_loglevel and time arguments on boot.
EVALUATION COPY
Unauthorized Reproduction or Distribution Prohibited
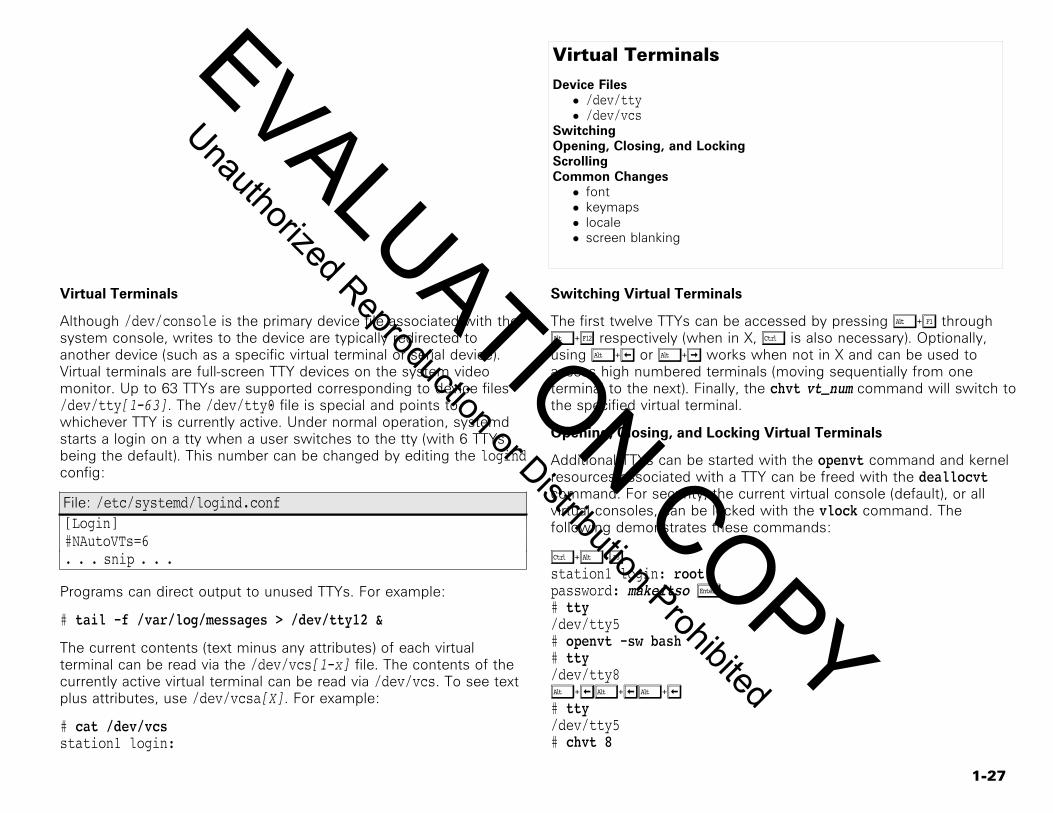
1-27
Virtual Terminals
Device Files• /dev/tty• /dev/vcs
SwitchingOpening, Closing, and LockingScrollingCommon Changes• font• keymaps• locale• screen blanking
Virtual Terminals
Although /dev/console is the primary device file associated with thesystem console, writes to the device are typically redirected toanother device (such as a specific virtual terminal or serial device).Virtual terminals are full-screen TTY devices on the system videomonitor. Up to 63 TTYs are supported corresponding to device files/dev/tty[1-63]. The /dev/tty0 file is special and points towhichever TTY is currently active. Under normal operation, systemdstarts a login on a tty when a user switches to the tty (with 6 TTYsbeing the default). This number can be changed by editing the logindconfig:
File: /etc/systemd/logind.conf[Login]#NAutoVTs=6. . . snip . . .
Programs can direct output to unused TTYs. For example:
# tail -f /var/log/messages > /dev/tty12 &
The current contents (text minus any attributes) of each virtualterminal can be read via the /dev/vcs[1-x] file. The contents of thecurrently active virtual terminal can be read via /dev/vcs. To see textplus attributes, use /dev/vcsa[X]. For example:
# cat /dev/vcsstation1 login:
Switching Virtual Terminals
The first twelve TTYs can be accessed by pressing Ô¿Ä throughÔ¿Ï respectively (when in X, Ó is also necessary). Optionally,using Ô¿¡ or Ô¿¤ works when not in X and can be used toaccess high numbered terminals (moving sequentially from oneterminal to the next). Finally, the chvt vt_num command will switch tothe specified virtual terminal.
Opening, Closing, and Locking Virtual Terminals
Additional TTYs can be started with the openvt command and kernelresources associated with a TTY can be freed with the deallocvtcommand. For security, the current virtual console (default), or allvirtual consoles, can be locked with the vlock command. Thefollowing demonstrates these commands:
Ó¿Ô¿Èstation1 login: rootpassword: makeitso Õ# tty/dev/tty5# openvt -sw bash# tty/dev/tty8Ô¿¡Ô¿¡Ô¿¡# tty/dev/tty5# chvt 8
EVALUATION COPY
Unauthorized Reproduction or Distribution Prohibited

1-28
# vlock -aThe entire console display is now completely locked.You will not be able to switch to another virtual console.Please enter the password to unlock.root's Password: makeitso Õ# exit# tty/dev/tty5# deallocvt 8
Scrolling
A scrollback buffer is maintained for the currently active virtualterminal. Scroll backward by pressing Ò¿Ü, and scroll forwardwith Ò¿Ý. When a switch to another virtual terminal is made, thecontents of the scrollback buffer are lost.
If anything is written to the terminal while it is currently displayingsomething in the scrollback region, the terminal will automaticallyjump forward to display the new text. This can make it difficult toexamine messages in the scrollback history (especially during boot, orshutdown) as the display will continue to jump away from the desiredtext as new messages are written. Pressing the Scroll Lock key willtoggle the state of the scroll-lock flag for the currently active virtualterminal. When scroll-lock is enabled on a particular TTY, the kernelwill block all writes to that TTY (causing any process attempting towrite to the TTY to enter an uninterruptable sleep state waiting forthe I/O write to complete). The Ò¿Ü and Ò¿Ý key comboswill still work to scroll the terminal while scroll-lock is engaged.Scrollback support can be completely disabled by passing theno-scroll argument to the kernel on boot.
Changing Screen Blanking
By default, the virtual terminals will be automatically blanked (usingAPM if available) after 10 minutes of inactivity. The interval ofinactivity that will trigger blanking can be set with setterm -blankinterval_minutes. Virtual terminal screen blanking can be disabledentirely with the following command:
# setterm -powersave off -blank 0
EVALUATION COPY
Unauthorized Reproduction or Distribution Prohibited
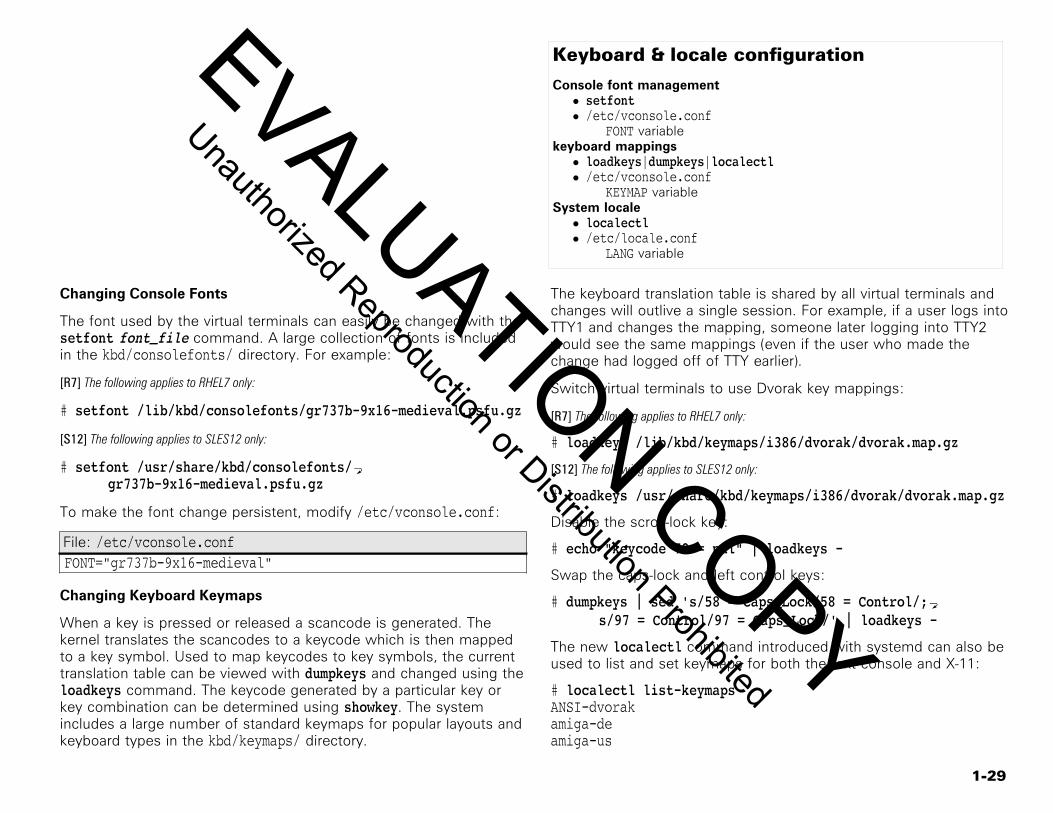
1-29
Keyboard & locale configuration
Console font management• setfont• /etc/vconsole.conf
FONT variablekeyboard mappings• loadkeys|dumpkeys|localectl• /etc/vconsole.conf
KEYMAP variableSystem locale• localectl• /etc/locale.conf
LANG variable
Changing Console Fonts
The font used by the virtual terminals can easily be changed with thesetfont font_file command. A large collection of fonts is includedin the kbd/consolefonts/ directory. For example:
[R7] The following applies to RHEL7 only:
# setfont /lib/kbd/consolefonts/gr737b-9x16-medieval.psfu.gz
[S12] The following applies to SLES12 only:
# setfont /usr/share/kbd/consolefonts/agr737b-9x16-medieval.psfu.gz
To make the font change persistent, modify /etc/vconsole.conf:
File: /etc/vconsole.confFONT="gr737b-9x16-medieval"
Changing Keyboard Keymaps
When a key is pressed or released a scancode is generated. Thekernel translates the scancodes to a keycode which is then mappedto a key symbol. Used to map keycodes to key symbols, the currenttranslation table can be viewed with dumpkeys and changed using theloadkeys command. The keycode generated by a particular key orkey combination can be determined using showkey. The systemincludes a large number of standard keymaps for popular layouts andkeyboard types in the kbd/keymaps/ directory.
The keyboard translation table is shared by all virtual terminals andchanges will outlive a single session. For example, if a user logs intoTTY1 and changes the mapping, someone later logging into TTY2would see the same mappings (even if the user who made thechange had logged off of TTY earlier).
Switch virtual terminals to use Dvorak key mappings:
[R7] The following applies to RHEL7 only:
# loadkeys /lib/kbd/keymaps/i386/dvorak/dvorak.map.gz
[S12] The following applies to SLES12 only:
# loadkeys /usr/share/kbd/keymaps/i386/dvorak/dvorak.map.gz
Disable the scroll-lock key:
# echo "keycode 70 = nul" | loadkeys -
Swap the caps-lock and left control keys:
# dumpkeys | sed 's/58 = Caps_Lock/58 = Control/;as/97 = Control/97 = Caps_Lock/' | loadkeys -
The new localectl command introduced with systemd can also beused to list and set keymaps for both the text console and X-11:
# localectl list-keymapsANSI-dvorakamiga-deamiga-us
EVALUATION COPY
Unauthorized Reproduction or Distribution Prohibited
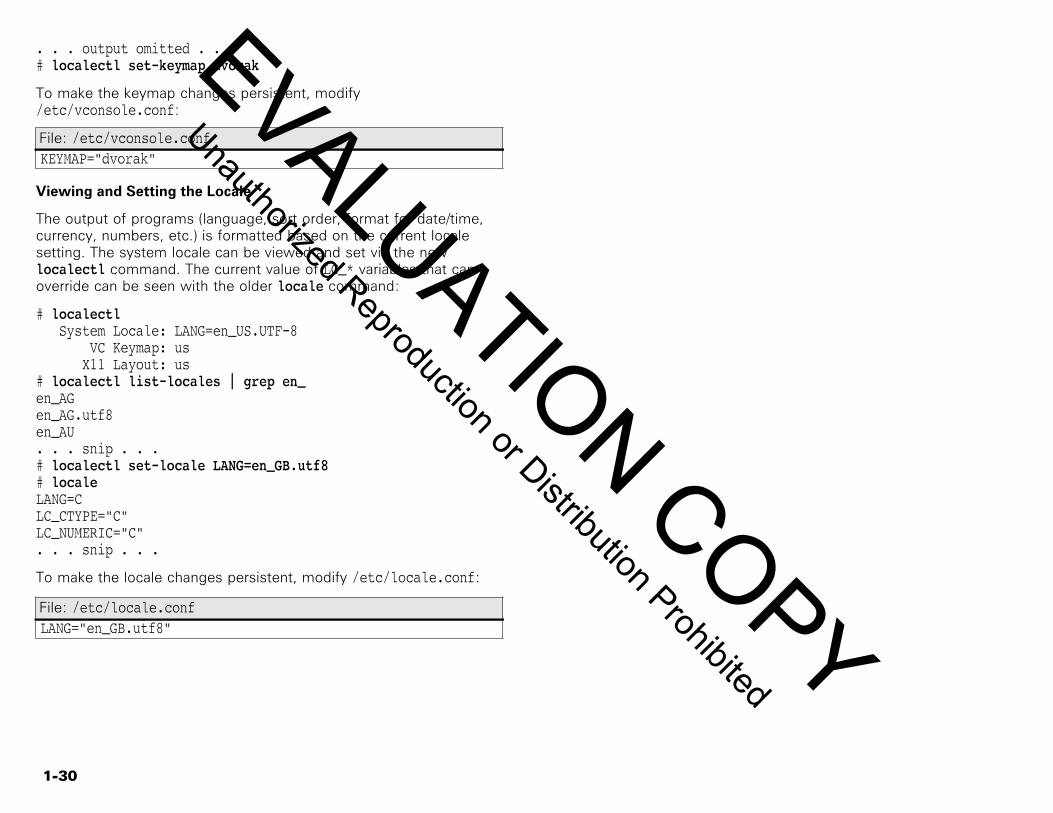
1-30
. . . output omitted . . .# localectl set-keymap dvorak
To make the keymap changes persistent, modify/etc/vconsole.conf:
File: /etc/vconsole.confKEYMAP="dvorak"
Viewing and Setting the Locale
The output of programs (language, sort order, format for date/time,currency, numbers, etc.) is formatted based on the current localesetting. The system locale can be viewed and set via the newlocalectl command. The current value of LC_* variables that canoverride can be seen with the older locale command:
# localectl System Locale: LANG=en_US.UTF-8 VC Keymap: us X11 Layout: us# localectl list-locales | grep en_en_AGen_AG.utf8en_AU. . . snip . . .# localectl set-locale LANG=en_GB.utf8# localeLANG=CLC_CTYPE="C"LC_NUMERIC="C". . . snip . . .
To make the locale changes persistent, modify /etc/locale.conf:
File: /etc/locale.confLANG="en_GB.utf8"
EVALUATION COPY
Unauthorized Reproduction or Distribution Prohibited
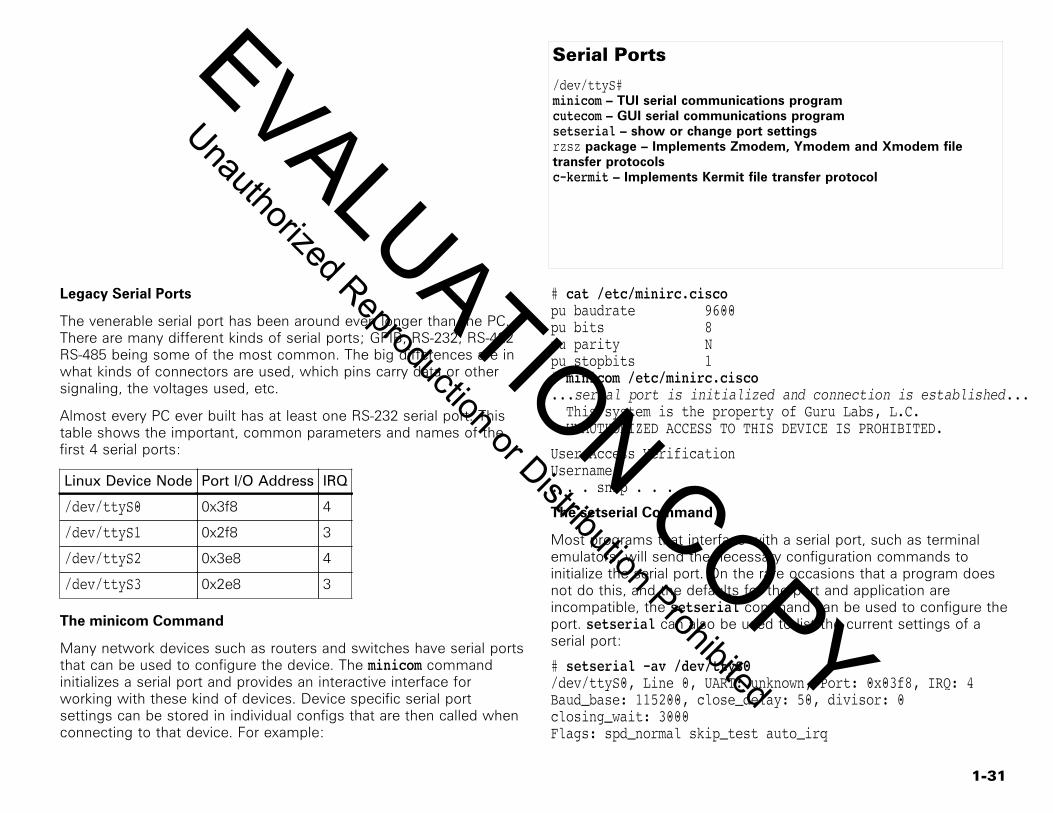
1-31
Serial Ports
/dev/ttyS#minicom – TUI serial communications programcutecom – GUI serial communications programsetserial – show or change port settingsrzsz package – Implements Zmodem, Ymodem and Xmodem filetransfer protocolsc-kermit – Implements Kermit file transfer protocol
Legacy Serial Ports
The venerable serial port has been around even longer than the PC.There are many different kinds of serial ports; GPIB, RS-232, RS-422RS-485 being some of the most common. The big differences are inwhat kinds of connectors are used, which pins carry data or othersignaling, the voltages used, etc.
Almost every PC ever built has at least one RS-232 serial port. Thistable shows the important, common parameters and names of thefirst 4 serial ports:
Linux Device Node Port I/O Address IRQ
/dev/ttyS0 0x3f8 4
/dev/ttyS1 0x2f8 3
/dev/ttyS2 0x3e8 4
/dev/ttyS3 0x2e8 3
The minicom Command
Many network devices such as routers and switches have serial portsthat can be used to configure the device. The minicom commandinitializes a serial port and provides an interactive interface forworking with these kind of devices. Device specific serial portsettings can be stored in individual configs that are then called whenconnecting to that device. For example:
# cat /etc/minirc.ciscopu baudrate 9600pu bits 8pu parity Npu stopbits 1# minicom /etc/minirc.cisco...serial port is initialized and connection is established... This system is the property of Guru Labs, L.C. UNAUTHORIZED ACCESS TO THIS DEVICE IS PROHIBITED.
User Access VerificationUsername:. . . snip . . .
The setserial Command
Most programs that interface with a serial port, such as terminalemulators, will send the necessary configuration commands toinitialize the serial port. On the rare occasions that a program doesnot do this, and the defaults for the port and application areincompatible, the setserial command can be used to configure theport. setserial can also be used to list the current settings of aserial port:
# setserial -av /dev/ttyS0/dev/ttyS0, Line 0, UART: unknown, Port: 0x03f8, IRQ: 4Baud_base: 115200, close_delay: 50, divisor: 0closing_wait: 3000Flags: spd_normal skip_test auto_irq
EVALUATION COPY
Unauthorized Reproduction or Distribution Prohibited
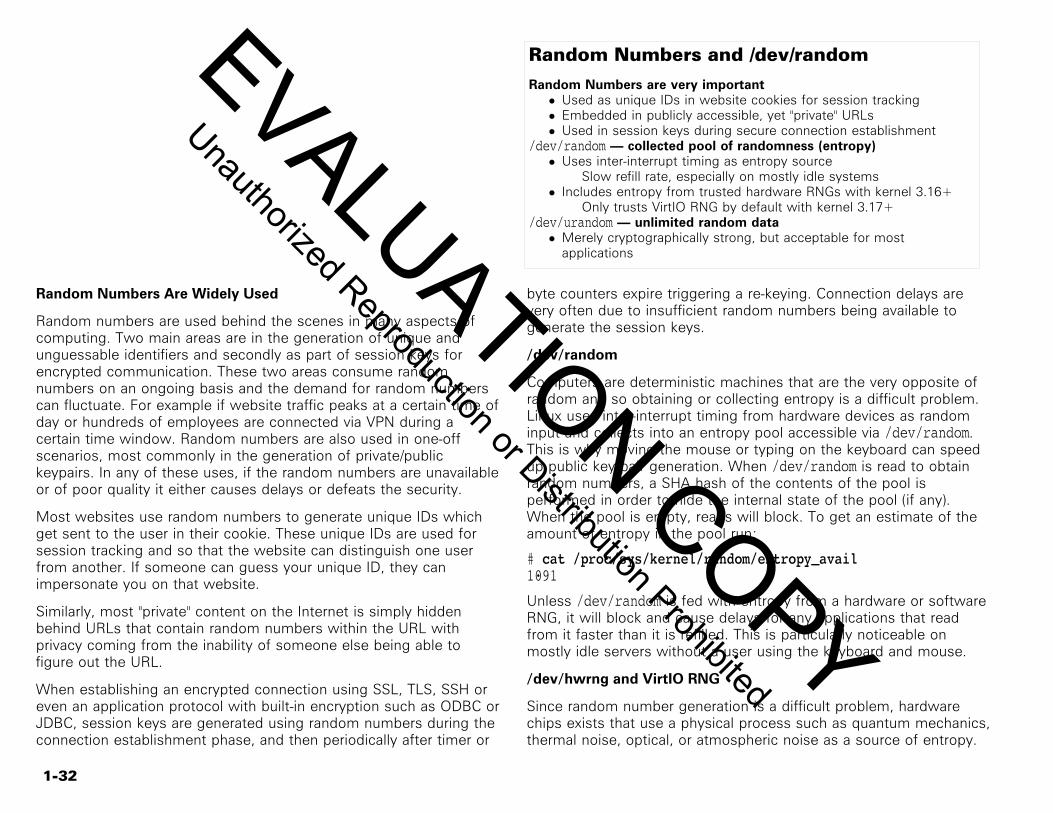
1-32
Random Numbers and /dev/random
Random Numbers are very important• Used as unique IDs in website cookies for session tracking• Embedded in publicly accessible, yet "private" URLs• Used in session keys during secure connection establishment
/dev/random — collected pool of randomness (entropy)• Uses inter-interrupt timing as entropy source
Slow refill rate, especially on mostly idle systems• Includes entropy from trusted hardware RNGs with kernel 3.16+
Only trusts VirtIO RNG by default with kernel 3.17+/dev/urandom — unlimited random data• Merely cryptographically strong, but acceptable for most
applications
Random Numbers Are Widely Used
Random numbers are used behind the scenes in many aspects ofcomputing. Two main areas are in the generation of unique andunguessable identifiers and secondly as part of session keys forencrypted communication. These two areas consume randomnumbers on an ongoing basis and the demand for random numberscan fluctuate. For example if website traffic peaks at a certain time ofday or hundreds of employees are connected via VPN during acertain time window. Random numbers are also used in one-offscenarios, most commonly in the generation of private/publickeypairs. In any of these uses, if the random numbers are unavailableor of poor quality it either causes delays or defeats the security.
Most websites use random numbers to generate unique IDs whichget sent to the user in their cookie. These unique IDs are used forsession tracking and so that the website can distinguish one userfrom another. If someone can guess your unique ID, they canimpersonate you on that website.
Similarly, most "private" content on the Internet is simply hiddenbehind URLs that contain random numbers within the URL withprivacy coming from the inability of someone else being able tofigure out the URL.
When establishing an encrypted connection using SSL, TLS, SSH oreven an application protocol with built-in encryption such as ODBC orJDBC, session keys are generated using random numbers during theconnection establishment phase, and then periodically after timer or
byte counters expire triggering a re-keying. Connection delays arevery often due to insufficient random numbers being available togenerate the session keys.
/dev/random
Computers are deterministic machines that are the very opposite ofrandom and so obtaining or collecting entropy is a difficult problem.Linux uses inter-interrupt timing from hardware devices as randominput and collects into an entropy pool accessible via /dev/random.This is why moving the mouse or typing on the keyboard can speedup public key pair generation. When /dev/random is read to obtainrandom numbers, a SHA hash of the contents of the pool isperformed in order to hide the internal state of the pool (if any).When the pool is empty, reads will block. To get an estimate of theamount of entropy in the pool run:
# cat /proc/sys/kernel/random/entropy_avail1091
Unless /dev/random is fed with entropy from a hardware or softwareRNG, it will block and cause delays for any applications that readfrom it faster than it is refilled. This is particularly noticeable onmostly idle servers without a user using the keyboard and mouse.
/dev/hwrng and VirtIO RNG
Since random number generation is a difficult problem, hardwarechips exists that use a physical process such as quantum mechanics,thermal noise, optical, or atmospheric noise as a source of entropy.
EVALUATION COPY
Unauthorized Reproduction or Distribution Prohibited
1-33
Linux supports multiple different hardware RNGs, but doesn't trustthem by default so their entropy is available separately via/dev/hwrng. With Linux kernel 3.16 and higher, the trust is defined ona sliding quality scale from 0 to 1000, where 0 is not trusted at alland not mixed into /dev/random by the kernel, and 1000 is fullytrusted and mixed in its entirety into /dev/random.
All hardware RNGs have a default quality of 0, to change this add therng_core.current_quality and rng_core.default_qualitycommand line parameters to a desired non-zero value up to andincluding 1000 in the /etc/default/grub. For example:
rng_core.current_quality=700 rng_core.default_quality=700
With Linux kernel 3.17 and higher, the qemu VirtIO RNG is trustedfully by default, so if the virtual machine has the following libvirt XMLdevice added, it will mix the VirtIO RNG into /dev/random by default.This is a big deal for virtual machines, which are often starved forentropy sources:
<devices> ... <rng model='virtio'> <rate bytes='6000' period='300'/> <backend model='random'>/dev/random</backend> </rng></devices>
rngd and the RdRand CPU Instruction
Prior to Linux kernel 3.16, when using a hardware RNG, the rngddaemon from the rng-tools package is needed. It reads from/dev/hwrng and writes to /dev/random. With kernels 3.16 and newer,rngd like functionality is integrated into the kernel itself. To see a listof available HW entropy sources run:
# rngd -fvAvailable entropy sources: Intel/AMD hardware rng DRNGÓ¿c
The DRNG RNG doesn't refer to a traditional RNG, but instead refers tothe new RdRand CPU instruction which returns a random number. Thekernel doesn't automatically use DRNG and so rngd must be run if use
of DRNG is desired. To see if the CPU supports the instruction, run:
# grep --color rdrand /proc/cpuinfoflags : ...snip long list of flags... rdrand
/dev/urandom & Pseudorandom Number Generators
A pseudorandom number generator must be seeded with an initialrandom number, but then uses a deterministic algorithm to generatea stream of numbers that exhibit statistical randomness. Linuxprovides the /dev/urandom pseudorandom number generator whichis seeded from /var/lib/systemd/random-seed at boot. The mainbenefit of /dev/urandom is that it provides an unlimited, highthroughput non-blocking source of random numbers.
Unless a public key pair is being generated, or extreme security isneeded, most applications should use /dev/urandom instead of/dev/random. For example, to configure the Java virtual machine toseed its SecureRandom class with /dev/urandom instead of/dev/random, add the following to the java command line invocation:
-Djava.security.egd=file:/dev/./urandom
Or for a global Java change, edit the java.security config file:
File: $JAVA_HOME/jre/lib/security/java.security+ securerandom.source=file:/dev/./urandom
The haveged daemon
The hardware volatile entropy gathering and expansion (HAVEGE)daemon can be used to collect entropy from the thousands of binaryvolatile states that exist in modern superscalar processors and feedthat entropy into /dev/random at hundreds of megabits per second. Itis a good alternative if an application can't be reconfigured to use/dev/urandom and a HW RNG isn't available or fast enough.
Benchmarking Random Number Generation Performance
To determine the speed that /dev/random, /dev/urandom or/dev/hwrng can generate random numbers, run the dd forapproximately 10 seconds:
# dd if=/dev/random of=/dev/nullÓ¿c0+1825 records in106+0 records out54272 bytes (54 kB) copied, 10.9434 s, 5.0 kB/s
EVALUATION COPY
Unauthorized Reproduction or Distribution Prohibited
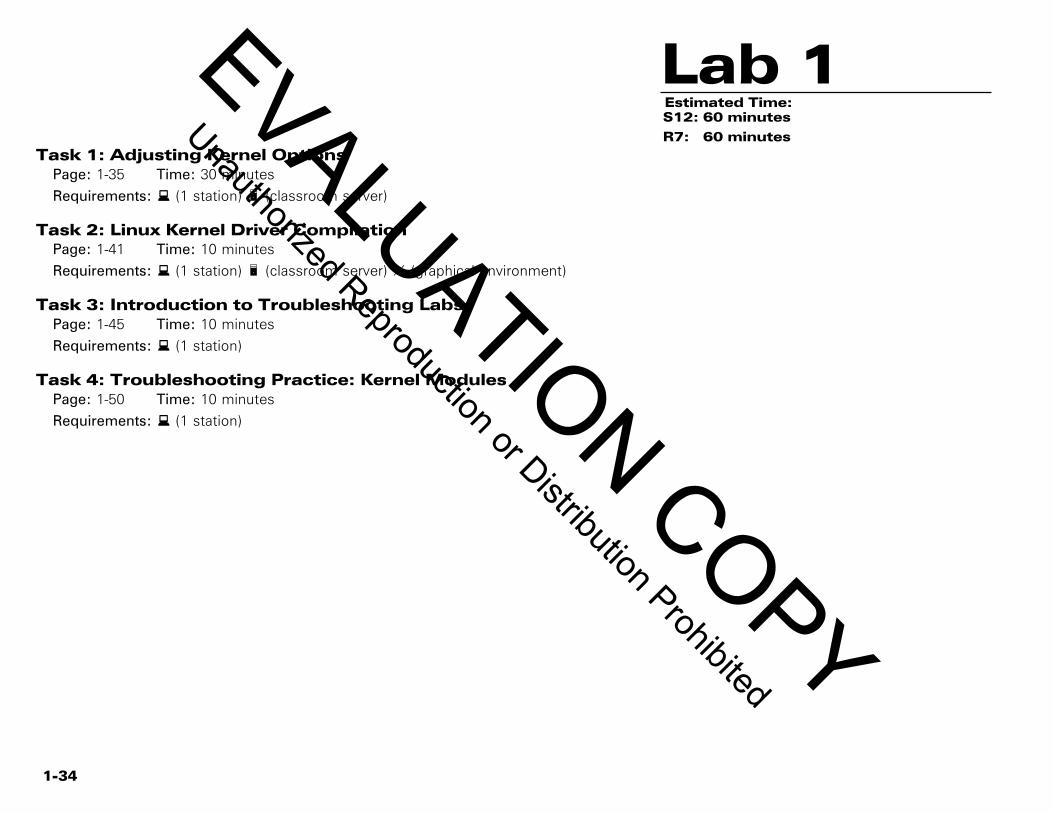
1-34
Lab 1Estimated Time:S12: 60 minutes
R7: 60 minutesTask 1: Adjusting Kernel Options
Page: 1-35 Time: 30 minutesRequirements: b (1 station) c (classroom server)
Task 2: Linux Kernel Driver CompilationPage: 1-41 Time: 10 minutesRequirements: b (1 station) c (classroom server) d (graphical environment)
Task 3: Introduction to Troubleshooting LabsPage: 1-45 Time: 10 minutesRequirements: b (1 station)
Task 4: Troubleshooting Practice: Kernel ModulesPage: 1-50 Time: 10 minutesRequirements: b (1 station)
EVALUATION COPY
Unauthorized Reproduction or Distribution Prohibited
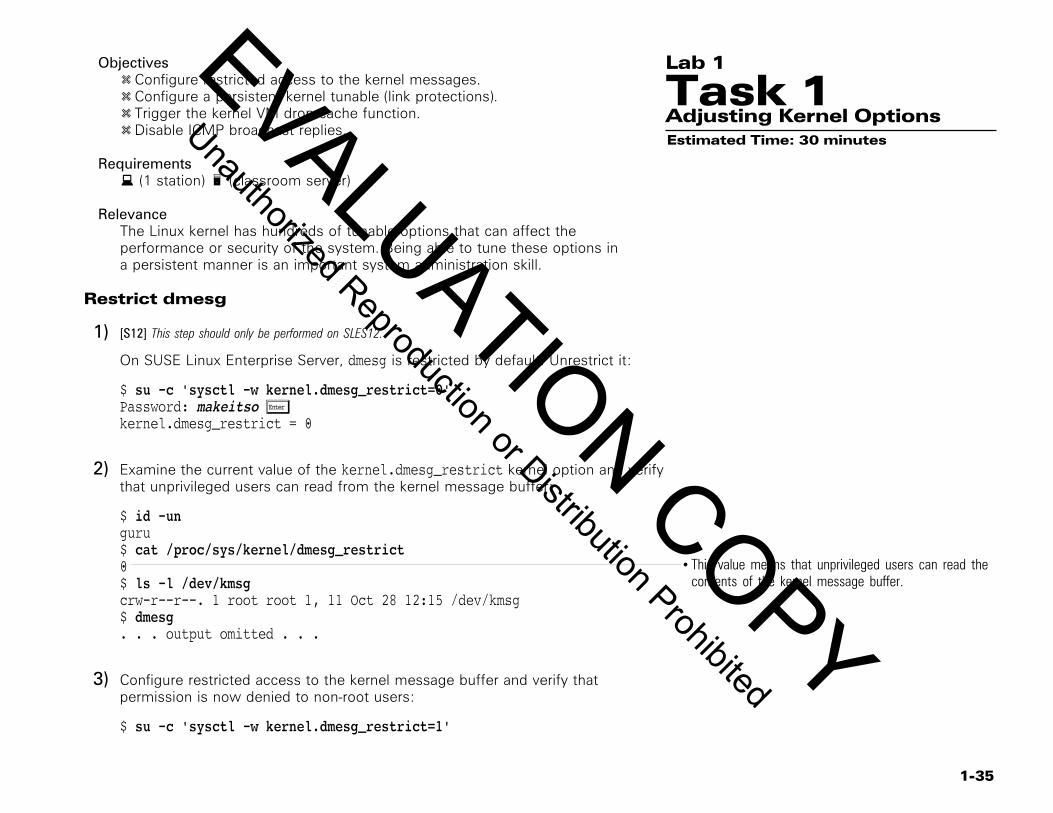
1-35
Objectivesy Configure restricted access to the kernel messages.y Configure a persistent kernel tunable (link protections).y Trigger the kernel VM drop cache function.y Disable ICMP broadcast replies.
Requirementsb (1 station) c (classroom server)
RelevanceThe Linux kernel has hundreds of tunable options that can affect theperformance or security of the system. Being able to tune these options ina persistent manner is an important system administration skill.
Lab 1
Task 1Adjusting Kernel OptionsEstimated Time: 30 minutes
Restrict dmesg
[S12] This step should only be performed on SLES12.1)On SUSE Linux Enterprise Server, dmesg is restricted by default. Unrestrict it:
$ su -c 'sysctl -w kernel.dmesg_restrict=0'Password: makeitso Õkernel.dmesg_restrict = 0
Examine the current value of the kernel.dmesg_restrict kernel option and verify2)that unprivileged users can read from the kernel message buffer:
$ id -unguru$ cat /proc/sys/kernel/dmesg_restrict
This value means that unprivileged users can read thecontents of the kernel message buffer.
0$ ls -l /dev/kmsgcrw-r--r--. 1 root root 1, 11 Oct 28 12:15 /dev/kmsg$ dmesg. . . output omitted . . .
Configure restricted access to the kernel message buffer and verify that3)permission is now denied to non-root users:
$ su -c 'sysctl -w kernel.dmesg_restrict=1'
EVALUATION COPY
Unauthorized Reproduction or Distribution Prohibited
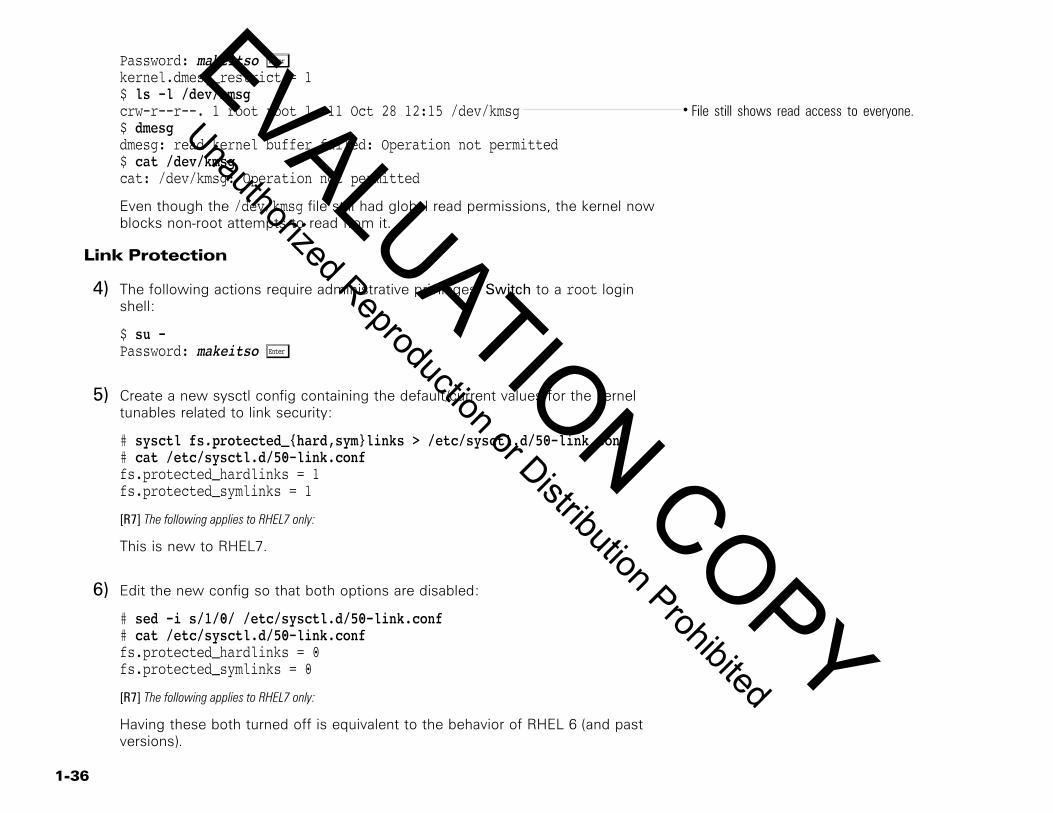
1-36
Password: makeitso Õkernel.dmesg_restrict = 1$ ls -l /dev/kmsg
File still shows read access to everyone.crw-r--r--. 1 root root 1, 11 Oct 28 12:15 /dev/kmsg$ dmesgdmesg: read kernel buffer failed: Operation not permitted$ cat /dev/kmsgcat: /dev/kmsg: Operation not permitted
Even though the /dev/kmsg file still had global read permissions, the kernel nowblocks non-root attempts to read from it.
Link Protection
The following actions require administrative privileges. Switch to a root login4)shell:
$ su -Password: makeitso Õ
Create a new sysctl config containing the default/current values for the kernel5)tunables related to link security:
# sysctl fs.protected_{hard,sym}links > /etc/sysctl.d/50-link.conf# cat /etc/sysctl.d/50-link.conffs.protected_hardlinks = 1fs.protected_symlinks = 1
[R7] The following applies to RHEL7 only:
This is new to RHEL7.
Edit the new config so that both options are disabled:6)
# sed -i s/1/0/ /etc/sysctl.d/50-link.conf# cat /etc/sysctl.d/50-link.conffs.protected_hardlinks = 0fs.protected_symlinks = 0
[R7] The following applies to RHEL7 only:
Having these both turned off is equivalent to the behavior of RHEL 6 (and pastversions).
EVALUATION COPY
Unauthorized Reproduction or Distribution Prohibited
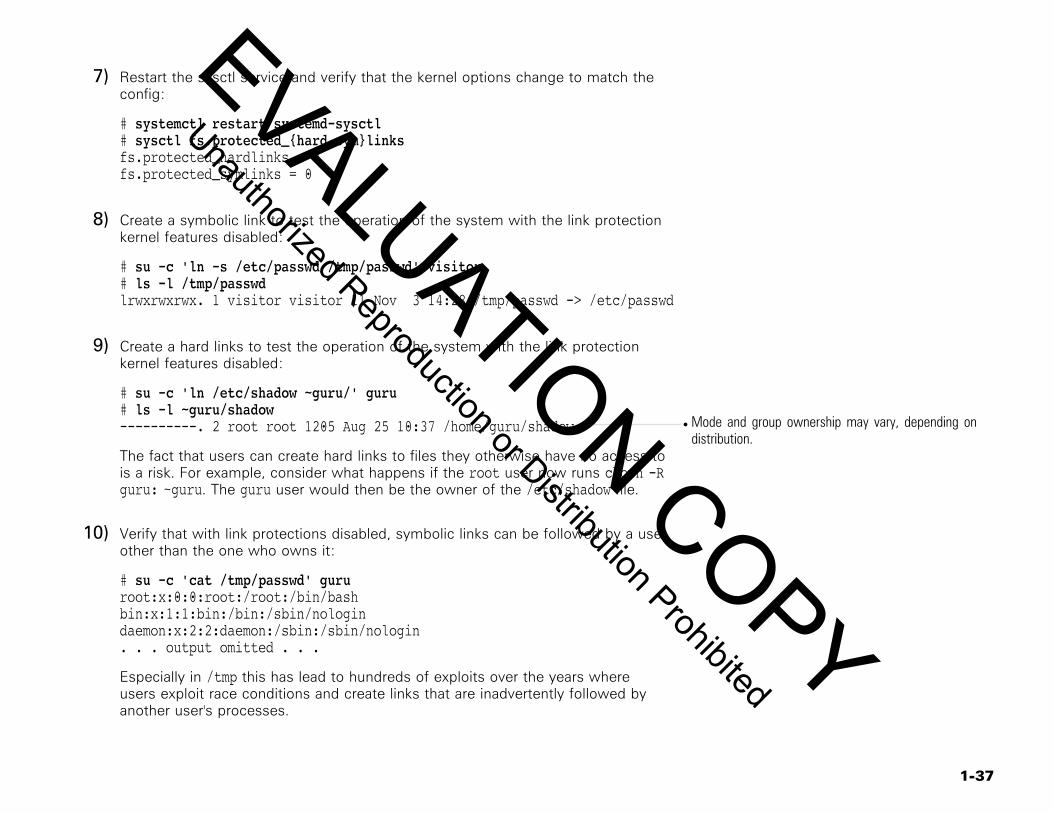
1-37
Restart the sysctl service and verify that the kernel options change to match the7)config:
# systemctl restart systemd-sysctl# sysctl fs.protected_{hard,sym}linksfs.protected_hardlinks = 0fs.protected_symlinks = 0
Create a symbolic link to test the operation of the system with the link protection8)kernel features disabled:
# su -c 'ln -s /etc/passwd /tmp/passwd' visitor# ls -l /tmp/passwdlrwxrwxrwx. 1 visitor visitor 11 Nov 3 14:28 /tmp/passwd -> /etc/passwd
Create a hard links to test the operation of the system with the link protection9)kernel features disabled:
# su -c 'ln /etc/shadow ~guru/' guru# ls -l ~guru/shadow
Mode and group ownership may vary, depending ondistribution.
----------. 2 root root 1205 Aug 25 10:37 /home/guru/shadow
The fact that users can create hard links to files they otherwise have no access tois a risk. For example, consider what happens if the root user now runs chown -Rguru: ~guru. The guru user would then be the owner of the /etc/shadow file.
Verify that with link protections disabled, symbolic links can be followed by a user10)other than the one who owns it:
# su -c 'cat /tmp/passwd' gururoot:x:0:0:root:/root:/bin/bashbin:x:1:1:bin:/bin:/sbin/nologindaemon:x:2:2:daemon:/sbin:/sbin/nologin. . . output omitted . . .
Especially in /tmp this has lead to hundreds of exploits over the years whereusers exploit race conditions and create links that are inadvertently followed byanother user's processes.
EVALUATION COPY
Unauthorized Reproduction or Distribution Prohibited
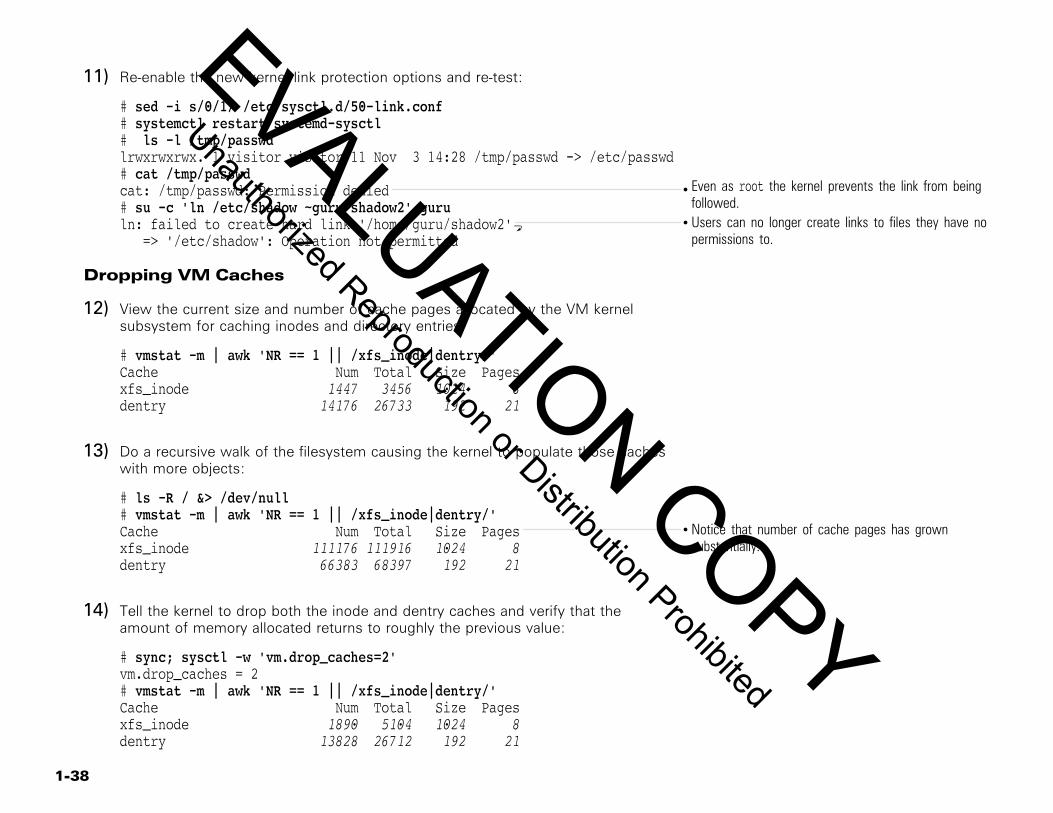
1-38
Re-enable the new kernel link protection options and re-test:11)
# sed -i s/0/1/ /etc/sysctl.d/50-link.conf# systemctl restart systemd-sysctl# ls -l /tmp/passwdlrwxrwxrwx. 1 visitor visitor 11 Nov 3 14:28 /tmp/passwd -> /etc/passwd# cat /tmp/passwd
Even as root the kernel prevents the link from beingfollowed.
cat: /tmp/passwd: Permission denied# su -c 'ln /etc/shadow ~guru/shadow2' guru
Users can no longer create links to files they have nopermissions to.
ln: failed to create hard link '/home/guru/shadow2'a => '/etc/shadow': Operation not permitted
Dropping VM Caches
View the current size and number of cache pages allocated by the VM kernel12)subsystem for caching inodes and directory entries:
# vmstat -m | awk 'NR == 1 || /xfs_inode|dentry/'Cache Num Total Size Pagesxfs_inode 1447 3456 1024 8dentry 14176 26733 192 21
Do a recursive walk of the filesystem causing the kernel to populate those caches13)with more objects:
# ls -R / &> /dev/null# vmstat -m | awk 'NR == 1 || /xfs_inode|dentry/'
Notice that number of cache pages has grownsubstantially.
Cache Num Total Size Pagesxfs_inode 111176 111916 1024 8dentry 66383 68397 192 21
Tell the kernel to drop both the inode and dentry caches and verify that the14)amount of memory allocated returns to roughly the previous value:
# sync; sysctl -w 'vm.drop_caches=2'vm.drop_caches = 2# vmstat -m | awk 'NR == 1 || /xfs_inode|dentry/'Cache Num Total Size Pagesxfs_inode 1890 5104 1024 8dentry 13828 26712 192 21
EVALUATION COPY
Unauthorized Reproduction or Distribution Prohibited
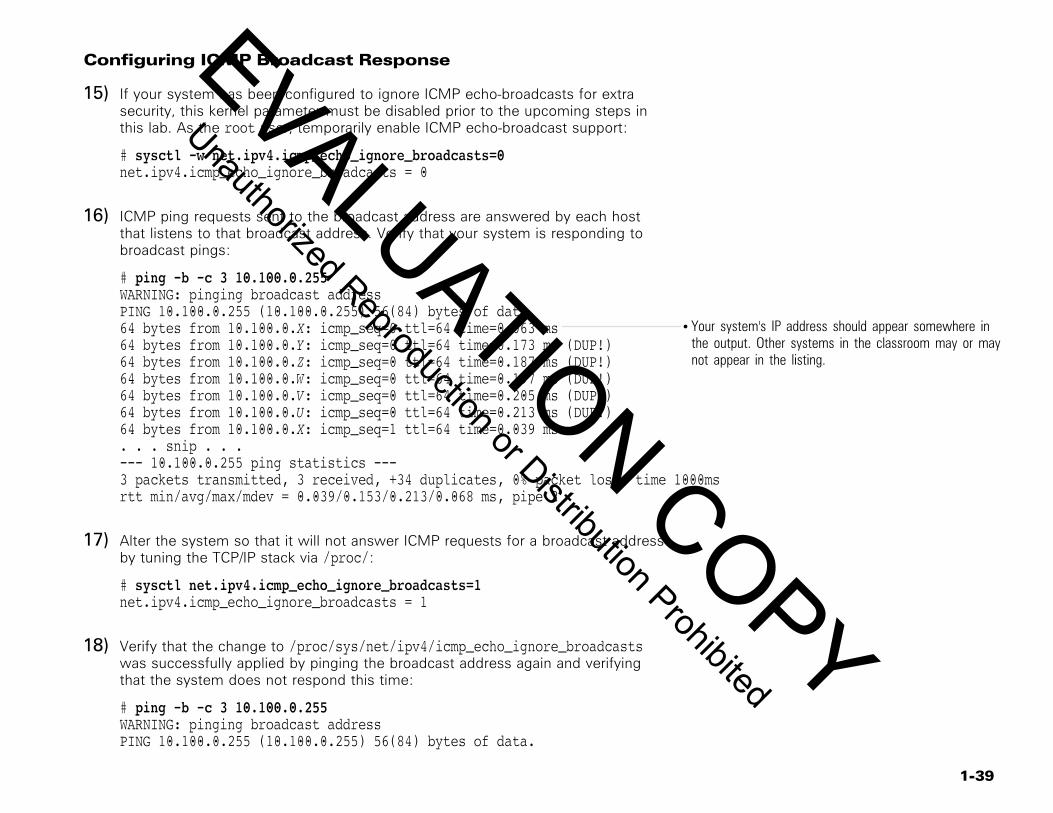
1-39
Configuring ICMP Broadcast Response
If your system has been configured to ignore ICMP echo-broadcasts for extra15)security, this kernel parameter must be disabled prior to the upcoming steps inthis lab. As the root user, temporarily enable ICMP echo-broadcast support:
# sysctl -w net.ipv4.icmp_echo_ignore_broadcasts=0net.ipv4.icmp_echo_ignore_broadcasts = 0
ICMP ping requests sent to the broadcast address are answered by each host16)that listens to that broadcast address. Verify that your system is responding tobroadcast pings:
# ping -b -c 3 10.100.0.255WARNING: pinging broadcast addressPING 10.100.0.255 (10.100.0.255) 56(84) bytes of data.
Your system's IP address should appear somewhere inthe output. Other systems in the classroom may or maynot appear in the listing.
64 bytes from 10.100.0.X: icmp_seq=0 ttl=64 time=0.063 ms64 bytes from 10.100.0.Y: icmp_seq=0 ttl=64 time=0.173 ms (DUP!)64 bytes from 10.100.0.Z: icmp_seq=0 ttl=64 time=0.187 ms (DUP!)64 bytes from 10.100.0.W: icmp_seq=0 ttl=64 time=0.197 ms (DUP!)64 bytes from 10.100.0.V: icmp_seq=0 ttl=64 time=0.205 ms (DUP!)64 bytes from 10.100.0.U: icmp_seq=0 ttl=64 time=0.213 ms (DUP!)64 bytes from 10.100.0.X: icmp_seq=1 ttl=64 time=0.039 ms. . . snip . . .--- 10.100.0.255 ping statistics ---3 packets transmitted, 3 received, +34 duplicates, 0% packet loss, time 1000msrtt min/avg/max/mdev = 0.039/0.153/0.213/0.068 ms, pipe 2
Alter the system so that it will not answer ICMP requests for a broadcast address17)by tuning the TCP/IP stack via /proc/:
# sysctl net.ipv4.icmp_echo_ignore_broadcasts=1net.ipv4.icmp_echo_ignore_broadcasts = 1
Verify that the change to /proc/sys/net/ipv4/icmp_echo_ignore_broadcasts18)was successfully applied by pinging the broadcast address again and verifyingthat the system does not respond this time:
# ping -b -c 3 10.100.0.255WARNING: pinging broadcast addressPING 10.100.0.255 (10.100.0.255) 56(84) bytes of data.
EVALUATION COPY
Unauthorized Reproduction or Distribution Prohibited
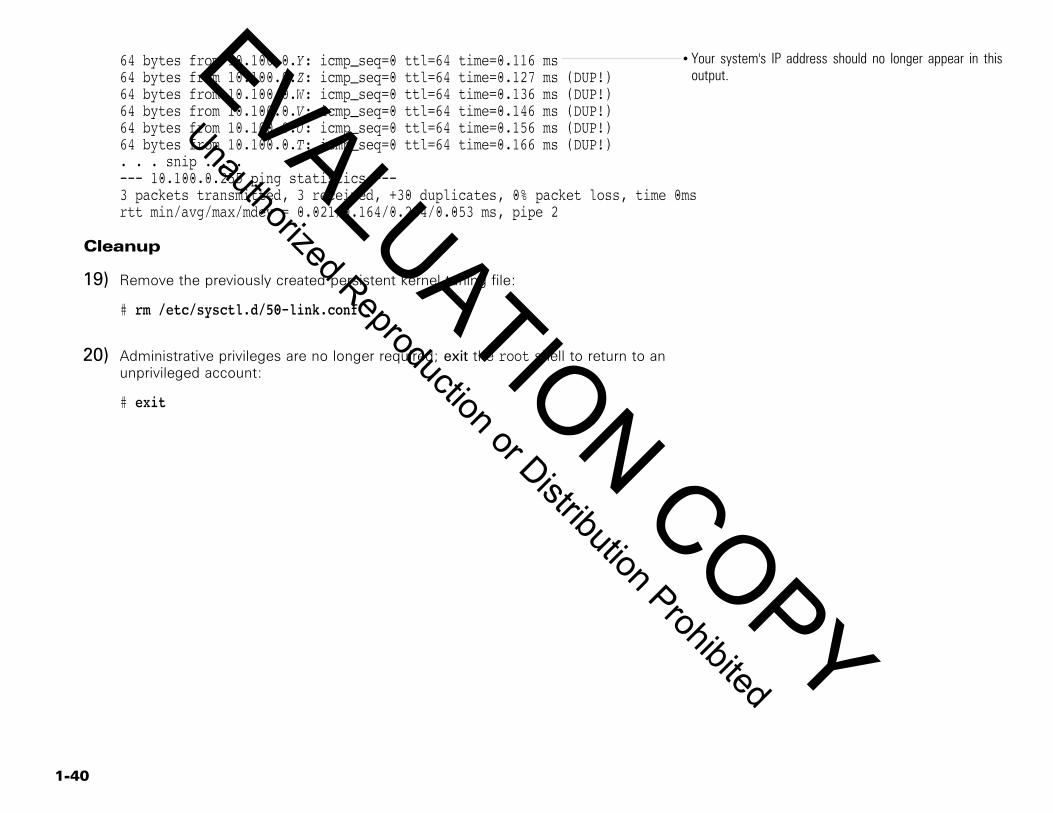
1-40
Your system's IP address should no longer appear in thisoutput.
64 bytes from 10.100.0.Y: icmp_seq=0 ttl=64 time=0.116 ms64 bytes from 10.100.0.Z: icmp_seq=0 ttl=64 time=0.127 ms (DUP!)64 bytes from 10.100.0.W: icmp_seq=0 ttl=64 time=0.136 ms (DUP!)64 bytes from 10.100.0.V: icmp_seq=0 ttl=64 time=0.146 ms (DUP!)64 bytes from 10.100.0.U: icmp_seq=0 ttl=64 time=0.156 ms (DUP!)64 bytes from 10.100.0.T: icmp_seq=0 ttl=64 time=0.166 ms (DUP!). . . snip . . .--- 10.100.0.255 ping statistics ---3 packets transmitted, 3 received, +30 duplicates, 0% packet loss, time 0msrtt min/avg/max/mdev = 0.021/0.164/0.234/0.053 ms, pipe 2
Cleanup
Remove the previously created persistent kernel tuning file:19)
# rm /etc/sysctl.d/50-link.conf
Administrative privileges are no longer required; exit the root shell to return to an20)unprivileged account:
# exit
EVALUATION COPY
Unauthorized Reproduction or Distribution Prohibited
1-41
Objectivesy Build, test, and install a new driver for the currently running kernel.
Requirementsb (1 station) c (classroom server) d (graphical environment)
RelevanceSometimes it is necessary to add missing capabilities to the kernels thatwill be used for a particular system. This might include drivers for newer orspecialized hardware. In many cases, hardware vendors provide Linuxdrivers in source form that can be built without a full kernel tree,separately from building the kernel. These are sometimes called "externalmodules".
Lab 1
Task 2Linux Kernel DriverCompilationEstimated Time: 10 minutes
The following actions require administrative privileges. Switch to a root login1)shell:
$ su -Password: makeitso Õ
As root, install packages needed to compile kernel modules:2)
# yum install -y gcc kernel-devel-$(uname -r)[R7]
. . . output omitted . . .[R7]
# zypper install -y gcc kernel-source[S12]
. . . output omitted . . . [S12]
Administrative privileges are no longer required; exit the root shell to return to an3)unprivileged account:
# exit
Create a directory from which to work with source packages. As the guru user,4)run these commands:
$ mkdir ~/src
EVALUATION COPY
Unauthorized Reproduction or Distribution Prohibited
1-42
Enter the new ~/src/ directory and extract the source code for the new module:5)
$ cd ~/src/$ tar xvf /labfiles/fooru-0.2.tar.bz2
Change into the directory for the new kernel module and list the contents:6)
$ cd fooru-0.2/$ ls. . . output omitted . . .
Build the driver:7)
$ make. . . output omitted . . .
The following actions require administrative privileges. Switch to a root login8)shell:
$ su -Password: makeitso Õ
Use the load-module script (as root) to test the newly built kernel module:9)Remember, only root can load and unload modules forthe kernel.
# cd ~guru/src/fooru-0.2/# insmod fooru.ko
Use the lsmod command to verify that the module was, indeed, loaded10)successfully:
# lsmod | head -n 2Module Size Used by
The size of the module may differ from this value.fooru 2424 0
EVALUATION COPY
Unauthorized Reproduction or Distribution Prohibited
1-43
Test the new driver by reading from the device node it is supposed to handle:11)Remember, by default, head will only return the first 10lines from the specified file. Also, because of thefunction of this particular kernel module, the output will(almost always) differ from that listed here. Thiscommand will work for any user who has access to thedevice node.
# head /dev/foorugururfc3092tuxbarfredquxbaztuxquuxthud
Unload the module and delete the corresponding device node:12)
# rmmod fooru
As root, use make to install the fooru module into the modules directory structure13)for the currently running kernel:
# make install. . . output omitted . . .
Load the module using the modprobe command:14)
# modprobe fooru[R7]
# modprobe --allow-unsupported fooru[S12]
Verify that the module was loaded successfully and that the correct device node15)is present:
# lsmod | head -n 2Module Size Used byfooru 7520 0# ls -l /dev/foorucrw-rw---- 1 root root 252, 0 Apr 22 16:46 /dev/fooru
EVALUATION COPY
Unauthorized Reproduction or Distribution Prohibited

1-44
Test the driver:16)
# head /dev/foorufoofredbazthudtux. . . snip . . .
EVALUATION COPY
Unauthorized Reproduction or Distribution Prohibited
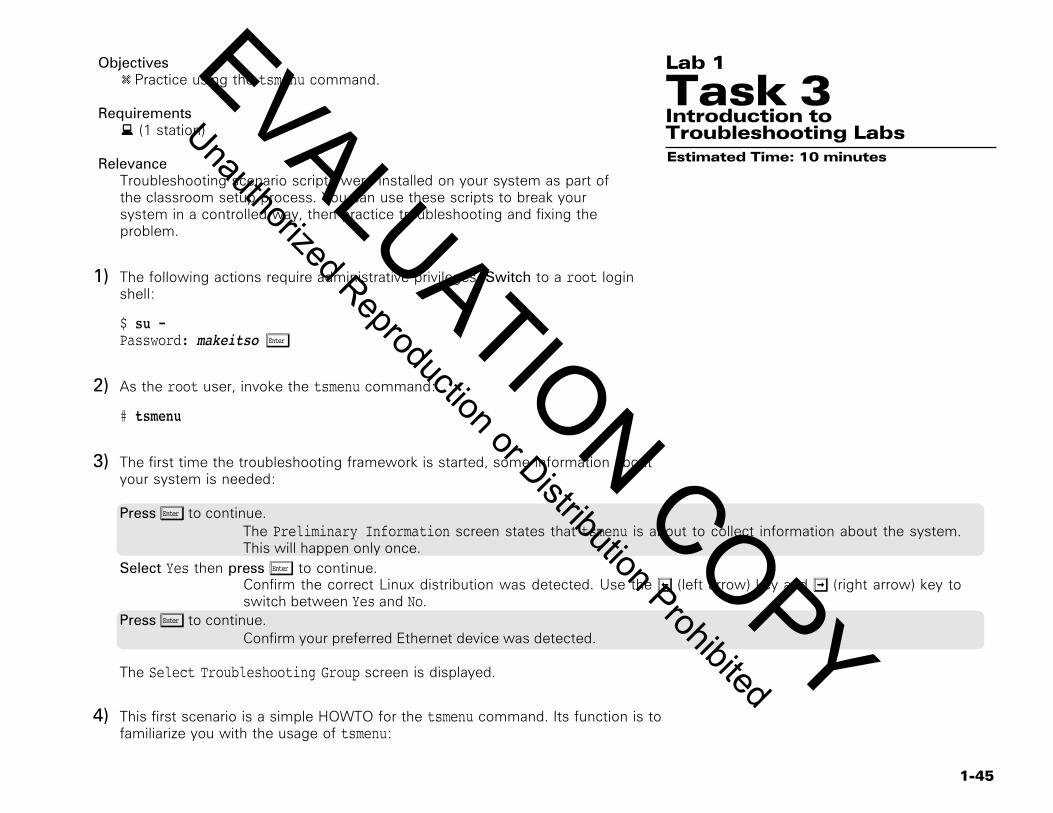
1-45
Objectivesy Practice using the tsmenu command.
Requirementsb (1 station)
RelevanceTroubleshooting scenario scripts were installed on your system as part ofthe classroom setup process. You can use these scripts to break yoursystem in a controlled way, then practice troubleshooting and fixing theproblem.
Lab 1
Task 3Introduction toTroubleshooting LabsEstimated Time: 10 minutes
The following actions require administrative privileges. Switch to a root login1)shell:
$ su -Password: makeitso Õ
As the root user, invoke the tsmenu command:2)
# tsmenu
The first time the troubleshooting framework is started, some information about3)your system is needed:
PressÕ to continue.The Preliminary Information screen states that tsmenu is about to collect information about the system.This will happen only once.
Select Yes then press Õ to continue.Confirm the correct Linux distribution was detected. Use the ¡ (left arrow) key and ¤ (right arrow) key toswitch between Yes and No.
PressÕ to continue.Confirm your preferred Ethernet device was detected.
The Select Troubleshooting Group screen is displayed.
This first scenario is a simple HOWTO for the tsmenu command. Its function is to4)familiarize you with the usage of tsmenu:
EVALUATION COPY
Unauthorized Reproduction or Distribution Prohibited
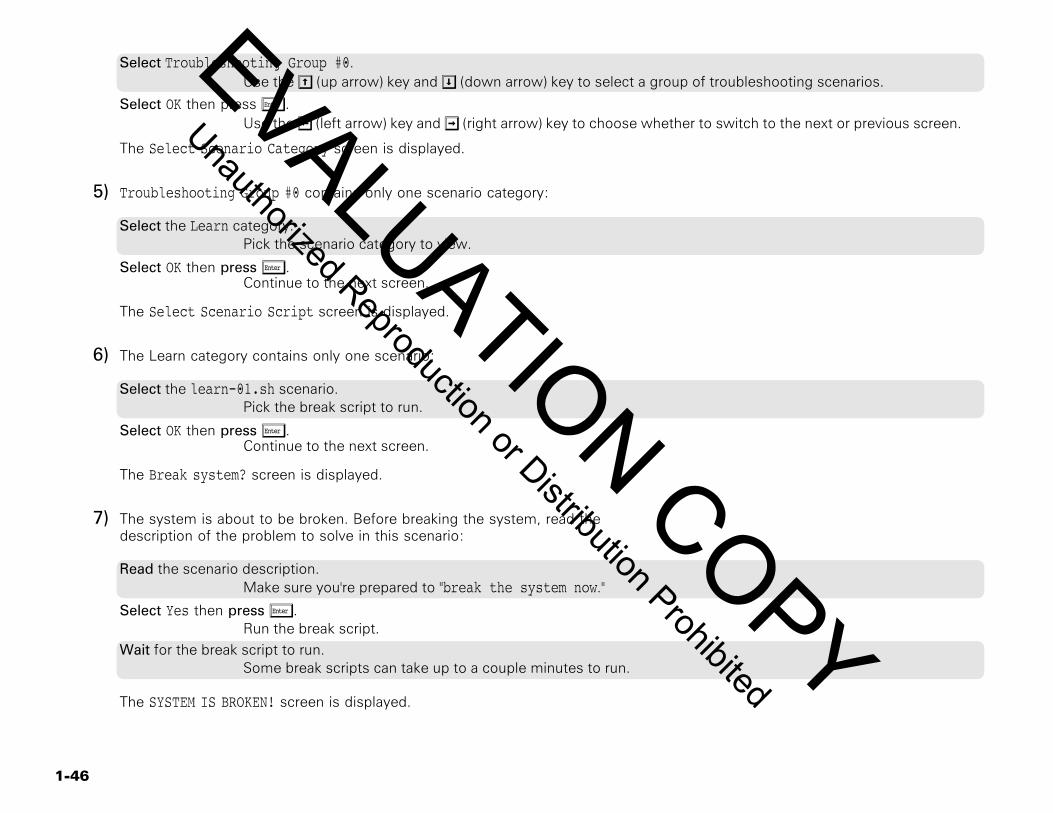
1-46
Select Troubleshooting Group #0.Use the¢ (up arrow) key and£ (down arrow) key to select a group of troubleshooting scenarios.
Select OK then press Õ.Use the¡ (left arrow) key and¤ (right arrow) key to choose whether to switch to the next or previous screen.
The Select Scenario Category screen is displayed.
Troubleshooting Group #0 contains only one scenario category:5)
Select the Learn category.Pick the scenario category to view.
Select OK then press Õ.Continue to the next screen.
The Select Scenario Script screen is displayed.
The Learn category contains only one scenario:6)
Select the learn-01.sh scenario.Pick the break script to run.
Select OK then press Õ.Continue to the next screen.
The Break system? screen is displayed.
The system is about to be broken. Before breaking the system, read the7)description of the problem to solve in this scenario:
Read the scenario description.Make sure you're prepared to "break the system now."
Select Yes then press Õ.Run the break script.
Wait for the break script to run.Some break scripts can take up to a couple minutes to run.
The SYSTEM IS BROKEN! screen is displayed.
EVALUATION COPY
Unauthorized Reproduction or Distribution Prohibited
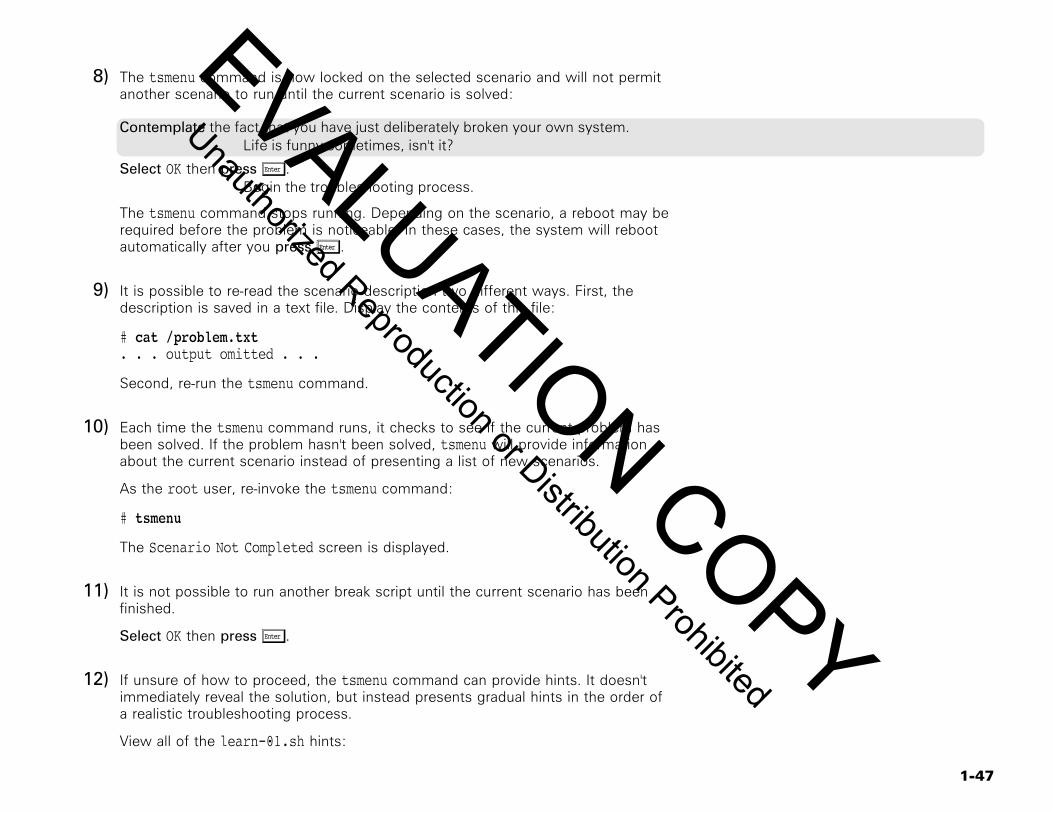
1-47
The tsmenu command is now locked on the selected scenario and will not permit8)another scenario to run until the current scenario is solved:
Contemplate the fact that you have just deliberately broken your own system.Life is funny sometimes, isn't it?
Select OK then press Õ.Begin the troubleshooting process.
The tsmenu command stops running. Depending on the scenario, a reboot may berequired before the problem is noticeable. In these cases, the system will rebootautomatically after you press Õ.
It is possible to re-read the scenario description two different ways. First, the9)description is saved in a text file. Display the contents of this file:
# cat /problem.txt. . . output omitted . . .
Second, re-run the tsmenu command.
Each time the tsmenu command runs, it checks to see if the current problem has10)been solved. If the problem hasn't been solved, tsmenu will provide informationabout the current scenario instead of presenting a list of new scenarios.
As the root user, re-invoke the tsmenu command:
# tsmenu
The Scenario Not Completed screen is displayed.
It is not possible to run another break script until the current scenario has been11)finished.
Select OK then press Õ.
If unsure of how to proceed, the tsmenu command can provide hints. It doesn't12)immediately reveal the solution, but instead presents gradual hints in the order ofa realistic troubleshooting process.
View all of the learn-01.sh hints:
EVALUATION COPY
Unauthorized Reproduction or Distribution Prohibited
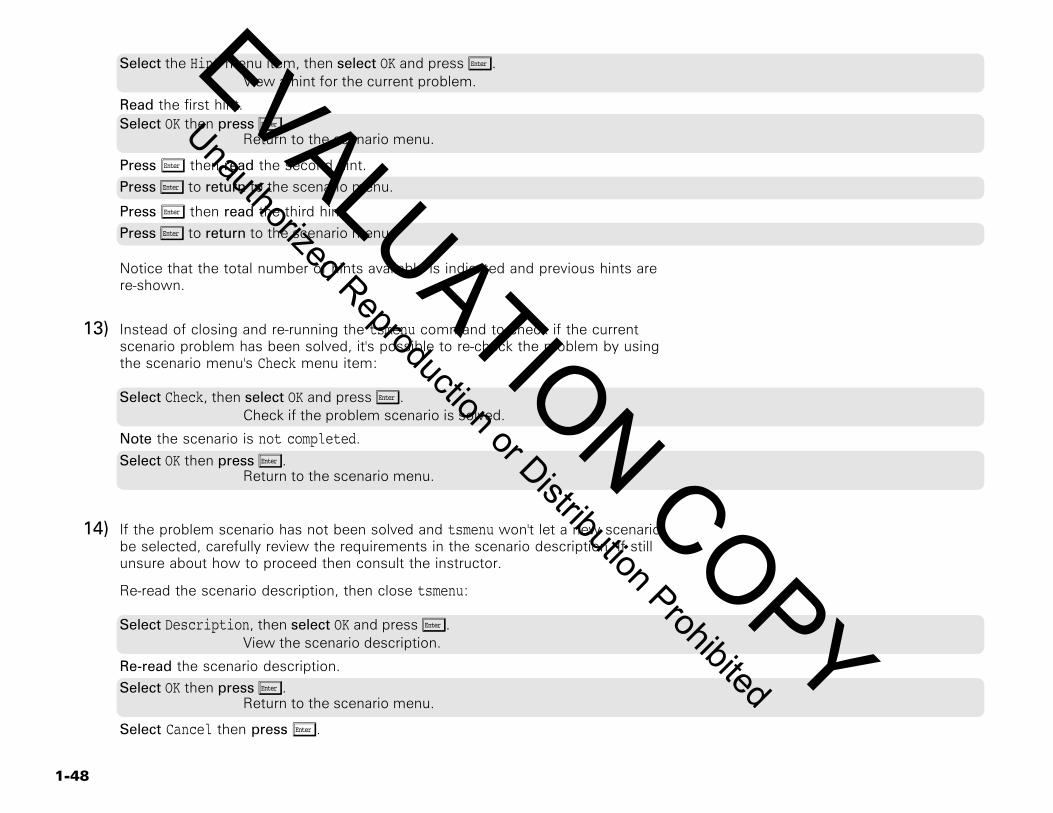
1-48
Select the Hint menu item, then select OK and pressÕ.View a hint for the current problem.
Read the first hint.Select OK then pressÕ.
Return to the scenario menu.
Press Õ then read the second hint.PressÕ to return to the scenario menu.
Press Õ then read the third hint.PressÕ to return to the scenario menu.
Notice that the total number of hints available is indicated and previous hints arere-shown.
Instead of closing and re-running the tsmenu command to check if the current13)scenario problem has been solved, it's possible to re-check the problem by usingthe scenario menu's Check menu item:
Select Check, then select OK and pressÕ.Check if the problem scenario is solved.
Note the scenario is not completed.
Select OK then pressÕ.Return to the scenario menu.
If the problem scenario has not been solved and tsmenu won't let a new scenario14)be selected, carefully review the requirements in the scenario description. If stillunsure about how to proceed then consult the instructor.
Re-read the scenario description, then close tsmenu:
Select Description, then select OK and pressÕ.View the scenario description.
Re-read the scenario description.Select OK then pressÕ.
Return to the scenario menu.
Select Cancel then press Õ.
EVALUATION COPY
Unauthorized Reproduction or Distribution Prohibited

1-49
Close tsmenu and return to the command line.
Solve the scenario problem by creating the required file:15)
# touch /root/solved
Launch the tsmenu command again:16)
# tsmenu
As usual, tsmenu checks to see if you've solved the current problem. Once the17)problem is solved, the Troubleshooting Group screen is unlocked and anotherscenario can be explored:
Note that you've completed the scenario.
Select OK then press Õ.The Troubleshooting Group screen is now unlocked.
Select Cancel then pressÕ.Close tsmenu and return to the command line.
EVALUATION COPY
Unauthorized Reproduction or Distribution Prohibited
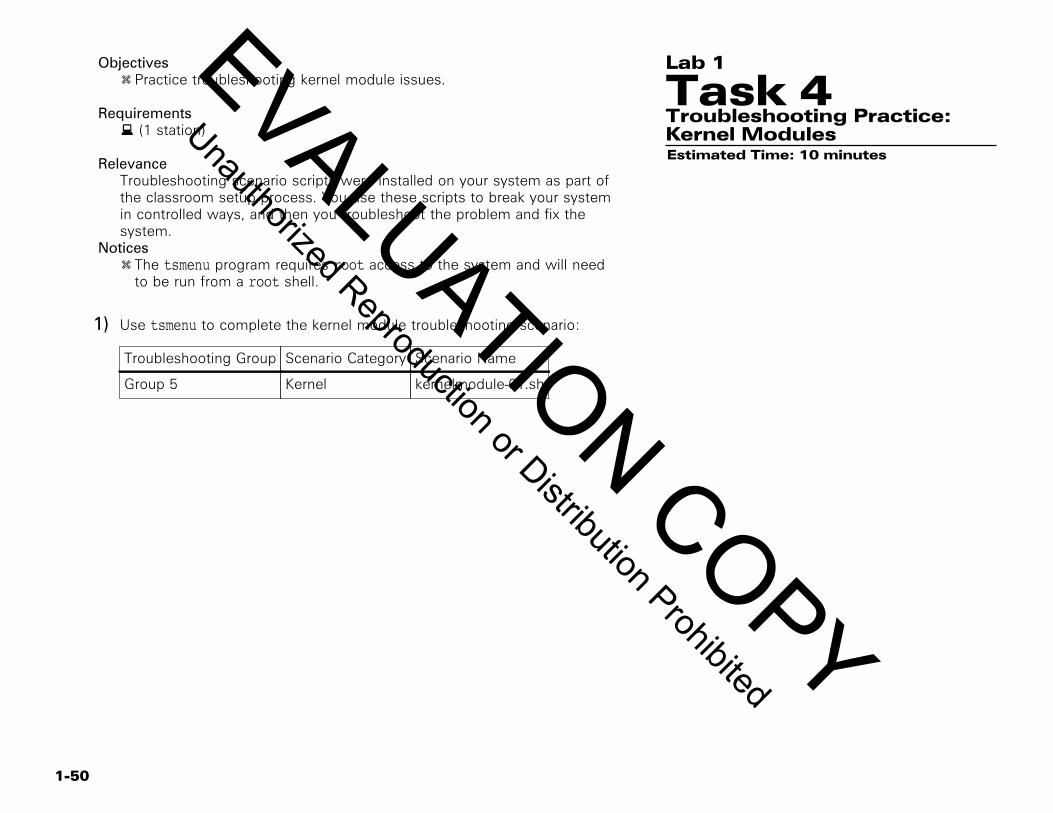
1-50
Objectivesy Practice troubleshooting kernel module issues.
Requirementsb (1 station)
RelevanceTroubleshooting scenario scripts were installed on your system as part ofthe classroom setup process. You use these scripts to break your systemin controlled ways, and then you troubleshoot the problem and fix thesystem.
Noticesy The tsmenu program requires root access to the system and will need
to be run from a root shell.
Lab 1
Task 4Troubleshooting Practice:Kernel ModulesEstimated Time: 10 minutes
Use tsmenu to complete the kernel module troubleshooting scenario:1)
Troubleshooting Group Scenario Category Scenario Name
Group 5 Kernel kernelmodule-01.sh
EVALUATION COPY
Unauthorized Reproduction or Distribution Prohibited
Chapter
2SYSTEMDOVERVIEW
ContentSystem Boot Method Overview . . . . . . . . . . . . . . . . . . . . . . 2systemd System and Service Manager . . . . . . . . . . . . . . . . 3Modifying systemd services . . . . . . . . . . . . . . . . . . . . . . . . . 5Systemd Service Sandboxing Features . . . . . . . . . . . . . . . . 6systemd Targets . . . . . . . . . . . . . . . . . . . . . . . . . . . . . . . . . . . 7Using systemd . . . . . . . . . . . . . . . . . . . . . . . . . . . . . . . . . . . . . 8Linux Runlevels Aliases . . . . . . . . . . . . . . . . . . . . . . . . . . . . 10Legacy Support for SysV init . . . . . . . . . . . . . . . . . . . . . . . . 11
Lab Tasks 121. Managing Services With Systemd's systemctl . . . . . . 132. Creating a systemd unit file . . . . . . . . . . . . . . . . . . . . . . . 19
EVALUATION COPY
Unauthorized Reproduction or Distribution Prohibited
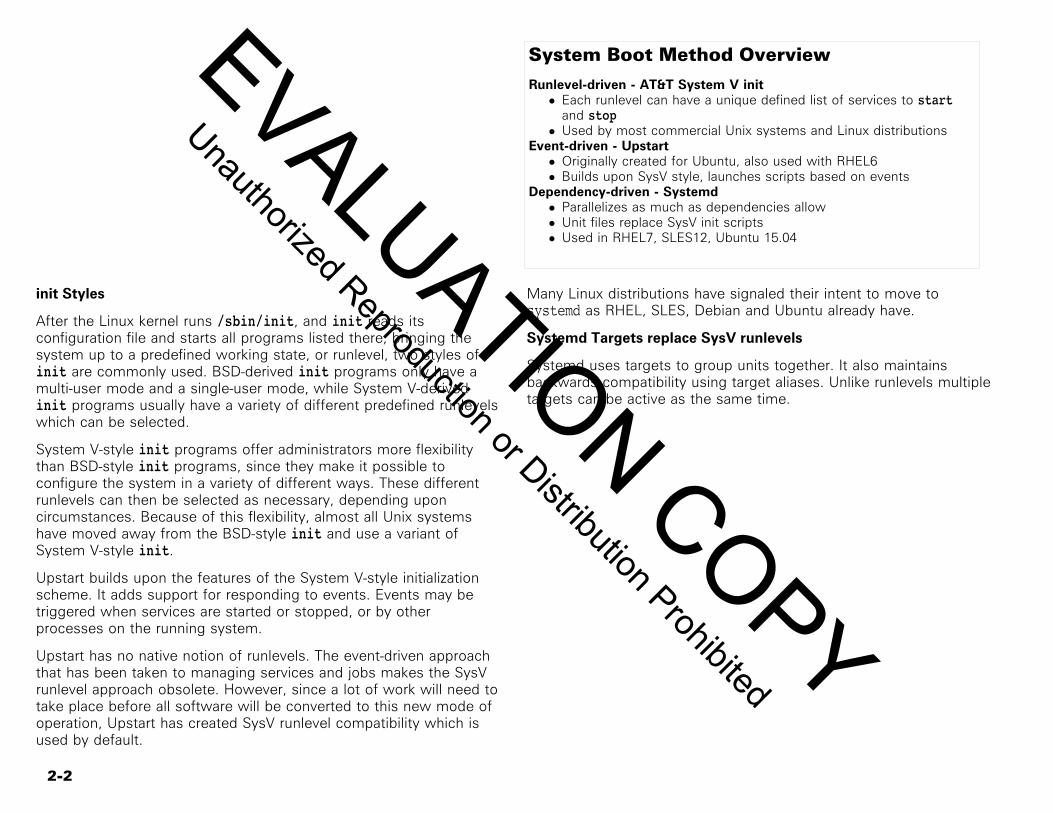
2-2
System Boot Method Overview
Runlevel-driven - AT&T System V init• Each runlevel can have a unique defined list of services to start
and stop• Used by most commercial Unix systems and Linux distributions
Event-driven - Upstart• Originally created for Ubuntu, also used with RHEL6• Builds upon SysV style, launches scripts based on events
Dependency-driven - Systemd• Parallelizes as much as dependencies allow• Unit files replace SysV init scripts• Used in RHEL7, SLES12, Ubuntu 15.04
init Styles
After the Linux kernel runs /sbin/init, and init reads itsconfiguration file and starts all programs listed there, bringing thesystem up to a predefined working state, or runlevel, two styles ofinit are commonly used. BSD-derived init programs only have amulti-user mode and a single-user mode, while System V-derivedinit programs usually have a variety of different predefined runlevelswhich can be selected.
System V-style init programs offer administrators more flexibilitythan BSD-style init programs, since they make it possible toconfigure the system in a variety of different ways. These differentrunlevels can then be selected as necessary, depending uponcircumstances. Because of this flexibility, almost all Unix systemshave moved away from the BSD-style init and use a variant ofSystem V-style init.
Upstart builds upon the features of the System V-style initializationscheme. It adds support for responding to events. Events may betriggered when services are started or stopped, or by otherprocesses on the running system.
Upstart has no native notion of runlevels. The event-driven approachthat has been taken to managing services and jobs makes the SysVrunlevel approach obsolete. However, since a lot of work will need totake place before all software will be converted to this new mode ofoperation, Upstart has created SysV runlevel compatibility which isused by default.
Many Linux distributions have signaled their intent to move tosystemd as RHEL, SLES, Debian and Ubuntu already have.
Systemd Targets replace SysV runlevels
Systemd uses targets to group units together. It also maintainsbackwards compatibility using target aliases. Unlike runlevels multipletargets can be active as the same time.
EVALUATION COPY
Unauthorized Reproduction or Distribution Prohibited
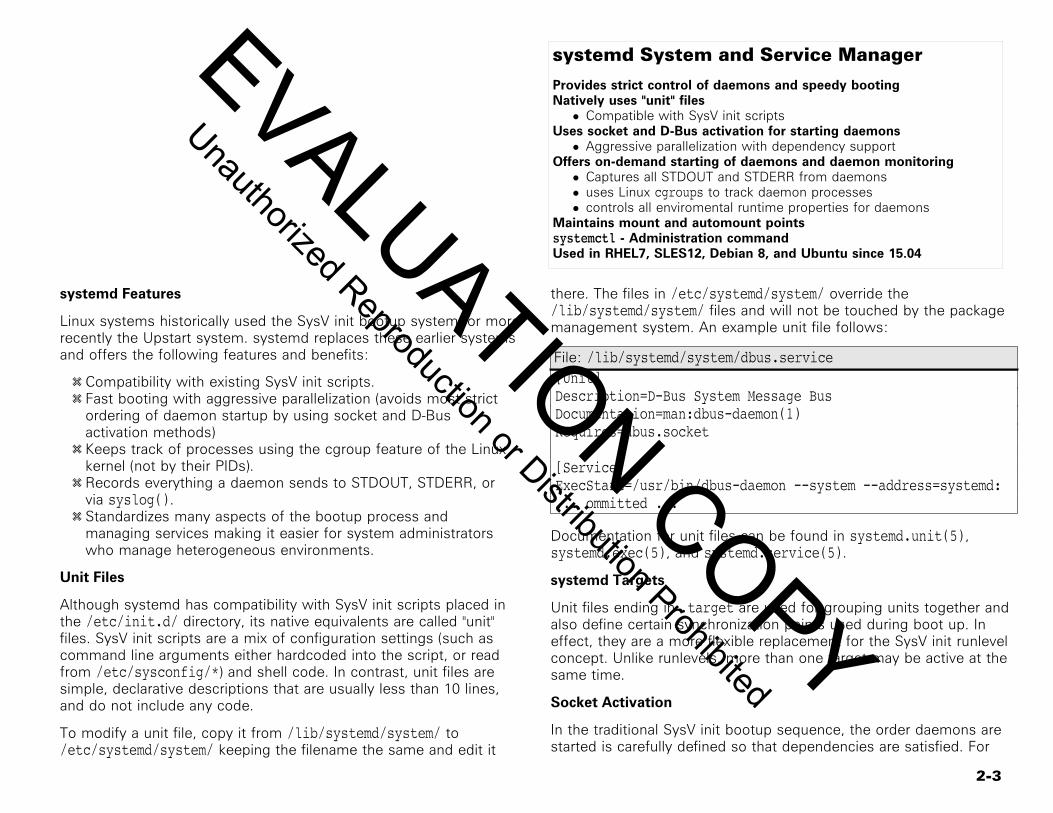
2-3
systemd System and Service Manager
Provides strict control of daemons and speedy bootingNatively uses "unit" files• Compatible with SysV init scripts
Uses socket and D-Bus activation for starting daemons• Aggressive parallelization with dependency support
Offers on-demand starting of daemons and daemon monitoring• Captures all STDOUT and STDERR from daemons• uses Linux cgroups to track daemon processes• controls all enviromental runtime properties for daemons
Maintains mount and automount pointssystemctl - Administration commandUsed in RHEL7, SLES12, Debian 8, and Ubuntu since 15.04
systemd Features
Linux systems historically used the SysV init bootup system, or morerecently the Upstart system. systemd replaces these earlier systemsand offers the following features and benefits:
y Compatibility with existing SysV init scripts.y Fast booting with aggressive parallelization (avoids most strict
ordering of daemon startup by using socket and D-Busactivation methods)y Keeps track of processes using the cgroup feature of the Linux
kernel (not by their PIDs).y Records everything a daemon sends to STDOUT, STDERR, or
via syslog().y Standardizes many aspects of the bootup process and
managing services making it easier for system administratorswho manage heterogeneous environments.
Unit Files
Although systemd has compatibility with SysV init scripts placed inthe /etc/init.d/ directory, its native equivalents are called "unit"files. SysV init scripts are a mix of configuration settings (such ascommand line arguments either hardcoded into the script, or readfrom /etc/sysconfig/*) and shell code. In contrast, unit files aresimple, declarative descriptions that are usually less than 10 lines,and do not include any code.
To modify a unit file, copy it from /lib/systemd/system/ to/etc/systemd/system/ keeping the filename the same and edit it
there. The files in /etc/systemd/system/ override the/lib/systemd/system/ files and will not be touched by the packagemanagement system. An example unit file follows:
File: /lib/systemd/system/dbus.service[Unit]Description=D-Bus System Message BusDocumentation=man:dbus-daemon(1)Requires=dbus.socket
[Service]ExecStart=/usr/bin/dbus-daemon --system --address=systemd:... ommitted ...
Documentation for unit files can be found in systemd.unit(5),systemd.exec(5), and systemd.service(5).
systemd Targets
Unit files ending in .target are used for grouping units together andalso define certain synchronization points used during boot up. Ineffect, they are a more flexible replacement for the SysV init runlevelconcept. Unlike runlevels, more than one target may be active at thesame time.
Socket Activation
In the traditional SysV init bootup sequence, the order daemons arestarted is carefully defined so that dependencies are satisfied. For
EVALUATION COPY
Unauthorized Reproduction or Distribution Prohibited
2-4
example, many daemons send syslog messages (via the socket file/dev/log) when they start so the syslog daemon must be startedbefore anything attempts to use it. The design systemd uses is that itcreates all the sockets for all daemons in one step, and then starts allthe daemons. If one daemon requires another, it will connect to thepre-created socket and send the request which will then be queuedby the Linux kernel until the other daemon is ready to dequeue all themessages and process them. The result is that daemons, even thosewith interdependencies, can be started in parallel.
Another benefit is that a daemon can be configured to beauto-spawned by systemd when a request is made to its socket file.Finally, because the socket files are not created by the daemon itself,a daemon can exit or crash, then be restarted without affecting clientprocesses or dropping any request.
Filesystem Management
On a box using systemd, the /etc/fstab will only contain entries fordisk based filesystems. All the kernel based filesystems are handledby .mount unit files.
$ ls -1 /lib/systemd/system/*.mount/lib/systemd/system/dev-hugepages.mount/lib/systemd/system/dev-mqueue.mount/lib/systemd/system/media.mount/lib/systemd/system/proc-fs-nfsd.mount/lib/systemd/system/proc-sys-fs-binfmt_misc.mount/lib/systemd/system/sys-fs-fuse-connections.mount/lib/systemd/system/sys-kernel-config.mount/lib/systemd/system/sys-kernel-debug.mount/lib/systemd/system/var-lib-nfs-rpc_pipefs.mount
Normally, disk based filesystems listed in the /etc/fstab arechecked and mounted before they are used. systemd offers thealternative that filesystems can be configured to be checked andmounted when they are first accessed. This can speed boot,especially for filesystems not needed during boot such as /home. Thisis done by editing the /etc/fstab and adding thecomment=systemd.automount mount option to the filesystem.
Tracking Processes Belonging to a Daemon
When stopping or restarting a daemon cleanly, it is important that allthe running processes associated with a daemon are stopped. It is
also useful for the Systems Administrator to be able to identify whichprocesses belong to each daemon (especially given the proliferationof processes on modern Linux systems). In certain circumstancessuch as crond or web server CGI processes it can be complex totrack back the inheritance. Linux has always supported the Unixfeature of process groups and tracking of the parent PID, howeverthese decades old methods have limitations and allow a process to"escape" supervision.
The Linux kernel 2.6.24 added a new feature called "control groups"(cgroups) that was primarily created by engineers at Google. The useof cgroups allows for labeling, control, isolation, accounting,prioritization, and resource limiting of groups of processes. Bydefault, systemd only uses cgroups for labeling and tracking whichprocesses belong to which daemon. Every child process inherits thecgroup of its parent and can't escape that cgroup unless it isprivileged. This way systemd can kill a daemon and all processes itcreated with certainty. View the systemd created cgroups withsystemd-cgls either in their entirety or for an individual service:
$ systemd-cgls. . . output omitted . . .$ systemd-cgls systemd:/system.slice/dbus.servicesystemd:/system.slice/dbus.service:- 627 /bin/dbus-daemon --nofork --systemd-activation- 656 /usr/libexec/polkit-1/polkitd --no-debug- 708 /usr/sbin/modem-manager
With systemd, when users login to interactive sessions, all processesfor that user are placed into a cgroup unique to that login session.This way all processes for users are tracked and systemd can beconfigured to terminate all user processes on logout so that stragglerprocesses don't hang around. This is done with the following edit:
File: /etc/systemd/logind.conf [Login]
+ KillUserProcesses=yes
EVALUATION COPY
Unauthorized Reproduction or Distribution Prohibited
2-5
Modifying systemd services
Method 1 - Fully replace the default unit file.• systemctl edit --full unit_name.service• Copies /lib/systemd/system/unit_name.service to
/etc/systemd/system/Method 2 - Create a unit_name.service.d/ directory with
supplemental configurations.• systemctl edit unit_name.service
Method 3 - Create a new unit file referencing the default unitAfter changing a unit_name.service file run systemctl daemon-reload• Not needed when using systemctl edit
Persistent changes to unit files
The systemd unit files which exist under /lib/systemd/system/should never directly be edited, since updates applied to the systemfrom the package manager will cause any changes made to the/lib/systemd/ unit files to be lost. However, there are multiple waysto modify the default systemd unit files where the changes willremain persistent after updates.
Fully replacing a default unit file
To fully replace the existing unit file under the /lib/systemd/system/directory use the command systemctl edit --fullunit_name.service which will copy the unit file from/lib/systemd/system/ to /etc/systemd/system/ keeping thefilename the same and opening a text editor. Once the text editor isexited, the command systemctl daemon-reload will automatically beperformed.
Creating a unit_name.service.d directory
Another option is to create a directory named/etc/systemd/system/unit_name.service.d/, within this directorymultiple supplementary .conf configuration files can be placed. Thefiles will be processed in lexicographical order. Using the commandsystemctl edit unit_name.service will automatically create thisdirectory and open a text editor, the file created by the text editor willbe saved as override.conf, after the text editor is exited thecommand systemctl daemon-reload will automatically be performed.
Referencing an existing unit file in a new unit file
Using the .include directive can include external unit files. Acommon method to modify existing units is to include the default unitfile then override specific settings. For example, modify the crondservice to start with a higher nice value so it doesn't interfere withother important system processes:
File: /etc/systemd/system/crond.service.include /lib/systemd/system/crond.service
[Service]Nice=5
As with any change to a unit file after creating or editing the abovefile, the command systemctl daemon-reload will need to beexecuted and for the changes to take effect the service would needto be restarted with systemctl restart unit_name.service.
If the environmental variables $VISUAL, $EDITOR and $SYSTEMD_EDITORare left unset, when executing systemctl edit the text editor nanowill be started.
Gathering Service Information
Run the command systemctl status unit_name.service to displaythe service state, cgroup heirarchy, and a few log lines. Run thecommand systemctl cat unit_name.service to output the serviceunit file as it is currently known to the running systemd process.
EVALUATION COPY
Unauthorized Reproduction or Distribution Prohibited
2-6
Systemd Service Sandboxing Features
Common Directives• PrivateTmp• PrivateNetwork• ProtectSystem• ProtectHome• CapabilityBoundingSet
Reference Man Pages• systemd.exec(5)• systemd.unit(5)• systemd.service(5)• systemd.directives(5)• capabilities(7)
Systemd Service Sandboxing Features
Within a unit file it is possible to specify restrictions on the executionenvironment of any processes started either directly or indirectly by asystemd unit file. Common sandbox directives include:
PrivateTmp ⇒ Runs a service with private /tmp and /var/tmpdirectories.
PrivateNetwork ⇒ Runs a service in a private network namespacewith only a loopback interface.
ProtectSystem ⇒ Mounts /boot, /etc, and /usr read-only.ProtectHome ⇒ Sets /root and /home read-only or inaccessible.ReadOnlyDirectories ⇒ Mount a directory as read-only for the
serviceInaccessibleDirectories ⇒ Prevents the service from accessing
specified directories.
The man page systemd.directives(7) has a full list of possibledirectives and references other man pages which containdescriptions of the directives.
If a service retains the Capability CAP_SYS_ADMIN it could unsandboxitself by remounting the filesystem device. To prevent this set thedirective CapabilityBoundingSet=~CAP_SYS_ADMIN which will stripthe CAP_SYS_ADMIN from any process started by systemd. UsingCapability Bounding will often cause services which require rootaccess to the system to fail in new and exciting ways. This can bewitnessed in the example on this page, the root user is unable tomount filesystems when using ssh.
The following example demonstrates the use of the PrivateTmpdirective being applied to the sshd service. Any files inside of theglobal /tmp namespace are not visible to an ssh client, any /tmp filesan ssh client creates are not visible to the host system. Any filescreated in /tmp by the sshd service will be deleted when the serviceor system is restarted.
# systemctl edit --full sshd
File: /etc/systemd/system/sshd.service Restart=on-failure RestartSec=42s
+ CapabilityBoundingSet=~CAP_SYS_ADMIN+ PrivateTmp=yes
# systemctl restart sshd# ls /tmp. . . output omitted . . .# ssh localhostroot@localhost's password: makeitso Õ# ls /tmp# touch /tmp/TESTFILE# ls /tmpTESTFILE# mount /dev/mapper/vg0-tmp /tmpmount: permission denied# exit# ls /tmp
EVALUATION COPY
Unauthorized Reproduction or Distribution Prohibited
2-7
systemd Targets
Targets allow grouping of units• More flexible replacement for the SysV runlevel concept• Defined in unit files ending in .target• Use a unit_name.wants/ directory to track grouped units
Runlevel targets provided for backwards compatibilitySpecial hardcoded targets provide core systemd functionalityChanging targets (runlevels)• systemctl isolate graphical.target
Viewing & Changing the default boot target• systemctl get-default• systemctl set-default desired.target
Defining Units Wanted by a Target
Any unit, including a .target unit, can explicitly specify dependencieswith a Wanted= line within the unit file. In order to allow for easymodification of explicit dependencies without modifying the unit file,each unit can instead have a unit_name.wants/ directory that cancontain symlinks to the desired unit files. This is analogous to the SXXsymlinks with the SysV init rcX.d/ directories. Since systemd has theconcept of shipped configuration versus custom configuration, foreach unit with a unit_name.wants/ directory, there are twodirectories where the symlinks may reside. As an example, with themulti-user.target, the following two directories are consulted:/lib/systemd/system/multi-user.target.wants/, and/etc/systemd/system/multi-user.target.wants/
Special Targets
There are approximately 50 special targets that are internal tosystemd, which are documented in the systemd.special(7) manpage. Some examples include:
network-online.target ⇒ Units that absolutely require networkingup and running should depend on network-online.target via aWants=network-online.target line
ctrl-alt-del.target ⇒ Started by systemd when Ó¿Ô¿Ù ispressed on the console. Typically aliased to reboot.target
rescue.target ⇒ Alternate boot target that runs bare minimumservices and a rescue shell like the legacy runlevel 1
sigpwr.target ⇒ Started when systemd receives the SIGPWR signal,
which is usually sent by the UPS monitoring daemons whenpower fails
default.target ⇒ What systemd starts at boot by default. Usuallyaliased (symlinked) to multi-user.target or graphical.target
Changing Targets
The equivalent of changing runlevels it to isolate targets. This startsall a target's dependencies and stops all others. This is done with thesystemctl isolate command. For example:
# systemctl isolate graphical.target
This only works on target units that have the AllowIsolate=yessetting configured.
Default Boot Target
The symlink /etc/systemd/system/default.target controls whattarget to boot to. The /etc/inittab is not consulted.
To boot to a text mode login, run this command:
# systemctl set-default multi-user.target. . . output omitted . . .
To boot to a graphical mode login, run this command:
# systemctl set-default graphical.target. . . output omitted . . .
EVALUATION COPY
Unauthorized Reproduction or Distribution Prohibited
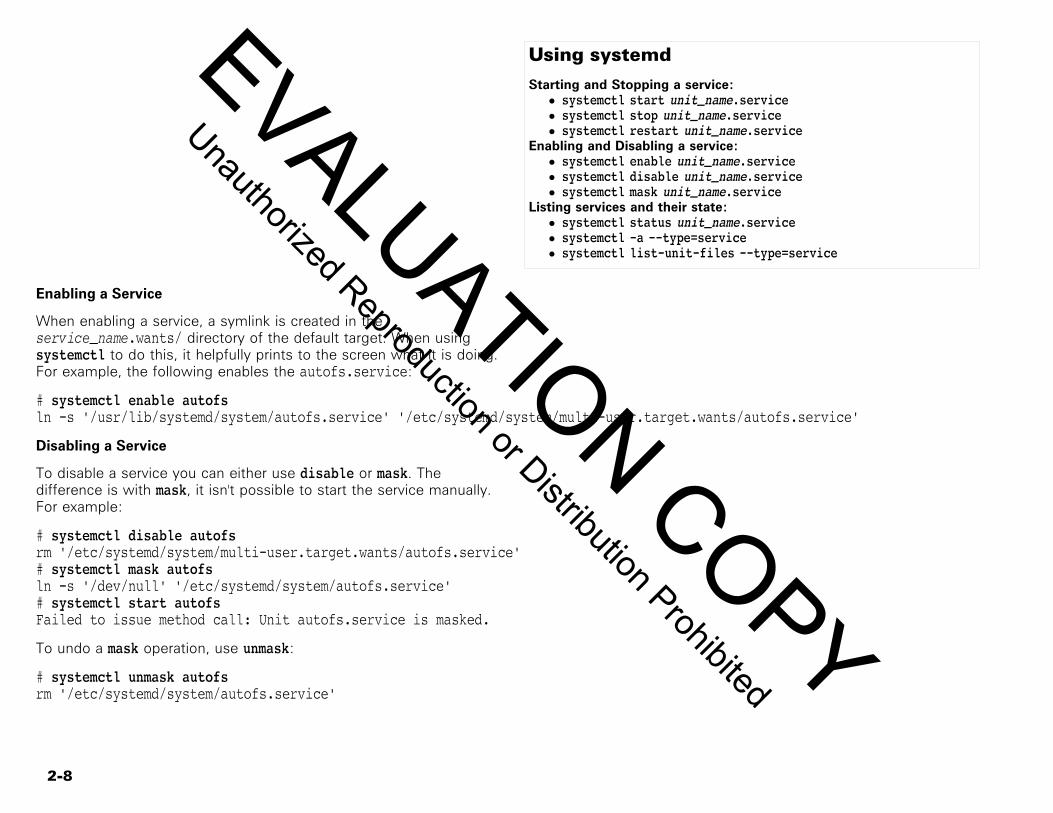
2-8
Using systemd
Starting and Stopping a service:• systemctl start unit_name.service• systemctl stop unit_name.service• systemctl restart unit_name.service
Enabling and Disabling a service:• systemctl enable unit_name.service• systemctl disable unit_name.service• systemctl mask unit_name.service
Listing services and their state:• systemctl status unit_name.service• systemctl -a --type=service• systemctl list-unit-files --type=service
Enabling a Service
When enabling a service, a symlink is created in theservice_name.wants/ directory of the default target. When usingsystemctl to do this, it helpfully prints to the screen what it is doing.For example, the following enables the autofs.service:
# systemctl enable autofsln -s '/usr/lib/systemd/system/autofs.service' '/etc/systemd/system/multi-user.target.wants/autofs.service'
Disabling a Service
To disable a service you can either use disable or mask. Thedifference is with mask, it isn't possible to start the service manually.For example:
# systemctl disable autofsrm '/etc/systemd/system/multi-user.target.wants/autofs.service'# systemctl mask autofsln -s '/dev/null' '/etc/systemd/system/autofs.service'# systemctl start autofsFailed to issue method call: Unit autofs.service is masked.
To undo a mask operation, use unmask:
# systemctl unmask autofsrm '/etc/systemd/system/autofs.service'
EVALUATION COPY
Unauthorized Reproduction or Distribution Prohibited
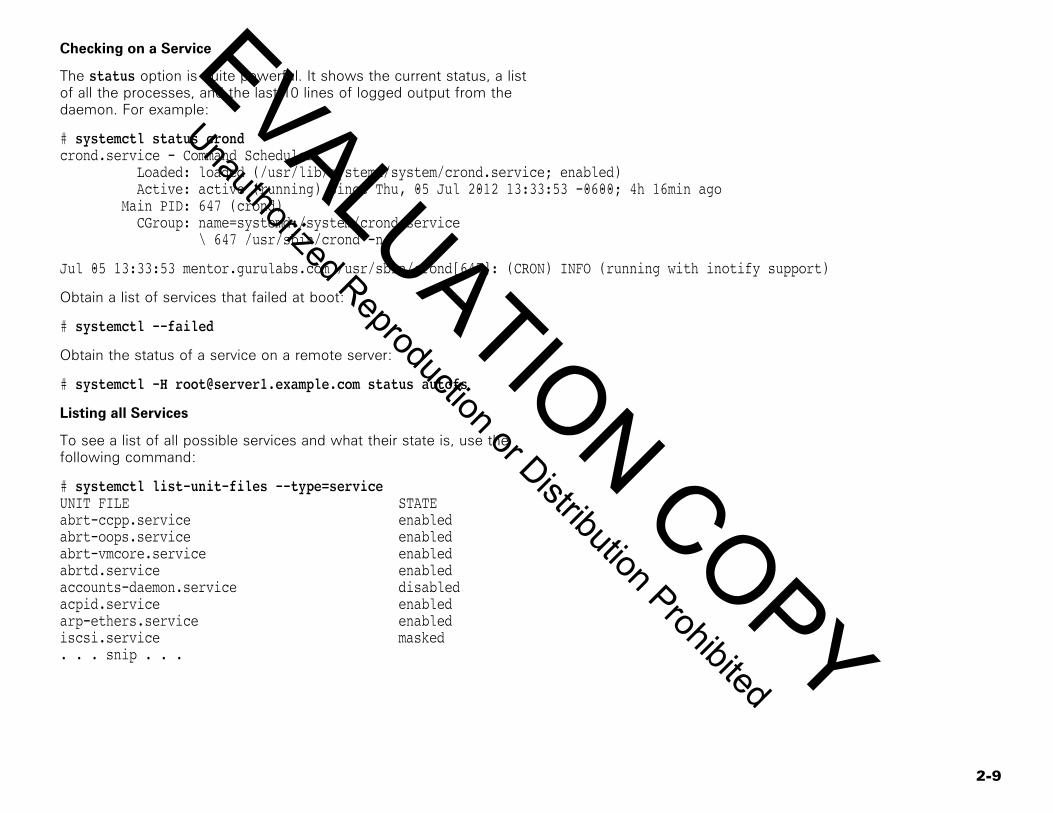
2-9
Checking on a Service
The status option is quite powerful. It shows the current status, a listof all the processes, and the last 10 lines of logged output from thedaemon. For example:
# systemctl status crondcrond.service - Command Scheduler Loaded: loaded (/usr/lib/systemd/system/crond.service; enabled) Active: active (running) since Thu, 05 Jul 2012 13:33:53 -0600; 4h 16min ago Main PID: 647 (crond) CGroup: name=systemd:/system/crond.service \ 647 /usr/sbin/crond -n
Jul 05 13:33:53 mentor.gurulabs.com /usr/sbin/crond[647]: (CRON) INFO (running with inotify support)
Obtain a list of services that failed at boot:
# systemctl --failed
Obtain the status of a service on a remote server:
# systemctl -H [email protected] status autofs
Listing all Services
To see a list of all possible services and what their state is, use thefollowing command:
# systemctl list-unit-files --type=serviceUNIT FILE STATEabrt-ccpp.service enabledabrt-oops.service enabledabrt-vmcore.service enabledabrtd.service enabledaccounts-daemon.service disabledacpid.service enabledarp-ethers.service enablediscsi.service masked. . . snip . . .
EVALUATION COPY
Unauthorized Reproduction or Distribution Prohibited
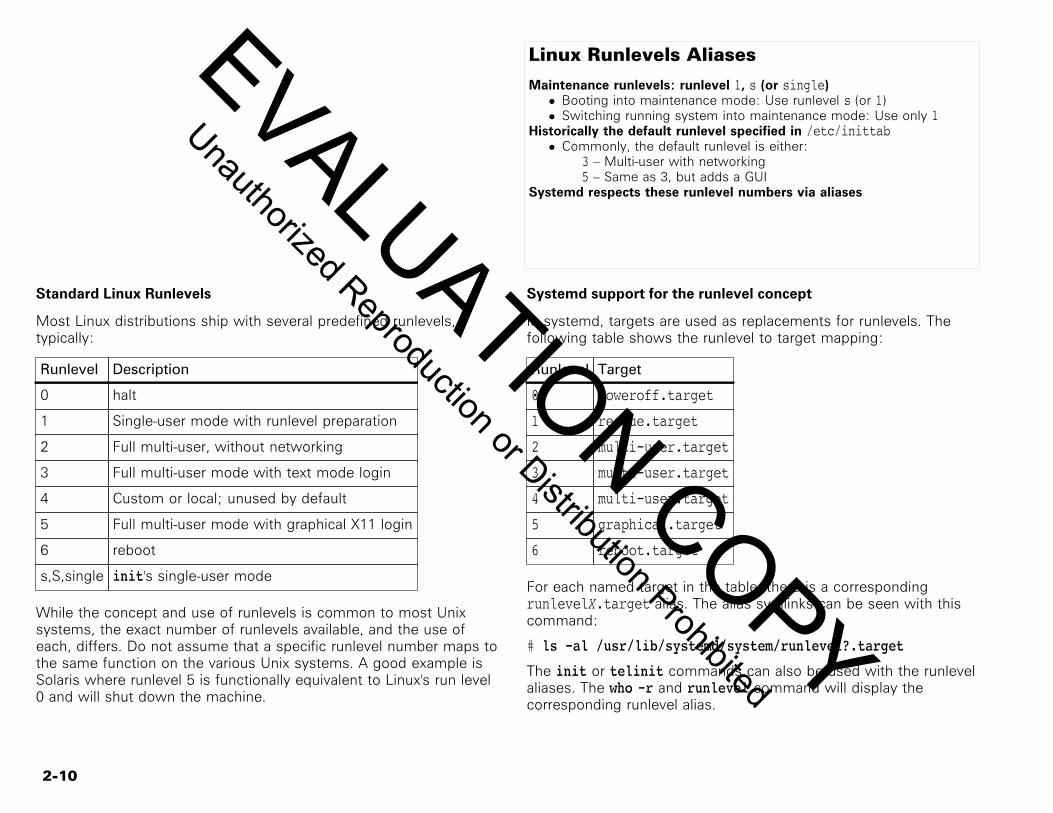
2-10
Linux Runlevels Aliases
Maintenance runlevels: runlevel 1, s (or single)• Booting into maintenance mode: Use runlevel s (or 1)• Switching running system into maintenance mode: Use only 1
Historically the default runlevel specified in /etc/inittab• Commonly, the default runlevel is either:
3 – Multi-user with networking5 – Same as 3, but adds a GUI
Systemd respects these runlevel numbers via aliases
Standard Linux Runlevels
Most Linux distributions ship with several predefined runlevels,typically:
Runlevel Description
0 halt
1 Single-user mode with runlevel preparation
2 Full multi-user, without networking
3 Full multi-user mode with text mode login
4 Custom or local; unused by default
5 Full multi-user mode with graphical X11 login
6 reboot
s,S,single init's single-user mode
While the concept and use of runlevels is common to most Unixsystems, the exact number of runlevels available, and the use ofeach, differs. Do not assume that a specific runlevel number maps tothe same function on the various Unix systems. A good example isSolaris where runlevel 5 is functionally equivalent to Linux's run level0 and will shut down the machine.
Systemd support for the runlevel concept
In systemd, targets are used as replacements for runlevels. Thefollowing table shows the runlevel to target mapping:
Runlevel Target
0 poweroff.target
1 rescue.target
2 multi-user.target
3 multi-user.target
4 multi-user.target
5 graphical.target
6 reboot.target
For each named target in the table, there is a correspondingrunlevelX.target alias. The alias symlinks can be seen with thiscommand:
# ls -al /usr/lib/systemd/system/runlevel?.target
The init or telinit commands can also be used with the runlevelaliases. The who -r and runlevel command will display thecorresponding runlevel alias.
EVALUATION COPY
Unauthorized Reproduction or Distribution Prohibited
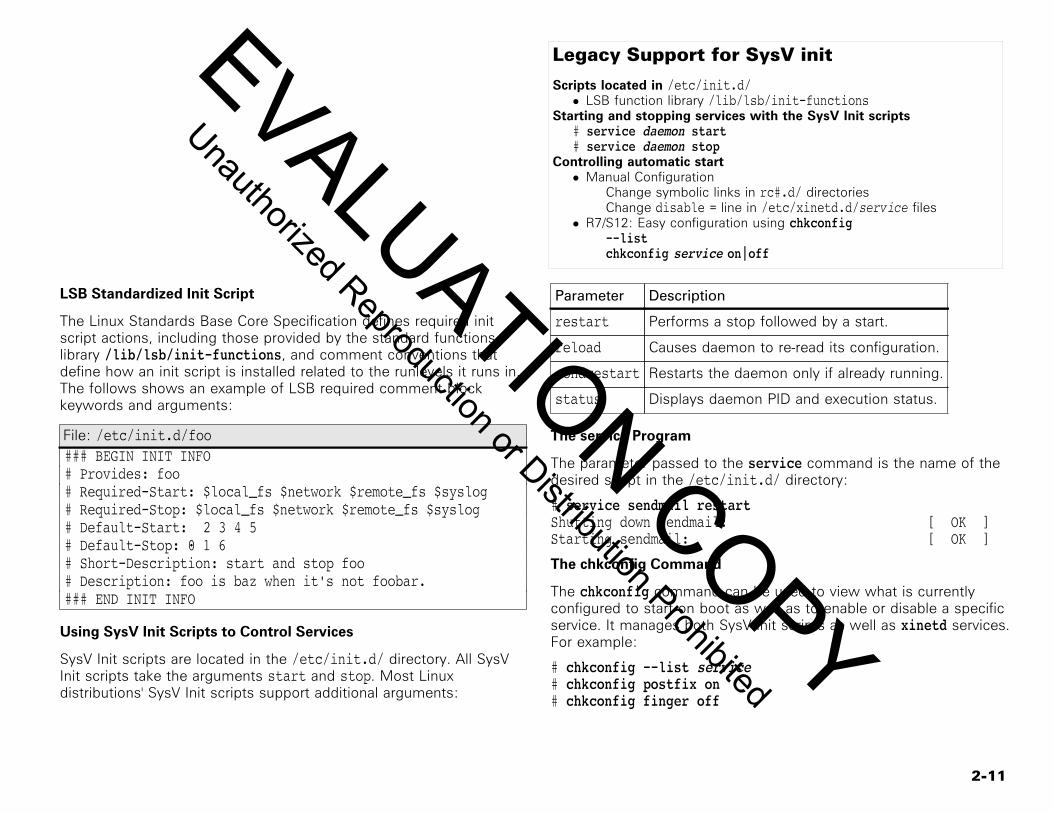
2-11
Legacy Support for SysV init
Scripts located in /etc/init.d/• LSB function library /lib/lsb/init-functions
Starting and stopping services with the SysV Init scripts# service daemon start# service daemon stop
Controlling automatic start• Manual Configuration
Change symbolic links in rc#.d/ directoriesChange disable = line in /etc/xinetd.d/service files
• R7/S12: Easy configuration using chkconfig--listchkconfig service on|off
LSB Standardized Init Script
The Linux Standards Base Core Specification defines required initscript actions, including those provided by the standard functionslibrary /lib/lsb/init-functions, and comment conventions thatdefine how an init script is installed related to the runlevels it runs in.The follows shows an example of LSB required comment blockkeywords and arguments:
File: /etc/init.d/foo### BEGIN INIT INFO# Provides: foo# Required-Start: $local_fs $network $remote_fs $syslog# Required-Stop: $local_fs $network $remote_fs $syslog# Default-Start: 2 3 4 5# Default-Stop: 0 1 6# Short-Description: start and stop foo# Description: foo is baz when it's not foobar.### END INIT INFO
Using SysV Init Scripts to Control Services
SysV Init scripts are located in the /etc/init.d/ directory. All SysVInit scripts take the arguments start and stop. Most Linuxdistributions' SysV Init scripts support additional arguments:
Parameter Description
restart Performs a stop followed by a start.
reload Causes daemon to re-read its configuration.
condrestart Restarts the daemon only if already running.
status Displays daemon PID and execution status.
The service Program
The parameter passed to the service command is the name of thedesired script in the /etc/init.d/ directory:
# service sendmail restartShutting down sendmail: [ OK ]Starting sendmail: [ OK ]
The chkconfig Command
The chkconfig command can be used to view what is currentlyconfigured to start on boot as well as to enable or disable a specificservice. It manages both SysV init scripts as well as xinetd services.For example:
# chkconfig --list service# chkconfig postfix on# chkconfig finger off
EVALUATION COPY
Unauthorized Reproduction or Distribution Prohibited
2-12
Lab 2Estimated Time:S12: 30 minutes
R7: 30 minutesTask 1: Managing Services With Systemd's systemctl
Page: 2-13 Time: 15 minutesRequirements: b (1 station)
Task 2: Creating a systemd unit filePage: 2-19 Time: 15 minutesRequirements: b (1 station)
EVALUATION COPY
Unauthorized Reproduction or Distribution Prohibited
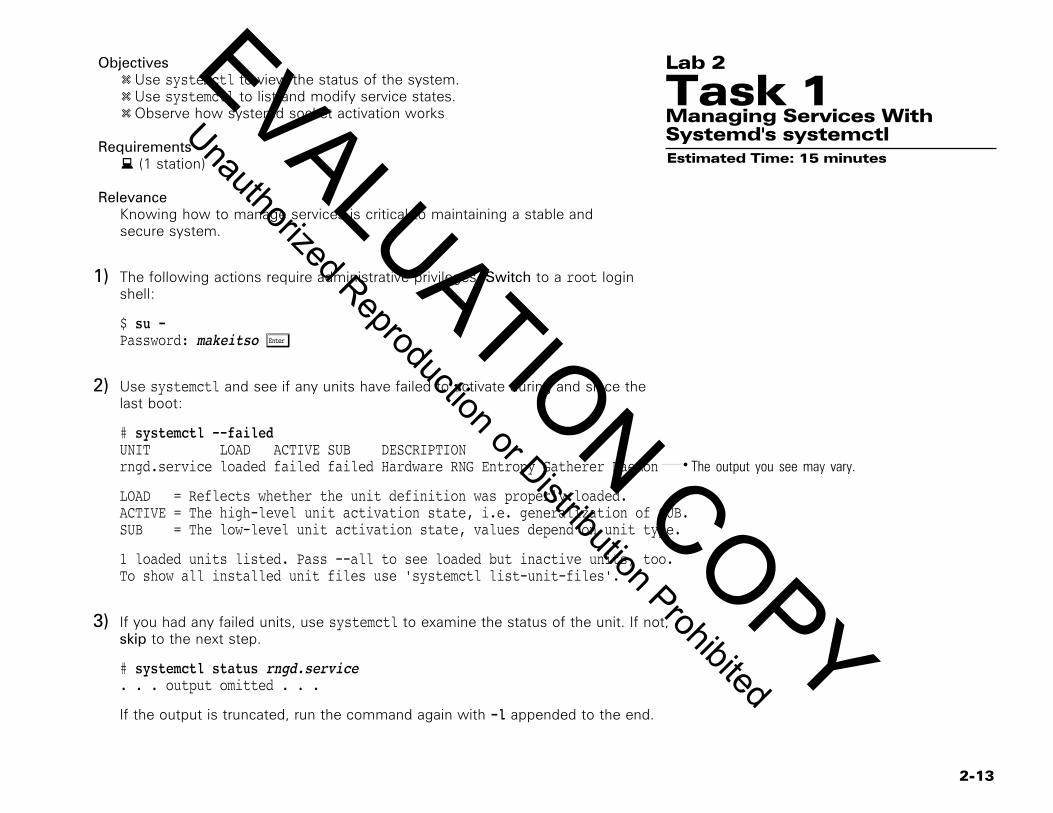
2-13
Objectivesy Use systemctl to view the status of the system.y Use systemctl to list and modify service states.yObserve how systemd socket activation works
Requirementsb (1 station)
RelevanceKnowing how to manage services is critical to maintaining a stable andsecure system.
Lab 2
Task 1Managing Services WithSystemd's systemctlEstimated Time: 15 minutes
The following actions require administrative privileges. Switch to a root login1)shell:
$ su -Password: makeitso Õ
Use systemctl and see if any units have failed to activate during and since the2)last boot:
# systemctl --failedUNIT LOAD ACTIVE SUB DESCRIPTION
The output you see may vary.rngd.service loaded failed failed Hardware RNG Entropy Gatherer Daemon
LOAD = Reflects whether the unit definition was properly loaded.ACTIVE = The high-level unit activation state, i.e. generalization of SUB.SUB = The low-level unit activation state, values depend on unit type.
1 loaded units listed. Pass --all to see loaded but inactive units, too.To show all installed unit files use 'systemctl list-unit-files'.
If you had any failed units, use systemctl to examine the status of the unit. If not,3)skip to the next step.
# systemctl status rngd.service. . . output omitted . . .
If the output is truncated, run the command again with -l appended to the end.
EVALUATION COPY
Unauthorized Reproduction or Distribution Prohibited
2-14
Use systemctl to view a list of all the enabled services:4)
# systemctl list-unit-files --type service --state enabled. . . output omitted . . .
Use systemctl to view a list of all the disabled services:5)
# systemctl list-unit-files --type service --state disabled. . . output omitted . . .
Use systemctl to list all the known active service units with a short description of6)each one:
# systemctl list-units --type service. . . output omitted . . .
Use systemctl to get a list of all targets and their state:7)
# systemctl list-units --type target. . . output omitted . . .
Remember, unlike SysV init runlevels, multiple targets can be activated at thesame time.
Use systemctl to get of all the dependencies of the graphical.target:8)
# systemctl list-dependencies graphical.targetgraphical.target. . . output omitted . . .
Remember, unlike SysV init runlevels, multiple targets can be activated at thesame time.
Use systemctl to examine the status of the OpenSSH server:9)
# systemctl status sshd -lsshd.service - OpenSSH Daemon Loaded: loaded (/usr/lib/systemd/system/sshd.service; enabled) Active: active (running) since Thu 2014-12-04 08:45:07 MST; 5h 55min ago
EVALUATION COPY
Unauthorized Reproduction or Distribution Prohibited
2-15
Main PID: 1494 (sshd) CGroup: /system.slice/sshd.service `-1494 /usr/sbin/sshd -D
Dec 04 08:45:07 station2 sshd-gen-keys-start[1481]: Checking for missing server keys in /etc/sshDec 04 08:45:08 station2 sshd[1494]: Server listening on 0.0.0.0 port 22.Dec 04 08:45:08 station2 sshd[1494]: Server listening on :: port 22.Dec 04 10:51:49 station2 sshd[1940]: Accepted keyboard-interactive/pam for root from 10.100.0.254 port 41195 ssh2Dec 04 10:51:49 station2 sshd[1940]: pam_unix(sshd:session): session opened for user root by (uid=0)
Notice how all the standard output from the sshd command is viewable.
Use systemctl to programmatically check to see if a service is enabled or10)disabled:
# systemctl is-enabled sshdenabled# echo $?0# systemctl is-enabled iscsiddisabled# echo $?1
[S12] This step should only be performed on SLES12.11)Install tftp, and view the files contained within the package:
# zypper install -y tftp. . . output omitted . . .# rpm -ql tftp
Notice how the package contains both an Xinetd service file as well as systemdunit files. The daemon should only be enabled via one of the methods.
[R7] This step should only be performed on RHEL7.12)Install the tftp client and server, and view the files contained within the serverpackage:
# yum install -y tftp tftp-server
EVALUATION COPY
Unauthorized Reproduction or Distribution Prohibited
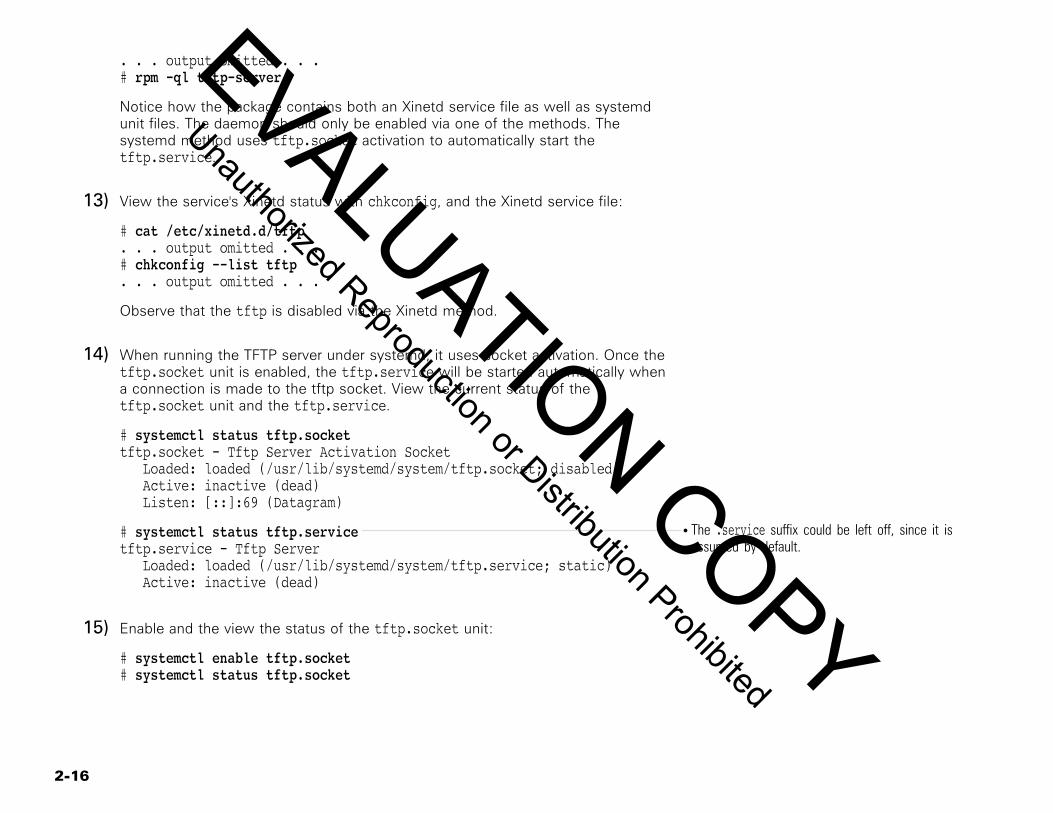
2-16
. . . output omitted . . .# rpm -ql tftp-server
Notice how the package contains both an Xinetd service file as well as systemdunit files. The daemon should only be enabled via one of the methods. Thesystemd method uses tftp.socket activation to automatically start thetftp.service.
View the service's Xinetd status with chkconfig, and the Xinetd service file:13)
# cat /etc/xinetd.d/tftp. . . output omitted . . .# chkconfig --list tftp. . . output omitted . . .
Observe that the tftp is disabled via the Xinetd method.
When running the TFTP server under systemd, it uses socket activation. Once the14)tftp.socket unit is enabled, the tftp.service will be started automatically whena connection is made to the tftp socket. View the current status of thetftp.socket unit and the tftp.service.
# systemctl status tftp.sockettftp.socket - Tftp Server Activation Socket Loaded: loaded (/usr/lib/systemd/system/tftp.socket; disabled) Active: inactive (dead) Listen: [::]:69 (Datagram)
The .service suffix could be left off, since it isassumed by default.
# systemctl status tftp.servicetftp.service - Tftp Server Loaded: loaded (/usr/lib/systemd/system/tftp.service; static) Active: inactive (dead)
Enable and the view the status of the tftp.socket unit:15)
# systemctl enable tftp.socket# systemctl status tftp.socket
EVALUATION COPY
Unauthorized Reproduction or Distribution Prohibited

2-17
See if anything is listening UDP port 69, then start the tftp.socket and check the16)port again:
# lsof -i :69# systemctl start tftp.socket# lsof -i :69COMMAND PID USER FD TYPE DEVICE SIZE/OFF NODE NAMEsystemd 1 root 22u IPv6 32053 0t0 UDP *:tftp
Confirm that the TFTP server is not yet running:17)
# systemctl is-active tftpinactive# systemctl status tftp. . . output omitted . . .
Run the tftp client utility and connect to the server and attempt to download a18)file called foo (which doesn't exist). Observe that the tftp.socket automaticallystarts the service.
# tftp localhost -c get fooError code 1: File not found# systemctl is-active tftpactive# systemctl status tftptftp.service - Tftp Server Loaded: loaded (/usr/lib/systemd/system/tftp.service; static) Active: active (running) since Thu 2014-12-04 15:09:16 MST; 4min 59s ago Main PID: 3743 (in.tftpd). . . snip . . .
Manually stop the tftp.service, pay attention to the warning:19)
# systemctl stop tftpWarning: Stopping tftp.service, but it can still be activated by: tftp.socket
EVALUATION COPY
Unauthorized Reproduction or Distribution Prohibited

2-18
20)
CleanupStop and disable the tftp.socket:
# systemctl disable --now tftp.socket
EVALUATION COPY
Unauthorized Reproduction or Distribution Prohibited
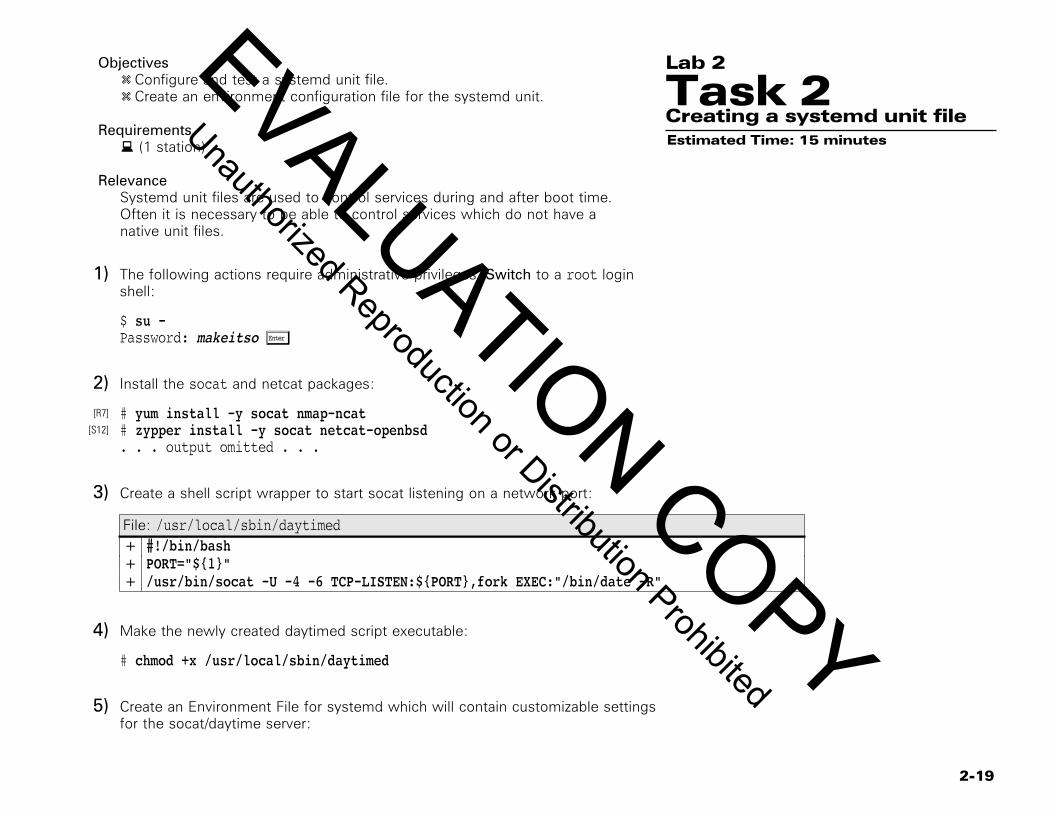
2-19
Objectivesy Configure and test a systemd unit file.y Create an environment configuration file for the systemd unit.
Requirementsb (1 station)
RelevanceSystemd unit files are used to control services during and after boot time.Often it is necessary to be able to control services which do not have anative unit files.
Lab 2
Task 2Creating a systemd unit fileEstimated Time: 15 minutes
The following actions require administrative privileges. Switch to a root login1)shell:
$ su -Password: makeitso Õ
Install the socat and netcat packages:2)
# yum install -y socat nmap-ncat[R7]
# zypper install -y socat netcat-openbsd[S12]
. . . output omitted . . .
Create a shell script wrapper to start socat listening on a network port:3)
File: /usr/local/sbin/daytimed+ #!/bin/bash+ PORT="${1}"+ /usr/bin/socat -U -4 -6 TCP-LISTEN:${PORT},fork EXEC:"/bin/date -R"
Make the newly created daytimed script executable:4)
# chmod +x /usr/local/sbin/daytimed
Create an Environment File for systemd which will contain customizable settings5)for the socat/daytime server:
EVALUATION COPY
Unauthorized Reproduction or Distribution Prohibited
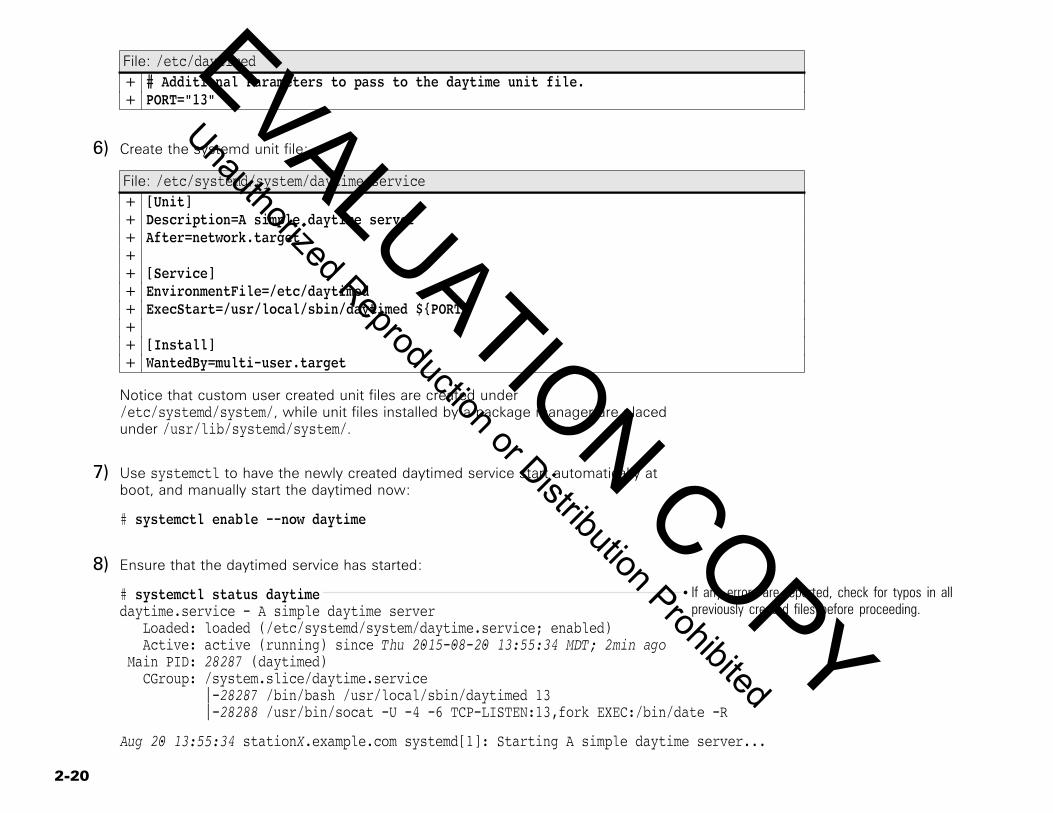
2-20
File: /etc/daytimed+ # Additional Parameters to pass to the daytime unit file.+ PORT="13"
Create the systemd unit file:6)
File: /etc/systemd/system/daytime.service+ [Unit]+ Description=A simple daytime server+ After=network.target++ [Service]+ EnvironmentFile=/etc/daytimed+ ExecStart=/usr/local/sbin/daytimed ${PORT}++ [Install]+ WantedBy=multi-user.target
Notice that custom user created unit files are created under/etc/systemd/system/, while unit files installed by a package manager are placedunder /usr/lib/systemd/system/.
Use systemctl to have the newly created daytimed service start automatically at7)boot, and manually start the daytimed now:
# systemctl enable --now daytime
Ensure that the daytimed service has started:8)If any errors are reported, check for typos in allpreviously created files before proceeding.
# systemctl status daytimedaytime.service - A simple daytime server Loaded: loaded (/etc/systemd/system/daytime.service; enabled) Active: active (running) since Thu 2015-08-20 13:55:34 MDT; 2min ago Main PID: 28287 (daytimed) CGroup: /system.slice/daytime.service |-28287 /bin/bash /usr/local/sbin/daytimed 13 |-28288 /usr/bin/socat -U -4 -6 TCP-LISTEN:13,fork EXEC:/bin/date -R
Aug 20 13:55:34 stationX.example.com systemd[1]: Starting A simple daytime server...
EVALUATION COPY
Unauthorized Reproduction or Distribution Prohibited
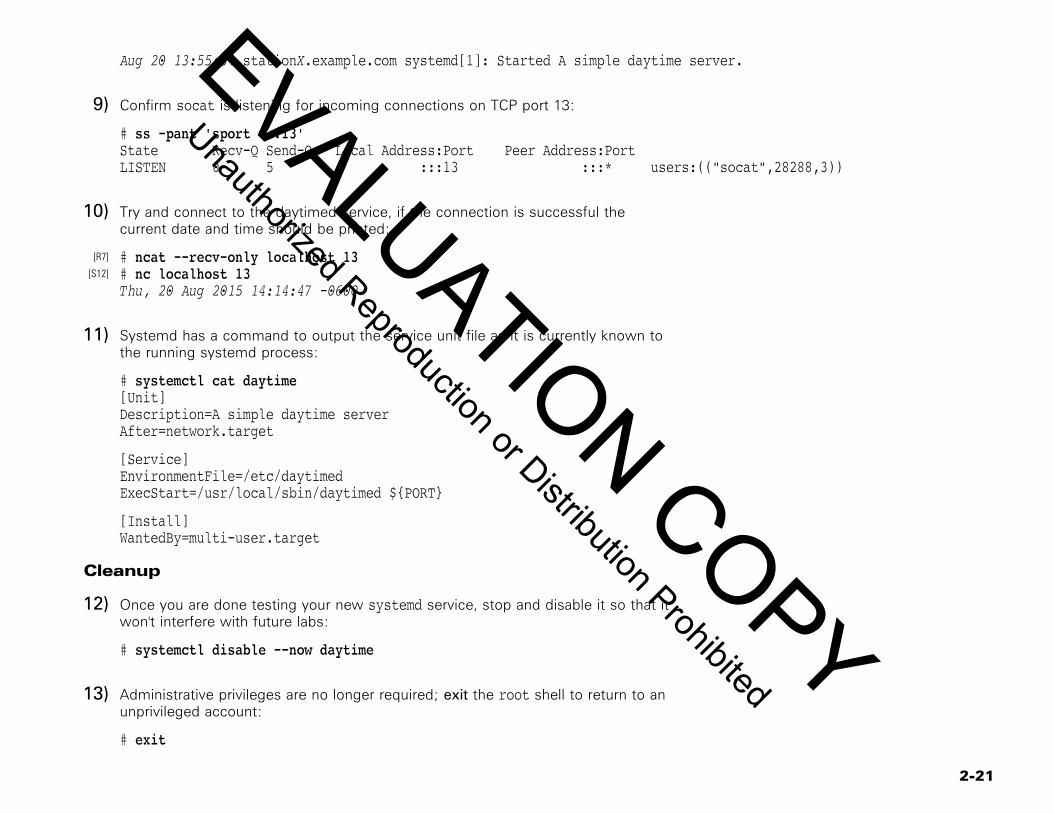
2-21
Aug 20 13:55:34 stationX.example.com systemd[1]: Started A simple daytime server.
Confirm socat is listening for incoming connections on TCP port 13:9)
# ss -pant 'sport = :13'State Recv-Q Send-Q Local Address:Port Peer Address:PortLISTEN 0 5 :::13 :::* users:(("socat",28288,3))
Try and connect to the daytimed service, if the connection is successful the10)current date and time should be printed:
# ncat --recv-only localhost 13[R7]
# nc localhost 13[S12]
Thu, 20 Aug 2015 14:14:47 -0600
Systemd has a command to output the service unit file as it is currently known to11)the running systemd process:
# systemctl cat daytime[Unit]Description=A simple daytime serverAfter=network.target
[Service]EnvironmentFile=/etc/daytimedExecStart=/usr/local/sbin/daytimed ${PORT}
[Install]WantedBy=multi-user.target
Cleanup
Once you are done testing your new systemd service, stop and disable it so that it12)won't interfere with future labs:
# systemctl disable --now daytime
Administrative privileges are no longer required; exit the root shell to return to an13)unprivileged account:
# exit
EVALUATION COPY
Unauthorized Reproduction or Distribution Prohibited

7400 East Orchard Rd., Suite 1450N Greenwood Village, Colorado 80121
Ph: 303-302-5280 www.itcourseware.com
9-37-00033-000-03-13-19
EVALUATION COPY
Unauthorized Reproduction or Distribution Prohibited