Getting started with ANTLR4 - ttu.eeati.ttu.ee/~hkinks/antlr/tutorial.pdf · · 2015-11-19Getting...
22
Getting started with ANTLR4 Set up the environment 1. Open up terminal and copy the following commands wget http://ati.ttu.ee/~hkinks/antlr/antlr.sh sh antlr.sh It will download and execute a script which downloads ANTLR4 library, plugin for Intellij IDEA and sets up necessary aliases. The library and the plugin can be found in ‘workspace’ directory after running the script. 2. Next open Intellij IDEA where the development will take place cad idea & 3. Press OK in the following dialog window
Transcript of Getting started with ANTLR4 - ttu.eeati.ttu.ee/~hkinks/antlr/tutorial.pdf · · 2015-11-19Getting...

Getting started with ANTLR4 Set up the environment
1. Open up terminal and copy the following commands wget http://ati.ttu.ee/~hkinks/antlr/antlr.sh sh antlr.sh
It will download and execute a script which downloads ANTLR4 library, plugin for Intellij IDEA and sets
up necessary aliases.
The library and the plugin can be found in ‘workspace’ directory after running the script.
2. Next open Intellij IDEA where the development will take place cad idea &
3. Press OK in the following dialog window
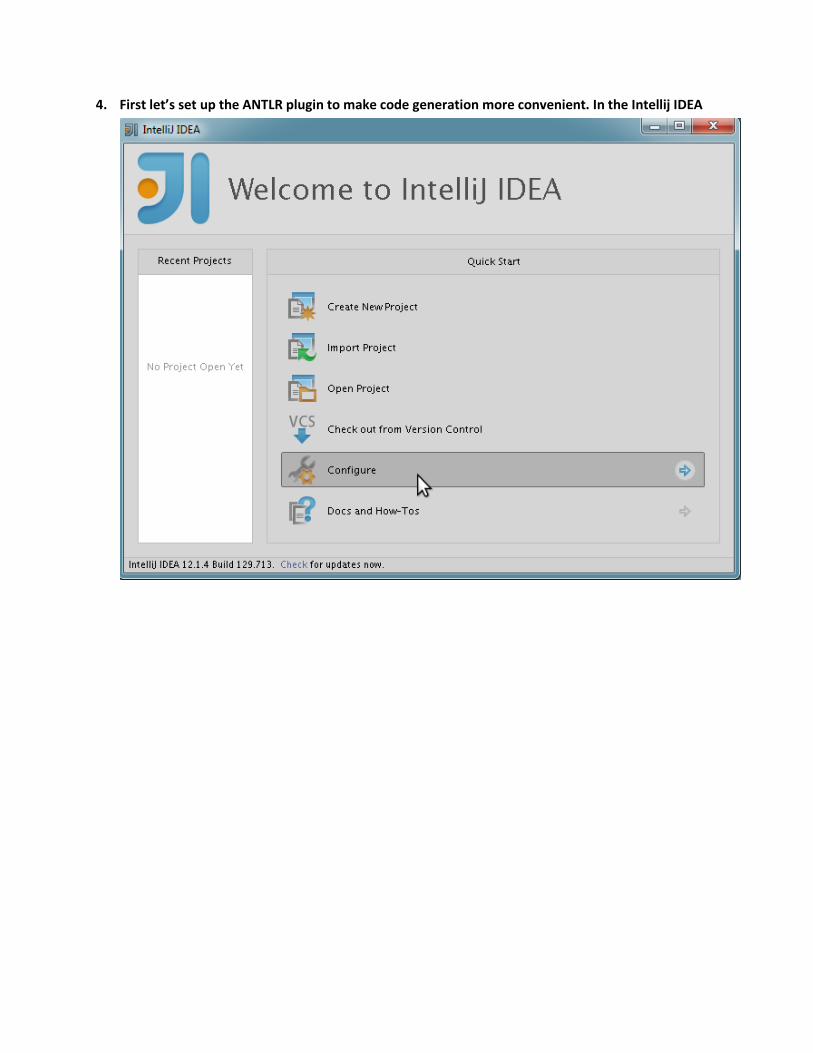
4. First let’s set up the ANTLR plugin to make code generation more convenient. In the Intellij IDEA
quick start menu choose Configure.
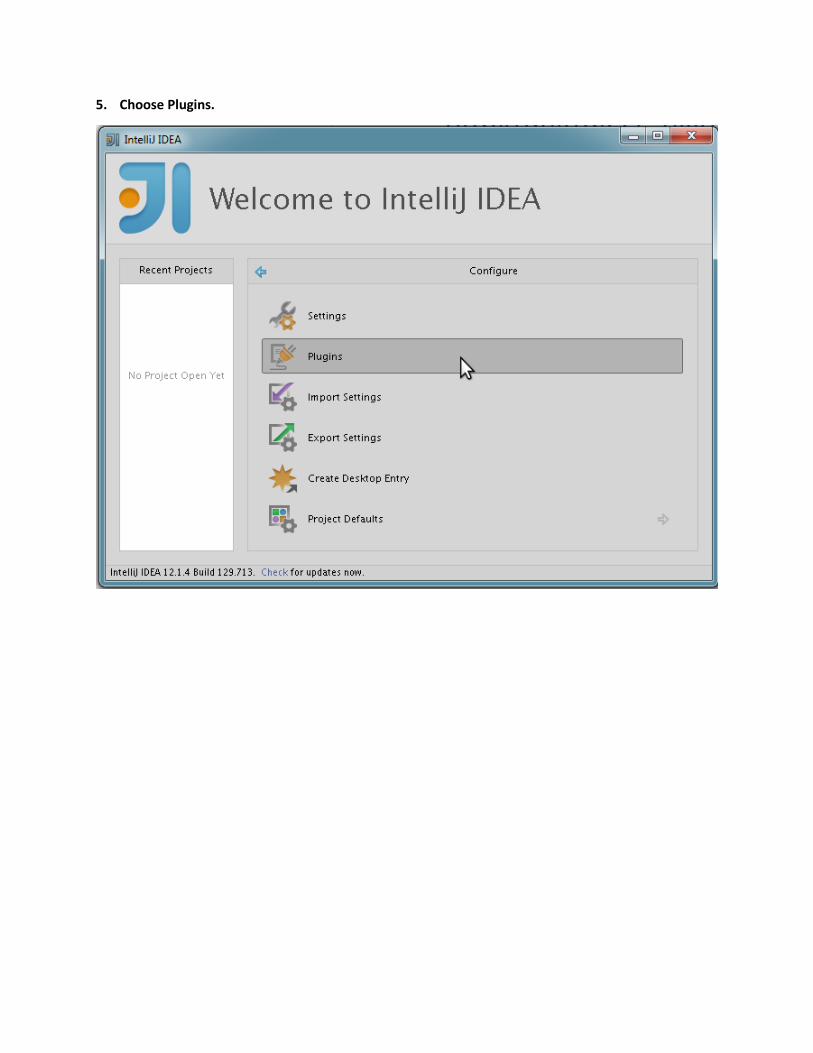
5. Choose Plugins.
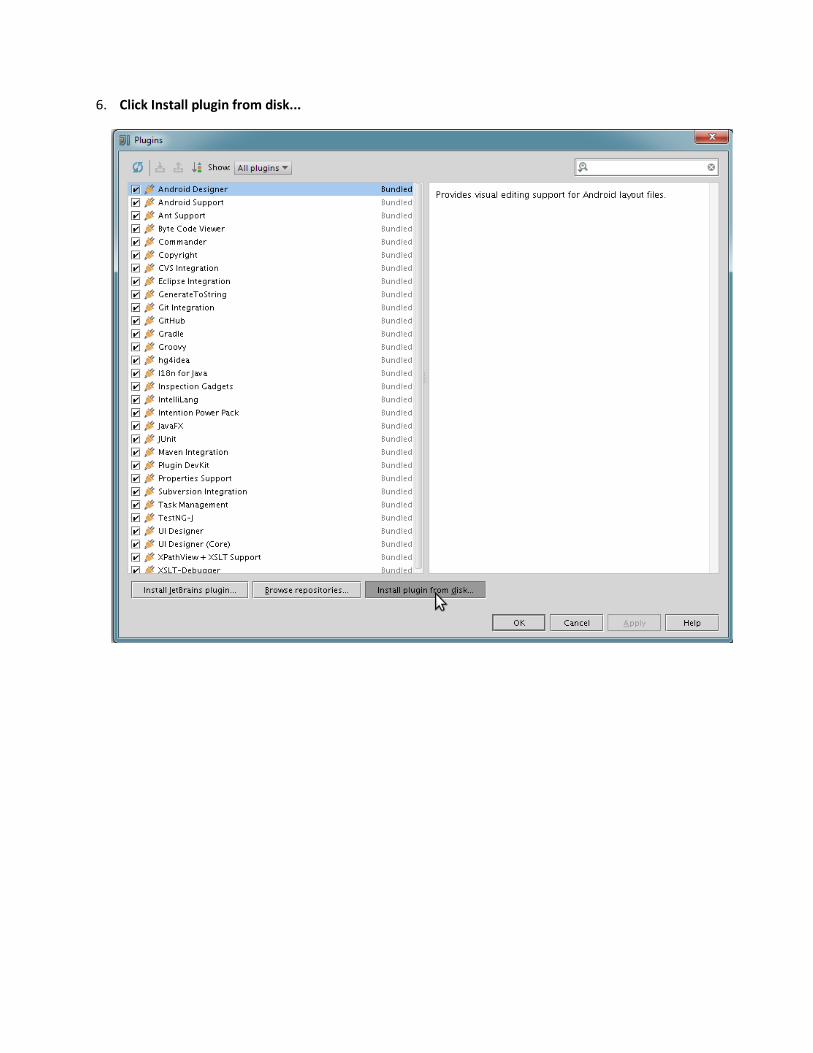
6. Click Install plugin from disk...
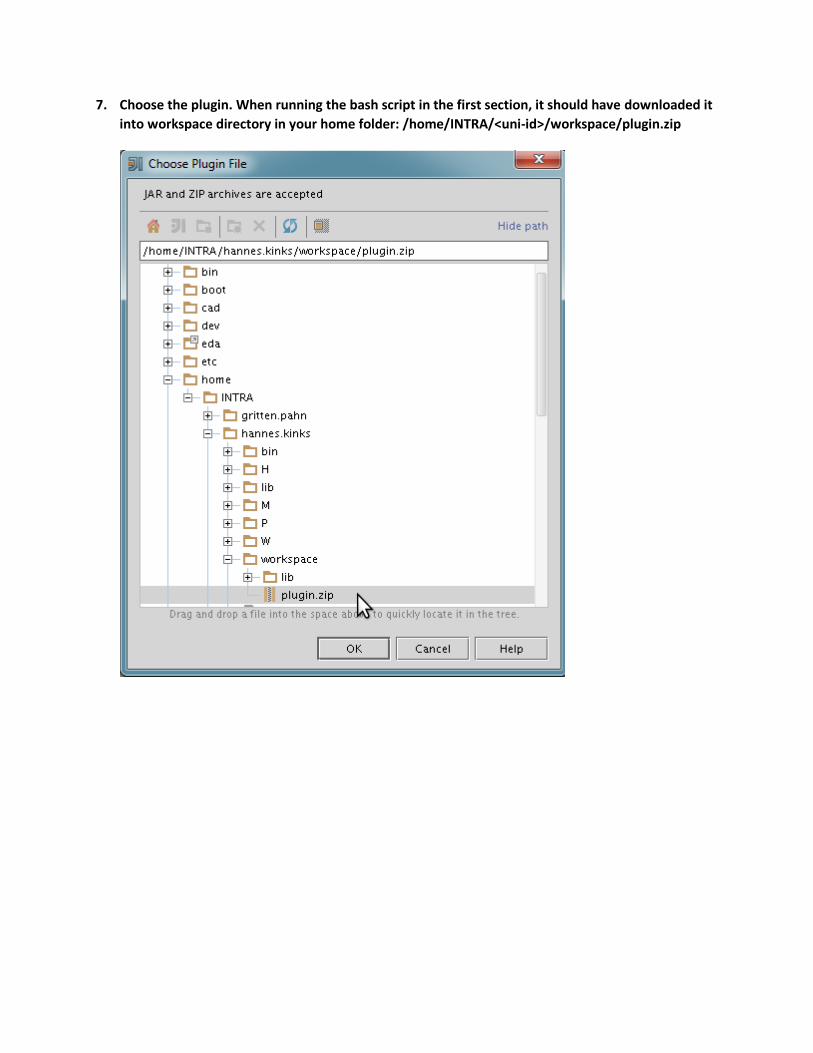
7. Choose the plugin. When running the bash script in the first section, it should have downloaded it
into workspace directory in your home folder: /home/INTRA/<uni-id>/workspace/plugin.zip

8. Click OK and the plugin should appear in the plugins list.
9. Restart when it requires it.

10. Start off with a new project.
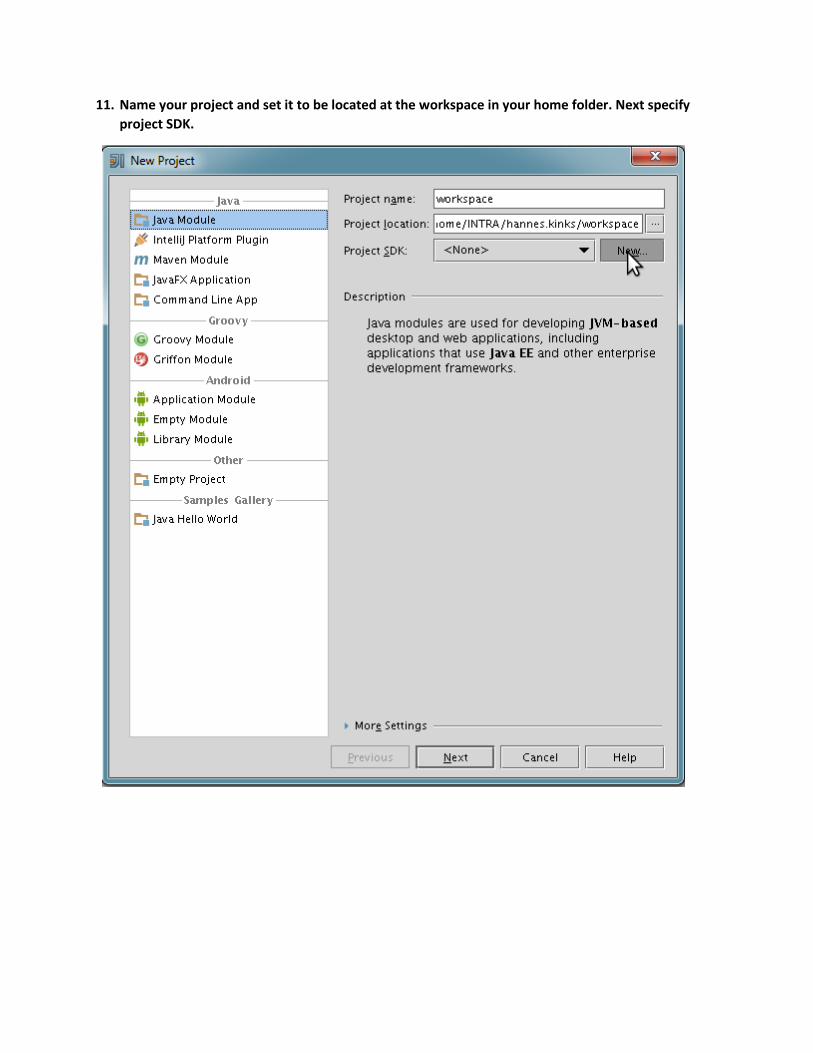
11. Name your project and set it to be located at the workspace in your home folder. Next specify
project SDK.

12. Locate to /opt/JDK17 and select it.

13. When everything is set, press Next
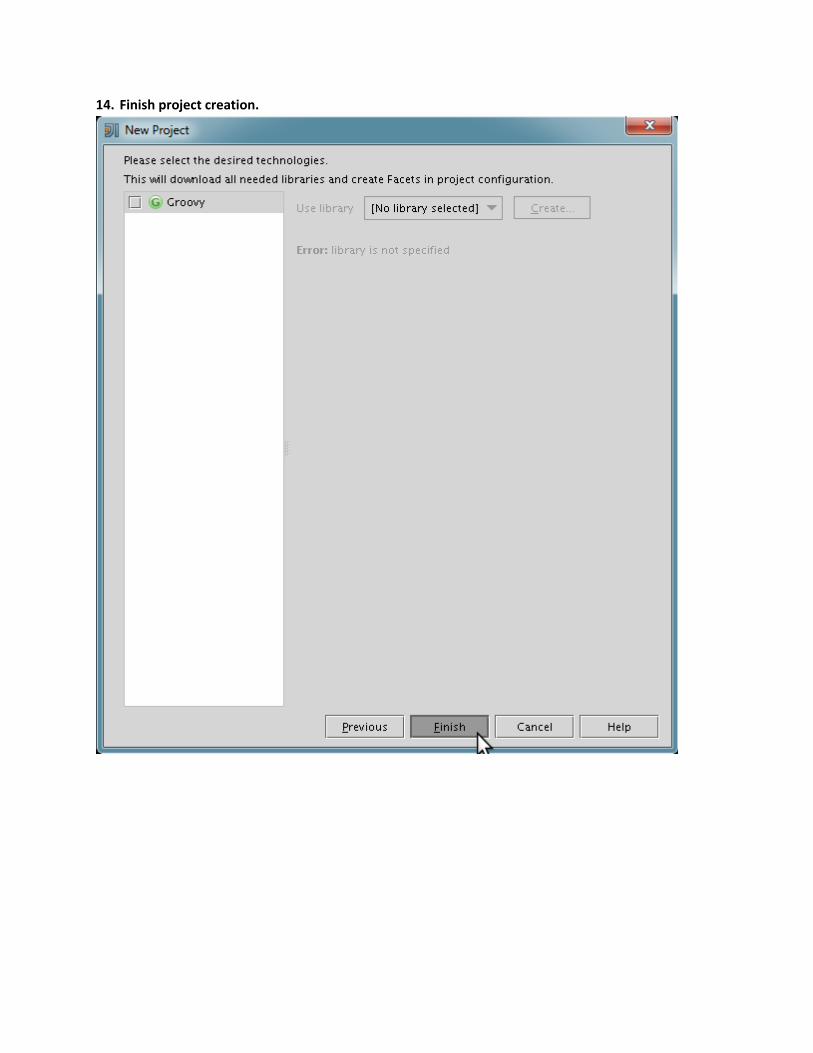
14. Finish project creation.

CSV parser tutorial Now that the environment is set up, we can continue with making a simple CSV parser as a first sample
project. The goal would be to have our program accept valid CSV file and parse its contents. What
should the program do with the parsed data is up to the application. For an example it could be
converted to JSON format and outputted to a file.
Finished project is available in GIT repository http://git.hkinks.com/hkinks/csv-tutorial
Input The input should be a regular comma (“,”) separated file. Contents can be made up or a book list
example can be downloaded from http://ati.ttu.ee/~hkinks/antlr/input.csv .
Grammar To get started we should describe the grammar.
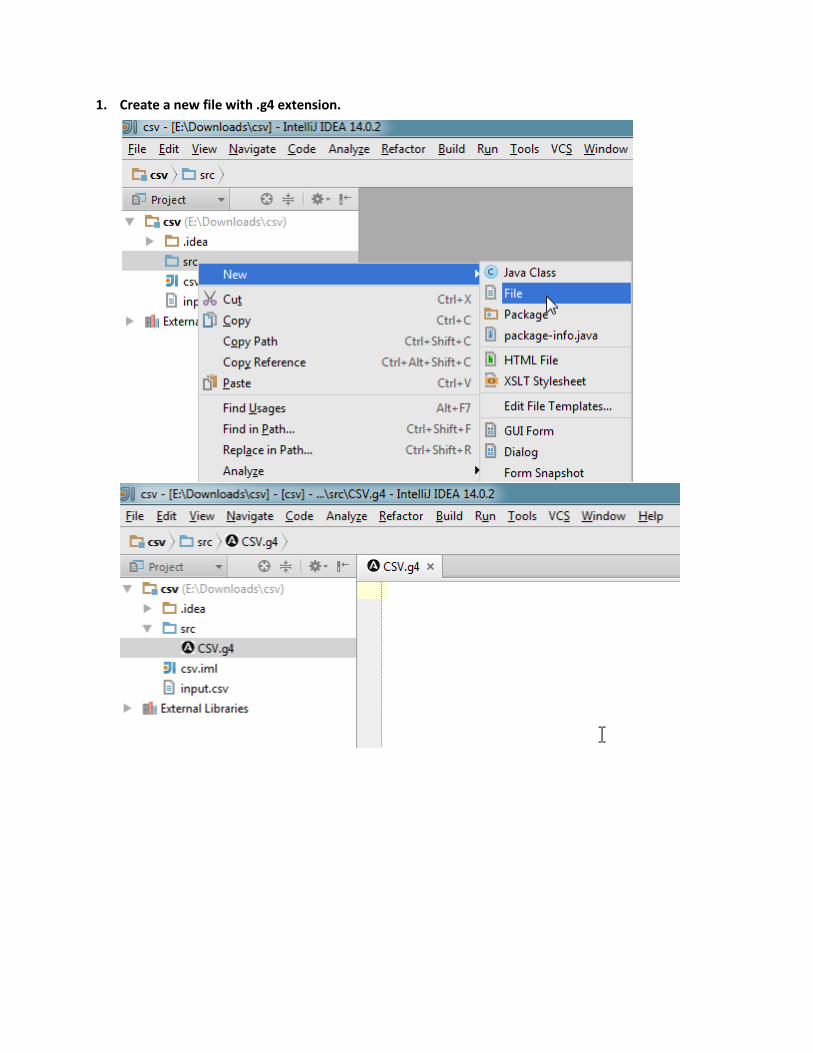
1. Create a new file with .g4 extension.

2. Write grammar. Note that the grammar file name must match with the name specified in the first
line. For example: ‘CSV.g4’ and ‘grammar CSV;’ grammar CSV; file: header line+; header: line; line: entry (',' entry)* '\r'? '\n' ; entry : TEXT #text | #empty ; TEXT: ~[,\n\r"]+ ;
3. Next step is to let ANTLR generate code. Based on the grammar it will create tokens and
parser/lexer classes. Right click on the grammar file and choose Generate ANTLR recognizer...

Side note: By default ANTLR generates code for Listener design pattern. However if you wish to
use Visitor pattern instead, you can configure ANTLR to do so by choosing Configure ANTLR... and
choosing generate parse tree visitor.
4. As a result we should get a new folder with the name gen which contains the ANTLR generated
files. Intellij IDEA newer versions should recognize the folder by itself that it contains source files.
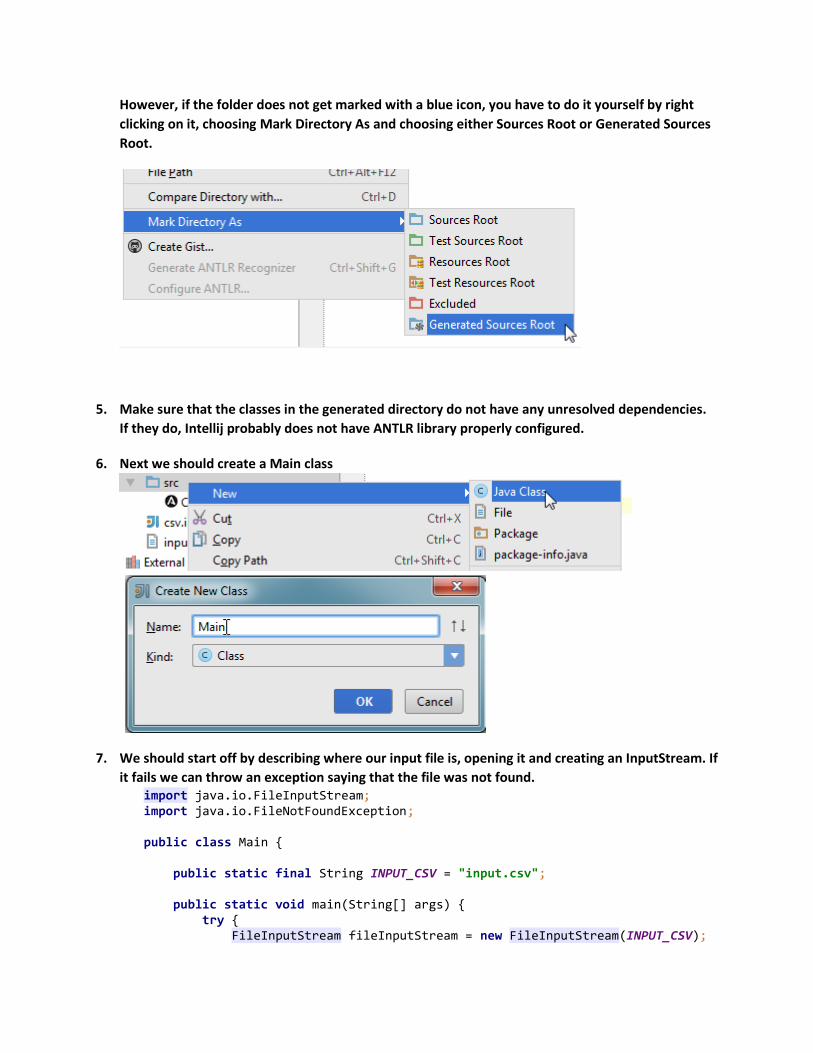
However, if the folder does not get marked with a blue icon, you have to do it yourself by right
clicking on it, choosing Mark Directory As and choosing either Sources Root or Generated Sources
Root.
5. Make sure that the classes in the generated directory do not have any unresolved dependencies.
If they do, Intellij probably does not have ANTLR library properly configured.
6. Next we should create a Main class
7. We should start off by describing where our input file is, opening it and creating an InputStream. If
it fails we can throw an exception saying that the file was not found. import java.io.FileInputStream; import java.io.FileNotFoundException; public class Main { public static final String INPUT_CSV = "input.csv"; public static void main(String[] args) { try { FileInputStream fileInputStream = new FileInputStream(INPUT_CSV);

} catch (FileNotFoundException e) { System.err.println("Input file not found."); return; } } }
8. The input can now be given to ANTLR lexer, CSVLexer that was generated during the 3rd step
where we let ANTLR generate code for us. CSVLexer lexer; try { lexer = new CSVLexer(new ANTLRInputStream(fileInputStream)); } catch (IOException e) { e.printStackTrace(); return; }
9. Lexer’s result will be a stream of tokens which can be passed to parser. CommonTokenStream tokens = new CommonTokenStream(lexer); CSVParser parser = new CSVParser(tokens);
10. As an intermediate step we can let ANTLR draw us a Parse Tree Diagram, which is good for
debugging and making sure the grammar was properly parsed. ParserRuleContext ruleContext = parser.file(); Trees.inspect(ruleContext, parser);

11. Run the code to see the parse tree.
12. You should see something like this:
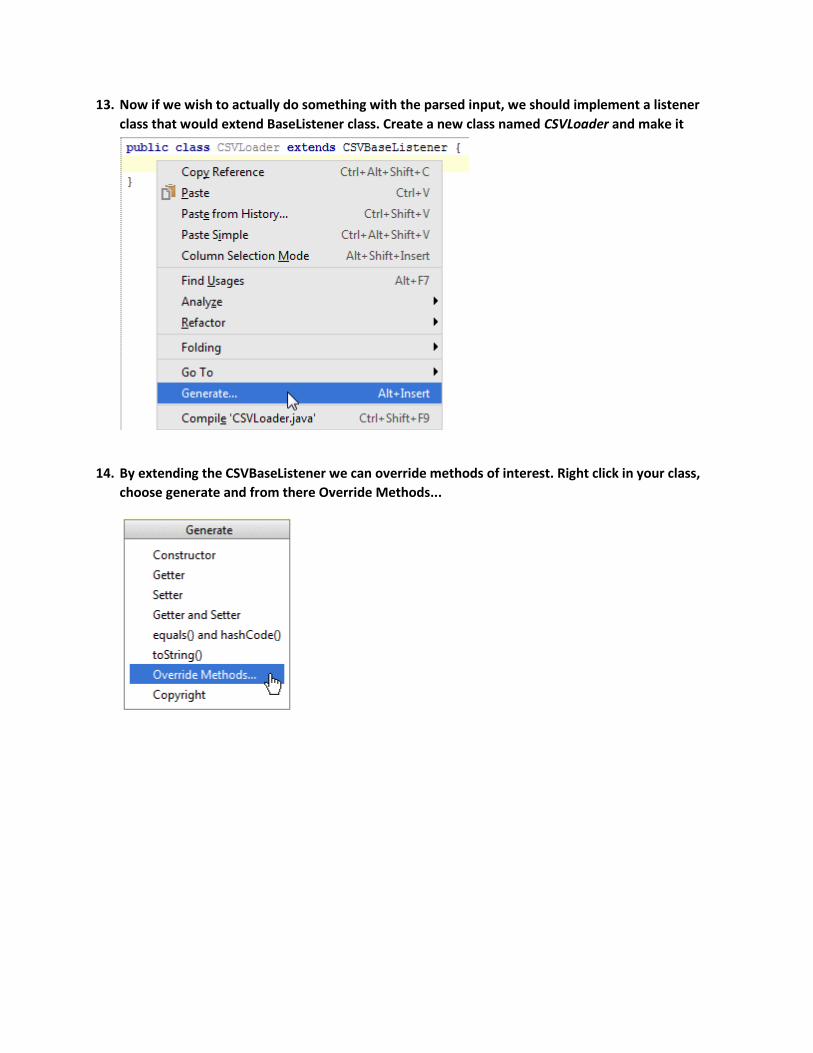
13. Now if we wish to actually do something with the parsed input, we should implement a listener
class that would extend BaseListener class. Create a new class named CSVLoader and make it
extend CSVBaseListener.
14. By extending the CSVBaseListener we can override methods of interest. Right click in your class,
choose generate and from there Override Methods...

15. The methods what would interest are for example where the parser enters and exits different
contexts specified in the grammar.
16. For memorizing the data we can create some Lists that would contain the rows of the csv file. As
in the example file we also have a header row, we can add it to a different list and finally associate
each entry with its header (we are using map for this). List<Map<String, String>> rows = new ArrayList<Map<String, String>>(); List<String> header; List<String> currentRow;
17. Every time we enter a line we create a new row object and when we exit the line, we can add the
elements met along the way into it and finally add the row into the list of rows.
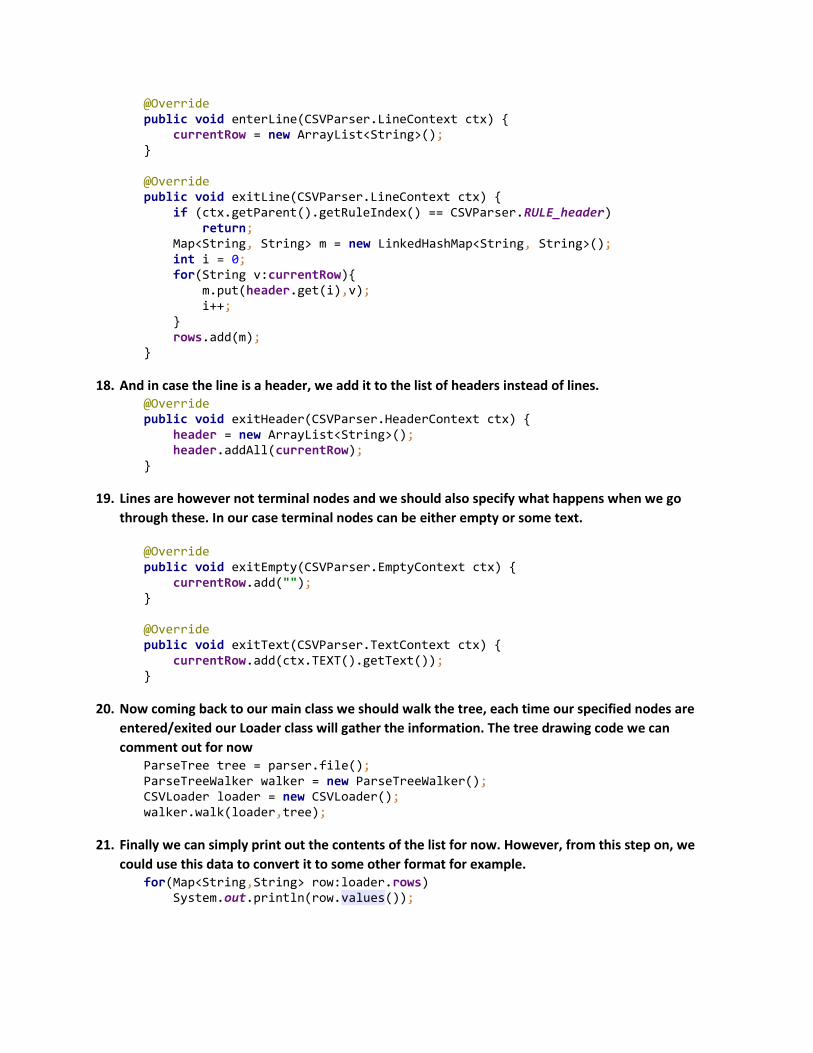
@Override public void enterLine(CSVParser.LineContext ctx) { currentRow = new ArrayList<String>(); } @Override public void exitLine(CSVParser.LineContext ctx) { if (ctx.getParent().getRuleIndex() == CSVParser.RULE_header) return; Map<String, String> m = new LinkedHashMap<String, String>(); int i = 0; for(String v:currentRow){ m.put(header.get(i),v); i++; } rows.add(m); }
18. And in case the line is a header, we add it to the list of headers instead of lines. @Override public void exitHeader(CSVParser.HeaderContext ctx) { header = new ArrayList<String>(); header.addAll(currentRow); }
19. Lines are however not terminal nodes and we should also specify what happens when we go
through these. In our case terminal nodes can be either empty or some text. @Override public void exitEmpty(CSVParser.EmptyContext ctx) { currentRow.add(""); } @Override public void exitText(CSVParser.TextContext ctx) { currentRow.add(ctx.TEXT().getText()); }
20. Now coming back to our main class we should walk the tree, each time our specified nodes are
entered/exited our Loader class will gather the information. The tree drawing code we can
comment out for now ParseTree tree = parser.file(); ParseTreeWalker walker = new ParseTreeWalker(); CSVLoader loader = new CSVLoader(); walker.walk(loader,tree);
21. Finally we can simply print out the contents of the list for now. However, from this step on, we
could use this data to convert it to some other format for example. for(Map<String,String> row:loader.rows) System.out.println(row.values());

22. The output should look something like this in our case:


![SQL Tool Kit - Computer Science€¦ · SQL Tool Kit Submitted by: ... ANTLR4[2] is a powerful parser tool that can build and walk parse trees. ANTLR4 library[2] is used as the existing](https://static.fdocuments.in/doc/165x107/5edad3e709ac2c67fa685ec2/sql-tool-kit-computer-science-sql-tool-kit-submitted-by-antlr42-is-a-powerful.jpg)


![The cim22Grammar v0.2 Package - ANTLR Parser Generator · ANTLR fundamentals. ... 2.1 CIM Specification CIM Specification [4, 5] ... and the CIM naming mechanism (enterprise-wide](https://static.fdocuments.in/doc/165x107/5b2ed0f07f8b9adc6e8cafdd/the-cim22grammar-v02-package-antlr-parser-antlr-fundamentals-21-cim.jpg)