Getting Started Tutorial - E-dokumen | e-dokumen...
46
1 Getting Started Tutorial Welcome This tutorial will introduce you to the main functions of your MYOB accounting software. You can use this tutorial with the current versions of MYOB Accounting, MYOB Accounting Plus, MYOB Premier and MYOB Premier Enterprise; these products will be referred to as ‘MYOB accounting software’ throughout this tutorial. Viewing this tutorial You can view this tutorial on screen or you can print it. If you are viewing it on screen and the screenshots are too small for you to see the details, you can zoom in using the zoom function ( ) on the Acrobat toolbar. Working through this tutorial The first part of this tutorial provides an overview of how to set up your MYOB software and how to navigate through it. The rest of the tutorial is made up of modules that teach you how to do specific tasks. You can do the modules in order or you can skip to the module you want. However, complete the exercises within each module in the order in which they are presented, as they may build on previous exercises. You can stop the tutorial at any time and return to it later. This tutorial has the following modules: ’Banking’ on page 8 ’Purchases’ on page 15 ’Sales’ on page 20 ’Jobs’ on page 29 ’Forms’ on page 33 ’Reports’ on page 39 ’Payroll’ on page 42
Transcript of Getting Started Tutorial - E-dokumen | e-dokumen...

Getting Started Tutorial
Welcome
This tutorial will introduce you to the main functions of your MYOB accounting software.
You can use this tutorial with the current versions of MYOB Accounting, MYOB Accounting Plus, MYOB Premier and MYOB Premier Enterprise; these products will be referred to as ‘MYOB accounting software’ throughout this tutorial.
Viewing this tutorial You can view this tutorial on screen or you can print it. If you are viewing it on screen and the screenshots are too small for you to see the details, you can zoom in using the zoom function ( ) on the Acrobat toolbar.
Working through this tutorial The first part of this tutorial provides an overview of how to set up your MYOB software and how to navigate through it. The rest of the tutorial is made up of modules that teach you how to do specific tasks.
You can do the modules in order or you can skip to the module you want. However, complete the exercises within each module in the order in which they are presented, as they may build on previous exercises.
You can stop the tutorial at any time and return to it later.
This tutorial has the following modules:
’Banking’ on page 8
’Purchases’ on page 15
’Sales’ on page 20
’Jobs’ on page 29
’Forms’ on page 33
’Reports’ on page 39
’Payroll’ on page 42
1
2
Your MYOB company file
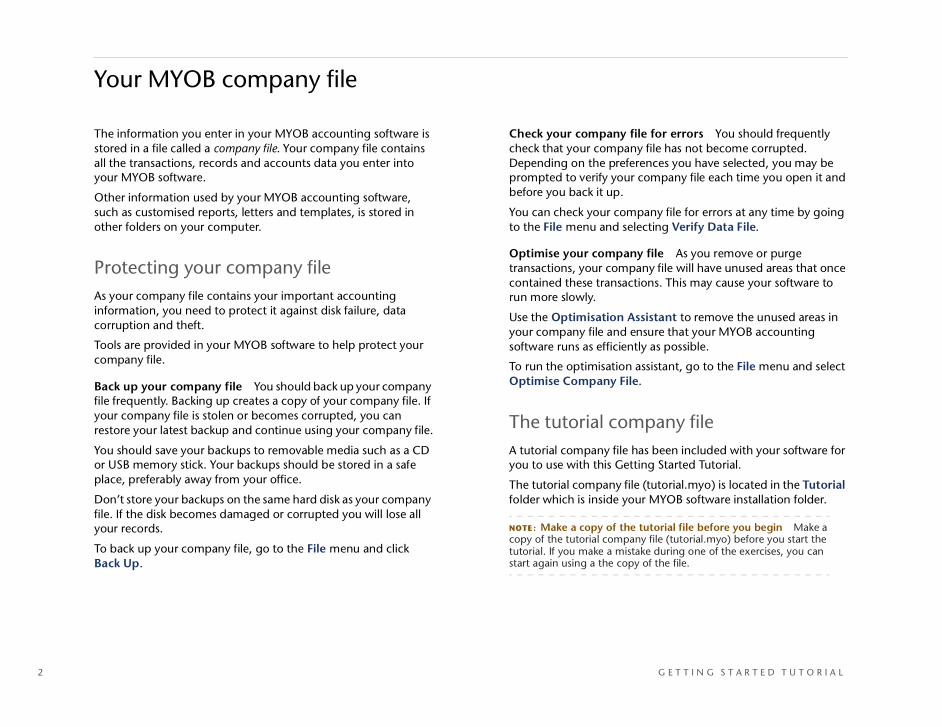
The information you enter in your MYOB accounting software is stored in a file called a company file. Your company file contains all the transactions, records and accounts data you enter into your MYOB software.
Other information used by your MYOB accounting software, such as customised reports, letters and templates, is stored in other folders on your computer.
Protecting your company fileAs your company file contains your important accounting information, you need to protect it against disk failure, data corruption and theft.
Tools are provided in your MYOB software to help protect your company file.
Back up your company file You should back up your company file frequently. Backing up creates a copy of your company file. If your company file is stolen or becomes corrupted, you can restore your latest backup and continue using your company file.
You should save your backups to removable media such as a CD or USB memory stick. Your backups should be stored in a safe place, preferably away from your office.
Don’t store your backups on the same hard disk as your company file. If the disk becomes damaged or corrupted you will lose all your records.
To back up your company file, go to the File menu and click Back Up.
Check your company file for errors You should frequently check that your company file has not become corrupted. Depending on the preferences you have selected, you may be prompted to verify your company file each time you open it and before you back it up.
You can check your company file for errors at any time by going to the File menu and selecting Verify Data File.
Optimise your company file As you remove or purge transactions, your company file will have unused areas that once contained these transactions. This may cause your software to run more slowly.
Use the Optimisation Assistant to remove the unused areas in your company file and ensure that your MYOB accounting software runs as efficiently as possible.
To run the optimisation assistant, go to the File menu and select Optimise Company File.
The tutorial company fileA tutorial company file has been included with your software for you to use with this Getting Started Tutorial.
The tutorial company file (tutorial.myo) is located in the Tutorial folder which is inside your MYOB software installation folder.
NOTE : Make a copy of the tutorial file before you begin Make a copy of the tutorial company file (tutorial.myo) before you start the tutorial. If you make a mistake during one of the exercises, you can start again using a the copy of the file.
G E T T I N G S T A R T E D T U T O R I A L

To start using the tutorial company file
1 Start your MYOB accounting software. The Welcome window appears.
2 Click Open your company file. The Open window appears.
3 Open the tutorial company file:a Locate and open your MYOB software installation folder. If
you selected the default options during installation, this will be C:\myob16 or C:\Premier11.
b Open the Tutorial folder.c Select tutorial.myo and click Open. The Sign-on window
appears.
4 In the User ID field, type Administrator. Leave the Password field blank.
5 Select the Single-user access option and click OK. A data verification message appears. To verify the company file data:a Click Yes. A warning message appears.b Click OK. A message appears asking you if you want to
display errors.c Click Display Errors. The data verification process starts.
When this process is complete, a confirmation message appears.
6 Click OK. The Command Centre window appears.
You can now begin using the tutorial company file.
Y O U R M Y O B C O M P A N Y F I L E 3

4
Getting to know your MYOB software
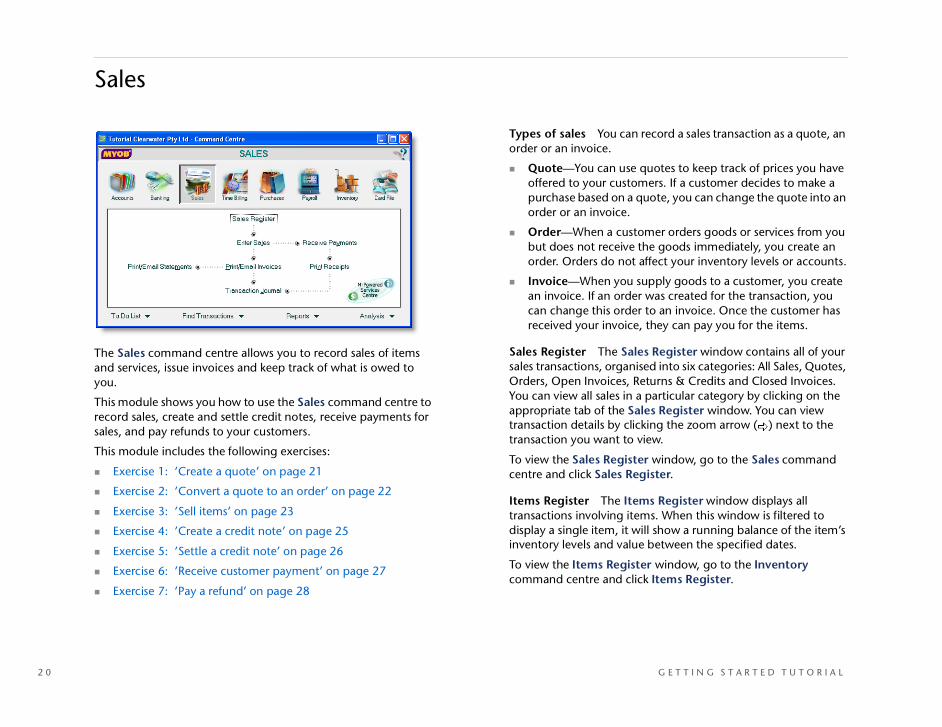
Command centresThere are eight command centres in your MYOB accounting software. They cover functions related to Accounts, Banking, Sales, Time Billing (MYOB Accounting Plus and Premier only), Purchases, Payroll, Inventory and Card File. The Sales command centre is shown below.
You can move between command centres by clicking the icons in the top section of the window.
The following functions are available from all command centres:
To Do List—Record and manage tasks that need your attention, such as paying invoices or restocking items when inventory is low.
Find Transactions—View summary information about your accounts, sales, purchases, items, payroll and jobs.
Reports—View a list of the available reports.
Analysis—Analyse key aspects of your business
MenusLists menu The records you enter into your company file, such as customers or accounts, are grouped into lists of similar records. For example, all your customer and supplier records are grouped in the Cards List, and item records are grouped in the Items List. To open a list, go to the Lists menu at the top of the screen and select the list you want to open.
Recap transactions Before you record a transaction, you can use the recap transaction feature to view the journal entries that will be created when the transaction is recorded. This is useful for confirming that your accounts are set up correctly.
You can access this feature from any transaction window by selecting Recap Transaction from the Edit menu.
G E T T I N G S T A R T E D T U T O R I A L
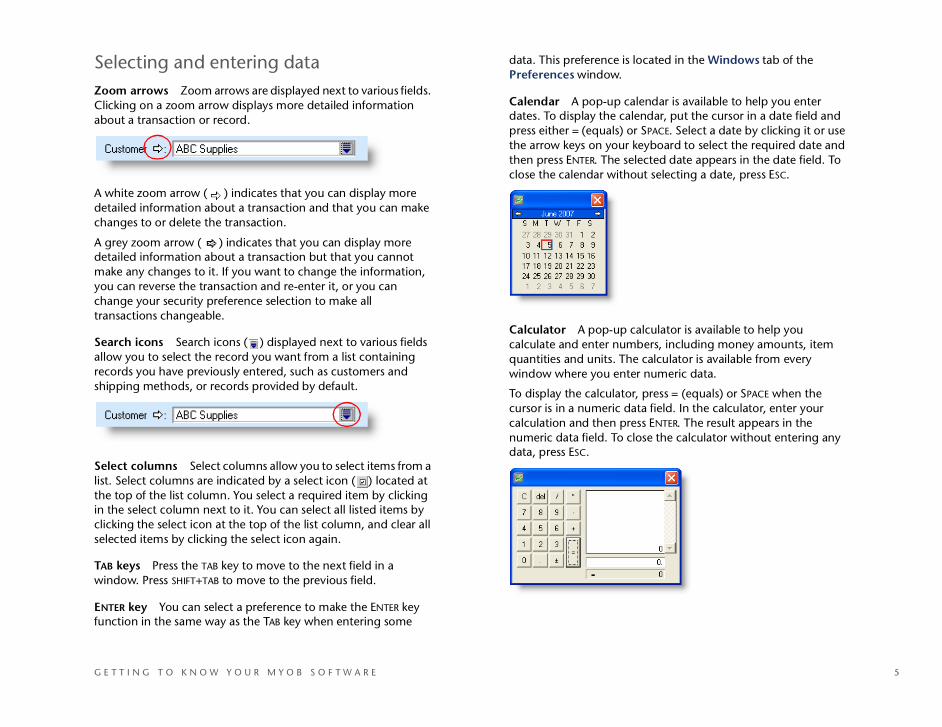
Selecting and entering dataZoom arrows Zoom arrows are displayed next to various fields. Clicking on a zoom arrow displays more detailed information about a transaction or record.
A white zoom arrow ( ) indicates that you can display more detailed information about a transaction and that you can make changes to or delete the transaction.
A grey zoom arrow ( ) indicates that you can display more detailed information about a transaction but that you cannot make any changes to it. If you want to change the information, you can reverse the transaction and re-enter it, or you can change your security preference selection to make all transactions changeable.
Search icons Search icons ( ) displayed next to various fields allow you to select the record you want from a list containing records you have previously entered, such as customers and shipping methods, or records provided by default.
Select columns Select columns allow you to select items from a list. Select columns are indicated by a select icon ( ) located at the top of the list column. You select a required item by clicking in the select column next to it. You can select all listed items by clicking the select icon at the top of the list column, and clear all selected items by clicking the select icon again.
TAB keys Press the TAB key to move to the next field in a window. Press SHIFT+TAB to move to the previous field.
ENTER key You can select a preference to make the ENTER key function in the same way as the TAB key when entering some
data. This preference is located in the Windows tab of the Preferences window.
Calendar A pop-up calendar is available to help you enter dates. To display the calendar, put the cursor in a date field and press either = (equals) or SPACE. Select a date by clicking it or use the arrow keys on your keyboard to select the required date and then press ENTER. The selected date appears in the date field. To close the calendar without selecting a date, press ESC.
Calculator A pop-up calculator is available to help you calculate and enter numbers, including money amounts, item quantities and units. The calculator is available from every window where you enter numeric data.
To display the calculator, press = (equals) or SPACE when the cursor is in a numeric data field. In the calculator, enter your calculation and then press ENTER. The result appears in the numeric data field. To close the calculator without entering any data, press ESC.
G E T T I N G T O K N O W Y O U R M Y O B S O F T W A R E 5

6
ShortcutsKeyboard shortcuts You can use keyboard shortcuts to quickly access many of the windows and functions in your MYOB software. For example, you can access the Cards List window by pressing CTRL–F.
Keyboard shortcuts are displayed next to the window or function in the menus at the top of the screen.
Mouse shortcuts You can right-click in a window to open a shortcut menu containing options that are relevant to the current window and to the location of the pointer.
Setting up accounts
Accounts provide a means for grouping similar transactions. For example, if your business pays rent, you would create a rent account and allocate all rent payments to that account.
Accounts List You can view all the accounts you use for your business in the Accounts List window. You can also create new accounts and edit existing accounts.
To display the Accounts List window, go to the Accounts command centre and click Accounts List. The Accounts List window appears.
Account numbers Each account is identified by a unique five digit number. The first digit indicates the account’s classification (for example, accounts starting with 1 are asset accounts). The remaining four digits determine its location within the classification.
Account classifications and types The accounts list groups accounts into six classifications—Assets, Liabilities, Equity, Income, Cost of Sales and Expenses. Within each account classification there is at least one account type.
G E T T I N G S T A R T E D T U T O R I A L

Account classifications and types are described in the following table:
Header accounts Your accounts list is made up of detail accounts (the accounts you allocate transactions to) and header accounts. Header accounts group related detail accounts to help organise your accounts list.
For example, you could group your telephone, electricity and gas expense accounts using a utilities header account. This makes it easier for you to locate these accounts in the accounts list and to see your combined utility expenses.
You group accounts by indenting the detail accounts located directly below a header account.
Linked accounts Linked accounts are the default accounts that your sales, purchases and inventory transactions are posted to. For example, when you link your Trade Debtors account to track your receivables (the amount of money your customers owe you), you tell your software to post the unpaid balance of each sales transaction to that account.
Classification Type Description
Asset
(1-xxxx)
Bank Money in the bank, for example, in a cheque or savings account.
Accounts Receivable
Money owed to you by your customers.
Other Current Asset
Assets that, if required, can be turned into cash within a year. These may include your term deposits.
Fixed Asset Assets which have a long life, for example, buildings, cars and computers.
Other Asset
Other assets you own, such as loans made to others and goodwill.
Liability
(2-xxxx)
Credit Card
Repayments required to service credit card debt.
Accounts Payable
Money owed by you to your suppliers.
Other Current Liability
Money owed by you that is due in less than a year, for example, tax.
Long Term Liability
Money owed by you that is due in more than one year, for example, a business loan.
Other Liability
Other money you owe.
Equity(3-xxxx)
Equity The business’s net worth, that is, its assets minus its liabilities. Common equity accounts are current year earnings, retained earnings and shareholders’ equity.
Income(4-xxxx)
Income Revenue from the sale of goods and services.
Cost of Sales(5-xxxx)
Cost of Sales
The direct cost of selling your goods and providing services, for example, purchase costs and freight charges.
Expense(6-xxxx)
Expense The day-to-day expenses of running your business, for example, utility bills, employee wages and cleaning.
Classification Type Description
Header accounts
Detail accounts
S E T T I N G U P A C C O U N T S 7

8
To view and edit your linked accounts, go to the Setup menu and select one of the following from the Linked Accounts submenu:
Accounts & Banking Accounts
Sales Accounts
Purchases Accounts
Payroll Accounts.
The Sales Linked Accounts window is shown below.
NOTE : Changing linked accounts If you change a linked account, only future transactions are affected. Transactions that have already been recorded using the previous linked account will not be affected.
Banking
This module shows you how to use the Banking command centre to spend and receive money, set up recurring transactions and reconcile your bank accounts.
This module includes the following exercises:
Exercise 1: ’Receive money’ on page 9
Exercise 2: ’Spend money’ on page 10
Exercise 3: ’Create a recurring transaction’ on page 12
Exercise 4: ’Reconcile your bank account’ on page 13.
G E T T I N G S T A R T E D T U T O R I A L

Receive Money Use the Receive Money window to record miscellaneous cash receipts or to record interest payments. Note that money received from customers for invoice payments should be recorded using the Sales command centre.
Spend Money Use the Spend Money window to record payments for expenses such as postage or rent and. Note that all payments relating to supplier purchase orders and bills should be recorded using the Purchases command centre.
Reconcile Accounts The Reconcile Accounts function checks the transactions you have entered in your company file against the transactions recorded in your bank statement. Use this function to make sure all of your transactions have been entered accurately.
Bank Register You can enter miscellaneous cash receipts and purchases in the Bank Register window. You can also use the Bank Register window to receive payments for invoices and pay supplier bills for purchases you have made.
For more information about entering transactions in the Bank Register window, see your user guide or online help.
Exercise 1: Receive moneyIn this exercise, you will record a deposit of $20,000 cash into the business bank account as start-up capital for your business.
1 Go to the Banking command centre and click Receive Money. The Receive Money window appears.
2 Select the Deposit to Account option. Your cheque account is selected automatically.
3 In the Date field, type 6/9/7 and press TAB. If you receive a date warning, click OK to ignore the message.
4 In the Amount Received field, type 20000 and press TAB.
5 Select Cheque in the Payment Method field.
6 In the Memo field, type Initial funding of the company and press TAB.
7 In the Account Name column, click the search icon ( ). The Select from List window appears.
8 Select Partner A Capital from the list of accounts and click Use Account.
As this transaction will increase your share of the business, it is appropriate to choose an equity account. The journal entry for this transaction will show that the increase in the balance of the cheque account is a result of Partner A’s capital deposit from an equity account.
B A N K I N G 9

1 0
9 Press TAB. The Amount column displays $20,000. Note that the N-T tax code is used because no tax is payable on capital investments into the business.
10 Click Record. The entry is saved and the window is cleared.
Note that the balance of the bank account you selected at the top of the window has increased by $20,000.
11 Click Cancel. The Banking command centre appears.
Review
Let’s see how this transaction has affected your accounts.
1 Go to the Banking command centre and click Transaction Journal. The Transaction Journal window appears.
2 Click the Receipts tab.
3 In the Dated From field, type 1/9/7. In the To field, type 30/9/7. Press TAB. All transactions recorded between these dates are displayed.
Note that the Cheque Account has been debited with $20,000 and the Partner A Capital account has been credited with $20,000.
In other words, your company has increased its assets by $20,000, and your contribution to the company (equity) has increased by $20,000.
4 Click Close. The Banking command centre appears.
Exercise 2: Spend money
In this exercise you will buy a desk, chair and computer for $5,500 (including GST) from Acme Business Supplies.
1 Go to the Banking command centre and click Spend Money. The Spend Money window appears.
2 In the Date field, type 8/9/7 and press TAB. If you receive a date warning, click OK to ignore the message.
3 In the Amount field, type 5500 and press TAB.
G E T T I N G S T A R T E D T U T O R I A L

4 Create a card for the supplier:a In the Card field, type Acme Business Supplies and
press TAB. The Select from List window appears.b Click New. The Card Information window appears.c Press TAB.d From the Card Type list, select Supplier.e In the Card ID field, type A485.f Complete the remaining contact details as shown below.
5 Enter the supplier’s buying details:a Click the Buying Details tab.b Enter the supplier’s A.B.N., Tax Code and Freight Tax
Code as shown below.
c Select the Use Supplier’s Tax Code option.d Click OK. The Spend Money window reappears.
6 Press TAB. The address of Acme Business Supplies appears in the Payee field.
7 Enter the purchase details for each item.
Note that you need to enter each item on a separate transaction line. Press ENTER to move to the next line.
In this column… do this…
Account Name 1 Click the search icon ( ) and select the Office Equipment at Cost asset account.
2 Click Use Account.
Amount For the:• desk, enter 1500• chair, enter 500• computer, enter 3500
Memo Enter an item description. For example, enter Desk for the desk and so on.
Tax 1 Click the search icon ( ). The Select From List window appears.
2 Select GST from the list and click Use Tax Code.
B A N K I N G 1 1
1 2
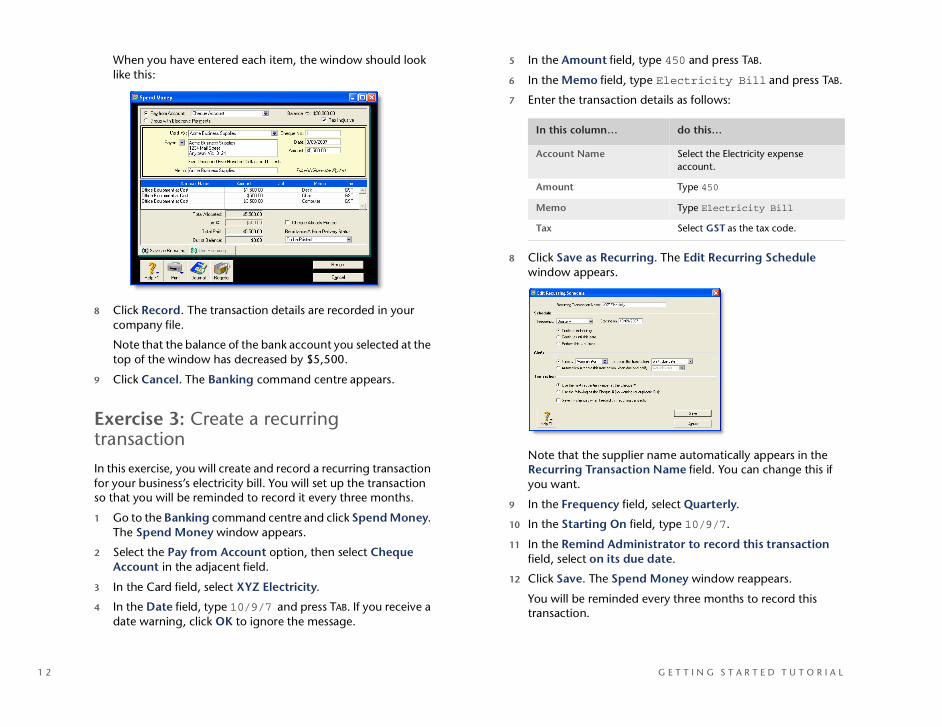
When you have entered each item, the window should look like this:
8 Click Record. The transaction details are recorded in your company file.
Note that the balance of the bank account you selected at the top of the window has decreased by $5,500.
9 Click Cancel. The Banking command centre appears.
Exercise 3: Create a recurring transactionIn this exercise, you will create and record a recurring transaction for your business’s electricity bill. You will set up the transaction so that you will be reminded to record it every three months.
1 Go to the Banking command centre and click Spend Money. The Spend Money window appears.
2 Select the Pay from Account option, then select Cheque Account in the adjacent field.
3 In the Card field, select XYZ Electricity.
4 In the Date field, type 10/9/7 and press TAB. If you receive a date warning, click OK to ignore the message.
5 In the Amount field, type 450 and press TAB.
6 In the Memo field, type Electricity Bill and press TAB.
7 Enter the transaction details as follows:
8 Click Save as Recurring. The Edit Recurring Schedule window appears.
Note that the supplier name automatically appears in the Recurring Transaction Name field. You can change this if you want.
9 In the Frequency field, select Quarterly.
10 In the Starting On field, type 10/9/7.
11 In the Remind Administrator to record this transaction field, select on its due date.
12 Click Save. The Spend Money window reappears.
You will be reminded every three months to record this transaction.
In this column… do this…
Account Name Select the Electricity expense account.
Amount Type 450
Memo Type Electricity Bill
Tax Select GST as the tax code.
G E T T I N G S T A R T E D T U T O R I A L

13 Click Record. The transaction is recorded and the window is cleared.
14 Click Cancel. The Banking command centre appears.
Exercise 4: Reconcile your bank accountTo ensure the accuracy of your business records, you should keep the record of each bank account balance in your company file reconciled with your bank’s records.
The frequency with which you need to reconcile your accounts depends on the number of transactions your company processes. Reconciling can help you pick up errors made either by the bank or by the person entering data in your company file.
You can either manually reconcile the transactions recorded in your company file to those listed on your bank statement, or you can import an electronic bank statement into your company file and the transactions will be matched automatically.
Transactions that appear on your statement but which you have not entered into your company file (such as bank charges or interest) will need to be recorded manually.
In this exercise, you will reconcile the bank account used in the previous two exercises.
An electronic bank statement is provided with this tutorial. If you are registered with your bank’s online banking service and you can download electronic bank statements from their website, you can use these to reconcile your bank account.
The bank statement provided covers the dates from 1/9/2007 to 30/9/2007. The closing balance is $14,045 and the statement includes the following four transactions:
A deposit of $20,000A cheque for $5,500A cheque for $450A bank charge of $5.
1 Go to the Banking command centre and click Reconcile Accounts. The Reconcile Accounts window appears.
2 In the Account field, click the search icon ( ). The Select from List window appears.
3 Select Cheque Account from the list of accounts and click Use Account.
4 In the New Statement Balance field, type 14045. This is the closing balance of your account, as shown on your bank statement.
5 In the Bank Statement Date field, type 30/9/7. This is the last date included on the bank statement.
6 Press TAB. If you receive a date warning, click OK to ignore the message.
B A N K I N G 1 3

1 4
The three transactions you recorded in the previous exercises appear in the list. Note that only transactions dated on or before the Bank Statement Date will be displayed.
NOTE : Manual bank reconciliation This exercise uses an electronic bank statement to reconcile your bank account. If you want to reconcile your account using a paper statement, you match each transaction in your bank statement to a transaction in this list. When you find the matching transaction, you reconcile it by clicking in the select column ( ) next to it.
7 Click Get Statement. An MYOB M-Powered message appears.
8 Click Bank File. The Open window appears.
9 Locate the Tutorial folder and select ANZ.qif.
10 Click Open. The Get Statement window appears.
11 Click OK. The Unmatched Statement Transactions window appears.
This window shows that four transactions appeared on the statement, and that three of these were automatically matched to transactions recorded in your company file (a $20,000 deposit, a payment of $5,500 for office equipment and a payment of $450 for an electricity bill).
The window also shows that one transaction, a bank charge of $5.00, could not be matched to your records. You will now record this transaction in your company file so that your records match the bank’s records.
12 Select Bank Charge from the list of unmatched transactions and click Add Transaction. The Spend Money window appears.
Most of the transaction details have been filled in automatically. You only need to provide the relevant account details.
13 Click in the first row of the Account Name column, then click the search icon ( ). The Select from List window appears.
G E T T I N G S T A R T E D T U T O R I A L

14 Select Bank Charges and click Use Account. The Spend Money window re-appears.
15 Press TAB. $5.00 appears in the Amount column.
16 Click Record. The Unmatched Statement Transactions window appears, displaying the message: ‘All of your transactions match!’.
17 Click Done. Four transactions now appear in the Reconcile Accounts window. A tick appears in the Cleared column next to each transaction, indicating that they have been reconciled.
Note that the out-of-balance amount is $0.00. This means that the selected cheque account now reconciles with the bank’s records.
18 Click Reconcile to complete the reconciliation process. The following window appears.
Purchases
The Purchases command centre allows you to record details of your purchases and the payments you make to your suppliers.
This module shows you how to use the Purchases command centre to place an order, record a purchase and pay a bill.
This module includes the following exercises:
Exercise 1: ’Order an item’ on page 16
Exercise 2: ’Receive items’ on page 18
Exercise 3: ’Pay a bill’ on page 19.
Types of purchases You can record a purchase transaction as a quote, an order or a bill, or as a Receive items transaction.
Quote—Quotes are used to keep track of prices offered to you by suppliers. If you decide to make a purchase based on a quote, you can change the quote to an order or a bill.
Order—When you order goods from a supplier, you create a purchase order. Orders do not affect your inventory levels or accounts.
P U R C H A S E S 1 5
1 6
Bill—Once you receive the items and an invoice from the supplier, you convert the order to a bill. Once you have created a bill, you can pay the supplier for the items.
Receive Items—If you receive items that you have not yet been billed for, you can record the receipt of these items using the Receive Items purchase type.
Purchase Layouts The purchase layout you choose determines what fields appear in the Purchases window. There are four different purchase layouts available: Service, Item, Professional and Miscellaneous.
Service—Use this layout when purchasing services.
Item—Use this layout when purchasing items that you have created an item record for or will create an item record for. When you record the purchase of items using this layout, your inventory levels are affected.
Professional—Use this layout when purchasing services or items that you have not created an item record for. This layout allows you to assign a date to each individual line item on the purchase order or bill.
Miscellaneous—This layout should only be used for adjustments and for purchases where a printed form is not needed.
You can change the purchase layout in the Purchases window when you enter a purchase by clicking Layout.
If you want, you can assign a purchase layout to each supplier card so that all purchases from this supplier automatically use this layout.
Purchases Register The Purchases Register window allows you to view all of your purchase transactions, including quotes, orders and bills as well as closed bills, debit notes and refunds. To display the Purchases Register window, go to the Purchases command centre and click Purchases Register.
Exercise 1: Order an itemIn this exercise, you will place an order for 100 widgets at $5.50 each (including GST) from World of Gadgets Pty Ltd. You will also create an item record for ‘gadgets’, an item you purchase regularly.
1 Go to the Purchases command centre and click Enter Purchases. The Purchases - New Service window appears.
2 Click the search icon ( ) next to the Supplier field. The Select from List window appears.
3 Select World of Gadgets Pty Ltd and click Use Supplier. Your company’s address appears in the Ship To field.
4 Click Layout. The Select Layout window appears.
5 Select Item and click OK. The Purchases - New Item window appears.
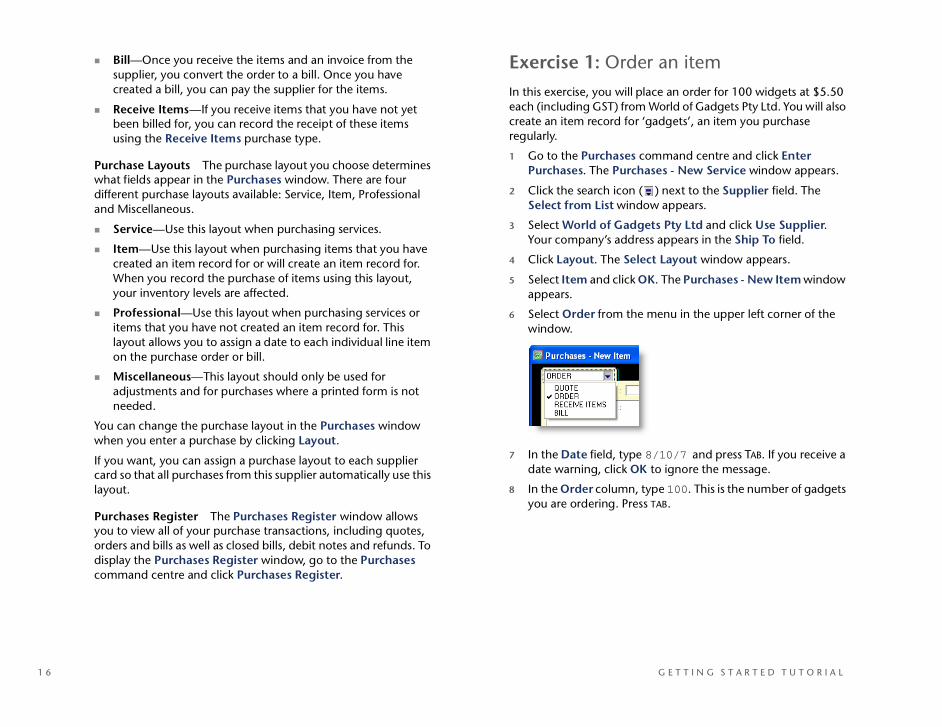
6 Select Order from the menu in the upper left corner of the window.
7 In the Date field, type 8/10/7 and press TAB. If you receive a date warning, click OK to ignore the message.
8 In the Order column, type 100. This is the number of gadgets you are ordering. Press TAB.
G E T T I N G S T A R T E D T U T O R I A L

9 In the Item Number column, type 300-101A5.
10 Press TAB. As you do not have a record for this item in your company file, the Select from List window appears.
11 You need to create the item. To do this:a Click New. The Item Information window appears,
displaying 300-101A5 in the Item Number field. b Press TAB. The Name field appears.c In the Name field, type Gadgets.d Select the I Buy This Item option. The Expense Account
for Tracking Costs field appears.e Select the I Sell This Item option. The Income Account for
Tracking Sales field appears.f Select the I Inventory This Item option. The Asset
Account for Item Inventory field appears and the Cost of Sales Account field replaces the Expense Account for Tracking Costs field.
g Complete the Profile tab details as shown:
h Click the Buying Details tab and complete the details as shown:
i Click the Selling Details tab and complete the details as shown:
j Click OK. The Purchases - New Item window reappears.
12 Press TAB. The Description and Tax columns are completed automatically.
13 In the Price column, type 5.50. This is the price you are paying per Gadget.
14 In the Comment field, type Please deliver to warehouse.
P U R C H A S E S 1 7

1 8
15 In the Promised Date field, type 20/10/7. This is the date you expect to receive the goods.
16 Click Record. The order is recorded.
17 Click Cancel. The Purchases command centre appears.
As you are only placing an order, your inventory levels have not yet changed and no money has been exchanged. In the next exercise, you will receive the goods and convert the order to a bill.
Exercise 2: Receive items
Let’s say that the 100 gadgets ordered in Exercise 1: ’Order an item’ are delivered a week later with an invoice from the supplier.
In this exercise, you will receive these items and convert the order into a bill.
1 Go to the Purchases command centre and click Purchases Register. The Purchases Register window appears.
2 Click the Orders tab.
3 From the Search by list, select Supplier.
4 Click the search icon ( ) in the Supplier field. The Select from List window appears.
5 Select World of Gadgets Pty Ltd from the list of suppliers and click Use Supplier.
6 In the Date From field, type 1/10/7. In the To field, type 31/10/7 and press TAB. All orders made to this supplier between these dates are displayed.
7 Select the order to World of Gadgets Pty Ltd and click Change to Bill. The Purchases - New Item window appears.
8 In the Date field, type 15/10/7 and press TAB. If you receive a date warning, click OK to ignore the message.
9 In the Supplier Inv# field, type 88943.
10 Click Record. The order is converted to a bill.
11 Click Cancel. The Purchases Register window reappears.
If you want, you can now view the bill in the Open Bills tab of the Purchases Register window.
12 Click Close. The Purchases command centre appears.
G E T T I N G S T A R T E D T U T O R I A L

Review
Let’s see how this transaction has affected your items list:
1 Go to the Inventory command centre.
2 Click Items List. The Items List window appears, showing that you now have 100 gadgets in stock.
Exercise 3: Pay a bill
In this exercise, you will pay for the gadgets you received in Exercise 2: ’Receive items’.
Let’s say you want to pay the $550 by cheque, one week after you received the gadgets.
1 Go to the Purchases command centre and click Pay Bills. The Pay Bills window appears.
2 In the Supplier field, click the search icon ( ). The Select from List window appears.
3 Select World of Gadgets from the list of suppliers and click Use Supplier. The supplier details and all unpaid bills for this supplier are displayed.
4 In the Date field, type 22/10/7 and press TAB. If you receive a date warning, click OK to ignore the message.
5 In the Amount field, type 550.
6 Click in the Amount Applied column of the bill you are paying, then press TAB.
Note that the figures in the Amount field and the Amount Applied field now match and the Out of Balance field diplays $0.00.
7 Click Record. The bill is paid, and the balance of your cheque account is reduced by $550.
8 Click Cancel. The Purchases command centre appears.
If you want, you can now view this bill in the Closed Bills tab of the Purchases Register window.
P U R C H A S E S 1 9
2 0
Sales
The Sales command centre allows you to record sales of items and services, issue invoices and keep track of what is owed to you.
This module shows you how to use the Sales command centre to record sales, create and settle credit notes, receive payments for sales, and pay refunds to your customers.
This module includes the following exercises:
Exercise 1: ’Create a quote’ on page 21
Exercise 2: ’Convert a quote to an order’ on page 22
Exercise 3: ’Sell items’ on page 23
Exercise 4: ’Create a credit note’ on page 25
Exercise 5: ’Settle a credit note’ on page 26
Exercise 6: ’Receive customer payment’ on page 27
Exercise 7: ’Pay a refund’ on page 28
Types of sales You can record a sales transaction as a quote, an order or an invoice.
Quote—You can use quotes to keep track of prices you have offered to your customers. If a customer decides to make a purchase based on a quote, you can change the quote into an order or an invoice.
Order—When a customer orders goods or services from you but does not receive the goods immediately, you create an order. Orders do not affect your inventory levels or accounts.
Invoice—When you supply goods to a customer, you create an invoice. If an order was created for the transaction, you can change this order to an invoice. Once the customer has received your invoice, they can pay you for the items.
Sales Register The Sales Register window contains all of your sales transactions, organised into six categories: All Sales, Quotes, Orders, Open Invoices, Returns & Credits and Closed Invoices. You can view all sales in a particular category by clicking on the appropriate tab of the Sales Register window. You can view transaction details by clicking the zoom arrow ( ) next to the transaction you want to view.
To view the Sales Register window, go to the Sales command centre and click Sales Register.
Items Register The Items Register window displays all transactions involving items. When this window is filtered to display a single item, it will show a running balance of the item’s inventory levels and value between the specified dates.
To view the Items Register window, go to the Inventory command centre and click Items Register.
G E T T I N G S T A R T E D T U T O R I A L

Sales Layouts The sales layout you choose determines what fields appear in the Sales window.
Service—Use this layout when selling services.
Item: Use this layout when selling items that you have created a record for. When you record the sale of items using this layout, your inventory levels are affected.
Professional—Use this layout when selling services or items for which no item record has been created. This layout allows you to assign a date and account to each individual line item on the invoice.
Time Billing—Use this layout when billing for time and materials, or when selling miscellaneous services to your clients. Time Billing is not available in MYOB Accounting.
Miscellaneous—This layout should only be used for adjustments and for sales where a printed form is not needed.
You can change the sales layout in the Sales window when you enter a sale by clicking Layout.
If you want, you can assign a default sales layout to each customer card so that all sales to this customer will automatically use this layout unless you specify otherwise.
Exercise 1: Create a quote
In this exercise, you will create a quote for the installation of water filters at the Island Way Hotel.
As this quote involves the sale of a service, it is appropriate to use the Service layout.
1 Go to the Sales command centre and click Enter Sales. The Sales window appears.
2 Click Layout. The Select Layout window appears.
3 Select Service and click OK. The Sales - New Service window appears.
4 Select Quote from the menu in the top left corner of the window.
5 In the Customer field, click the search icon ( ). The Select from List window appears.
6 Select Island Way Hotel and click Use Customer.
7 In the Date field, type 1/11/7 and press TAB. If you receive a date warning, click OK to ignore the message.
8 In the Description column, type Installation of water filters and press TAB.
9 In the Account column, click the search icon ( ). The Select from List window appears.
10 Select Installation Income from the list of accounts and click Use Account. The Sales - New Service window reappears.
11 In the Amount field, type 300.
12 In the Tax field, click the search icon ( ). The Select from List window appears.
13 Select GST from the list of tax codes and click Use Tax Code. Make sure the Tax Inclusive option at the top of the window is selected.
S A L E S 2 1
2 2
14 Click Save Quote. The quote is saved.
If you want, you can view this quote in the Quotes tab of the Sales Register window.
15 Click Cancel. The Sales command centre appears.
Exercise 2: Convert a quote to an orderBased on the quote you created in Exercise 1: ’Create a quote’, you install the water filters. The customer pays for the installation on the same day.
In this exercise, you will convert the quote you created into an order and record the customer’s payment.
1 Go to the Sales command centre and click Sales Register. The Sales Register window appears.
2 Click the Quotes tab.
3 In the Search by field, select Customer, then click the search icon ( ) in the adjacent field. The Select from List window appears.
4 Select Island Way Hotel and click Use Customer.
5 In the Dated From field, type 1/11/7. In the To field, type 30/11/7. All quotes for this customer between the specified dates appear.
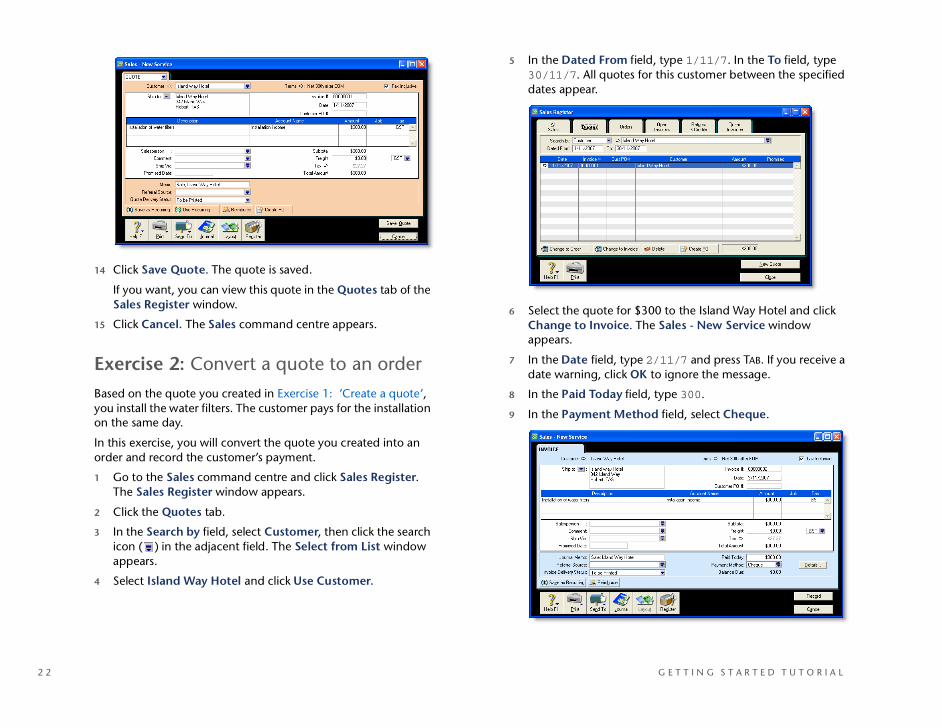
6 Select the quote for $300 to the Island Way Hotel and click Change to Invoice. The Sales - New Service window appears.
7 In the Date field, type 2/11/7 and press TAB. If you receive a date warning, click OK to ignore the message.
8 In the Paid Today field, type 300.
9 In the Payment Method field, select Cheque.
G E T T I N G S T A R T E D T U T O R I A L
10 Click Record. The invoice and payment are both recorded.
11 Click Cancel. The Sales Register window appears.
If you want, you can now view the invoice in the Closed Invoices tab of the Sales Register window.
12 Click Close. The Sales command centre appears.
Exercise 3: Sell itemsIn this exercise, you will sell 65 widgets to Widget Eaters Limited. An item record for widgets has already been set up in your items list and you have 100 widgets in stock.
For more information about setting up items for sales and purchases, see Exercise 1: ’Order an item’ on page 16 in the Purchases module.
1 Go to the Sales command centre and click Enter Sales. The Sales - New Service window appears.
2 Click the Layout button. The Select Layout window appears.
3 Select Item and click OK. The Sales - New Item window appears.
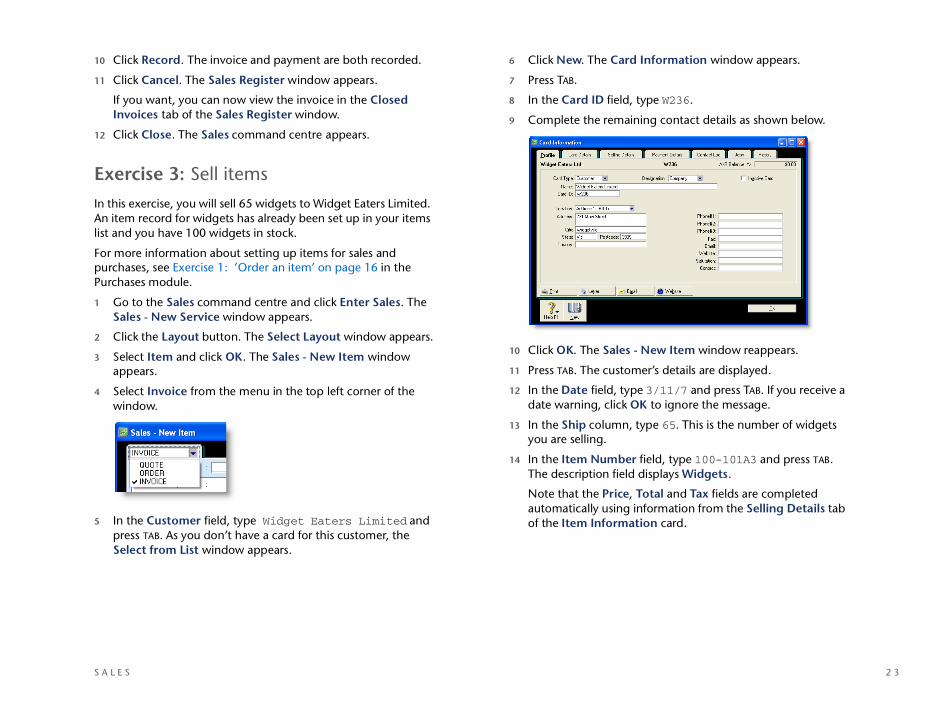
4 Select Invoice from the menu in the top left corner of the window.
5 In the Customer field, type Widget Eaters Limited and press TAB. As you don’t have a card for this customer, the Select from List window appears.
6 Click New. The Card Information window appears.
7 Press TAB.
8 In the Card ID field, type W236.
9 Complete the remaining contact details as shown below.
10 Click OK. The Sales - New Item window reappears.
11 Press TAB. The customer’s details are displayed.
12 In the Date field, type 3/11/7 and press TAB. If you receive a date warning, click OK to ignore the message.
13 In the Ship column, type 65. This is the number of widgets you are selling.
14 In the Item Number field, type 100-101A3 and press TAB. The description field displays Widgets.
Note that the Price, Total and Tax fields are completed automatically using information from the Selling Details tab of the Item Information card.
S A L E S 2 3

2 4
15 Click Record. The sale is recorded and the window is cleared.
If you want, you can now view this invoice in the Open Invoices tab of the Sales Register window.
16 Click Cancel. The Sales command centre appears.
Review
Let’s see how this transaction has affected your inventory.
1 Go to the Inventory command centre and click Items Register. The Items Register window appears.
2 In the Search by list, select Item and click the search icon ( ) in the adjacent field. The Select from List window appears.
3 Select Widgets and click Use Item. The Items Register window reappears.
4 In the Dated From field, type 1/11/7. In the To field, type 30/11/7. Press TAB. All transactions affecting the inventory levels of widgets between these dates appear.
Note that after selling 65 widgets, you have 35 widgets remaining in stock, with a total current value of $175.
5 Click the zoom arrow ( ) next to the transaction. The Sales - Edit Item window appears with the transaction details.
6 Click Cancel. The Items Register window reappears.
7 Click Close. The Inventory command centre appears.
Advanced review Let’s look at the entries this sale has made in your transaction journal.
1 Go to the Sales command centre and click Transaction Journal.
G E T T I N G S T A R T E D T U T O R I A L

2 In the Dated from and To fields, type 3/11/7 and then press TAB. The debits and credits of the sale you just entered appear:
3 Click Close. The Sales command centre appears.
Exercise 4: Create a credit noteLet’s assume that five of the widgets shipped to Widget Eaters Limited were damaged before they reached the customer.
In this exercise, you will give the customer a credit note for the five damaged widgets.
You create a credit note in the same way as you create a sale. The only difference is that when you create a credit note, you enter the amount as a negative number.
If we use the Item sales layout to create the credit note, and enter the returned widgets as a negative number, the damaged widgets will be added back into inventory.
We do not want to do this, so we will create the credit note using the Miscellaneous sales layout.
1 Go to the Sales command centre and click Enter Sales. The Sales - New Service window appears.
2 In the Customer field, select Widget Eaters Limited.
3 Click Layout. The Select Layout window appears.
4 Select Miscellaneous and click OK. The Sales - New Miscellaneous window appears.
5 In the Date column, type 8/11/7 and press TAB. If you receive a date warning, click OK to ignore the message.
6 In the Description column, type Credit note for five damaged widgets.
7 Click in the Account Name column, press TAB and select Sales Returns from the list of accounts, then click Use Account.
As this transaction affects your income from sales, it is appropriate to use an income account.
8 In the Amount column, type -55 and press TAB. This is the total price the customer paid for the damaged widgets (five widgets at $11.00 each).
A The Trade Debtors account keeps track of money owed to you by customers. This account has been debited twice, once for the amount of the sale and once for the amount of GST collected from the sale.
B The Widgets Sales Income account keeps track of the money you have received from selling widgets. This account has been credited for the amount of the sale, excluding GST.
C The GST Collected account keeps track of how much GST you have collected.This account has been credited for the amount of GST included in the transaction.
D The Widgets Cost of Sales account keeps track of the costs of making sales. The Inventory account keeps track of the value of your inventory items.The purchase value of the widgets (65 widgets multiplied by the purchase price of $5.00 = $325.00) has been transferred from your inventory account to your Widgets Cost of Sales account.
AB C
D
S A L E S 2 5

2 6
9 In the Tax field, select GST.
10 Click Record. The credit note is created.
If you want, you can now view the credit note in the Returns & Credits tab of the Sales Register window.
11 Click Cancel. The Sales command centre appears.
Exercise 5: Settle a credit noteYou can choose to settle a credit note by applying it against the customer’s outstanding account balance or by paying a refund to the customer.
In this exercise, you will apply the credit note towards the customer’s original invoice, which they have not yet paid.
1 Go to the Sales command centre and click Sales Register. The Sales Register window appears.
2 Click the Returns & Credits tab.
3 In the Search by list, select Customer, then select Widget Eaters Limited in the adjacent field. All credit notes and returns for this customer appear.
4 Select the $55 credit note that you created in the previous exercise and click Apply to Sale. The Settle Returns & Credits window appears, displaying the customer’s unpaid invoice.
5 In the Date field, type 10/11/7 and press TAB. If you receive a date warning, click OK to ignore the message.
6 Click in the Amount Applied column, then press TAB. The Out of Balance field displays $0.00.
This means that you are applying the full amount of the credit note against this customer’s outstanding balance.
7 Click Record. The credit is applied and the customer’s outstanding balance is reduced by $55.
Note that the credit note no longer appears in the Returns & Credits tab of the Sales Register window, and the balance of the invoice to Widget Eaters Limited is reduced by $55.
8 Click Close. The Sales command centre appears.
G E T T I N G S T A R T E D T U T O R I A L

Exercise 6: Receive customer paymentYou receive a cheque for $670 from Widget Eaters Limited as payment for the invoice. This is $10 more than the outstanding balance of the invoice.
In this exercise, you will record the payment and close the invoice. You will also create a credit note for the $10 overpayment, which will then be refunded to the customer.
1 Go to Sales command centre and click Receive Payments. The Receive Payments window appears.
2 Select the Deposit to Account option. In the adjacent field, select Cheque Account.
3 In the Customer field, type Widget Eaters Limited and Press TAB. The customer’s unpaid invoice appears.
4 In the Amount Received field, type 670.
5 In the Payment Method field, select Cheque.
6 In the Date field, type 20/11/7 and press TAB. If you receive a date warning, click OK to ignore the message.
7 Click in the Amount Applied column. The amount of $660.00 appears. Press DELETE, then type 670. Press TAB. The Out of Balance field at the bottom of the window displays $0.00
Note that even though the payment you received is $10 more than the total of the outstanding invoice, you need to apply the whole payment to the invoice.
8 Click Record. A message appears, telling you that a credit note will be created for the overpayment.
9 Click OK. The credit note is created.
If you want, you can now view the credit note in the Returns & Credits tab of the Sales Register window.
10 Click Cancel. The Sales command centre appears.
S A L E S 2 7

2 8
Exercise 7: Pay a refundYou will now refund the $10 credit by recording a cheque to Widget Eaters Limited.
1 Go to the Sales command centre and click Sales Register. The Sales Register window appears.
2 Click the Returns & Credits tab.
3 Select Customer from the Search by list, then select Widget Eaters Limited in the adjacent field. The credit note created in the previous exercise is displayed.
4 Select the credit note and click Pay Refund. The Settle Returns & Credits window appears.
5 In the date field, type 21/11/7 and press TAB. If you receive a date warning, click OK to ignore the message.
6 Click Record. The refund is recorded.
7 Click Close.
G E T T I N G S T A R T E D T U T O R I A L

Jobs
Jobs can be set up to track income and expenses for individual projects. You can allocate transactions to a job and then view financial details and profit-and-loss statements for individual jobs.
A job can be a profit centre, a product line, a project or any other subset of your business that requires a separate income statement.
This module shows you how to use the Jobs function to create jobs, assign expenses to a job, and analyse job activity.
This module includes the following exercises:
Exercise 1: ’Create a job’ on page 29
Exercise 2: ’Allocate an expense to a job’ on page 30
Exercise 3: ’View job activity’ on page 32
Jobs List You can view all of your jobs in the Jobs List window. To display the Jobs List window, go to the Lists menu and select Jobs.
To view and edit information about a job, including start date, finish date, percentage completed and contact details, click the zoom arrow ( ) next to any job in the Jobs List window.
Exercise 1: Create a jobYour company has been hired to install 50 water filters at Island Way Hotel.
In this exercise, you will set up a job to keep track of the income and expenses associated with this installation. You will also track expenses incurred as part of the job, that need to be reimbursed.
1 Go to the Lists menu and select Jobs. The Jobs List window appears.
2 Click New. The New Job window appears.
3 Select the Track Reimbursables option.
4 Enter the job information:a In the Job Number field, type 4980 and press TAB.b In the Job Name field, type Filters - Island Way.c In the Description field, type Install water filters in fifty suites.
d In the Contact field, type Terry Fothergill.e Assume the job has been started and type 25 in the
Percent Complete field.f In the Start Date field, type 3/1/8.g In the Finish Date field, type 20/1/8.
J O B S 2 9

3 0
h In the Manager field, type Harry J. Knox.i In the Linked Customer field, click the search icon ( ).
The Select from List window appears.j Select Island Way Hotel and click Use Customer. The
New Job window reappears.
5 Click OK. The Jobs List window reappears, displaying the job you just created.
If you want, you can view and edit the job details by clicking the zoom arrow next to the job in the Jobs List window.
6 Click Close.
Exercise 2: Allocate an expense to a jobTo install the water filters at Island Way Hotel, you have to purchase 50 wall brackets. In this exercise, you will allocate this expense to the installation job.
1 Go to the Purchases command centre and click Enter Purchases. The Purchases window appears.
2 Select Bill from the menu in the top left corner of the window.
3 In the Supplier field, type World of Gadgets Pty Ltd and press TAB. Your company’s address appears in the Ship to field.
4 Click Layout. The Select Layout window appears.
5 Select Item and click OK.
6 In the Date field, type 7/1/8 and press TAB. If you receive a date warning, click OK to ignore the message.
7 In the Supplier Inv# field, type 1234.
8 In the Bill column, type 50.
9 In the Item Number field, press TAB. The Select from List window appears.
10 Select Wall brackets and click Use Item.
11 In the Price field, type 4.
12 Click in the Job column then click the search icon ( ). The Select from List window appears.
13 Select 4980 and click Use Job. The job number appears in the Job column.
G E T T I N G S T A R T E D T U T O R I A L

14 In the Paid Today field, type 200 and press TAB.
15 Click Record. As you paid for the items when you recorded the bill, a window appears asking you to verify the details of your payment.
16 Click OK.
17 Click Cancel. The Purchases command centre appears.
Review
You will now view the list of reimbursable expenses for this job.
1 Go to the Lists menu and select Jobs. The Jobs List window appears.
2 Click the zoom arrow ( ) next to job 4980. The Edit Job window appears.
3 Click Reimburse. The Job Reimbursable Expenses window appears.
Note that the purchase you just created appears in the To Be Reimbursed tab of this window, indicating that you have not yet been reimbursed for this purchase by the customer.
Once you receive the reimbursement payment, you click in the select column ( ) next to the expense that has been reimbursed, then click Remove from List. The expense disappears. You can then view the expense in the Reimbursed/Removed tab of the Job Reimbursable Expenses window.
J O B S 3 1

3 2
Exercise 3: View job activityIn this exercise, you will use the Analyse Jobs window to display a profit-and-loss statement for the job you created earlier.
1 In any command centre, click the Analysis down arrow, then select Jobs from the drop-down menu.
The Analyse Jobs window appears.
2 In the Job Number field, type 4980 and press TAB.
A detailed profit and loss statement for this job appears, listing the actual versus budget information for every account in your accounts list.
Note that you did not enter budget information when you created the job in Exercise 1: ’Create a job’, so no amounts appear in these columns for this example. For more information about setting budgets for jobs, see your user guide or online help.
If you want, you can click Up to simplify the information so that it shows fewer account levels. To show more account levels, click Down.
3 Click Close. The Command Centre window appears.
G E T T I N G S T A R T E D T U T O R I A L
Forms
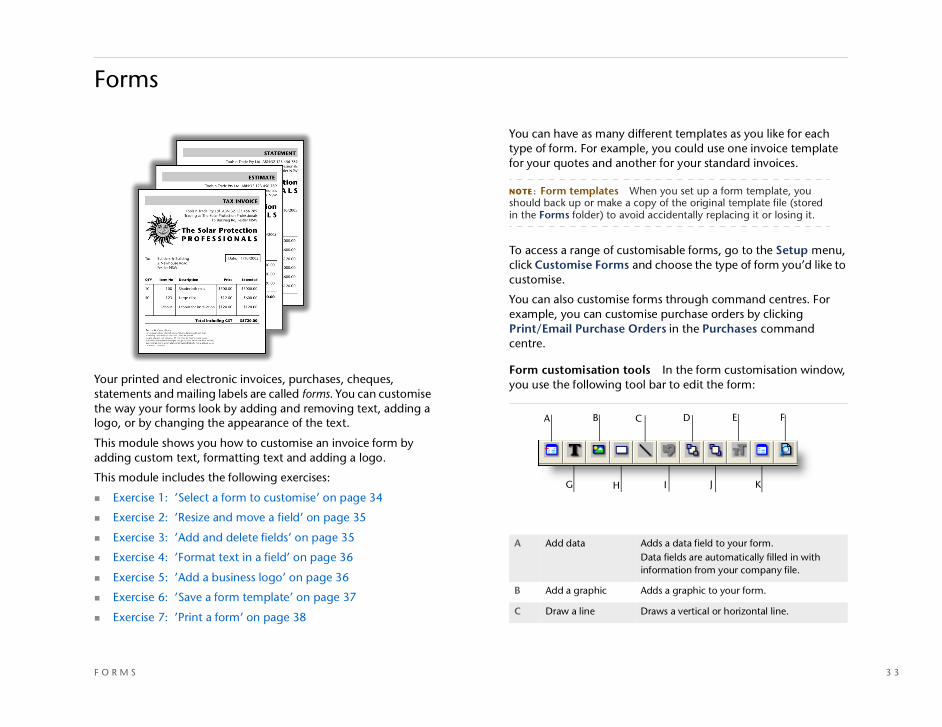
Your printed and electronic invoices, purchases, cheques, statements and mailing labels are called forms. You can customise the way your forms look by adding and removing text, adding a logo, or by changing the appearance of the text.
This module shows you how to customise an invoice form by adding custom text, formatting text and adding a logo.
This module includes the following exercises:
Exercise 1: ’Select a form to customise’ on page 34
Exercise 2: ’Resize and move a field’ on page 35
Exercise 3: ’Add and delete fields’ on page 35
Exercise 4: ’Format text in a field’ on page 36
Exercise 5: ’Add a business logo’ on page 36
Exercise 6: ’Save a form template’ on page 37
Exercise 7: ’Print a form’ on page 38
You can have as many different templates as you like for each type of form. For example, you could use one invoice template for your quotes and another for your standard invoices.
NOTE : Form templates When you set up a form template, you should back up or make a copy of the original template file (stored in the Forms folder) to avoid accidentally replacing it or losing it.
To access a range of customisable forms, go to the Setup menu, click Customise Forms and choose the type of form you’d like to customise.
You can also customise forms through command centres. For example, you can customise purchase orders by clicking Print/Email Purchase Orders in the Purchases command centre.
Form customisation tools In the form customisation window, you use the following tool bar to edit the form:
A Add data Adds a data field to your form. Data fields are automatically filled in with information from your company file.
B Add a graphic Adds a graphic to your form.
C Draw a line Draws a vertical or horizontal line.
A B DC FE
G H JI K
F O R M S 3 3
3 4
Exercise 1: Select a form to customise
1 Go to the Sales command centre and click Print/Email Invoices. The Review Sales Before Delivery window appears.
2 Click Advanced Filters. The Advanced Filters window appears.
3 In the Sale Type field, select Service.
4 In the Selected Form for Sale field, select MYOB Plain Paper Invoice.
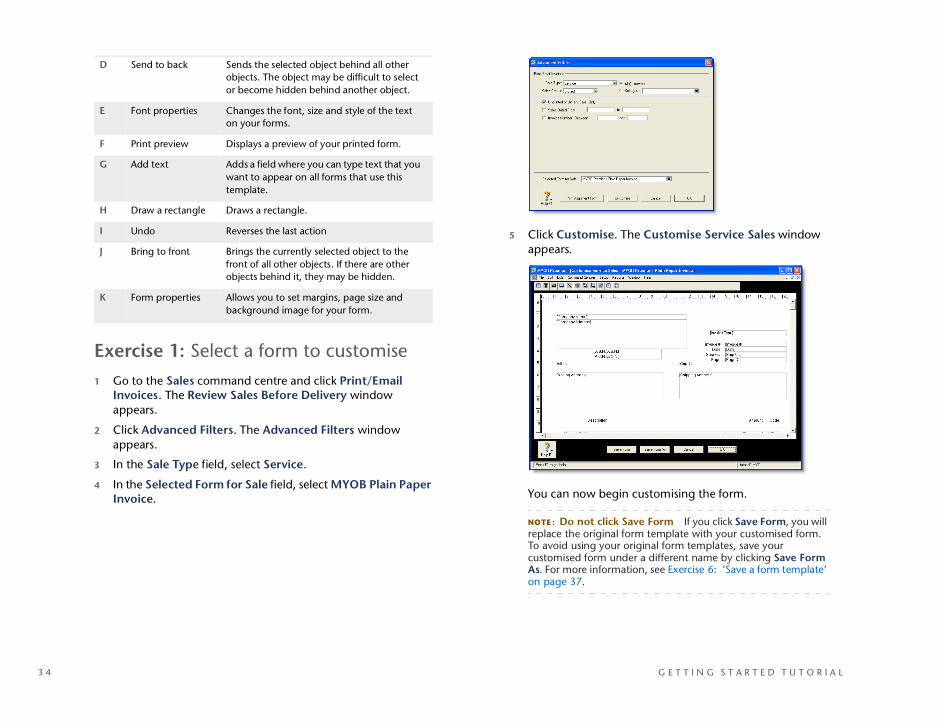
5 Click Customise. The Customise Service Sales window appears.
You can now begin customising the form.
NOTE : Do not click Save Form If you click Save Form, you will replace the original form template with your customised form. To avoid using your original form templates, save your customised form under a different name by clicking Save Form As. For more information, see Exercise 6: ’Save a form template’ on page 37.
D Send to back Sends the selected object behind all other objects. The object may be difficult to select or become hidden behind another object.
E Font properties Changes the font, size and style of the text on your forms.
F Print preview Displays a preview of your printed form.
G Add text Adds a field where you can type text that you want to appear on all forms that use this template.
H Draw a rectangle Draws a rectangle.
I Undo Reverses the last action
J Bring to front Brings the currently selected object to the front of all other objects. If there are other objects behind it, they may be hidden.
K Form properties Allows you to set margins, page size and background image for your form.
G E T T I N G S T A R T E D T U T O R I A L
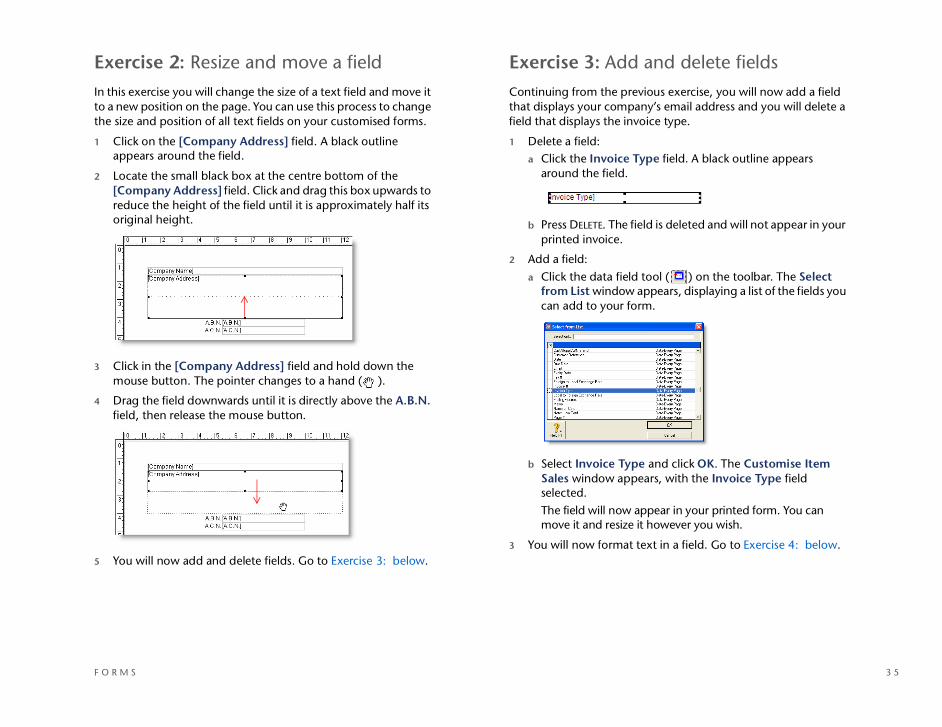
Exercise 2: Resize and move a fieldIn this exercise you will change the size of a text field and move it to a new position on the page. You can use this process to change the size and position of all text fields on your customised forms.
1 Click on the [Company Address] field. A black outline appears around the field.
2 Locate the small black box at the centre bottom of the [Company Address] field. Click and drag this box upwards to reduce the height of the field until it is approximately half its original height.
3 Click in the [Company Address] field and hold down the mouse button. The pointer changes to a hand ( ).
4 Drag the field downwards until it is directly above the A.B.N. field, then release the mouse button.
5 You will now add and delete fields. Go to Exercise 3: below.
Exercise 3: Add and delete fieldsContinuing from the previous exercise, you will now add a field that displays your company’s email address and you will delete a field that displays the invoice type.
1 Delete a field:a Click the Invoice Type field. A black outline appears
around the field.
b Press DELETE. The field is deleted and will not appear in your printed invoice.
2 Add a field:a Click the data field tool ( ) on the toolbar. The Select
from List window appears, displaying a list of the fields you can add to your form.
b Select Invoice Type and click OK. The Customise Item Sales window appears, with the Invoice Type field selected.The field will now appear in your printed form. You can move it and resize it however you wish.
3 You will now format text in a field. Go to Exercise 4: below.
F O R M S 3 5

3 6
Exercise 4: Format text in a fieldContinuing from the previous exercise, we will now format text in a form field.
1 Double-click the [Company Address] field. The Field Properties window appears.
2 Click Text Format. The Text Format window appears.
3 Make the following selections to change the size and style of the text that will be shown in the field.
4 Click OK. The Field Properties window reappears.
5 Click OK. The Customise Item Sales window reappears.
6 You will now add your business logo to the form. Go to Exercise 5: below.
Exercise 5: Add a business logoContinuing from the previous exercise, you will add your business logo to the form.
1 Click the picture tool ( ) on the toolbar.
2 Click anywhere on the form. A picture frame appears on the form.
3 Double-click the picture frame. The Field Properties window appears.
You will import a picture into your form. You could also use a graphics program to copy a picture onto your clipboard, then paste it into your form by clicking Paste Picture.
4 Click Load Picture. The Open window appears.
5 Select clear.bmp, which is located in the Tutorial folder, and click Open.The Field Properties window reappears, displaying a preview of the picture you are importing.
6 Set the position of the picture:a In the top Field Location field, type 0.45.b In the bottom Field Location field, type 14.
G E T T I N G S T A R T E D T U T O R I A L

7 In the top Field Size field, type 2.1. and press TAB. The value in the bottom Field Size field is adjusted automatically. This makes sure the picture does not appear stretched.
8 Click OK. The picture appears on the form.
9 You will now save your customised form as a template. Go to Exercise 6: below.
Exercise 6: Save a form templateContinuing from the previous exercise, you will now save your customised form to the Forms folder on your hard drive. This folder is located in your MYOB program folder (for example, C:\MYOB\Forms).
NOTE : Do not save your forms to another folder You must save your customised forms to the Forms folder. If you save them in another folder, your MYOB software will not be able to access them.
1 In the Customise Item Sales window, click Save Form As. The Save As window appears.
2 In the Form File Name field, type Test.
3 In the Description field, type Tutorial Exercise.
4 Click OK. The Customise Item Sales window reappears.
This form is now the default form for printing item invoices, except for customers who have a different form specified in the Selling Details tab of their customer card.
5 Click Cancel. The Advanced Filters window appears.
The form you created is displayed in the Selected Form for Sale field.
If you want, you can click the search icon ( ) next to this field to select a different form.
F O R M S 3 7

3 8
6 You will now print a form using the template you just created. Go to Exercise 7: below.
Exercise 7: Print a formYou will now print an invoice using the customised template you created in the previous exercises.
1 Go to the Sales command centre and click Print/Email Invoices. The Review Sales Before Delivery window appears.
2 Click Advanced Filters. The Advanced Filters window appears.
3 In the Sales Type field, select Service.
4 In the Sales Status field, select All Sales.
5 Click Selected and select Barney’s Widgets Inc. in the adjacent field.
6 In the Selected Form for Sale field, select Test.
7 Click OK. The Review Sales Before Delivery window reappears. An invoice for a sale to Widget Eaters Limited is listed.
8 Click in the select column ( ) next to the invoice.
9 If you want, you can print the invoice by clicking Print. Select your printer options, then click Print.
Click Cancel. The Sales command centre appears.
G E T T I N G S T A R T E D T U T O R I A L
Reports
You can view detailed information about different aspects of your business by generating reports.
This module shows you how to display, customise and email reports.
It includes the following exercises:
Exercise 1: ’Display a report’ on page 39
Exercise 2: ’Customise a report’ on page 40
Exercise 3: ’Email a report’ on page 41
Index to Reports The Index to Reports window contains a list of all reports available in your MYOB software. Reports are organised into the following tabs: Accounts, Banking, GST/Sales Tax, Sales, Time Billing, Purchases, Payroll, Inventory and Card. You can also define custom reports, which are stored in the Custom tab.
Note that the Time Billing and Payroll feature is not available in MYOB Accounting, so no corresponding reports are included in the Index to Reports window.
Exercise 1: Display a reportIn this exercise, you will display a report that lists all of the accounts in your Accounts List and their balances.
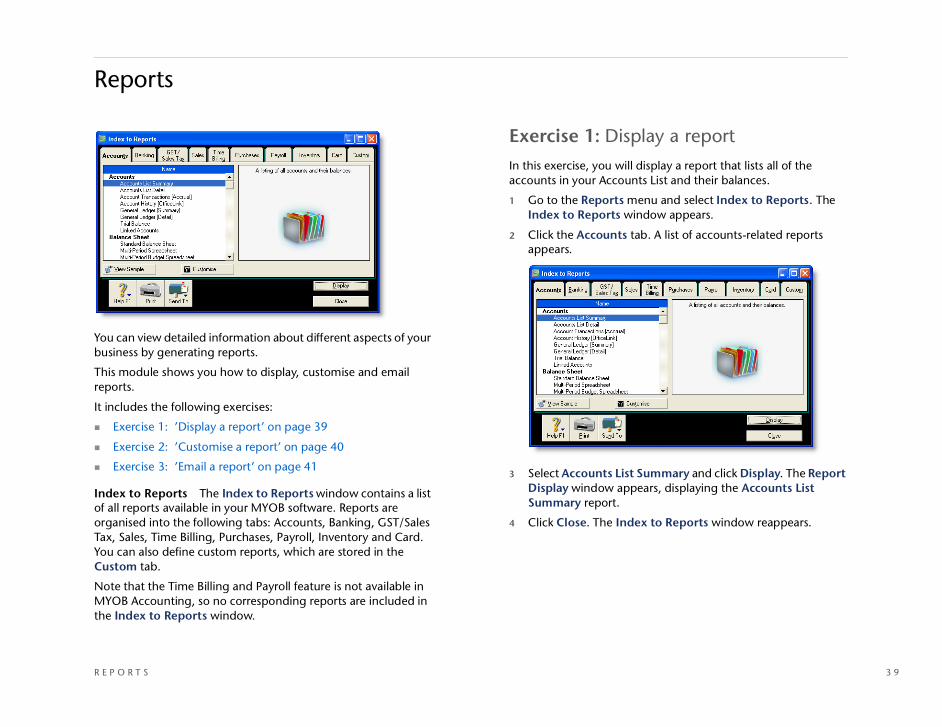
1 Go to the Reports menu and select Index to Reports. The Index to Reports window appears.
2 Click the Accounts tab. A list of accounts-related reports appears.
3 Select Accounts List Summary and click Display. The Report Display window appears, displaying the Accounts List Summary report.
4 Click Close. The Index to Reports window reappears.
R E P O R T S 3 9
4 0
Exercise 2: Customise a reportIn this exercise, you will customise a report by changing the font and style of the text, selecting which fields to include, and rearranging the layout of the final report.
1 Go to the Reports menu and select Index to Reports. The Index to Reports window appears.
2 Click the Banking tab. A list of banking-related reports appears.
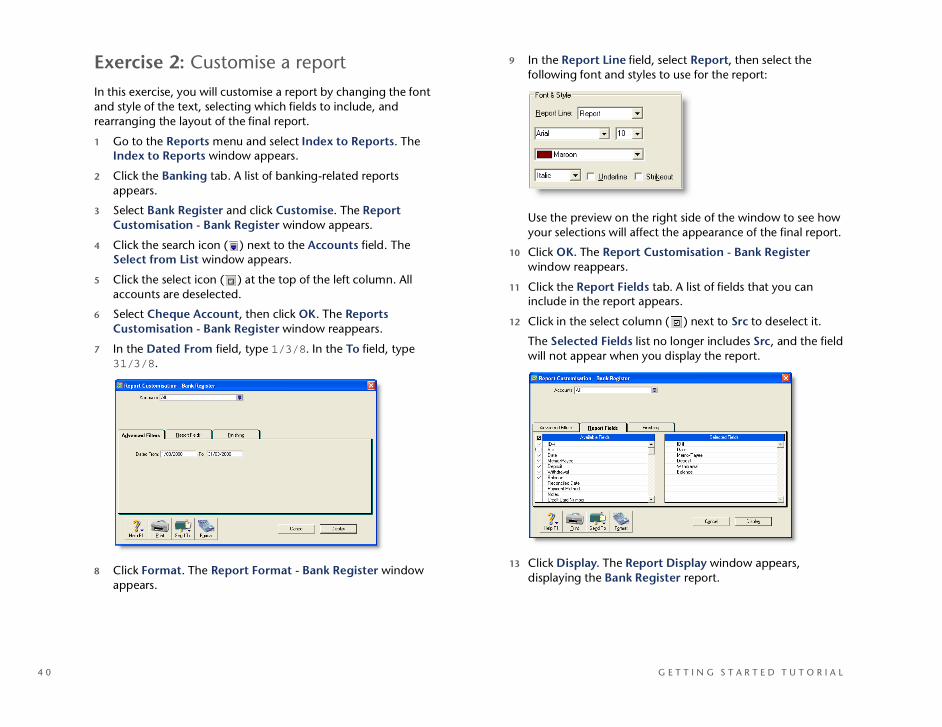
3 Select Bank Register and click Customise. The Report Customisation - Bank Register window appears.
4 Click the search icon ( ) next to the Accounts field. The Select from List window appears.
5 Click the select icon ( ) at the top of the left column. All accounts are deselected.
6 Select Cheque Account, then click OK. The Reports Customisation - Bank Register window reappears.
7 In the Dated From field, type 1/3/8. In the To field, type 31/3/8.
8 Click Format. The Report Format - Bank Register window appears.
9 In the Report Line field, select Report, then select the following font and styles to use for the report:
Use the preview on the right side of the window to see how your selections will affect the appearance of the final report.
10 Click OK. The Report Customisation - Bank Register window reappears.
11 Click the Report Fields tab. A list of fields that you can include in the report appears.
12 Click in the select column ( ) next to Src to deselect it.
The Selected Fields list no longer includes Src, and the field will not appear when you display the report.
13 Click Display. The Report Display window appears, displaying the Bank Register report.
G E T T I N G S T A R T E D T U T O R I A L

The report lists all transactions that affected your cheque account for the month of March 2008.
Note that the Src column does not appear in the report.
TIP : View original transactions You can view full details of a transaction shown on a report by clicking on the transaction
14 Move the ID# column:a Position the cursor over the ID# heading. The cursor
changes to a hand.b Click and drag the ID# heading until it is to the right of the
Date heading, then release the mouse button.
NOTE : Saving customised reports You can save your customised reports by clicking Save As in the Report Display window. You can access your custom reports in the Custom tab of the Index to Reports window.
Exercise 3: Email a reportIn this exercise, you will email the report to your accountant.
1 In the Report Display window, click Send To, then select Email. The Email window appears.
2 Click the search icon ( ) next to the Name field. The Select from List window appears.
3 Select ABC Accountants and click Use Card. The name and email address fields are filled in automatically.
4 In the Subject field, type Clearwater banking report.
5 If you want, you can type in the Message field to include a short email message with the report.
6 As you do not want to email the report, click Cancel.
If you wanted to email the report, you would click Send.
7 Click Close. The Index to Reports window reappears.
8 Click Close. The command centre appears.
R E P O R T S 4 1

4 2
Payroll
The payroll feature is only available in MYOB Premier Enterprise, Premier and Accounting Plus.
The Payroll command centre allows you to calculate employees’ wages, salaries and entitlements, and process pays for both salary and wage earners. You can calculate overtime rates, allowances, tax deductions, employer expenses, superannuation and leave entitlements.
This module shows you how to use the Payroll command centre to set up employee records and process a pay run.
This module includes the following exercises:
Exercise 1: ’Create an employee card’ on page 42
Exercise 2: ’Pay employees’ on page 44
Payroll categories An employee’s pay is made up of components, called payroll categories. These may include wages, entitlements, superannuation and taxes. You assign payroll categories to an employee’s card, then combine them to calculate the employee’s pay.
Exercise 1: Create an employee cardIn this exercise, you will create an employee card for a new employee named Rick Shaw. He is a full-time, permanent employee with an annual salary of $55,000. He is entitled to sick leave and holiday leave and receives superannuation guarantee contributions on top of his annual salary.
1 Go to the Card File command centre and click Cards List. The Cards List window appears.
2 Click the Employee tab.
3 Click New. The Card Information window appears.
4 Enter the employee’s personal details as shown:
G E T T I N G S T A R T E D T U T O R I A L

5 Click the Payroll Details tab. There are a number of views in this tab.
6 In the Personal view, enter the employee’s personal information as shown:
7 Click Wages. The Wages view of the Payroll Details tab appears.
8 Enter the employee’s wage details:a In the Pay Basis field, select Salary.b In the Annual Salary field, type 55,000.c In the Pay Frequency field, select Monthly.
Note that when you select Salary as the pay basis, the Base Salary wage category is selected automatically.
9 Click Superannuation. The Superannuation view of the Payroll Details tab appears.
10 Enter the employee’s superannuation details:a In the Superannuation Fund field, type AMP Life. b Click in the select column ( ) next to SGC
Superannuation to assign the superannuation guarantee contributions payroll category to the employee’s card.
P A Y R O L L 4 3

4 4
11 Click Entitlements. The Entitlements view of the Payroll Details tab appears.
12 Click in the select column ( ) to select Holiday Leave Accrual and Sick Leave Accrual.
13 Click Taxes. The Taxes view of the Payroll Details tab appears.
Note that the PAYG Withholding category is automatically selected.
14 Click Standard Pay. The Standard Pay view of the Payroll Details tab appears.
The employee’s standard pay details are displayed. These values have been calculated using the values you entered and the payroll categories you selected in the Payroll Details tab of the employee card.
15 Click the Payment Details tab.
16 In the Payment Method field, select Cheque.
17 Click OK. The Cards List window appears.
18 Click Close. The Card File command centre appears.
Exercise 2: Pay employeesIn this exercise, you will process a pay run for five employees. You will adjust one employee’s pay to include four hours of overtime pay.
1 Go to the Payroll command centre and click Process Payroll. The Process Payroll assistant appears. The Process Payroll assistant is a series of windows that take you through the process of recording your employee pays.
2 Select the Process all employees paid option, then select Monthly in the adjacent field.
3 In the Payment date field, type 15/3/8.
4 In the Pay period start field, type 1/3/8. In the Pay period end field, type 31/3/8. If you receive a date warning, click OK to ignore the message.
G E T T I N G S T A R T E D T U T O R I A L
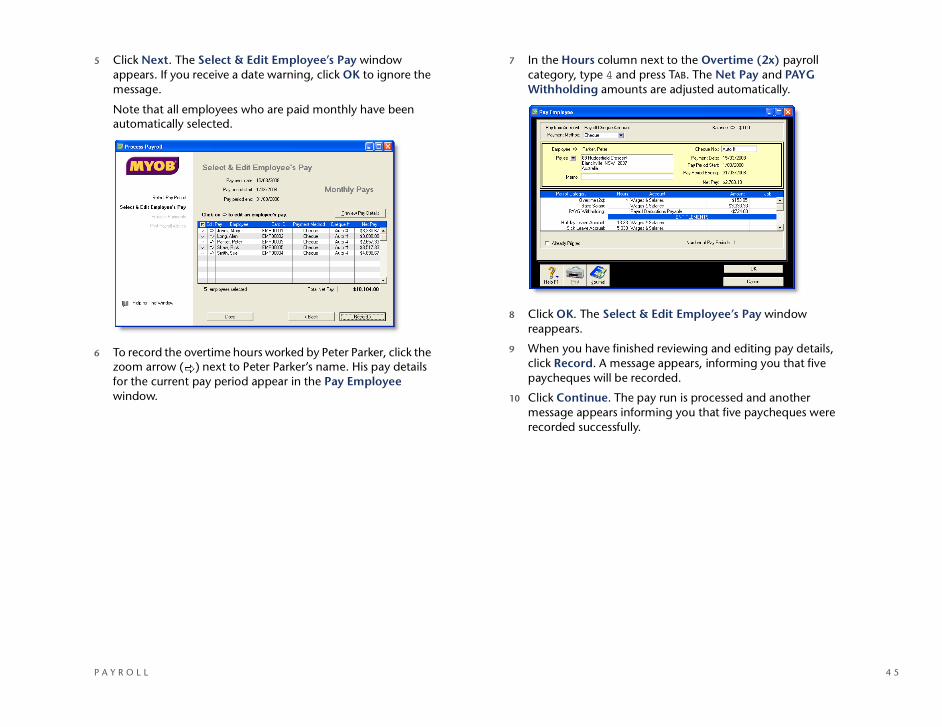
5 Click Next. The Select & Edit Employee’s Pay window appears. If you receive a date warning, click OK to ignore the message.
Note that all employees who are paid monthly have been automatically selected.
6 To record the overtime hours worked by Peter Parker, click the zoom arrow ( ) next to Peter Parker’s name. His pay details for the current pay period appear in the Pay Employee window.
7 In the Hours column next to the Overtime (2x) payroll category, type 4 and press TAB. The Net Pay and PAYG Withholding amounts are adjusted automatically.
8 Click OK. The Select & Edit Employee’s Pay window reappears.
9 When you have finished reviewing and editing pay details, click Record. A message appears, informing you that five paycheques will be recorded.
10 Click Continue. The pay run is processed and another message appears informing you that five paycheques were recorded successfully.
P A Y R O L L 4 5

4 6
11 Click OK. The Process Payments window appears.
12 To print the paycheques, you would click Print Paycheques. However, for the purposes of this tutorial click Next. The Print Payroll Advice window appears.
13 If you want to print pay advice for your employees. click Display Pay Advice.
14 Click Finish.
You have successfully processed a pay run for five employees.
G E T T I N G S T A R T E D T U T O R I A L