Genesis Climber MOSPEADA 1 32 Legioss Prototype Model Diary John Moscato
188
-
Upload
patrick-fontaine -
Category
Documents
-
view
139 -
download
4
description
Genesis Climber MOSPEADA 1 32 Legioss Prototype Model Diary John Moscato
Transcript of Genesis Climber MOSPEADA 1 32 Legioss Prototype Model Diary John Moscato
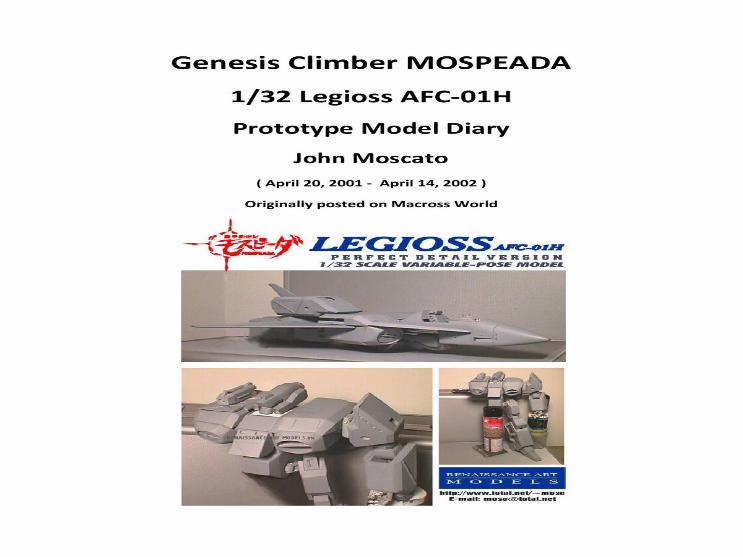
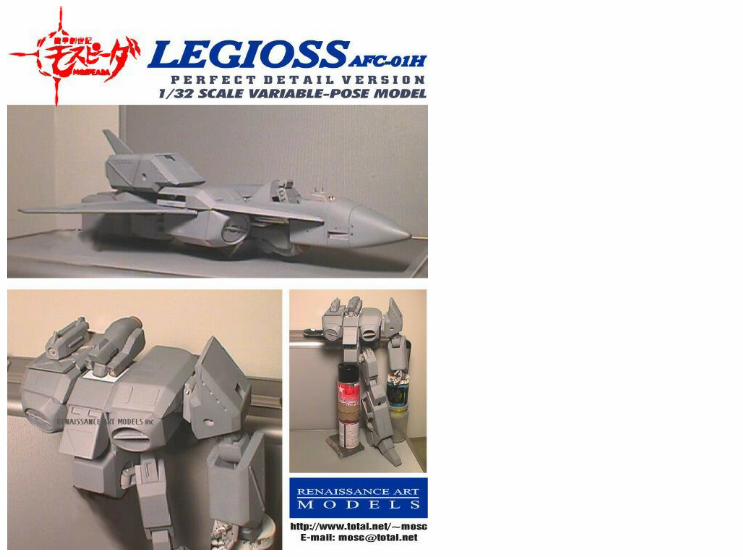

Genesis Climber MOSPEADA
1/32 Legioss AFC-01H
Prototype Model Diary
John Moscato
( April 20, 2001 - April 14, 2002 )
Originally posted on Macross World

"I am proud to present the first of many progress reports on what is sure to be the
definitive Legioss model when complete. John Moscato runs 'Renaissance Art Models', a
custom model shop in Canada. His attention to detail is incredible-please visit his site and
see his incredible Formula Cars. He could be thought of as the Canadian version of Tanmen

(who did the 1/48 Ultimate Detail VF-1 Valkyrie).
ANYWAYS, he is a big Macross and Mospeada fan-and for a personal project he has decided
to make a 1/32 scale perfect detail Legioss model! Not directly variable, but it can be built
in any of the 3 modes. After internally debating whether to attack the VF-1 or the AFC-01,
he leaned towards the Mospeada side first. With all the attention to the VF-1 (Hasegawa and
Yamato), the Legioss has long been overlooked."
Shawn of MacrossWorld
April 20th, 2001
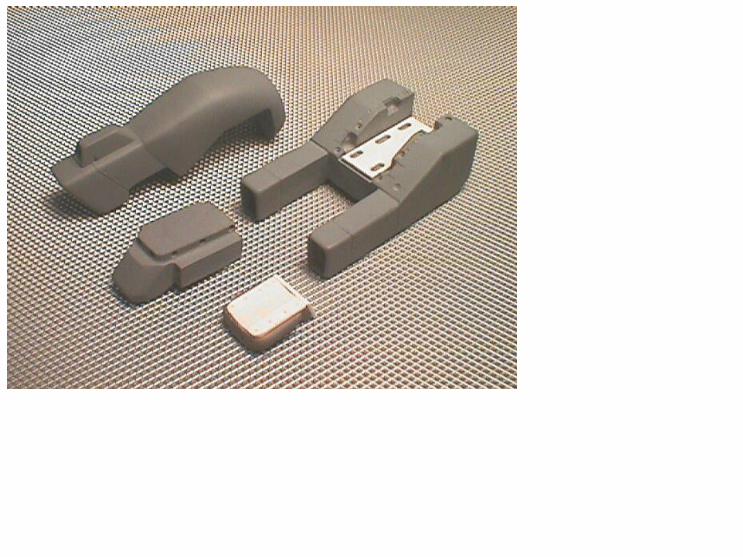
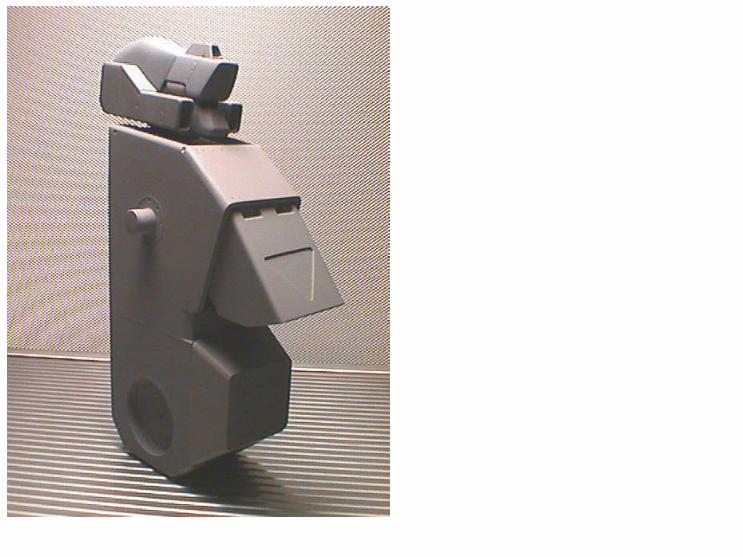
First Peek at the Head!
Here are five pics of the almost-completed Legioss 1/32 scale head unit. Unfortunately, I
was only able to squeeze off five shots before my battery died, but not to fear, more pics
are coming your way tomorrow!
The only external component not shown is the rear white radome that goes on the back of
the head, as I have yet to complete the attachment mechanism.
Basically, the components shown just need a bit of cleaning, but otherwise the shape is
there... Hard to see in the pics, but the area around the rivet points has that very slight

buckling which I always felt was missing from all of the good mecha/aircraft models: it's
visible on all modern aircraft, and it will be replicated in scale on my model.


April 21st, 2001
Camera recharged!
Well, here are a few more pics of the 1/32 Legioss head I'd promised you, thanks to a
freshly-recharged battery!

Indeed you were correct: the components of the head are separate, as you will see in the
included pictures. The head and the nosecone/cockpit area are, in my esteem, areas worth
putting a little extra detail in. Since there's no hard reference for the internal mechanism of
the head/sensor area, I'm basically ad-libbing.
I know there's a color schematic of the Legioss and Mospeada under-the-skin that was
printed on certain model box-tops, but I can't seem to get a hold of a good scan(!) of either,
so if you should know anyone who might have acces to it, please feel free to point me in
their direction.
In the meantime, I'll postpone working on the head-internals and continue to plot the other
components of the torso. My main reference for proportions is the Imai 1/72 Armo-soldier
and fighter, as I feel these are the very best/nicest Legioss models available in any scale...
The 1/48 transformable being horribly disproportionate and just plain U-G-L-Y!:) I'm also
going to eyeball some aspects of the 9" toy, which I feel has some interesting shapes to it.


May 26th, 2001
Taking shape!
Part one: The main body
As you can see, things have progressed considerably since the last set of pictures!

Most of the large components have now been machined into three dimensions for test-
fitting and "transform feasibility" with absolutely no problems encountered.
Though there are still quite a few components yet to sculpt; most notably the
nosecone/cockpit, hands and feet, the project is coming along at a very good pace, and is
quite ahead of schedule for the time being.
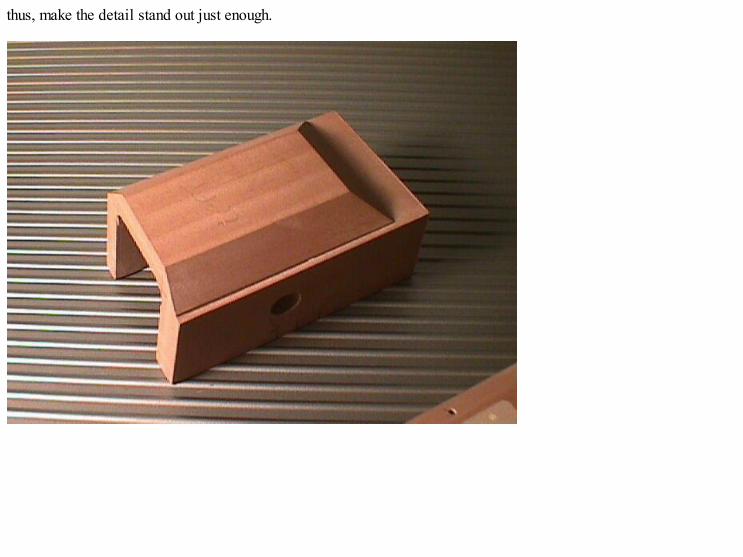
The first set of pictures center around the main torso module, primed in neutral grey.
Though I have opted to photograph a great deal of the components in unpainted form to
allow viewers to see the materials I'd used and subsequent alterations, this part's exterior
sides were predominantly white styrene, and would not have photographed well at all
otherwise.
The center module has numerous recesses and fittings to accommodate the hip-joints,
frontal thrusters, engines and nosecone, and will therefore feature de-mountable access
panels that will show off some of the Legioss' internal parts; giving the modeler the option
to build these in open or closed state.
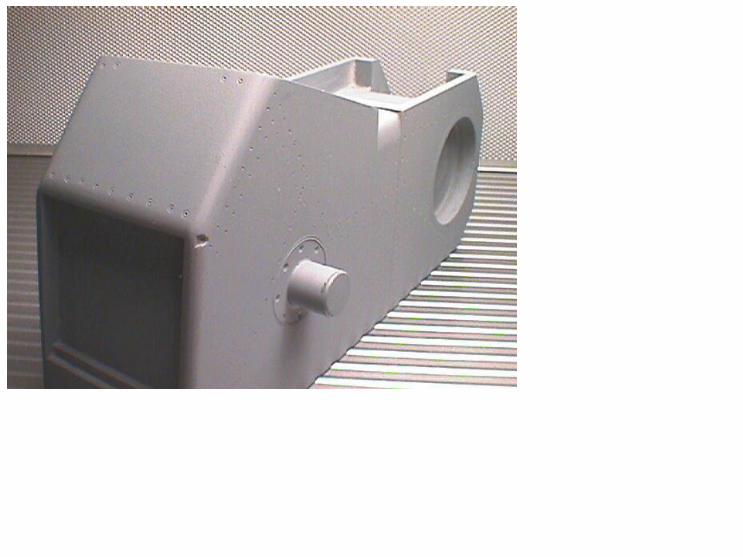
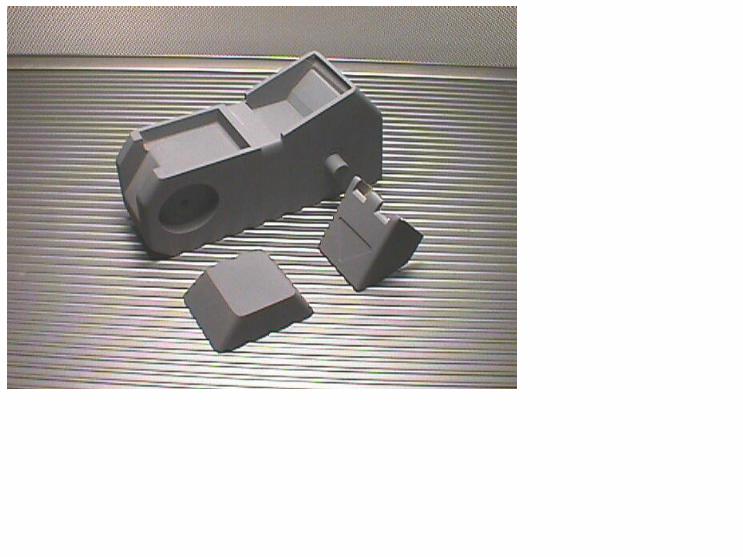

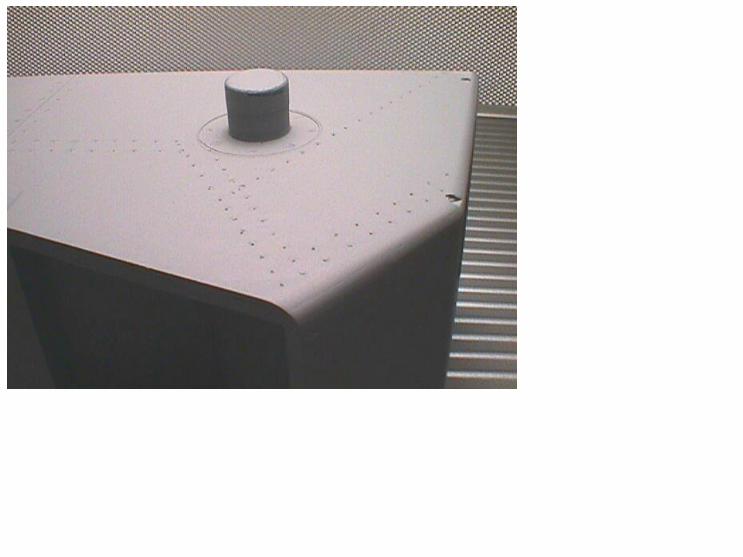

Though it was difficult to photograph, even with the grey primer, the outer surface of the
torso module is dotted with precisely aligned countersunk rivets and fasteners. I did not
want these to stand out tremendously, as I wanted to try to capture the fabrication
techniques and tight tolerances that will most probably be de rigueur in the near future, and
thus, make the detail stand out just enough.

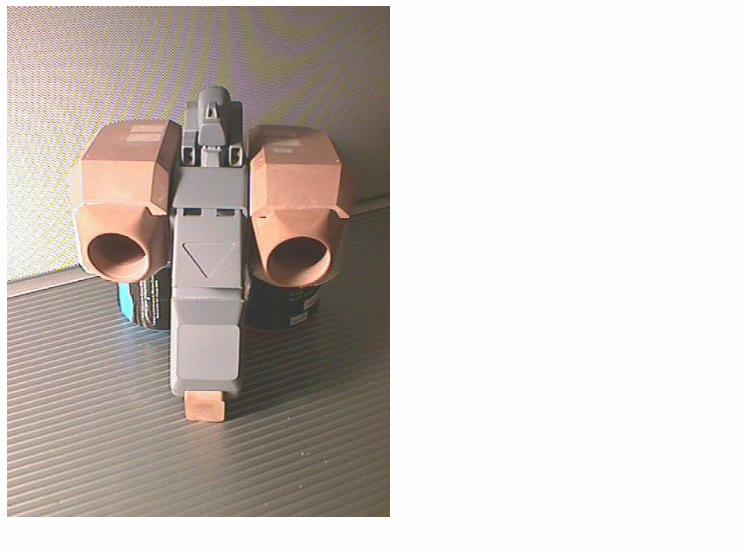
Part two: Engine nacelles and thigh pieces
The next set of pictures are of the semi-finished chest components/engine nacelles. The
brown/rust-colored material is grade 65 modeling board, which was used to construct nearly
all of the Legioss' components, and is my material of choice for most projects due to its

extreme workability with both handheld and heavy machine tools.

The lighter patches seen on the upper-surface of the completed nacelles are the HBT
insertion ports, which were milled-out and subsequently refilled with putty, as they were
located too far aft and therefore partially obstructed by the arms in fighter mode. These will
be re-milled at a later time in their correct location.

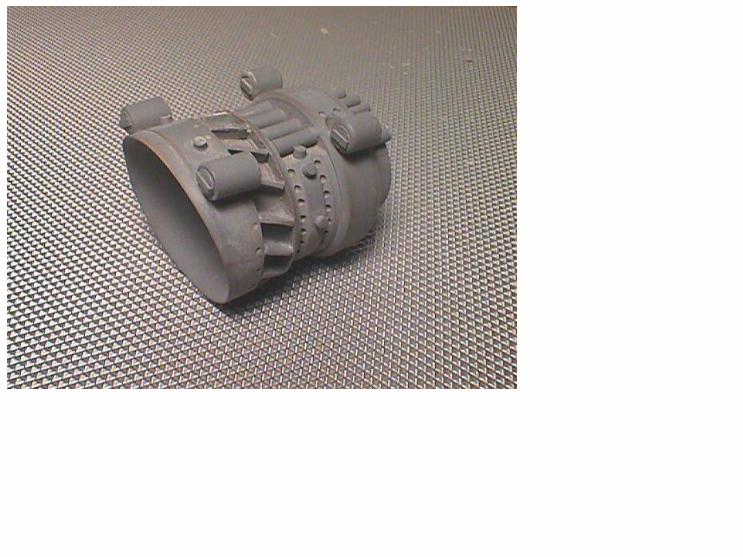
The exploded view of the engine pods clearly shows the partially hollowed-out main
housing, which will contain the JG-97M powerplants and cooling system. The entire engine
system will be "serviceable" by sliding the engine/intake assembly foreword out of the
nacelle, and will provide the modeler the option to build these open or closed.

The frontal view of the intake geometry shows the smooth contours of the leading edge of
the air intakes. These will later be fitted with variable-geometry louvers.
The last two pictures are of the thighs, still in their freshly-machined state. The paper
template is still affixed to one of the pieces, and serves as a visual guide when cutting the

rough shape of the part under the mill. The small holes visible on most of the unpainted
parts are for alignment pins, which I have opted to incorporate into the model so that parts
"fiddling" is kept to a minimum, and should make for substantially easier building, even for
novice modelers.
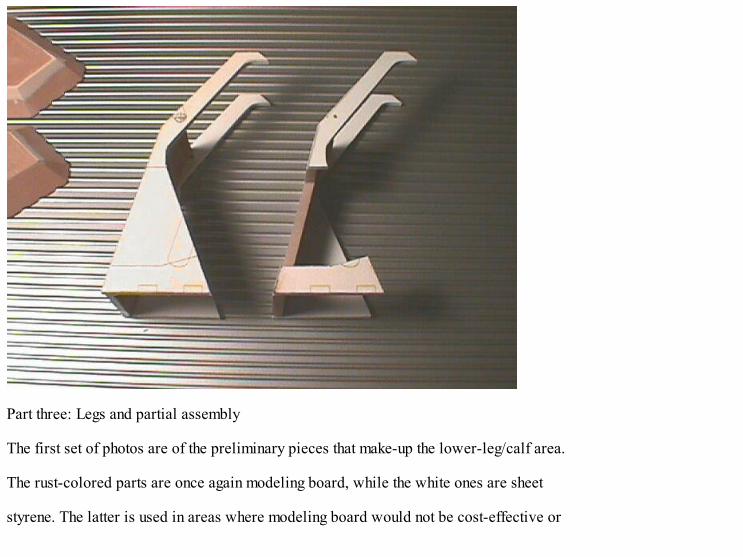
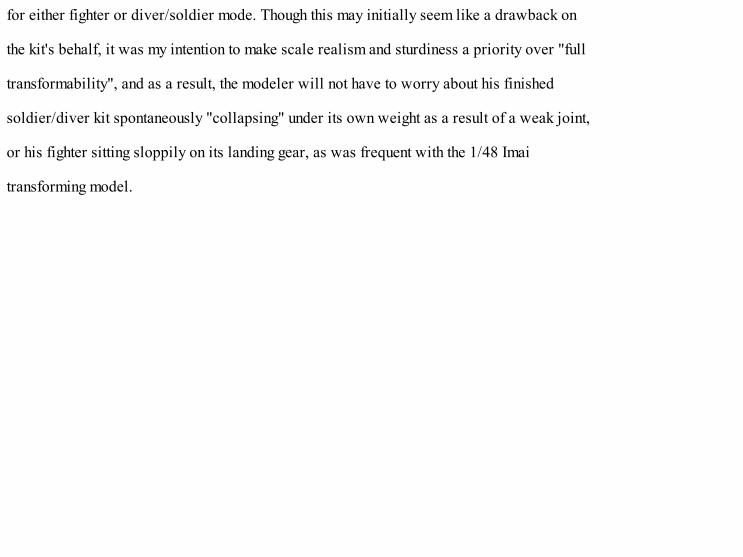
Part three: Legs and partial assembly
The first set of photos are of the preliminary pieces that make-up the lower-leg/calf area.
The rust-colored parts are once again modeling board, while the white ones are sheet
styrene. The latter is used in areas where modeling board would not be cost-effective or

solid enough depending on the geometry, as most modeling boards tend to be somewhat
brittle, and therefore not recommended for thinner parts.
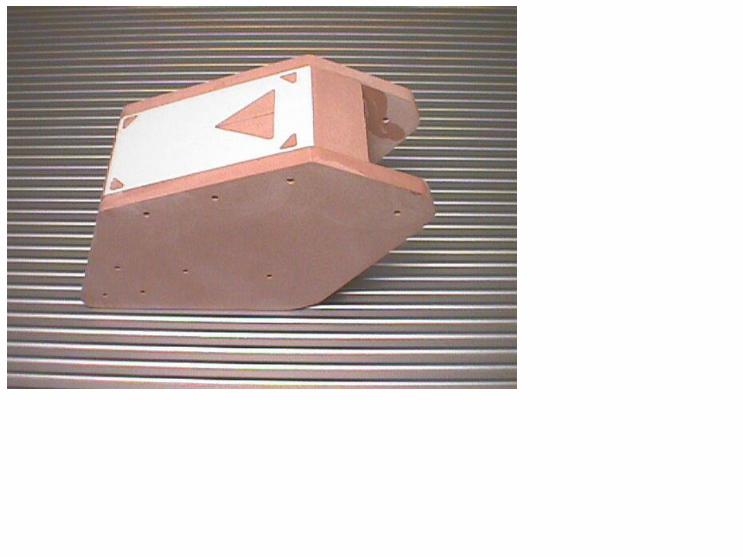


The alignment pinholes are once again visible on the central calf-piece, though some of
these will also serve as joints and will therefore accept screws. Notice that there is no slide-
rail of any sort on this piece to allow the thigh-part to slide in and out for different versions.
Instead, the modeler will have the option to use either of the two mounting holes provided
for either fighter or diver/soldier mode. Though this may initially seem like a drawback on
the kit's behalf, it was my intention to make scale realism and sturdiness a priority over "full
transformability", and as a result, the modeler will not have to worry about his finished
soldier/diver kit spontaneously "collapsing" under its own weight as a result of a weak joint,
or his fighter sitting sloppily on its landing gear, as was frequent with the 1/48 Imai
transforming model.

The next, more interesting series of pictures shows many of the Legioss parts temporarily
fitted in fighter mode. The ruler gives an idea of the immensity of the model thus far.
Though the fit of the parts may initially appear sloppy, this in fact quite normal, as the
pieces are affixed to each other only with masking tape, and are not aligned properly.


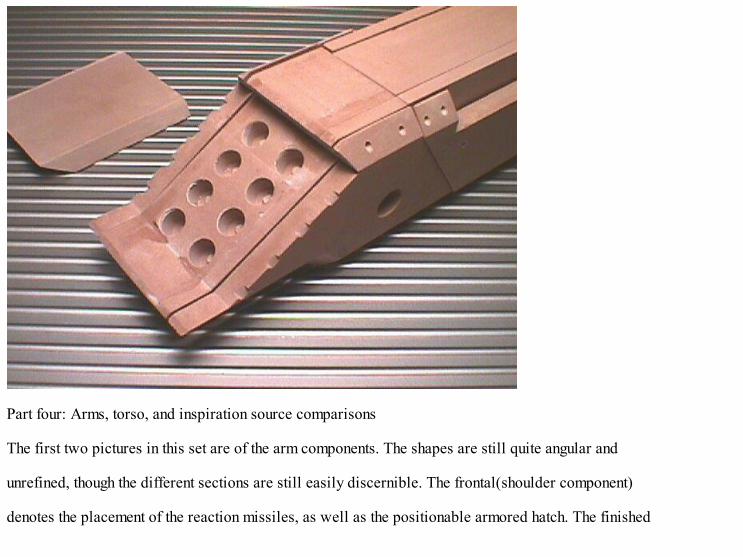
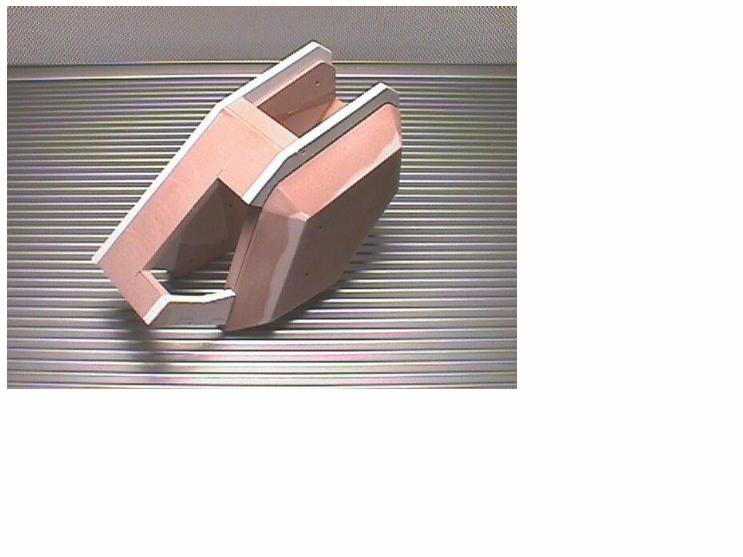
Part four: Arms, torso, and inspiration source comparisons
The first two pictures in this set are of the arm components. The shapes are still quite angular and
unrefined, though the different sections are still easily discernible. The frontal(shoulder component)
denotes the placement of the reaction missiles, as well as the positionable armored hatch. The finished
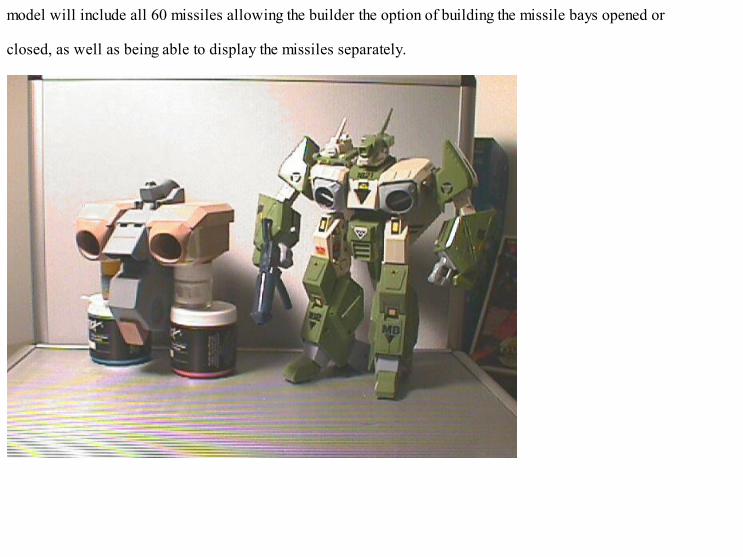
model will include all 60 missiles allowing the builder the option of building the missile bays opened or
closed, as well as being able to display the missiles separately.

The side-by-side picture of the 1/32 model with the 1/35 toy illustrates the drastic difference in size of
either design. The 1/72 scale Imai armo-soldier(also pictured) was used as a base point for proportions,
as it is the most aesthetically-pleasing version of the Legioss produced in any scale, though my own draft
was altered in all the necessary places in order to "tweak" the design for transforming purposes, as well as toimprove the look.


The last set of pictures is of the torso components assembled in soldier mode.


August 14th, 2001
Back on track!
The first set of updated pics are of the arm components. Though you've seen these in
closed/fighter form, I've since made some modifications, as well as sculpted the bicep
section components as well. The major joints have already been plotted, but I'm seriously
contemplating double-jointing the elbow to give the soldier maximum pose-ability.


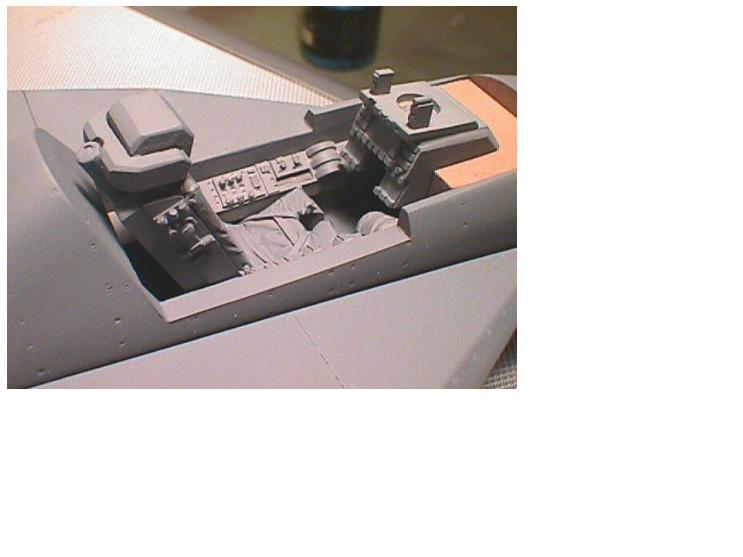
As you can see, the basic components are sculpted, even the dash and ejection seat,
though no major details have been added yet. The hollowed-out portion behind the
nosecone will house the main radar assembly, while access hatches along the main tub will
house additional avionics and plumbing. Modelers will have the option of leaving all hatches

opened or closed.
Though it's not noticeable in these pics, the nose is quite stubby when wiewed in fighter
mode; particularly with the LEX fins attached, and as a result I'm seriously contemplating
lengthening the nose another 2cm to harmonize the look of the plane. The down-side to this
is that the nose will extend to about knee-level in soldier mode, and there is no reasonnable
way of articulating the nose to collapse on itself or pivot rearward and out of the way.
Ideally, I'd also like to avoid having to "swap" nosecones for the sake of realism.
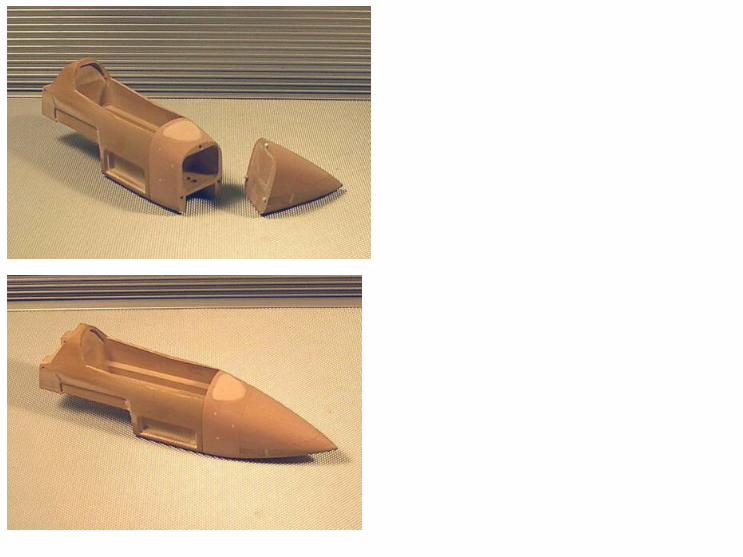
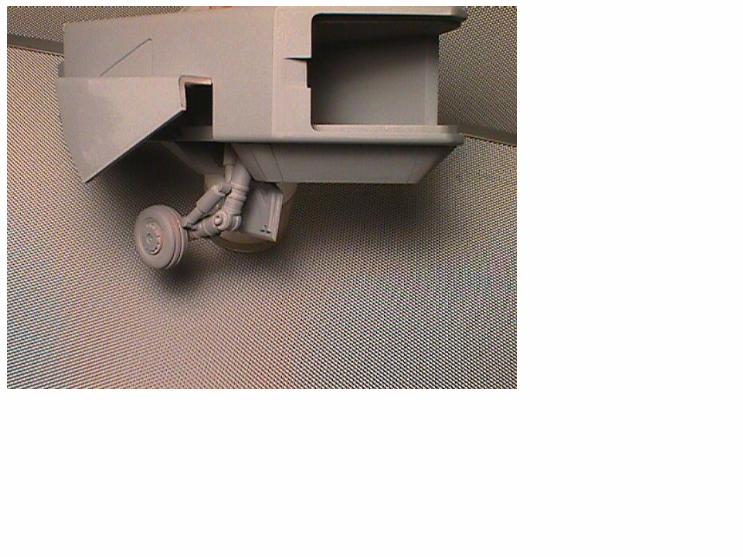
Picture set 2: nose section.

The first pic here (albeit a poor one) is of the front landing gear strut. My new camera
seems to be quite inadequate for photographing small pieces, so you'll have to use your
imagination on this one! :p

The main strut shaft is turned aluminum, while the shock absorber is brass. I'm not quite
married to this particular piece, since it looks a little iffy to my eye, so it's very possible that

I'll start it over.
The next two pictures are of the front of the foot assembly, with all pieces having been
milled in Ren-Shape. The toe will probably be hollowed-out at a later time to save weight.
The last set of pictures are of the combined torso/leg assembly, which have been crudely
mocked-up to verify size and proportions. My next priority will be to machine the

appropriate neck/shoulder/hip and ankle joints. This will allow for better pictures with
components properly attached, and will allow me to verify that each part has the necessary
range of motion without binding.
The overall size of the model is particularly apparent with the briefcase serving as a
backdrop, and at this rate, it's probably safe to say that this Legioss kit will tower over most
anything in the average model-builder's showcase.


September 28th, 2001
Details inside!
Here you can see the full range of motion for the arm, and the incredible INDEPENDENTLY
poseable fingers.


Shoulder details! One word-wow!

The 3 barrel Thunder Stick!


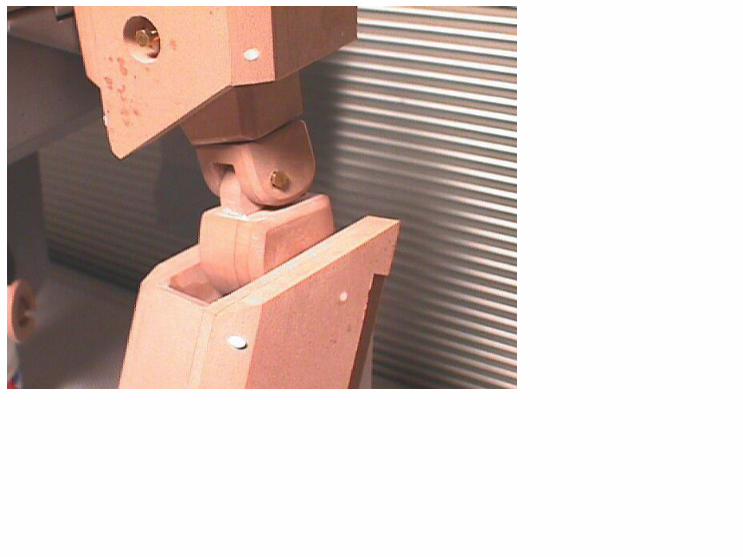
Uhmmm-this is the leg.

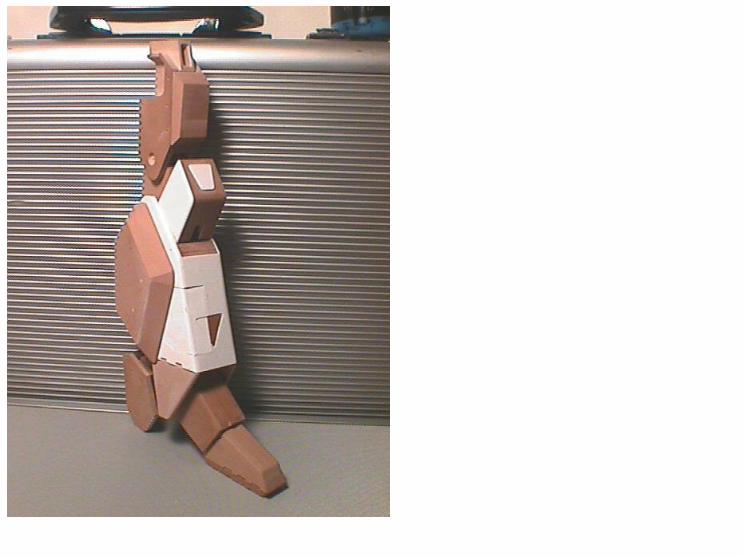


And the multi-poseable foot! It will be ball jointed for that wide stance cool posing our robots so
desperately need!


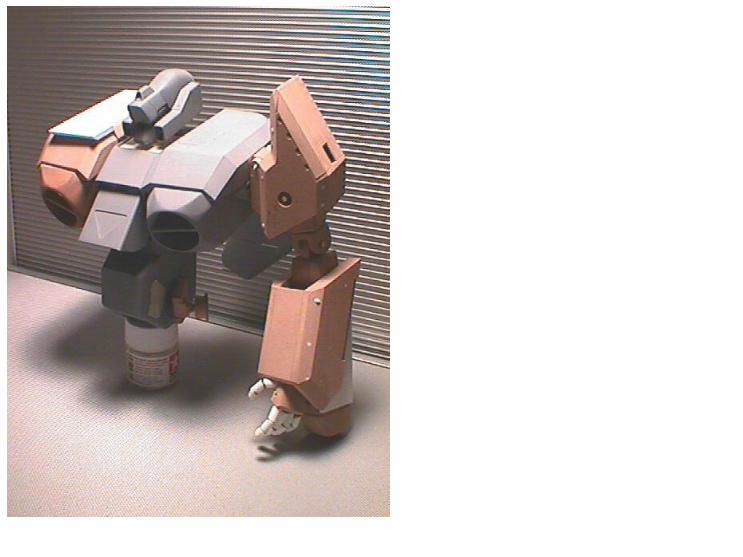
Torso shots. Looking pretty tough!


The money shot! Check out the engine nacelle with removable turbine!

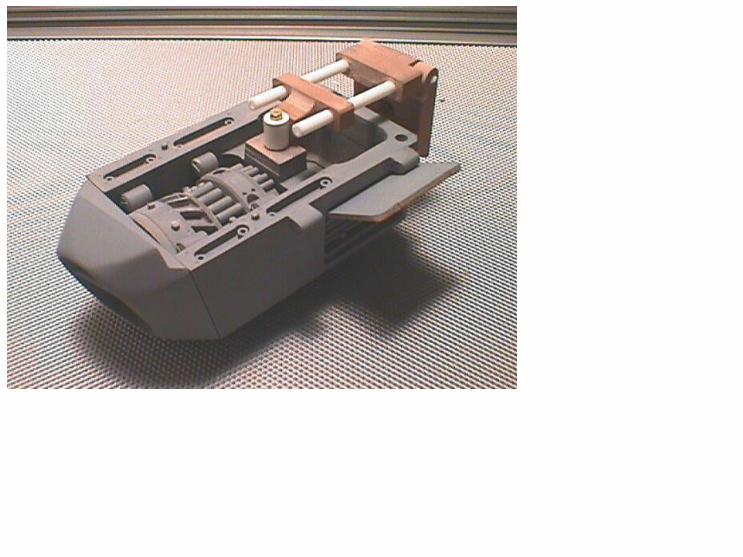


Here is a basic body assembly of all the pieces you see above.


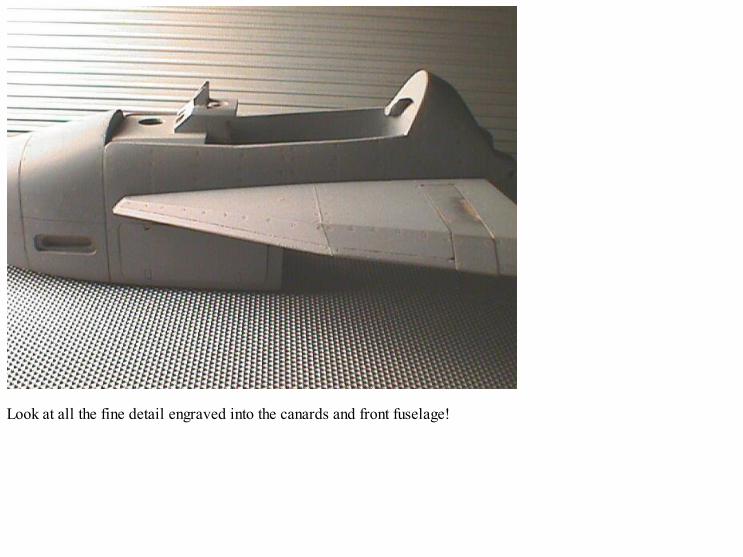
Look at all the fine detail engraved into the canards and front fuselage!


Oh..did he mention that the radome can be OPENED to show the radar assembly!!?
I think you need to take some deep breaths before you pass out!


Lets throw in a full motion landing gear strut shot, and oh...independently operated wing
flaps and slats. ohhh mamma!


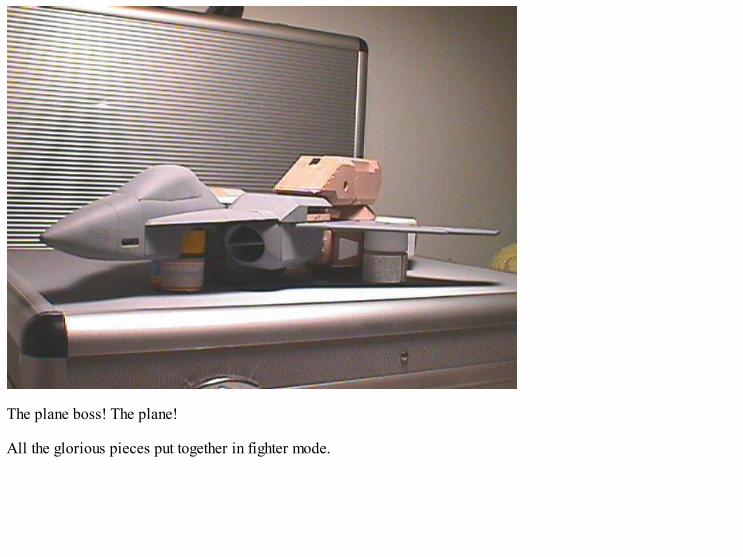
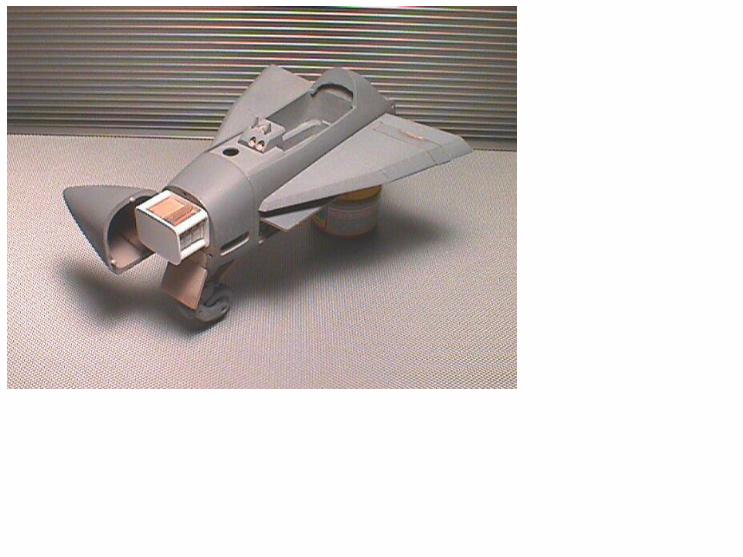
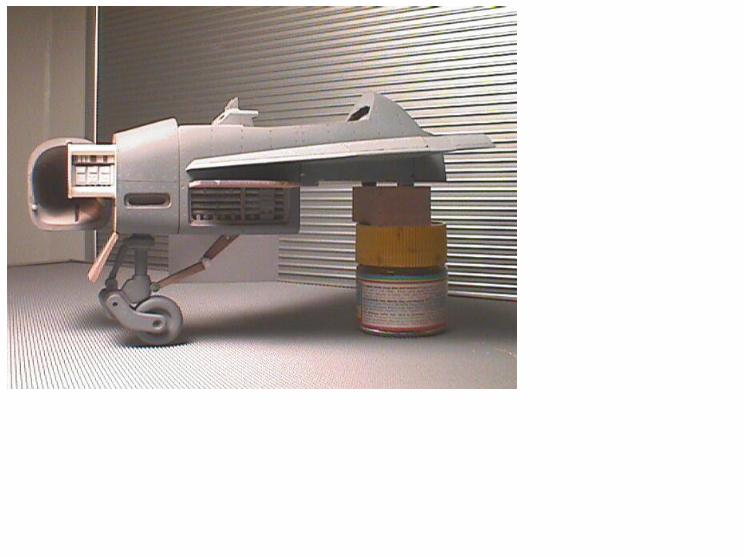
The plane boss! The plane!
All the glorious pieces put together in fighter mode.


November 25th, 2001
Getting Close!
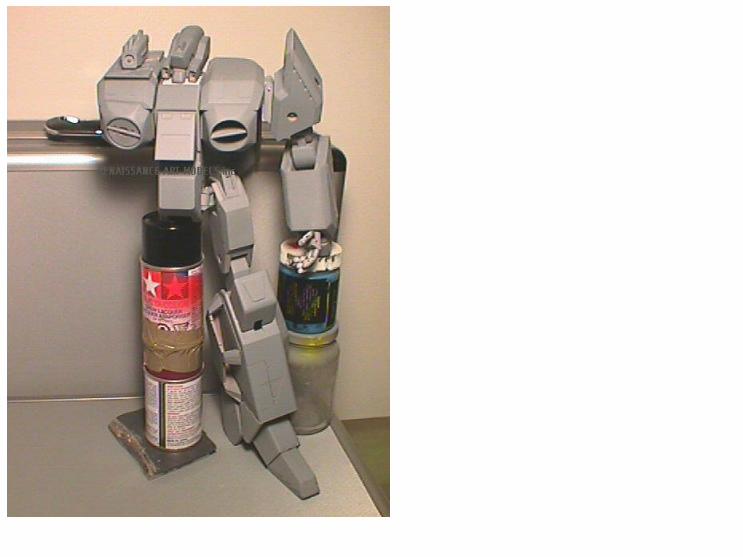
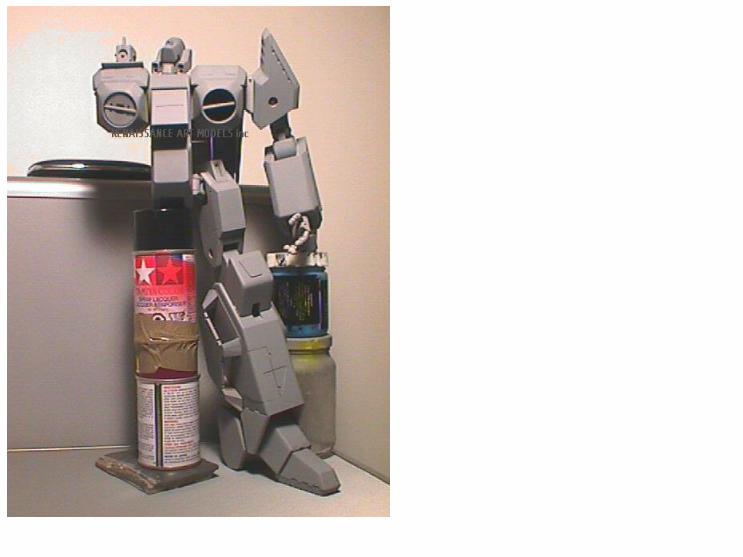
Quick notes as the pictures basically tell the whole story: I would have put the landing gear
on in the long-shots, but since the patterns are almost all plastic, they would have collapsed

under the weight of the model. The finished, cast pieces will obviously be cast metal.


The majority of the parts have all been primed, though these have still to undergo proper
finishing, paneling and riveting, as well as sealing before molds can be attempted.


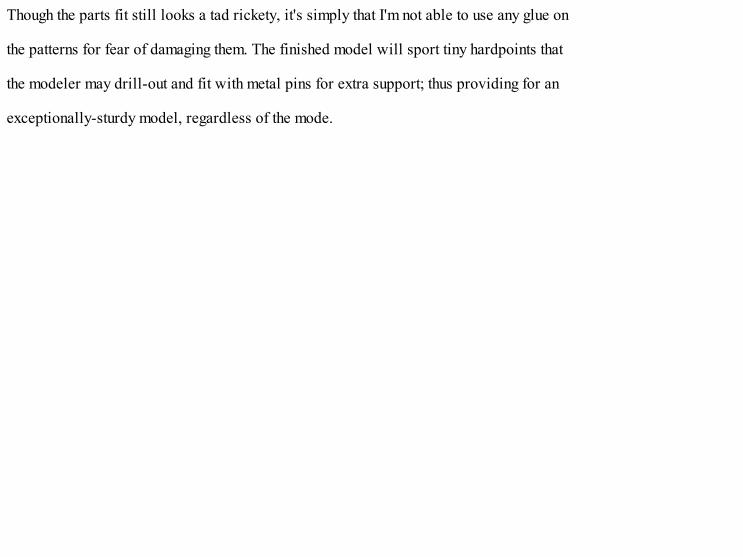
Though the parts fit still looks a tad rickety, it's simply that I'm not able to use any glue on
the patterns for fear of damaging them. The finished model will sport tiny hardpoints that
the modeler may drill-out and fit with metal pins for extra support; thus providing for an
exceptionally-sturdy model, regardless of the mode.


Oh-and here are the size comparisons against that newly released Yamato VF-1 Toy!

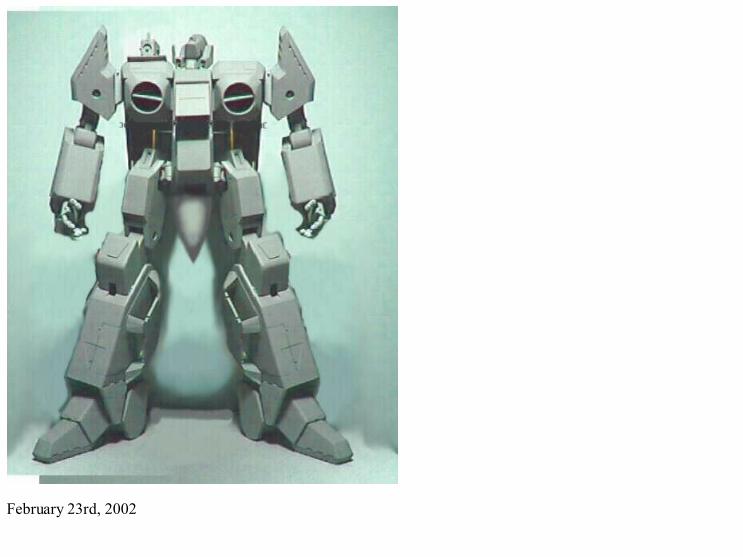
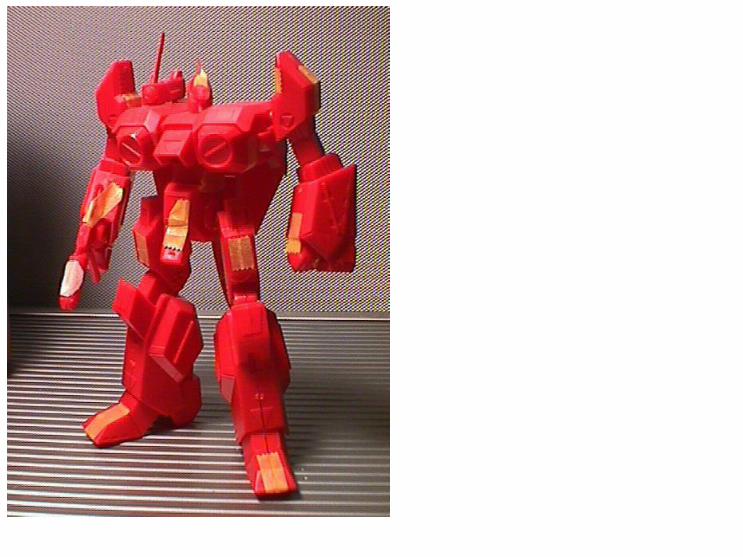
February 23rd, 2002
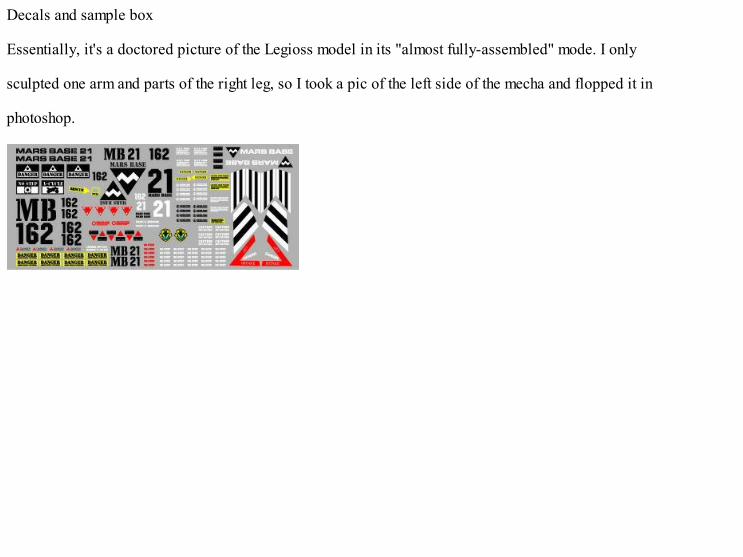
Decals and sample box
Essentially, it's a doctored picture of the Legioss model in its "almost fully-assembled" mode. I only
sculpted one arm and parts of the right leg, so I took a pic of the left side of the mecha and flopped it in
photoshop.

The second image is of the almost-finished decal sheet. The whole thing was done completely from
scratch, and I'm happy to say, it leaves the old Imai decals in the dust. I've included a lot of little "NO
STEP" markings as well. I think they'll provide a nice touch to a model of this scale.
The third image is of the as-of-yet tentative box-art. The IMAI styling is quite evident; I modeled myself
on their old packaging, as I felt it was(and still is) a truly magnificent example of layout and color
harmony. To this day, I don't think I've seen packaging that is as pleasant to the eye.
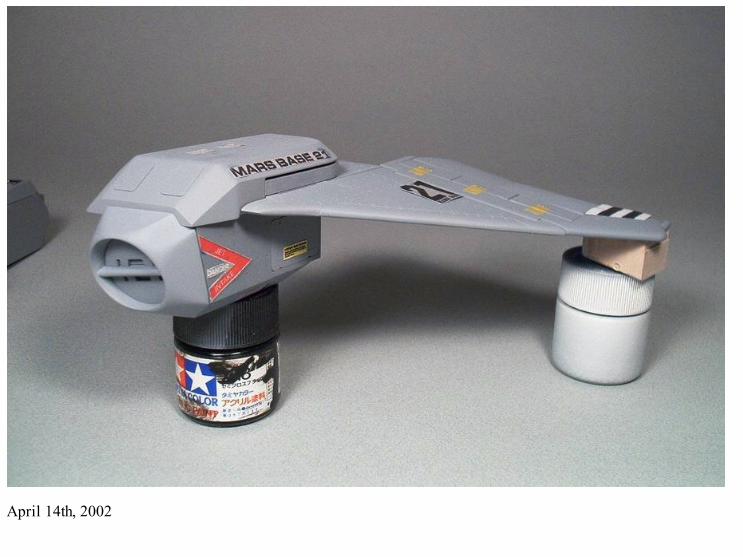
April 14th, 2002

Suprise!
I know the grey primer is a bit of an eyesore, so I thought I'd dress it up a tad by
temporarily-affixing some of the decal artwork. It also gave me an opportunity to make sure
all the logos were sized adequately.
Rivets... This thing has a s&*W$^@t load of them, but my feeling is that they're a nice
touch and give the model a realistic and subtle hint of detail. I'm about half-way through
the process, which is quite long, as each one must be punched individually by hand.
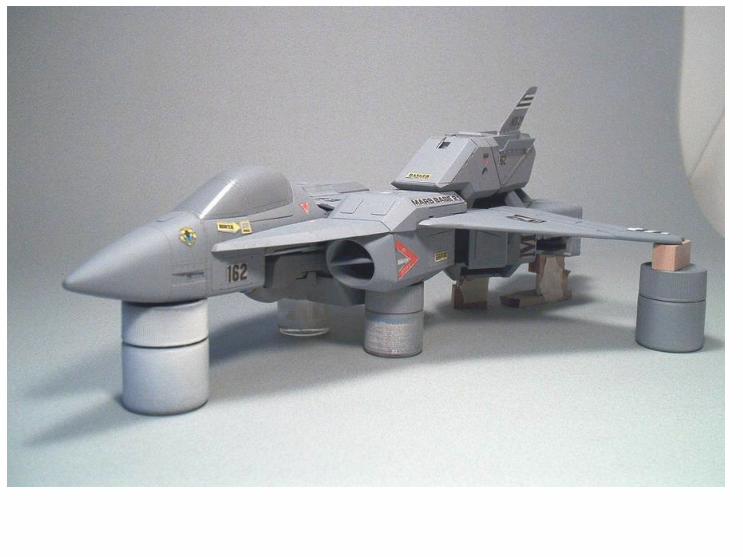
Alterations: one aspect of the model which I decided to alter since the last update was the
location of the wings, as I wasn't happy with the way the main wing platform stepped-down
from the LEX. By comparing older pictures of the fighter, you'll notice that I mounted the
wings about 5mm higher, aligning the under-side with the LEX and adding a splitter-plate
aft of the engine nacelle that blended-in with the wing itself; closing off the gap between
the engine nacelle, the arm and the wing in fighter mode.


While I'm on the subject of the wings, I photographed a nearly-completed wing with all the
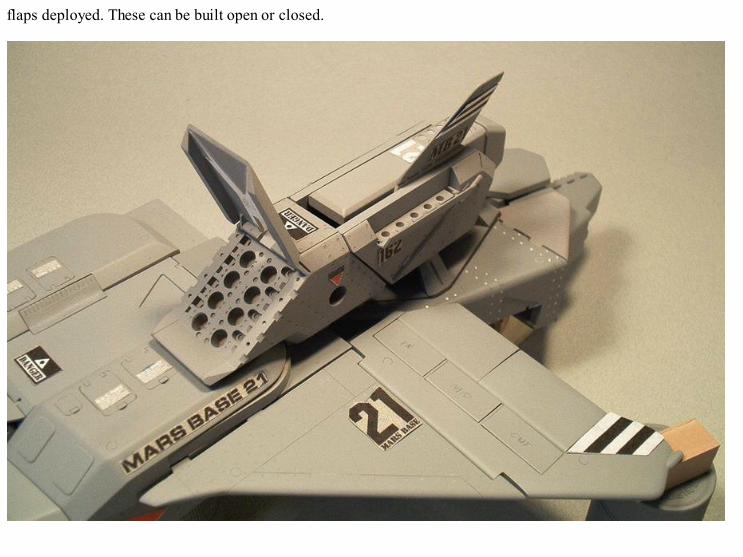
flaps deployed. These can be built open or closed.

Pictures of the arm-missile launch bays also have a bit of extra detail added. As with the

wings/flaps, these can be positioned open or closed.
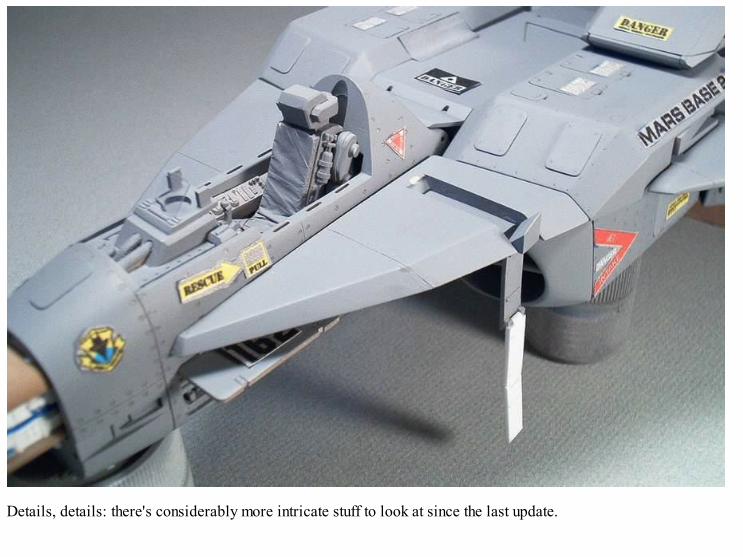
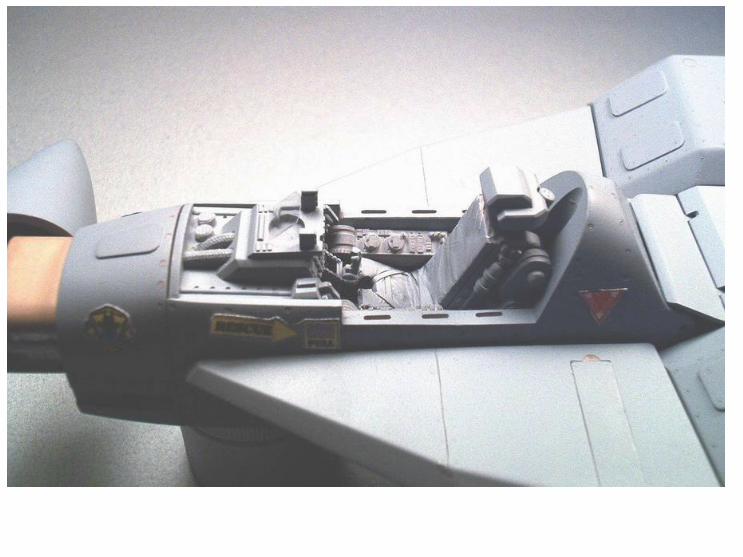
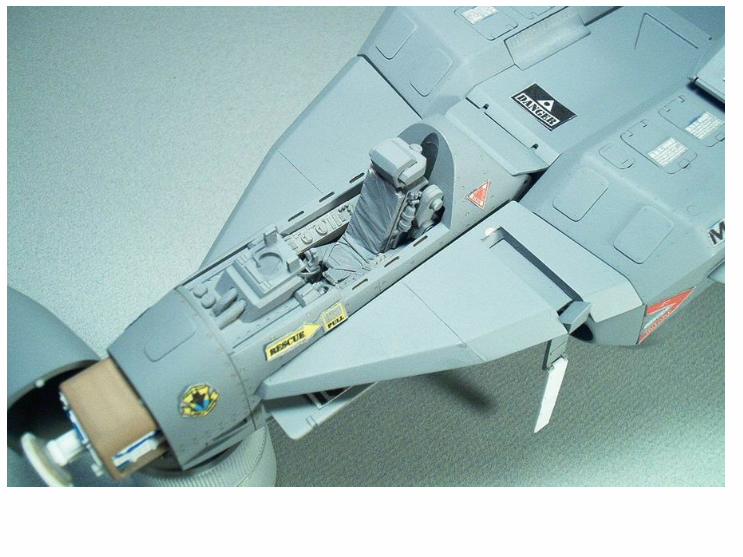
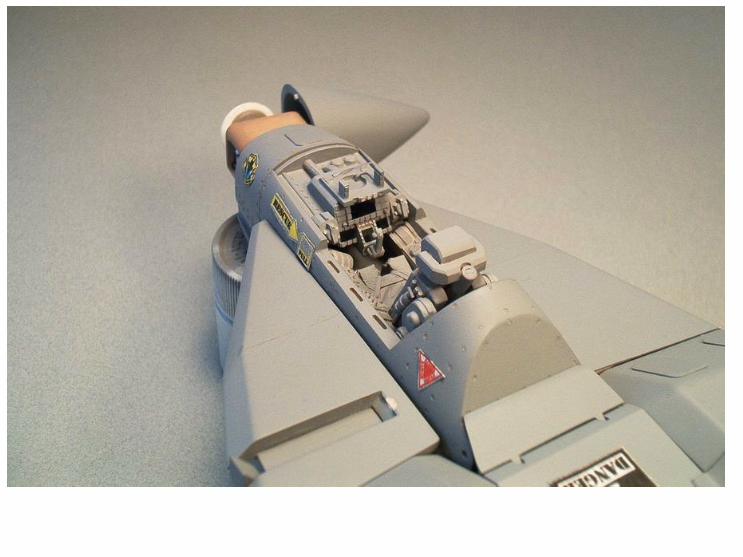
Details, details: there's considerably more intricate stuff to look at since the last update.

Firstly, the pattern for the canopy was produced, as well as a re-worked-and detailed
cockpit section, sporting an improved HUD, cockpit screens, and center control stick.
Basically, only the throttle and mode-change lever are missing now.


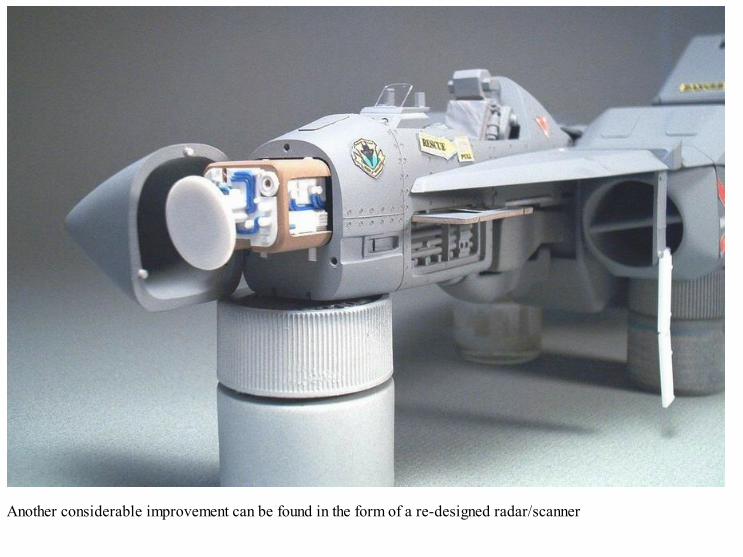
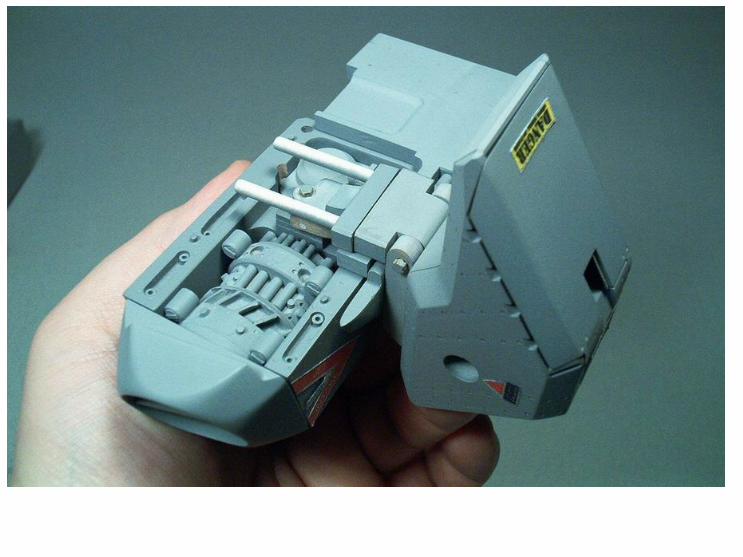
Another considerable improvement can be found in the form of a re-designed radar/scanner
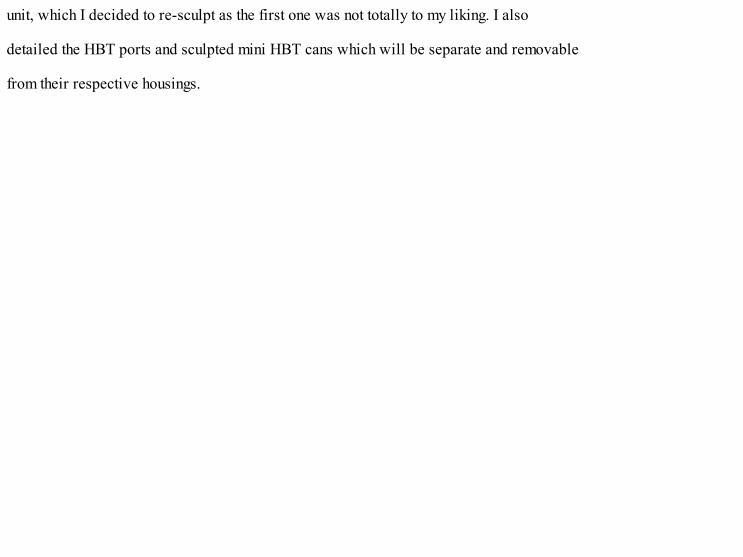
unit, which I decided to re-sculpt as the first one was not totally to my liking. I also
detailed the HBT ports and sculpted mini HBT cans which will be separate and removable
from their respective housings.


Moving along to the torso area, you'll notice that I added the thruster in the upper-chest

center section(the ride-armor stowage bin is SLIGHTLY visible underneath), and made a
pivoting hatch for the bottom section to access the hip joint articulators. I also took a shot
of the engine intakes; the left in fighter(open) mode, and the right in diver/soldier mode
with the FOD shudders in place.
Feet: thrusters: I also did a bit of tinkering in this area; detailing the inside of the
heel/afterburner, as well as machining the thrust nozzles themselves.
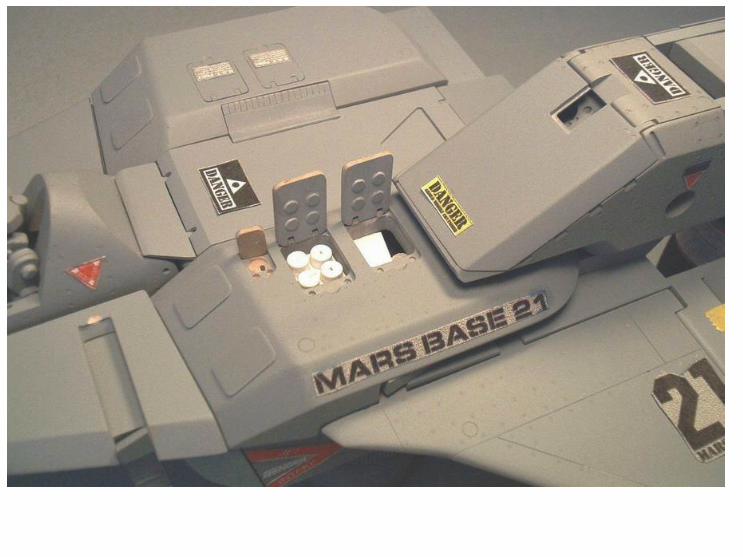


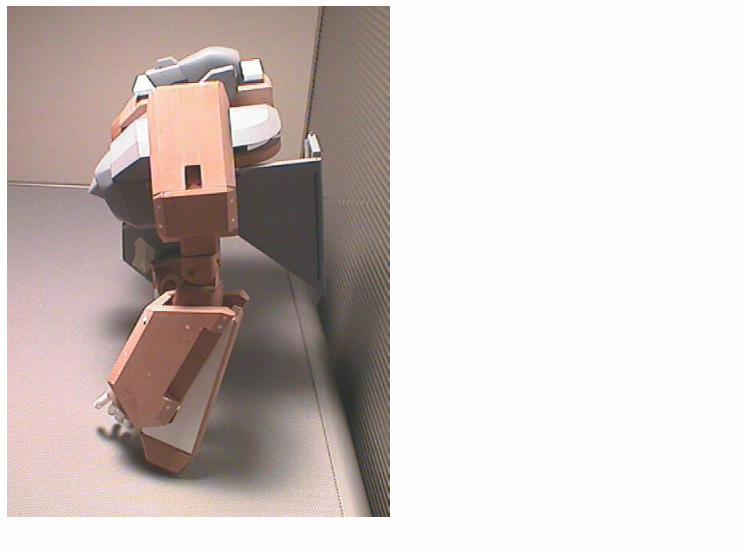
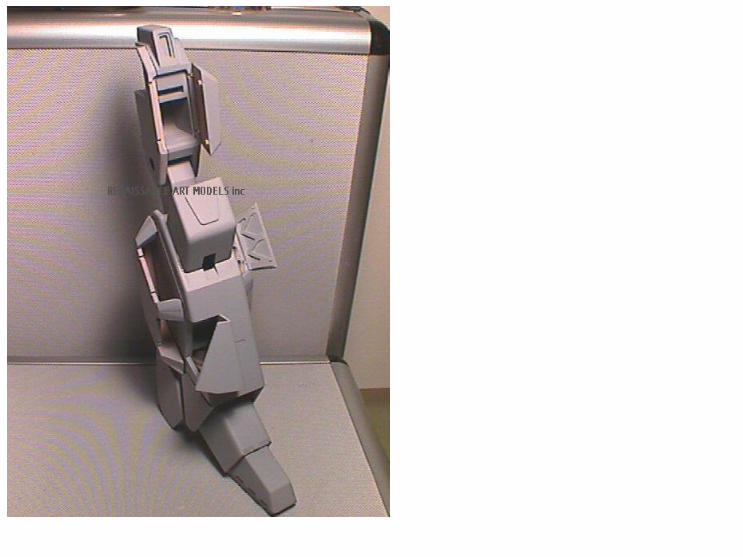
Special requests: several people have mentioned that I never took any pics of the Legioss in
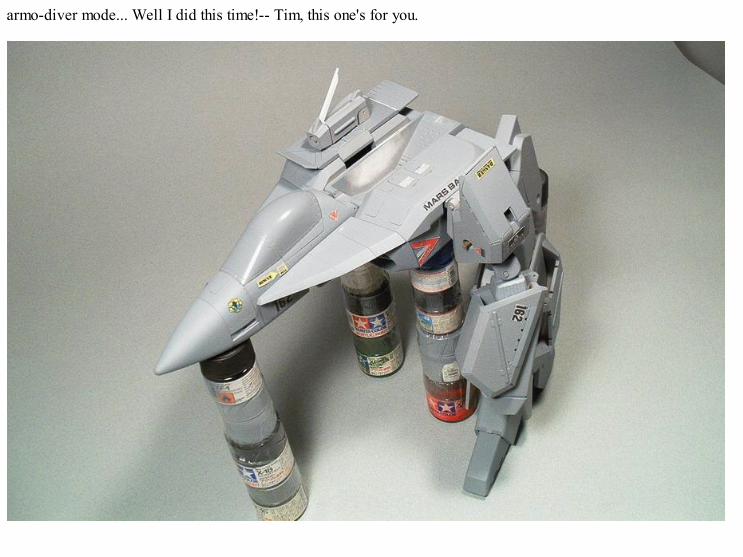
armo-diver mode... Well I did this time!-- Tim, this one's for you.


The leg in the pictures is positioned a little bit further aft than it would be on the completed

kit, but the torso was starting to wobble on those stacked paint-bottles, so I didn't dare
push the leg in any further forward for the photo-shoot for fear of toppling it altogether.


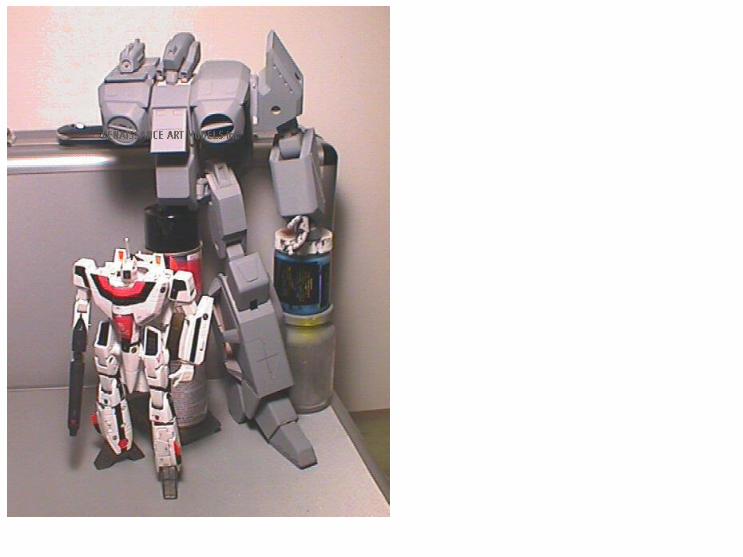
Smoke & mirrors: As I only sculpted one arm and leg, I resorted to a little bit of photo-
manipulating to give everyone an idea of what this thing would look like once completed.
The results aren't perfect, but I think they definitely give a better idea of what the Legioss
will look like once completed... This thing is BIG! I mean REALLY big: even a PG Zeta
Gundam is 2 inches short of a 1/32 Legioss in armo-soldier mode!


Anyway, that's it for this update. Once again, I'd like to remind everyone that if you'd like to

see this thing produced as a resin model that you can buy, don't forget to e-mail me and tell
me so!