GAME MANUAL - CWG2 - Civil War Generals 2 Manual.pdf · They had larger armies and greater ... LEE,...
77
GAME MANUAL
Transcript of GAME MANUAL - CWG2 - Civil War Generals 2 Manual.pdf · They had larger armies and greater ... LEE,...

GAME MANUAL

QUALITY ASSURANCE & Greg Sheppard
SCENARIO DESIGN Andy M. Santom John McAuleyAylissa McIntosh Terence ClareyEniola Oluwole Hans Wang CP McBeeKeenan Davis
MULTIMEDIA HISTORY &
FILM FOOTAGE Jay Wertz &Associates
CIVIL WAR PAINTINGS Mort Künstler
HISTORICAL RESEARCH Doug Gonya
Doug Sawan
Gordon Calhoun
Robin Muir
VOICE ACTORS Keith CharlesMike Rosenbaum
Based on the original R.E.Lee: Civil War General gamedesign of Jeff Fiske.
Special thanks to Glenn Oliver, Steve Serafino, andDarrin Horbal for their invaluable support andadvice.
CIVIL WAR GENERALS 2: GRANT, LEE, SHERMAN usesSmacker Video Technology. Copyright © 1994 byInvisible, Inc. d.b.a. RAD Software.
GGRRAANNTT,, LLEEEE,, SSHHEERRMMAANN
3
EXECUTIVE PRODUCER Peter Haffenreffer
GAME DESIGNER Doug Gonya
PRODUCER Steve Grammont
PROGRAMMING Dean Lawson
ADDITIONAL PROGRAMMING David LeCompte
Brian ReillyPatrick Doane Mark Emmert
ARTISTS Andrea Muzeroll
Peter Crafts
CREATIVE DIRECTOR Chris Beatrice
MANUAL Chris Clark
MUSIC Keith Zizza
SOUND, & FILM EDITING Ed Saltzman
QUALITY ASSURANCE MANAGER Forrest Walker
LEAD TESTER Ken Parker
MAPS Ken ParkerEniola Oluwole
CCIIVVIILL WWAARR GGEENNEERRAALLSS 22
CREDITS

GGRRAANNTT,, LLEEEE,, SSHHEERRMMAANN
5
Part 1: Int roduction . . . . . . . . . . . . . . . . . . . . .6Game Overview . . . . . . . . . . . . . . . . . . . . . .7Objectives . . . . . . . . . . . . . . . . . . . . . . . . . . .9Game Options & Multiplayer Features . . . . .10Installation and Loading . . . . . . . . . . . . . . . .11Multimedia History . . . . . . . . . . . . . . . . . . . .12Where Do I Start? . . . . . . . . . . . . . . . . . . . . .13Game Time and Interface . . . . . . . . . . . . . . .14Menu Items . . . . . . . . . . . . . . . . . . . . . . . . .16Tutorials . . . . . . . . . . . . . . . . . . . . . . . . . . . .24
Part II : Reference Section . . . . . . . . . . . . . . . . .38Campaigns . . . . . . . . . . . . . . . . . . . . . . . . . .38Units . . . . . . . . . . . . . . . . . . . . . . . . . . . . . . .50The Information Panel . . . . . . . . . . . . . . . . . .62
Displays . . . . . . . . . . . . . . . . . . . . . . . . . .62Number of Men . . . . . . . . . . . . . . . . . . . .64Movement Points . . . . . . . . . . . . . . . . . . .66Supply . . . . . . . . . . . . . . . . . . . . . . . . . . .67Firepower . . . . . . . . . . . . . . . . . . . . . . . . .69Unit Organization . . . . . . . . . . . . . . . . . . .70Unit Health . . . . . . . . . . . . . . . . . . . . . . .72Morale . . . . . . . . . . . . . . . . . . . . . . . . . . .73Unit Quality . . . . . . . . . . . . . . . . . . . . . . .75Experience . . . . . . . . . . . . . . . . . . . . . . . .76Weapon Type . . . . . . . . . . . . . . . . . . . . . .77
Division Commanders & Unit Leaders . . . . .78How to Reassign & Dismiss Leaders . . . .80Leader Ratings . . . . . . . . . . . . . . . . . . . . .81
Special Orders . . . . . . . . . . . . . . . . . . . . . . . .83Movement and Terrain . . . . . . . . . . . . . . . . . .87
Cover . . . . . . . . . . . . . . . . . . . . . . . . . . . .91Height . . . . . . . . . . . . . . . . . . . . . . . . . . .92Zone of Control . . . . . . . . . . . . . . . . . . . .92Stacking Units . . . . . . . . . . . . . . . . . . . . .93
CCIIVVIILL WWAARR GGEENNEERRAALLSS 22
TABLE OF CONTENTS Visibility . . . . . . . . . . . . . . . . . . . . . . . . .93Line of Sight . . . . . . . . . . . . . . . . . . . . . .94Line of Fire . . . . . . . . . . . . . . . . . . . . . . .94Hexes . . . . . . . . . . . . . . . . . . . . . . . . . . . .94
Zoom . . . . . . . . . . . . . . . . . . . . . . . . . . . . . .95Combat . . . . . . . . . . . . . . . . . . . . . . . . . . . . .96
Basic Structure of an Engagement . . . . . .97Artillery Attacks . . . . . . . . . . . . . . . . . . . .98Indirect Fire . . . . . . . . . . . . . . . . . . . . . . .99Coordinated Attacks . . . . . . . . . . . . . . . . .100Rear Attacks . . . . . . . . . . . . . . . . . . . . . . .100Charges . . . . . . . . . . . . . . . . . . . . . . . . . .101Multiple Unit Attacks . . . . . . . . . . . . . . . .102Surprise Attacks . . . . . . . . . . . . . . . . . . . .102Specialist Attacks . . . . . . . . . . . . . . . . . . .102 Voluntary Retreats & Exits . . . . . . . . . . . .102Routed Units . . . . . . . . . . . . . . . . . . . . . .103Video Clips . . . . . . . . . . . . . . . . . . . . . . .104Dawn, Dusk, and Night Turns . . . . . . . . .105Reinforcements . . . . . . . . . . . . . . . . . . . .105Play Level . . . . . . . . . . . . . . . . . . . . . . . .106After Combat Report . . . . . . . . . . . . . . . .107Winning the Game . . . . . . . . . . . . . . . . . .108Weapons & Ammunition . . . . . . . . . . . . . 110
The Command Tents . . . . . . . . . . . . . . . . . . 114The Campaign Game . . . . . . . . . . . . . . . . . . 116Scenario Editor . . . . . . . . . . . . . . . . . . . . . . . 122
Part 3: Appendix . . . . . . . . . . . . . . . . . . . . . . . 133Historical Considerations . . . . . . . . . . . . . . . 133Strategy Hints & Tips . . . . . . . . . . . . . . . . . . 134Multiplayer Games . . . . . . . . . . . . . . . . . . . . 137Customer Service Support & Sales . . . . . . . . 141Technical Tips . . . . . . . . . . . . . . . . . . . . . . . 144Technical Support . . . . . . . . . . . . . . . . . . . . . 145Index . . . . . . . . . . . . . . . . . . . . . . . . . . . . . . 147

Compromises no longer sufficed to appease the strifebetween the states. Fighting to stop the expanding Unionfrom disintegrating, the North was also taking an importantstand against slavery. They had larger armies and greaterfirepower on their side as well as a willingness to throwtheir economic weight behind the effort. The South wasfighting for the independence and freedom they thoughtAmerica stood for. Their aristocratic way of life was atstake, and thus their men had personal motivation to suc-ceed. Both sides were stubborn, choosing to fight ratherthan to yield.
Game Overview
You control one of the great generals of the civil war andcan choose which side to take. Do you want to try and real-ize the Southern dream of independence, or would yourather see if you can improve on the North's success? Thefate of a nation is in your hands.
'What was civil war combat really like?' you may ask.
CIVIL WAR GENERALS 2: GRANT, LEE, SHERMAN will answerthis question. It is the most comprehensive simulation ofthe civil war ever made. While you have the ability to alter
GGRRAANNTT,, LLEEEE,, SSHHEERRMMAANN
7
"Neither party expected for the war the magnitude or theduration which it has already attained…the prayers of bothcould not be answered."
-Abraham Lincoln, second inaugural address, 1865
The United States never officially declared war on theConfederate states. At first, President Lincoln referred toit as an insurrection. The Confederates did pass an act in1861 that recognized the existence of war between the twosides, but they too never came out with a declaration ofwar. Neither side thought the other to be entirely serious,expecting a compromise would soon be reached. When thewar began, the typical soldier had little idea of what he wasgetting into, signing up in pursuit of adventure and pres-tige. Poorly trained and lacking discipline, it was morethan likely that he had never fired a weapon. His main con-cern at the start of the war was the fear that it would be overbefore he had a chance to fight.
Hard lessons would be learned as the conflict progressed.New weapons could accurately fire as much as ten times asfar as previous weaponry, a factor that combat tactics didnot take into account until many lives had been lost. Thoseunfortunate enough to be wounded in battle were lucky ifthe doctors rinsed their instruments between surgeries.Hundreds of thousands of lives, more than the total losseson the battlefield, were claimed by typhoid, dysentery, andpneumonia.
What had started as a regional conflict soon transformedinto a full scale war. The North and South had not seen eyeto eye for some time, but it wasn't until now that they eachcame to realize just how strongly they felt about the moraland economic issues behind the struggle.
CCIIVVIILL WWAARR GGEENNEERRAALLSS 22
Part 1: INTRODUCTION
AN UNOFFICIAL WAR

ObjectivesCIVIL WAR GENERALS 2: GRANT, LEE, SHERMAN is a game oftactical battles. Each scenario, or battle, has specific goalsthat require strategic considerations. All scenarios sharesome common goals. You always want to inflict as manycasualties as possible on your enemy while keeping yourcasualties to a minimum. Forcing enemy units from theirpositions is another universal objective that is a benefit inall scenarios. Other strategic objectives are specific toindividual battles. These are sometimes represented byspecial victory point positions on the battlefield or byawards and penalties for exiting the map at certain loca-tions.
When playing a series of battles found in a Campaigngame, different factors determine the overall victory of thecampaign. The outcome of one battle will influence thestrength and status of your men in subsequent battles. Thevictory level achieved in a battle determines which battle isto be fought next and what condition your army will be inas the battle commences. Casualties suffered will carryover to the rest of the campaign, as will the experience thatyour men gain. If you destroy enemy units, the capturedsupplies and ammunition can be traded in to upgrade theweapons that you currently own. Your troops will thenstart the next scenario with improved weapons and, as aresult, be better situated to win the battle.
You must keep these concepts in mind when playing CIVIL
WAR GENERALS 2, particularly in a campaign. Forcing theenemy to retreat or surrender can be just as important asinflicting numerous casualties, though killing enemy lead-ers has an especially devastating effect on enemy morale.A good leader can accomplish these things without forget-ting the importance of maintaining the health and fightingspirit of his own men. Through careful planning, the spoilsof victory will surely be yours.
GGRRAANNTT,, LLEEEE,, SSHHEERRMMAANN
9history, don't think that it will be easy. The results of everybattle impact the way the rest of the game plays, history bedamned. If you suffer a demoralizing defeat, your troopsmight be too disheartened to fight in the next skirmish.Lead the Confederates shrewdly and you could wind up incontrol of the nation's capitol. Mismanage the North andthe United States will fall into rebel hands.
There is a lot to think about. Your army consists of a dozendifferent types of units, each with its own strengths andweaknesses on the battlefield. As the commander, everyunit will look to you for instructions. Decisions cannot bemade lightly. Recklessly direct your troops on long march-es and you will soon discover the limits of humanendurance. Leaving key positions open will run the risk ofenemy occupation. With concerns like these, it is easy toforget about the more basic elements of battle such as ter-rain and weaponry.
Most players will want to start out with one of the individ-ual battles in the game. At the end of the battle, you willbe informed which side has emerged victorious, often anambiguous judgement due to the subtleties of Civil Warcombat. Simply finishing a conflict with less casualties isnot enough if you ignore strategic positions or allow thehealth of your men to deteriorate.
The more adventurous player might prefer to jump rightinto a full campaign game. A campaign is made up of aseries of battles that share the same objective. To win a fullcampaign, you must successfully guide your men througheach of the battles without losing sight of your objectives.Not every battle must be won to achieve overall victory,but losing a battle will certainly make it more of a chal-lenge. Only the most diligent will succeed.
CCIIVVIILL WWAARR GGEENNEERRAALLSS 22
8

GGRRAANNTT,, LLEEEE,, SSHHEERRMMAANN
11
CCIIVVIILL WWAARR GGEENNEERRAALLSS 22
10 Installation and LoadingThe installation program gives you three options: a smallinstallation, which copies the minimum files necessary, amedium installation, and a maximum installation, whichcopies all the game files to your hard drive. These optionyou choose will influence how well the game will perform.The small and medium installations will require the gameto read files from the CD-ROM during a game. A maxi-mum install will copy all game files to your hard drive, butfor copy protection it will still require you to start the gamewith the disc in your CD-ROM drive. The maximum instal-lation will help to improve performance on most systems.
Windows 95 Installation:
Insert the CIVIL WAR GENERALS 2 CD into your CD-ROMdrive. If the Autoplay option on your computer is enabled,a panel will automatically appear on your screen. Click onthe install button and follow the onscreen instructions. Ifthe Autoplay feature on your computer is not activated,open the My Computer folder on your desktop and selectthe drive letter that corresponds to your CD-ROM drive.Double click on the Setup icon in the window that appearsand follow the onscreen instructions to complete the instal-lation.
Windows 3.1 Installation:With the game CD in your drive, select Run from the Filemenu in the Program Manager. Type D:\Setup.exe (D indi-cates the letter that corresponds to your CD-ROM drive).Follow the onscreen instructions to complete the setupprocess.
To play the game once it has been installed, you must firstinsert the game CD. If your computer supports AutoPlay,you will be presented with a screen where you can simplyclick on a Play Civil War Generals 2 button. You can alsoaccess the directory on your hard drive where you haveinstalled the game and double-click on CWG2.exe.
Game Options & Multiplayer FeaturesCIVIL WAR GENERALS 2 allows for several styles of play. Ifyou crave historical accuracy, you can play one of theHistorical Battles or begin one of the campaigns.Depending on your success, whether or not you repeated orredirected the course of history, the next battle may also be“historically” accurate or it may present you with a sce-nario based on the outcome of the previous battle. If youhave ever wondered what might have happened if a cam-paign had followed a different course, there are theAlternate Battles that take some liberties with the facts topresent "what if…" scenarios.
You can play any of five different types of multiplayergames. Play a 'hotseat' game against a friend (or an enemy)on a single computer, or use a modem line or serial cableto connect two computers and battle it out. If your officehas an internal network (IPX), you can challenge a co-worker to go to war with you (after business hours, of
course). You can also play CIVIL WAR GENERALS 2 with aconnection over the Internet to Sierra's Internet GamingService (SIGS) for free. For details on how to set up mul-tiplayer games, consult page 137 of this manual.
A powerful scenario editor has also been included so thatplayers can create their own personalized battles. You candesign a battle based on a real civil war map or you canpretend that your own backyard was a wartime battlefieldby recreating your neighborhood. A vast array of terraintypes are at your fingertips, from sunken roads and swampsto rocky knolls and pontoon bridges. These creations canbe distributed to friends and over the Internet for multi-player games or they can be played against the computer.Instructions for using the scenario editor can be found onpage 122.

GGRRAANNTT,, LLEEEE,, SSHHEERRMMAANN
13Multimedia HistoryTake advantage of our extensive research by checking outthe complete multimedia history of the Civil War includedon the disc. After you have installed the game, doubleclick on the History icon in the game directory to launchthe supplement. There is also a button on the autoplayscreen that launches the history supplement.
The interface for the supplement is so simple that itrequires little explanation. The brass buttons at the bottomof the screen allow you to access the main topics as do theimages on the main screen. Once you have selected atopic, the right arrow advances you through it, or, whenyou reach the end of a topic, on to the next topic. Click onthe left arrow to go back to the previous screen you wereviewing. When you see the Ear icon next to the left arrow,it signifies that a sound clip is associated with the currenttopic. Blue text can be clicked on to link to a more detailed
CCIIVVIILL WWAARR GGEENNEERRAALLSS 22
12 discussion of the subject at hand. The Help button alsoprovides instructions for using the multimedia supplement.
Selecting Options allows you to view the credits and bibli-ography, adjust or turn off the sound, or exit the program.If you experience poor sound quality, try turning the soundwithin the program all the way up and then adjust the vol-ume level on your computer. Turning the sound off com-pletely should permit the program to run more quickly.
Where Do I Start?We recommend that you begin by watching a short videothat will introduce the game's interface. Find the directorywhere you installed the game and double click on the filecalled “HowTo.avi.” A minute long video will then playthat demonstrates the basics of movement within the game.
While most people want to get into the action right away, itwill be less confusing if you take at least the first of the twotutorials we have provided. The tutorials begin on page 24of the manual and will show you the fundamentals ofgameplay. The first tutorial also takes you step by stepthrough your first battle, introducing some of the basic
strategies of CIVIL WAR GENERALS 2. Part II of the tutorialcovers what needs to be done between the battles of a cam-paign game and thus should be consulted before embarkingon your first campaign.
Once you are done with the tutorial, play the game for awhile to get a feel for the controls and gameplay. Whenyou have questions about a particular part of the game,refer to this manual for more detailed information andstrategy. You can also consult the on-line help by choosingHelp from the menu bar at the top of the screen.
Finally, there is a Readme file on the CD that can beaccessed by double clicking on the icon in the game'sdirectory. It contains any late breaking developments thatpopped up after this book went to press.

ly than scrolling permits, click on the overview map tochange your view.
Activating the Zoom Modefits four times as much of thebattlefield onto the screen while you play. Press the Zoombutton on the information panel, choose Zoom from theDisplay menu, or press the ‘Z’ key to enter Zoom Mode.
Nearly every function in the game can be accessed eitherthrough mouse clicks on buttons and hotspots, throughitems on the menu bar, or by pressing a certain key on thekeyboard. The keyboard shortcuts are listed next to theappropriate menu item. To conserve screen space, themenu can be toggled on and off by pressing either theMenu button on the status bar or ‘M’ on the keyboard.
GGRRAANNTT,, LLEEEE,, SSHHEERRMMAANN
15
CCIIVVIILL WWAARR GGEENNEERRAALLSS 22
14 Game Time and InterfaceGameplay in CIVIL WAR GENERALS 2 progresses in turns,each of which usually represents a half hour of battle. Thelength of night turns will vary, and turns taking place atdusk or dawn last for an hour. If a daytime battle lasted sixhours, the game would take twelve turns, and so on. Oneturn consists of both a Confederate and a Union turn. Theside that moves first will depend on which scenario isbeing played.
The maps in CIVIL WAR GENERALS 2 are made up of hundredsof hexagons, each of which portrays an area about 200yards across. With a few exceptions, only one unit mayoccupy a particular hexat a time.
When this manual tells you to "click on" or "select" some-thing, we mean for you to click once with the left mousebutton unless the instructions specify otherwise. However,to select a unit (even an enemy unit), right click on thatunit. Look at the information panel to see what informa-tion is available about that unit. If more than one unit hap-pens to occupy a hex, right click on the unit to togglebetween the two.
Confederate information will appear on the left side of thebar while Union information is on the right. You can alsosimply place the cursor over a battlefield element (withoutclicking) to see information displayed in the text window.
With a unit selected, click on the desired location to movethe unit, provided it has enough movement points. Whenyou move to a hex occupied by your opponent, your troopswill receive orders to attack. Understandably, the gamewill not let you move enemy units around the battlefield.
The Overview Mapshows an bird’s eye view of the entirebattlefield with your current main view highlighted with awhite frame. If you need to move to the action more quick- Confederate information Union informationText window
Unit Main map Overview map
Each unit occupies a single hexagonalposition or “hex.”
Zoom button

OPTIONS PANEL
Play Level lets you set the level of difficulty by selectingBeginner, Intermediate, or Advanced. See page 106 formore information about difficulty settings.
Full Visibility can be turned on to reveal all enemy unitson the map. When Full Visibility is turned off, Line ofSight will determine which enemy units are visible.
Line of Sight governs whether terrain will obstruct yourunits’ view. When on, things like hills and forests mayblock part of a unit’s sighting range and prevent them fromseeing enemy units. If Line of Sight is turned off, yourunits can see all enemy units within their spotting range,regardless of obstructions.
Line of Fire only affects units with ranged weapons.With this setting turned on, artillery and naval units cannotfire at an enemy if there is an obstruction in the way.Ranged weapons can fire at any enemy unit when Line ofFire is off, provided that the enemy is close enough.
Video Clips activates or deactivates the live action clipsthat play during combat sequences. While the clips areturned on, you can end an individual clip by clicking themouse. Turning off the video clips will make the gameplay more quickly. However, if you turn the video clipsoff, you will not gain the insight that the clips provide asthey illustrate the sequence of events in the battle.
Sound Effects lets you control the ambient sounds thatplay in the background.
Music lets you select whether you will listen to Unionmusic, Confederate music, or allow the computer to makeRandom selections. You may also turn off the game music.
GGRRAANNTT,, LLEEEE,, SSHHEERRMMAANN
17
The menu bar can be displayed or hidden by pressing theMenu button on the control panel or by pressing the ‘M’key on the keyboard. When a checkmark appears next toan item, it indicates that the option is currently selected andactive. Keyboard shortcuts listed on the drop down menusmake it easier to access frequently used controls. When areport is to be displayed on a hex containing two units, aseparate value will be shown for each unit.
FILE MENU
New begins a new game.
Save Game saves the current game. When you selectthis option, the game will be saved to the last save fileselected for loading or saving. If the current battle has notbeen loaded or saved before, Save Game will function likeSave As. Remember, you can only save a game duringyour turn.
Save As opens a panel that allows you to either enter anew name for your game to be saved under or select a pre-viously saved game to overwrite.
Load Saved Game will display a list of previouslysaved games. Select one from the list and choose Load torestore that game. Saved Multiplayer games must beloaded after the connection to your opponent is made.
Optionsopens the Options Panel (see next section). Youalso have access to the Options Panel from the Battle andCampaign Selection Screen since some options can only beset prior to play.
Exit exits CIVIL WAR GENERALS 2.
CCIIVVIILL WWAARR GGEENNEERRAALLSS 22
MENU ITEMS
The Menu button

Change Formationlets you switch the formation ofthe current unit. This is not available if a unit has only oneformation, does not have sufficient movement points, or ison terrain that prevents formation changes.
Get Next/Previous Unitselects either the next or pre-vious unit awaiting orders in the current player’s army.
Center on Current Unitadjusts the main map view tocenter on the currently selected unit. This is useful forwhen you forget which unit you have selected and do notwant to search the map.
Skip Unit lets you skip the currently selected unit for theremainder of the turn. You can still select this unit manu-ally, but it will no longer be selected with the Get Next Unitand Get Previous Unitcommands.
Reassign Division Commanders (Next Turn)dis-plays a screen that allows you to assign each of your divi-sion commanders to new units at the start of the next turn.
Chat Modeis only available in Multiplayer Games. Itlets you send messages to and receive messages from youropponent.
DISPLAY
Grid toggles the main map’s hexagonal grid overlay onand off.
Overview Mapdisplays and hides the small map.
Show Movement/Line of Fire Rangedisplays themovement range for all units that do not have a rangedattack by greying out the hexes that cannot be moved toduring the current turn. Limbered Artillery units will first
GGRRAANNTT,, LLEEEE,, SSHHEERRMMAANN
19
CCIIVVIILL WWAARR GGEENNEERRAALLSS 22
18 Auto Select Next Unitautomatically selects a new unitwhen the current unit has expended all of its movementpoints.
Show After Combat Reportdetermines whether ornot you will see the panel that appears after an encounter.The After Combat Reportlists the gains and losses experi-enced by each side.
Set Speed Controlsbrings up a window that lets youchange the scrolling and movement speeds.
Auto Resolutionis useful if you normally run yourcomputer at high resolutions. Turn on this setting to havethe game automatically change your screen resolution to640x480 when the game is launched. When you quit thegame, Auto Resolutionwill then change your resolutionback to what it was before you began playing.
GAME CONTROLS
End Turn ends the current player turn.
Undo Moveretracts the most recent move or formationchange. This will not be available if the most recent actionwas an attack or a movement that revealed a previouslyhidden enemy unit.
Dig In orders the currently selected unit to set up fortifi-cations at their present location. This command is onlyavailable if the currently selected unit has the ability to DigIn and is on the right sort of terrain. Engineers can beordered to build and destroy structures with this command.
Rest and Resupply Current Unitdirects the current-ly selected unit to spend the turn resting and lets you decidewhat quantity of supplies to send them.
Undo button
Rest & Resupplybutton
ChangeFormation button
Dig In button
End Turn button

Times Defendedwhen activated will show whichenemy units have been attacked during the current turn. Anumber will be displayed next to the enemy unit indicatinghow many times it has been attacked.
Zoomwhen activated, increases the amount of the battle-field that you can view at once.
OFFICER�S REPORTS
Command Tentdisplays the Command Tentscreenwhich gives you access to a number of other useful reports.Move the cursor over the various elements of theCommand Tentscreen to find out what actions can betaken.
Casualty Reportdisplays a screen which details thenumber of men and leaders that were killed or wounded,deserted or surrendered, as well as how many victorypoints and supplies each side has captured. This report isautomatically displayed at the end of a battle.
Reinforcement Reportbrings up a screen that tellsyou when and where you can expect reinforcements toarrive.
Objectives Reportdisplays the letter that you read atthe start of the battle in case you need to jog your memory.
Order of Battlelets you view the command structureof your army. This is particularly useful when reassign-ing a leader.
GGRRAANNTT,, LLEEEE,, SSHHEERRMMAANN
21display movement range, then, with an additional rightclick on the unit, display the firing range the unit wouldhave if it were unlimbered. When an artillery unit isalready unlimbered, only the attack range will be dis-played. Naval units first show their attack range, display-ing their movement range with another right click.
Show LOF displays a Line of Fire radius of up to 15hexes from any empty hex that is right clicked. This isvery useful when deciding where to post artillery units.
Show LOS Pathexamines the path between the cur-rently selected unit and any hex that is left clicked. It per-mits you to see exactly which hexes block the Line of Sightor Line of Firebetween the two positions.
Show Ready Unitshighlights all units that still havemovement points available on the Overview Map.
Show Fleeing Unitsshows the locations of all unitsthat have been routed on the Overview Map.
Show Low Supplied Unitsindicates, on the OverviewMap, the locations of all units that are running low on sup-plies. Any unit with less than half of their full supply levelwill be highlighted.
Show Corps Commanderhighlights the location ofall friendly Corps and Division Commanderson theOverview Map.
Show Reinforcement Areasindicates locations onthe Overview Mapwhere friendly reinforcements willarrive.
Show Victory Point Hexeshighlights, on theOverview Map, all locations that can be controlled to gainvictory points.
CCIIVVIILL WWAARR GGEENNEERRAALLSS 22
20
Zoom button
Command Tentbutton

Terrain Height shows the level of elevation for eachhex on the map.
Toggle Hex Numbersdisplays the consecutive num-bers that are assigned to each hex, starting at zero andcounting up. This can be useful when you are using theeditor to design a level or if you are trying to keep track ofexactly where you have moved your units.
EDITOR (This menu only appears while in the editor.)
Scenario Dialogdisplays a window that lets you load,save, or create a new scenario and define the global para-meters for it.
Unit Organization Dialog displays a panel thatexplains your army’s structure and allows it to be modified.
Random Woodsadds trees and forests to your map atrandom locations.
Clear All Terrain Mods will remove any TerrainModifiers(things like fords, morale boosts, and hindrancesto movement) that have been placed on the current mapwhile using the editor.
HELP
Contentsdisplays a window with all the various topicsaddressed in the on-line helpfile.
Searchlets you enter a particular topic to search for.
About provides version and copyright information for
CIVIL WAR GENERALS 2.
GGRRAANNTT,, LLEEEE,, SSHHEERRMMAANN
23REPORTS
Labelsdisplays text that identifies some of the features onthe map. This includes things like the names of roads,hills, forts, and towns.
Victory Pointsshows small numbers and flags on eachhex that possesses Victory Points. If the number is positiveand on top of a Union flag, it means that the North will gainvictory points if it controls the position. If on aConfederate flag, the South will gain points. The bottomflag shows which side currently controls and gains pointsfor the hex.
Unit Morale Leveldisplays the morale rating for everyvisible unit on the battlefield.
Unit Firepower Level displays the firepower rating forevery visible unit on the battlefield.
Movement Maxdisplays a small number next to everyunit that tells you what their maximum range is with a fullsupply of movement points available.
Movement Leftdisplays a small number next to eachunit telling you how much movement each unit has left.
Natural/Prepared Coverdisplays the amount of nat-ural or prepared coverthat the selected unit in its currentformation will receive in every hex on the battlefield. Thegreater the number, the more cover the position provides.
Terrain Morale Boostdisplays which hexes carry anautomatic bonus when occupied. A unit receives themorale bonus as long as they remain in the hex. Rockyknolls, walls, and forts possess the biggest boosts to moralesince they provide the most cover.
CCIIVVIILL WWAARR GGEENNEERRAALLSS 22
22
orders to your units. You can scroll around the map bymoving the cursor just over the edge of the screen. Take amoment to survey the rest of the map to see the terrain fea-tures and the enemy units that you will be fighting against.
You can see the names of some of the key locations on themap. Labels can be turned on and off with the Labelsoption from the Reports menu. Before you can access themenu items, you need to activate the menu bar by pressingthe Menu button found at the bottom of the informationpanel. The menu bar can be turned on and off in this wayso that you can conserve space for the map when you arenot using the menu. Once you have activated the labels,you will discover that the city the Union has occupied isKernstown.
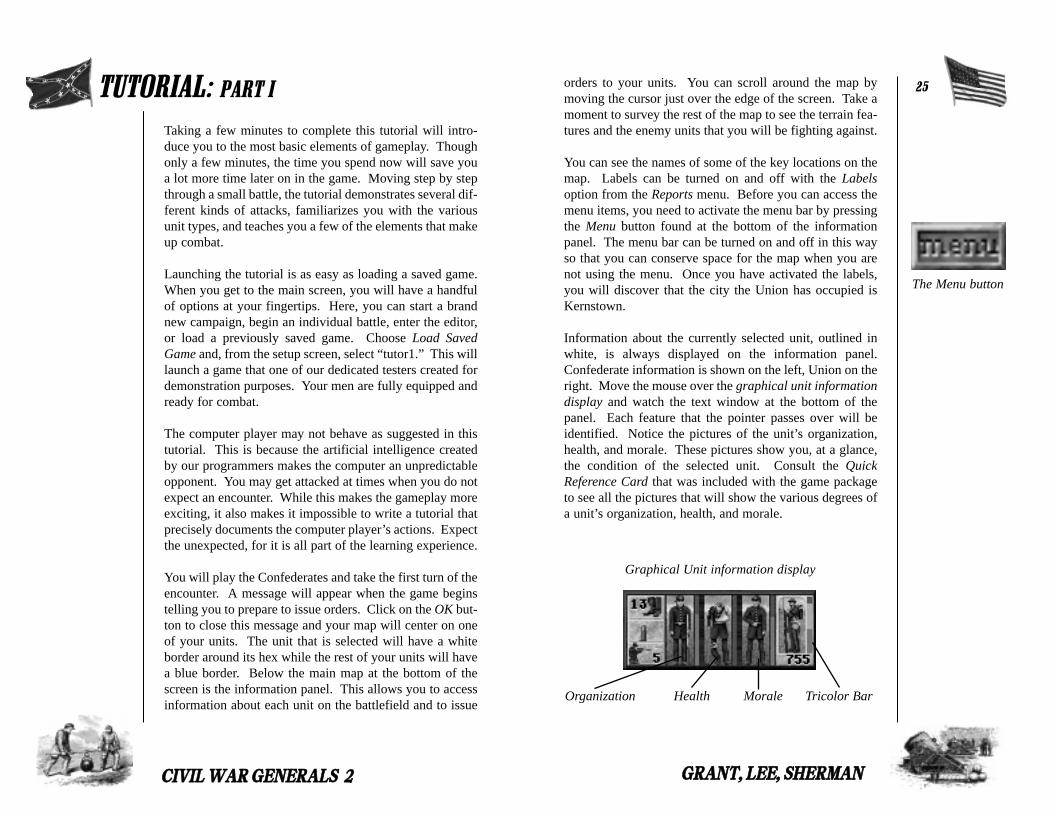
Information about the currently selected unit, outlined inwhite, is always displayed on the information panel.Confederate information is shown on the left, Union on theright. Move the mouse over the graphical unit informationdisplay and watch the text window at the bottom of thepanel. Each feature that the pointer passes over will beidentified. Notice the pictures of the unit’s organization,health, and morale. These pictures show you, at a glance,the condition of the selected unit. Consult the QuickReference Cardthat was included with the game packageto see all the pictures that will show the various degrees ofa unit’s organization, health, and morale.
GGRRAANNTT,, LLEEEE,, SSHHEERRMMAANN
25
Taking a few minutes to complete this tutorial will intro-duce you to the most basic elements of gameplay. Thoughonly a few minutes, the time you spend now will save youa lot more time later on in the game. Moving step by stepthrough a small battle, the tutorial demonstrates several dif-ferent kinds of attacks, familiarizes you with the variousunit types, and teaches you a few of the elements that makeup combat.
Launching the tutorial is as easy as loading a saved game.When you get to the main screen, you will have a handfulof options at your fingertips. Here, you can start a brandnew campaign, begin an individual battle, enter the editor,or load a previously saved game. Choose Load SavedGameand, from the setup screen, select “tutor1.” This willlaunch a game that one of our dedicated testers created fordemonstration purposes. Your men are fully equipped andready for combat.
The computer player may not behave as suggested in thistutorial. This is because the artificial intelligence createdby our programmers makes the computer an unpredictableopponent. You may get attacked at times when you do notexpect an encounter. While this makes the gameplay moreexciting, it also makes it impossible to write a tutorial thatprecisely documents the computer player’s actions. Expectthe unexpected, for it is all part of the learning experience.
You will play the Confederates and take the first turn of theencounter. A message will appear when the game beginstelling you to prepare to issue orders. Click on the OK but-ton to close this message and your map will center on oneof your units. The unit that is selected will have a whiteborder around its hex while the rest of your units will havea blue border. Below the main map at the bottom of thescreen is the information panel. This allows you to accessinformation about each unit on the battlefield and to issue
CCIIVVIILL WWAARR GGEENNEERRAALLSS 22
TUTORIAL: PART I
The Menu button
Graphical Unit information display
HealthOrganization Morale Tricolor Bar

northeast of the clump of trees near where the unit beganthe turn. This will move the Specialists close enough to theenemy in Kernstown to attack next turn.
The Cavalry unit will now be selected. You should movethem so that they can also attack the enemy on the nextturn. Move the Cavalry to the hex just north of the greybuilding. They should now be to the right of the Specialistswith one hex inbetween them.
The Infantry is the last unit that you will direct this turn.Move them to the position just south of the city, adjacent tothe enemy. Press the Change Formationsbutton once theyare there to get them ready for combat.
You have now issued orders to every one of your units onthe battlefield. Virtually all of your men are ready tolaunch attacks against the enemy unit in Kernstown. Pressthe End Turn button in the lower right of the informationpanel. This will end your current turn and you will see theenemy taking a turn. It is possible that the enemy willattack you at this point, either with their Artillery unit ortheir Infantry. You may even get attacked by both units inthe same turn. Do not let this discourage you, for you stillhave the manpower advantage over the Union forces.
Once the enemy turn is completed, you will get a messagetelling you to prepare to issue orders for turn number two.Click the OK button to clear this message and begin yoursecond turn.
Again, the Corps HQwill be the selected unit to start off.Click the Change Formationsbutton to have them estab-lish themselves. They will now appear as two leaders dis-cussing battle plans over a map. Once established, all ofyour units will receive a leadership boost.
Use the Get Next Unitcommand to select the Artillery unit.When planning to attack an enemy unit, it is often a goodidea to weaken them with an artillery or other ranged
GGRRAANNTT,, LLEEEE,, SSHHEERRMMAANN
27The Corps HQis the unit currently selected. The first thingyou need to do is to get theCorps HQ established, whichwill allow it to better aid your other troops. First, you willwant to move the unit to a more advantageous location.Notice that hexes appearing a certain distance away fromthe Corps HQunit are shaded. This indicates that they areout of the range that the unit can move to in one turn. Leftclick on one of the clear hexes at the edge of the hill, foundto the unit’s right, to move it.
After the Corps HQ has moved, all of their movementpoints will have been expended. You will establish themnext turn when their movement points are replenished. Atthis time, there will no longer be a border around the CorpsHQ’s position since they cannot perform any more activi-ties until the next turn. When a unit has used all of itsmovement points, or cannot perform any actions with themovement points it has left, the next unit will be selectedfor you automatically. Therefore, if you follow this tutori-al correctly, the unit that is being described should alwaysbe the one selected on your screen. You can also manual-ly select a different unit by right clicking on them or byusing the Get Next Unitcommand from the Game Controlsmenu.
Your Artillery unit will be selected once the Corps HQhasfinished moving. The Artillery is in a good position whereit is, but it cannot fire while in its current formation. Withthe Artillery unit selected, press the Change Formationsbutton, found on the information panel. This will unlimberthe Artillery and prepare them for combat. The Artillerywill still have some movement points left, but not enoughto attack. You will need to wait for the next turn to attack.Press the ‘S’ key on the keyboard to skip the artillery unitfor the remainder of the turn.
The unit that will be selected next is a Specialist unit,sharpshooters who snipe at an enemy from a safe distance.Move them into a position that will leave them ready toattack during the second turn by left clicking on the hex
CCIIVVIILL WWAARR GGEENNEERRAALLSS 22
26
ChangeFormations button
End Turn button

another battle represented with video clips. The Casualtyreport will then appear to let you know how successful theSpecialists were at damaging the enemy. The Specialistsshould still have a few movement points left, enough tomove them to safer ground. Left click on the hex south oftheir current position. This should expend the remainder oftheir movement points and the Cavalry unit will automati-cally be selected.
With the Cavalry unit selected, left click on the enemyInfantry in or near Kernstown. The Cavalry will ride intothe city and attack the Union forces. If the Cavalry hasenough movement points left over at the end of theencounter, move them away from the enemy. It is often agood policy to move your units away from the enemy afteran attack if there are movement points remaining. Doingso makes it more difficult for the enemy to attack the unitwhen your turn is finished.
There is still one unit left with which you can attack, theInfantry. Select the Infantry unit and click on the enemy’shex. Your men will enter the enemy’s position and attemptto drive them away. By now you have surely done a fairamount of damage to the enemy unit. You too may havereceived some damage from the skirmish. Notice thechanges in health, morale, organization, and firepower toeach side.
Press the End Turnbutton when you have finished observ-ing the statistics. The computer will now move, quite pos-sibly attacking your units. When it is your turn again, seeif you can position your men so that one unit is in front ofthe enemy unit and another is on the opposite side. Attackwith either one first, then order the other unit to attack. Amessage will appear that alerts the defender to expectsevere casualties. This is because you have launched a rearattack. These are far more devastating to a unit than a sin-gle attack or even multiple attacks from different sides.When a rear attack occurs, it catches the defender offguard as they have only just been attacked from the other
GGRRAANNTT,, LLEEEE,, SSHHEERRMMAANN
29attack before sending in Infantry or Cavalry units. Toorder the Artillery unit to attack the enemy Infantry inKernstown (if they have not moved), simply left click onthe enemy hex while your Artillery is selected. You willsee an explosion over the enemy unit, indicating that youhave attacked it. Video clips will play to illustrate thesequence of activities in the encounter. The video clips arefollowed by a Casualty report that breaks down the gainsand losses for each side during the fighting. You willnotice that all of the numbers in the attacker column arezero except for the Morale rating. This is because thedefending unit cannot return the Artillery’s fire as it does
not have a ranged attack. Your army, on the other hand,receives a boost in morale since you successfully damagedthe enemy and took no losses.
Click OK to close this report. Your Specialists should nowbe selected since Artillery units use all of their movementpoints when attacking an enemy. The Specialists have theability to move close to an enemy, snipe at them, and thenretreat to safer ground. As with the artillery attack, thedefender cannot return fire. Left click on the enemy inKernstown while the Specialists are selected. They willmove to a hex adjacent to the enemy and you will see
CCIIVVIILL WWAARR GGEENNEERRAALLSS 22
28
NOTE:After especiallyfierce engage-ments, dead sol-diers may remainon the battlefieldwhere the fighttook place.
Rear attack
First attack

TUTORIAL: PART IIThis tutorial illustrates what happens between battles dur-ing campaign games. Abort any games in progress andchoose New from the File menu. From the Options thatappear, select Load Saved Gameand double click on"tutor2" from the list that appears.
This save begins just after the first battle of a campaigngame. A brief animation will play, followed by the appear-ance of the Casualty Report, which lists the dead, wound-ed, and other vital factors of the recent battle. The outcomeof the battle is displayed at the bottom of the screen. Whenyou have finished viewing this screen, click on the donebutton on the bottom right-hand side of the screen.
The Field Hospital Recovery Reportwill now appear. Unitleaders and Corps Commanders may have been woundedin battle. Depending on their injuries, some leaders may beable to rejoin their troops, while others will become dis-abled veterans. This report displays which leaders havebeen wounded in the previous battle, along with theirupdated status. Again, select the done button to move onto the next screen when you are finished with the report.
Following this, you will be taken to the Weapons Purchasescreen. Here you are able to review your units, dismissleaders, and purchase some new weapons for your men.
Unit information is displayed at the bottom of the screen.You can find out the structure of your army by observingthe leader portraits at the lower left of the screen. The firstportrait shows the leader of the corps you are looking at,the second shows the leader of the current division, and thethird portrait is the leader of the currently selected unit.Click on the up and down arrows next to each portrait tomove through the various branches of your army. To nar-row the scope of which unit information is displayed, clickon one of the four Unit typebuttons above the portraits.
GGRRAANNTT,, LLEEEE,, SSHHEERRMMAANN
31side and are still turned around. Remember that a singledaytime turn in the game only represents a half hour, so tobe attacked from two opposite positions in the same turncan be devastating.
If you successfully continue to attack the same unit, even-tually they will be forced to retreat, vacating the hex thatthey occupied. You have already won a small victory whenthis occurs, but you should exploit the enemy’s weakenedstate. Continue attacking the unit even if it means pursu-ing the enemy around the map. You can also use a Chargeto attack an enemy that you have an advantage over. To dothis, simply press the Charge button before ordering yourunit to attack. If your men are confident enough, they willCharge. Otherwise, they will inform you that they will notundertake such a risky maneuver. You have the option topay a personal visit to a unit to try to convince them tocharge if they are reluctant. Charges are only wise if youhave a significant combat advantage (better morale, fire-power, etc.) or if your unit outnumbers the enemy by a sig-nificant margin.
Continue to experiment and familiarize yourself with thegame. When you have completed the sixth and final turnof the tutorial, you will be shown the results of the battle onthe Victory Screen. The relative changes to both armies aredisplayed as well as an overall battle resolution. This willnot simply be which side won since the ambiguities ofCivil War combat made this kind of distinction difficult.Rather, there are levels of victory, major victories, minorvictories, and even draws.
You have now experienced a number of different varietiesof attack and are prepared to begin your first real battle.Part II of this tutorial only relates to campaign games. Itwill begin in a campaign game that is already in progress,just after the end of a battle. Part II takes you step by stepthrough the process of purchasing new weapons for yourunits. We recommend that you play several individualgames before tackling a full campaign game.
CCIIVVIILL WWAARR GGEENNEERRAALLSS 22
30
The Charge button

To the right side of the information panel is the PurchaseSelected Weaponbutton. The number beneath it tells thecost of equipping the selected unit with the selectedweapon. Army Supply points provide the currency withwhich you will purchase weapons. Click on a few weaponboxes to compare their army supply costs.
Whenever you purchase new weapons, the selected unit'sprevious weapons are sold back to the armory. If theselected weapon is more expensive than the unit's currentweapon, the cost number beneath the Purchase SelectedWeaponbutton will be red, indicating that a purchase will
GGRRAANNTT,, LLEEEE,, SSHHEERRMMAANN
33The Unit type buttons limit the display to show onlyinfantry, cavalry, artillery, or specialist units. Corps HQ,engineers, scouts, heavy artillery, and naval units cannotreceive weapon upgrades.
Let's pretend that you are unhappy with a leader's perfor-mance. First, select an Infantry unit. While you may nowdismiss this leader, there is no way of knowing whether ornot his replacement will be an improvement. To dismiss theleader of the selected unit, click the Dismissbutton foundjust below the unit leader’s portrait., and confirm your dis-missal. A new leader will then appear in the portrait win-dow.
You will now want to outfit the selected Infantry unit withsome new weapons. Between battles, new weapons maybe purchased for any unit, provided that you have enougharmy supply points.
The main part of the Weapons Purchasescreen displays avariety of weapons that can be purchased for your units.The weapon highlighted with a red frame is the one cur-rently being used by the selected unit. A white frame indi-cates which weapon is selected. Each weapon box containsthe name of the weapon, the price per individual weapon,the full supply cost, and the Weapon Powerand Hand-to-Hand ratings. The bullet icons in each weapon box showthe number of rounds of ammunition that make up a fullsupply. A large bullet denotes 5 rounds, while small bul-lets each represent 1 round.
CCIIVVIILL WWAARR GGEENNEERRAALLSS 22
32
Weapons Purchase screen Available weapons
Unit type buttons Leader portraits Unit information
Weapon Power
Hand-to-Hand rating
Price per weapon Price per man forfull supply
Full supply (8 rounds)

There are two ways to switch units on the WeaponPurchase Screen.
1) Use the Unit type buttons above the leader portrait.There are four Unit type buttons and each one limits theunits that you can view to the specified variety of unit.Infantry, Cavalry, Artillery, and Specialists each have theirown button. All the other units in the game have weaponsthat cannot be upgraded.
2) You can use the up and down arrows next to each indi-vidual portrait to move through the different branches ofyour army. The portrait on the far left displays your Corpsleaders. The middle portrait shows the Division leaders,and the last portrait displays the leaders of the individualunits. Therefore, when a particular Corps leader is shown,only those leaders and units that fall under his commandwill be shown.
Some weapons may only be used by a particular type ofunit, so not all weapons will be available for each unit.
Your weapon purchases do not take effect until you clickon the done button. Once you are finished dismissing lead-ers and purchasing weapons, click on Done to continue thegame. At this point, the next battle of the campaign willbegin.
GGRRAANNTT,, LLEEEE,, SSHHEERRMMAANN
35
reduce your Army Supply. When this number is green, itindicates that the selected weapon is cheaper than the cur-rent weapon, thus the purchase will add to your ArmySupply.
The number beneath the wagon displays your currentArmy Supply. It is important to know how much a weaponwill cost you each time you need to resupply your men.The cost for fully supplying all of the men in the currentunit with ammunition for the selected weapon is shownbeneath the soldier's ammunition pack. Each weaponcomes with a full supply of ammunition, consisting of acertain number of rounds. A round is the amount the unituses to fire once in battle.
Choose a new improved weapon for your selected unit.The new weapon should have at least one rating that ishigher than the rating of the unit's current weapon, but keepin mind how many army supply points you have available.To make the purchase, select the weapon and click on thePurchase Selected Weaponbutton. You may purchase newweapons for as many units as you like.
CCIIVVIILL WWAARR GGEENNEERRAALLSS 22
34 Purchase Selected Weapon button
Full supply cost for selectedweapon, selected unit
Your army supply

Advanced players may also click directly on any leaderportrait to access detailed information about that leader.The leader information display will show the leader's influ-ence, organization, loyalty, and health ratings. The num-bers to the right of the black numbers indicate what kind ofbenefits, if any, the leader is receiving from his nearbysuperior officers. For more information about all of theseratings, see Division Commanders and Unit Leaders onpage 78.
GGRRAANNTT,, LLEEEE,, SSHHEERRMMAANN
37FOR ADVANCED PLAYERS
The graphic unit information display, with its pictures andbars, should provide adequate information for any gamesituation. Some players, however, may wish to view unitinformation in greater detail.
For these players, CIVIL WAR GENERALS 2 includes adetailed information display. To view the detailed infor-mation display for any unit, click directly on the graphicinformation display, or left-click on a selected unit on thebattlefield.
The detailed display shows ratings specific to the selectedunit: organization, health, morale, quality, experience,number of men (original and current), movement points,supply, and firepower, as well as the unit's weapon ratings.For more information about unit ratings, see TheInformation Panel, beginning on page 62.
For an Artillery unit, the detailed information display isidentical to the other unit types, except that the weaponportion will show the cannon's maximum range and powerrating (which influence the unit's firepower).
CCIIVVIILL WWAARR GGEENNEERRAALLSS 22
36
Leader information display
Detailed unit information display (for Artillery)
Power ratingMaximum range
Weapon Power
Detailed unit information display
Hand-to-Hand rating
GGRRAANNTT,, LLEEEE,, SSHHEERRMMAANN
39
CCIIVVIILL WWAARR GGEENNEERRAALLSS 22
THE EASTERN THEATER
The Bull Run CampaignThe Civil War started with the Confederate attack on FortSumter on April 12, 1861, yet three months later there hadstill been no major battles fought. In July the North learnedthat Southern forces, under General Beauregard, wereencamped only 25 miles from Washington at ManassasJunction. In order to clear away this threat to the Northerncapital, the poorly armed and trained forces under GeneralMcDowell were ordered to carry out an attack.
Thanks to spies in Washington, the South found out aboutthe move and rushed General J.E. Johnston's 11,000 men tohelp repulse the attack. After a brief skirmish atBlackburn's Ford on July 18th, both sides knew the first bigbattle was near. Both sides also thought that this one bat-tle might decide the war and bring it to a quick end.
The First Battle of Bull Run opened up with a Unionartillery bombardment in the early hours of July 21st. Thebattle did not go well for either side, but by the end of theday the Union forces had been clearly defeated, with manyof them running from the battlefield. The first major battleof the Civil War gave the South a taste of victory, while theNorth was made painfully aware that it was ill prepared forlarge scale military action. Both sides were wrong aboutone thing, however, the war was not to be decided by a sin-gle battle.
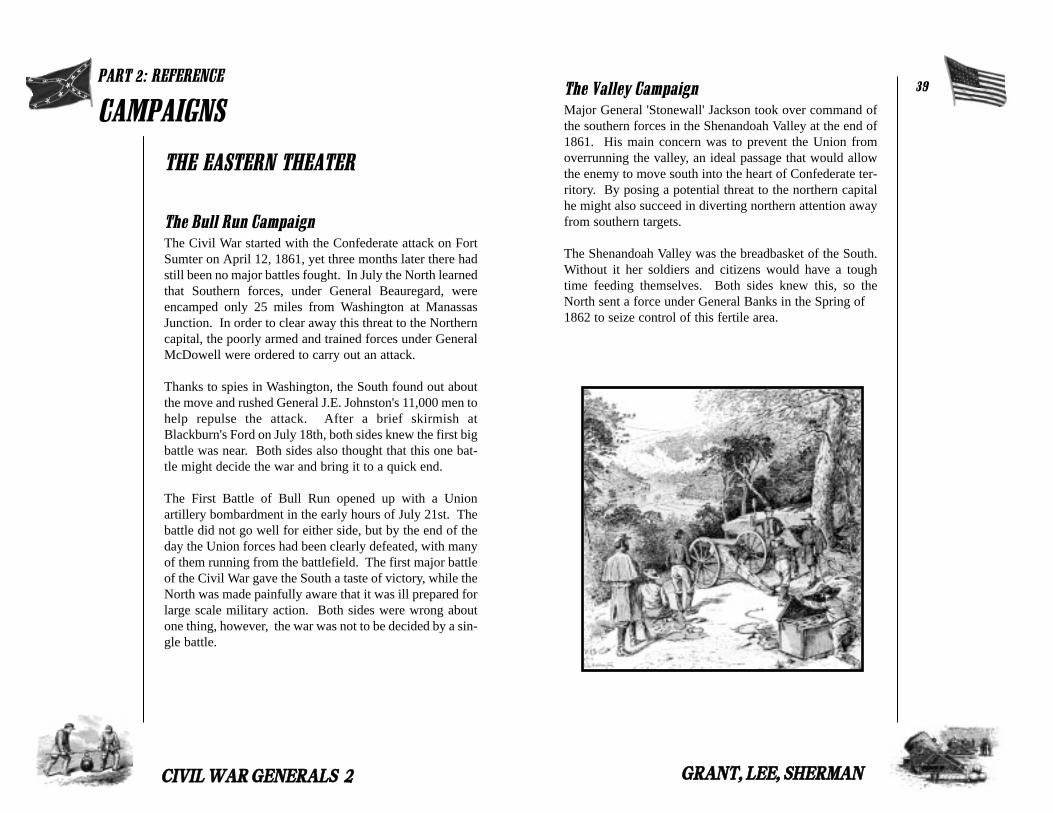
The Valley CampaignMajor General 'Stonewall' Jackson took over command ofthe southern forces in the Shenandoah Valley at the end of1861. His main concern was to prevent the Union fromoverrunning the valley, an ideal passage that would allowthe enemy to move south into the heart of Confederate ter-ritory. By posing a potential threat to the northern capitalhe might also succeed in diverting northern attention awayfrom southern targets.
The Shenandoah Valley was the breadbasket of the South.Without it her soldiers and citizens would have a toughtime feeding themselves. Both sides knew this, so theNorth sent a force under General Banks in the Spring of1862 to seize control of this fertile area.
PART 2: REFERENCE
CAMPAIGNS

The Peninsula CampaignOn February 22, 1862 President Lincoln issued GeneralWar Order No. 1. It ordered the North's Army of thePotomac, under its creator General McClellan, to march onConfederate forces located less than 30 miles fromWashington. Although Lincoln wanted to march on thisconcentration at Centerville, McClellan convinced him toinstead allow a drive on Richmond.
The campaign started with McClellan's 100,000 man armytravelling by ship to a point 70 miles from Richmond.After finding his reinforcements were tied up by Jackson inthe Shenandoah valley, McClellan lost confidence andstalled for time. Eventually he marched forward, but anoverly cautious attitude lead him to sit opposite a mere13,000 Confederates at Yorktown, which he believed weremany times that number. In short, a huge Union army wentfar to go nowhere, while only the thinnest of defenses wereinbetween it and Richmond.
McClellan's hesitancy allowed Confederate General Lee toamass an additional 60,000 men to oppose the Union force.Finally, on May 3rd McClellan went on the offensive onlyto find that Yorktown had been abandoned by the South infavor of better positions further to the rear. The next fourmonths would see McClellan hesitate more and more as histroops got closer and closer to Richmond. The delays pro-vided the South with too much freedom of action, whichGeneral Lee exploited to begin a counter offensive at theend of June. In this way Richmond was saved and Lee wasin an excellent position to exert pressure on the North.
GGRRAANNTT,, LLEEEE,, SSHHEERRMMAANN
41Southern General Lee relied upon General Jackson and hisStonewall Brigade to keep the valley in Confederate hands. With his small force, never numbering more than 17,000,he managed to do just that. In a brilliant campaign of tac-tics, maneuver, and concentration of force, Jackson man-aged to best the Union forces.
Although the Northern forces numbered some 33,000troops, Jackson always seemed to be where the Union leastexpected him, and in greater numbers than they. He uti-lized the cover of the Massanutten mountains to his advan-tage and kept on the move, sometimes marching his men asfar as thirty five miles in a single day. His victories atMcDowell, Port Republic, Cross Keyes, and Wincester ele-vated Jackson to legendary status. Jackson's stature is welldeserved, since his efforts kept the vital Shenandoah inConfederate hands for another two years.
CCIIVVIILL WWAARR GGEENNEERRAALLSS 22
40

Lee�s Second InvasionAfter yet another change in command, the Union's Army ofthe Potomac was again ready for offensive action in theSpring of 1863. The new commander, General “FightingJoe” Hooker, left a holding force to keep General Lee occu-pied at Fredericksburg while his main force went around totake Lee in the rear.
At the last moment, Lee reacted to the move, swung hisforces around, and soundly defeated Hooker atChancellorsville. Although a brilliant and huge success forLee, he paid a high price when he lost one of his best com-manders, General “Stonewall” Jackson, to friendly fire.
While the main part of the Army of the Potomac was beingdefeated at Chancellorsville, the holding force in front ofFredericksburg, under General Sedgwick, launched a reliefattack upon Lee's thin defenses. The initial attack was asuccess, but it was quickly beaten back after Lee wheeledhis main force north again to face the new threat. In theend, the Army of the Potomac was again totally defeated.
Lee decided to go on the offensive for a second time.However, the Army of the Potomac had reformed, with yetanother commander at its head; General Meade. After alengthy parallel march into Pennsylvania, the two armiesfinally came together to fight the largest battle ever foughton US soil. In the small town of Gettysburg the 165,000troops of North and South fought for three days losing atotal of 50,000 men combined. With the loss of almost athird of his army, and facing a foe of growing strength, Leehad no choice but to retreat and give up his attempts toinvade the North.
GGRRAANNTT,, LLEEEE,, SSHHEERRMMAANN
43Lee�s First InvasionAfter the debacle at the gates of Richmond, the Northdecided to combine General McClellan's 90,000 men withthe 50,000 troops of General Pope near Washington.Southern General Lee knew that once this command wascreated, he would have a tough time dealing with it since itwas nearly three times as large as his own. Therefore, heordered his army to seek out and intercept Pope beforeMcClellan could join him.
The main engagement was fought at Manassas (also knownas Second Bull Run) and Pope’s army was massivelydefeated. Although the North still managed to consolidateits troops, they did so only after Pope lost 16,000 men andretreated to Washington. Lee sensed the time was right fora march into Maryland, but was forced to abandon the pushafter narrowly avoiding destruction in the bloody battle ofAntietam.
Lincoln, seeing that Lee was badly mauled and on the run,relieved McClellan of command and replaced him withGeneral Burnside (considered the most incompetent gener-al of the North after the war), who was instructed to onceagain march on Richmond. Burnside bungled his advanceinto Virginia by walking right into Lee's carefully con-structed defenses at Fredericksburg. After suffering hor-rendous casualties, the Union army retreated fromFredricksburg, received a new commander, and spent thewinter licking its wounds.
CCIIVVIILL WWAARR GGEENNEERRAALLSS 22
42

The Western Theater
ShilohThe North realized that to beat the South, they had to occu-py it. One of the best ways to do this was to split the Southin half by controlling the Mississippi. In March of 1862General Grant's Army of the Mississippi established itselfon the western bank of the Tennessee River in order to pre-pare for a major push into the South.
While Grant was waiting for reinforcements, the South sawan opportunity to attack and, hopefully, push Grant backacross the Tennessee River. Confederate General A.S.Johnston assembled an army of 40,000 strong to wipe outGrant's 33,000 troops before they could be reinforced.Early on the morning of April 6, Johnston drove his armyinto the sleeping camps of the Union force. Confused andinitially outnumbered, the Union troops routed andstreamed back towards their main camp at PittsburghLanding. Northern General Sherman, however, rallied histroops and greatly slowed the progress of the Southernforces. The Confederates still continued their advance dur-ing the day until, in the early evening, Union reinforce-ments, gunboats, and artillery ground them to a halt.
Throughout the night Union forces were brought over theTennessee River, reinforcing Grant's command withGeneral Buell's 25,000 fresh troops. The next morningGrant mounted a counter offensive which swept theConfederate troops all the way back to Corinth. The battlewas a disaster for both sides, with total losses of nearly50,000 troops. The South was in worse shape due to itshigher percentage of loss and the fact that Grant was nowfirmly established in Southern territory, a position thatwould allow him to start his campaign to seize theMississippi and split the Confederacy.
GGRRAANNTT,, LLEEEE,, SSHHEERRMMAANN
45The Wilderness CampaignOn May 4, 1864 General Grant, now in command of allUnion armed forces, set out to take Richmond Virginia.His plan was to march his 115,000 well equipped menthrough the Virginia Wilderness and do battle withConfederate General Lee on open ground on the other sideof the large wooded area. Since his army was in no shapefor an open battle, Lee decided his exhausted 66,000 manarmy's only chance of survival was to ambush the Federalswhile they advanced through the forest.
All through the day of May 5th, a confused and bloody bat-tle was waged amongst the trees, with neither side gainingmuch ground. The next day the Confederates launched acounter attack which was gradually beaten back, eventual-ly turning into a general retreat. The Southern forces ral-lied when General Longstreet's corps arrived and went onthe attack. This attack too faded when the exhausted south-erners saw their beloved General Longstreet carriedwounded from the battlefield.
A second full day of fighting was much the same as before,with large casualties for both sides, yet neither one gainedmuch ground. Grant thought the time was right to bypassLee and resume the march to Richmond. Although Leewas smart enough to anticipate this move, thus getting backinto Grant's path at Spotsylvania, he had lost a good part ofhis army in the Wilderness. Though the North had lostabout 14,000 men to Lee's 7,750, Lee could ill afford thelosses as Grant closed in on Richmond.
CCIIVVIILL WWAARR GGEENNEERRAALLSS 22
44

The Tennessee Valley CampaignIn the summer of 1863 the Union decided that it was timeto take Tennessee from the Confederate States of America.To do this they dispatched General Rosecrans' Army of theCumberland to push Confederate General Bragg's Army ofTennessee out of the state. The seizure of Tennessee wouldgive the North the ability to invade the heart of the South.
The campaign started to produce results for the North withthe brilliant seizure of Chattanooga, an important rail hub.But the North quickly had its fortunes reversed when it wasbadly beaten in the battle of Chickamauga. In this battlethe North lost nearly half of its entire force and retreated indisorder, back into Chattanooga, where it remainedbesieged by General Bragg for months.
In October General Grant was put in charge of the Unionforces. While still in the process of a lengthy reorganiza-tion, Grant was compelled to attack Bragg before he wasfully ready. Although the Confederate ring around the citywas tight, Grant now had the numerical edge. Through aseries of brilliant moves, bravery, and Confederate blun-dering, the Northern forces seized the high ground atMissionary Ridge and broke the siege. Although casualtieswere relatively light for both sides (about 6,000 each), theUnion forces were now free to resume offensive action inTennessee.
GGRRAANNTT,, LLEEEE,, SSHHEERRMMAANN
47The Vicksburg CampaignAfter the success of Shiloh, General Grant was in positionto start his assault into the heart of the South. His mainobjective was the city of Vicksburg, which commanded theheights above the Mississippi and linked the western andeastern halves of the Confederacy together. However,Grant had to halt his attack for the winter after sufferingsupply problems and losses during in the Fall of 1862.
In the Spring of 1863 Grant was again frustrated when heunsuccessfully tried to take Vicksburg by a direct attackfrom the north. Instead of trying the same thing twice,Grant hatched a brilliant plan that had his forces sweepwest, then south, east again, and come at Vicksburg fromthe southeast. To do this he needed to get his troops acrossthe Mississippi using Admiral Porter's fleet. For this tohappen, Porter had to make his famous dash under the gunsof Vicksburg in order to meet Grant south of the city.
The Union army then fought a brilliant campaign againstthe ill prepared Confederate forces. Grant abandoned hissupply lines, cutting across Mississippi and seizing its cap-ital, Jackson, thereby blocking Vicksburg from reinforce-ment. Grant then turned west to set about takingVicksburg. Although the Southern forces under Pembertonnumbered only 30,000 to Grant's 50,000, Vicksburg'sdefenses were well prepared with forts all around the city.
After two quick, unsuccessful assaults, Grant's forces com-menced a lengthy 43 day siege. The siege ended with thesurrender of the tired, starving Confederate forces on July4th. Thus the South became two halves of a whole, split bythe North's control of the Mississippi River.
CCIIVVIILL WWAARR GGEENNEERRAALLSS 22
46

GGRRAANNTT,, LLEEEE,, SSHHEERRMMAANN
49The Atlanta CampaignThree Union Armies, numbering 100,000 men under thecommanded of General Sherman, were dispatched byGeneral Grant to take one of the Confederacy's last majorindustrial centers: Atlanta. Opposing Sherman's drive wasConfederate General J.E. Johnston with a smaller, butcapable, army of 62,000 men.
Johnston knew he could not win a pitched battle againstSherman, so he played for time by conducting a skillfulfighting withdrawal towards Atlanta. The battles of Resacaand Kennesaw Mountain served their purpose by slowingdown the Northern forces, while keeping the Confederateforces intact.
A change in plan came when Confederate President Davis,rejecting Johnston's policy of gradual retreat, replaced himwith General Hood. The new commander immediatelywent on the offensive at Peachtree Creek, which started outwell enough, but ended with huge losses of men and mate-rial and an eventual retreat into Atlanta itself. After a lastditched Confederate attack on Jonesboro, Hood had nooption other than to surrender. Thus Atlanta fell toSherman on August 31st, 1864, finishing off the South'sability to defend its interior. The stage was set forSherman's famous March to the Sea.
CCIIVVIILL WWAARR GGEENNEERRAALLSS 22
48

mations costs movement points and, when done excessive-ly, can hurt the unit's organization. Still, when a unit isclose to the enemy, it is best to have them ready for com-bat as they will be less vulnerable if attacked and more pre-pared for offensive measures. If you give the order toattack when an Infantry unit is in marching formation, theywill automatically get into combat formation before attack-ing the enemy. Infantry units must also be in combat for-mation before they can Dig In (see page 83 for more infor-mation on Digging In).
An Infantry unit can see a range of four hexes in any direc-tion from its position. When Line of Sight is turned on,obstructions will block what the units can see around them.Their firepower depends on what type of weapons are car-ried. Weapon Power is a measure of how effective aweapon is when fired, and the Hand-to-Hand rating mea-sures how effective it is in a melee attack. See page 110 formore information on weapons and their ratings.
Infantry can be ordered to Charge an enemy from eitherformation, but, as with a normal attack, they have to usemovement points to change into combat formation if giventhe order from a marching formation. The charge will onlyoccur if morale is high within the unit, its leader has a highloyalty rating, and the unit has enough of a combat advan-tage. See page 101 for more information on Charges.
ENGINEERSA very useful addition to any army, Engineer unitscan be used to build pontoon bridges and abatis.They can also be ordered to destroy the sameenemy structures as well as enemy forts.
Additionally, engineers are the only units that can cross ariver at any point.
Engineers have two formations, but, they only come in onesize. When Engineers are in marching formation, they canmove freely around the map. They must change to work-
GGRRAANNTT,, LLEEEE,, SSHHEERRMMAANN
51
CCIIVVIILL WWAARR GGEENNEERRAALLSS 22
INFANTRYThe most basic and common of all soldiers duringthe Civil War was the infantryman. Each memberof the infantry carried a rifle and a supply ofammunition along with food and other personal
supplies. They spent a lot of their time marching fromplace to place, sometimes more than 30 miles a day.
The way Infantry units will look on the screen variesdepending on their size. Small units are shown as threemen, medium as five, and large as seven.
Infantry in CIVIL WAR GENERALS 2 have one formation formarching and another for combat. It is important to movethe infantry while they are in marching formation to avoidthe unnecessary loss of organization and health that occurswhen trying to move in combat formation. Improper for-mation also limits the range of movement available to theunit since they are more efficient when in the right group-ing for marching.
When not in motion, the defensive abilities of the Infantryare better served when in combat formation. Changing for-
UNITS
Small Medium Large
Marching formation
Combat formation

GGRRAANNTT,, LLEEEE,, SSHHEERRMMAANN
53ing formation, however, before building or destroying anystructures. Engineers are unable to move while in workingformation.
Engineers will defend themselves but may not initiate anattack. Their talents lie elsewhere, so it is advisable to keepthem away from combat and hold them in reserve forfuture tasks.
To have your Engineers build or destroy a structure, yousimply issue the Dig In command. If the Engineers are onterrain that can be built on or has structures that can bedestroyed, they will automatically change the terrain.When an Engineer is on any kind of terrain except fortrees, cities, forts, rivers, and swamps, an abatis will bebuilt (or removed if an abatis already occupies the space).If you tell them to Dig In while they are on a hex with afort, they will ruin the fort. When on a river, they will builda pontoon bridge or, if a bridge already exists, destroy it.Building a pontoon bridge expends all of the equipmentcarried by the Engineer. Therefore, to build a pontoonbridge, you must first march an Engineer unit to the pointon a river where you want to build the bridge. On the nextturn you give the order to change formations, and on theturn after that you instruct them to Dig In. After buildingthe bridge, an Engineer unit is worn out and no longer use-ful to the army and is removed from the battlefield. Unlikebridge construction, there is no limit to the number ofabatis or forts that an Engineer can build or destroy.
CORPS HQThe Corps HQ has one size and two formations,mounted and established. When mounted, theycan be seen on the map riding a horse and wearinga distinctive blue or red shirt. Once the Corps HQ
establishes itself, they confer over a map table.Headquarters prefers directing their men to actual fightingand thus only carry pistols and swords. They have a goodspotting range (six hexes) which makes them good at
CCIIVVIILL WWAARR GGEENNEERRAALLSS 22
52 scouting enemy positions. Though they can defend them-selves, Corps HQ may not initiate an attack and alwaysretreat from an enemy if attacked. You can have Corps HQunits Dig In which improves their defenses.
Subordinate leaders in the same corps that fall within athree hex radius of the Corps HQ will receive benefitsdepending on what formation the HQ is in. The subordi-nate leader’s unit will also be influenced as a result of thebenefits he receives. Leaders within an eight hex radius oftheir corps commander receive half of the normal benefit.When the HQ is established, nearby units belonging to sub-ordinate leaders will experience an improvement in organi-zation, firepower, and loyalty to the cause. When HQ ismounted, units only receive the boost to their organizationratings. To see the amount of benefits that a unit’s leaderis receiving due to the proximity to a superior officer, tog-gle the leader display on the information panel. This canbe accomplished by clicking directly on the leader display.Bonuses appear as a green number next to the statistics,and detrimental influences are shown in red. See page 62for more information about the leader display.
Another important feature of the Corps HQ is their abilityto rally a routed unit. When a unit is routed, it will movetowards its nearest Corps HQ to recuperate. If the contactwith a leader does not successfully rally the group, the unitmoves to a nearby Supply Source to flee the battlefield.
CAVALRYAn agricultural way of life gave the South one oftheir few wartime advantages; greater experienceon horseback. Cavalry units are fast and have asizeable range of movement which makes them an
ideal candidate for scouting and creating diversions. Theycarry better shoulder arms than the Infantry, but generallyhave fewer men and thus cannot inflict the same amount ofdamage in a single encounter.
Engineers inmarching formation
Engineers inworking formation
Mounted CorpsHQ
EstablishedCorps HQ

GGRRAANNTT,, LLEEEE,, SSHHEERRMMAANN
55
CCIIVVIILL WWAARR GGEENNEERRAALLSS 22
54 SCOUTSScouts are small units that play an important rolein locating your enemy. They move quicklyaround the map on horseback and can see greaterdistances than any other kind of unit. While they
have a lot of movement points available to them, they can-not initiate an attack. They can defend themselves againstan attack, but combat is not what they were trained for andthey will prove to be poor fighters. Scouts carry shoulderarms and have only one formation.
SPECIALISTSSpecialists are the most proficient sharpshootersaround, as well as being efficient scouts. Thanksto their exceptional skills, they have been handpicked from the rest of the army and grouped
together in small units. Specialist units, like Engineers,only have one formation and are all approximately thesame size. As a result, their appearance on the battlefielddoes not change.
Outstanding scouting abilities allow Specialists to see ene-mies that fall within a five hex range. When attacking, aSpecialist unit does not enter the same hex as the enemy,instead ‘sniping’ from an adjacent hex with long rangerifles. If the enemy retreats, the attacking Specialist groupwill not advance into the position, unlike infantry and cav-alry.
One of the most beneficial things about using Specialists isthe fact that an enemy unit cannot return fire whenattacked. This is because the Specialists are so good at hid-ing their location from the enemy that it is unclear wherethe shots originated. They are also more likely to kill orwound an enemy leader than any other type of unit.Specialists cannot be ordered to Charge as it would not uti-lize their unique talents.
Cavalry units can see up to six hexes around their position,except when Line of Sightis on and their view is obstruct-ed. They have different appearances on the battlefielddepending on their size and formation.
Mounted and dismounted are the two formations that aCavalry unit can assume, and they are the only type of unitthat can attack in both formations. Movies often show thecavalry swooping across the battlefield on their horses withgreat success, but the reality of the situation was quite theopposite. They obviously could move a lot farther when onhorseback, but in combat this formation only served tomake them bigger targets for the enemy. Therefore youshould have your Cavalry units dismount when involvedwith an attack unless they outnumber the enemy by a sig-nificant margin.
Cavalry functions much like the infantry when dismount-ed, having the ability to Dig In, but they can Charge andattack from either formation. A mounted charge will causemuch more damage to the enemy than a dismountedcharge, but the Cavalry unit itself will take more damagewhen mounted unless it is a surprise or rear attack or theenemy unit is routed. When resting or defending, Cavalryunits should always dismount first and, if threatened, DigIn.
Small Medium Large
Dismounted
Mounted Specialistunit
Scout unit

GGRRAANNTT,, LLEEEE,, SSHHEERRMMAANN
57ARTILLERYInvaluable assets due to their ability to attack fromafar, Artillery units can prime an enemy for anattack, or even win an encounter singlehandedly.Power and effectiveness will vary with their dis-
tance from the enemy and the variety of cannon used.
Artillery units move while they are limbered and attackwhile unlimbered. These units cannot travel while unlim-bered since the preparations that get a cannon ready toattack involve unhitching it from the horses that move it.Likewise, when on wheels, an Artillery unit is incapable offiring as it lacks the proper stability and would certainlyspook the horses. As with other units, the appearance ofthe Artillery will reflect its size and formation.
Changing artillery formation cannot take place in the sameturn as an attack. Attacks require all of a cannon's move-ment points, so if some have already been spent to changeformation, the attack must wait for the next round.
Artillery units can only see an area of four hexes from theirposition. Their attack range is greater, depending on thetype of cannon being used. Each of the different cannonsin the game has its own individual range and destructivepower. Additionally, there are four different kinds of
CCIIVVIILL WWAARR GGEENNEERRAALLSS 22
56 ammunition that can be utilized, chosen by the unit basedon the the type of cannon and the distance from the target.
Since the crew selects the ammunition best suited for thetask at hand, all you need to worry about is choosing whichenemy units to attack. The closer the target, the greater thedamage a selected Artillery unit can inflict. To find outwhat the firepower of an Artillery unit will be against dif-ferent enemies, simply right click on the enemy you arethinking of targeting and check their firepower rating.
The range of a selected Artillery unit is displayed visuallyon the map when the movement rangesetting is chosenfrom the display menu. If the unit is unlimbered, the hexesthat cannot be seen or are out of range will be greyed out.When an Artillery unit is limbered, selecting it will greyout the hexes that it cannot move to. Right click on thesame limbered unit to see what its attack range would bewere it unlimbered at the same location.
A single cannon requires a crew of nine men to operate it.Each man has been specially trained so that they can move,load, aim, and fire the cannon. Though only one cannon isdisplayed on the map, an artillery unit can contain manycannons. Since there are nine men to each cannon, anartillery unit that has 90 men has 10 cannons. A cannonwill cease to function after half of its crew is killed orwounded.
Small Medium Large
Limbered
Unlimbered

HORSE ARTILLERYHorse Artillery units function just like regularartillery except that their range of movement isgreater. This is because the cannons used by theHorse Artillery are lighter than those used by the
Artillery. Everyone in a Horse Artillery unit is mountedwhile a regular Artillery unit only has enough horses to pullthe cannon. They use the same kinds of ammunition as aregular artillery unit.
There are three different sizes of Horse Artillery and twoformations, limbered and unlimbered, depending onwhether they are moving or firing. Formation change andattack costs for a Horse Artillery unit are only half those fora normal Artillery unit. This gives the Horse Artillery thedistinct advantage of being able to move, change forma-tion, and attack in the same turn.
SIEGE MORTARSAnother type of artillery unit, Siege Mortars useshort barreled cannons that fire shells at high tra-jectories. The velocity that the shells are fired atis low, but the angle of the shot gives Mortar units
very good range. These weapons can therefore inflict a lotof damage on a distant enemy but are virtually useless atclose range.
GGRRAANNTT,, LLEEEE,, SSHHEERRMMAANN
59Attacks usually cannot be launched if the Artillery unitdoes not have a clear Line of Fire. As a general rule, anenemy shielded by an obstruction like a ridge cannot beattacked (see page 94 for more information on Line ofFire). The exception to this rule is when Artillery units areequipped with howitzers or mortars; then they may useindirect fire to shoot at their targets. For more informationabout indirect fire, see page 99.
Stacking an Infantry unit in the same hex as an Artilleryunit is a good defensive measure. Men in Artillery units donot carry any additional weapons and, as a result, are morevulnerable to an attack. The men are so loyal to their gunsthat most would prefer being killed to retreating. Sincethese units are amongst the most expensive to outfit andreplace, it is wise to protect them well. To stack Infantryand Artillery units, simply move one unit into the hex occu-pied by the other. It is far more difficult to successfullyattack or capture a position with this kind of extra defensethan when the Artillery is on its own. See also StackingUnits on page 93.
HEAVY ARTILLERYOnly found in forts, these massive artillery unitsare equipped with extremely large siege cannonsand are capable of firing very long distances.Their size allows them to dominate any area that
falls within their field of fire. Heavy Artillery units areimmobile due to their weight and bulk, and as a result cannever retreat or rout. Heavy Artillery only has one forma-tion since they cannot move, but they do come in three dif-ferent sizes.
CCIIVVIILL WWAARR GGEENNEERRAALLSS 22
58
Small Medium Large
Limbered
Unlimbered

artillery pieces that dwarf those used by Artillery and evenHeavy Artillery units.
GUNBOATSUsed in shallow waters, these ships are smallerand less heavily armed than the impressiveFrigates. They are, however, more agile and canbe maneuvered closer to shore. Gunboats can
occupy a coastal hex if it is predominantly water.
Since Gunboats use large artillery pieces, they have aranged attack and can strike a land based unit from thewater if they are near enough to shore. If the Gunboat isequipped with howitzers, it will make indirect fire attacks.Naval units may only be attacked by units with rangedattack abilities, therefore they only get attacked by othernaval units and certain land units.
Gunboats only come in one size and formation and theycan move and attack in the same turn. This is an advantagethat most land based units do not have and it keepsGunboats and other naval units primed to make an attack.
MORTAR GUNBOATSThese vessels are similar to the regular Gunboatsexcept for the fact that they are armed with mor-tars rather than cannons. Like Gunboats, MortarGunboats can be positioned in a coastal hex pro-
vided it is mainly water and unoccupied.
Mortar Gunboats may only be hit with a ranged attack andcan only shell land units that fall within their range. Sincethey are only equipped with mortars, they will always useindirect fire. They have just one size and formation andcan therefore move and attack in the same turn.
GGRRAANNTT,, LLEEEE,, SSHHEERRMMAANN
61Siege Mortars have a limbered and an unlimbered forma-tion, moving while limbered and attacking while unlim-bered. These units need all of their movement points tofire, and their weight makes them difficult to move. As aresult, Siege Mortars cannot retreat or rout, and willinstead be captured or destroyed if attacked.
Siege Mortar units come in three sizes and they always fireindirectly (see page 99). This makes it possible to acci-dentally strike a friendly unit when firing at an enemy.Their accuracy is greatly improved when they can see theirtarget, even though they cannot aim directly at it.
FRIGATESOnly available to the Union, these square riggedships are what people usually think of when itcomes to nautical battles in the Civil War period.They are very fast (by 19th century standards) and
are mainly used to escort other ships and to patrol an area.Due to their size, a Frigate can only enter or occupy a hexthat is entirely water.
Frigates are like other naval units in that they have oneformation and one size. Each Frigate unit represents a sin-gle vessel on the map. They can attack other naval unitsand land units that fall within their range, using immense
CCIIVVIILL WWAARR GGEENNEERRAALLSS 22
60
Gunboat
Mortar gunboat Frigate
LargeMediumSmall
Unlimbered
Limbered

GGRRAANNTT,, LLEEEE,, SSHHEERRMMAANN
63
CCIIVVIILL WWAARR GGEENNEERRAALLSS 22
The Information Panel displays data about virtually everydetail in a battle, from the middle initial of a leader's nameto the number of bullets an enemy unit has remaining. Thisis the interface you will use to monitor and control much ofthe action in the game. The information for theConfederates will be displayed on the left of the panel, theUnion's information on the right. Brass buttons that issuespecific commands reside at the bottom of the informationpanel.
Leader DisplayTo the left of each side’s information display is a portrait.This is the leader of the unit that is selected. The numberof crossed swords next to the portrait represents a rating ofhis overall quality. This rating is broken down into fourcategories, Influence, Organization, Loyalty, and Health.Click directly on the portrait to view the detailed LeaderDisplay (see page 81 for more information about these cat-egories). A graphical representation of how many engage-ments have been fought during the course of a battle, pro-vided that any have been fought at all, is also displayed. Asmall bullet hole signifies that one engagement has beenfought, and a large bullet hole represents five engagements.The more engagements fought in a battle, the greater thechance that the leader’s abilities and the unit’s experiencewill improve between battles in a campaign.
The leader’s abilities are also found on the toggled leaderdisplay. The numbers to the left, displayed in black, are theleader’s current levels of ability, including all benefits fromnearby superiors. The numbers to the right show the exactvalue of the benefits the leader is receiving, displayed ingreen if positive and red if negative.
Unit DisplayThe unit window, found to the right of the leader portrait,gives information about the soldiers in a particular unit. Itcan display this information either with text or graphicsthat illustrate the organization, health, and morale ratings.Toggle between these two displays by left clicking on theunit window or on a particular unit on the battlefield. Thepictures on the graphical display change as the ratings fluc-tuate. For example, if the unit's morale drops from full tomedium, and then to low, the soldier in the picture begins
THE INFORMATION PANEL
Graphic unit information display
MoraleOrganization Health
Unit type
Movement
Supply
Firepower # Effectivemen
The LeaderDisplay toggledto show details
TricolorStatus Bar

GGRRAANNTT,, LLEEEE,, SSHHEERRMMAANN
65
CCIIVVIILL WWAARR GGEENNEERRAALLSS 22
64 with his hands on his hips, looking eager to fight, then putsa hand up to his brow with a dejected appearance, andfinally can be seen running away. For a guide to all the pic-tures and what they represent, see the Quick ReferenceCard included with the game package.
The unit window also tells you what movement points,firepower, and supplies are left to the unit, as well as whattype of unit it is and how many able bodied men remain. Look at the detailed information display to find out the pre-cise value of each rating. The following section explainsthe ratings in greater detail.
Number of MenThere are three different statistics by which you can gaugethe size of a unit. With the graphic unit information displayvisible, you will see the number of effectivefighting men inthe unit. This number appears below the picture on the farright of the window and represents how many healthy,organized men you have on the firing line.
A tricolored bar on the graphical unit display gives you aquick breakdown of the condition of a unit. The totalheight of the bar represents the size of the unit when itbegan the battle. The top section of the bar is the percent
of the original men who are now dead. For example, if aunit started out with 1,000 men and 100 have been killed,then the top ten percent of the bar would be darkened. Themiddle section represents the percentage differencebetween living and effective men. The larger the shadedpart in the middle section of the bar, the more stragglers,sick, and wounded are in the unit. By allowing the unit torest, the men will recover and be able to fight effectively.The bottom part of the bar shows what percent of the orig-inal men are currently effective. These are the only sol-diers who actually fight with the unit and add to its fire-power.
If you look at the detailed unit information display (simplyclick on the graphical display to toggle between the two),next to the label "#MEN," you will see two numbers witha right facing arrow between them. The first is the totalnumber of men the unit started the current battle with, thesecond is how many are still alive. When there is a big gapbetween the two numbers, it indicates that you have takensubstantial losses during battle, and, as a result, the moraleof the men who are still alive will suffer.
The second number, how many men are still alive, is notthe same as the number of effective fighting men found onthe graphical display. Just because your men are clingingto life does not mean that they will join in the fighting. Youmight have a lot of men too badly wounded, sick, strag-gling far behind, or too fearful to participate in anencounter. When the unit's health and organization are low,you will notice a large discrepancy between the number ofliving versus effective men.
Quality
Organization
Health
Morale
Movement Supply Firepower
# of men alive
Experience
Original # of menWeapon info
Detailed unit information display
Tip:To change thename of any unitor leader (even an enemy), clickdirectly on thename and type in a new name in the window thatappears.
Tricolorbar

GGRRAANNTT,, LLEEEE,, SSHHEERRMMAANN
67Movement PointsAt the start of every turn, all the unitsunder your command receive a freshsupply of movement points. The typeof unit will determine how far it canmove. For example, a Cavalry unit is
able to travel much farther on horseback than an Artilleryunit can while lugging a heavy cannon. Movement pointsare not only expended when a unit moves, they also mea-sure the amount of activity that a unit can participate induring a single turn. When a unit attacks, digs in, changesformation, and even when it rests, movement points areused.
Terrain types affect the range of movement your men havesince some terrain uses up more movement points than oth-ers. In general, roads provide the most effective way tomove troops around. The cost in movement points fortravelling on a road remains the same regardless of whattype of terrain the road passes through, assuming the unit isin movement formation. The only exception to this iswhen travelling up a hill. For every height change, there isan added cost of one movement point. The maximumheight change that can occur between two adjacent hexes istwo, which would result in a cost of two movement points.When in combat formation, a road provides no benefits formovement, allowing the underlying terrain to exact themovement cost on the unit.
Fewer movement points are expended if units assume theformation appropriate to the task at hand. Greater dis-tances can be covered if, for example, the cavalry is mount-ed and the infantry is in marching formation. Artilleryunits cannot move while unlimbered or fire while limbered.
CCIIVVIILL WWAARR GGEENNEERRAALLSS 22
66 Unit SupplyA unit's supply is the cache of ammu-nition it carries. The informationpanel informs you how many roundsthe selected unit is equipped with.On the graphical display, the bullets
to the left side of the unit window represent the number ofrounds remaining; a large bullet equals five rounds and asmall bullet equals one. The image above shows that theunit is carrying eight rounds of ammunition. The text dis-play gives this number next to the "SP" label. A round isnot a fixed number of shells, but instead the amount ofammunition that a unit's weapons can fire during a halfhour period. Some weapons are capable of a greater firingrate and will thus discharge more shots per volley. Forexample, an Enfield rifle cannot fire as rapidly as the moreadvanced Henry Repeater. Therefore, the Enfield willcause less damage, but, on the plus side, it is cheaper toresupply than the Henry since it uses less ammunition perround.
Each time a unit attacks or defends a position, it uses oneround of ammunition. When attacked repeatedly duringthe same turn, a unit will fire a round every time it has todefend itself until it runs out of supplies, at which time itwill lose its ability to defend or attack. If a charge isinvolved, two rounds are expended by each side.
A retreating unit leaves behind two rounds of ammunitionin the haste of their departure. The winning player gainsthe equivalent amount of Army Supply points (described inthe next section) when moving into the position. In thecase of a rout, the victor claims all the ammunition carriedby the routed unit, again in the form of Army Supply points(see page 103 for information on routs). A unit that isdestroyed, either through combat or by routing off the map,gives the weapons carried by the casualties to the enemy.Additionally, some of the weapons of the survivors also goto the enemy since the men flung down their guns in order
TIP:Causing an enemyunit to retreat,rout, or surrenderwill ensure a highArmy Supply.

Any remaining Army Supply points at the end of a battle areadded to the value of the weapons captured. This total iswhat a player will get to spend on new weapons betweenthe battles of a Full Campaign game. Enemy supplies thatare captured during a battle are converted into ArmySupply points. The total value of the captured supplies isequal to the gain in your Army Supply. The exact value ofammunition will vary depending on what weapon it is usedfor and the amount of supplies captured will depend on thesize of the enemy unit. See page 117 for more informationabout upgrading weapons.
FirepowerThe effectiveness of a unit duringcombat is given a measurable valueknown as firepower, found under theUnit Supply icon on the Unit informa-tion display. When looking at the
detailed display, the firepower rating is located next to thelabel "FP." This is the best way to quickly judge your menand see how they stack up against another unit on the bat-tlefield. The greater the firepower, the more casualties aunit will be able to inflict during an engagement.Firepower ratings are determined by combining the variousfactors affecting combat performance, such as health,morale, organization, number of effective men, leaderinfluence, weapon type, and the terrain on which the unit isfound.
Because firepower is made up of so many elements, itsvalue will fluctuate throughout the game. For instance,cavalry firepower is changed by dismounting, whileartillery firepower depends on how far away its target lies.
GGRRAANNTT,, LLEEEE,, SSHHEERRMMAANN
69to run faster. Units who surrender lose not only theirweapons, but also the supplies that they carry. Capturedweapons are not converted into Army Supply points for thevictor until the end of the battle since this is when they aredeposited at the headquarters. The value of all capturedweapons is displayed on the Casualty Report screen.
Units that are running low on supplies should be ordered toRest & Resupply before they find themselves in a skirmish.The Dig In command also gives you the opportunity toresupply a unit.
Army SupplyAs the general of an entire army, you have access to a greatdeal of "petty cash" in the form of Army Supply points.Not only do you start out with a lump sum of these pointsat the start of each battle, you may also earn more pointsduring the course of the fighting. You inherit all of anenemy unit's supply points whenever you win an engage-ment by routing the enemy or by causing the enemy to sur-render. If an enemy is forced to retreat, two supply pointswill be captured. Army supply points are the currency thatyou use to buy new weapons for your men or to simplyresupply them with ammunition.
When a turn ends, you will automatically be asked if youwould like to resupply the units that did not use any of theirmovement points. The values listed next to the varioussupply amounts correspond to how many army supplypoints the transaction will cost you. Simply choose theamount that you think your men require and click on OK.These same supply choices will pop up when you give aunit the individual order to Rest and Resupply during aturn. The order to Dig In also allows you the opportunityto send more supplies while a particular unit is in theprocess of fortifying their location. See the Special Orderssection on page 83 for more details.
CCIIVVIILL WWAARR GGEENNEERRAALLSS 22
68
Rest & Resupplybutton
Dig In button

GGRRAANNTT,, LLEEEE,, SSHHEERRMMAANN
71Unit OrganizationOrganization is also rated on a scalefrom 0 to 99. It is listed after theabbreviation “ORG” on the detaileddisplay and is represented by the first
soldier on the graphic display. In some ways, organizationmeasures the success of a unit's leadership; the better orga-nized a unit is, the more effective it will be at carrying outorders. This rating should not be confused with the leaderorganization rating (discussed on page 81), which is anentirely independent measurement. A unit's current levelof organization fluctuates with every action it takes. Aleader's organization rating is a measure of his personalability. Although leader ratings may be modified during abattle by the presence of nearby superior officers, they onlychange permanently between battles in a campaign game.
An organized unit is far more effective in combat and willhave a higher morale than a poorly organized one. Thelower this rating gets, the smaller the percentage of menwho will actually participate in an engagement. Excessivemarching will leave many men straggling behind on theroad. Combat will also separate men from their unit, butthere is less of an organizational cost than for movement.
The amount that unit organization suffers during combatdepends on the severity of the situation. An entrenchedunit is less vulnerable than one that has not been ordered toDig In. When involved in a rear attack or a charge, orga-nization will be reduced more than in a normal attack fromthe front.
At the Intermediate and Advanced difficulty settings,movement has a noticeable affect on organization. Avoidmarching your troops around without a clear objective, andwhenever possible, get the unit into the proper formationfor movement. Of course, even formation changes, whendone too frequently, can have a negative impact on unitorganization.
CCIIVVIILL WWAARR GGEENNEERRAALLSS 22
70 Terrain contributes to the organization of your men.Troops prefer to march on roads or at least on grassy areas.Avoiding travel across forests, swamps, or rocky patcheswill help to keep your men organized. Nighttime is anoth-er period when you should refrain from movement. Yourmen will become cranky and poorly organized if they donot get the sleep that they deserve.
When a unit’s organization drops below a certain point, itwill not accept any movement orders. If this occurs youwill no longer be able to get the unit to do much of any-thing and can only order them to rest or to make a volun-tary retreat. This option will appear automatically whenthe disorganized unit is issued a command and can preventthe unit from becoming completely immobilized. You can-not choose where the unit retreats to as a clear destinationwould be far too organized for such a confused unit.Generally they start out moving towards their headquartersand then on to the nearest friendly Supply Source. Formore information on voluntary retreats, see page 102.
The only way to regain lost organization within a unit is tolet it rest. When a unit rests, the commanding officer triesto gather up all the stragglers. As more men return to theirposts, the overall organization of the unit increases.Entrenching a unit through the Dig In command also helpsto increase organization, but not to the extent of merelyresting. A routed unit regains its organization very slowly,which explains why they usually require a visit from thegeneral to be rallied.
Tip:The better a unit’sorganization is,the higher itsmorale and fire-power will be. A well organizedunit is more effective in combat.
Tip:Moving a unit onrugged terrain, orwhile in combatformation can seriously reduce its organization rating.

some of the health is has lost. Resting near its Corps HQincreases the benefits of rest. Ordering a unit to Dig In alsoimproves health, but to a lesser degree than pure rest.
Unit MoraleKeeping your men in good spirits isone of the most demanding jobs askedof a general. A great many outsideinfluences can change a unit's morale,
so maintaining a high level of morale can be quite a trickyundertaking. It cannot be stressed enough how importantmorale is since it is the primary influence on the ability ofyour troops to move and fight.
All units receive a morale rating that ranges from 0 to 99.The detailed unit information display lists the morale ratingnext to the abbreviation "MOR." On the graphical display,morale is represented by the third soldier on the window.When this soldier is standing at attention, the unit's moraleis high. If the soldier clutches his belt or hangs his head,morale is slipping and the unit will be at greater risk in anengagement. A soldier that can be seen running away indi-cates that the morale of the unit is dangerously low andsteps should be taken to make it improve.
High morale makes men forget about the risks they are tak-ing and thus increases their firepower and effectiveness. Acharge, for example, cannot be ordered unless the unit hasa very good morale rating. Your men do not want to runblindly at the enemy unless they have a lot of confidence intheir ability to win. The lower the morale, the more likelyit will be that the unit will surrender, retreat, or even refuseto fight in the first place.
In general, any movement, attacks, charges, or defensivemeasures are only carried out after morale has beenchecked to confirm that the unit can perform the desiredaction. When this check fails, you will learn of a stubbornrefusal to carry out your orders. In this situation, if the unit
GGRRAANNTT,, LLEEEE,, SSHHEERRMMAANN
73Unit HealthOver half of all deaths in the civil warwere not even related to combat.Most were due to the diseases andinfections that ran rampant amongst
the soldiers, often caused by medieval medical practices ora lack of treatment at all. Fortunately, these concerns will
not be yours in Civil War Generals 2. This does not meanthat you will suffer half as many casualties for there arestill plenty of things that can ruin your men's health.
The health rating, designated by "HLTH" on the detailedinformation display, is displayed graphically on the unitinformation window. The soldier second from the left willkeep you updated as to the health of the unit, growing moreand more decrepit looking as the health level decreases.
The health of your men will be impacted the most whenthey are involved in combat, regardless of whether theyattack or defend. After almost any engagement, your unitwill have some dead and wounded, resulting in a reductionof its health relative to the strength of the enemy and thenumber of men on each side. When a unit has a high healthrating, the difference between the actual and effective num-ber of men will be small as most of the men are still readyand able to fight. Low health will lead to a big differencebetween the two numbers since many soldiers will be toosick or injured to fight. Like organization, health has aserious effect on the firepower and morale of your men.
Movement has a negative influence on health unless youare playing at the Beginner difficulty level, so you shouldavoid needlessly maneuvering your men. Changing for-mations often lowers your health as well, and it is alwaysadvisable to travel on roads or grass and keep nighttimeactivity to a minimum.
The only way to improve a unit's deteriorating health is toallow it to rest. For every turn a unit rests, it will regain
CCIIVVIILL WWAARR GGEENNEERRAALLSS 22
72
Tip:Experience, leaderinfluence, quality,unit health, organi-zation, weapons,terrain height, andcasualties all havean impact on aunit’s morale.

GGRRAANNTT,, LLEEEE,, SSHHEERRMMAANN
75is attacked, it will be likely to retreat, flee, or surrender.
The factors below are used in determining a unit's morale:* health (better health, higher morale).* organization (better organization, higher morale).* experience (more experience, higher morale).* leader influence(more influence, higher morale).* quality (higher quality, higher morale).* weapon used(better weapon, higher morale).* terrain (elevation and good cover, higher morale).* casualties (large losses, lower morale).* movement (excessive or at night, lower morale)
When a unit makes a successful attack, it will experience acorresponding increase in its morale. An even greatermorale boost is gained when an enemy leader is killed or ifan enemy is routed or forced to surrender. Likewise, whena unit suffers these losses, its morale will drop.
There are morale boosts and penalties for nearly everyaction in the game. These affect other units in the armybased on command structure. For instance, if a divisionleader is killed or his unit is routed, all brigades within thatdivision will be disheartened. Other units in the samecorps will also be upset, but to a lesser extent.
Army MoraleIn addition to the individual measures of morale, there is anoverall rating that encompasses an entire army. ArmyMorale is affected both positively and negatively by casu-alties and capturing positions.
While Army Morale does not play a direct role in deter-mining the victor of a battle, it can be a benefit during bat-tle in two ways:
Charge:Charges are special attacks that can devastate anopponent. Only Infantry units in combat formation andCavalry units may charge. Units that cannot charge will
CCIIVVIILL WWAARR GGEENNEERRAALLSS 22
74 not have a charge button on the information panel. Toorder a charge, all you have to do is click on the Chargebutton before launching an attack. To use this attack, a unitmust have a sufficiently high morale rating. Sometimes,when the morale level is just below the amount required fora charge, Army Morale points can be "spent" to make upthe difference. This usually means that you, the general,will pay the unit in question a special visit in order to unifyand inspire them.
Rally: If you do not pay close attention to a unit's moraleand it gets too low, the unit will be routed when it isattacked. The soldiers will panic and run to a safer posi-tion, ignoring any orders you give them. Occasionally aunit will compose itself with no outside help and rejoin thefight. Other times you will need to use some of your ArmyMorale points to rally a unit to the cause. This meansanother visit from you to lift their spirits and to stop theirflight. To attempt to rally a unit, select it and press theRally button. Sometimes a unit will be so badly shakenthat it will require more than one visit from the generalbefore it regains the ability to fight. If you fail to rally arouted unit, and it does not recover on its own, the unit willeventually leave the battlefield at a Supply Source location.It will then be lost for the remainder of the current battleand detract from the number of victory points you receive.
Unit QualityThe quality of a single soldier is constant throughout agame. He will display the same calibre of performancecome what may. The quality of an entire unit also remainsconstant throughout each individual battle, but will changebetween battles in a Campaign game. Unit quality can onlybe found on the detailed information display.
When playing a Full Campaign game, new soldiers fill thevacancies created by those who were killed during battles.This replenishment of your units takes place between bat-
Tip:The quality ofConfederate rein-forcements is likelyto drop as the warprogresses.
The Charge button
The Rally button

Weapon TypeAt the start of the game, all of your men have some sort ofweapon appropriate to their unit type. You can find outwhat weapon a unit is carrying and its specific attributes onthe detailed unit information display. Each weapon hasspecific strengths and weaknesses that vary according tobattle conditions. The attributes of every weapon are mea-sured through Weapon Power and Hand-to-Hand ratings(see page 110). For example, the shoulder arms carried bythe infantry, cavalry, engineers, scouts, and specialistshave good Hand-to Hand ratings at close range, but are nomatch for the weapon power of the artillery. Between bat-tles in a Full Campaign game you may use the value of cap-tured weapons and remaining army supply points to pur-chase new weapons for your units.
GGRRAANNTT,, LLEEEE,, SSHHEERRMMAANN
77tles, thus the unit quality rating is likely to change whenyou start a new battle. If high quality soldiers were killedin one battle, their replacements are usually less experi-enced and will receive lower ratings. The South will bemore greatly affected by this factor since they had fewermen at the beginning of the war and therefore had to relyon less competent recruits as the war dragged on.
Morale and firepower are affected by the quality of a unit.When playing on one of the advanced levels, quality playsa role in determining the effect that movement and combatwill have on health and organization.
ExperiencePerformance and experience go hand in hand. The morecombat experience a unit gathers, the better it will fight inthe next battle. Soldiers do not necessarily improve a cer-tain amount per engagement, so the number of times a unitenters into combat will not correspond directly with theexperience level.
As with quality, experience only changes between the bat-tles of a Campaign game. If a unit does well over thecourse of one battle, they will get a higher experience rat-ing at the start of the next. You can see how much experi-ence a group has on the detailed information display.
The more experience a unit has, the better its morale andfirepower. At the Intermediate and Advanced levels, themore experience a unit has accumulated, the less move-ment and combat will detract from its health and organiza-tion.
CCIIVVIILL WWAARR GGEENNEERRAALLSS 22
76

Division commandersare the next in command. They arenot an independent unit on the map like corps comman-ders, rather they can be assigned to a brigade within theirdivision. Division commandersboost the morale and fire-power of the group being accompanied and have the abili-ty to rally a routed unit with a great deal of success. Whena division commanderis overseeing a unit, his presencewill be indicated by a gold star next to the unit. The divi-sion commander's ratings replace the ratings of the brigadecommander(described below) and his portrait will be theone to appear on the leader information panel. Divisioncommandersmay be reassigned to another unit during thegame as long as the unit is part of their division and with-in ten hexes of their current location. A division comman-der affects the statistics of all the leaders within their divi-sion provided that they are within a three hex radius. Thismodification occurs regardless of the formation of the unitthe division commanderis accompanying and is cumula-tive with the corps commander's modifications. Due to thevalue of these leaders, it is advisable to protect the com-mander by avoiding unnecessary engagements with hisunit.
Finally, there are brigade commandersand regiment com-manders. They are part of the unit under their control andcannot be reassigned. When a higher authority is accom-panying their unit, control is assumed by the visiting leaderfor the duration of his stay. If a brigade commanderiskilled in battle, the highest ranking leader of a regiment inthe brigade will be promoted and take over his job.
Since regimentalgames are made up of smaller units, theplayer essentially takes on the role of corps commander,though you will not appear as a unit on the map. This, inturn, 'bumps' the function of other units down a level.Therefore, in a regimental level battle, division comman-ders appear asHQ units on the map, brigade commanderscan be assigned to accompany a particular regiment, andregiment commanderssimply remain with their unit.
GGRRAANNTT,, LLEEEE,, SSHHEERRMMAANN
79
CCIIVVIILL WWAARR GGEENNEERRAALLSS 22
Everyone in the game, except for the enemy, answers toyou, the commanding general of either the northern orsouthern army. There are two different levels of combatyou can engage in; brigade and regimental. A typicalbrigade is made up of four regiments, each of which theo-retically contains 1,000 men. Three brigades then form adivision, and three divisions form a corps. As a result, thebrigade level of combat involves larger units and requiresmore leaders.
In brigade level combat, your next in command is the corpscommander. He is in charge of a large part of your armyand can be seen on the map as a Corps HQunit. A corpscommanderhas a lot of power and modifies the ratings ofboth the men under his charge and subordinate leaders.Units receive greater benefits from resting within threehexes of a corps commanderand have a better chance ofrallying when one is near. Leaders who come under acorps commander's jurisdiction and are within three hexesof the commander will have their ratings modified by thecommander. If theCorps HQ unit is in movement forma-tion, only the organization of his subordinate leaders willbe modified. When the HQ unit is in established forma-tion, influence and loyalty are affected in addition to orga-nization. When the subordinate leader's unit is betweenthree and eight hexes away from the corps commander, theeffect of the modifications will be reduced by half.
You can find out just how much impact a corps comman-derhas on another leader by looking at the detail side of theleader's information panel. The statistics are followed by anumber that indicates the amount each statistic changeddue to the presence of the corps commander. If the num-ber is red, the corps commanderhas a negative impact. Agreen number means that his modifications are beneficial.
DIVISION COMMANDERS
& UNIT LEADERS
Tip:Move your CorpsCommandersaround to maxi-mize their strategicvalue, but keepthem behind thelines to minimizetheir risk.

are no restrictions as to what type of unit a division com-mandercan be assigned to. Movement range shading willcover the units that the commander cannot be assigned to.You can find out where a unit fits into the army commandstructure by looking at the text beneath the detailed unitinformation display.
How to Dismiss a Unit LeaderUnit leaders may not be dismissed during the heat of com-bat; you must wait until the period between the battles of acampaign game. When you get to the Weapons Purchasescreen, select the unit whose leader you want to dismissand click on the Dismiss button beneath his portrait. Hisreplacement will come from within the unit's ranks accord-ing to the chain of command for the unit. This new leaderwill not have any ratings at first because he has yet to leadthe unit in a battle. You can only dismiss a unit's leaderonce after a battle since, being a fair general, you want togive your men a chance to prove themselves.
RatingsA rating on a scale from one to ten, displayed in crossedswords, can be found next to each leader portrait on theinformation panel. This gives you a quick overview ofhow well the leader is performing, the rating being an aver-age of the three categories by which he is judged modifiedby his current health. By clicking on the portrait, you cansee not only the breakdown of the ratings, but also howmany engagements he has been involved with in the courseof the current battle. This figure is displayed with bullethole icons, with each large bullet hole representing fiveengagements and each small hole representing one. Abovethe bullet holes are the figures that rate the quality of yourleader.
GGRRAANNTT,, LLEEEE,, SSHHEERRMMAANN
81No matter which level a battle takes place on, brigade orregimental, purchasing weapons always take place at thebrigade level. Regiments will be reabsorbed into thebrigades after you fight a regimental level battle so thatyou can purchase weapons for the entire brigade at once.This prevents weapons purchasing from becoming overlycomplicated since some campaigns are made up of a com-bination of brigade and regimental battles.
Just as good judgement is learned from experience, experi-ence comes from a display of poor judgement. All of yourleaders will improve over time as they gain experience onthe battlefield. If they do not seem to be learning fromtheir mistakes, you have the ability to remove them fromtheir current positions.
The only time you will be aware of an enemy division com-manderis when you engage his current unit. A gold starwill appear next to the enemy unit when it is attacked andwill remain until the completion of the battle or until theenemy leader is killed or reassigned to another unit.
How To Reassign a Division CommanderDivision commanderscan only be reassigned at the begin-ning of a turn. When you feel the need to remove a com-mander from a particular unit, activate the ReassignDivision Commanders Next Turnoption from the GameControlsmenu. At the start of your next turn you will beasked which commanders you would like to reassign.When this message comes up, you will see the location ofa commander on the battlefield map, marked by a largegold star at the location of the unit he is currently with.The message will show only one division commander at atime, but you can look at all the commanders by using theNext and Previous buttons. To assign a particular divisioncommanderto a new unit, simply click on another unit onthe battlefield while he is selected. The unit must be amember of the commander’s division and within a 10 hexradius in order for the reassignment to take place. There
CCIIVVIILL WWAARR GGEENNEERRAALLSS 22
80
Bullet holes rep-resent the numberof engagementsfought

able to defend its position for the remainder of the battle.However, if the leader is good and the battle will soon end,it may be wise to make sure this leader will be with his unitfor the next battle. In a Full Campaign game, woundedleaders can recover between battles and will return to takecharge of their former unit through future engagements.Recovery is not guaranteed. They may never fully regaintheir health, sometimes dying or being forced into retire-ment as a disabled veteran.
Special Orders
Digging InA common practice during the civil war, digging ininvolved piling trees and dirt into walls, camouflaging aposition, and digging ditches and pits. Soldiers entrenchedthemselves in this way to strengthen their defensive capa-bilities when they were in possession of an importantstrategic position.
When you decide that it is time for a unit to Dig In, selectthe unit and click on the Dig In button on the informationpanel (or select Dig in from the Game Controlsmenu). Inorder to follow your command, infantry must be in combatformation, cavalry must dismount, and artillery must beunlimbered. The unit needs to have enough movementpoints and can only Dig In on the right kind of terrain.Obviously some types of terrain are not suitable for dig-ging in, including rivers, streams, cities, swamps, andbridges, in which case the Dig In button cannot be accessedand will be darkened.
Units spend the entire turn preparing their fortifications,doing their best to utilize the natural defenses of the posi-tion. As they do this, they will receive a minor increase inboth health and organization and may be resupplied. Whena unit has become entrenched, a shovel icon will appear
GGRRAANNTT,, LLEEEE,, SSHHEERRMMAANN
83
CCIIVVIILL WWAARR GGEENNEERRAALLSS 22
82 The following categories are based on a scale of 0 to 99:
Influence: Not all leaders have the power to affect theperformance of their men. This rating is a measure of howwell a leader can direct his troops in combat. Influence isa determining factor on the battlefield since it can changethe firepower and morale of a unit.
Organization: It is hard to get anything accomplishedwithout being well organized. A disorganized leader’s menwill have problems trying to attack, defend, and evenmove. As a result, sometimes a unit’s organization willsink too low and a unit may find itself unable to do any-thing at all. When playing on the two harder levels of dif-ficulty, a good leader organization rating can lessen thenegative effect that movement and combat will have on aunit.
Loyalty: When troops are loyal to their leader, they willfollow his orders even if the situation looks desperate, par-ticularly when defending against a charge. High loyaltyratings are the lifeblood of morale and thus make a unit farless likely to surrender or retreat and far more likely tocarry out a charge.
Health: Your leaders may be tough as nails, but they arenot impervious to attack. Every leader has his own per-sonal health rating that is separate from the rating for theunit he is with. Whenever a unit is involved in a fight,there is the possibility that the leader will be wounded oreven killed. If a wound is critical, it will take his health rat-ing below 40 and he will be carried off to the hospital andautomatically replaced by the next in command. Ofcourse, if the wound is fatal he must also be replaced. If itis a light wound (his health remains above 60) he can stillact as an effective leader. A serious wound (health ratingbetween 40 and 60) will bring up a message asking if youwould like to replace the leader. Electing to keep him incharge will immobilize the entire unit, which will only be
Dig in button
Tip:Once a leader’shealth drops below60, his unit cannotmove or attack - itmay only defend.

next to their position on the battlefield. They will then beconsidered entrenched for as long as they remain in thatposition. Units cannot be ordered to Dig In again until theymove to a new position.
The special function button for engineers appears in thesame location as the Dig In button when an Engineer unitis selected. See page 51 for more information on usingengineers.
Rest & ResupplyIf soldiers are denied regular periods of rest and fresh sup-plies, they quickly lose their effectiveness and grow wearyand sick. When a unit is resting, its men regain the healththey lost during combat. Leaders will attempt to round upstragglers and deserters, thus boosting the organization andthe effective size of the unit. Morale and firepower willincrease as a result of these improvements. More benefitswill be gained from resting if the unit is not in a combatformation with the exception of the cavalry. They rest bet-ter when dismounted, as do their horses. Terrain also influ-ences the benefits of rest. Towns and forts are the bestplaces to rest while swamps, rivers, and streams are theworst. Additionally, any unit that rests within three hexesof its Corps Commander will gain more organization andhealth from resting.
Even a unit that is mentally and physically ready for battlecannot do much damage without any bullets. The amountof ammunition a unit has on hand is called their supply. Itis important to keep track of how much supply is left toyour units to prevent them from running out and losingtheir ability to fight.
There are two ways to issue the Rest & Resupply com-mand, either to all units who did not move during a turn, oron an individual basis.
As a turn ends, all units that have used no movement points
CCIIVVIILL WWAARR GGEENNEERRAALLSS 22
84 will automatically be rested and resupplied. You have theability to choose how many Army Supply points to spendon the provisions, but keep in mind that you will be send-ing the same amount of supplies to every unit. Normallyyou will send full supplies to your men, but if you are run-ning low on Army Supply points, you may want to opt forhalf, quarter, or even none. If a unit is already fully sup-plied, you will have the option to oversupply the unit. Themen will get a morale boost when they have more ammu-nition than they need, and they will be able to fight forlonger periods of time without running out of supplies.
When you need more control over the amount of supplieseach unit is to get, you may give this command to individ-ual units during a turn. The command will be eagerly car-ried out by your men provided that they still have all oftheir movement points available. Simply click on the Rest& Resupply button on the information panel while a unit isselected, press the ‘R’ hotkey, or choose Rest Unit from theGame Controls menu. Then, unless the unit is alreadyoversupplied, you will be given the list of different quanti-ties of supplies to choose from. If two enemy units areadjacent to your unit, only half supply can be chosen, andwhen three enemies are present, no supplies can be sent.Once the order has been given, the unit will spend theremainder of the turn resting.
Changing FormationsIt is always beneficial to get a unit into a formation appro-priate to the task at hand. Not only does the wrong forma-tion make your units less effective, it may also damagetheir health and organization ratings.
To change formation, just click on the Change Formationbutton on the information panel or press the ‘F’ key whilethe unit is selected. With a couple of exceptions, changingformations uses some, but not all, movement points. It isalways easier to move a unit when they are in the properformation, and you will find that the movement range may
GGRRAANNTT,, LLEEEE,, SSHHEERRMMAANN
85
Change formations button
Rest andResupply button

MOVEMENT & TERRAINMovementOne of the worst things a general can do is to tire out histroops through unnecessary movement. They will quicklygrow weary of the marching and as a result will not benearly as effective on the battlefield. Let them rest when-ever possible, especially after a skirmish. Plan ahead andmove your units wisely, keeping in mind the factors of ter-rain and formation as well as your strengths and theenemy's weaknesses.
At the Beginner difficulty level, movement has no illeffects on your troops. When you play at the higher diffi-culty levels, the negative effect movement has on your menwill be greater. Intermediate treats all units in the sameway, while the Advanced level includes factors like leaderorganization, unit quality and experience. For more spe-cific details on difficulty levels, see page 106.
At the start of each turn, units have a fresh supply of move-ment points at their disposal. The range of movement willvary from unit to unit, and you can see a graphical displayof the range by selecting Show Movement Range from theDisplay menu. This will grey out the parts of the map thatcannot be reached with the movement points available tothe selected unit. Right clicking on a limbered artilleryunit or on a naval unit will toggle this display betweenmovement range and Line of Fire. This allows you to findout where the artillery can fire before taking the time tounlimber.
Some units have two formations, one for combat and theother for movement. Though it is possible to order a com-bat ready unit to move, the unit's health and organizationwill suffer and the movement points expended will be fargreater than if the unit first gets into proper formation. Ingeneral, if there is a chance of being attacked by a more
GGRRAANNTT,, LLEEEE,, SSHHEERRMMAANN
87
CCIIVVIILL WWAARR GGEENNEERRAALLSS 22
86 even increase with a formation change, despite the loss ofsome movement points. If an attack is ordered while in thewrong formation, the unit automatically changes formationbefore launching the attack. Terrain like bridges andswamps will prevent any unit from switching formations.If a unit is already in the proper formation to attack or hasonly one formation, the terrain they are on will not preventan attack.
Infantry should be in marching formation while travelling,and in combat formation by the time they encounter theenemy. Artillery needs to be limbered to move and unlim-bered to fire. Cavalry moves faster and attacks better whenmounted and rests and defends better when dismounted.Engineers can only move while in marching formation andcan only build and destroy structures while in working for-mation. Specialists and all naval units have only one for-mation, so the change formations command does not applyto them.
UndoPressing the Undo button retracts the most recent move orformation change. This button will not be available if themost recent action was an attack or a movement thatrevealed a previously hidden enemy unit.
Undo button

icon gives a graphical "soldier's eye view" of the position,which can be clicked on to obtain more details about theterrain. You can find out the height, natural defenses, andmanmade cover of the position, useful information whenplanning an attack or simply digging in.
Sometimes a location will give the soldiers occupying it asense of confidence, particularly when the position is high-ly elevated or contains many natural defensive features likerocks and trees. Such positions boost your men's morale aslong as they continue to occupy the spot. To quickly findout which locations provide such a boost, choose TerrainMorale Boost from the Reports menu.
Roads are the most effective means of travel available ascrossing them requires the least movement points of anyterrain. They are completely exposed though and thusleave your men vulnerable to attack. There are regularsized minor roads as well as large major roads. Majorroads exact less health and organization costs from move-ment than minor roads.Sunken roads are another efficient way to travel andalso provide good cover and a morale boost. Towns are relatively easy to move troops into as long asthe unit is in movement formation. In movement forma-tion, towns function as roads. But in non-movement for-mation, towns can be difficult and disruptive to movethrough. Towns are the best place to rest troops, but theyare disruptive to both attackers and defenders in combat.Grass is the most efficient non-road terrain type to movethrough.Forests exact relatively high movement costs but providegood cover. When an engagement is fought in a forest,both sides are likely to suffer high health and organizationreductions.Railroad Lines are similar to roads, but they providebetter cover. When moving on railroads, units are assumedto be walking along the rails, and not riding on trains.
GGRRAANNTT,, LLEEEE,, SSHHEERRMMAANN
89powerful enemy, keep your group in whatever combat for-mation it has. Whenever you need to move for more thana few hexes, have the unit in movement formation. Ofcourse, some units, like artillery, cannot move at all unlessthey are limbered for movement, while others have onlyone formation and thus do not have movement limitations.
Crossing certain kinds of terrain, such as wooded areas,hills, and swamps, will have a greater cost in movementpoints than the more efficient methods of travel. Roadsand railroads take the least toll on the troops, and will usu-ally get a unit to a desired location faster than taking atreacherous shortcut. Keep in mind though that unless aunit is in the proper formation to move, the advantages oftravelling on roads will be lost and the terrain that the roadis built on will be the one to affect your troops. Movementfrom one location to an adjacent hex will only receive theroad’s movement point advantage if the road actually con-nects the two hexes.
When a unit has been badly battered, it will lose its resolveand may be routed. If this happens, the men will ignoreyour commands, instead fleeing to the nearest Corps HQunit and then to a nearby Supply Source. For more infor-mation on routed units, see page 103. If you act in time, avoluntary retreat can be made which may save a unit frombeing routed (see Voluntary Retreats on page 103).
By the time night falls, your men are ready for a wellearned rest. For this reason, moving units at night and atdawn and dusk takes a drastic toll on the health and orga-nization of your men. See Dawn, Dusk, & Night Turns onpage 105.
TerrainOther than sheer manpower, terrain can prove to be themost important factor influencing the course of the battle.The information panel displays data about the terrain occu-pied by a specific unit next to the unit information. An
CCIIVVIILL WWAARR GGEENNEERRAALLSS 22
88
Minor Road
Sunken Road
Town
Grass
Forest
Railroad Line
Major Road

Swamps slow your men down and should be avoidedwhenever possible. The health and organization of yourmen will suffer if you attempt to cross a swamp on foot. Forts give a morale boost and provide the most cover ofany single terrain type. You must defend them well thoughas enemy engineers can destroy them, causing them tobecome ruined forts. Retreating from a fort also turns itinto a ruined fort.Ruined fortsstill provide your men with a good amountof cover, but are far easier to infiltrate than an intact fort.Abatis are spiked wooden barricades built to keep anenemy at bay. They are extremely costly to move acrossand some of your men might even be killed in the process.Go around them unless you have no other options.
CoverThere are two cover ratings for every position on the map,natural cover and prepared cover. Ratings are accessed byclicking on the terrain window found on the informationpanel or by selecting these reports from the Reports menu.The higher these numbers are for a position, the better thedefensive ability and firepower of a group located there.
Natural cover encompasses things like trees, rocks, ledges,etc., and its rating is the first number next to "CVR" on theterrain window. From the most exposed rating of -5, to thehighest protection of a 6 rating, natural cover will drasti-cally affect the success of your units.
Prepared cover is the amount of protection a unit will gainthrough Digging In to a position (see Digging In on page83). When a unit does this, their defenses will increasewhen attacked, based on the prepared cover rating of theposition, anywhere from 0 to 6. You can find out the pre-pared cover values for every hex on the map that the cur-rently selected unit (in its current formation) would receiveif it were there by selecting Prepared Cover from theReports menu.
GGRRAANNTT,, LLEEEE,, SSHHEERRMMAANN
91Unfinished Railroad Lines exact slightly moremovement points than railroads, but offer more cover.Rivers cannot be crossed without some kind of bridge oran area shallow enough to negotiate on foot. Your men canuse a bridge, a pontoon bridge, or they can find a spotwhere the river can be forded. Bridges do not require any more movement points thanroads to cross and function the same way as roads. Moraleis temporarily reduced while a unit is on a bridge.Pontoon bridges take longer to cross than regularbridges and require more movement points. An engineercan build a pontoon bridge by using the Dig In commandwhile he is situated on the appropriate hex. The only alter-native to using a bridge to cross a river is to have your menattempt to ford the river.River fords are shallow points in a river that allow it tobe crossed. They take on different qualities on differentbattlefields. Some battlefields have shallow rivers, whichare passable at any point (although such crossings willcarry a high movement point cost). Other rivers will allowfords only at certain places. Some fords are visible on themap, but others must be found by moving a unit along theriver and looking for the movement range extension. Ascommander, one of your jobs will be to determine, as bestyou can, the nature of a battlefield's rivers. Except for engineers, units may not change formation orDig In while on any type of river crossing. Streams raise the movement cost slightly higher than theterrain that the stream runs through, at the same timedecreasing the amount of cover. A unit may not Dig Inwhile on a stream.Rocky Knolls are rugged terrain. They will be difficultfor all types of units to move into, but they provide the bestcover and give an occupying unit a morale boost.Stone walls provide good cover and frequently giveoccupying units a morale boost. They can be linkedtogether to form long and effective fortifications.
CCIIVVIILL WWAARR GGEENNEERRAALLSS 22
90
Abatis
Ruined Fort
Fort
Swamp
Stone Wall
River Ford
Pontoon Bridge
Bridge
River
UnfinishedRailroad Line
Stream
Rocky Knoll

not be able to march between two opposing units withoutstopping.
Stacking UnitsA unit is able to move through oneother unit on the map, provided thatboth units are on the same side. Theonly time two units may actuallyoccupy the same hex is when one ofthem is an Artillery unit. Infantry,Cavalry, and Specialists may share the
same space as an Artillery unit, and vice versa. The oneexception to this rule is when it is one of the HeavyArtillery units found inside a fort. These units cannot bestacked.
Two is the maximum number of units that may share a sin-gle hex at any given time. When this occurs, it is referredto as stacking. Other units are not able to move through aposition that contains stacked units.
When two units are stacked, each right click on the positionwill select one of the units. Left clicking toggles betweenthe graphic and the detailed information displayed for theselected unit.
VisibilityGuesswork was often employed by civil war commandersto locate the enemy, due to a lack of more advanced meth-ods. Incorrect guesses often proved to be disastrous, illus-trating the strategic importance of knowing where yourenemy is hiding.
Thanks to technological developments, modern soldiersexpect, and even need, detailed maps and information con-
cerning the enemy. CIVIL WAR GENERALS 2 gives you theability to customize your view in several ways. In additionto being able to zoom your view in and out (press the Zoom
GGRRAANNTT,, LLEEEE,, SSHHEERRMMAANN
93HeightEvery position on the map has a specific height. There isno limit to the height of the terrain. The height of any indi-vidual position can be checked by clicking on its terrainwindow. To see the levels of the entire map at once, selectTerrain Heightfrom the Reports menu.
Each height level represents a difference of 30 to 40 feet,depending on which battle is being fought. The greater theelevation of a position, the more advantageous it is todefend. When attacking a location that has a lower heightlevel, the position on higher ground will always have anadvantage in that it can see more clearly than the lowerposition. A height difference of one level gives a unit at thehigher elevated position 10 percent greater firepower whilethe lower position’s firepower is reduced by the same per-centage. In the rare instance that there are two levels ofdifference, the firepower of the units involved will increaseor decrease by 40 percent, depending their position.
Height will also influence a unit's willingness to participatein an attack. If the unit is on high ground, the benefits ofthe location instill confidence in the men and will increasetheir desire to win. Launching an attack from a lower ele-vation than the target should only be undertaken as a lastresort and if you have a significant combat advantage.
Zone of ControlSpecialists, unlimbered Artillery, andcombat ready Infantry and Cavalryexert control over hexes adjacent totheir position. Enemy movement isrestricted through these areas. A unitmay never enter two consecutiveZones of Controlin the same turn(unless it starts a turn in a Zone ofControl). Defensive lines can bespaced apart with units occupyingevery other hex since attackers will
CCIIVVIILL WWAARR GGEENNEERRAALLSS 22
92
This unit cannotmove between twoenemies due totheir Zone ofControl

friendly units. Enemy units will have a red outline whenthey are selected. You can display a grid of hexes over theentire map by activating Grid from the Display menu.
Zoom This setting lets you enlarge your view to see more of thebattlefield at once. Click on the Zoombutton, select Zoomfrom the Display menu, or hit the ‘Z’ key to activate anddeactivate Zoom mode.
GGRRAANNTT,, LLEEEE,, SSHHEERRMMAANN
95button on the Information panel, the ‘Z’ hotkey, or from theZoom item on the Display menu) you can also adjust whichenemy units you can see and how obstructions interferewith attacks. These options, Full Visibility, Line of Sight,and Line of Firecan be set from the Options menu.
Full VisibilityThis option allows you to see all enemy units anywhere onthe map regardless of whether or not they have been spot-ted by one of your units. Toggle this setting off and youwill only be able to see enemies when spotted by a friend-ly unit.
Line of SightA defined area around your men, called spotting range,represents the distance that your units can see. When theLine of Sightsetting is turned on, an obstruction like a hillor a forest that blocks part of your unit’s spotting range willprevent them from being able to see enemy units. Turn offLine of Sight and your units will see any enemy unit that iswithin their spotting range, regardless of the terrain. If fullvisibility is turned on, the Line of Sight setting will ceaseto be a factor as you will see every enemy unit on the map.
Line of FireLine of Fire determines which units can be targeted byArtillery units. When this option is turned on, terrain mayprevent an Artillery unit from firing at an enemy even if itlies within their range. Terrain obstructions like ridges thatcome between a cannon and its target block any shot that isfired. Turn Line of Fireoff and artillery will be able to firestraight through such obstructions to strike the enemy.
HexesHexes outline all of your units that still have enough move-ment points left to perform an action. This outline is whitefor your currently selected unit and blue for all other
CCIIVVIILL WWAARR GGEENNEERRAALLSS 22
94
Zoomed in view
Zoomed out view
The Zoom button

GGRRAANNTT,, LLEEEE,, SSHHEERRMMAANN
97
Most of the focus of CIVIL WAR GENERALS 2 centers on onething: combat. Each battle consists of dozens or even hun-dreds of small engagements, all fought on a unit-to-unitbasis. Winning a single engagement is just one small steptowards overall victory.
While the computer handles all the complex calculations, itis a good idea to be familiar with the basic elements thatwill decide the outcome of a battle. First and foremost isthe condition of your troops. If they are fatigued, outnum-bered, spread too thin, or have suffered too many demoral-izing defeats, your men will cease to be effective and maynot enter a fight at all. In addition, they require sufficientammunition and decent weapons in order to be able toachieve victory. The caliber of your leaders is another cru-cial factor. If an inexperienced leader is in command or iftoo many leaders have been lost in other engagements, themen will lose respect for the position of authority andmorale will suffer as a result. Terrain is a determining fac-tor that cannot be overlooked. Attacking a position withhigher elevation is a risky proposition at best, and unitslocated behind dense trees, rocky areas, or across a rivercan be very difficult to approach. Once an engagement hasended, the victorious unit will occupy the disputed positionand the loser will be forced to retreat, or, if the men arethoroughly battered, they will surrender or rout.
CCIIVVIILL WWAARR GGEENNEERRAALLSS 22
COMBAT Engagements commence when you order a unit to attack ahex that is occupied by the enemy. If the target lies withinrange of the attacking unit and your men have sufficientmorale and supplies and are in good health, the engage-ment will begin. When you attack with your infantry orcavalry, they will advance into the enemy’s position andattempt to capture it. Specialist forces snipe from an adja-cent hex, and artillery units can attack from as many as 15hexes away. The skirmish starts with your men moving tothe disputed position (if need be), followed by the explo-sion of combat.
Thanks to the reenactment footage included with Civil War
Generals 2, you can watch an engagement as it unfoldsthrough a sequence of video clips. These may be turned offat any time during the game, depending on your prefer-ence. More information on these clips can be found onpage 104.
After the skirmish ends, the loser vacates the position, aninformation display details the casualties on each side, andall the ratings of the units involved are immediately updat-ed.
THE BASIC STRUCTURE OF AN ENGAGEMENTThe following outline demonstrates a normal attack by aninfantry or cavalry unit. Precise elements of an engage-ment will vary because attacks can take many differentforms.
1. The attacking unit uses its available movement points tomove to the enemy unit and get into combat formation(when required). 2. The attacking unit confirms a safe destination adjacent tothe enemy's position, in the event of a retreat. Engagingthe enemy with no escape route is very risky. If the attack-ing unit does not win, it will panic and rout.3. If the attacking unit's morale and supply are sufficient-

GGRRAANNTT,, LLEEEE,, SSHHEERRMMAANN
99ly high, it moves into the enemy's position, stops within100 yards of the enemy, and prepares to fire. 4. The defending unit'smorale and supply are checked. Ifthey are low, the defender will begin to retreat, rout, or sur-render depending on its condition, and will not fire at fullstrength. If the unit's ratings are adequate, then the defend-er fires the first volley of the engagement.5. The attacking unit absorbs the volley: its organization,health, and morale are adjusted, and its firepower is updat-ed. When these ratings fall too low, the attacker begins toretreat or rout and will not inflict much damage on thedefender. 6. If the attacking unit is still fit for combat, it fires. Its sta-tistics are updated. 7. The defending unit absorbs the attack. If the defender'smorale is sufficiently high after the attack, it will hold itsposition, and the attacker will leave (thus losing theengagement). If the defender's morale drops too low, itwill either retreat, rout, or surrender, and the attacker willremain in the disputed position (thus winning the engage-ment).
Artillery AttacksCapable of launching ranged attacks from up to 15 hexesaway (depending on the type of cannon used), artilleryunits are one of your most valuable resources. Whenattacking a non-artillery unit, the defender cannot returnfire, suffering casualties and organization, health, andmorale damage from the bombardment.
If your target is another piece of artillery, a duel may occur.The defender will then have an opportunity to return fireafter the initial barrage, usually with the result of both sidestaking damage. Some cannons have a greater range thanothers, like rifled cannons, which can shoot farther thansmoothbores. If a target does not have enough range toreturn fire, they will not be able to retaliate.
CCIIVVIILL WWAARR GGEENNEERRAALLSS 22
98 When a target contains both an artillery unit and a combatunit crowded into the same position, your odds of inflictingdamage are greatly increased due to the "fish in a barrel"effect. In these cases you will be asked to make a choice;target both units and distribute the barrage evenly, or targetjust the artillery and focus the attack on the cannons with asmall portion of the ammunition unavoidably hitting theother unit.
INDIRECT FIRESome units are capable of firing on a target even if they donot have a clear line of fire. Having this ability is deter-mined by the kind of weapon the unit is carrying. All unitsthat use mortars or howitzers can fire indirectly. Mortarunits and mortar gunboats come equipped with mortars andartillery units may be outfitted with howitzers.
Indirect fire means that if an enemy unit is hidden by aridge or a forest, you can still attack by firing over theobstruction. In some cases you may suspect that an enemyis in a certain spot before you even see them. If you havethe resources available, you might want to attack the posi-tion and get a jump on the opposition. Left click on anyhex you want to target. If you strike a hidden enemy youwill be given a damage report, but you still will not be ableto see the unit on the map. Defending units get no coverbonus for terrain when subjected to an indirect fire attack.Walls cannot block shells falling from above. The accura-cy of indirect fire is not very good, however, sometimesstriking hexes that are near the target, whether they befriend or foe. Mortars always use indirect fire, greatly lim-iting their abilities at close ranges, but they do haveimproved accuracy if the target is visible. Howitzers, onthe other hand, use direct fire if the target is within sight,relying on indirect fire only when no clear line of fire isavailable.

ChargesWhen your confidence in a unit's abil-ity is high, you may employ the brutaltactic of charging your opponent. It
requires great courage and skill on the part of the attacker,so it should only be used when you have a significant com-bat advantage. Whereas a normal attack has troopsadvance towards the enemy, opening fire at 100-200 yards,a charge advances your men, fires a volley, and then con-tinues to overrun the enemy line. The defender will usual-ly retreat if his situation is hopeless, hoping to avoid thebloodshed of hand-to-hand combat.
To order a unit to charge, attack as usual with the Chargebutton depressed. Only infantry units in line formation andcavalry units can be ordered to charge. A charge mirrorsthe structure of a normal attack with a few key exceptions:
* The attacker must have at least two rounds of ammuni-tion before a charge can take place. One round is fired dur-ing the advance and another will be fired point blank uponreaching the defender's line. In order to have a hope of sur-viving such an attack, the defender must also have at leasttwo rounds of ammunition at their disposal. * Loyalty, morale, and organization ratings must be signif-icantly higher than in a normal attack.* Once the initial portion of the attack has been carried out,the combatants enter into hand-to-hand combat. At thistime, each unit will suffer an amount of damage based onthe number and condition of the enemy as well as the hand-to-hand rating of the weapons involved. High morale iscrucial to withstanding this form of attack.
Combining a charge with an attack from the rear adds theadvantage of surprise to the sheer brute aggression of acharge. When the opportunity presents itself, a rear chargecan be the most devastating attack of the battle.
GGRRAANNTT,, LLEEEE,, SSHHEERRMMAANN
101Coordinated AttacksOne of the best ways to effectively defeat an enemy unit isto coordinate your attack. Having several different unitsgang up on a single enemy unit of a similar size will be farmore successful than an individual assault. Bear in mindthat each day turn lasts for only a half hour, so multipleattacks that take place in a single turn strike in quick suc-cession and can easily overwhelm the defender. In additionto the combat damage, each attack reduces the defendingunit's firepower for the rest of the turn, weakening it con-siderably. To be sure that you are targeting the same unit,select the group in question and access a display calledTimes Defended from the Display menu. All non artilleryattacks will be shown in this report as long as the attackingunit was at least 50 percent as large as the defender. Therealso is aTimes Defendedexplosion graphic that will appearin the defender’s hex to indicate how many times it hasbeen attacked.
Rear AttacksClosely related to a coordinated attack, a rear attackinvolves launching two assaults on the same position in thesame turn, with the distinction being that the second comesfrom the side directly opposite to the first. Unless adefender has ratings that are considerably higher than thoseof the attacker, it is likely to be devastated. As troops arenot trained or equipped to defend against such a tactic, it isadvisable to avoid getting into a position where you can beattacked in this manner, while employing the rear attackagainst your enemy whenever possible. Since the defend-er can only react with surprise to the second attack, theaggressor fires first with the advantage of enhanced fire-power while the defender's return fire will be at a greatlydecreased level.
CCIIVVIILL WWAARR GGEENNEERRAALLSS 22
100
Rear attack
First attack

If its Headquarters unit is not on the battlefield or it isalready adjacent to its Headquarters unit, the retreating unitwill move toward the nearest supply source hex. A supplysource hex is indicated on the map by a small coveredwagon.
Voluntary ExitsThere will be times when it is beneficial to leave the mapof your own free will at a supply source. Some scenariosset the goal of leaving the battlefield as the main objective.At other times, exiting the map may be the only way tosave yourself from complete destruction. In either case,you will want to pay attention to the victory pointsassigned to the supply sources. Select the option “victorypoints” from the Reports menu to find out what the bonusor penalty will be for each side at all the various supplysources on the map.
Routed UnitsYour men can only withstand somuch before they decide that the situ-ation is hopeless and run for theirlives. When morale reaches a criticallevel, usually after a humiliatingdefeat, the unit will be routed. Whenthis occurs, the unit will rout toward
their commanding officer (the Headquarters unit underwhose command they fall). The morale rating gives somewarning, displaying a soldier running away when there isdanger of an approaching rout, but once you see soldiersrunning on the battlefield map, it is too late to prevent therout. When a routed unit is near to a Corps HQ unit, theyhave a better chance of pulling themselves together andrejoining the fight. If this fails, they will keep movingtoward the nearest Supply Source and then off the battle-field.
Sometimes a routed unit will regain its composure withoutyour intervention, but it is more likely that you will need to
GGRRAANNTT,, LLEEEE,, SSHHEERRMMAANN
103Multiple Unit AttacksNot to be confused with coordinated attacks, a multipleunit attack is a situation where a single hex is occupied bymore than one defending unit. The effect of the attack actson the combined forces of both defenders, with each unittaking a proportional amount of damage. Of course, bothdefenders will also be able to return fire.
Surprise AttacksIf an Infantry or Artillery unit is attacked while in move-ment formation, the attacker will fire first. The defender,caught unaware, returns fire with a firepower penalty forbeing in the wrong formation.
Specialist AttacksSpecialist units, made up of sharpshooters, launch theirattacks from a hex that is adjacent to the enemy. Highquality rifles fitted with scopes give Specialists the abilityto snipe at an opponent from a great distance. Unlikeartillery, specialist forces cannot target two units that sharethe same hex; they must specify which unit to attack.Specialists are particularly skilled at killing enemy leaderssince they can fire accurately from a distance, and, beingbeyond the range of enemy shoulder arms, defending unitsdo not get the opportunity to return fire.
Voluntary RetreatsOccasionally a unit will become too damaged to staytogether as a group. Unless the leader loyalty rating is verygood, when morale and organization drop below a certainpoint, the unit becomes unable to move in an organizedfashion. Whenever you try to issue any orders to a unit insuch a predicament, a prompt will appear asking if youwant to issue the voluntary retreat command. This givesyou the ability to remove the unit from imminent danger,but you cannot control the unit's movement. It will auto-matically head towards its commanding Headquarters unit.
CCIIVVIILL WWAARR GGEENNEERRAALLSS 22
102

of Union infantrymen retreating. This sequence of eventsdepicts what happened in the engagement and in whatorder shots were fired. When the video clip screen disap-pears, the Confederate attacker will occupy the disputedposition. The sequence of clips will depend on thesequence of events in the particular engagement.
Dawn, Dusk, and Night TurnsEveryone needs rest and relaxation sometime, even a warhardened soldier. As the general, you can stay up all nightplanning the next morning's battle if you like, but your menneed their beauty sleep before they face a full day of fight-ing. Tents and fires will let you know where your menhave set up camp for the night. It is advisable to let thetroops rest during the night turns, only moving them whenit is absolutely essential since any activity at night is farmore taxing than during the daytime. Engagements maynot be fought during the night, regardless of the proximityof the enemy. Dawn and dusk are also good times to letyour men rest. They receive more benefits from restingduring these times than in the daytime, but still not as muchas at night. Units may attack at dawn and dusk, but theywill lose more health and organization than they would ina daytime attack.
At 19:00 (7 p.m.), dusk arrives. It lasts for an hour yet onlycomprises one turn in the game. Between 20:00 and 6:00(8 p.m. - 6 a.m.) there will be only three turns, each onerepresenting just over three hours of the nighttime. Dawnlasts from 6:00 to 7:00 (6 a.m. - 7 a.m.) and is also one turn.
ReinforcementsJust when you are worried that the situation is completelyhopeless, the reinforcements arrive. Most reinforcementsappear on the battlefield at a Supply Source, although somearrive at other locations on the battlefield. Supply sourcesare favored mainly because they are hexes with roads lead-ing onto the map. To find the location of these areas, selectShow Supply Sources from the Display menu.
GGRRAANNTT,, LLEEEE,, SSHHEERRMMAANN
105rally the unit. This requires a personal visit from you, thegeneral, and uses some of the accumulated Army Moralepoints. A rally button for the routed unit appears on theinformation panel in the same position as the charge but-ton. Simply press this button to attempt to rally the unit.Depending on the severity of the situation, rallying mayhave to be repeated more than once to stop a unit from itsflight. When a unit leaves the battlefield entirely, havingmade it to one of the supply sources, they will not appearagain during the current battle.
Video ClipsWhen the Video Clips option is toggled on from theOptions Panel, the events of the combat you are involvedwith are shown through authentic battle reenactmentfootage. These clips show specific unit and terrain typesand depict what transpired in the engagement, whether it bea sniper attack, a retreat, or an artillery bombardment. If,for example, a Confederate infantry unit launches a normalattack on a Union infantry unit, you will see a clip of aUnion defensive volley, followed by a clip of aConfederate offensive volley, possibly followed by a clip
CCIIVVIILL WWAARR GGEENNEERRAALLSS 22
104

After Combat ReportWhen an engagement between two units ends, a screenappears with a report detailing the results of the confronta-tion. This screen, the After Combatreport, is useful as afast guide to determining the victor as it displays the loss-es and gains made during combat. Listed are firepowerlosses, casualties, Army Morale changes, supply changes,and leaders wounded and killed for each unit that wasinvolved in the fight. If two units share the same hex, thereport combines the numbers and displays them together.
On the off chance that you are not interested in seeing thisreport at the end of each skirmish, the after combat reportcan be deactivated from the Options menu.
It is also possible to view this report during an enemy turn.This will enable you to find out the results of attacksagainst your units. To see the report during enemy turns,activate the After Combat report from the Options menu.This will bring up a submenu with two choices: friendlyattacksand enemy attacks. Selecting enemy attackswilldisplay the report after an attack during the enemy turn.
GGRRAANNTT,, LLEEEE,, SSHHEERRMMAANN
107It is also useful to periodically check the ReinforcementsReport in the Command Tent to find out when and wherethe reinforcements are scheduled to arrive. The arrows atthe left of this screen allow you move through the differentunits to see which troops are going to be arriving. Listedare the unit type, unit name, number of men, and time ofarrival for each reinforcement unit. The arrows to the rightside of the screen allow you to select a particular time ofarrival to check. This way you can check on the time ofarrival of your reinforcements starting with the present andwork forward. Only units arriving in the near future areincluded as the exact times for future reinforcements can-not be predicted. This report can be very useful to raiseyour spirits when things are beginning to look bleak.
Play LevelThere are three difficulty levels available to you: Beginner,Intermediate, and Advanced. The default setting isIntermediate, but you can change this simply by selecting adifferent level from the Options Panel.
When you are first getting familiar with the game, it ismost likely that you should play on the Beginner level. By
the time you are comfortable with CIVIL WAR GENERALS 2,you will be ready for the increased challenge and greaterdegree of realism on the Intermediate and Advanced levels.
As a Beginner, movement of troops expends only move-ment points, even in the middle of the night. The other lev-els address the fatigue and organizational issues associatedwith moving troops around. At the Intermediate level,health and organization ratings will be reduced uniformly,regardless of the quality of the leader or the troops.Playing at the Advanced level, the organization and healthof a unit are affected less severely if the leader is well orga-nized and if the unit is made up of experienced soldiers.
CCIIVVIILL WWAARR GGEENNEERRAALLSS 22
106
The After Combat Report

applied to the victor and a similar penalty applied to theloser. After the final turn has been played, the VictoryScreenappears with the statistics for each side. The pri-mary source that decides the outcome of a battle is thenumber of victory points both sides have accumulated.Often, the historical defender will start a battle with somevictory points, with more victory points added or subtract-ed based on each side’s overall battlefield performance.
Morale plays a big role in the calculation of victory points,and each Army Morale point gained results in an addition-al victory point. Lose morale points and your victorypoints will also diminish. The only time a decrease inmorale points does not result in a loss of victory points iswhen you "spend" morale points to rally a routed unit or toorder a charge.
While some war simulations declare a winner based on the
capture of one particular hex, CIVIL WAR GENERALS 2 placesmore importance on hard won positions. At the start of abattle there will be certain hexes that produce more victorypoints than the rest. These will grow in value throughoutthe battle unless there are no enemy units nearby. That is,if the entire battle winds up being fought on a distant partof the map, victory hexes will maintain their original value.The value of key positions in the thick of battle willincrease and hexes that are fought over repeatedly canspontaneously become victory hexes.
Additional factors that affect total victory points include:the number of casualties and wounded, how many men sur-rendered or were routed, the health and organization ofyour men, the number of commanding officers killed, andthe amount of supplies captured. At any point during a bat-tle you can see how many victory points you have byselecting the Casualty Reportfrom the Officer's Reports.
GGRRAANNTT,, LLEEEE,, SSHHEERRMMAANN
109Winning the GameMany times during the civil war, it was not entirely clearwhich side won a battle. Perhaps one side held more posi-tions but the other took more prisoners. Or maybe onearmy was poorly organized at the end of the battle whilethe other had lower morale. Who would be called the vic-tor?
An oversimplification would be to say that the army thatloses fewer men, retreats less often, and captures and holdsmore positions is victorious. In reality, many more factorsthan this contributed to the results of civil war battles. Apredominant factor, often overlooked in favor of compar-ing numbers, is morale. For example, if the North andSouth both killed the same number of enemy soldiers in aconflict, it is more likely that the Southern morale wouldstill get a boost as they were frequently outnumbered. TheNorthern morale, on the other hand, would suffer a blow ifit took losses from a smaller enemy.
CIVIL WAR GENERALS 2 accepts these ambiguities andincludes them in the final resolutions of the battles by usingdifferent levels of victory. It is possible that some battlesmay even end in a draw if no clear advantage can be found.The terms below represent the other five types of battleresults:
Major Confederate VictoryMinor Confederate VictoryDrawMinor Union VictoryMajor Union Victory
The victory level achieved determines which battle isfought next in a campaign. Battles normally conclude atthe predetermined time and date found on the CasualtyReport screen. Sometimes a battle will end early if oneside has no units left and has no reinforcements on the way.When this happens, a weapons cost captured bonus will be
CCIIVVIILL WWAARR GGEENNEERRAALLSS 22
108

Weapons have a substantial impact on a unit's effective-ness. Quality guns improve a unit's morale and are moreaccurate than cheap, poorly made weapons. If a soldier hasa bad weapon, he knows it and will resent his superiors formaking him use it while his life is on the line.
There are five classes of shoulder arms:
Smoothbores: Unlike the more advanced rifle, asmoothbore has no grooves inside the barrel of the gun andas a result is not very accurate. These guns, designated bythe letters "SB" after the weapon name, have the lowestWeapon Powerbut are fairly effective in Hand-to-Handcombat.
Rifles: All groove-barreled guns that do not fall into thecarbine or repeater categories are called rifles. They areidentified by the letters "RF" following the weapon name.One step up from the smoothbores, rifles do not excel ineither Weapon Poweror Hand-to-Handratings.
Carbines: Designed for use while mounted, these short-barreled and lightweight rifles have good Weapon Powerratings but are poorly designed for Hand-to-Hand combat.
Repeaters: These firearms are the prized possessions ofthe soldiers lucky enough to carry them. Repeaters can firemore ammunition in a single turn than any other weapon.As a result, they have excellent power and Hand-to-Handratings but are costly to resupply.
Specialty Weapons:There are two kinds of specialtyweapons, target rifles and shotguns. Target rifles, designedwith a scope for sharpshooting, may only be used by spe-cialist units. Their weapon power is unmatched, but theyare fairly useless at close ranges. Shotguns, carried exclu-sively by cavalry units, are the reverse of a target rifle.Shotguns have very low Weapon Powerratings but aredeadly in Hand-to-Handsituations.
GGRRAANNTT,, LLEEEE,, SSHHEERRMMAANN
111
Every unit on the battlefield is armed with some sort ofweapon, whether it be a cannon, shoulder arm, or mortar.In a full campaign game you can use your Army Supplypoints between battles to purchase different weapons foryour men. Some units have access to more powerful andspecialized weapons with which to attack the enemy.
SHOULDER ARMSInfantry, Cavalry, Engineers and Specialists all carryshoulder arms. The combat ratings of these guns, weaponpower and hand-to-hand, varies with the variety of shoul-der arm being used. Both ratings are given on a scale of 0to 99.
Weapon Poweris a rating of the attack capabilities of aweapon from a normal firing range. High weapon powerindicates an accurate and reliable weapon that can bereloaded quickly.
Hand-to-Handmeasures the effectiveness of the weapon atclose-range. This influences a unit's success when itcharges. During a charge, weapon power determines thestrength of the first barrage and hand-to-hand determinesthe force with which the unit advances on the enemy line.
CCIIVVIILL WWAARR GGEENNEERRAALLSS 22
WEAPONS
Weapon Power
Hand-to-handrating

When you buy ammunition, you will usually get an assort-ment of types of ammunition. Your men will automatical-ly load the appropriate type for each attack.
Artillery units use the following kinds of ammunition:
GGrraappee SShhoott:: designed to function like a large shotgun shell,grape shot is a metal case filled with a cluster of small ironballs that explodes upon being fired. This makes it veryeffective at defending a position at close range, and it istypically used against an enemy that enters an artillery hex.
CCaanniisstteerr:: similar to grape shot, canister ammunition has aslightly lower range and utilizes smaller projectiles. It is ametal cylinder packed with pellets that scatters after leav-ing the mouth of the cannon. Artillery crews use canisterif the target is one or less hexes away.
CCaassee SShhoott:: a shell packed with gunpowder and shrapnel,case shot explodes in midair and thus has a greater rangethan canister or grape shot. It is used on targets 4-6 hexesaway from the unit.
SSoolliidd SShhoott:: a solid metal ball that has better range and accu-racy than the other artillery ammunition, solid shot is muchthe same as most people's idea of a traditional cannonball.It inflicts minimal damage due to the relatively small areait targets. Solid shot is always chosen for targets that areover 7 hexes away.
Siege Mortarsand Mortar Gunboatsboth use large hollowballs made of metal and filled with gunpowder, commonlyknown as ‘shell.’ A fuse attached to the ball could be usedto time the explosion so that it inflicts the most damage.
Shoulder arms all use min’ee balls, small solid lead pro-jectiles fired from the barrel of the gun.
GGRRAANNTT,, LLEEEE,, SSHHEERRMMAANN
113AMMUNITION
CCIIVVIILL WWAARR GGEENNEERRAALLSS 22
112 CANNONSThere are a variety of cannons to choose from in the game,each of which is given ratings for Range (R), the measureof the maximum number of hexes that a cannon can fire,and Artillery Power(P), the power of the cannon at a rangeof two hexes.
The amount of damage an Artillery unit can inflict is deter-mined by the Artillery Power of the cannon at the specificdistance of the attack and by the total number of cannonswithin the unit. To find out how many cannons a unit has,divide the effective number of men by 9 (the number ofmen required to operate a single cannon).
Range
ArtilleryPower
Rifles: A rifled cannon can only fire Canister and SolidShot, but it has a greater range than a smoothbore cannon.The letters "RF" will follow the name of rifled cannons.
Smoothbores:Smoothbores are capable of using all dif-ferent ammunition types. Though their range is more lim-ited, they are more destructive than rifles in close-rangeengagements. The letters "SB" will come after the name ofa smoothbore cannon.
Howitzers: Capable of both direct and indirect fire,Howitzers are otherwise similar to Smoothbores.
Mortars: Mortars are a type of cannon that fire lowvelocity shells at a steep angle. The high trajectory great-ly increases their range and makes them excellent at attack-ing over great distances.

The Casualty Report lets you know how many men oneach side have been killed in the current battle.
Help is on the way, but how soon? There is no need to beleft in the dark wondering when your reinforcements aregoing to arrive. The reinforcement report puts all the infor-mation at your fingertips and tells you exactly what time toexpect your comrades. More information regarding theReinforcement Report can be found on page 105.
When you are ready to return to the fray, find the TacticalView to return to the game with the normal view.
The Strategic View will return you to the battle with a moredistant zoomed out view.
GGRRAANNTT,, LLEEEE,, SSHHEERRMMAANN
115
At any point during the game, you can pause the action toassess the battle from a statistical point of view. Click onthe Command Tent button on the control panel to enter thetent where you can expect full reports from a number ofgenerals. Both the union and the confederate sides havetheir own tent to consult. When you position the cursorover the figures on the command tent screen, text willappear at the bottom of the screen telling you which reportthat general has prepared for you.
To refresh your memory as to your objectives, find theObjectives Report. This summarizes the primary objec-tives of the battle and details the historical events that ledup to the conflict. Additionally, the generals in the tenthave their own opinions on how to handle the battle, andwill be happy to supply some strategic suggestions.
CCIIVVIILL WWAARR GGEENNEERRAALLSS 22
Confederate Command Tent
THE COMMAND TENTS
The CommandTent button
Union Command Tent

VICTORY SCREENThe Victory Screen is the first thing that you will see whena battle ends. It informs you how many men were wound-ed, killed, missing, or surrendered, and which leaders werereplaced or killed. High casualty numbers alone may notcause you to lose a battle, but it will certainly hurt yourchances of success in the next battle.
FIELD HOSPITAL RECOVERY REPORTThe death and retirement of top leaders can cripple analready weak army. Most often, the calibre of the replace-ment is no match for that of the original leader. When awounded leader does recover, he will be able to rejoin hismen at the start of the next battle. To check the health ofyour wounded leaders during the game, you can select theField Hospital Recovery Reportfrom the Officer's Reportsmenu. You will also be shown this report between battles.
THE WEAPON PURCHASE SCREENThe weapon purchase screen is the place to shop for newand improved weapons. You can also dismiss specificleaders from this screen if you are not satisfied with theirperformance. The unit buttons near the bottom of thescreen allow you to select which variety of unit you wouldlike to display. Below this are leader portraits that allowyou to determine which part of your army you are observ-ing. When you have found the unit that you want to adjust,select it by clicking on its display. Once selected, you candismiss the leader or purchase new weapons. Replacementof a dismissed leader is automatic; all you need to do ispress the Dismissbutton and a new officer will be chosenfor you.
SHOPPING FOR A NEW WEAPONBetween battles you are given choices as to which weaponsyou would like to purchase for each particular unit. Thedifferent types of weapons are listed along with their price
GGRRAANNTT,, LLEEEE,, SSHHEERRMMAANN
117
While multiplayer games and single battles are fun, the real
challenge of CIVIL WAR GENERALS 2: GRANT, LEE, SHERMAN isthe full campaign game. There is a large variety of cam-paigns to choose from, each comprising a group of indi-vidual battles, such as the series of battles fought in theShenandoah Valley in late 1861 and the first half of 1862.
Winning an entire campaign is more difficult than winninga single battle due to the fact that any losses you suffer inone battle carry over to the next. Greater focus is thereforenecessary in order to keep your men healthy and in goodenough spirits so that they can continue to fight in as manyas 40 battles.
When a battle ends, you will notice that many units have anincrease in their experience rating. The more combat a unitis involved with, the better its experience rating will get.Heavy casualties usually nullify these improvements due tothe influx of unseasoned replacements. The quality ratingof a unit also goes down with the addition of reinforce-ments. When playing as the south, it is wise to keep inmind that the number of men available is limited and, as aresult, less reinforcements will take over for the departed.
When the leader of a unit is killed or severely wounded inthe line of duty, he will be absent for the remainder of thecampaign. The loss of a leader can have a major impact onan army as a whole.
BETWEEN BATTLESThere is a period of downtime between battles that allowsyou to assess your men and buy them new weapons if youcan afford it. You can also take a look in on your wound-ed officers to see how they are recovering and make anoverall evaluation of your success of the most recent battle.
CCIIVVIILL WWAARR GGEENNEERRAALLSS 22
THE CAMPAIGN GAME

units cannot upgrade weapons). The gun that your unit iscurrently in possession of is outlined with red. A whiteframe will appear when you select a different weapon forthe unit. You can click on different weapons to find outwhat it will cost you before actually purchasing the weapon(purchasing only takes place when you click again on the
Purchase Weapon button). Under each gun are the statis-tics for Weapon Power (WP) and Hand-to-Hand (H-H),basically long and short range strength. The cost of buyingthe gun and the price of a full supply of ammunition arealso listed beneath the weapon. For more information onshoulder arms and other weapons, see page 110.
GGRRAANNTT,, LLEEEE,, SSHHEERRMMAANN
119and combat statistics. For the most part you will beupgrading the rifles and cannons for your infantry, cavalry,specialist, and artillery units, purchasing new andimproved weapons as you can afford them. When you buya new weapon, you only pay the difference in cost betweenthe two as you receive credit for the old weapons.
The Weapons Purchase Screen displays a wide variety ofweapon types with prices and ratings listed next to them.You can either buy a unit better weapons or downgrade theones they already own if you are short on funds. Supposeyou have planned a strategy that relies on your artillerymore than your other units. Cannons cost a pretty penny,and you may come up a little short on Army Supply points.While we do not recommend this as a common practice, inthis case you could trade in some of your rifles for cheap-er models in order to gain the difference in Army Supplypoints. Then, when you have enough points, you can buysome top of the line cannons for the artillery.
Use the up and down arrows next to the leader portraits tostep through the various branches of your army. The firstleader portrait shows you the leader of the corps you arecurrently looking at. The second portrait is of the leader ofthe particular division within that corps, and the third por-trait shows you the leader of the currently selected unit. Toselect a specific type of unit to be displayed, click on oneof the four unit typebuttons to the left of the leader portrait.
In the lower right corner of the Weapons Purchase Screenare three images with numbers beneath them. The first ofthese is a picture of a wagon and shows the total number ofArmy Supply points you have available to you. To the rightof this is the cost of buying the selected weapon for theentire unit, and the last is the cost of supplying the entireunit with ammunition for the weapon in question.
Shoulder arms or cannons are displayed when you shop forweapons for your Infantry, Artillery, Heavy Artillery,Cavalry, and Specialists (Corps HQ, Engineers, and naval
CCIIVVIILL WWAARR GGEENNEERRAALLSS 22
118
The Weapons Purchase Screen
Corps leader
Division leader Unit leader
Weapon detailsUnit Type buttons

SUPPLY PRICEThe cost of ammunition should be taken into considerationwhen choosing a new weapon. Is the upgrade worth theadded expense of keeping your men supplied? Does theincreased firepower merit the purchase? The figure belowthe image of a soldier putting a package of bullets into hisbag is the amount of army supply points spent each timeyou want to resupply an entire unit that has completely runout of ammunition. All weapons come with a full supplyof ammunition, but you are likely to use this up before thebattle even hits its stride.
BUYING YOUR WEAPONWhen you have made up your mind as to which weapon isright for you, make sure that the correct unit has beenselected. Then click on the weapon you want and click onthe appropriately namedPurchase Weaponbutton. Thetransaction will be finalized when you click the Done but-ton on the confirmation screen that appears. If you cannotafford the weapon in the first place, a different messagewill appear, telling you in no uncertain terms that yourcredit is no good.
GGRRAANNTT,, LLEEEE,, SSHHEERRMMAANN
121Artillery units use cannons which are rated for their Power(P) and Range (R). These categories measure the cannon'sfirepower and maximum number of hexes it can shoot.The power rating for a cannon is based on the damage theycan inflict from a position two hexes away. This value willvary depending on how far you try to shoot.
WEAPON PRICEThe cost of a weapon is the dollar value listed first under-neath its picture. This is the cost for just one weapon, paidfor with Army Supply points. The figure next to theweapon price is the cost of resupplying a single weaponwith a full supply of ammunition. To the right of this num-ber are bullet icons that represents the number of roundsthat the weapon will have when fully supplied. A largebullet equals five rounds and a small bullet equals one.Highlighting the weapon you are interested in will showyou the total cost in the Weapon Pricebox, the one with apicture of a soldier accepting a new gun. When you arespending supply points to acquire the weapon, the price inthe Weapon Price box will be displayed in red. If you aretrading in weapons for cheaper models, the price will begreen, representing the amount of supply points you willreceive as a refund.
CCIIVVIILL WWAARR GGEENNEERRAALLSS 22
120
Weapon Power
Hand-to-Hand rating
Price per weapon Price per man forfull supply
Full supply (8 rounds)
Purchase Selected Weapon button
Full supply cost for selectedweapon, selected unit
Your army supply

LAUNCHING THE EDITORTo launch the editor, click on the Editor button from themain menu. Once the editor has loaded, you will be look-ing at a window called Scenario Setup Screen. This iswhere you will name your personal scenario, describe it,and adjust settings like who goes first and how long thebattle lasts.
SETTINGSThe first thing you will want to do is name your scenario.At the top of the Scenario Setup Screenare three boxes.The first of these is where you enter the name that willappear on the Battle Selection Screen, the Full ScenarioNamebox. The second box, Scenario File Name, is whereyou tell the computer what to name the scenario, up toeight characters. This is the name that will be assigned toall of the files that are created when you save the scenario.If you want to trade scenarios with a friend, all files thathave this name must be exchanged. The third box is whereyou enter the name that will appear on the overview map inthe scenario.
Beneath these text boxes are three boxes that each let youtoggle between two options. You must decide which play-er will make the initial move by selecting either Union orConfederate under the heading First Player. Your secondchoice is whether you want to play with brigades or regi-ments, in other words, do you want units that are large orsmall in size. One thousand men make up a regiment, anda brigade consists of about four regiments. It is importantto note that changing this setting after having placed unitson the map will clear the map of all units. The last of thesethree boxes asks you what category your level should fallunder, Historical or Alternate. This will only affect wherethe battle gets displayed on the Battle Selection Screen; thegame does not punish you for labeling a fictional gameHistorical or vice versa.
GGRRAANNTT,, LLEEEE,, SSHHEERRMMAANN
123
While we have tried to include all of the war's pivotal bat-
tles in CIVIL WAR GENERALS 2, don't get upset if yourfavorite is not available. Over 10,000 engagements werefought during the five years that the war lasted, and we didwant to release the game before the turn of the century. Forthis reason we thought it would be a good idea to appendour library of battles with a scenario editor. Suppose thatyour favorite battle of the war is the Battle of Olustee inFlorida. Now, with the inclusion of an editor, you canfaithfully recreate this minor skirmish or create an entirelyfictional scenario.
CCIIVVIILL WWAARR GGEENNEERRAALLSS 22
The Scenario Editor

At the bottom of the setup panel are three categories forsetting the starting values of supply, morale, and victorypoints for each army. Supply sets the starting value for Army Supply, used tobuy ammunition when resupplying units.Morale sets the starting value for Army Morale, used topay personal visits to rally routed units or encourage unitsto charge.Victory points are not tallied until the end of a battle, how-ever the level editor lets you start either player with a vic-tory point advantage. Generally, the historical defendershould be given some victory points to start as this forcesthe other player to attack in order to win.
The last order of business on the setup panel is to save yourscenario. Simply click on the Save button in the lowerright to save your current scenario setup and overviewmap. Even if you have not started editing the map at thispoint, it is a good idea to save frequently in case you sufferan unforeseen catastrophe. Next to the Save button are theNew and Load buttons. Clicking on these brings up a sub-panel asking you whether you want a scenario, map, or unitdatabase. This lets you take an existing unit database ormap from one scenario and import it to another scenario.
Editing the MapNow that you have finished setting all the variables on theScenario Setup Screen, the fun commences. Anyone whohas played a city simulation game knows how much joycan be found in designing maps and constructing terrain.
CIVIL WAR GENERALS 2 has over two dozen different ele-ments that can be used in the creation of custom maps,everything from swamps to pontoon bridges.
To begin editing the map, click the New button on theScenario Setup Screen. Four options then become avail-able to you, Scenario, Unit, Map, and Cancel. By choos-ing Scenario, you can create a new map and decide whatunits should be used in your level. Later, when you have
GGRRAANNTT,, LLEEEE,, SSHHEERRMMAANN
125To the right of these boxes are three buttons, Commanders,Description, and Full Description:
Click on the Commanders button and a panel will pop upthat allows you to decide who will be in charge. Scrollthrough the array of generals available to you by clickingthe arrow buttons beneath each portrait. Once you havemade your decision, click on the Confirm button in thelower right of this panel. You also have the opportunity toname your army commanders for the battle. These nameswill appear on the full description screen (see below).
The Description button lets you type in a short textdescription of the scenario (only four or five lines) that willappear on the Battle Selection Screenwhen the it is high-lighted. This helps players remember what a particular bat-tle is like, and is especially useful when trading them withother people.
The Full Description button allows you to go into moredepth about the scenario. There is no limit to how muchtext can be entered here, and your description will scroll upthe screen when viewed later. You can tell the world howmuch love and sweat went into the creation of the scenarioor share details of the events that led up to the battle. Thefull description screen also displays the overview map ofthe upcoming battle.
The row of boxes in the middle of the Scenario Setup panellabeled First Turn and Last Turndetermine how long thebattle will last. Drop down menus let you decide whatyear, month, day, and even hour the battle begins and ends.Different weapons will become available to you in the lateryears of the war, so plan accordingly. To the right of theseboxes is a display where the computer calculates howmany turns will make up the scenario. Generally, battlesshould not exceed 100 turns. Even though we all haveaspirations of becoming a time traveler, the game will notallow you to select values that result in a negative numberof turns.
CCIIVVIILL WWAARR GGEENNEERRAALLSS 22
124

You will be asked what size map you would like to use, andthese measurements can range from 25 by 20 to 100 by 100hexes. The default setting is 50 by 50 which is spaciousenough for most battlefields. For now, let's stick with thedefault size and save more ambitious projects for later.
When the map first opens up, it is a blank slate with noth-ing but grass as far as the eye can see. An overview mapand toolbar will also appear when the map is displayed.Scrolling behaves the same way as during gameplay, youcan move the cursor to the edge of the screen, click on themini map, or use the arrow keys to relocate your field ofview. Choose a location where you would like to startbuilding and center your main view there. Don't forget thatyou can get a complete working view of the map by select-ing Zoom from the Display menu, pressing 'Z' on the key-board, or by clicking on the Zoom button on the statuspanel. Additionally, choosing Grid from the Display menuor pressing 'G' on the keyboard places a hexagonal gridover the map and will make your job a lot easier.
THE TOOLBARThis section demonstrates how to use all the items on thetoolbar and will explain some of the subtleties each terraintype possesses. Consult the quick reference card for a pic-ture of the toolbar that tells what the different icons repre-sent.
The toolbar lets you select terrain types by simply clickingon the appropriate button. The button will remain selecteduntil you choose another tool. Generally, left clicking onthe map will place an item while right clicking will removeit. Items can only be removed if their tool is the one in use.It is useful to have the grid displayed when editing the map.
Start by clicking on the hill button. At this point, sinceyour map is still untouched, you can build hills anywhere.Later on you will discover that some terrain types havelimitations on how they can be placed on hills and vice
GGRRAANNTT,, LLEEEE,, SSHHEERRMMAANN
127some scenarios saved, you will be able to reuse either themap or unit information from a saved scenario. To use apreviously saved map, open up the scenario and select Newand then Unit from the setup screen. It is also possible toedit the scenarios that shipped with the game, but be sureto save any modified battles with a new file name. If youoverwrite the existing scenarios, your game will be incom-patible with other players. Unit information may be trans-ported to another battle by clicking Map after selectingNew from the setup screen. Since we need to create bothat this time, click on the Scenario button.
CCIIVVIILL WWAARR GGEENNEERRAALLSS 22
126
The Scenario Editor map
The Toolbar Overview Map

regions. The plateau button is ideal for elevating largeareas of the map. With plateau selected, removing a hillfunctions just like the hill button, right clicking removesone hex of the hill at a time. You might be tempted to cre-ate a map full of complicated and towering hills, but bearin mind how this will affect the playability of your level.
Choose the third item from the toolbar, the forest. Treescan be placed almost anywhere on the map with a few log-ical exceptions. They cannot exist on the same hex aswater, coastlines, walls, rocky knolls, forts, or cities. Plantas big a forest as you like because, hey, the trees are freeand can be chopped down with a right click.
The fourth tool is for turning your terrain into swampland.While there are no virtual mosquitoes to worry about,swamps do block the progression of sunken roads, forts,abatis, rocky knolls, and walls. Swamps can only beplaced on flat terrain, so if you want a swamp with a view,your hill must have a plateau on top.
There are three kinds of roads to choose from in the editor,minor roads, major roads, and sunken roads. Build roadsby clicking on two hexes that are next to each other, or byholding down the left mouse button and dragging themouse in the path where you want the road to appear.Right clicking removes roads and works in the same way.The minor and major roadsare quite versatile and can tra-verse hills, rivers, railroads, and even walls and are only offlimits on water and rocky knoll hexes. When a road comesin contact with a river or stream, a bridge or ford will bebuilt at the junction. Sunken roads can also cross hills, but,due to their low lying nature, they are unable to span a riveror coexist with a railroad.
Though they tend to make a mess in real life, people are anice addition to the landscape, so you should build sometowns and cities. The town icon builds a small neighbor-hood one hex at a time. Towns must be placed on flat ter-rain, and, like most of the elements on the toolbar, can be
GGRRAANNTT,, LLEEEE,, SSHHEERRMMAANN
129versa, but we will get into that a bit later. To place a hill,simply click on the map and the hex you clicked on will beraised one level. Click in the middle of a hex and the hillwill be perfectly centered in the hex. The six corners of ahex, when clicked, will place the hill between intersectinghexes. A right click lowers the terrain by one level, so it isjust as easy to remove an unwanted hill as to place one.
If you want to create a plateau, you can either drag the cur-sor around while holding down the mouse button or youcan click on the second item on the toolbar, the plateau.Selecting this button lets you raise more than one hex at atime, a useful feature if your level includes mountainous
CCIIVVIILL WWAARR GGEENNEERRAALLSS 22
128
TIP:Absolute heightdoes not matter;only relative eleva-tions do. Ratherthan raising mostof the map to makea large plateau,you can insteaddepress a smallerarea to create val-leys.
Plateau
Swamp
Major Road
Sunken Road
Unfinished Railroad
River
View Current Turn
Supply Source
Label
Rocky Knoll
Ruined Fort
Abatis
Water
Hill
Forest
Minor Road
Town
Railroad
Stream
Coastline
Stone Wall
Fort
Pontoon Bridge
Victory Points
Terrain Modifiers
Units

serve to block movement, especially on a road, as well asproviding an added degree of cover. The only kinds of ter-rain on which an abatis can be placed are hills and all typesof roads and railroads.
Forts are a good strategic item to include on your battle-field. Their characteristics are much like those of a city;they need to be built on a flat surface and they connectwhen adjacent to each other. If your fort is large enough,you may put minor and major roads inside it. No other ter-rain may be placed inside a fort. During the game, if yourunits are forced to abandon a fort, it becomes a ruined fort .Engineers can be ordered to ruin an enemy’s fort, and it isalso possible to deliberately ruin your own fort when thesituation calls for it. Ruined forts share the properties of aregular fort except that they provide less defense. The edi-tor allows you to place ruined forts and even connect themto intact forts so that scenario can simulate a greater vari-ety of battlefield situations.
Like an abatis, pontoon bridgescan be built during thegame by an engineer. They may only be placed acrossrivers (since streams can be crossed on foot) and thus sharethe properties of rivers. Perhaps the best use of a pontoonbridge is to fill in the gap where an unfinished railroadintersects with a river.
The rocky knoll is the most unfriendly kind of terrain onthe toolbar, only coexisting in the same hex with hills. Thefirst time you click, only the selected hex will become arocky knoll. Click on the same hex again and the six hexessurrounding it will join the first, forming a massive knoll.All six surrounding hexes must be devoid of everythingexcept hills.
The terrain modifiers button opens a dialog box thatallows you to alter the map hex by hex. You can placebonuses for morale and build individual houses amongstother things.
GGRRAANNTT,, LLEEEE,, SSHHEERRMMAANN
131removed with a right click. The only items that may sharea town's hex are the railroads and streams, which cut rightthrough a town. Towns already have roads in them and areconnected to other roads by dragging a road into them.
Railroads, found below the city and sunken road icons onthe toolbar, come in finished and unfinished forms. Bothare blocked by water, forts, sunken roads, and rocky knolls.A finished railroad can span a river or stream and overlapsany normal roads it comes into contact with. Unfinishedrailroads are more limited due to the fact that they are stillunder construction. They can cross the same roads as thefinished railroads but leave a gap when they come in con-tact with a stream or river, the site of a future bridge.
Beneath the railroads are the stream and river icons. Tinystreams can be merged with rivers and eventually flow pastthe coastline into open waters. Streams and rivers cannotcross sunken roads, rocky knolls, abatis, or forts. Whilestreams can go through a town, rivers are too big.
Placing large bodies of water is one of the best ways to giveyour map a dramatic look. Use the water icon to createlakes, major rivers, and oceans on your map. When youclick anywhere on a hex after choosing this button, theentire hex and part of the six surrounding hexes turn intowater. The coastline item, to the left of water, createssmaller and more intricate bodies of water that can be con-nected to large ones made with the water tool. Use it to adddetail to a dull coastline or to create puddle sized ponds.
Stone walls are able to share hexes with most of the otherterrain types, leaving a gap when they cross over some-thing. Since they do not take up the entire hex, walls canbe built parallel to things like rivers and roads withoutneeding to be a hex away. A wall cannot be placed onswamp, tree, city, water, abatis, fort, or rocky knoll hexes.
Next to the wall icon is the abatis button. An abatis can beplaced or removed during gameplay by an engineer. They
CCIIVVIILL WWAARR GGEENNEERRAALLSS 22
130

Beyond capturing the mood of the war, CIVIL WAR GENER-
ALS 2 also incorporates various battle considerations spe-cific to the period. For example, the North and South didnot have the same resources available to them, a factor thatplays an important role as your campaign progresses.Northern forces had access to more advanced weaponryand greater manpower, while the determination andcourage of the southern soldiers at the start of the war wasstronger. As the war dragged on, the quality of the south-ern forces declined as they were forced to enlist men tooyoung or too old to be well suited to the life of a soldier.
Training, or lack of it, was also an influence. Specialist andartillery units tended to be made up of the most educatedrecruits and generally received more intensive training thaninfantry and cavalry units. Used wisely, these units couldvery well win or lose a battle for you.
GGRRAANNTT,, LLEEEE,, SSHHEERRMMAANN
Label permits you to personalize your map by givingnames to individual structures and elements of the terrain.
You can also use the toolbar to place victory points any-where on the map. Select this button, click on the desiredhex, and enter the number of victory points you would liketo assign to the hex.
Supply Sourcelets you choose the locations on the mapwhere new supplies and reinforcements will originate.
Units opens a dialog box to choose and place units on themap.
View current turn lets you see the map as it will appearon a specific turn. This is useful for making sure that rein-forcement units will arrive in the right place at the righttime.
CCIIVVIILL WWAARR GGEENNEERRAALLSS 22
132PART 3: APPENDIX
HISTORICAL CONSIDERATIONS

5) Hit and Run: Mounted Cavalryand Specialists cansometimes attack without fear of counterattack. This isbecause they are able to move, attack, and then move tosafety. Be sure to stay out of range of enemy Artilleryunits though.
6) Artillery pursuit: It is always wise to take a battered unitout of the line, move it to safety, and let it rest for a fewhours. Deny your opponent this luxury! When your oppo-nent moves a weak unit to the rear, shell it with yourartillery. It is also advisable to position cannons at as highan elevation as possible while still remaining in range ofthe enemy. Elevation boosts firepower for all units andreduces the amount of a unit’s view that is blocked byobstructions.
7) Travel on roads: Excessive maneuvering can take aheavy toll on your troops. Always try to move in move-ment formation and stay on roads or at least on open grass-land. Major roads are better for travel than minor roads asthe cost in organization and health are lower.
8) Rest:Avoid the temptation to keep throwing units intocombat as soon as their morale is high enough to attack. Itis better to create a second line of defense that you canmove weakened units to when they need to rest. Set up thissecond line near to a Corps HQ if possible. With a secondline in place, if your main line gets broken, the remainingunits can fall back on the second line.
9) Rivers, bridges & fords:It can be nearly impossible tofight your way across certain bridges and fords in some ofthe scenarios. Make an effort to see if there are anyunmarked (hidden) fords across the river that you can use.Try to cross up or downstream from the disputed bridgeand then return along the other side of the river to clear offthe defenders. Sometimes it is good to place an expendableunit so that it blocks a bridge and delays the enemy fromcrossing. You can also use an Engineer unit to build a pon-toon bridge, but remember that they will be removed fromthe game once the bridge is complete.
GGRRAANNTT,, LLEEEE,, SSHHEERRMMAANN
135
1) The Dance of Death: Attack the enemy in waves.Place two or three units adjacent to an enemy, with severalextra units in reserve behind the line. Start off with anartillery attack and then have the close units attack.Withdraw these units one at a time to vacant positionsbehind them. Fill these spots with new brigades, and havethem attack. Each time a unit is attacked by an enemy ofcomparable or greater size it pays a firepower penalty inaddition to its loss of firepower due to casualties. You cansee how many times a unit has been attacked in a turn byselecting Times Defendedfrom the Reports menu. Chargescan come in especially handy while employing this tactic.
2) Those extra cartridges: When you resupply, you areonly charged for supplying the effective men in your unit.When you rest, this number can increase dramatically asstragglers return to your unit and men with minor woundsrejoin the ranks. You don’t have to pay to supply them —they weren’t around to fire off their cartridges when therest of the unit was in combat, so they still have them.
3) Cover the rear: Make an effort to outflank your enemy’sline with infantry and cavalry. Once the battle is underway,you can use these units to set up rear attacks. Anotheradvantage to getting your units behind the enemy is thatyou can attack fleeing and retreating units. You can alsouse these units to grab undefended victory point hexes.
4) The Counterattack:It is usually best to adopt a defen-sive posture for the initial sequence of attacks. Wheneverpossible, maneuver to good defensive terrain near theenemy, dig in, and wait. If he is nice enough to attack you,let him. The longer you wait, the more benefits your mencan receive from resting. Once you are attacked, moveyour weakened units out of the main line and have themrest near their Corps HQ. Then have all of your fresh unitsconverge on his weak ones.
CCIIVVIILL WWAARR GGEENNEERRAALLSS 22
STRATEGY HINTS

MODEM & HOTSEAT GAMES
Two players can play head to head at the same computerterminal, or at two separate terminals linked by modem ornull modem cable. A null modem is a special cable that canconnect two computers that are within 30 feet of eachother, and can be purchased from most computer retailers.
Hotseat Game
A game in which two players compete by taking their turnsat a single computer is called a “hotseat” game. To play ahotseat game, load the game as usual, select theMultiplayer option from the startup screen, and click onHotseatin the panel that appears.
Modem Link Game
To play a two player game with a modem connection, bothplayers will be required to have a CIVIL WAR GENERALS 2game CD, and to have the game installed and running ontheir computers. Both players should select Multiplayerfrom the startup screen, and click on Modemin the Selecta Session window that appears. This will access the modemconnectionscreen.
Both players should set Speedand Com port settingsappropriate to their computer hardware, and both shouldmake sure that Phone Connectionis selected in theConnection Type box. To make a modem connection, youmust first decide which player will initiate the telephonecall and which player will receive the call.
The receiving player should first select Host in the modemconnection screen. Once this selection is made, the otherplayer will have about three minutes in which to make thetelephone connection.
To do so, the calling player should enter the telephonenumber of the receiving modem, and then select Join.
GGRRAANNTT,, LLEEEE,, SSHHEERRMMAANN
137MULTIPLAYER GAMES10) Upgrade:In Campaign play, be cautious when upgrad-ing weapons. Some weapons, especially artillery pieces,may have a fairly cheap weapon cost but use expensiveammunition. You do not want to get into a position whereyou cannot afford to resupply units during combat.11)Surround the enemy:Prevent the arrival of supplies toan enemy unit by positioning three of your units next to anenemy unit. This will prevent them from being resuppliedand will eventually put an end to their attacks as they runout of ammunition. When an enemy unit is completely sur-rounded, they will be forced to surrender rather than flee.12) Attack enemy leaders:When a leader is wounded orkilled, all of the men under his command will suffer a lossof morale. This is an easy way to weaken a large part ofyour enemy at once.13) Trap the enemy:Troops cannot get into attack forma-tion when on a river. A nasty strategy is to try to trap themin movement formation by having one of your units Dig Inon one side of the river while another chases them towardsthe river from the other side. 14) Get the victory flags:The main advantage of the cav-alry is their speed. Use them to run around the battlefieldand capture as many victory flags as possible.15) Supply wisely:Don’t oversupply a unit that is in dan-ger of being routed. They will just drop the supplies yousent them when they flee. Healthy troops are expensive tosupply since they have more effective soldiers, while weakunits are comparatively cheap to supply. For this reason, itis not always a good idea to oversupply a healthy unit. Onthe other hand, it is advisable to oversupply a weak unit ifthey are going to be able to rest for several turns in a safeplace.16) Know when to take a break:When things are goingbadly, disengage from combat and let your men rest for afew turns. By keeping combat to a minimum, even for ashort while, your troops will recover some of their morale.The enemy will actually lose morale when you do thissince morale that is gained as a result of combat victoriesis only temporary and will return to zero in the same waythat morale losses are eventually regained.
CCIIVVIILL WWAARR GGEENNEERRAALLSS 22
136

INTERNET & IPX GAMES
SIGS (Sierra's Internet Gaming System) Games:
You can play CIVIL WAR GENERALS 2 over the Internet'sWorld Wide Web using the Sierra Internet Gaming System(SIGS) with players from all over the world. All playersneed to have a working Internet PPP connection that sup-ports WinSock32. If you're not sure whether you meetthese requirements, contact your Internet Service Providerfor details.
The SIGS drivers should have been installed when youinstalled the game. If this wasn't done at that time, you willhave to re-install the product. SIGS should work with anyInternet Service Provider with true 32-bit access. Becauseof this requirement, SIGS will not work with: AmericaOn-Line, Prodigy, WOW, and some others. SIGS itself isfree. Your cost for Internet connect time to SIGS dependson your Internet provider.
How to use Sierra's Internet Gaming System:1. Connect to your internet service provider.2. To begin a SIGS session, Select Multi-Player then theSIGS option from the Select a Sessionwindow.3. Your system will link to the SIGS servers. If you are anew member, you will be asked to enter your name, a pass-word, and other information the first time you visit anddownload the SIGS software. Either write down your username and password somewhere, or tell SIGS to rememberthem for you by checking the Save passwordoption.4. After you sign into SIGS, you'll see the Gaming Roomsscreen. Here you can join a room for the type of game youwant to play, or Create a Room if you want to start some-thing on your own. Use the SIGS Chat window to find outabout games that are starting. Choose the Campaign room
if you want to play a full game of CIVIL WAR GENERALS 2 .Choose the Battle Room if you want to play Battles only.5. When you see a game you want to join, simply click onit and then click Join Game. That game's Host will decideif you can join or not (don't be hurt if you're not let in-some
GGRRAANNTT,, LLEEEE,, SSHHEERRMMAANN
139Once the connection is made, the player who has initiatedthe modem connection must set up the game (choose a bat-tle or campaign, set the difficulty level, adjust game set-tings, etc.). During a modem game, only the player whoseturn it is may take action. While it is not your turn, youshould not attempt to take any action. You will be able towatch your opponent’s moves as they occur, and you willsee engagements as they are fought. At times you will becalled upon to take action during your opponent’s turn (toorder an artillery duel, for example). When this occurs, youwill be prompted to enter the appropriate information.During modem play, the game may only be saved by thehost player (the one that initiated the connection), duringhis or her turn.
On the game screen, a telegraph symbol will appear when-ever the game is transferring data between the linked com-puters. Neither player should take any action while thissymbol is displayed.
Null Modem Cable Game
To set up a null modem connection, you will follow theprocedure described above, except that you will select NullModem in the Connection Typebox, and you will not entera phone number. For null modem connections, most play-ers will get the best results by selecting the highest baudrate in the Speedbox. If problems arise on this setting, tryplaying at a lower speed.
A Technical Note
Before beginning a modem game, Windows 95 usersshould make sure that Error Control is set to off, and UseFlow Control is set to Hardware.
These settings can be found by opening your ControlPanel, and selecting Modems, then Properties, thenConnection, then Advanced.
CCIIVVIILL WWAARR GGEENNEERRAALLSS 22
138

United StatesSierra Direct7100 W. Center RdSTE 301CSTOmaha, NE 68106
U.S.A. Sales Phone: (800) 757-7707International Sales: (425) 746-5771 Hours: Mon-Sat 7AM to 11 PM CST, Sun 8 AM to 9PM Fax: (402) 393-3224
United Kingdom Sierra On-Line Limited2 Beacontree Plaza,Gillette Way,Reading, BerkshireRG2 0BS United Kingdom
Main: (0118) 920-9111Monday-Friday, 9:00 a.m. - 5:00 p.m.Fax: (0118) 987-5603
Disk/CD replacements in the U.K. are £6.00, or £7.00outside the UK. Add "ATTN.: Returns."
FranceParc Tertiaire de MeudonImmeuble "Le Newton"25 rue Jeanne Braconnier 92366 Meudon La Forêt CedexFrance
Phone: (01) 46-01-48-53Lundi au Vendredi de 9h à 18h Fax: (01) 46-30-00-65
GGRRAANNTT,, LLEEEE,, SSHHEERRMMAANN
141folks just want to keep their games private). You can alsochoose to Create Game, and invite others to join.6. As soon as the game has enough players, the Host clicksGo to get things rolling.7.The rest of your game should proceed normally. 8.When you exit a game, you will be returned to SIGS.You may join new rooms or games from here.
SIGS Help:For further information, see the 'Online Help' option in theSIGS screens. Other answers to frequently asked questionsmay be found through the Internet at: http://sigs.sierra.com/sigs_faq.html.Also feel free to visit the SIGS main Web page for infor-mation on other SIGS products at:http://www.sierra.com/sigs Or view Sierra's Web page at: http://www.sierra.com.
IPX GamesSelect Multi-Player from the Startup screen. Choose IPXfrom the Select a Sessionwindow. You will then have theoption to Host or Join a game. If the computer does notdetect another game running on the network, the Joinoption will not be available. To Host a game, you will sim-ply select what kind of game you want to play and wait forother players to join.
Chat Mode
During modem, null modem, IPX, or SIGS games, playersmay send messages to each other using the chat modeoption. You may only send a message during your ownturn. To do so, select Chat Mode from the Game Controlsmenu (or hit the <F12> key on your keyboard). In the panelthat appears, type your message in the Local Machinebox,and then click on Send Text. When the player receives amessage, an identical panel will appear on his or her screenwith the message printed in the Remote Machinebox.
CCIIVVIILL WWAARR GGEENNEERRAALLSS 22
140 CUSTOMER SERVICE
SUPPORT & SALES

THE SIERRA NO-RISK GUARANTEE
The Promise: We want you to be happy with every Sierraproduct you purchase from us. Period. If for any reasonyou're unhappy with the product, return it within 30 daysfor an exchange or a full refund…EVEN IF YOUBOUGHT IT RETAIL. (Hardware ordered direct must bereturned within ten days.)
The Only Catch: You've got to tell us why you don't likethe game. Otherwise, we'll never get any better. Send itback to us and we promise we'll make things right. (Ifyou bought it at a retail outlet, please send your originalsales receipt.)* Returns valid in North America only.
Disk and or Manual Replacement:Sierra On-Line Fulfillment4100 West 190th StreetTorrance, CA 90504
Product Returns:*Sierra On-Line Returns4100 West 190th StreetTorrance, CA 90504
NOTE: To replace your disk(s) please send only Disk #1(or the CD) and copy of your dated Receipt, if less then90 days. After 90 days please include a $10 handling feealong with Disk / CD #1. For Documentation, pleaseinclude a $ 5.00 handling fee and a photocopy ONLY ofdisk #1. Payment should be made at the time of yourrequest. Sorry, no credit cards.* Returns to this address valid in North America only.
GGRRAANNTT,, LLEEEE,, SSHHEERRMMAANN
143GermanySierra Coktel DeutschlandRobert-Bosh-Str. 32D-63303 DreieichGermany
Tel: (0) 6103-99-40-53Montag bis Freitag von 10h - 17UhrFax: (0) 6103-99-40-35
On-Line Sales
CompuServe USA:GO SI (CServe Mall (Sales Only))CompuServe USA:GO SIERRA (Technical Support Only)CompuServe United Kingdom:GO UKSIERRACompuServe France:GO FRSIERRACompuServe Germany:GO GESIERRAAmerica Online:Keyword SierraInternet USA:http://www.sierra.comInternet United Kingdom:http://www.sierra-online.co.ukInternet France:http://www.sierra.frInternet Germany:http://www.sierra.de
CCIIVVIILL WWAARR GGEENNEERRAALLSS 22
142

you have any other programs running by looking at thesystem task list. You can get to this list by holding downthe <Ctrl> and <Esc> keys at the same time. If you seeanything other than “Program Manager” and the game,choose that item in the list with the up and down arrowkeys and hit the end taskbutton with your mouse.
TECHNICAL SUPPORTAutomated Technical Support Line - USA:
1-425-644-4343
Sierra On-Line offers a 24-hour Automated TechnicalSupport line with recorded answers to the most frequentlyasked technical questions. To access this service, call (425)644-4343, and follow the recorded instructions to find yourspecific topic and resolve the issue. If this fails to solveyour problem, you may still write, or fax us with your ques-tions, or contact us via our On-Line services.
U.S. Technical SupportSierra On-LineTechnical SupportP.O. Box 85006Bellevue, WA 98015-8506Main: (425) 644-4343Monday-Friday, 8:00 a.m. - 4:45 p.m. PST Fax: (425) 644-7697
Automated Technical Support Line - United Kingdom:
Sierra On-Line UK offers a 24-hour Automated TechnicalSupport line with recorded answers to the most frequentlyasked technical questions. To access this service, call(0118) 920-9111, and follow the recorded instructions tofind your specific topic and resolve the issue. If this fails tosolve your problem, you may still write, or fax us with yourquestions, or contact us via our Internet or CompuServesites.
GGRRAANNTT,, LLEEEE,, SSHHEERRMMAANN
145
Tech Tip for Win95 only:
If you maximize the window during game play, theWin95 taskbar may cover the buttons on the bottom ofyour screen. These buttons are vital to game play, and thetool bar can be easily disabled, and will return for all yourother applications. To disable the tool bar, right click andhold on it. Scroll down to the Properties selection anddisable the Always on top box by left clicking on it.
Tech Tips for Both Win95 & Windows 3.1:
Why doesn’t my sound work?
Sound hardware, usually a card of some kind, is requiredto play sound in the game. If you hear sounds in otherplaces in Windows, but not in the game, it is possible thatthere is a conflict of resources, where some other programthat is running is controlling the card. Make sure the gameand the Program Manager are the only two programs run-ning (hold down the <Ctrl> and the <Esc> keys to get alist of currently running programs). Make sure yoursound drivers are properly installed. If you have an olderconfiguration, contact the manufacturer of your card forthe latest sound drivers.
General problems
Make sure the game and the Program Manager are theonly two things running (hold down the <Ctrl> and the<Esc> keys to get a list of currently running programs) asthings like screen savers and runtime virus checkers cansometimes cause problems with other programs runningat the same time.
Memory Requirements: This game is designed to run
on a machine that has at least 16 megabytes of systemRAM installed. If you experience errors that say “Out ofmemory” or “General Protection Fault”, check to see if
CCIIVVIILL WWAARR GGEENNEERRAALLSS 22
TECHNICAL TIPS
GGRRAANNTT,, LLEEEE,, SSHHEERRMMAANN
147U.K. Technical SupportSierra On-Line Limited2 Beacontree Plaza,Gillette Way,Reading, Berkshire, United KingdomRG2 0BS Phone: (0118) 920-9111Monday-Friday, 9:00 a.m. - 5:00 p.m.Fax: (0118) 987-5603
FranceParc Tertiaire de MeudonImmeuble "Le Newton"25 rue Jeanne Braconnier92366 Meudon La Forêt Cedex, FranceTéléphone: 01-46-01-46-50Support Technique automatisé 7 jours sur 7 24h/24Techniciens accessibles du Lundi au Vendredi de 10h à 19hFax: 01-46-30-00-65
GermanySierra Coktel Vision DeutschlandRobert-Bosh-Str. 32D-63303 Dreieich, DeutschlandPhone: (0) 6103-99-40-40Montag bis Freitag von 9 - 19UhrFax: (0) 6103-99-40-35Mailbox: (0) 6103-99-40-41
SpainCoktel Educative MultimediaAvenida de Burgos 91º-OF228036 Madrid, SpainTeléfono: (01) 383-2623Lunes a Viernes de 9h30 a 14h y de 15h a 18h30Fax: (01) 381-2437
ItalyContattare il vostro distribotore.
CCIIVVIILL WWAARR GGEENNEERRAALLSS 22
146

Abatis, 91After Combat Report, 107Army morale, 74-75Army Supply, 68-69Artillery, 56-60Artillery Duels, 98-99Auto Resolution, 18Battle Resolution, 108-109Bridges, 90Campaign game, 116-121Cannons, 112Casualty Report, 21Cavalry, 53-54Charges, 101Combat, 96-108Command Tent, 21, 114-115Corps Commanders, 78-80Corps HQ, 52-53Cover, 91
natural, 91prepared, 91
Dawn, 105Digging in, 83-84 Dismissing Unit Leaders, 81Division Commanders, 78-81
Reassigning, 80-81Dusk, 105Engineers, 51-52Experience, 76Field Hospital Recovery Report, 117File Menu, 16
CCIIVVIILL WWAARR GGEENNEERRAALLSS 22
Firepower, 69Fords, 90Forests, 89Formations, 50-61, 85-86Forts, 91
Ruined, 91Frigates, 60-61Game Controls, 18-19Get Next Unit, 19Get Previous Unit, 19Grass, 89Grid, 19Gunboats, 61Hand-to-hand rating, 77, 110Health, leader, 81-83Health, unit, 72-73Heavy Artillery, 58Hexes, 14, 94Horse Artillery, 59Infantry, 50-51Influence, 81-82Installation and Loading, 11Interface, 14-15Internet Games, 139-140Labels, 22Line of Fire, 17, 94Line of Sight, 17, 94Loading games, 16Loyalty, 81-82Modem Games, 137-138Morale, army, 74-75Morale, unit, 73-74Mortar Gunboats, 61
GGRRAANNTT,, LLEEEE,, SSHHEERRMMAANN
149INDEX

Supply Sources, 105-106Swamps, 90-91Technical Support, 145-146 Technical Tips, 144-145 Terrain, 88-91, 127-131
height, 92modifiers, 23, 131
Times Defended, 21Towns, 89Tutorial, 24-37Undo, 18, 86Units, 50-61Unit Leaders, 78-82
dismissing, 81Unit Supply, 67-68Victory points, 108-109Video Clips, 104-105Visibility, 93-94Voluntary Retreats, 102 Walls, 90Weapon power, 77, 110Weapon Purchase Screen, 32-35, 117-121Weapons, 110-112 Zoom, 95
GGRRAANNTT,, LLEEEE,, SSHHEERRMMAANN
151Movement, 22, 87-88Movement points, 66, 87-88 Multimedia History, 12-13Music, 17Night, 105Number of men, 64-65 Objectives, 9Objectives Report, 21Options Panel, 17-18 Organization, leader, 81-82Organization, unit, 70-71Overview map, 14-15, 19Play Level, 106Quality, 75-76Railroads, 8-90Rallying units, 75, 103-104 Rear Attacks, 100Reinforcements, 20, 105 Reinforcements Report, 21, 106Rest and resupply, 84-85Rivers, 90, 128, 130 Roads, 89Rocky Knolls, 90Rout, 103Saving games, 16Scenario Dialog, 23, 122Scouts, 55Sharpshooters (see Specialists) Siege Mortars, 59-60Sound Effects, 17Specialists, 55Stacking, 93Streams, 90
CCIIVVIILL WWAARR GGEENNEERRAALLSS 22
150

GGRRAANNTT,, LLEEEE,, SSHHEERRMMAANN
153
IT IS ILLEGAL TO MAKE UNAUTHORIZED COPIES OF THIS SOFTWAREThis software is protected under federal; copyright law. It is illegal to make or distributecopies of this software except to make a backup copy for archival purposes only. Dupli-
cation of this software for any other reason including for sale, loan, rental or gift is afederal crime. Penalties include fines of as much as $50,000 and jail terms of up to fiveyears. Sierra, as a member of the Software Publishers Association (SPA), supports the
industry’s effort to fight the illegal copying of personal computer software. Reportviolations to :SPA, 1101 Connecticut Avenue NW, Suite 901,
Washington, D.C. 20036
Sierra Warranty You are entitled to use this product for your own use, but may not copy, reproduce,translate, publicly perform, display, or reduce to any electronic medium or machine-
readable form, reproductions of the software or manual to other parties in any way, norsell, rent or lease the product to others without prior written permission of Sierra. Youmay use one copy of the product on a single computer. YOU MAY NOT NETWORKTHE PRODUCT OR OTHERWISE INSTALL IT OR USE IT ON MORE THAN ONE
COMPUTER AT THE SAME TIME.UNAUTHORIZED REPRESENTATIONS: SIERRA WARRANTS ONLY THAT THEPROGRAM WILL PERFORM AS DESCRIBED IN THE USER DOCUMENTATION.NO OTHER ADVERTISING, DESCRIPTION, OR REPRESENTATION, WHETHER
MADE BY A SIERRA DEALER, DISTRIBUTOR, AGENT, OR EMPLOYEE,SHALL BE BINDING UPON SIERRA OR SHALL CHANGE THE TERMS OF THIS
WARRANTY.IMPLIED WARRANTIES LIMITED: EXCEPT AS STATED ABOVE, SIERRA
MAKES NO WARRANTY, EXPRESS OR IMPLIED, REGARDING THISPRODUCT. SIERRA DISCLAIMS ANY WARRANTY THAT THE SOFTWARE IS
FIT FOR A PARTICULAR PURPOSE, AND ANY IMPLIED WARRANTY OFMERCHANTABILITY SHALL BE LIMITED TO THE NINETY (90) DAY
DURATION OF THIS LIMITED EXPRESS WARRANTY AND IS OTHERWISEEXPRESSLY AND SPECIFICALLY DISCLAIMED. SOME STATES DO NOT
ALLOW LIMITATIONS ON HOW LONG AN IMPLIED WARRANTY LASTS, SOTHE ABOVE LIMITATION MAY NOT APPLY TO YOU.
NO CONSEQUENTIAL DAMAGES: SIERRA SHALL NOT BE LIABLE FORSPECIAL, INCIDENTAL, CONSEQUENTIAL OR OTHER DAMAGES, EVEN IF
SIERRA IS ADVISED OF OR AWARE OF THE POSSIBILITY OF SUCHDAMAGES. THIS MEANS THAT SIERRA SHALL NOT BE RESPONSIBLE ORLIABLE FOR LOST PROFITS OR REVENUES, OR FOR DAMAGES OR COSTS
INCURRED AS A RESULT OF LOSS OF TIME, DATA OR USE OF THESOFTWARE, OR FROM ANY OTHER CAUSE EXCEPT THE ACTUAL COST OF
THE PRODUCT. IN NO EVENT SHALL SIERRA'S LIABILITY EXCEED THEPURCHASE PRICE OF THIS PRODUCT. SOME STATES DO NOT ALLOW THE
EXCLUSION OR LIMITATION OF INCIDENTAL OR CONSEQUENTIALDAMAGES, SO THE ABOVE LIMITATION OR EXCLUSION MAY NOT APPLY
TO YOU.
©1997 Sierra On-Line, Inc. ® and ä designate trademarks of, or licensed to Sierra On-Line, Inc. All rights reserved.