Fuel System: Pumps, Relays - BrickBoardFuel System: Pumps, Relays FAQ Home Volvo Maintenance FAQ for...
27
Fuel System: Pumps, Relays file:///C|/Users/Steve/Documents/Volvo%20FAQ%20Updated/FuelSystem.html[01/13/14 10:10:55 PM] Fuel System: Pumps, Relays FAQ Home Volvo Maintenance FAQ for 7xx/9xx/90 Cars Filter: Fuel Filter Replacement Airbag Deployment While Changing Fuel Filter Carbon Vapor Canister Fuel Injection Relay: Fuel Pump and FI Relay Diagnostic Tests Symptoms of Bad Pump Relay Fuel Pumps: Fuel Pump Noise Fuel Pre-Pump Problems & Diagnoses Fuel Pump and Sender Replacement Fuel Gauge Failure: Fuel Level Sending Unit Repair Fuel Main Pump Problems & Replacement Gas More Than Empty But Can't Be Pumped Out B230K BiFuel Engine Ticking Sound: Fuel Pump Fuel Tank: Gas Cap Fuel Tank Fill Hose Failure Fuel Tank Auxiliary Tank Fuel Pressure: Fuel Pressure Regulator and System Pressure
Transcript of Fuel System: Pumps, Relays - BrickBoardFuel System: Pumps, Relays FAQ Home Volvo Maintenance FAQ for...
Fuel System: Pumps, Relays
file:///C|/Users/Steve/Documents/Volvo%20FAQ%20Updated/FuelSystem.html[01/13/14 10:10:55 PM]
Fuel System: Pumps, Relays
FAQ Home
Volvo Maintenance FAQ for 7xx/9xx/90 Cars
Filter:
Fuel Filter Replacement
Airbag Deployment While Changing FuelFilter
Carbon Vapor Canister
Fuel Injection Relay:
Fuel Pump and FI Relay Diagnostic Tests
Symptoms of Bad Pump Relay
Fuel Pumps:
Fuel Pump Noise
Fuel Pre-Pump Problems & Diagnoses
Fuel Pump and Sender Replacement
Fuel Gauge Failure: Fuel Level Sending UnitRepair
Fuel Main Pump Problems & Replacement
Gas More Than Empty But Can't Be PumpedOut
B230K BiFuel Engine Ticking Sound: FuelPump
Fuel Tank:
Gas Cap
Fuel Tank Fill Hose Failure
Fuel Tank
Auxiliary Tank
Fuel Pressure:
Fuel Pressure Regulator and SystemPressure
Fuel System: Pumps, Relays
file:///C|/Users/Steve/Documents/Volvo%20FAQ%20Updated/FuelSystem.html[01/13/14 10:10:55 PM]
Noisy Fuel Pump: Bad FPR
Fuel Pressure Test Tool
Failed Check Valve
Abbreviations:
AMM Air Mass Meter
ECT Engine Coolant Temperaturesensor
ECU Engine Control Unit computer(either fuel injection or ignition)
FI Fuel Injection
FPR Fuel Pressure Regulator
IAC Idle Air Control solenoid valve
TB Throttle Body
TPS Throttle Position Sensor
VSS Vehicle Speed Sensor
Filter:
Fuel Filter Replacement. [Inquiry:] The time has come for the fuel filter to bereplaced. Rather than pay the dealer an arm and a leg, I'd like to replace it myself.How do I do this? [Editor] The location, subject to salt spray and serious corrosion,makes this routine job a lot tougher. Bolts seize and are tough to remove. In thisone instance, it is often worth your while to have a shop do the work. Ask them toreassemble everything using a good antiseize for ease of future removal.
Replacement Procedure:
[Response 1: John B/Tom Irwin/Neos/Philip] Here's how to do it safely:
Pull the fuel pump fuse while engine is running, engine stops with no fuelpressure left in line.
(alternative 1:pull the fuses for the fuel pumps and crank the engine.(alternative 2: attach a vacuum pump to the FPR vacuum fitting andapply vacuum.)
Shut off the engine and remove the key from the ignition.Raise the car (740) high enough, so that you have the best of angles (androom to work) to hold all in proper position. Spray the fuel filter fittings withpenetrating oil.The filter and pump sit in a subframe or cradle under the driver's side of thecar, mid-ship, held up by three 10mm bolts. The pump is held in place with acushioned band clamp, one 10mm bolt, that can only be accessed with thetray lowered. The filter itself has two different sized fittings of 22mm and
Fuel System: Pumps, Relays
file:///C|/Users/Steve/Documents/Volvo%20FAQ%20Updated/FuelSystem.html[01/13/14 10:10:55 PM]
27mm: each end uses a different size. Do not use an adjustable wrench: buythe proper size open-end box wrenches (Sears). The sizes of the banjo boltsare 18mm (mates into the 22mm or 7/8 inch filter side) and 19mm or 3/4inch (mates into the 27mm or 1-1/16 inch filter side). These are easilyaccessed with a ratcheting socket. Everything will be corroded: soak inPBlaster for a day or so in advance if you live in the salt belt.If you are doing this alone, loosen the carriage that holds the filter by ONLYREMOVING THE OUTSIDE NUT that holds it up, then bend the carriage downto work on the filter. The manuals say to take ALL of the nuts loose and dropthe whole thing; loosening just one nut makes the job much easier and faster.Unplug the main fuel pump electric connections, disconnect the fuel tank line(plug this one) and disconnect the line to the engine.There should be wrench flats on the filter body to counterhold with a wrenchas you use another to bust the banjo bolts free.While removing the lines, Ialmost broke the short line at the front of the filter that goes to the pump. Itis real easy to start it bending to the point of having a kink if not careful. Ifbadly corroded, try an impact wrench. You can get an impact wrench onto thefront banjo fitting with an extension and knuckle. Place an open end wrenchon the line on the back. Banjo bolt will spin out nicely. Then go to a biggersocket to fit the shoulder on the filter and use it to loosen the filter from theline on the back end. Your impact wrench can save the day on this.Instead of removing the filter from the bracket and then trying to disconnectthe lines, now I try to leave the filter in place as much as possible, although Ifind that I do need to loosen the bolts to the cage a little to get my wrenchesin there. After the lines are off, I loosen and push out the filter. When I put itback on, it is difficult to get the right angle of the rubber line around the cageunless it is one of the last things tightened.Once free of fuel lines, loosen the clamp around the middle and swap it out.Replace fuel filter and banjo gaskets. Use grease as anti-seize on the threadsand washer flats of the fittings but don't get any in the fuel intakes. The newfilter will come with 4 copper crush washers, two for each compression fitting-- note the location of the old ones as you remove the fittings. The BEST(most successful) way to reinstall the fuel lines is with an impact wrench,while gripping the filter body with a free hand or the rear flats with an openwrench. Just BRrraaapp! until it feels right. Using hand wrenches, you stand agood chance of twisting the lines under load, potentially causing a leak failure.Use a backup wrench. And be EXTREMELY careful.Cinch the clamp. Bend the cradle back up and tighten the bolts.Check for leaks when you are done and it is running.
Gasoline Spillage. [Tips from Patrick] Make SURE the negative cable on the batt isdisconnected! (have your radio code available.) Be EXTREMELY careful as asignificant volume of fuel may come out. Be ready to catch all the gas in the filterand the line between the filter and the engine. Some gas drips out of the mainpump with the filter removed, but it won't be much as long as you keep the pumpand tray assembly elevated as you replace the filter. If you remove all the carrierbolts, have an old box or something ready to support the weight of the tray --don't let the tray hang by the fuel lines! An oil pan has more than enough volumeto do this job. One last word of caution ... don't smoke when doing this job.
Copper Washers.
Fuel System: Pumps, Relays
file:///C|/Users/Steve/Documents/Volvo%20FAQ%20Updated/FuelSystem.html[01/13/14 10:10:55 PM]
Whenever you change the fuel filter, make sure you have four new copper washers.The filter should come with them, or you can buy them from the dealer. WagnerBrake sells them as brake fitting copper washers, numbers F17 and F10775, atauto stores. There is a copper washer on each side of both banjo fittings. Theyreally aren't designed to be re-used (the old ones work-harden and won't crushenough to make a seal) and four new washers should have come with your newfilter. If they didn't, try annealing the old ones. First, dress both surfaces with a flatfile, or fine sandpaper on a flat surface to remove ridges left from the banjofittings. Second, heat the washers to bright cherry red with a propane torch and letcool. This step anneals the copper. Third, clean again with a file or fine sandpaper.When reinstalling, don't get crud or rust-proofing material stuck between thecopper washer and the fitting (this crud usually isn't visible after installation).
Worst Case: Bolts Stuck; Fuel Line Breaks.
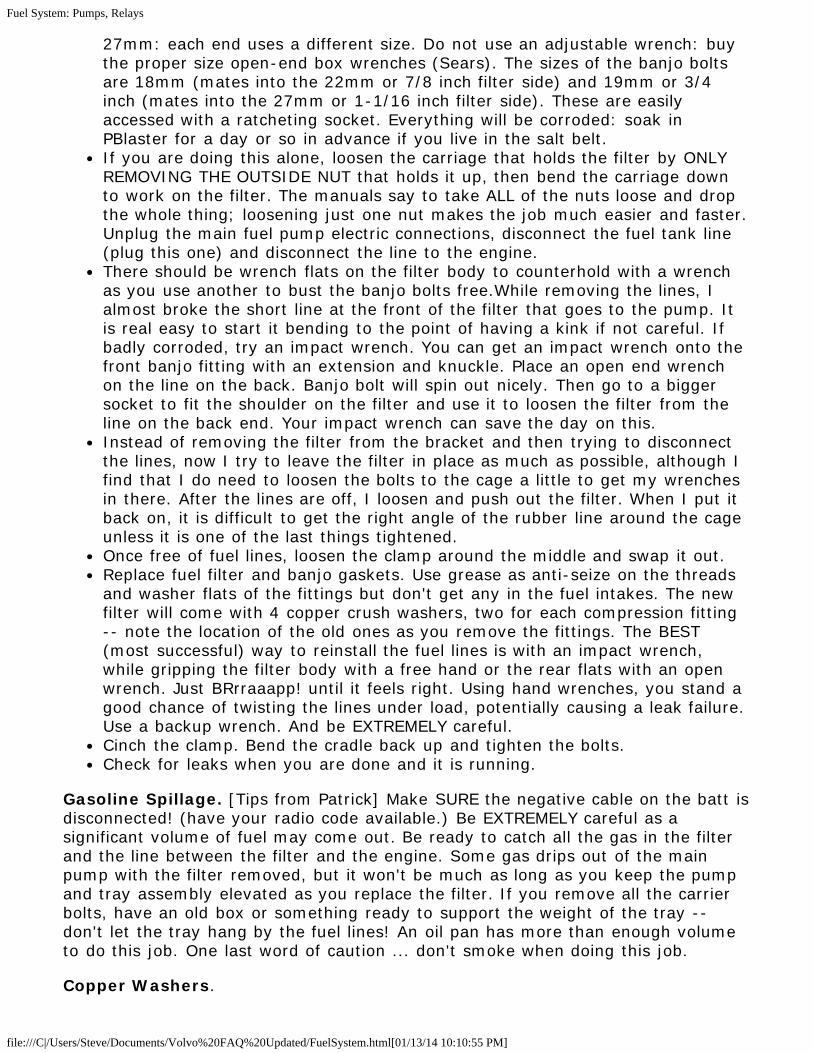
[Tip from Fisher] If you find that while workingunder the car, you absolutely cannot remove thecorroded fuel filter bolts, you can remove the linesto the engine and to the tank which is easily done. Use flare wrenches andpenetrating oil. You can then disconnect the fuel pump wires and the whole cradle,pump and lines will come right out. Now with the filter off the car, remove the linesat the filter. [Editor] If you break the small connecting fuel feed line, get anotherone from an online retailer (e.g., FCPGroton) for around $30.
Airbag Deployment While Changing Fuel Filter
[Tip from Abe Crombie] There is a Volvo SB out on precautions when changing fuelfilters. The SRS Airbag system is powered anytime the key is in position I or II. Ifyou are listening to radio while changing fuel filter and you are using air impacttools there are real risks of deploying airbag as you re-install the fuel pump/fuelfilter bracket. The hammering of air impact tool on bolts securing this bracketwhich is very near crash sensor location in floor pan on inside of car, can cause adeployment. This sounds like someone found out about this the hard and expensiveway. The bulletin only mentions 700/900 series but the 240 crash sensor is not toofar away from the same location. LEAVE KEY OFF WHEN CHANGING FUEL FILTER!!If you need tunes get your rhythm somewhere else besides the car radio.
[Comment: S. Ringlee] By extension, then, if I use impact tools on such things assuspension bolts or anything else likely to jolt the body while the ignition is on, thesame result may occur. $2500 lesson (bags, sensors, seat belts, glass, speakers,heaven knows what else.) This is great advice: listen to a boom box and NOT thecar radio while banging on the car.
Carbon Vapor Canister. For notes on diagnosing and replacing this filter, see theFAQ link.
Fuel Injection Relay:
Fuel System: Pumps, Relays
file:///C|/Users/Steve/Documents/Volvo%20FAQ%20Updated/FuelSystem.html[01/13/14 10:10:55 PM]
Fuel Pump and FI Relay Diagnostic Tests.
Here is a procedure to test the operation of the fuel injection relay and theoperation of both fuel pumps. The 3 main things to check in the fuel circuit are thefuel pump relay, and the 2 fuel pumps.
1. Fuel Injection Relay Test. There are 2 relays inside the fuel injection/pumprelay. One of them should turn ON when the ignition is turned on (withoutturning over the engine), and the other relay (which actually turns the fuelpumps) should come ON when the engine turns over/runs. You can check the1st relay by putting your fingers on the relay module and turning the ignitionon and off repeatedly. You should feel the relay click on every time. If itdoesn't, that relay isn't working. And you'll find the car doesn't start if therelay did not come on.
2. [Tips from Bob Dietz] Locate the main fuel injection relay, pop the cover andoperate the contacts with your finger to operate the fuel pump when the keyis on. If the pump operates then the problem is in the spark side of theequation. If the pump does not operate then replace the relay. If the pumpthen operates on its own when the key is switched to start, the problem issolved. If not, leave the new relay in place and check for current at the pump.If current exists, replace the pump. If the pump is defective, you'll want toreplace the relay anyway because of an internal diode across the contactpoints that protects the fuel injection computer. High current loads from afailing main pump will cause extreme arcing across the point contacts on shutdown and damage the diode protection circuit.
3. Fuel Pump Diagnostic Tests. On the 740, the fuse-box + relay box can bepulled out a little to facilitate inserting/removing relay modules. So pull it outas much as the wires will allow. Pull out the fuel injection/pump relay module.Now take a small piece of wire to jumper terminals 30 and 87/2 on the relayboard (the terminals are identified on the relay module pins. The 2 terminalsare the nearest left and middle right pins on the relay board). This shouldmake the car act like the fuel pump relay is ON. Note: be careful that youinsert the jumper ONLY in these pins, else you will damage the ECU.
4. Now turn the ignition ON (without turning the engine). You should hear awhirring sound right from where you are. That will be the main fuel pump.Now go to the gas tank and unscrew the cap. Put you ear to the hole and youshould hear a smaller whirring sound. Or, listen with a piece of heater hose tothe tank pump through the gas filler with car running. Should hear ahumming. That will be the in-tank pump. If you hear both noises, the fuelpumps should be OK.
5. To check the pumps individually, you can pull out the in-tank fuel pump fuseafter you do the above test, and repeat the test. You should not hear anywhirring at the tank, but you should be able to hear the main pump. [BruceYoung] For cars using fuse 11 to power the in-tank pump or Regina mainpump (NB: Regina and post-1994 cars have only one pump), you can test fuelpumps individually. Improvise a jumper wire with a flat male terminal on eachend. Disconnect the fuel line at the injector rail and route it into a safecontainer with a helper watching.
6. For the 94/95 940 Single In-Tank Pump: [Eric Cordis] You can easily hear thepump in the trunk if it works. The 95 940 does not run a priming cycle whenthe key is turned; engine rotation on "start" is required to power up the
Fuel System: Pumps, Relays
file:///C|/Users/Steve/Documents/Volvo%20FAQ%20Updated/FuelSystem.html[01/13/14 10:10:55 PM]
pump. A new pump will test at 1-2 ohms; my old, worn one was 20k-30kohms.
To run or test the In-Tank Pump, remove fuse 1 and in-tank pump fuse 11 andapply battery voltage from the fuse 1 terminal closest to you to the Fuse 11terminal that is farthest away from you, i.e., toward the engine. BE CAREFUL thatyou do not ground this jumper. The in-tank pump should push a good flow of fuelthrough the unpowered main pump all the way to the injector rail. To run/test theMain Pump, jumper voltage from F1 to the other F11 terminal—the closest one.
CAVEAT: The main fuel pump is not designed to be run without the in-tank pumpon, so get the second part of this test over quickly. You should not need to keep itrunning in this condition for more than a few seconds to complete this partanyway.
Symptoms of Bad Pump Relay. [Symptoms:] 89 740 died & started 10 min.later. My '89 740 did the EXACT same thing for a while. When it acted up it didhave spark. It seemed to be related to getting hot. It would die in motion, or whenhot, it would also refuse to restart 'til it rested for 10 min. As far as driving it, notmuch you can do, just be prepared to pull over and give it a rest for 10 min. Whenit acts up, as the key is turned ON, listen, the fuel pump should normally be heardto come on for about 1.5 sec. If it's not coming on, I'd bet on the relay.[Diagnosis:] After replacing the fuel pump relay ($38 at dealer), it's been 100%fine. [Editor's Note: See the note on Headlamp Circuits/Relay Won't Function in theElectrical: Lighting section for more relay information.]
Fuel Pumps:
Most 700/900 series four cylinder cars with Bosch injection systems have two fuelpumps: an intank pump which is low pressure and merely lifts the fuel from thetank and sends it to the main pump under the drivers seat. The latter is a highpressure pump capable of going to 80 psi or so, modulated by the fuel pressureregulator which keeps pressure around 35 psi by allowing excess fuel to circulateback to the tank. Of course, there are exceptions: the 1995 940 and all Regina-equipped cars have single in-tank main pumps.
Fuel Pump Noise. Fuel Pump Noise.
Cars With Pre-Pumps: [Inquiry:] My car is running perfectly but whenever the fuel-gauge drops to around 25%, noises coming out unexpectedly, but after refuellingthe noise will suddenly disappear. Does anyone could tell me what's wrong with mycar? [Response: Michael Pardee] Sounds like the hose on the in-tank fuel pump hasa hole in it. That is very common, and if the hole gets much worse, it will not beable to run below 1/4 tank at all. Fortunately, it's an easy fix. [Response: PeterJames] I would agree with that and/or the intank pump has failed and you are nowstressing the main pump, which in turn can lead to premature failure of the mainpump. [Response:] Are you sure it's the in-tank pump, not the main pump downby the rear wheel arch that is making the noise? Most commonly this pump makesthis noise not because it is failing, but because the in tank pump is not supplyingthe fuel to it for some reason. It won't do it any good to operate in this condition,
Fuel System: Pumps, Relays
file:///C|/Users/Steve/Documents/Volvo%20FAQ%20Updated/FuelSystem.html[01/13/14 10:10:55 PM]
and when the main pump fails, you're stuck at the roadside. The most commoncauses of in tank pump woes are not failure of the pump itself, but two otherpossibilities:
The little sock filter on the in tank pump intake is blocked with debrisThe pipe from the in tank pump has split.
Both require the pump removed from the tank to rectify unfortunately.
[Tip from Jeff] If you turn the ignition on to KPII ("on" but not started), the fuelpump should turn on then off after a short time as pressure increases. If thesecondary, high pressure fuel pump runs continuously then the appropriatepressure is not building up. Check the fuel pressure regulator and the primary in-tank low pressure pump for faults.
Cars With Single In-Tank Pumps: If your pump makes noise, it is close to failure.The usual symptom is a strange buzzing sound, often intermittent. The usual failuremode is worn commutator and brushes.
Replace Rubber Bushings. [Tip] I replaced the three fuel pump cradle rubberbushings (Volvo p/n 1255018-2) three weeks ago and today I realized that I wasn'thearing the fuel pump anymore. Replacing all the rubber bushings in many placesin the car has made a huge difference in the way it drives and handles.
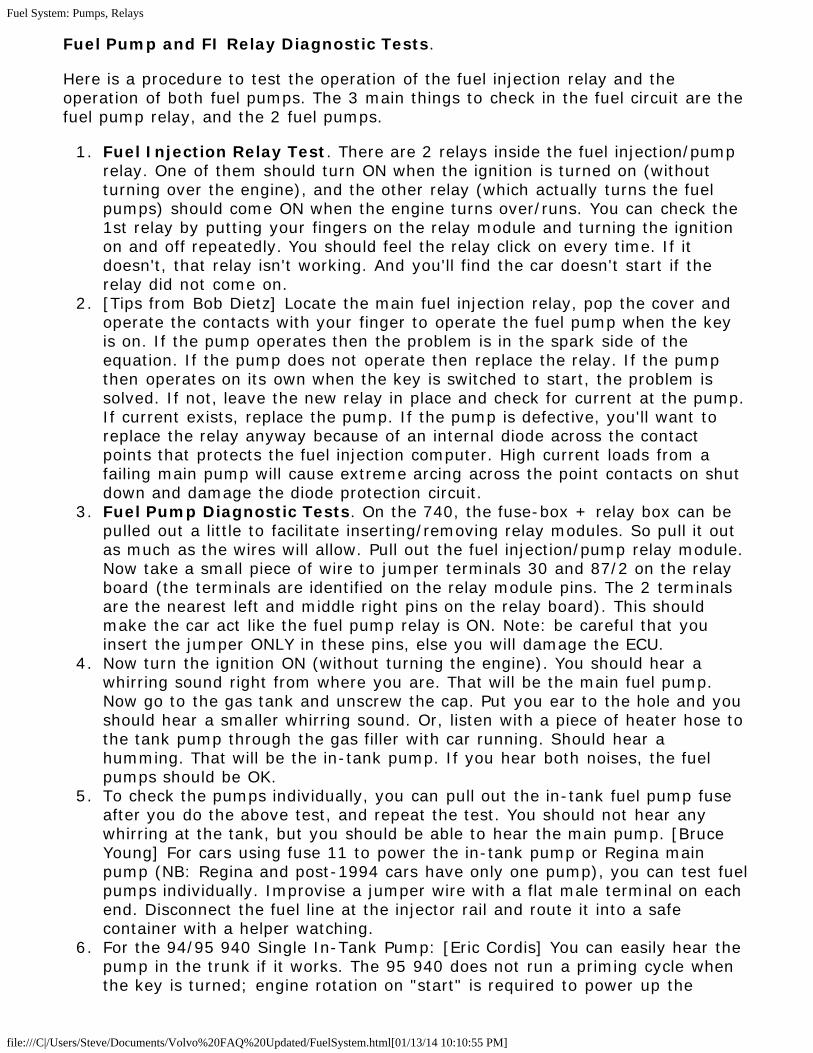
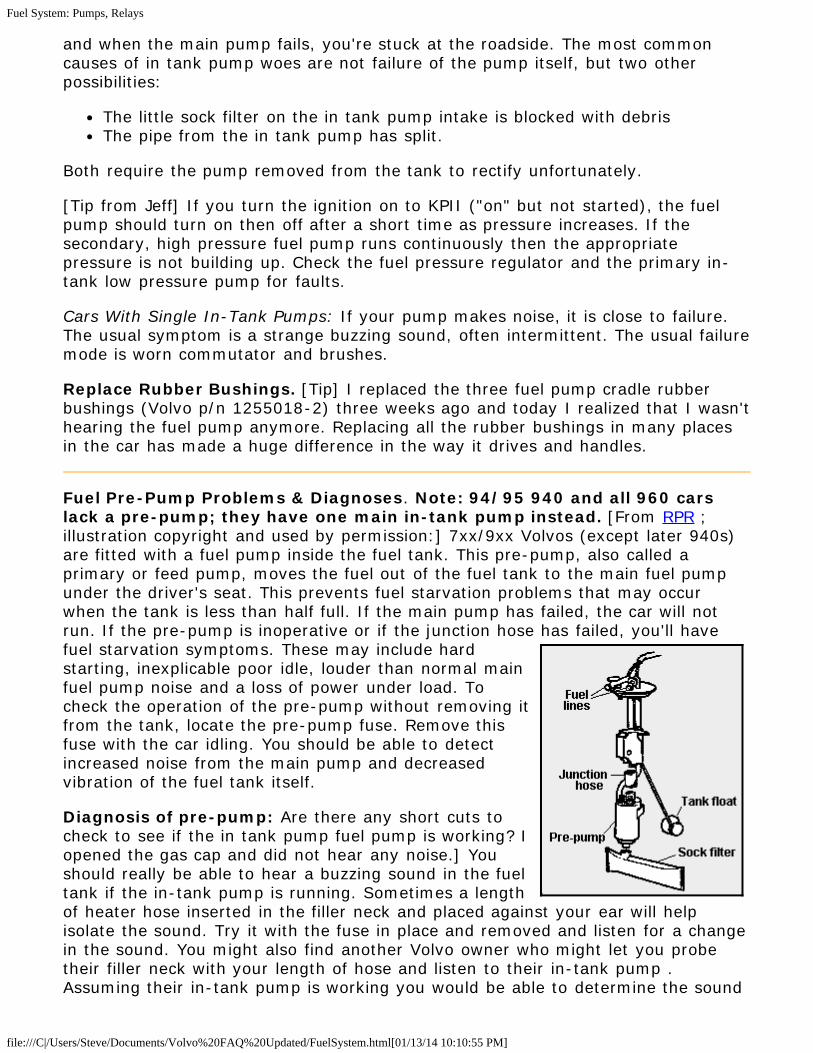
Fuel Pre-Pump Problems & Diagnoses. Note: 94/95 940 and all 960 carslack a pre-pump; they have one main in-tank pump instead. [From RPR ;illustration copyright and used by permission:] 7xx/9xx Volvos (except later 940s)are fitted with a fuel pump inside the fuel tank. This pre-pump, also called aprimary or feed pump, moves the fuel out of the fuel tank to the main fuel pumpunder the driver's seat. This prevents fuel starvation problems that may occurwhen the tank is less than half full. If the main pump has failed, the car will notrun. If the pre-pump is inoperative or if the junction hose has failed, you'll havefuel starvation symptoms. These may include hardstarting, inexplicable poor idle, louder than normal mainfuel pump noise and a loss of power under load. Tocheck the operation of the pre-pump without removing itfrom the tank, locate the pre-pump fuse. Remove thisfuse with the car idling. You should be able to detectincreased noise from the main pump and decreasedvibration of the fuel tank itself.
Diagnosis of pre-pump: Are there any short cuts tocheck to see if the in tank pump fuel pump is working? Iopened the gas cap and did not hear any noise.] Youshould really be able to hear a buzzing sound in the fueltank if the in-tank pump is running. Sometimes a lengthof heater hose inserted in the filler neck and placed against your ear will helpisolate the sound. Try it with the fuse in place and removed and listen for a changein the sound. You might also find another Volvo owner who might let you probetheir filler neck with your length of hose and listen to their in-tank pump .Assuming their in-tank pump is working you would be able to determine the sound
Fuel System: Pumps, Relays
file:///C|/Users/Steve/Documents/Volvo%20FAQ%20Updated/FuelSystem.html[01/13/14 10:10:55 PM]
you are listening for. If you do take it out of the tank:
Replace the short segment of rubber hose with a new section of fuel hose.Replace the sock that is on the end of the pickup tube (about $15 from Volvo)DO NOT bench test the in-tank pump. When the pump is removed from thetank arcing will occur when powered up and can result in a fire due to thegasoline vapors present. Certainly don't remove the pump from the fuel levelin the tank and give it a quick bump on the starter to check out its function-that can result in one hell of a fire (and explosion). The pumps are designedto run submerged in gasoline.
Symptoms of worn fuel pre-pump: My experience with a worn fuel pre-pump isthat it will cause the engine to miss and lose power under conditions of high flow(high throttle and high rpm). The problem grew worse very gradually (over 10's of1000's of kms). It certainly wasn't going to leave me stranded anywhere. [Anotherexample:] My wife drives an '83 760, which I have maintained as needed. Recently,the car started to vapor-lock in warmer weather, and/or when the fuel leveldropped to around a 1/4 tank or lower. Oddly enough, when I refill the tank, theproblem seems to go away. [Test Tip:] As far as a definitive test goes, I guess itwould be necessary to set up a pressure gauge and flow meter as well as a valvein the circuit that would allow a specified volume to flow while reading pressure,but see the above fuse and noise procedure for an alternative. [Editor] Hardstarting and poor idle have been traced to a bad pre-pump, if other symptoms arealso present such as main pump noise. How Long Do They Last? [John McPhail]I've junked a couple of 240s (severe rust problems) that had over 250K miles onthe original pumps. The three cars that needed replacement in-tank pumps hadbetween 150K and 200K on them when the pumps failed: 158K, 174K and 190K.
[Car Stalls During Turn: Fuel Prepump Failing.]
[Inquiry:] I bought a used '87 760t. It ran fine when I first got it but after a fewmonths it started stalling when making a left turn. Not every time, but its worse(more likely to stall) if I'm decelerating, in fact I can usually avoid the stall if Islow down before the turn and then give it some gas during the turn. When it doesstall it almost always starts right back up no problem.
[Response: MikeW] The stalling during turns is usually indicative of a problem withthe in-tank fuel pump. Does it happen when you have a full tank of gas, or onlywhen your down around 1/3 tank or less? Anyway, it sounds like your in-tankpump may be bad, or the rubber hose connecting it with the metal line running outof the tank may have deteriorated, or the filter sock on the bottom of the in-tankpump is plugged.
Changing Fuel Pre-Pump:
[Parts note from Editor] If you change the pre-pump, have your parts guy supplytwo compatible nuts for the electrical connections (threads differ) and the OEMoutlet hose. The OEM threads are3.5mm x .75, available at electricalsupply stores.
[Erik Smith] Before changing the

Fuel System: Pumps, Relays
file:///C|/Users/Steve/Documents/Volvo%20FAQ%20Updated/FuelSystem.html[01/13/14 10:10:55 PM]
pump, make sure that the fuel pumpground connection is not the problem:if the connection to the body is notintact, the symptom will mimic that ofa failed pre-pump
[John Sargent] There is a metal panel(about 6" X 6") under the carpet in thetrunk, left of center, in front of thecargo/third seat compartment. Remove that panel. You will see the top of the fuelpre-pump/sending unit assembly. It is retained by a large plastic nut. Take thehoses off, remove the plastic nut, free the electrical wiring from any clamps andloosen both the connection in the trunk and the grommet through which the wiringpasses. Mark the orientation of the round plate so you can reassemble it correctly.The fuel pump assembly can be manipulated through the hole. It is very easy toreverse the wires that attach directly to the pump, so make sure you locate "+ and-" on the pump and install the wires with correct polarity. When reassembling,don't overtorque the plastic nut and strip the threads. Access Tips: there is a blackground wire that needs to be either disconnected or cut and re-spliced. To removethe panel covering the fuel sender in the wagon, push the rear seats forward, pullback the front floor panel, remove the three nuts holding the panel in place, andpull the panel up and forward to remove. It is secured by adhesive or Velcro andtwo clips that clear once it is pulled forward.
Pre-pump Outlet Hose. Don't let those guys charge you $200.00 for working onyour pre-pump! Most likely the small piece of rubber fuel line between the in-tankelectric pre-pump and the metal output tube has eroded and needs replacing.Remove the pre-pump from inside the trunk to get to this hose. The hose varies:about two inches long in earlier sedans (Volvo has a nice OEM bellows hose for thisapplication) and about nine inches long in the later sedan and wagon (standard5/16 inch fuel hose will work, but you are better off buying the $10 OEM hose froma dealer since it is an exact fit AND is resistant to fuel degradation.)
Fuel Tank Line Clamp Recommendations. [Inquiry:] Which clamps work best onfuel lines inside tanks? What's their projected life span ? [Response: Jim McDonald]Breeze Liner all-stainless clamps: about 250 years; somewhat less in plain steel.Buy Breeze Liner clamps from a truck dealer.
Fuel Sender and In-Tank Pump Replacement. There are several FAQ filesdescribing this generic procedure: the OEM manual scan (courtesy VolvoCar Corporation, copyright; all rights reserved; some browsers will notdirectly open a pdf plugin, so right-click to "save as" and save the file, thenopen it directly in Adobe Reader)) and Art Benstein's illustrated version.The latter in particular will guide you through this process.
Fuel sender unit removal and replacement (see below for later Bosch and

Fuel System: Pumps, Relays
file:///C|/Users/Steve/Documents/Volvo%20FAQ%20Updated/FuelSystem.html[01/13/14 10:10:55 PM]
Regina one-pump systems) .
System Variants. [Dave Stevens] There are a number of fuel tank sender/pumpvariants for the North American market. To the best of my knowledge they appearto be:
All 740s and 1992 16-valve 940s to 1992; B230F, B230FT, B234F w/Bosch FIand 60 litre tank; in-tank pre-pump (same pre-pump for turbo; main pumpalongside fuel filter in undercarriage frame below left rear passenger area)1992-1993 940s; B230F, B230FT w/Regina FI and 60 litre tank; quick-disconnect fuel line fittings (push-in plastic); in-tank main pump (differentpump for turbo); otherwise similar assembly to 740s1994 940s; B230F, B230FT w/Regina FI and larger 75 litre tank; quick-disconnect fuel line fittings (push-in plastic); in-tank main pump same as1992-1993 Regina; longer fuel level sender barrel (also supports empty tankwarning light); trickier to remove/install1995 940s; B230FD, B230FT w/Bosch FI and larger 75 litre tank; in-tank mainpump (different for turbo and both different from Regina); proper wiringconnector for the fuel pump; otherwise similar assembly to 1994 940s960 through 1992: sedan 80 litre; wagon 60 litre tanks with single in-tankpump and similar fitments as above960 92-94: sedan 80 litre; wagon 75 litre950 1995+: 80 litre
The sender/pump units for larger tanks are longer and somewhat more difficult toremove and reinstall. Sending units from 940s and 960s generally do notinterchange, even if the pumps do, because the fuel tanks have different shapes.
Parts Needs. [Editor] In addition to the pump (specific to your model) and anyassociated in-tank hose or filter sock, you will in all likelihood need a new topgasket (p/n 1367623-4) and new hose clamps securing all the hoses on the top ofthe sender unit. These are almost always severely corroded. The large clampholding the fill hose is Volvo p/n 943477-0; buy two of these. The smaller clampsare 943471-3; buy four of these. The spring clamps are 1321719-5; buy two ofthese. If you do not have to remove all the hoses or if a clamp is reused, you'llend up with an extra clamp or so. You should also buy a new 7.6mm ID in-tankpump hose (p/n 3514604-2): some pumps have been changed and the old hose istoo short. Buy 14 inches. In a pinch, Gates 7.8mm submersible fluorelastomer fuelhose is a good substitute (p/n 27093 or 5/16 inch I.D.) but costs three times asmuch as OEM. If you need to replace the sender assembly because of rust, makesure you use a unit appropriate for your model and fuel tank size.
Tool Needs. [Editor] You will need an LED headlamp, a length of strong string,some Vaseline or light grease, and patience if you are working in the trunk of asedan.
[Note: See Removing Rear Floor Panels for Access to Fuel Tank and Pre-Pump for instructions on wagon fuel tank hatch access.]
If the tank is brim full you will need to siphon some gas out. Ideally the tankshould be 3/4 full or less. If the rear of the car is securely up on jacks or rampsthen this is less of a problem.
Fuel System: Pumps, Relays
file:///C|/Users/Steve/Documents/Volvo%20FAQ%20Updated/FuelSystem.html[01/13/14 10:10:55 PM]
First disconnect the hose coupling under the rear axle housing -it will be half-seizedso apply penetrating oil, give it some time, use a proper flare wrench on the brasscollar and an open end wrench as a counterhold to avoid twisting the metal line,work it back and forth with more penetrating oil once you get it started. Inspectthe lines; you may need to replace the rubber hoses. NOTE: Volvo uses non-standard 1/2 inch pipes; most auto parts stores only carry up to 3/8 inch injectorhose. Before you cut those lines have replacements ready. This applies to therubber lines running to the main pump and from the fuel filter as well.
Then disconnect all the other clamped hoses on the sender housing: one is a venthose from the fuel door supply tube; one is the feed hose to the fuel pump; one isthe return hose. The clamps will usually be badly corroded. For any quickdisconnect (clamp-free) connections, press in on the fitting with your thumb andpull the circular lock ring back toward the fitting with your first two fingers, using alittle penetrant if needed. Be careful with the electrical connector on the sendinghousing: treat that connection as if it were made of gold because if it breaks, thenyou lose ground contact with the base of the sending unit and you might as wellthrow it away.
Remove the trunk trim panel on the left rear wheel, then disconnect the electricalconnector in the left trunk well, cut the plastic ties, and feed it out of the chassisby pushing the rubber grommet out of the sheet metal and then pushing the wiresthrough the body into the axle area. If you can't fit the plastic connector holderthrough the chassis hole, just record the wire colors and their locations in theplastic holder you just disconnected. Separate the plastic connector from the wiresby inserting a jeweler's screwdriver into the slots inside, depressing the lockingtang between the U-shaped side tangs on each wire (look into the back of theconnector with a flashlight), then pulling the wire and metal connector out of theplastic holder. Undo the plastic knurled sender lock collar -you can tap around thelugs at an angle using a piece of wood to start the process. Now you're ready toperform the sender extraction.
Corroded Fuel Line Clamps. The line clamps WILL be corroded. Use P-Blasterliberally to loosen. A set of 1/4 inch drive metric sockets helps with access as doesa pair of water pump or long angled needle nose pliers for the spring clamps. Thenarrow fuel line at the top of the sender emerging from the Y-filler hose is tough toaccess; you may have to drill a hole in the trunk deck to get to the clamp. Thesame is true of the large clamp at the intake side of the Y-hose. Before you drillthis hole, buy a rubber grommet at the hardware store to fill the hole: drill to thesize of the grommet. And treat the drilled hole edges with paint and rustproofbefore reassembling. Use stainless Breeze aero clamps on reassembly to preventfuture corrosion. [Editor] While people have reported success using a Dremel cutoffwheel to remove corroded clamps, the shower of sparks near the fuel tank(regardless of how well it is sealed) is disconcerting at best. Perhaps it is better touse a diamond bit to cut through the clamp while minimizing sparking.
Unit Removal. Twist and pull the unit straight out until it is free of the collar. Nowpull all the fuel hoses and wires out of the trunk opening. Once you get the rubbercollar free there is no need to force anything. Now, starting from the six o-clockposition turn the unit clockwise to about the ten o-clock position, tipping it up asyou pull it out. Note the position of the filter sock (if it's missing you've knocked it
Fuel System: Pumps, Relays
file:///C|/Users/Steve/Documents/Volvo%20FAQ%20Updated/FuelSystem.html[01/13/14 10:10:55 PM]
off and will have to fish it out of the bottom of the tank). Check the filter sock fordamage or dirt -replace as needed. The rubber neck seal usually needs to bereplaced: buy a new one before you start the job. The large plastic lock ring ismade of some polymer that shrinks over time, so if you are not planning tocomplete the job within about half a day, reinstall it or buy a new one
Replace the pre-pump. That's the easiest part of the whole job.
Now is the time to remove rust from the sender top if it is metal, treat with MetalReady deruster, and paint with POR-15. If the fuel outlet bases are cracked due tocorrosion or if you have a holed area, repair with JBWeld epoxy, then apply POR-15and repaint. While doing this, be very careful to not damage the three wires andthe ground connection. If needed, get your old sender unit top plate, which mayhave rust and cracked pipes, rebuilt at a local radiator shop; they can clean off therust and braze new outlet pipes into place. Much cheaper than replacing the wholeassembly including pre-pump.
On re-installation, take a look in the tank with a flashlight and note the anti-splashbucket in the bottom. You've got to get the unit back into there without knockingoff the filter sock -just follow the extraction gyrations in reverse without letting thesock go too far to the left or right so as to catch on the bucket. Also note that thebottom of the sender sleeve is spring loaded in a fully extended position. I find itmakes the whole process much easier if you loop a string under the pre-pump soyou can pull the sleeve back during initial installation (pull out the string once youget it vertical). During the final stages of re-installation you'll need to bump thesender unit up and down to get the unit to sit properly with the sender plate flushto the opening. Grease the sender unit top mating surface and the gasket withVaseline. I found it best to install the rubber collar first about half way then pushthe assembly into it. What matters is that the rubber collar is seated properly allthe way round the opening lip and that the sender unit face is completed seatedflush to the rubber collar before you hand tighten the collar. If you smell gas fumesa few days later then you know you didn't get the sender seated properly. Do notovertighten the collar or the threads will slip. If you must tap the ring to tighten itthen don't go much more than about 1/4 turn. I highly recommend putting a 5"stainless steel hose clamp (available at places like Home Depot) around the collarto prevent the collar from expanding and stripping threads (do this with the hoseclamp lightly tightened). Fully tighten the hose clamp when done. Apply sprayasphalt rustproofing after installation. Test for leaks by turning the engine on for aminute to pressurize the system.
Installation Tips
[Colin] The Bosch pump assembly is both telescopic and spring loaded against thecover plate and seats into a receptor in the base of the tank to ensure that thepick-up screen sits at the very bottom of the tank. Unless you disable this springfeature temporarily it will engage too soon and prevent you from rocking theassembly. To disable this function pass a thin cord or or thread though the returnfuel pipe of the assembly. Compress the telescopic portion, wedge it in this positionwith a cocktail stick or similar then tie the end of the thread to the end of thewedge. Fit the unit as previously described and then pull on the thread to removeboth the wedge and the thread. If you lose the wedge from the end of the string itwon`t cause any problems as it will float on the suface of the fuel and cannot get

Fuel System: Pumps, Relays
file:///C|/Users/Steve/Documents/Volvo%20FAQ%20Updated/FuelSystem.html[01/13/14 10:10:55 PM]
sucked into the pump.By far the easiest (possibly only) way to refit the assembly isto fit the gasket into the tank first, then push the assembly into it. A straight pushmay result in pushing the gasket into the tank, what is required is a relativelygentle push combined with slight rotary/rocking motion applied to the assembly
[Doug Bostrom] When replacing the tank pump/sender assembly, put a littlevaseline on the surface of the pickup that mates with the wide gasket surfaceleading into the tank. By then positioning the gasket into the tank neck andinserting the pickup unit the job suddenly becomes much easier - the pickuppractically dropped into place by itself. It is also helpful to put the gasket in placeafter getting the pickup unit prepositioned without the gasket being in the way. Thegasket will stretch around the pickup, allowing it to be added to the stack quiteeasily.
Rust on Fuel Sender Top. [Editor] A frequent cause of fuel sending unit failure isrust. The design and placement encourages rust, which then loosens pipes andelectrical connections and ruins the sending unit. The replacement cost is $350 andup, so you may want to consider rustproofing the area when you open up the fueltank to replace a prepump or sock. Normal spray-on tar rustproofing does not workif the sending unit top has already begun rusting. Instead, carefully wirebrush thetop, including pipe connections, and clean it off using alcohol or brake cleaner. Letit dry, then apply POR-15 rustproof paint. Once this dries, apply spray-on tarrustproof such as 3M. If you have a plastic sender top, look carefully at the fuelpipes for rust especially as the penetrate the top.
Single Pump In-tank for Bendix/Regina/Later Bosch Systems/960 Cars:
[Procedure from Kuba] I have a one-pump-only Regina in-tank system on a '93940 wagon. The access to the tank in the wagon makes life really easy. But firstrelieve the fuel system pressure *and* have your wife handy with a fireextinguisher. Make sure she knows how to use it (how to pull the pin and how tosqueeze the trigger). See Art Benstein's illustrated website procedure in theedited FAQ file.
1995 Replacement Pump. [Editor] This single in-tank fuel pump (note: NO pre-pump is fitted on '95 cars) is made by AC/Delco and may be obtained fromaftermarket sources such as FCPGroton for far less than from Volvo. They reliablylast about 150,000 miles: after that you are on borrowed time. [Jay Simkin] TheVolvo fuel pump numbers for this 1995 specific application are:
Non-turbo B230FD engine with Bosch injection:Volvo pump P/N 3507436B230FD engine with Rex-Regina fuel/ignition: Volvo pump P/N 9438001(applies to 93+ as well)B230FT turbo engine with Bosch injection:Volvo pump P/N 9438756
Removal. First clean everything with PBlaster before opening it up. You will needto disconnect the wiring, the top of the round cover of the sender assembly, andperhaps the large fuel filler hose. The fuel feed line (pressurized one) on newerRegina-equipped cars has a quick-disconnect which can be difficult to remove: pullthe black plastic cylinder sleeve back with your two fingers while pushing on the 90degree fitting with your thumb and then pull the hose off.
Fuel System: Pumps, Relays
file:///C|/Users/Steve/Documents/Volvo%20FAQ%20Updated/FuelSystem.html[01/13/14 10:10:55 PM]
Most others have hose clamps. The clamp on the fuel return line is a spring type(although it may be equipped with a crimped-on hose clamp fitting, depending onthe year), others are worm screw type. Just undo those and you're OK. Thecrimped clamp may require cutting. To reassemble the quick disconnect, just pullthe cylinder sleeve, push the whole thing back on the metal pipe, and release thecylinder. The electrical wiring going to the sender is connected in left trunk well.Disconnect it there and pull it out working from under the car: do NOT attempt todisconnect it at the sending unit. You will need to see the slosh pan on the bottomof the tank to be able to clear the assembly when removing or installing it. Use aflashlight to see the pan, or remove the fuel. Either siphon the excess fuel out(NOT BY MOUTH!), or if your car runs just run it a little more till you go throughmost of the fuel. To get the assembly out, rotate it clockwise from 6 to 10 o'clock.You will likely need to peel out the tank seal and store it on the sender top, onceclear of the tank, in order to withdraw the entire unit.
Reassembly Preparation. Don't even think of putting the rubber seal in yet. Justleave it out. You will be able to put it back later. If you insist on putting it in tankor on the assembly right now, you are making your life miserable. Get a piece of acord. Make sure that it's won't dissolve in gasoline. A cotton knitting thread workedfor me. Fold the cord in half to get a stronger version, push it through the ventfitting - the only uncommitted (as in nothing on the inside) fitting on the coverplate. Pass the cord under the *thicker* bracket (zinc-coated, not brass) that holdsthe fuel pump assembly together and back through the vent fitting. Pull the cord sothat the movable part of the sender assembly goes against the stop in the topmostpossition. Tie the cord outside around the fuel feed line. That way you don't haveto constantly pull on it while wiggling the assembly to make it fit.
Reassembly. Take a good look at the yellowish anti-slosh pan on the bottom ofthe tank. See the high side plates? You'll need to maneouver the assembly aroundthem. Put the assembly in through the hole in the tank so that the bend in it pointsmore-or-less at 3 o'clock. Push the assembly in some more while rotating itcounterclockwise. Make sure you know when it's vertical. You'll need to clear theleft-side edge of the anti-slosh pan on the bottom of the fuel tank. In order toachieve that, you don't want to push the assembly all the way into the tank - pushit in only as far as you need to rotate it. To properly seat the bottom of the senderon the center of the slosh pan, you need to make the final 10-20 degrees ofcounterclockwise rotation with the assembly tilted up inside the tank so as to clearthe edge of the pan. When the assembly has cleared the edge you'll be able tofinally get it to vertical orientation (end of clockwise motion). Then push it in fully(2-3" deeper compared to where it should be right now). Make sure it seatsproperly. This is impossible with the rubber seal in the way.
[Tip from Philip] I discovered that the unit is spring loaded and collapses in itselfabout 5-6 inches as it rides up and down (like a telescope) within the larger part ofthe unit. Knowing this, I was able to install it by keeping it collapsed using a stringand I was able to do this from the top (from inside the trunk). The UK Haynesmanual suggests you compress the spring in order to install more easily: wedge fullup with a match stick with a string attached and run out thru the vent pipe. Onceinstalled, the string pulls the wedge free, letting the spring release properly intoposition.
Fuel System: Pumps, Relays
file:///C|/Users/Steve/Documents/Volvo%20FAQ%20Updated/FuelSystem.html[01/13/14 10:10:55 PM]
Seal Installation. The rubber seal's purpose is essentially to keep the gas where itbelongs - namely in the tank. To that end you'll notice that the side of the sealfacing into the tank is split (bifurcated) - it looks like two concentric rings. Sincethe in-tank side of the seal has two concentric lips, it's next to impossible to get itto seat while the seal is on the sender/pump assembly cover. Pull the senderassembly out so that the cover with its rim clears the tank. It will get messy. Applysome Vaseline on the inside and outside of the seal, and onto the seal seatingsurfaces (cover and tank's rim). All four surfaces (inside/outside of seal and matingplastic surfaces of tank and cover) must be slippery. Don't overdo it -- spray atone point and then smear it nicely all over the seal and mating surfaces. Stretchthe seal a tad and pull it over the sender assembly cover. Push the seal abouthalfway into the rim in the tank. With a rotating rocking motion (rock the sender inthe seal slightly), slowly push the sender assembly's cover into the seal, and use itat the same time to fully seat the seal in the tank. After it's fully seated, pull theassembly out about 1/8". Feel the gap between the tank rim and the sender assycover - make sure that the slight flange on the seal is present all around the cover.If you've pushed the seal improperly so that the flange made its way into the tank,pull the assembly out enough to be able to repeat pushing the seal halfway into thetank and following. With slight rocking, push the assembly back fully into the seal.It will obviously go only the same distance as you've pulled it out in step 8 above.Apply some grease to the large ring and screw it in place until it contacts thesender top, then slightly more to compress the seal. Not too much.
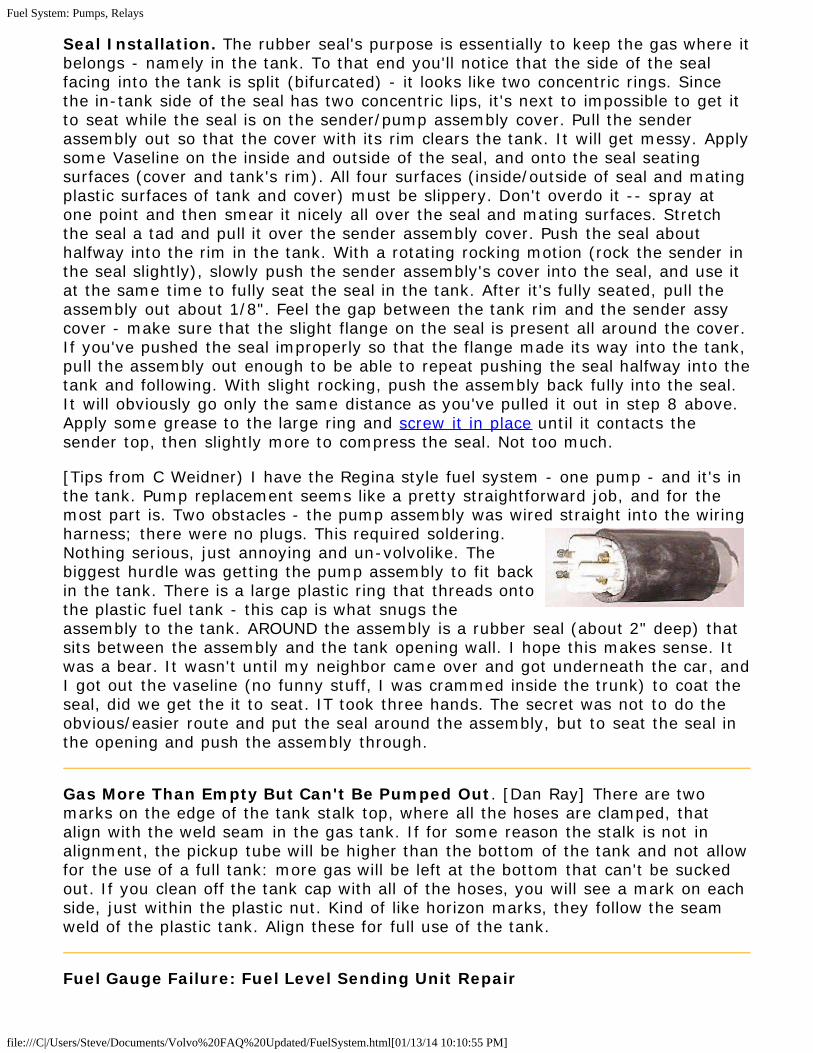
[Tips from C Weidner) I have the Regina style fuel system - one pump - and it's inthe tank. Pump replacement seems like a pretty straightforward job, and for themost part is. Two obstacles - the pump assembly was wired straight into the wiringharness; there were no plugs. This required soldering.Nothing serious, just annoying and un-volvolike. Thebiggest hurdle was getting the pump assembly to fit backin the tank. There is a large plastic ring that threads ontothe plastic fuel tank - this cap is what snugs theassembly to the tank. AROUND the assembly is a rubber seal (about 2" deep) thatsits between the assembly and the tank opening wall. I hope this makes sense. Itwas a bear. It wasn't until my neighbor came over and got underneath the car, andI got out the vaseline (no funny stuff, I was crammed inside the trunk) to coat theseal, did we get the it to seat. IT took three hands. The secret was not to do theobvious/easier route and put the seal around the assembly, but to seat the seal inthe opening and push the assembly through.
Gas More Than Empty But Can't Be Pumped Out. [Dan Ray] There are twomarks on the edge of the tank stalk top, where all the hoses are clamped, thatalign with the weld seam in the gas tank. If for some reason the stalk is not inalignment, the pickup tube will be higher than the bottom of the tank and not allowfor the use of a full tank: more gas will be left at the bottom that can't be suckedout. If you clean off the tank cap with all of the hoses, you will see a mark on eachside, just within the plastic nut. Kind of like horizon marks, they follow the seamweld of the plastic tank. Align these for full use of the tank.
Fuel Gauge Failure: Fuel Level Sending Unit Repair
Fuel System: Pumps, Relays
file:///C|/Users/Steve/Documents/Volvo%20FAQ%20Updated/FuelSystem.html[01/13/14 10:10:55 PM]
[Procedure From Nathan Babcook] Fuel Gauge failure seems to be rather commonin 940 Volvos. I requested a received a lot of information before finally solving theproblem. The Fuel Level Sending Unit and Tank Pump assembly is a fairlystraightforward design. There are no a lot of moving parts to break, and if you arecareful about your diagnosis you can avoid having to "crack anything open."
Diagnosis Proceedure. Before you replace the sending unit, be sure that yourmuch-easier-and-cheaper-to-replace gauge is working by using a 68-ohm resistorto simulate a working fuel sending unit. Buy a 1/2 watt 68 Ohm resistor (precisely68!) at Radio Shack. The resistor will substitute for the coiled wires around the rodsinside the send unit barrel. As the float unit moves along the rods within the sendunit barrel, the float unit changes the resistance to the current flowing through thebrown and grey-white wires. That change in resistance causes the gauge needle tomove. The resistor substitutes for the send unit.
Be sure the car is turned off! Disconnect and isolate the negative (black) batterycable clamp using a zip-lock freezer bags). Have the radio-activation-code at hand.
Find the sending unit connector C93 in the left rear wheel housing in the trunk anddisconnect it (in the 1995 940 wagon it is a 4-wire quick connector located in thedriver's side hidden compartment at the rear). Inside are Black, Pink, Brown, andGrey/White wires. The pink wire provides +12V to the pump, the black is yourground and the grey/white and brown wires are your fuel level sending unit wires.Your wires may differ slightly in color depending on year: check the wiring diagram.
Bend the resistor leads into a "U" and insert them into the gauge side connectors -one side into the grey/white wire connector and the other side into the brown wireconnector . If your wiring harness and gauge are fine, the gauge should read thetable values after you reconnect the battery and turn the key to KPII. If you can'tobtain a reading, suspect your gauge or your wiring from the gauge to thetestedconnector is at fault. See the gauge fault diagnosis in the FAQ)
If the gauge and panel wiring harness are fine, then your fault lies in the sender orthe wiring from the sender to the tested connector. To test the sender, use amultimeter One capable of reading small scales like 1-250 ohms is best. Measurethe ohms between the two wire connectors (brown and grey/white) at the reartrunk connector . If the sending unit is working you should get a reading between 2and 131. If you get no reading or infinity then there is a problem with the contactsinside the unit and you'll have to pull it.
Diagnosing and repairing the damaged nickle-plated contact in the sending unit isdiscussed below.
Pulling the Unit. Pull the whole sending unit. Once you have the unit pulled,drained of gasoline and dry, turn the unit over to be sure that the slide moveseasily (you can hear the float inside the float canister sliding from top to bottom).If it doesn't then your problem is inside the canister (see "repairing the sendingunit"). If it does move easily, you may not need to crack it open.
Break out your multimeter and measure the resistance again by touching yourprobes to the coils that stick out of the top of the float canister (hint: the two grey-white wires are sodered to them). Be sure you move the float up and down by

Fuel System: Pumps, Relays
file:///C|/Users/Steve/Documents/Volvo%20FAQ%20Updated/FuelSystem.html[01/13/14 10:10:55 PM]
turning it over and measuring it with the float at EACH end of the canister! If thecoils and resistor contacts are fine you should get a resistance reading of around 2at the top (full) and around 100+ at the bottom (empty). If you get a reading here,then you can assume that your grey/white wires are the problem. To check thesewires, de-solder (or cut) the wires free from the coils (I marked one with a sharpieso that I could put them back if needed). After they are free, connect them to eachother (twist or clamp) and measure the resistance at the plug-end of theconnector. If the wires are fine, you should get a 0 Ohm reading. If not, then you'llneed to replace the wires (good luck).
If the wires are fine, and the sending unit float is giving you proper resistance,then you can be fairly sure that the fault lies at the solder point.
The Repair. Clean up the wires and re-solder them to the coils. Be sure that youcan get resistance at the plug end of the wiring. This worked for me. Although I'mnot sure if it will hold up, I went ahead and installed some shrink tubing over theconnectors as an added level of protection. If you can now get the properresistance from the sender apparatus at the plug, you are in good shape.
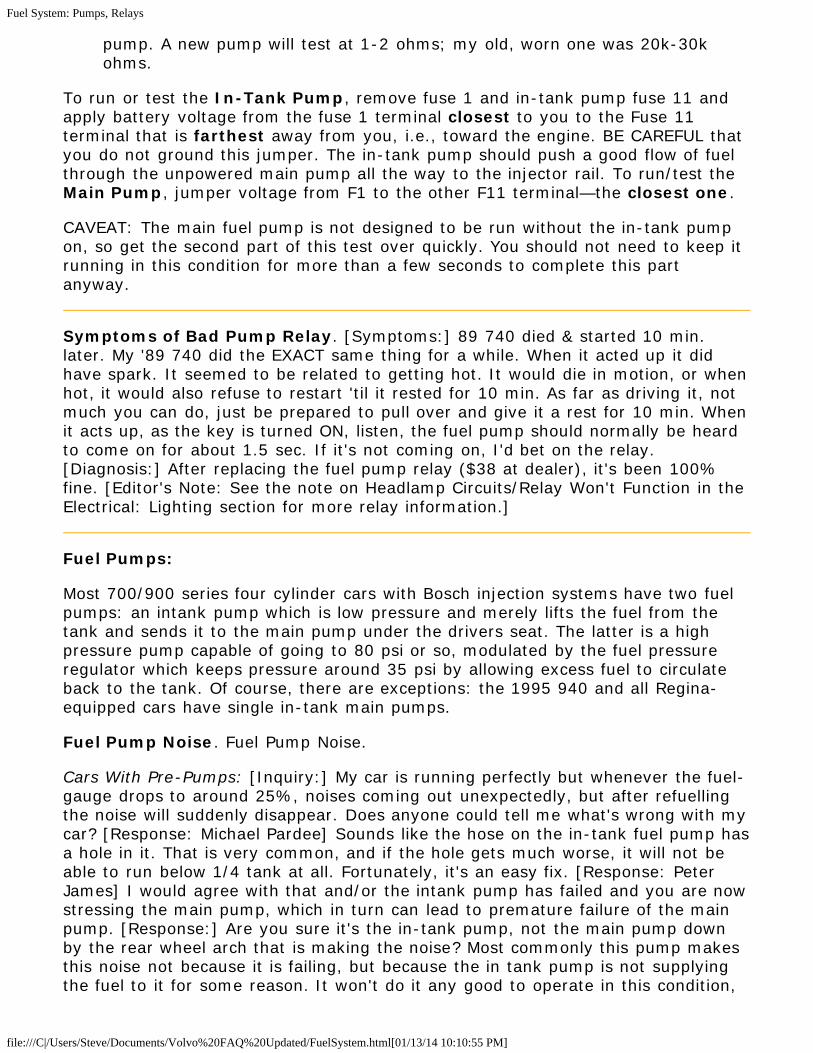
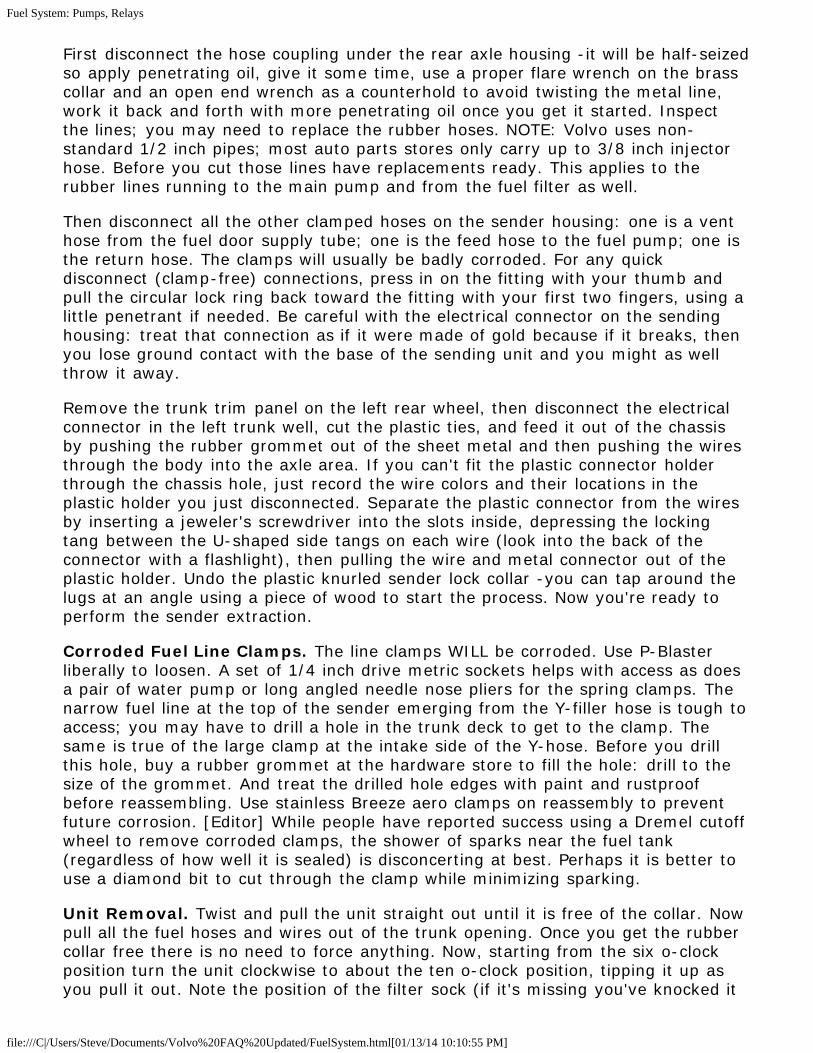
Float Sender ContactRepair. [Mike] You canhave a problem with thewindings that the float rideson where the rods that havethe wire around arecorroded inside the plasticshield and no continuity willbe measured because ofthis. I managed to build onegood sender from two 95940 junkyard units and theone in my 94 940. The 95940 sender is a littledifferent than the 94 940but can be modified as the94 has the two pumpsystem and the 95 has one.The lower picture belowshows the usual suspect:the small nickel metal partthat rides up and down withthe float that contacts therods with the wires spunaround them. It just plain wears out. Time consuming but it appears I was

Fuel System: Pumps, Relays
file:///C|/Users/Steve/Documents/Volvo%20FAQ%20Updated/FuelSystem.html[01/13/14 10:10:55 PM]
victorious.
Final Testing. Head back to your car and plug the sending unit into the harness(DO NOT put it in the fuel tank yet!!). Reconnect your battery and turn the key toKPII - BE CAREFUL!, when you turn the key, the pump should fire up and couldmake the unit jump, possibly falling and damaging it!!! It may take a few secondsfor your gauge to respond to the repaired sender - particulary if it's been at "E" fora long time, but you should be able to turn the sender so that the float "falls" tothe top, this should make you gauge rise to "Full" (eventually). Be sure you let itfall to bottom and be sure that your "low fuel" light comes on. Repeat to verifyyour repair. If all goes well, you may have just saved yourself $500.00 in parts andmore in labor!!! Hint: don't run the pump longer than necessary since it is cooledby gasoline in the tank.
Reinstall. Replace the sender unit/pump in your fuel tank (easier to get into thetank, but harder to get that rubber seal and locking ring on) It's not fun, but thinkof all the money you just saved!
Fuel Main Pump Problems and Replacement - Why Do Fuel Pumps Fail?
[Tips from Counterman Magazine, August 2001] What causes electric fuel pumps tofail? Electric fuel pumps can fail for any number of reasons:
Loss of current or low voltage - The pump can't run without electricity, soanything that prevents current or voltage from reaching the pump will make itstop. This includes corroded, loose or broken wiring.Dirt - Dirt, sediment or other debris in the tank can clog the pickup strainer,accelerate pump wear, damage the pump and/or cause the pump's checkvalve to stick open (which can cause a hard starting condition due to loss ofpressure when the engine is shut off). When dirt has caused a pump failure, orif there appears to be a lot of dirt or sediment in the tank, the tank should bethoroughly cleaned to prevent a repeat failure.Rust - Corrosion inside the tank produces rust, which can flake off and plug upthe pickup strainer and have the same damaging effects on the pump as dirt.Rust is caused by condensation, which occurs during cool, humid weatherwhen the fuel tank is low. Keeping the tank full will minimize the formation ofcondensation. If the tank is badly rusted or leaking, it should also be replaced.Wear - Most pumps are capable of going 100,000 miles or more, but depend

Fuel System: Pumps, Relays
file:///C|/Users/Steve/Documents/Volvo%20FAQ%20Updated/FuelSystem.html[01/13/14 10:10:55 PM]
on lubrication and cooling provided by the fuel itself. Frequent driving with alow fuel level may occasionally starve the pump for lubrication and cooling,which can lead to accelerated wear or even pump damage. If a vehicleexperiences a momentary hesitation when cornering, for example, it may bebecause the fuel is sloshing away from the pump and allowing it to suck air.Wear can also be caused by running at excessive pressure. A faulty regulator,check valve or crimped line can cause blockages that force the pump to run ata higher-than-normal pressure - so too can a clogged fuel filter. If theunderlying problem is not diagnosed and corrected, it can cause thereplacement pump to fail prematurely as well. Regina-equipped cars with theBendix fuel system and the single AC in-tank fuel pump tend to fail before100k miles.Noise may sometimes be an indication of excessive pump wear. Noise can alsobe caused by a failing fuel pre-pump inside the tank. For proper engineperformance, the pump must be able to deliver the specified fuel pressure andvolume of fuel for the application. If it can't, the pump needs to be replaced
Symptoms of failing main fuel pump.
Symptoms that may indicate low fuel pressure include hard starting, rough idle,hesitation, stumbling, loss of high-speed power, lean misfire (which may set anOBD trouble code) or pinging/knock due to low fuelpressure. These same symptoms, though, can also becaused by a defective fuel pressure regulator, a pluggedfuel filter, dirty fuel injectors, a restriction in the fuelsupply line, a leaky pump check valve, or a dirty filtersock in the tank. If the main pump runs continously whenyour ignition is at KPII, then your fuel pressure regulatoror in-tank pump has a fault since pressure is not building up.
Fuel pressure can be checked by connecting a gauge to the Schraeder valve serviceport on the fuel rail (later B230F) or teed into the fuel supply line at the fuel rail(earlier B230F). If an engine has no fuel pressure (cranks, but won't start), andthere is no pump noise, the pump may not be receiving voltage from the fuelinjection relay. There may also be a problem in the wiring to the pump, the pumpground or an open inertia safety switch.
Diagnosis:
Check for a spark using a spark plug wire and a paperclip near ground. If youhave a spark, then your fuel injection system is a candidate for furtherinvestigation. If not, then your ignition system is at fault.Next, you could replace (or use a spare) the fuel pump relay. Normally, whenyou switch on the ignition, but just before you actually crank it over, youshould hear the fuel pump working, (a faint whine) then it stops (i.e. it ispriming the system to pressure) If you hear nothing at all, then the relaycould be bad (it is a green bastard stuck in the row of relays (usually top leftas you look at it) behind the ash tray. You should remove the little shelf panelto get at it.Another thing you can do is undo slightly one of the unions in the fueldistributor, using a 12 (or 13mm) mm ring spanner. Normally, undoing one ofthese, there will be a spurt of fuel. If there is nothing, you have no fuel

Fuel System: Pumps, Relays
file:///C|/Users/Steve/Documents/Volvo%20FAQ%20Updated/FuelSystem.html[01/13/14 10:10:55 PM]
pressure.So far it could be the relay or the main pump. You could buy a new relay, slotit in and the car should go. If not, then it is your main fuel pump (or pumpwiring, but that is less likely, as the connections to the pump are very solidand durable) You could disconnect the pump wires (you can do this withoutremoving it completely) and get someone to crank while you test voltageacross the connectors.You can also test current draw at the respective fuse using a DVM when thecar is started. The main Bosch pump (all B23X engines) should draw around6.5 amps; those engines equipped with Regina systems should draw 8.8amps. The pre-pump should draw around 3-4 amps (non-turbo), 5.5 amps(turbo), 1.4 amps (auxiliary reserve tank only). B6300 engine fuel pumpsshould draw 6.5 amps through 1994; 8.5 amps thereafter. Too much drawindicates an overworked and about-to-fail pump, or a main pump operatingwithout a pre-pump (which would have zero draw).If you have an old relay, you can remove the electricals and solder a largewire between terminals 30 and 87/2. As soon as you put it in (even withoutthe ignition on) the main fuel pump should start to run and keep running andcar should start. If nothing happens, then your main pump is well dead. Don'tforget to remove the relay and chuck it, or mark on it what you did to it as itwould be really dangerous to use otherwise. It is a strictly 'get you home' ordiagnostic.So it's your main fuel pump. The tank pre-pump can be dead (or dying) andthe motor will still run if you have more than half a tank of fuel. Get a newone if you can, or a scrap one from a yard, but test it before you buy it. Orderthe piece of fuel line from the accumulator to beginning or main engine linefrom Volvo.
Changing the Main Under-Car Fuel Pump (Bosch LH Systems):
Note: If you have a Regina fuel injection system or a later 940 with asingle Bosch in-tank pump, then your pump is inside the tank mountedto the fuel sender unit.See the instructions for changing the fuel filter above for tool needs. It helpsin the future to use anti-seize on all bolts and a little dab on the banjo boltsentering the fuel filter.Disconnect battery negative.Clamp off the front and rear fuel lines using hose clamps. Disconnect both fuellines to the pump. The tank-to-pump line has a screw clamp; the pump-to-filter line requires a 17mm wrench with a backup wrench. This short line isfragile, so don't bend or stress it. Disconnect the filter-to-engine line asabove.Disconnect the electrical lines by squeezing the connector tangs.Drop the cradle holding the pump and filter.Remove the fuel filter. Note orientation of filter: flow is toward the rear.Turn it over and loosen the bolt securing the filter clamp to the cradle.Remove the filter clamp.Clean out the usually rusted Torx screw in the pump clamp and loosen theclamp.Replace the pump. The threaded end goes toward the front.Replace the filter clamp and filter.
Fuel System: Pumps, Relays
file:///C|/Users/Steve/Documents/Volvo%20FAQ%20Updated/FuelSystem.html[01/13/14 10:10:55 PM]
Reconnect the pump-to-filter short connector, being careful not to bend it.Use a backup wrench.Install cradle and reconnect the fuel lines.Reconnect the electrical lines. Black goes to the black pump terminal.Test for leakage.
If you have a one-pump later Bosch or Regina system, see Fuel Sender and In-Tank Pump Replacement above.
Gas Cap. [Editor] While aftermarket replacement caps from Stant et al may be hadalmost anywhere, the OEM cap can be purchased from EEuroParts for about $8.
Fuel Tank Fill Hose Failure. If your car experiences gasoline smells after fillupand occasional leakage at the tank, see the FAQ section for information about fueltank fill hose failures. This section deals with 960/90 cars but the advice applies to740 and 940s as well.
B230K BiFuel Engine Ticking Sound: Fuel Pump. [Tips from Jaap Keyman] Iposted on problems with my 740 estate 1987 B230K BiFuel (mainly LPG driven,carburettor type here in the Old World!): intermittent ticking noise, not from insidethe engine, to be heard clearly inside the car, significantly less outside, fix relationto engine rpm, no difference when driving or static, no difference whether clutchdepressed or not. The experiments done included replacing belts, checking exhaustshields and components and other extensive checks. Still the ticking noise remainedintermittently present. I thought to have done everything, but finally after staringat the block........ I NOTICED THAT I FORGOT ABOUT THE MECHANICAL FUELPUMP! This, together with the Pierburg carburettor is apparently not present in anyUS model 700, so does not show up in any publication on this board. Well, takingthe pump away (I can drive on the second fuel) and putting a plate on the hole inthe block, cleared the issue fully. Throughout its life this car may have driven only1000mls on regular gas and the rest on Liquified Petrol Gas, so the pump may havesuffered in some way; or an issue may be in the fuel tank (hose rotten)causingstanding waves in the fuel lines, which generate contact noise to the car body.Anyhow, long story, but hopeful interesting for those with mechanical pumps.
Fuel Tank. Replacement of Tank Straps: [Contributions added by Dave Mather]The 940 fuel tank sits ahead of the rear axle on two cradles that support it frontand rear. The straps, or what Volvo refers to as 'tensioners', stretch length-wise,front-to-back, between the two cradles. One of my tensioners rusted and snapped(after 14 years and 350k miles) and I was alarmed the tank could fall while Idrove. I guess there is always that risk, but when I examined the set-up while Ireplaced the tensioners I felt the engineers did an admiral job insuring the safetyand integrity of the tank support. Now that I think about it, this is an integral partto the safety of the car. For 740 cars, the bracket is different: see note and photosbelow.
I ordered both tensioning straps from the dealer and they were US$20 each. Theseare simple straps of metal that are

Fuel System: Pumps, Relays
file:///C|/Users/Steve/Documents/Volvo%20FAQ%20Updated/FuelSystem.html[01/13/14 10:10:55 PM]
heavily painted in black. To replace thestraps I used a 13mm extended socketand 6" extension off the rachet, a set ofsturdy ramps, a floor jack to support thetank and a 2" x 8" x 24" piece of lumber.It's a good idea to have some sprayundercoating on hand to touch up theareas when you finish.
Back the car up onto the ramps oruse jack stands. Follow the utmost caution and take all precautions to insureyour safety while you work under the car. Also remember you are workingwith gasoline. If you don't know what this means, don't start this project. Thetank was relatively empty when I did this and this helps when you support theweight from below.Soak all exposed bolts with your favourite rust buster. (2 on the straps at therear of the tank, and the four 10mm bolts on the plastic deflector strip at thefront of the tank.)Begin by removing the four 10mm bolts holding the deflector strip at the frontof the tank. This strip deflects debris away from the front of the tank, andshields the brake line and junction fitting running near the front of the tank.Volvo was not shy with undercoating, so this will likely have to be pried loose.The forward cradle or shelf holds the tensioners with 13mm bolts (under thedeflector strip) that go directly intothe underside of the car. There arefour bolts: two that receive thefront end of the tensioner andanother two that also secure thecradle to the car. There may be abrake line. Be very gentle andremove the brake line out of theway. Pry it off the plastic clips andtry not to put any bends or stresson the line. The rear cradle hasstuds with washers and nuts. Minewere covered with undercoatingand therefore not rusted badly, soeasy to remove. The tensioners slipthrough a slot in the forwardcradle, while in the back they bolt directly to the car. The front cradle presentsa problem because it's difficult to remove the old tensioner and feed in thenew with the cradle attached to the car.While these mounting bolts are soaking, setup your support jacks, andassociated lumber positioned in between the two long straps. Your goal is tosupport the centre of the tank, as much as possible. I used two pieces of 2x6.The front 2x6 fit as is, the rear one had to be trimmed for width, as theselong straps run closer together at the back of the tank. Position the rear(narrowed to fit) 2x6 on a jack so that it projects just past the vertical edge ofthe tank, but not far enough that it will interfere with unbolting the straps atthe rear. Position the front 2x6/jack in between the long straps, so that it
Fuel System: Pumps, Relays
file:///C|/Users/Steve/Documents/Volvo%20FAQ%20Updated/FuelSystem.html[01/13/14 10:10:55 PM]
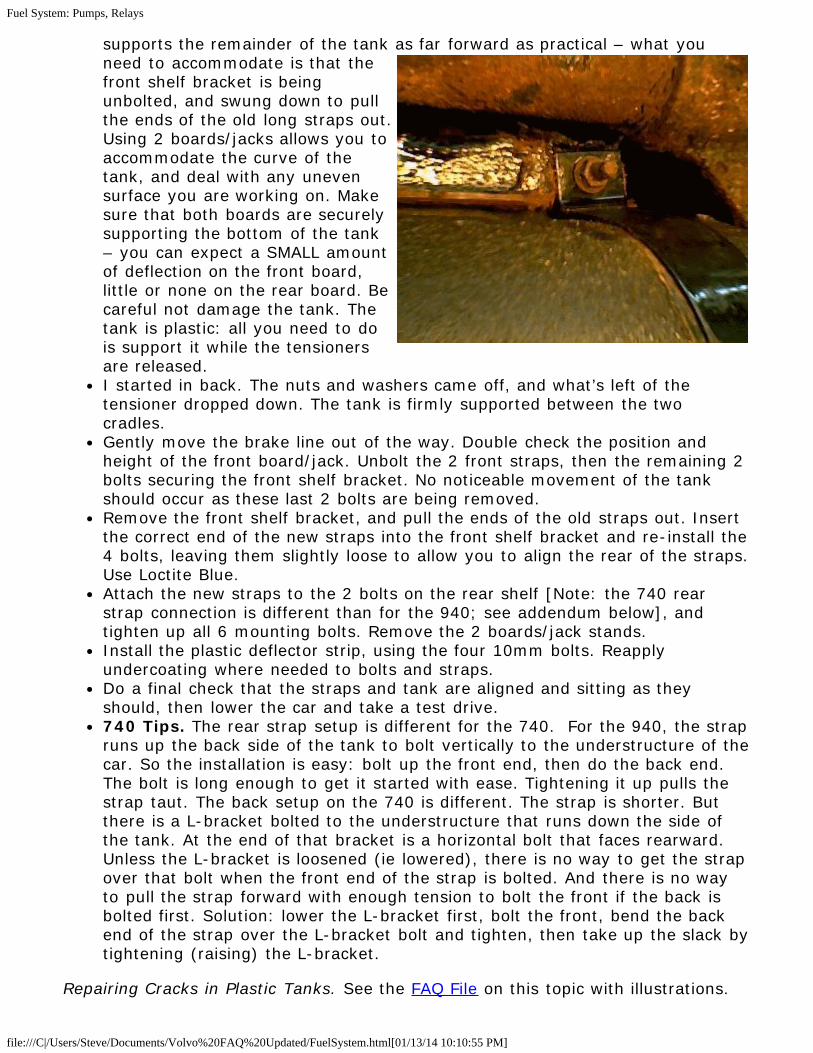
supports the remainder of the tank as far forward as practical – what youneed to accommodate is that thefront shelf bracket is beingunbolted, and swung down to pullthe ends of the old long straps out.Using 2 boards/jacks allows you toaccommodate the curve of thetank, and deal with any unevensurface you are working on. Makesure that both boards are securelysupporting the bottom of the tank– you can expect a SMALL amountof deflection on the front board,little or none on the rear board. Becareful not damage the tank. Thetank is plastic: all you need to dois support it while the tensionersare released.I started in back. The nuts and washers came off, and what’s left of thetensioner dropped down. The tank is firmly supported between the twocradles.Gently move the brake line out of the way. Double check the position andheight of the front board/jack. Unbolt the 2 front straps, then the remaining 2bolts securing the front shelf bracket. No noticeable movement of the tankshould occur as these last 2 bolts are being removed.Remove the front shelf bracket, and pull the ends of the old straps out. Insertthe correct end of the new straps into the front shelf bracket and re-install the4 bolts, leaving them slightly loose to allow you to align the rear of the straps.Use Loctite Blue.Attach the new straps to the 2 bolts on the rear shelf [Note: the 740 rearstrap connection is different than for the 940; see addendum below], andtighten up all 6 mounting bolts. Remove the 2 boards/jack stands.Install the plastic deflector strip, using the four 10mm bolts. Reapplyundercoating where needed to bolts and straps.Do a final check that the straps and tank are aligned and sitting as theyshould, then lower the car and take a test drive.740 Tips. The rear strap setup is different for the 740. For the 940, the strapruns up the back side of the tank to bolt vertically to the understructure of thecar. So the installation is easy: bolt up the front end, then do the back end.The bolt is long enough to get it started with ease. Tightening it up pulls thestrap taut. The back setup on the 740 is different. The strap is shorter. Butthere is a L-bracket bolted to the understructure that runs down the side ofthe tank. At the end of that bracket is a horizontal bolt that faces rearward.Unless the L-bracket is loosened (ie lowered), there is no way to get the strapover that bolt when the front end of the strap is bolted. And there is no wayto pull the strap forward with enough tension to bolt the front if the back isbolted first. Solution: lower the L-bracket first, bolt the front, bend the backend of the strap over the L-bracket bolt and tighten, then take up the slack bytightening (raising) the L-bracket.
Repairing Cracks in Plastic Tanks. See the FAQ File on this topic with illustrations.

Fuel System: Pumps, Relays
file:///C|/Users/Steve/Documents/Volvo%20FAQ%20Updated/FuelSystem.html[01/13/14 10:10:55 PM]
Auxiliary Tank. See Body: Accessories.
Fuel Pressure:
Fuel Pressure Regulator and System Pressure.
Operation of Fuel Pressure Regulator.
To provide the exact amount of fuel the engine needs under all conditions, thepressure inside the fuel lines that supply the injectors changes. When the driversteps on the gas and opens the throttle, intake vacuum drops. To deliver the sameamount of fuel, pressure has to go up along with injector on time. Likewise, whenthe driver lets up on the gas and the vehicle decelerates, less fuel is needed tokeep the engine running. Fuel pressure can drop along with injector on time. Thedevice that makes all of this happen magically is not the fuel pump (which runsconstantly and provides steady pressure to the engine), but the fuel pressureregulator. On most engines, a fuel pressure regulator is mounted on the fuel railthat supplies the injectors. Inside is a diaphragm valve connected by a rubber hoseto intake vacuum. When vacuum goes up, the valve opens and allows excesspressure to vent through a return line back to the fuel tank.
Effects of FPR Failure. [Tips from Mike W.] When the fuel pressure regulator fails,it either provides full pump pressure to the injectors, resulting in an overly richcondition (I've had two cars do this), or inadequate fuel pressure, in which casethe car will barely run and have no power. See Jason's note below. My experiencewith FPRs pressuring up and giving the engine too much fuel has been that sparkplugs will be wet and/or carbon fouled, exhaust will be black and sooty, checkengine light will come on, and the OBD will throw codes 113 (fault in fuel injectors)and/or 232 (fuel system compensating for rich or lean mixture at idle). Sometimes,the main fuel pump will even start squealing and get hot to thetouch when running. A fairly easy test to see if the FPR is pressuringup too much requires disconnecting the fuel return line (back to thefuel tank) from the rear of the fuel rail. On my 940, this is a simplehose clamp. Be prepared for some fuel to spill. Now get several feetof rubber fuel line hose, slip it over the open end of the fuel rail, and aim it into agasoline-safe container. Have an assistant start the car, and observe the fuel flowfrom the hose. You should get a strong stream of fuel, something on the order of1/2 to 1 gallon per minute. If you get just a trickle or no fuel at all, the FPR is bad.[Tip from Mark Lundell] When you replace the FPR because of a rich burningproblem, also replace the little vacuum tube and clean out the intake manifoldnipple. [Jason R] If you have a Regina system and have to crank a long time oncold start to build fuel pressure, replace the FPR.
Pressure Test: Specifications.
[Jim Holst] The Volvo green manual states that the system fuel pressure for Bosch,Regina, non-turbo, and turbo 4-cylinder B2XX and 6-cyclinder B6304 enginesshould be 43.5 +/- 1.5 psi (or 300 kPa) static pressure. The rail pressure should be43.5 minus the vacuum tester vacuum at the regulator vacuum port. This tells ifthe regulator is working. Residual or shut-off pressure should drop below 29 psi
Fuel System: Pumps, Relays
file:///C|/Users/Steve/Documents/Volvo%20FAQ%20Updated/FuelSystem.html[01/13/14 10:10:55 PM]
(200 kPa) in less than 20 minutes but not too quickly which could mean leakinginjection and cold start valves. Note that system components among Bosch,Regina, and Motronic are NOT the same: the part numbers andspecifications differ.
Bosch Systems:
With engine at warm idle, FPR vac hose removed and plugged (simulatingWide Open Throttle/accelerating condition) pressure should be 43.5psi.With FPR vac hose reconnected, idling fuel pressure should be about 36.5 psi.
Regina Systems:
With engine off, the pump hot-wired at the fuel injection relay and FPR vac hoseremoved and plugged, pressure at the rail should be 43.5 psi. That makes it theequivalent of Wide Open Throttle, but with the FPReg feeling atmospheric pressure,rather than the normal vacuum of a running engine
Procedures, Tools, and Tips.
[Symptom: Car won't start] I hooked up a fuel pressure gauge (in-line fuelpressure gauge) it'll save you from guessing on your problem as to fuel pressureand clogged lines or filter. I've got mine from Summit part #SUM-800160 (60psi)$19.95) and found that no more than 10 psi was generated while running the fuelpump continuously, and the trickle sound got worse. I removed the vacuum hosefrom the fuel pressure regulator, and found a couple of drops of gas. Just as acheck, I turned the fuel pump on for one more second....YEOW!! I could haveburned down the whole house with the stream that shot out the front of theregulator. Conclusion: No pressure to injectors, but plenty of raw gas supplied tothe intake manifold, thence to the cylinders, and finally onto the ground under theexhaust manifold. No wonder the car wouldn't start. I have a new fuel pressureregulator now.
[Tip: Smitty] Be real careful removing the vacuum line off the FPR while the engineis running. If you suspect a failed diaphragm, use your nose and eyes first to checkfor raw gas on the vacuum side of the reg, with the engine off. Then maybeproceed with a helper available to crank/kill the engine in case gasoline shouldstream out the front.
[Art Benstein] Jumper the fuel relay to operate the pump continuously (listen forthe pump in the tank) using an ammeter as the jumper around the fuel relay. Whenit was idling and would rev well, the pump would draw over 5A.Then place a cheapstick tire gauge on the fuel rail test port. The $2.00 pressure gauge fits well if youbring it up between the #1 and #2 runners on the intake manifold. It does emit alittle fuel shower as you press it on, so take readings with the fuel pump hot-wiredrather than with the motor running. And keep a fire extinguisher handy if you dothis.
[Al Stensby] I found a fitting to attach a test hose to the schrader valve on the fuelrail. It is a Number 705 made by Amflo. It should be available in any industrialsupply store. I purchased mine at McFadden Dale in Anaheim, Calif for $1.58. [JimHolst] The Volvo green manual states that the Regina system fuel pressure should
Fuel System: Pumps, Relays
file:///C|/Users/Steve/Documents/Volvo%20FAQ%20Updated/FuelSystem.html[01/13/14 10:10:55 PM]
be 43.5 +/- 1.5 psi static pressure. The rail pressure should be 43.5 minus thevacuum tester vacuum at the regulator vacuum port. This tells if the regulator isworking.
Relieving Fuel Pressure When Opening FI System. See the link for tips onrelieving system fuel pressure safely when changing a component.
Changing the FPR. [Andy Jameson] Relieve the system fuel pressure and put arag under the area to catch what does come out.
1. Use a screwdriver to loosen the clamp holding the fuel line to the FPR.2. Remove the two bolts holding the FPR to the fuel rail.3. Pull the FPR out of the fuel rail; straight out toward the driver's side fender. It
is just held in by an o-ring which should come out with the FPR.4. Then pull the FPR off the fuel line by pulling it toward the front of the car.5. Installation is the reverse, except you will use the two bolts to force the O-
ring and FPR into the fuel rail. Lubricate the O-ring with a little motor oil orvaseline. Be sure to keep it straight and turn each bolt a little at a time inturn. If it gets too crooked going in, the fuel rail can bend or the O-ring cantear.
Leaking FPR Seal. The seal between the FPR and the fuel rail can fail and leak.This seal is the same as those used on the fuel injectors which in turn are identicalto the seals used on the injectors for a 92 Ford F-150 V-8. The latter seals areinexpensive and easy to find.
Noisy Fuel Pump: Bad FPR. [Tip from Chris Daunhauer ] My fuel pump noise(both the old one and the new one I installed) turned out to be caused by a faultypressure regulator up at the injector rail NOT by a bad pump. Parts counter maninsisted that from my description of the problem I had a bad pump in the tank. Hewas wrong. Bad regulator was not letting excess pressure bleed off back into thefuel tank causing external pump have to work too hard. Thanks for the 2suggestions, guys, they were both right. The electric pump delivers about 10 timesas much gas to the injectors as they need. Excess is routed back to the tank. Couldhave been either a clogged return to tank line or faulty regulator. In my case itwas the regulator. Here's what I learned.
If the external electric fuel pump is noisy, pull the return line off the pressureregulator. Install a spare length of hose on the barb and run the other end into acan on the ground. Start the engine. Fuel should be rushing out of the hose leadinginto your can, even at idle. If this excess fuel that the injectors aren't using is NOT(mine was not) rushin out, there's a good chance your fuel pressure
Volvo mech said he's put pressure gauges on cars w/ stuck regulators and theneedle goes off the scale.
Noisy Fuel Pump: FPR Faulty. [Tip from Jeff] I have been fighting a noisy fuelpump, rough idling, and poor performance for the past 3 months and finally solvedthe problem. It may not be a faulty fuel pump. In my case it was not. I replacedpump and the new one was just as noisy. I checked the in-tank pump and itworked fine. Then I disconnected the outlet or return line from fuel pressure

Fuel System: Pumps, Relays
file:///C|/Users/Steve/Documents/Volvo%20FAQ%20Updated/FuelSystem.html[01/13/14 10:10:55 PM]
regulator and attached a piece of fuel line to it and stuck it in a bucket. Nothingcame out with engine running. The fuel should have been gushing out. I replacedthe regulator and I have a totally new car. It runs like a top with no pump noise.So before ruling out pump problems check the regulator output first it is easy andtakes about 3 minutes to test.
Fuel Pressure Test Tool. See the FAQ file for a description. See also the abovenotes from Art Benstein, who used a tire gauge to test his system.
Failed Check Valve. [Symptom:] My '84 244GLE isequipped with B23F engine and LH Jetronic 2 fuel injection,she doesn't want to start (read run) the first time -thoughcranks fine- when it has been sitting at least 6 hours. Thecar will start without hesitation on the second try.[Diagnosis:] It sounds like a classic case of failed fuel pumpcheck valve, on the main pump under the car, left side,beneath the driver's seat (in LHD cars). The check valvekeeps the fuel rail under pressure after shutting down. Underpressure the fuel cannot vaporize and cause a vapor lock.This will usually only happen under very hot conditions. On fuel injected cars vaporin the line would only delay a start, not prevent it. The check valve also allows fuelpressure to build faster resulting in faster starts. They cost about $14 at the dealerand are fairly easy to install. Just go buy one at the dealer and they'll show you inthe parts book where it goes.
Volvo Maintenance FAQ for 7xx/9xx/90 Cars