Formatting Text and Paragraphs. Objectives Format with fontsFormat with fonts Use the Format...
33
Formatting Text and Paragraphs
-
Upload
lorraine-smith -
Category
Documents
-
view
231 -
download
1
Transcript of Formatting Text and Paragraphs. Objectives Format with fontsFormat with fonts Use the Format...

Formatting Text and Paragraphs

Objectives
• Format with fonts• Use the Format Painter• Change line and paragraph spacing• Align paragraphs• Work with tabs
22Microsoft Office 2013 - Illustrated

Objectives
• Work with indents• Add bullets and numbering• Add borders and shading• Insert online pictures
33Microsoft Office 2013 - Illustrated
Format with Fonts
• Formatting text with fonts is a powerful way to enhance the appearance of a document• A font is a complete set of characters
with the same typeface or design
44Microsoft Office 2013 - Illustrated
• Changing the size of text, or the font size, helps determine the impact of text• Font size is measured in points• A point is 1/72 of an inch• 11-point Calibri is the default font size
and font for a new Word document• You can also change the font color
55
Format with Fonts
Microsoft Office 2013 - Illustrated
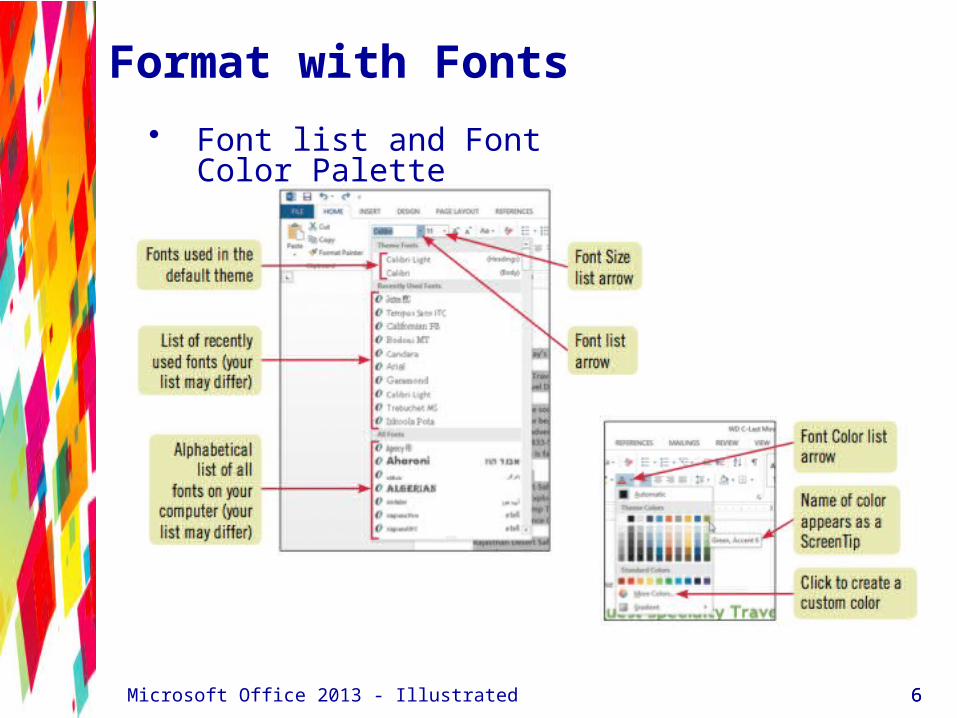
• Font list and Font Color Palette
66
Format with Fonts
Microsoft Office 2013 - Illustrated

Use the Format Painter
• Font styles• Make text darker and thicker by
applying bold• Slant text by applying italic • Underline text for emphasis
• The Format Painter allows you to copy the format setting applied to selected text to other text
77Microsoft Office 2013 - Illustrated
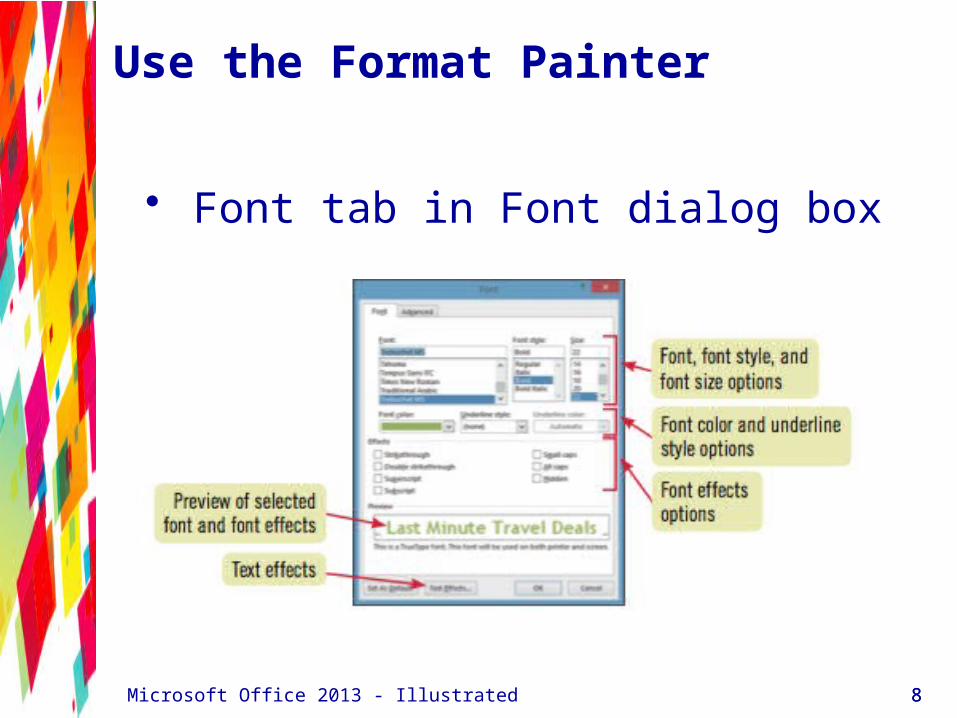
• Font tab in Font dialog box
88
Use the Format Painter
Microsoft Office 2013 - Illustrated
Change Line and Paragraph Spacing
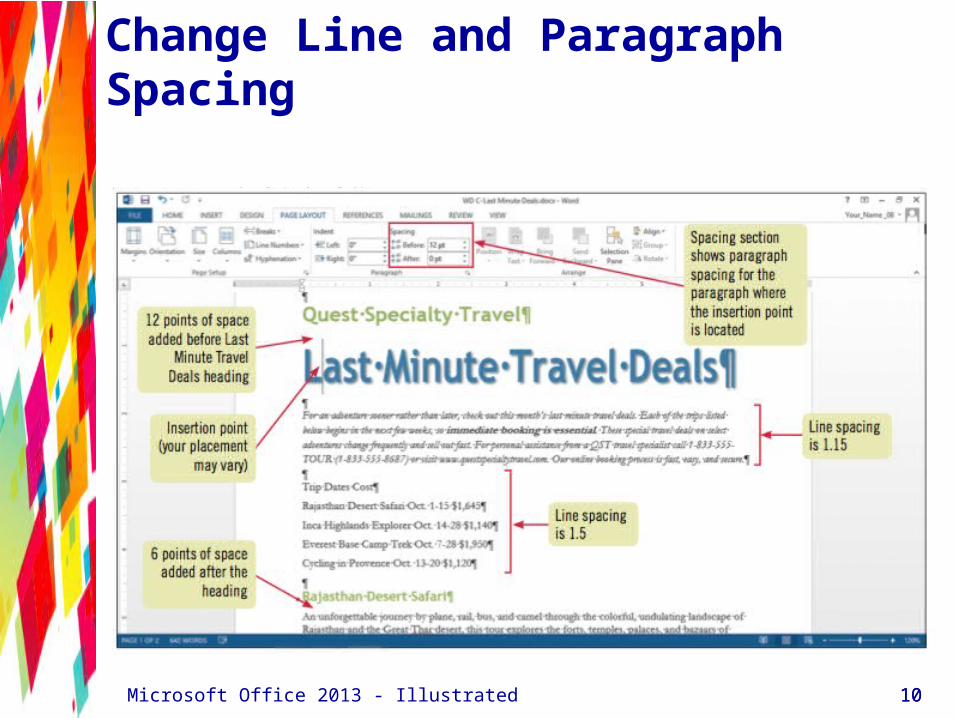
• Adding white space to a document can make it easier to read• Increase space between lines using the
Line and Paragraph Spacing list arrow • Increase space between paragraphs
using the Before and After text boxes in the Paragraph group on the Page Layout tab
99Microsoft Office 2013 - Illustrated
1010
Change Line and Paragraph Spacing
Microsoft Office 2013 - Illustrated
Change Line and Paragraph Spacing
• Formatting with Quick Styles• Apply multiple format settings in one step
with a style• Use styles to give your document a more
cohesive look• A style is a set of format settings that are
named and stored together• Styles can include character and
paragraph format settings• Apply Quick Styles by selecting a style
from the Quick Styles gallery
1111Microsoft Office 2013 - Illustrated

Change Line and Paragraph Spacing
• Each Quick Style set includes styles for a title, several heading levels, body text, quotes, and lists
• Each Quick Style Set has a different design
12Microsoft Office 2013 - Illustrated

Align Paragraphs
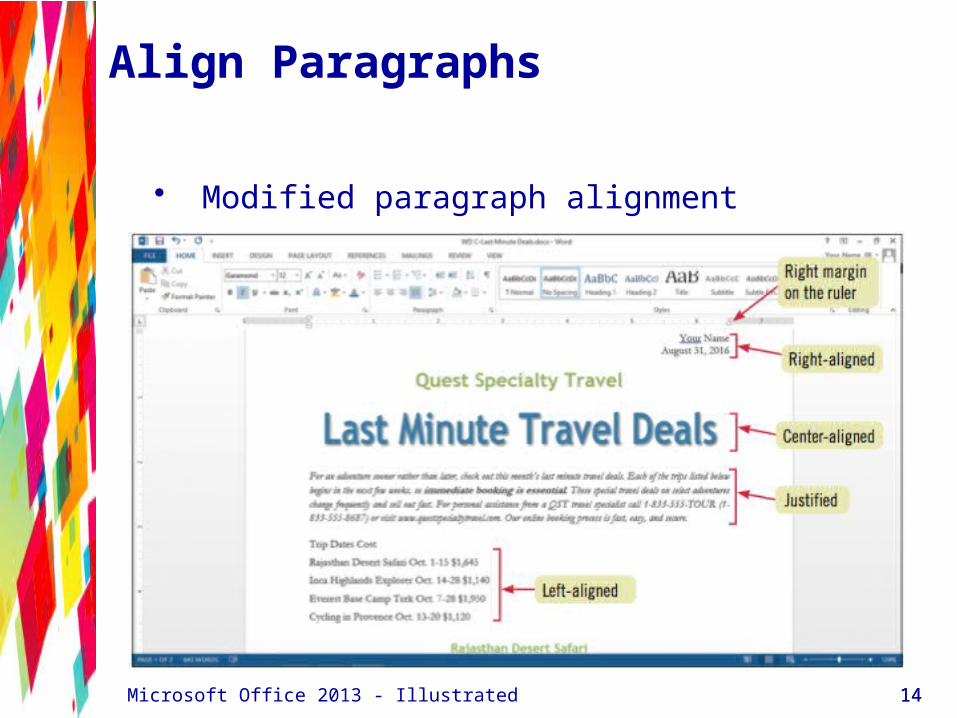
• Paragraphs are aligned relative to the left and right margins• Left-aligned text is flush with the left
margin and has a ragged right edge• Text is left-aligned by default
• Right-aligned text is flush with the right margin
• Centered text is positioned evenly between the margins
• Justified text is flush with both the left and right margins
1313Microsoft Office 2013 - Illustrated
Align Paragraphs
• Modified paragraph alignment
1414Microsoft Office 2013 - Illustrated
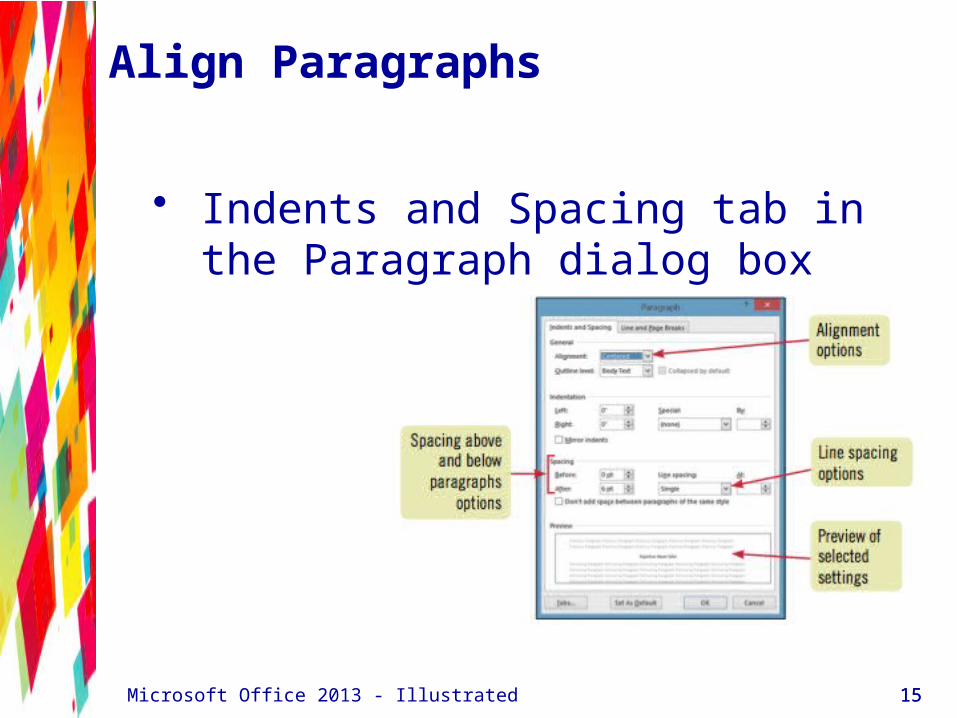
Align Paragraphs
• Indents and Spacing tab in the Paragraph dialog box
1515Microsoft Office 2013 - Illustrated

• Format a document using themes• A theme is a complete set of theme
colors, fonts, and effects• Preview a theme before applying it
• Applying a Theme changes all content that uses theme colors, font and table styles, and graphics effects
• Click the Themes button in the Themes group on the Page Layout tab to select and apply a theme
16
Align Paragraphs
Microsoft Office 2013 - Illustrated
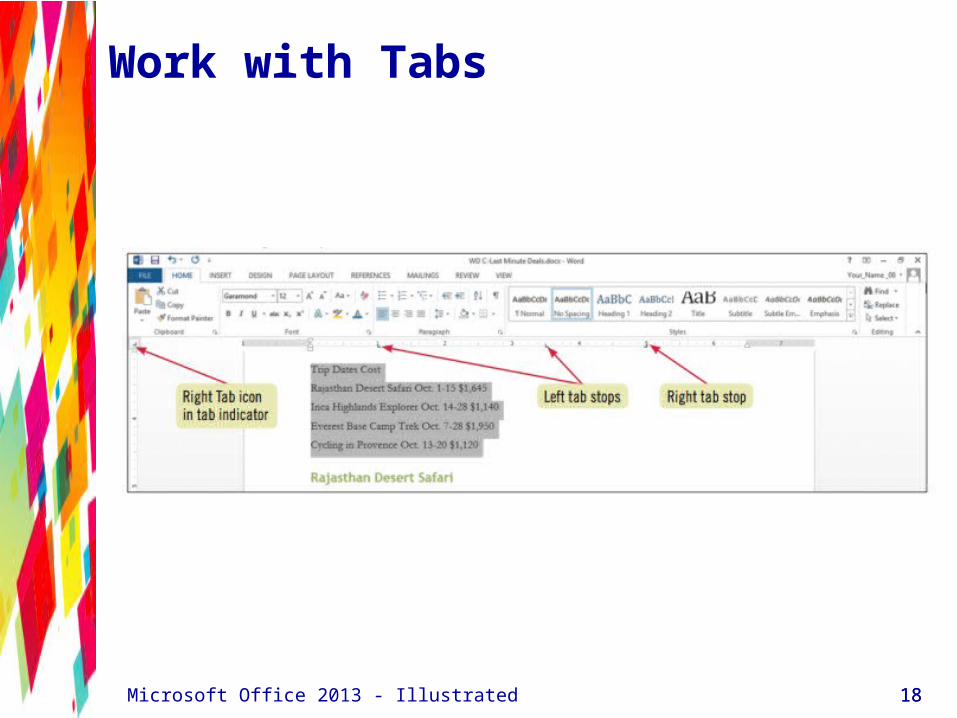
Work with Tabs
• Tabs help you to align text vertically at a specific location on a page• A tab stop is a point on the horizontal ruler that
identifies a text alignment location• Text can be aligned to the left, right, or center
of a tab stop, or aligned with a bar character or decimal point
• Set tabs using the Ruler
1717Microsoft Office 2013 - Illustrated
Work with Tabs
1818Microsoft Office 2013 - Illustrated
Work with Tabs
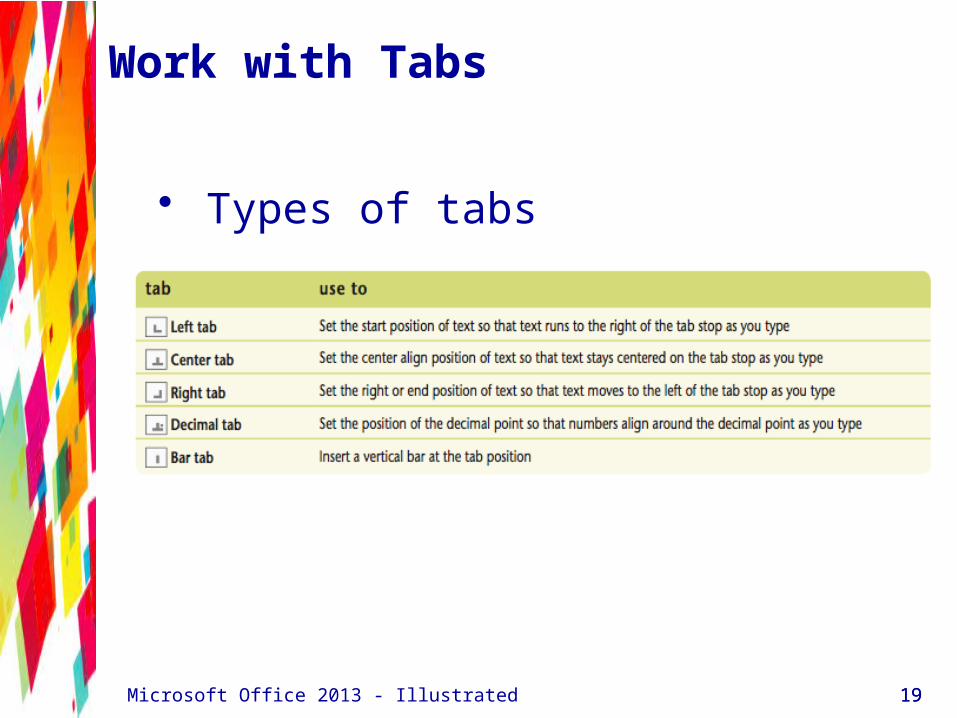
• Types of tabs
1919Microsoft Office 2013 - Illustrated

Work with Indents
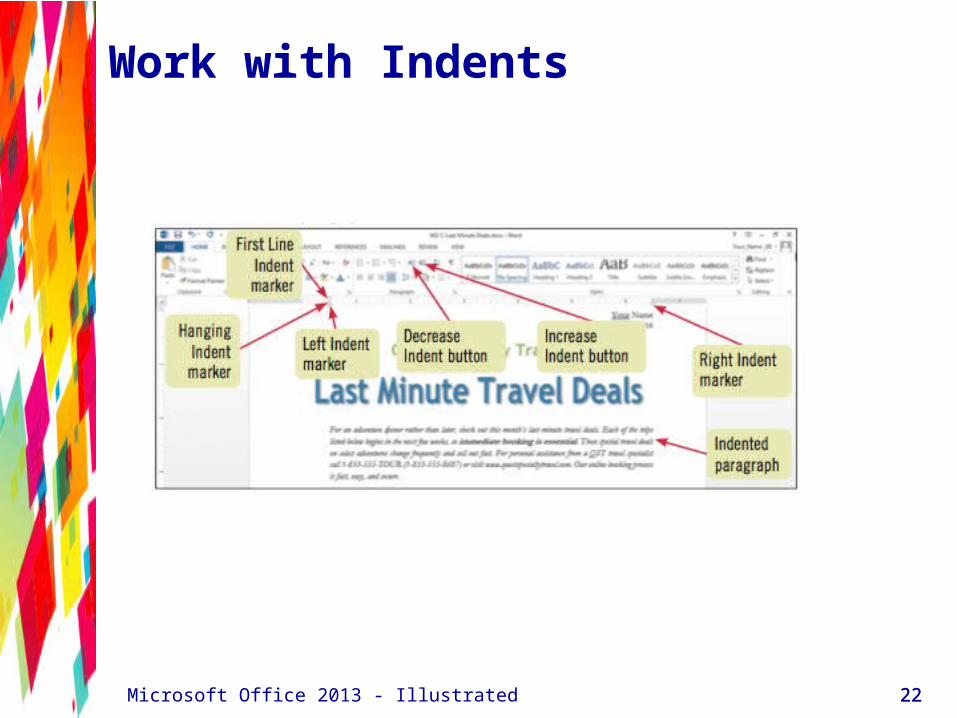
• Indenting a paragraph moves the edge of the paragraph in from the left or right margin• Indent the entire left or right edge of a
paragraph• Indent just the first line• Indent all lines except the first line• Indent the left edge of a paragraph to the left
of the left margin• Indent markers on the horizontal ruler
identify the indent settings for the paragraph in which the insertion point is located
2020Microsoft Office 2013 - Illustrated
Work with Indents
• Applying Word Text Effects and Typography feature• Allows you to add visual appeal by
adding special text effects such as outlines shadow, reflections, and glows
• WordArt – preformatted combined text effects
2121Microsoft Office 2013 - Illustrated
Work with Indents
2222Microsoft Office 2013 - Illustrated

Work with Indents
• Types of indents
2323Microsoft Office 2013 - Illustrated
Add Bullets and Numbering
• Formatting paragraphs with bullets and numbering can help to organize ideas in a document• A bullet is a character, often a small
circle, that appears before the items in a list to add emphasis
• Numbering the items in a list helps to illustrate sequence and priority
2424Microsoft Office 2013 - Illustrated

• Use the Bullets button or Numbering button in the Paragraph group on the HOME tab to apply bullets or numbering to paragraphs
2525
Add Bullets and Numbering
Microsoft Office 2013 - Illustrated

• Creating multilevel lists• To create a hierarchical structure in a
list, apply a multilevel list style• Click the Multilevel List list arrow to
select and apply a multilevel list style• Format an existing list
• Demote items using the Increase Indent button
• Promote items using the Decrease Indent button
2626
Add Bullets and Numbering
Microsoft Office 2013 - Illustrated

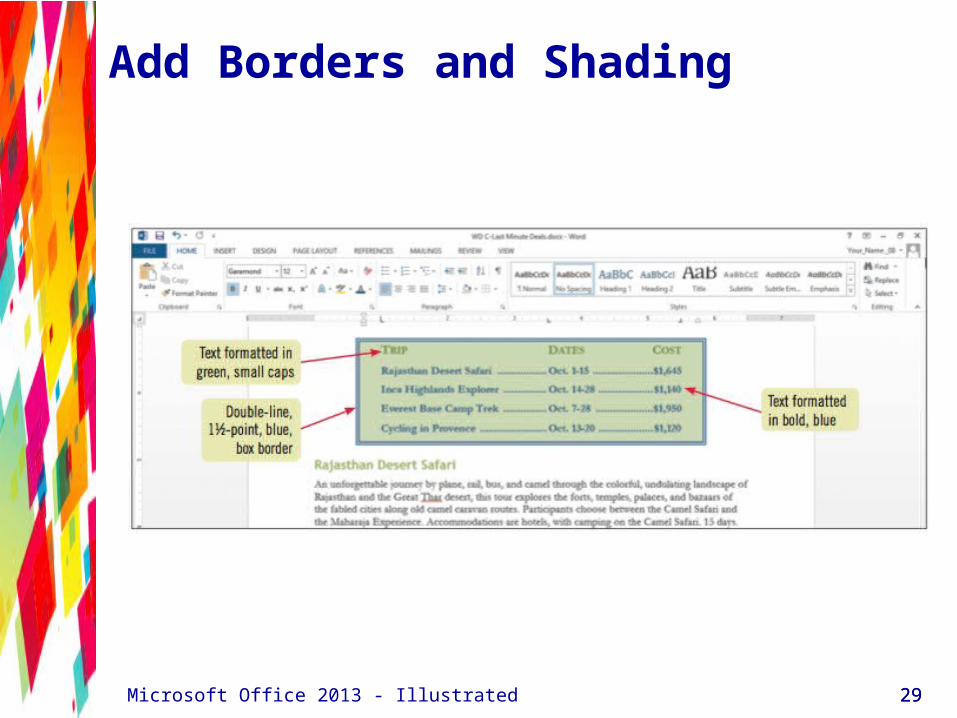
Add Borders and Shading
• Adding borders and shading to text can help to enhance the information in a document• A border is a line added above, below, to the
side of, or around words or paragraphs• Shading is a color or pattern that is added
behind words or paragraphs• Use the Borders button or the Shading button
in the Paragraph group on the Home tab
2727Microsoft Office 2013 - Illustrated
Add Borders and Shading
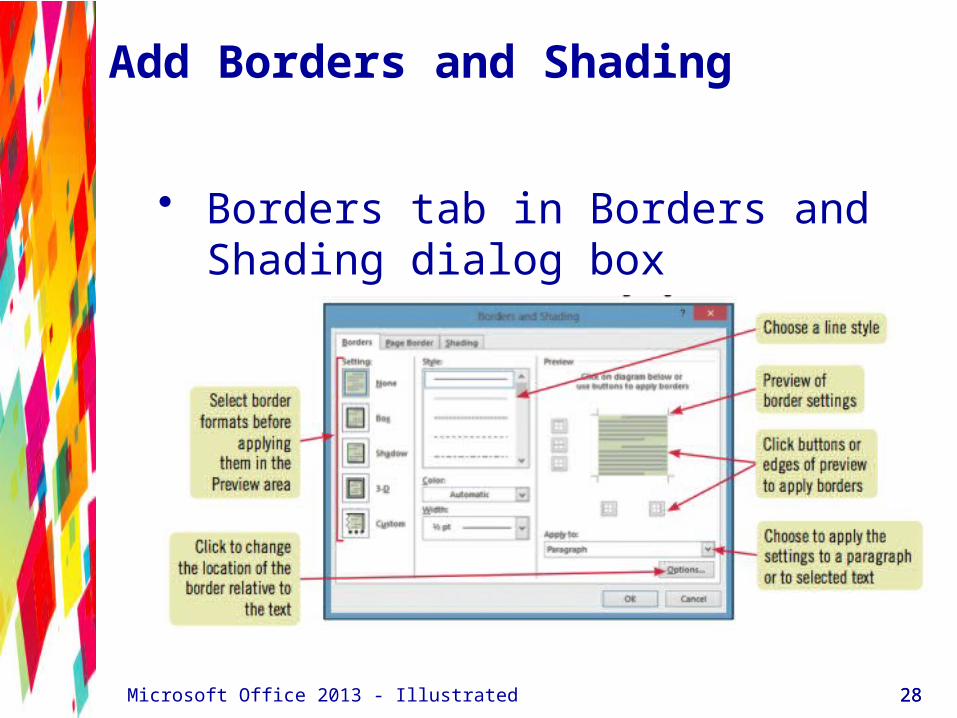
• Borders tab in Borders and Shading dialog box
2828Microsoft Office 2013 - Illustrated
Add Borders and Shading
2929Microsoft Office 2013 - Illustrated
Add Borders and Shading
• Highlighting text in a document• Highlighting is transparent color that is
applied to text using the Highlight pointer
• Highlighting is most effective when a document is viewed on screen
• Highlighting does print• To highlight text, click the Text Highlight
Color list arrow in the Font group on the Home tab, select a color, then select the text
3030Microsoft Office 2013 - Illustrated
Insert Online Pictures
• Clip art is a collection of graphic images that you can insert in a document
• Office.com Clip art images are royalty-free photos and illustrations you can add to a document using the Online Pictures command on the INSERT tab
3131Microsoft Office 2013 - Illustrated
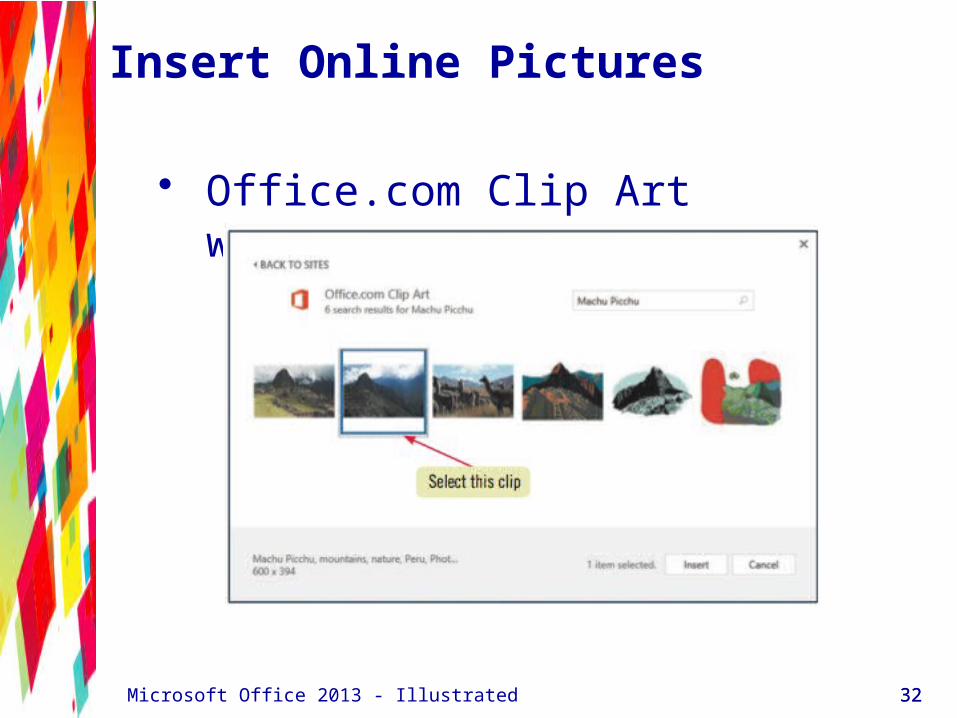
Insert Online Pictures
• Office.com Clip Art window
3232Microsoft Office 2013 - Illustrated

Summary
• Enhance documents with formatting• Format characters:
• Font, font size, font styles, font effects, and character-spacing
• Format paragraphs• Alignment, line spacing, paragraph spacing, tabs,
indents, bullets, numbering, borders, and shading
• Insert clip art images into a document
• Choose appropriate formatting for the document’s purpose and audience
• Take care not to over format a document
3333Microsoft Office 2013 - Illustrated