FJP Student Labmanual v20
312
Fundamentals of Java Programming Student Lab Manual This document is exclusive property of Cisco Systems, Inc. Permission is granted to print and copy this document for non-commercial distribution and exclusive use by instructors in the Fundamentals of Network Security course as part of an official Cisco Networking Academy Program.
Transcript of FJP Student Labmanual v20
Fundamentals of Java Programming
Student Lab Manual
This document is exclusive property of Cisco Systems, Inc. Permission is granted to print and copy this document for non-commercial distribution and exclusive use by instructors in the Fundamentals of Network Security course as part of an official Cisco Networking Academy Program.
Lab 1.5.1 Organizing folders and exploring the installation of the SDK and other tools
Estimated Time 30 minutes
Learning Objective In this lab activity, students will locate the resources required to complete all the labs in the course.
Description/Scenario • This lab describes three different platforms for lab work. The Windows platform, the Mac OS and
the Unix/Linux platforms.
• The student completes the activities specific to the platform in which they will primarily be completing the labs.
• There are three Parts to this lab. Part I describes tasks and activities for the Windows platform. Part II describes tasks and activities for the MacOS platform, and Part III describes tasks and activities for the Unix/Linux platforms. Labs for each of the platforms begins first with the verification of required files, installation of files that are missing.
• This is a required lab. Successful completion of this lab ensures that the student has all the resources to complete subsequent labs.
Tasks
Step 1 Checklist for resources (all platforms) Review the following list of resources. Discuss with your instructor the location of these resources.
Installed SDK files
• J2SDK1.4.x FOLDER
• J2SDK1.4.X \ DOCS FOLDER.
• J2SDK1.4.X\src.zip
Installed BlueJ files
• BlueJ.exe BlueJ Launcher
• Select VM
• examples folder
• lib folder
• uninst folder
1 - 8 Fundamentals of Java Programming Lab 1.5.1 Copyright 2004, Cisco Systems, Inc.
JavaCourse files and folders. A zip file labeled javacourse.zip should be provided by the instructor.
The zip file will extract to create
• folders for each chapter labeled Chap1.. Chap13
• folder for resources
• Printout or electronic copy of the Case Study JBANK
• Computer Lab usage policies
Additional files and folders that are provided, but not essential to completing the labs are:
• UML tool
• Installation instructions for the SDK
• Installation instructions for Courselab files
The following sections describe the activates to be conducted for three different platform. The student is not required to complete all three parts. The student should complete the part that matches the Computer System/ OS platform they will be using most frequently for this course.
PART I Tasks to be completed for the windows operating system
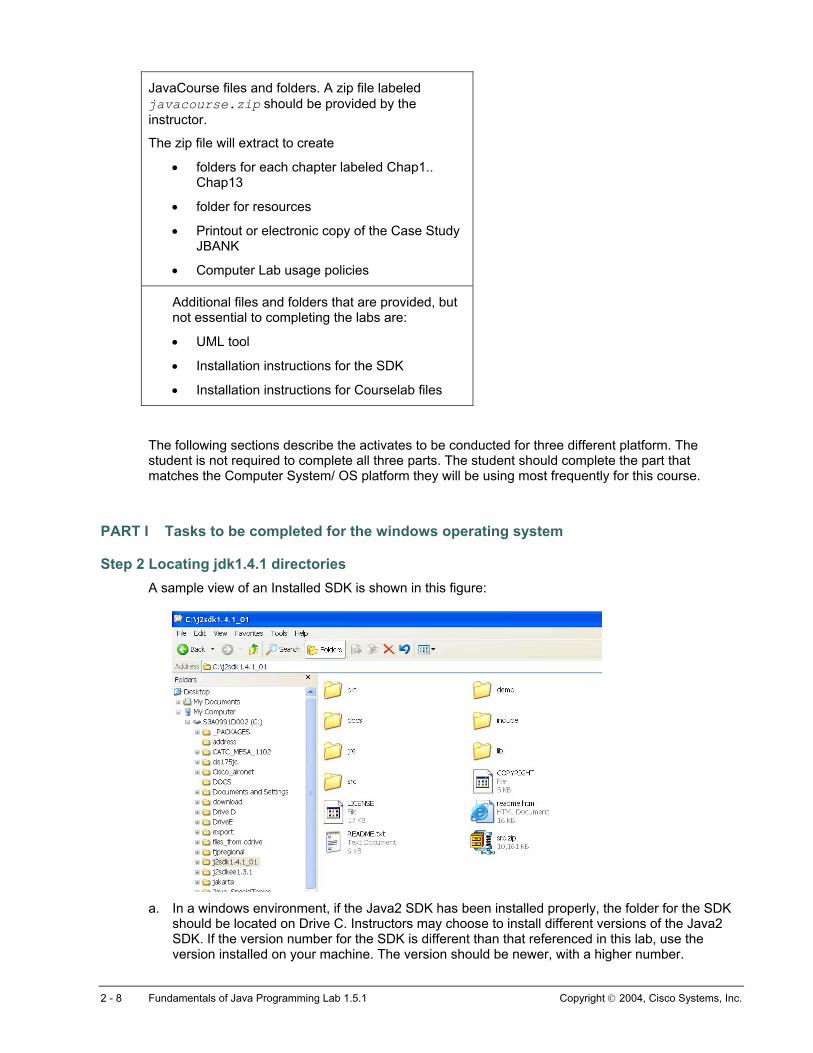
Step 2 Locating jdk1.4.1 directories A sample view of an Installed SDK is shown in this figure:
a. In a windows environment, if the Java2 SDK has been installed properly, the folder for the SDK
should be located on Drive C. Instructors may choose to install different versions of the Java2 SDK. If the version number for the SDK is different than that referenced in this lab, use the version installed on your machine. The version should be newer, with a higher number.
2 - 8 Fundamentals of Java Programming Lab 1.5.1 Copyright 2004, Cisco Systems, Inc.
Locate the JDK1.4.1_02 folder and click on it. If the Java2 SDK has not been installed, ask your instructor for additional information.
b. Locate the bin folder and click on it.
c. Locate javac.exe. Do not click on this, as this will execute the javac compiler.
d. Locate java.exe. Do not click on this as this will execute the java.exe application launcher.
e. Locate the docs folder. When the SDK was installed, the documentation that you will be using to access the Java API should be installed in this folder. These are the files you should locate: Folder – api, guide, images, relnotes, tooldocs. Inside the api folder should be – index-files, java, javax, org folders.
You have now verified all of the files required for using the Java2 SDK.
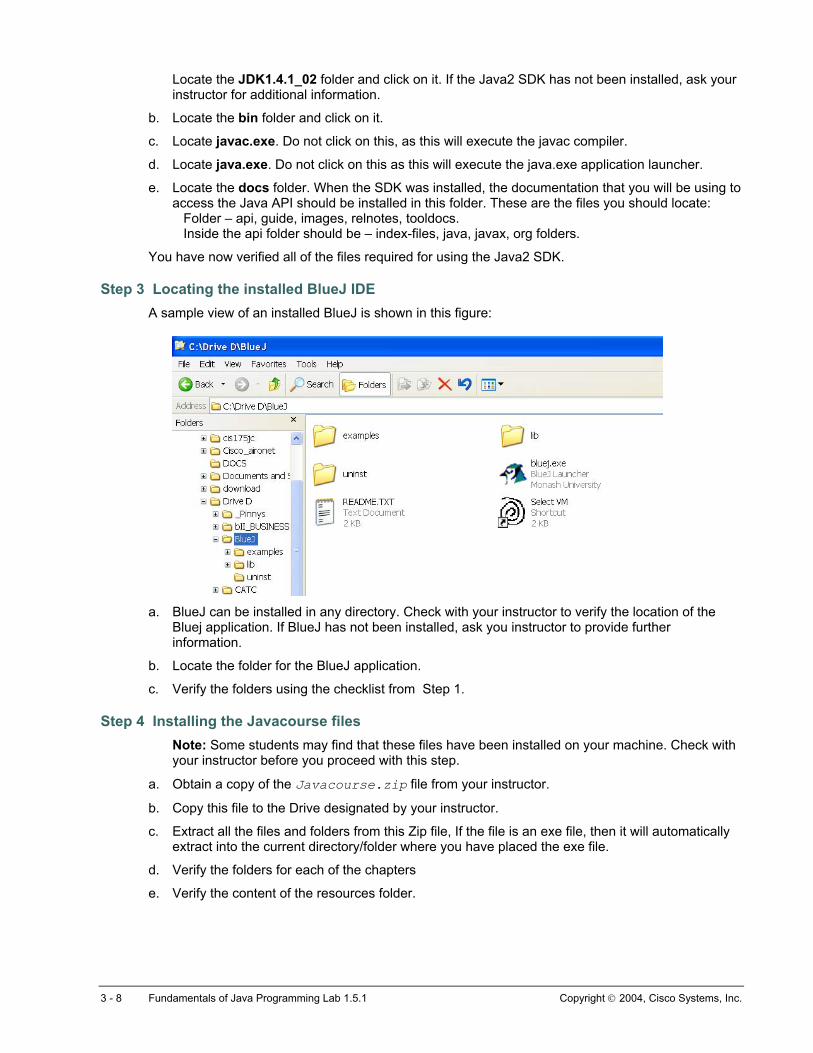
Step 3 Locating the installed BlueJ IDE A sample view of an installed BlueJ is shown in this figure:
a.
b.
c.
BlueJ can be installed in any directory. Check with your instructor to verify the location of the Bluej application. If BlueJ has not been installed, ask you instructor to provide further information.
Locate the folder for the BlueJ application.
Verify the folders using the checklist from Step 1.
Step 4 Installing the Javacourse files Note: Some students may find that these files have been installed on your machine. Check with your instructor before you proceed with this step.
a. Obtain a copy of the Javacourse.zip file from your instructor.
b. Copy this file to the Drive designated by your instructor.
c. Extract all the files and folders from this Zip file, If the file is an exe file, then it will automatically extract into the current directory/folder where you have placed the exe file.
d. Verify the folders for each of the chapters
e. Verify the content of the resources folder.
3 - 8 Fundamentals of Java Programming Lab 1.5.1 Copyright 2004, Cisco Systems, Inc.
PART II Tasks to be completed for the Unix/Linux operating systems
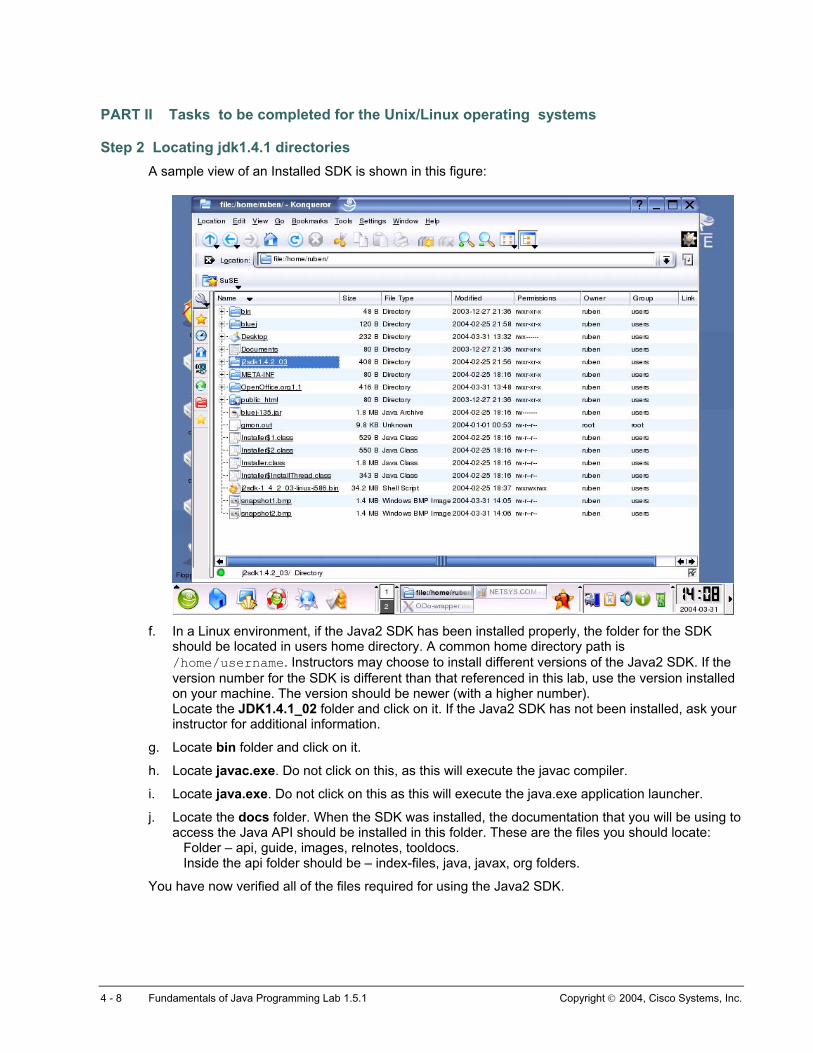
Step 2 Locating jdk1.4.1 directories A sample view of an Installed SDK is shown in this figure:
f. In a Linux environment, if the Java2 SDK has been installed properly, the folder for the SDK
should be located in users home directory. A common home directory path is /home/username. Instructors may choose to install different versions of the Java2 SDK. If the version number for the SDK is different than that referenced in this lab, use the version installed on your machine. The version should be newer (with a higher number). Locate the JDK1.4.1_02 folder and click on it. If the Java2 SDK has not been installed, ask your instructor for additional information.
g. Locate bin folder and click on it.
h. Locate javac.exe. Do not click on this, as this will execute the javac compiler.
i. Locate java.exe. Do not click on this as this will execute the java.exe application launcher.
j. Locate the docs folder. When the SDK was installed, the documentation that you will be using to access the Java API should be installed in this folder. These are the files you should locate: Folder – api, guide, images, relnotes, tooldocs. Inside the api folder should be – index-files, java, javax, org folders.
You have now verified all of the files required for using the Java2 SDK.
4 - 8 Fundamentals of Java Programming Lab 1.5.1 Copyright 2004, Cisco Systems, Inc.
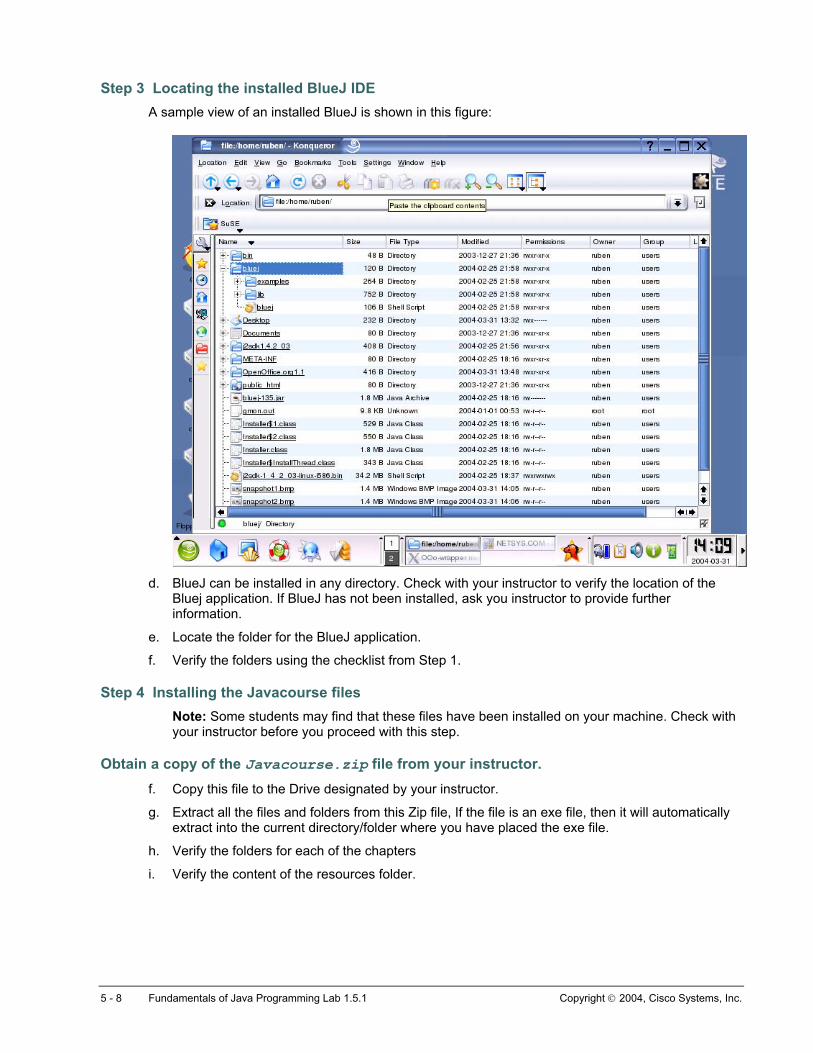
Step 3 Locating the installed BlueJ IDE A sample view of an installed BlueJ is shown in this figure:
d.
e.
f.
BlueJ can be installed in any directory. Check with your instructor to verify the location of the Bluej application. If BlueJ has not been installed, ask you instructor to provide further information.
Locate the folder for the BlueJ application.
Verify the folders using the checklist from Step 1.
Step 4 Installing the Javacourse files Note: Some students may find that these files have been installed on your machine. Check with your instructor before you proceed with this step.
Obtain a copy of the Javacourse.zip file from your instructor. f. Copy this file to the Drive designated by your instructor.
g. Extract all the files and folders from this Zip file, If the file is an exe file, then it will automatically extract into the current directory/folder where you have placed the exe file.
h. Verify the folders for each of the chapters
i. Verify the content of the resources folder.
5 - 8 Fundamentals of Java Programming Lab 1.5.1 Copyright 2004, Cisco Systems, Inc.
PART III Tasks to be completed for the MAC Operating System
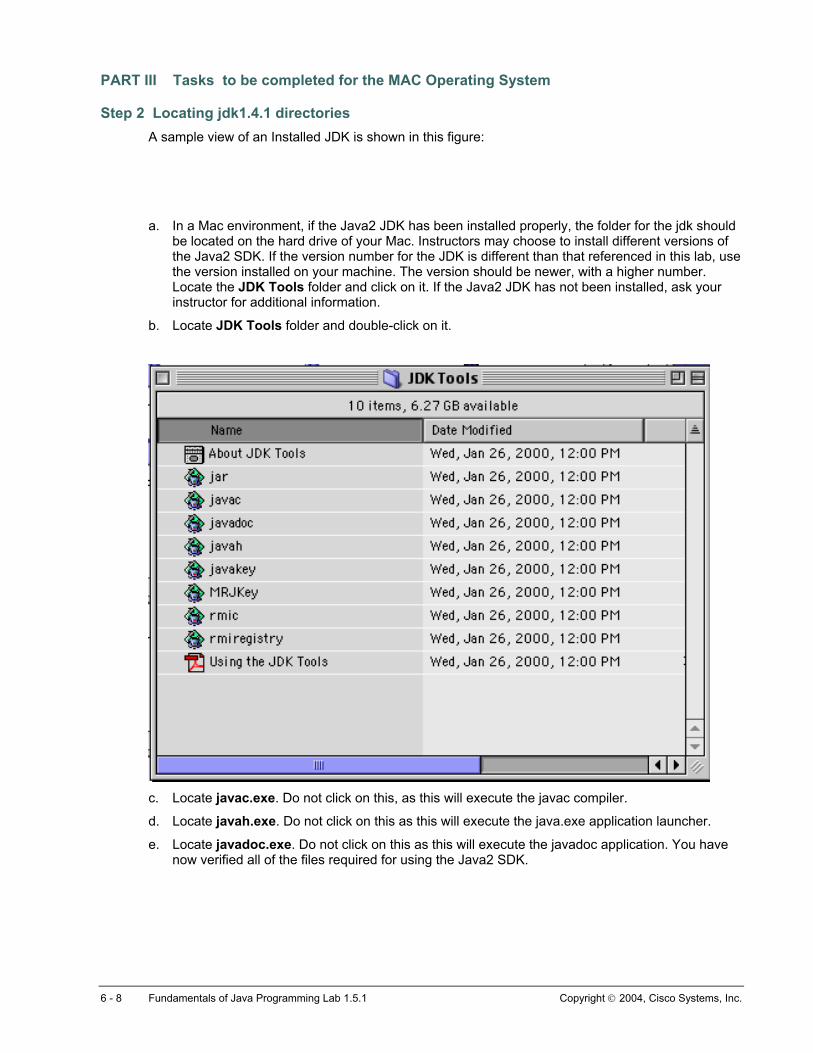
Step 2 Locating jdk1.4.1 directories A sample view of an Installed JDK is shown in this figure:
a.
b.
In a Mac environment, if the Java2 JDK has been installed properly, the folder for the jdk should be located on the hard drive of your Mac. Instructors may choose to install different versions of the Java2 SDK. If the version number for the JDK is different than that referenced in this lab, use the version installed on your machine. The version should be newer, with a higher number. Locate the JDK Tools folder and click on it. If the Java2 JDK has not been installed, ask your instructor for additional information.
Locate JDK Tools folder and double-click on it.
c.
d.
e.
Locate javac.exe. Do not click on this, as this will execute the javac compiler.
Locate javah.exe. Do not click on this as this will execute the java.exe application launcher.
Locate javadoc.exe. Do not click on this as this will execute the javadoc application. You have now verified all of the files required for using the Java2 SDK.
6 - 8 Fundamentals of Java Programming Lab 1.5.1 Copyright 2004, Cisco Systems, Inc.
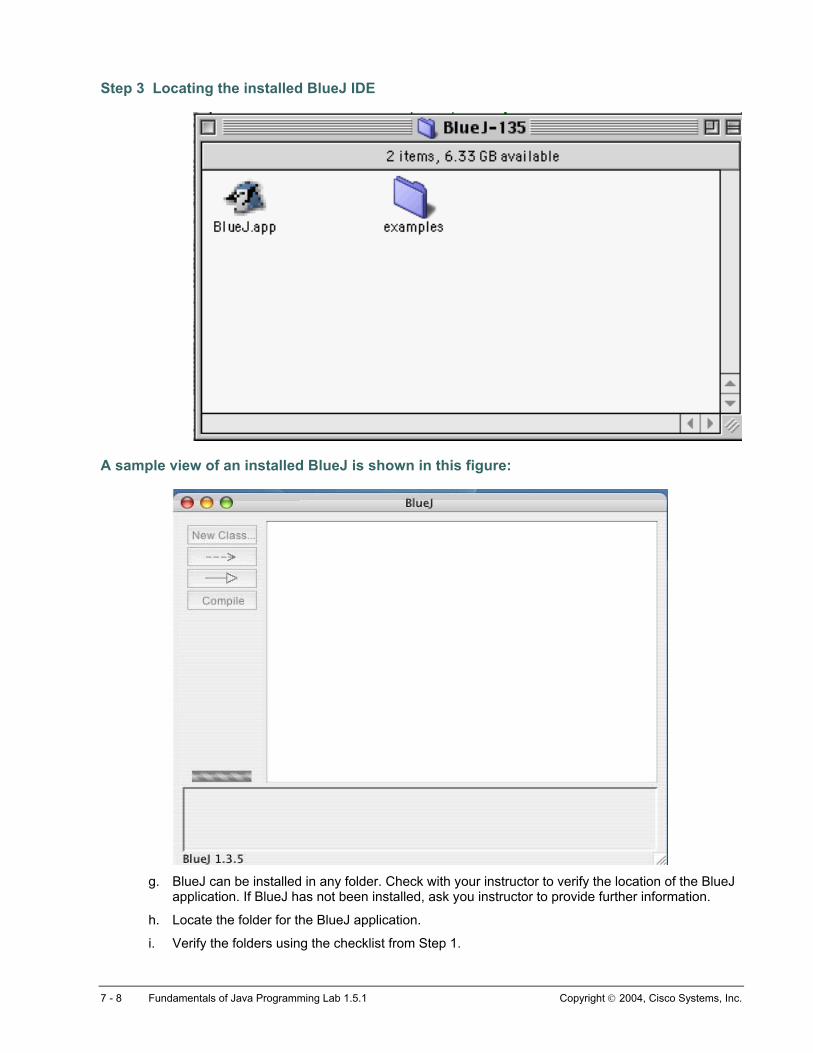
Step 3 Locating the installed BlueJ IDE
A sample view of an installed BlueJ is shown in this figure:
g.
h.
i.
BlueJ can be installed in any folder. Check with your instructor to verify the location of the BlueJ application. If BlueJ has not been installed, ask you instructor to provide further information.
Locate the folder for the BlueJ application.
Verify the folders using the checklist from Step 1.
7 - 8 Fundamentals of Java Programming Lab 1.5.1 Copyright 2004, Cisco Systems, Inc.
Step 4 Installing the Javacourse files Note: Some students may find that these files have been installed on your machine. Check with your instructor before you proceed with this step.
Obtain a copy of the Javacourse.zip file from your instructor. j. Copy this file to the location designated by your instructor.
k. Extract all the files and folders from this Zip file, If the file is an exe file, then it will automatically extract into the current directory/folder where you have placed the exe file.
l. Verify the folders for each of the chapters
m. Verify the content of the resources folder.
8 - 8 Fundamentals of Java Programming Lab 1.5.1 Copyright 2004, Cisco Systems, Inc.
Lab 1.5.2 Locate Resources and Manage Editors and Console Windows
Estimated Time 30 minutes
Learning Objective In this lab activity Students will verify the proper installation of the Java2 SDK, invoke the command-line interface, and locate and launch a simple text editor
Description/Scenario • This lab describes three different platforms for lab work. The Windows platform, the Mac OS and
the Unix/ Linux platforms.
• The student completes the activities specific to the platform in which they will primarily be completing the labs.
• There are three Parts to this lab. Part I describes tasks and activities for the Windows platform. part II describes tasks and activities for the MacOS platform, and Part III describes tasks and activities for the Unix/Linux platforms. Labs for each of the platforms begin first with the verification of required files, installation of files that are missing.
• This is a required lab. Successful completion of this lab ensures that the student has all the resources to complete subsequent labs.
• Locate a Console window that serves as a command-line interface and execute instructions on the command-line.
• Verify the proper installation of the Java2 SDK by executing a call to the compiler javac.exe and application launcher java.exe.
• Verify that the operating system variables necessary for proper functioning of javac and java have been created.
• Locate a standard text editor for each platform.
• Create, save and edit a simple text document.
• Locate the BlueJ application and execute the BlueJ application.
Tasks
This lab is divided into three parts, to accommodate users of different operating systems. The three parts address tasks to be performed in a Windows operating system, the Mac OS, and Linux/Unix operating systems. The student should complete the part that matches the Operating system they will be using.
Part I Tasks to be completed for the Windows operating system
Step 1 Open a console (MS-DOS) window a. Open a console window from Run
1 - 11 Fundamentals of Java Programming Lab 1.5.2 Copyright 2004, Cisco Systems, Inc.
1. Click on the Start button, located in the lower left corner of the screen.
2. Click on Run, located on the menu.
3. Type cmd (Windows 2000) or command (Windows 98) in the text box to the right of the word run. Press enter or click the on OK button. OR
b. Opening a console window from the taskbar
1. Click on the Start button, located in the lower left corner of the screen.
2. Position cursor over Programs, located on the menu.
3. Click on MS-DOS prompt.
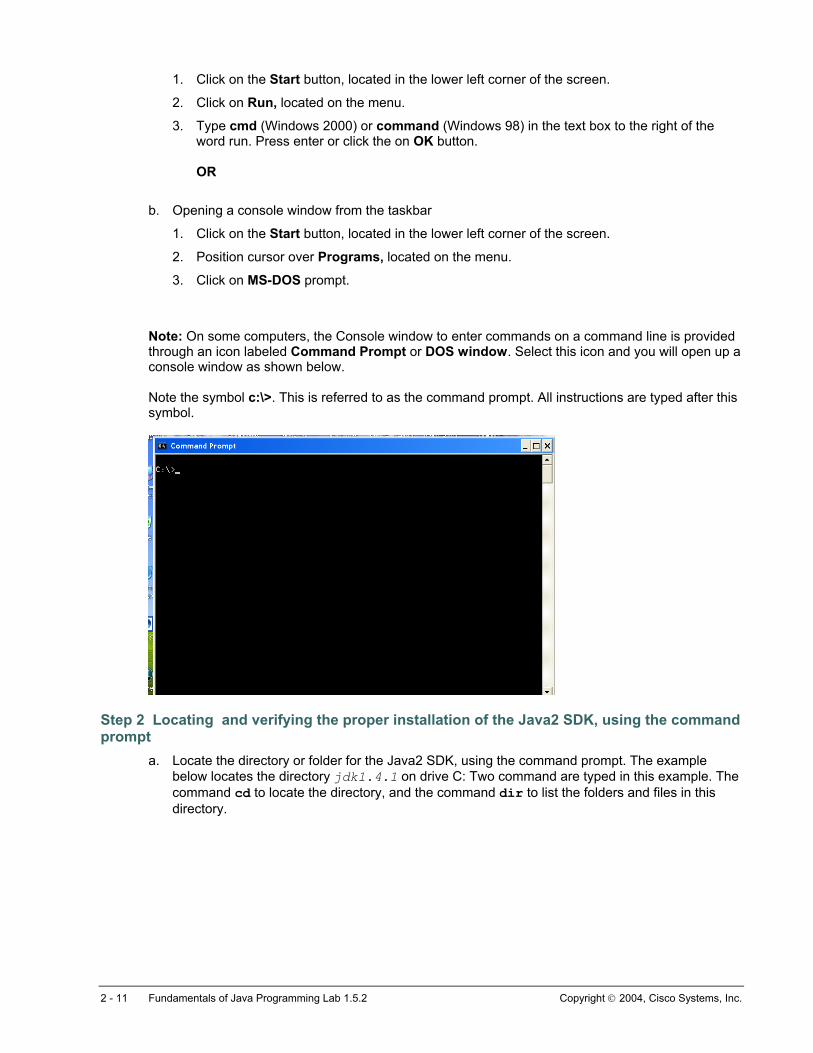
Note: On some computers, the Console window to enter commands on a command line is provided through an icon labeled Command Prompt or DOS window. Select this icon and you will open up a console window as shown below. Note the symbol c:\>. This is referred to as the command prompt. All instructions are typed after this symbol.
Step 2 Locating and verifying the proper installation of the Java2 SDK, using the command prompt
a. Locate the directory or folder for the Java2 SDK, using the command prompt. The example below locates the directory jdk1.4.1 on drive C: Two command are typed in this example. The command cd to locate the directory, and the command dir to list the folders and files in this directory.
2 - 11 Fundamentals of Java Programming Lab 1.5.2 Copyright 2004, Cisco Systems, Inc.
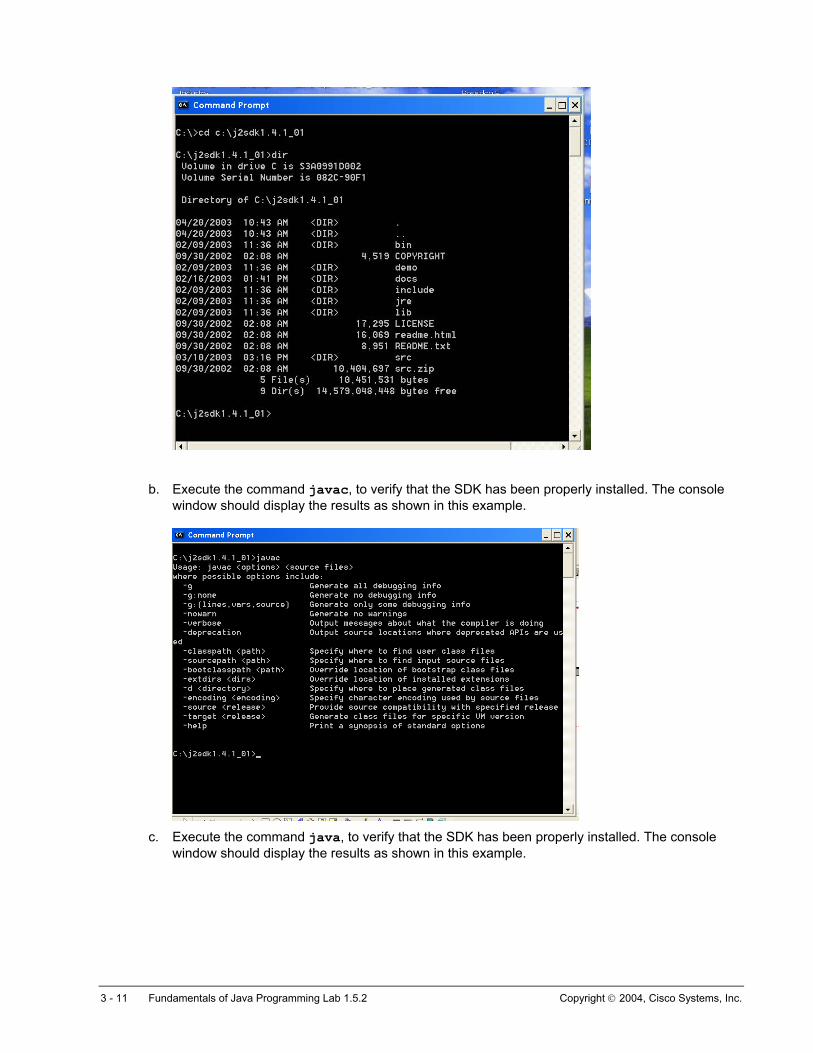
b. Execute the command javac, to verify that the SDK has been properly installed. The console window should display the results as shown in this example.
c. Execute the command java, to verify that the SDK has been properly installed. The console
window should display the results as shown in this example.
3 - 11 Fundamentals of Java Programming Lab 1.5.2 Copyright 2004, Cisco Systems, Inc.
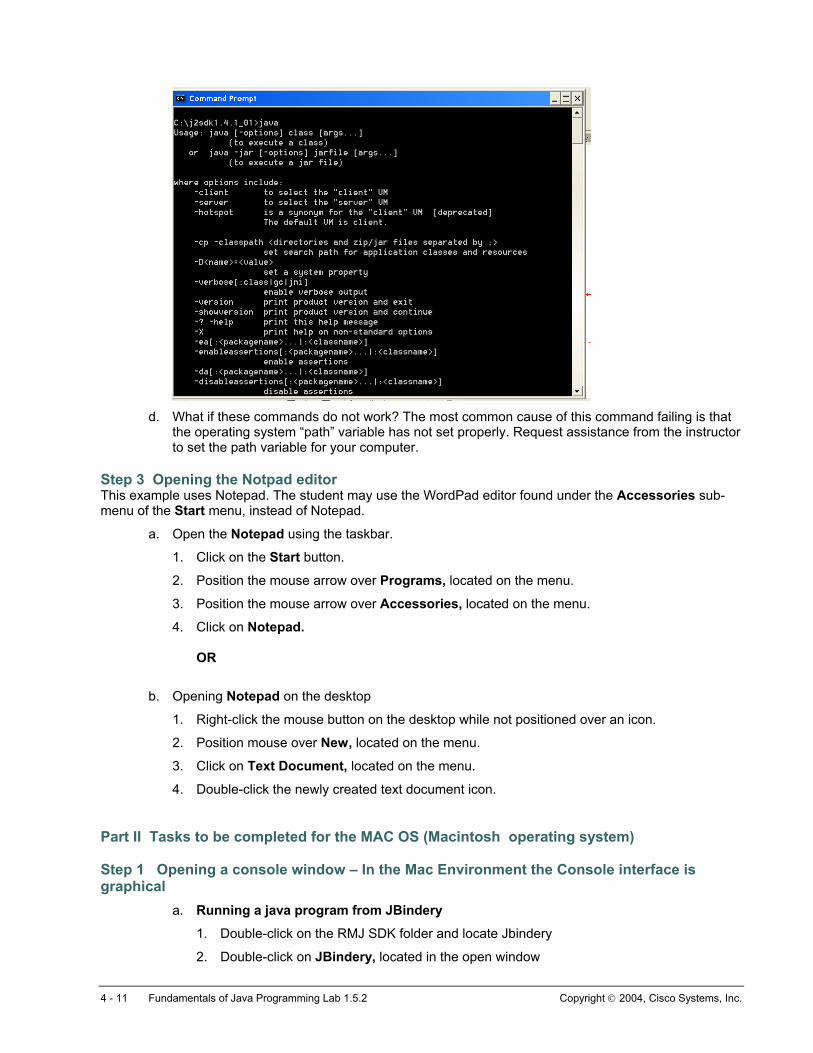
d. What if these commands do not work? The most common cause of this command failing is that
the operating system “path” variable has not set properly. Request assistance from the instructor to set the path variable for your computer.
Step 3 Opening the Notpad editor This example uses Notepad. The student may use the WordPad editor found under the Accessories sub-menu of the Start menu, instead of Notepad.
a. Open the Notepad using the taskbar.
1. Click on the Start button.
2. Position the mouse arrow over Programs, located on the menu.
3. Position the mouse arrow over Accessories, located on the menu.
4. Click on Notepad. OR
b. Opening Notepad on the desktop
1. Right-click the mouse button on the desktop while not positioned over an icon.
2. Position mouse over New, located on the menu.
3. Click on Text Document, located on the menu.
4. Double-click the newly created text document icon.
Part II Tasks to be completed for the MAC OS (Macintosh operating system)
Step 1 Opening a console window – In the Mac Environment the Console interface is graphical
a. Running a java program from JBindery
1. Double-click on the RMJ SDK folder and locate Jbindery
2. Double-click on JBindery, located in the open window
4 - 11 Fundamentals of Java Programming Lab 1.5.2 Copyright 2004, Cisco Systems, Inc.
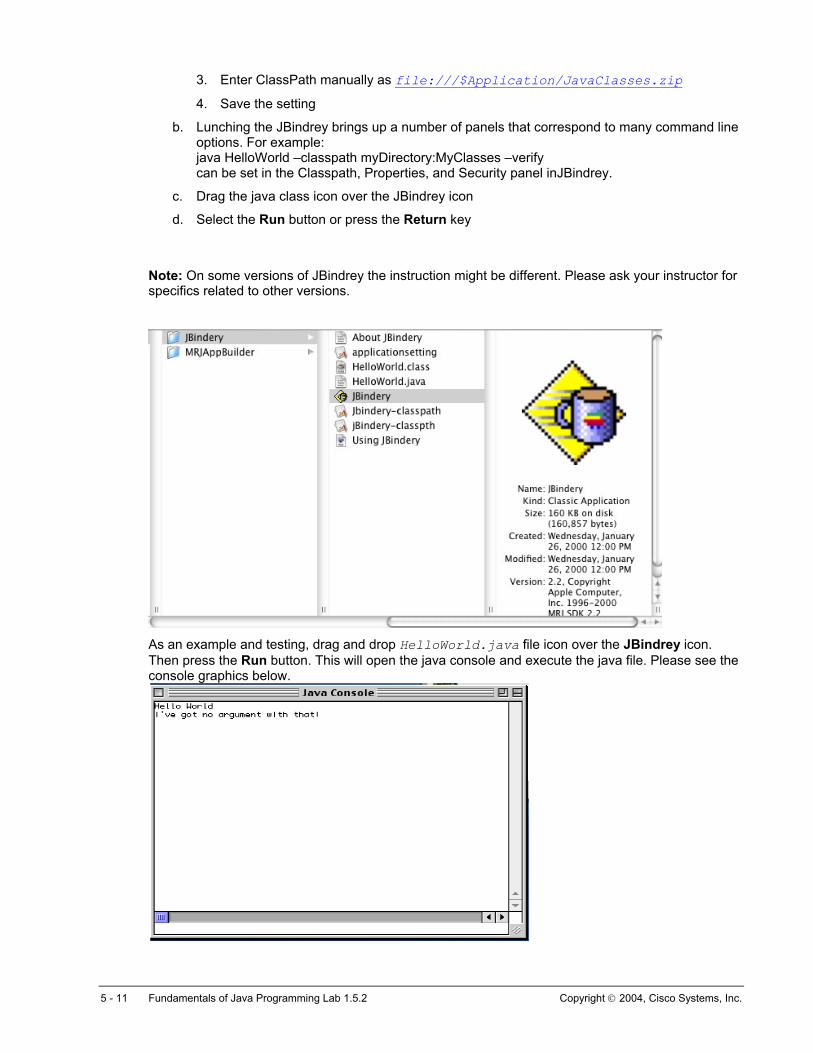
3. Enter ClassPath manually as file:///$Application/JavaClasses.zip
4. Save the setting
b. Lunching the JBindrey brings up a number of panels that correspond to many command line options. For example: java HelloWorld –classpath myDirectory:MyClasses –verify can be set in the Classpath, Properties, and Security panel inJBindrey.
c. Drag the java class icon over the JBindrey icon
d. Select the Run button or press the Return key
Note: On some versions of JBindrey the instruction might be different. Please ask your instructor for specifics related to other versions.
As an example and testing, drag and drop HelloWorld.java file icon over the JBindrey icon. Then press the Run button. This will open the java console and execute the java file. Please see the console graphics below.
5 - 11 Fundamentals of Java Programming Lab 1.5.2 Copyright 2004, Cisco Systems, Inc.
Step 2 Locating and verifying the proper installation of the Java2 SDK in Macintosh
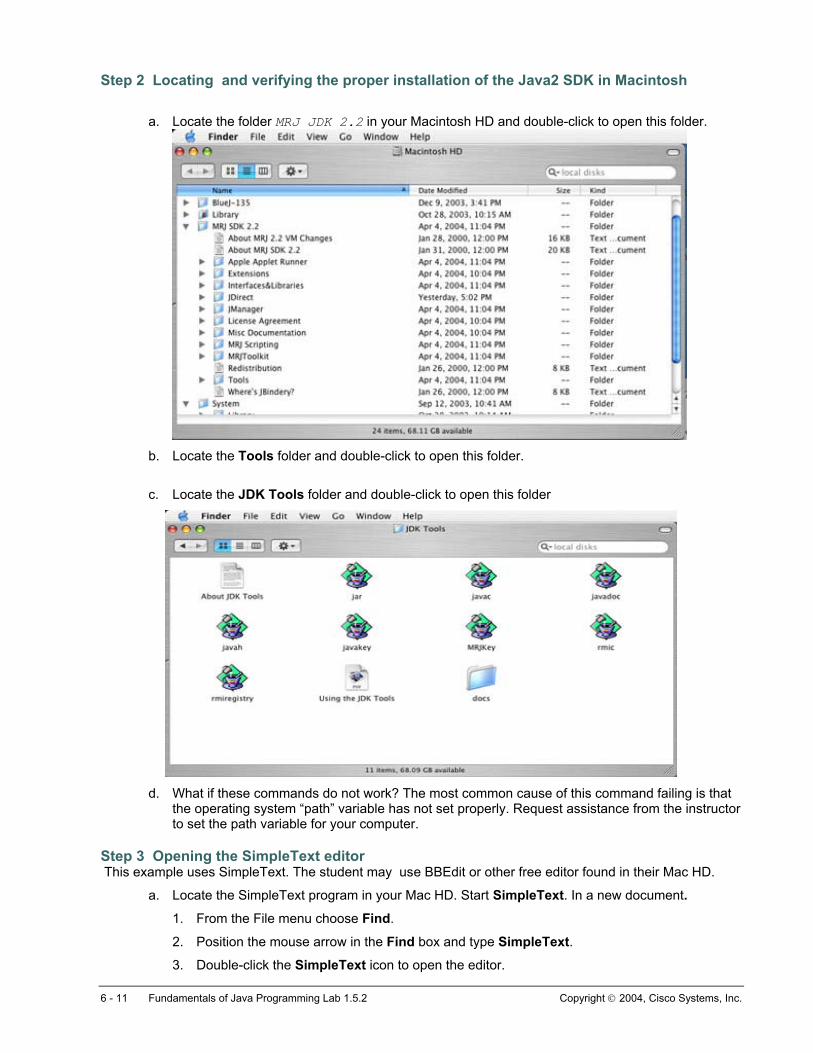
a. Locate the folder MRJ JDK 2.2 in your Macintosh HD and double-click to open this folder.
b. Locate the Tools folder and double-click to open this folder.
c. Locate the JDK Tools folder and double-click to open this folder
d. What if these commands do not work? The most common cause of this command failing is that
the operating system “path” variable has not set properly. Request assistance from the instructor to set the path variable for your computer.
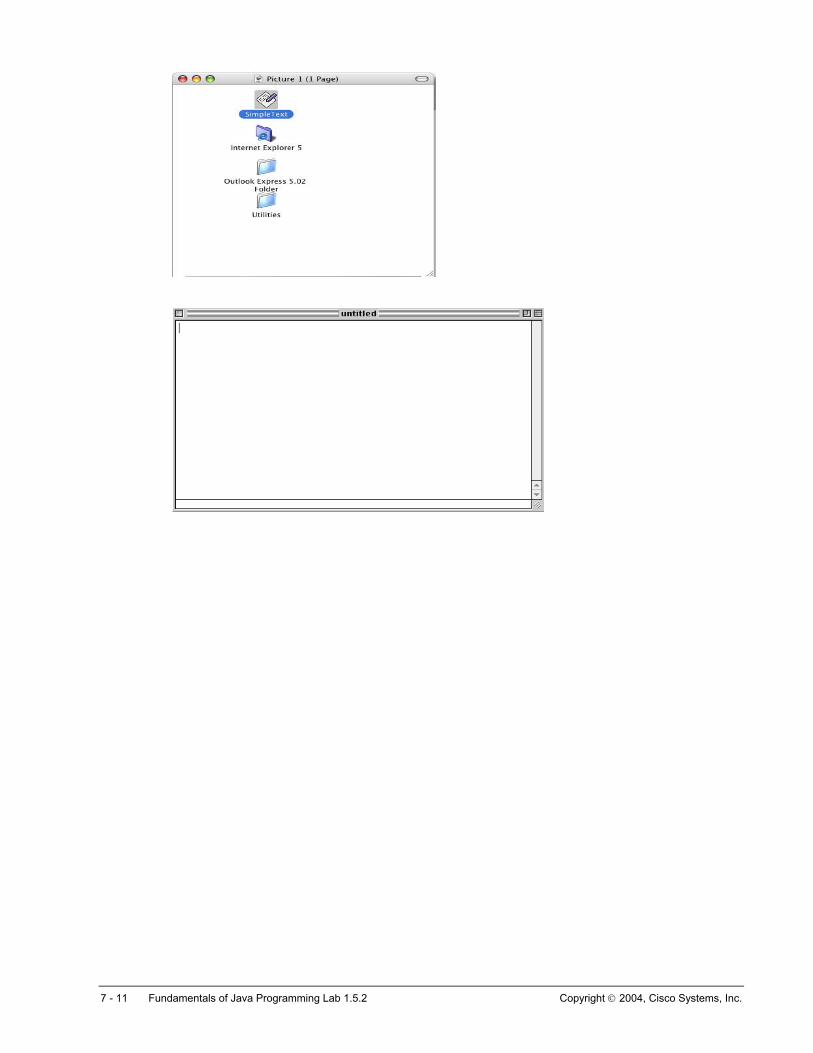
Step 3 Opening the SimpleText editor This example uses SimpleText. The student may use BBEdit or other free editor found in their Mac HD.
a. Locate the SimpleText program in your Mac HD. Start SimpleText. In a new document.
1. From the File menu choose Find.
2. Position the mouse arrow in the Find box and type SimpleText.
3. Double-click the SimpleText icon to open the editor.
6 - 11 Fundamentals of Java Programming Lab 1.5.2 Copyright 2004, Cisco Systems, Inc.
7 - 11 Fundamentals of Java Programming Lab 1.5.2 Copyright 2004, Cisco Systems, Inc.
Part III Tasks to be completed for the Unix/Linux systems
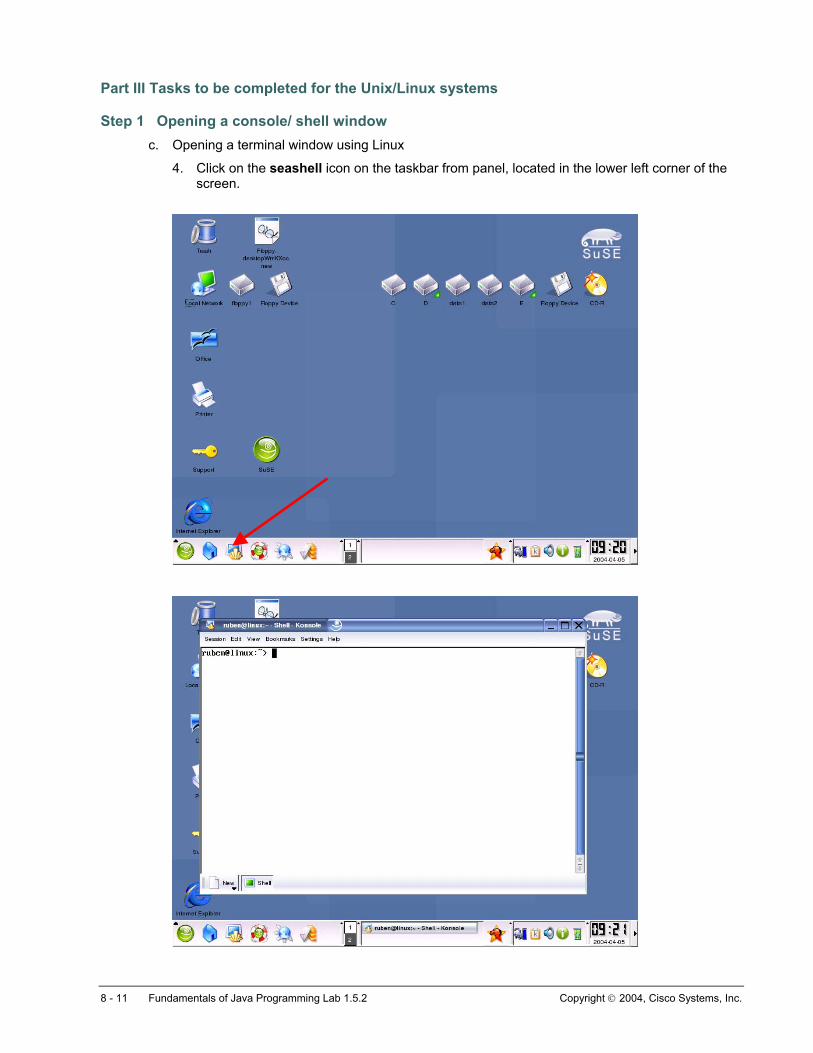
Step 1 Opening a console/ shell window c. Opening a terminal window using Linux
4. Click on the seashell icon on the taskbar from panel, located in the lower left corner of the screen.
8 - 11 Fundamentals of Java Programming Lab 1.5.2 Copyright 2004, Cisco Systems, Inc.
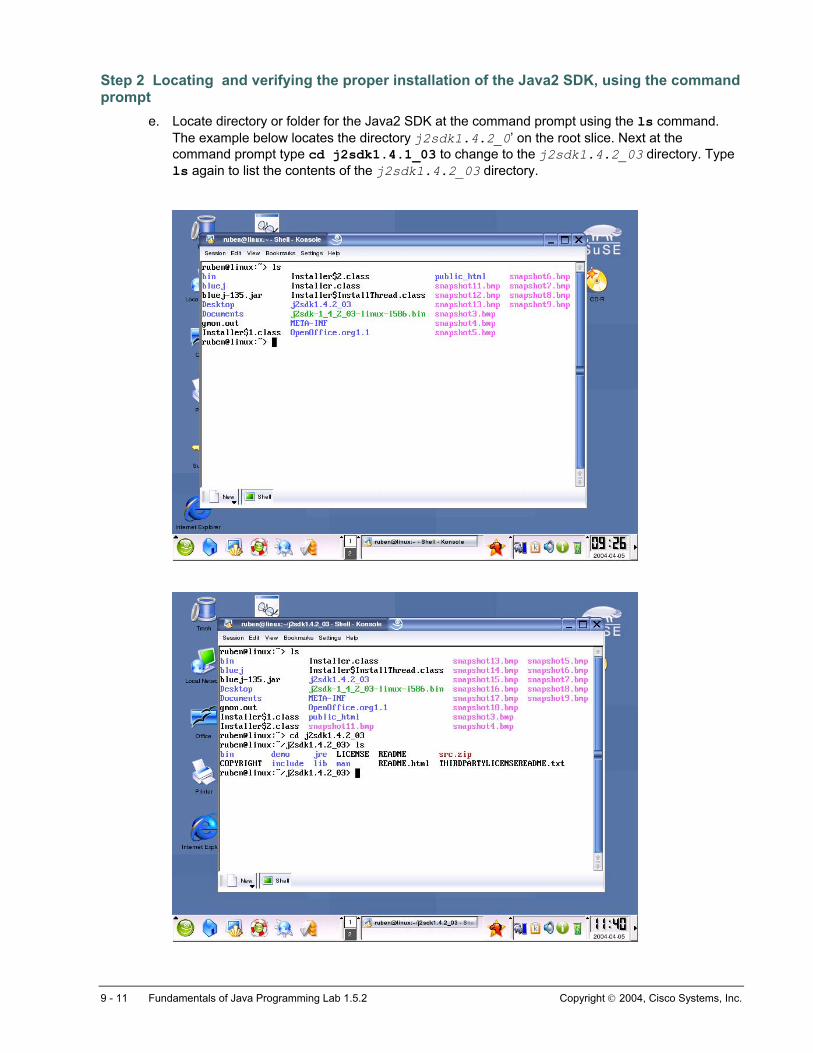
Step 2 Locating and verifying the proper installation of the Java2 SDK, using the command prompt
e. Locate directory or folder for the Java2 SDK at the command prompt using the ls command. The example below locates the directory j2sdk1.4.2_0’ on the root slice. Next at the command prompt type cd j2sdk1.4.1_03 to change to the j2sdk1.4.2_03 directory. Type ls again to list the contents of the j2sdk1.4.2_03 directory.
9 - 11 Fundamentals of Java Programming Lab 1.5.2 Copyright 2004, Cisco Systems, Inc.
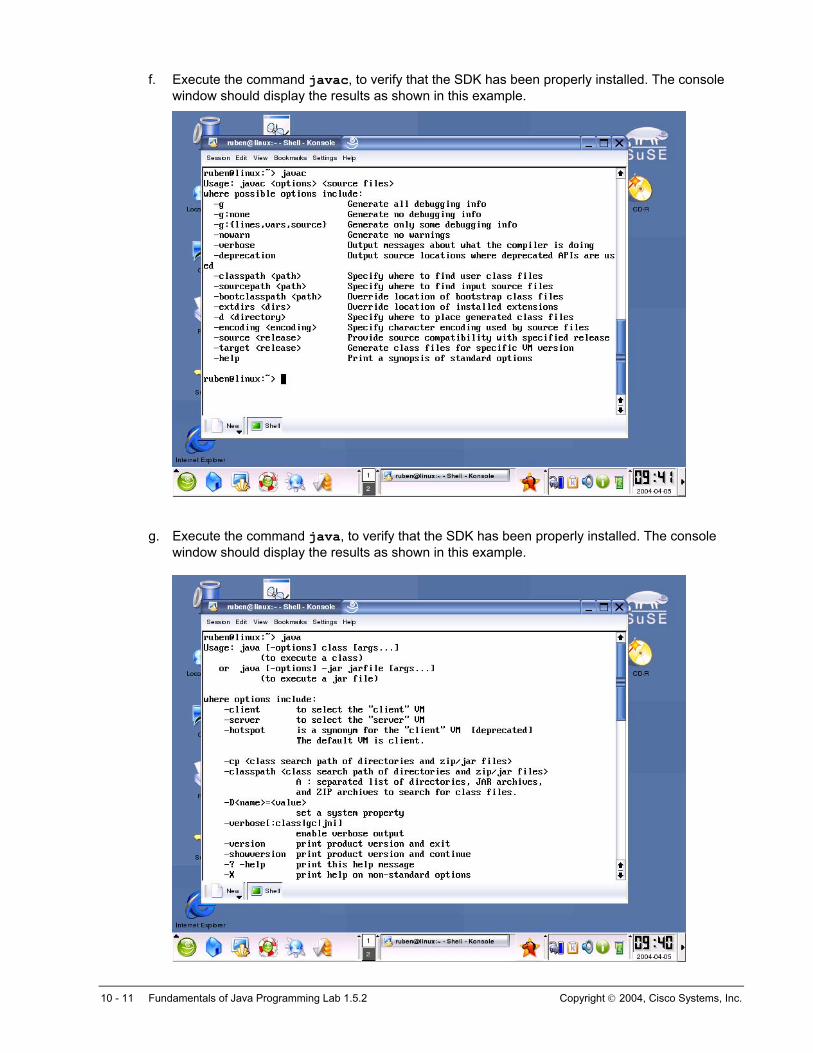
f. Execute the command javac, to verify that the SDK has been properly installed. The console window should display the results as shown in this example.
g. Execute the command java, to verify that the SDK has been properly installed. The console window should display the results as shown in this example.
10 - 11 Fundamentals of Java Programming Lab 1.5.2 Copyright 2004, Cisco Systems, Inc.
h. What if these commands do not work? The most common cause of this command failing is that the operating system “path” variable has not set properly. Request assistance from the instructor to set the path variable for your computer.
Step 3 Opening the simple text editor This example uses vi.
b. Open the vi in a terminal window.
4. Type the command vi filename. Use the name of the file being opened.
5. Edit the file with the vi editing commands.
11 - 11 Fundamentals of Java Programming Lab 1.5.2 Copyright 2004, Cisco Systems, Inc.
Lab 1.5.4 Create and Run the HelloStudent1 Class
Estimated Time 15 minutes
Learning Objectives • In this lab activity, students will create their first Java program, called HelloStudent1.java,
using a simple text editor.
• Using a console and command-line, students will use the javac command to compile the HelloStudent1.java file, creating a HelloStudent1.class file. Students will then use the java command to launch the JVM and run the HelloStudent1.class program.
Description/Scenario • This lab requires access to the command-line in a console window. If the students do not have
access to this feature, this lab can be completed using the BlueJ IDE in later sections.
• Students should use the appropriate command for their computer system and launch a console window to complete the tasks of the labs.
• The students will create a text file and save it in the folder Javacourse\chap1 or Javcourse/chap1.
• The three steps to create and run a Java program:
1. Create the source code using an editor. The source code is stored in a .java file. Use Notepad, or WordPad, or the vi editor.
2. The name of the compiler program for Java is javac. This program will create a byte code file, with the same name as the source code file, but with the suffix of .class. Compile the source code to create the byte code using the program javac. The command to execute is javac HelloStudent1.java. The byte code is stored in a .class file. Remember when compiling the program that Java is case sensitive. Verify that the .class file has been created, the name of the class file will be HelloStudent1.class.
3. Start the JVM and run the program (the .class file) using the program java. To execute the program SayHello, type the command java HelloStudent1.
4. Understanding the basic syntax, keywords and identifiers of the Java programming language. Java keywords used in this lab are public, class, static, and void.
Tasks
Step 1 Coding and Saving the HelloStudent1.java a. Locate the Folder javacourse on your computer system. Open this folder and locate the folder
chap1. You will create a source code (java instructions in a text file) file and save it in the chap1 folder.
1 - 4 Fundamentals of Java Programming Lab 1.5.4 Copyright 2004, Cisco Systems, Inc.
b. Launch any simple text editor such as Notepad, or WordPad, or vi. Create a new file. Before you begin typing in instructions, save the file. Name the file HelloStudent1.java. Save this file in the chap1 folder. (See step above).
1. Select the File menu option from your text editor.
2. Click on the Save button.
3. Select the folder chap1, inside the folder javacourse.
4. Type HelloStudent1.java in the dialog box requesting the file name.
5. Complete the save operation.
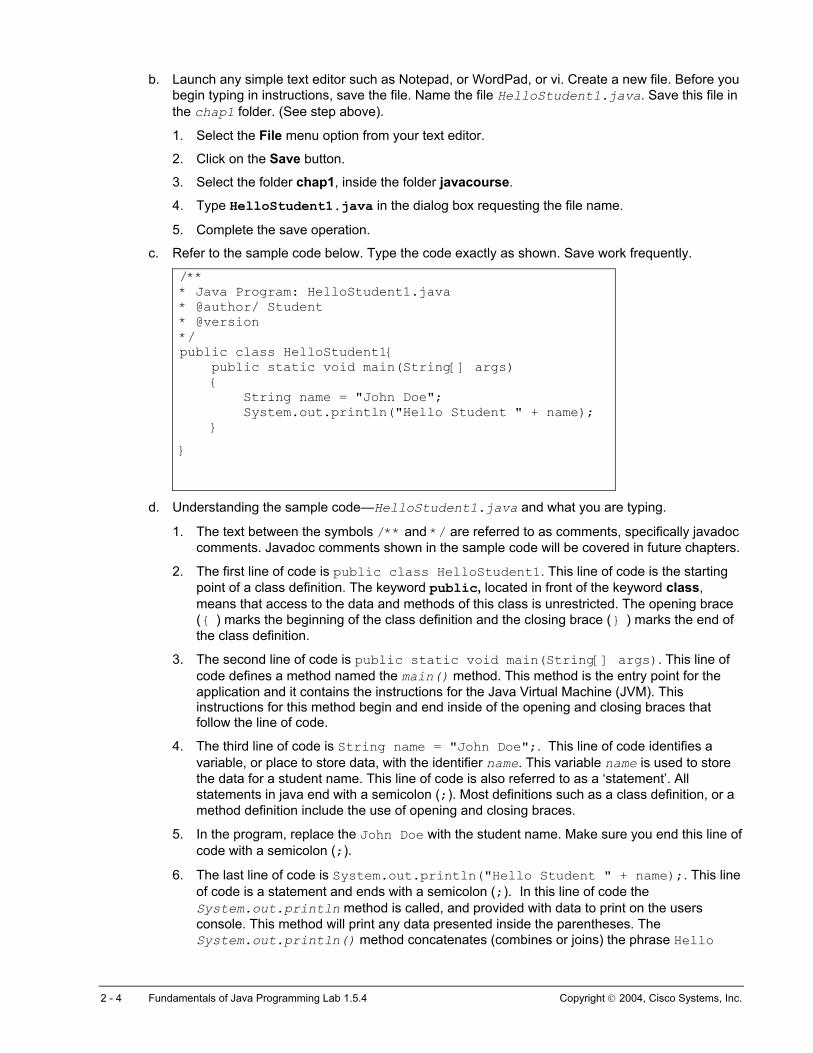
c. Refer to the sample code below. Type the code exactly as shown. Save work frequently.
/** * Java Program: HelloStudent1.java * @author/ Student * @version */ public class HelloStudent1{ public static void main(String[] args) { String name = "John Doe"; System.out.println("Hello Student " + name); } }
d. Understanding the sample code—HelloStudent1.java and what you are typing.
1. The text between the symbols /** and */ are referred to as comments, specifically javadoc comments. Javadoc comments shown in the sample code will be covered in future chapters.
2. The first line of code is public class HelloStudent1. This line of code is the starting point of a class definition. The keyword public, located in front of the keyword class, means that access to the data and methods of this class is unrestricted. The opening brace ( { ) marks the beginning of the class definition and the closing brace ( } ) marks the end of the class definition.
3. The second line of code is public static void main(String[] args). This line of code defines a method named the main() method. This method is the entry point for the application and it contains the instructions for the Java Virtual Machine (JVM). This instructions for this method begin and end inside of the opening and closing braces that follow the line of code.
4. The third line of code is String name = "John Doe";. This line of code identifies a variable, or place to store data, with the identifier name. This variable name is used to store the data for a student name. This line of code is also referred to as a ‘statement’. All statements in java end with a semicolon (;). Most definitions such as a class definition, or a method definition include the use of opening and closing braces.
5. In the program, replace the John Doe with the student name. Make sure you end this line of code with a semicolon (;).
6. The last line of code is System.out.println("Hello Student " + name);. This line of code is a statement and ends with a semicolon (;). In this line of code the System.out.println method is called, and provided with data to print on the users console. This method will print any data presented inside the parentheses. The System.out.println() method concatenates (combines or joins) the phrase Hello
2 - 4 Fundamentals of Java Programming Lab 1.5.4 Copyright 2004, Cisco Systems, Inc.
Student with the data name. The phrase Hello Student is also referred to as a literal string.
Step 2 Compiling the HelloStudent1.java a. Launch a console window, to enter in command-line instructions.
b. At the command-line prompt, issue the appropriate command to change to the directory chap1 in the javacourse folder. The change directory command allows you to navigate to different directories at the command-line console window. Navigate to the chap1 folder/directory located inside the javacourse folder/directory.
c. Most command-line prompts will display the name of the current directory. This should display javacourse\chap1. The next command will allow the student to verify the contents of the directory. Using a directory command such as dir or ls list the files and directories, and ensure that the HelloStudent1.java file exists.
d. Compile the code in the java source file HelloStudent1.java. At the command-line prompt type javac HelloStudent1.java and press the Enter key. The javac command creates a byte code file called HelloStudent1.class in the current directory/folder.
e. Make sure there are no compilation errors. Compilations errors at this stage will result from typing errors in any of the code. Review the code, by comparing what is typed and saved in the HelloStudent1.java file against the sample provided. Make any edits using the text editor, and compile the source code by following the previous step.
f. At the command-line prompt, type the appropriate command dir or ls to list the files and directories, and ensure that the HelloStudent1.class file exists. The HelloStudent1.class file is the correctly compiled byte code from the HelloStudent1.java source file.
Step 3 Executing the HelloStudent1 class. a. At the command-line prompt, type java HelloStudent1 and press the Enter key. NOTE: Do
not type HelloStudent1.class. The java command is the program that launches the java virtual machine. The JVM will execute the main(String[] args) method of the HelloStudent1 class.
b. Program output should be Hello Student <student name>.
c. At the command-line prompt, type exit to close the console window, or using the window icons, close the console window.
Step 5 Review Questions
a. What symbol was used to concatenate (or join in order) the Hello Student to the identifier name?
b. What symbol is used to end a java statement?
c. What command is used to launch the JVM?
3 - 4 Fundamentals of Java Programming Lab 1.5.4 Copyright 2004, Cisco Systems, Inc.

d. What command is used to compile the source file?
e. What is the entry point of the program.?
4 - 4 Fundamentals of Java Programming Lab 1.5.4 Copyright 2004, Cisco Systems, Inc.
Lab 1.6.2 Create HelloStudent2 with BlueJ
Estimated Time 15 minutes
Learning Objective In this lab activity, the student will use BlueJ to create a HelloStudent2 program using the sample program shown below. Javadoc comments will be discussed in detail in future chapters.
Description/Scenario In this lab activity, students will use BlueJ to create, edit, and run a Java program. The Java program is the same program as HelloStudent1. Some students have already done this once, and will find it easier to work with a new tool. Students who were unable to complete the HelloStudent1 class using the command-line in the console window, will be creating, compiling and executing a java program for the first time.
The purpose of this lab is to familiarize students with the BlueJ program. Using BlueJ requires that students pay close attention to saving their files in the proper folders. The lab instructions must be followed correctly. If files are not saved as instructed, later labs will become increasingly difficult to create and manage.
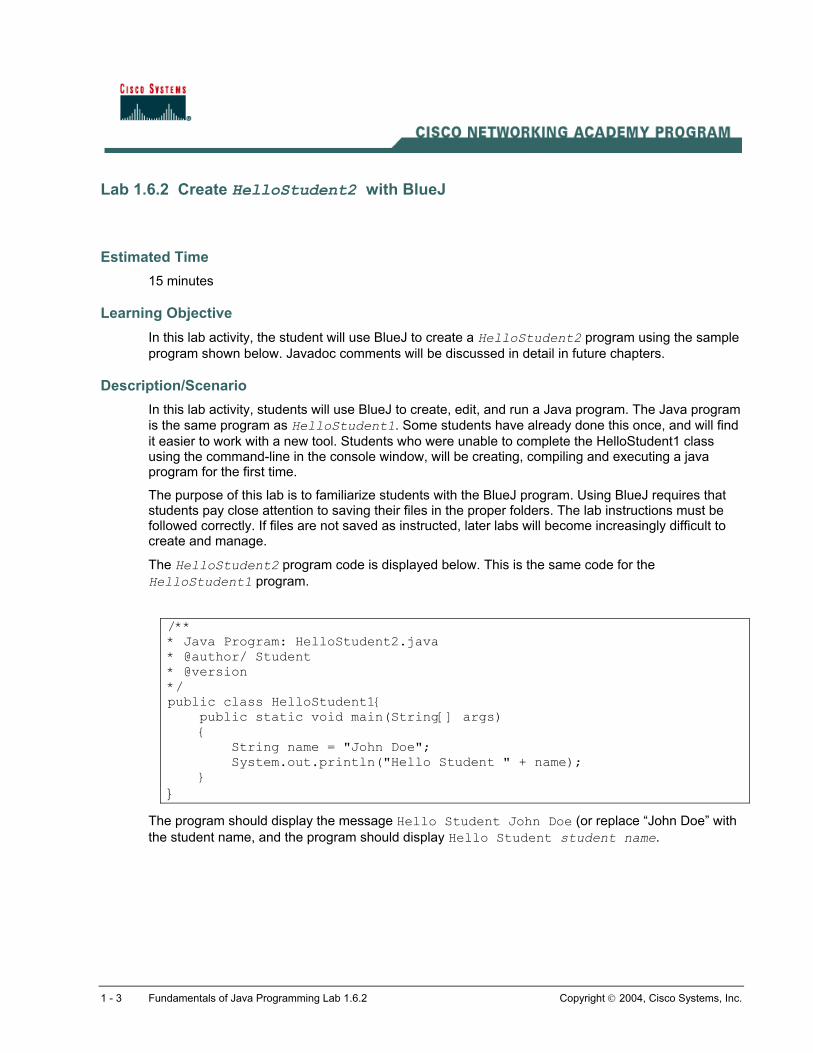
The HelloStudent2 program code is displayed below. This is the same code for the HelloStudent1 program.
/** * Java Program: HelloStudent2.java * @author/ Student * @version */ public class HelloStudent1{ public static void main(String[] args) { String name = "John Doe"; System.out.println("Hello Student " + name); } }
The program should display the message Hello Student John Doe (or replace “John Doe” with the student name, and the program should display Hello Student student name.
1 - 3 Fundamentals of Java Programming Lab 1.6.2 Copyright 2004, Cisco Systems, Inc.
File Management Students should ensure that the javacourse folder and folders for each of the chapter have been created on their computer system.
In this lab the students will create a project in the chap1 folder.
The project will be named lab1.6.2 (or lab1_6_2 for computer systems that do not permit the use of multiple periods (.) in the file name.
This lab introduces the creation of project folders and class files.
Tasks
Step 1 Programming using BlueJ a. Navigate through the folders on the computer system and locate the folder javacourse, and
inside this the folder chap1. BlueJ should be installed on the computer system and a short-cut icon for the program presented on the desktop. The icon for BlueJ is shown below.
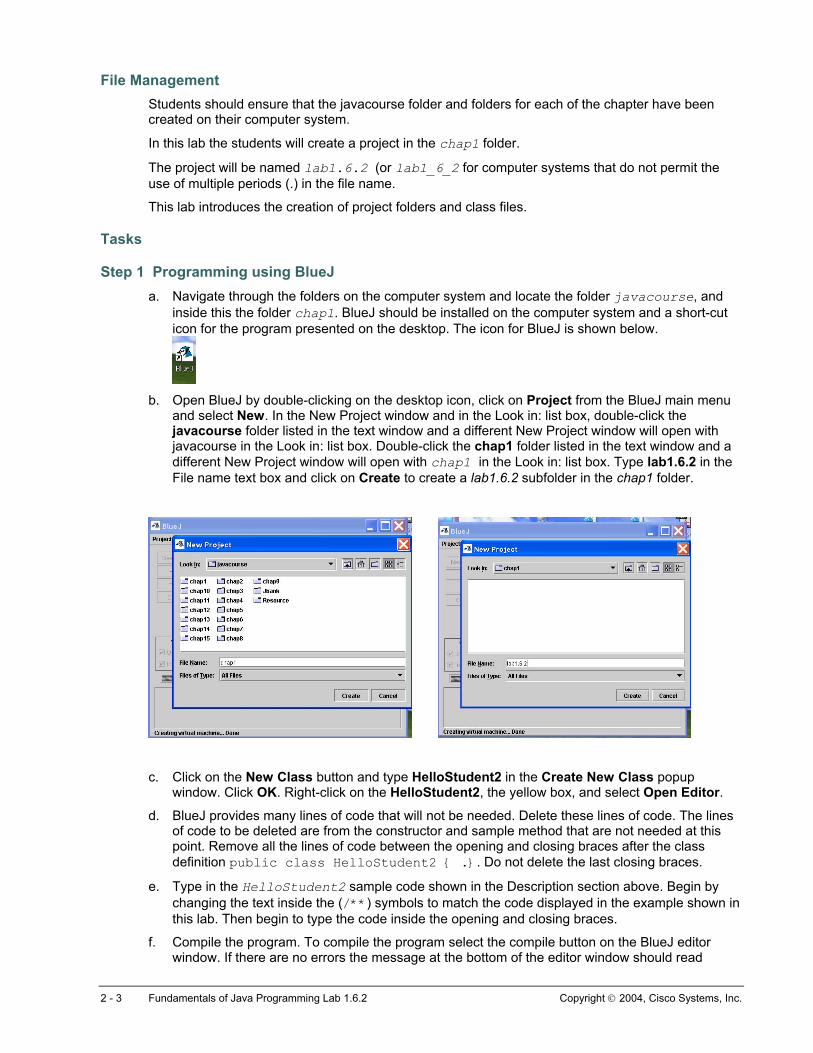
b. Open BlueJ by double-clicking on the desktop icon, click on Project from the BlueJ main menu
and select New. In the New Project window and in the Look in: list box, double-click the javacourse folder listed in the text window and a different New Project window will open with javacourse in the Look in: list box. Double-click the chap1 folder listed in the text window and a different New Project window will open with chap1 in the Look in: list box. Type lab1.6.2 in the File name text box and click on Create to create a lab1.6.2 subfolder in the chap1 folder.
c. Click on the New Class button and type HelloStudent2 in the Create New Class popup window. Click OK. Right-click on the HelloStudent2, the yellow box, and select Open Editor.
d. BlueJ provides many lines of code that will not be needed. Delete these lines of code. The lines of code to be deleted are from the constructor and sample method that are not needed at this point. Remove all the lines of code between the opening and closing braces after the class definition public class HelloStudent2 { .}. Do not delete the last closing braces.
e. Type in the HelloStudent2 sample code shown in the Description section above. Begin by changing the text inside the (/**) symbols to match the code displayed in the example shown in this lab. Then begin to type the code inside the opening and closing braces.
f. Compile the program. To compile the program select the compile button on the BlueJ editor window. If there are no errors the message at the bottom of the editor window should read
2 - 3 Fundamentals of Java Programming Lab 1.6.2 Copyright 2004, Cisco Systems, Inc.
“Class compiled- no syntax errors” and at the bottom right box of the editor window the status should display “saved”. Close the editor window.
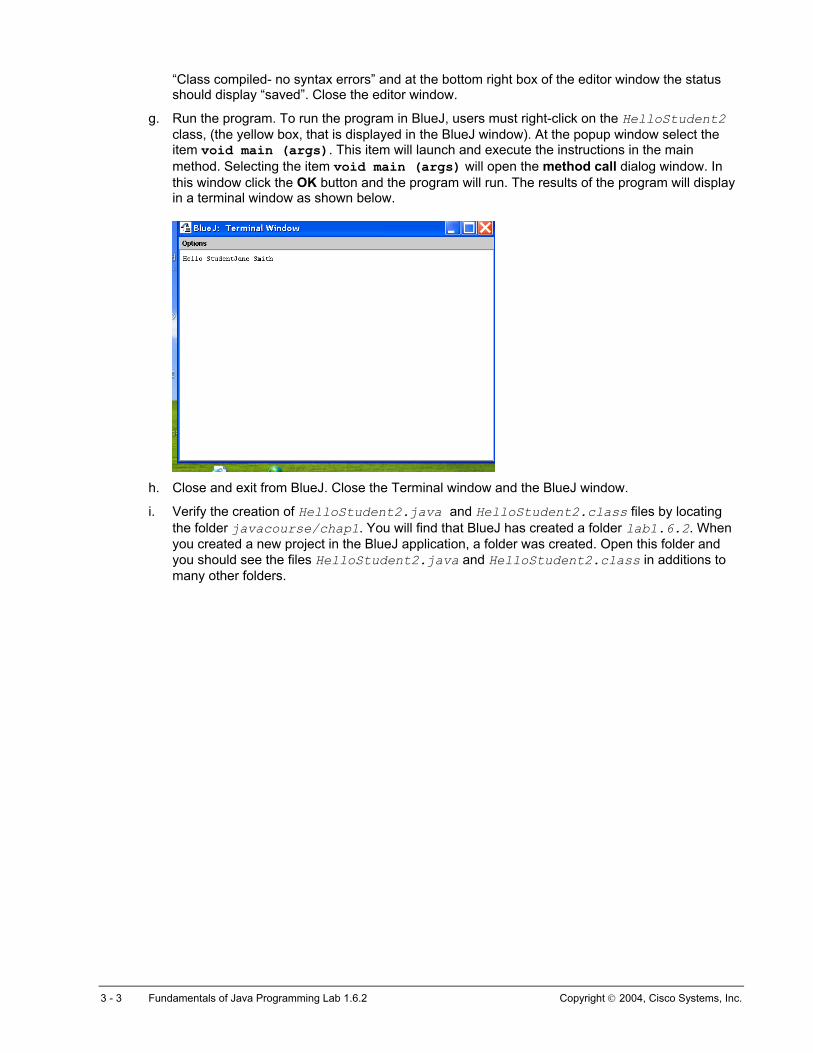
g. Run the program. To run the program in BlueJ, users must right-click on the HelloStudent2 class, (the yellow box, that is displayed in the BlueJ window). At the popup window select the item void main (args). This item will launch and execute the instructions in the main method. Selecting the item void main (args) will open the method call dialog window. In this window click the OK button and the program will run. The results of the program will display in a terminal window as shown below.
h. Close and exit from BlueJ. Close the Terminal window and the BlueJ window.
i. Verify the creation of HelloStudent2.java and HelloStudent2.class files by locating the folder javacourse/chap1. You will find that BlueJ has created a folder lab1.6.2. When you created a new project in the BlueJ application, a folder was created. Open this folder and you should see the files HelloStudent2.java and HelloStudent2.class in additions to many other folders.
3 - 3 Fundamentals of Java Programming Lab 1.6.2 Copyright 2004, Cisco Systems, Inc.
Lab 1.6.3 Exploring BlueJ Tutorial
Estimated Time 30 minutes
Learning Objective In this lab activity, the student will explore BlueJ by working through the tutorial that is provided with the IDE.
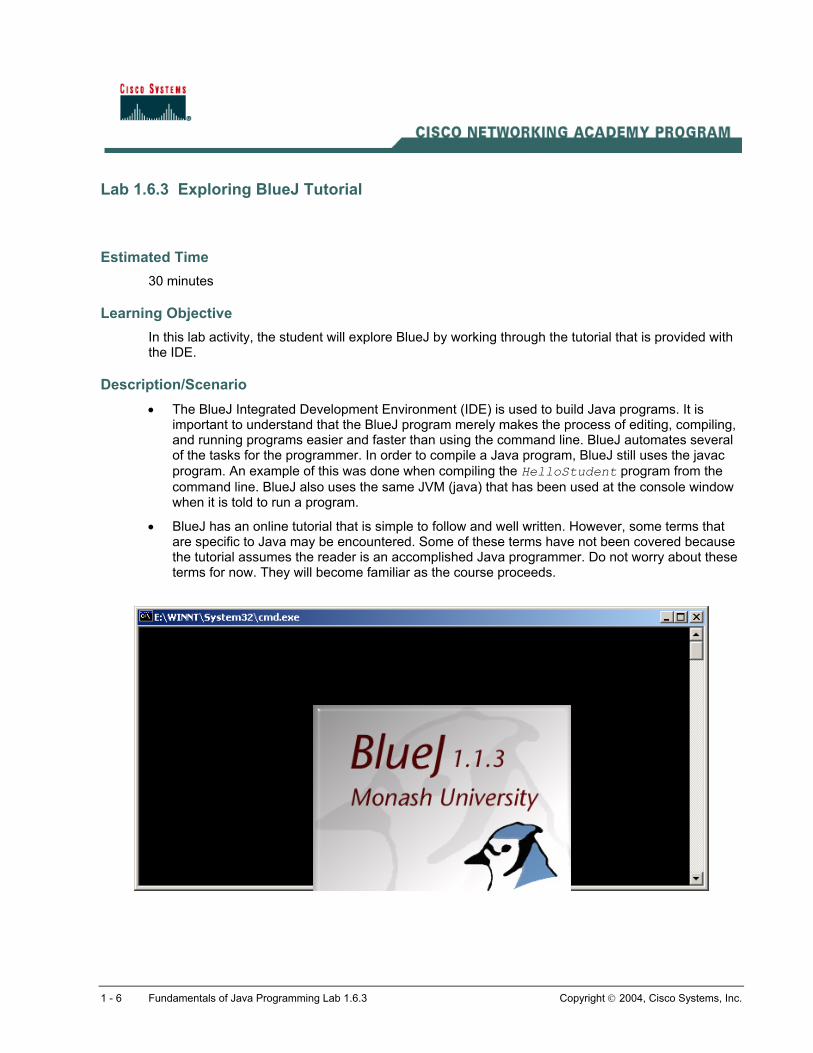
Description/Scenario • The BlueJ Integrated Development Environment (IDE) is used to build Java programs. It is
important to understand that the BlueJ program merely makes the process of editing, compiling, and running programs easier and faster than using the command line. BlueJ automates several of the tasks for the programmer. In order to compile a Java program, BlueJ still uses the javac program. An example of this was done when compiling the HelloStudent program from the command line. BlueJ also uses the same JVM (java) that has been used at the console window when it is told to run a program.
• BlueJ has an online tutorial that is simple to follow and well written. However, some terms that are specific to Java may be encountered. Some of these terms have not been covered because the tutorial assumes the reader is an accomplished Java programmer. Do not worry about these terms for now. They will become familiar as the course proceeds.
1 - 6 Fundamentals of Java Programming Lab 1.6.3 Copyright 2004, Cisco Systems, Inc.
Tasks
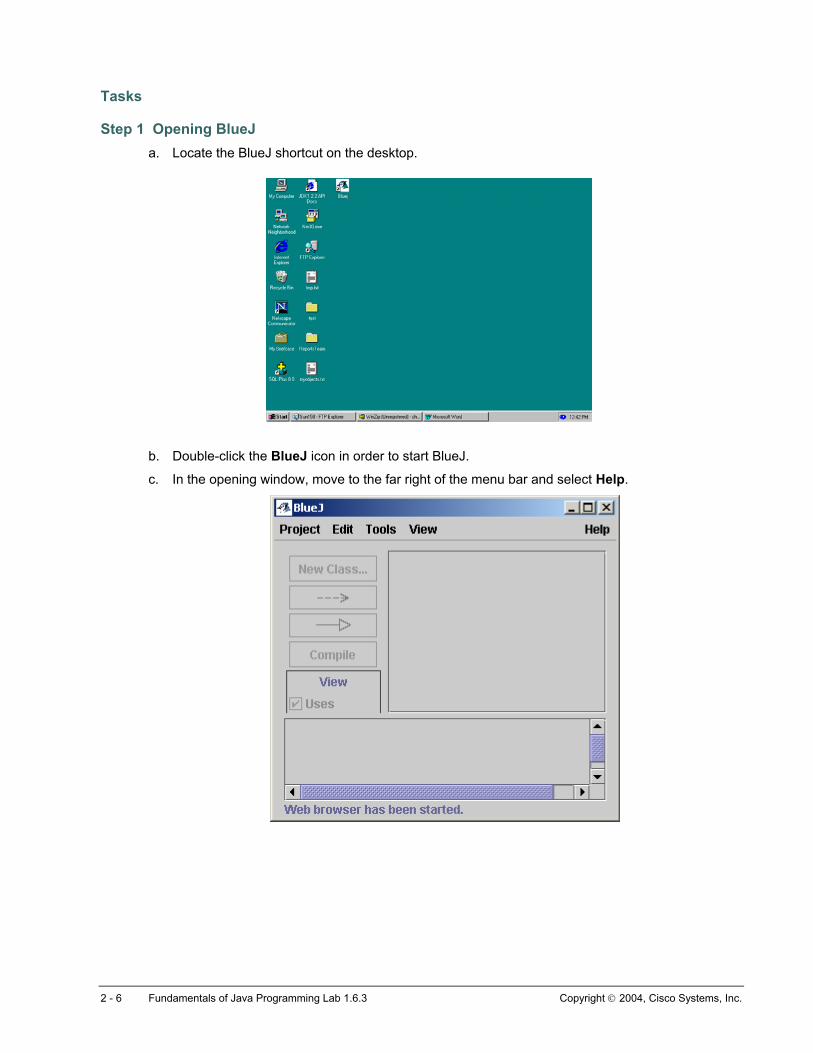
Step 1 Opening BlueJ a. Locate the BlueJ shortcut on the desktop.
b. Double-click the BlueJ icon in order to start BlueJ.
c. In the opening window, move to the far right of the menu bar and select Help.
2 - 6 Fundamentals of Java Programming Lab 1.6.3 Copyright 2004, Cisco Systems, Inc.
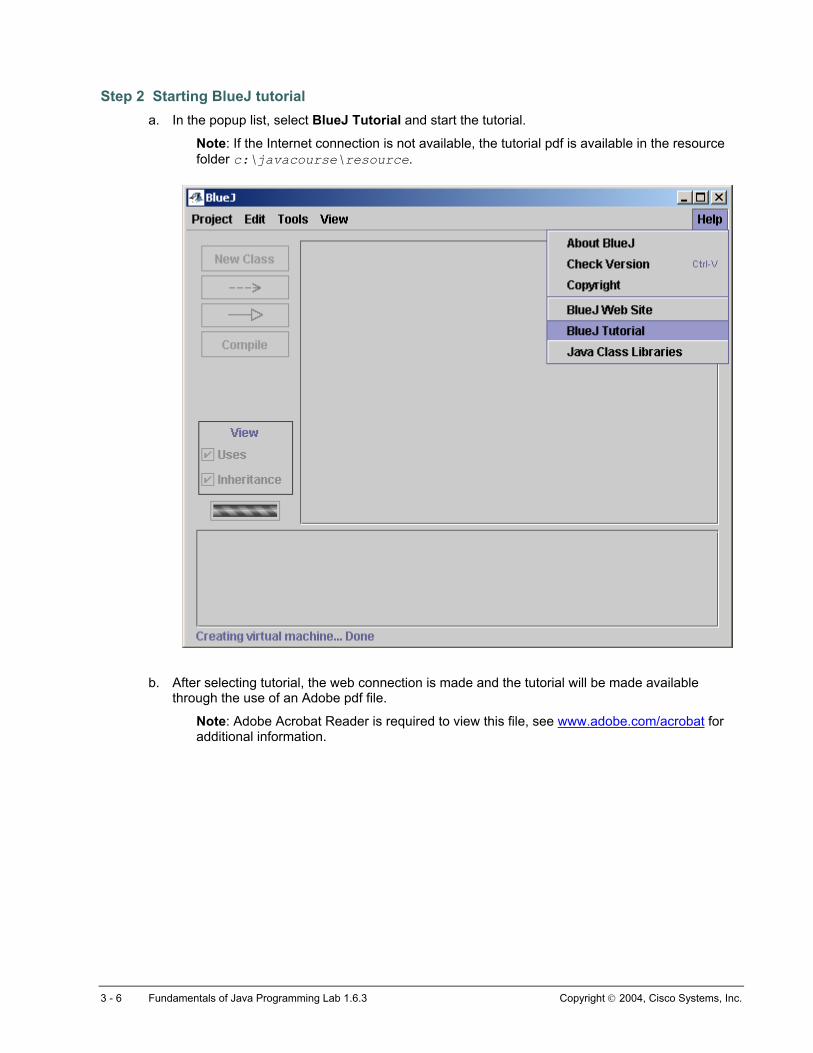
Step 2 Starting BlueJ tutorial a. In the popup list, select BlueJ Tutorial and start the tutorial.
Note: If the Internet connection is not available, the tutorial pdf is available in the resource folder c:\javacourse\resource.
b. After selecting tutorial, the web connection is made and the tutorial will be made available
through the use of an Adobe pdf file.
Note: Adobe Acrobat Reader is required to view this file, see www.adobe.com/acrobat for additional information.
3 - 6 Fundamentals of Java Programming Lab 1.6.3 Copyright 2004, Cisco Systems, Inc.
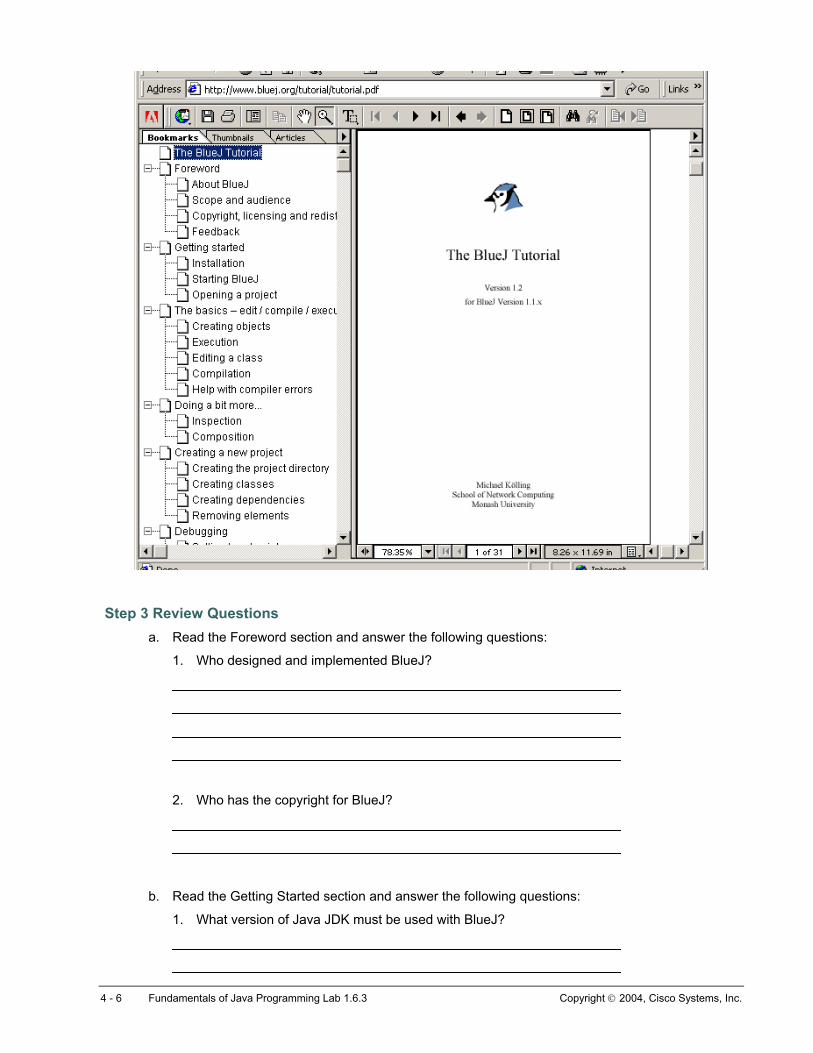
Step 3 Review Questions a. Read the Foreword section and answer the following questions:
1. Who designed and implemented BlueJ?
2. Who has the copyright for BlueJ?
b. Read the Getting Started section and answer the following questions:
1. What version of Java JDK must be used with BlueJ?
4 - 6 Fundamentals of Java Programming Lab 1.6.3 Copyright 2004, Cisco Systems, Inc.
2. What is the meaning of JDK?
3. What is the meaning of SDK?
4. What is the meaning of JRE ?
5. How is BlueJ started at the command line?
c. Read the Basic- edit/compile/execute section and answer the following questions:
1. Where is the examples directory located?
2. What method is used to start an application?
3. How is the editor opened for a class?
4. How is a class compiled?
5 - 6 Fundamentals of Java Programming Lab 1.6.3 Copyright 2004, Cisco Systems, Inc.
5. How is an application executed?
6 - 6 Fundamentals of Java Programming Lab 1.6.3 Copyright 2004, Cisco Systems, Inc.

Lab 1.7.1 Modify HelloStudent2 Program to Accept Input from User at Runtime
Estimated Time
30 minutes
Learning Objective In this lab activity, the student will create the HelloStudent3.java to accept the student’s first name and last name at runtime.
Students will learn how to provide input to a java program at runtime.
Students will use BlueJ to create a new project from a copy of an existing project, and modify classes in the new project.
Description/Scenario
• A program has different ways in which data can be received for processing. For example, the data can be defined as part of the code of the program. For example, the java statement in HelloStudent2 that stores data in a variable is String name = “John Doe”. Here the data “John Doe” is provided in the instruction. This is often referred to as “hard-coding data”. The program HelloStudent2 will always display the same message.
• A program is far more useful when it can process data in flexible ways. Data can be provided to a program when a program is executing. Two common approaches to doing this are to provide the data when the program is launched, or provide the data through interaction of the user with the program as part of the logic/ code of the program. This interaction may be in the form of answering a set of text based questions and typing data on a command-line console or terminal window, or through the presentation of some form of graphical user interfaces (windows). Graphical user interfaces require considerable extensive knowledge in java programming. Later chapters will explore the creation of graphical user interfaces.
• This lab explores the technique for providing input at runtime using a console window and using BlueJ.
• All data provided as input during run-time is considered String or Text data. Data must be presented in quotes.
• The console window used to compile and run Java programs is, in fact, a program running on the computer. The command line accepts text as an input message and can pass that message to other programs, and in particular, to the next Java program. In this lab, the java program will be executed by supplying a name. This name will be received as input to the program from the console and stored in two variables (data locations), args[0] and args[1]. The main method provides access to input from the console through the use of the String array args.
• The main method outputs Hello <student first name> <student last name> to the screen. The key to sending a message to the main method is the String[] args inside the parentheses.
1 - 5 Fundamentals of Java Programming Lab 1.7.1 Copyright 2002, Cisco Systems, Inc.
There are several key points to know for this lab exercise:
• All methods receive data as input in the form of an argument list. The argument list is the text inside the parentheses after the name of the method. For the main method, the argument list is String[] args.
• The main method is the entry point of the program. Data that is provided as input to the main method is stored in the String[] array args. The argument list for a method is a list of word pairs. The first word identifies what type of object the argument must be and the second word is the identifier, or name, of the argument. In the main method, the identifier for the input data is args and class type of String array.
• An array is a list of elements, all of the same type. A String array is a list of objects, which are all Strings. A String object contains text, like “Sam Smith” or “123-34-1234”. The brackets “[]” are the operators that denote an array in Java. They can appear next to the identifier of the array, or they can appear next to the name of the type of elements in the array. In this example, String[] args or String args[] both mean an array of String objects. Now it is clear why there are two ways to write the main method.
• Since an array is a list of objects, there must be a way to tell the program to look at the first, or fifth, or hundredth element in the list. Access any element in the array by using an index. An index is a number that corresponds to the element’s position in the array. The numbering for arrays starts at 0, not 1. This can cause confusion for new programmers. The first element in the String array called args is args[0], not args[1] where args[0] is the first element in the array. The reference args[1] refers to the second element in the array. The thirty-seventh element in the array is referenced with args[36], not args[37]. Why array indices start at zero will be studied in more detail in the Module on arrays.
Tasks
Step 1 Using BlueJ to provide input to the HelloStudent3 program. a. Create a new project from an existing project.
1) The student will open an existing project and save it under a different name, thus creating a copy of an existing project.
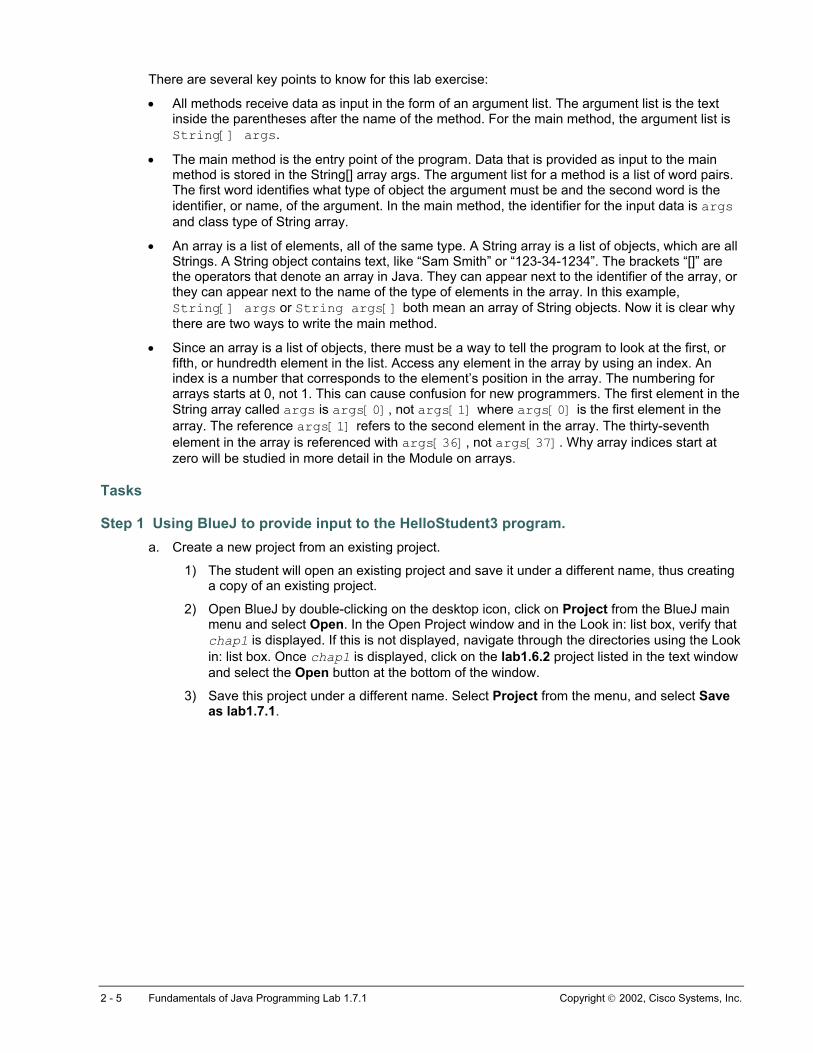
2) Open BlueJ by double-clicking on the desktop icon, click on Project from the BlueJ main menu and select Open. In the Open Project window and in the Look in: list box, verify that chap1 is displayed. If this is not displayed, navigate through the directories using the Look in: list box. Once chap1 is displayed, click on the lab1.6.2 project listed in the text window and select the Open button at the bottom of the window.
3) Save this project under a different name. Select Project from the menu, and select Save as lab1.7.1.
2 - 5 Fundamentals of Java Programming Lab 1.7.1 Copyright 2002, Cisco Systems, Inc.
b. The name of the class will be HelloStudent2. This will change as you change the code in the class. Open the editor by double-clicking on the class HelloStudent2, or by right-clicking on the symbol for the class HelloStudent2 and select Open Editor.
c. Modify the class name HelloStudent2 to HelloStudent3 as shown below.
1) Change the name of the class on the first line as shown here: public class HelloStudent2 change to read public class HelloStudent3
2) Compile and close the editor. Verify that the class name displayed in the project window is now changed to HelloStudent3.
3) Modify the main method to accept input at runtime. Open the class file HelloStudent3 for editing. In the main method, replace the line [String name = “John Doe”;] with [String firstName = args[0];] and add a second line of code [String lastName = args[1];]. Values are passed to the main method through the identifier args. The values are entered on the command line when the program is executed. The identifier args is an array of Strings where args[0] refers to the first element in the array and args[1] refers to the second element in the array. Arrays will be covered in later chapters.
4) Include the System.out.println() method to print Hello Student followed by the first name and the last name.
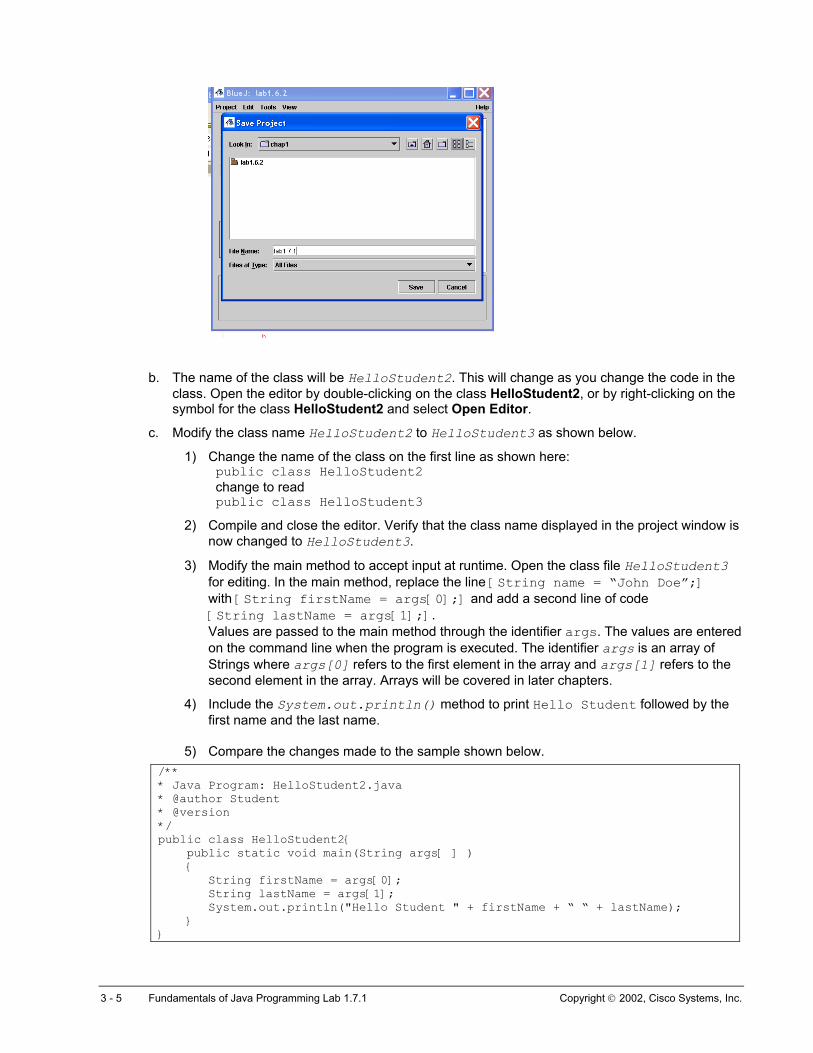
5) Compare the changes made to the sample shown below.
/** * Java Program: HelloStudent2.java * @author Student * @version */ public class HelloStudent2{ public static void main(String args[ ] ) { String firstName = args[0]; String lastName = args[1]; System.out.println("Hello Student " + firstName + “ “ + lastName); } }
3 - 5 Fundamentals of Java Programming Lab 1.7.1 Copyright 2002, Cisco Systems, Inc.
d. Compile the file.
e. Execute the program passing input to the program at run time.
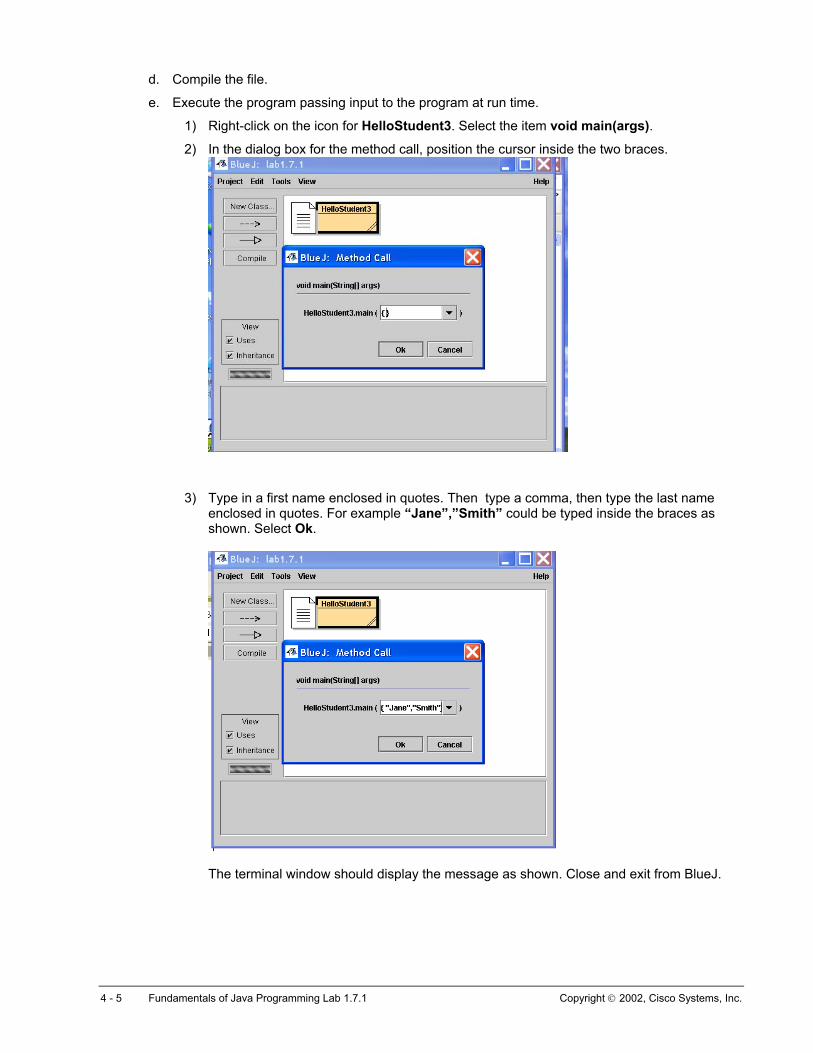
1) Right-click on the icon for HelloStudent3. Select the item void main(args).
2) In the dialog box for the method call, position the cursor inside the two braces.
3) Type in a first name enclosed in quotes. Then type a comma, then type the last name enclosed in quotes. For example “Jane”,”Smith” could be typed inside the braces as shown. Select Ok.
The terminal window should display the message as shown. Close and exit from BlueJ.
4 - 5 Fundamentals of Java Programming Lab 1.7.1 Copyright 2002, Cisco Systems, Inc.
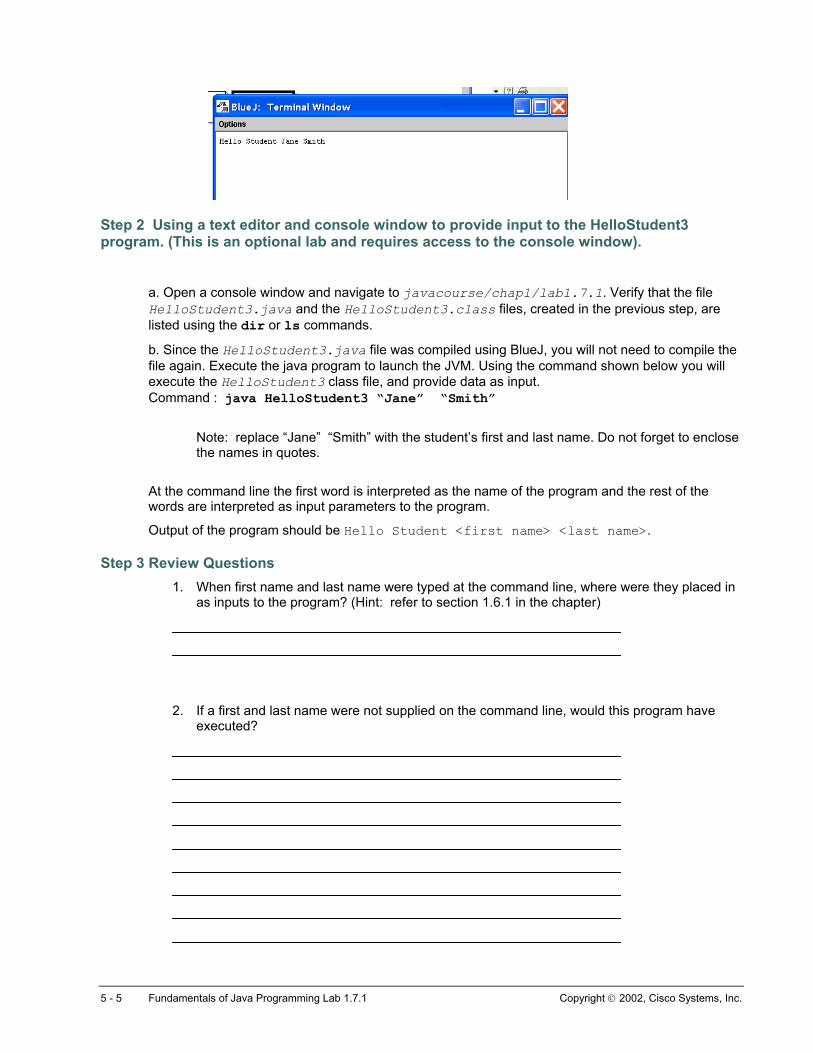
Step 2 Using a text editor and console window to provide input to the HelloStudent3 program. (This is an optional lab and requires access to the console window).
a. Open a console window and navigate to javacourse/chap1/lab1.7.1. Verify that the file HelloStudent3.java and the HelloStudent3.class files, created in the previous step, are listed using the dir or ls commands.
b. Since the HelloStudent3.java file was compiled using BlueJ, you will not need to compile the file again. Execute the java program to launch the JVM. Using the command shown below you will execute the HelloStudent3 class file, and provide data as input. Command : java HelloStudent3 “Jane” “Smith”
Note: replace “Jane” “Smith” with the student’s first and last name. Do not forget to enclose the names in quotes.
At the command line the first word is interpreted as the name of the program and the rest of the words are interpreted as input parameters to the program.
Output of the program should be Hello Student <first name> <last name>.
Step 3 Review Questions 1. When first name and last name were typed at the command line, where were they placed in
as inputs to the program? (Hint: refer to section 1.6.1 in the chapter)
2. If a first and last name were not supplied on the command line, would this program have executed?
5 - 5 Fundamentals of Java Programming Lab 1.7.1 Copyright 2002, Cisco Systems, Inc.
Lab 1.8.2 Debug and Correct Errors in Pre-defined Classes
Estimated Time 20 minutes
Learning Objective In this lab, students are given several predefined classes with errors, Auto.java, BlueJay.java, HelloStudent.java, and Beam.java. These files are all located in the c:\javacourse\resource\chap1 folder. Students will debug and correct the errors.
Description/Scenario Several Java programs with errors are provided. Use BlueJ to copy these files to a new project. Correct the syntax errors in the Java programs.
Use the sample code shown below to answer the review questions:
/** * Java Program: YourData.java * @author Student * @version */ public class YourData { public static void Main(String[] args) { String firstname = args[0] String lastname = args[1]; int postalcode = 45356; String FavoriteColor = “Blue”; System.out.println(“Hello “ + firstName+” “+ lastName); System.out.println(“ Your postal code is : “ + postalcode); System.out.println(“Your favorite color is “ + Favoritecolor):
} }
1 - 3 Fundamentals of Java Programming Lab 1.8.2 Copyright 2004, Cisco Systems, Inc.
Tasks
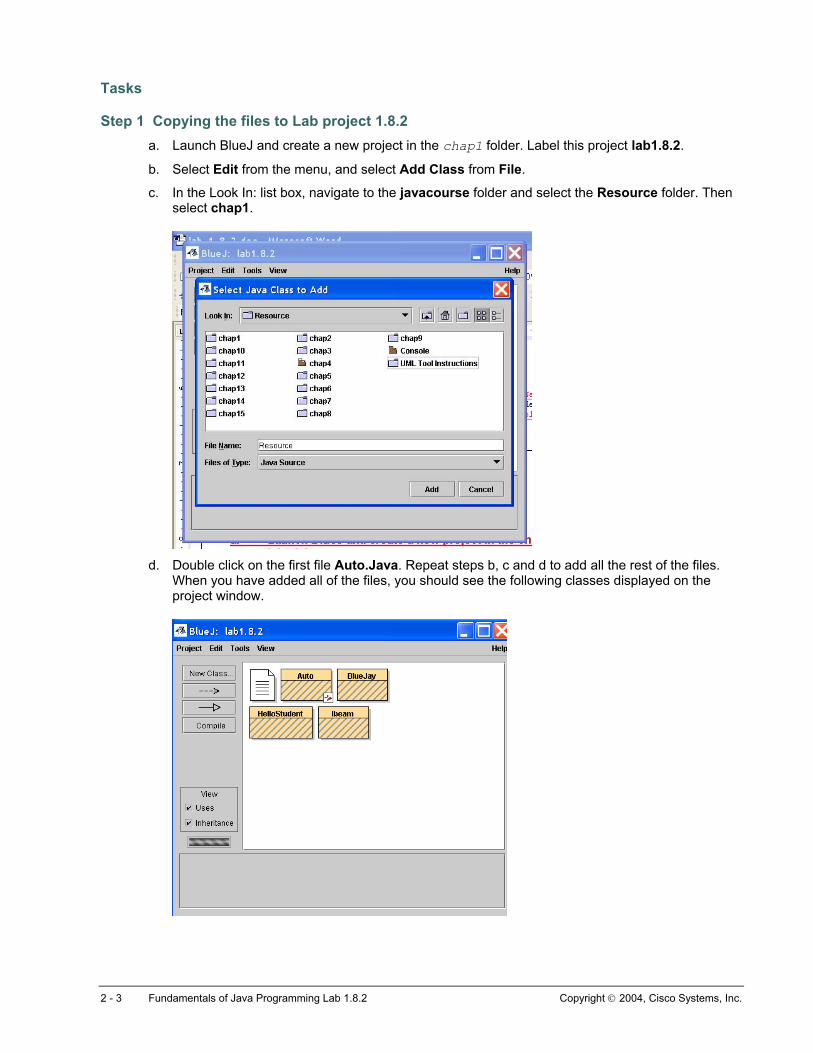
Step 1 Copying the files to Lab project 1.8.2 a. Launch BlueJ and create a new project in the chap1 folder. Label this project lab1.8.2.
b. Select Edit from the menu, and select Add Class from File.
c. In the Look In: list box, navigate to the javacourse folder and select the Resource folder. Then select chap1.
d. Double click on the first file Auto.Java. Repeat steps b, c and d to add all the rest of the files.
When you have added all of the files, you should see the following classes displayed on the project window.
2 - 3 Fundamentals of Java Programming Lab 1.8.2 Copyright 2004, Cisco Systems, Inc.
Step 2 Correcting program errors e. Compile one file at a time, by right-clicking each icon for a class and select compile. Do not use
the compile button on the left side of the project window. This will attempt to compile all the classes. In this lab compile one class at a time, fix the errors before attempting the next class.
f. When editing the classes, look for these common errors:
• Java keywords or class names spelled incorrectly
• Inconsistently referencing identifiers. Remember the Java language is case sensitive.
• Forgetting to close braces {}, brackets [] or parentheses ( )
• Missing the dot operator (.)
• Missing semicolons (;)
g. Make a note of the errors, make corrections, and recompile the program. Repeat the process
until no errors are listed.
h. Repeat the process for all programs until no errors are reported for all programs.
i. Once all the programs are error free, have the instructor view the execution of the programs to confirm the tasks were completed correctly.
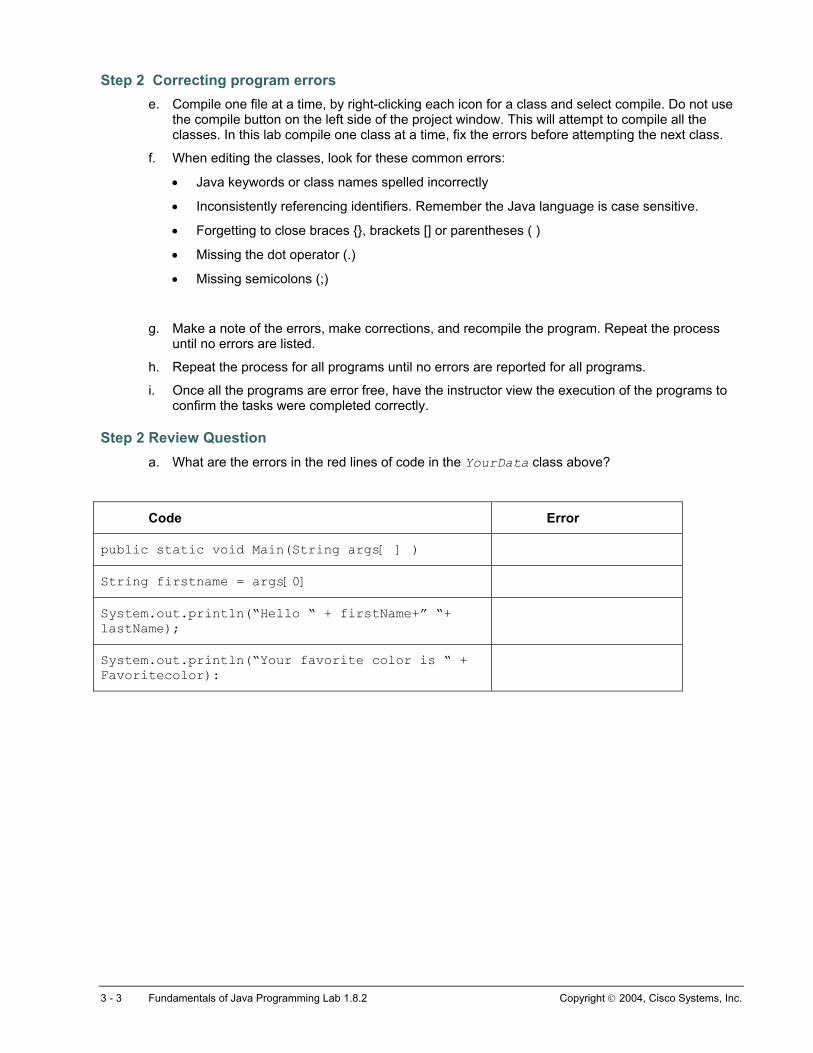
Step 2 Review Question a. What are the errors in the red lines of code in the YourData class above?
Code Error
public static void Main(String args[ ] )
String firstname = args[0]
System.out.println(“Hello “ + firstName+” “+ lastName);
System.out.println(“Your favorite color is “ + Favoritecolor):
3 - 3 Fundamentals of Java Programming Lab 1.8.2 Copyright 2004, Cisco Systems, Inc.
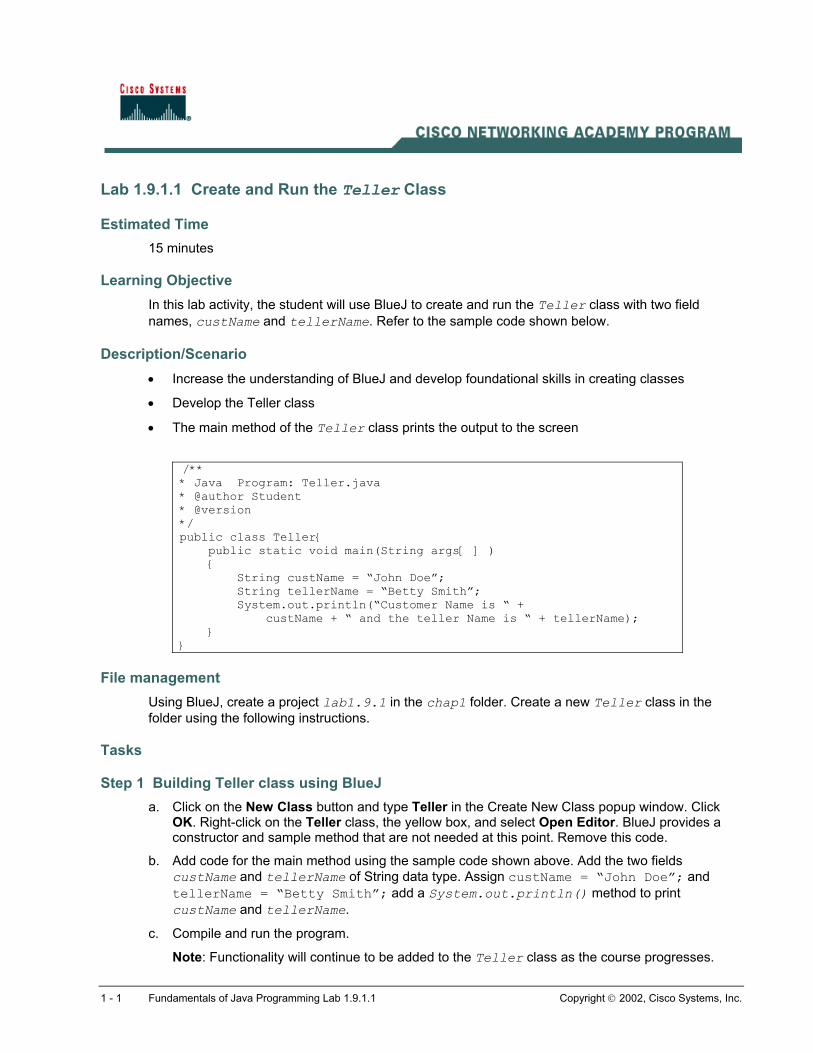
Lab 1.9.1.1 Create and Run the Teller Class
Estimated Time 15 minutes
Learning Objective In this lab activity, the student will use BlueJ to create and run the Teller class with two field names, custName and tellerName. Refer to the sample code shown below.
Description/Scenario • Increase the understanding of BlueJ and develop foundational skills in creating classes
• Develop the Teller class
• The main method of the Teller class prints the output to the screen
/** * Java Program: Teller.java * @author Student * @version */ public class Teller{ public static void main(String args[ ] ) { String custName = “John Doe”; String tellerName = “Betty Smith”; System.out.println(“Customer Name is “ + custName + “ and the teller Name is “ + tellerName); } }
File management Using BlueJ, create a project lab1.9.1 in the chap1 folder. Create a new Teller class in the folder using the following instructions.
Tasks
Step 1 Building Teller class using BlueJ a. Click on the New Class button and type Teller in the Create New Class popup window. Click
OK. Right-click on the Teller class, the yellow box, and select Open Editor. BlueJ provides a constructor and sample method that are not needed at this point. Remove this code.
b. Add code for the main method using the sample code shown above. Add the two fields custName and tellerName of String data type. Assign custName = “John Doe”; and tellerName = “Betty Smith”; add a System.out.println() method to print custName and tellerName.
c. Compile and run the program.
Note: Functionality will continue to be added to the Teller class as the course progresses.
1 - 1 Fundamentals of Java Programming Lab 1.9.1.1 Copyright 2002, Cisco Systems, Inc.
Lab 1.9.1.2 Case Study: Modifying the Teller Program to Accept Runtime Data
Estimated Time 20 minutes
Learning Objective In this lab activity, the student will modify the Teller program to accept runtime input in order to set the custName and tellerName.
Description/Scenario Accepting input data for Teller class at runtime.
File management Launch BlueJ and edit the file created in lab 1.9.1, the Teller class.
Open BlueJ. Click on Project from the BlueJ main menu and select Open. You can also select Open Recent Projects from the project menu item. Open the project lab1.9.1. The Teller class should be displayed on the project window.
Tasks
Step 1 Modifying Teller class using BlueJ a. Modify the Teller class main method to accept data at runtime by using this code:
String custName = args[0]; String tellerName = args[1];
b. Display the fields as in the previous Teller lab.
c. Compile and run the program.
d. To run the program with runtime input data, right-click on the class and select the main method as usual. In the method call dialog window, place the input data between the braces as Strings {“John Doe”, “Betty Smith”}. Click OK.
Step 2 Review Questions 1. Into which variables are the runtime data John Doe and Betty Smith placed?
1 - 1 Fundamentals of Java Programming Lab 1.9.1.2 Copyright 2002, Cisco Systems, Inc.
Lab 2.2.6 Create Classes and Operate on Objects
Estimated Time 20 minutes
Learning Objectives • In this lab activity, using an UML diagram, the student will identify the attributes of Student
objects, define and code a Student class.
• Using an UML diagram the student will define and code a Teacher class with Java instructions in the main method to create and operate on Student objects.
Description/Scenario • Object concepts that should be understood before working on this lab include:
o What is the relationship between a class and an object? Classes define the template for the creation of objects. The Java programmer, defines the code for the class of an object in a .java source file. This definition is then used, often by other objects or classes, to create the actual objects that will be operated on.
o The Relationship between UML and Defining a class for objects
Current object-oriented designing methods use Unified Modeling Language (UML) to define object-oriented constructs and models. UML is a result of efforts to standardize the terminology and diagramming of object models. Many software products provide graphical tools to create UML diagrams.
UML is a collection of symbols and patterns of symbols. It is used to describe objects, the relationship between objects, the use of objects, and the state of objects. UML has many different types of diagrams that can be used to describe object models.
The symbols associated with a UML diagram are as follows:
• Rectangles to describe the class
• Lines to describe relationships
• Special symbols to describe accessibility and strength of relationships
• “+ “ --- public, any other object can access the data or the method
• “-“ --- private, only methods defined within the class can access
• “#” --- protected, only objects in the same name package (that is directory) can access
• “ “ --- no symbol indicates default access.
• italics --- represent abstract class or method
1 - 7 Fundamentals of Java Programming Lab 2.2.6 Copyright 2004, Cisco Systems, Inc.

• underline --- represents static method or attribute
o Describing object data (attributes) and methods (behaviors) through the class definitions. All objects have attributes and exhibit behaviors. Attributes are also known as data, while behaviors are referred to as methods. Attributes or data that belongs to objects of a class are defined in statements that describe the data type and a variable identifier. For example, String name, defines a variable name that will store data of the type String (text data). Double balance defines a variable balance that will store data of the type double (decimal or floating point data).
o Create (instantiate objects using the class definition and constructor methods), and operate on objects of a class by calling it’s methods. To create an object, a special method, known as a constructor is used. A constructor is a block of code that defines procedures for how to create an object. The constructor has the same name as the class. The request to create an object is made by using the keyword new. Objects interact with each other by sending messages and performing operations or procedures. These actions occur in methods. For one object to interact with another object, it must know the identifier (the name given by the programmer) or object reference (the location in memory). The request for a method is a message. The message is sent to an object using the method signature. The method signature identifies the name of the method and provides the method with the data defined in the method signature. A method signature provides the method name, the data it needs to complete the procedure, and the results it will return
File Management Using BlueJ, create a new project Lab2.2.6 in the folder chap2, located inside the javacourse folder. Open BlueJ. Click on Project from the BlueJ main menu and select New. Using the Look In: list box, navigate to the folder javacourse/chap2. Type lab2.2.6 in the File name text box and click on Create to create a lab2.2.6 subfolder in the chap2 folder.
2 - 7 Fundamentals of Java Programming Lab 2.2.6 Copyright 2004, Cisco Systems, Inc.
Tasks
Step 1 Understanding the UML for the Student and Teacher class. a. Students should use the following UML diagram for the Student class definition. The symbols
(–) and (+) declare the data or method as private or public. The Constructor is underlined and has the same name as the class. This UML defines two constructors for the Student class. The arguments for the methods are defined inside the parentheses, and the return type is listed after the method signature.
b. Before using BlueJ to create the Student class, write down the Java statements that will be used to define each of the attributes and the methods. In later labs you will become proficient in translating UML information directly into BlueJ to create a class file. For this first lab, and to gain confidence, write down the Java statements.
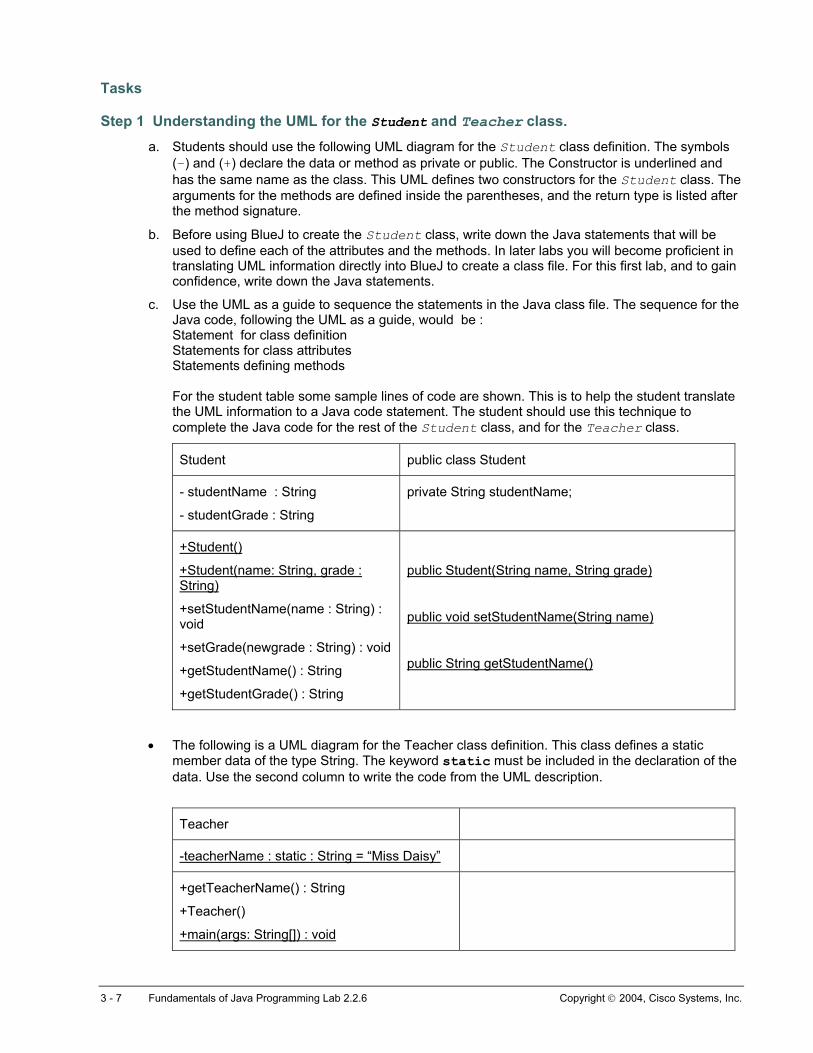
c. Use the UML as a guide to sequence the statements in the Java class file. The sequence for the Java code, following the UML as a guide, would be : Statement for class definition Statements for class attributes Statements defining methods For the student table some sample lines of code are shown. This is to help the student translate the UML information to a Java code statement. The student should use this technique to complete the Java code for the rest of the Student class, and for the Teacher class.
Student public class Student
- studentName : String
- studentGrade : String
private String studentName;
+Student()
+Student(name: String, grade : String)
+setStudentName(name : String) : void
+setGrade(newgrade : String) : void
+getStudentName() : String
+getStudentGrade() : String
public Student(String name, String grade)
public void setStudentName(String name)
public String getStudentName()
• The following is a UML diagram for the Teacher class definition. This class defines a static
member data of the type String. The keyword static must be included in the declaration of the data. Use the second column to write the code from the UML description.
Teacher
-teacherName : static : String = “Miss Daisy”
+getTeacherName() : String
+Teacher()
+main(args: String[]) : void
3 - 7 Fundamentals of Java Programming Lab 2.2.6 Copyright 2004, Cisco Systems, Inc.
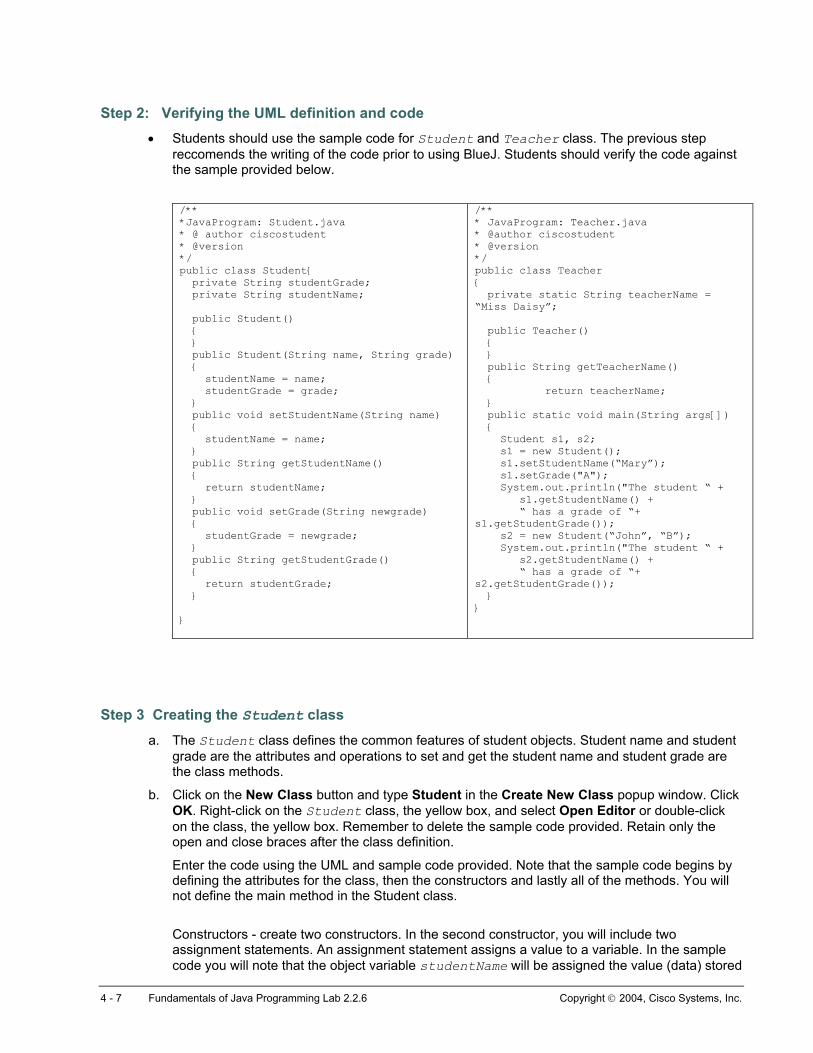
Step 2: Verifying the UML definition and code • Students should use the sample code for Student and Teacher class. The previous step
reccomends the writing of the code prior to using BlueJ. Students should verify the code against the sample provided below.
/** *JavaProgram: Student.java * @ author ciscostudent * @version */ public class Student{ private String studentGrade; private String studentName; public Student() { } public Student(String name, String grade) { studentName = name; studentGrade = grade; } public void setStudentName(String name) { studentName = name; } public String getStudentName() { return studentName; } public void setGrade(String newgrade) { studentGrade = newgrade; } public String getStudentGrade() { return studentGrade; } }
/** * JavaProgram: Teacher.java * @author ciscostudent * @version */ public class Teacher { private static String teacherName = “Miss Daisy”; public Teacher() { } public String getTeacherName() { return teacherName; } public static void main(String args[]) { Student s1, s2; s1 = new Student(); s1.setStudentName(“Mary”); s1.setGrade("A"); System.out.println("The student “ + s1.getStudentName() + “ has a grade of “+ s1.getStudentGrade()); s2 = new Student(“John”, “B”); System.out.println("The student “ + s2.getStudentName() + “ has a grade of “+ s2.getStudentGrade()); } }
Step 3 Creating the Student class a. The Student class defines the common features of student objects. Student name and student
grade are the attributes and operations to set and get the student name and student grade are the class methods.
b. Click on the New Class button and type Student in the Create New Class popup window. Click OK. Right-click on the Student class, the yellow box, and select Open Editor or double-click on the class, the yellow box. Remember to delete the sample code provided. Retain only the open and close braces after the class definition.
Enter the code using the UML and sample code provided. Note that the sample code begins by defining the attributes for the class, then the constructors and lastly all of the methods. You will not define the main method in the Student class.
Constructors - create two constructors. In the second constructor, you will include two assignment statements. An assignment statement assigns a value to a variable. In the sample code you will note that the object variable studentName will be assigned the value (data) stored
4 - 7 Fundamentals of Java Programming Lab 2.2.6 Copyright 2004, Cisco Systems, Inc.
in the constructor or method variable name, and studentgrade will be assigned the value (data) stored in the grade variable. Understanding and writing a correct assignment statement ensures that data is stored in an object. For example, name=StudentName while correct in syntax, is logically wrong. In this example the variable name is being assigned data from the object. Since the constructor is just being called, there will be no meaningful data in the object, and this would be a useless statement. Watch the assignments statements that you create, and note that the value to the right of the equal (=) symbol is being assigned to the variable to the right of the equal (=) statement.
Other methods - for each method you will code, be sure to include the return-type, and to include a return statement where shown. Methods will be discussed in detail in Module 3. Compile and save the Student class, correcting any syntax errors.
c. Testing the Student class. Although the purpose of this lab is to create Student objects using the Teacher class, BlueJ provides the functionality for testing objects of any class in the BlueJ project window. Follow these steps to create and operate on an object using the Object tool in BlueJ. You will create two Student objects. The first will be a Student object using the Student() constructor, and the second will use the Student(String name, String grade) constructor.
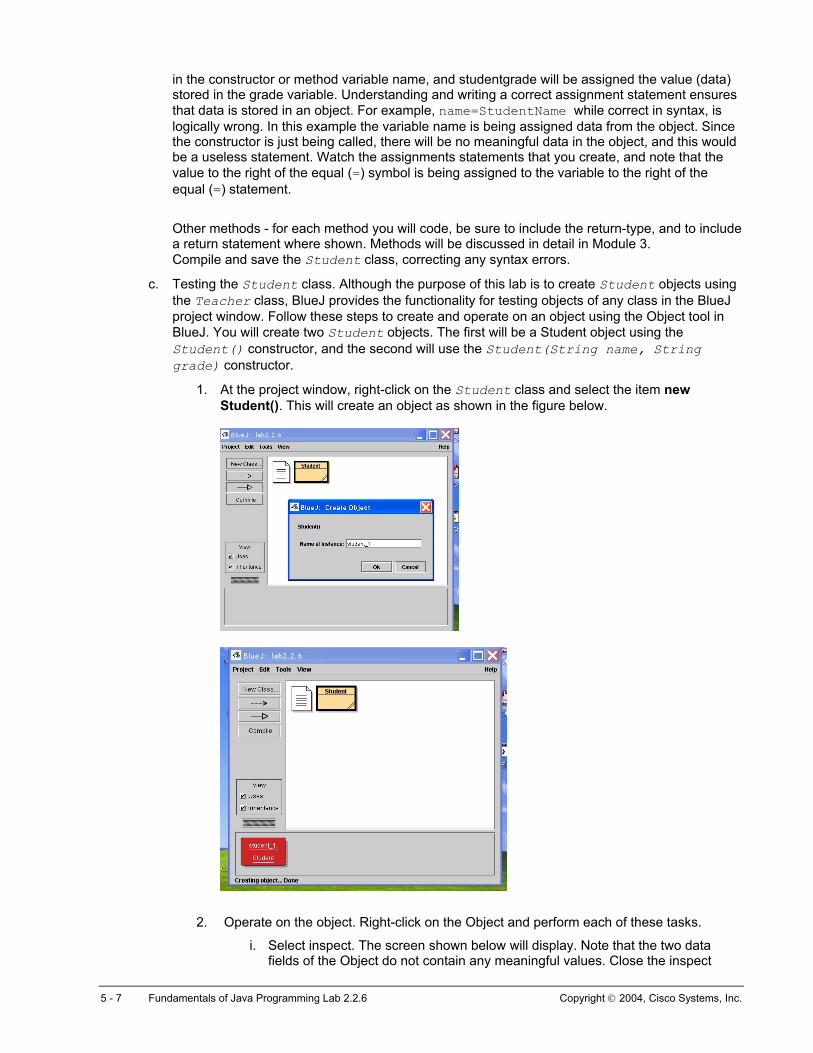
1. At the project window, right-click on the Student class and select the item new Student(). This will create an object as shown in the figure below.
2. Operate on the object. Right-click on the Object and perform each of these tasks.
i. Select inspect. The screen shown below will display. Note that the two data fields of the Object do not contain any meaningful values. Close the inspect
5 - 7 Fundamentals of Java Programming Lab 2.2.6 Copyright 2004, Cisco Systems, Inc.
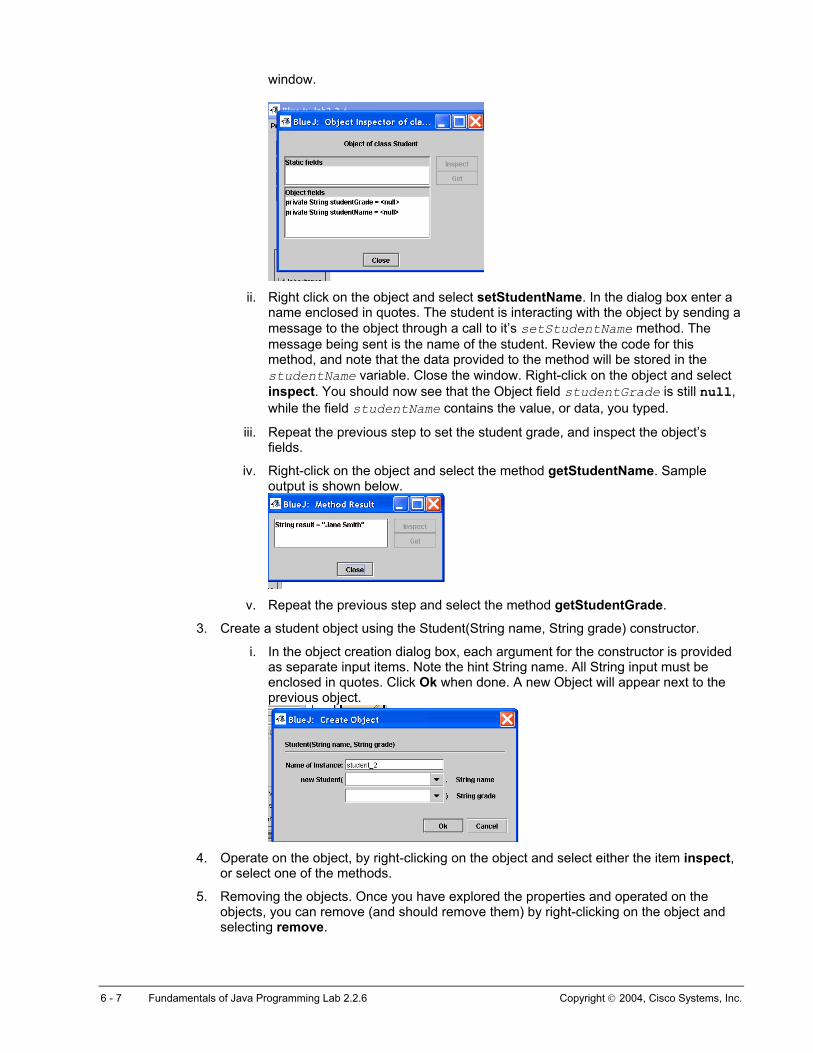
window.
ii. Right click on the object and select setStudentName. In the dialog box enter a
name enclosed in quotes. The student is interacting with the object by sending a message to the object through a call to it’s setStudentName method. The message being sent is the name of the student. Review the code for this method, and note that the data provided to the method will be stored in the studentName variable. Close the window. Right-click on the object and select inspect. You should now see that the Object field studentGrade is still null, while the field studentName contains the value, or data, you typed.
iii. Repeat the previous step to set the student grade, and inspect the object’s fields.
iv. Right-click on the object and select the method getStudentName. Sample output is shown below.
v. Repeat the previous step and select the method getStudentGrade.
3. Create a student object using the Student(String name, String grade) constructor.
i. In the object creation dialog box, each argument for the constructor is provided as separate input items. Note the hint String name. All String input must be enclosed in quotes. Click Ok when done. A new Object will appear next to the previous object.
4. Operate on the object, by right-clicking on the object and select either the item inspect,
or select one of the methods.
5. Removing the objects. Once you have explored the properties and operated on the objects, you can remove (and should remove them) by right-clicking on the object and selecting remove.
6 - 7 Fundamentals of Java Programming Lab 2.2.6 Copyright 2004, Cisco Systems, Inc.
Step 4 Creating Teacher class a. Similar to Step 3, create the Teacher class using the UML and sample code provided.
b. The Teacher class has the main method. In the main method of the Teacher class create two Student objects, using statements like the following:
Student s1, s2;
s1 = new Student(); //or
s2 = new Student(“Joe Doe”, “B”);
c. The identifier s1 references a Student object created without a name, after instantiating using
the default constructor. The Teacher class uses setName() to set the name for s1 and uses setGrade() method to set the grade for s1.
d. The identifier s2 references a student object created with a studentName and a studentGrade, using the second constructor.
e. The Teacher class prints the studentName and studentGrade of Student objects through the accessor methods getStudentName() and getStudentGrade().
Step 5 Running Teacher class a. Compile the Teacher class.
b. The Teacher class defines the main method, which is the entry point for this application. Run the Teacher class.
1. What is the code in the Teacher class that is used to print the student’s name and grade?
2. In the main method of the Teacher class, why can’t the code access Student name by using s1.studentName instead of using the method s1.getStudentName()?
7 - 7 Fundamentals of Java Programming Lab 2.2.6 Copyright 2004, Cisco Systems, Inc.
Lab 2.6.1.1 Design and Describe Classes with UML
Estimated Time 20 minutes
Learning Objectives • In this lab activity, the student will identify the features of the JBANK classes using the UML
diagram provided below. The UML diagram presents Phase I of the JBANK application.
• Students will describe the accessibility to the attributes and methods of the Customer and Account classes.
• Students will identify the business rules for the JBANK application
Description • Current object-oriented designing methods use Unified Modeling Language (UML) to define
object-oriented constructs and models. UML is a result of efforts to standardize the terminology and diagramming of object models. Many software products provide graphical tools to create UML diagrams. UML is a collection of symbols and patterns of symbols. It is used to describe objects, the relationship between objects, the use of objects, and the state of objects. UML has many different types of diagrams that can be used to describe object models.
• The symbols associated with a UML diagram are as follows:
Rectangles to describe the class
Lines to describe relationships
Special symbols to describe accessibility and strength of relationships
“+ “ public, any other object can access the data or the method “-“ private, only methods defined within the class can access “#” protected, only objects in the same name package (that is directory)
can access “ “ no symbol indicates default access. italics represent abstract class or method underline represents static method or attribute
The JBANK Case Study document lists the business rules for the banking applications. Business rules are used to define the logic of the code in different methods. For example the business rule that states a Bank cannot have more than 20 customers will result in the Bank classes having a variable that tracks the number of customers, and a method that is used to add customers that will include programming logic to test whether the maximum number of customers have been created before creating a new customer. A business rule that states money cannot be withdrawn from an account if there is insufficient funds, will result in a logical test within a withdraw method of the Account class, to ensure that there is no negative balance as a result of withdrawing from the account. It is imperative that the student reviews the business rules of any project thoroughly.
1 - 6 Fundamentals of Java Programming Lab 2.6.1.1 Copyright 2002, Cisco Systems, Inc.

Preparation • BlueJ, paper and pencil.
Task
Step 1 JBANK Business rules Review questions: Answer these questions after reviewing the Case Study document. Keep in mind, that this project is a simplified example of what is often a very complex application. Most banking applications have many more business rules, and very complex business rules, that are defined based on governmental, local, state, national and global banking regulations. As you answer these questions, recognize that you are answering specific to the Case Study document.
a. What is the basic type of account that all customers will be provided?
b. Name the three supporting accounts in addition to the basic account that a customer can have.
c. Can a customer withdraw amount in excess of the balance in a Checking account. If no, what would be the result of accessing more money? If yes, what conditions must exist?
d. How will each type of account be distinguished, in other words, what are the identifiers for a customers account?
e. How will each customer be identified?
f. Can a Customer open two checking accounts?
g. Can a customer create an account on: Sunday 4:00 p.m.? Monday 5:00 a.m.?
If either answer is no, why not?
2 - 6 Fundamentals of Java Programming Lab 2.6.1.1 Copyright 2002, Cisco Systems, Inc.
h. Where will the information such as interest rates, hours of operation exist (in which class). How will this information be initialized (setup) or modified (updated), through which class.
i. Is there a minimum balance required for a checking account? For a saving account? And how much?
j. What is the function or purpose of an Investment account? How does such an account increase its balance?
k. How will the balance of a Checking account increase? And decrease? What arithmetic operation should be used to show an increase in the account and what arithmetic operation should be used to show a decrease in the account?
l. What is the maximum amount that can be withdrawn from the Line of credit account? What is the penalty, is there a finance charge, how much is this charge?
3 - 6 Fundamentals of Java Programming Lab 2.6.1.1 Copyright 2002, Cisco Systems, Inc.
Step 2 UML Review Questions Answer the questions using the UML diagram shown below:
a. Which class is the entry point for the application and why?
b. Which class includes a custom method that is other than an accessor or mutator method, and what is the method signature?
c. Identify the accessor method signatures for the Account class:
d. Identify the mutator method signatures for the Customer class:
e. Which class stores each of the following data and what is its accessibility?
Attribute Class accessibility balance email lastName firstName custId
4 - 6 Fundamentals of Java Programming Lab 2.6.1.1 Copyright 2002, Cisco Systems, Inc.
f. Which method(s) will define the logic for the following:
• Ensuring that the number of customers in a bank do not exceed the limit specified in the business rules. Hint: Who will be creating the customers?
• Ensuring that the balance in the account is not negative.
• Establish the interest rates for different accounts.
• Establish the hours of operations for the bank.
• Retrieve Customer information.
5 - 6 Fundamentals of Java Programming Lab 2.6.1.1 Copyright 2002, Cisco Systems, Inc.
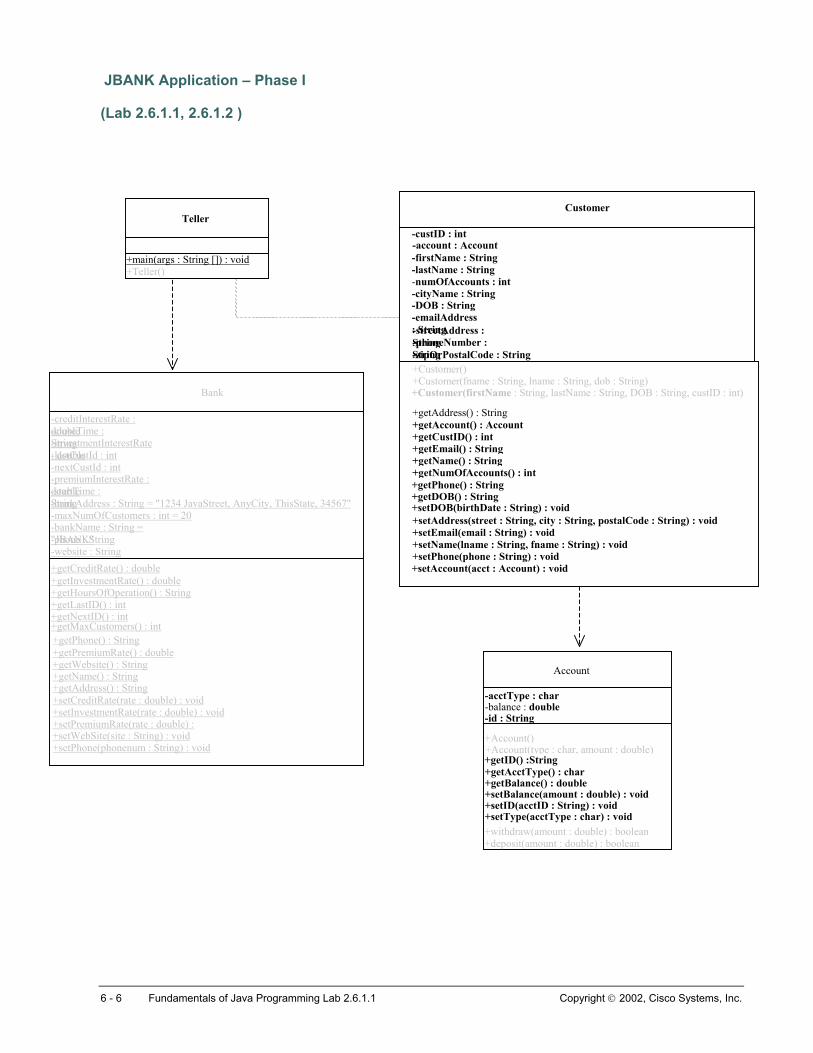
JBANK Application – Phase I
(Lab 2.6.1.1, 2.6.1.2 )
Customer Teller
-streetAddress : String-phoneNumber :
-custID : int-account : Account-firstName : String-lastName : String
-emailAddress : String
-DOB : String-cityName : String-numOfAccounts : int
String-zipOrPostalCode : String
+main(ar s : String []) : void g+Teller()
Bank
-creditInterestRate : double -closeTime : String -investmentInterestRate : double -lastCustId : int -nextCustId : int -premiumInterestRate : double -startTime : String -bankAddress : String = "1234 JavaStreet, AnyCity, ThisState, 34567"-maxNumOfCustomers : int = 20 -bankName : S ing = tr"JBANK" -phone : String -website : String
+getMaxCustomers() : int +getPhone() : String+getPremiumRate() : double +getWebsite() : String +getName() : String +getAddress() : String +setCreditRate(rate : double) : void +setInvestmentRate(rate : double) : void +setPremiumRate(rate : double) : +setWebSite(site : String) : void +setPhone(phonenum : String) : void
+getCreditRate() : double+getInvestmentRate() : double +getHoursOfOpe tion() : Stringra+getLastID() : int +getNextID() : int
+Customer()+Customer(fname : String, lname : String, dob : String) +Customer(firstName : String, lastName : String, DOB : String, custID : int)
+setAccount(acct : Account) : void+setPhone(phone : String) : void+setName(lname : String, fname : String) : void +setEmail(email : String) : void+setAddress(street : String, city : String, postalCode : String) : void
+getPhone() : String+getNumOfAccounts() : int+getName() : String+getEmail() : String+getCustID() : int+getAccount() : Account+getAddress() : String
+setDOB(birthDate : String) : void+getDOB() : String
Account
-acctType : char-balance : double-id : String
+getBalance() : double
+Account(type : char, amount : double) +getAcctType() : char +getID() :String
+Account()
+setBalance(amount : double) : void +setID(acctID : String) : void +setType(acctType : char) : void +withdraw(amount : double) : boolean +deposit(amount : double) : boolean
6 - 6 Fundamentals of Java Programming Lab 2.6.1.1 Copyright 2002, Cisco Systems, Inc.
Lab 2.6.1.2 Develop the Classes for Phase 1
Estimated 45 minutes
Learning Objectives In this lab activity, the student will begin to work on Phase1 of the JBANK Banking Application and create the Account class, edit and modify the Customer class using the UML diagrams provided.
The student will practice the creation of and operation on Account and Customer objects by modifying the Teller class main method.
Description • This activity requires that students use the UML diagram to design and develop the Customer
and Account JBANK classes. In this lab, the students will not implement all of the business rules, since the topics of control structures is required to properly implement many of the rules, and is covered in a later chapter. The students will primarily define the data fields for the classes and the accessor and mutator methods for these data fields.
• Accessor methods will require the use of a return statement. Students will use the UML to determine what value the method should return.
• Students will implement encapsulation rules by ensuring that all of the Customer and Account data fields are declared private, and by providing public accessor and mutator methods for each of the fields.
• The Teller class has a main method and is the entry point of the JBANK application. Students will import the Teller class from previous lab and modify the main method in this class. The Teller class creates the Customer and Account objects.
• While the UML diagram provides a complete definition for each class, in the labs the students will partially code the descriptions in the UML. For each lab some of the descriptions have been grayed out. These are not to be completed in these particular labs, but will be completed later.
• A UML test tool is also provided, which can be used to verify that the created classes match the UML diagram defined.
Business Rules 1. The Account class maintains account balance. This class is used to define account objects that
hold data on a customer’s bank accounts. An account has an id, type, and balance. These are not accessible to other objects directly. The Account class provides methods to deposit or withdraw funds. The id for an account uses the id of the customer and a single letter at the end of the id to describe the type of account. For example, a customer with id 1000 and a saving account will have an account id of 1000S.
1 - 6 Fundamentals of Java Programming Lab 2.6.1.2 Copyright 2004, Cisco Systems, Inc.
2. The Customer class maintains information on a specific customer. The customer information maintained includes last name, first name, customer id, address, phone, email, and date of birth. The account information is maintained in an Account object and the customer has a reference to this Account object in the Customer field account. This is an example of an Association or “has a “ relationship between two objects. In this situation, the Customer object “has a” reference to an Account object. This very important concept exists in the Bank class, and the Customer class also. All attributes of class that are declared as “String” are also references to String objects. Thus the Account class also “has a” reference to a String object in the field “id”.
File Management Using BlueJ, create a new project lab2.6.1.2 in the folder chap2.
Task
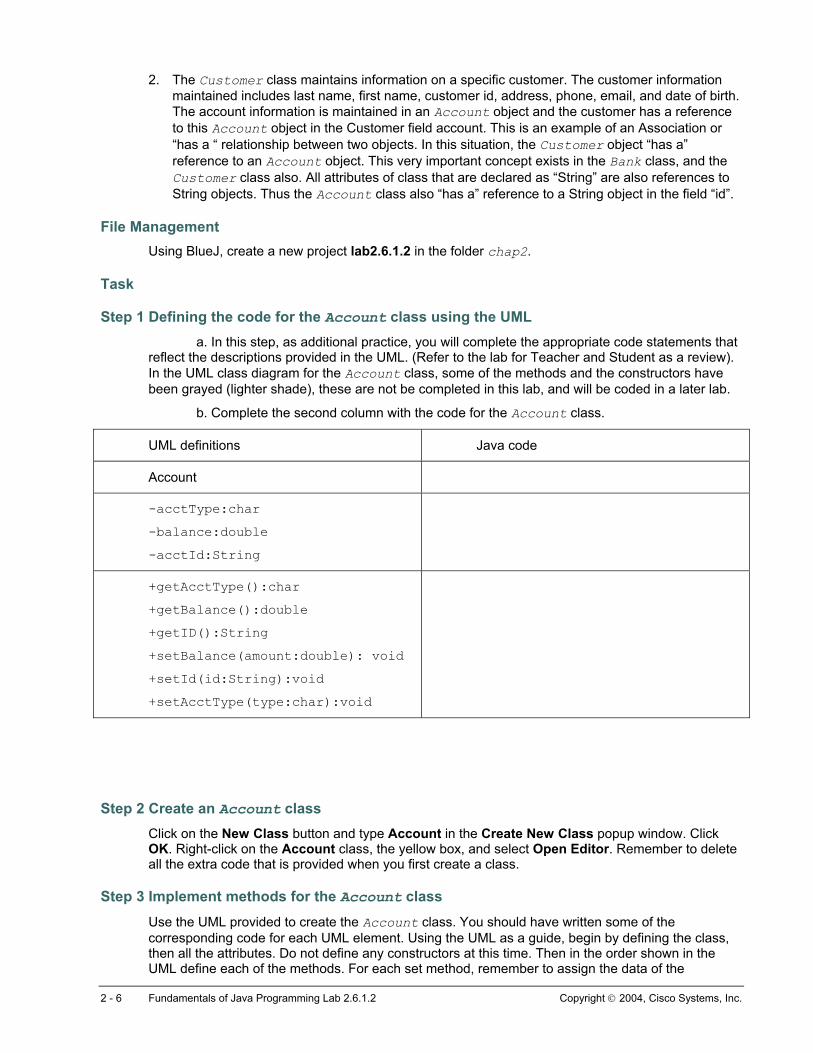
Step 1 Defining the code for the Account class using the UML a. In this step, as additional practice, you will complete the appropriate code statements that reflect the descriptions provided in the UML. (Refer to the lab for Teacher and Student as a review). In the UML class diagram for the Account class, some of the methods and the constructors have been grayed (lighter shade), these are not be completed in this lab, and will be coded in a later lab.
b. Complete the second column with the code for the Account class.
UML definitions Java code
Account
-acctType:char
-balance:double
-acctId:String
+getAcctType():char
+getBalance():double
+getID():String
+setBalance(amount:double): void
+setId(id:String):void
+setAcctType(type:char):void
Step 2 Create an Account class Click on the New Class button and type Account in the Create New Class popup window. Click OK. Right-click on the Account class, the yellow box, and select Open Editor. Remember to delete all the extra code that is provided when you first create a class.
Step 3 Implement methods for the Account class Use the UML provided to create the Account class. You should have written some of the corresponding code for each UML element. Using the UML as a guide, begin by defining the class, then all the attributes. Do not define any constructors at this time. Then in the order shown in the UML define each of the methods. For each set method, remember to assign the data of the
2 - 6 Fundamentals of Java Programming Lab 2.6.1.2 Copyright 2004, Cisco Systems, Inc.
arguments to the attribute of the object. For example:
public void setBalance(double amount) {
balance = amount; // assigns the value of amount to the object attribute balance.
}
The accessor methods or the set methods set the private attributes to the argument passed in the set method. Mutator or get methods return the required attribute. For example: public String getID() {
return acctID; // note the use of the return keyword to return a value
} The custom methods are deposit and withdraw. These methods will be implemented later in the next lab.
Step 4 Test the Account class a. Compile, correct any errors and save the Account class.
b. Test the Account class by creating an object. Right-click on the Account class and select the item new Account().
c. An object will appear on the right-hand corner of the window. Right-click on the object and select the setBalance method, enter in the value 1050.89 in the input box and click the OK button. Right-click on the object and select the setId method. Type “1000S” in the input box (remember to include the quotes, the ID is a string and all strings should be enclosed in quotes), clicking OK when done. Now inspect the object. Right-click on the object and select inspect. The values you entered will be displayed for each of the fields. Verify that the acctType is null.
Step 5 Create a Customer class a. Similar to Step 1, create the Customer class using the UML provided. Do not implement
(that is code ) any of the methods that are grayed out. These will be completed in a latter lab. Implement all the set and get methods for the Customer class. Take time to verify the correct spelling (upper and lowercase as shown in the UML) for each of the fields.
b. Add the code shown below to some of the methods. This code is provided so that you can explore different ways to change the data in an object and learn to code some complex data values that can be returned by a method.
1. The getAddress() method concatenates the streetAddress, cityName, and the zipOrPostalCode and returns this concatenated value. The (+) symbol is used to concatenate (join) text. return streetAddress + cityName + zipOrPostalCode;
2. The getName method returns a concatenate value of the Lastname a comma and the firstname. return lastName + “,” + firstName;
3. The getAccount method returns the reference to the Account object. return account;
4. The setAddress method will receive input for three data values, the street information, the city information and the postalcode information. Inside this method you will code separate statements to assign each of these values to the appropriate fields (attributes) of the class. For example: zipOrPostalCode = postalCode;
3 - 6 Fundamentals of Java Programming Lab 2.6.1.2 Copyright 2004, Cisco Systems, Inc.
5. The setName method will receive input for the lastname and the firstname. Assign the values received to the appropriate field of the object.
6. The setAccount method receives a reference to an Account object. Assign this to the account field of the object: account = acct.
c. Compile and test the Customer class by creating an object using the Object creation technique shown in the previous step for the Account class. Using the object, test some of its methods and then inspect the object for its data values.
Step 6 Create a Teller class a. The Teller class is the entry point of this application. The Teller class is the only class that
has a main method.
b. Instead of creating the Teller class again, copy the Teller class from Lab 1.9.1 (The last lab in Module 1). To copy the lab and add it to your current project from the Edit menu, select Add Class from File. Navigate to chap1/lab1.9.1. You will see the Teller class listed in the documents window. Select the Teller.java file and then select the ADD button. The Teller class icon should appear on you project screen.
c. Modify the Teller class using the code provided. Note that the UML for the Teller class describes the main method. The constructor for the class is grayed out. In the main method delete any existing code. Now add some new code to do the following: Customer c1 = new Customer(); // This creates a customer object. c1.setName(“Smith“, “Jane”); // Enter any lastname and first name in that order. System.out.println(“Customer name is “ + c1.getName()); // This will print the Customer name. Account a1 = new Account(); // This will create a new Account object. a1.setBalance(1000.98); // This will set the balance for a account c1.setAccount(a1); // This will assign the account with a balance of 1000.98 to the Customer.
d. To retrieve information about an account from the Customer class type this code: System.out.println(“Customer balance is “ + c1.getAccount().getBalance()); c1.getAccount() returns an Account object that the customer has a reference to. We then use this object and call the getBalance() of this object to obtain the balance. This form of chaining methods is quite common in Java. We saw this in the use of System.out.println. The dot symbol is a very important symbol in Java and you will learn more about this in the next Module.
Note: In later labs, all account objects will be created when a customer is created. This lab creates an Account and a Customer object independent of each other and then associates them with the call to the setAccount method. The more appropriate technique for creating Account objects is to create them through the Customer class. The reason is that an Account should not exist without a customer.
e. Test the Teller class. Execute the main method. (Right-click on the Teller class icon and select the main method). A sample output would be: Customer name is Jane,Smith
Customer balance is 1000.98
4 - 6 Fundamentals of Java Programming Lab 2.6.1.2 Copyright 2004, Cisco Systems, Inc.

Step 7 Verifying your work Using the Document “How to use UML TestTool”, follow the instructions to verify that the JBANK classes created in this lab match the JBANK UML diagram shown below. (Remember that the shaded methods are not yet implemented in this lab.)
5 - 6 Fundamentals of Java Programming Lab 2.6.1.2 Copyright 2004, Cisco Systems, Inc.
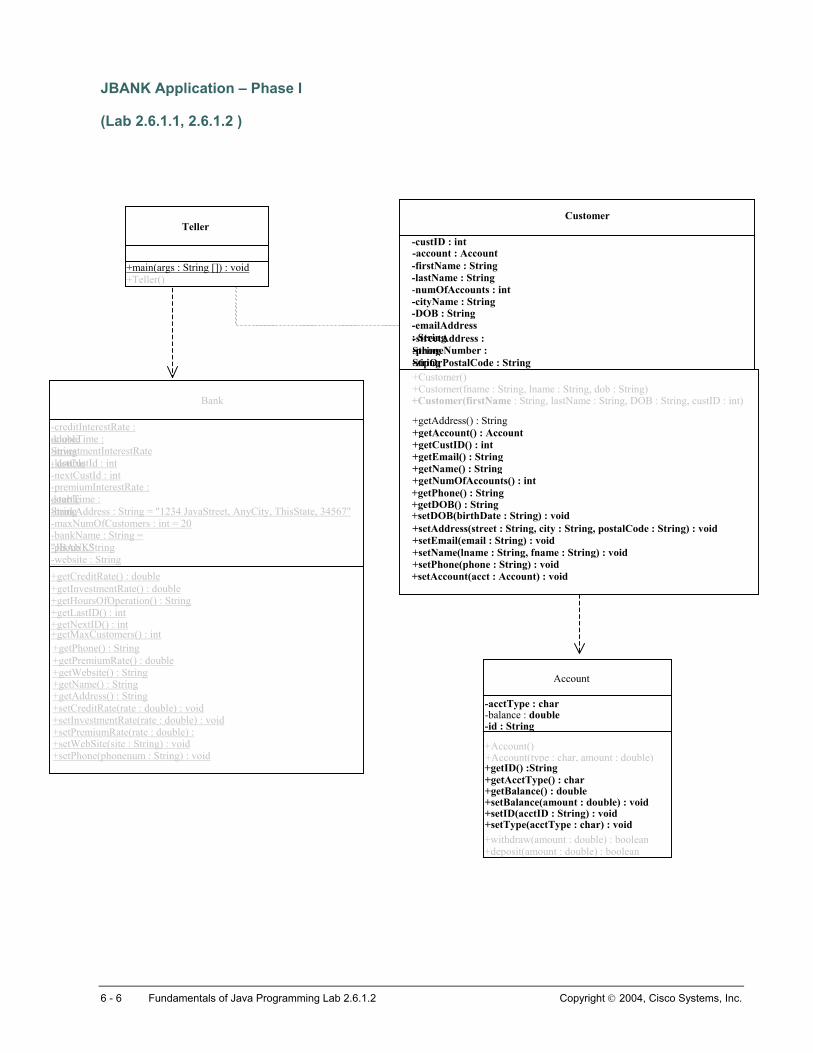
JBANK Application – Phase I
(Lab 2.6.1.1, 2.6.1.2 )
Customer Teller
-streetAddress : String-phoneNumber :
-custID : int-account : Account-firstName : String-lastName : String
-emailAddress : String
-DOB : String-cityName : String-numOfAccounts : int
String-zipOrPostalCode : String
+main(ar s : String []) : void g+Teller()
Bank
-creditInterestRate : double -closeTime : String -investmentInterestRate : double -lastCustId : int -nextCustId : int -premiumInterestRate : double -startTime : String -bankAddress : String = "1234 JavaStreet, AnyCity, ThisState, 34567"-maxNumOfCustomers : int = 20 -bankName : S ing = tr"JBANK" -phone : String -website : String
+getMaxCustomers() : int +getPhone() : String+getPremiumRate() : double +getWebsite() : String +getName() : String +getAddress() : String +setCreditRate(rate : double) : void +setInvestmentRate(rate : double) : void +setPremiumRate(rate : double) : +setWebSite(site : String) : void +setPhone(phonenum : String) : void
+getCreditRate() : double+getInvestmentRate() : double +getHoursOfOpe tion() : Stringra+getLastID() : int +getNextID() : int
+Customer()+Customer(fname : String, lname : String, dob : String) +Customer(firstName : String, lastName : String, DOB : String, custID : int)
+setAccount(acct : Account) : void+setPhone(phone : String) : void+setName(lname : String, fname : String) : void +setEmail(email : String) : void+setAddress(street : String, city : String, postalCode : String) : void
+getPhone() : String+getNumOfAccounts() : int+getName() : String+getEmail() : String+getCustID() : int+getAccount() : Account+getAddress() : String
+setDOB(birthDate : String) : void+getDOB() : String
Account
-acctType : char-balance : double-id : String
+getBalance() : double
+Account(type : char, amount : double) +getAcctType() : char +getID() :String
+Account()
+setBalance(amount : double) : void +setID(acctID : String) : void +setType(acctType : char) : void +withdraw(amount : double) : boolean +deposit(amount : double) : boolean
6 - 6 Fundamentals of Java Programming Lab 2.6.1.2 Copyright 2004, Cisco Systems, Inc.
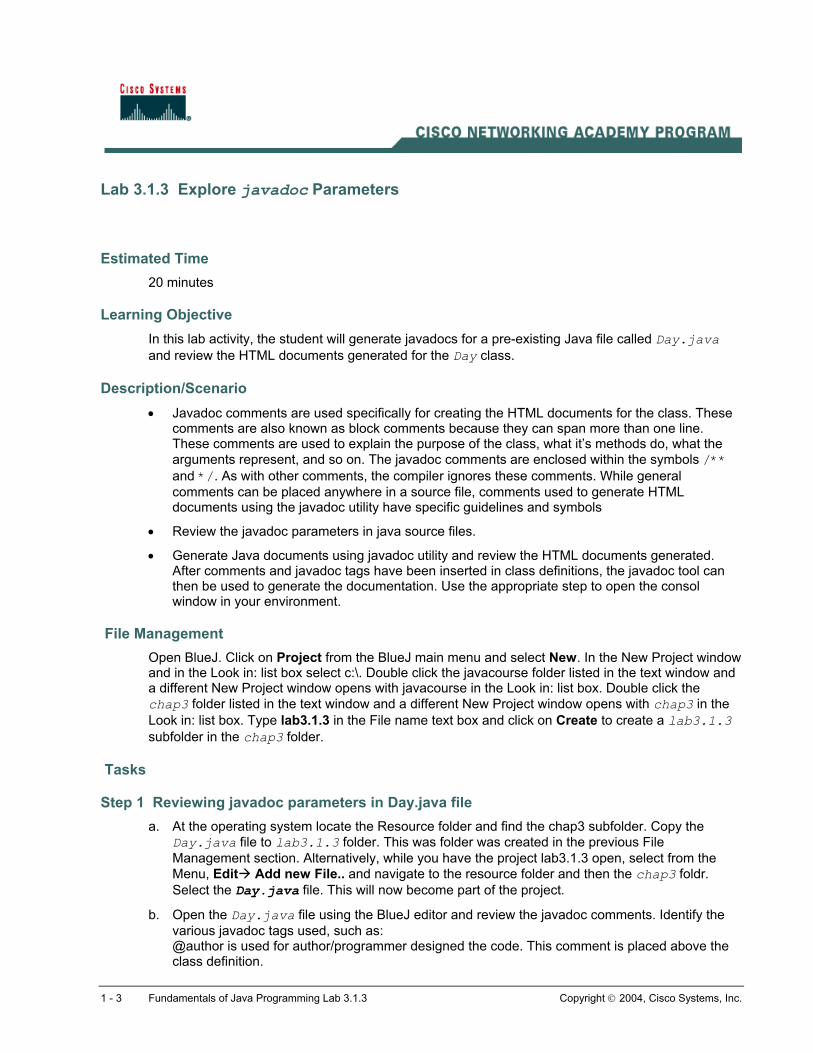
Lab 3.1.3 Explore javadoc Parameters
Estimated Time 20 minutes
Learning Objective In this lab activity, the student will generate javadocs for a pre-existing Java file called Day.java and review the HTML documents generated for the Day class.
Description/Scenario • Javadoc comments are used specifically for creating the HTML documents for the class. These
comments are also known as block comments because they can span more than one line. These comments are used to explain the purpose of the class, what it’s methods do, what the arguments represent, and so on. The javadoc comments are enclosed within the symbols /** and */. As with other comments, the compiler ignores these comments. While general comments can be placed anywhere in a source file, comments used to generate HTML documents using the javadoc utility have specific guidelines and symbols
• Review the javadoc parameters in java source files.
• Generate Java documents using javadoc utility and review the HTML documents generated. After comments and javadoc tags have been inserted in class definitions, the javadoc tool can then be used to generate the documentation. Use the appropriate step to open the consol window in your environment.
File Management Open BlueJ. Click on Project from the BlueJ main menu and select New. In the New Project window and in the Look in: list box select c:\. Double click the javacourse folder listed in the text window and a different New Project window opens with javacourse in the Look in: list box. Double click the chap3 folder listed in the text window and a different New Project window opens with chap3 in the Look in: list box. Type lab3.1.3 in the File name text box and click on Create to create a lab3.1.3 subfolder in the chap3 folder.
Tasks
Step 1 Reviewing javadoc parameters in Day.java file a. At the operating system locate the Resource folder and find the chap3 subfolder. Copy the
Day.java file to lab3.1.3 folder. This was folder was created in the previous File Management section. Alternatively, while you have the project lab3.1.3 open, select from the Menu, Edit Add new File.. and navigate to the resource folder and then the chap3 foldr. Select the Day.java file. This will now become part of the project.
b. Open the Day.java file using the BlueJ editor and review the javadoc comments. Identify the various javadoc tags used, such as: @author is used for author/programmer designed the code. This comment is placed above the class definition.
1 - 3 Fundamentals of Java Programming Lab 3.1.3 Copyright 2004, Cisco Systems, Inc.
@version is used for date of code creation or revision. This comment is placed above the class definition. These parameter values are displayed in the Description section of the CLASS document.
@param is used for arguments declared in the method signature. These are displayed in the table displaying all the method information. The param parameter precedes the method signature. Each argument declared in the method signature is described with a param parameter.
@return is used for description of return-type of the method. The return parameter precedes the method signature.
Step 2 Review questions 1. What is the difference between javadocs and multi-line comments?
2. What is the -D switch used in javadoc –D command?
Step 3a Creating the javadocs in Windows environment a. Open the MS-DOS window and type javadoc at the command prompt. A listing of all the
options used for javadoc command is shown. At the C:\ prompt, change the directory by typing cd\javacourse\chap3\lab3.1.3. To generate the javadoc for Day.java, type javadoc Day.java after the prompt. An HTML file will be generated in the same directory, unless a different directory option was selected. It is highly recommended that you keep your javadoc documentation in a folder such as docs. To do this,use the –D switch of the javadoc command. Try the following for the Day.java docs javadoc –D docs Day.java. This command will create the docs folder and store your javadoc files in the docs folder.
b. The javadoc utility does not automatically insert the version and author information. To include this information use the –version and –author options at the command line as shown: javadoc –version –author Day.java
c. For a complete list of javadoc switches and commands, please visit http://java.sun.com/javadoc
Step 3b Creating the javadocs in Macintosh environment a. Open the Tools folder from the MRJ SDK 2.2 folder.
b. Open the JDK Tools folder and double-click on javadoc icon.
c. A javadoc dialog box appears where you can specify the Java files and the destination folder where you want to store the generated docs.
d. Click on Do Javadoc to execute the command.
e. A folder with the html files are generated and stored in the folder you have specified.
f. The javadoc utility does not automatically insert the version and author information. To include this information click on Version tags and Author tags in the javadoc dialog box
2 - 3 Fundamentals of Java Programming Lab 3.1.3 Copyright 2004, Cisco Systems, Inc.
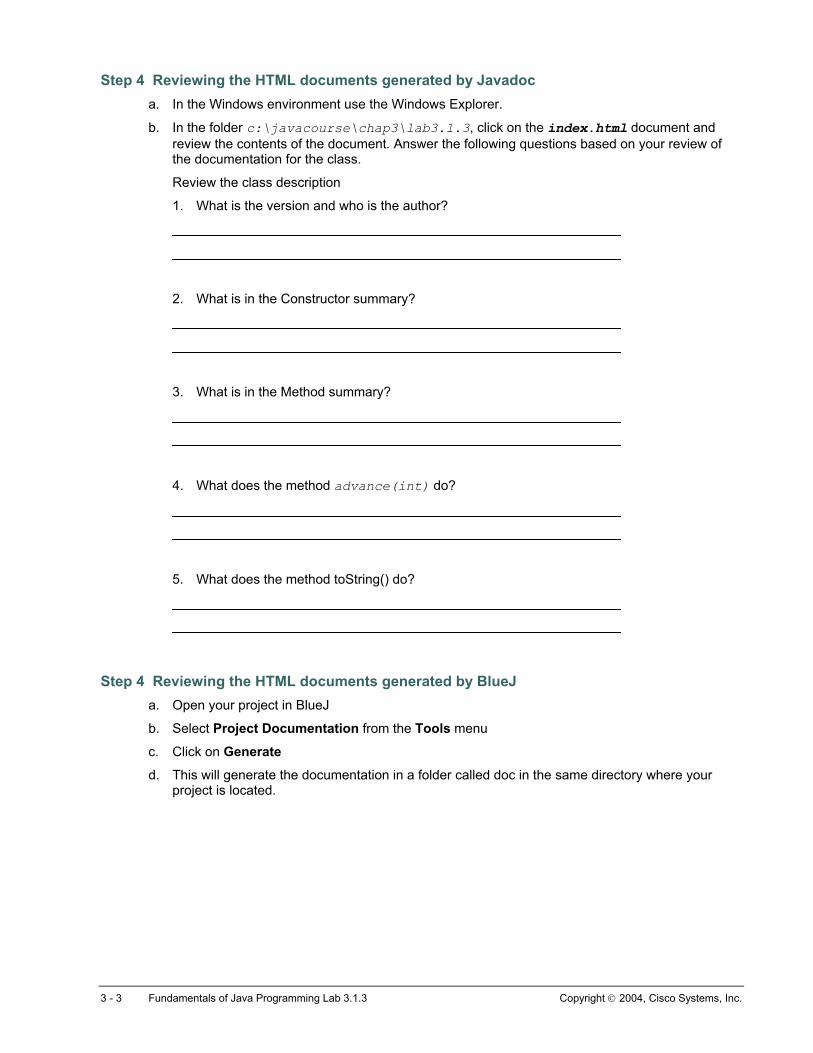
Step 4 Reviewing the HTML documents generated by Javadoc a. In the Windows environment use the Windows Explorer.
b. In the folder c:\javacourse\chap3\lab3.1.3, click on the index.html document and review the contents of the document. Answer the following questions based on your review of the documentation for the class.
Review the class description
1. What is the version and who is the author?
2. What is in the Constructor summary?
3. What is in the Method summary?
4. What does the method advance(int) do?
5. What does the method toString() do?
Step 4 Reviewing the HTML documents generated by BlueJ a. Open your project in BlueJ
b. Select Project Documentation from the Tools menu
c. Click on Generate
d. This will generate the documentation in a folder called doc in the same directory where your project is located.
3 - 3 Fundamentals of Java Programming Lab 3.1.3 Copyright 2004, Cisco Systems, Inc.
Lab 3.1.5 Review the API Documentation
Estimated Time 15 minutes
Learning Objective In this lab activity, the students will review the Java API documentation and familiarize themselves with its structure and content. The API helps students to resolve Java issues and questions.
Description/Scenario • Explore the documentation on core Java API
• Students can get to the documentation for the core Java classes by locating the API docs on the desktop or opening the browser to http://java.sun.com/j2se/1.3/docs/api/index.html
• The information for a Class in the API docs includes:
o The actual class definition statement
o Links to other related words or phrases
o Version and author information
o A description that includes information on the proper use of the class and restrictions
o A section for locating sample code
o A field summary describing the types of data that the object stores
o The constructors that are the specific methods for constructing objects (Classes that do not describe constructors use a null constructor. These are also known as default constructors.)
o A method summary displays the method signature and the return value for the method
• This lab will also show students where to find key Java constructors, fields, and methods. It will also give insight into which classes and methods to use to achieve the necessary results.
Tasks
Step 1 Locating Java API a. Find the local copy of the Java API (a shortcut should be located on the desktop) and open it
with the browser or point the browser to http://java.sun.com/j2se/1.3/docs/api/index.html. The HTML files that form this extensive documentation should be installed in a directory of the name C:/Javadocs/docs/api/index.html.
b. Once the API is open, review the different sections. Go to the Packages frame in the upper left corner and look at the packages available. Note the different packages.
1 - 3 Fundamentals of Java Programming Lab 3.1.5 Copyright 2002, Cisco Systems, Inc.
Step 2 Browsing the java.lang package a. Click on the java.lang package. Go to the Classes frame just below the Package frame and click
on String. Notice that String has a tree structure describing inheritance. Scroll down; see the Field summary, the documentation refers to Class or Object data that is member data as Fields. This section will inform you of the data that the object will store. Next you will find the Constructor summary and then the Method summary, this is a very important section and you will need to become intimately familiar with the operations or methods of the objects you use. Note that in general field data is hidden or encapsulated. You use the methods to access the field data.
b. What is the concatenation operator? (see the String description following the tree structure)
c. Are String objects mutable or immutable?
d. How many constructors does the String class have (look in the Constructor Summary)?
e. How many are deprecated (look for the reason the constructor has been deprecated)?
f. There are two substring() methods listed (look in the Method Summary) what is the difference between these two?
g. What will the length() method do?
2 - 3 Fundamentals of Java Programming Lab 3.1.5 Copyright 2002, Cisco Systems, Inc.
h. Find the methods equals() and equalsIgnoreCase() these will be very useful in future labs. What is the difference between these two methods?
Step 3 Browsing System package a. Go to the Classes frame and click on System. Just like the String class, this class has similar
information for Fields, Constructors, Methods and Inheritance. What are the fields for the System class? Now click on the field out link. What is the typical way to write a line of output data?
b. Next click on the See Also link PrintStream.println(java.lang.String) and read some of the detailed methods for print and println.
c. How many print and println methods are there?
d. Why would so many variations of println or print methods be needed?
e. What are some of the special non-printing chars or escape sequences that can be used with the print and println methods. Identify at least three. What effect do these symbols have on the output or printed results:
3 - 3 Fundamentals of Java Programming Lab 3.1.5 Copyright 2002, Cisco Systems, Inc.
Lab 3.1.6.1 Insert Documentation for Classes in the JBANK Application
Estimated Time 20 minutes
Learning Objectives • In this lab activity, the student will add or update comments in the Customer, Account, and
Teller classes.
• Students will add or complete the associated @tags for author, version, and method parameters.
Description/Scenario • Demonstrate the usage of line comments, block comments, and Javadoc comments along with
several Javadoc parameters.
• Programmers must get into the practice of embedding documentation in all of their code. While single line and block comments are useful to review personal source files, they are not visible to other programmers who only have access to the class files. For a program to be useful, it must be well documented, which includes javadoc comments. Only information that is public should be commented for javadoc purposes.
• Since the banking application used in this course has multiple classes, it is important that students document each class.
• The importance of documentation is emphasized here by including specific instructions for documenting the classes in each phase of the banking application. Every time students change the code of a class, they should re-run the javadoc utility to generate updated HTML documents.
• In the following lab, students will begin by inserting specific documentation tags in the Customer and Account class.
File Management In most of the JBANK labs, the student will open a previous version of the application and save it under a new project title. This will allow the student to retain each lab in its original version while making modifications to classes in the new lab.
For this lab, launch BlueJ. Click on Project from the BlueJ main menu and select Open, navigate to the folder chap2, and select the BlueJ project lab2.6.1.2. An alternative method is to select Project and Open Recent, and select the previous JBANK lab 2.6.1.2.
Now save this Project under a new name lab3.1.6.1. To do this, select Project and Save as, Change the Folder in the Look In: box to chap3, and type lab3.1.6.1 as the new Project name. The Project window title should display lab3.1.6.1.
1 - 3 Fundamentals of Java Programming Lab 3.1.6.1 Copyright 2002, Cisco Systems, Inc.
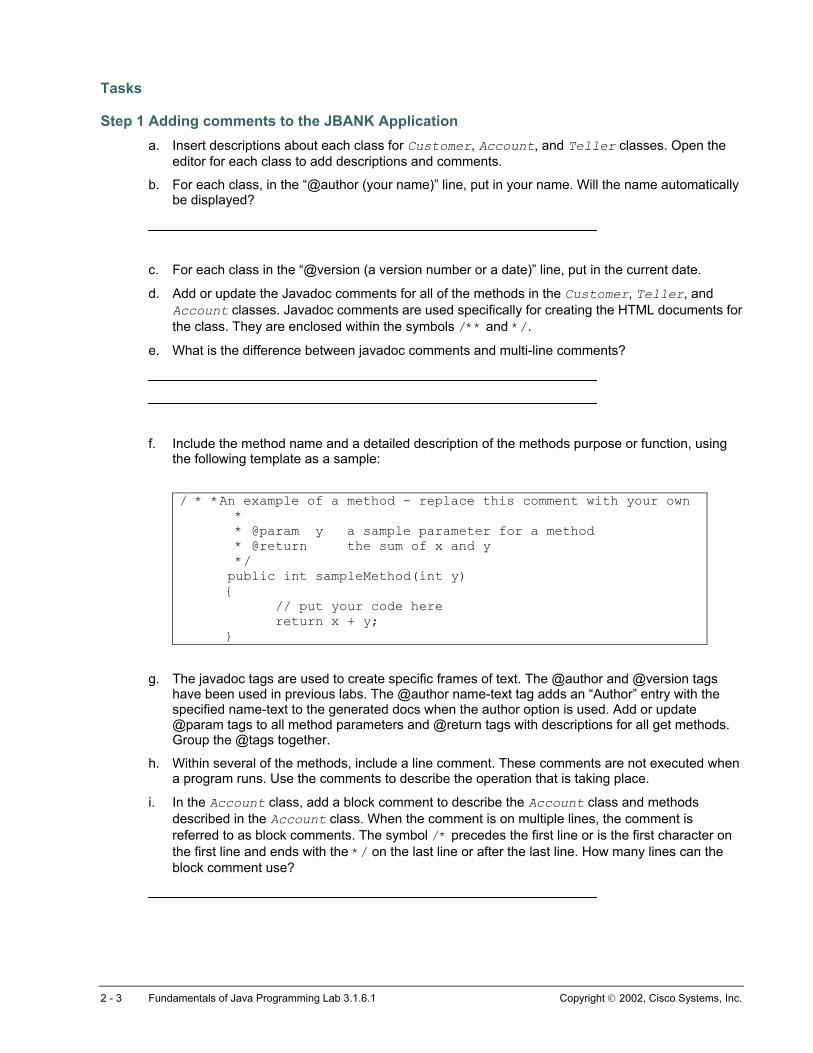
Tasks
Step 1 Adding comments to the JBANK Application a. Insert descriptions about each class for Customer, Account, and Teller classes. Open the
editor for each class to add descriptions and comments.
b. For each class, in the “@author (your name)” line, put in your name. Will the name automatically be displayed?
c. For each class in the “@version (a version number or a date)” line, put in the current date.
d. Add or update the Javadoc comments for all of the methods in the Customer, Teller, and Account classes. Javadoc comments are used specifically for creating the HTML documents for the class. They are enclosed within the symbols /** and */.
e. What is the difference between javadoc comments and multi-line comments?
f. Include the method name and a detailed description of the methods purpose or function, using the following template as a sample:
/ * *An example of a method - replace this comment with your own * * @param y a sample parameter for a method * @return the sum of x and y */ public int sampleMethod(int y) { // put your code here return x + y; }
g. The javadoc tags are used to create specific frames of text. The @author and @version tags
have been used in previous labs. The @author name-text tag adds an “Author” entry with the specified name-text to the generated docs when the author option is used. Add or update @param tags to all method parameters and @return tags with descriptions for all get methods. Group the @tags together.
h. Within several of the methods, include a line comment. These comments are not executed when a program runs. Use the comments to describe the operation that is taking place.
i. In the Account class, add a block comment to describe the Account class and methods described in the Account class. When the comment is on multiple lines, the comment is referred to as block comments. The symbol /* precedes the first line or is the first character on the first line and ends with the */ on the last line or after the last line. How many lines can the block comment use?
2 - 3 Fundamentals of Java Programming Lab 3.1.6.1 Copyright 2002, Cisco Systems, Inc.
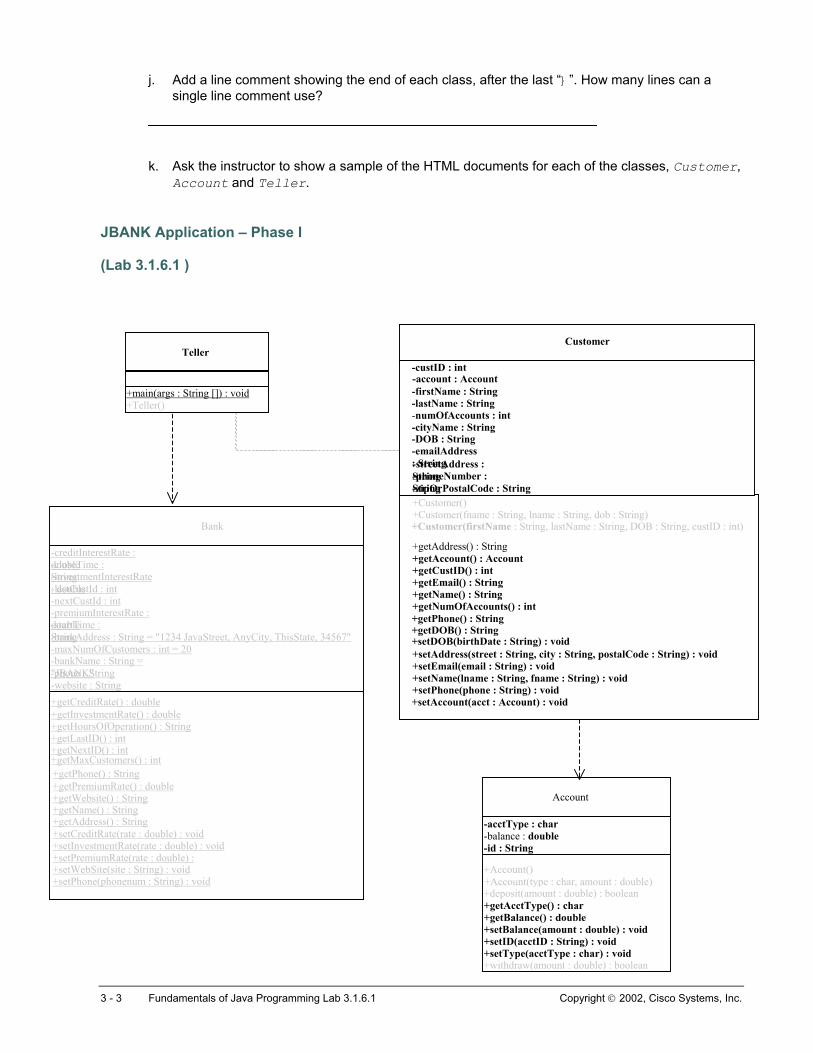
j. Add a line comment showing the end of each class, after the last “}”. How many lines can a single line comment use?
k. Ask the instructor to show a sample of the HTML documents for each of the classes, Customer, Account and Teller.
JBANK Application – Phase I
(Lab 3.1.6.1 )
Customer Teller
-streetAddress : String-phoneNumber :
-custID : int-account : Account-firstName : String-lastName : String
-emailAddress : String
-DOB : String-cityName : String-numOfAccounts : int
String-zipOrPostalCode : String
+main(ar s : String []) : void g+Teller()
Bank
-creditInterestRate : double -closeTime : String -investmentInterestRate : double -lastCustId : int -nextCustId : int -premiumInterestRate : double -startTime : String -bankAddress : String = "1234 JavaStreet, AnyCity, ThisState, 34567"-maxNumOfCustomers : int = 20 -bankName : S ing = tr"JBANK" -phone : String -website : String
+getMaxCustomers() : int +getPhone() : String+getPremiumRate() : double +getWebsite() : String +getName() : String +getAddress() : String +setCreditRate(rate : double) : void +setInvestmentRate(rate : double) : void +setPremiumRate(rate : double) : +setWebSite(site : String) : void +setPhone(phonenum : String) : void
+getCreditRate() : double+getInvestmentRate() : double +getHoursOfOpe tion() : Stringra+getLastID() : int +getNextID() : int
+Customer()+Customer(fname : String, lname : String, dob : String) +Customer(firstName : String, lastName : String, DOB : String, custID : int)
+setAccount(acct : Account) : void+setPhone(phone : String) : void+setName(lname : String, fname : String) : void +setEmail(email : String) : void+setAddress(street : String, city : String, postalCode : String) : void
+getPhone() : String+getNumOfAccounts() : int+getName() : String+getEmail() : String+getCustID() : int+getAccount() : Account+getAddress() : String
+setDOB(birthDate : String) : void+getDOB() : String
-acctType : char-balance : double-id : String
+getAcctType() : char +deposit(amount : double) : boolean+Account(type : char, amount : double) +Account()
+getBalance() : double +setBalance(amount : double) : void +setID(acctID : String) : void +setType(acctType : char) : void +withdraw(amount : double) : boolean
Account
3 - 3 Fundamentals of Java Programming Lab 3.1.6.1 Copyright 2002, Cisco Systems, Inc.
Lab 3.1.6.2 Generate API Docs for JBANK Classes with the javadoc Tool
Estimated Time 15 minutes
Learning Objective In this lab activity, the student will generate API docs using javadoc tool for the JBANK classes.
Description/Scenario • Generating HTML documentation for JBANK classes using the javadoc utility. Java provides a
way to share the information about classes through the javadoc tool. Students will use the javadoc tool to create the HTML documentation for their Account and Customer classes.
• Javadoc utility is also provided with the BlueJ IDE.
Tasks
Step 1 : Creating HTML documentation using javadoc at the Command-line console window. a. Make sure javadoc comments were added along with the @param and @return tags to
lab3.1.6.1. While general comments can be placed anywhere in a source file, comments used to generate HTML documents must be placed before declarations.
b. Using Console window, navigate to the directory for lab3.1.6.1 containing the Customer, Account, and Teller classes.
c. At the console window, using the command-line enter the command javadoc followed by the two class file names, including their .java extension. For example enter: javadoc Customer.java
Note: To see a listing of all the options for javadoc, enter javadoc at the prompt. The HTML files will be generated in the same directory, unless a different directory option was selected.
d. Note the events that occur.
e. Using the appropriate command such as dir or ls, verify that HTML files have been created.
f. Double-click on index.html to open it with the browser.
g. Review the contents.
h. The javadoc utility does not automatically insert version and author information. To include this information, repeat task c using javadoc -version –author Account.java Customer.java in the DOS command line.
i. Repeat tasks d through f and note the changes in the docs.
Step 2: Creating HTML documentation using BlueJ a. Launch BlueJ, and open the Project lab3.1.6.1
b. Select Tool from the menu and then select Project Documentation
c. A browser should display the HTML documentation for all the three classes in the Project window.
1 - 1 Fundamentals of Java Programming Lab 3.1.6.2 Copyright 2002, Cisco Systems, Inc.
Lab 3.5.1 Define Variables
Estimated Time 20 minutes
Learning Objective In this lab activity, the student will practice defining variables and using them in a Java program.
Description/Scenario • When a variable is declared, the allocation of storage for a variable is being requested. If the
variable is defined as part of the object data, default values are assigned to the variable when the object is created. If the variable is a local or method variable, its values must be assigned by the programmer as part of the method definition.
• The syntax for declaring variables is as follows: <modifiers> datatype identifier; example : private int length;
• In this lab activity the students will create a class called Rectangle. In this class variables called length and width, of the data type int are declared, and the area of the rectangle is computed.
File Management Open BlueJ. Click on Project from the BlueJ main menu and select New. In the New Project window and in the Look in: list. Navigate to the javacourse folder. Double-click the chap3 folder listed in the project files window. Type lab3.5.1 in the File name text box and click on Create to create a lab3.5.1 subfolder in the chap3 folder.
Tasks
Step 1 Creating class Rectangle.java a. Create a class called Rectangle.java, define a variable called length of type int and
define another variable called width of type int. The syntax for declaring variables is <modifiers> datatype identifier Assign length equals to 10 and width equals to 2. In the main method create an instance of the Rectangle object. Define a variable called area of type int, compute and print the area of the rectangle.
Sample code:
Rectangle rectangle = new Rectangle();
1 - 2 Fundamentals of Java Programming Lab 3.5.1 Copyright 2002, Cisco Systems, Inc.
int area = rectangle.length * rectangle.width;
b. A variable declaration is a request for the allocation of storage for the variable. If the variable is defined as part of the object data, default values are assigned to the variable when the object is created. If the variable is a local or method variable, its values must be assigned by the programmer as part of the method definition. In this example the length and width are the part of rectangle object and area is local to the main method.
Step 2 Compile and Run the program
2 - 2 Fundamentals of Java Programming Lab 3.5.1 Copyright 2002, Cisco Systems, Inc.
Lab 3.5.9 Apply Access Modifiers
Estimated Time 20 minutes
Learning Objective In this lab activity, the student will create a class and apply access modifiers testing the impact of these in the programs.
Description/Scenario • A class, method, or variable definition can include modifiers. There are two categories of
modifiers, access-specifiers and qualifiers.
• Access-specifiers define the level of access to the method, variable, or class. The keywords are private, public, and protected. If the access-specifier is left blank, the access is defined to be default.
• Qualifiers define the state of the object, variable, or method. The keywords are static, final, native, and transient.
• In the StudentProfile class studentName and courseNumber have public access. The studentID and studentGrade have private access.
File Management Open BlueJ. Click on Project from the BlueJ main menu and select New. Using the Look in: List window, navigate to the folder chap3, and then name the project lab3.5.9.
Tasks
Step 1 Creating the StudentProfile class a. Create a class called StudentProfile.java. Define the attribute studentName of String
type. Make it public by using the keyword public. The public access specifier allows all other classes and objects to reference the attribute. Define the studentID of int type, make it private by using the keyword private. The private access specifier allows only the methods within the class to access the attributes. Similarly define studentGrade of char type with private access.
b. Define the courseNumber of int type with public access and static qualifier. A static qualifier qualifies the data at class level. No object is needed to use this variable. Assign a value to the courseNumber.
c. Define a public method setStudentGrade(char grade) to set the studentGrade. Similarly define a public method setStudentID(int id) to set the studentID. Define get methods to get the student id and grade.
1 - 2 Fundamentals of Java Programming Lab 3.5.9 Copyright 2002, Cisco Systems, Inc.
Step 2 Testing StudentProfile class a. Define a class called StudentTest.java. In the main method create an instance of the
StudentProfile class called student1.
Sample code: StudentProfile student1 = new StudentProfile();
b. Set the studentName to “John Doe” and use set methods to set the studentID.
Sample code:
student1.setStudentID(3456);)
studentGrade.
Use System.out.println() to print the studentName, studentID, studentGrade. In the System.out.println() use get methods to get the studentID and studentGrade.
Sample code:
student1.getStudentID(); c. The studentName can be accessed by using student1.studentName, since studentName
is a public member. The student courseNumber is a public static member, it can be accessed directly using the class name like StudentProfile.courseNumber.
2 - 2 Fundamentals of Java Programming Lab 3.5.9 Copyright 2002, Cisco Systems, Inc.
Lab 3.6.1 Using Constructors
Estimated Time 20 minutes
Learning Objective In this lab activity, the student will define constructors and use constructors to create objects.
Description/Scenario • All class definitions include a special method that is used to construct objects. The creation of an
object requires such a method be defined.
• The syntax for a constructor is as follows: <modifier> Classname(<modifier data-type identifier>, <modifier data-type identifier>, …)
• A constructor is a very special type of method. This method does not have any return values. The name of the method must be the name of the class. There can be more than one constructor method defined in a class. If the programmer has not explicitly defined a constructor method, the compiler will insert one in the class definition during the compilation of the source code. Constructors can be defined with no arguments, sometimes referred to as the null constructor, or with arguments
Define a Constructor for the StudentProfile class created in previous lab 3.5.5. Create StudentProfile objects to demonstrate the use of constructors.
File Management Open BlueJ. Click on Project from the BlueJ main menu and select New. In the New Project window and in the Look in: list box select c:\. Double-click the javacourse folder listed in the text window and a different New Project window opens with javacourse in the Look in: list box. Double-click the chap3 folder listed in the text window and a different New Project window opens with chap3 in the Look in: list box. Type lab3.6.1 in the File name text box and click on Create to create a lab3.6.1 subfolder in the chap3 folder. Import the Student class from lab3.5.5.
Tasks
Step 1 Define the Constructor for the StudentProfile Class a. A constructor is a very special type of method. This type of method does not have a return value.
The name of the method must be the name of the class. The syntax for a constructor is <modifier> Classname (modifier data-type identifier, modifier data-type identifier, ……). In the StudentProfile class define a constructor public StudentProfile(String name, int id, char grade) and initialize the studentName, studentID and studentGrade.
1 - 1 Fundamentals of Java Programming Lab 3.6.1 Copyright 2004, Cisco Systems, Inc.
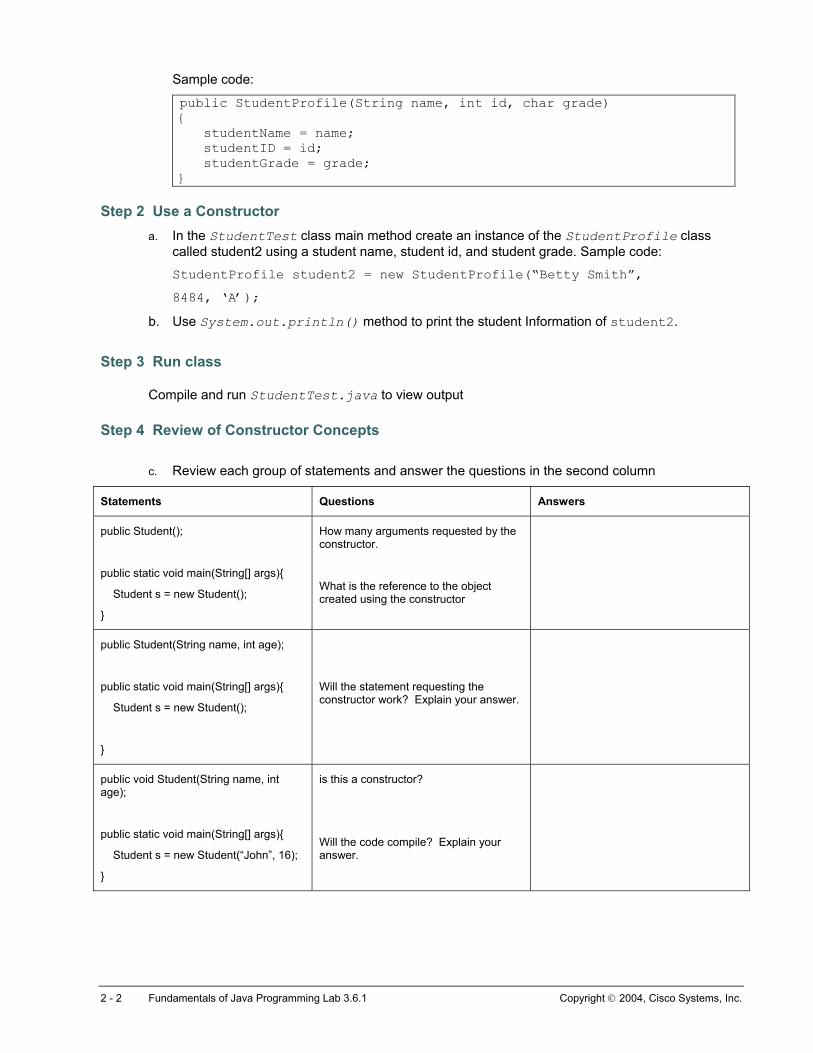
Sample code:
public StudentProfile(String name, int id, char grade) { studentName = name; studentID = id; studentGrade = grade; }
Step 2 Use a Constructor a. In the StudentTest class main method create an instance of the StudentProfile class
called student2 using a student name, student id, and student grade. Sample code:
StudentProfile student2 = new StudentProfile(“Betty Smith”, 8484, ‘A’);
b. Use System.out.println() method to print the student Information of student2.
Step 3 Run class
Compile and run StudentTest.java to view output Step 4 Review of Constructor Concepts
c. Review each group of statements and answer the questions in the second column
Statements Questions Answers
public Student();
public static void main(String[] args){
Student s = new Student();
}
How many arguments requested by the constructor.
What is the reference to the object created using the constructor
public Student(String name, int age);
public static void main(String[] args){
Student s = new Student();
}
Will the statement requesting the constructor work? Explain your answer.
public void Student(String name, int age);
public static void main(String[] args){
Student s = new Student(“John”, 16);
}
is this a constructor?
Will the code compile? Explain your answer.
2 - 2 Fundamentals of Java Programming Lab 3.6.1 Copyright 2004, Cisco Systems, Inc.
Lab 3.8.1 Create the Classes for Phase I of JBANK Application
Estimated Time 90 minutes
Learning Objectives
In this lab activity, the student will add the Bank class to the current Phase 1 JBANK classes to match the UML diagram. Part of the Bank class will be provided. The students will complete it to match the UML diagram shown below.
Description/Scenario • Phase I of the banking application creates all the basic classes needed. These are the
Customer, Bank, Account, and Teller classes.
• Teller class is the main entry point for the banking application. This will be the class that creates the Customer and Account objects.
• The Customer class is a "data-filled" class. While the code is lengthy, this will give students practice in managing classes that hold lots of data. This is not uncommon in real-world applications. The Customer class will go through additional modifications in later Modules. Here its primary use is to store customer information.
• The Account class is a simple class that holds account balance information. This class includes methods for depositing and withdrawing from the account. This is a class that will also be modified further in later chapters.
• The Bank class provides for the use of static qualifiers. This is particular appropriate as the information pertinent to a bank is shared by all customers. Therefore, if a user needs to display information about the bank or an account for a specific customer, they obtain the bank information from the Bank class and the customer and account information from the Customer and Account objects. This important concept states that no objects of the Bank class need to be created in order to use the data in the class. This class will be loaded into memory as soon as a reference is made to this class.
• Apply static fields to the Bank class for use by any of the classes. Demonstrate the usage of static fields. Implement Accessor methods to access these static fields and then print the resulting contents.
• In this lab, students will also use a tool to verify the accuracy of their class against the UML provided. This UMLTEST tool is written in Java. This tool will generate a UML diagram of the class, which students can compare with the one that is provided with the course.
File management For this lab, launch BlueJ. Click on Project from the BlueJ main menu and select Open, navigate to the folder chap3, and select the BlueJ project lab3.1.6.1. An alternative method is to select Project and Open Recent, and select the previous JBANK lab 3.1.6.1.
1 - 5 Fundamentals of Java Programming Lab 3.8.1 Copyright 2004, Cisco Systems, Inc.
Now save this Project under a new name lab3.8.1. To do this, select Project and Save as, change the Folder in the Look In: box to chap3, and type lab3.8.1 as the new Project name. The Project window title should display lab3.8.1.
Tasks
Step 1 Add Bank class a. Add the incomplete Bank class to the current project. Click on Edit, select Add Class from File,
using the Look In : List box, navigate to the Resource folder (the resource folder is at the same level as the chap3 folder. Once you have located the resource folder, select the folder chap3, select the Bank class.
b. Carefully compare the class code to the UML diagram below. Make a note of any differences in the name of methods, or variables, and any missing methods or variables. You will implement all of the methods in the Bank class and define all of the variables. Note that the UML does not show any ‘grayed’ attributes and methods for the Bank class.
c. Double-click on the Bank class and begin to edit the code, correcting any differences and enter all of the fields needed, based upon the UML specification. The Bank fields are private static attributes/fields. When data is to be shared among all objects of a class, the data is declared static and is the same for all instances of the class.
d. Adding and editing the methods. Make all of the Bank methods public static. You can code the methods at the end of the existing methods, or if you wish to place them in the order in which they appear on the UML, position you cursor at the location you wish to type. The operations on the data are performed by methods of the object. The code that you will include in each method is defined by the purpose of the method. Get methods will return data, and set methods will assign new values to object or class variables. You will note that some methods have been defined cush as the getHoursOfOperations method. This method returns a String that states the start and close time of the bank.
e. Modify the Teller class main method. Delete all the code inside the code braces for the main method.
f. Create Customer and Account objects, using the syntax shown below as an example.
Customer newCustomer = new Customer( ); Account account1 = new Account();
Name the variables that will reference the Customer object cust1, and the Account object acct1.
g. Operate on the Customer object cust1, and change (set) the data for this customer, using the sample provided below. For example to change the name of the Customer object, you would code a statement that calls the setName method as shown in this example:
Customer c = new Customer(); c.setName(“Doe”, “John”);
Remember that the setName method requires that you provide the lastName and then the firstName.
Customer data:
Customer firstName : John
Customer lastName: Doe
2 - 5 Fundamentals of Java Programming Lab 3.8.1 Copyright 2004, Cisco Systems, Inc.
Customer street Address: Java Street
Customer city Address: Java city
Customer zip Or Postal code: 9999
Customer phone number: 778-888-9999
Customer email: java.com
Customer date of birth : 07/08/1963
h. Use the System.out.println() statement and the corresponding get methods of the Customer class to display the Customer name, address, date of Birth, phone, and email. Remember that the Customer class holds all the data for the object as private, thus you cannot print the data by referencing the variables of the object directly.
i. Similarly create an instance of Account class called account1. Use the set methods defined in the Account class to set the account information using the data provided below. The account type is stored as a char (character) and must be enclosed in single quotes (‘ ‘), all other text data is stored as Strings and should be enclosed inside double quotes (“ “).
Account Id: 1001S
Account Type: 'S'
Account balance: 5000
j. Use the System.out.println() statement and the corresponding get methods to display the all of the account information. Remember that the Account class holds all the data for the object as private, thus you cannot print the data by referencing the variables of the object directly.
k. The Bank class data can be changed without creating any objects of the class. Use the public setMethods of the class to change the bank’s phone and website. To call on an of the banks method you will use syntax as shown below:
Bank.setPhone()
l. Now print the following information for the Bank. Each line is printed using a separate System.out.println() statement. Include the labels shown on each line. For example to print the first line you would use the statement System.out.println(“Bank Name: “ + Bank.getName()); Bank name: Address: Phone Number: WebSite: Hours of operation:
Step 2 Documentation Writing javadoc Comments to the Bank class:
a. Write a description of the Bank class.
b. In the “@author (your name)” line, put in your name.
c. In the “@version (a version number or a date)” line, put in the version number or current date.
d. Write a detailed description of each method.
3 - 5 Fundamentals of Java Programming Lab 3.8.1 Copyright 2004, Cisco Systems, Inc.

e. Using BlueJ Create the HTML documentation for the classes in the project.
Optional Step:
Using the Document “How to use UMLTestTool”, follow the instructions to verify your JBANK classes match the JBANK UML diagram shown below.
4 - 5 Fundamentals of Java Programming Lab 3.8.1 Copyright 2004, Cisco Systems, Inc.
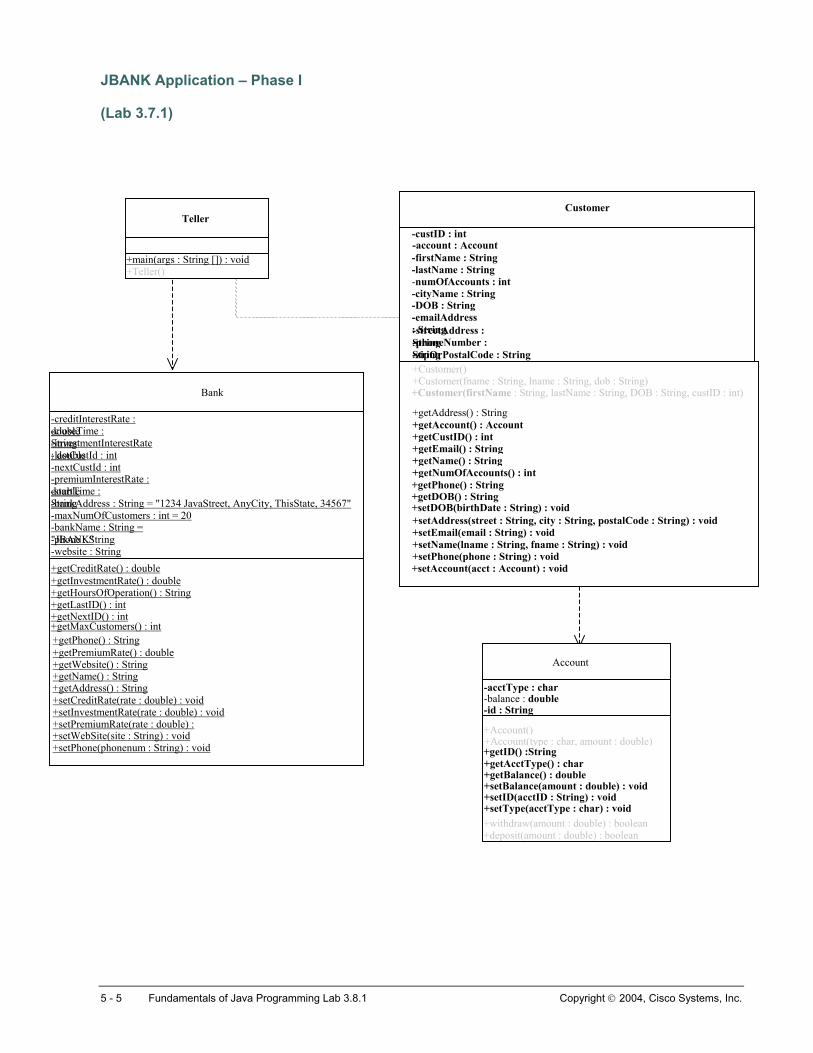
JBANK Application – Phase I
(Lab 3.7.1)
Customer Teller
-streetAddress : String-phoneNumber :
-custID : int-account : Account-firstName : String-lastName : String
-emailAddress : String
-DOB : String-cityName : String-numOfAccounts : int
String-zipOrPostalCode : String
+main(ar s : String []) : void g+Teller()
-creditInterestRate :
Bank
double -closeTime : String -investmentInterestRate : double -lastCustId : int -nextCustId : int -premiumInterestRate : double -startTime : String -bankAddress : String = "1234 JavaStreet, AnyCity, ThisState, 34567"-maxNumOfCustomers : int = 20 -bankName : S ing = tr"JBANK" -phone : String -website : String
+Customer()+Customer(fname : String, lname : String, dob : String) +Customer(firstName : String, lastName : String, DOB : String, custID : int)
+setAccount(acct : Account) : void+setPhone(phone : String) : void+setName(lname : String, fname : String) : void +setEmail(email : String) : void+setAddress(street : String, city : String, postalCode : String) : void
+getPhone() : String+getNumOfAccounts() : int+getName() : String+getEmail() : String+getCustID() : int+getAccount() : Account+getAddress() : String
+setDOB(birthDate : String) : void+getDOB() : String
+getMaxCustomers() : int
+getCreditRate() : double+getInvestmentRate() : double +getHoursOfOpe tion() : Stringra+getLastID() : int +getNextID() : int +getPhone() : String+getPremiumRate() : double +getWebsite() : String +getName() : String +getAddress() : String +setCreditRate(rate : double) : void +setInvestmentRate(rate : double) : void +setPremiumRate(rate : double) : +setWebSite(site : String) : void +setPhone(phonenum : String) : void
-acctType : char-balance : double-id : String
+getBalance() : double
+Account(type : char, amount : double) +getAcctType() : char +getID() :String
+Account()
+setBalance(amount : double) : void +setID(acctID : String) : void +setType(acctType : char) : void +withdraw(amount : double) : boolean +deposit(amount : double) : boolean
Account
5 - 5 Fundamentals of Java Programming Lab 3.8.1 Copyright 2004, Cisco Systems, Inc.
Lab 4.2.2 Arithmetic Operators
Estimated Time 15 minutes
Learning Objective In this lab activity, the student will build a new class called Time and use the Java language arithmetic operators.
Description/Scenario The Java language provides the use of operator symbols that are similar to regular algebraic symbols. Division (/) of integers, variable or constant, will result in an integer value. Any fraction or remainder is lost. The modulus operator (%) is used to obtain the remainder in integer division. A modulus might also be used to identify whether a number is odd or even. Another modulus use might be to calculate hours and minutes, given a total number of minutes. In general, modulus (%) is used only with integral numbers, not decimal.
Utilize operators, variables, and System.out.print().
File Management Open BlueJ. Click on Project from the BlueJ main menu and select New. In the New Project window and in the Look in: list box navigate to javacourse folder. Select the chap4 folder. Type lab4.2.2 in the File name text box and click on Create to create a lab4.2.2 subfolder in the chap4 folder.
Preparation • Open BlueJ
Create a new class called Time.
Tasks
Step 1 Create Time class Create the Time class, including a main method.
Step 2 Create three variables Within the main method, create three variables of type int. Make one of the int variables minutesWorked. Have this variable contain the amount of time to be worked. The other two int variables will hold the resulting hours and minutes.
1 - 2 Fundamentals of Java Programming Lab 4.2.2 Copyright 2004, Cisco Systems, Inc.
Step 3 Include operations 1. Include the operations that are needed to calculate the hours and minutes. What would be the
expected results if the variables were double instead of int?
Step 4 Add print statements Add print statements to display the results.
Step 5 Add comments Be sure to add a completed set of comments and execute the javadoc command to create the HTML documentation of your program.
Step 6 Run class Compile and run the class.
2 - 2 Fundamentals of Java Programming Lab 4.2.2 Copyright 2004, Cisco Systems, Inc.
Lab 4.2.5 Use of Operators
Estimated Time: 30 minutes
Learning Objective In this lab activity, students will build small new class named Operators that demonstrates the use of Java operators. Please refer to the Tables of Operators for syntax and examples.
Description • Use of operators, class or static variables and System.out.println().
• There are some general guidelines to consider when creating arithmetic expressions:
o Use parentheses to avoid ambiguity.
o Consider the size of resulting values and possible loss of precision.
o When using negative numbers with modulus calculation, drop the negative signs from either operand and calculate the result. Then figure the sign of the result.
o The + operator can be used to add numbers and concatenate the String objects.
File Management For this lab, launch BlueJ. Click on Project from the BlueJ main menu and select Open, navigate to the folder chap4, and select the BlueJ project lab4.2.2. An alternative method is to select Project and Open Recent, and select the previous lab4.2.2. Now save this Project under a new name lab4.2.5. To do this, select Project and Save as, Change the Folder in the Look In: box to chap5, and type lab4.2.5 as the new Project name. The Project window title should display lab4.2.5.
Preparation • Open BlueJ
• Create a new class named Operators.
Tasks
Step 1 Declare variables In the Operators class declare variables of following type: int, double, string, char .
Step 2 Calculate results
1 - 3 Fundamentals of Java Programming Lab 4.2.5 Copyright 2004, Cisco Systems, Inc.
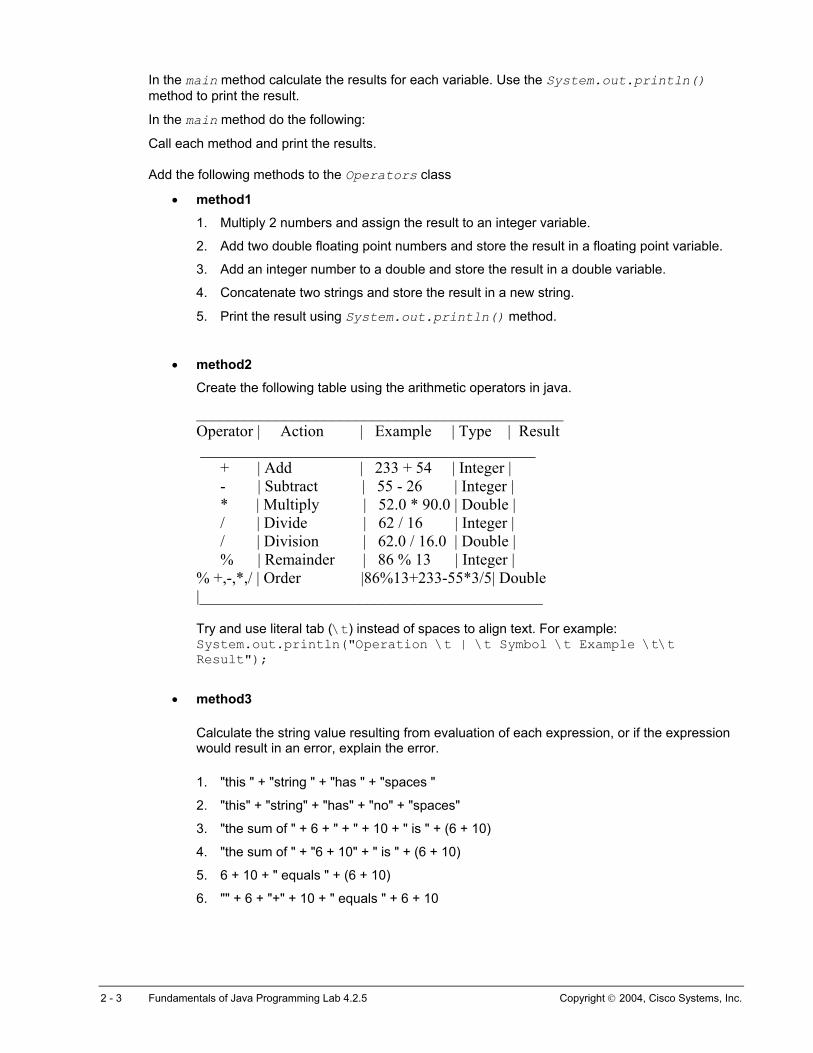
In the main method calculate the results for each variable. Use the System.out.println() method to print the result.
In the main method do the following:
Call each method and print the results. Add the following methods to the Operators class
• method1
1. Multiply 2 numbers and assign the result to an integer variable.
2. Add two double floating point numbers and store the result in a floating point variable.
3. Add an integer number to a double and store the result in a double variable.
4. Concatenate two strings and store the result in a new string.
5. Print the result using System.out.println() method.
• method2
Create the following table using the arithmetic operators in java.
______________________________________________ Operator | Action | Example | Type | Result __________________________________________ + | Add | 233 + 54 | Integer | - | Subtract | 55 - 26 | Integer | * | Multiply | 52.0 * 90.0 | Double | / | Divide | 62 / 16 | Integer | / | Division | 62.0 / 16.0 | Double | % | Remainder | 86 % 13 | Integer | % +,-,*,/ | Order |86%13+233-55*3/5| Double |___________________________________________ Try and use literal tab (\t) instead of spaces to align text. For example: System.out.println("Operation \t | \t Symbol \t Example \t\t Result");
• method3
Calculate the string value resulting from evaluation of each expression, or if the expression would result in an error, explain the error.
1. "this " + "string " + "has " + "spaces "
2. "this" + "string" + "has" + "no" + "spaces"
3. "the sum of " + 6 + " + " + 10 + " is " + (6 + 10)
4. "the sum of " + "6 + 10" + " is " + (6 + 10)
5. 6 + 10 + " equals " + (6 + 10)
6. "" + 6 + "+" + 10 + " equals " + 6 + 10
2 - 3 Fundamentals of Java Programming Lab 4.2.5 Copyright 2004, Cisco Systems, Inc.
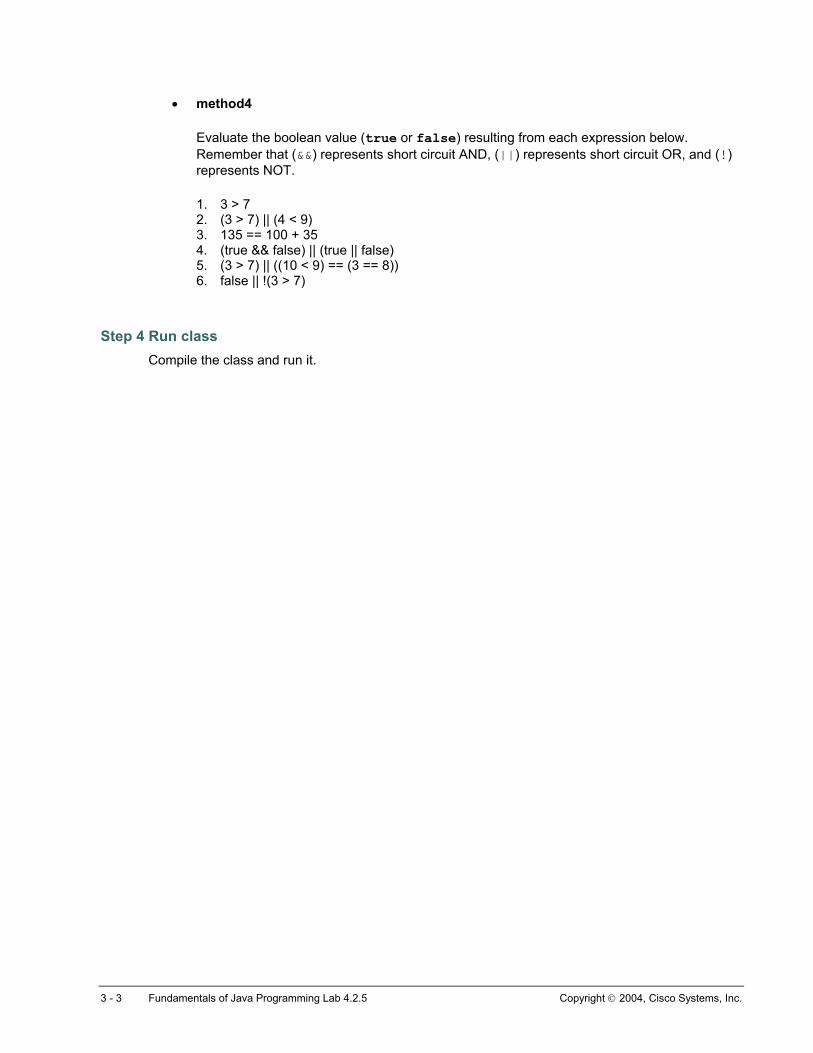
• method4
Evaluate the boolean value (true or false) resulting from each expression below. Remember that (&&) represents short circuit AND, (||) represents short circuit OR, and (!) represents NOT.
1. 3 > 7 2. (3 > 7) || (4 < 9) 3. 135 == 100 + 35 4. (true && false) || (true || false) 5. (3 > 7) || ((10 < 9) == (3 == 8)) 6. false || !(3 > 7)
Step 4 Run class Compile the class and run it.
3 - 3 Fundamentals of Java Programming Lab 4.2.5 Copyright 2004, Cisco Systems, Inc.
Lab 4.4.2 Casting and Conversion
Estimated Time 20 minutes
Learning Objectives In this lab activity, the student will apply concepts of type casting and data conversion.
Description • The Java programming language provides wrapper classes to manipulate primitive data
elements as objects. Such data elements are "wrapped" in an object that is created around them. Each Java primitive data type has a corresponding wrapper class in the java.lang package
• Wrapper classes implement immutable objects. This means that after the primitive value is initialized in the wrapper object, there is no way to change that value. Wrapper classes are useful when converting primitive data types because of the many wrapper class methods available, for example to convert a numeric value stored as a string, use the Integer class method to extract an int from a String.
• Create a class called ReadNum to read numbers from the console into an int variable. The numbers are read one character at a time to build a number String. The Interger.parseInt() method is used to parse the String to int type.
File Management Open BlueJ. Click on Project from the BlueJ main menu and select New. Select c:/ in the New Project window and in the Look in: list box. Double-click the javacourse folder listed in the text window and a different New Project window opens with javacourse in the Look in: list box. Double-click the chap4 folder listed in the text window and a different New Project window opens with chap4 in the Look in: list box. Type lab4.4.2 in the File name text box and click on Create to create a lab4.4.2 subfolder in the chap4 folder.
Tasks
Step 1 Reading numbers from keyboard a. Create a class called ReadNum. In the main method use System.in.read() method in a
while loop to read character by character. Break the while loop when the Enter key is read, that is if the character read is a newline (\n) character. Concatenate each character read into a variable numString of type String. Add a throws Exception clause to the main method.
b. Use Integer.parseInt(numString) to parse a String to int type. The Java programming language provides wrapper classes like Integer, Double, and Character to manipulate primitive data elements as objects. Such data elements are “wrapped” in an object created around them. Each Java primitive data type has a corresponding wrapper class in the java.lang package. Each wrapper class object encapsulates a single primitive value.
1 - 2 Fundamentals of Java Programming Lab 4.4.2 Copyright 2002, Cisco Systems, Inc.

Step 2 Run class Compile and test class
2 - 2 Fundamentals of Java Programming Lab 4.4.2 Copyright 2002, Cisco Systems, Inc.
Lab 4.4.3 String Concatenation
Estimated Time 15 minutes
Learning Objective In this lab activity, the student will build a new class called Concatenate and use String concatenation operations.
Description/Scenario • The simple definition of a String is a collection of one or more Unicode characters that are stored
in an object. String objects are immutable. The + operator in Java is considered an overloaded operator. The + operator can also be used to combine strings. This is also referred to as concatenation.
• The concept of overloading is explored in Module 5. A simple definition of overloading in Java is that the operator or method can perform more than the same action with different types of data. In this lab the + operator, which was used in adding numeric data, can also be used to combine strings. This is often referred to as concatenation.
• Guidelines for using String objects:
o Create strings for fixed string data.
o Use String s = "text"; or String s = new String("text");
o Strings can be concatenated or combined using the + operator:
String s = "Now ", s2 = " Then";
String phrase = s + "and" + s2;
o The System.out.println() method requires a String as its argument: System.out.println(s + "and" + s2);
• Because String objects are immutable and cannot be changed, concatenation operations on Strings are memory intensive.
• Create a class Concatenate. This class will have a main method and several variables. The variables will be private static char class variables. The class function will be to display all three variables in a single line with periods between each character. This will use the System.out.println() method.
File Management Open BlueJ. Click on Project from the BlueJ main menu and select New. Select c:/ in the New Project window and in the Look in: list box. Double-click the javacourse folder listed in the text window and a different New Project window opens with javacourse in the Look in: list box. Double-click the chap4 folder listed in the text window and a different New Project window opens with chap4 in the Look in: list box. Type lab4.4.3 in the File name text box and click on Create to create a lab4.4.3 subfolder in the chap4 folder.
1 - 2 Fundamentals of Java Programming Lab 4.4.3 Copyright 2004, Cisco Systems, Inc.
Preparation • Open BlueJ
• Create a new class named Concatenate.
Tasks
Step 1 Create Concatenate class Create the Concatenate class, including a main method.
Step 2 Create static variables Create three private static variables of type char and initialize them.
Step 3 Print values Within the main method, use System.out.println() and print all three values separated by periods.
1. Could this have been placed into a single variable and then printed?
Step 4 Add comments Be sure to add a complete set of comments.
Step 5 Run class Compile and run the class.
2 - 2 Fundamentals of Java Programming Lab 4.4.3 Copyright 2004, Cisco Systems, Inc.
Lab 4.5.4 If Statement
Estimated Time 30 minutes
Learning Objective In this lab activity, the student will use java language control structures such as if statements in the method definitions.
Description/Scenario • A control structure is a standard progression of logical steps that are used to control the
sequence of execution. In object-oriented programming, control structures are used only in methods of a class. The three basic control structures are sequence, selection or decision, and repetition. The two selection control structures in Java are if-then-else and switch. A control structure is a standard progression of logical steps to control the execution sequence of statements. The purpose of these structures is to define the logic flow of the procedure. All of these structures can nest inside each other. A sequence structure can nest inside a selection, a selection and sequence can nest inside a repetition, and so on.
• Conditional statements allow for the selective execution of portions of the program according to the value of some expressions. The Java programming language supports the if statement for two-way alternatives. In an if statement, actions are performed based on a certain condition. The condition is a boolean expression or a boolean value. The condition must therefore evaluate to true or false.
• The basic syntax for an if/else statement is as follows:
if (Boolean expression) {statement or block;} else { statements)
• Demonstrate decision-making techniques using condition testing to establish ranking order for grades.
• Update the Teacher class. Use its current main method and add a static testGrade() method that will test a grade set (homeWork and finalTest) using two input arguments. The first argument will be a double, and the second will be an int. The function of the testGrade() method will be to take the two arguments and determine if the grades are acceptable or if the student needs to see a counselor. The criterion are if:
o The homeWork grade is 3.6 or above and the finalTest is at least 50 then display “Grades acceptable!”
o The homeWork grade is 3.0 or above and the finalTest is at least 60 then display “Grades acceptable!”
1 - 1 Fundamentals of Java Programming Lab 4.5.4 Copyright 2004, Cisco Systems, Inc.
o The homeWork grade is 2.6 or above and the finalTest is at least 70 then display “Grades acceptable!”
o The homeWork grade is 2.0 or above and the finalTest is at least 80 then display “Grades acceptable!”
o If the values do not achieve the values shown then a different message needs to be shown.
File Management Open BlueJ. Click on Project from the BlueJ main menu and select New. Select c:/ in the New Project window and in the Look in: list box. Double-click the javacourse folder listed in the text window and a different New Project window will open with javacourse in the Look in: list box. Double-click the chap4 folder listed in the text window and a different New Project window will open with chap4 in the Look in: list box. Type lab4.5.4 in the File name text box and click on Create to create a lab4.5.4 subfolder in the chap4 folder.
Tasks
Step 1 Add the Teacher Class to the Project Click on Project from the BlueJ main menu and select Import. In the Select Directory to Import window, select lab2.2.6 and click on the Import button. In the Import Status window, click the Continue button. Right-click on the Teacher class and select open editor.
Step 2 Add the testGrade Method Add a private static testGrade() method to the Teacher class (not in the main method).
The testGrade()method requires two input arguments, the first needs to be a double (homeWork) and the second an int (finalTest).
Step 3 Print Implement the decision-making process in the testGrade() method. Print “Your grades are acceptable!” if they are else print "Please see your counselor!" if they are not.
What is the difference between & and &&?
Step 4 Test the Code In the main method of the class insert several calls to the testGrade method. In order to do this, first construct a Teacher object. Invoke the testGrade() method and call on the Teacher object. For each call use different values to verify that all of the if conditions work.
The ability to test control structures is a very import skill. You will discover that testing the creation of objects becomes fairly routine. Testing of method operations requires understanding the range of acceptable values, and the results expected for specific input values.
You should come up with at least eight combinations of values to verify that every single if condition will be executed properly.
2 - 2 Fundamentals of Java Programming Lab 4.5.4 Copyright 2004, Cisco Systems, Inc.
Step 5 Question Why wasn’t a Teacher object needed to call the testGrade() method?
Step 6 Add Comments Be sure to add a complete set of comments.
Step 7 Run the Class Compile, run, and test the class.
3 - 3 Fundamentals of Java Programming Lab 4.5.4 Copyright 2004, Cisco Systems, Inc.
Lab 4.5.6 Switch Statement
Estimated Time 25 minutes
Learning Objective In this lab activity, the student will include the use of the Java language control structure switch in the method definitions.
Description/Scenario • switch statements are also known as branching statements. They are a special kind of
selection control that allows for more than two choices when the condition is evaluated. In the switch statement the expression must be assignment compatible with an int type. The keyword break ends the sequence of actions and exits from this control structure.
• The switch statement syntax is as follows.
switch (expr1) { case constant1: statements; break;
case constant2: statements; break;
default: statements; break;
}
• There are several keywords and symbols that must be used in this control structure. The keyword switch begins the selection. The braces follow the expression. The keyword case tests if the condition is equal to the constant. The colon (:) at the end of this statement is required. The keyword break ends the sequence of actions and exits from this control structure. The keyword default specifies the set of actions that will be executed if no match was found between the expression and each constant.
• Build a class Vowel. This class will have a main method with a single char variable, and implement program decisions. Its function will be to use the input from args to test if its first character is a vowel. If it is not a vowel, a message will be displayed using a print() method. This lab will also have students go back to the API and look up one of the String class methods charAt(). This lab demonstrates several new Java features.
1 - 1 Fundamentals of Java Programming Lab 4.5.6 Copyright 2004, Cisco Systems, Inc.
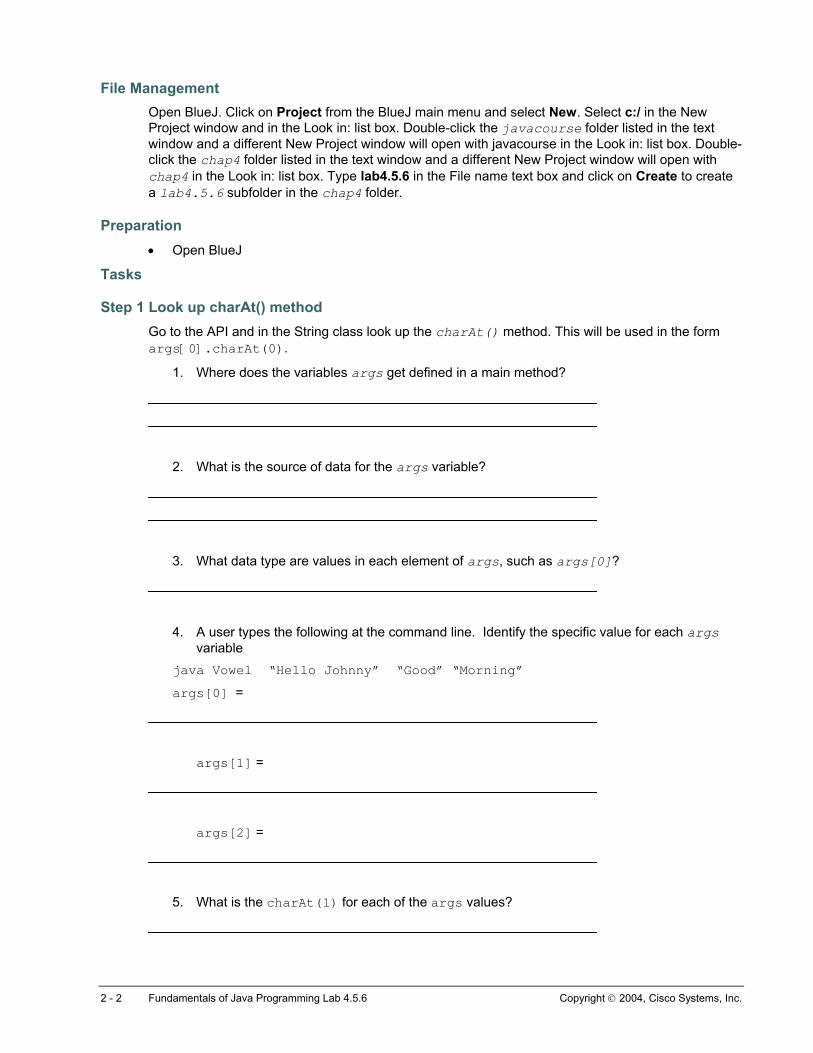
File Management Open BlueJ. Click on Project from the BlueJ main menu and select New. Select c:/ in the New Project window and in the Look in: list box. Double-click the javacourse folder listed in the text window and a different New Project window will open with javacourse in the Look in: list box. Double-click the chap4 folder listed in the text window and a different New Project window will open with chap4 in the Look in: list box. Type lab4.5.6 in the File name text box and click on Create to create a lab4.5.6 subfolder in the chap4 folder.
Preparation • Open BlueJ
Tasks
Step 1 Look up charAt() method Go to the API and in the String class look up the charAt() method. This will be used in the form args[0].charAt(0).
1. Where does the variables args get defined in a main method?
2. What is the source of data for the args variable?
3. What data type are values in each element of args, such as args[0]?
4. A user types the following at the command line. Identify the specific value for each args variable
java Vowel “Hello Johnny” “Good” “Morning”
args[0] =
args[1] =
args[2] =
5. What is the charAt(1) for each of the args values?
2 - 2 Fundamentals of Java Programming Lab 4.5.6 Copyright 2004, Cisco Systems, Inc.
6. What is the first consonant in each of the args values?
Step 2 Create the Vowel Class 1. Create the Vowel class, including a main method.
2. Use an if statement to verify that the user has typed in a word. To test this use the following if statement.
if (args = = null)
3. This if statement will be true if the user did not enter any values after the call to the Java class. Print a goodbye message on the screen and the program exits.
4. If the args is not null, then the user has entered at least one word. Extract the first character of the word. Assign the resulting character value to a local variable of type char. The statement char letter = args[0].charAt(0), will extract the first character of the first word provided by the user.
5. Use a switch statement to test if the character is one of the vowels. If it is, print a message stating that it is a vowel, other wise print a message stating it is not.
The program exits with one of three messages, that the first character is a vowel, the first character is not a vowel, or that the user has not entered any words.
Step 3 Add comments/Run class Be sure to add a complete set of comments. Compile, run and test the new class.
3 - 3 Fundamentals of Java Programming Lab 4.5.6 Copyright 2004, Cisco Systems, Inc.
Lab 4.5.8 do while Statement
Estimated Time 25 minutes
Learning Objective In this lab activity, the student will develop skills in using the iterative control structure do while loop.
Description/Scenario • The Java programming language supports three types of loop constructs, for, while, and do
loops. The for and while loops test the loop condition before executing the loop body. The do loops check the condition after executing the loop body. The for loop should be used in cases where the loop is executed a predetermined number of times. All loop structures have four elements or actions that occur:
1. Initialization
2. Test a condition or expression
3. Execution of statements
4. Alter the condition or expression to exit the loop.
The syntax for the do loop is as follows:
do { statement or block; } while (boolean test);
• Create a class named MyBalance. The main method will contain two method variables, a double variable balance assigned the value of 2000.00 and a char variable answer. The main method will also display the balance and then will ask the user “Do you want to see your balance again? Y or N”. If the answer is “Y,” the balance will be displayed again. The program will continue to loop until the answer is “N.” Use the System.in.read() method as in the following code example:
//answer is a char variable and will hold the value input from keyboard. answer = (char)System.in.read();
All data is read and written in bits. In Java the reading of input from the console is not an easy task. The Java language API provides the read() method of the System.in object to allow a programmer to obtain input from the user. When the user enters data, the data is read as an int. This int must be cast to a char. The statement answer = (char)System.in.read(
1 - 1 Fundamentals of Java Programming Lab 4.5.8 Copyright 2002, Cisco Systems, Inc.

); reads input of a single character from the keyboard as an int, the (char) expression casts this int value as a char.
File Management Open BlueJ. Click on Project from the BlueJ main menu and select New. Select c:/ in the New Project window and in the Look in: list box. Double-click the javacourse folder listed in the text window and a different New Project window will open with javacourse in the Look in: list box. Double-click the chap4 folder listed in the text window and a different New Project window will open with chap4 in the Look in: list box. Type lab4.5.8 in the File name text box and click on Create to create a lab4.5.8 subfolder in the chap4 folder.
Preparation • Open BlueJ
Tasks
Step 1 Create the MyBalance Class Create the class MyBalance.
Step 2 Add the main Method a. In the declaration section of the main method, include the phrase throws Exception as
shown below:
public static void main(String[] args) throws Exception.
Note: You will learn a great deal about the concept of exceptions and error handling in Module 11. At this stage, you are being asked to follow certain language rules. The reason you are being asked to include this statement is because you will be including a call to a method, System.in.read(). Use of this method requires handling of errors in a very specific way. The phrase throws Exception is one way to handle this requirement.
b. Add the method variables balance of the type double with a value of 2000, and answer of the type char.
c. Add a prompt statement and a do while loop to display the balance. The loop will display the balance and then will ask the user “Do you want to see your balance again? Y or N”. If the answer is “Y,” the balance will be displayed again. The program will continue to loop until the answer is “N.” To obtain input from the user, first display the prompt “Do you want to see your balance again? Y or N” using the System.in.println() statement.
d. Inside the do while loop insert the statement to read a char from the keyboard using System.in.read(). The proper form of this statement is shown below:
//answer is a char variable and will hold the value input from keyboard
answer = (char)System.in.read(); e. Insert another statement System.in.read(); This statement will retrieve the char
representing the user pressing the return key on the keyboard.
Step 3 Run the Class Compile and run the class.
2 - 2 Fundamentals of Java Programming Lab 4.5.8 Copyright 2002, Cisco Systems, Inc.

Step 4 Question How would the code be changed to accept either an uppercase or lowercase “y” or “n”?
3 - 3 Fundamentals of Java Programming Lab 4.5.8 Copyright 2002, Cisco Systems, Inc.
Lab 4.5.9 Use of while Loops
Estimated Time 15 minutes
Learning Objectives In this lab activity, the student will develop skills in using the iterative control structure while loop.
Description • The while loop syntax is as follows.
while (Boolean) { statement or block; }
• Ensure that the loop control variable is appropriately initialized before the loop body begins execution, and ensure that the loop condition is true at the beginning. The control variable must be updated appropriately to prevent an infinite loop.
• Create a new class named CountLoop.
• The class named CountLoop will contain a public static int class variable (field) count initialized with a value of 0. The main method will have a while loop that will display “Hello World” and count for every loop. The while loop will continue until count reaches 40.
File Management Open BlueJ. Click on Project from the BlueJ main menu and select New. In the New Project window and in the Look in: list box select c:\. Double-click the javacourse folder listed in the text window and a different New Project window opens with javacourse in the Look in: list box. Double-click the chap4 folder listed in the text window and a different New Project window opens with chap4 in the Look in: list box. Type lab4.5.9 in the File name text box and click on Create to create a lab4.5.9 subfolder in the chap4 folder.
1 - 1 Fundamentals of Java Programming Lab 4.5.9 Copyright 2004, Cisco Systems, Inc.
Tasks
Step 1 Create the CountLoop Class Create the class CountLoop.
Step 2 Add a Class Variable Add the class variable count of type int. The variable is declared as private static int count. You must declare this variable as static since it will be accessed in the static main method. Static methods can only access static variable directly. If you choose not to declare this variable as static, then you will need to create an instance of the CountLoop object, and reference the variable through the object.
Step 3 Add the main Method and the code for the While Loop Add a main method. Include a while loop in this method. Using this loop print the message, “Hello World” 40 times.
Increment the value of the variable count after printing the message.
To ensure that you do not print the message more than 40 times, insert the appropriate condition to test the value of count.
Step 4 Run the Class Compile the class and run it.
2 - 2 Fundamentals of Java Programming Lab 4.5.9 Copyright 2004, Cisco Systems, Inc.
Lab 4.5.10 for Loops
Estimated Time 25 minutes
Learning Objective In this lab activity, students will develop skills in using the iterative control structure for loop.
Description / Scenario • The for loop should be used in cases where the loop is executed a predetermined number of
times. All loop structures have four elements or actions that occur:
1) Initialization
2) Test a condition or expression
3) Execution of statements
4) Alter the condition or expression to exit the loop
• The Java programming language allows the comma separator in a for loop structure. For example, for (int i = 0, j = 0; j < 10; I++, j++) { } is legal. It initializes both i and j to 0 and increments both i and j after executing the loop body. In this example, int i is declared and defined within the for block. The variable i is accessible only within the scope of this particular for block. The following for loop construct is also legal for (int i=0,j=0; j<10;j++). The value of i will be incremented inside the loop, based on the logic of the code. for(int 1=0; i<10;) is also legal. The value of i can be incremented or changed inside the loop.
• In this Lab exercise, students will build a new class named EvenOdd. The main method will contain several local variables (variables within the main method) and produce the output for the program. Using two for loops, the main method will print to the console all the even numbers from 1 to 40 and in the second for loop it will print out to the console all the odd numbers from 1 to 40.
File Management Open BlueJ. Click on Project from the BlueJ main menu and select New. Select c:/ in the New Project window and in the Look in: list box. Double-click the javacourse folder listed in the text window and a different New Project window will open with javacourse in the Look in: list box. Double-click the chap4 folder listed in the text window and a different New Project window will open with chap4 in the Look in: list box. Type lab4.5.10 in the File name text box and click on Create to create a lab4.5.10 subfolder.
1 - 1 Fundamentals of Java Programming Lab 4.5.10 Copyright 2002, Cisco Systems, Inc.
Tasks
Step 1 Create EvenOdd class Create a new class named EvenOdd.
Step 2 Add main method Add a main method.
Step 3 Add loop Add a for loop to print messages regarding the numbers. The loop should execute no more than 40 times. The counter variable for the loop is an int x, initialized to 0.
In the loop, use the conditional operator to test if the value is odd or even. Use the modulus operator to determine the result of dividing the loop counter variable x by 2. if the remainder is 0, the number is even, and if the remainder is 1 the number is odd.
The conditional operator can be used to actually print the message. The syntax for the conditional operator is condition? true value: false value;
A sample of this is shown below:
x % 2 == 0 ? System.out.println( x + “is an even number”); : System.out.println(x + “is an odd number”);
The condition being tested is x % 2 == 0 ?
Alternatively you can also us an if statement to produce the two different messages.
Step 4 Run class Compile and run the class.
Step 5 Explain operations Explain the ++ and % operators:
2 - 2 Fundamentals of Java Programming Lab 4.5.10 Copyright 2002, Cisco Systems, Inc.
Lab 4.6.1 The Java.lang.System Class
Estimated Time 45 minutes
Learning Objective In this lab activity, the student will use the System class to read input from keyboard and process it in the program.
Description/Scenario • Complex activities such as accepting input on GUI screens or printing to the printers, requires
the use of the Java classes in SWING and AWT API. In Java, data flowing in and out of a program is called a stream. The language provides the System class to access properties of the underlying operating system devices to stream data in and out of the program. The System class contains references to three useful objects, in, out, and err. These objects can send data and receive data from the default input and output devices. System.in accepts data from the keyboard buffer. The method used is read(). The following sample code illustrates the use of System.in.read(). Note the throws Exception statement.
public class GetUserInput {
public static void main (String{} args) throws Exception { char userinput; System.out.println(”Please enter a usercharacter”); userinput = (char) System.in.read(); System.out.print(“ You entered “ + userinput);
} }
The throws Exception is required because the method read() declares the possibility of sending an error message in the event that it cannot read any data from the input stream. When using any method that throws an Exception, users are required to notify the complier about the possibility of such an error message.
• Build a class called MyMenu that will ask the user to enter an M, A, E, N, or Q. When the user types Q, the program will exit. When the user types M, A, E, or N, the program displays a message “Good Morning”, “Good Afternoon”, “ Good Evening”, or “Good Night” and then ask for input. If something other than an M, A, E, N, or Q, is entered, an error is displayed and input is asked for again. Input is also asked again if the user selects M,A,E,N. . The main method will contain the while loop, which will contain the menu items. The menu item will be displayed using System.out.println().
1 - 1 Fundamentals of Java Programming Lab 4.6.1 Copyright 2002, Cisco Systems, Inc.
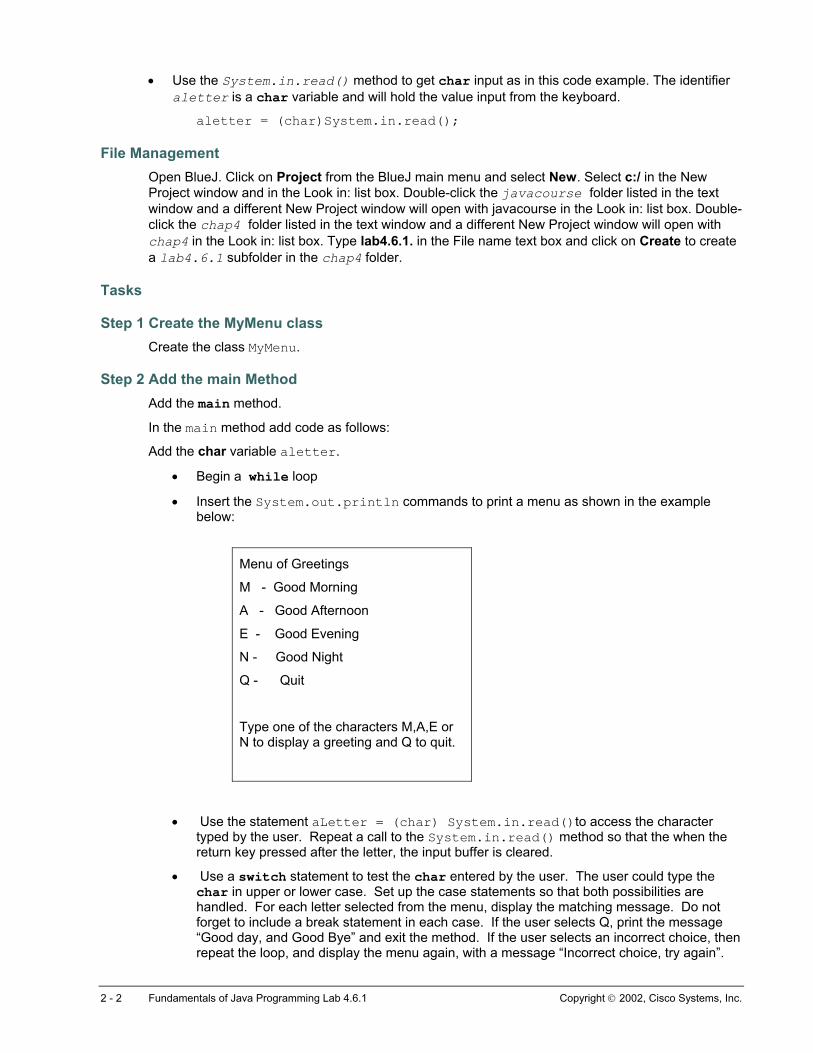
• Use the System.in.read() method to get char input as in this code example. The identifier aletter is a char variable and will hold the value input from the keyboard.
aletter = (char)System.in.read();
File Management Open BlueJ. Click on Project from the BlueJ main menu and select New. Select c:/ in the New Project window and in the Look in: list box. Double-click the javacourse folder listed in the text window and a different New Project window will open with javacourse in the Look in: list box. Double-click the chap4 folder listed in the text window and a different New Project window will open with chap4 in the Look in: list box. Type lab4.6.1. in the File name text box and click on Create to create a lab4.6.1 subfolder in the chap4 folder.
Tasks
Step 1 Create the MyMenu class Create the class MyMenu.
Step 2 Add the main Method Add the main method.
In the main method add code as follows:
Add the char variable aletter.
• Begin a while loop
• Insert the System.out.println commands to print a menu as shown in the example below:
Menu of Greetings
M - Good Morning
A - Good Afternoon
E - Good Evening
N - Good Night
Q - Quit
Type one of the characters M,A,E or N to display a greeting and Q to quit.
• Use the statement aLetter = (char) System.in.read()to access the character typed by the user. Repeat a call to the System.in.read() method so that the when the return key pressed after the letter, the input buffer is cleared.
• Use a switch statement to test the char entered by the user. The user could type the char in upper or lower case. Set up the case statements so that both possibilities are handled. For each letter selected from the menu, display the matching message. Do not forget to include a break statement in each case. If the user selects Q, print the message “Good day, and Good Bye” and exit the method. If the user selects an incorrect choice, then repeat the loop, and display the menu again, with a message “Incorrect choice, try again”.
2 - 2 Fundamentals of Java Programming Lab 4.6.1 Copyright 2002, Cisco Systems, Inc.
• Add a header line to the main method, throws exception, which will allow the use of the System.in.read() method.
Step 3 Run the Class Compile and run the class.
Step 4 Question Why would the second System.in.read() be needed by itself ?:
3 - 3 Fundamentals of Java Programming Lab 4.6.1 Copyright 2002, Cisco Systems, Inc.
Lab 4.6.3 Read Input with System.in
Estimated Time 20 minutes
Learning Objectives In this lab activity, the student will expand the use of the System class and character input techniques.
Description • The System class has three objects that can be used to input and output data from a program.
This lab uses the methods of the object in to read data from the keyboard.
• The System.in object can be used to read one character at a time. The in object has several methods for reading data. The data returned from the read() method has an int datatype. The int needs to be converted to (cast as) a char.
• To store more than one set of keyboard characters as one value in a variable, include repetition of the simple System.in.read() instruction until the user has typed in all of the information and pressed the enter key.
• Create a class called MyPassword which accepts a 5 character password from the keyboard using System.in.read() method.
File Management Open BlueJ. Click on Project from the BlueJ main menu and select New. In the New Project window and in the Look in: list box select c:\. Double-click the javacourse folder listed in the text window and a different New Project window opens with javacourse in the Look in: list box. Double-click the chap4 folder listed in the text window and a different New Project window opens with chap4 in the Look in: list box. Type lab4.6.3 in the File name text box and click on Create to create a lab4.6.3 subfolder in the chap4 folder.
Tasks
Step 1 Accepting input from the keyboard using System.in.read() a. Define a class called MyPassword. In the main method define five char variables c1, c2, c3,
c4, c5. Use System.in.read() method to accept one character at a time from the keyboard. The System.in.read() method throws an Exception, include the clause throws Exception to the main method.
Sample code: c1 = (char)System.in.read(); Note: Remember to include an extra System.in.read() method call to read the return key sent to the keyboard buffer.
1 - 1 Fundamentals of Java Programming Lab 4.6.3 Copyright 2002, Cisco Systems, Inc.
b. The in object has several methods for reading data. The data returned from the read() method has an int datatype. The int needs to be converted to (cast as) a char. Even if the user typed in a number, the int value is the Unicode of the symbol for the number, not the value of the number. For example if the number typed was a 7, the int would not be a 7 but the Unicode of the character 7, which is 55.
c. Test all the five characters. If the characters spell c i s c o, then issue the message that the password is valid, otherwise issue a message that the password is not valid.
d. Use System.out.println() to print the password.
Step 2 Run class Compile and test class
2 - 2 Fundamentals of Java Programming Lab 4.6.3 Copyright 2002, Cisco Systems, Inc.
Lab 4.6.5 The Console Class
Estimated Time 15 minutes
Learning Objective In this lab activity, the student will explore the code use of the System.in member and its methods using a sample class to obtain user input from the keyboard.
Description/Scenario • Introduction to the Console class. The Console class is a custom class designed to accept
input from the keyboard. This class implements methods to read the data and return the data as int, char or String. The students will be exploring this class and the methods of the class, so that they may use this class in future labs.
• The Java language provides the System class to access properties of the underlying operating system devices to stream data in and out of the program. The System class contains references to three useful objects: in, out, and err. These objects can send data and receive data from the default input and output devices. Although quite powerful on their own, these objects require additional coding. A very powerful and flexible class has already been created to provide some of the basic input and output methods that are needed. This class is the Console class.
• Open the Console class with BlueJ and review the available methods. Note what capabilities are available.
File Management Open BlueJ. Click on Project from the BlueJ main menu and select Open. Select c:\ in the Open Project window and in the Look in: list box. Double-click the javacourse folder listed in the text window and a different New Project window will open with javacourse in the Look in: list box. Double-click the chap4 folder listed in the text window and a different Open Project window will open with chap4 in the Look in: list box. Select the Console file and click Open.
Tasks
Step 1 Review the Console Class Code Open the Console class.
Review each of the available methods. Note the function of each method, the parameter required by some, and what each returns.
1 - 1 Fundamentals of Java Programming Lab 4.6.5 Copyright 2002, Cisco Systems, Inc.
a. How many methods are available?
b. Name all of the types that can be returned.
c. Which one of the methods returns a Boolean value?
d. How many methods potentially throw Exceptions?
e. Could this now be used in class?
f. Give an example code segment showing how this class could be used.
2 - 2 Fundamentals of Java Programming Lab 4.6.5 Copyright 2002, Cisco Systems, Inc.
Step 2 Use the Console Class Create a class Test.
Insert a main method in this class.
• Add the statements that will allow the console class to fulfill the following requirements:
• Accept any number between 1-5 from the user, and then print the number selected by the user.
• Accept the first name of the user
• Accept the middle initial of the user
• Accept the last name of the user.
• Print the first name Middle initial and the last name
• Accept a value from the user that represents the price of a Candy bar. Print the value entered by the user.
Step 3 Compile and Run the Class Compile and run the Test class.
3 - 3 Fundamentals of Java Programming Lab 4.6.5 Copyright 2002, Cisco Systems, Inc.
Lab 4.7.1 Control Structures
Estimated Time 15 minutes
Learning Objective In this lab activity, the student will practice additional applications of the Java control structures switch, if, and else if.
Description This lab implements the following key points from chapter 4:
• No matter what procedure or progression of logical actions the computer is to perform, all programming logic can be broken down into one of three control structures: sequence, selection or decision, and repetition. A control structure is a standard progression of logical steps to control the execution sequence of statements. The purpose of these structures is to define the logic flow of the procedure. All of these structures can nest inside each other. A sequence structure can nest inside a selection, a selection and sequence can nest inside a repetition, and so on.
• All loop structures have four elements or actions that occur:
1. Initialization
2. Test a condition or expression
3. Execution of statements
4. Alter the condition or expression to exit the loop
• The System class contains references to three useful objects. They are the static objects in, out, and err. Static means the value is based on the class. That is, no object is needed to use this member. Objects of the type System do not need to be created to access the member object out, in, or err. These objects can send data and receive data from default input and output devices.
• A Console class is provided that has methods to accept user input from the keyboard as part of the logic of the program.
• Develop a Java program for vehicle leasing business using control structures.
• Problem statement: Create a program that asks two questions to a customer, to which you will reply with a recommendation as to the model of vehicle that would best suit their needs. The first question will be the intended use of the vehicle. To simplify things the user will enter: ‘C’ for Carpool, ‘F’ for Family use, or ‘S’ for Sport. The next question will be “How many passengers?” The user will use: “A” for 1-2, “B” for 2-3, “C” for 3-4, “D” for 4-6, “E” for 6-8, “F” for 8-10 and “G” 10-16. Your program will then implement the following table to provide the final solution:
1 - 1 Fundamentals of Java Programming Lab 4.7.1 Copyright 2002, Cisco Systems, Inc.
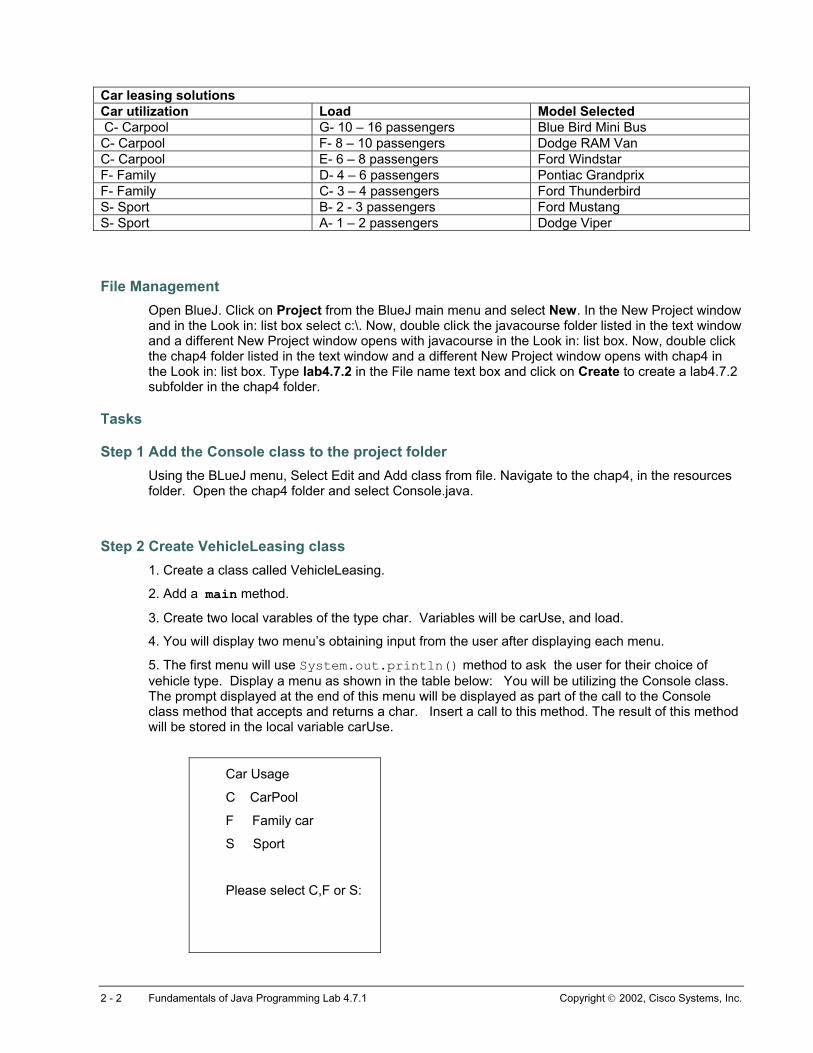
Car leasing solutions Car utilization Load Model Selected C- Carpool G- 10 – 16 passengers Blue Bird Mini Bus C- Carpool F- 8 – 10 passengers Dodge RAM Van C- Carpool E- 6 – 8 passengers Ford Windstar F- Family D- 4 – 6 passengers Pontiac Grandprix F- Family C- 3 – 4 passengers Ford Thunderbird S- Sport B- 2 - 3 passengers Ford Mustang S- Sport A- 1 – 2 passengers Dodge Viper
File Management Open BlueJ. Click on Project from the BlueJ main menu and select New. In the New Project window and in the Look in: list box select c:\. Now, double click the javacourse folder listed in the text window and a different New Project window opens with javacourse in the Look in: list box. Now, double click the chap4 folder listed in the text window and a different New Project window opens with chap4 in the Look in: list box. Type lab4.7.2 in the File name text box and click on Create to create a lab4.7.2 subfolder in the chap4 folder.
Tasks
Step 1 Add the Console class to the project folder Using the BLueJ menu, Select Edit and Add class from file. Navigate to the chap4, in the resources folder. Open the chap4 folder and select Console.java.
Step 2 Create VehicleLeasing class 1. Create a class called VehicleLeasing.
2. Add a main method.
3. Create two local varables of the type char. Variables will be carUse, and load.
4. You will display two menu’s obtaining input from the user after displaying each menu.
5. The first menu will use System.out.println() method to ask the user for their choice of vehicle type. Display a menu as shown in the table below: You will be utilizing the Console class. The prompt displayed at the end of this menu will be displayed as part of the call to the Console class method that accepts and returns a char. Insert a call to this method. The result of this method will be stored in the local variable carUse.
Car Usage
C CarPool
F Family car
S Sport
Please select C,F or S:
2 - 2 Fundamentals of Java Programming Lab 4.7.1 Copyright 2002, Cisco Systems, Inc.
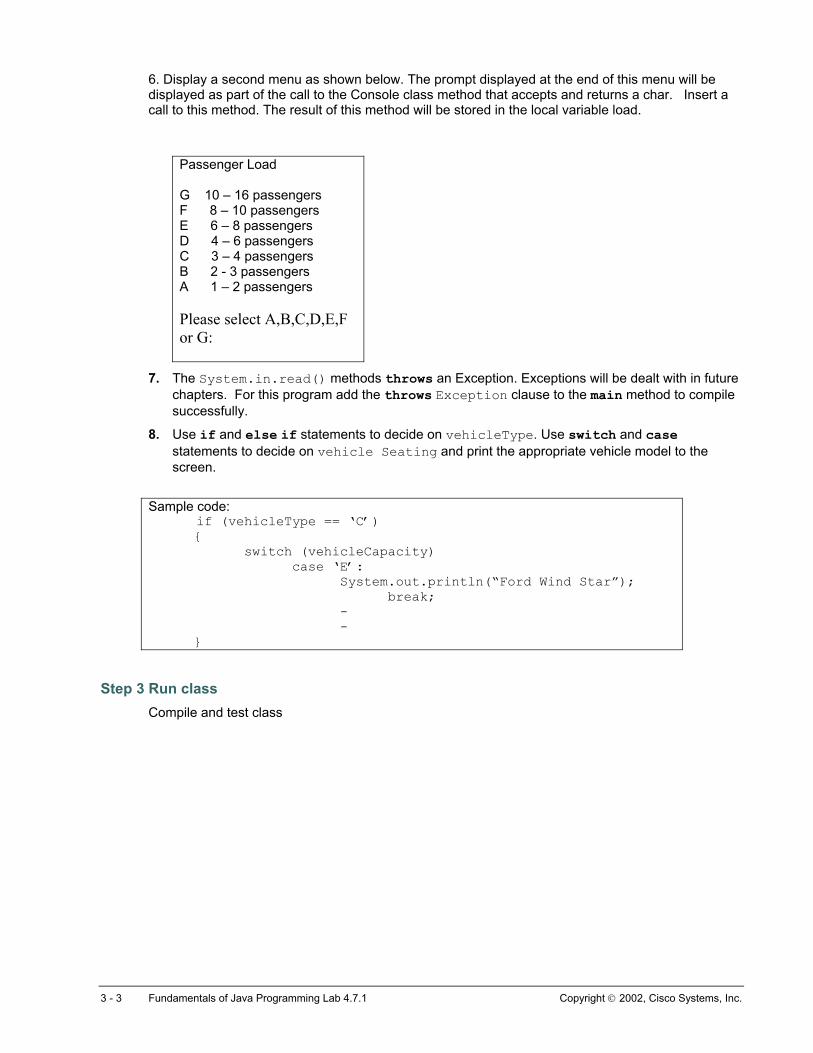
6. Display a second menu as shown below. The prompt displayed at the end of this menu will be displayed as part of the call to the Console class method that accepts and returns a char. Insert a call to this method. The result of this method will be stored in the local variable load.
Passenger Load G 10 – 16 passengers F 8 – 10 passengers E 6 – 8 passengers D 4 – 6 passengers C 3 – 4 passengers B 2 - 3 passengers A 1 – 2 passengers Please select A,B,C,D,E,F or G:
7. The System.in.read() methods throws an Exception. Exceptions will be dealt with in future chapters. For this program add the throws Exception clause to the main method to compile successfully.
8. Use if and else if statements to decide on vehicleType. Use switch and case statements to decide on vehicle Seating and print the appropriate vehicle model to the screen.
Sample code: if (vehicleType == ‘C’) { switch (vehicleCapacity) case ‘E’: System.out.println(“Ford Wind Star”); break; - - }
Step 3 Run class Compile and test class
3 - 3 Fundamentals of Java Programming Lab 4.7.1 Copyright 2002, Cisco Systems, Inc.
Lab 4.8.1 Adding Control Structures in the JBANK Application
Estimated Time 90 minutes
Learning Objectives
In this lab activity, the student will modify the Account, Bank, and the Teller classes to include the use of control structures for decision-making and repetition in the methods of these classes.
Description/Scenario • In this lab, the UML definitions have changed. The Bank class has been modified to include a
new field numOfCurrentCustomers, to keep track of how many customers have been created. A get method to retrieve data from this field, getnumOfCurrentCustomers has also been added. In the Account class the withdraw and deposit methods are now visible (not grayed out),and will be implemented in the lab.
• The last banking lab in Module 3 completed the creation of all the classes for JBANK. These classes included the Bank class with information about the Bank, the Customer class and the Account class. The Teller class will continue to be the entry point for the banking application. In this lab changes will be made to each of these classes to reflect the business rules as shown below.
• The Account class implements these business rules:
o The basic account that a customer will have is a savings account.
o Savings accounts require a minimum balance of 10 US dollars.
o When new customers join the bank, they are assigned a savings account and must deposit at least 10 US dollars in it.
o Customers will be allowed to withdraw money from the savings account at any time.
o Customers cannot withdraw amounts exceeding that in the account.
o The savings interest rate is 3% per year and it is calculated daily.
• The Bank class implements these business rules:
o In order to manage and control the assignment of IDs the bank class will ensure that the Lastid and Nextid are initialized to 1000, for the first call to the Bank. All subsequent calls to the Bank class to obtain IDs will automatically increase the ID value by one.
o The Bank class will track the number of customers created. The Teller class will use this information to ensure that the number of customers created does not exceed the maximum number defined in the Bank class.
• The Customer class implements a getCustID and setCustId method. this method will retrieve the ID from the Bank class, using the getNextId method.
o The Teller class implements these business rules: Ensures that the number of customers created does not exceed the maximum of 20
1 - 7 Fundamentals of Java Programming Lab 4.8.1 Copyright 2004, Cisco Systems, Inc.
o Ensures that the proper customer IDs are assigned using the IDs from the Bank class. In this lab the Teller class will assign the Customer ID for each Customer object. Automatically assigns the account type as savings with the char ‘S’. The Teller class will obtain the ids from the Bank class.
o Ensures that no account object is created without the creation of a customer object. The Business rules state: Accounts cannot exist without customers, and customers cannot exist without at least one type of account. A more complex implementation of this rule is explored in later chapters.
o Ensures that the account ID is based on the Customer ID for the customer and the acctType is assigned as savings, since all customers will have a basic savings account.
File management
For this lab, launch BlueJ. Click on Project from the BlueJ main menu and select Open, navigate to the folder chap3, and select the BlueJ project lab3.7.1. An alternative method is to select Project and Open Recent, and select the previous JBANK lab 3.7.1 .
Now save this Project under a new name lab4.8.1. To do this, select Project and Save as, Change the Folder in the Look In: box to chap4, and type lab4.8.1 as the new Project name. The Project window title should display lab4.8.1.
Add the Console class to the lab project. Select the Edit menu and select Add files from.. Navigate to the resource folder and locate the Console class from the folders for chapter 4.
Tasks
Step 1 Modifying the Account class a. Add the deposit method, using the UML to define the method signature, access modifier and
return type. This method returns a boolean value of true or false. Inside the method code instructions that will use the value of the amount variable declared in the method signature, to increase the balance in the account. Verify that the amount value passed to the method is not a negative number, before using it to increase the balance. If the amount provided can be deposited into the account, that is it is not a negative number, the method adds the amount to the balance. Use the unary += assignment operator and returns the boolean value true otherwise it returns the boolean value false. Sample logic:
• Check if amount is negative, if amount is negative, then do not change the balance, and return a false value.
• If the amount is not negative, change the balance using the += operator to add the amount to the balance, and then return a true value.
b. Add the withdraw method of the account class uses if statements to ensure that the withdrawing the amount withdrawn does not result in a negative balance. If the amount withdrawn should result in a negative balance, the amount is not withdrawn and the method returns a boolean false value, and the balance remains the same as before the method call. If the amount can be withdrawn from the balance, the balance is reduced by the amount and the method returns a boolean true value. Use the -= operator to reduce the balance by the amount value.
2 - 7 Fundamentals of Java Programming Lab 4.8.1 Copyright 2004, Cisco Systems, Inc.
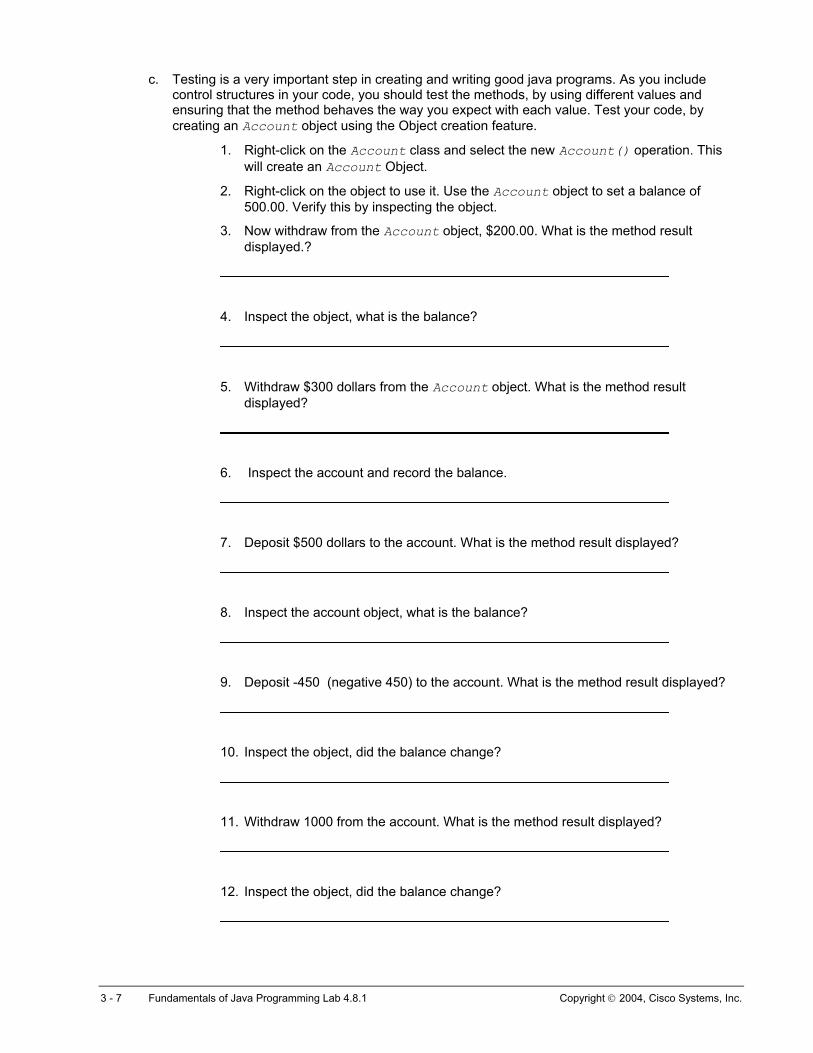
c. Testing is a very important step in creating and writing good java programs. As you include control structures in your code, you should test the methods, by using different values and ensuring that the method behaves the way you expect with each value. Test your code, by creating an Account object using the Object creation feature.
1. Right-click on the Account class and select the new Account() operation. This will create an Account Object.
2. Right-click on the object to use it. Use the Account object to set a balance of 500.00. Verify this by inspecting the object.
3. Now withdraw from the Account object, $200.00. What is the method result displayed.?
4. Inspect the object, what is the balance?
5. Withdraw $300 dollars from the Account object. What is the method result displayed?
6. Inspect the account and record the balance.
7. Deposit $500 dollars to the account. What is the method result displayed?
8. Inspect the account object, what is the balance?
9. Deposit -450 (negative 450) to the account. What is the method result displayed?
10. Inspect the object, did the balance change?
11. Withdraw 1000 from the account. What is the method result displayed?
12. Inspect the object, did the balance change?
3 - 7 Fundamentals of Java Programming Lab 4.8.1 Copyright 2004, Cisco Systems, Inc.
Step 2 Modifying the Bank class
a. Modify the Bank class. Add the new field numOfCurrentCustomers. The field is static private int. Add a new public static method getnumOfCurrenrtCustomers which returns an int. This method should return the value numOfCurrentCustomers.
b. Modify the getNextId method. This method returns an int, the value of the nextID field. The return statement was implemented in the lab for Module 3. In this method add code that does the following:
c. Create a local int variable that will be the value returned by the method.
int return_value = 0; d. Verify that the value of the nextCustID variable is not 0. Use the equal to operator (==) to test
the value of the nextCustID field. If the value is 0, then the variable needs to be initialized. The business rules state that Customer IDs will begin with the value 1000. If the value of the nextCustID variable is 0, then this will be assigned the value 1000. At initialization, the numOFCurrentCustomers will be increased by one. Assign the value of nextCustId to the local variable return_value.
e. The nextID is called to assign IDs to new customers. No new customers can be created is the current number of customers is equal to the maximum number of customers. If the value of nextID is not 0, the additional condition to be tested is whether the value of numOfCurrentCustomers is equal to maxNumOFCustomers. If these are equal no more customers can be created. If this is not true, then nextCustID will be assigned to lastCustID first, and then incremented by one. Postfix increment operator (++) can be used in this expression. The postfix increment operator will increase the value of the operand after it has been used in the assignment expression. The numOFCurrentCustomers will be increased by one. Assign the value of nextCustId to the local variable return_value.
f. As the last line of code include a return statement that returns the local variable return_value. This variable will have the values 0 (no new customers can be created) , or 1000 for the first customer or 1000+n for each new customer created.
1. Test your code. Since all of the methods of the Bank class are static methods, you do not need to create an object. Right-click on the Bank class and select the method getNextId. What is the method result?
2. Now select the method again, does this return the next value, what is it?
3. Select the getLastId method, what is the method result?
g. Test your code using the Teller class. Modify the main method of the Teller class. Delete all the code in the class and replace it with the following lines of code. The code shown here will call the getNextId method over 20 times, and print the results. Note the values printed for the NextCustId, numOfCurrentCustomers and lastCustId.
for (int i =0; i <22; i ++) { System.out.println(Bank.getNextId() + ", " + Bank.getNumOfCurrentCustomers() + ", " + Bank.getLastId()); }
4 - 7 Fundamentals of Java Programming Lab 4.8.1 Copyright 2004, Cisco Systems, Inc.
Step 4 Modifying the Customer class Modify the Customer class and add the method setCustId.This method should accept an int value and assign it to the custId field. Verify against the UML.
Step 5 Modifying the Teller class The purpose of the Teller class is to create Customer and Account objects and allow for use of these objects. The main method of the Teller class will be modified. Read the instructions carefully before you begin to define the code for the method. The method should do the following inside a do loop. The student may wish to write the code out on paper before trying to type it in the method.
a. Ask the user if they want to create a customer, If they do not exits the loop after displaying a polite message. Sample code is shown below.
char createCust; do { createCust = Console.readChar(“ Would you like to create a Customer enter Y or N”);
b. If user wants to create a customer, provide the user with prompts and accept the users input using the Console class. The input from the user is stored in local variables. One for each input item. All the input will be stored in String objects. Partial code provided below.
if (createCust ! = ‘N’) { String custLName = Console.readLine(“Enter Customer’s Last name”): ----
c. Collect information for Customer’s FirstName, DOB (date of birth) and Phone.
d. Create a Customer object. Sample code. Customer c = new Customer();
e. Assign an ID for the Customer object calling the Bank’s getNextId method.
c.setCustId( Bank.getNextId()); f. Assign the Customer object with data obtained from the user. Use the object reference variable
calling the set methods of the object and passing the method the appropriate variables. Partial code is provided, remember that the setName method accepts both the last and the first name.
c.setName(custLname, custFname); g. Ask the Customer if they would like to create an Account object . Sample code provided.
char createAcct = Console.readChar("Would you like to create a Savings account for the customer? Enter Y or N" );
h. If the user states Y to create an account, ask for user input for the balance amount for the account. The balance is a double value. to clarify, this request obtains the starting balance for the account. Check that the starting balance is at least 20.00. If not print a message that no account can be created.
if (createAcct = = ‘Y’) { double acctBalance = Console.readDouble(“Please enter a starting balance for the account”);
i. Creates an Account object. Account a = new Account();
5 - 7 Fundamentals of Java Programming Lab 4.8.1 Copyright 2004, Cisco Systems, Inc.

j. Assigns an account ID, using the retrieved customer ID from the Customer object and concatenating this with the letter “S”, assigns the letter ‘S’ to the acctType and the balance from then input to the balance field. Remember that all the fields of the Account class are private and you will need to use the set methods to assign data to the object. Partial code provided.
a.setID( c.getCustID() + “S”); k. Displays the information on the Customer created, and the account for the customer. Use a
series of System.out.println statements to display the data for the Customer and Account objects.
l. Returns to the top of the loop to repeat the process for another customer. Since this is a do loop, the while expression is tested at the end of the loop. In this lab the while expression would be:
} while (creatCust == ‘Y’);
m. Test your code by creating a customer and an account. Create a second Customer and no account, and then decline creation of accounts when prompted.
n. (Optional) As a challenge add a loop inside the if statement where the account object is created, allowing the user to conduct one or more transactions on the account, such as withdraw from the account and deposit to the account. Make sure you always print the result of each transaction, displaying the amount used, and the balance before allowing another transaction.
Step 4 Documentation a. Modify the comments of the Bank class to include explanations of how the getnextId method
works and what business rules are implemented in this method. Add comments to the new getnumOfCurrentCustomers method.
b. Modify the comments of the Account class to describe the business rules implemented in the withdraw and deposit methods.
c. Add comments to the setCustID method of the Customer class.
d. Using BlueJ Create the HTML documentation for the classes in the project.
Optional Step: Using the Document “How to use UMLTestTool”, follow the instructions to verify your JBANK classes match the JBANK UML diagram shown below.
6 - 7 Fundamentals of Java Programming Lab 4.8.1 Copyright 2004, Cisco Systems, Inc.
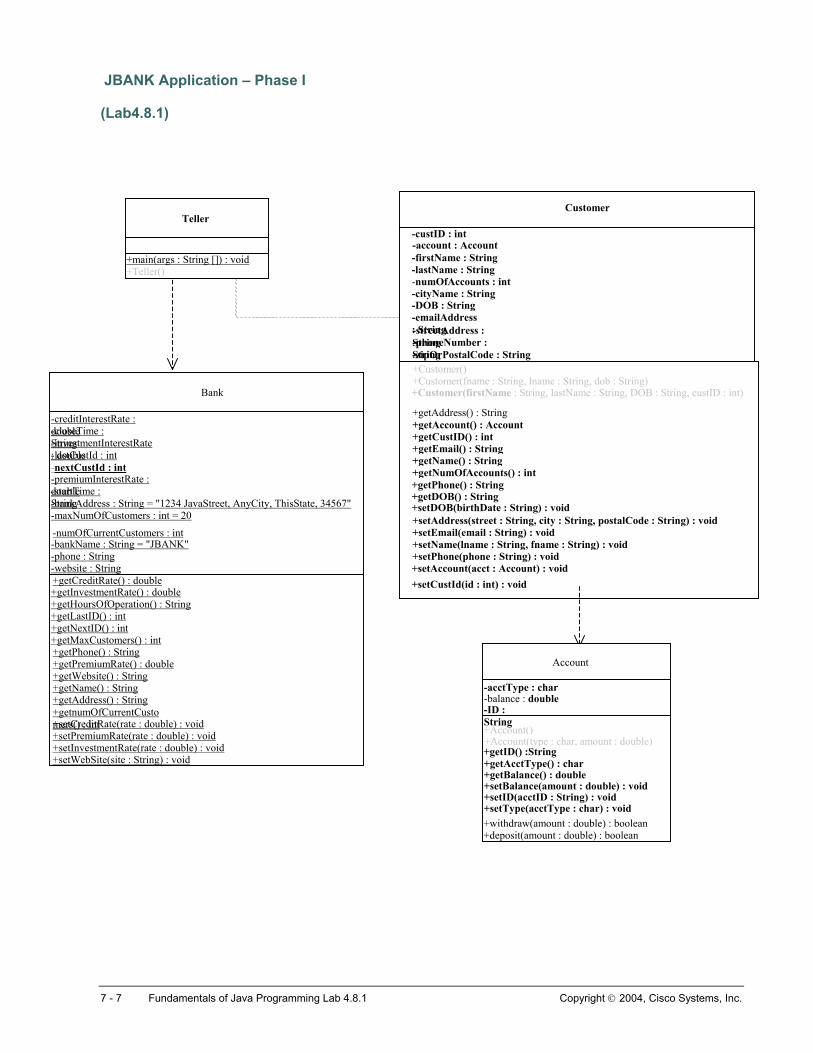
JBANK Application – Phase I
(Lab4.8.1)
Customer Teller
-streetA-emailAddress : String
-custID : int-account : Account-firstName : String-lastName : String
-DOB : String-cityName : String-numOfAccounts : int
ddress : String-phoneNumber : String-zipOrPostalCode : String
+main(ar s : String []) : void g+Teller()
+Customer()+Customer(fname : String, lname : String, dob : String) +Customer(firstName : String, lastName : String, DOB : String, custID : int)Bank
+setAccount(acct : Account) : void+setPhone(phone : String) : void+setName(lname : String, fname : String) : void +setEmail(email : String) : void+setAddress(street : String, city : String, postalCode : String) : void
+getPhone() : String+getNumOfAccounts() : int+getName() : String+getEmail() : String+getCustID() : int+getAccount() : Account+getAddress() : String
+setDOB(birthDate : String) : void+getDOB() : String
-creditInterestRate : double -closeTime : String -investmentInterestRate : double -nextCustId : int -premiumInterestRate : double -startTime : String -bankAddress : String = "1234 JavaStreet, AnyCity, ThisState, 34567"-maxNumOfCustomers : int = 20
+getAddress() : String
-lastCustId : int
-bankName : String = "JBANK" -phone : String-website : String
+getName() : String +getWebsite() : String +getPremiumRate() : double +getPhone() : String+getMaxCustomers() : int +getNextID() : int +getLastID() : int +getHoursOfOperation() : String+getInvestmentRate() : double +getCreditRate() : double
-numOfCurrentCustomers : int
+setWebSite(site : String) : void +setInvestmentRate(rate : double) : void +setPremiumRate(rate : double) : void +setCreditR+getnumOfCurrentCustomers() : int ate(rate : double) : void
+getBalance() : double
-acctType : char-balance : double-ID : String
+Account(type : char, amount : double) +getAcctType() : char +getID() :String
+Account()
+setBalance(amount : double) : void +setID(acctID : String) : void +setType(acctType : char) : void +withdraw(amount : double) : boolean +deposit(amount : double) : boolean
Account
+setCustId(id : int) : void
7 - 7 Fundamentals of Java Programming Lab 4.8.1 Copyright 2004, Cisco Systems, Inc.
Lab 5.2.4 Four Steps to Create Objects
Estimated Time 30 minutes
Learning Objectives In this lab activity, the student will create classes and objects applying a four step technique.
Description/Scenario • The four steps necessary in creating objects are:
1. Design the attributes and behaviors of the class.
2. Define the object. Create a class definition or blueprint.
3. Create an object.
4. Use the object.
• An attribute is the data stored in an object. Attributes are declared using variables to identify storage of data. Data can be a reference to any of the eight primitive data types (boolean, char, byte, short, int, long, float, or double). Data can also be a reference or an identifier for another object.
• Attributes can also be public or private. The private access modifier limits the use of these variables to the class. The public access modifier allows other classes to use the contents of the variables. These keywords precede the data type attributes:
public int days; private String name;
• A class definition can include three categories of variables, including instance or object
variables, static data or class variables, and local or method variables.
o Instance data or instance variables are stored in each object of a class.
o Class data or static variables are stored in the class and are available to all objects of a class or objects of other classes if the access is permitted. This is data that can be shared.
o Local data or method variables are the data used in a method. This data is temporary and does not exist once the method has completed execution.
• Objects are created when the new operator is used. There are almost no restrictions as to when an object can be created. Objects can be created in methods of other classes, as a part of the attribute definition of another class, and within the definition of the class of the object. The creation of an object is also referred to as instantiation. An instance of the class is thus created.
1 - 1 Fundamentals of Java Programming Lab 5.2.4 Copyright 2004, Cisco Systems, Inc.
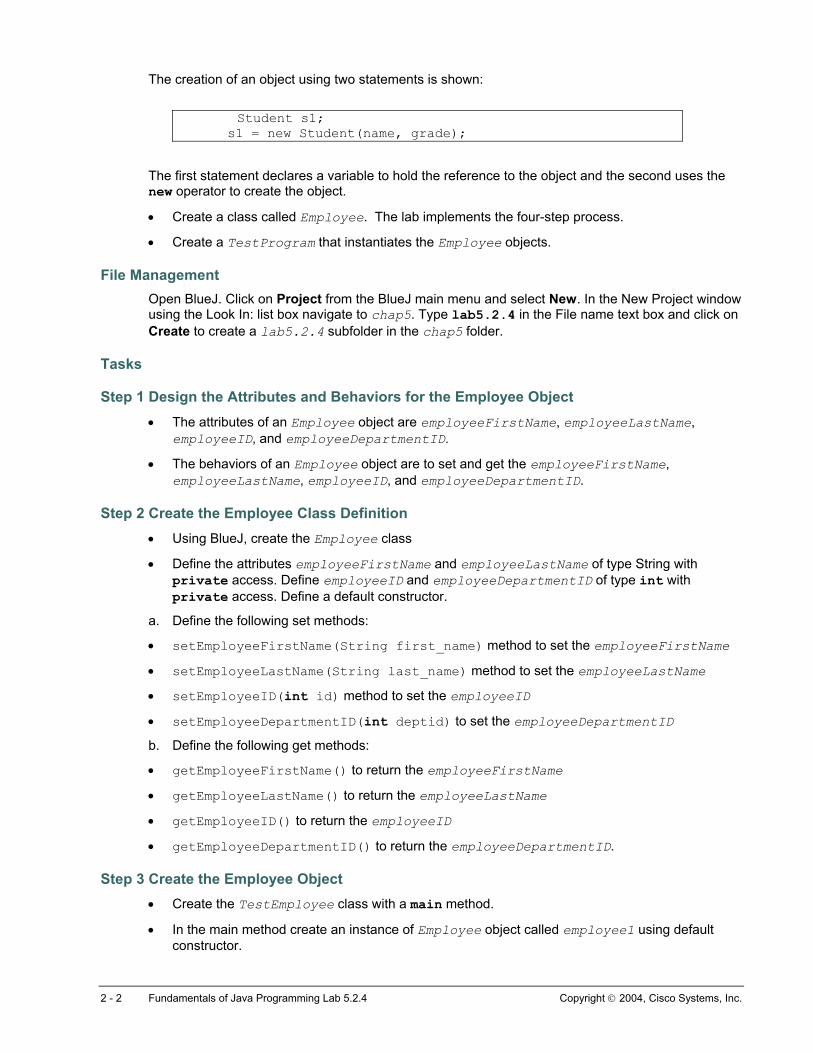
The creation of an object using two statements is shown:
Student s1; s1 = new Student(name, grade);
The first statement declares a variable to hold the reference to the object and the second uses the new operator to create the object.
• Create a class called Employee. The lab implements the four-step process.
• Create a TestProgram that instantiates the Employee objects.
File Management Open BlueJ. Click on Project from the BlueJ main menu and select New. In the New Project window using the Look In: list box navigate to chap5. Type lab5.2.4 in the File name text box and click on Create to create a lab5.2.4 subfolder in the chap5 folder.
Tasks
Step 1 Design the Attributes and Behaviors for the Employee Object • The attributes of an Employee object are employeeFirstName, employeeLastName,
employeeID, and employeeDepartmentID.
• The behaviors of an Employee object are to set and get the employeeFirstName, employeeLastName, employeeID, and employeeDepartmentID.
Step 2 Create the Employee Class Definition • Using BlueJ, create the Employee class
• Define the attributes employeeFirstName and employeeLastName of type String with private access. Define employeeID and employeeDepartmentID of type int with private access. Define a default constructor.
a. Define the following set methods:
• setEmployeeFirstName(String first_name) method to set the employeeFirstName
• setEmployeeLastName(String last_name) method to set the employeeLastName
• setEmployeeID(int id) method to set the employeeID
• setEmployeeDepartmentID(int deptid) to set the employeeDepartmentID
b. Define the following get methods:
• getEmployeeFirstName() to return the employeeFirstName
• getEmployeeLastName() to return the employeeLastName
• getEmployeeID() to return the employeeID
• getEmployeeDepartmentID() to return the employeeDepartmentID.
Step 3 Create the Employee Object • Create the TestEmployee class with a main method.
• In the main method create an instance of Employee object called employee1 using default constructor.
2 - 2 Fundamentals of Java Programming Lab 5.2.4 Copyright 2004, Cisco Systems, Inc.

Step 4 Use the Employee Object • Use the set methods to set the firstName, lastName, empID, and departmentID of the
Employee object.
• Use the get methods to get the firstName, lastName, empID, and departmentID and print them to the screen.
Step 5 Run the Class
Compile and test the class.
3 - 3 Fundamentals of Java Programming Lab 5.2.4 Copyright 2004, Cisco Systems, Inc.
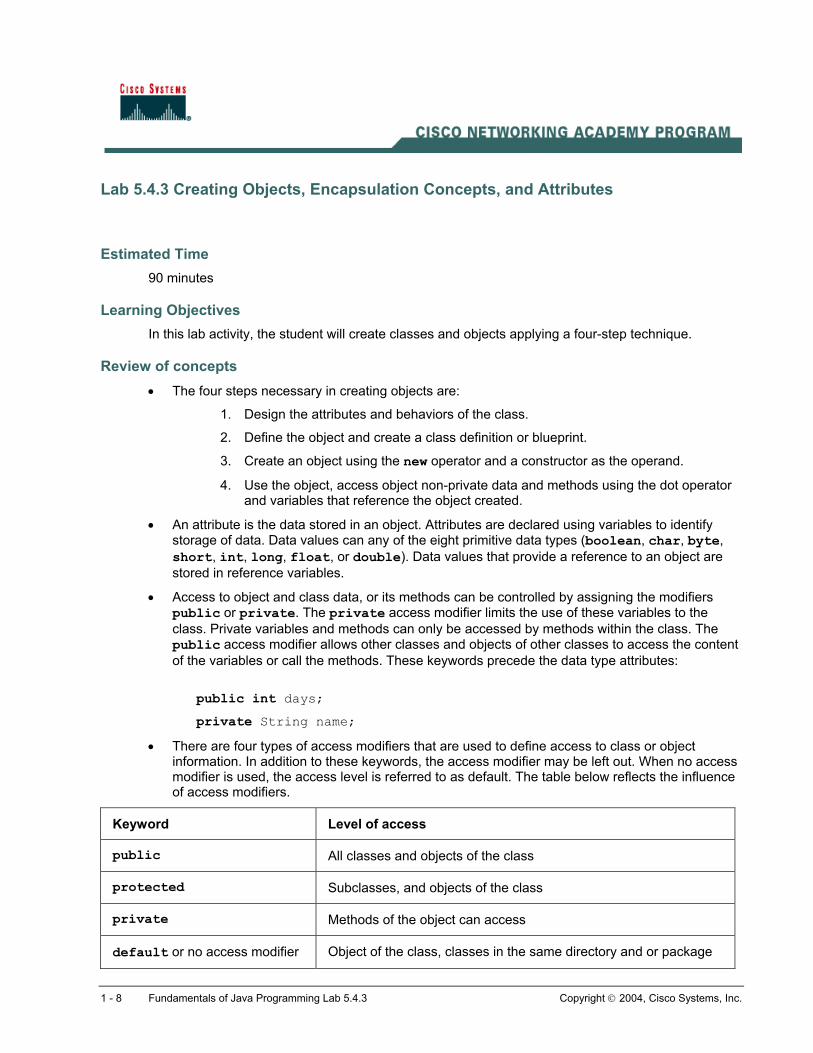
Lab 5.4.3 Creating Objects, Encapsulation Concepts, and Attributes
Estimated Time 90 minutes
Learning Objectives In this lab activity, the student will create classes and objects applying a four-step technique.
Review of concepts • The four steps necessary in creating objects are:
1. Design the attributes and behaviors of the class.
2. Define the object and create a class definition or blueprint.
3. Create an object using the new operator and a constructor as the operand.
4. Use the object, access object non-private data and methods using the dot operator and variables that reference the object created.
• An attribute is the data stored in an object. Attributes are declared using variables to identify storage of data. Data values can any of the eight primitive data types (boolean, char, byte, short, int, long, float, or double). Data values that provide a reference to an object are stored in reference variables.
• Access to object and class data, or its methods can be controlled by assigning the modifiers public or private. The private access modifier limits the use of these variables to the class. Private variables and methods can only be accessed by methods within the class. The public access modifier allows other classes and objects of other classes to access the content of the variables or call the methods. These keywords precede the data type attributes:
public int days; private String name;
• There are four types of access modifiers that are used to define access to class or object information. In addition to these keywords, the access modifier may be left out. When no access modifier is used, the access level is referred to as default. The table below reflects the influence of access modifiers.
Keyword Level of access
public All classes and objects of the class
protected Subclasses, and objects of the class
private Methods of the object can access
default or no access modifier Object of the class, classes in the same directory and or package
1 - 8 Fundamentals of Java Programming Lab 5.4.3 Copyright 2004, Cisco Systems, Inc.
• A class definition can include three categories of variables, instance or object variables or fields, static or class variables shared by all objects, and local or method variables only accessible to the code of the method:
o Instance data or instance variables are stored in each object of a class.
o Class data or static variables are stored in the class and are available to all objects of a class or objects of other classes if the access is permitted. This is data that can be shared.
o Local data or method variables are the data used in a method. This data is temporary and does not exist once the method has completed execution.
o Instance and static variables are initialized with values based on its data type. Numeric primitives (byte, short, int, long, float and double) are initialized as 0, boolean as false and char as ‘\u0000’. All reference variables are initialized as null.
o The programmer can choose to initialize an instance or static variable with some specific value. This is referred to as explicit initialization.
o All local variables must be initialized specifically by the programmer prior to their use.
• Class definition may include none, one or many constructors. When no constructor is defined, the compiler will insert a no argument null constructor. That is constructor with no code also referred to as any empty constructor.
• Objects are created when the new operator is used. The new operator requires that a Constructor of the class be provided as its operand. As the student may recall, operators are provided in a language to perform action on data. The new operator is a unary operator, requiring only one operand. There are almost no restrictions as to when an object can be created. Objects can be created in methods of other classes, as a part of the attribute definition of another class, and within the definition of the class of the object, and as arguments to a method call. The creation of an object is also referred to as instantiation. An instance of the class is thus created.
• The syntax to create an object can be any one of these examples:
Student s1 = new Student(); // reference variable is declared and object created in one statement Student s1; s1 = new Student(); // 2 statement , one to declare the reference variable, and the second to assign it the object reference value. // call to a method: methodX( new Student()); // the object will be created and it’s reference passed as a value to the method.
• Class definitions include public, private, and protected methods. Methods can provide access to the data, such as get and set methods or accessor and mutator methods. Methods can also provide complex operations on the data of the object, or some other purpose. Such methods are known as custom or business methods.
2 - 8 Fundamentals of Java Programming Lab 5.4.3 Copyright 2004, Cisco Systems, Inc.
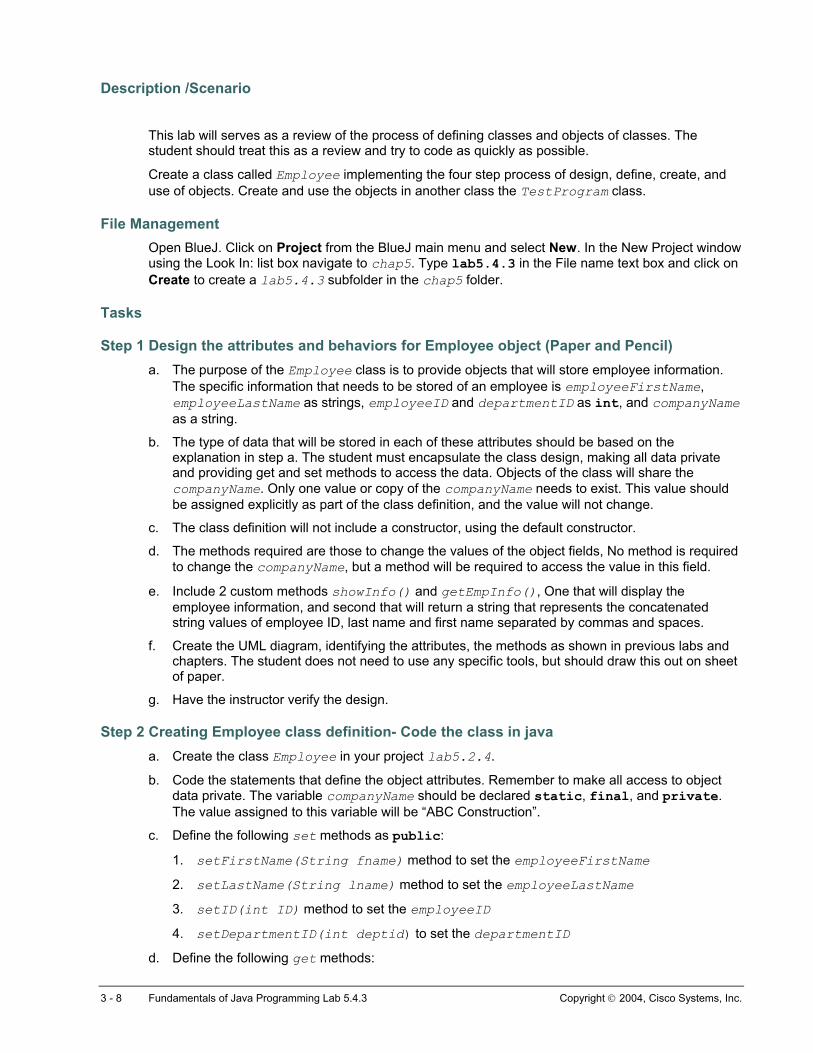
Description /Scenario
This lab will serves as a review of the process of defining classes and objects of classes. The student should treat this as a review and try to code as quickly as possible.
Create a class called Employee implementing the four step process of design, define, create, and use of objects. Create and use the objects in another class the TestProgram class.
File Management Open BlueJ. Click on Project from the BlueJ main menu and select New. In the New Project window using the Look In: list box navigate to chap5. Type lab5.4.3 in the File name text box and click on Create to create a lab5.4.3 subfolder in the chap5 folder.
Tasks
Step 1 Design the attributes and behaviors for Employee object (Paper and Pencil) a. The purpose of the Employee class is to provide objects that will store employee information.
The specific information that needs to be stored of an employee is employeeFirstName, employeeLastName as strings, employeeID and departmentID as int, and companyName as a string.
b. The type of data that will be stored in each of these attributes should be based on the explanation in step a. The student must encapsulate the class design, making all data private and providing get and set methods to access the data. Objects of the class will share the companyName. Only one value or copy of the companyName needs to exist. This value should be assigned explicitly as part of the class definition, and the value will not change.
c. The class definition will not include a constructor, using the default constructor.
d. The methods required are those to change the values of the object fields, No method is required to change the companyName, but a method will be required to access the value in this field.
e. Include 2 custom methods showInfo() and getEmpInfo(), One that will display the employee information, and second that will return a string that represents the concatenated string values of employee ID, last name and first name separated by commas and spaces.
f. Create the UML diagram, identifying the attributes, the methods as shown in previous labs and chapters. The student does not need to use any specific tools, but should draw this out on sheet of paper.
g. Have the instructor verify the design.
Step 2 Creating Employee class definition- Code the class in java a. Create the class Employee in your project lab5.2.4.
b. Code the statements that define the object attributes. Remember to make all access to object data private. The variable companyName should be declared static, final, and private. The value assigned to this variable will be “ABC Construction”.
c. Define the following set methods as public:
1. setFirstName(String fname) method to set the employeeFirstName
2. setLastName(String lname) method to set the employeeLastName
3. setID(int ID) method to set the employeeID
4. setDepartmentID(int deptid) to set the departmentID
d. Define the following get methods:
3 - 8 Fundamentals of Java Programming Lab 5.4.3 Copyright 2004, Cisco Systems, Inc.
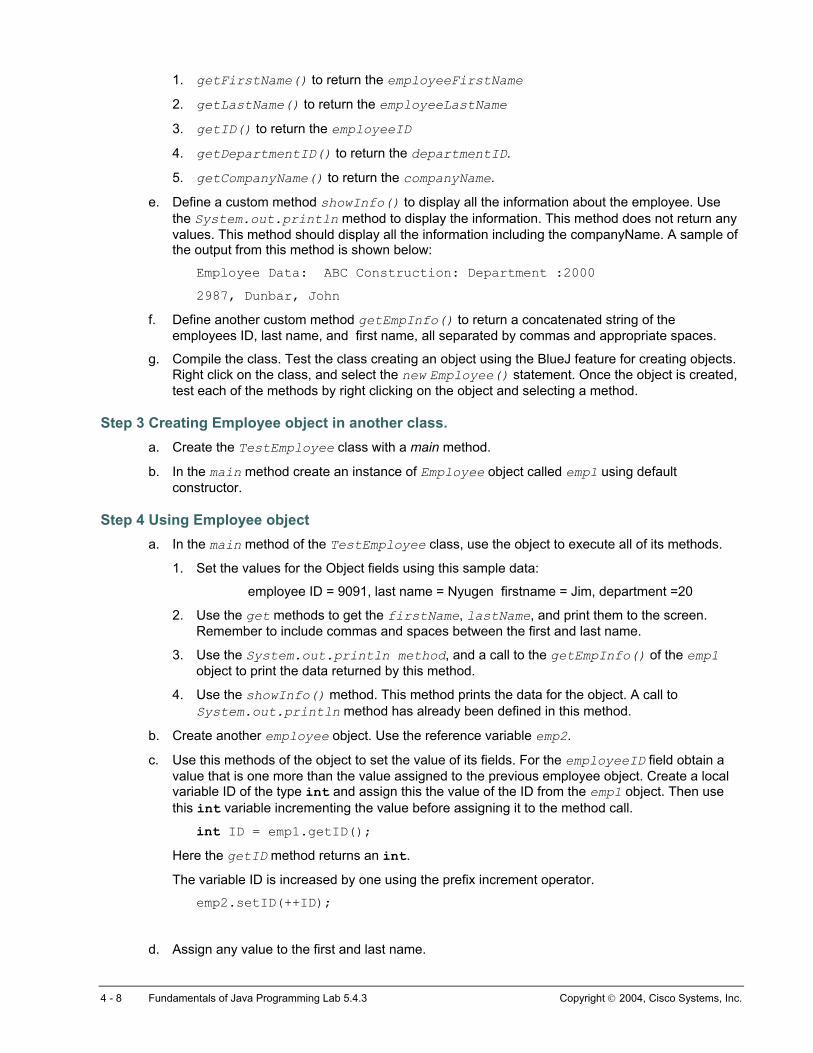
1. getFirstName() to return the employeeFirstName
2. getLastName() to return the employeeLastName
3. getID() to return the employeeID
4. getDepartmentID() to return the departmentID.
5. getCompanyName() to return the companyName.
e. Define a custom method showInfo() to display all the information about the employee. Use the System.out.println method to display the information. This method does not return any values. This method should display all the information including the companyName. A sample of the output from this method is shown below:
Employee Data: ABC Construction: Department :2000 2987, Dunbar, John
f. Define another custom method getEmpInfo() to return a concatenated string of the employees ID, last name, and first name, all separated by commas and appropriate spaces.
g. Compile the class. Test the class creating an object using the BlueJ feature for creating objects. Right click on the class, and select the new Employee() statement. Once the object is created, test each of the methods by right clicking on the object and selecting a method.
Step 3 Creating Employee object in another class. a. Create the TestEmployee class with a main method.
b. In the main method create an instance of Employee object called emp1 using default constructor.
Step 4 Using Employee object a. In the main method of the TestEmployee class, use the object to execute all of its methods.
1. Set the values for the Object fields using this sample data:
employee ID = 9091, last name = Nyugen firstname = Jim, department =20
2. Use the get methods to get the firstName, lastName, and print them to the screen. Remember to include commas and spaces between the first and last name.
3. Use the System.out.println method, and a call to the getEmpInfo() of the emp1 object to print the data returned by this method.
4. Use the showInfo() method. This method prints the data for the object. A call to System.out.println method has already been defined in this method.
b. Create another employee object. Use the reference variable emp2.
c. Use this methods of the object to set the value of its fields. For the employeeID field obtain a value that is one more than the value assigned to the previous employee object. Create a local variable ID of the type int and assign this the value of the ID from the emp1 object. Then use this int variable incrementing the value before assigning it to the method call.
int ID = emp1.getID(); Here the getID method returns an int. The variable ID is increased by one using the prefix increment operator.
emp2.setID(++ID);
d. Assign any value to the first and last name.
4 - 8 Fundamentals of Java Programming Lab 5.4.3 Copyright 2004, Cisco Systems, Inc.
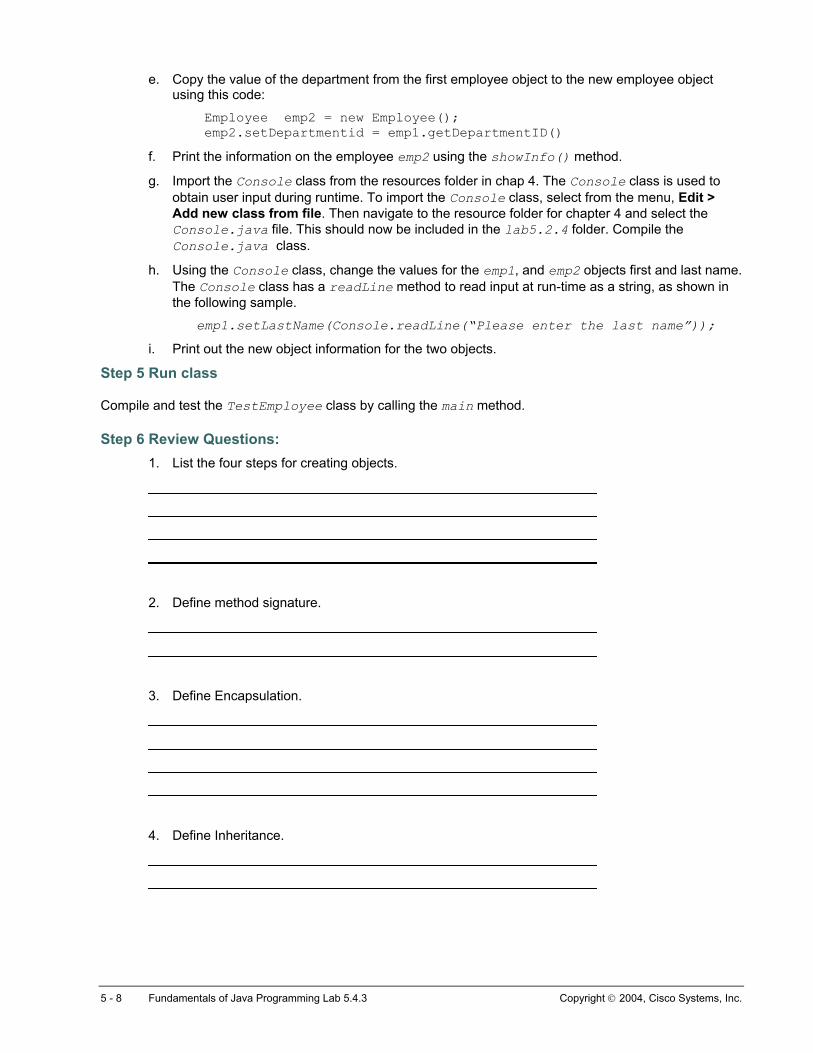
e. Copy the value of the department from the first employee object to the new employee object using this code:
Employee emp2 = new Employee(); emp2.setDepartmentid = emp1.getDepartmentID()
f. Print the information on the employee emp2 using the showInfo() method.
g. Import the Console class from the resources folder in chap 4. The Console class is used to obtain user input during runtime. To import the Console class, select from the menu, Edit > Add new class from file. Then navigate to the resource folder for chapter 4 and select the Console.java file. This should now be included in the lab5.2.4 folder. Compile the Console.java class.
h. Using the Console class, change the values for the emp1, and emp2 objects first and last name. The Console class has a readLine method to read input at run-time as a string, as shown in the following sample.
emp1.setLastName(Console.readLine(“Please enter the last name”));
i. Print out the new object information for the two objects.
Step 5 Run class
Compile and test the TestEmployee class by calling the main method. Step 6 Review Questions:
1. List the four steps for creating objects.
2. Define method signature.
3. Define Encapsulation.
4. Define Inheritance.
5 - 8 Fundamentals of Java Programming Lab 5.4.3 Copyright 2004, Cisco Systems, Inc.
5. In designing a blueprint for objects, what can lead a programmer to possible data/attributes of the object? What can lead to methods of an object?
6. What is the syntax for a class definition?
7. List the class definition constructs or structures.
8. What is the purpose of a constructor?
9. Does a constructor have a return value?
10. How do you declare data of an object to be hidden?
11. What operator is used to create an object?
12. What is another name used to refer to the creation of an object?
13. When a class contains a main method, what is it considered to be?
6 - 8 Fundamentals of Java Programming Lab 5.4.3 Copyright 2004, Cisco Systems, Inc.

14. How is encapsulation implemented?
15. List the three types of access modifiers (remember, default is not actually typed in code).
16. What happens when no access modifier is used?
17. T/F You should explicitly specify your class members as public or private rather than omitting the access modifier.
18. List the eight primitive data types.
19. Where can attributes of a class be defined?
20. What is the coding convention for identifiers or variables?
21. What is the area of RAM that is used for objects?
22. What is the area of RAM that is used for method data?
7 - 8 Fundamentals of Java Programming Lab 5.4.3 Copyright 2004, Cisco Systems, Inc.

23. What do you use to reference a variable of an object by another object?
8 - 8 Fundamentals of Java Programming Lab 5.4.3 Copyright 2004, Cisco Systems, Inc.
Lab 5.6.4 Constructors and Methods
Estimated Time 90 minutes
Learning objective In this lab activity the student will define classes to include default and explicit constructors, and create objects using them.
Description/Scenario • Class definitions can include constructors requiring, none, one, or several arguments.
• Class definitions can include methods that accept none, one, or several arguments.
• Class definitions can include explicit initialization of object data, as part of the attribute declaration. For example the statement private String manager = “Unassigned”; will initialize this variable for every object as holding the string value “unassigned”. If the declaration statement is private String manager; then every object of this class will have the manager variable assigned the default value of null.
• Encapsulation of object data is accomplished by declaring all attributes as private and providing set and or get methods to access and change the values. Attributes can have a read-only status by providing only get methods for the attribute and no set methods. Attributes that have both get and set methods have read-write status, and attributes with only set methods have write status. Not only can the access to an attribute be controlled by the use of the modifier private, the status of the variable as read, read-write, or write can be controlled by including or omitting set and get methods, and or making the set method private.
• Objects are created only when the new operator is invoked. The new operator can be called in several contexts, as a statement that assigns a reference value to a variable as in employee emp1 == new Employee() or emp1 = new Employee(). These statements could be in a method, or while declaring attributes for a class. It can also be used to create an object as part of an value passed to a method, such as in methodX(new Employee()). The following sample code shows a number of uses of the new operator.
1 - 1 Fundamentals of Java Programming Lab 5.6.4 Copyright 2004, Cisco Systems, Inc.
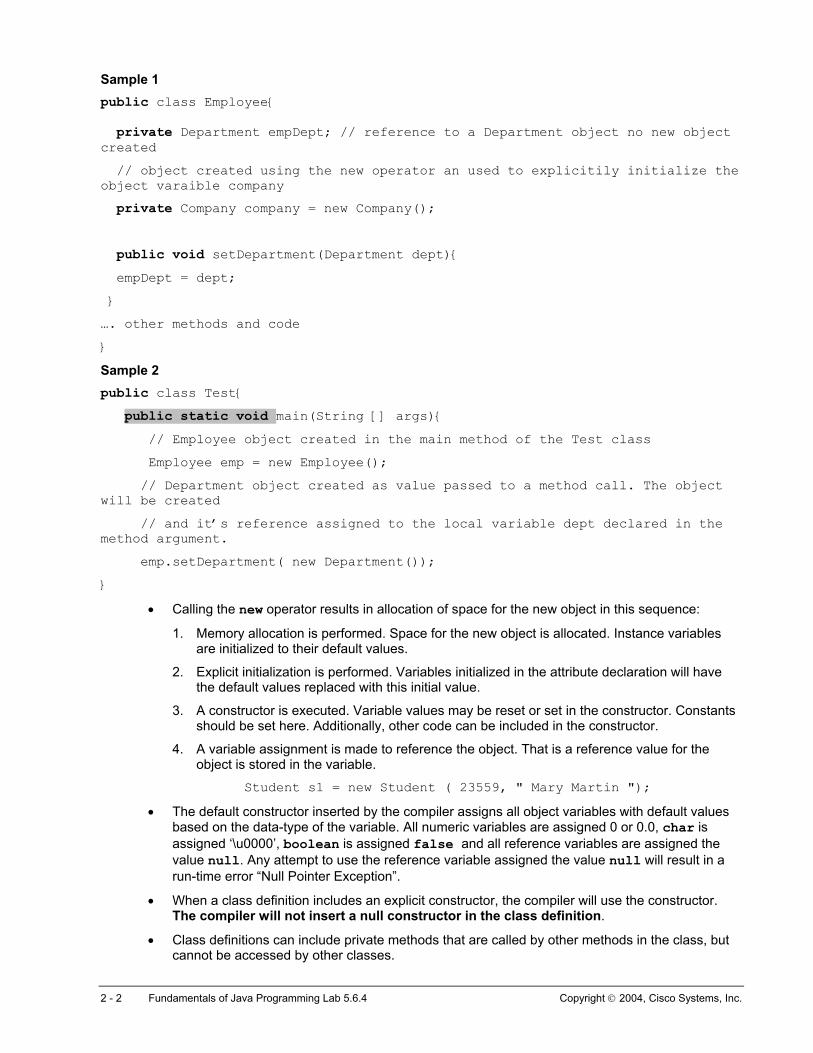
Sample 1 public class Employee{ private Department empDept; // reference to a Department object no new object created
// object created using the new operator an used to explicitily initialize the object varaible company
private Company company = new Company();
public void setDepartment(Department dept){ empDept = dept;
}
…. other methods and code
}
Sample 2 public class Test{ public static void main(String [] args){ // Employee object created in the main method of the Test class
Employee emp = new Employee();
// Department object created as value passed to a method call. The object will be created
// and it’s reference assigned to the local variable dept declared in the method argument.
emp.setDepartment( new Department());
}
• Calling the new operator results in allocation of space for the new object in this sequence:
1. Memory allocation is performed. Space for the new object is allocated. Instance variables are initialized to their default values.
2. Explicit initialization is performed. Variables initialized in the attribute declaration will have the default values replaced with this initial value.
3. A constructor is executed. Variable values may be reset or set in the constructor. Constants should be set here. Additionally, other code can be included in the constructor.
4. A variable assignment is made to reference the object. That is a reference value for the object is stored in the variable.
Student s1 = new Student ( 23559, " Mary Martin ");
• The default constructor inserted by the compiler assigns all object variables with default values based on the data-type of the variable. All numeric variables are assigned 0 or 0.0, char is assigned ‘\u0000’, boolean is assigned false and all reference variables are assigned the value null. Any attempt to use the reference variable assigned the value null will result in a run-time error “Null Pointer Exception”.
• When a class definition includes an explicit constructor, the compiler will use the constructor. The compiler will not insert a null constructor in the class definition.
• Class definitions can include private methods that are called by other methods in the class, but cannot be accessed by other classes.
2 - 2 Fundamentals of Java Programming Lab 5.6.4 Copyright 2004, Cisco Systems, Inc.
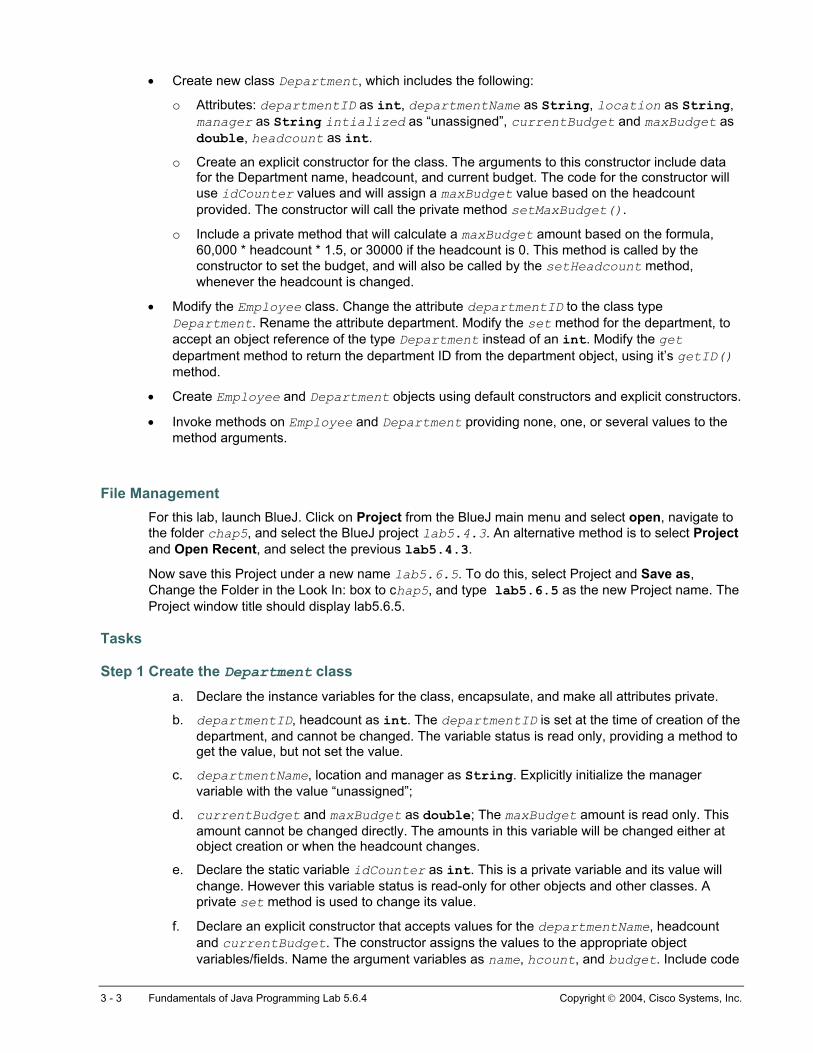
• Create new class Department, which includes the following:
o Attributes: departmentID as int, departmentName as String, location as String, manager as String intialized as “unassigned”, currentBudget and maxBudget as double, headcount as int.
o Create an explicit constructor for the class. The arguments to this constructor include data for the Department name, headcount, and current budget. The code for the constructor will use idCounter values and will assign a maxBudget value based on the headcount provided. The constructor will call the private method setMaxBudget().
o Include a private method that will calculate a maxBudget amount based on the formula, 60,000 * headcount * 1.5, or 30000 if the headcount is 0. This method is called by the constructor to set the budget, and will also be called by the setHeadcount method, whenever the headcount is changed.
• Modify the Employee class. Change the attribute departmentID to the class type Department. Rename the attribute department. Modify the set method for the department, to accept an object reference of the type Department instead of an int. Modify the get department method to return the department ID from the department object, using it’s getID() method.
• Create Employee and Department objects using default constructors and explicit constructors.
• Invoke methods on Employee and Department providing none, one, or several values to the method arguments.
File Management For this lab, launch BlueJ. Click on Project from the BlueJ main menu and select open, navigate to the folder chap5, and select the BlueJ project lab5.4.3. An alternative method is to select Project and Open Recent, and select the previous lab5.4.3.
Now save this Project under a new name lab5.6.5. To do this, select Project and Save as, Change the Folder in the Look In: box to chap5, and type lab5.6.5 as the new Project name. The Project window title should display lab5.6.5.
Tasks
Step 1 Create the Department class a. Declare the instance variables for the class, encapsulate, and make all attributes private.
b. departmentID, headcount as int. The departmentID is set at the time of creation of the department, and cannot be changed. The variable status is read only, providing a method to get the value, but not set the value.
c. departmentName, location and manager as String. Explicitly initialize the manager variable with the value “unassigned”;
d. currentBudget and maxBudget as double; The maxBudget amount is read only. This amount cannot be changed directly. The amounts in this variable will be changed either at object creation or when the headcount changes.
e. Declare the static variable idCounter as int. This is a private variable and its value will change. However this variable status is read-only for other objects and other classes. A private set method is used to change its value.
f. Declare an explicit constructor that accepts values for the departmentName, headcount and currentBudget. The constructor assigns the values to the appropriate object variables/fields. Name the argument variables as name, hcount, and budget. Include code
3 - 3 Fundamentals of Java Programming Lab 5.6.4 Copyright 2004, Cisco Systems, Inc.
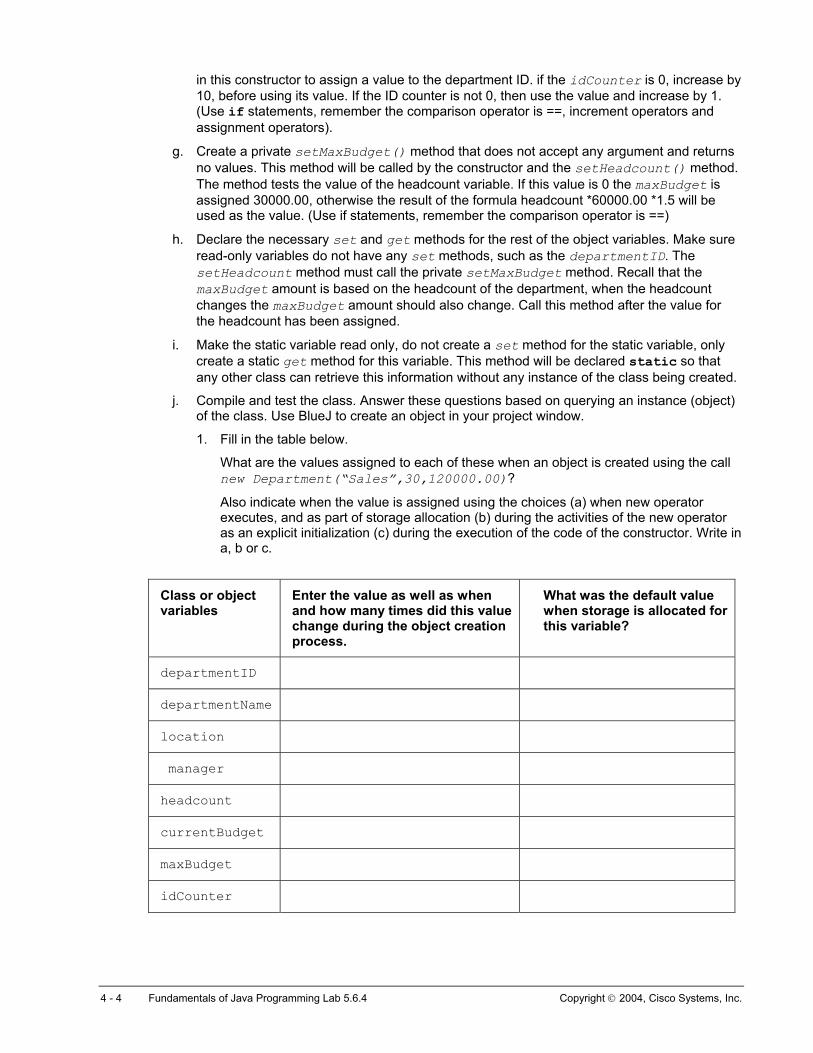
in this constructor to assign a value to the department ID. if the idCounter is 0, increase by 10, before using its value. If the ID counter is not 0, then use the value and increase by 1. (Use if statements, remember the comparison operator is ==, increment operators and assignment operators).
g. Create a private setMaxBudget() method that does not accept any argument and returns no values. This method will be called by the constructor and the setHeadcount() method. The method tests the value of the headcount variable. If this value is 0 the maxBudget is assigned 30000.00, otherwise the result of the formula headcount *60000.00 *1.5 will be used as the value. (Use if statements, remember the comparison operator is ==)
h. Declare the necessary set and get methods for the rest of the object variables. Make sure read-only variables do not have any set methods, such as the departmentID. The setHeadcount method must call the private setMaxBudget method. Recall that the maxBudget amount is based on the headcount of the department, when the headcount changes the maxBudget amount should also change. Call this method after the value for the headcount has been assigned.
i. Make the static variable read only, do not create a set method for the static variable, only create a static get method for this variable. This method will be declared static so that any other class can retrieve this information without any instance of the class being created.
j. Compile and test the class. Answer these questions based on querying an instance (object) of the class. Use BlueJ to create an object in your project window.
1. Fill in the table below.
What are the values assigned to each of these when an object is created using the call new Department(“Sales”,30,120000.00)?
Also indicate when the value is assigned using the choices (a) when new operator executes, and as part of storage allocation (b) during the activities of the new operator as an explicit initialization (c) during the execution of the code of the constructor. Write in a, b or c.
Class or object variables
Enter the value as well as when and how many times did this value change during the object creation process.
What was the default value when storage is allocated for this variable?
departmentID
departmentName
location
manager
headcount
currentBudget
maxBudget
idCounter
4 - 4 Fundamentals of Java Programming Lab 5.6.4 Copyright 2004, Cisco Systems, Inc.
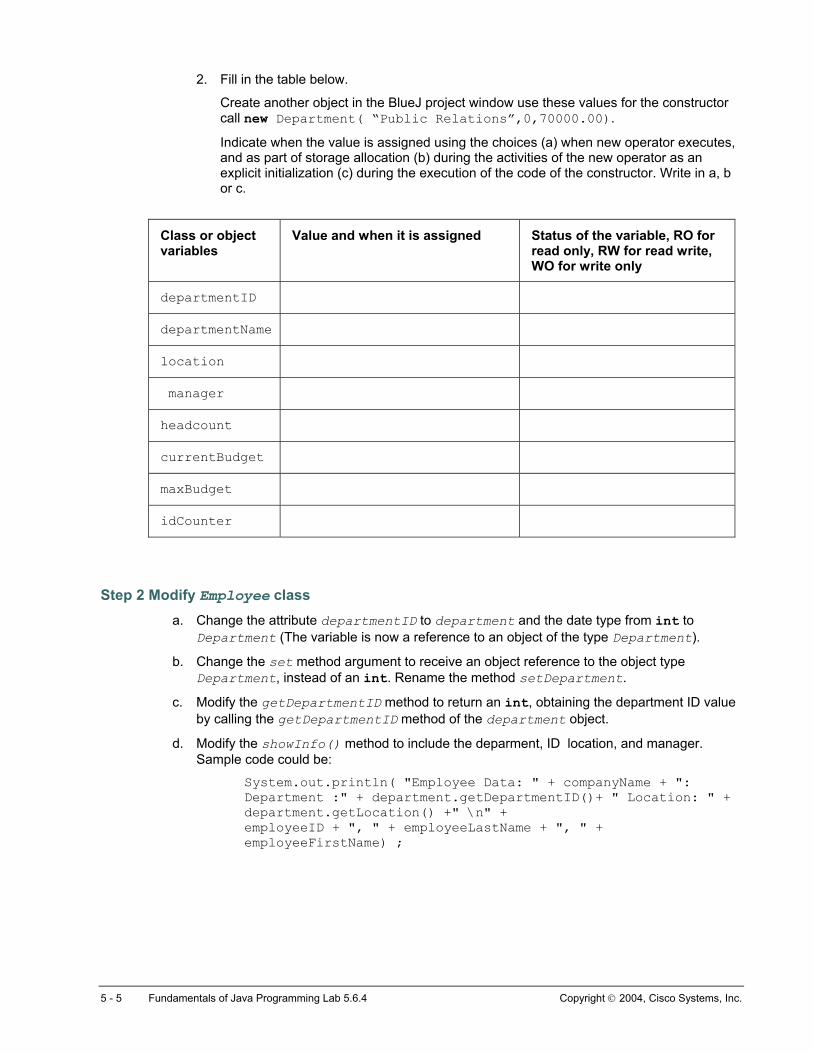
2. Fill in the table below.
Create another object in the BlueJ project window use these values for the constructor call new Department( “Public Relations”,0,70000.00).
Indicate when the value is assigned using the choices (a) when new operator executes, and as part of storage allocation (b) during the activities of the new operator as an explicit initialization (c) during the execution of the code of the constructor. Write in a, b or c.
Class or object variables
Value and when it is assigned Status of the variable, RO for read only, RW for read write, WO for write only
departmentID
departmentName
location
manager
headcount
currentBudget
maxBudget
idCounter
Step 2 Modify Employee class a. Change the attribute departmentID to department and the date type from int to
Department (The variable is now a reference to an object of the type Department).
b. Change the set method argument to receive an object reference to the object type Department, instead of an int. Rename the method setDepartment.
c. Modify the getDepartmentID method to return an int, obtaining the department ID value by calling the getDepartmentID method of the department object.
d. Modify the showInfo() method to include the deparment, ID location, and manager. Sample code could be:
System.out.println( "Employee Data: " + companyName + ": Department :" + department.getDepartmentID()+ " Location: " + department.getLocation() +" \n" + employeeID + ", " + employeeLastName + ", " + employeeFirstName) ;
5 - 5 Fundamentals of Java Programming Lab 5.6.4 Copyright 2004, Cisco Systems, Inc.
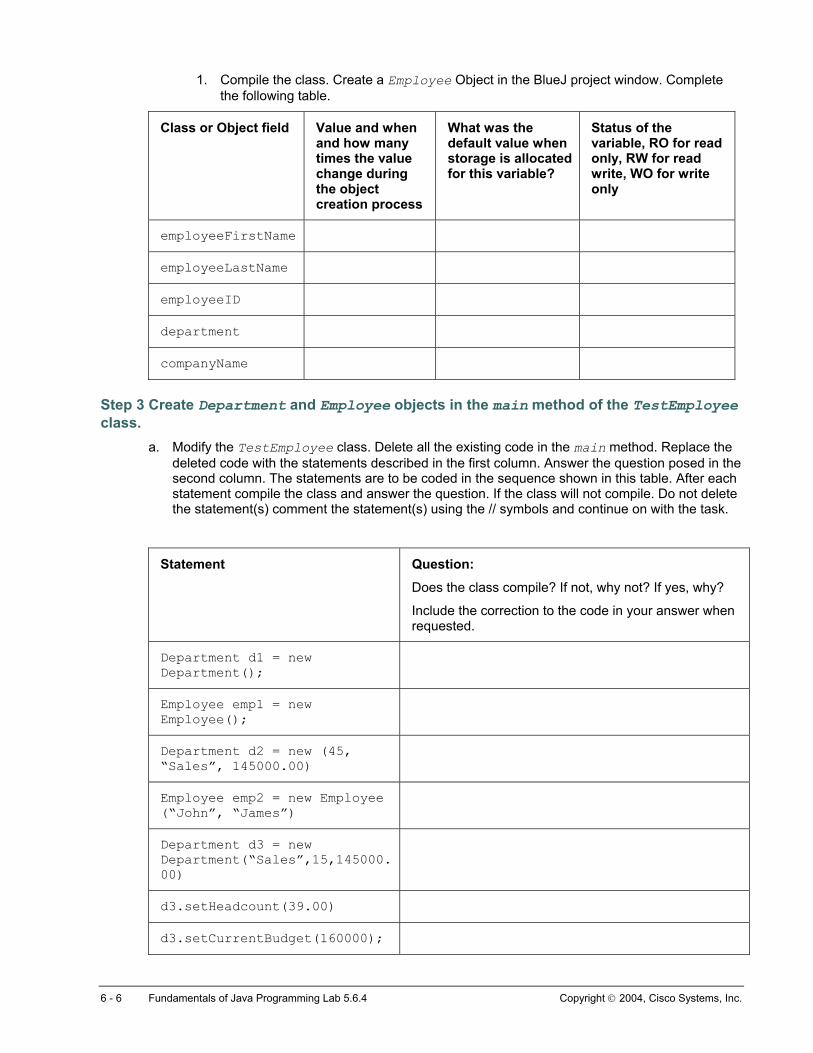
1. Compile the class. Create a Employee Object in the BlueJ project window. Complete the following table.
Class or Object field Value and when and how many times the value change during the object creation process
What was the default value when storage is allocated for this variable?
Status of the variable, RO for read only, RW for read write, WO for write only
employeeFirstName
employeeLastName
employeeID
department
companyName
Step 3 Create Department and Employee objects in the main method of the TestEmployee class.
a. Modify the TestEmployee class. Delete all the existing code in the main method. Replace the deleted code with the statements described in the first column. Answer the question posed in the second column. The statements are to be coded in the sequence shown in this table. After each statement compile the class and answer the question. If the class will not compile. Do not delete the statement(s) comment the statement(s) using the // symbols and continue on with the task.
Statement Question:
Does the class compile? If not, why not? If yes, why?
Include the correction to the code in your answer when requested.
Department d1 = new Department();
Employee emp1 = new Employee();
Department d2 = new (45, “Sales”, 145000.00)
Employee emp2 = new Employee (“John”, “James”)
Department d3 = new Department(“Sales”,15,145000.00)
d3.setHeadcount(39.00)
d3.setCurrentBudget(160000);
6 - 6 Fundamentals of Java Programming Lab 5.6.4 Copyright 2004, Cisco Systems, Inc.
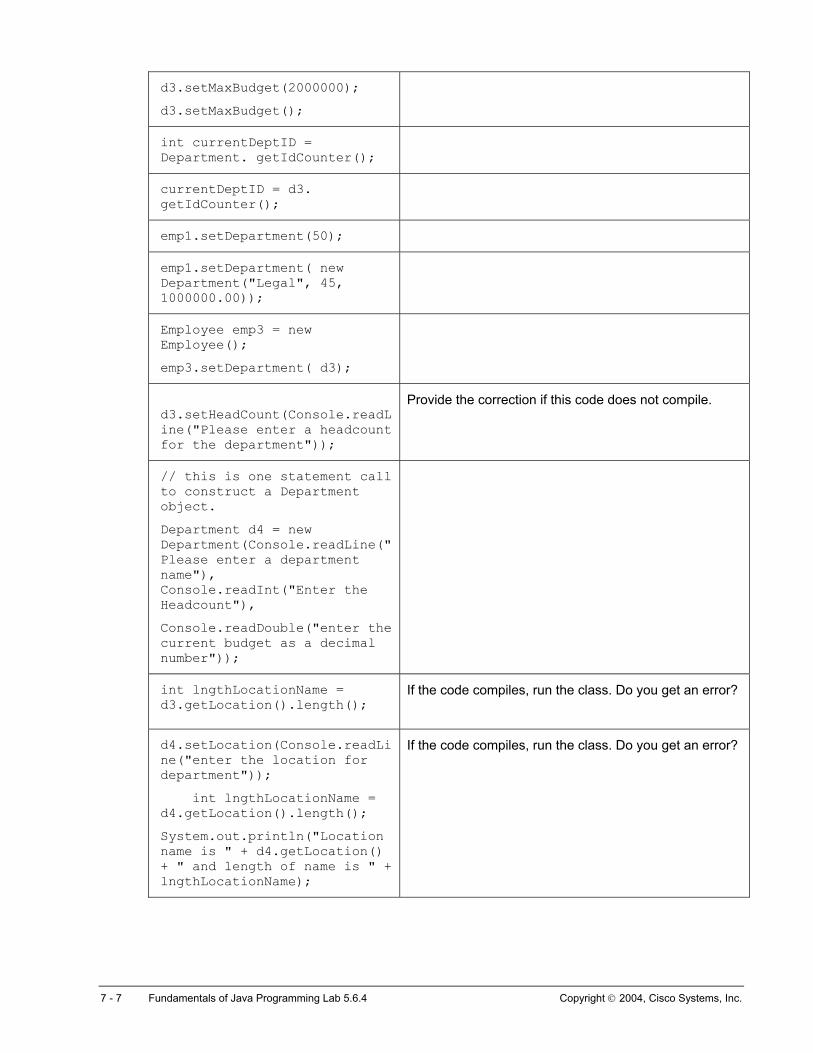
d3.setMaxBudget(2000000);
d3.setMaxBudget();
int currentDeptID = Department. getIdCounter();
currentDeptID = d3. getIdCounter();
emp1.setDepartment(50);
emp1.setDepartment( new Department("Legal", 45, 1000000.00));
Employee emp3 = new Employee();
emp3.setDepartment( d3);
d3.setHeadCount(Console.readLine("Please enter a headcount for the department"));
Provide the correction if this code does not compile.
// this is one statement call to construct a Department object.
Department d4 = new Department(Console.readLine("Please enter a department name"), Console.readInt("Enter the Headcount"),
Console.readDouble("enter the current budget as a decimal number"));
int lngthLocationName = d3.getLocation().length();
If the code compiles, run the class. Do you get an error?
d4.setLocation(Console.readLine("enter the location for department"));
int lngthLocationName = d4.getLocation().length();
System.out.println("Location name is " + d4.getLocation() + " and length of name is " + lngthLocationName);
If the code compiles, run the class. Do you get an error?
7 - 7 Fundamentals of Java Programming Lab 5.6.4 Copyright 2004, Cisco Systems, Inc.
Lab 5.8.2 Overloaded Methods and Constructors
Estimated Time 20 minutes
Learning Objectives In this lab activity, the student will create and use overloaded methods and constructors.
Description/Scenario • Overloading is the rule that allows a function, method or operator to accept different operands.
Overloading was first introduced in the context of the use of the + operator. The plus operator functions in two different ways, depending on the operands used with the operator. If the operands are numeric values, this operator performs the addition operation, if one or both of the operands is a String, then the operator concatenates the two operands to produce a string. Note that not only does this operator behave differently given different types of operands, but it also returns different types of results, either a number or a string.
• The rule of overloading can be applied to methods and constructors. When the same method or when the constructor of a class needs to be created to accept different types of input, the overloading rule is applied.
• Rules for overloading of methods or constructor are as follows:
o The name must be the same.
o The arguments must be different, in either the number of arguments, or in data-types of the arguments. While changing the order of the arguments is acceptable, this is not recommended, since so many possible combinations of arguments could be supplied.
o The return-type of the method does not affect its status as an overloaded method. The return-type for overloaded methods may return the same type of data or different type of data.
• The following examples show proper implementation of overloading:
o Constructors for the Employee class: Employee(), Employee(String lname,String Fname), Employee( int ID, String lname), Employee(int ID, String fname).
o The constructors Employee(String lname, int ID) would not be recommended, since this just changes the order of the arguments.
o Methods in the Employee class: void setName( String lname, String fName), void setName(String lname).
• The following examples show improper attempts at overloading:
o Constructors: Employee(String lname, String fname) and Employee(String fname, String lname). Here the arguments are the same in data-type and number of arguments. The names of the variables do not count when following the overloading rules.
1 - 3 Fundamentals of Java Programming Lab 5.8.2 Copyright 2002, Cisco Systems, Inc.
o Methods: public void setName(String lname, String fName) and public boolean setName(String lname, String fname). Here the return type does not matter, the arguments are not different, and thus the method is not considered overloaded. The compiler will display an error stating that the method setName(String lname, String fName) exists.
• Add overloaded constructors and methods to the Employee and Department classes from the previous lab. Use the this variable to cascade the call to overloaded methods and constructors
• Understand how overloaded constructors and methods are called.
File Management For this lab, launch BlueJ. Click on Project from the BlueJ main menu and select Open, navigate to the folder chap5, and select the BlueJ project lab5.6.9. An alternative method is to select Project and Open Recent, and select the previous lab5.6.9.
Now save this Project under a new name lab5.8.2. To do this, select Project and Save as, Change the Folder in the Look In: box to chap5, and type lab5.8.2 as the new Project name. The Project window title should display lab5.8.2.
Tasks
Step 1 Adding Overloaded constructors and methods in the Employee class
a. Overloading constructors
1. Add the following private, final (constants) to the attribute definition of the class. private final String LAST_NAME = “unknown”; private final String FIRST_NAME = “unknown”;
2. The Employee class does not currently define a constructor, thus the default constructor has been inserted by the compiler. Insert the following constructors. Each constructor will accept different information.
• Employee() This constructor should be included, since the compiler will not longer provide a no-argument constructor. In the code of the constructor, assign the object variables these values:
employeeID = 999999; employeeFirstName = FIRST_NAME; employeeLastName = LAST_NAME;
• Employee(int employeeID) Assign the employeeID to the employeeID, and use the constants to assign values to the last and first name. Since the name of the constructor argument and the variable for the object are exactly the same use the this keyword to distinguish the two. For example employeeID = employeeID; will not change the value of the object’s variable employeeID. however this.employeeID= employeeID; clarifies that the variable to the left references the object through the use of this variable.
• Employee(int employeeID, String lname) Assign the values from the arguments to the variables, using the constant for the first name.
• Employee (int employeeID, String lname, String fname) Assign all the values from the arguments to the variables.
2 - 3 Fundamentals of Java Programming Lab 5.8.2 Copyright 2002, Cisco Systems, Inc.
b. Overloading methods
1. The setID method could receive input from the user at run-time that is either a number or a string. In order to allow for these two possibilities, overload the setID method, to accept an int in one version and a String in another version. The method definitions are:
public void setID(int ID) and public void setID(String ID)
2. In the method that accepts a String, the String value that is passed to the method will need to be converted from an object String to a primitive int. The simple cast operator cannot be used in this situation. In Chapter 4, you were introduced to the wrapper classes. While you will explore these classes and their methods further, the following line of code will convert a String to an integer.
IDemployeeID = Integer.parseInt(ID ). ID is the variable declared in the method argument as a String. public void setID(String ID).
c. Test the class
Use BlueJ to create several objects of the class in the project window. Use different constructors. Inspect the objects. Use the two different setID methods of the objects.
Step 2 Overloading constructors and methods in the Department class
a. Modify the current constructor Department(String name, int hcount, double budget). Change the arguments for this constructor to Department(String name, String location,int hcount, double budget). Insert the statements to assign the values from location. Remember to use the this variable. Each constructor accepts partial information, adds some constant value, and calls one of the other constructors.
b. Add these constructors. In each constructor, the this variable will be used to call the first constructor (see previous step). This specific call to the previous constructor is shown for each constructor.
• Department(String name,int hcount, double budget) Use the following constructor call:
this(name,”NewYork”,hcount,budget) • Department(String name, double budget) Use the following constructor call:
this(name, 0, budget)
• Department(String name) Use the following constructor call:
this(name, 450000.00)
• Department()Use the following constructor call:
this(“New”)
3 - 3 Fundamentals of Java Programming Lab 5.8.2 Copyright 2002, Cisco Systems, Inc.
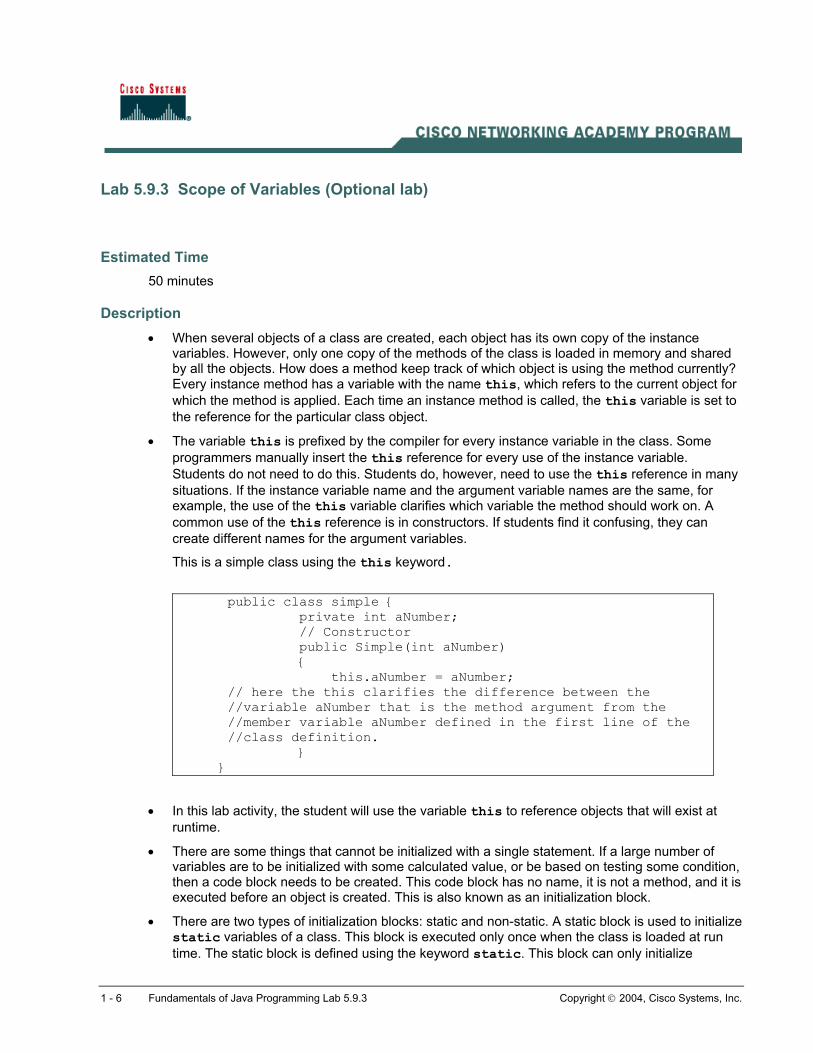
Lab 5.9.3 Scope of Variables (Optional lab)
Estimated Time 50 minutes
Description • When several objects of a class are created, each object has its own copy of the instance
variables. However, only one copy of the methods of the class is loaded in memory and shared by all the objects. How does a method keep track of which object is using the method currently? Every instance method has a variable with the name this, which refers to the current object for which the method is applied. Each time an instance method is called, the this variable is set to the reference for the particular class object.
• The variable this is prefixed by the compiler for every instance variable in the class. Some programmers manually insert the this reference for every use of the instance variable. Students do not need to do this. Students do, however, need to use the this reference in many situations. If the instance variable name and the argument variable names are the same, for example, the use of the this variable clarifies which variable the method should work on. A common use of the this reference is in constructors. If students find it confusing, they can create different names for the argument variables.
This is a simple class using the this keyword.
public class simple { private int aNumber; // Constructor public Simple(int aNumber) { this.aNumber = aNumber; // here the this clarifies the difference between the //variable aNumber that is the method argument from the //member variable aNumber defined in the first line of the //class definition.
} }
• In this lab activity, the student will use the variable this to reference objects that will exist at
runtime.
• There are some things that cannot be initialized with a single statement. If a large number of variables are to be initialized with some calculated value, or be based on testing some condition, then a code block needs to be created. This code block has no name, it is not a method, and it is executed before an object is created. This is also known as an initialization block.
• There are two types of initialization blocks: static and non-static. A static block is used to initialize static variables of a class. This block is executed only once when the class is loaded at run time. The static block is defined using the keyword static. This block can only initialize
1 - 6 Fundamentals of Java Programming Lab 5.9.3 Copyright 2004, Cisco Systems, Inc.
static variables of the class. A non-static initialization block is executed for each object that is created and thus can initialize instance variables in a class. Non-static initialization blocks can initialize both static and instance variables. Object data is always initialized when an object is created.
• The student will include code for initializing static and non-static attributes using initializer code blocks.
Learning Objectives • Implement the variable this
• Implement initialization blocks
• Test scope of variables
• Implement an immutable object
• Set objects ready for garbage collection in a dispose method
• Create the class TreeLandscape to display tree packages for the customers. Each instance of this class is a tree package someone could purchase.
• Choose between three types of trees: Shade, desert, and fruit. The only packages available are: P1—three trees; P2—two trees; P3 – one tree. Create the StartProgram2 class to display the three packages available.
File Management Open BlueJ. Click on Project from the BlueJ main menu and select New. In the New Project window and in the Look in: list box navigate to the folder chap5. You may already be in this folder. Type lab5.9.3 in the File name text box and click on Create to create a lab5.9.3 subfolder in the chap5 folder.
Tasks
Step 1 Designing classes a. Discover the Class to be defined
b. Design the attributes and behaviors of the object
Step 2 Creating TreeLandscape class a. Create the TreeLandscape class
b. Add the following attributes:
private final String coName = “Joe’s Landscaping”; private String address; private String city; private String state; private String phone; public String tree1; public String tree2;
public String tree3;
c. Add overloaded constructors to initialize attributes with one tree, two trees, and three trees. Use the variable this to initialize like name variables in the constructors. Since the instance variable name and the argument variable names are the same, the use of the variable this clarifies which variable the method should work on. A common use of the this reference is in constructors.
2 - 6 Fundamentals of Java Programming Lab 5.9.3 Copyright 2004, Cisco Systems, Inc.
d. Add a non-static initialization block to initialize company data. A non-static initialization block is executed for each object that is created and thus can initialize instance variables in a class.
e. Add the get and set method for each attribute to access the members in the TreeLandScape class.
Step 3 Creating TreeLandScape objects and testing a. Create the StartProgram2 class with a main method that will create three objects of the class
TreeLandScape using three different constructors:
TreeLandScape(“Shade”); TreeLandScape(“Shade”,”Desert”);
TreeLandScape(“Shade”,”Desert”,”Fruit”);
Also create a dispose method that sets each object created to null. Make the main method call it as the last task before exiting.
b. Compile the TreeLandScape class and StartProgram2 class.
c. Run the StartProgram class to verify the output.
Step 4 Review Questions 1. When several objects of a class are created, how many copies of the instance methods are
loaded into memory?
2. Every instance method has a variable with the name
3. What will the statement “return this;” return?
4. What are the four potential sources of data available when writing code for a method?
5. Encapsulation occurs in methods naturally. (TRUE OR FALSE)
6. Hidden instance data of an object can be accessed or changed using getter and setter or accessor and mutator methods. (TRUE OR FALSE)
3 - 6 Fundamentals of Java Programming Lab 5.9.3 Copyright 2004, Cisco Systems, Inc.
7. What is it called when two or more methods in the same class with the same name exist?
8. List the four rules for overloading methods or constructors:
9. What is the reason for overloading?
10. The compiler uses a process called name mangling to generate distinct internal names for methods. (TRUE OR FALSE)
11. Constructors have a return value. (TRUE OR FALSE)
12. Static variables of a class are initialized before any object is created. (TRUE OR FALSE)
13. Define an intialization block:
14. What are the two types of initialization blocks?
15. When are parameter variables initialized?
16. Local variables can be used before initialization. (TRUE OR FALSE)
4 - 6 Fundamentals of Java Programming Lab 5.9.3 Copyright 2004, Cisco Systems, Inc.
17. What is the scope of an instance variable?
18. Class variables are available as long as the class is loaded in memory. (TRUE OR FALSE)
19. Variables of a method are known as automatic, temporary, and local. (TRUE OR FALSE)
20. Parameters or variables defined inside a method are automatically created in the heap.(TRUE OR FALSE)
21. In general the lifetime of a variable (object or method) is for the duration of the application. (TRUE OR FALSE)
22. What is the lifetime of an object?
23. If an object is declared to be immutable, then all the values of its member variable are changeable. (TRUE OR FALSE)
24. The String class is declared as immutable with the keyword in the class definition.
25. What happens when the reference variable of an object is set to null?
5 - 6 Fundamentals of Java Programming Lab 5.9.3 Copyright 2004, Cisco Systems, Inc.
26. Garbage collection must be coded within a program for it to do its job. (TRUE OR FALSE)
27. What happens when the count of a reference reaches 0?
28. When does the count reach 0?
29. When does garbage collection occur?
30. Finalizers should be used sparingly. (TRUE OR FALSE)
31. What is an alternative to finalizer methods?
32. Every class inherits from the super class Object. (TRUE OR FALSE)
6 - 6 Fundamentals of Java Programming Lab 5.9.3 Copyright 2004, Cisco Systems, Inc.
Lab 5.11.1 Completing the JBANK Phase1 Application
Estimated Time 60 minutes
Learning objective • In this lab activity the student will complete all the classes for Phase I of the JBANK application
• The student will apply the concepts of overloaded constructors, variable this, all access modifiers, create, use, and destroy objects.
Description/Scenario • Use of variable this to clarify a method variable from the object variable
• A class definition may include one or more constructor methods. The purpose of the constructor method, which must share the same name as the class in which it is located, is to define the specifics for object creation. Objects are created when the constructor is used. The creation of an object is also referred to as instantiation. Zero, one, or many constructors may be defined for a class. Constructors do not have a return value and are executed only for object creation. Constructors are only called as an operand for the new operator. The code of the constructor is executed after the object has been created, and assigned either default or explicit initial values.
• Constructors can be declared as private. The special cases for doing so are to control the creation of objects of the class, such as when implementing the Singleton design pattern, or in classes where all of the methods and attributes of the class are static.
• Object variables declared as final must be initialized either explicitly when the variable is declared, or in the constructors of the class.
• Complete the implementation of constructors, methods and variables for all the classes of JBANK. Phase I.
o Bank class modifications: The JBank project provides for the representation of a Single bank, with no more than 20 customers and no more than 4 accounts for each customer. In a previous lab, the student learnt how to design the code for a class such that only one instance of the class can exist at all times. Note that the current UML for the Bank class includes a single private constructor. In general when a class does not require the creation of any objects, since all the data and methods are static, the constructor should be declared as private, thus reducing all possibilities of creating objects that are not needed.
o In the Bank class all the fields that have specific values assigned will now be declared, public, static, and final. These fields will contain data that is not expected to change, and thus they can be declared final. When variables have public access, there is no need to create the simple set or get methods. In the Java language the keyword final is used to qualify a class attribute or method as final. They are also referred to as constants. The use of the final keyword instructs the compiler to assign a value to the object attribute. Once the object is created and this attribute has a value it cannot be changed. Each instance of the class will have it’s own copy of the attribute. The set and get methods associated with these variables will be commented using the java multi-line comment. Recall that any lines of code that are commented do not execute at run time. The get method is not needed since the variable can be accessed directly, and the set method is not valid,
1 - 5 Fundamentals of Java Programming Lab 5.11.1 Copyright 2004, Cisco Systems, Inc.
since the variable has been declared as final (constant, and cannot be changed). In keeping with naming convention of variables, these public static variables will be named in all uppercase letters. The variables declared final in this class are explicitly initialized in the declaration statement.
o Customer class modifications: The customer ID and DOB are very critical values, and should not be easily changed or altered. Thus these variables are declared final. However, since these variables will hold different values for each object created, these variables should not be explicitly initialized during the variable declaration. When an object is created, all the constants for the objects must contain values. To ensure that this occurs, the compiler will display an error, if these variables are not initialized in the constructors.
o The Customer class includes a default constructor and a one other that accepts a different number of arguments. The default constructor will be coded explicitly by the programmer, and will include no arguments and assign values for the constants of the object custID and DOB. The two constructors will use a the cascading approach. The constructor with the lesser number of arguments will call the other constructor. Additionally, the identifiers for the argument variables have the same name as those of the fields/ attributes of the object. Using the this variable in assignment expressions, the programmer will differentiate between the constructor argument and the object variable. Using the this variable, a cascading call from one constructor to another will be coded.
o Account class modifications: The Account class includes a no-argument constructor and a constructor which takes the account type and amount as arguments. Students should recall the following business rules:
1. Each customer will be provided a basic savings account. 2. Savings accounts require a minimum balance of 10 US dollars.
In the no-argument constructor, code the logic to implement these business rules. Assign the balance as 10.00 and the acctType as ‘S’. Use the cascading method to allow the no-argument constructor to call the constructor with arguments. Use the this variable.
• The Customer, Account objects are created in the main method of the Teller class, using different constructors.
File Management For this lab, launch BlueJ. Click on Project from the BlueJ main menu and select Open, navigate to the folder chap3, and select the BlueJ project lab4.8.1. An alternative method is to select Project and Open Recent, and select the previous JBank lab 4.8.1 .
Now save this Project under a new name lab5.11.1. To do this, select Project and Save as, Change the Folder in the Look In: box to chap5, and type lab5.11.1 as the new Project name. The Project window title should display lab5.11.1.
Tasks
Step 1 Modifying the Bank class
a. Make the Bank fields Name, Address and maxNumberOfCustomers public, static, and final.
b. Rename the fields as shown in the UML diagram. You will be able to access each of these fields using the syntax Bank.BANK_NAME or Bank.BANK_ADDRESS or Bank.MAX_NUM_OF_CUSTOMERS
c. Insert a no-argument constructor, make sure this is declared private.
2 - 5 Fundamentals of Java Programming Lab 5.11.1 Copyright 2004, Cisco Systems, Inc.
d. Comment the set and get methods for the bank name, bank address and maximum number of customers. Use the /* prior to the start of each of these method and */ after the last code brace for each method. These methods are no longer needed, since they are constants, declared public, and accessed directly.
e. Compile the class, editing any references to the renamed variables.
Step 2 Modifying the Customer class a. In the Customer class make the customer fields custId and dateOfBirth final. Remove the
setCustomerId() method and setDateOfBirth() method since the attributes/fields are final.
b. Remember the following: the variables DOB, and custID must be initialzed in the constructors. If no DOB value is provided the constructor will assign the value “none”. For both the constructors, the custid will be obtained from the bank class. The reason for this, is that the method of the bank class ensures that ID numbers are assigned only if the maximum number of customers have not been exceeded. Additionally, each time a customer is created, the bank class variable numOfCurrentCustomers needs to be updated. the logic to implement this business rule was introduced in the lab from 4.8.1.
c. Insert two constructors. In the constructor that accepts information for the first and last name, call the second constructor using the method call this( ) with these values, date Of Birth DOB is “none”. The syntax will be
this(lastName, firstName, “none”)
d. In the second constructor, assign the values from the lastname, firstname, and DOB to the appropriate variables. Since the names of the argument variables are the same as those of the object, use the this variable to differentiate between the two. For example: this.lastName = lastName; will distinguish the object variable from the method argument. Additionally assign the custID a value returned by calling the static method Bank.getNextID().
Step 3 Modifying the Account class
a. The account class provides two constructors.
b. Insert a no argument constructor. In the code of the constructor, assign the acctType as ‘S’ and the balance as 10.00 Recall the business rule that requires this code.
c. Insert a constructor that accepts a char for the account type and double for the amount. Assign the type to the acctType and the amount to the balance.
Step 4 Creating, using, and destroying objects In teller class main method delete all of the existing code. You will be inserting code to do the following:
• Create a customer, create an account, and associate it with the customer by assigning it the value of the Customer ID and the account type.
• Print out the information for the account and the customer.
• Withdraw and or deposit money to the account.
• Print the information on the account after these transactions.
3 - 5 Fundamentals of Java Programming Lab 5.11.1 Copyright 2004, Cisco Systems, Inc.
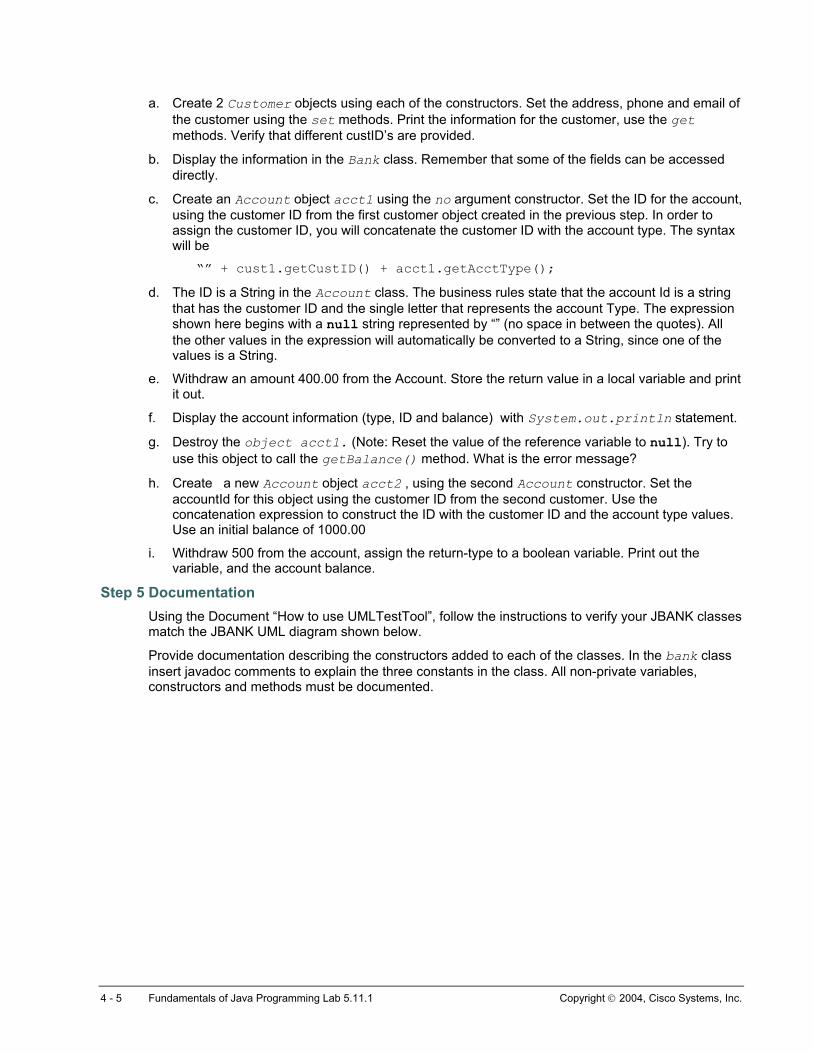
a. Create 2 Customer objects using each of the constructors. Set the address, phone and email of the customer using the set methods. Print the information for the customer, use the get methods. Verify that different custID’s are provided.
b. Display the information in the Bank class. Remember that some of the fields can be accessed directly.
c. Create an Account object acct1 using the no argument constructor. Set the ID for the account, using the customer ID from the first customer object created in the previous step. In order to assign the customer ID, you will concatenate the customer ID with the account type. The syntax will be
“” + cust1.getCustID() + acct1.getAcctType();
d. The ID is a String in the Account class. The business rules state that the account Id is a string that has the customer ID and the single letter that represents the account Type. The expression shown here begins with a null string represented by “” (no space in between the quotes). All the other values in the expression will automatically be converted to a String, since one of the values is a String.
e. Withdraw an amount 400.00 from the Account. Store the return value in a local variable and print it out.
f. Display the account information (type, ID and balance) with System.out.println statement.
g. Destroy the object acct1. (Note: Reset the value of the reference variable to null). Try to use this object to call the getBalance() method. What is the error message?
h. Create a new Account object acct2 , using the second Account constructor. Set the accountId for this object using the customer ID from the second customer. Use the concatenation expression to construct the ID with the customer ID and the account type values. Use an initial balance of 1000.00
i. Withdraw 500 from the account, assign the return-type to a boolean variable. Print out the variable, and the account balance.
Step 5 Documentation Using the Document “How to use UMLTestTool”, follow the instructions to verify your JBANK classes match the JBANK UML diagram shown below.
Provide documentation describing the constructors added to each of the classes. In the bank class insert javadoc comments to explain the three constants in the class. All non-private variables, constructors and methods must be documented.
4 - 5 Fundamentals of Java Programming Lab 5.11.1 Copyright 2004, Cisco Systems, Inc.
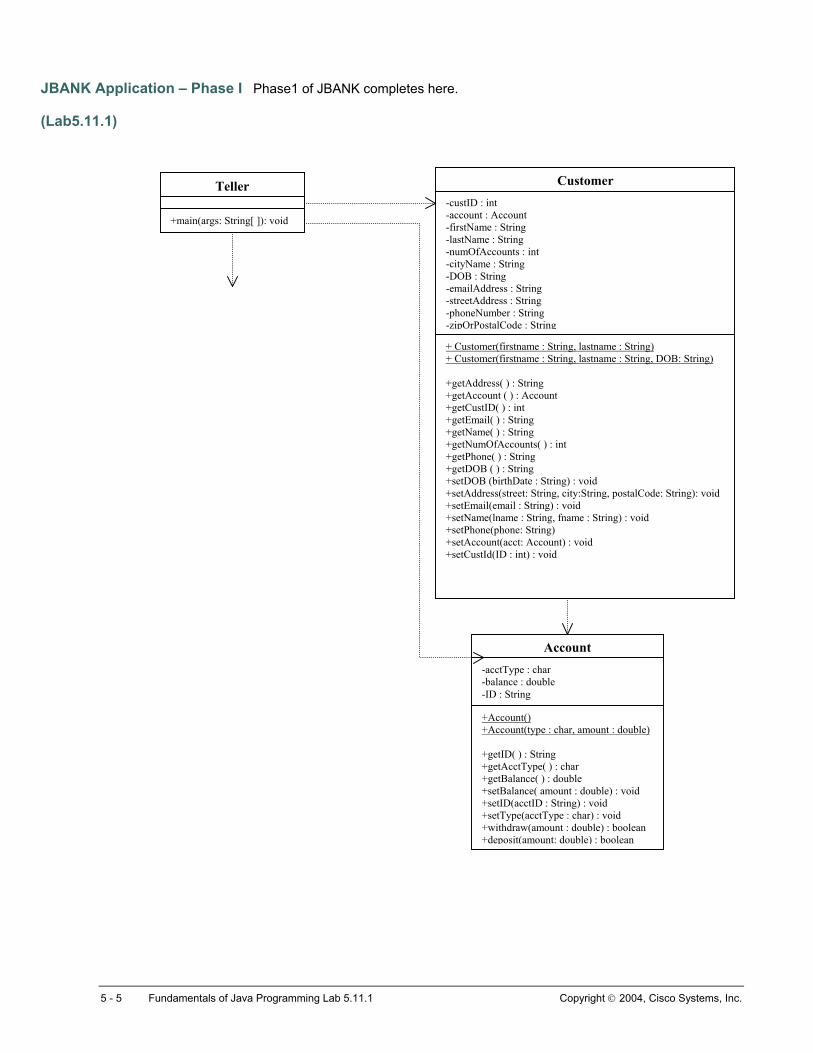
JBANK Application – Phase I Phase1 of JBANK completes here.
(Lab5.11.1)
-custID : int -account : Account -firstName : String -lastName : String -numOfAccounts : int -cityName : String -DOB : String -emailAddress : String -streetAddress : String -phoneNumber : String -zipOrPostalCode : String
+ Customer(firstname : String, lastname : String) + Customer(firstname : String, lastname : String, DOB: String) +getAddress( ) : String +getAccount ( ) : Account +getCustID( ) : int +getEmail( ) : String +getName( ) : String +getNumOfAccounts( ) : int +getPhone( ) : String +getDOB ( ) : String +setDOB (birthDate : String) : void +setAddress(street: String, city:String, postalCode: String): void +setEmail(email : String) : void +setName(lname : String, fname : String) : void +setPhone(phone: String) +setAccount(acct: Account) : void +setCustId(ID : int) : void
+Account() +Account(type : char, amount : double) +getID( ) : String +getAcctType( ) : char +getBalance( ) : double +setBalance( amount : double) : void +setID(acctID : String) : void +setType(acctType : char) : void +withdraw(amount : double) : boolean +deposit(amount: double) : boolean
Account -acctType : char -balance : double -ID : String
Customer
+main(args: String[ ]): void
Teller
5 - 5 Fundamentals of Java Programming Lab 5.11.1 Copyright 2004, Cisco Systems, Inc.
Lab 6.1.2 String Methods
Estimated Time 20 minutes
Learning Objectives In this lab activity, the student will make use of the String class and its methods.
Description • The String class is defined as final. This means that any objects created of this class are
considered immutable or unchangeable.
• When a String is created using a literal assignment, the String is stored in a memory space that can be shared by all objects. This is often referred to as the string pool.
• When a new operator is used to create a String, the variable references a String object that will be created in heap memory, not in the String pool.
• Strings can be operated on using the + operator. Testing equality of strings using the == operator will only test the equality of the references. To compare strings several methods are defined in the String class such as the equals() and equalsIgnoreCase().
• Any String method that makes changes to the String actually results in a copy of the string being created with the change.
• Create a class called StringDemo. The StringDemo class uses String variables to hold the objects and demonstrate the usage of String class methods like equals(), equalsIgnoreCase(), compareTo(), charAt(), and length().
File Management Open BlueJ. Click on Project from the BlueJ main menu and select New. In the New Project window and in the Look in: list box select c:\. Double-click the javacourse folder listed in the text window and a different New Project window opens with javacourse in the Look in: list box. Double-click the chap6 folder listed in the text window and a different New Project window opens with chap6 in the Look in: list box. Type lab6.1.2 in the File name text box and click on Create to create a lab6.2.2 subfolder in the chap6 folder.
Tasks
Step 1 Using String class and its methods a. Define a class called StringDemo. Define following statements:
String s1 = new String(“Jones”); // s1 references a String object created in heap
String s2 = new String(“James”); // s2 references a String object
1 - 3 Fundamentals of Java Programming Lab 6.1.2 Copyright 2002, Cisco Systems, Inc.
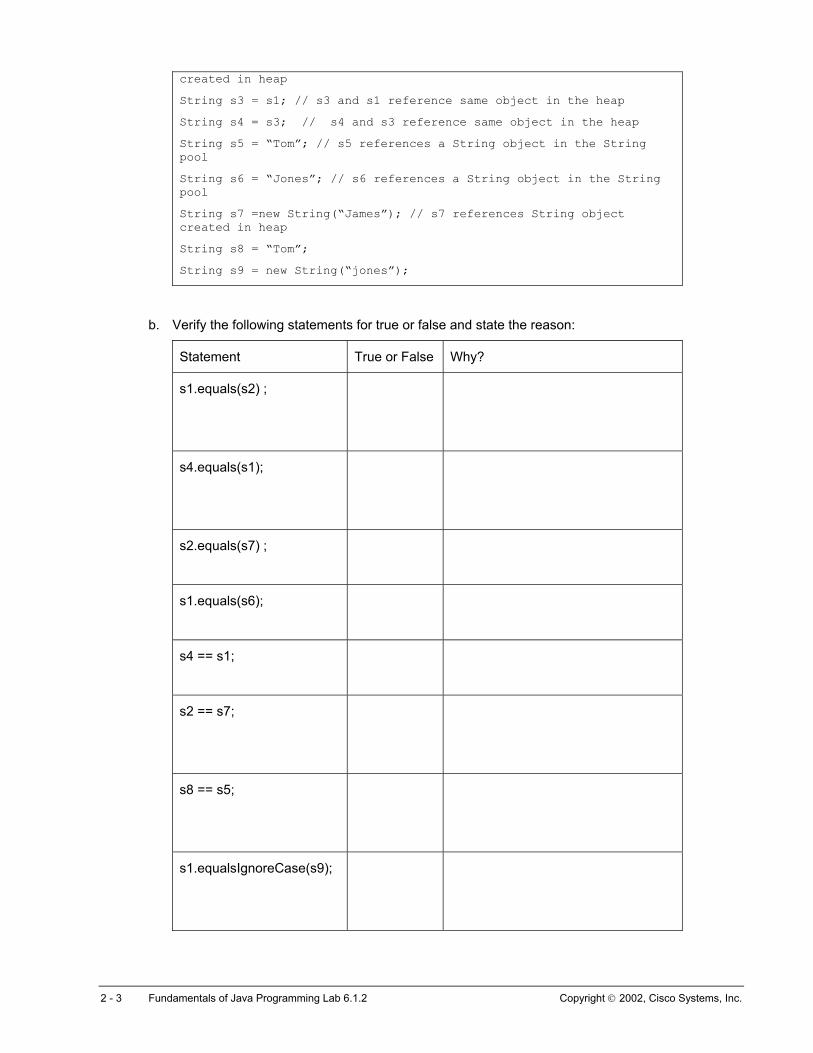
created in heap
String s3 = s1; // s3 and s1 reference same object in the heap
String s4 = s3; // s4 and s3 reference same object in the heap
String s5 = “Tom”; // s5 references a String object in the String pool
String s6 = “Jones”; // s6 references a String object in the String pool
String s7 =new String(“James”); // s7 references String object created in heap
String s8 = “Tom”;
String s9 = new String(“jones”);
b. Verify the following statements for true or false and state the reason:
Statement True or False Why?
s1.equals(s2) ;
s4.equals(s1);
s2.equals(s7) ;
s1.equals(s6);
s4 == s1;
s2 == s7;
s8 == s5;
s1.equalsIgnoreCase(s9);
2 - 3 Fundamentals of Java Programming Lab 6.1.2 Copyright 2002, Cisco Systems, Inc.
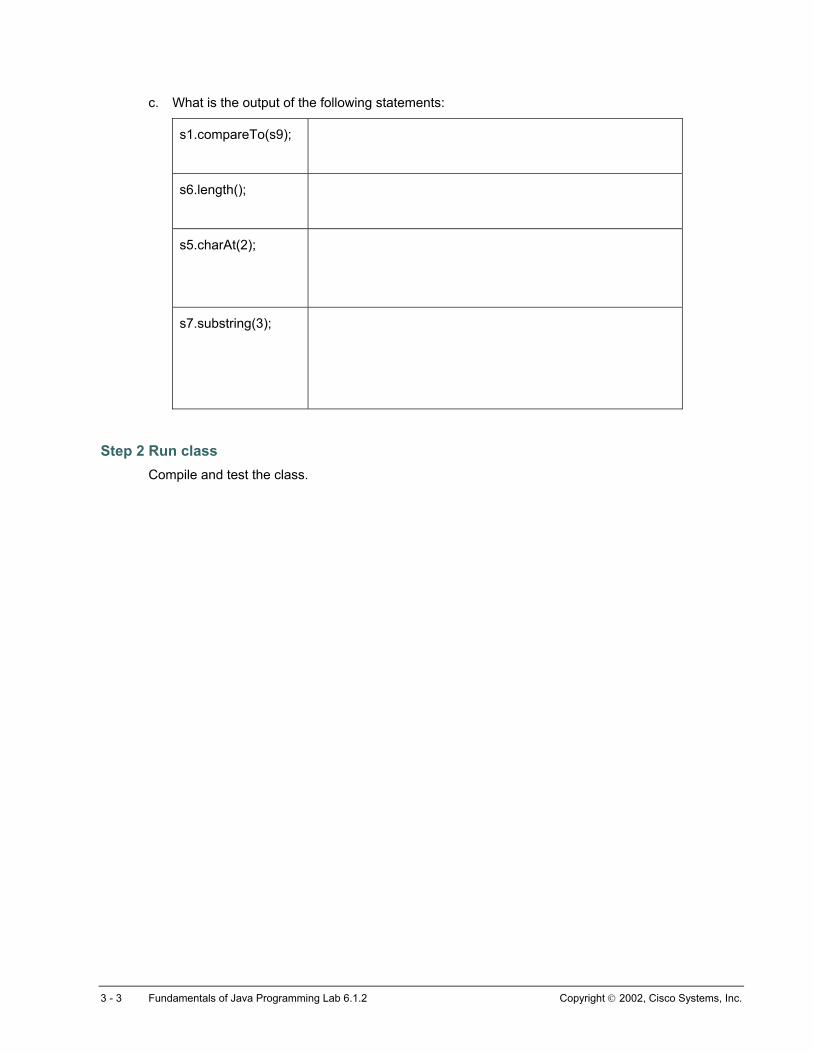
c. What is the output of the following statements:
s1.compareTo(s9);
s6.length();
s5.charAt(2);
s7.substring(3);
Step 2 Run class
Compile and test the class.
3 - 3 Fundamentals of Java Programming Lab 6.1.2 Copyright 2002, Cisco Systems, Inc.
Lab 6.2.1 StringBuffer Methods
Estimated Time 45 minutes
Learning Objectives This lab will expand on the use of the StringBuffer class and the methods available to a programmer.
Description/Scenario • Use of System class for input and output
• Use of String and StringBuffer classes
• Read Customer data from standard input using System.in • Output Customer data to standard output using System.out
• Use String and StringBuffer classes to store, retrieve, and manipulate data
• Use the Console class provided in the Resource folder to read Customer data. The Console class can be used to display any prompt to the user and collect input from the user. The methods of the Console class are static.
• String and StringBuffer are independent classes. They have no common methods or fields. Use the StringBuffer class as the working space for manipulating the characters and the String class as the place where the final result is placed.
File Management Open BlueJ. Click on Project from the BlueJ main menu and select New. In the New Project window and in the Look in: list box select c:\. Double-click the javacourse folder listed in the text window and a different New Project window opens with javacourse in the Look in: list box. Double-click the chap6 folder listed in the text window and a different New Project window opens with chap6 in the Look in: list box. Type lab6.2.1 in the File name text box and click on Create to create a lab6.2.1 subfolder in the chap6 folder. Import the JBANK classes from lab5.11.1.
Tasks
Step 1 Reading data from the console a. In the main method of the Teller class declare a StringBuffer called greeting and initialize
it to “Hello”.
b. Using StringBuffer insert() method, insert “Mr” at the 7th position in the StringBuffer greeting.
1 - 1 Fundamentals of Java Programming Lab 6.2.1 Copyright 2002, Cisco Systems, Inc.
c. Use System.in.read() to read a customer’s name from the console. (Hint: Use a while loop to check until the enter key or a carriage return is pressed.) The System.in object can be used to read one character at a time. The in object has several methods for reading data. The data returned from the read() method has an int datatype. The int needs to be converted to (cast as) a char. Include a throws Exception in the main method (Exceptions will be covered in detail in later Modules).
d. Append the customer’s name to the StringBuffer greeting using the append() method. Use System.out.println() to display the greeting. The out object is an object of the class PrintStream. This class has overloaded methods print() and println(). These are particularly useful for console output.
Step 2 Use of String and StringBuffer methods to manipulate and display Customer data
a. In the Customer class implement the toString() method which returns a String object. In this method declare a StringBuffer called customerData and use the append() method to append Customer fields to customerData. Use the toString() method of the StringBuffer class to return the String object from customerData.
b. In the Teller class main method use the System.out.println() method to display the customer data in customer3.toString().
c. Use the System.out.println(customer3) to display Customer data. What is the difference between b and c?
Step 3 Using Console class to read Customer Data a. Import the Console class from the Resource folder. The Console class is provided to obtain
input from the keyboard. The methods of the Console class are static. The following is sample code for using the Console class:
double price = Console.readDouble(“Enter the balance amount”); b. In the Teller class main method create an instance of Customer called customer4 using the
constructor Customer(firstName, lastName, dateOfBirth, custId). Use readline() and readInt() methods of the Console class to read Customer data such as Customer streetAddress, cityAddress, zipOrPostalCode, phoneNumber, and email. Use the set methods to set the values.
c. Use toString() method of Customer class in System.out.println() method to print the customer data.
Step 4 Review Questions a. What is the advantage of the StringBuffer over String? (Hint immutability?)
b. Using StringBuffer() what is the limit to the number of input characters?
2 - 2 Fundamentals of Java Programming Lab 6.2.1 Copyright 2002, Cisco Systems, Inc.
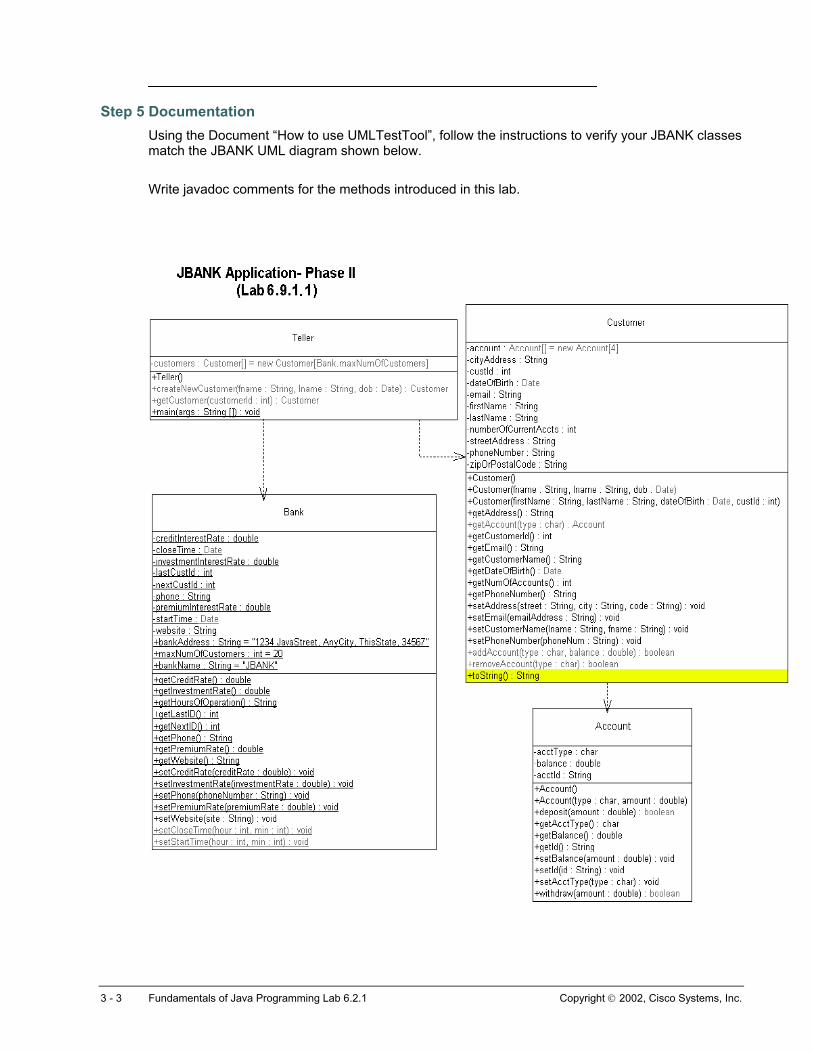
Step 5 Documentation Using the Document “How to use UMLTestTool”, follow the instructions to verify your JBANK classes match the JBANK UML diagram shown below.
Write javadoc comments for the methods introduced in this lab.
3 - 3 Fundamentals of Java Programming Lab 6.2.1 Copyright 2002, Cisco Systems, Inc.
Lab 6.4.2 Using the Math Class
Estimated Time 20 minutes
Learning Objectives In this lab activity, the student will use several methods of the Math class to perform mathematical calculations on numeric values.
Description Create a class called NumberPlay to use various Math class methods on int and double numbers.
File Management Open BlueJ. Click on Project from the BlueJ main menu and select New. In the New Project window and in the Look in: list box select c:\. Double-click the javacourse folder listed in the text window and a different New Project window opens with javacourse in the Look in: list box. Double-click the chap6 folder listed in the text window and a different New Project window opens with chap6 in the Look in: list box. Type lab6.4.2 in the File name text box and click on Create to create a lab6.4.2 subfolder in the chap6 folder.
Tasks
Step 1 Using the various Math class methods a. Define a class called NumberPlay. In the main method define a double variable num1 and
initialize it to 34.7889.
b. Define an int variable num2 and initialize it to 36. The Math class has static methods defined and an instance of this class is not needed to use its methods.
c. Use the Math.sqrt(num2) to find the square root of num2, use Math.round(num1) to round num1 to the closest integer.
d. Use max(num1, num2) to find the largest of two numbers.
Step 2 Run class Compile and test the class.
1 - 1 Fundamentals of Java Programming Lab 6.4.2 Copyright 2002, Cisco Systems, Inc.
Lab 6.5.1 Using the java.math Package
Estimated Time 20 minutes
Learning Objectives In this lab activity, the student will use the classes BigDecimal and BigInteger from the Math package to store and operate on arbitrary sized numeric data.
Description • BigDecimal and BigInteger classes are for manipulating numbers with an arbitrarily long
sequence of digits. The documentation for these classes can be found in the section on the java.math package in the Java API Documentation
• BigDecimal objects can perform calculations that might result in numbers larger than a 64-bit storage number such as a double. BigDecimal objects hold signed decimal numbers that are accurate to an arbitrary level of precision and are useful for currency operations. This class gives programmers control over rounding and scaling behavior and provides methods for performing basic operations.
• BigInteger can perform calculations that might result in numbers larger than a 64-bit storage number.
• Create a class called BigNumberPlay to add and multiply long sequence of digits using BigDecimal and BigInteger class methods.
File Management Open BlueJ. Click on Project from the BlueJ main menu and select New. In the New Project window and in the Look in: list box select c:\. Double-click the javacourse folder listed in the text window and a different New Project window opens with javacourse in the Look in: list box. Double-click the chap6 folder listed in the text window and a different New Project window opens with chap6 in the Look in: list box. Type lab6.5.1 in the File name text box and click on Create to create a lab6.5.1 subfolder in the chap6 folder.
Tasks
Step 1 Defining BigInteger and BigDecimal classes a. Create a class called BigNumberPlay. In the main method create a BigInteger object using
following syntax: import java.math.*//first line in the source file
BigInteger bigInteger = new BigInteger(“1240321448912348724793249872498723”);
1 - 2 Fundamentals of Java Programming Lab 6.5.1 Copyright 2002, Cisco Systems, Inc.
The constructor converts a long sequence of digits into a BigInteger.
b. Similarly create a BigDecimal object of a long sequence of digits using following syntax: BigDecimal bigDecimal = new BigDecimal(“1324123412341324213421342.13421”);
Step 2 Operating on BigInteger and BigDecimal objects a. The add() method of the BigInteger class requires an argument of type BigInteger. To
add an ordinary number (number of type int) to a BigInteger, convert the number to a BigInteger using the valueOf() method. For example to add 100 to bigInteger use the following syntax:
bigInteger = bigInteger.add(BigInteger.valueOf(100)); b. To multiply 5000.234f to a bigDecimal use the following syntax:
bigDecimal = bigDecimal.multiply(BigDecimal.valueOf((long)(5000.234f)));
To print bigInteger use the following syntax:
System.out.println(bigInteger);
Step 3 Run class Compile and test the class.
2 - 2 Fundamentals of Java Programming Lab 6.5.1 Copyright 2002, Cisco Systems, Inc.
Lab 6.6.3 Working with Dates
Estimated Time 20 minutes
Learning Objectives In this lab activity, the student will work with Date class, Calendar class, and DateFormat class to operate on date values.
Description • Dates are used to document identities for individuals such as date of birth, date hired, completed
course date, and date started.
• There are three classes in the Java API documentation concerned with dates. The Date class creates a Date object. The Calendar class sets or changes the date for a Date object. The DateFormat class displays the date in different formats. The Date and Calendar classes are located in the java.util package. The DateFormat class is part of the java.text package. When using these classes, specify the location of these using the following statements before the class header.
import java.util.*; import java.text.* ;
• Create a class called DateDemo. In this class students will create Date objects, use DateFormat class to parse different date formats, and use Calendar class to set the date of a Date objects.
File Management Open BlueJ. Click on Project from the BlueJ main menu and select New. In the New Project window and in the Look in: list box select c:\. Double-click the javacourse folder listed in the text window and a different New Project window opens with javacourse in the Look in: list box. Double-click the chap6 folder listed in the text window and a different New Project window opens with chap6 in the Look in: list box. Type lab6.6.3 in the File name text box and click on Create to create a lab6.6.3 subfolder in the chap6 folder.
Tasks
Step 1 Creating, setting and displaying dates a. Create a class called DateDemo in the main method. To display the current date of your
computer in full format use the following sample code:
Date today = new Date();
DateFormat df = DateFormat.getDateInstance(DateFormat.FULL, Locale.US);
1 - 2 Fundamentals of Java Programming Lab 6.6.3 Copyright 2002, Cisco Systems, Inc.
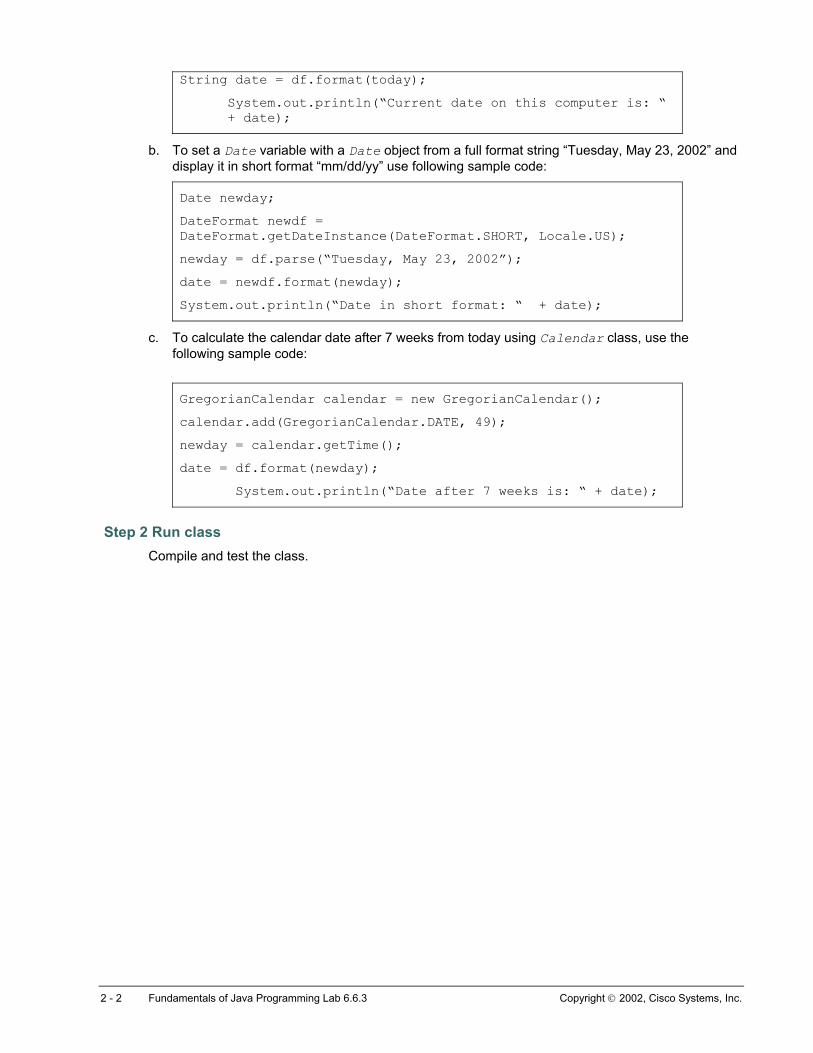
String date = df.format(today);
System.out.println(“Current date on this computer is: “ + date);
b. To set a Date variable with a Date object from a full format string “Tuesday, May 23, 2002” and display it in short format “mm/dd/yy” use following sample code:
Date newday;
DateFormat newdf = DateFormat.getDateInstance(DateFormat.SHORT, Locale.US);
newday = df.parse(“Tuesday, May 23, 2002”);
date = newdf.format(newday);
System.out.println(“Date in short format: “ + date);
c. To calculate the calendar date after 7 weeks from today using Calendar class, use the following sample code:
GregorianCalendar calendar = new GregorianCalendar();
calendar.add(GregorianCalendar.DATE, 49);
newday = calendar.getTime();
date = df.format(newday);
System.out.println(“Date after 7 weeks is: “ + date);
Step 2 Run class Compile and test the class.
2 - 2 Fundamentals of Java Programming Lab 6.6.3 Copyright 2002, Cisco Systems, Inc.
Lab 6.7.1 Implementing, Wrapper objects, dates, formatting numbers and dates in the JBANK application.
Estimated Time 90 minutes
Learning Objectives In this lab activity, the student will use wrapper classes to convert String data to primitives, Use DateFormat class to parse strings to dates and dates to strings, use BigDecimal, and BigInteger classes to create numeric values of arbitrary precision.
Description/ Business Rules • Wrapper classes manipulate primitive data types. Every primitive data type has a corresponding
wrapper class. This class is also useful for converting String data to primitives.
• BigDecimal and BigInteger classes are useful for manipulating numbers with an arbitrarily long sequence of digits. The documentation for these classes can be found in the section on the java.math package in the Java API Documentation.
• There are three classes in the Java API documentation concerned with dates. The Date class creates a Date object. The Calendar class sets or changes the date for a Date object. The DateFormat class displays the date in different formats. The Date and Calendar classes are located in the java.util package. The DateFormat class is part of the java.text package.
• Use BigDecimal and BigInteger for manipulating numbers with an arbitrarily long sequence of digits to calculate the interest on the Account balance.
• Use wrapper classes to convert String data to primitive data types.
• This lab applies several business rules to the Customer, Teller and the Bank classes as described below:
o The Customer and Bank classes will be modified, so that the data stored in these objects is reflects meaningful values. The Customer class field DOB (Date of Birth) is currently stored as a String. They will now be stored as Date type values. The getDOB method will return a date value instead of a String.
o The Bank class stores information regarding the start and close times. These fields currently store Strings. Change these to store Date values or time values. Additionally, add get and set methods specifically for each, the start time and close time.
o Change the code of the getHours of operation method. In order to return the string, convert the date values to a string using the DateFormat class or its subclass the SimpleDateFormat.
o The Bank business rules state that a customer account can only be created during normal hours of operation. Customer accounts are created in the Teller class. This class will implement tests of conditions, regarding the time during which the accounts are created, testing the time against the time provided for hours of operation.
o In The Bank class the interest rates are stored as double. Banks often require that very precise, yet large numeric values be represented in the Bank’s interest rates and finance
1 - 7 Fundamentals of Java Programming Lab 6.7.1 Copyright 2004, Cisco Systems, Inc.
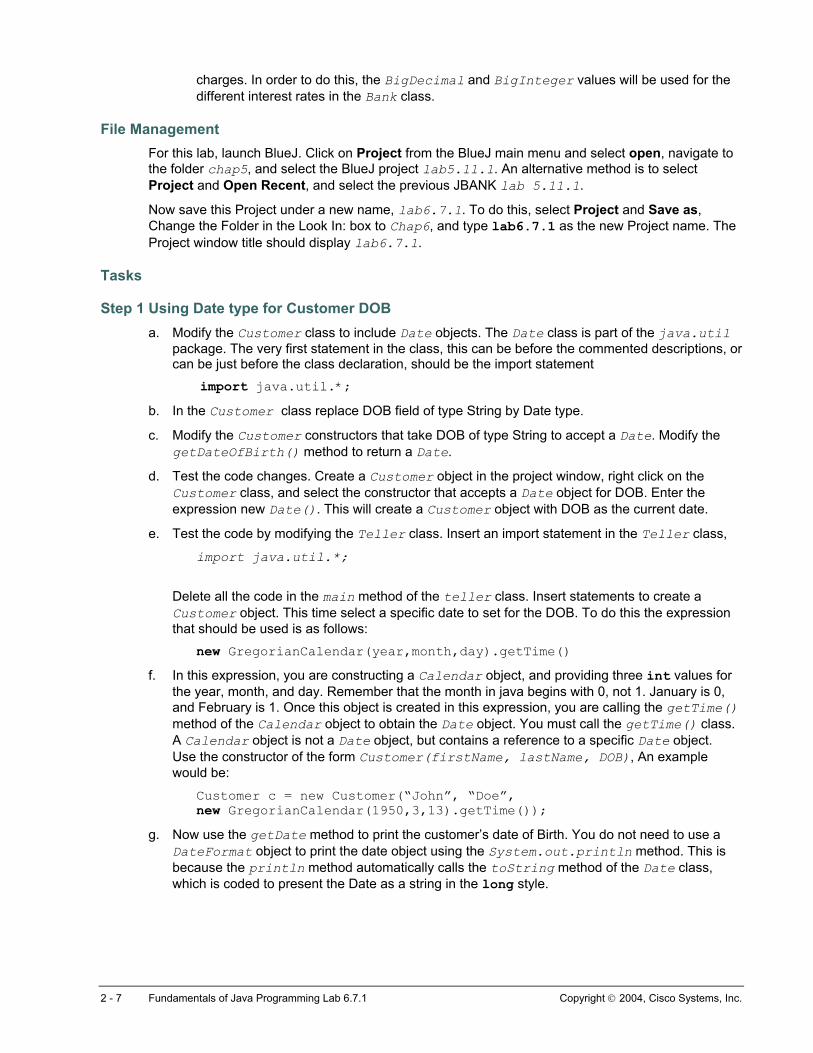
charges. In order to do this, the BigDecimal and BigInteger values will be used for the different interest rates in the Bank class.
File Management For this lab, launch BlueJ. Click on Project from the BlueJ main menu and select open, navigate to the folder chap5, and select the BlueJ project lab5.11.1. An alternative method is to select Project and Open Recent, and select the previous JBANK lab 5.11.1.
Now save this Project under a new name, lab6.7.1. To do this, select Project and Save as, Change the Folder in the Look In: box to Chap6, and type lab6.7.1 as the new Project name. The Project window title should display lab6.7.1.
Tasks
Step 1 Using Date type for Customer DOB a. Modify the Customer class to include Date objects. The Date class is part of the java.util
package. The very first statement in the class, this can be before the commented descriptions, or can be just before the class declaration, should be the import statement
import java.util.*;
b. In the Customer class replace DOB field of type String by Date type.
c. Modify the Customer constructors that take DOB of type String to accept a Date. Modify the getDateOfBirth() method to return a Date.
d. Test the code changes. Create a Customer object in the project window, right click on the Customer class, and select the constructor that accepts a Date object for DOB. Enter the expression new Date(). This will create a Customer object with DOB as the current date.
e. Test the code by modifying the Teller class. Insert an import statement in the Teller class,
import java.util.*;
Delete all the code in the main method of the teller class. Insert statements to create a Customer object. This time select a specific date to set for the DOB. To do this the expression that should be used is as follows:
new GregorianCalendar(year,month,day).getTime()
f. In this expression, you are constructing a Calendar object, and providing three int values for the year, month, and day. Remember that the month in java begins with 0, not 1. January is 0, and February is 1. Once this object is created in this expression, you are calling the getTime() method of the Calendar object to obtain the Date object. You must call the getTime() class. A Calendar object is not a Date object, but contains a reference to a specific Date object. Use the constructor of the form Customer(firstName, lastName, DOB), An example would be:
Customer c = new Customer(“John”, “Doe”, new GregorianCalendar(1950,3,13).getTime());
g. Now use the getDate method to print the customer’s date of Birth. You do not need to use a DateFormat object to print the date object using the System.out.println method. This is because the println method automatically calls the toString method of the Date class, which is coded to present the Date as a string in the long style.
2 - 7 Fundamentals of Java Programming Lab 6.7.1 Copyright 2004, Cisco Systems, Inc.
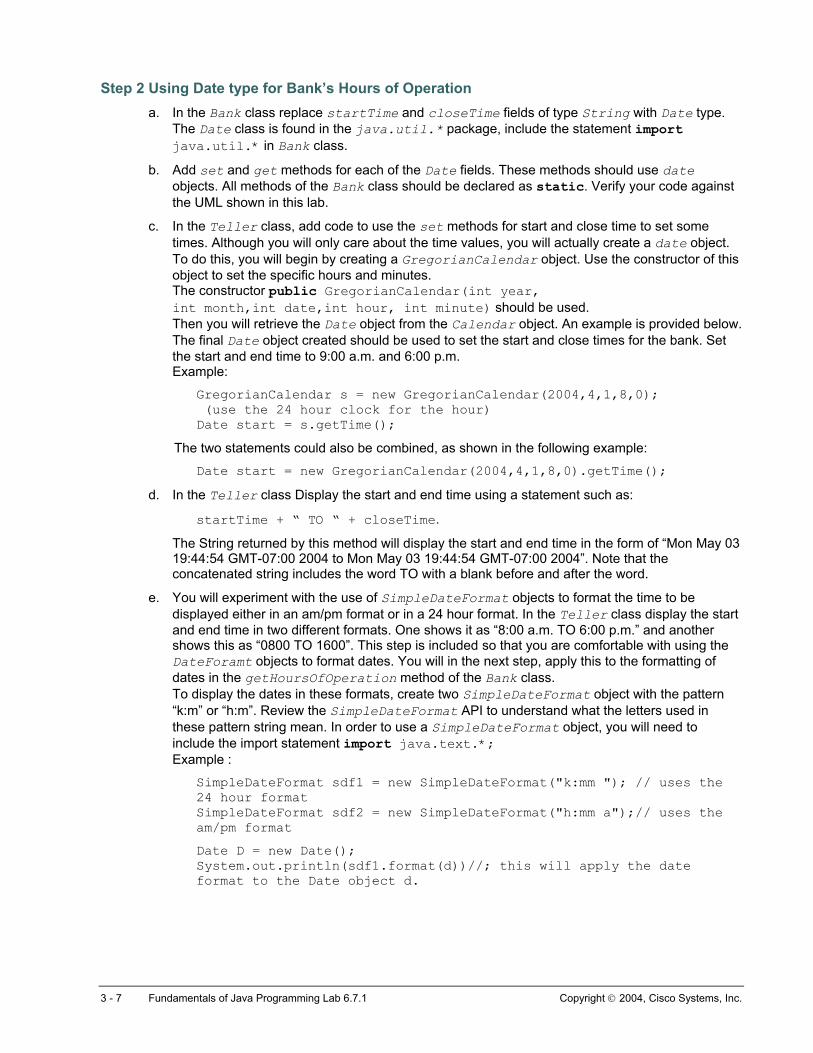
Step 2 Using Date type for Bank’s Hours of Operation a. In the Bank class replace startTime and closeTime fields of type String with Date type.
The Date class is found in the java.util.* package, include the statement import java.util.* in Bank class.
b. Add set and get methods for each of the Date fields. These methods should use date objects. All methods of the Bank class should be declared as static. Verify your code against the UML shown in this lab.
c. In the Teller class, add code to use the set methods for start and close time to set some times. Although you will only care about the time values, you will actually create a date object. To do this, you will begin by creating a GregorianCalendar object. Use the constructor of this object to set the specific hours and minutes. The constructor public GregorianCalendar(int year, int month,int date,int hour, int minute) should be used. Then you will retrieve the Date object from the Calendar object. An example is provided below. The final Date object created should be used to set the start and close times for the bank. Set the start and end time to 9:00 a.m. and 6:00 p.m. Example:
GregorianCalendar s = new GregorianCalendar(2004,4,1,8,0); (use the 24 hour clock for the hour) Date start = s.getTime();
The two statements could also be combined, as shown in the following example:
Date start = new GregorianCalendar(2004,4,1,8,0).getTime();
d. In the Teller class Display the start and end time using a statement such as:
startTime + “ TO “ + closeTime.
The String returned by this method will display the start and end time in the form of “Mon May 03 19:44:54 GMT-07:00 2004 to Mon May 03 19:44:54 GMT-07:00 2004”. Note that the concatenated string includes the word TO with a blank before and after the word.
e. You will experiment with the use of SimpleDateFormat objects to format the time to be displayed either in an am/pm format or in a 24 hour format. In the Teller class display the start and end time in two different formats. One shows it as “8:00 a.m. TO 6:00 p.m.” and another shows this as “0800 TO 1600”. This step is included so that you are comfortable with using the DateForamt objects to format dates. You will in the next step, apply this to the formatting of dates in the getHoursOfOperation method of the Bank class. To display the dates in these formats, create two SimpleDateFormat object with the pattern “k:m” or “h:m”. Review the SimpleDateFormat API to understand what the letters used in these pattern string mean. In order to use a SimpleDateFormat object, you will need to include the import statement import java.text.*; Example :
SimpleDateFormat sdf1 = new SimpleDateFormat("k:mm "); // uses the 24 hour format SimpleDateFormat sdf2 = new SimpleDateFormat("h:mm a");// uses the am/pm format
Date D = new Date(); System.out.println(sdf1.format(d))//; this will apply the date format to the Date object d.
3 - 7 Fundamentals of Java Programming Lab 6.7.1 Copyright 2004, Cisco Systems, Inc.
f. Insert an import java.text.*; statement in the Bank class, just below the other import statements. Then modify the getHoursOfOperation() method. This method currently returns a String. The code of this method, will work even though the fields startTime and closeTime have been changed to Date objects. However, the information printed for each date is not formatted to show just the time. Using the example completed in the Teller class, create a string that presents the date using the a.m/p.m. format. Now the method will return the date in a easy to read format as shown in this example: “8:00 AM TO 6:00 PM”
g. Modify the Teller class to display the hours of operation by calling the getHoursOfOperation() method that was modified in the Bank class.
Step 4 Use of BigDecimal and BigInteger to calculate interest rate and use of Wrapper classes
a. The calculation of the interest rates can be quite complex. In this section of the lab you will write statements using BigDecimal and BigInteger to calculate some interest rates. In module 8, these statements will become part of a number of new classes introduced in this module.
b. In preparation for implementing business rules in the Module 7, the following table shows the business rules we will experiment with in this section.
The savings interest rate is 3% per year and it is calculated daily.
Investment accounts are savings accounts used to save money for an extended period of time. This account provides customers with a higher interest rate based on how long they invest money in the account. The longer they keep the money in the account, the higher the interest rate earned. Investment accounts require a minimum of 100 US dollars to open. An investment term is how long the money has to remain in the account without any withdrawals from the account. The minimum investment term is six months. Interest rates for this account are 6 months at 5% and 12 months at 7%, both compounded monthly. The penalty for early withdraw is 20% of the balance.
Line of credit (LOC) checking accounts are tied to credit cards and have a fixed maximum credit limit of 500 US dollars. This is a type of checking account where overdraft protection is provided by allowing a negative balance up to a maximum of 500 US dollars. This type of account charges the customer a finance charge when the balance in the account is negative. The customer can only withdraw amounts equal to the balance in the account plus the credit limit. The amount withdrawn from the credit limit will be the first paid back by any customer deposit. The interest rate is 18% which is calculated daily.
4 - 7 Fundamentals of Java Programming Lab 6.7.1 Copyright 2004, Cisco Systems, Inc.

The calculation for the interest earnings on a balance uses the regular compound interest formula: A = Future amount P = Present Amount r = annual interest rate (as a decimal) n = number of times the interest compounded per year t = number of years A = P(1 + r/n) ^ n*t (^ is the symbol for exponentiation. In java the Math.power() method is used. To apply this formula, the following example can be used: A is the final value for the balance P is the balance amount r is the interest rate n is 360 if the interest is compounded daily. t is the term of the investment. BigDecimal bal = new BigDecimal(balance); // convert the double to a BigDecimal BigDecimal n = new BigDecimal(360.0); // daily compounding BigDecimal t = new BigDecimal(1.0); // for one year BigDecimal r = new BigDecimal(.03); // interest rate in decimal
// (r/n + 1) because of the use of the BigDecimal the 1 is added after the division, and the divide operation is without any rounding BigDecimal f1 = r.divide(n, BigDecimal.ROUND_UNNECESSARY).add(1.0); // P(1 + r/n) BigDecimal f2 = bal.multiply(f1, BigDecimal.ROUND_UNNECESSARY); // n * t BigDecimal f3 = n.multiply(t,BigDecimal.ROUND_UNNECESSARY); Now to complete the final calculation the BigDecimal and BigInteger classes do not provide any exponentiation operations. So we will extract the double values from the formulas, to complete the calculations: double balance = Math.pow(f2.doubleValue(),f3.doubleValue());
c. Modify the Teller class as follows:
1. Add an import statement to the Teller class import java.math.*;
2. In the main method, create an Account object savings to hold a balance of 1000.00.
3. In the main method, create an Account object invest to hold a balance of 10000.00
4. In the main method, create an Account object creditline to hold a balance of 500.00
5. In the main method, calculate the savings interest rate using the BigDecimal object. Change the balance to include both the balance and the interest earned.
6. In the main method, calculate the interest rate for the investment, at a term of 12 months. Change the balance of the account to include both the balance and the interest rate. Display the balance.
5 - 7 Fundamentals of Java Programming Lab 6.7.1 Copyright 2004, Cisco Systems, Inc.
7. In the main method, calculate the finance charge of the creditlIne account, where the last withdrawal on the account was 750.00. (The starting balance was $500. The maximum credit line allowed is $500.00). The finance charge is at 18% of the amount over the balance. The interest amount is calculated using the Compound interest formulas. However, instead of increasing the balance, the balance is decreased by the interest or finance charge assessed on the amount.
8. For additional practice create a String variable investAmount and the investment period into an int variable term. Set the investment rate to 5% by calling the setInvestmentRate() method of the Bank class. Call the getInvestmentRate() method of the Bank class which returns an investmentRate into a variable of type double called interestRate. Declare a variable called futureValue of type BigDecimal and in the BigDecimal constructor pass the investAmount. Use BigDecimal to calculate the interest earned. (Hint: Review the API, use multiply() and add() methods of BigDecimal method to calculate interest earned). To use BigDecimal class include the statement import java.math.*;. Use wrapper classes to convert a double to a String. Students may have to review the API for this lab. To learn more about BigDecimal and BigInteger refer to the site http://www.javaworld.com/javaworld/jw-06-2001/jw-0601-cents_p.htm l
Step 5 Review Questions 1. Name two wrapper classes.
2. b. What are two import statements required in order to work with Date objects?
3. Which class permits the use of patterns to format dates?
4. What are the letters used for the format pattern to show a 24 hour time, 8 hour time in A.M. P.M., day of week, name of the month?
5. Why must the GregorianCalendar class be used to create Date objects?
Step 6 Documentation Using the Document “How to use UMLTestTool”, follow the instructions to verify your JBANK classes match the JBANK UML diagram shown below.
Write javadoc comments for the methods introduced in this lab.
6 - 7 Fundamentals of Java Programming Lab 6.7.1 Copyright 2004, Cisco Systems, Inc.
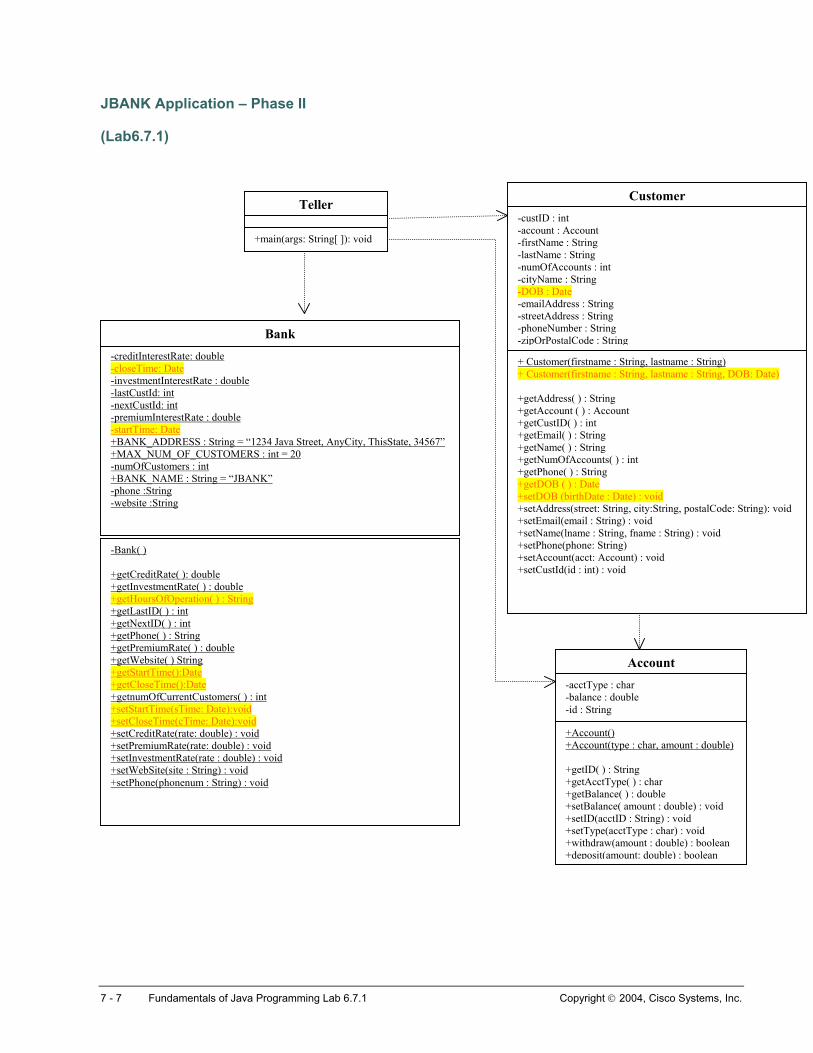
JBANK Application – Phase II
(Lab6.7.1)
Teller
+main(args: String[ ]): void
-custID : int -account : Account -firstName : String -lastName : String -numOfAccounts : int -cityName : String -DOB : Date -emailAddress : String -streetAddress : String -phoneNumber : String -zipOrPostalCode : String
-Bank( ) +getCreditRate( ): double +getInvestmentRate( ) : double +getHoursOfOperation( ) : String +getLastID( ) : int +getNextID( ) : int +getPhone( ) : String +getPremiumRate( ) : double +getWebsite( ) String +getStartTime():Date +getCloseTime():Date +getnumOfCurrentCustomers( ) : i+setStartTime(sTime: Date):void +setCloseTime(cTime: Date):void +setCreditRate(rate: double) : void+setPremiumRate(rate: double) : v+setInvestmentRate(rate : double) +setWebSite(site : String) : void +setPhone(phonenum : String) : vo
-creditInterestRate: double -closeTime: Date -investmentInterestRate : double -lastCustId: int -nextCustId: int -premiumInterestRate : double -startTime: Date +BANK_ADDRESS : String = “12+MAX_NUM_OF_CUSTOMERS-numOfCustomers : int +BANK_NAME : String = “JBAN-phone :String -website :String
Customer
7 - 7 Fundamentals of Java P
Bank
+ Customer(firstname : String, lastname : String) + Customer(firstname : String, lastname : String, DOB: Date) +getAddress( ) : String +getAccount ( ) : Account +getCustID( ) : int +getEmail( ) : String +getName( ) : String +getNumOfAccounts( ) : int +getPhone( ) : String +getDOB ( ) : Date +setDOB (birthDate : Date) : void +setAddress(street: String, city:String, postalCode: String): void +setEmail(email : String) : void +setName(lname : String, fname : String) : void +setPhone(phone: String) +setAccount(acct: Account) : void +setCustId(id : int) : void
nt
oid : void
id
34 Java Street, AnyCity, ThisState, 34567” : int = 20
K”
+Account() +Account(type : char, amount : double) +getID( ) : String +getAcctType( ) : char +getBalance( ) : double +setBalance( amount : double) : void +setID(acctID : String) : void +setType(acctType : char) : void +withdraw(amount : double) : boolean +deposit(amount: double) : boolean
-acctType : char -balance : double -id : String
Account
rogramming Lab 6.7.1 Copyright 2004, Cisco Systems, Inc.
Lab 6.8.7 Explore the API Packages
Estimated Time 20 minutes
Learning Objectives In this lab activity, the student will investigate the Java core package structures and their classes.
Description/Scenario • Packages are entities that help manage classes as a collection. The Java platform uses
packages to hold collections of classes that share a common function.
• Classes are packaged based on their commonality of use. Inheritance does not affect the ability to package classes with different inheritances in the same package.
• Classes that belong to the same package will inherit all default, protected, and public attributes of the super/parent class. Classes that are in a different package will only inherit the public and protected attributes of the parent class.
• Explore the Java core API packages structure.
• Locate classes.
• Investigate the Java core package structures and their classes. This will help the student to locate the required classes.
Tasks
Step 1 Find Java Docs API a. Find a local copy of the Java Docs API and open it with the browser or open the browser to
http://java.sun.com/j2se/1.3/docs/api/index.html. Once the API is open, students should familiarize themselves with the different sections. Go to the Packages frame and look at the available packages. Understanding the package structures and the classes in the packages will help students to quickly locate the necessary classes.
Step 2 Understanding the package structure a. Click on the java.awt package and go through the package structure. Classes are packaged
based on their commonality of use. Inheritance does not affect the ability to package classes with different inheritances in the same package.
Step 3 Inheritance in the same package a. Selecting a specific package like java.awt narrows the listing of the classes to that particular
package. In the package java.awt, select the class Button. The class definition shows both the package location and the inheritance as shown in figure below. The Button class is a subclass of the Component class. The Button and the Component classes are in the same package, java.awt.
1 - 2 Fundamentals of Java Programming Lab 6.8.7 Copyright 2002, Cisco Systems, Inc.
b. Which attributes do classes that belong to the same package inherit?
Step 4 Inheritance in different packages a. The Applet class is in the java.applet package, and inherits from or is a subclass of the
Panel class in the java.awt package. Here the classes have been grouped for commonality of use and may be subclasses of packages in other classes.
b. Which attributes do classes that belong to a different package inherit?
Go through the java.io package. Become familiar with the various classes.
2 - 2 Fundamentals of Java Programming Lab 6.8.7 Copyright 2002, Cisco Systems, Inc.
Lab 6.8.8 Build a Banking Package
Estimated Time 20 minutes
Learning Objectives In this lab activity, the student will create directory structures to store packaged classes.
The student will implement packaging to organize classes and include import statements to access classes in packages.
Description/Scenario • Creating directory structures
• Usage of keyword package to organize Java classes
• Usage of classes from other packages by import statements
• Archiving packages in jar files
• Creating a directory structure that helps students organize their classes into a Banking package.
• Organizing the classes by Phase into separate subdirectories under the JBANK directory.
• Using package statements and import statements to access the classes in those packages.
• Creating a jar file for archiving Phase I classes of the JBANK application.
• Java Packaging is the management of classes in a group. The package command defines a class as part of a collection and the import command defines the namespace to locate the class.
• There are two main reasons for creating Java packages. The primary reason is that the Java interpreter locates and loads the classes for the program using namespaces. A second reason to consider organizing classes into packages is to manage the program as a collection of classes.
• The package command in the Java language allows these collections of classes to be identified as belonging with each other.
• The import command in Java ensures that the interpreter knows where the classes that are referenced are located. It declares the unique namespaces for the classes.
• For the Java run-time environment, the two variables that affect access to class files and JDK programs are the PATH variable and the CLASSPATH variable.
• The PATH variable is an operating system variable that will contain the names of directories where many programs are located. The operating system on a machine uses these paths to locate programs that need to be launched.
• The Java compiler and the interpreter use the variable CLASSPATH to locate classes and packages. The CLASSPATH variable can contain paths to many directories that contain packages.
• The CLASSPATH variable can be overridden by the use of the classpath option when using the compiler and the use of the cp option when using the interpreter.
1 - 3 Fundamentals of Java Programming Lab 6.8.8 Copyright 2004, Cisco Systems, Inc.
• All of the files in a package can also be combined into a single compressed file using the jar utility. This is a utility program that will take all the class files in the directory and the directories and compress (pack) them into one file. This file is known as an archive file. Jar is an acronym for Java Archive.
Tasks
Step 1 Creating packages using the command-line console window a. In BlueJ when the programs are compiled, the class files are created in the same directory as
that of the source files. Since students need to build packages from a directory with class files only, they will be making use of a command line window and jdk utilities for this step of the lab. The lab section that has the student creating packages using the command line is for practice only. Most IDE’s provide simple and easy to use packaging feature. In Step 2 you will explore using this feature in BlueJ.
b. There are two main reasons for creating java packages. The first main reason is that the java interpreter locates and loads the classes for the program using namespaces. Namespaces are identifiers of a class and its methods. The second reason to consider organizing the classes into packages is to manage the program as a collection of classes.
c. Use you computer systems, file management program to create a folder called Test. Try to place this folder at the top-most level of your directory/folder. Do not place this in your java course folder.
d. Using the appropriate commands for your computer system, open a console window. (In windows this will be the Command or DOS window, in UNIX this is the Shell window).
e. You will use the java compiler to compile the class files to this folder in a directory structure. We will create a package of all the classes created for phase I and phase II of the bank application. Phase I was completed in lab 5.11.1.
f. To create a package of all the classes in lab5.11.1 you will execute the following commands:
1. Using the most appropriate commands, locate the directory lab5.11.1. This is a folder under the folders javacourse/chap5. Once you have navigated to this folder make sure you verify that you can see all the .java files for Customer, Bank, Account and Teller.
2. Now you will compile these source files into a package under the Test directory. When you execute the command, make sure that the path to the Test folder is complete. You are not currently in the parent directory for the Test folder, and this command will cause a Test folder to be created inside the lab5.11.1 folder instead of the Test folder.
javac –d Test *.java
3. Now move to the Test folder, you should just the classes compiled into this directory. Although all the classes are compiled into this directory, they are not actually part of a formal java package. This is because you have not inserted the package statement into these source files. We will not do this, since we do not want to introduce any errors into your code.
2 - 3 Fundamentals of Java Programming Lab 6.8.8 Copyright 2004, Cisco Systems, Inc.
Step 2 Creating packages using BlueJ You will create the actual packages for the banking application using BlueJ.
a. Launch BlueJ. Select Project and New. Navigate to the javacourse folder and locate the JBANK folder. Type in the name PhaseI.
b. Select Edit and New package. Name the jbank1 (this is case sensitive). You will see the icon for a folder in the project window.
c. Double-click and open the folder. Note the title at the top of the window. The title reads: phase I [jbank1]. This is the BlueJ representation of java packages. Although it might seem simple, in actuality a number of activities have occurred. As you now add classes to the package, each class will have the statement package automatically included in the source code.
d. Add classes from lab5.11.1 into this package. To do this, while in the package folder, select edit > add class from file. Navigate in the Look in List: box till you locate the folder lab5.11.1 in chap5. Open this folder and add each class to the package.
e. Compile all the classes added to the package. Open each class and make sure a package statement has been included at the top of each file.
f. In addition to creating packages using BlueJ, you can compress all of the class files into a single jar files. In most complex applications, the classes that make up the application are stored and executed from .jar files.
g. Double-click on the folder “go up”. This will now place you in the parent folder for the package. Select from the menu Project, and then export. In the dialog box select “Store as a jar file”. Also unselect the item “include source files”. The purpose of the jar file is to keep all the class files together. The source files are generally not included in a jar file of classes. Click the button continue. You will be presented with a dialog box to select a folder to save the jar file.
h. In the dialog file, navigate to JBANK folder inside the javacourse folder. Name the jar file bank1.
i. Once the jar file has been saved, close BlueJ. Locate the javacourse folder using the file management program for the computer. Locate the folder JBANK. You should see the jar file bank1.jar saved in this folder.
3 - 3 Fundamentals of Java Programming Lab 6.8.8 Copyright 2004, Cisco Systems, Inc.
Lab 7.4.2 Pass an Array to a Method
Estimated Time 20 minutes
Learning Objectives In this lab activity, the student will create and use array objects as part of the class definition.
The student will demonstrate the use of array references in the method calls.
Description • The syntax for declaring and populating an array of object references is:
JavaStudent studentsInACourse[] = new JavaStudent[10];
This statement creates a reference variable identified by studentsInACourse, to reference an array object that will hold an array of references to JavaStudent objects. When this statement is executed, a reference variable and an array object with 10 reference variables will be created. The length of the array is 10. The first element of the array referenced by studentsInACourse will contain a null value, since no JavaStudent objects have been created.
StudentsInACourse[0] = new JavaStudent();
This statement creates a JavaStudent object and stores the reference to the object in the first element of the array studentsInACourse.
• An array element can be passed to a method requesting a single value.
A method with the signature averageStudentPerc(JavaStudent astudent){} will accept the following argument:
averageStudentPerc(studentsInaCourse[0]);
Here the argument is a reference to the student object referenced in the array element [0]. This is not different from using any single reference variable. This method will now have access to the non-private data and methods of the JavaStudent object. In this example, the method requires a single JavaStudent object.
• A reference to an array object can be passed to a method.
averageClassPerc(JavaStudent[] students, int testnumber); In this example, the method requires a reference to an array object of JavaStudent references as its first argument, and a test number int for its second argument.
averageClassPerc(studentsInaCourse, 0);
• Create a class called ArrayDemo. In this class define a method that takes an array reference, an array index, and a value as arguments and changes the corresponding array index element to the new value.
1 - 2 Fundamentals of Java Programming Lab 7.4.2 Copyright 2002, Cisco Systems, Inc.
File Management Open BlueJ. Click on Project from the BlueJ main menu and select New. In the New Project window and in the Look in: list box select c:\. Double-click the javacourse folder listed in the text window and a different New Project window opens with javacourse in the Look in: list box. Double-click the chap7 folder listed in the text window and a different New Project window opens with chap7 in the Look in: list box. Type lab7.4.2 in the File name text box and click on Create to create a lab7.4.2 subfolder in the chap7 folder.
Tasks
Step 1 Using array reference in a method call a. Create a class called ArrayDemo. Define a public static method called
replaceArrayElement() that takes names (a reference to an array object of String), index (of type int) and value (a String object reference) as arguments.
b. In the main method define a String array called names and initialize it with some values.
Sample code: String names[] = {“Joe”, “Ben”, “Tom”, “John”);
c. Using a for loop, iterate through the array elements and print the array elements to the output screen.
public static replaceArrayElement( String[] names, int index, String value) {..}
d. Using the Console class, accept a number that represents an array index and a String to replace the array element corresponding to the index. Use replaceArrayElement(names, index, value) statement to replace an array element and display the modified array elements.
e. In the replaceArrayElement() method use the index to identify the array element to be replaced and assign the value to this element.
f. Using a for loop, iterate through the updated array elements and print the array elements to the output screen.
Step 2 Run class Compile and test the class.
2 - 2 Fundamentals of Java Programming Lab 7.4.2 Copyright 2002, Cisco Systems, Inc.
Lab 7.4.3 Create and Traverse through Arrays
Estimated Time 20 minutes
Learning Objectives In this lab activity, the student will use parallel arrays to store data and apply iterative loop structures for traversing (scanning) through the arrays.
Description • In the JavaStudent class, each of the arrays can be thought of as parallel arrays. That is, the
value in one element of the array has a corresponding meaning for the value of the same element in another array.
For example:
testDate[0], testName[0], maxPoints[0] all hold different information about the first test.
testScore[0] and percentage[0] contain the scores and percentages of a specific student for the first test.
• This parallel relationship between the arrays can be used to process and handle these arrays in the same loop construct, the same if statement, or any other method or statement. A single int variable can be used to access the parallel elements of the array. It is important to note that declaration of similar arrays does not make them parallel. It is the deliberate storing of corresponding meaningful values that make arrays parallel. The test[0] should store the score for the first test, and the maxPoints[0] should store the corresponding value for the maximum points for the first test. It is the responsibility of the programmer to understand the data and ensure its validity.
• Creating and traversing through arrays
• Use arrays to store student Ids and student names. The value of a Student Id in the Student array corresponds to a student name in the student name array.
• Use the Console class to accept a student Id and display the corresponding student name.
File Management Open BlueJ. Click on Project from the BlueJ main menu and select New. In the New Project window and in the Look in: list box select c:\. Double-click the javacourse folder listed in the text window and a different New Project window opens with javacourse in the Look in: list box. Double-click the chap7 folder listed in the text window and a different New Project window opens with chap7 in the Look in: list box. Type lab7.4.3 in the File name text box and click on Create to create a lab7.4.3 subfolder in the chap7 folder.
1 - 3 Fundamentals of Java Programming Lab 7.4.3 Copyright 2002, Cisco Systems, Inc.
Tasks
Step 1 Creating and Initializing arrays a. Create the class called StudentIdName. In this class define and initialize an array of type int
called studentID and define and initialize another array of type String called studentName. An array object creates and stores data in a sequential set of storage locations. Make sure that the studentID array and studentName array are initialized with same number of elements.
Code sample: private int[] studentID = {101,102,104,105,106}
b. Define a set method to change a studentID in the studentID array. The set method takes two arguments, the first argument is of type int representing an index of the array, and the second argument is of type int representing a student id. Use a similar approach to define a set method to change a student name in the studentName array.
c. Define a get method that takes an argument of type int that represents an index of the studentID array and returns the studentID of the corresponding index. Similarly define a get method to get a student name from the studentName array by an index.
Step 2 Traversing through the arrays a. Define a main method that uses the Console class to accept a studentID. Using the student
ID traverse through the studentID array to find the index to get the corresponding student name from the studentName array.
b. Compile and run the class.
c. Do the student ids have to be in sequence to work here?
d. Update the array objects at the second and fifth index, for the ids and names. Then as in Step 1,
display all of the ids and names in both arrays.
e. Is it possible to change the array size dynamically?
f. What comparison operator would be needed to check the name? Could we use “= =”?
g. What would happen if in the set or get methods, the index argument was greater to or equal to
the size of the arrays?
h. What if the index was a negative number?
2 - 3 Fundamentals of Java Programming Lab 7.4.3 Copyright 2002, Cisco Systems, Inc.

i. What if the index pointed to a null value for a studentName?
3 - 3 Fundamentals of Java Programming Lab 7.4.3 Copyright 2002, Cisco Systems, Inc.
Lab 7.4.4 Search and Sort an Array
Estimated Time 20 minutes
Learning Objectives In this lab activity, the student will implement methods to sort arrays in ascending and descending orders.
Description • Sorting is the process of arranging a series of objects in some logical order. When objects are
placed in an order beginning with the lowest value and ending at the highest value, they are being sorted in ascending order. Sorting character data can be influenced by the case of the character. When objects are placed in an order beginning with the highest value and ending with the lowest value, they are being sorted in descending order. In the examples so far used in this chapter, the array elements have been manipulated in the sequence in which they were created. Sorting a large number of values without the use of arrays can be a difficult task.
• A commonly used programming/sorting technique is called a bubble sort. This particular technique relies on being able to compare pairs of values, assuming that there is some order in which the values can be organized. If the values are out of order, then they are swapped. The simple swap technique could be used to process an array several times until the values are in the necessary order. In this technique, the array is processed until the largest or the smallest number is assigned to the first element. The lowest or highest value bubbles to the start of the array. Each processing of the array includes the comparison of pairs of values and swapping the values if needed. Before values are swapped, one of the pair of values is stored in a temp variable.
For example:
int x = 20 , y = 10, temp; // swapping if (y < x ) { temp = x; x = y; y = temp; }
1 - 2 Fundamentals of Java Programming Lab 7.4.4 Copyright 2002, Cisco Systems, Inc.
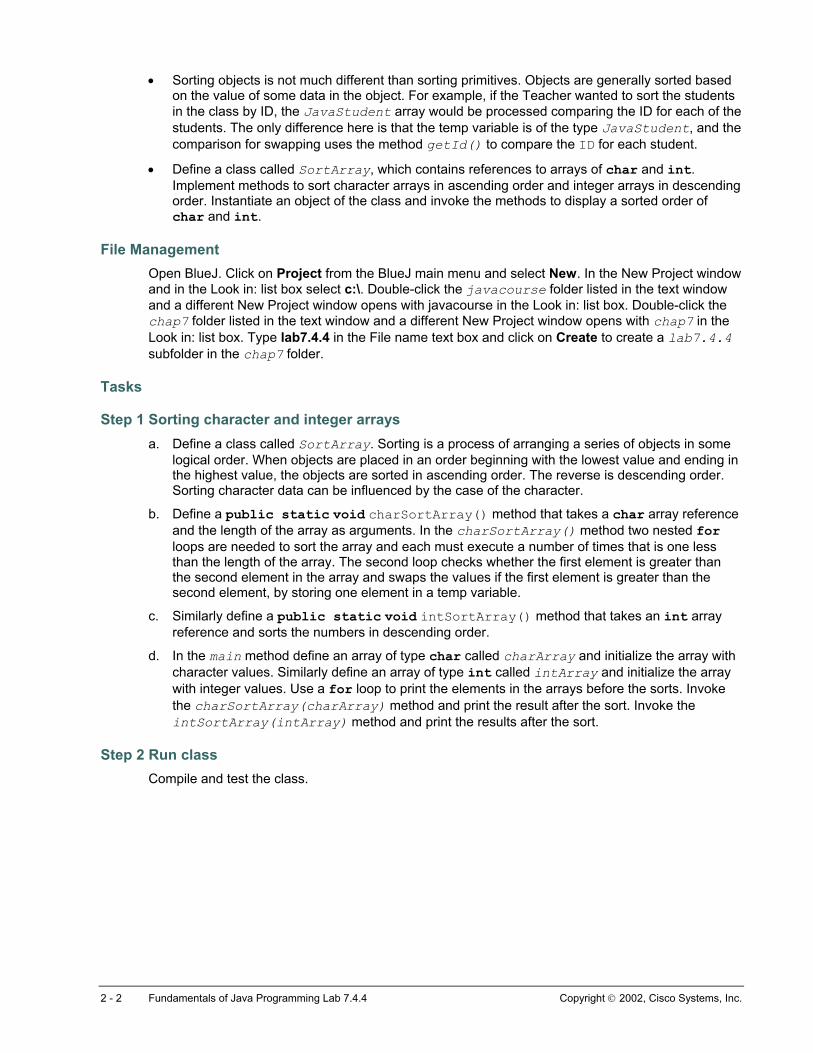
• Sorting objects is not much different than sorting primitives. Objects are generally sorted based on the value of some data in the object. For example, if the Teacher wanted to sort the students in the class by ID, the JavaStudent array would be processed comparing the ID for each of the students. The only difference here is that the temp variable is of the type JavaStudent, and the comparison for swapping uses the method getId() to compare the ID for each student.
• Define a class called SortArray, which contains references to arrays of char and int. Implement methods to sort character arrays in ascending order and integer arrays in descending order. Instantiate an object of the class and invoke the methods to display a sorted order of char and int.
File Management Open BlueJ. Click on Project from the BlueJ main menu and select New. In the New Project window and in the Look in: list box select c:\. Double-click the javacourse folder listed in the text window and a different New Project window opens with javacourse in the Look in: list box. Double-click the chap7 folder listed in the text window and a different New Project window opens with chap7 in the Look in: list box. Type lab7.4.4 in the File name text box and click on Create to create a lab7.4.4 subfolder in the chap7 folder.
Tasks
Step 1 Sorting character and integer arrays a. Define a class called SortArray. Sorting is a process of arranging a series of objects in some
logical order. When objects are placed in an order beginning with the lowest value and ending in the highest value, the objects are sorted in ascending order. The reverse is descending order. Sorting character data can be influenced by the case of the character.
b. Define a public static void charSortArray() method that takes a char array reference and the length of the array as arguments. In the charSortArray() method two nested for loops are needed to sort the array and each must execute a number of times that is one less than the length of the array. The second loop checks whether the first element is greater than the second element in the array and swaps the values if the first element is greater than the second element, by storing one element in a temp variable.
c. Similarly define a public static void intSortArray() method that takes an int array reference and sorts the numbers in descending order.
d. In the main method define an array of type char called charArray and initialize the array with character values. Similarly define an array of type int called intArray and initialize the array with integer values. Use a for loop to print the elements in the arrays before the sorts. Invoke the charSortArray(charArray) method and print the result after the sort. Invoke the intSortArray(intArray) method and print the results after the sort.
Step 2 Run class Compile and test the class.
2 - 2 Fundamentals of Java Programming Lab 7.4.4 Copyright 2002, Cisco Systems, Inc.
Lab 7.4.5 Extended Use of Arrays
Estimated Time 15 minutes
Learning Objectives In this lab activity, the student will create an array of Strings and retrieve elements based on specific index values provided using the Math.random() method.
Description • Create a class called PickADay with an array of Strings initialized with the seven days of the
week.
• Utilize a class constructor to create a random number to index a day in the array. The random() method of the java.lang.Math class is a static method that returns a random number as a double, where:
0.0 <= returned double < 1.0
File Management Open BlueJ. Click on Project from the BlueJ main menu and select New. In the New Project window and in the Look in: list box select c:\. Double-click the javacourse folder listed in the text window and a different New Project window opens with javacourse in the Look in: list box. Double-click the chap7 folder listed in the text window and a different New Project window opens with chap7 in the Look in: list box. Type lab7.4.5 in the File name text box and click on Create to create a lab7.4.5 subfolder in the chap7 folder.
Tasks
Step 1 a. Create the class PickADay. This class has a static array object named weekday as a class
attribute. The array object weekDay is of the type String.
b. Use a static initializer block to load the weekday array object with the seven days of the week.
c. Create an instance variable index of the type int and make it private static.
d. In the PickADay constructor use the random method in the Math class to set the value of the index and make sure that it is an int that is between 0 and 6.
e. In the main method create an instance of PickADay and using a single println() statement, display the day of the week that was randomly selected.
f. Compile and run the class.
1 - 2 Fundamentals of Java Programming Lab 7.4.5 Copyright 2002, Cisco Systems, Inc.
g. What would happen if the index was larger than 6?
h. Modify the main method println() statement to say “sorry” if the day that was randomly
selected is already a normal day off (Saturday or Sunday).
2 - 2 Fundamentals of Java Programming Lab 7.4.5 Copyright 2002, Cisco Systems, Inc.
Lab 7.5.2 Traverse a Multidimensional Array
Estimated Time 20 minutes
Learning Objectives In this lab activity, the student will implement code to traverse a multidimensional array
Description • The syntax for declaring and storing data in a multidimensional array is:
int [] [] aTableofNumbers;
Here, the statement creates a 3 rows and 3 column array to store int.
aTableofNumbers = new int[3][3];
Alternatively, each row of the array can have a different number of elements. This syntax will result in each element of the array holding the default int value 0.
aTableofNumbers = new int[3][]; aTableofNumbers[0] = new int[3]; aTableofNumbers [1] = new int[5]; aTableofNumbers[2] =new int[7];
Here each row is different and has data stored in each element. int [][] aTableofNumbers ={ {3,4,5,6}, {2,3,4}, {1,2,3,4,5}};
• To reference a single element of a multidimensional array, reference the index value for each dimension. For example aTableofNumbers[1][3] will reference the element in the 2nd row and 4th column.
• To access more than one element of a multidimensional array, nested for loops can be used. Each loop processes elements of one dimension.
• Create a class called EmployeeData. This class stores the employee names and employee titles in a two dimensional array and stores the employees’ salaries in a single dimensional array. Students will traverse through the arrays to display employees who earn more than $2000.
File Management Open BlueJ. Click on Project from the BlueJ main menu and select New. In the New Project window and in the Look in: list box select c:\. Double-click the javacourse folder listed in the text window and a different New Project window opens with javacourse in the Look in: list box. Double-click the chap7 folder listed in the text window and a different New Project window opens with chap7 in the Look in: list box. Type lab7.5.2 in the File name text box and click on Create to create a lab7.5.2 subfolder in the chap7 folder.
1 - 2 Fundamentals of Java Programming Lab 7.5.2 Copyright 2002, Cisco Systems, Inc.
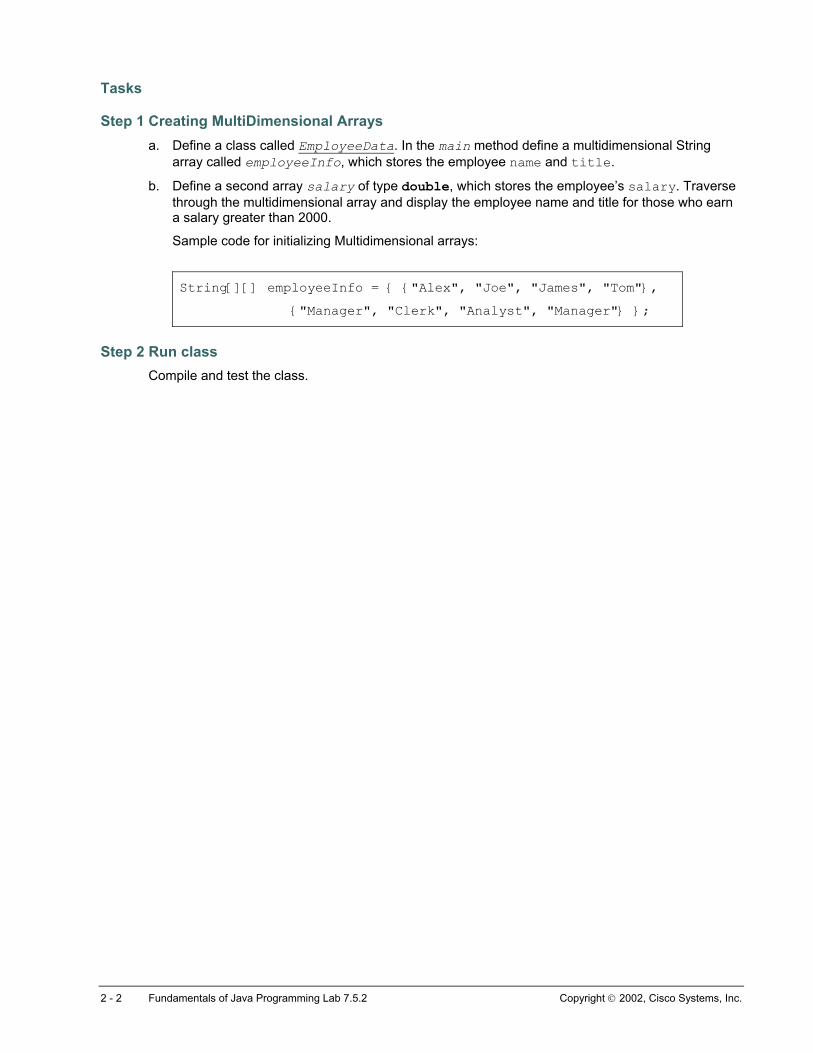
Tasks
Step 1 Creating MultiDimensional Arrays a. Define a class called EmployeeData. In the main method define a multidimensional String
array called employeeInfo, which stores the employee name and title.
b. Define a second array salary of type double, which stores the employee’s salary. Traverse through the multidimensional array and display the employee name and title for those who earn a salary greater than 2000.
Sample code for initializing Multidimensional arrays:
String[][] employeeInfo = { {"Alex", "Joe", "James", "Tom"},
{"Manager", "Clerk", "Analyst", "Manager"} };
Step 2 Run class Compile and test the class.
2 - 2 Fundamentals of Java Programming Lab 7.5.2 Copyright 2002, Cisco Systems, Inc.
Lab 7.6.1 Implementing Arrays in the JBANK Application
Estimated Time 120 minutes
Learning Objectives In this lab activity the student will incorporate array objects to store Customer and Account data.
Description • This lab will complete all the code required for Phase II of the banking application. At the end of
this lab, the student will package the classes and create a jar file.
• In Phase II of the application you will be set the limits for the creation of customers using the methods provided in different classes. You might choose to work with a number less than 20, or more than 20. Any attempt by tellers to create more customers than maximum number set for the Bank should be prohibited.
• Every customer can own no more than 4 accounts. An array of Account object references is provided in the Customer class.
• Customers belong to a bank. In this lab the student will implement the use of Arrays to maintain references to Customer objects in the Bank class. The size of the array is controlled by the bank field MAX_NUM_OF_CUSTOMERS.
• Customers can have a total of four accounts. In this lab, the student will implement the use of arrays to maintain information on no more than four accounts for each customer. In the labs in chapter 8, students will introduce logic to manage the type of account in the array.
• A Customers accounts are assigned IDs based on the customer’s ID and the type of the account. In this class the rules for connecting each account to a customer will be implemented by using the ID of the customer to set the Account ID.
• Arrays can be used to store primitives and objects. Arrays serve the purpose of containers, to hold more than one instance of a primitive value or an object. This allows the programmer to write smaller set of instructions to manage a collection of data.
• Array’s are built-in objects and have the same methods as the Object class
• To traverse through an array, the index value of the array is used to inspect and operate on each element of the array. Loops aid in the recursive operations on arrays.
File Management: For this lab, launch BlueJ. Click on Project from the BlueJ main menu and select open, navigate to the folder chap6, and select the BlueJ project lab6.7.1. An alternative method is to select Project and Open Recent, and select the previous JBANK lab6.7.1.
Now save this Project under a new name lab7.6.1. To do this, select Project and Save as, Change the Folder in the Look In: box to Chap7, and type lab7.6.1 as the new Project name. The Project window title should display lab7.6.1.
1 - 9 Fundamentals of Java Programming Lab 7.6.1 Copyright 2004, Cisco Systems, Inc.
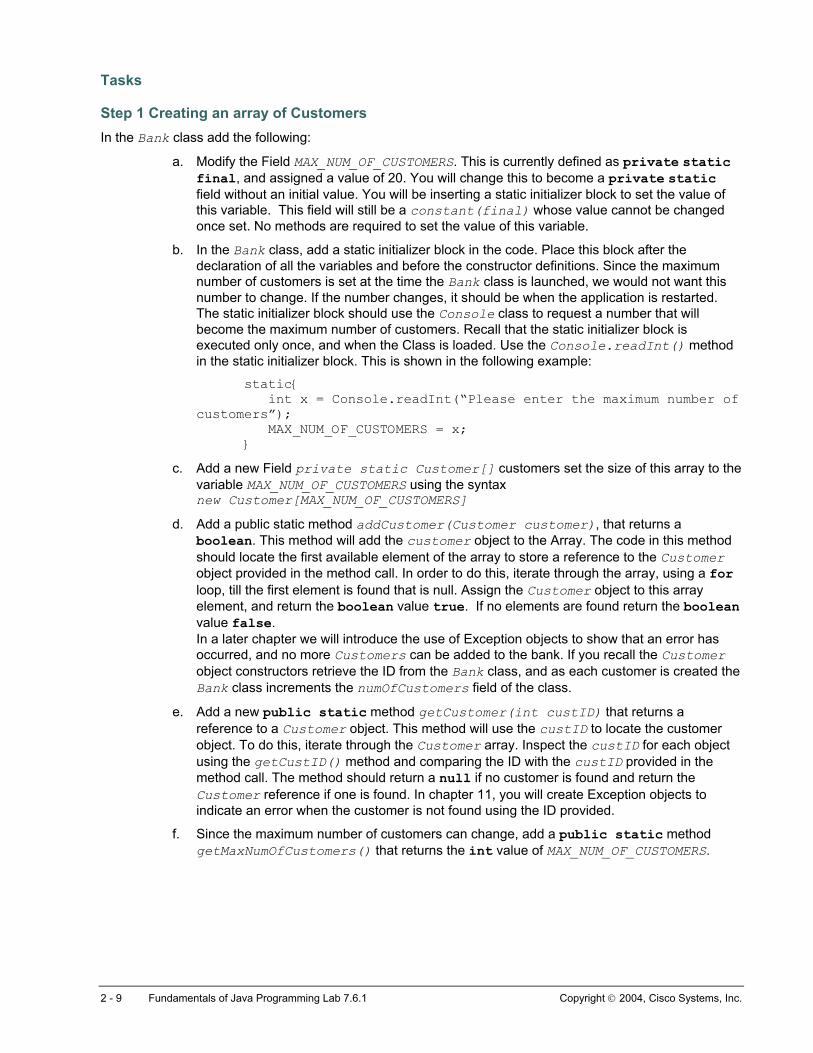
Tasks
Step 1 Creating an array of Customers In the Bank class add the following:
a. Modify the Field MAX_NUM_OF_CUSTOMERS. This is currently defined as private static final, and assigned a value of 20. You will change this to become a private static field without an initial value. You will be inserting a static initializer block to set the value of this variable. This field will still be a constant(final) whose value cannot be changed once set. No methods are required to set the value of this variable.
b. In the Bank class, add a static initializer block in the code. Place this block after the declaration of all the variables and before the constructor definitions. Since the maximum number of customers is set at the time the Bank class is launched, we would not want this number to change. If the number changes, it should be when the application is restarted. The static initializer block should use the Console class to request a number that will become the maximum number of customers. Recall that the static initializer block is executed only once, and when the Class is loaded. Use the Console.readInt() method in the static initializer block. This is shown in the following example:
static{ int x = Console.readInt(“Please enter the maximum number of customers”); MAX_NUM_OF_CUSTOMERS = x; }
c. Add a new Field private static Customer[] customers set the size of this array to the variable MAX_NUM_OF_CUSTOMERS using the syntax new Customer[MAX_NUM_OF_CUSTOMERS]
d. Add a public static method addCustomer(Customer customer), that returns a boolean. This method will add the customer object to the Array. The code in this method should locate the first available element of the array to store a reference to the Customer object provided in the method call. In order to do this, iterate through the array, using a for loop, till the first element is found that is null. Assign the Customer object to this array element, and return the boolean value true. If no elements are found return the boolean value false. In a later chapter we will introduce the use of Exception objects to show that an error has occurred, and no more Customers can be added to the bank. If you recall the Customer object constructors retrieve the ID from the Bank class, and as each customer is created the Bank class increments the numOfCustomers field of the class.
e. Add a new public static method getCustomer(int custID) that returns a reference to a Customer object. This method will use the custID to locate the customer object. To do this, iterate through the Customer array. Inspect the custID for each object using the getCustID() method and comparing the ID with the custID provided in the method call. The method should return a null if no customer is found and return the Customer reference if one is found. In chapter 11, you will create Exception objects to indicate an error when the customer is not found using the ID provided.
f. Since the maximum number of customers can change, add a public static method getMaxNumOfCustomers() that returns the int value of MAX_NUM_OF_CUSTOMERS.
2 - 9 Fundamentals of Java Programming Lab 7.6.1 Copyright 2004, Cisco Systems, Inc.
Step 2 Testing changes to the Bank class a. In the Teller class delete the existing code in the main method. Test the modifications to the
Bank class, by calling the Bank.getHoursOfOperation() method. A call to this method will be the first time the Bank class is loaded. The static method in the bank class will execute, and the prompt on the screen will request input for the maximum number of customers. To verify that the maximum number of customers is set to the value you entered, call the Bank. getMaxNumOfCustomers() method and verify that the value entered is stored in the variable. For testing purposes enter a small value such as 3 or 4.
b. Next create a number of customers, and add them to the Customer array in the bank class. Use the sample data provided below to create the customers, or your own data. You should use a loop to add the customers. Try to add more customers that the size of the Customer array. If you set the size of the array to 3, enter 4 customers. This will allow you to test if the addCustomer() method operates the way it should, which is it should return a true if the customer is added and a false if the customer is not added.
1. Use a do or while loop that tests a boolean value, which is set to true if the user wants to create a customer and false if they do not want to create any more customers. In the loop code first a set of statements to obtain data to create a Customer object. Use the Console class to obtain data for each of the arguments for the customer constructors. Store each of the values in local variables.
2. Recall that the Customer constructor is overloaded. Use the local variables as arguments to construct the Customer objects. Inside the loop create a single Customer object using the values of the local variables created in the previous step.
3. Now add the Customer to the array in the Bank class. To do this use the ternary conditional operator (Condition?true:false) to call the Bank.addCustomer(customer) method, passing the Customer created in the previous step as the argument to the method. This method returns the value true if the Customer was added, and false if the customer was not added. The ternary expression should evaluate the result of the method addCustomer. If the method returns true, the expression prints the statement “Customer added”, else the statement “Customer not added”. Make sure you use the conditional operator and not if statements. Examples are:
Bank.addCustomer(customer)?System.out.println(“Customer added”):System.out.println(“Customer not added”); or System.out.println((Bank.addCustomer(customer)? “Customer added”: “Customer not added”;
3 - 9 Fundamentals of Java Programming Lab 7.6.1 Copyright 2004, Cisco Systems, Inc.
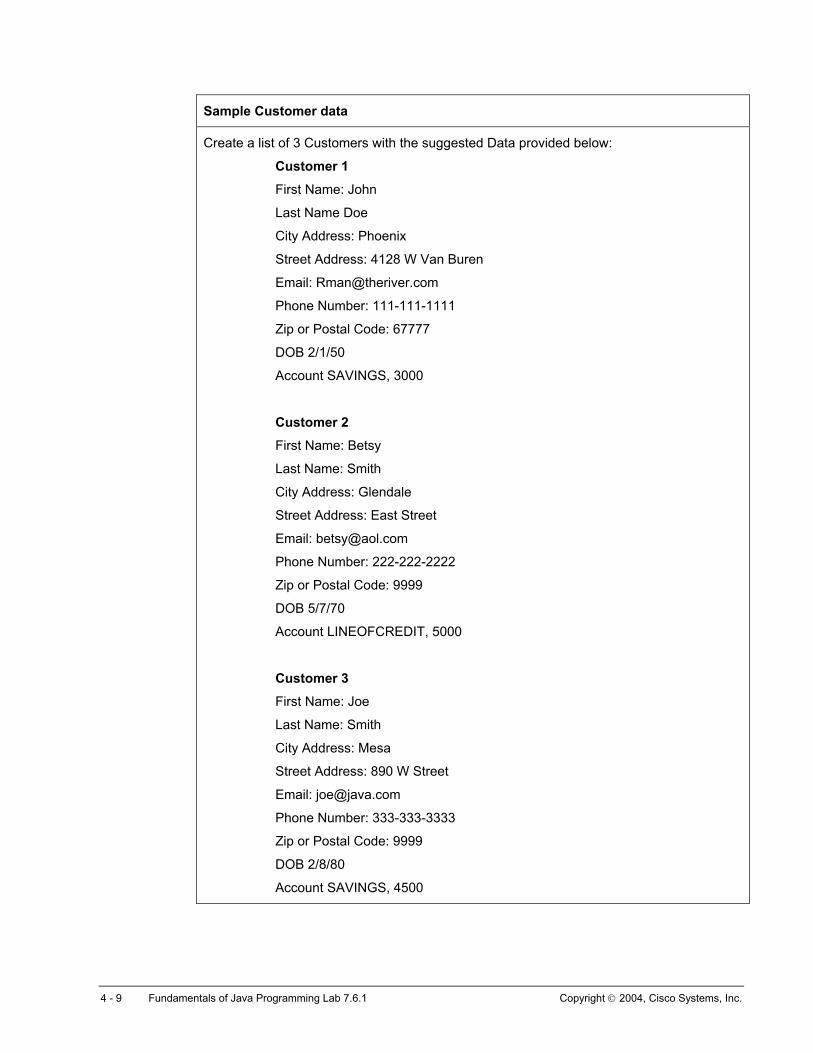
Sample Customer data
Create a list of 3 Customers with the suggested Data provided below:
Customer 1
First Name: John
Last Name Doe
City Address: Phoenix
Street Address: 4128 W Van Buren
Email: [email protected]
Phone Number: 111-111-1111
Zip or Postal Code: 67777
DOB 2/1/50
Account SAVINGS, 3000
Customer 2
First Name: Betsy
Last Name: Smith
City Address: Glendale
Street Address: East Street
Email: [email protected]
Phone Number: 222-222-2222
Zip or Postal Code: 9999
DOB 5/7/70
Account LINEOFCREDIT, 5000
Customer 3
First Name: Joe
Last Name: Smith
City Address: Mesa
Street Address: 890 W Street
Email: [email protected]
Phone Number: 333-333-3333
Zip or Postal Code: 9999
DOB 2/8/80
Account SAVINGS, 4500
4 - 9 Fundamentals of Java Programming Lab 7.6.1 Copyright 2004, Cisco Systems, Inc.
c. In the Teller class, add code to retrieve the Customer objects and print them. Using the cust ID of one of the customer objects created see if you are able to retrieve the customer from the array. If you recall from earlier labs, the custID values begin with 1000, and increment by 1. Call the getCustomer method. This method accepts an int as the argument. The method returns a reference to the Customer object. Once again use the ternary conditional operator that prints the message “customer found” if the customer is found. Recall that the method returns either a reference to a customer object or the value null. An example is:
System.out.println(Bank.getCustomer(1001) != null? “Customer found”:”Customer not found”);
Step 3 Modifying the Account class a. The business rules for the bank application require that the accounts for a customer must
include the ID of the customer as the ID for the account.
b. Modify the constructors in the Account class. Remove the no argument constructor. Since the rules of the bank require that an account cannot exist without the customer, you will enforce this by providing only one constructor that requires a reference to a Customer object, a balance, and an account type. By requiring that the account object have a reference to the Customer object, we ensure that an actual Customer is associated with the account.
c. In the constructor code the following actions.
1. Assign the amount to the balance, and the type to the acctType for the ID. Use the type String.
2. Create a String value obtaining the Customer ID from the customer object and appending the type to it. Use the type char. To do this, use this example:
Account(Customer cust, double amount, char type){ ID = cust. getCustID( ) + “” + type;
3. You will need to create a string using the syntax shown above. Another alternative is to use one of the wrapper classes as in this next example:
ID = Integer.toString(cust.getCustID()) + Character.toString(type);
d. Since an Account object cannot exist without the Customer object, we no longer will permit the changing of IDs for the Account object. Remove the setId() method.
e. Test the creation of account objects. In the Teller class add code after the last lines of code inserted in the previous steps.
1. Retrieve a Customer and hold a local reference variable to this Customer object.
2. Create an Account object using the customer object as one of the values for the constructor, use the amount of 1000 and the account type as ‘C’ for checking.
3. Display information on this Account object using the get methods
5 - 9 Fundamentals of Java Programming Lab 7.6.1 Copyright 2004, Cisco Systems, Inc.
Step 4 Modifying the Customer class to manage an array of accounts a. In the Customer class, modify the account field. Currently this field is a reference to a single
account object. Rename the field to accounts (plural). Change the type to reference an array of Account objects. Initialize this field to hold an array of the size 4. Recall the Customer can only own 4 accounts. This is shown in the following example:
Account [] accounts = new Account[4];
b. Modify the method setAccount(). Rename this method to addAccount(double balance, char type), with the return type boolean. This method will add account objects to the array. When the Account[] array is initialized, the elements of the array are initialized to null. Code the following actions:
1. Create a local boolean variable accountAdded. Set the value as false.
2. Check the field numOfAccounts. Proceed with the next steps if this value of this field is less than 5. Use an if statement to make this determination.
3. Create an account object using the current Customer reference, this, as one of the values, a balance and type provided in the argument.
4. Use a nested for loop to traverse through the Account[] array. As in the Bank class the code of this loop should locate the element that is available to store an account. In the Bank class a customer was added to the array for any element whose value was null. In this method the code is more complex. Not only will you want to test for the value of the element as null, you will want to be sure that an account of this type does not already exist. Two tests need to be performed. The first account is null then there are no more accounts and the array is empty. The reason is that a new method, removeAccount, is being added to this class. Thus it is possible that any element is null, and an account was removed from this. The logic for the code could be as follows:
• Check the first element. If it is null, then save the index of this element as available for use. Use a separate local variable.
• Check each of the following elements. Any element with an object should be checked for account type. To check for account type use the String methods as shown here:
if (account.getID().endsWith(Character.toString(type)) { break; }
The method should return a false if an account of the same type exists, otherwise the method should assign the Account object to the index element with the null value. Remember this index is saved in local variable.
5. Assign this Account object to the element located in the previous step. Assign the value true to the local variable accountAdded. Increase the value of number of accounts by 1. This will be 0 when the Customer object is first created. The value of this field is increased each time an account is added.
6. At the end of the method return the value of accountAdded. If the entire Array has been searched and no elements are available, or if the number of accounts =4, or if an account of the type exists, this variable will be false. If the loop was successful and an account object created, then the variable will be true.
6 - 9 Fundamentals of Java Programming Lab 7.6.1 Copyright 2004, Cisco Systems, Inc.
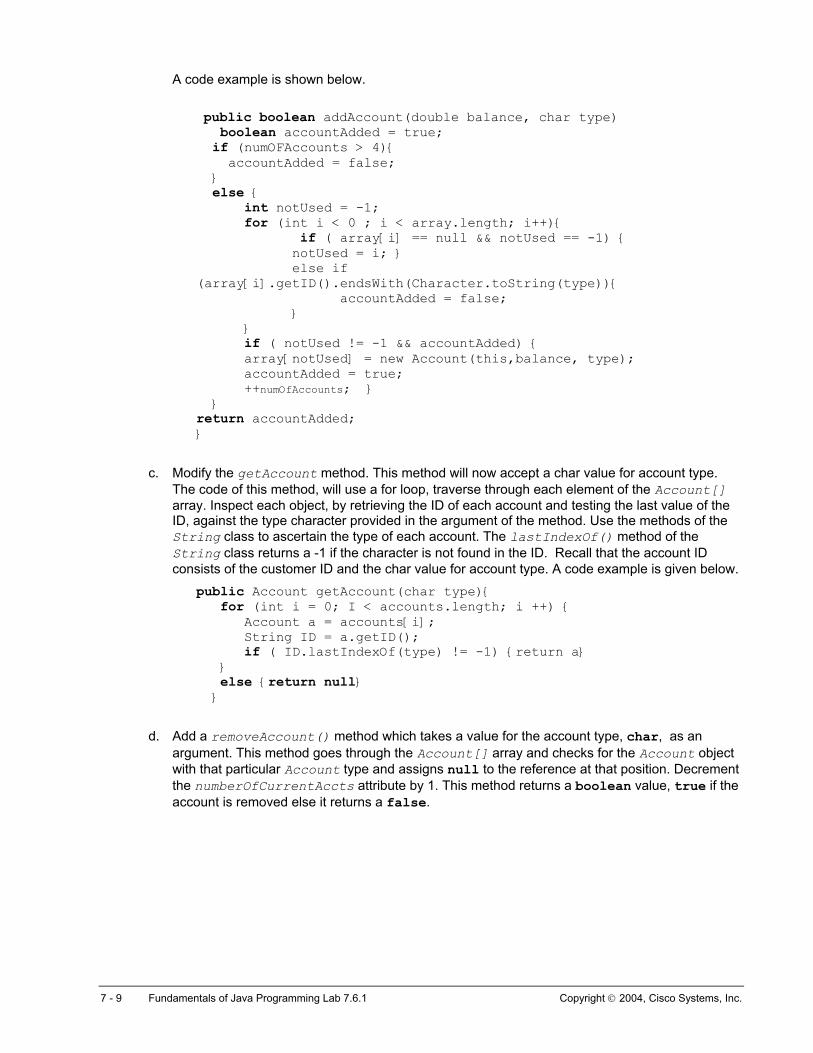
A code example is shown below.
public boolean addAccount(double balance, char type) boolean accountAdded = true; if (numOFAccounts > 4){ accountAdded = false; } else { int notUsed = -1; for (int i < 0 ; i < array.length; i++){ if ( array[i] == null && notUsed == -1) { notUsed = i; } else if (array[i].getID().endsWith(Character.toString(type)){ accountAdded = false; } } if ( notUsed != -1 && accountAdded) { array[notUsed] = new Account(this,balance, type); accountAdded = true; ++numOfAccounts; } } return accountAdded; }
c. Modify the getAccount method. This method will now accept a char value for account type. The code of this method, will use a for loop, traverse through each element of the Account[] array. Inspect each object, by retrieving the ID of each account and testing the last value of the ID, against the type character provided in the argument of the method. Use the methods of the String class to ascertain the type of each account. The lastIndexOf() method of the String class returns a -1 if the character is not found in the ID. Recall that the account ID consists of the customer ID and the char value for account type. A code example is given below.
public Account getAccount(char type){ for (int i = 0; I < accounts.length; i ++) { Account a = accounts[i]; String ID = a.getID(); if ( ID.lastIndexOf(type) != -1) {return a} } else {return null} }
d. Add a removeAccount() method which takes a value for the account type, char, as an argument. This method goes through the Account[] array and checks for the Account object with that particular Account type and assigns null to the reference at that position. Decrement the numberOfCurrentAccts attribute by 1. This method returns a boolean value, true if the account is removed else it returns a false.
7 - 9 Fundamentals of Java Programming Lab 7.6.1 Copyright 2004, Cisco Systems, Inc.
Step 5 Testing - Putting it all together
a. In the Teller class main method add code to perform these actions. You will use the add account method of the Customer class
b. Create a Checking and Savings account for the first customer. Recall the type values are C and S. Use any amounts you wish.
c. Create a Savings and Investment account for the Second customer, the type values are S and I. Use any amounts you wish.
d. Add another Savings account for the Second customer. Test the return value of the method to see if this account was added. Recall you have already added a savings account to the second customer.
e. Remove an account from the first customer.
f. Try to locate the account you removed. Does the method return an account or a null value?
Step 6 Documentation: Using the UMLTestTool, verify your JBANK classes match the JBANK UML diagram shown below.
Write javadoc comments for the methods introduced in this lab.
Step 7 Packaging Phase II of the banking application a. In BlueJ, first close the current project 7.6.1. Then from the menu select Project and New.
Navigate to the javacourse folder and locate the JBANK folder. Type in the name PhaseII
b. Select Edit and New package. Name the package jbank2. This name is case sensitive. You will see the icon for a folder in the project window.
c. Double-click and open the folder. Note the title at the top of the window. The title reads: phase II [jbank2]. This is the BlueJ representation of java packages. Although it might seem simple, in actuality a number of activities have occurred. As you now add classes to the package, each class will have the statement package automatically included in the source code.
d. Add classes from lab7.6.1into this package. To do this, while in the package folder, select edit > Add class from file. Navigate in the Look in List: box till you locate the folder lab7.6.1 in chap7. Open this folder and add each class to the package.
e. Compile all the classes added to the package. Open each class and make sure a package statement has been included at the top of each file.
f. In addition to creating packages using BlueJ, you can compress all of the class files into a single jar files. In most complex applications, the classes that make up the application are stored and executed from .jar files.
g. Double-click on the folder “go up”. This will now place you in the parent folder for the package. Select from the menu Project, and then export. In the dialog box select “Store as a jar file”. Also unselect the item “include source files”. The purpose of the jar file is to keep all the class files together. The source files are generally not included in a jar file of classes. Click the button continue. You will be presented with a dialog box to select a folder to save the jar file.
h. In the dialog file, navigate to JBANK folder inside the javacourse folder. Name the jar file bank2.
i. Once the jar file has been saved, close BlueJ. Locate the javacourse folder using the computer system file management program. Locate the folder JBANK. You should see the jar file bank2.jar saved in this folder.
8 - 9 Fundamentals of Java Programming Lab 7.6.1 Copyright 2004, Cisco Systems, Inc.
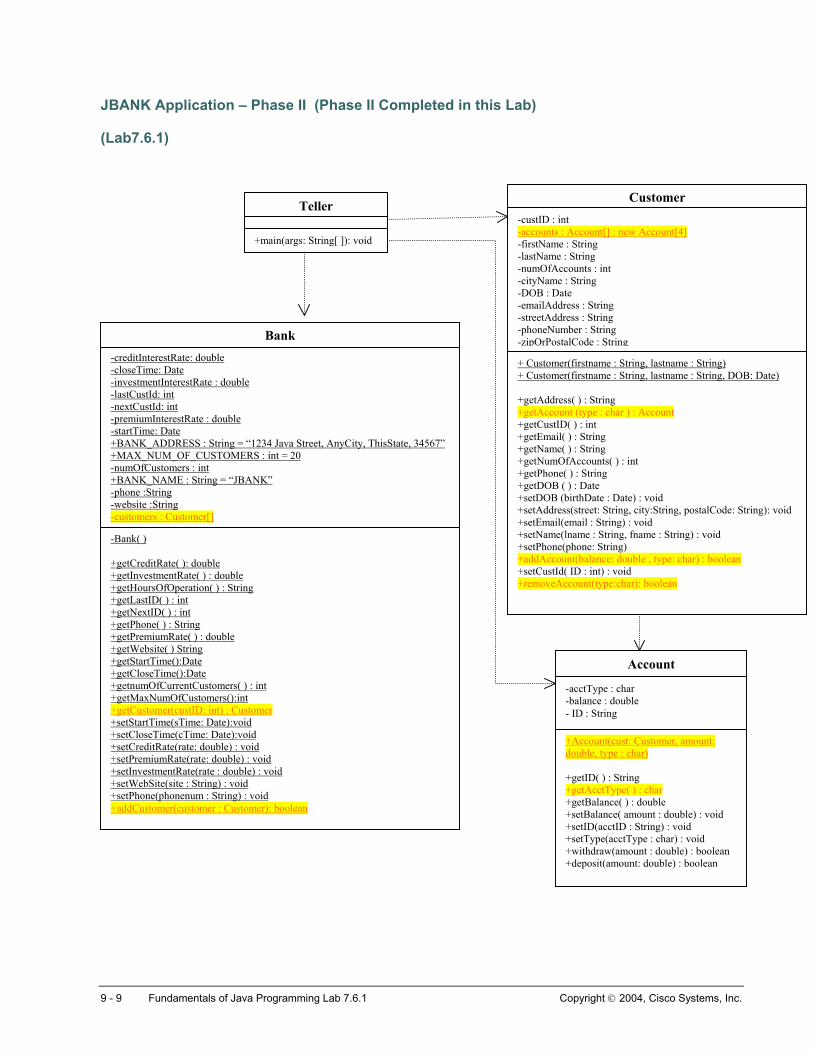
(Lab7.6.1)
Teller
+main(args: String[ ]): void
-custID : int -accounts : Account[] : new Account[4] -firstName : String -lastName : String -numOfAccounts : int -cityName : String -DOB : Date -emailAddress : String -streetAddress : String -phoneNumber : String -zipOrPostalCode : String
-Bank( ) +getCreditRate( ): double +getInvestmentRate( ) : double +getHoursOfOperation( ) : String +getLastID( ) : int +getNextID( ) : int +getPhone( ) : String +getPremiumRate( ) : double +getWebsite( ) String +getStartTime():Date +getCloseTime():Date +getnumOfCurrentCustomers( ) : i+getMaxNumOfCustomers():int +getCustomer(custID: int) : Custom+setStartTime(sTime: Date):void +setCloseTime(cTime: Date):void +setCreditRate(rate: double) : void+setPremiumRate(rate: double) : v+setInvestmentRate(rate : double) +setWebSite(site : String) : void +setPhone(phonenum : String) : vo+addCustomer(customer : Custom
-creditInterestRate: double -closeTime: Date -investmentInterestRate : double -lastCustId: int -nextCustId: int -premiumInterestRate : double -startTime: Date +BANK_ADDRESS : String = “12+MAX_NUM_OF_CUSTOMERS-numOfCustomers : int +BANK_NAME : String = “JBAN-phone :String -website :String -customers : Customer[]
Customer
9 - 9 Fundamentals of Java P
Bank
+ Customer(firstname : String, lastname : String) + Customer(firstname : String, lastname : String, DOB: Date) +getAddress( ) : String +getAccount (type : char ) : Account +getCustID( ) : int +getEmail( ) : String +getName( ) : String +getNumOfAccounts( ) : int +getPhone( ) : String +getDOB ( ) : Date +setDOB (birthDate : Date) : void +setAddress(street: String, city:String, postalCode: String): void +setEmail(email : String) : void +setName(lname : String, fname : String) : void +setPhone(phone: String) +addAccount(balance: double , type: char) : boolean +setCustId( ID : int) : void +removeAccount(type:char): boolean
nt
er
oid : void
id er): boolean
34 Java Street, AnyCity, ThisState, 34567” : int = 20
K”
+Account(cust: Customer, amount: double, type : char) +getID( ) : String +getAcctType( ) : char +getBalance( ) : double +setBalance( amount : double) : void +setID(acctID : String) : void +setType(acctType : char) : void +withdraw(amount : double) : boolean +deposit(amount: double) : boolean
-acctType : char -balance : double - ID : String
Account
rogramming Lab 7.6.1 Copyright 2004, Cisco Systems, Inc.
Lab 8.7.1 Implement Abstraction in the Phase III of the Banking Application
Estimated Time 30 minutes
Learning Objectives In this lab activity, the student will discover the common fields and behaviors for different types of account classes. The student will use these generalizations to define abstract classes.
Description/Scenario • As the programmer moves up the inheritance hierarchy, classes become more general and
probably more abstract. At some point, the ancestor class becomes so general that it is thought of as a guideline for other classes, rather than as a definition for an object that can be used. When the class in a hierarchy serves as a framework or guideline for other classes, the class is defined as abstract. In this case, the class is not expected to be used to create objects that store data and do work. The class is used to set boundaries for definitions of other subclasses. It is viewed as a common framework for a set of related subclasses.
• One of the goals of OOP design is to factor out the common operations and data to a higher level in the inheritance hierarchy. As the common operations are factored out, it may become apparent that the details of how the operations are implemented cannot be specified in the higher-level class.
• Abstraction in OO is accomplished in the definition of methods. Abstract methods define the return type, name and arguments but no code.
• An abstract method is declared using the following syntax: <modifiers> abstract <return-type> method-name (arguments);
• An abstract method does not have any body of code. • Abstract classes contain at least one abstract method. A class that has an abstract method must
be declared abstract using this syntax: <modifier> abstract class ClassName { }
• Abstract methods cannot be declared as final. Declarations of final indicate that the method, attribute or class is constant and cannot be changed. When a method is declared as abstract the expectation is that this declaration will change in some sub-class. The compiler enforces this rule.
• The banking application business rules declare that a Customer can own 4 types of accounts. For many operations the specificity of the account type is not as important as that it is an Account type. All of the four types of accounts, will have some common properties, they include the variables id, type, and balance. However the methods for deposit and withdraw have to be modified to implement the rules for operating on the different types of accounts.
1 - 4 Fundamentals of Java Programming Lab 8.7.1 Copyright 2004, Cisco Systems, Inc.
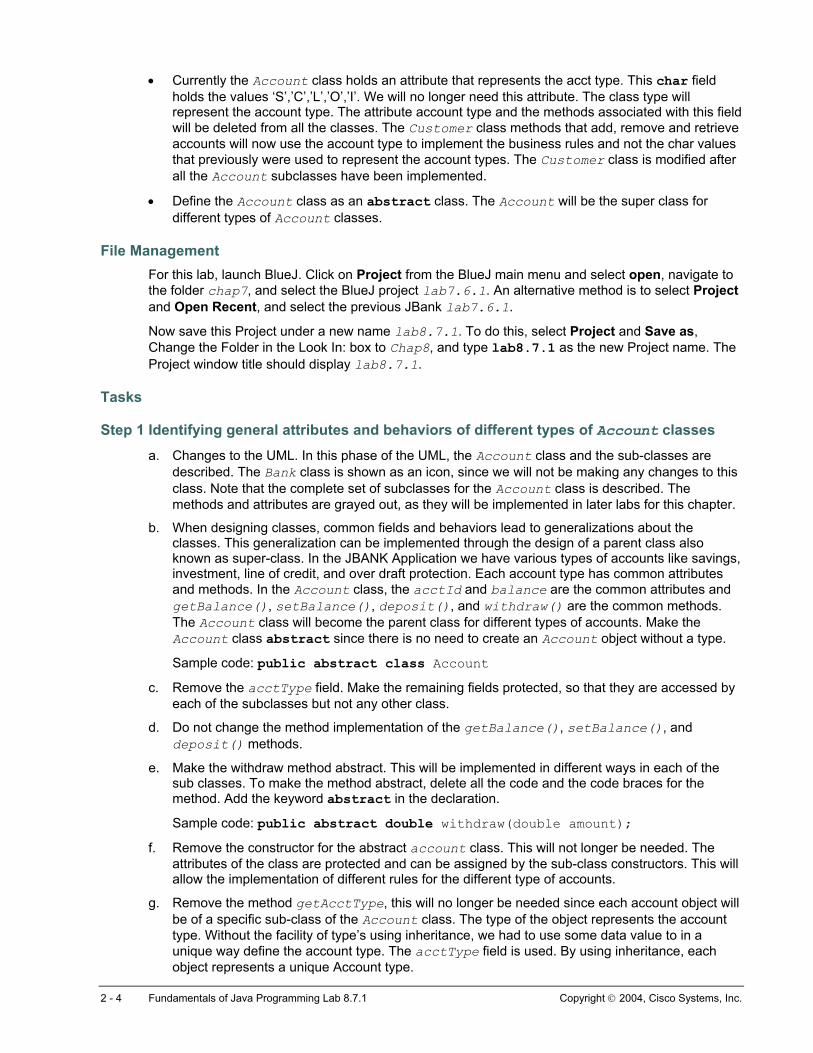
• Currently the Account class holds an attribute that represents the acct type. This char field holds the values ‘S’,’C’,’L’,’O’,’I’. We will no longer need this attribute. The class type will represent the account type. The attribute account type and the methods associated with this field will be deleted from all the classes. The Customer class methods that add, remove and retrieve accounts will now use the account type to implement the business rules and not the char values that previously were used to represent the account types. The Customer class is modified after all the Account subclasses have been implemented.
• Define the Account class as an abstract class. The Account will be the super class for different types of Account classes.
File Management For this lab, launch BlueJ. Click on Project from the BlueJ main menu and select open, navigate to the folder chap7, and select the BlueJ project lab7.6.1. An alternative method is to select Project and Open Recent, and select the previous JBank lab7.6.1.
Now save this Project under a new name lab8.7.1. To do this, select Project and Save as, Change the Folder in the Look In: box to Chap8, and type lab8.7.1 as the new Project name. The Project window title should display lab8.7.1.
Tasks
Step 1 Identifying general attributes and behaviors of different types of Account classes a. Changes to the UML. In this phase of the UML, the Account class and the sub-classes are
described. The Bank class is shown as an icon, since we will not be making any changes to this class. Note that the complete set of subclasses for the Account class is described. The methods and attributes are grayed out, as they will be implemented in later labs for this chapter.
b. When designing classes, common fields and behaviors lead to generalizations about the classes. This generalization can be implemented through the design of a parent class also known as super-class. In the JBANK Application we have various types of accounts like savings, investment, line of credit, and over draft protection. Each account type has common attributes and methods. In the Account class, the acctId and balance are the common attributes and getBalance(), setBalance(), deposit(), and withdraw() are the common methods. The Account class will become the parent class for different types of accounts. Make the Account class abstract since there is no need to create an Account object without a type.
Sample code: public abstract class Account
c. Remove the acctType field. Make the remaining fields protected, so that they are accessed by each of the subclasses but not any other class.
d. Do not change the method implementation of the getBalance(), setBalance(), and deposit() methods.
e. Make the withdraw method abstract. This will be implemented in different ways in each of the sub classes. To make the method abstract, delete all the code and the code braces for the method. Add the keyword abstract in the declaration.
Sample code: public abstract double withdraw(double amount); f. Remove the constructor for the abstract account class. This will not longer be needed. The
attributes of the class are protected and can be assigned by the sub-class constructors. This will allow the implementation of different rules for the different type of accounts.
g. Remove the method getAcctType, this will no longer be needed since each account object will be of a specific sub-class of the Account class. The type of the object represents the account type. Without the facility of type’s using inheritance, we had to use some data value to in a unique way define the account type. The acctType field is used. By using inheritance, each object represents a unique Account type.
2 - 4 Fundamentals of Java Programming Lab 8.7.1 Copyright 2004, Cisco Systems, Inc.
h. Remove the setAcctType() and the setId(String id) method.
i. The Account class automatically inherits from the Object class. The object class defines a toString() method. Override the toString() method to display the account id.
1. In the Teller class main method, create an instance of the Account class. Can the program be compiled?
Step 2 Documentation Using the Document “How to use UMLTestTool”, follow the instructions to verify your JBANK classes match the JBANK UML diagram shown below.
Write javadoc comments to match the changes made to the Account class.
3 - 4 Fundamentals of Java Programming Lab 8.7.1 Copyright 2004, Cisco Systems, Inc.
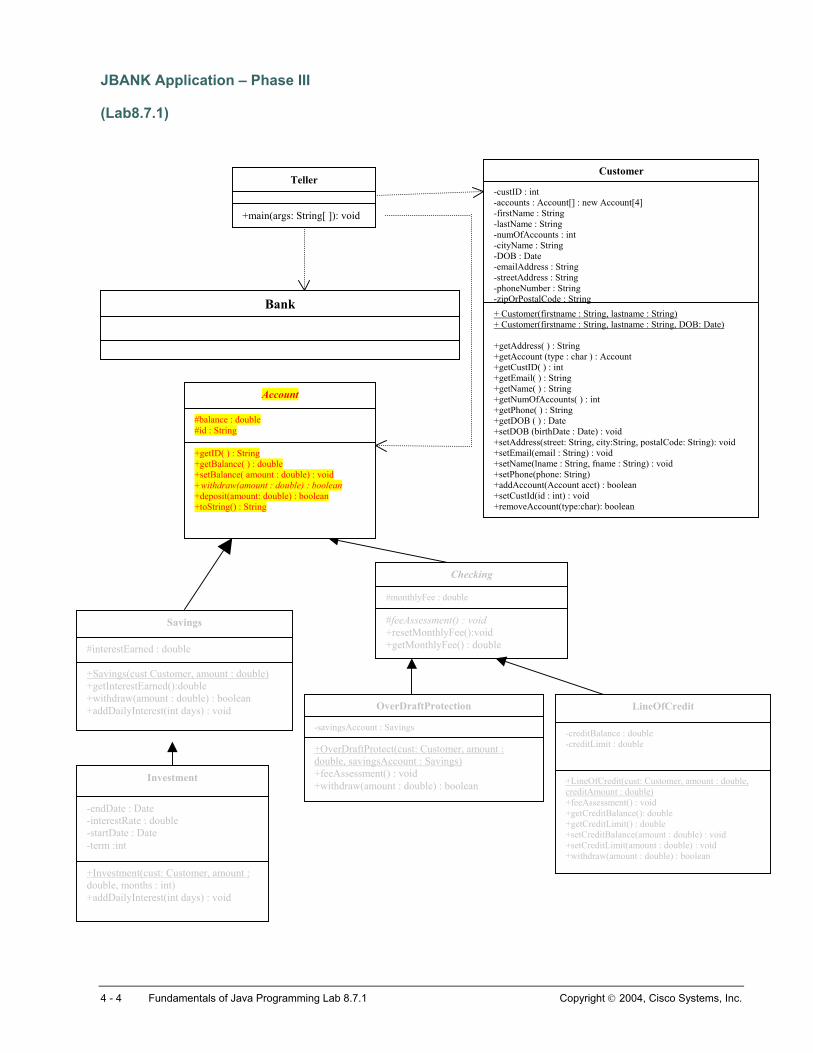
JBANK Application – Phase III
(Lab8.7.1)
Teller
+main(args: String[ ]): void
-custID : int -accounts : Account[] : new Account[4] -firstName : String -lastName : String -numOfAccounts : int -cityName : String -DOB : Date -emailAddress : String -streetAddress : String -phoneNumber : String -zipOrPostalCode : String + Customer(firstname : String, lastname : String) + Customer(firstname : String, lastname : String, DOB: Date) +getAddress( ) : String +getAccount (type : char ) : Account +getCustID( ) : int +getEmail( ) : String +getName( ) : String +getNumOfAccounts( ) : int +getPhone( ) : String +getDOB ( ) : Date +setDOB (birthDate : Date) : void +setAddress(street: String, city:String, postalCode: String): void +setEmail(email : String) : void +setName(lname : String, fname : String) : void +setPhone(phone: String) +addAccount(Account acct) : boolean +setCustId(id : int) : void +removeAccount(type:char): boolean
Checking
+getID( ) : String +getBalance( ) : double +setBalance( amount : double) : void +withdraw(amount : double) : boolean +deposit(amount: double) : boolean +toString() : String
#balance : double #id : String
Account
Bank
Customer
#feeAssessment() : void +resetMonthlyFee():void +getMonthlyFee() : double
#monthlyFee : double
+Savings(cust Customer, amount : double) +getInterestEarned():double +withdraw(amount : double) : boolean +addDailyInterest(int days) : void
#interestEarned : double
Savings
+OverDraftProtect(cust: Customer, amount : double, savingsAccount : Savings) +feeAssessment() : void +withdraw(amount : double) : boolean
-savingsAccount : Savings
OverDraftProtection LineOfCredit
-creditBalance : double -creditLimit : double
+LineOfCredit(cust: Customer, amount : double, creditAmount : double) +feeAssessment() : void +getCreditBalance(): double +getCreditLimit() : double +setCreditBalance(amount : double) : void +setCreditLimit(amount : double) : void +withdraw(amount : double) : boolean
+Investment(cust: Customer, amount : double, months : int) +addDailyInterest(int days) : void
-endDate : Date -interestRate : double -startDate : Date -term :int
Investment
4 - 4 Fundamentals of Java Programming Lab 8.7.1 Copyright 2004, Cisco Systems, Inc.
Lab 8.7.2.1 Implement Inheritance to create the Savings and Investment subclasses
Estimated Time 60 minutes
Learning Objectives In this lab activity, the student will apply inheritance principles to extend concrete classes from abstract super-classes, and extend concrete classes from concrete super classes.
Concepts • Programmers arrive at abstract and concrete designs of classes in one of two ways:
o Generalization, or discovery of general behaviors among classes
o Specialization, or identification of specific adaptation of general behaviors or adoption of new behaviors in an inherited class
• When designing classes, common fields and behaviors lead to generalizations about the classes. These generalizations can be implemented through the design of parent classes also known as superclasses. Superclasses can then be designed to describe required and optional fields and behaviors. A superclass can be an abstract representation of common behaviors and data.
• Generalizations of classes into a superclass can be either concrete or abstract.
• The term abstract is applied to classes from which no objects are expected to be created. When the superclass is an abstract representation, no objects of this class will be created. Superclasses can also be concrete classes. This particular design of classes is often used, when the superclass could represent a number of objects, and the subclasses represent variations of this object.
• Subclassing can occur with both abstract and concrete classes. The keyword extends establishes the “is a” relationship with the parent class.
• In operating on objects that are part of a class hierarchy, several new keywords are used.
• The keyword extend is used to declare a class as a subclass of another. The keyword abstract is used to declare a class as an abstract representation.
• A keyword that allow a programmer to reference the particular object being operated on is the this keyword, and super is used to represent the attributes and behaviors of the parent class.
• Overloading is the technique of providing multiple declarations of the same method, with different arguments. Overloading occur in a specific class. Overloading provides flexibility in the operations of an object, allowing for multiple inputs.
• Overriding is used only in the context of inheritance. Overriding is the technique of modifying a parent method in a subclass.
1 - 7 Fundamentals of Java Programming Lab 8.7.2.1 Copyright 2004, Cisco Systems, Inc.
• These are the rules to remember as overloading and overriding are implemented in subclass designs.
o Any method that is repeated in the subclass with the same name and different arguments is an overloading of the parent method in the child class.
o Any method that is repeated in the child class, with the same name, arguments, and return type as that of the parent class is an overriding of the parent method.
o Overriding of methods allows for specialized implementation in a subclass.
o Abstract methods of the parent class must be overridden in a concrete implementation of the subclass.
o When abstract methods of the parent class are not overridden in the subclass, the subclass must be declared abstract.
o Static methods of a parent class cannot be overridden in a subclass.
o Subclass class methods, overridden from the parent class, cannot be more restrictive in access than that of the parent method. For example if the parent class method is public, the subclass overridden version cannot be protected =, default or private.
o Private methods of the parent class cannot be overridden in the subclass.
o In order to maintain encapsulation, declare parent attributes as protected.
o Abstract classes cannot be declared as final, nor can abstract methods.
o Constructors are not inherited in the subclass. The parent constructor must be called explicitly in any constructors implemented in the subclass. The call to the parent constructor is of the form super(). This must be the first statement in the subclass constructor.
• The class type will represent the account type. The attribute account type and the methods associated with this field will be deleted from all the classes. The Customer class methods that add, remove, and retrieve accounts will now use the account type to implement the business rules and not the char values that previously were used to represent the account types. The Customer class is modified after all the Account subclasses have been implemented.
Business Rules • In the lab, create a concrete Savings Account class from the abstract Account class
defined in the previous lab. Several business rules are implemented in this class.
o Savings accounts require a minimum balance of ten dollars. When a new customer joins the bank they are assigned a savings account and must deposit at least ten dollars. They can deposit more if they wish. Customers will be allowed to withdraw from the savings account at any time. Customers cannot withdraw amounts exceeding the amount in their account less ten dollars. The savings interest rates are calculated on daily basis depending on the premium interest rates set in the Bank class.
o Implement a constructor in the Savings class that accepts a Customer object, which will be used to obtain part of the Account ID information, an amount that represents the balance. The Account ID is given by CustomerID. We will no longer require that the account type is identified as part of the account ID. By creating very specific classes of the Account class, the class type serves this purpose.
o The savings interest rate is 3% per year and it is calculated daily.
2 - 7 Fundamentals of Java Programming Lab 8.7.2.1 Copyright 2004, Cisco Systems, Inc.
• Extend the Investment Account as a concrete class from the Savings class several business rules are implemented in this class.
o Investment accounts are used to save money for an extended period of time. This account provides the customer with a higher interest rate based on how long they invest money in the account. The longer they keep the money in the account the higher the interest rate they will earn. Investment accounts require a minimum amount to open the account. The minimum amount is 100 dollars, and the minimum investment term is six months. An investment term is how long the money has to remain in the account without any withdrawals from the account. Investment interest rates are at 0-6 months at 5% and 6 -12 months at 6% and 12+ months at 7%. Interest calculation is compounded monthly. The penalty for early withdraw is 20%.
File Management For this lab, launch BlueJ. Click on Project from the BlueJ main menu and select Open, navigate to the folder chap8, and select the BlueJ project lab8.7.1. An alternative method is to select Project and Open Recent, and select the previous JBANK lab8.7.1.
Now save this Project under a new name lab8.7.2.1. To do this, select Project and Save as, Change the Folder in the Look In: box to chap8, and type lab8.7.2.1 as the new Project name. The Project window title should display lab8.7.2.1.
Tasks
Step 1 Extending Savings class from Account class a. Create the Savings class, which extends from the abstract Account class. The Savings class
is a concrete class, in object oriented programming the term concrete means a class from which an object can be created and used. To keep track of the interest earned define a protected attribute of type double called interestEarned.
b. Add a Savings constructor that takes a reference to the Customer object and a double amount. The form of the constructor is shown in the following example:
Savings(Customer cust, double amount);
c. Inside the constructor, the first statement should be a call to the parent default constructor. Recall in the previous lab all the constructors of the Account class were deleted, and the default constructor is implied. The next statements should assign an ID to the ID field using the expression shown in the following example:
ID = Integer.toString(cust.getCustID()) ;
Recall that the account type is no longer needed.
d. Implement the withdraw method in this class. In this method, the amount to be withdrawn cannot reduce the balance below the minimum of $10.00 dollars. The method returns a true if the balance is reduced by the amount, and a false if unable to reduce the balance by the amount.
3 - 7 Fundamentals of Java Programming Lab 8.7.2.1 Copyright 2004, Cisco Systems, Inc.
e. Define the method addDailyInterest() which takes an int for the number of days to add the interest. This method applies the following formula to calculate the interest. The result is stored in the interestEarned field, and the interestEarned added to the balance. This is the only method by which the interestEarned is assigned a value. This field interestEarned is protected to allow subclasses access to the field to set interest rates as appropriate for the type of account. The formula to calculate the interest is shown below:
The calculation for the interest earnings on a balance uses the regular compound interest formula: A = Future amount (interest earned + balance) P = Present Amount (balance) r = annual interest rate (as a decimal, 3 % annual, .03/365 for a daily rate) n = number of times the interest compounded per year (number of days in a year) t = term of the interest calculation (number of days) A = P(1 + r/n) ^ n*t (^ is the symbol for exponentiation. In Java, the Math.power() method is used. To apply this formula, the following example can be used: A is the final value for the balance P is the balance amount r is the interest rate n is 365 if the interest is compounded daily. t is the term of the investment. A = P(1 + r/n) ^ n*t
In this method do the following:
• Create a local variable double f
• Assign the result of the following expression to f:
Math.pow((balance * (1 + (.03/365))),(365 * days));
days is the int value provided to this method. The number of days is provided to figure out interest earned for each quarter or each month.
• The local variable f contains both the interest earned and the balance. To calculate the interestEarned, use the following expression:
interestEarned = f – balance;
• After storing the interest earned in the field interestEarned, then update the balance with the value of f, using the following expression:
balance =f;
• Example of the method call to this method would be as follows:
addDailyInterest(90);
f. Define the getInterestEarned() method which returns the interestEarned.
4 - 7 Fundamentals of Java Programming Lab 8.7.2.1 Copyright 2004, Cisco Systems, Inc.
Step 2 Extending Investment Account from the Savings Account class a. Create an Investment class, which extends from Savings. The Investment class is to be
declared final. No subclasses can be derived from this class.
public final class Investment extends Savings { } b. The investment account is a savings account that provides a user with higher percentage
interest rates. The investment account accumulates interest based on different rates for different terms. The interest is calculated on the balance, using the number of days, and the rate for the specific term.
c. Add the following private attributes. Define one private attribute of type date to hold the startDate of the investment and another private attribute of type date to hold the endDate Define a private attribute of type int to hold the term. The term is the amount of time that the money is to be invested. Define a private attribute of type double to store the interestRate based on the term.
d. The constructor for the Investment account accepts a reference to the customer associated with the account, an amount for the investment, and the term of the investment.
• The constructor’s first statement is a call to super, passing the customer reference and the amount. Then the term is assigned to the object field term.
• The constructor should verify that the months provided is a value of six or more. Create a local variable term. Assign this variable a value of six if the number provided by the user is less than six. Otherwise, assign this the value provided by the argument months.
• The constructor will also calculate the start and end date for the investment. Since the start date should be the date the account is created, the start date will be assigned the result of the following expression:
Calendar s = new GregorianCalendar();
startDate = s.getTime(): // This will obtain the current date for this field.
• The end date will be assigned using the expression shown in the example below. In this example, s is the variable defined in the previous step.
s.add(Calendar.MONTH, term ); // this will add the term in months to the calendar date value endDate = s.getTime(); // retrieve the new end date
e. The interest rate is calculated based on the term of the investment. The local variable term holds the value for the number of months for the investment. The Business rule implemented regarding interest rates is that minimum investment term is six months. Investment interest rates are at 0-6 months at 5% and 6 -12 months at 6% and 12+ months at 7%. An example of the logic that can be used to calculate the interest rate is given below:
if (months < =6) { interestRate = .05;
}
else if (months >6 & months <= 12){ interestRate = .06;
}
else { interestRate = .07;
}
5 - 7 Fundamentals of Java Programming Lab 8.7.2.1 Copyright 2004, Cisco Systems, Inc.
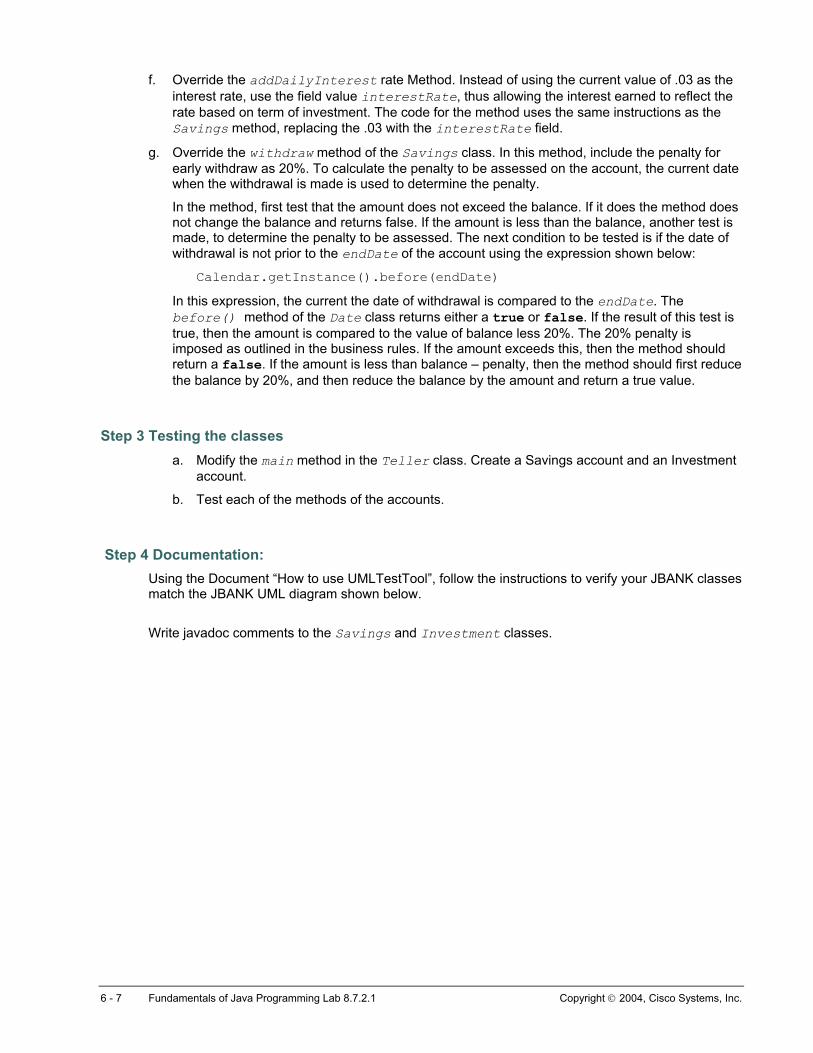
f. Override the addDailyInterest rate Method. Instead of using the current value of .03 as the interest rate, use the field value interestRate, thus allowing the interest earned to reflect the rate based on term of investment. The code for the method uses the same instructions as the Savings method, replacing the .03 with the interestRate field.
g. Override the withdraw method of the Savings class. In this method, include the penalty for early withdraw as 20%. To calculate the penalty to be assessed on the account, the current date when the withdrawal is made is used to determine the penalty.
In the method, first test that the amount does not exceed the balance. If it does the method does not change the balance and returns false. If the amount is less than the balance, another test is made, to determine the penalty to be assessed. The next condition to be tested is if the date of withdrawal is not prior to the endDate of the account using the expression shown below:
Calendar.getInstance().before(endDate)
In this expression, the current the date of withdrawal is compared to the endDate. The before() method of the Date class returns either a true or false. If the result of this test is true, then the amount is compared to the value of balance less 20%. The 20% penalty is imposed as outlined in the business rules. If the amount exceeds this, then the method should return a false. If the amount is less than balance – penalty, then the method should first reduce the balance by 20%, and then reduce the balance by the amount and return a true value.
Step 3 Testing the classes a. Modify the main method in the Teller class. Create a Savings account and an Investment
account.
b. Test each of the methods of the accounts.
Step 4 Documentation: Using the Document “How to use UMLTestTool”, follow the instructions to verify your JBANK classes match the JBANK UML diagram shown below.
Write javadoc comments to the Savings and Investment classes.
6 - 7 Fundamentals of Java Programming Lab 8.7.2.1 Copyright 2004, Cisco Systems, Inc.
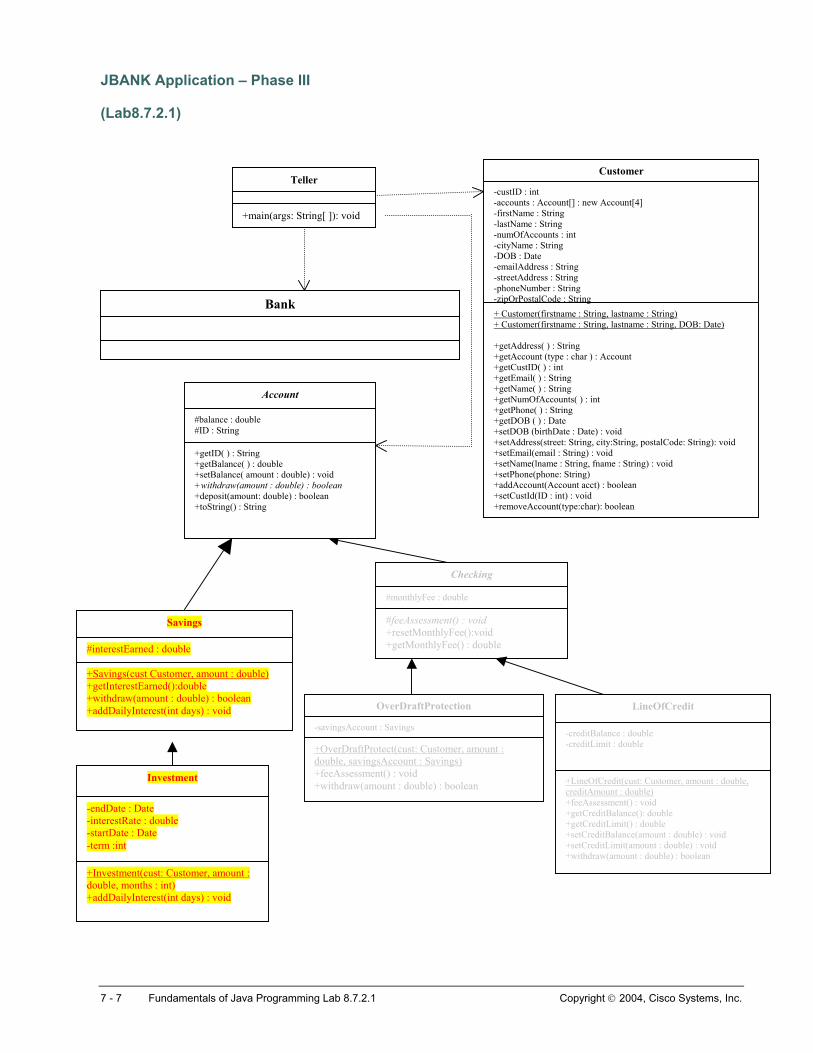
JBANK Application – Phase III
(Lab8.7.2.1)
Teller
+main(args: String[ ]): void
-custID : int -accounts : Account[] : new Account[4] -firstName : String -lastName : String -numOfAccounts : int -cityName : String -DOB : Date -emailAddress : String -streetAddress : String -phoneNumber : String -zipOrPostalCode : String + Customer(firstname : String, lastname : String) + Customer(firstname : String, lastname : String, DOB: Date) +getAddress( ) : String +getAccount (type : char ) : Account +getCustID( ) : int +getEmail( ) : String +getName( ) : String +getNumOfAccounts( ) : int +getPhone( ) : String +getDOB ( ) : Date +setDOB (birthDate : Date) : void +setAddress(street: String, city:String, postalCode: String): void +setEmail(email : String) : void +setName(lname : String, fname : String) : void +setPhone(phone: String) +addAccount(Account acct) : boolean +setCustId(ID : int) : void +removeAccount(type:char): boolean
Checking
+getID( ) : String +getBalance( ) : double +setBalance( amount : double) : void +withdraw(amount : double) : boolean +deposit(amount: double) : boolean +toString() : String
#balance : double #ID : String
Account
Bank
Customer
#feeAssessment() : void +resetMonthlyFee():void +getMonthlyFee() : double
#monthlyFee : double
+Savings(cust Customer, amount : double) +getInterestEarned():double +withdraw(amount : double) : boolean +addDailyInterest(int days) : void
#interestEarned : double
Savings
+OverDraftProtect(cust: Customer, amount : double, savingsAccount : Savings) +feeAssessment() : void +withdraw(amount : double) : boolean
-savingsAccount : Savings
OverDraftProtection LineOfCredit
-creditBalance : double -creditLimit : double
+LineOfCredit(cust: Customer, amount : double, creditAmount : double) +feeAssessment() : void +getCreditBalance(): double +getCreditLimit() : double +setCreditBalance(amount : double) : void +setCreditLimit(amount : double) : void +withdraw(amount : double) : boolean
+Investment(cust: Customer, amount : double, months : int) +addDailyInterest(int days) : void
-endDate : Date -interestRate : double -startDate : Date -term :int
Investment
7 - 7 Fundamentals of Java Programming Lab 8.7.2.1 Copyright 2004, Cisco Systems, Inc.
Lab 8.7.2.2 Abstraction at Several Levels, Create Checking Account and subclasses
Estimated Time 30 minutes
Learning Objectives In this lab activity, the student will apply inheritance principles for continuing the abstraction into a child class.
Description/Scenario • Inherit an abstract class from an abstract superclass
• Overloading, Overriding, and the use of the keyword super
• Create abstract Checking Account that extends the Account class
• Create concrete classes like LineOfCredit and OverDraftProtect from the abstract Checking Account class
Business Rules • The Checking account class is an abstract class, derived from the parent class Account. It is
not uncommon, that the layers of abstraction extend beyond the first class. At each layer of abstraction new information is added to the framework.
• According to business rules a checking account should be of type LineOfCredit and OverDraftProtection. Both are specialized types of checking accounts. Although we will not be creating checking account objects, the Checking account class created as an abstraction can provide a framework for the common features of any checking account class. Additionally, if new types of checking services are implemented in the bank, then new types of checking accounts can be created, and the Overdraft and Line of credit classes that use the current types do not need to be revised to accommodate any new types. Classes will reference these specific checking accounts in the form of their parent type Checking account.
• The Overdraft Protection (ODP) account — Checking accounts must have overdraft protection links to the savings account. What is overdraft? When you try to withdraw money from your checking account and the amount you wish to withdraw is more than the amount of money in your checking account, then you are overdrafting your checking account. The JBANK provides all its customers overdraft protection by linking the customer’s checking account balance to their savings account balance. This type of bank account allows the customer to deposit any amount of money and withdraw any amount as long as there is adequate money in the checking account, the savings account, or a combination of both. For example, if a customer has 40 dollars in the checking account and 100 dollars in the savings account, then the customer can withdraw a maximum of 140 dollars. A withdrawal of this amount will cause the savings account balance to become zero and the checking account balance to become zero. A transaction fee is assessed to the overdraft account for ordering checks, bouncing checks, overdrafts, and so on. The fee assessed for each overdraft transaction that requires a withdrawal from the savings account is $3.00.
• Line of credit (LOC) accounts — LOC accounts are tied to a credit card and have a fixed maximum credit limit. The credit limit varies depending on the customer’s creditworthiness and payments made to the credit card. In this type of checking account overdraft protection is
1 - 7 Fundamentals of Java Programming Lab 8.7.2.2 Copyright 2004, Cisco Systems, Inc.
provided by allowing a customer to withdraw money in excess of current balance, by drawing down the credit balance in the credit card. As in the transaction fee for savings account overdraft withdrawals, withdrawals in excess of the balance will reduce the credit balance and will increase the fee assessed on the account. The fee assessed is for the amount that has been covered by the credit balance. This value is the difference between the credit balance and the credit limit. The difference represents the amount used to assess a fee. The assessment is based on daily finance charge based 21% annual rate finance charge.
File Management For this lab, launch BlueJ. Click on Project from the BlueJ main menu and select Open, navigate to the folder chap8, and select the BlueJ project lab8.7.2.1. An alternative method is to select Project and Open Recent, and select the previous JBANK lab8.7.2.1.
Now save this Project under a new name lab8.7.2.2. To do this, select Project and Save as, Change the Folder in the Look In: box to chap8, and type lab8.7.2.2 as the new Project name. The Project window title should display lab8.7.2.2.
Tasks
Step 1 Implementing abstract Checking account class a. Identify the common attributes and behaviors of the two types of Checking accounts,
LineOfCredit and OverDraftProtection, and define them in the Checking class. The common attributes and behaviors include all described in the Account class, along with the following list:
• Both types of Checking accounts are required to keep track of the fee assessed on the transactions on a monthly basis.
• Define a protected attribute called monthlyFee of type double. This attribute is used to store the total amount of monthly fees assessed on the account. For this application the monthly fees assessed vary by type of checking account. The value is this field is not used for any purpose other than to provide information on feesAssessed.
• Each of the checking accounts has its own rules for feeAssessment(), so define a protected abstract feeAssessment() method, as shown in the example below:
protected abstract void feeAssessment();
b. The abstract class Checking does not require a constructor, since the parent class Account uses the default constructor.
c. Define a public resetMonthlyFee() method that will zero out the monthly fee. This method is called at the end of each month.
d. Define the public getMonthlyFee() method to return the monthlyFee.
2 - 7 Fundamentals of Java Programming Lab 8.7.2.2 Copyright 2004, Cisco Systems, Inc.
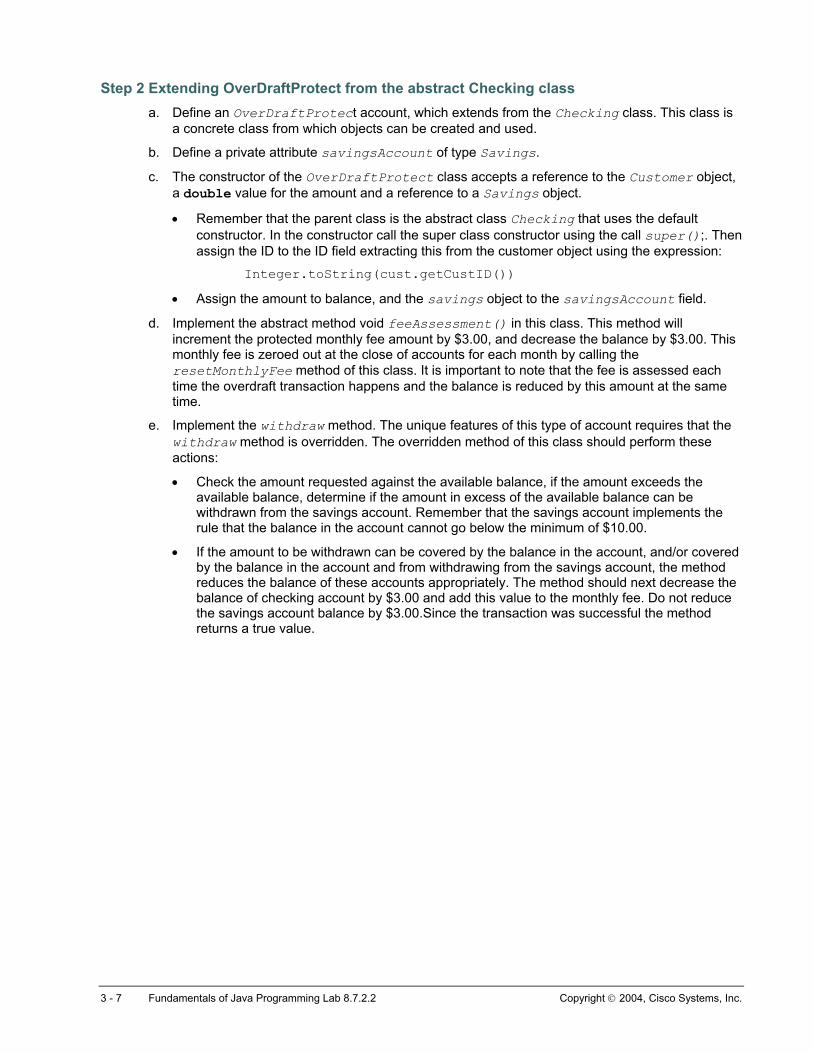
Step 2 Extending OverDraftProtect from the abstract Checking class a. Define an OverDraftProtect account, which extends from the Checking class. This class is
a concrete class from which objects can be created and used.
b. Define a private attribute savingsAccount of type Savings.
c. The constructor of the OverDraftProtect class accepts a reference to the Customer object, a double value for the amount and a reference to a Savings object.
• Remember that the parent class is the abstract class Checking that uses the default constructor. In the constructor call the super class constructor using the call super();. Then assign the ID to the ID field extracting this from the customer object using the expression:
Integer.toString(cust.getCustID())
• Assign the amount to balance, and the savings object to the savingsAccount field.
d. Implement the abstract method void feeAssessment() in this class. This method will increment the protected monthly fee amount by $3.00, and decrease the balance by $3.00. This monthly fee is zeroed out at the close of accounts for each month by calling the resetMonthlyFee method of this class. It is important to note that the fee is assessed each time the overdraft transaction happens and the balance is reduced by this amount at the same time.
e. Implement the withdraw method. The unique features of this type of account requires that the withdraw method is overridden. The overridden method of this class should perform these actions:
• Check the amount requested against the available balance, if the amount exceeds the available balance, determine if the amount in excess of the available balance can be withdrawn from the savings account. Remember that the savings account implements the rule that the balance in the account cannot go below the minimum of $10.00.
• If the amount to be withdrawn can be covered by the balance in the account, and/or covered by the balance in the account and from withdrawing from the savings account, the method reduces the balance of these accounts appropriately. The method should next decrease the balance of checking account by $3.00 and add this value to the monthly fee. Do not reduce the savings account balance by $3.00.Since the transaction was successful the method returns a true value.
3 - 7 Fundamentals of Java Programming Lab 8.7.2.2 Copyright 2004, Cisco Systems, Inc.
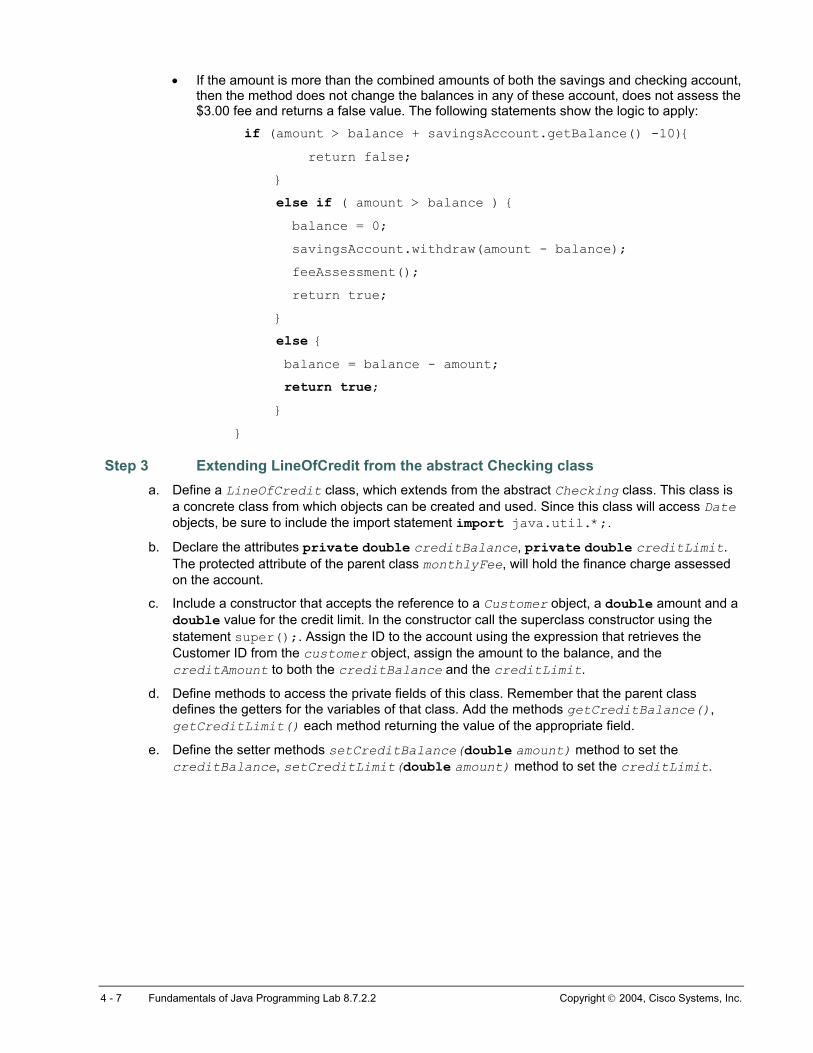
• If the amount is more than the combined amounts of both the savings and checking account, then the method does not change the balances in any of these account, does not assess the $3.00 fee and returns a false value. The following statements show the logic to apply:
if (amount > balance + savingsAccount.getBalance() -10){ return false;
}
else if ( amount > balance ) { balance = 0;
savingsAccount.withdraw(amount - balance);
feeAssessment();
return true;
}
else { balance = balance - amount;
return true; }
}
Step 3 Extending LineOfCredit from the abstract Checking class a. Define a LineOfCredit class, which extends from the abstract Checking class. This class is
a concrete class from which objects can be created and used. Since this class will access Date objects, be sure to include the import statement import java.util.*;.
b. Declare the attributes private double creditBalance, private double creditLimit. The protected attribute of the parent class monthlyFee, will hold the finance charge assessed on the account.
c. Include a constructor that accepts the reference to a Customer object, a double amount and a double value for the credit limit. In the constructor call the superclass constructor using the statement super();. Assign the ID to the account using the expression that retrieves the Customer ID from the customer object, assign the amount to the balance, and the creditAmount to both the creditBalance and the creditLimit.
d. Define methods to access the private fields of this class. Remember that the parent class defines the getters for the variables of that class. Add the methods getCreditBalance(), getCreditLimit() each method returning the value of the appropriate field.
e. Define the setter methods setCreditBalance(double amount) method to set the creditBalance, setCreditLimit(double amount) method to set the creditLimit.
4 - 7 Fundamentals of Java Programming Lab 8.7.2.2 Copyright 2004, Cisco Systems, Inc.
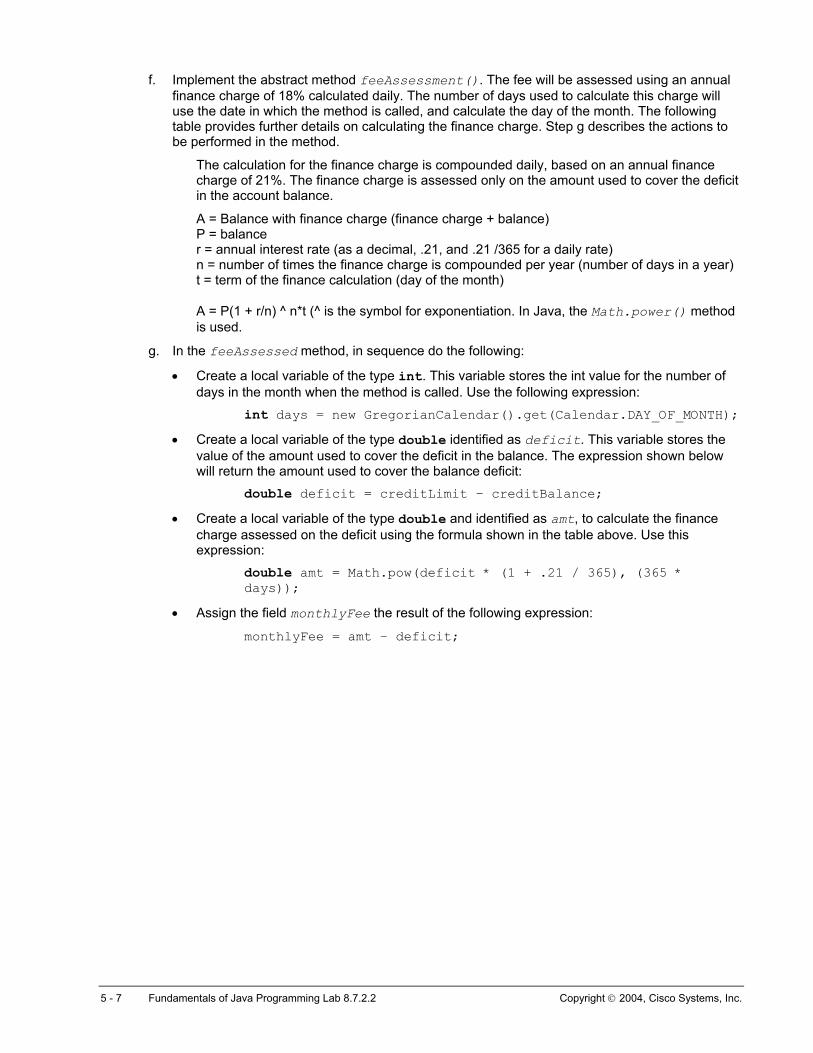
f. Implement the abstract method feeAssessment(). The fee will be assessed using an annual finance charge of 18% calculated daily. The number of days used to calculate this charge will use the date in which the method is called, and calculate the day of the month. The following table provides further details on calculating the finance charge. Step g describes the actions to be performed in the method.
The calculation for the finance charge is compounded daily, based on an annual finance charge of 21%. The finance charge is assessed only on the amount used to cover the deficit in the account balance.
A = Balance with finance charge (finance charge + balance) P = balance r = annual interest rate (as a decimal, .21, and .21 /365 for a daily rate) n = number of times the finance charge is compounded per year (number of days in a year) t = term of the finance calculation (day of the month) A = P(1 + r/n) ^ n*t (^ is the symbol for exponentiation. In Java, the Math.power() method is used.
g. In the feeAssessed method, in sequence do the following:
• Create a local variable of the type int. This variable stores the int value for the number of days in the month when the method is called. Use the following expression:
int days = new GregorianCalendar().get(Calendar.DAY_OF_MONTH); • Create a local variable of the type double identified as deficit. This variable stores the
value of the amount used to cover the deficit in the balance. The expression shown below will return the amount used to cover the balance deficit:
double deficit = creditLimit – creditBalance;
• Create a local variable of the type double and identified as amt, to calculate the finance charge assessed on the deficit using the formula shown in the table above. Use this expression:
double amt = Math.pow(deficit * (1 + .21 / 365), (365 * days));
• Assign the field monthlyFee the result of the following expression:
monthlyFee = amt – deficit;
5 - 7 Fundamentals of Java Programming Lab 8.7.2.2 Copyright 2004, Cisco Systems, Inc.
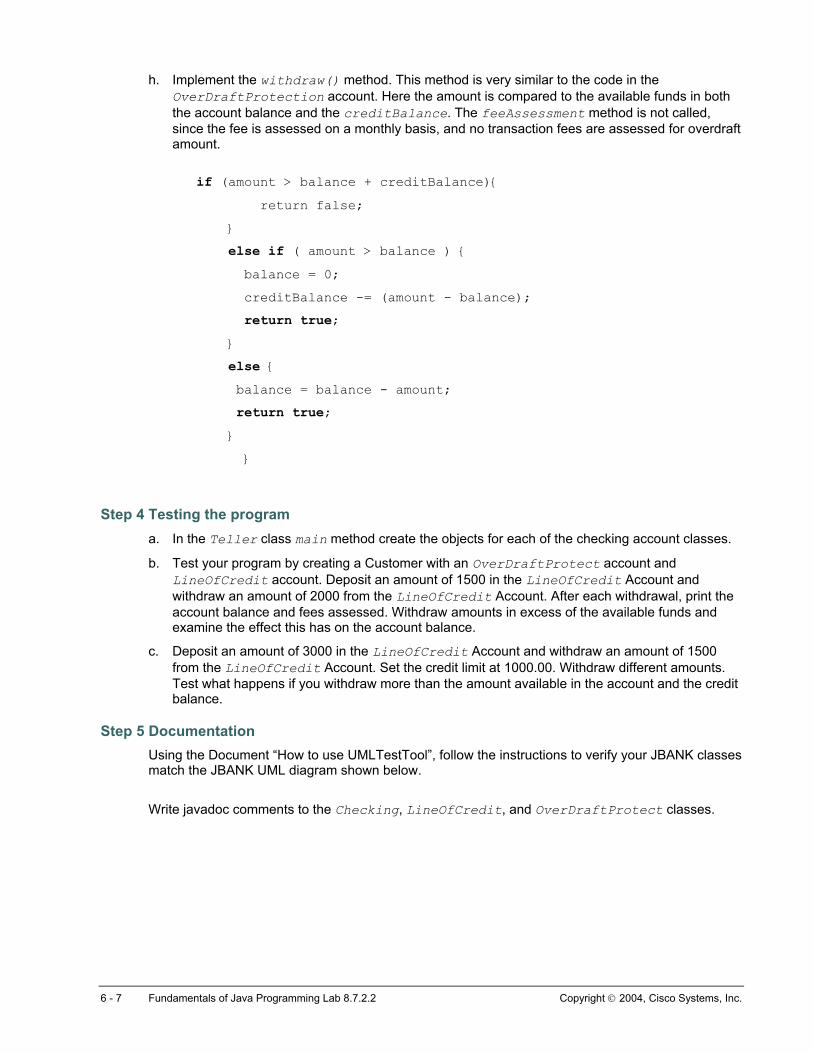
h. Implement the withdraw() method. This method is very similar to the code in the OverDraftProtection account. Here the amount is compared to the available funds in both the account balance and the creditBalance. The feeAssessment method is not called, since the fee is assessed on a monthly basis, and no transaction fees are assessed for overdraft amount.
if (amount > balance + creditBalance){ return false;
}
else if ( amount > balance ) { balance = 0;
creditBalance -= (amount - balance);
return true; }
else { balance = balance - amount;
return true; }
}
Step 4 Testing the program a. In the Teller class main method create the objects for each of the checking account classes.
b. Test your program by creating a Customer with an OverDraftProtect account and LineOfCredit account. Deposit an amount of 1500 in the LineOfCredit Account and withdraw an amount of 2000 from the LineOfCredit Account. After each withdrawal, print the account balance and fees assessed. Withdraw amounts in excess of the available funds and examine the effect this has on the account balance.
c. Deposit an amount of 3000 in the LineOfCredit Account and withdraw an amount of 1500 from the LineOfCredit Account. Set the credit limit at 1000.00. Withdraw different amounts. Test what happens if you withdraw more than the amount available in the account and the credit balance.
Step 5 Documentation Using the Document “How to use UMLTestTool”, follow the instructions to verify your JBANK classes match the JBANK UML diagram shown below.
Write javadoc comments to the Checking, LineOfCredit, and OverDraftProtect classes.
6 - 7 Fundamentals of Java Programming Lab 8.7.2.2 Copyright 2004, Cisco Systems, Inc.
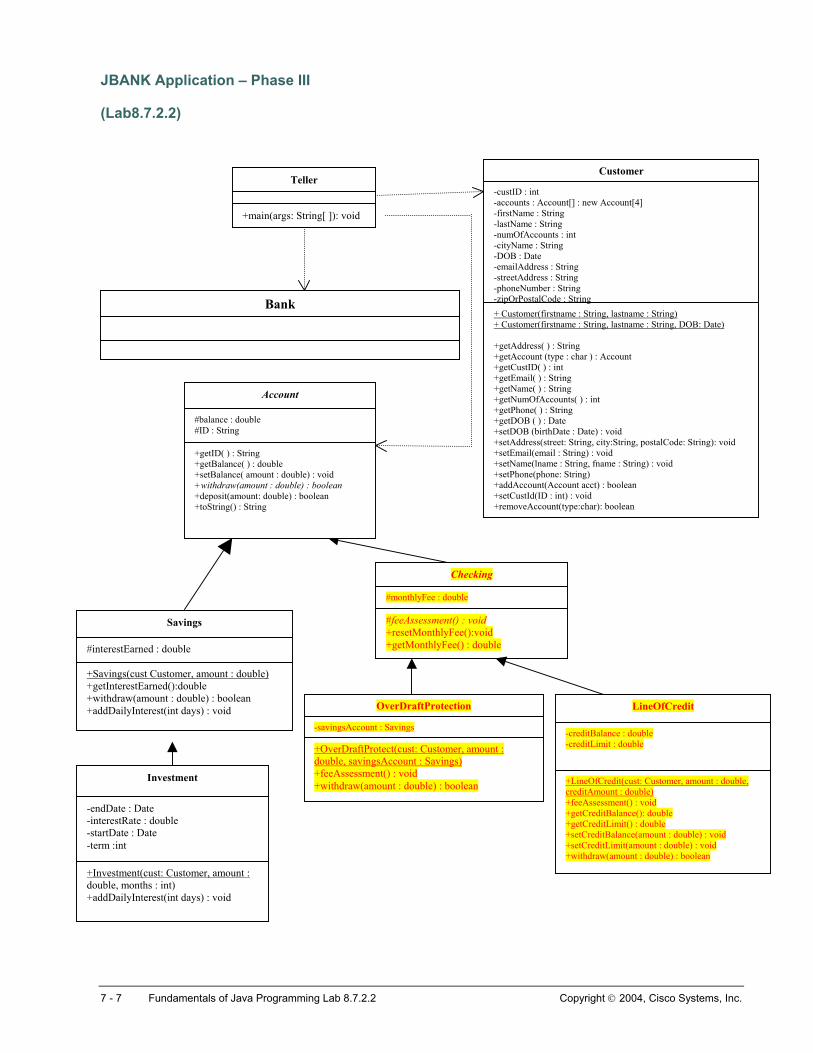
JBANK Application – Phase III
(Lab8.7.2.2)
Teller
+main(args: String[ ]): void
-custID : int -accounts : Account[] : new Account[4] -firstName : String -lastName : String -numOfAccounts : int -cityName : String -DOB : Date -emailAddress : String -streetAddress : String -phoneNumber : String -zipOrPostalCode : String + Customer(firstname : String, lastname : String) + Customer(firstname : String, lastname : String, DOB: Date) +getAddress( ) : String +getAccount (type : char ) : Account +getCustID( ) : int +getEmail( ) : String +getName( ) : String +getNumOfAccounts( ) : int +getPhone( ) : String +getDOB ( ) : Date +setDOB (birthDate : Date) : void +setAddress(street: String, city:String, postalCode: String): void +setEmail(email : String) : void +setName(lname : String, fname : String) : void +setPhone(phone: String) +addAccount(Account acct) : boolean +setCustId(ID : int) : void +removeAccount(type:char): boolean
#feeAssessment() : void +resetMonthlyFee():void +getMonthlyFee() : double
#monthlyFee : double
Checking
+getID( ) : String +getBalance( ) : double +setBalance( amount : double) : void +withdraw(amount : double) : boolean +deposit(amount: double) : boolean +toString() : String
#balance : double #ID : String
Account
Bank
Customer
+Savings(cust Customer, amount : double) +getInterestEarned():double +withdraw(amount : double) : boolean +addDailyInterest(int days) : void
#interestEarned : double
Savings
+OverDraftProtect(cust: Customer, amount : double, savingsAccount : Savings) +feeAssessment() : void +withdraw(amount : double) : boolean
-savingsAccount : Savings
OverDraftProtection LineOfCredit
-creditBalance : double -creditLimit : double
+LineOfCredit(cust: Customer, amount : double, creditAmount : double) +feeAssessment() : void +getCreditBalance(): double +getCreditLimit() : double +setCreditBalance(amount : double) : void +setCreditLimit(amount : double) : void +withdraw(amount : double) : boolean
+Investment(cust: Customer, amount : double, months : int) +addDailyInterest(int days) : void
-endDate : Date -interestRate : double -startDate : Date -term :int
Investment
7 - 7 Fundamentals of Java Programming Lab 8.7.2.2 Copyright 2004, Cisco Systems, Inc.
Lab 8.8.2 Interface and Abstract Class
Estimated Time 60 minutes
Learning Objective In this lab activity, the student will implement abstraction through the use of the interfaces.
Description/Scenario • Java does not allow for multiple inheritances. However, the Java language provides Interface
classes for implementing inheritance from two unrelated sources.
Interfaces are abstract classes that define abstract methods and constants. The purpose of an interface is to serve as a design document for external features of a class. All of the methods in an interface must be public. Interfaces provide a mechanism for a subclass to define behaviors from sources other than the direct and indirect super classes.
The syntax for implementing an interface includes the use of the keyword implements in the class definition statement. However, implementing interfaces is more than the declaration in the class definition statement. This declaration is viewed as a contract between the class that implements the interface and the interface itself. The compiler enforces this contract by ensuring that all methods declared in the interface are also implemented in the class. In some cases, this may include a null implementation. A null implementation is an implementation of a method definition without any procedural code.
The guidelines for implementing interfaces are:
o A public interface is a contract between the client code (that is the code in the interface class) and the class that implements the interface.
o A Java interface is a formal declaration of a contract in which all methods contain no implementation. That is all methods are abstract.
o Many unrelated classes can implement the same interface.
o A class can implement many interfaces.
o A class that implements an interface is an instance of the interface class. This relationship that exists between super and sub-classes also applies to classes that implement interfaces.
o All methods of an interface are declared public and are automatically abstract. The keyword abstract is not required to define the methods as such.
o An interface cannot include methods with qualifiers such as native, static, synchronized, or final. These keywords imply implementation code, and methods cannot be implemented in an interface.
o An interface can declare constants and they are public, static and final. If the qualifiers are omitted, the Java compiler provides them.
o Interfaces can extend other interfaces.
1 - 4 Fundamentals of Java Programming Lab 8.8.2 Copyright 2004, Cisco Systems, Inc.
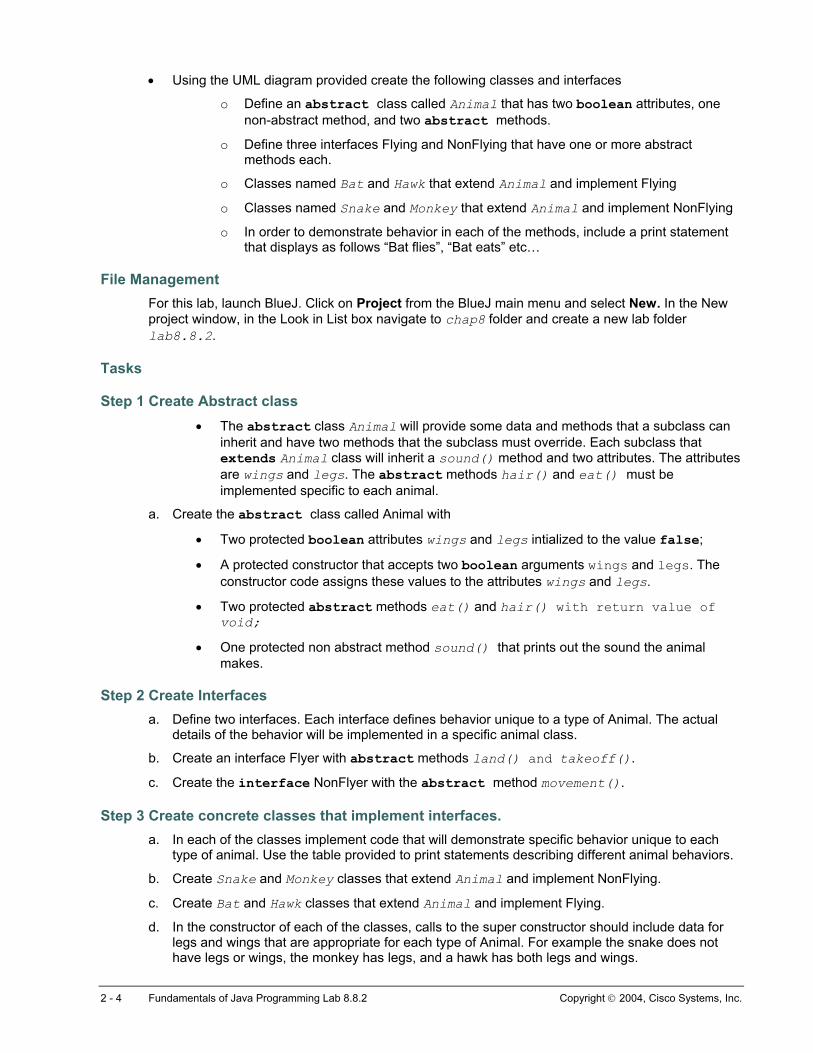
• Using the UML diagram provided create the following classes and interfaces
o Define an abstract class called Animal that has two boolean attributes, one non-abstract method, and two abstract methods.
o Define three interfaces Flying and NonFlying that have one or more abstract methods each.
o Classes named Bat and Hawk that extend Animal and implement Flying
o Classes named Snake and Monkey that extend Animal and implement NonFlying
o In order to demonstrate behavior in each of the methods, include a print statement that displays as follows “Bat flies”, “Bat eats” etc…
File Management For this lab, launch BlueJ. Click on Project from the BlueJ main menu and select New. In the New project window, in the Look in List box navigate to chap8 folder and create a new lab folder lab8.8.2.
Tasks
Step 1 Create Abstract class • The abstract class Animal will provide some data and methods that a subclass can
inherit and have two methods that the subclass must override. Each subclass that extends Animal class will inherit a sound() method and two attributes. The attributes are wings and legs. The abstract methods hair() and eat() must be implemented specific to each animal.
a. Create the abstract class called Animal with
• Two protected boolean attributes wings and legs intialized to the value false;
• A protected constructor that accepts two boolean arguments wings and legs. The constructor code assigns these values to the attributes wings and legs.
• Two protected abstract methods eat() and hair() with return value of void;
• One protected non abstract method sound() that prints out the sound the animal makes.
Step 2 Create Interfaces a. Define two interfaces. Each interface defines behavior unique to a type of Animal. The actual
details of the behavior will be implemented in a specific animal class.
b. Create an interface Flyer with abstract methods land() and takeoff().
c. Create the interface NonFlyer with the abstract method movement().
Step 3 Create concrete classes that implement interfaces. a. In each of the classes implement code that will demonstrate specific behavior unique to each
type of animal. Use the table provided to print statements describing different animal behaviors.
b. Create Snake and Monkey classes that extend Animal and implement NonFlying.
c. Create Bat and Hawk classes that extend Animal and implement Flying.
d. In the constructor of each of the classes, calls to the super constructor should include data for legs and wings that are appropriate for each type of Animal. For example the snake does not have legs or wings, the monkey has legs, and a hawk has both legs and wings.
2 - 4 Fundamentals of Java Programming Lab 8.8.2 Copyright 2004, Cisco Systems, Inc.

Animal eat () hair() sound() movement() take off() land()
Snake rats none Hisses slithers
Monkey fruit fur Chatters jumps
Bat fruit and insects
feathers launches from the tree
hangs on a rafter
Hawk small animals
feathers Screeches glides perches on a tree top
Step 4 Create test class a. Create a test class named AnimalTest that will demonstrate calling super methods, different
implementations of the interfaces, and the use of extended methods.
b. Use this data: monkey = “spider”, hawk = “redtail”, snake = “cobra”, bat = “fox”
In the main method of AnimalTest include the following:
Snake s = new Snake(“cobra”); Bat b = new Bat(“fox”); Hawk h = new Hawk(“redtail”); Monkey m = new Monkey(“spider”); Animal a = new Animal(true,false) Animal z = new Hawk(); NonFlying f = new Monkey(); s.movement(); System.out.println("Snakes have legs? "+s.legs+" Snakes have wings? "+s.wings); b.takeoff(); z.eat(); z.hair(); z.sound(); f.movement();
a. What happens if you try to instantiate an abstract class or an interface?
3 - 4 Fundamentals of Java Programming Lab 8.8.2 Copyright 2004, Cisco Systems, Inc.
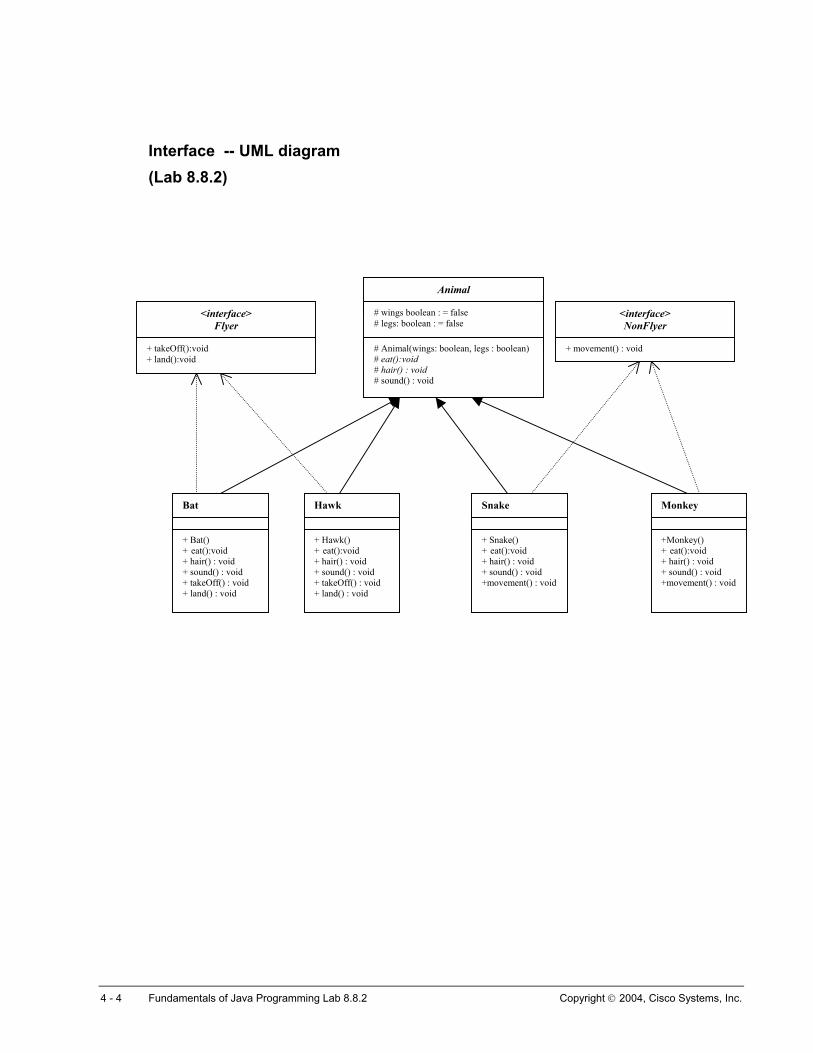
Interface -- UML diagram (Lab 8.8.2)
Animal
<interface> Flyer
<interface> NonFlyer
# wings boolean : = false # legs: boolean : = false
+ takeOff():void + land():void
# Animal(wings: boolean, legs : boolean)# eat():void # hair() : void # sound() : void
+ movement() : void
+Monkey() + eat():void + hair() : void + sound() : void +movement() : void
Monkey
+ Snake() + eat():void + hair() : void + sound() : void +movement() : void
Snake
+ Hawk() + eat():void + hair() : void + sound() : void + takeOff() : void + land() : void
Hawk Bat
+ Bat() + eat():void + hair() : void + sound() : void + takeOff() : void + land() : void
4 - 4 Fundamentals of Java Programming Lab 8.8.2 Copyright 2004, Cisco Systems, Inc.
Lab 8.10.1 Polymorphism in the Banking Application
Estimated Time 30 minutes
Learning Objectives In this lab activity, the student will create objects from classes with inherited attributes and demonstrate the application of polymorphic behaviors and dynamic binding.
Description/Scenario • Polymorphism literally means "many forms". Polymorphism is a mechanism in the Java language
that adds enormous flexibility to programs. In general terms, polymorphism allows the same code to have different effects at run-time depending on the context. Polymorphism takes advantage of inheritance and interface implementations.
• Inheritance only works in one direction, from superclass to subclass. A method that receives an object of a type can be called with objects that are subclasses of that type, but not more general or superclasses of the type.
• The technique of resolving the behaviors of the object at run-time is known as dynamic method binding, or virtual method invocation. This is a key feature of polymorphism.
• Dynamic binding resolves which method to call at run-time when more than one class in an inheritance hierarchy has implemented the method. The JVM looks at the type of object for which the call is made, not the type of object reference in the calling statement.
• Dynamic binding also resolves the handling of the arguments being passed to a method. Again, the JVM looks at the type of object being passed by value as an argument, not the reference type of the variable being passed as an argument to the method.
• In lab 7.6.1 the Customer class was modified to store an array of accounts in the Customer object. The addAccount method was implemented to ensure that the Customer does not have more than 4 accounts, and no duplicate accounts. In this lab, the addAccount method will be edited to take advantage of the subclasses created in the previous lab. The test of account type will be based on object type and not the char values of ‘S’,’L’,’O’,’I’. Modify the methods of the Customer class that add, remove and get accounts to use the account type to determine what account is to be added.
Business Rules • Each customer will be provided with a basic Savings account. A Customer cannot have more
than 4 accounts and a Customer cannot have more than one of each type of account.
1 - 6 Fundamentals of Java Programming Lab 8.10.1 Copyright 2004, Cisco Systems, Inc.
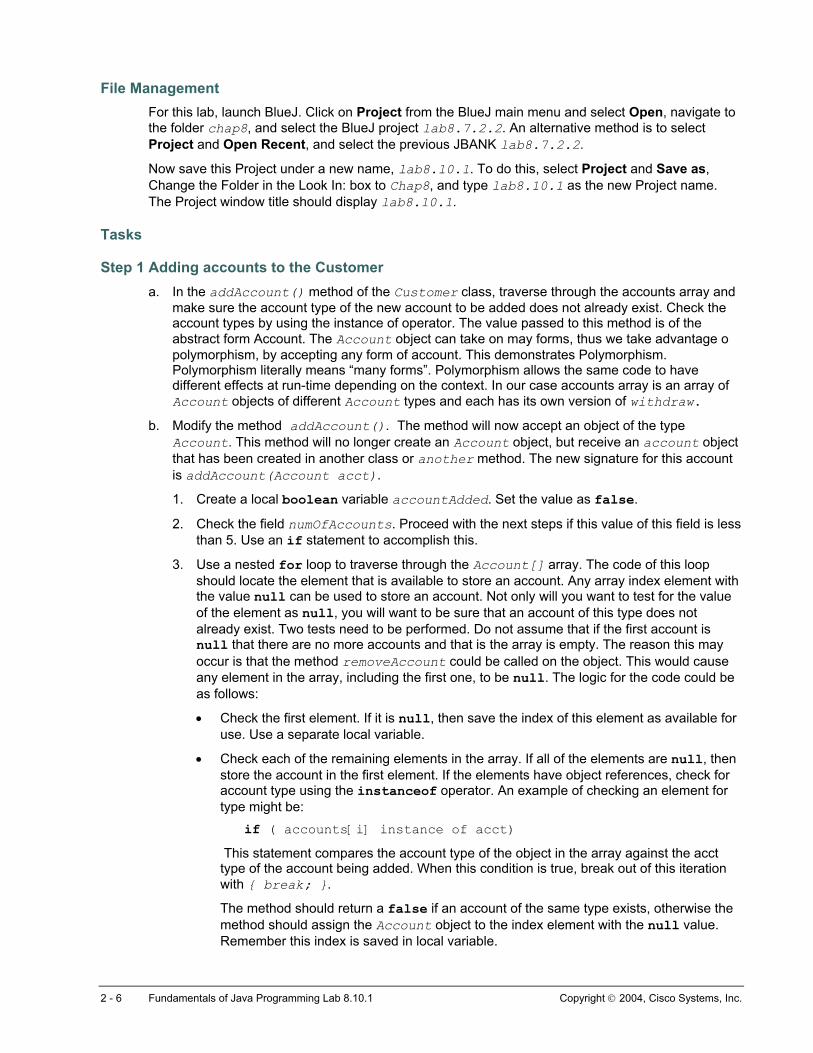
File Management For this lab, launch BlueJ. Click on Project from the BlueJ main menu and select Open, navigate to the folder chap8, and select the BlueJ project lab8.7.2.2. An alternative method is to select Project and Open Recent, and select the previous JBANK lab8.7.2.2.
Now save this Project under a new name, lab8.10.1. To do this, select Project and Save as, Change the Folder in the Look In: box to Chap8, and type lab8.10.1 as the new Project name. The Project window title should display lab8.10.1.
Tasks
Step 1 Adding accounts to the Customer a. In the addAccount() method of the Customer class, traverse through the accounts array and
make sure the account type of the new account to be added does not already exist. Check the account types by using the instance of operator. The value passed to this method is of the abstract form Account. The Account object can take on may forms, thus we take advantage o polymorphism, by accepting any form of account. This demonstrates Polymorphism. Polymorphism literally means “many forms”. Polymorphism allows the same code to have different effects at run-time depending on the context. In our case accounts array is an array of Account objects of different Account types and each has its own version of withdraw.
b. Modify the method addAccount(). The method will now accept an object of the type Account. This method will no longer create an Account object, but receive an account object that has been created in another class or another method. The new signature for this account is addAccount(Account acct).
1. Create a local boolean variable accountAdded. Set the value as false.
2. Check the field numOfAccounts. Proceed with the next steps if this value of this field is less than 5. Use an if statement to accomplish this.
3. Use a nested for loop to traverse through the Account[] array. The code of this loop should locate the element that is available to store an account. Any array index element with the value null can be used to store an account. Not only will you want to test for the value of the element as null, you will want to be sure that an account of this type does not already exist. Two tests need to be performed. Do not assume that if the first account is null that there are no more accounts and that is the array is empty. The reason this may occur is that the method removeAccount could be called on the object. This would cause any element in the array, including the first one, to be null. The logic for the code could be as follows:
• Check the first element. If it is null, then save the index of this element as available for use. Use a separate local variable.
• Check each of the remaining elements in the array. If all of the elements are null, then store the account in the first element. If the elements have object references, check for account type using the instanceof operator. An example of checking an element for type might be:
if ( accounts[i] instance of acct) This statement compares the account type of the object in the array against the acct type of the account being added. When this condition is true, break out of this iteration with { break; }.
The method should return a false if an account of the same type exists, otherwise the method should assign the Account object to the index element with the null value. Remember this index is saved in local variable.
2 - 6 Fundamentals of Java Programming Lab 8.10.1 Copyright 2004, Cisco Systems, Inc.
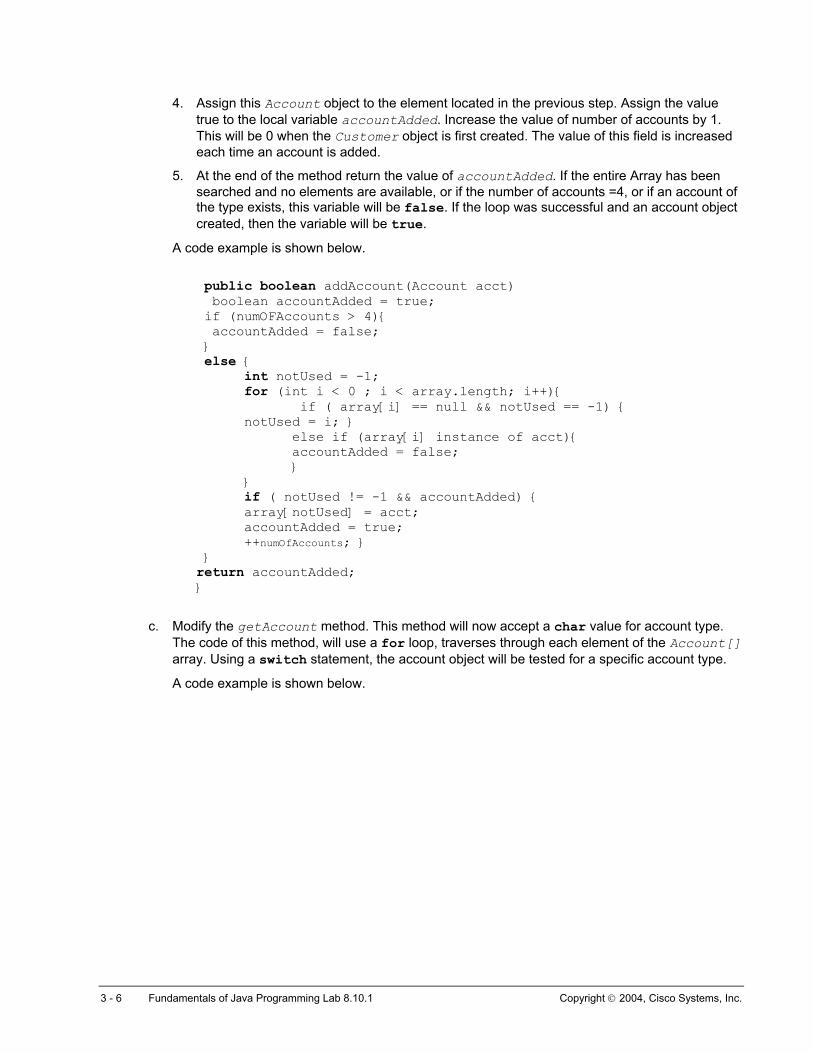
4. Assign this Account object to the element located in the previous step. Assign the value true to the local variable accountAdded. Increase the value of number of accounts by 1. This will be 0 when the Customer object is first created. The value of this field is increased each time an account is added.
5. At the end of the method return the value of accountAdded. If the entire Array has been searched and no elements are available, or if the number of accounts =4, or if an account of the type exists, this variable will be false. If the loop was successful and an account object created, then the variable will be true.
A code example is shown below.
public boolean addAccount(Account acct) boolean accountAdded = true; if (numOFAccounts > 4){ accountAdded = false; } else { int notUsed = -1; for (int i < 0 ; i < array.length; i++){ if ( array[i] == null && notUsed == -1) { notUsed = i; } else if (array[i] instance of acct){ accountAdded = false; } } if ( notUsed != -1 && accountAdded) { array[notUsed] = acct; accountAdded = true; ++numOfAccounts; } } return accountAdded; }
c. Modify the getAccount method. This method will now accept a char value for account type. The code of this method, will use a for loop, traverses through each element of the Account[] array. Using a switch statement, the account object will be tested for a specific account type.
A code example is shown below.
3 - 6 Fundamentals of Java Programming Lab 8.10.1 Copyright 2004, Cisco Systems, Inc.

public Account getAccount(char type){ Account acct ; switch (type){ case ‘S’: if (accounts[i] instance of Savings) { acct = accounts[i]; } break; case ‘L’: if (accounts[i] instance of LineOfCredit) { acct = accounts[i]; } break; …… } return acct; } // end of method
d. Modify the removeAccount() method which takes a value for the account type, char, as an argument. Using the switch statements similar to those shown in the previous step, locate the account and set the array element to null. If the account is found and element set to null, the method returns true, else the method returns false.
Step 2 Testing the program using Suggested Data a. Compile had run the code. Using the Suggested Data, create a customer with multiple accounts.
Print the results. Try to add a previously existing account to the customer. Note the results.
Suggested Data:
First Name: John
Last Name Doe
City Address: Phoenix
Street Address: 4128 W Van Buren
Email: [email protected]
Phone Number: 111-111-1111
Zip or Postal Code: 67777
DOB 2/1/50
Account SAVINGS, 3000
4 - 6 Fundamentals of Java Programming Lab 8.10.1 Copyright 2004, Cisco Systems, Inc.
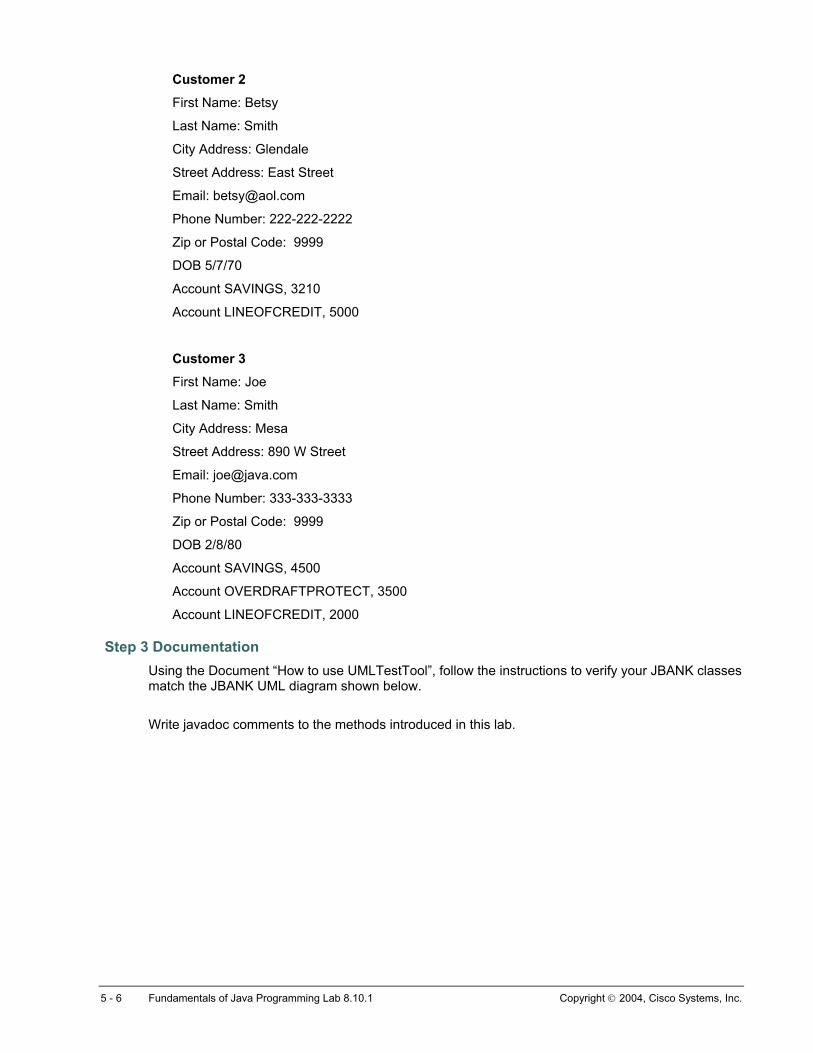
Customer 2
First Name: Betsy
Last Name: Smith
City Address: Glendale
Street Address: East Street
Email: [email protected]
Phone Number: 222-222-2222
Zip or Postal Code: 9999
DOB 5/7/70
Account SAVINGS, 3210
Account LINEOFCREDIT, 5000
Customer 3
First Name: Joe
Last Name: Smith
City Address: Mesa
Street Address: 890 W Street
Email: [email protected]
Phone Number: 333-333-3333
Zip or Postal Code: 9999
DOB 2/8/80
Account SAVINGS, 4500
Account OVERDRAFTPROTECT, 3500
Account LINEOFCREDIT, 2000
Step 3 Documentation Using the Document “How to use UMLTestTool”, follow the instructions to verify your JBANK classes match the JBANK UML diagram shown below.
Write javadoc comments to the methods introduced in this lab.
5 - 6 Fundamentals of Java Programming Lab 8.10.1 Copyright 2004, Cisco Systems, Inc.
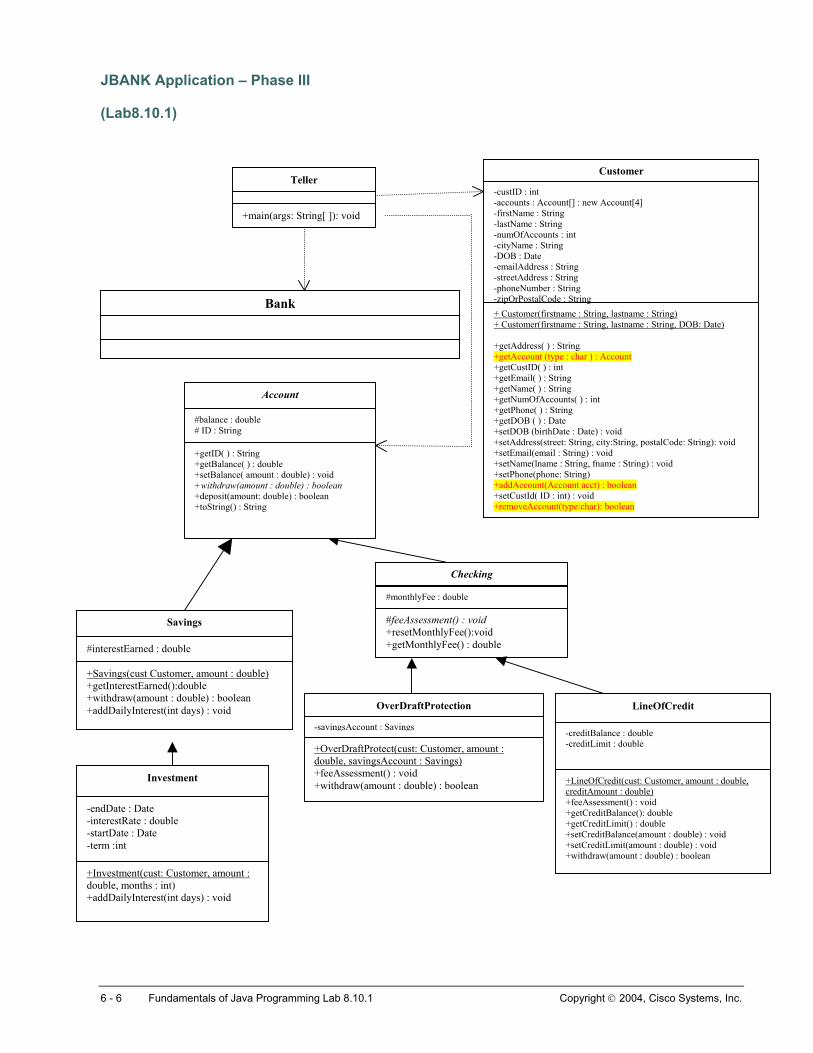
JBANK Application – Phase III
(Lab8.10.1)
Teller
+main(args: String[ ]): void
-custID : int -accounts : Account[] : new Account[4] -firstName : String -lastName : String -numOfAccounts : int -cityName : String -DOB : Date -emailAddress : String -streetAddress : String -phoneNumber : String -zipOrPostalCode : String + Customer(firstname : String, lastname : String) + Customer(firstname : String, lastname : String, DOB: Date) +getAddress( ) : String +getAccount (type : char ) : Account +getCustID( ) : int +getEmail( ) : String +getName( ) : String +getNumOfAccounts( ) : int +getPhone( ) : String +getDOB ( ) : Date +setDOB (birthDate : Date) : void +setAddress(street: String, city:String, postalCode: String): void +setEmail(email : String) : void +setName(lname : String, fname : String) : void +setPhone(phone: String) +addAccount(Account acct) : boolean +setCustId( ID : int) : void +removeAccount(type:char): boolean
Checking
+getID( ) : String +getBalance( ) : double +setBalance( amount : double) : void +withdraw(amount : double) : boolean +deposit(amount: double) : boolean +toString() : String
#balance : double # ID : String
Account
Bank
Customer
#feeAssessment() : void +resetMonthlyFee():void +getMonthlyFee() : double
#monthlyFee : double
+Savings(cust Customer, amount : double) +getInterestEarned():double +withdraw(amount : double) : boolean +addDailyInterest(int days) : void
#interestEarned : double
Savings
+OverDraftProtect(cust: Customer, amount : double, savingsAccount : Savings) +feeAssessment() : void +withdraw(amount : double) : boolean
-savingsAccount : Savings
OverDraftProtection LineOfCredit
-creditBalance : double -creditLimit : double
+LineOfCredit(cust: Customer, amount : double, creditAmount : double) +feeAssessment() : void +getCreditBalance(): double +getCreditLimit() : double +setCreditBalance(amount : double) : void +setCreditLimit(amount : double) : void +withdraw(amount : double) : boolean
+Investment(cust: Customer, amount : double, months : int) +addDailyInterest(int days) : void
-endDate : Date -interestRate : double -startDate : Date -term :int
Investment
6 - 6 Fundamentals of Java Programming Lab 8.10.1 Copyright 2004, Cisco Systems, Inc.
Lab 9.2.2 Design of GUIs
Estimated Time 40 minutes
Learning Objective In this lab activity, the student will explore the API and locate references for the Swing and Advanced Windowing ToolKit package of classes.
The student will apply appropriate design principles to design a GUI based on the provided specifications.
Description/Scenario • In this lab, students are provided with a design specification for designing a GUI. Use the
specification to select the components.
• This lab prepares students for designing a GUI for the Banking application, JBANK. The objective is to create a display that serves as an Automatic Teller Machine (ATM). This is just a simulation of the GUI, and students will not actually be concerned with the retrieval of money.
• Step 1 of the lab describes the requirements for the ATM GUI.
• Step 2 provides the students with three different GUIs. Students will use these to identify the component and containers used in each GUI, researching the methods, constructors, and fields for each component in the API.
• Step 3 provides the students with tasks that require use of the API to determine the appropriate answers.
Tasks
Step 1 Understand the Requirements • The ATM will interact with only one customer at a time. The customer will input the following
information:
o Customer ID – This will be used to retrieve the Customer Name Account ID to use for the transaction.
o Account type – This will allow the user to make selections from four radio buttons. There will be one radio button for each type of account including Savings, Investment, Line of Credit, and Overdraft Protection.
o The amount to use for the transaction
o Buttons to invoke transaction activities such as deposit, withdrawal, and exit.
• In addition to input from the user, the ATM window will display the following information:
o Customer’s full name
o Transaction details such as Withdrawing $1000, or Depositing $1000, and the account balance resulting from the completed transaction
1 - 1 Fundamentals of Java Programming Lab 9.2.2 Copyright 2004, Cisco Systems, Inc.
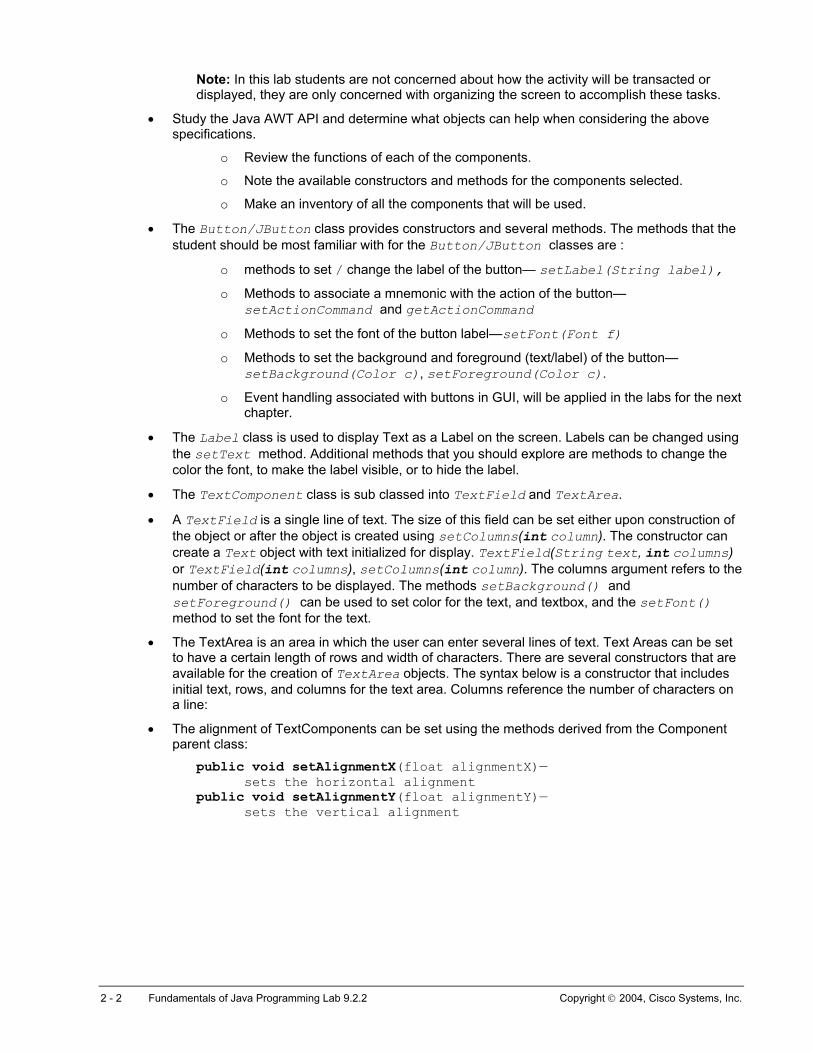
Note: In this lab students are not concerned about how the activity will be transacted or displayed, they are only concerned with organizing the screen to accomplish these tasks.
• Study the Java AWT API and determine what objects can help when considering the above specifications.
o Review the functions of each of the components.
o Note the available constructors and methods for the components selected.
o Make an inventory of all the components that will be used.
• The Button/JButton class provides constructors and several methods. The methods that the student should be most familiar with for the Button/JButton classes are :
o methods to set / change the label of the button— setLabel(String label),
o Methods to associate a mnemonic with the action of the button—setActionCommand and getActionCommand
o Methods to set the font of the button label—setFont(Font f)
o Methods to set the background and foreground (text/label) of the button—setBackground(Color c), setForeground(Color c).
o Event handling associated with buttons in GUI, will be applied in the labs for the next chapter.
• The Label class is used to display Text as a Label on the screen. Labels can be changed using the setText method. Additional methods that you should explore are methods to change the color the font, to make the label visible, or to hide the label.
• The TextComponent class is sub classed into TextField and TextArea.
• A TextField is a single line of text. The size of this field can be set either upon construction of the object or after the object is created using setColumns(int column). The constructor can create a Text object with text initialized for display. TextField(String text, int columns) or TextField(int columns), setColumns(int column). The columns argument refers to the number of characters to be displayed. The methods setBackground() and setForeground() can be used to set color for the text, and textbox, and the setFont() method to set the font for the text.
• The TextArea is an area in which the user can enter several lines of text. Text Areas can be set to have a certain length of rows and width of characters. There are several constructors that are available for the creation of TextArea objects. The syntax below is a constructor that includes initial text, rows, and columns for the text area. Columns reference the number of characters on a line:
• The alignment of TextComponents can be set using the methods derived from the Component parent class:
public void setAlignmentX(float alignmentX)— sets the horizontal alignment
public void setAlignmentY(float alignmentY)— sets the vertical alignment
2 - 2 Fundamentals of Java Programming Lab 9.2.2 Copyright 2004, Cisco Systems, Inc.

Step 2 Understand GUI components • The definition of a GUI class begins with the creation of references for all of the component
objects. Some of the components available are the Button class, Label class, and the subclasses of the TextComponent. Some of the methods have been identified in this description. However, the student will obtain the most accurate and complete information about each of these classes from the API docs.
• Three different GUI are shown below. For each GUI Identify the components used. You will implement The ATMGUI in the next labs.
• Print the Lab and label each GUI component.
• Review your work with your instructor.
TellerView GUI
3 - 3 Fundamentals of Java Programming Lab 9.2.2 Copyright 2004, Cisco Systems, Inc.
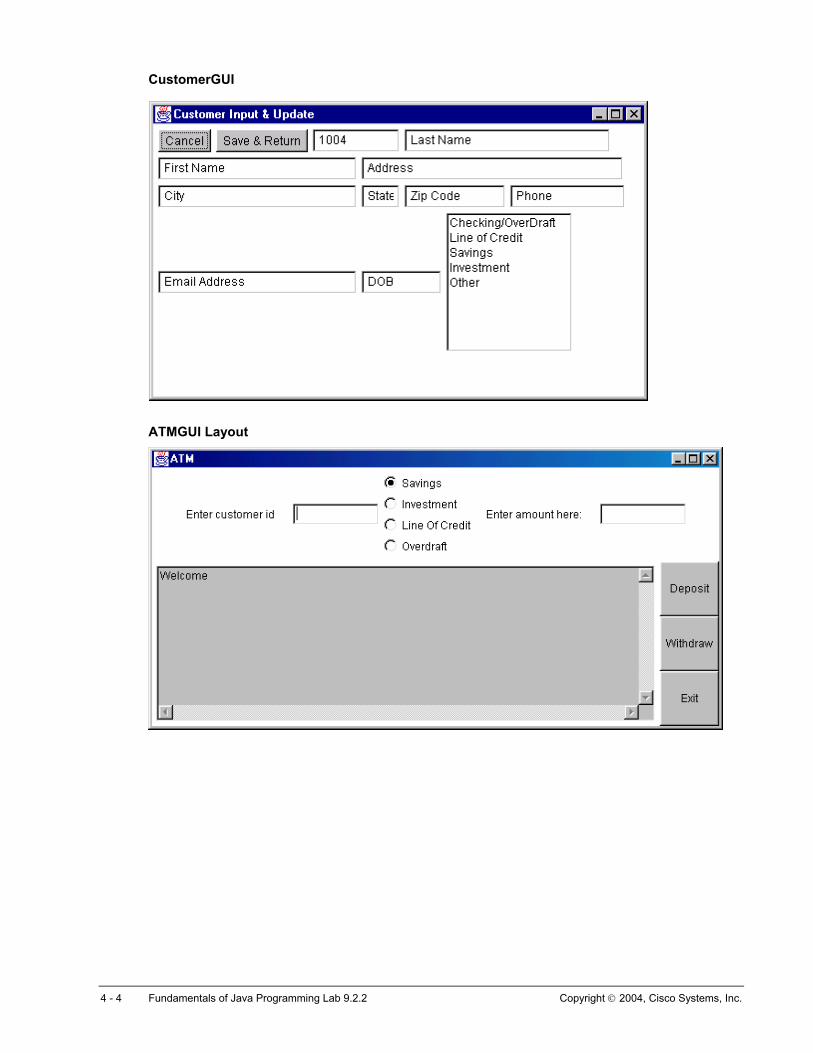
CustomerGUI
ATMGUI Layout
4 - 4 Fundamentals of Java Programming Lab 9.2.2 Copyright 2004, Cisco Systems, Inc.
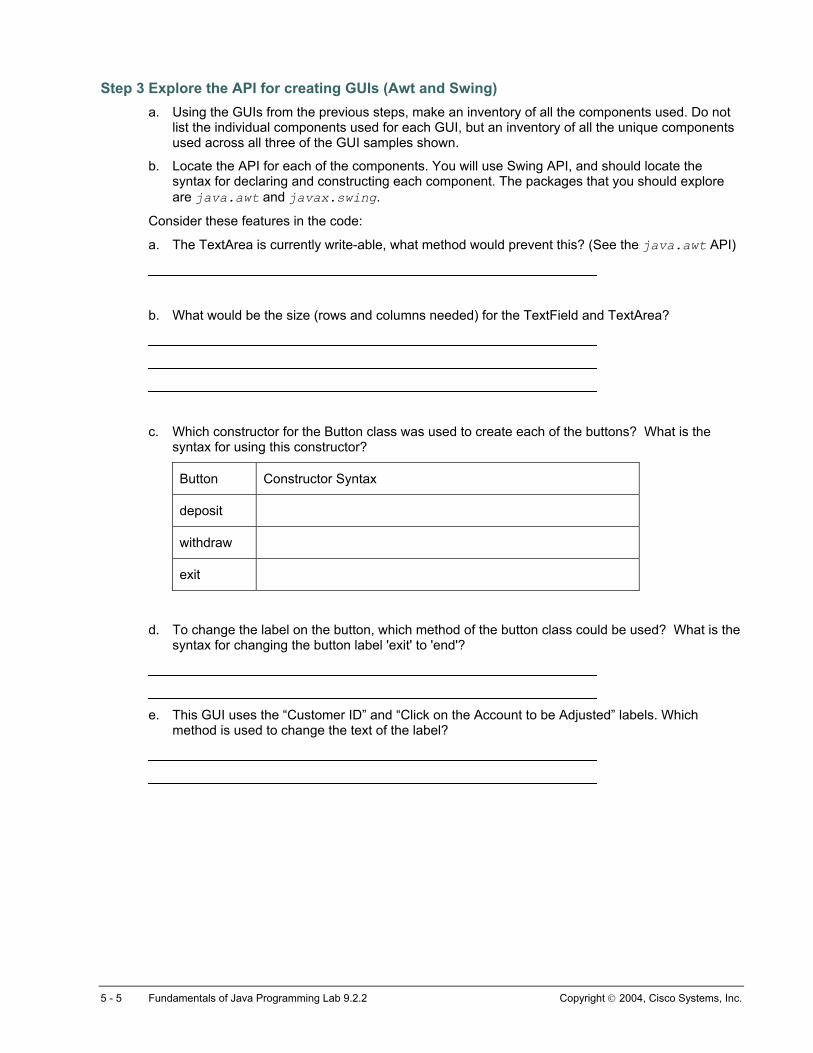
Step 3 Explore the API for creating GUIs (Awt and Swing) a. Using the GUIs from the previous steps, make an inventory of all the components used. Do not
list the individual components used for each GUI, but an inventory of all the unique components used across all three of the GUI samples shown.
b. Locate the API for each of the components. You will use Swing API, and should locate the syntax for declaring and constructing each component. The packages that you should explore are java.awt and javax.swing.
Consider these features in the code:
a. The TextArea is currently write-able, what method would prevent this? (See the java.awt API)
b. What would be the size (rows and columns needed) for the TextField and TextArea?
c. Which constructor for the Button class was used to create each of the buttons? What is the syntax for using this constructor?
Button Constructor Syntax
deposit
withdraw
exit
d. To change the label on the button, which method of the button class could be used? What is the syntax for changing the button label 'exit' to 'end'?
e. This GUI uses the “Customer ID” and “Click on the Account to be Adjusted” labels. Which
method is used to change the text of the label?
5 - 5 Fundamentals of Java Programming Lab 9.2.2 Copyright 2004, Cisco Systems, Inc.
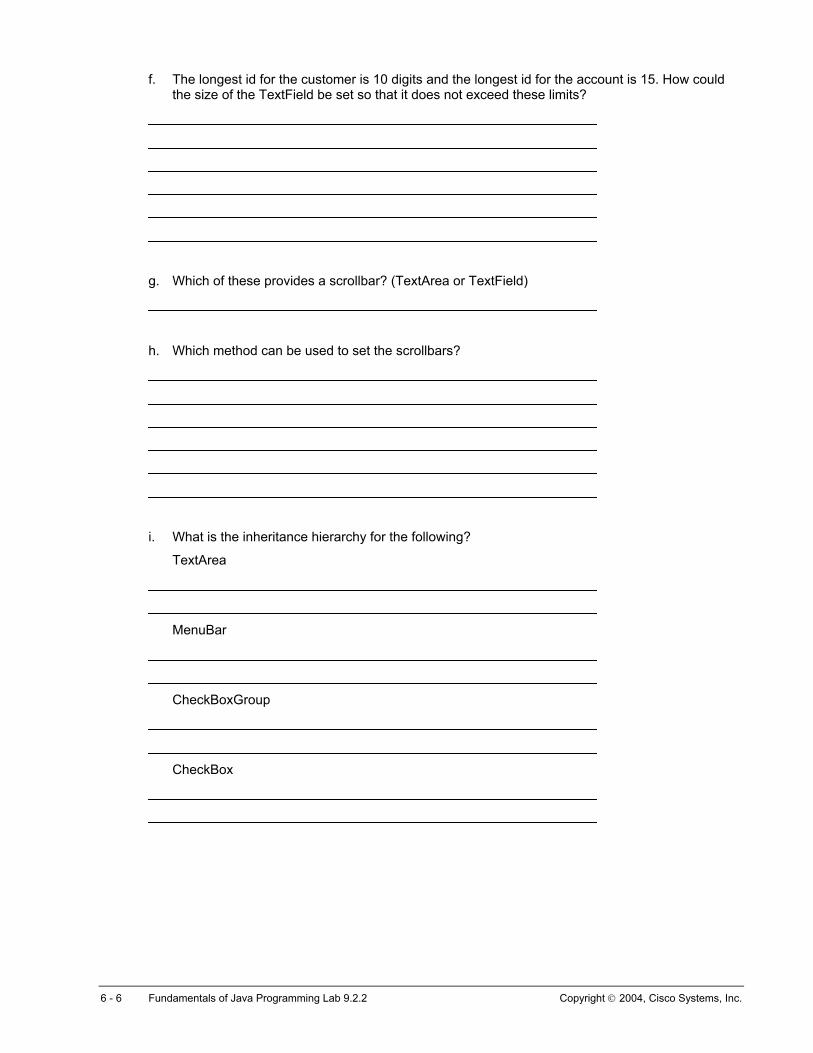
f. The longest id for the customer is 10 digits and the longest id for the account is 15. How could the size of the TextField be set so that it does not exceed these limits?
g. Which of these provides a scrollbar? (TextArea or TextField)
h. Which method can be used to set the scrollbars?
i. What is the inheritance hierarchy for the following?
TextArea
MenuBar
CheckBoxGroup
CheckBox
6 - 6 Fundamentals of Java Programming Lab 9.2.2 Copyright 2004, Cisco Systems, Inc.
Lab 9.2.5 Selecting Containers and Constructing Components
Estimated Time 40 minutes
Learning Objective In this lab activity, the student will learn to correctly select and apply components to a GUI. The student will also identify and create the JPanel objects required for displaying visible components of the ATMGUI, obtain the appropriate contentPane reference and instantiate each of the components to be displayed.
Description/Scenario • This lab completes steps 2 and 3 described in the curriculum for creating GUIs.
o Step 2 – Create references to all the components used in the GUI as attributes of the class. This will enable the class code to include methods to manipulate the properties of each component, since they are member attributes of the class.
o Step 3 – Implement a Constructor that creates instances of each component. Add any enhancements to the component as desired.
• Apply the components that have been selected for the ATMGUI. In this lab you will use the Swing API to create the GUI.
• This lab begins the process of writing the code for the GUI. At this stage, only the components are declared. None of the components will be created, thus you will not be able to display the GUI at this time.
• The definition of a GUI class begins with the creation of references for all of the component objects. Some of the components available are the Button class, Label class, and the Text component.
• Several import statements are required when creating GUI. In order to use the Swing API, you will import classes from AWT and Swing packages. Include the appropriate import statements in your class definition.
import java.awt.*; and javax.swing.*; • The constructors for each of the components define options for creating each component
• When creating button Button/JButton objects, set the label for the button in the constructor. Additionally, apply the setActionCommand method for each button. This gives flexibility in internationalizing the buttons for different locales. Assigning a fixed action command for each button allows the code to stay the same, while the representation of the component has different look.
• For the TextArea, you can set the size of the area as part of the construction of the object.
public TextArea(String text,int rows, int columns)
1 - 1 Fundamentals of Java Programming Lab 9.2.5 Copyright 2004, Cisco Systems, Inc.
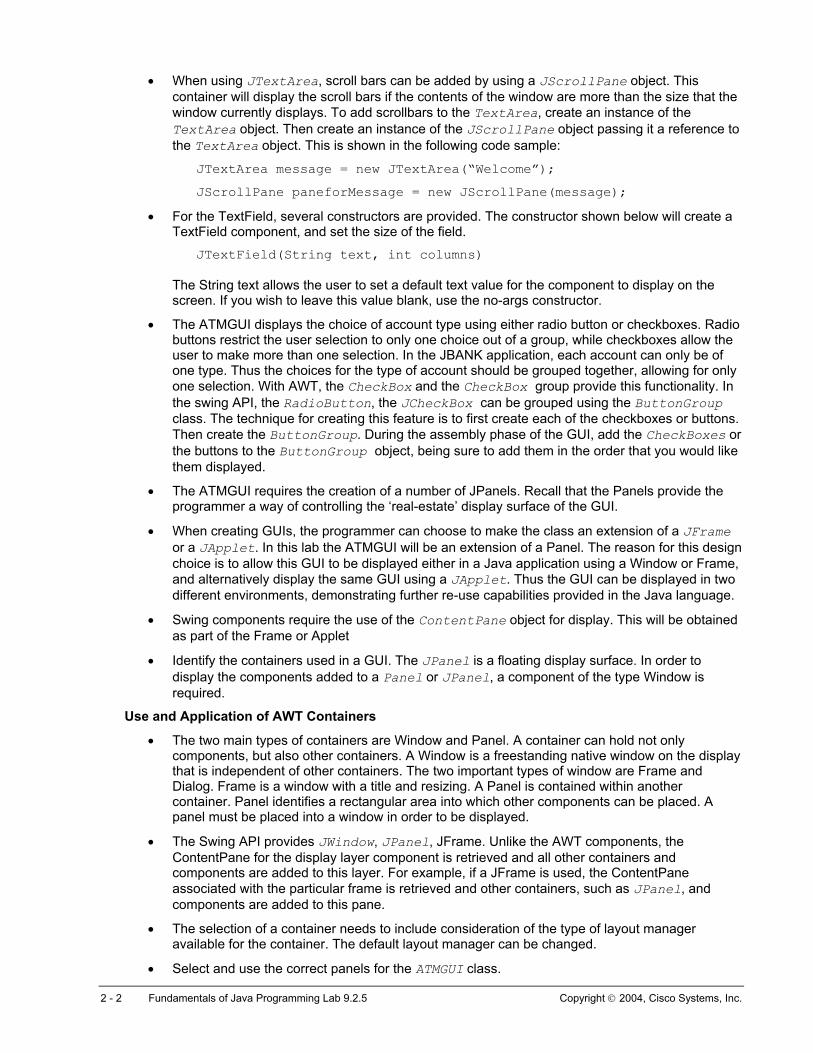
• When using JTextArea, scroll bars can be added by using a JScrollPane object. This container will display the scroll bars if the contents of the window are more than the size that the window currently displays. To add scrollbars to the TextArea, create an instance of the TextArea object. Then create an instance of the JScrollPane object passing it a reference to the TextArea object. This is shown in the following code sample:
JTextArea message = new JTextArea(“Welcome”);
JScrollPane paneforMessage = new JScrollPane(message);
• For the TextField, several constructors are provided. The constructor shown below will create a TextField component, and set the size of the field.
JTextField(String text, int columns) The String text allows the user to set a default text value for the component to display on the screen. If you wish to leave this value blank, use the no-args constructor.
• The ATMGUI displays the choice of account type using either radio button or checkboxes. Radio buttons restrict the user selection to only one choice out of a group, while checkboxes allow the user to make more than one selection. In the JBANK application, each account can only be of one type. Thus the choices for the type of account should be grouped together, allowing for only one selection. With AWT, the CheckBox and the CheckBox group provide this functionality. In the swing API, the RadioButton, the JCheckBox can be grouped using the ButtonGroup class. The technique for creating this feature is to first create each of the checkboxes or buttons. Then create the ButtonGroup. During the assembly phase of the GUI, add the CheckBoxes or the buttons to the ButtonGroup object, being sure to add them in the order that you would like them displayed.
• The ATMGUI requires the creation of a number of JPanels. Recall that the Panels provide the programmer a way of controlling the ‘real-estate’ display surface of the GUI.
• When creating GUIs, the programmer can choose to make the class an extension of a JFrame or a JApplet. In this lab the ATMGUI will be an extension of a Panel. The reason for this design choice is to allow this GUI to be displayed either in a Java application using a Window or Frame, and alternatively display the same GUI using a JApplet. Thus the GUI can be displayed in two different environments, demonstrating further re-use capabilities provided in the Java language.
• Swing components require the use of the ContentPane object for display. This will be obtained as part of the Frame or Applet
• Identify the containers used in a GUI. The JPanel is a floating display surface. In order to display the components added to a Panel or JPanel, a component of the type Window is required.
Use and Application of AWT Containers
• The two main types of containers are Window and Panel. A container can hold not only components, but also other containers. A Window is a freestanding native window on the display that is independent of other containers. The two important types of window are Frame and Dialog. Frame is a window with a title and resizing. A Panel is contained within another container. Panel identifies a rectangular area into which other components can be placed. A panel must be placed into a window in order to be displayed.
• The Swing API provides JWindow, JPanel, JFrame. Unlike the AWT components, the ContentPane for the display layer component is retrieved and all other containers and components are added to this layer. For example, if a JFrame is used, the ContentPane associated with the particular frame is retrieved and other containers, such as JPanel, and components are added to this pane.
• The selection of a container needs to include consideration of the type of layout manager available for the container. The default layout manager can be changed.
• Select and use the correct panels for the ATMGUI class.
2 - 2 Fundamentals of Java Programming Lab 9.2.5 Copyright 2004, Cisco Systems, Inc.
File Management For this lab, launch BlueJ. Click on Project from the BlueJ main menu and select Open, navigate to the folder chap8, and select the BlueJ project lab8.10.1. An alternative method is to select Project and Open Recent, and select the previous JBANK lab 8.10.1.
Now save this Project under a new name lab9.2.5. To do this, select Project and Save as, change the Folder in the Look In: box to chap9, and type lab9.2.5 as the new Project name. The Project window title should display lab9.2.5.
Tasks
Step 1 Create the ATMGUI Class Create a new class named ATMGUI in your project window. This class will extend from JPanel.
Step 2 Include the Import Statements Include the proper import statements that will allow the classes in the awt package to be accessed.
import java.awt.*; and import javax.swing.*;
Step 3 Instantiate the GUI Components a. The ATMGUI is displayed at the end of this lab. You should have verified your work in the
previous lab, against a list of correct components that will be used to create the GUI. Your instructor will provide you with this information.
b. The components can be instantiated as the references are created. The references can also be created first and then the components can be instantiated in a buildGUI method or in the constructor. Declare each of the components as fields of the class. Do not construct any instances of the objects at this time. Remember you can declare multiple references for the same component type on a single statement as shown in the following example:
JButton b1,b2.b3;
c. Remember to create a reference for a JScrollpane object, so that the TextArea can be displayed in this container.
d. Create a reference for JCheckBox objects and a ButtonGroup object.
e. In this lab you will create the components in the constructor of the class. Once the components are constructed, the buidGUI() method will be called to assemble the display.
f. The GUI is not ready to display as yet. Compile the class code, and correct any errors.
3 - 3 Fundamentals of Java Programming Lab 9.2.5 Copyright 2004, Cisco Systems, Inc.
Step 4 GUI Panels a. In the previous step, the ATMGUI is a class that extends JPanel. You will be placing several
smaller panels onto the base panel. This will allow for more granular control of the components in different regions of the display.
b. There are four panels required for this GUI:
• One to display all of the buttons, buttonPanel
• Another to display the checkboxes, chkbxPanel
• A third to display the account information (customer id and amount) and the checkbox panel, infoPanel
• The fourth to display the TextArea, textPanel
Note: This GUI is built using the four panels described above that are then added to the base Panel that is the ATMGUI class (extends from JPanel).
c. Create references for each of the JPanels. These references should be created as fields for the class ATMGUI.
Step 5 Construct the Objects a. Insert a constructor with no arguments for the ATMGUI class.
b. Add code in the constructor to create instances for each component declared in the class. Select the appropriate constructor for each component.
c. Constrain the number of characters to be entered into the Customer id field to be no larger than 10 characters.
d. Compile the class. Correct any errors.
4 - 4 Fundamentals of Java Programming Lab 9.2.5 Copyright 2004, Cisco Systems, Inc.
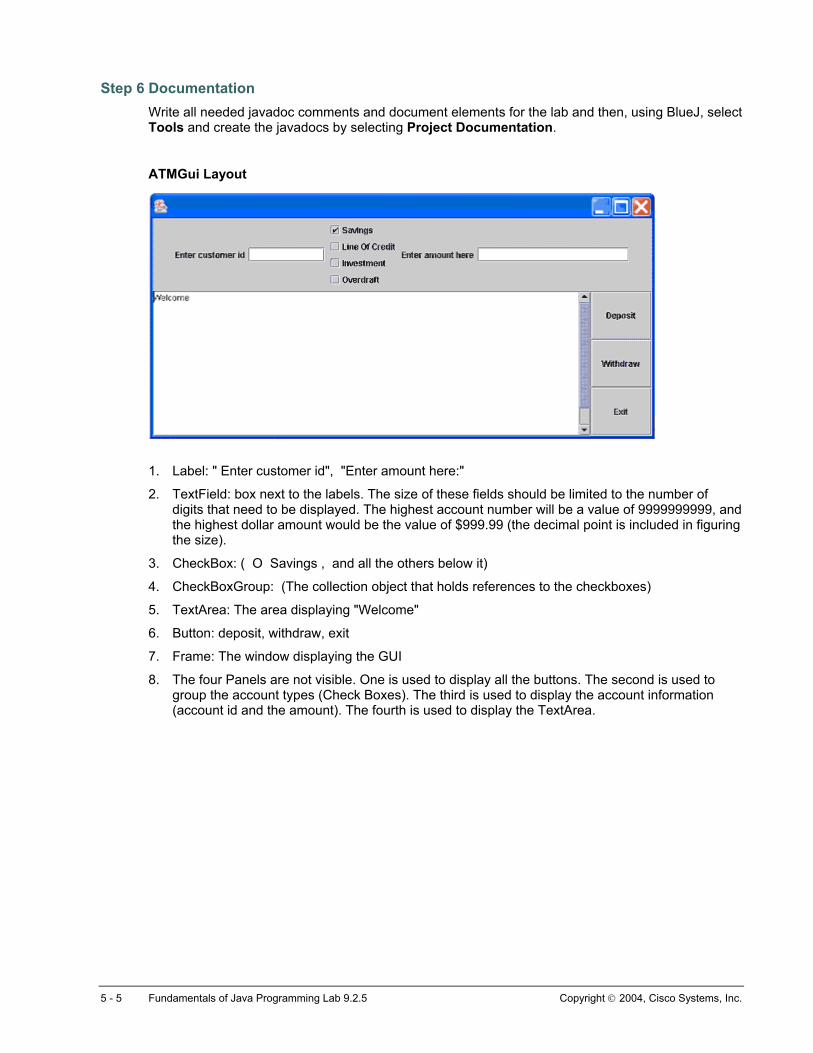
Step 6 Documentation Write all needed javadoc comments and document elements for the lab and then, using BlueJ, select Tools and create the javadocs by selecting Project Documentation.
ATMGui Layout
1. Label: " Enter customer id", "Enter amount here:"
2. TextField: box next to the labels. The size of these fields should be limited to the number of digits that need to be displayed. The highest account number will be a value of 9999999999, and the highest dollar amount would be the value of $999.99 (the decimal point is included in figuring the size).
3. CheckBox: ( O Savings , and all the others below it)
4. CheckBoxGroup: (The collection object that holds references to the checkboxes)
5. TextArea: The area displaying "Welcome"
6. Button: deposit, withdraw, exit
7. Frame: The window displaying the GUI
8. The four Panels are not visible. One is used to display all the buttons. The second is used to group the account types (Check Boxes). The third is used to display the account information (account id and the amount). The fourth is used to display the TextArea.
5 - 5 Fundamentals of Java Programming Lab 9.2.5 Copyright 2004, Cisco Systems, Inc.
Lab 9.2.9 Use Layout Managers and Assemble the Components
Estimated Time 60 minutes
Learning Objective In this lab activity, students will correctly identify Layout managers and use them to control the layout of components in containers.
Students will assemble the components using different containers, and display the GUI using a JFrame.
Description/Scenario • Each container object will add other components or containers when the add() method of the
container is called and a component object reference passed to it. Each container has a default Layout manager object that sets the position for displaying each component. The default Layout manager for Panel is the FlowLayout manager, and for Frames it is BorderLayout. The BorderLayout manager breaks up the area into five regions. The regions are North, South, East, West, and Center.
• The setLayout(new BorderLayout()); method will create a new instance of the BorderLayout object for the specific container. The add(component, Region); statement adds a specific component in the region. The region can be specified using the syntax BorderLayout.NORTH, or "North”. When selecting regions, make sure that the CENTER region is always used in that container.
• Components are displayed by using the setVisible() method. It is best to display the GUI after all of the components have been built and added to the Panels, Frames, and Windows. The method setVisible() is used to display components. The last container, the base for the display, is the container whose setVisible() method is called. This method accepts the boolean value true to make the components visible and false to hide them.
• The setVisible() method can be used on a specific component other than the base container that contains all other components.
• The setSize() method can be used to set the absolute size of a component. Because the layout manager is responsible for the size and position of components on its container, the programmer should normally not attempt to set the size or the position of components manually. The layout manager could override manual decisions. In addition to the setSize() method, the pack() method can be used to place all of the components within a small Panel or Frame.
1 - 1 Fundamentals of Java Programming Lab 9.2.9 Copyright 2004, Cisco Systems, Inc.

File Management For this lab, launch BlueJ. Click on Project from the BlueJ main menu and select Open, navigate to the folder chap9, and select the BlueJ project lab9.2.5. An alternative method is to select Project and Open Recent, and select the previous JBANK lab 9.2.5.
Now save this Project under a new name lab9.2.9. To do this, select Project and Save as, change the Folder in the Look In: box to chap9, and type lab9.2.9 as the new Project name. The Project window title should display lab9.2.9.
Tasks
Step 1 Understand Layout Managers (No computer required for this step) a. Using the hard copy of the TellerGUI source code provided below, identify the Layout
managers that are used for this GUI.
b. Add line comments to the sheet, indicating what each one is and how it is used.
c. What are the regions of the BorderLayout?
d. If only one region of BorderLayout is to be used, which one should be selected?
e. What syntax does GridLayout use?
f. Name four Layout managers.
g. Can a Layout manager be created?
2 - 2 Fundamentals of Java Programming Lab 9.2.9 Copyright 2004, Cisco Systems, Inc.
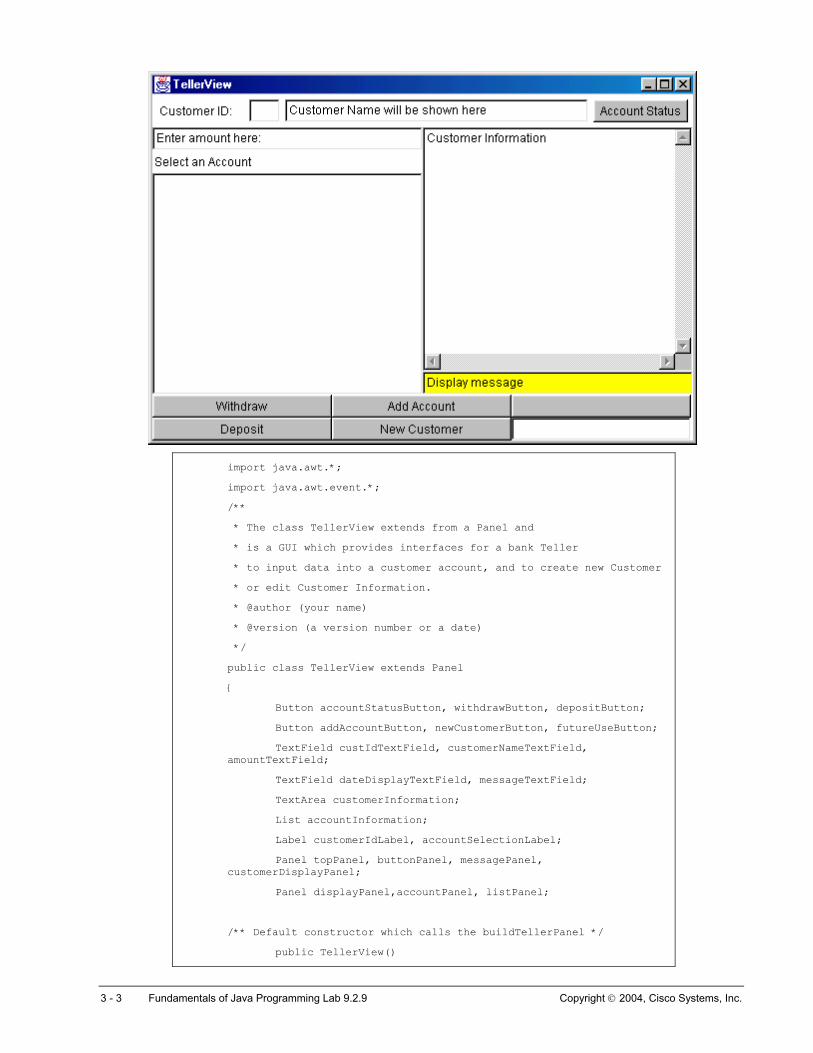
import java.awt.*;
import java.awt.event.*;
/**
* The class TellerView extends from a Panel and
* is a GUI which provides interfaces for a bank Teller
* to input data into a customer account, and to create new Customer
* or edit Customer Information.
* @author (your name)
* @version (a version number or a date)
*/
public class TellerView extends Panel
{
Button accountStatusButton, withdrawButton, depositButton;
Button addAccountButton, newCustomerButton, futureUseButton;
TextField custIdTextField, customerNameTextField, amountTextField;
TextField dateDisplayTextField, messageTextField;
TextArea customerInformation;
List accountInformation;
Label customerIdLabel, accountSelectionLabel;
Panel topPanel, buttonPanel, messagePanel, customerDisplayPanel;
Panel displayPanel,accountPanel, listPanel;
/** Default constructor which calls the buildTellerPanel */
public TellerView()
3 - 3 Fundamentals of Java Programming Lab 9.2.9 Copyright 2004, Cisco Systems, Inc.
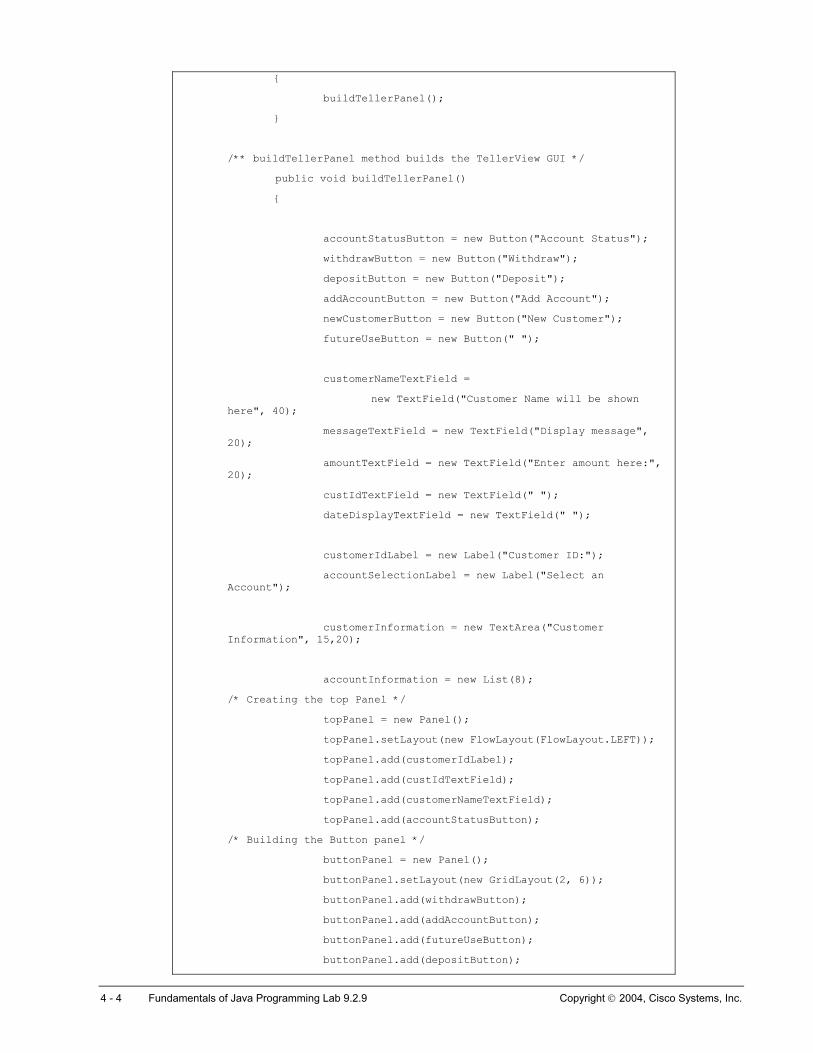
{
buildTellerPanel();
}
/** buildTellerPanel method builds the TellerView GUI */
public void buildTellerPanel()
{
accountStatusButton = new Button("Account Status");
withdrawButton = new Button("Withdraw");
depositButton = new Button("Deposit");
addAccountButton = new Button("Add Account");
newCustomerButton = new Button("New Customer");
futureUseButton = new Button(" ");
customerNameTextField =
new TextField("Customer Name will be shown here", 40);
messageTextField = new TextField("Display message", 20);
amountTextField = new TextField("Enter amount here:", 20);
custIdTextField = new TextField(" ");
dateDisplayTextField = new TextField(" ");
customerIdLabel = new Label("Customer ID:");
accountSelectionLabel = new Label("Select an Account");
customerInformation = new TextArea("Customer Information", 15,20);
accountInformation = new List(8);
/* Creating the top Panel */
topPanel = new Panel();
topPanel.setLayout(new FlowLayout(FlowLayout.LEFT));
topPanel.add(customerIdLabel);
topPanel.add(custIdTextField);
topPanel.add(customerNameTextField);
topPanel.add(accountStatusButton);
/* Building the Button panel */
buttonPanel = new Panel();
buttonPanel.setLayout(new GridLayout(2, 6));
buttonPanel.add(withdrawButton);
buttonPanel.add(addAccountButton);
buttonPanel.add(futureUseButton);
buttonPanel.add(depositButton);
4 - 4 Fundamentals of Java Programming Lab 9.2.9 Copyright 2004, Cisco Systems, Inc.
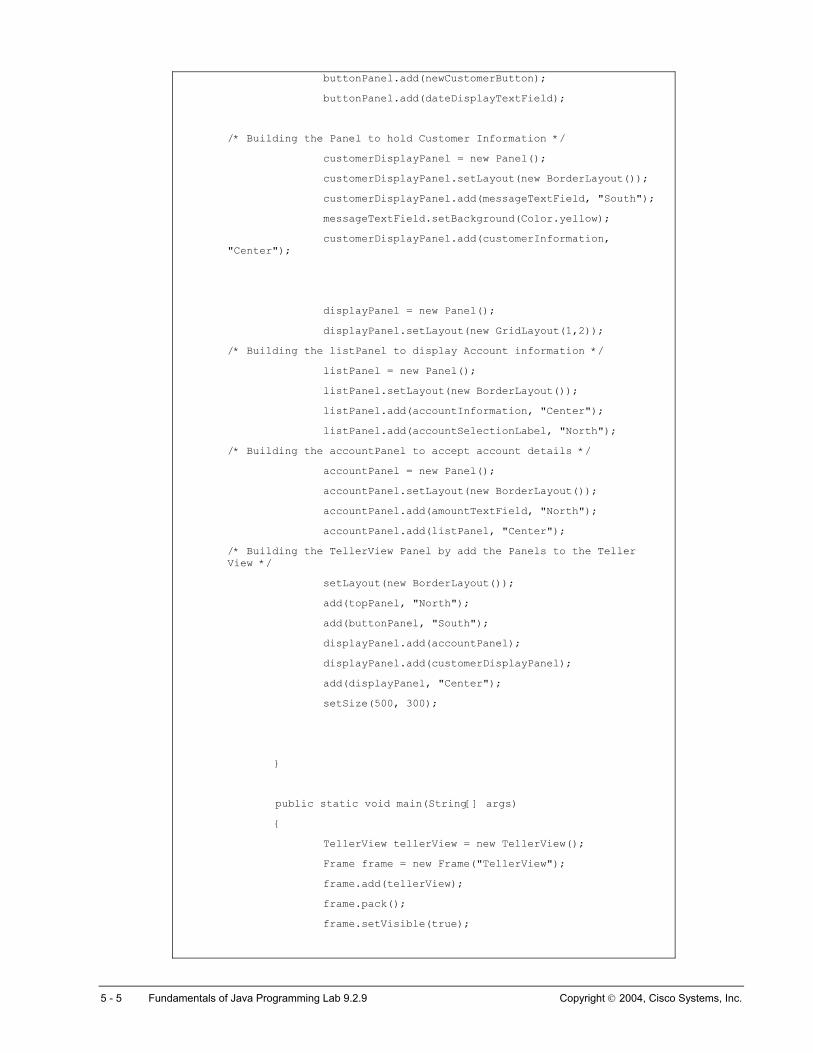
buttonPanel.add(newCustomerButton);
buttonPanel.add(dateDisplayTextField);
/* Building the Panel to hold Customer Information */
customerDisplayPanel = new Panel();
customerDisplayPanel.setLayout(new BorderLayout());
customerDisplayPanel.add(messageTextField, "South");
messageTextField.setBackground(Color.yellow);
customerDisplayPanel.add(customerInformation, "Center");
displayPanel = new Panel();
displayPanel.setLayout(new GridLayout(1,2));
/* Building the listPanel to display Account information */
listPanel = new Panel();
listPanel.setLayout(new BorderLayout());
listPanel.add(accountInformation, "Center");
listPanel.add(accountSelectionLabel, "North");
/* Building the accountPanel to accept account details */
accountPanel = new Panel();
accountPanel.setLayout(new BorderLayout());
accountPanel.add(amountTextField, "North");
accountPanel.add(listPanel, "Center");
/* Building the TellerView Panel by add the Panels to the Teller View */
setLayout(new BorderLayout());
add(topPanel, "North");
add(buttonPanel, "South");
displayPanel.add(accountPanel);
displayPanel.add(customerDisplayPanel);
add(displayPanel, "Center");
setSize(500, 300);
}
public static void main(String[] args)
{
TellerView tellerView = new TellerView();
Frame frame = new Frame("TellerView");
frame.add(tellerView);
frame.pack();
frame.setVisible(true);
5 - 5 Fundamentals of Java Programming Lab 9.2.9 Copyright 2004, Cisco Systems, Inc.
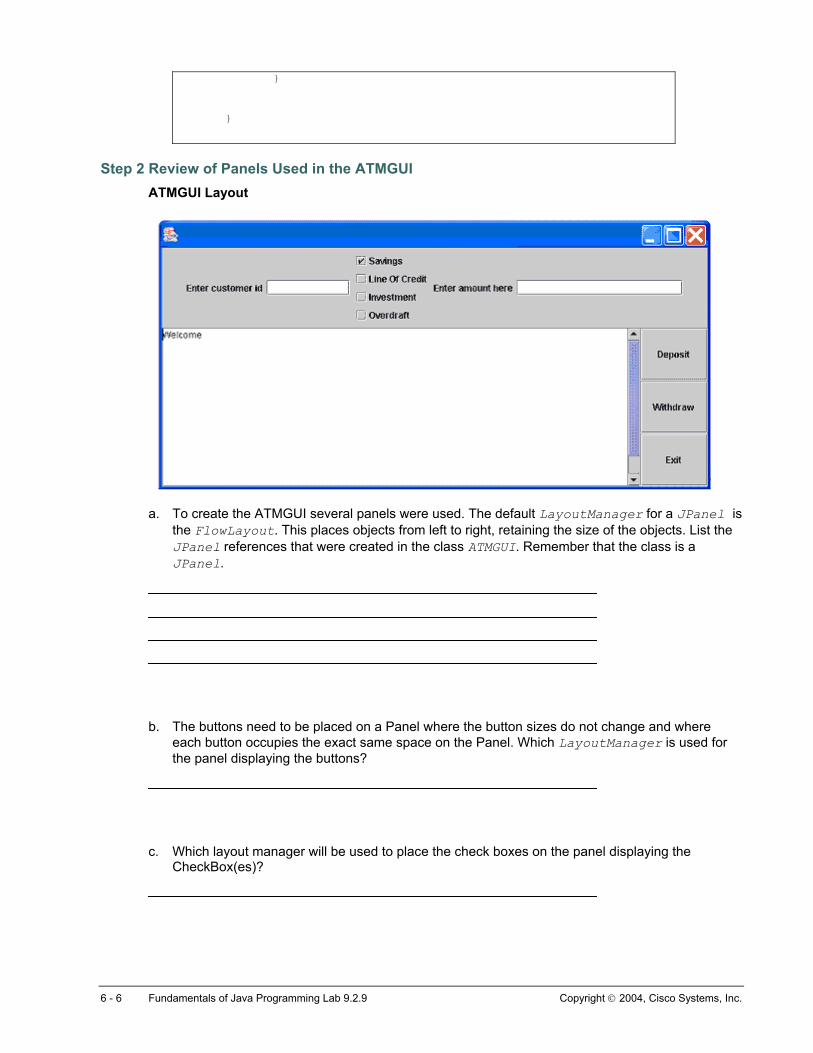
}
}
Step 2 Review of Panels Used in the ATMGUI ATMGUI Layout
a. To create the ATMGUI several panels were used. The default LayoutManager for a JPanel is
the FlowLayout. This places objects from left to right, retaining the size of the objects. List the JPanel references that were created in the class ATMGUI. Remember that the class is a JPanel.
b. The buttons need to be placed on a Panel where the button sizes do not change and where each button occupies the exact same space on the Panel. Which LayoutManager is used for the panel displaying the buttons?
c. Which layout manager will be used to place the check boxes on the panel displaying the CheckBox(es)?
6 - 6 Fundamentals of Java Programming Lab 9.2.9 Copyright 2004, Cisco Systems, Inc.
d. A Panel will be used to display the Checkbox Panel and the labels and text fields for account id and amount. Which LayoutManager will be appropriate for this panel?
e. Which layout manager is used to place the TextArea on a panel?
f. Which Layout is used to manage the containers that will be placed on the base Panel (the ATMGUI)?
Step 3 Set Layout Managers a. The constructor of the GUI class will be used to create all of the components used in the GUI.
The constructor includes a method call to the buildGUI() method. The GUI will be assembled and completed in this method.
b. Create a method buildGUI(), with return type void, and no arguments.
c. Insert into the buildGUI method code to assemble the panels after selecting the layout. The code in this GUI must be organized such that the assembly of the components occur in a sequential and logical manner. When assembling the GUI components begin by assembling each of the smaller components first. One possible sequence is shown below:
i. buttonPanel – to display all of the buttons – select the layout manager and add all the buttons to this panel
ii. chkbxPanel – to display the checkboxes – select the layout manager and add checkboxes to this panel
iii. infoPanel – to display the account information, customer id and amount, and the checkbox panel – select the layout manager, and place the text labels, text fields and the checkbox panel. This is where you will learn to place a container ontop of another container
iv. textPanel – This panel will hold both a textArea component and the button panel.
v. Add the infoPanel and the textPanel to the ATMGUI which is also a Panel.
d. Select one panel at a time, beginning with the buttonPanel, and set the layout manager for the panel. Add the buttons to this panel calling the add method of the buttonPanel object. An example of code used to accomplish this is:
buttonPanel.add(button1);
Add the buttons to the panel, in the order in which they are to be displayed. Deposit is the first button. Sequence is important.
e. CheckBoxes should be added to the Panel in the order in which they are to be displayed. The first one is Savings.
7 - 7 Fundamentals of Java Programming Lab 9.2.9 Copyright 2004, Cisco Systems, Inc.
f. Once the buttonPanel, chkbxPanel, infoPanel, and textPanel have all been assembled, add the infoPanel to the top (North) of the ATMGUI and the textPanel to the bottom (South) of the ATMGUI. Since the ATMGUI class is a JPanel, the syntax would be as follows:
add(infoPanel), or this.add(infoPanel)
g. Add a method to the buildGUI method as a last line of code in the constructor.
Step 4 Positioning a component a. A layout manager determines the position and size of a component in a container. When the
container needs to position a component, it invokes the layout manager to do so. The same delegation occurs when deciding on the size of a component. The layout manager generally is responsible for the size and positions on its container. What method will be used to set the size of the Panel?
b. Set the size of the Base Panel so that it displays a GUI approximately 7.5 cm (3 inches) in height and 20 cm (7inches) in width. Assume that 100 pixels can be displayed in 2.5 cm (1 inch) and set the size using pixels. (Size dimensions used for the sample were 700 , 300).
Step 5 Display the GUI a. The GUI is now ready for display. Remember, a JPanel is a free-floating container that requires
a Frame or Window object to be visible. Since this Panel will be used for both an application and will be used to launch the ATMGUI in a frame.
b. In the Teller class, make the following modifications:
• Add the necessary import statements to utilize awt and swing classes.
• Replace all the code in the main method with code to display the GUI by creating a reference for a single instance (object) of the ATMGUI class:
ATMGUI atmg = new ATMGUI();
• Then Create a reference for a single instance of the JFrame object:
JFrame frame = new JFrame();
• Obtain a reference to the ContentPane of the JFrame object:
Container cp = frame.getContentPane();
• Add the ATMGUI object to the ContentPane:
cp.add(atmg);
• Make the JFrame visible:
frame.setVisible(true);
• Compile the class.
• Run the Teller class main method.
Step 6 Documentation a. Write all needed javadoc comments and document elements for the lab and then, using BlueJ,
select Tools and create the javadocs by selecting Project Documentation.
8 - 8 Fundamentals of Java Programming Lab 9.2.9 Copyright 2004, Cisco Systems, Inc.
Lab 9.2.11 Add Color and Font Enhancements to the Components
Estimated Time 30 minutes
Learning Objective In this lab activity, the student will use Color and Font objects to enhance the look of some of the components.
Description/Scenario • Display type components in a GUI can be enhanced with color and font features.
• The setBackground() method inherited from the component class is used to set the background color of a component. For example a button that should display a red background and black lettering can be enhanced by using the setBackground() method and using the object Color.red or Color.Red. The foreground, the color of the text, can be set with the setForeground() method.
• Color objects can be created using the constructor for the Color class, part of the java.awt package. The Color class also defines a number of static color objects with the appropriate levels of red, green and blue to represent different colors. These color objects are generally referenced as Color.nameofcolor such as Color.Red, or Color.Magenta.
• Font represents graphic representations of letters and symbols of a language. The Font class allows for the creation of font objects. Section 9.2.11 provides information about a number of different font families.
• Font object are created using the constructor. When creating a font object, the name of the typeface, the style of the font, and the size of the font are provided. The int constants Font.ITALIC, Font.BOLD, Font.PLAIN are examples of font styles.
• Some sample font objects are created below:
Font f1 = new Font(“Serif”,Font.ITALIC, 14): Font f2 = new Font(“Monospaced”,Font.ITALIC + Font.BOLD, 14);
File Management For this lab, launch BlueJ. Click on Project from the BlueJ main menu and select Open, navigate to the folder chap9, and select the BlueJ project lab9.2.9. An alternative method is to select Project and Open Recent, and select the previous JBANK lab9.2.9.
Now save this Project under a new name lab9.2.11. To do this, select Project and Save as, change the Folder in the Look In: box to chap9, and type lab9.2.11 as the new Project name. The Project window title should display lab9.2.11.
1 - 1 Fundamentals of Java Programming Lab 9.2.11 Copyright 2004, Cisco Systems, Inc.
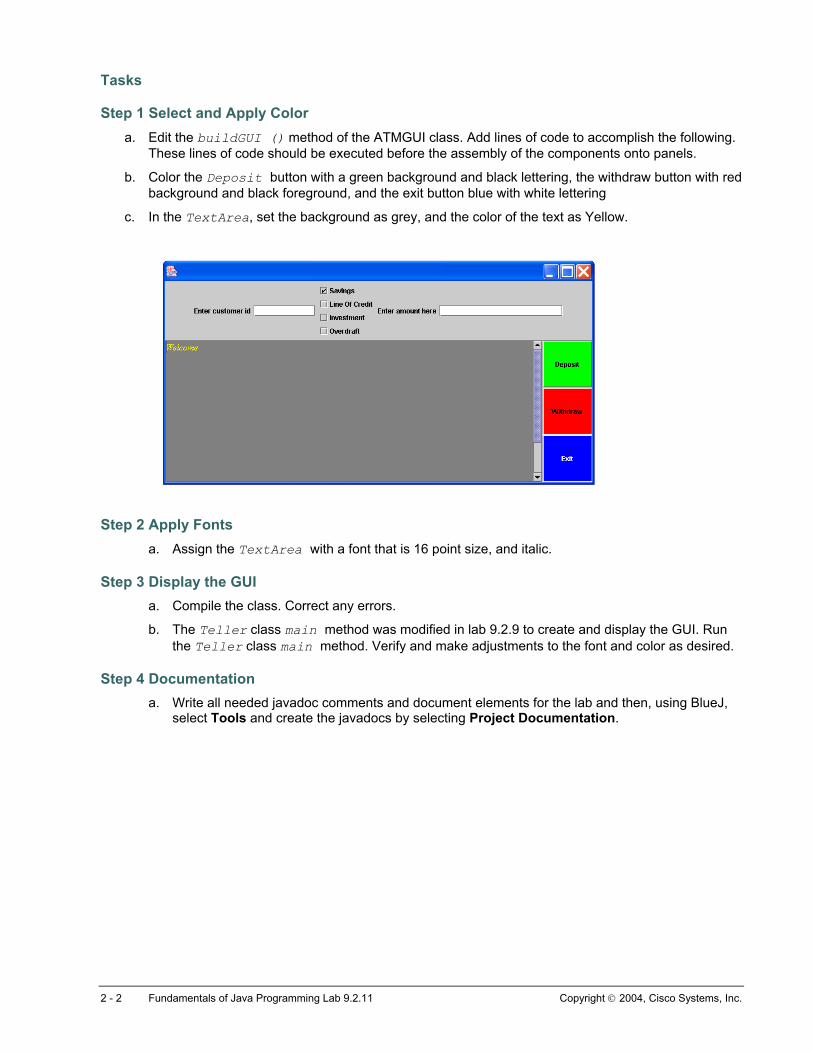
Tasks
Step 1 Select and Apply Color a. Edit the buildGUI () method of the ATMGUI class. Add lines of code to accomplish the following.
These lines of code should be executed before the assembly of the components onto panels.
b. Color the Deposit button with a green background and black lettering, the withdraw button with red background and black foreground, and the exit button blue with white lettering
c. In the TextArea, set the background as grey, and the color of the text as Yellow.
Step 2 Apply Fonts a. Assign the TextArea with a font that is 16 point size, and italic.
Step 3 Display the GUI a. Compile the class. Correct any errors.
b. The Teller class main method was modified in lab 9.2.9 to create and display the GUI. Run the Teller class main method. Verify and make adjustments to the font and color as desired.
Step 4 Documentation a. Write all needed javadoc comments and document elements for the lab and then, using BlueJ,
select Tools and create the javadocs by selecting Project Documentation.
2 - 2 Fundamentals of Java Programming Lab 9.2.11 Copyright 2004, Cisco Systems, Inc.
Lab 9.4.3.1 Create an Applet to Display Employee Information
Estimated Time 20 minutes
Learning Objective In this lab activity, the student will create an applet to display information.
Description/Scenario • The basic steps followed in the creation and use of applets is outlined below:
o Design the GUI that you wish to display
o Create a class that extends from the Applet class
o Compile the applet
o Create a HTML file. Insert the statements that call the Applet class
o Open a Browser or use the appletviewer program and call the HTML file
• An applet cannot be run directly. It requires an HTML file and a browser to display the HTML file. The Java platform also provides the appletviewer program to test run the applets.
• Writing an Applet class will require several things:
o Adding more import statements (in addition to others such as java.awt.*; java.awt.event.*; )
o Adding components
o Implementing the methods to handle what happens to the applet when the window is resized or minimized
o Including the use of the Font and Color classes to set the properties of text and graphics
o Including the use the Graphics class to draw images on the display
o Implementing event handling through WindowListener and ActionListener objects
• Create an Employee class that will extend from Applet.
• Use the AWT components TextField and Label to display employee information.
• Create the .java file and compile it to create the .class file.
• Create a HTML document to display the .class file or use BlueJ’s ability to run an applet from an appletviewer or a browser when you right-click on the class and select run.
• Create an applet to display information about an Employee.
• The Employee class will extend from Applet. This applet displays the information using the AWT components TextField and Label.
1 - 1 Fundamentals of Java Programming Lab 9.4.3.1 Copyright 2004, Cisco Systems, Inc.
• Create the .java file, compile it to create the .class file and then create a HTML document to display the .class file.
• Remember you cannot display the applet unless you have the .java file compiled to it’s corresponding .class file.
• The HTML document references the .class file and not the .java file.
File Management Open BlueJ. Click on Project from the BlueJ main menu and select New. In the New Project window and in the Look in: list box navigate to the chap9 folder. Double-click the chap9 folder listed in the text window and a different New Project window opens with chap9 in the Look in: list box. Type lab9.4.3.1in the File name text box and click on Create to create a lab9.4.3.1.
Tasks
Step 1 Create the Applet a. Create a class named Employee that extends Applet. To create an Applet, you will require
import statements such as import java.awt.* , java.awt.event and java.applet.*
b. The applet’s class must be public and its name must match the name of the file. The class must be sub-classed from the class java.applet.Applet that extends from Applet.
c. Create a Label for first name, last name, street address, city, and state. A sample is shown below:
Label firstName = new Label(“First Name”);
d. Initialize the Labels to the appropriate names.
e. Create a TextField for first name, last name, street address, city, and state.
f. Initialize the TextFields. Set the first name to “John”, last name to “Smith”, street Address to “123 North Fifth Street”, city to “Mesa”, and state to “Arizona”.
Step 2 Create the HTML a. In the init( ) method set the layout of the applet to GridLayout(5,2).
b. Add the Label and then the TextField until all five sets have been added to the applet. A sample is shown below:
add(firstName);
c. Compile the program and right-click on the Employee class and click on Run Applet. Set the height to 150 and the width to 300. You will be able to view the Applet.
d. If you want to create a HTML document open Notepad and write the following sample code:
<HTML> <APPLET CODE =Employee.class WIDTH = 300 HEIGHT = 150> </APPLET> </HTML>
e. Save the file as emp.html in your working folder. Open the browser and run the HTML file.
2 - 2 Fundamentals of Java Programming Lab 9.4.3.1 Copyright 2004, Cisco Systems, Inc.
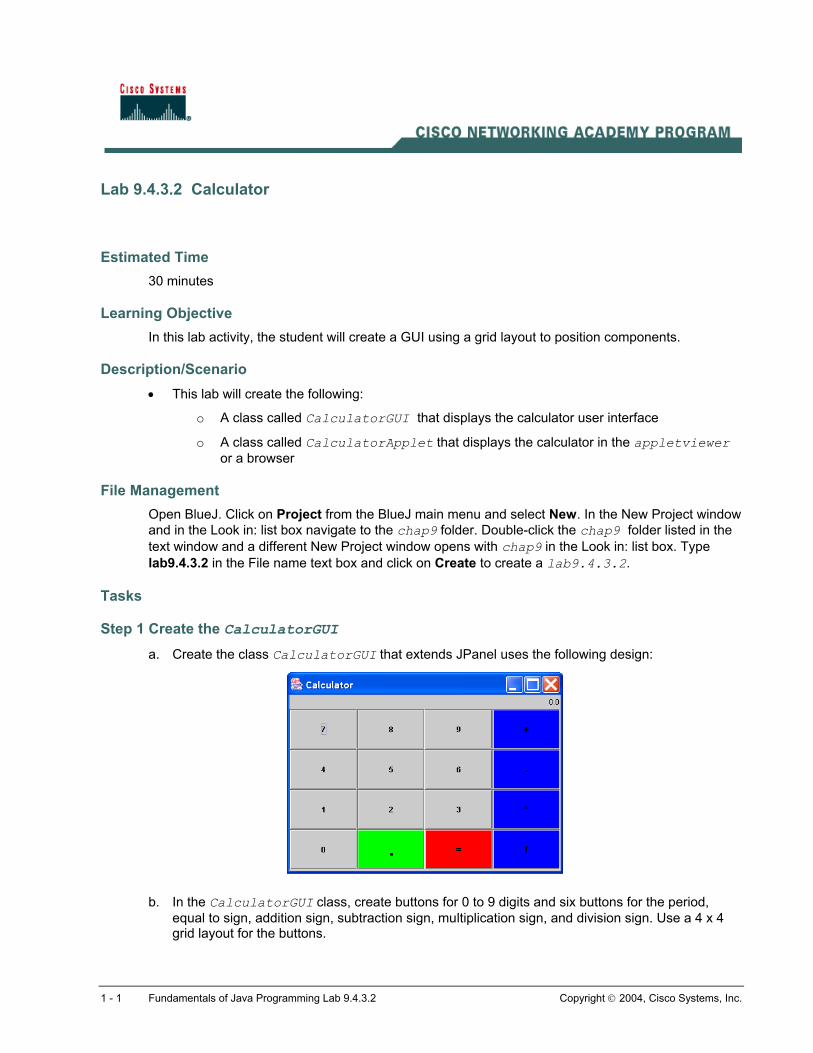
Lab 9.4.3.2 Calculator
Estimated Time 30 minutes
Learning Objective In this lab activity, the student will create a GUI using a grid layout to position components.
Description/Scenario • This lab will create the following:
o A class called CalculatorGUI that displays the calculator user interface
o A class called CalculatorApplet that displays the calculator in the appletviewer or a browser
File Management Open BlueJ. Click on Project from the BlueJ main menu and select New. In the New Project window and in the Look in: list box navigate to the chap9 folder. Double-click the chap9 folder listed in the text window and a different New Project window opens with chap9 in the Look in: list box. Type lab9.4.3.2 in the File name text box and click on Create to create a lab9.4.3.2.
Tasks
Step 1 Create the CalculatorGUI a. Create the class CalculatorGUI that extends JPanel uses the following design:
b. In the CalculatorGUI class, create buttons for 0 to 9 digits and six buttons for the period,
equal to sign, addition sign, subtraction sign, multiplication sign, and division sign. Use a 4 x 4 grid layout for the buttons.
1 - 1 Fundamentals of Java Programming Lab 9.4.3.2 Copyright 2004, Cisco Systems, Inc.
c. You can use a loop to create each button that represents a digit from 0-9. A sample is shown below. An array of JButton object is referenced by the variable manyButtons.
for(int x = 0; x < 10; x++) { Integer y = new Integer(x); manyButtons[x] = new Button(y.toString()); }
d. Create the buttons for each symbol separately.
e. Apply a different color for each button with a symbol to make these buttons stand out from the numbers. A sample is shown below.
buttons[10] = new JButton("+"); buttons[10].setBackground(Color.BLUE); buttons[10].setFont(new Font("Helvetica", Font.BOLD, 16));
Make sure the font size for the decimal point is large, as shown below:
buttons[13] = new JButton("."); buttons[13].setBackground(Color.GREEN); buttons[13].setFont(new Font("Helvetica",Font.BOLD, 26));
f. Use panels and layout managers that will assist you in the CalculatorGUI design. The class is a JPanel. One additional panel will be needed to place the buttons
g. Assemble the GUI by adding the buttons a button panel. This should use a grid layout. Make sure you add the buttons in the correct order.
h. Use a BorderLayout manager for the Class, which is a JPanel. This class serves as the base panel for the buttons and the label that displays the answers. Add the buttonPanel to the center of the CalculatorGUI and the label to the north of the GUI.
Step 2 Create the Class CalculatorApplet a. Create a class named CalculatorApplet that extends JApplet.
b. Create an instance of the CalculatorGUI class, and this object to contentPan, obtaining the content pane from the JApplet. Keep in mind that the init() method of the JApplet class is where you assemble or add the CalculatorGUI (JPanel).
c. Launch this applet using the appletviewer or the browser option after selecting run from the menu in response to the right clicking of the CalculatorApplet class in the BlueJ IDE.
d. Display the Calculator using an applet.
2 - 2 Fundamentals of Java Programming Lab 9.4.3.2 Copyright 2004, Cisco Systems, Inc.
Lab 10.1.3.1 Event handling – A simple Personality Tool
Estimated Time 60 minutes
Learning Objective In this lab activity, the student will display multiple pieces of textual information based on user interactions.
Description/Scenario • This lab will expand on the use of event handling technology, setting colors as part of event
handling technologies, and other enhancements to the GUI.
• Using a Frame or Window of the awt API will require that the programmer include event handling for managing window events, such as closing or minimizing. The WindowListener interface provides methods for this functionality.
• The swing component JFrame implements a default method to close the window. In the GUIs created thus far, you are able to close the GUI by pressing the close button. This added functionality could be overridden if the programmer wants to add additional functionality, such a closing files or network connections before closing a window.
• The Model View Controller design pattern suggests that separate classes perform the duties of displaying the view, handling user interaction, and representing the business logic or model.
• Since separate classes are desired, in this lab we will implement the following:
o The view – the code for displaying the GUI
o The controller – the code to manage the user request
o The model – which is the actual data or model to be displayed in the same class
• The first step prepares the view, and then tests and displays it.
• The second step does both the implementation of code that will serve as the controller as well as implements the business logic, the actual response to user requests.
• The third step connects the different functions. These are the view and the controller, connected via the registration of the listener to the button.
File Management Open BlueJ. Click on Project from the BlueJ main menu and select New. In the New Project window and in the Look in: list box navigate to the chap10 folder. Double-click the chap10 folder listed in the text window and a different New Project window opens with chap10 in the Look in: list box. Type lab10.1.3.1 in the File name text box and click on Create to create a lab10.1.3.1 subfolder in the chap10 folder.
1 - 1 Fundamentals of Java Programming Lab 10.1.3.1 Copyright 2004, Cisco Systems, Inc.
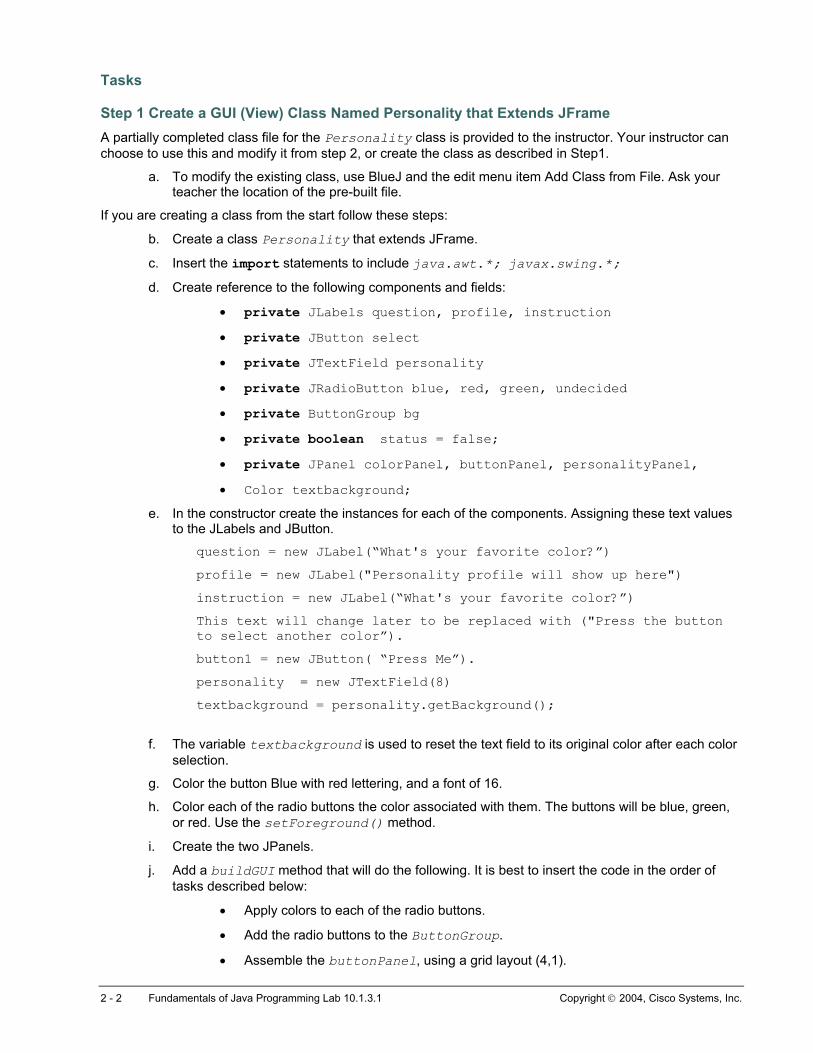
Tasks
Step 1 Create a GUI (View) Class Named Personality that Extends JFrame A partially completed class file for the Personality class is provided to the instructor. Your instructor can choose to use this and modify it from step 2, or create the class as described in Step1.
a. To modify the existing class, use BlueJ and the edit menu item Add Class from File. Ask your teacher the location of the pre-built file.
If you are creating a class from the start follow these steps:
b. Create a class Personality that extends JFrame.
c. Insert the import statements to include java.awt.*; javax.swing.*;
d. Create reference to the following components and fields:
• private JLabels question, profile, instruction • private JButton select • private JTextField personality • private JRadioButton blue, red, green, undecided • private ButtonGroup bg • private boolean status = false; • private JPanel colorPanel, buttonPanel, personalityPanel, • Color textbackground;
e. In the constructor create the instances for each of the components. Assigning these text values to the JLabels and JButton.
question = new JLabel(“What's your favorite color?”)
profile = new JLabel("Personality profile will show up here")
instruction = new JLabel(“What's your favorite color?”)
This text will change later to be replaced with ("Press the button to select another color”).
button1 = new JButton( “Press Me”).
personality = new JTextField(8)
textbackground = personality.getBackground();
f. The variable textbackground is used to reset the text field to its original color after each color selection.
g. Color the button Blue with red lettering, and a font of 16.
h. Color each of the radio buttons the color associated with them. The buttons will be blue, green, or red. Use the setForeground() method.
i. Create the two JPanels.
j. Add a buildGUI method that will do the following. It is best to insert the code in the order of tasks described below:
• Apply colors to each of the radio buttons.
• Add the radio buttons to the ButtonGroup.
• Assemble the buttonPanel, using a grid layout (4,1).
2 - 2 Fundamentals of Java Programming Lab 10.1.3.1 Copyright 2004, Cisco Systems, Inc.
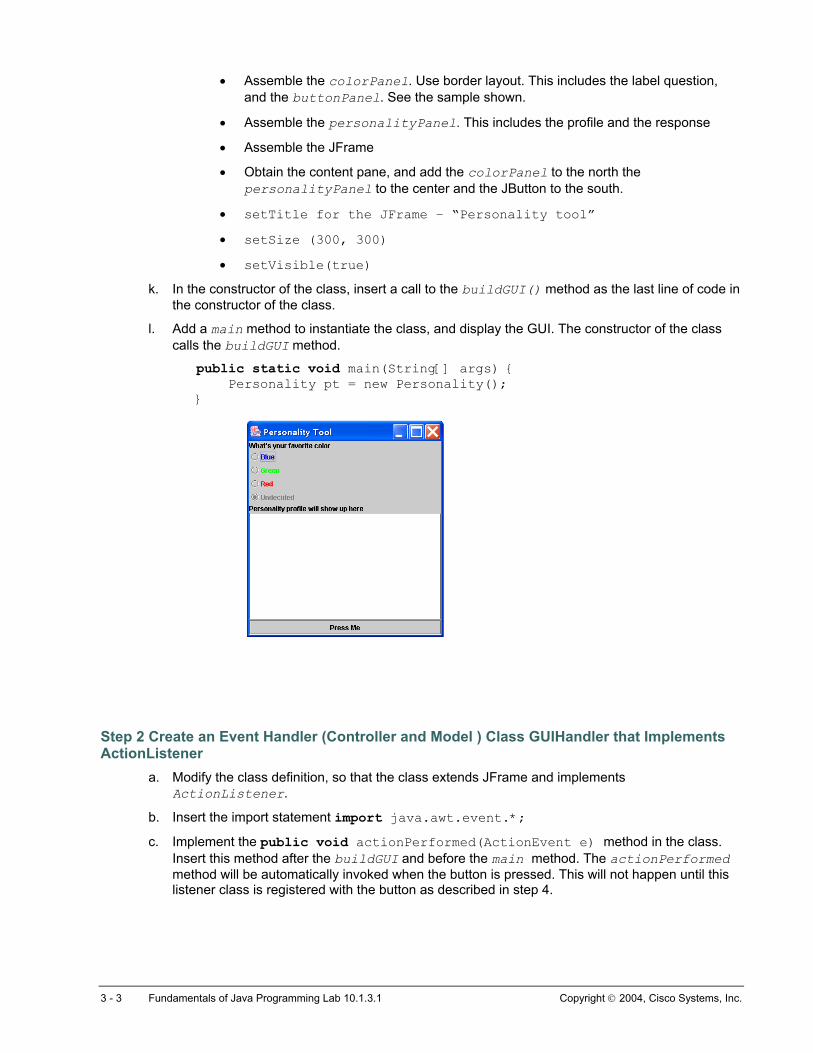
• Assemble the colorPanel. Use border layout. This includes the label question, and the buttonPanel. See the sample shown.
• Assemble the personalityPanel. This includes the profile and the response
• Assemble the JFrame
• Obtain the content pane, and add the colorPanel to the north the personalityPanel to the center and the JButton to the south.
• setTitle for the JFrame – “Personality tool”
• setSize (300, 300)
• setVisible(true)
k. In the constructor of the class, insert a call to the buildGUI() method as the last line of code in the constructor of the class.
l. Add a main method to instantiate the class, and display the GUI. The constructor of the class calls the buildGUI method.
public static void main(String[] args) { Personality pt = new Personality(); }
Step 2 Create an Event Handler (Controller and Model ) Class GUIHandler that Implements ActionListener
a. Modify the class definition, so that the class extends JFrame and implements ActionListener.
b. Insert the import statement import java.awt.event.*;
c. Implement the public void actionPerformed(ActionEvent e) method in the class. Insert this method after the buildGUI and before the main method. The actionPerformed method will be automatically invoked when the button is pressed. This will not happen until this listener class is registered with the button as described in step 4.
3 - 3 Fundamentals of Java Programming Lab 10.1.3.1 Copyright 2004, Cisco Systems, Inc.
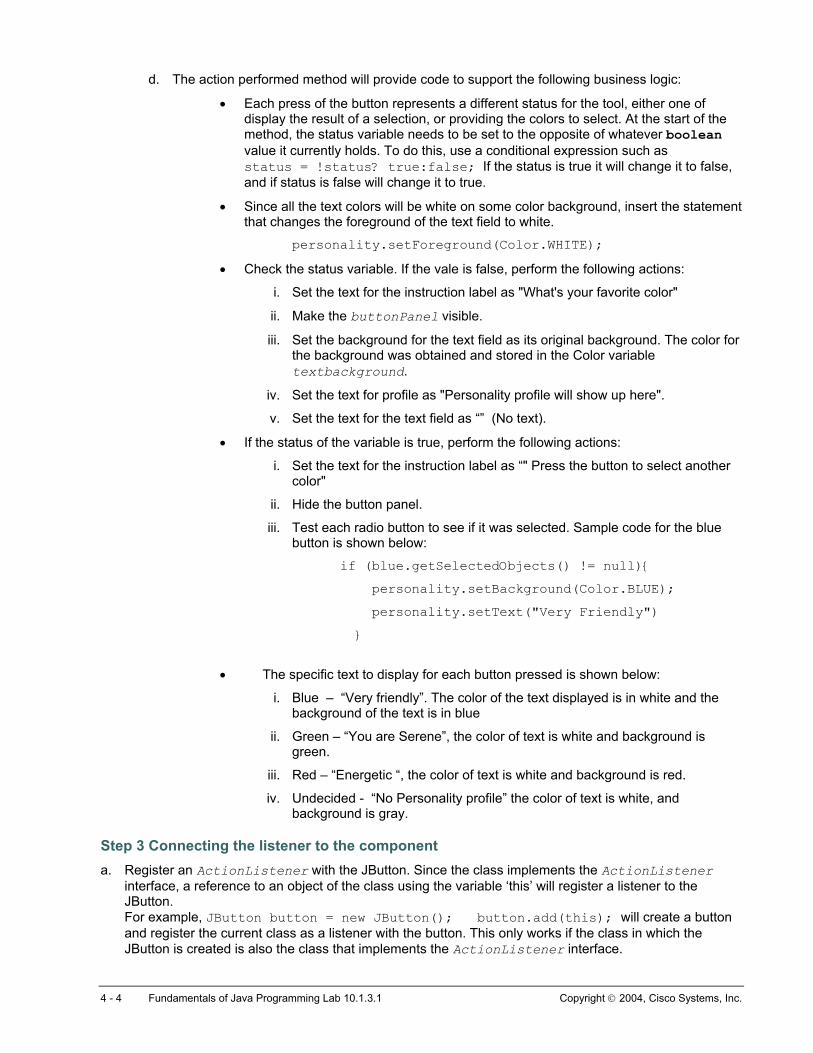
d. The action performed method will provide code to support the following business logic:
• Each press of the button represents a different status for the tool, either one of display the result of a selection, or providing the colors to select. At the start of the method, the status variable needs to be set to the opposite of whatever boolean value it currently holds. To do this, use a conditional expression such as status = !status? true:false; If the status is true it will change it to false, and if status is false will change it to true.
• Since all the text colors will be white on some color background, insert the statement that changes the foreground of the text field to white.
personality.setForeground(Color.WHITE);
• Check the status variable. If the vale is false, perform the following actions:
i. Set the text for the instruction label as "What's your favorite color"
ii. Make the buttonPanel visible.
iii. Set the background for the text field as its original background. The color for the background was obtained and stored in the Color variable textbackground.
iv. Set the text for profile as "Personality profile will show up here".
v. Set the text for the text field as “” (No text).
• If the status of the variable is true, perform the following actions:
i. Set the text for the instruction label as “" Press the button to select another color"
ii. Hide the button panel.
iii. Test each radio button to see if it was selected. Sample code for the blue button is shown below:
if (blue.getSelectedObjects() != null){
personality.setBackground(Color.BLUE);
personality.setText("Very Friendly")
}
• The specific text to display for each button pressed is shown below:
i. Blue – “Very friendly”. The color of the text displayed is in white and the background of the text is in blue
ii. Green – “You are Serene”, the color of text is white and background is green.
iii. Red – “Energetic “, the color of text is white and background is red.
iv. Undecided - “No Personality profile” the color of text is white, and background is gray.
Step 3 Connecting the listener to the component a. Register an ActionListener with the JButton. Since the class implements the ActionListener
interface, a reference to an object of the class using the variable ‘this’ will register a listener to the JButton. For example, JButton button = new JButton(); button.add(this); will create a button and register the current class as a listener with the button. This only works if the class in which the JButton is created is also the class that implements the ActionListener interface.
4 - 4 Fundamentals of Java Programming Lab 10.1.3.1 Copyright 2004, Cisco Systems, Inc.
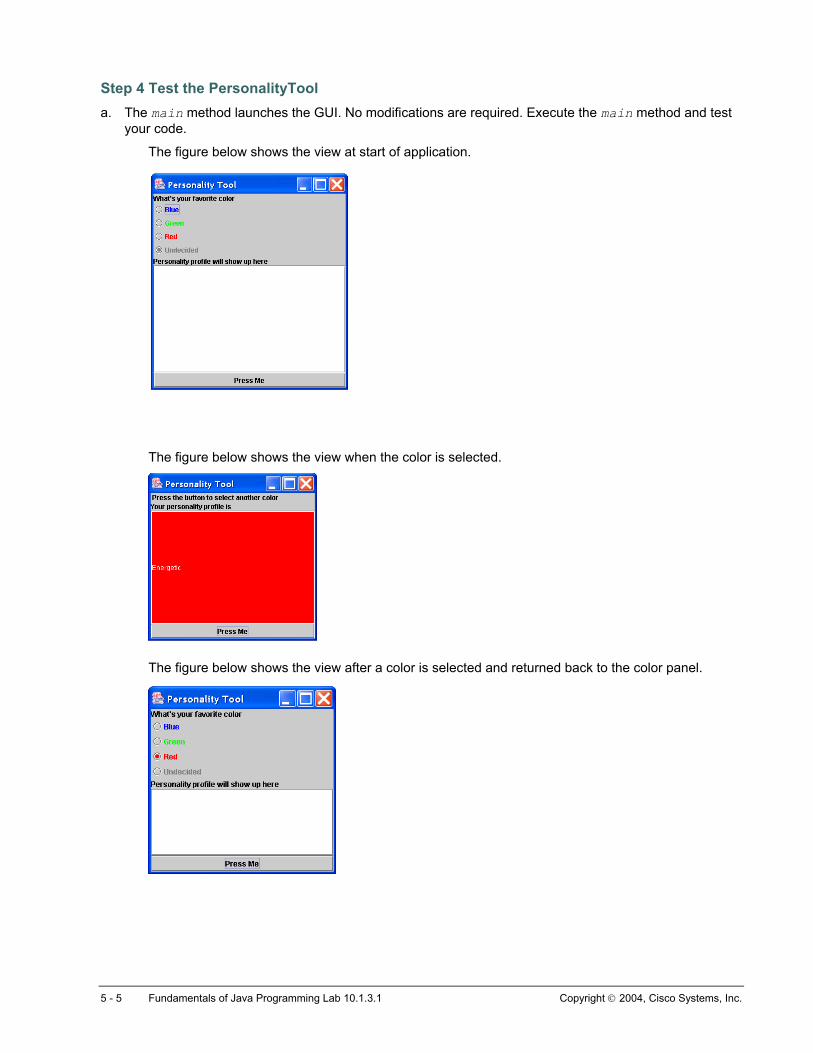
Step 4 Test the PersonalityTool a. The main method launches the GUI. No modifications are required. Execute the main method and test
your code.
The figure below shows the view at start of application.
The figure below shows the view when the color is selected.
The figure below shows the view after a color is selected and returned back to the color panel.
5 - 5 Fundamentals of Java Programming Lab 10.1.3.1 Copyright 2004, Cisco Systems, Inc.

Lab 10.1.3.2 Event Handling and Business Logic Applied to the Calculator Class
Estimated Time 60 minutes
Learning Objective In this lab activity, the student will add event handling functionality and business logic to the CalculatorGUI class created in the previous module.
Description/Scenario • The CalculatorGUI subclasses JPanel, and requires a JFrame or JApplet to display the class.
• A Calculator class will be created that creates a JFrame to display Calculator.
• The Model view controller design pattern is implemented by the following steps:
1. The CalculatorGUI class represents the view and renders, or displays, the data for the model.
2. The CalculatorGUI class declares all the attributes as private (encapsulation). However, access to the attributes will be through methods that retrieve the data from the GUI, and update or referesh the data on the GUI.
3. The Calculator class will function both as the model and the controller. This class will implement the code to handle the functions of the calculator. Here the CalculatorGUI class will implement the ActionListener interface.
4. The CalculatorGUI class will register an instance of the Calculator class with each of the buttons.
5. The Calculator class will hold a reference to the CalculatorGUI.
6. In a Model View controller design pattern each of the class hold references to each other so that they can communicate requests to display data or requests to retrieve data. A view class will generally have a reference to the Model and the Controller, and a controller class will have a reference to a Model and a View. The Model class usually has just a reference to the view.
7. Since the Calculator class serves as both the model and the controller, the class will have a reference to the GUI.
Calculator operations require the use of two operands, or values. The Calculator class will hold the current value displayed, or the intermediate result of an ongoing operation, as result1. As each number is followed by a selection of an operator, the new number is used as number2 and these two numbers will be operated. An example of this sequence of actions, using the equation 23 + 45, is shown below:
1 - 1 Fundamentals of Java Programming Lab 10.1.3.2 Copyright 2004, Cisco Systems, Inc.
a. Create the value 23. To do this, the code should obtain the char symbol for the button pressed. To create 23, the user would press 2 and then 3. Since both button actions are numbers, the program should take each char value and concatenate it with the next char value it receives. The code should perform a test to see if the user has pressed an operation (+ / * -) operator or a number. If the user has pressed a number, then the program should concatenate all of the numbers as the buttons are clicked. As the user presses each button the display should show the value for the number that is selected. Therefore, when the user presses 23, they will first see a 2 and then a 23. When an operator is selected, this should signal to the program that the user has finished entering the value of the first number. Store this value as number 1, and as a variable result.
b. Capture the specific operator pressed by the user. Use a variable to keep track of the particular operator selected. Maintain a boolean variable that indicates that the user is in the midst of a calculation.
c. Create the number 45 in the same way that the number 23 was created from the user interaction. This becomes number 2.
d. Operate on the two numbers based on the operation requested and store the result in the variable result. The result of the operation should then be displayed.
e. If the user presses another numeric button, then the program will start the process again. If the user presses another operations button, then the program will use the result as number 1, and the new number as number 2, performing the appropriate calculation.
File Management Open BlueJ. Click on Project from the BlueJ main menu and select Open. In the Open Project window and in the Look in: list box navigate to the chap9 folder. Double-click the chap9 folder listed in the text window and select lab9.4.3.2. The CalculatorGUI class will be displayed. If you did not complete this lab, ask your instructor for a completed version of the lab 9.4.3.2. Save the project by selecting File and Save as. Name the new project lab10.1.3.2.
Tasks
Step 1 Launching the CalculatorGUI Class
a. The CalculatorGUI class will display as shown in either in a JFrame or a JApplet. If you want to test the class, insert a main method in the class, and add the following lines of code to the method.
public static void main(String[] args){ CalculatorGUI cg = new CalculatorGUI(); JFrame frame = new JFrame("Calculator"); Container cp = frame.getContentPane(); cp.add(cg); frame.setSize(600,300); frame.setVisible(true); }
2 - 2 Fundamentals of Java Programming Lab 10.1.3.2 Copyright 2004, Cisco Systems, Inc.
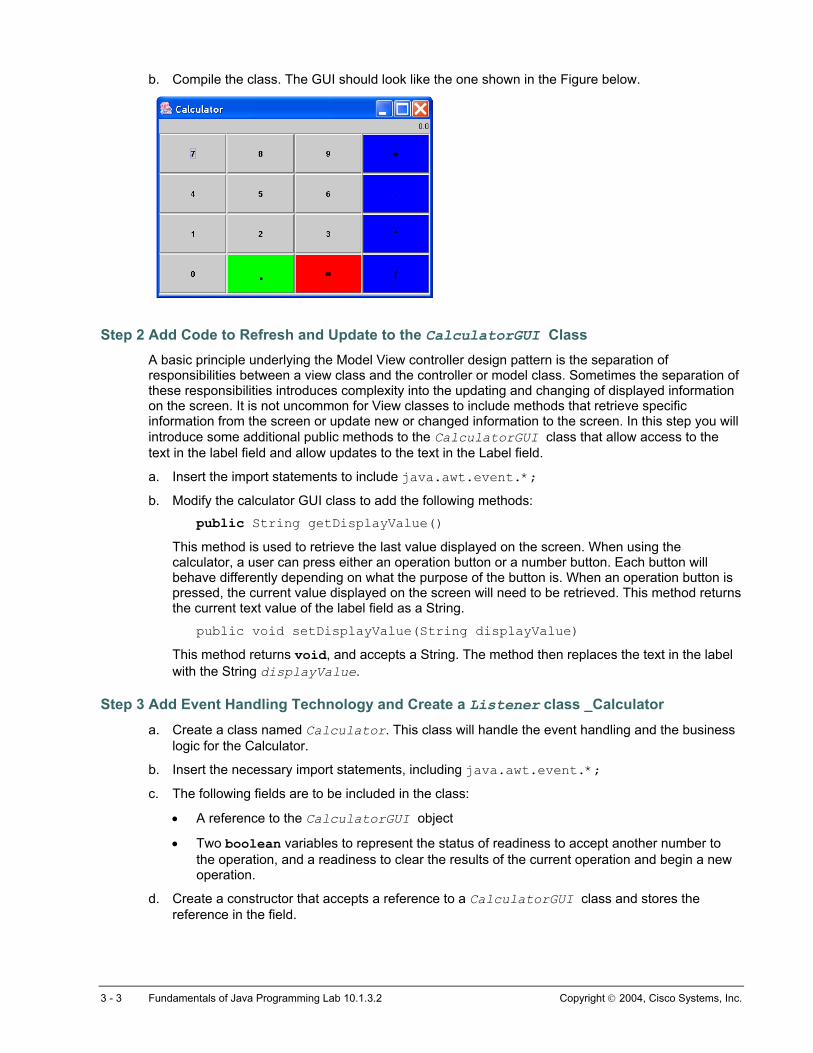
b. Compile the class. The GUI should look like the one shown in the Figure below.
Step 2 Add Code to Refresh and Update to the CalculatorGUI Class A basic principle underlying the Model View controller design pattern is the separation of responsibilities between a view class and the controller or model class. Sometimes the separation of these responsibilities introduces complexity into the updating and changing of displayed information on the screen. It is not uncommon for View classes to include methods that retrieve specific information from the screen or update new or changed information to the screen. In this step you will introduce some additional public methods to the CalculatorGUI class that allow access to the text in the label field and allow updates to the text in the Label field.
a. Insert the import statements to include java.awt.event.*;
b. Modify the calculator GUI class to add the following methods: public String getDisplayValue()
This method is used to retrieve the last value displayed on the screen. When using the calculator, a user can press either an operation button or a number button. Each button will behave differently depending on what the purpose of the button is. When an operation button is pressed, the current value displayed on the screen will need to be retrieved. This method returns the current text value of the label field as a String.
public void setDisplayValue(String displayValue)
This method returns void, and accepts a String. The method then replaces the text in the label with the String displayValue.
Step 3 Add Event Handling Technology and Create a Listener class _Calculator a. Create a class named Calculator. This class will handle the event handling and the business
logic for the Calculator.
b. Insert the necessary import statements, including java.awt.event.*;
c. The following fields are to be included in the class:
• A reference to the CalculatorGUI object
• Two boolean variables to represent the status of readiness to accept another number to the operation, and a readiness to clear the results of the current operation and begin a new operation.
d. Create a constructor that accepts a reference to a CalculatorGUI class and stores the reference in the field.
3 - 3 Fundamentals of Java Programming Lab 10.1.3.2 Copyright 2004, Cisco Systems, Inc.
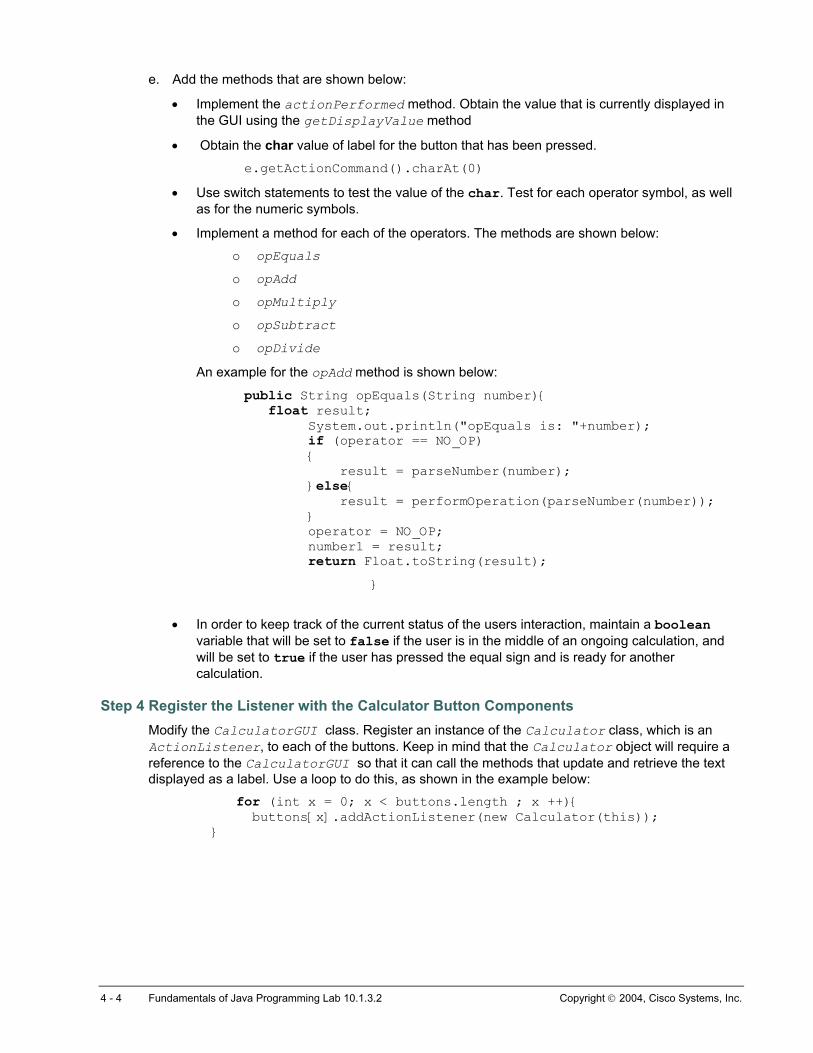
e. Add the methods that are shown below:
• Implement the actionPerformed method. Obtain the value that is currently displayed in the GUI using the getDisplayValue method
• Obtain the char value of label for the button that has been pressed.
e.getActionCommand().charAt(0) • Use switch statements to test the value of the char. Test for each operator symbol, as well
as for the numeric symbols.
• Implement a method for each of the operators. The methods are shown below:
o opEquals
o opAdd
o opMultiply
o opSubtract
o opDivide
An example for the opAdd method is shown below:
public String opEquals(String number){ float result; System.out.println("opEquals is: "+number); if (operator == NO_OP) { result = parseNumber(number); }else{ result = performOperation(parseNumber(number)); } operator = NO_OP; number1 = result; return Float.toString(result);
}
• In order to keep track of the current status of the users interaction, maintain a boolean variable that will be set to false if the user is in the middle of an ongoing calculation, and will be set to true if the user has pressed the equal sign and is ready for another calculation.
Step 4 Register the Listener with the Calculator Button Components Modify the CalculatorGUI class. Register an instance of the Calculator class, which is an ActionListener, to each of the buttons. Keep in mind that the Calculator object will require a reference to the CalculatorGUI so that it can call the methods that update and retrieve the text displayed as a label. Use a loop to do this, as shown in the example below:
for (int x = 0; x < buttons.length ; x ++){ buttons[x].addActionListener(new Calculator(this)); }
4 - 4 Fundamentals of Java Programming Lab 10.1.3.2 Copyright 2004, Cisco Systems, Inc.
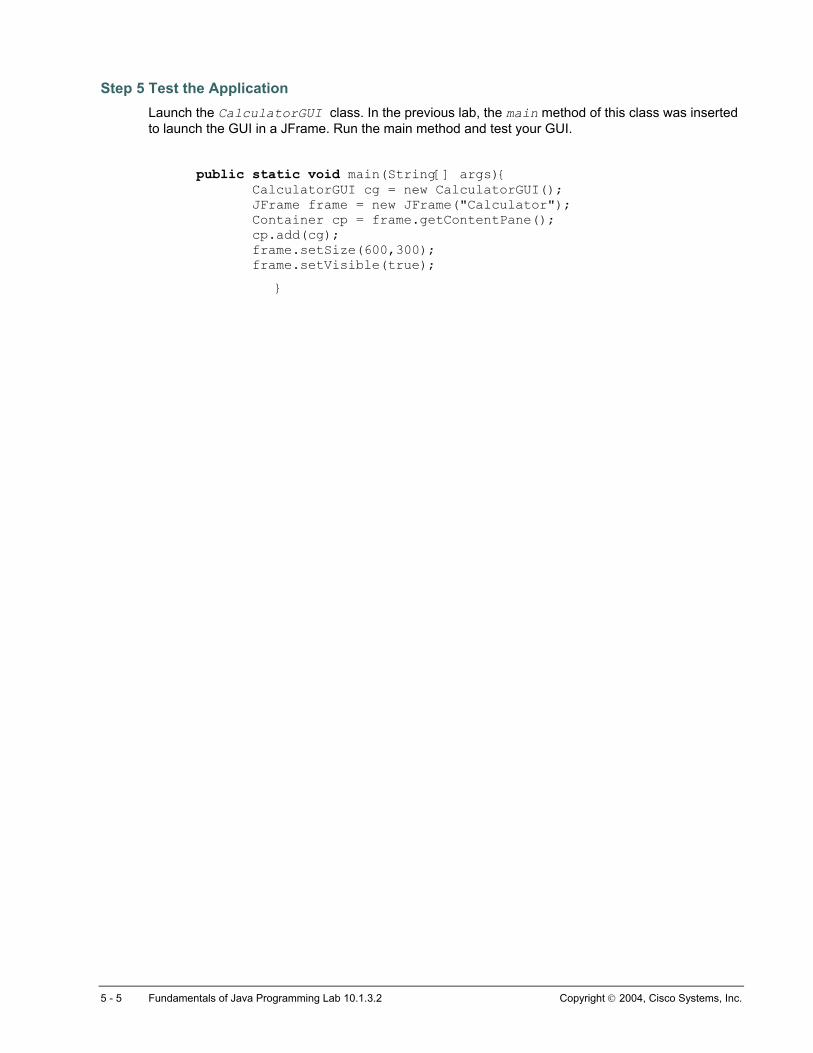
Step 5 Test the Application Launch the CalculatorGUI class. In the previous lab, the main method of this class was inserted to launch the GUI in a JFrame. Run the main method and test your GUI.
public static void main(String[] args){ CalculatorGUI cg = new CalculatorGUI(); JFrame frame = new JFrame("Calculator"); Container cp = frame.getContentPane(); cp.add(cg); frame.setSize(600,300); frame.setVisible(true);
}
5 - 5 Fundamentals of Java Programming Lab 10.1.3.2 Copyright 2004, Cisco Systems, Inc.
Lab 10.1.4.1 Preparing the ATMGUI for event handling technology
Estimated Time 45 minutes
Learning objective In this lab activity, the student will add several new methods to the ATMGUI class to retrieve data and update data on the GUI.
Description/Scenario • Frequently in GUI applications, the user interacts with components on the screen to either
retrieve information or change information. The GUI program will know when the user has interacted with a component.
• The class that provides the information requested or accepts information provided by the user is not generally the GUI class. The class that will handle the business logic of managing the data will need to obtain the data from the GUI and also send data to the GUI when the display needs to be refreshed.
• There are two approaches to accomplishing this. One is to allow the controller or the model classes to have direct access to the components of the GUI. This creates breaks the rules of encapsulation by allowing external objects to access data. The second approach is to create a number of get and set methods. These methods will be created for only those components where the information will need to change.
• In this lab, the students will create a number of methods to obtain the information entered by the user in the account and amt columns.
• Additional methods used to change the displayed information in the message box will also be required.
• These methods provide the information retrieval and update access to any controller class or model class.
File Management For this lab, launch BlueJ. Click on Project from the BlueJ main menu and select Open, navigate to the folder chap9, and select the BlueJ project lab9.2.11. An alternative method is to select Project and Open Recent, and select the previous JBANK lab 9.2.11.
Now save this Project under a new name lab10.1.4.1. To do this, select Project and Save as, change the Folder in the Look In: box to chap10, and type lab10.1.4.1 as the new Project name. The Project window title should display lab10.1.4.1.
1 - 1 Fundamentals of Java Programming Lab 10.1.4.1 Copyright 2004, Cisco Systems, Inc.

Tasks
Step 1 Modify the ATMGUI Class a. The ATMGUI should display as shown below.
b. Insert the following methods in the class. The purpose of each of these methods is to provide a
public access to the data values of the components, without allowing access to the components directly.
o public String getMessage() – This method returns the text from the message field.
o public void setMessage(String msg) – This method accepts a string and sets this string as the message to be displayed.
o public String getCustid() – This method retrieves the custid from the field.
o public String getAmt() – This method retrieves the amt from the field.
c. No methods to set the values for the custid or the amt are needed. The user will enter this information.
d. If you do not have a main method to test this GUI for display, insert the following code.
public static void main(String[] args){ ATMGUI atmg = new ATMGUI(); JFrame frame = new JFrame(); Container cp = frame.getContentPane(); cp.add(atmg); frame.setSize(700, 300); frame.setVisible(true);
}
e. Compile and run the main method. You will test these new methods inserted in the next lab.
Step 2 Documentation Write all needed javadoc comments and document elements for the lab and then, using BlueJ, select Tools and create the javadocs by selecting Project Documentation.
2 - 2 Fundamentals of Java Programming Lab 10.1.4.1 Copyright 2004, Cisco Systems, Inc.
Lab 10.1.4.2 Create the Controller Code for the ATMGUI
Estimated Time 45 minutes
Learning objective In this lab activity, the student will apply a simple version of the event handling technology required to display messages.
Description/Scenario • Learn how to register Events and handle Events in a GUI.
• The Event delegation model uses the following objects:
o The source of an event is an object that can generate an event object.
o The Event is an Event object that encapsulates information about an event.
o The Handler is the object that can handle the Event that is performing some task.
• Each of the component classes can generate specific event objects. Button objects generate Action events. TextComponents generate TextEvent objects. The Frame object is a Window that generates a WindowEvent object.
• The Handler is any class that implements a Listener interface that is appropriate for the type of event object generated by the component. Components generate event objects when a Listener object is registered with the component. The method of the component that accomplishes this is the xxxListener method. The xxx represents the name of a specific listener.
• The listener interface specifies the methods by which the event object can be handled. Listener interfaces are part of the java.awt.event package.
• Closing of a window does not happen automatically when using AWT components. When using Swing components, such as JFrame, the window closing technology is implemented by default.
1 - 1 Fundamentals of Java Programming Lab 10.1.2.2 Copyright 2004, Cisco Systems, Inc.
Responding to Window-Closing Events By default, when the user closes a frame onscreen, the frame is hidden. Although invisible, the frame still exists and the program can make it visible again. If you want different behavior, then you need to either register a window listener that handles window-closing events, or you need to specify default close behavior using the setDefaultCloseOperation method. You can even do both. The argument to setDefaultCloseOperation must be one of the following values, the first three of which are defined in the WindowConstants interface (implemented by JFrame, JInternalPane, and JDialog): DO_NOTHING_ON_CLOSE
Don't do anything when the user requests that the window close. Instead, the program should probably use a window listener that performs some other action in its windowClosing method.
HIDE_ON_CLOSE (the default for JDialog and JFrame) Hide the window when the user closes it. This removes the window from the screen but leaves it displayable.
DISPOSE_ON_CLOSE (the default for JInternalFrame) Hide and dispose of the window when the user closes it. This removes the window from the screen and frees up any resources used by it.
EXIT_ON_CLOSE (defined in the JFrame class) Exit the application, using System.exit(0). This is recommended for applications only. If used within an applet, a SecurityException may be thrown. Introduced in 1.3.
• In this lab, the student will learn to use window listeners to handle window closing in a specialized manner. For the ATM GUI, when the user selects the window close button a dialog will be displayed to remind the user they are exiting the application. The JOptionPane class, which creates a dialog box in a frame, will be used.
• In the lab students will implement WindowListener interfaces by extending from the WindowAdapter class. Recall that many of the listener interfaces have been implemented as actual classes. These adapter classes provide null implementations of all the methods declared in the interface. These classes can be extended, and only the particular method of interest to the programmer can be overridden. This cuts down the work the programmer needs to do to implement each of the many methods of the WindowListener interface.
• Create an ActionListener class that will display a message corresponding to the button that is pressed. This prepares the students to build on the messages and display continuous messages. The code to do this is far more complicated than the simple code to close the windows. Here is where the separation of duties of the view and the controller require some special considerations.
o The class that will implement the action listener for each button will need to have a reference to the GUI class. When the button is pressed and the ActionListener object executes the action performed method, it will need retrieve data from the GUI and send data to the GUI. To accomplish this, the listener class must have a reference to the GUI.
o If the listener class has to change the attributes of the components, such as font color or location, then the listener technology is embedded in the GUI as an inner or an anonymous class.
File Management For this lab, launch BlueJ. Click on Project from the BlueJ main menu and select Open, navigate to the folder chap10, and select the BlueJ project lab10.1.4.1. An alternative method is to select Project and Open Recent, and select the previous JBANK lab10.1.4.1.
Now save this Project under a new name lab10.1.4.2. To do this, select Project and Save as, change the Folder in the Look In: box to chap10, and type lab10.1.4.2 as the new Project name. The Project window title should display lab10.1.4.2.
2 - 2 Fundamentals of Java Programming Lab 10.1.2.2 Copyright 2004, Cisco Systems, Inc.
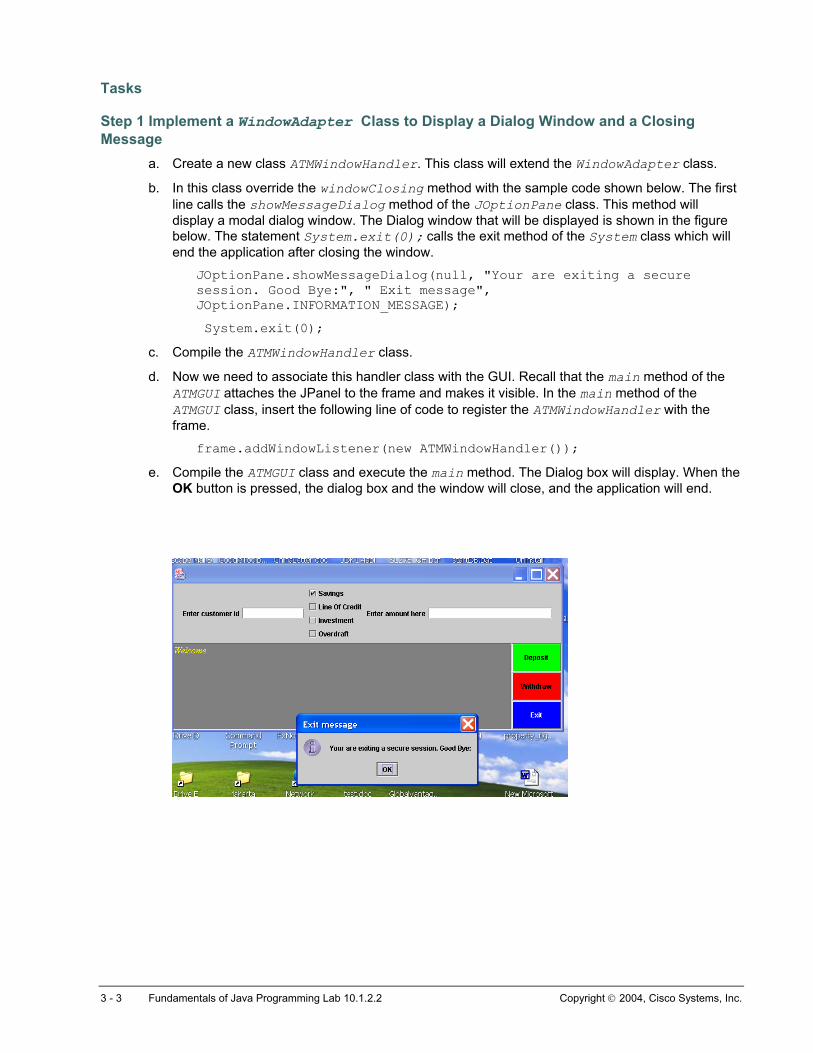
Tasks
Step 1 Implement a WindowAdapter Class to Display a Dialog Window and a Closing Message
a. Create a new class ATMWindowHandler. This class will extend the WindowAdapter class.
b. In this class override the windowClosing method with the sample code shown below. The first line calls the showMessageDialog method of the JOptionPane class. This method will display a modal dialog window. The Dialog window that will be displayed is shown in the figure below. The statement System.exit(0); calls the exit method of the System class which will end the application after closing the window.
JOptionPane.showMessageDialog(null, "Your are exiting a secure session. Good Bye:", " Exit message", JOptionPane.INFORMATION_MESSAGE);
System.exit(0);
c. Compile the ATMWindowHandler class.
d. Now we need to associate this handler class with the GUI. Recall that the main method of the ATMGUI attaches the JPanel to the frame and makes it visible. In the main method of the ATMGUI class, insert the following line of code to register the ATMWindowHandler with the frame.
frame.addWindowListener(new ATMWindowHandler());
e. Compile the ATMGUI class and execute the main method. The Dialog box will display. When the OK button is pressed, the dialog box and the window will close, and the application will end.
3 - 3 Fundamentals of Java Programming Lab 10.1.2.2 Copyright 2004, Cisco Systems, Inc.
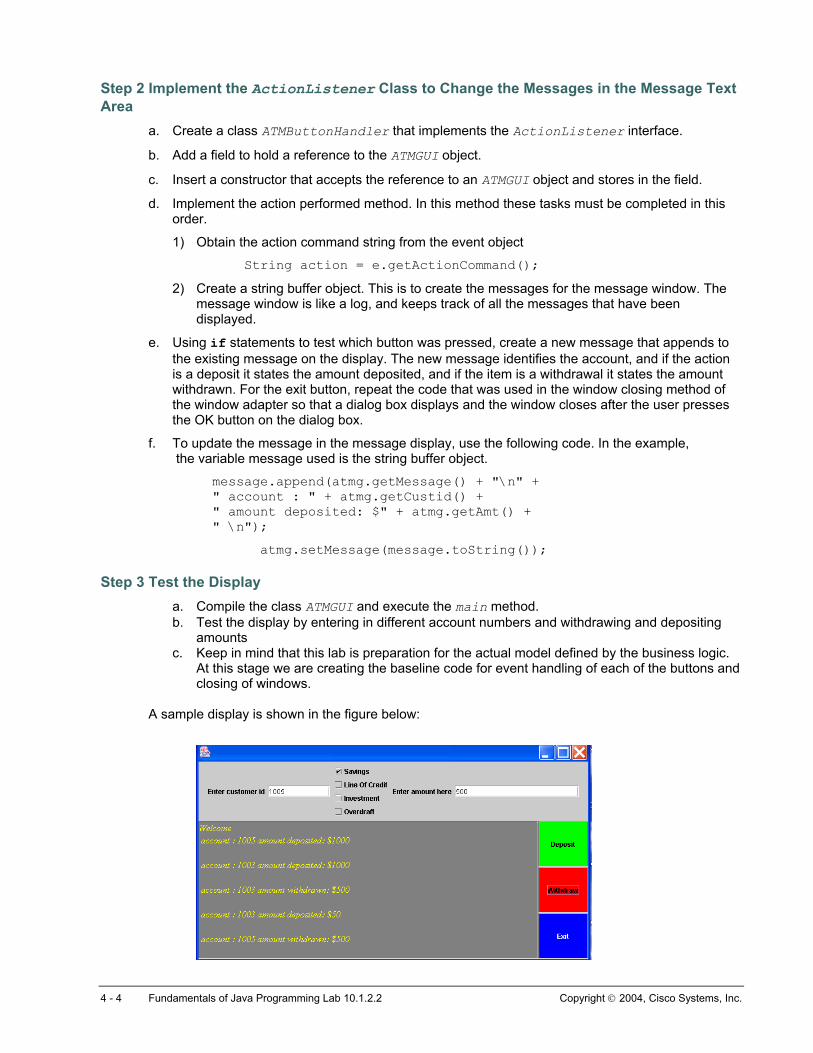
Step 2 Implement the ActionListener Class to Change the Messages in the Message Text Area
a. Create a class ATMButtonHandler that implements the ActionListener interface.
b. Add a field to hold a reference to the ATMGUI object.
c. Insert a constructor that accepts the reference to an ATMGUI object and stores in the field.
d. Implement the action performed method. In this method these tasks must be completed in this order.
1) Obtain the action command string from the event object
String action = e.getActionCommand();
2) Create a string buffer object. This is to create the messages for the message window. The message window is like a log, and keeps track of all the messages that have been displayed.
e. Using if statements to test which button was pressed, create a new message that appends to the existing message on the display. The new message identifies the account, and if the action is a deposit it states the amount deposited, and if the item is a withdrawal it states the amount withdrawn. For the exit button, repeat the code that was used in the window closing method of the window adapter so that a dialog box displays and the window closes after the user presses the OK button on the dialog box.
f. To update the message in the message display, use the following code. In the example, the variable message used is the string buffer object.
message.append(atmg.getMessage() + "\n" + " account : " + atmg.getCustid() + " amount deposited: $" + atmg.getAmt() + " \n");
atmg.setMessage(message.toString());
Step 3 Test the Display a. Compile the class ATMGUI and execute the main method. b. Test the display by entering in different account numbers and withdrawing and depositing
amounts c. Keep in mind that this lab is preparation for the actual model defined by the business logic.
At this stage we are creating the baseline code for event handling of each of the buttons and closing of windows.
A sample display is shown in the figure below:
4 - 4 Fundamentals of Java Programming Lab 10.1.2.2 Copyright 2004, Cisco Systems, Inc.

Step 4 Documentation Write all needed javadoc comments and document elements for the lab and then, using BlueJ, select Tools and create the javadocs by selecting Project Documentation.
5 - 5 Fundamentals of Java Programming Lab 10.1.2.2 Copyright 2004, Cisco Systems, Inc.
Lab 10.2.2 Use Anonymous Classes to Handle Window Closing Events in the ATMGUI
Estimated Time 30 minutes
Learning objective In this lab activity, the student will implement window closing technology directly in the GUI using anonymous classes.
Description/Scenario • Frequently, event handling technology may require direct access to the components declared in
the GUI. In order to accomplish this the inner and anonymous classes provide a solution.
• Anonymous classes are class definitions that are declared as part of an expression. Anonymous classes cannot be re-used. These classes are useful because they provide direct access to the fields of the enclosing class.
• In this lab you will implement an anonymous class to handle the window closing technology. This will be done as part of the expression used to register a listener with a frame.
• The syntax for anonymous classes requires the use of the new operator. Anonymous classes extend existing classes and or implement interfaces. Rules of sub classing apply to anonymous classes. Some samples of this are shown below:
// anonymopus classes in a method call addActionListener( new ActionListener(){ public void actionPerformer(ActionEvent e) { // code that handles the action } }); // creating a reference to an object using anonymous class ActionListener button1 = new ActionListener(){(){ public void actionPerformer(ActionEvent e) { // code that handles the action } };
• In the two examples shown, the anonymous classes have access to the private fields and methods of the enclosing class.
File Management For this lab, launch BlueJ. Click on Project from the BlueJ main menu and select Open, navigate to the folder chap10, and select the BlueJ project lab10.1.4.2. An alternative method is to select Project and Open Recent, and select the previous JBANK lab10.1.4.2.
Now save this Project under a new name lab10.2.2. To do this, select Project and Save as, change the Folder in the Look In: box to chap10, and type lab10.2.2 as the new Project name. The Project window title should display lab10.2.2.
1 - 1 Fundamentals of Java Programming Lab 10.2.2 Copyright 2004, Cisco Systems, Inc.
Tasks
Step 1 Implement an Anonymous Class that extends WindowAdapter a. Modify the ATMGUI class. Insert the import java.awt.event.*; statement.
b. In the main method of the class, modify the statement that registers the frame with a window listener with the following code. You can copy the code from the ATMWindowHandler class. The anonymous class will extend the WindowAdapter class.
frame.addWindowListener(new WindowAdapter(){ public void windowClosing(WindowEvent e){ JOptionPane.showMessageDialog(null, "Your are exiting a secure session. Good Bye:", " Exit message", JOptionPane.INFORMATION_MESSAGE); System.exit(0); }
});
c. Compile the ATMGUI class and execute the main method.
2 - 2 Fundamentals of Java Programming Lab 10.2.2 Copyright 2004, Cisco Systems, Inc.
Lab 10.3.1 Adding Business Logic to Represent the Model for the ATMGUI
Estimated Time 60 minutes
Learning objective In this lab activity, the student will implement the business logic for handling banking transactions through a GUI.
Description/Scenario • Additional methods are introduced into the ATMGUI class to access the type of account selected.
The ATMGUI class will host an array of Customers managed through the bank. The user will enter the following information:
o A customer ID
o An amount
o An account type
o A type of action to be performed
• The actionPerformed method will first locate the customer and the account. If the customer does not exist, an error message will be display in the message area. If the customer exists, but the account type does not, an error message will be displayed. The user will then need to enter a different customer id or a correct account type. Once the customer and account type have been identified correctly, the actionPerformed method will execute the appropriate methods depending on the action selected.
• The ATMButtonHandler class will be modified to implement the business logic required to enable the withdrawal and deposit of money into a customer account. The student will create some sample customer objects and use the GUI to transact banking activities.
• Methods are introduced in the ATMButtonHandler to separately handle the logic for each of the actions, such as locating a customer account or performing a withdrawal or a deposit.
• In the case of withdrawals, the withdraw method might return a false, indicating that the withdrawal did not occur. In this case an error message will be display in the message area.
• The current version of the ATMButtonHandler class will be modified to include this new business logic.
File Management For this lab, launch BlueJ. Click on Project from the BlueJ main menu and select Open, navigate to the folder chap10, and select the BlueJ project lab10.2.2. An alternative method is to select Project and Open Recent, and select the previous JBANK lab10.2.2.
Now save this Project under a new name lab10.3.1. To do this, select Project and Save as, change the Folder in the Look In: box to chap10, and type lab10.3.1 as the new Project name. The Project window title should display lab10.3.1.
1 - 1 Fundamentals of Java Programming Lab 10.3.1 Copyright 2004, Cisco Systems, Inc.
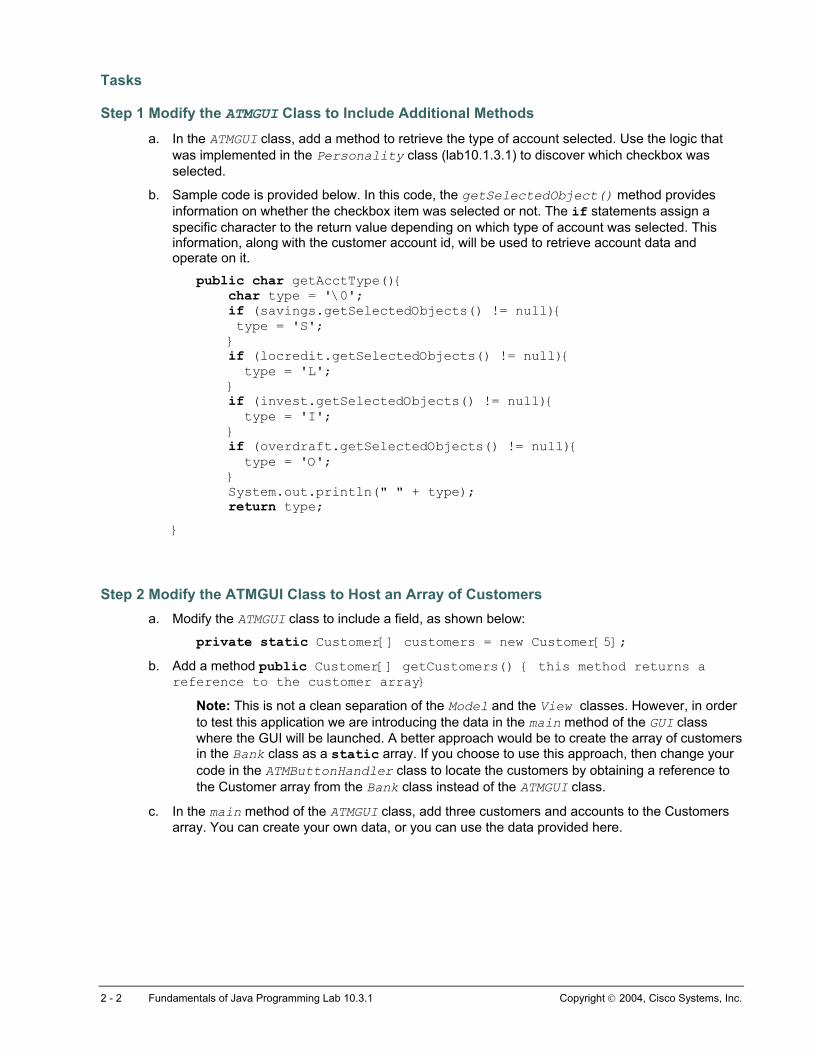
Tasks
Step 1 Modify the ATMGUI Class to Include Additional Methods a. In the ATMGUI class, add a method to retrieve the type of account selected. Use the logic that
was implemented in the Personality class (lab10.1.3.1) to discover which checkbox was selected.
b. Sample code is provided below. In this code, the getSelectedObject() method provides information on whether the checkbox item was selected or not. The if statements assign a specific character to the return value depending on which type of account was selected. This information, along with the customer account id, will be used to retrieve account data and operate on it.
public char getAcctType(){ char type = '\0'; if (savings.getSelectedObjects() != null){ type = 'S'; } if (locredit.getSelectedObjects() != null){ type = 'L'; } if (invest.getSelectedObjects() != null){ type = 'I'; } if (overdraft.getSelectedObjects() != null){ type = 'O'; } System.out.println(" " + type); return type;
}
Step 2 Modify the ATMGUI Class to Host an Array of Customers
a. Modify the ATMGUI class to include a field, as shown below:
private static Customer[] customers = new Customer[5]; b. Add a method public Customer[] getCustomers() { this method returns a
reference to the customer array}
Note: This is not a clean separation of the Model and the View classes. However, in order to test this application we are introducing the data in the main method of the GUI class where the GUI will be launched. A better approach would be to create the array of customers in the Bank class as a static array. If you choose to use this approach, then change your code in the ATMButtonHandler class to locate the customers by obtaining a reference to the Customer array from the Bank class instead of the ATMGUI class.
c. In the main method of the ATMGUI class, add three customers and accounts to the Customers array. You can create your own data, or you can use the data provided here.
2 - 2 Fundamentals of Java Programming Lab 10.3.1 Copyright 2004, Cisco Systems, Inc.
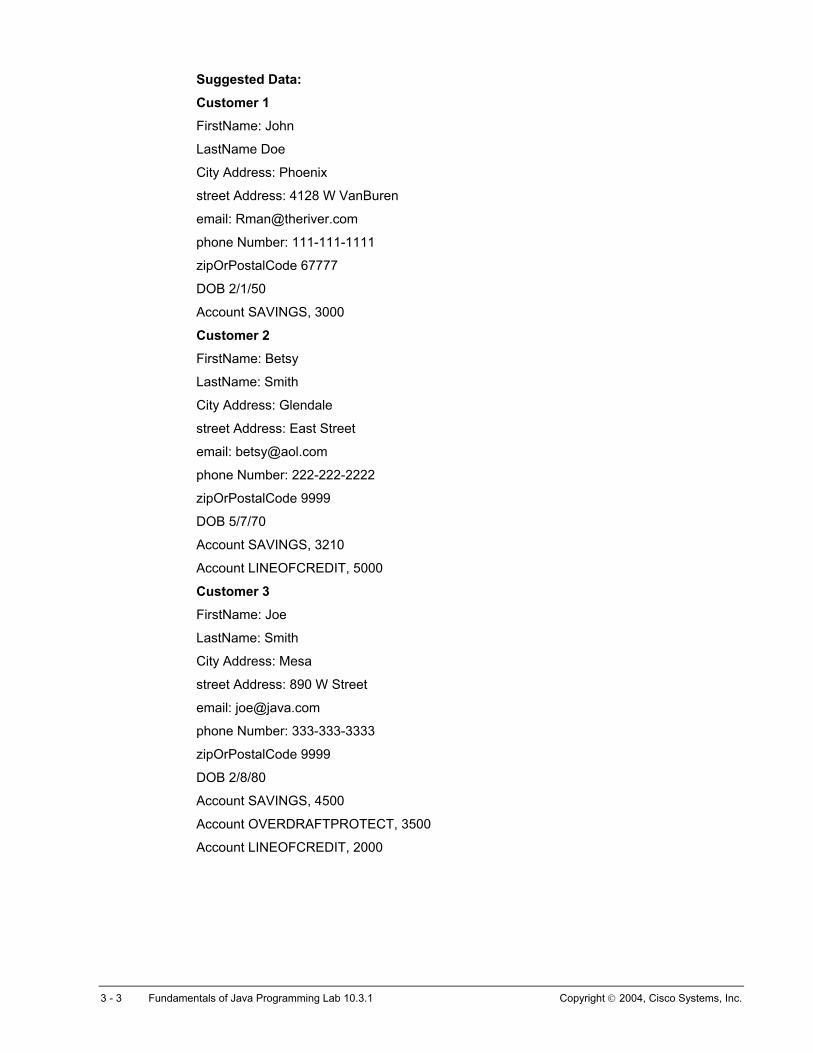
Suggested Data:
Customer 1
FirstName: John
LastName Doe
City Address: Phoenix
street Address: 4128 W VanBuren
email: [email protected]
phone Number: 111-111-1111
zipOrPostalCode 67777
DOB 2/1/50
Account SAVINGS, 3000
Customer 2
FirstName: Betsy
LastName: Smith
City Address: Glendale
street Address: East Street
email: [email protected]
phone Number: 222-222-2222
zipOrPostalCode 9999
DOB 5/7/70
Account SAVINGS, 3210
Account LINEOFCREDIT, 5000
Customer 3
FirstName: Joe
LastName: Smith
City Address: Mesa
street Address: 890 W Street
email: [email protected]
phone Number: 333-333-3333
zipOrPostalCode 9999
DOB 2/8/80
Account SAVINGS, 4500
Account OVERDRAFTPROTECT, 3500
Account LINEOFCREDIT, 2000
3 - 3 Fundamentals of Java Programming Lab 10.3.1 Copyright 2004, Cisco Systems, Inc.
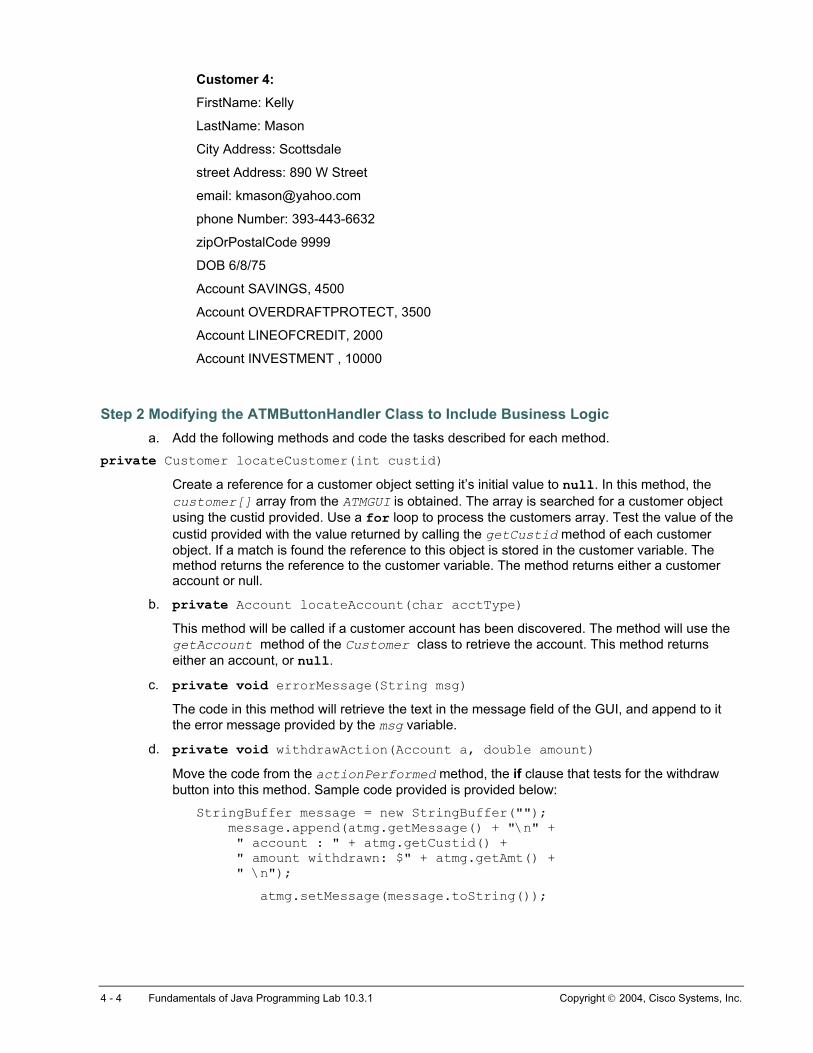
Customer 4:
FirstName: Kelly
LastName: Mason
City Address: Scottsdale
street Address: 890 W Street
email: [email protected]
phone Number: 393-443-6632
zipOrPostalCode 9999
DOB 6/8/75
Account SAVINGS, 4500
Account OVERDRAFTPROTECT, 3500
Account LINEOFCREDIT, 2000
Account INVESTMENT , 10000
Step 2 Modifying the ATMButtonHandler Class to Include Business Logic a. Add the following methods and code the tasks described for each method.
private Customer locateCustomer(int custid) Create a reference for a customer object setting it’s initial value to null. In this method, the customer[] array from the ATMGUI is obtained. The array is searched for a customer object using the custid provided. Use a for loop to process the customers array. Test the value of the custid provided with the value returned by calling the getCustid method of each customer object. If a match is found the reference to this object is stored in the customer variable. The method returns the reference to the customer variable. The method returns either a customer account or null.
b. private Account locateAccount(char acctType) This method will be called if a customer account has been discovered. The method will use the getAccount method of the Customer class to retrieve the account. This method returns either an account, or null.
c. private void errorMessage(String msg) The code in this method will retrieve the text in the message field of the GUI, and append to it the error message provided by the msg variable.
d. private void withdrawAction(Account a, double amount) Move the code from the actionPerformed method, the if clause that tests for the withdraw button into this method. Sample code provided is provided below:
StringBuffer message = new StringBuffer(""); message.append(atmg.getMessage() + "\n" + " account : " + atmg.getCustid() + " amount withdrawn: $" + atmg.getAmt() + " \n");
atmg.setMessage(message.toString());
4 - 4 Fundamentals of Java Programming Lab 10.3.1 Copyright 2004, Cisco Systems, Inc.
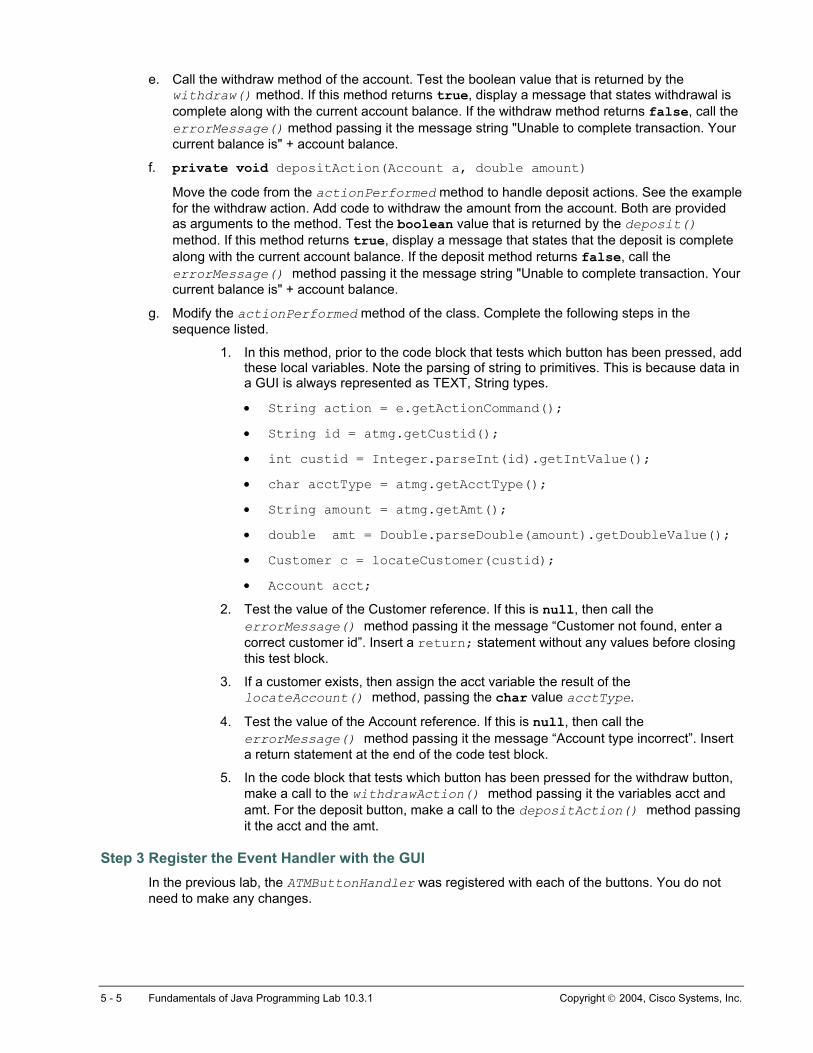
e. Call the withdraw method of the account. Test the boolean value that is returned by the withdraw() method. If this method returns true, display a message that states withdrawal is complete along with the current account balance. If the withdraw method returns false, call the errorMessage() method passing it the message string "Unable to complete transaction. Your current balance is" + account balance.
f. private void depositAction(Account a, double amount) Move the code from the actionPerformed method to handle deposit actions. See the example for the withdraw action. Add code to withdraw the amount from the account. Both are provided as arguments to the method. Test the boolean value that is returned by the deposit() method. If this method returns true, display a message that states that the deposit is complete along with the current account balance. If the deposit method returns false, call the errorMessage() method passing it the message string "Unable to complete transaction. Your current balance is" + account balance.
g. Modify the actionPerformed method of the class. Complete the following steps in the sequence listed.
1. In this method, prior to the code block that tests which button has been pressed, add these local variables. Note the parsing of string to primitives. This is because data in a GUI is always represented as TEXT, String types.
• String action = e.getActionCommand();
• String id = atmg.getCustid();
• int custid = Integer.parseInt(id).getIntValue();
• char acctType = atmg.getAcctType();
• String amount = atmg.getAmt();
• double amt = Double.parseDouble(amount).getDoubleValue();
• Customer c = locateCustomer(custid);
• Account acct;
2. Test the value of the Customer reference. If this is null, then call the errorMessage() method passing it the message “Customer not found, enter a correct customer id”. Insert a return; statement without any values before closing this test block.
3. If a customer exists, then assign the acct variable the result of the locateAccount() method, passing the char value acctType.
4. Test the value of the Account reference. If this is null, then call the errorMessage() method passing it the message “Account type incorrect”. Insert a return statement at the end of the code test block.
5. In the code block that tests which button has been pressed for the withdraw button, make a call to the withdrawAction() method passing it the variables acct and amt. For the deposit button, make a call to the depositAction() method passing it the acct and the amt.
Step 3 Register the Event Handler with the GUI In the previous lab, the ATMButtonHandler was registered with each of the buttons. You do not need to make any changes.
5 - 5 Fundamentals of Java Programming Lab 10.3.1 Copyright 2004, Cisco Systems, Inc.

Step 4 Test the GUI The main method of the ATMGUI class launches the GUI. Using the sample data, try to withdraw and deposit to the accounts. Also try incorrect accounts or customers to make sure the error message are displaying.
Step 5 Documentation Write all necessary javadoc comments and document elements for the lab and use BlueJ Tools to create the javadocs by selecting Project Documentation.
6 - 6 Fundamentals of Java Programming Lab 10.3.1 Copyright 2004, Cisco Systems, Inc.
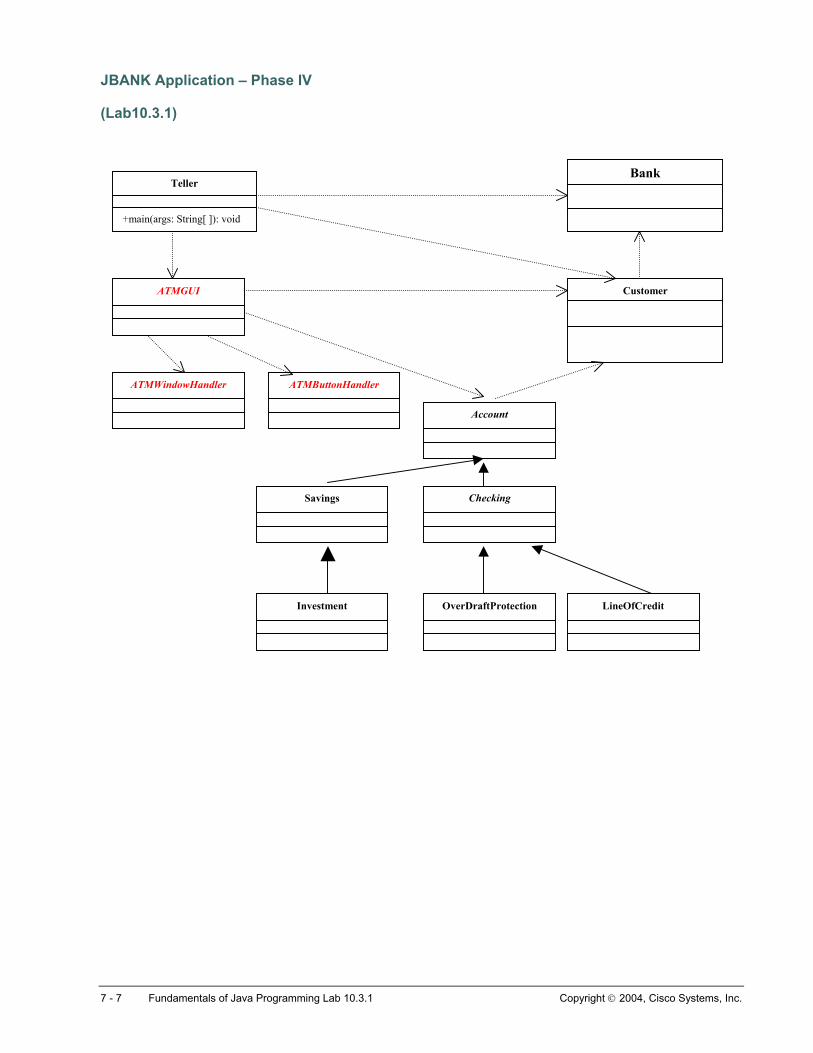
JBANK Application – Phase IV
(Lab10.3.1)
Teller
+main(args: String[ ]): void
Customer
Account
Checking
ATMWindowHandler ATMButtonHandler
ATMGUI
Savings
Bank
LineOfCredit OverDraftProtection Investment
7 - 7 Fundamentals of Java Programming Lab 10.3.1 Copyright 2004, Cisco Systems, Inc.
Lab 10.4.1 Change the Location of Components in an Applet
Estimated Time 30 minutes
Learning Objective In this lab activity, the student will display text information and place them in different locations on the screen, use setLocation() to place components in different locations and use validate() methods to change and add components to an Applet's display.
Description/Scenario • The important concept explored here is the use of setLocation(), validate(), and
invalidate() methods to change or add components to an Applet's display.
• Remember the applet cannot be displayed unless the .java file is compiled to its corresponding .class file.
• The HTML document references the .class file and not the .java file.
• Create a HTML document to display the .class file or use BlueJ’s ability to run an applet from an appletviewer or a browser when you right-click on the class and select run.
File Management Open BlueJ. Click on Project from the BlueJ main menu and select New. In the New Project window and in the Look in: list box select c:\. Double-click the javacourse folder listed in the text window and a different New Project window opens with javacourse in the Look in: list box. Double-click the chap10 folder listed in the text window and a different New Project window opens with chap10 in the Look in: list box. Type lab10.4.1 in the File name text box and click on Create to create a lab10.4.1 subfolder in the chap10 folder.
Tasks
Step 1 Create a class named Personality that extends Applet implements ActionListener. a. Create three Labels as follows:
Label question = new Label(“What's your favorite color?”)
Label profile = new Label("Personality profile will show up here")
Label instruction = new Label("Press the button until the question returns”).
b. Create a Button as follows:
Button button1 = new Button( “Press Me”).
1 - 2 Fundamentals of Java Programming Lab 10.4.1 Copyright 2002, Cisco Systems, Inc.
c. Create a TextField as follows:
TextField response = new TextField(8)
d. Create three int variables. One to be a counter and two variables to store x and y coordinates.
Step 2 Create components a. Create an init() method to add all components, request focus for the TextField, and add a
listener to the Button.
b. Create an actionListener(ActionEvent e) method that, after the button is pressed, checks to see which of three colors is typed in the TextField (blue,red,green).
c. If any of the three colors is typed, have your code remove the question Label, the instruction Label, and the response TextField.
d. Set the text of response to (“”).
e. Set the profile Label to: "Hot tempered " if the color is red; "You are serene" if the color is blue; "Very friendly " if the color is green.
f. Use the setLocation() method to move the profile Label to a different location every time the button is pressed until the y coordinate is greater than 100 at which time everything is recreated back to the original condition. The init() method is called only once when your applet loads. If the applet code adds or removes components, you must call two methods to have the applet redraw the components. These are the invalidate() and validate() methods. When moving out of the window, or resizing the window, the applet knows that the window needs to be re-drawn. It will re-draw based on the original information about the components. When adding a component, the applet does not know that its information is out of date. The programmer needs to call the invalidate() method for the applet. This marks it as out-of-date. The validate() method then re-draws any invalid windows, allowing the changes to take effect.
g. The recreation cycle is only three times at which time the button must be disabled.
h. Run the Applet using an HTML document or BlueJ.
2 - 2 Fundamentals of Java Programming Lab 10.4.1 Copyright 2002, Cisco Systems, Inc.

Lab 11.5.3 Testing for a Runtime Exception
Estimated Time 30 minutes
Learning Objectives In this lab activity, the student will implement try-catch blocks to handle exceptions.
Description • Use of try-catch blocks to handle run-time exceptions.
The sample syntax for a try-catch block is:
try {
System.in.read(); //code that might generate an exception }
catch ( IOException ioe) //first exception type being handled { // code to handle exceptions of first type
} catch( Exception e)
{ // code to handle other type of exceptions
}
• The try block will always contain the code you need to execute. The catch block consists of
an argument defining the specific type of Exception that the catch block will handle. Programmers can have more than one catch block to catch different types of exceptions.
• Code that can throw a known exception must be enclosed in a try block, or else the possibility of an exception must be advertised, using the throws Exception clause as part of the method signature. A try block can enclose code that may give rise to one or more exceptions. A try-catch block has one try block and one or more catch blocks.
• The code in the catch block encloses code that is intended to handle a specific type of Exception. There can be several catch blocks, each catching a different type of Exception. If the code is expected to give rise to different errors and each error needs to be handled differently, then make sure to code specific handlers for each error.
• The syntax of the catch code block consists of the keyword catch and a single argument specifying the Exception class type and a variable to hold the reference to the object of that type.
1 - 1 Fundamentals of Java Programming Lab 11.5.3 Copyright 2002, Cisco Systems, Inc.
• Create a class called ExceptionDemo. This class accepts two Strings from Console. The Integer.parseInt() method is used to convert the Strings to int type. If the Strings are not valid numbers, the parseInt() method raises a NumberFormatException. This exception is caught and an error message is displayed. The second number is used to divide the first number. If the second number is zero, an ArithmeticException is raised. This exception should be caught and an error message is displayed.
File Management Open BlueJ. Click on Project from the BlueJ main menu and select New. In the New Project window and in the Look in: list box select c:\. Double-click the javacourse folder listed in the text window and a different New Project window opens with javacourse in the Look in: list box. Double-click the chap11 folder listed in the text window and a different New Project window opens with chap11 in the Look in: list box. Type lab11.5.3 in the File name text box and click on Create to create a lab11.5.3 subfolder in the chap11 folder. Import the Console class from the resource folder.
Tasks
Step 1 Handling Exceptions Using Try-Catch Blocks a. An Exception is a representation of an error condition or any situation that is not the expected
result of a method. Exceptions can be errors at run-time, such as an unexpected response of a user or unexpected results of an expression.
b. Define a class called ExceptionDemo. In the main method use the Console class readLine() method to read two numbers in the form of Strings. Parse the Strings to int type and save them in two int variables number1 and number2. Divide number1 by number2 and display the result.
c. Compile and run the program, use two valid numbers as input. What is the result?
d. Run the program; enter two invalid numbers like “12A12” or “324B1” as input. What is the output?
e. The method Integer.parseInt() converts numbers from type String to type int. If the string
cannot be parsed as an integer it throws NumberFormatException. The Java language provides two code constructs to test code and handle exception when they occur. These are known as try-catch blocks. Handle the exception by using try and catch blocks. Enclose the statements in the main method inside a try block
f. Then add a catch block that catches the specific type of exception that is thrown when the String cannot be parsed. (See the previous step for hints). In the catch block, use the System.out.println method and display the numbers entered and the error message from the error/exception object.
2 - 2 Fundamentals of Java Programming Lab 11.5.3 Copyright 2002, Cisco Systems, Inc.
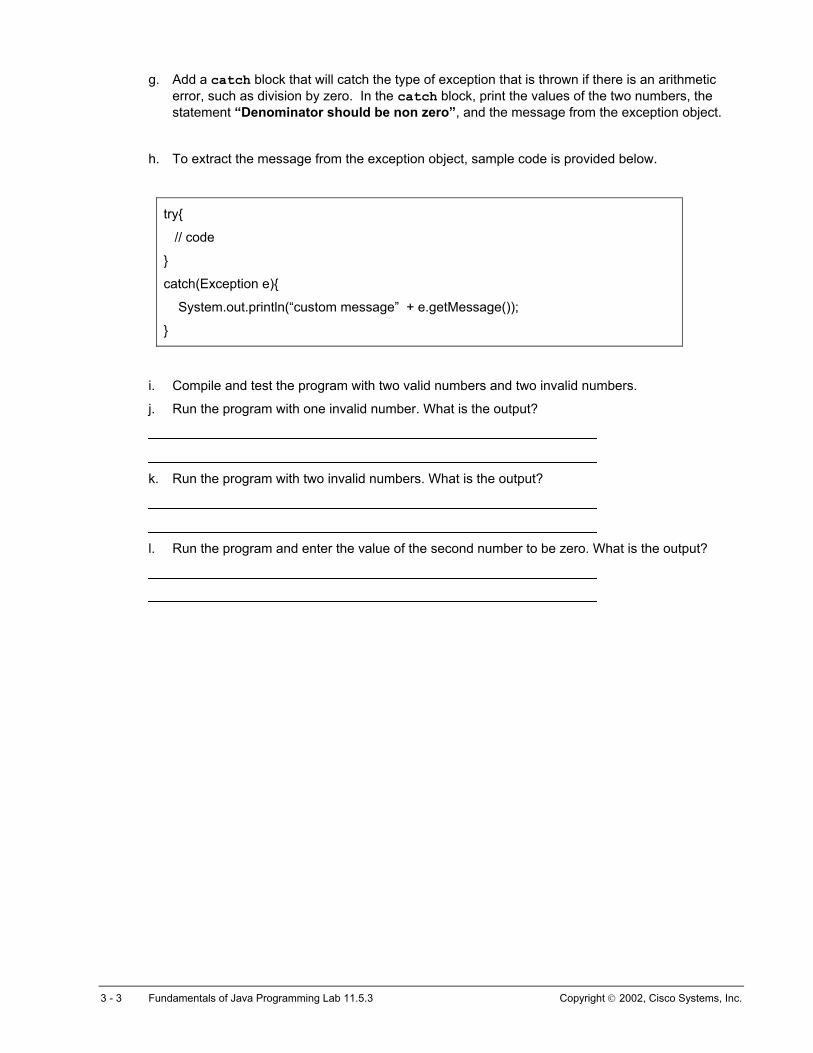
g. Add a catch block that will catch the type of exception that is thrown if there is an arithmetic error, such as division by zero. In the catch block, print the values of the two numbers, the statement “Denominator should be non zero”, and the message from the exception object.
h. To extract the message from the exception object, sample code is provided below.
try{
// code
}
catch(Exception e){
System.out.println(“custom message” + e.getMessage());
}
i. Compile and test the program with two valid numbers and two invalid numbers.
j. Run the program with one invalid number. What is the output?
k. Run the program with two invalid numbers. What is the output?
l. Run the program and enter the value of the second number to be zero. What is the output?
3 - 3 Fundamentals of Java Programming Lab 11.5.3 Copyright 2002, Cisco Systems, Inc.
Lab 11.5.6 Using finally Block
Estimated Time 15 minutes
Learning Objectives • In this lab activity, the student will use a finally block and demonstrate re-throwing of
exceptions.
• The student will practice throwing, handling, and closing exceptions based on logic in the methods.
Description • Exceptions are handled as soon as they occur. The execution of the try block of code
terminates and the code in a catch block is executed. This occurs regardless of the importance of the exception or the code in the try block that follows the statement that caused the exception. For example, in a code block that writes data to a file, an exception in this block will result in the file writing operations ceasing. This will leave the file that was being written to open. In this execution, any instruction in the try block that closes the file will never get executed.
• The try-catch block of constructs includes a construct finally, which is optional. This block of code is always executed, regardless of the exception that occurred or was caught, and even when there are no exceptions. The finally block provides a means to clean up at the end of executing a try block. This provides a means for the programmer to allow the user to exit.
• The finally block is executed when any of these conditions occurs:
When the code in the try block executes properly
When the code in the applicable catch block is executed after an exception occurs
When the code in the try block includes a break or continue statement
When the code in the try block includes a return
Code in finally does not execute when the System.exit() method is called in a try or catch block
File Management Open BlueJ. Click on Project from the BlueJ main menu and select New. In the New Project window and in the Look in: list box select c:\. Double-click the javacourse folder listed in the text window and a different New Project window opens with javacourse in the Look in: list box. Double-click the chap11 folder listed in the text window and a different New Project window opens with chap11 in the Look in: list box. Type lab11.5.6 in the File name text box and click on Create to create a lab11.5.6 subfolder in the chap11 folder. Import classes from lab11.5.3.
1 - 1 Fundamentals of Java Programming Lab 11.5.6 Copyright 2002, Cisco Systems, Inc.
Tasks
Step 1 Using finally block
• Exceptions are handled immediately, as soon as they occur. The execution of the try block code terminates and the code in the catch block is executed, regardless of the importance of the exception or the code in the try block that follows the statement that caused the exception.
• The try-catch block of constructs includes a construct finally. This block of code is always executed regardless of the error that occurred or was caught. The finally block provides a means to clean up at the end of executing a try block. This provides a means for the programmer to allow the user to exit gracefully.
• In the class ExceptionDemo, include a finally block. In the finally block display a message “End of Finally block”.
Step 2 Run class Compile and test the class.
2 - 2 Fundamentals of Java Programming Lab 11.5.6 Copyright 2002, Cisco Systems, Inc.
Lab 11.6.3 Creating your own Exceptions
Estimated Time 30 minutes
Learning Objectives In this lab activity, the student will create a user-defined exception, declare and throw the exception, and test the exception in a try-catch block.
Description • In addition to the extensive library of Throwable classes, individual exception classes can be
defined. These are used in many applications to alert the user of errors that represent unexpected activity or results that are unexpected from the point-of-view of the business.
• These steps describe how to create and use customized exceptions:
1. Create a class that extends from Exception.
2. In a method of another class, "throw" a new instance of the Exception.
3. Use the method that throws the exception in a try-catch block.
• User-defined exceptions need to be thrown in some method.
• Handling user-defined exceptions is no different than handling any other checked exception:
Declare the Exception and do nothing further.
Enclose the method that throws the exception in a try-catch block and handle the exception.
Enclose the method that throws the exception in a try-catch block and re-throw the exception.
• Create your own exceptions by extending the core Java Exception class.
• Use try-catch blocks to handle the exceptions.
• The business rules for this lab are that the water tank holds a maximum of twenty units of water, the user is notified if the tank is too full or empty.
File Management Open BlueJ. Click on Project from the BlueJ main menu and select New. In the New Project window and in the Look in: list box select c:\. Double-click the javacourse folder listed in the text window and a different New Project window opens with javacourse in the Look in: list box. Double-click the chap11 folder listed in the text window and a different New Project window opens with chap11 in the Look in: list box. Type lab11.6.3 in the File name text box and click on Create to create a lab11.6.3 subfolder in the chap11 folder.
1 - 1 Fundamentals of Java Programming Lab 11.6.3 Copyright 2004, Cisco Systems, Inc.
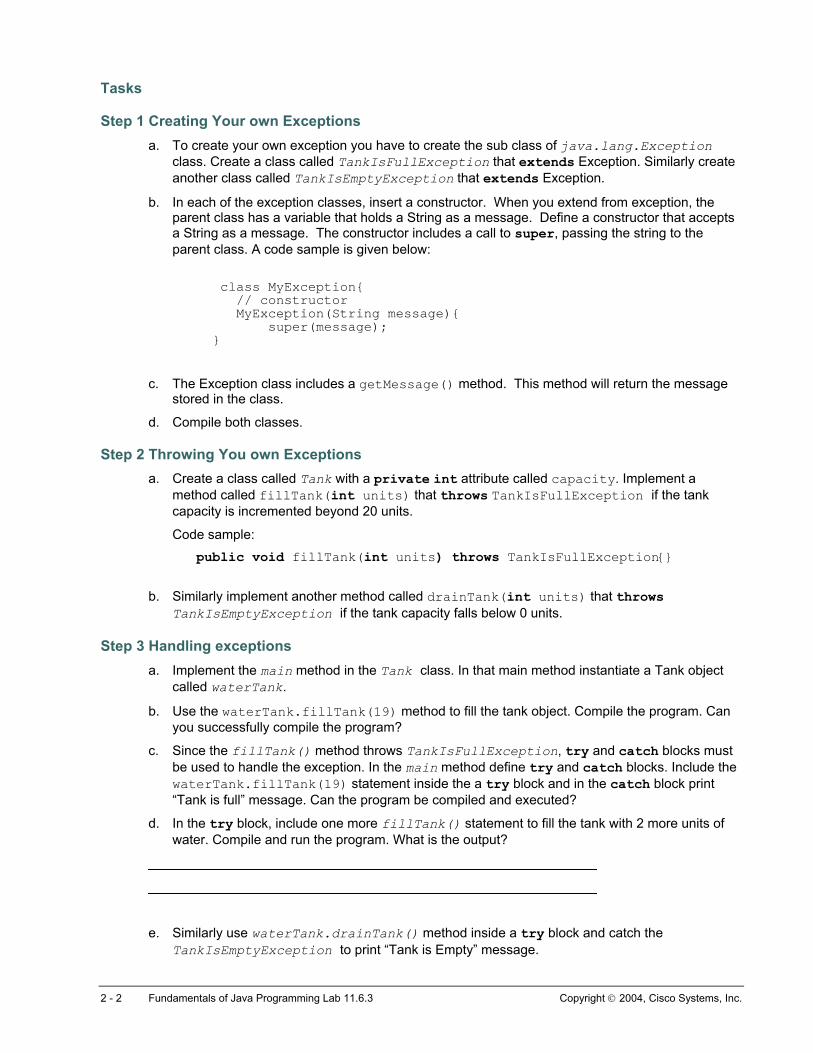
Tasks
Step 1 Creating Your own Exceptions a. To create your own exception you have to create the sub class of java.lang.Exception
class. Create a class called TankIsFullException that extends Exception. Similarly create another class called TankIsEmptyException that extends Exception.
b. In each of the exception classes, insert a constructor. When you extend from exception, the parent class has a variable that holds a String as a message. Define a constructor that accepts a String as a message. The constructor includes a call to super, passing the string to the parent class. A code sample is given below:
class MyException{ // constructor MyException(String message){ super(message); }
c. The Exception class includes a getMessage() method. This method will return the message stored in the class.
d. Compile both classes.
Step 2 Throwing You own Exceptions a. Create a class called Tank with a private int attribute called capacity. Implement a
method called fillTank(int units) that throws TankIsFullException if the tank capacity is incremented beyond 20 units.
Code sample: public void fillTank(int units) throws TankIsFullException{}
b. Similarly implement another method called drainTank(int units) that throws TankIsEmptyException if the tank capacity falls below 0 units.
Step 3 Handling exceptions a. Implement the main method in the Tank class. In that main method instantiate a Tank object
called waterTank.
b. Use the waterTank.fillTank(19) method to fill the tank object. Compile the program. Can you successfully compile the program?
c. Since the fillTank() method throws TankIsFullException, try and catch blocks must be used to handle the exception. In the main method define try and catch blocks. Include the waterTank.fillTank(19) statement inside the a try block and in the catch block print “Tank is full” message. Can the program be compiled and executed?
d. In the try block, include one more fillTank() statement to fill the tank with 2 more units of water. Compile and run the program. What is the output?
e. Similarly use waterTank.drainTank() method inside a try block and catch the TankIsEmptyException to print “Tank is Empty” message.
2 - 2 Fundamentals of Java Programming Lab 11.6.3 Copyright 2004, Cisco Systems, Inc.
Lab 11.9.1.1 Exceptions for the JBANK Application
Estimated Time 90 minutes
Learning Objectives In this lab activity, the student will create user-defined exceptions based on the business rules for the JBANK application, throw, and test the exceptions using a try-catch block.
Description • Dealing with Exceptions
• Defining and using custom Exceptions
• Create custom Exceptions by extending the core Java Exception class
• Use try-catch blocks to handle the exceptions
Business rules The following business rules direct the creation of appropriate exceptions.
• Customer cannot have more than one of each type of Account. Creating duplicate Accounts should result in an exception – AccountTypeAlreadyExistsException
• To deposit or withdraw money from a particular account type, the corresponding account type should exist for the customer.– AccountTypeNotFoundException
• A customer is not permitted to withdraw money from an account in an amount more than the balance or credit limit. – AmountOverDrawnException
File Management Open BlueJ. Click on Project from the BlueJ main menu and select New. In the New Project window and in the Look in: list box select c:\. Double-click the javacourse folder listed in the text window and a different New Project window opens with javacourse in the Look in: list box. Double-click the chap11 folder listed in the text window and a different New Project window opens with JBANK UML diagram in the Look in: list box. Type lab11.9.1.1 in the File name text box and click on Create to create a lab11.9.1.1 subfolder in the chap11 folder. Import the JBANK classes.
Tasks
Step 1 Defining Your Own Exception Classes – AmountOverDrawnException a. Create a class named AmountOverDrawnException that extends from the java.lang
Exception class.
b. Define an attribute that holds the reference to the account.
c. Define a constructor that accepts a char for the account type. AmountOverDrawnException(Account acct). In the constructor code pass a String
1 - 1 Fundamentals of Java Programming Lab 11.9.1.1 Copyright 2002, Cisco Systems, Inc.
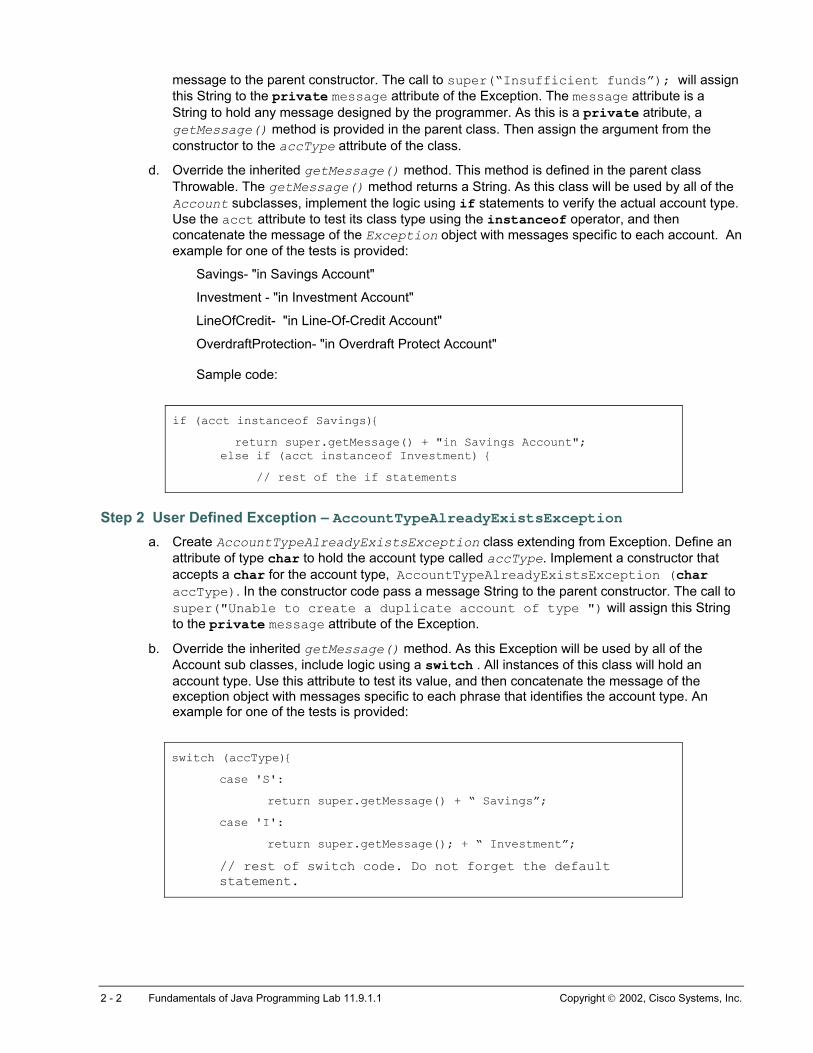
message to the parent constructor. The call to super(“Insufficient funds”); will assign this String to the private message attribute of the Exception. The message attribute is a String to hold any message designed by the programmer. As this is a private atribute, a getMessage() method is provided in the parent class. Then assign the argument from the constructor to the accType attribute of the class.
d. Override the inherited getMessage() method. This method is defined in the parent class Throwable. The getMessage() method returns a String. As this class will be used by all of the Account subclasses, implement the logic using if statements to verify the actual account type. Use the acct attribute to test its class type using the instanceof operator, and then concatenate the message of the Exception object with messages specific to each account. An example for one of the tests is provided:
Savings- "in Savings Account"
Investment - "in Investment Account"
LineOfCredit- "in Line-Of-Credit Account"
OverdraftProtection- "in Overdraft Protect Account" Sample code:
if (acct instanceof Savings){
return super.getMessage() + "in Savings Account"; else if (acct instanceof Investment) {
// rest of the if statements
Step 2 User Defined Exception – AccountTypeAlreadyExistsException a. Create AccountTypeAlreadyExistsException class extending from Exception. Define an
attribute of type char to hold the account type called accType. Implement a constructor that accepts a char for the account type, AccountTypeAlreadyExistsException (char accType). In the constructor code pass a message String to the parent constructor. The call to super("Unable to create a duplicate account of type ") will assign this String to the private message attribute of the Exception.
b. Override the inherited getMessage() method. As this Exception will be used by all of the Account sub classes, include logic using a switch . All instances of this class will hold an account type. Use this attribute to test its value, and then concatenate the message of the exception object with messages specific to each phrase that identifies the account type. An example for one of the tests is provided:
switch (accType){
case 'S':
return super.getMessage() + “ Savings”;
case 'I':
return super.getMessage(); + “ Investment”;
// rest of switch code. Do not forget the default statement.
2 - 2 Fundamentals of Java Programming Lab 11.9.1.1 Copyright 2002, Cisco Systems, Inc.
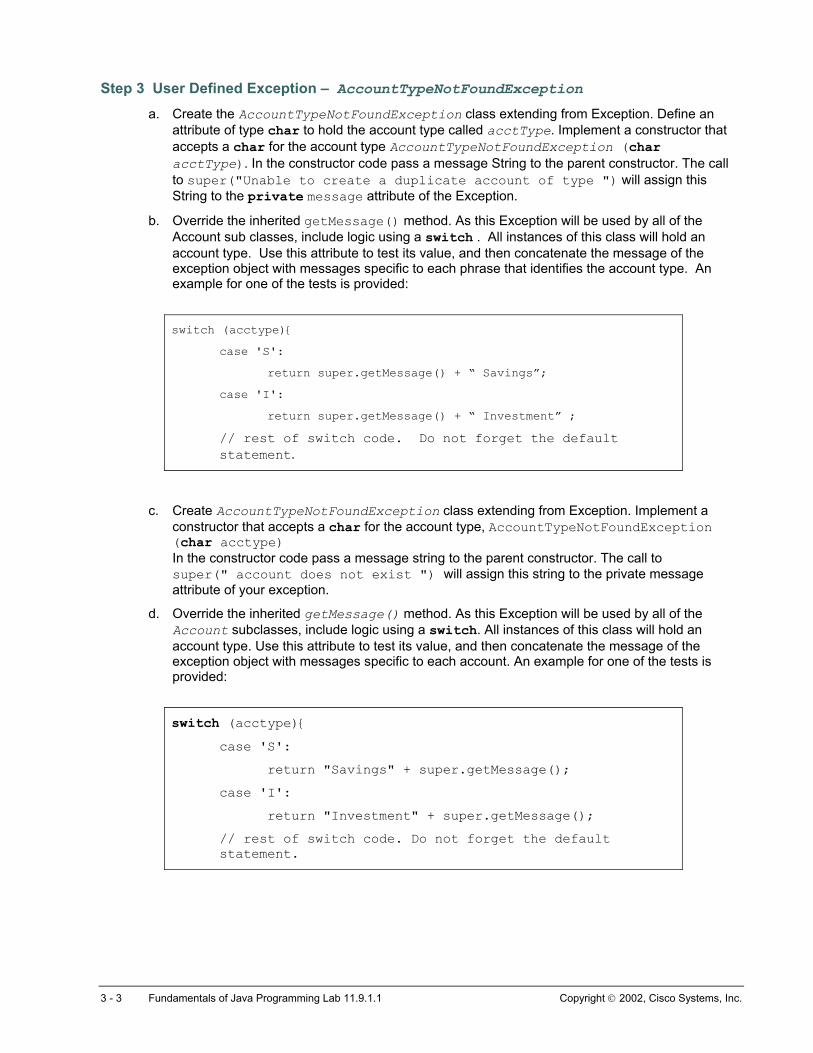
Step 3 User Defined Exception – AccountTypeNotFoundException a. Create the AccountTypeNotFoundException class extending from Exception. Define an
attribute of type char to hold the account type called acctType. Implement a constructor that accepts a char for the account type AccountTypeNotFoundException (char acctType). In the constructor code pass a message String to the parent constructor. The call to super("Unable to create a duplicate account of type ") will assign this String to the private message attribute of the Exception.
b. Override the inherited getMessage() method. As this Exception will be used by all of the Account sub classes, include logic using a switch . All instances of this class will hold an account type. Use this attribute to test its value, and then concatenate the message of the exception object with messages specific to each phrase that identifies the account type. An example for one of the tests is provided:
switch (acctype){
case 'S':
return super.getMessage() + “ Savings”;
case 'I':
return super.getMessage() + “ Investment” ;
// rest of switch code. Do not forget the default statement.
c. Create AccountTypeNotFoundException class extending from Exception. Implement a constructor that accepts a char for the account type, AccountTypeNotFoundException (char acctype) In the constructor code pass a message string to the parent constructor. The call to super(" account does not exist ") will assign this string to the private message attribute of your exception.
d. Override the inherited getMessage() method. As this Exception will be used by all of the Account subclasses, include logic using a switch. All instances of this class will hold an account type. Use this attribute to test its value, and then concatenate the message of the exception object with messages specific to each account. An example for one of the tests is provided:
switch (acctype){ case 'S':
return "Savings" + super.getMessage();
case 'I':
return "Investment" + super.getMessage();
// rest of switch code. Do not forget the default statement.
3 - 3 Fundamentals of Java Programming Lab 11.9.1.1 Copyright 2002, Cisco Systems, Inc.
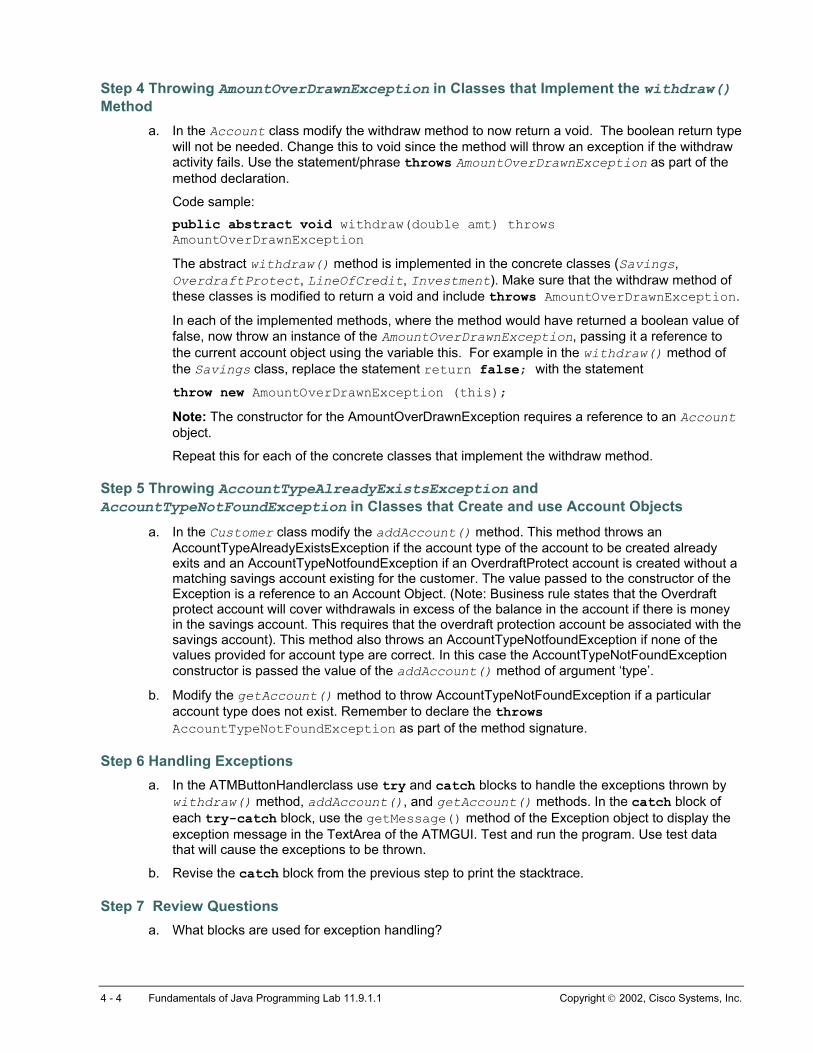
Step 4 Throwing AmountOverDrawnException in Classes that Implement the withdraw() Method
a. In the Account class modify the withdraw method to now return a void. The boolean return type will not be needed. Change this to void since the method will throw an exception if the withdraw activity fails. Use the statement/phrase throws AmountOverDrawnException as part of the method declaration.
Code sample: public abstract void withdraw(double amt) throws AmountOverDrawnException
The abstract withdraw() method is implemented in the concrete classes (Savings, OverdraftProtect, LineOfCredit, Investment). Make sure that the withdraw method of these classes is modified to return a void and include throws AmountOverDrawnException.
In each of the implemented methods, where the method would have returned a boolean value of false, now throw an instance of the AmountOverDrawnException, passing it a reference to the current account object using the variable this. For example in the withdraw() method of the Savings class, replace the statement return false; with the statement
throw new AmountOverDrawnException (this); Note: The constructor for the AmountOverDrawnException requires a reference to an Account object.
Repeat this for each of the concrete classes that implement the withdraw method.
Step 5 Throwing AccountTypeAlreadyExistsException and AccountTypeNotFoundException in Classes that Create and use Account Objects
a. In the Customer class modify the addAccount() method. This method throws an AccountTypeAlreadyExistsException if the account type of the account to be created already exits and an AccountTypeNotfoundException if an OverdraftProtect account is created without a matching savings account existing for the customer. The value passed to the constructor of the Exception is a reference to an Account Object. (Note: Business rule states that the Overdraft protect account will cover withdrawals in excess of the balance in the account if there is money in the savings account. This requires that the overdraft protection account be associated with the savings account). This method also throws an AccountTypeNotfoundException if none of the values provided for account type are correct. In this case the AccountTypeNotFoundException constructor is passed the value of the addAccount() method of argument ‘type’.
b. Modify the getAccount() method to throw AccountTypeNotFoundException if a particular account type does not exist. Remember to declare the throws AccountTypeNotFoundException as part of the method signature.
Step 6 Handling Exceptions a. In the ATMButtonHandlerclass use try and catch blocks to handle the exceptions thrown by
withdraw() method, addAccount(), and getAccount() methods. In the catch block of each try-catch block, use the getMessage() method of the Exception object to display the exception message in the TextArea of the ATMGUI. Test and run the program. Use test data that will cause the exceptions to be thrown.
b. Revise the catch block from the previous step to print the stacktrace.
Step 7 Review Questions a. What blocks are used for exception handling?
4 - 4 Fundamentals of Java Programming Lab 11.9.1.1 Copyright 2002, Cisco Systems, Inc.
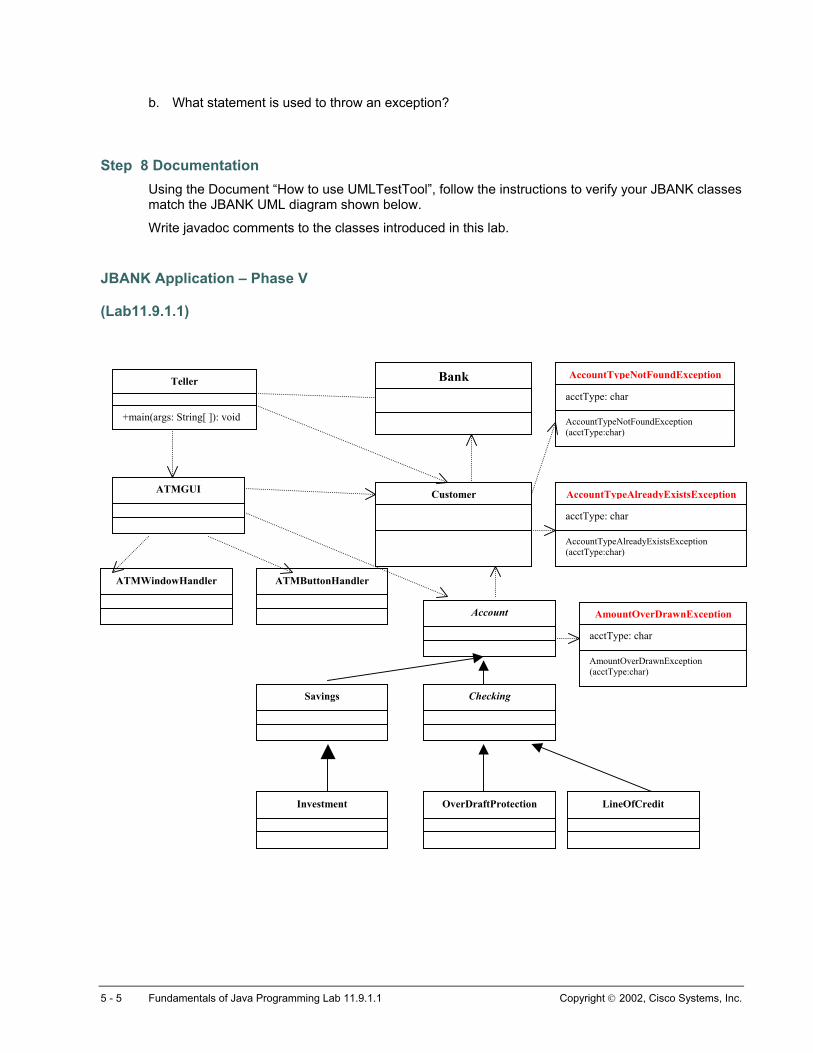
b. What statement is used to throw an exception?
Step 8 Documentation Using the Document “How to use UMLTestTool”, follow the instructions to verify your JBANK classes match the JBANK UML diagram shown below.
Write javadoc comments to the classes introduced in this lab.
JBANK Application – Phase V
(Lab11.9.1.1)
Teller
+main(args: String[ ]): void
Customer
AccountTypeNotFoundException (acctType:char)
AccountTypeAlreadyExistsException (acctType:char)
acctType: char
AccountTypeAlreadyExistsException
acctType: char
AccountTypeNotFoundException
Account
AmountOverDrawnException (acctType:char)
acctType: char
AmountOverDrawnException
Checking
ATMGUI
ATMWindowHandler ATMButtonHandler
Savings
Bank
Investment OverDraftProtection LineOfCredit
5 - 5 Fundamentals of Java Programming Lab 11.9.1.1 Copyright 2002, Cisco Systems, Inc.
Lab 11.9.1.2 Display the User defined Exception Messages in a GUI
Estimated Time 60 minutes
Learning Objectives In this lab activity, the student will use the messages generated by the exceptions and display these in the message window of a GUI.
Description • Modify the ATMButton handler class to display the messages thrown by exception.
• When working with GUI based applications, the programmer needs to handle the presentation of Exceptions and errors as part of the information displayed. In the ATMGUI the message area allows for the display of error messages.
• To incorporate the exception handling introduced into the Account and the Customer classes, the methods of the ATMButtonHandler class need to be modified.
• The methods will now enclose code that potentially could throw an exception in a try block, catching the exception, extracting the message stored in the exception, and displaying this message using the errorMessage() method.
Business rules • The following business rules direct the creation of appropriate exceptions.
o Customer cannot have more than one of each type of Account. Creating duplicate Accounts should result in an exception – AccountTypeAlreadyExistsException
o To deposit or withdraw money from a particular account type, the corresponding account type should exist for the customer – AccountTypeNotFoundException
o A customer is not permitted to withdraw money from an account in an amount more than the balance or credit limit – AmountOverDrawnException
File Management For this lab, launch BlueJ. Click on Project from the BlueJ main menu and select open, navigate to the folder chap11, and select the BlueJ project lab11.9.1.1. An alternative method is to select Project and Open Recent, and select the previous JBank lab11.9.1.1
Now save this Project under a new name lab11.9.1.2. Select Project and Save as, change the Folder to chap11. In the filename box, type lab11.9.1.2. You should see lab11.9.1.2 displayed on your project window.
Tasks
1 - 1 Fundamentals of Java Programming Lab 11.9.1.2 Copyright 2004, Cisco Systems, Inc.
Step 1 Modifying the ATMButtonHandler Class a. The ATMButtonHandler class has several methods that handle requests to retrieve an
account, or to withdraw money from an account. These methods need to be modified. The methods will be making calls to the methods of the Customer and the Account class, which have been modified in the pervious lab 11.9.1.1 to include exception handling. The methods of the button handler class will now include try catch blocks. The catch block will extract the message from the exception and pass the String to the errorMessage() method of the handler class.
b. Modify private Account locateAccount(char acctType) This method will be called if a customer account has been discovered. The method will use the getAccount method of the Customer class to retrieve the account. Currently this method returns either an account, or null. Change the code in this method. In the method, enclose the call to the Customer class getAccount method in a try block. The getAccount method of the customer class has been modified to throw an exception (AccountTypeNotFoundException). In the catch clause, catch the exception, extract the message from the exception object, and pass the resulting string to a method call to the errorMessage() method.
c. Modify the private void withdrawAction(Account a, double amount)
d. The method currently includes a call to the withdraw method of the account. The withdraw method of the account no longer returns a boolean value, but instead throws an exception. Enclose the call to the withdraw method in a try block. The withdraw method throws AmountOverDrawnException. In the catch block, catch the exception, extract the message from the exception object, passing this message as a string to the method errorMessage().
Step 2 Testing the code a. In the Teller class main method uncomment out the lines of code that display the GUI.
Comment out lines of code that perform transactions on customers. Do not comment out the lines of code that create the customer accounts. You will be using the GUI and these accounts to test the display of error messages.
b. The data to be used as suggested in the last lab was:
Suggested Data:
Customer 1
FirstName: John
LastName Doe
City Address: Phoenix
street Address: 4128 W VanBuren
email: [email protected]
phone Number: 111-111-1111
zipOrPostalCode 67777
DOB 2/1/50
Account SAVING, 3000
2 - 2 Fundamentals of Java Programming Lab 11.9.1.2 Copyright 2004, Cisco Systems, Inc.
Customer 2 – Creating this Customer should cause an exception for creating an account that alreadt exists.
FirstName: Betsy
LastName: Smith
City Address: Glendale
street Address: East Street
email: [email protected]
phone Number: 222-222-2222
zipOrPostalCode 9999
DOB 5/7/70
Account SAVINGS, 3210
Account LINEOFCREDIT, 5000
Account Savings , 4000
Customer 3 _ when you create this customer you should get an exception for creating an Overdraft protect account without having a savings account.
FirstName: Joe
LastName: Smith
City Address: Mesa
street Address: 890 W Street
email: [email protected]
phone Number: 333-333-3333
zipOrPostalCode 9999
DOB 2/8/80
Account OVERDRAFTPROTECT, 3500
Account LINEOFCREDIT, 2000
c. At the GUI retrieve one of the Customer accounts. Select an incorrect account type. Make sure the error message is displayed.
d. Now withdraw more than the balance form one or more of the accounts. Make sure the error message is displayed.
3 - 3 Fundamentals of Java Programming Lab 11.9.1.2 Copyright 2004, Cisco Systems, Inc.

JBANK Application – Phase V
(Lab11.9.1.2)
Teller
+main(args: String[ ]): void
Customer
AccountTypeNotFoundException (acctType:char)
AccountTypeAlreadyExistsException (acctType:char)
acctType: char
AccountTypeAlreadyExistsException
acctType: char
AccountTypeNotFoundException
Account
AmountOverDrawnException (acctType:char)
acctType: char
AmountOverDrawnException
Checking
ATMGUI
ATMWindowHandler ATMButtonHandler
Savings
Bank
Investment OverDraftProtection LineOfCredit
4 - 4 Fundamentals of Java Programming Lab 11.9.1.2 Copyright 2004, Cisco Systems, Inc.
Lab 12.2.6 ArrayList
Estimated Time 30 minutes
Learning Objectives In this lab activity, the student will use the Collections class ArrayList to store objects.
Description/Scenario • Collection objects represent references to other objects.
• There are four basic storage technologies available for storing objects. These are:
o Array
o linked list
o tree
o hash table
• Objects that can serve as containers for other objects can be categorized as collections, lists, sets, or maps.
• Lists are ordered collections, and they can have duplicates. The order can be the natural order, which is the order in which the objects were added to the list. Because the list is ordered, objects in a list can be indexed. An array is an example of a list. The collection framework includes classes that provide for dynamic lists. This type of storage is also known as a bag or multiset. Other names for this type of storage include list and sequence.
• The programmer can create classes that implement the collections interface to manage and store objects. However, an extensive group of classes are available that have implemented one or more of the collection interfaces and storage methods. The ArrayList class extends from AbstractList, which extends from AbstractCollection. The ArrayList class implements the List interface.
File Management Open BlueJ. Click on Project from the BlueJ main menu and select New. In the New Project window and in the Look in: list box navigate to chap12. Double-click the chap12 folder listed in the text window and a different New Project window opens with chap12 in the Look in: list box. Type lab12.2.6 in the File name text box and click on Create to create a lab12.2.6 subfolder in the chap12 folder.
1 - 1 Fundamentals of Java Programming Lab 12.2.6 Copyright 2004, Cisco Systems, Inc.
Tasks
Step 1 Use of ArrayList a. Define an ArrayList called points to store Point objects in a class called Line. Lists are
ordered collections and can have duplicates. One way a list can be ordered is the natural order. This is the order in which the objects were added to the list. Because the list is ordered, objects in a list can be indexed. An array is an example of a list.
b. Define an addPoint(Point p) method which takes a Point object as an argument. The class Point stores the x and y coordinates of a two-dimensional point and implements the toString() method to return a textual representation of a point.
c. Include import java.awt.Point statement to implement the Point class. The addPoint() method uses the add() method of the ArrayList points to add the points.
d. Define a method numberOfPoints() which returns the number of points (Hint: Use the size() method of the ArrayList to determine the size of the List).
Step 2 Testing the program In the main method create an instance of Line called line. Use the addPoint() method to add points to the ArrayList. A code sample is given below:
line.addPoint(new Point(17, 102));
Add points, such as (678, 56) to the array. Using the System.out.println() method, print the number of points.
2 - 2 Fundamentals of Java Programming Lab 12.2.6 Copyright 2004, Cisco Systems, Inc.
Lab 12.2.8.1 ListIterators
Estimated Time 20 minutes
Learning Objectives In this lab activity, the student will use ListIterators to scan through a Collection.
Description/Scenario • A collection can be scanned using an iterator. Two iterator interfaces are available in the
collection framework: the Iterator and its subclass the ListIterator. Use the ListIterator with list objects. Iterators provide methods for scanning through any collection. In a set, the order is non-deterministic. This means it is not determined by the sequence in which it was added, or by some special key value. When using an iterator to move over a set, the iteration moves forward (but not backwards) through the list elements.
• Iterator objects provide for scanning through the list and for adding and removing elements from the collection.
• A list object also supports a ListIterator, which allows the list to be scanned backwards.
• Use ListIterators to traverse through a Collection of Point objects created in the previous lab12.2.6
File Management For this lab, launch BlueJ. Click on Project from the BlueJ main menu and select open, navigate to the folder chap12, and select the BlueJ project lab12.2.6. An alternative method is to select Project and Open Recent, and select the previous JBank lab12.2.6.
Now save this Project under a new name lab12.2.8.1. To do this, select Project and Save as, Change the Folder in the Look In: box to Chap12, and type lab12.2.8.1 as the new Project name. The Project window title should display lab12.2.8.1.
Tasks
Step 1 Use of ListIterator a. Edit the class Line from previous lab. Add another method called listIterator(), which
returns a ListIterator object that can be used to iterate through the collection of Point objects. A collection can be scanned using an iterator. There are two iterator interfaces available in the collection framework. The iterator and its subclass the ListIterator.
b. Use the ListIterator with list objects. When using an iterator to move over a set, the iteration moves forward through the list elements. The ListIterator provides additional methods for scanning forward and backwards through the collection.
1 - 1 Fundamentals of Java Programming Lab 12.2.8.1 Copyright 2004, Cisco Systems, Inc.

Step 2 Test the Program a. Add statements to the main method to test the listIterator() method and the
ListIterator object it returns.
2 - 2 Fundamentals of Java Programming Lab 12.2.8.1 Copyright 2004, Cisco Systems, Inc.

Lab 12.2.8.2 Creating a Collection to Store Integer Objects
Estimated Time 20 minutes
Learning Objectives In this lab activity, the student will use the HashSet object for storing integers using objects of the Integer class, and include exception handling.
Description/Scenario • The two Set objects discussed in this chapter are the HashSet and the TreeSet.
• The HashSet class extends from AbstractSet, which extends from AbstractCollection. HashSet implements the Set interface. A Set object does not allow duplicate objects to enter the collection. The collection is unordered and unsorted. Note that the collection will fail when it tries to add duplicates. The HashSet class overrides the toString method and creates a sequence of the items separated by commas, delimited by the open and close braces.
• Create a collection class called IntegerSet. This class will store only integers and no duplicate values of an integer is allowed. This class will have methods for adding and removing values always ensuring that the rule stated here is followed. The class will also have a method to display the objects in the collection using an Iterator object.
• Create an 'InvalidIntegerObjectException' class and use this in the IntgerSet class. This exception will be thrown in the methods that enforce the rules disallowing duplicates or other objects being added to the collection.
File Management Open BlueJ. Click on Project from the BlueJ main menu and select New. In the New Project window and in the Look in: list box select c:\. Double-click the javacourse folder listed in the text window and a different New Project window opens with javacourse in the Look in: list box. Double-click the chap12 folder listed in the text window and a different New Project window opens with chap12 in the Look in: list box. Type lab12.2.8.2 in the File name text box and click on Create to create a lab12.2.8.2 subfolder in the chap12 folder.
Tasks
Step 1 Defining IntegerSet class a. A Set is collection of objects without duplicates. The collection is unordered and unsorted. Define
a class called IntegerSet, in this class define a private variable of type Set called integerElements to reference Set object.
Sample Code: private Set elements = new HashSet();
1 - 2 Fundamentals of Java Programming Lab 12.2.8.2 Copyright 2002, Cisco Systems, Inc.
b. Define a method called addElement() that takes an Integer object as an argument. In the addElement() method use the add() method of the Set class to add the Integer objects to the set.
c. Define a method called exists() that takes an Integer object as an argument. In the exists() method use the contains() method of the Set class to check whether the element exists in the Set.
d. Define a getIterator() method that returns an Iterator of the Set object.
e. Define a removeAllElements() method that removes all the objects in the Set. This method uses the clear() method of the Set class.
f. Define a removeElement() method which takes an Integer object as an argument and removes the object from the list. Use remove() method of the Set class to remove an object from the Set.
g. Define a toString() method which returns a String object containing the values of all the Objects in the Set.
Step 2 Adding InvalidIntegerObjectException This program should not allow duplicate integer values to be entered to the Set. Define an Exception class called InvalidIntegerObjectException that extends from the Exception class. This exception is thrown by the addElement() method which checks whether a duplicate element exists and raises the InvalidIntegerObjectException.
Step3 Testing your program In the main method create an instance of the IntegerSet class. Add integer elements to the Set using addElement() method.
Test your program by removing an element from the Set, displaying all the integer elements in the Set, and removing all elements in the Set. Use try and catch blocks to handle Exception.
2 - 2 Fundamentals of Java Programming Lab 12.2.8.2 Copyright 2002, Cisco Systems, Inc.
Lab 12.3.1.1 File I/O using Collection Classes
Estimated Time 60 minutes
Learning Objectives In this lab, the student will use Vector objects to store Customer objects retrieved from a file.
Description • This lab combines the use of i/o and collection technologies. The skills developed in this lab will
be useful for creating classes to extract data from databases.
• Modify the CustomerFileWriter class to accept a Vector and save the contents of the Vector to customers.dat file.
• Modify the CustomerFileReader class to read back the Vector from the customers.dat file.
File Management Open BlueJ. Click on Project from the BlueJ main menu and select New. In the New Project window and in the Look in: list box select c:\. Double-click the javacourse folder listed in the text window and a different New Project window opens with javacourse in the Look in: list box. Double-click the chap12 folder listed in the text window and a different New Project window opens with chap12 in the Look in: list box. Type lab12.3.1.1 in the File name text box and click on Create to create a lab12.3.1.1 subfolder in the chap12 folder. Import JBANK classes from lab11.9.1.
Tasks
Step 1 Using Object Vectors to write and read customers Objects a. Modify the saveCustomers() method signature of the CustomerFileWriter class to
accept an argument of type Vector. In this method, pass the Vector as a parameter to the writeObject() method of the ObjectOutputStream objectOutputStream.
b. Modify the readCustomers() method signature of the CustomerFileReader class to return a Vector. Modify the customers attributes to hold a Vector. In this method, type cast the output of the readObject() method of the ObjectInputStream objectInputStream to Vector type and return the Vector.
c. In the Teller class modify the attribute customers of type Customer array object to Vector type. Include the import statement import java.util.*;. In the Teller class constructor, read the customer data stored in the file by calling the readCustomers() method of the CustomerFileReader. Handle the IOExceptions in a try-catch block. Modify the createNewCustomer() method in the Teller class to add customers to the Vector. Modify the getCustomer() method by using an Iterator to traverse through the Vector and return a Customer object.
1 - 1 Fundamentals of Java Programming Lab 12.3.1.1 Copyright 2002, Cisco Systems, Inc.
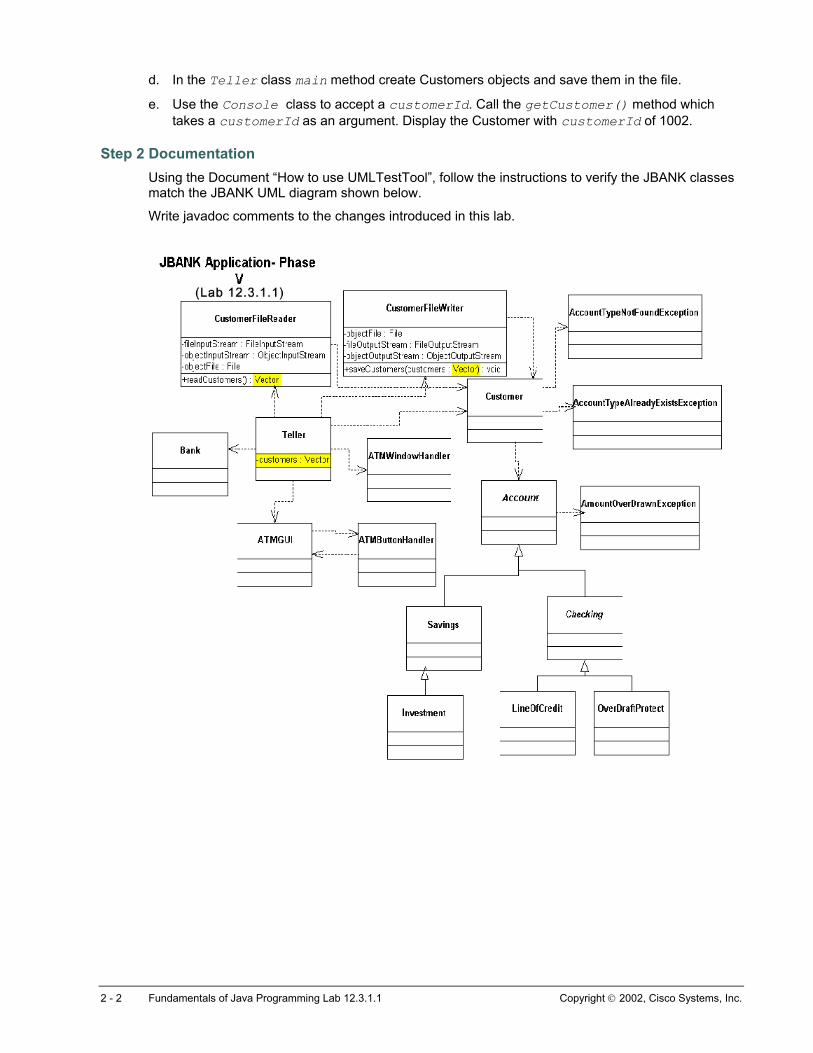
d. In the Teller class main method create Customers objects and save them in the file.
e. Use the Console class to accept a customerId. Call the getCustomer() method which takes a customerId as an argument. Display the Customer with customerId of 1002.
Step 2 Documentation Using the Document “How to use UMLTestTool”, follow the instructions to verify the JBANK classes match the JBANK UML diagram shown below.
Write javadoc comments to the changes introduced in this lab.
2 - 2 Fundamentals of Java Programming Lab 12.3.1.1 Copyright 2002, Cisco Systems, Inc.
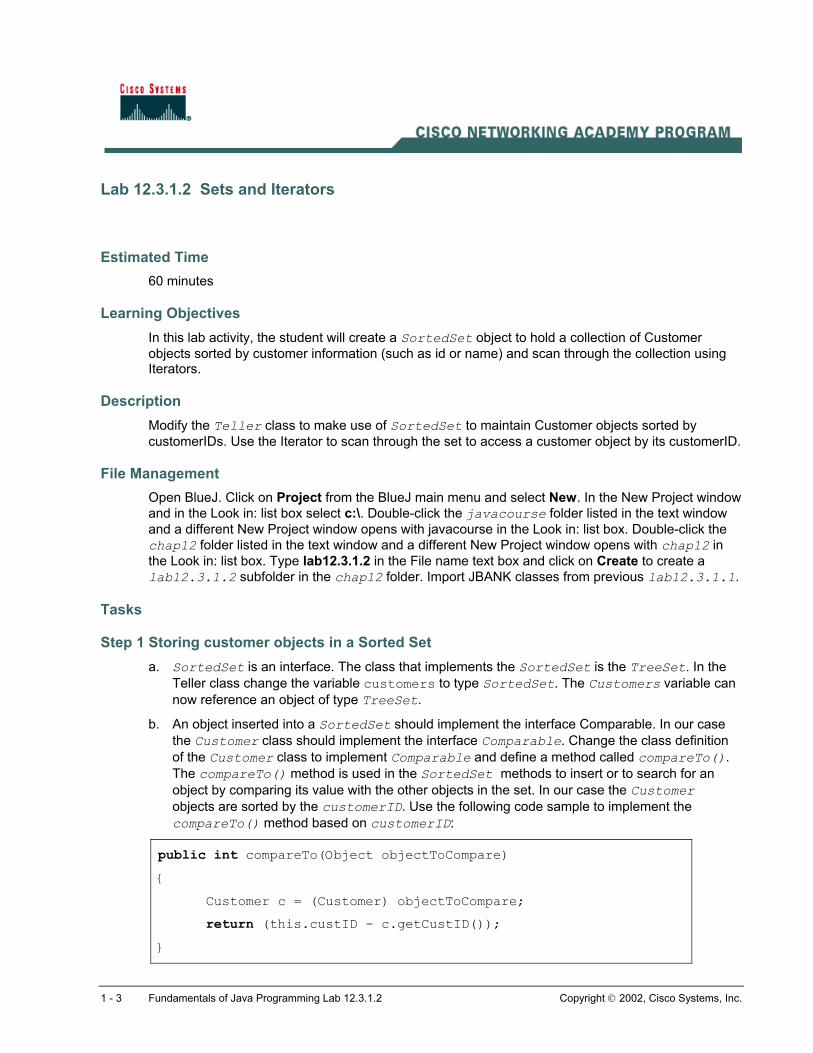
Lab 12.3.1.2 Sets and Iterators
Estimated Time 60 minutes
Learning Objectives In this lab activity, the student will create a SortedSet object to hold a collection of Customer objects sorted by customer information (such as id or name) and scan through the collection using Iterators.
Description Modify the Teller class to make use of SortedSet to maintain Customer objects sorted by customerIDs. Use the Iterator to scan through the set to access a customer object by its customerID.
File Management Open BlueJ. Click on Project from the BlueJ main menu and select New. In the New Project window and in the Look in: list box select c:\. Double-click the javacourse folder listed in the text window and a different New Project window opens with javacourse in the Look in: list box. Double-click the chap12 folder listed in the text window and a different New Project window opens with chap12 in the Look in: list box. Type lab12.3.1.2 in the File name text box and click on Create to create a lab12.3.1.2 subfolder in the chap12 folder. Import JBANK classes from previous lab12.3.1.1.
Tasks
Step 1 Storing customer objects in a Sorted Set a. SortedSet is an interface. The class that implements the SortedSet is the TreeSet. In the
Teller class change the variable customers to type SortedSet. The Customers variable can now reference an object of type TreeSet.
b. An object inserted into a SortedSet should implement the interface Comparable. In our case the Customer class should implement the interface Comparable. Change the class definition of the Customer class to implement Comparable and define a method called compareTo(). The compareTo() method is used in the SortedSet methods to insert or to search for an object by comparing its value with the other objects in the set. In our case the Customer objects are sorted by the customerID. Use the following code sample to implement the compareTo() method based on customerID:
public int compareTo(Object objectToCompare)
{
Customer c = (Customer) objectToCompare;
return (this.custID - c.getCustID()); }
1 - 3 Fundamentals of Java Programming Lab 12.3.1.2 Copyright 2002, Cisco Systems, Inc.
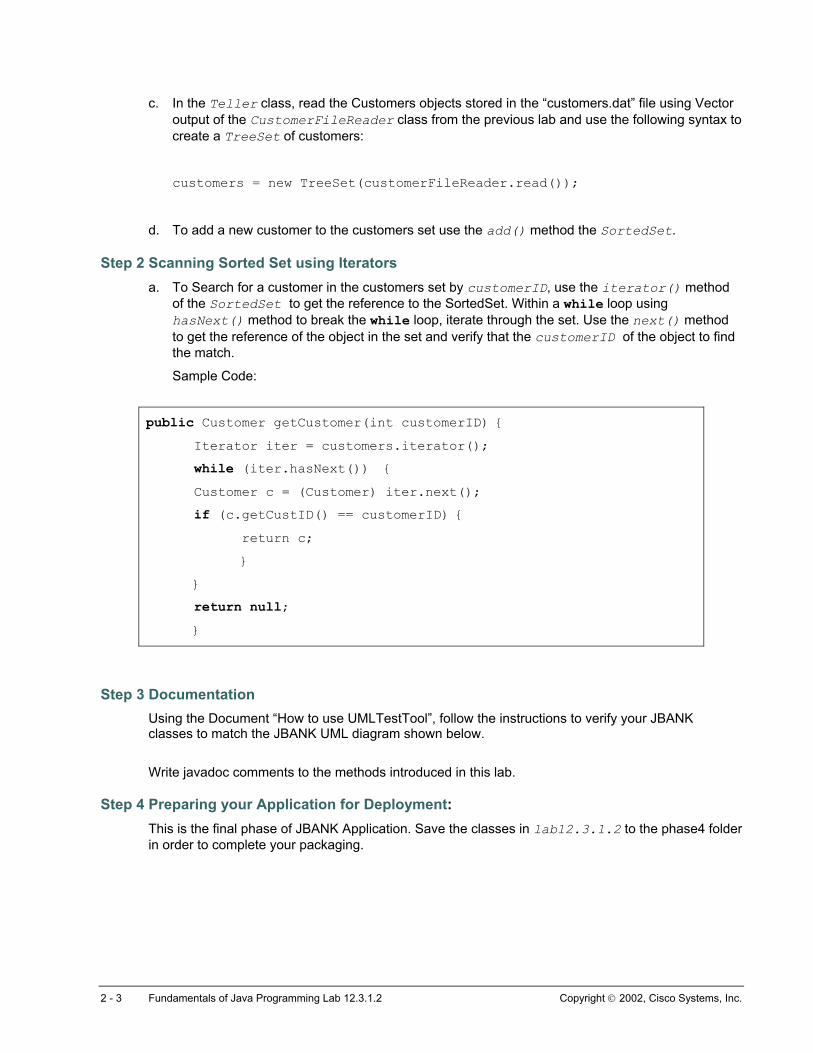
c. In the Teller class, read the Customers objects stored in the “customers.dat” file using Vector output of the CustomerFileReader class from the previous lab and use the following syntax to create a TreeSet of customers:
customers = new TreeSet(customerFileReader.read());
d. To add a new customer to the customers set use the add() method the SortedSet.
Step 2 Scanning Sorted Set using Iterators a. To Search for a customer in the customers set by customerID, use the iterator() method
of the SortedSet to get the reference to the SortedSet. Within a while loop using hasNext() method to break the while loop, iterate through the set. Use the next() method to get the reference of the object in the set and verify that the customerID of the object to find the match.
Sample Code:
public Customer getCustomer(int customerID) {
Iterator iter = customers.iterator();
while (iter.hasNext()) {
Customer c = (Customer) iter.next();
if (c.getCustID() == customerID) { return c;
}
}
return null; }
Step 3 Documentation Using the Document “How to use UMLTestTool”, follow the instructions to verify your JBANK classes to match the JBANK UML diagram shown below.
Write javadoc comments to the methods introduced in this lab.
Step 4 Preparing your Application for Deployment: This is the final phase of JBANK Application. Save the classes in lab12.3.1.2 to the phase4 folder in order to complete your packaging.
2 - 3 Fundamentals of Java Programming Lab 12.3.1.2 Copyright 2002, Cisco Systems, Inc.
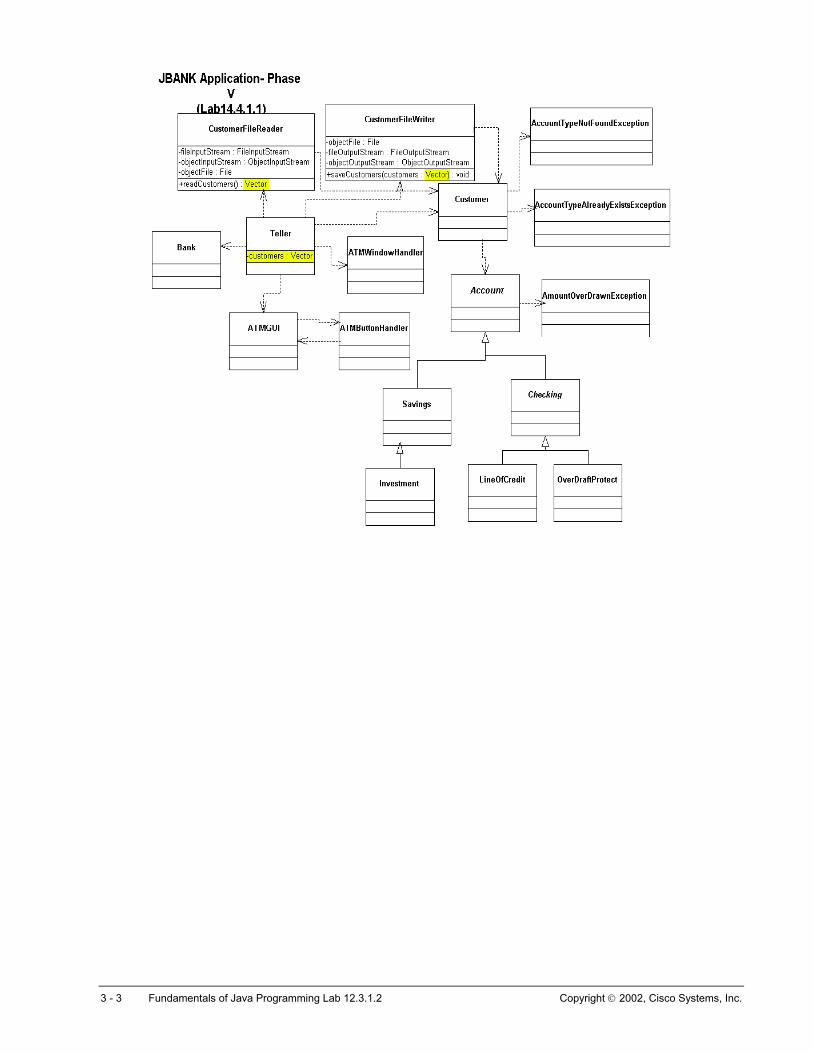
3 - 3 Fundamentals of Java Programming Lab 12.3.1.2 Copyright 2002, Cisco Systems, Inc.
Lab 13.3.2 Threads and Priorities
Estimated Time 30 minutes
Learning Objective In this lab activity, the student will create multithreading solutions using the Thread class to run several threads that display the same information.
Description/Scenario • In the Java language, the Virtual CPU that is created to manage a thread is an instance of
java.lang.Thread class. In other words, a Thread object is a virtual CPU that runs code and uses data. More than one Thread object can share the code and data.
• Any class whose instances are intended to be executed by a thread should implement the Runnable interface. The class must define a method of no arguments called run(). A class that implements Runnable can run without sub classing Thread by instantiating a Thread instance and passing itself in as the target.
• One way to create a thread is to create it in a class and pass it a reference to an object that implements Runnable. A second way to create a thread is to extend from Thread.
• A thread starts with the start() method. This calls the run() method of the thread or the Object implementing Runnable.
• The run() method can be that of an object that implements the Runnable interface or a Thread object that overrides the run() method. A programmer cannot control the schedule for a thread, but can assign a priority to a thread. The JVM schedules threads of same priority. Other method calls can be used to yield to a thread of same or higher priority. Use the getPriority() method to determine the current priority of the thread. Use the setPriority() method to set the priority of the thread. The priority is an integer value. The Thread class includes the following constants:
o Thread.MIN_PRIORITY
o Thread.NORM_PRIORITY
o Thread.MAX_PRIORITY
• This lab covers creation of a Thread Class and instantiation of three different threads.
• The student will set Thread priorities and observe the results.
• This lab also covers Thread priorities and the effects that priority has on Thread processes.
1 - 1 Fundamentals of Java Programming Lab 13.3.2 Copyright 2002, Cisco Systems, Inc.
File Management Open BlueJ. Click on Project from the BlueJ main menu and select New. In the New Project window and in the Look in: list box navigate to the chap13 folder. Double-click on the folder. Type lab13.3.2 in the File name text box and click on Create to create a lab13.3.2 subfolder in the chap13 folder.
Tasks
Step 1 Create the IntThread Class a. Create a class named IntThread that extends Thread and has a constructor that accepts an
int as an argument.
b. Add a run() method with a for loop that displays the int argument 15 times.
Step 2 Create the TestThread Class a. Create a class named TestThread that contains a main method.
b. Have the main method instantiate three Threads of IntThread class and pass the ints 1, 2, and 3. Use the start() method to start each Thread.
c. Run the TestThread class and observe which int displays first.
Step 3 Create the TestThread2 Class a. Create a class named TestThread2 that contains a main method.
b. Have the main method instantiate three Threads of IntThread class and pass the ints 1, 2, and 3.
c. Add setPriority() methods to set the priorities for each Thread as follows:
one.setPriority(Thread.MIN_PRIORITY);
two.setPriority(Thread.MIN_PRIORITY + 1);
three.setPriority(Thread.MIN_PRIORITY + 2);
d. Run the TestThread2 class and observe which int displays first.
2 - 2 Fundamentals of Java Programming Lab 13.3.2 Copyright 2002, Cisco Systems, Inc.
Lab 13.5.2 Controlling Threads Using Methods of the Thread Class
Estimated Time 30 minutes
Learning Objective In this lab activity, the student will use methods of the Thread class to control threads.
Description/Scenario • A program launches a thread's execution by calling the thread's start() method, which calls
the run() method. After start() launches the thread, start() returns to its caller immediately. The caller then executes concurrently with the launched thread. The start() method throws an IllegalThreadStateException if the thread it is trying to start has already been started.
• Threads can be placed in a blocked state to allow other threads to run or to wait for resources to become available. The programmer has several methods of the Thread class that can be used to place threads in a blocked state, assign threads a priority, or notify other threads when it is done. When a blocked thread becomes runnable, it is placed back into the appropriate runnable pool. Threads from the highest priority nonempty pool are given CPU time.
• When a sleep() method is called in a running thread, that thread enters the sleeping state. A sleeping thread becomes ready after the designated sleep time expires. A sleeping thread cannot use a processor even if one is available. The static method sleep() is called with an argument specifying how long, in milliseconds, the currently executing thread should sleep. While a thread sleeps, it does not contend for the processor, so other threads can execute. This can give lower-priority threads a chance to run.
• Create an applet that creates a Thread.
• Test the Thread sleep() method.
• Create an applet and inside the applet create a Thread.
• Create and start the Thread inside the init() method of the applet.
• Inside the run() method have the Thread sleep() method pause the Thread.
• Have the paint() method draw a string that is moved across the screen by the run() method.
File Management Open BlueJ. Click on Project from the BlueJ main menu and select New. In the New Project window and in the Look in: list box navigate to the folder chap13. Double-click the folder. Type lab13.5.2 in the File name text box and click on Create to create a lab13.5.2 subfolder in the chap13 folder.
1 - 1 Fundamentals of Java Programming Lab 13.5.2 Copyright 2004, Cisco Systems, Inc.
Tasks
Step 1 Create the AppletThread class a. Create a class named AppletThread that extends Applet and implements Runnable.
b. Create and start a Thread inside the init() method.
t = new Thread(this);
t.start();
Step 2 Add the String a. Have the paint() method draw a String. g.drawString("Help!",x, y);
b. Have the run() method move the String down the window in a diagonal line from the left side to the right. When it reaches the right side, the String moves down and to the left.
c. Have the String change color when the direction changes.
d. Have a try block inside the run() method that uses a Thread sleep() method to pause the movement of the String.
Step 3 Run the Applet a. Run the applet in the appletviewer provided by BlueJ.
b. Notice the speed of movement of the String.
c. Change the sleep time and run the applet in the appletviewer.
d. Notice the speed of movement of the String
2 - 2 Fundamentals of Java Programming Lab 13.5.2 Copyright 2004, Cisco Systems, Inc.
Lab 13.5.5 Digital Clock
Estimated Time 40 minutes
Learning Objective In this lab activity, the student will create an applet that will display a digital clock with hour, minute, and second.
Description/Scenario • Create an applet that displays a digital clock. The clock should display hours, minutes, and
seconds.
• Use the Thread sleep method to repaint the clock every second.
• Have the clock update the time every second using a Thread.
File Management Open BlueJ. Click on Project from the BlueJ main menu and select New. In the New Project window and in the Look in: list box navigate to the folder chap13. Double-click the folder. Type lab13.5.5 in the File name text box and click on Create to create a lab13.5.5 subfolder in the chap13 folder.
Tasks
Step 1 Create the DigitalClock Class a. Create a class named DigitalClock that extends Applet and implements Runnable.
b. In the init() method, create the Thread and start the Thread.
c. Use the run() method to call the Thread sleep() method and the repaint() method to repaint the clock every second.
d. Use the following code to get the current hour, minute, and second:
Date myHours = new Date();
Date mySeconds = new Date(); Date myMinutes = new Date(); hrs = myHours.getHours(); sec = mySeconds.getSeconds();
mins = myMinutes.getMinutes(); //Note: these methods are deprecated but work.
1 - 1 Fundamentals of Java Programming Lab 13.5.5 Copyright 2004, Cisco Systems, Inc.

Step 2 Run the Applet a. Run the applet in the appletviewer provided by BlueJ.
2 - 2 Fundamentals of Java Programming Lab 13.5.5 Copyright 2004, Cisco Systems, Inc.