FAQs: Timpani - Allison Hopper · 2018-09-09 · pressure. This is extremely important for timpani....
5
11/22/09 9:27 AM Percussion Department / University of Texas at Austin Page 1 of 5 file:///Users/nicholehorner/Desktop/Grad/Fall%202009/Perc%20Tech/Timpani%20Resources/UT%20TIMPANI.webarchive Search FAQs: Timpani Questions: How do I change timpani heads? The timpani pedal moves when I remove my foot. How do I fix this? When I play the drum at loud volumes the pitch will change. What can I do about this? Where can I find buy timpani felt to recover my mallets? Where can I find teflon tape? Q. How do I change timpani heads? By: Tony Edwards Step 1: Buying new head The most common mistake when changing timpani heads is purchasing the wrong head. With varying timpani sizes and the introduction of the extended collar (head extends 1 inch past bowl) it is no wonder why this is confusing. The best solution is to simply measure the head before purchasing a new one. To get an accurate measurement you must measure the inside of the rim of the head. Step 2: Head removal Head removal of spring tension system Because this method involves a spring, which applies tremendous pressure, incorrect head removal could result in severe damage to the pedal. Though there are several ways to correctly remove a head this is the method I have found most useful. With your foot, press pedal placing the drum in it’s highest range. While keeping pressure applied to the pedal begin loosening the tension rods Once you have completed a full rotation around the drum you should be able to release the pedal and it will stay down. Continue loosening the tension rods and remove them. Remove counter hoop and head. Head removal of Dresden system To help balance the tension produced by the head, the base of these drums are very heavy. A cross bar located under the base is held in place by only the tension of the head. Once the tension rods are removed this bar will drop to the floor. Not only is this extremely difficult to re-install but could result in a broke toe. To prevent this from happening place an object under the drum to act as a brace. (phone books work great for this!) Once the brace is in place loosen all tension rods and remove counter hoop and head. Home Faculty Repertoire News Ensembles Dictionary Students Courses Auditions Facility Contact Us UT Direct
Transcript of FAQs: Timpani - Allison Hopper · 2018-09-09 · pressure. This is extremely important for timpani....
11/22/09 9:27 AMPercussion Department / University of Texas at Austin
Page 1 of 5file:///Users/nicholehorner/Desktop/Grad/Fall%202009/Perc%20Tech/Timpani%20Resources/UT%20TIMPANI.webarchive
Search
FAQs: Timpani
Questions:
How do I change timpani heads?
The timpani pedal moves when I remove my foot. How do I fix this?
When I play the drum at loud volumes the pitch will change. What can I do about this?
Where can I find buy timpani felt to recover my mallets?
Where can I find teflon tape?
Q. How do I change timpani heads?
By: Tony Edwards
Step 1: Buying new head
The most common mistake when changing timpani heads is purchasing the wrong head. With varying timpani sizesand the introduction of the extended collar (head extends 1 inch past bowl) it is no wonder why this is confusing. Thebest solution is to simply measure the head before purchasing a new one. To get an accurate measurement you mustmeasure the inside of the rim of the head.
Step 2: Head removal
Head removal of spring tension system
Because this method involves a spring, which applies tremendous pressure, incorrect head removal could result insevere damage to the pedal. Though there are several ways to correctly remove a head this is the method I havefound most useful.
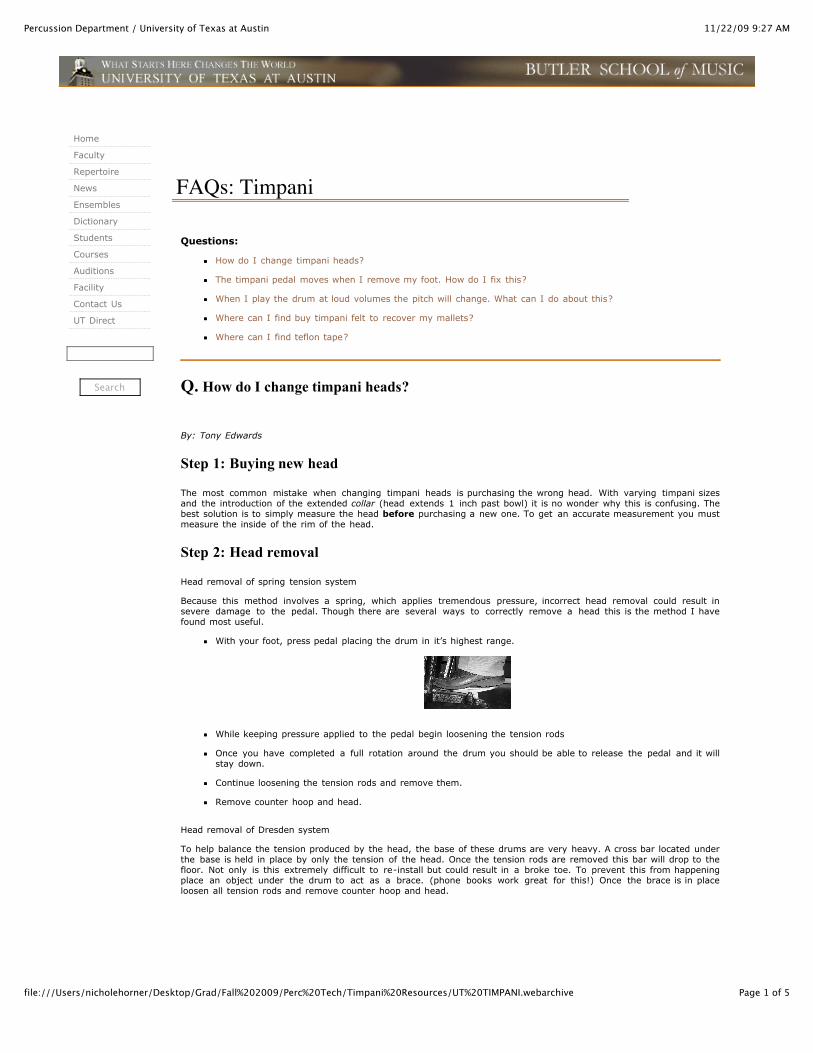
With your foot, press pedal placing the drum in it’s highest range.
While keeping pressure applied to the pedal begin loosening the tension rods
Once you have completed a full rotation around the drum you should be able to release the pedal and it willstay down.
Continue loosening the tension rods and remove them.
Remove counter hoop and head.
Head removal of Dresden system
To help balance the tension produced by the head, the base of these drums are very heavy. A cross bar located underthe base is held in place by only the tension of the head. Once the tension rods are removed this bar will drop to thefloor. Not only is this extremely difficult to re-install but could result in a broke toe. To prevent this from happeningplace an object under the drum to act as a brace. (phone books work great for this!) Once the brace is in placeloosen all tension rods and remove counter hoop and head.
Home
Faculty
Repertoire
News
Ensembles
Dictionary
Students
Courses
Auditions
Facility
Contact Us
UT Direct

11/22/09 9:27 AMPercussion Department / University of Texas at Austin
Page 2 of 5file:///Users/nicholehorner/Desktop/Grad/Fall%202009/Perc%20Tech/Timpani%20Resources/UT%20TIMPANI.webarchive
Step 3: Label head
I have found it very helpful to label heads before installing them on the timpani. You can label institutionalinformation, head size, or date of installation to help track it’s age.
The best way to do label a head is to mark the “inside” .
Place a piece of scotch tape (see through) on the top (batter side) of the head
Write the information on the tape
Turn the head over and then trace the writing
Remove the tape and “ta-da” it is labeled from the inside
Step 4: Lubricate bearing edge
Teflon Tape
To prevent “creaking” and improve resonance, it is necessary to lubricate the bearing edge of the bowl. Throughouthistory timpanist have used various products for this purpose such as wax and graphite powder. The best product Ihave found is Teflon tape. This is NOT the kind you find at your local hardware store but an adhesive Teflon tape. Thisproduct is very hard to find and is not available at most regular music stores. The best supplier is Steve WeissPercussion.
Drum Preparation
Once you have removed the head you can make any internal repairs, such as dent removal, cleaning the inside of thebowl, or gauge installation. Before you begin installing the new head, check the bearing edge for lubrication. If thedrum had been installed with Teflon tape and the tape is still in good condition continue to the next step. But if thetape is damaged or another form of lubrication had been used, then I would recommend installing fresh tape.
Remove any damaged tape or debris from edge.
Clean the bearing edge with steel wool.
Wipe bearing edge with cloth. Do not use any solvent (especially petrolium based).
Make sure edge is dry before applying fresh tape.
Place the tape (adhesive side down) on the bearing edge and as you roll out the tape apply pressure with thethumb.
Step 5: Head installation
Before you begin the process first inspect the new heads for any damage in shipping. This can be identified by awrinkle in the head. You would be surprised how common this is! Sometimes the rim of the head may get dented inshipping thus knocking the head “out of round” or “flush” (flat). If this happens the head is useless. Return it to thevendor for a replacement.
Place the counter hoop on head.
Put in tension rods in and lightly finger tighten, but allow enough give so the head can move.
Center the head on the drum.
Continue finger tightening until tension rods become taught.
With a timpani key turn each tension rod 1/2 turn. It is very important to tighten each tenstion rod using aspider pattern.
Continue this process until there is enough pressure that the pedal is balanced.
Place drum in it's lowest register and check that head is still centered.
Continue tightening tension rods until drum is in it's correct range.Drum Lowest note32" D29" F26" A23" C

11/22/09 9:27 AMPercussion Department / University of Texas at Austin
Page 3 of 5file:///Users/nicholehorner/Desktop/Grad/Fall%202009/Perc%20Tech/Timpani%20Resources/UT%20TIMPANI.webarchive
Step 6: Clearing a head
The term clearing a head refers to the method whereby each tension rod is adjusted so that it is applying equalpressure. This is extremely important for timpani. Since timpani have to be tuned to a specific pitch it is importantthat the drum produce a clear tone free of pitch bends or beads (the sound that you get when two instruments areplayed slightly out of tune). There have been several methods used to clear timpani heads, but the best (idiot proof)method I have found is the use of a drum dial (a device that measures head tension) There are many versions, andthey can be purchased at most music stores (est. price $80).
Place the drum so that it is in it’s lowest range.
Start at any lug on the drum. Place the edge of the dial so that it is sitting on the bearing edge of the drum.Get a reading from the dial (It tends to be between 75-80)
Move the dial to the next adjacent lug. When clearing the head I do not recommend using the “cross-tuning”method.
If you get a lug that is dramatically off it is recommended to move back one and recheck. As you alter eachlug it can affect lugs on adjacent sides
Work your way around the entire drum at least two times until all the tension rods register the same number.It’s not important what number it is, just as long they are all the same.
Once you’ve completed this check the pitch of the drum to make sure it’s correct (lowest pitch). If not, tightenor loosen the tension to get the pitch approximate and then repeat steps 1-5
Step 7: Shimming
Sometimes you may encounter a situation where one of the lugs registers a high tension even though you can removethe rod. This is often the result of a counter hoop that has gone out of flush. If this problem occurs the drum willnever clear properly. A method that can cheaply solve this problem is called shimming.
You will need the following supplies:
Black non-permanent felt marker
Washers (3/16)
Mole skin
How to shim:
Using the felt marker place a mark on the head, counter hoop and strut. This is to ensure that when you putthe counter hoop back on it will install exactly in the same position.
Remove counter hoop, turn over and place on table.
Cut mole skin to the same width as the inside of the counter hoop.
Using mole skin tape in 1-3 washer.
Place counter hoop back on drum and make sure you line up your marks.
Re-install and clear head.
Step 8: Collar
If you have ever removed a timpani head you will notice there is a crease where the head and bearing edge lined up.This crease ,called a collar, is very important for tone production. It is created through tension. To make sure a goodcollar is created, it is recommended that you depress the pedal to the drums highest pitch, let it sit overnight, and donot play on it.
Final adjustments
Chances are the head will stretch the following day and slight adjustment may need to be made. Using only quarter

11/22/09 9:28 AMPercussion Department / University of Texas at Austin
Page 4 of 5file:///Users/nicholehorner/Desktop/Grad/Fall%202009/Perc%20Tech/Timpani%20Resources/UT%20TIMPANI.webarchive
turns on each tension rod go around the drum. With each pass, check to make sure the correct pitch is achieved. It isalso common that the head will continue to stretch for about a week. Simply check periodically and make adjustmentsif needed.
back to top
Q. The timpani pedal moves when I remove my foot. How do I fix this?
By: Tony Edwards
A. This is a very common problem among timpani that use a spring tension pedal system and tends to be the resultof improper head tension. Before I discuss this process let me say one very important thing----DO NOT ADJUST ANYKNOBS AT THE BASE OF THE DRUM!!!!!. This tends to be the first course of action and could result in making theproblem worse. The symptom of a "slipping pedal" occurs only with timpani that use a spring tension pedal system. Aspring, located in the base of the drum, acts as a counterbalance to the tension created by the head. When thetension is unequal the pedal will slip. Usually, the head loses tension from wear or weather changes: heat will makethe head expand, cold will make it contract. The spring is designed to counter a specific amount of pressure. In orderto restore this tension the head must be tuned to a specific pitch interval (D-A as opposed to C-G). The best way toaccomplish this is to tune the timpani's lowest pitch. This will restore the drum to factory specifications. Push thepedal so that the drum plays the lowest possible pitch (the heal of the pedal should be on floor). Tune the timpaniaccordingly.
32"-Lowest pitch D
29"-Lowest pitch F
26"-Lowest pitch A
23"-Lowest pitch C
Once the drums are tuned to the appropriate pitch the problem should be solved. But, if it does not, the tension inthe spring must be adjusted. Find the adjustment knob at the base of the timpani. On Ludwig drums it will be a largeknob directly in front of the pedal. On Yamaha drums it will be found under the heal of the pedal. If the pedal lungesforward then loosen the tension knob. If the pedal lunges back then tighten the tension knob.
back to top
Q. When I play the drum at loud volumes the pitch will change. What can I doabout this?
A. This usually occurs when the pitch is to low in the drum's register. For example: Most players will tune a C on the26" drum. This is low in the drum's register, but high for the 29". C played at a medium volume will be fine on a 26"drum, but if the piece requires you to play long passages (such as rolls) at very loud volumes the 29" drum would bea better choice.
back to top
Q. Where can I buy timpani felt?
A. There are two types of timpani felt: German-which is a softer felt and American-which is a harder felt. The bestplace can be found at California Percussion. com. You can find German felt at Steve Weiss Percussion , and Americanfelt can be found at American Piano Felt (210) 777-3600.
back to top
Q. Where can I find teflon tape?
A. This has become the most popular product to use as a lubricant between the bowl lip and head. It is not the samekind of teflon tape you'll find at your local hardware store.
Here are a couple places that carry teflon tape:
Steve Weiss Percussion
Mr. Marshall E. LightAmerican Drum Manufacturing Co.P.O. Box 40403Denver, CO 80204-highly recommended
Lefima (USA) now has a kit available w/ Teflon Tape, Teflon Aerosol Spray, Grease & Grease Gun for grease fittings.Also available separately. Prices on request. Contact Everett M. Beale, U.S. Agent. Tel/Fax: 978-649-7685web: www.lefima-usa.com.
11/22/09 9:28 AMPercussion Department / University of Texas at Austin
Page 5 of 5file:///Users/nicholehorner/Desktop/Grad/Fall%202009/Perc%20Tech/Timpani%20Resources/UT%20TIMPANI.webarchive
Marion Rubber CompanyContact person: Becky SchneiderIndianapolis, IN(317) 638-6525
Specific Information on the Teflon Tape:3M Teflon Tapemodel # R5480 JK 7105 773/4" width x 36 yardsEach roll is about $35 or so - Marion Rubber Company offers a "blister pack" - which is a package of 2 rolls.
back to top
School of MusicUnversity of Texas at Austin
Accessibility | Privacy Policy