FAQ Lists for Husqvarna Viking · PDF fileeither from CD or when I download from this web...
300
FAQ Lists for Husqvarna Viking 3D Software Contents Web Sites ....................................................................................................................... 10 Demos and Documentation......................................................................................... 10 Downloading Files ....................................................................................................... 10 Error Messages ........................................................................................................... 11 Miscellaneous ............................................................................................................. 11 Dongle ............................................................................................................................ 12 Activation..................................................................................................................... 12 Dongle ......................................................................................................................... 12 Drivers ......................................................................................................................... 13 Error Messages ........................................................................................................... 14 General ....................................................................................................................... 15 Installation and CD ...................................................................................................... 16 Miscellaneous ............................................................................................................. 17 Product Information ..................................................................................................... 17 3D Embroidery............................................................................................................... 18 Browse Files................................................................................................................ 18 Changing Preferences ................................................................................................ 18 ColorSort ..................................................................................................................... 18 Combining Files .......................................................................................................... 18 Creating Lettering........................................................................................................ 19 Creating Shapes ......................................................................................................... 20 Dongle ......................................................................................................................... 20 Encore ......................................................................................................................... 20 Endless Embroidery .................................................................................................... 21 Error Messages ........................................................................................................... 21 Fonts ........................................................................................................................... 23 General ....................................................................................................................... 25 Installation and CD ...................................................................................................... 25 Lettering ...................................................................................................................... 25 Loading Embroideries ................................................................................................. 28 Miscellaneous ............................................................................................................. 30 Opening the Program .................................................................................................. 31 Preferences ................................................................................................................. 31 Printing ........................................................................................................................ 32 Product Information ..................................................................................................... 32 Saving Embroideries ................................................................................................... 32 Screen Appearance .................................................................................................... 33 Selecting Blocks .......................................................................................................... 36 Send To d-Card Reader/Writer Unit ............................................................................ 36 FAQ Lists for Husqvarna Viking 3D Software Page 1
-
Upload
duongquynh -
Category
Documents
-
view
214 -
download
1
Transcript of FAQ Lists for Husqvarna Viking · PDF fileeither from CD or when I download from this web...

FAQ Lists for Husqvarna Viking 3D Software
Contents Web Sites.......................................................................................................................10
Demos and Documentation.........................................................................................10 Downloading Files.......................................................................................................10 Error Messages...........................................................................................................11 Miscellaneous .............................................................................................................11
Dongle............................................................................................................................12 Activation.....................................................................................................................12 Dongle.........................................................................................................................12 Drivers.........................................................................................................................13 Error Messages...........................................................................................................14 General .......................................................................................................................15 Installation and CD......................................................................................................16 Miscellaneous .............................................................................................................17 Product Information.....................................................................................................17
3D Embroidery...............................................................................................................18 Browse Files................................................................................................................18 Changing Preferences ................................................................................................18 ColorSort .....................................................................................................................18 Combining Files ..........................................................................................................18 Creating Lettering........................................................................................................19 Creating Shapes .........................................................................................................20 Dongle.........................................................................................................................20 Encore.........................................................................................................................20 Endless Embroidery ....................................................................................................21 Error Messages...........................................................................................................21 Fonts ...........................................................................................................................23 General .......................................................................................................................25 Installation and CD......................................................................................................25 Lettering ......................................................................................................................25 Loading Embroideries .................................................................................................28 Miscellaneous .............................................................................................................30 Opening the Program..................................................................................................31 Preferences.................................................................................................................31 Printing ........................................................................................................................32 Product Information.....................................................................................................32 Saving Embroideries ...................................................................................................32 Screen Appearance ....................................................................................................33 Selecting Blocks..........................................................................................................36 Send To d-Card Reader/Writer Unit............................................................................36
FAQ Lists for Husqvarna Viking 3D Software Page 1

Send To Designer I Floppy Disk .................................................................................37 Send To Rose/Orchidea/#1+/Iris Reader/Writer .........................................................37 Sending Files to Machines ..........................................................................................37 Shapes ........................................................................................................................37 Smart Update ..............................................................................................................38 Thread Colors .............................................................................................................38 Tutorials ......................................................................................................................41 Using the Program ......................................................................................................41 Working with Embroideries .........................................................................................41
3D Disk Manager ...........................................................................................................42 Catalog Printing...........................................................................................................42 Error Messages...........................................................................................................42 General .......................................................................................................................43 Loading Embroideries .................................................................................................44 Miscellaneous .............................................................................................................45 Product Information.....................................................................................................45 Reading from a Disk....................................................................................................45 Saving Embroideries ...................................................................................................46 Screen Appearance ....................................................................................................47 Writing to a Disk ..........................................................................................................48
3D d-Card Reader/Writer ..............................................................................................49 Catalog Printing...........................................................................................................49 Error Messages...........................................................................................................49 General .......................................................................................................................50 Loading Embroideries .................................................................................................51 Miscellaneous .............................................................................................................52 Product Information.....................................................................................................52 Reading from a d-Card................................................................................................53 Saving Embroideries ...................................................................................................53 Screen Appearance ....................................................................................................54 Send To d-Card Reader/Writer Unit............................................................................55 Working with Embroideries .........................................................................................55 Writing to a d-Card ......................................................................................................56
3D Reader/Writer ...........................................................................................................57 Error Messages...........................................................................................................57 General .......................................................................................................................59 Loading Embroideries .................................................................................................59 Miscellaneous .............................................................................................................60 Product Information.....................................................................................................61 Reading from a Card...................................................................................................61 Saving Embroideries ...................................................................................................63 Screen Appearance ....................................................................................................63 Setting up the Reader/Writer Unit ...............................................................................64 Writing to a Card .........................................................................................................65
3D Digitizing ..................................................................................................................67 Acquiring Pictures .......................................................................................................67 Background Picture.....................................................................................................69 Creating Embroideries ................................................................................................70 Creating Stitches.........................................................................................................70
FAQ Lists for Husqvarna Viking 3D Software Page 2

Editing Designs ...........................................................................................................71 Editing Object Properties ............................................................................................74 Embossed Fill..............................................................................................................74 Error Messages...........................................................................................................75 Fill Areas using MyFills ...............................................................................................78 FreeHand™ Fill Areas.................................................................................................79 FreeHand™ Motif Fill Areas........................................................................................80 General .......................................................................................................................80 Importing Embroideries ...............................................................................................81 Inserting Characters....................................................................................................81 Inserting Embroideries ................................................................................................81 Installation and CD......................................................................................................81 Loading Designs .........................................................................................................82 Loading Embroideries .................................................................................................82 Loading Pictures .........................................................................................................83 Managing MyFills ........................................................................................................83 Miscellaneous .............................................................................................................85 Motif Fill Areas ............................................................................................................86 Motif Line.....................................................................................................................87 Opening the Program..................................................................................................89 Optimizing Pictures for Digitizing ................................................................................89 Picture Colors..............................................................................................................90 Preparing Pictures.......................................................................................................90 Printing ........................................................................................................................93 Product Information.....................................................................................................93 QuickStitch™ Borders.................................................................................................93 QuickStitch™ Fill Areas ..............................................................................................94 QuickStitch™ Motif Fill Areas......................................................................................98 QuickTrace..................................................................................................................98 Saving Designs ...........................................................................................................98 Saving Embroideries ...................................................................................................99 Screen Appearance ..................................................................................................100 Send To d-Card Reader/Writer Unit..........................................................................101 Sending Files to Machines ........................................................................................101 Start Point .................................................................................................................102 Thread Colors ...........................................................................................................102 Tutorials ....................................................................................................................104 Using Pictures ...........................................................................................................105 Using the Program ....................................................................................................105
3D Stitch Editor ...........................................................................................................106 Changing Preferences ..............................................................................................106 Error Messages.........................................................................................................106 General .....................................................................................................................108 Installation and CD....................................................................................................108 Loading Embroideries ...............................................................................................109 Miscellaneous ...........................................................................................................109 Opening the Program................................................................................................110 Preferences...............................................................................................................111 Printing ......................................................................................................................111 Product Information...................................................................................................111
FAQ Lists for Husqvarna Viking 3D Software Page 3
Saving Embroideries .................................................................................................111 Screen Appearance ..................................................................................................112 Selecting Blocks........................................................................................................115 Send To d-Card Reader/Writer Unit..........................................................................115 Sending Files to Machines ........................................................................................115 Thread Colors ...........................................................................................................115 Tutorials ....................................................................................................................118 Using the Program ....................................................................................................118 Working with Embroideries .......................................................................................119
3D Design Splitter .......................................................................................................120 General .....................................................................................................................120 Loading Embroideries ...............................................................................................120 Miscellaneous ...........................................................................................................121 Opening the Program................................................................................................121 Product Information...................................................................................................121 Saving Embroideries .................................................................................................122 Screen Appearance ..................................................................................................122 Tutorials ....................................................................................................................123 Using the Program ....................................................................................................123
3D PictureStitch ..........................................................................................................124 Acquiring Pictures .....................................................................................................124 Changing Preferences ..............................................................................................125 Creating Embroideries ..............................................................................................125 Error Messages.........................................................................................................126 General .....................................................................................................................127 Loading Pictures .......................................................................................................128 Miscellaneous ...........................................................................................................128 Picture Colors............................................................................................................128 Preferences...............................................................................................................128 Preparing Pictures.....................................................................................................129 Product Information...................................................................................................130 Saving Embroideries .................................................................................................131 Saving Pictures .........................................................................................................131 Screen Appearance ..................................................................................................132 Send To d-Card Reader/Writer Unit..........................................................................133 Sending Files to Machines ........................................................................................133 Splitting Embroideries ...............................................................................................133 Thread Colors ...........................................................................................................134 Tutorials ....................................................................................................................136
3D Cross Stitcher ........................................................................................................136 Acquiring Pictures .....................................................................................................137 Creating Embroideries ..............................................................................................137 Designing Fixed Fonts ..............................................................................................137 Editing Designs .........................................................................................................138 Error Messages.........................................................................................................138 Flood Fill....................................................................................................................140 General .....................................................................................................................140 Installation and CD....................................................................................................141 Loading Pictures .......................................................................................................141
FAQ Lists for Husqvarna Viking 3D Software Page 4
Miscellaneous ...........................................................................................................141 Opening Cross Stitch Designs ..................................................................................142 Product Information...................................................................................................142 Saving Cross Stitch Designs.....................................................................................142 Saving Embroideries .................................................................................................143 Screen Appearance ..................................................................................................143 Send To d-Card Reader/Writer Unit..........................................................................145 Sending Files to Machines ........................................................................................145 Stitching Out..............................................................................................................145 Thread Colors ...........................................................................................................146 Tutorials ....................................................................................................................148 Using the Picture Wizard...........................................................................................148 Using the Program ....................................................................................................149
3D Professional ...........................................................................................................149 Demos and Documentation.......................................................................................149 Dongle.......................................................................................................................149 Error Messages.........................................................................................................150 General .....................................................................................................................151 Installation and CD....................................................................................................152 Miscellaneous ...........................................................................................................153 Product Information...................................................................................................154 Screen Appearance ..................................................................................................154 Smart Update ............................................................................................................155 Thread Colors ...........................................................................................................155 Tutorials ....................................................................................................................156
3D QuickFont...............................................................................................................156 Error Messages.........................................................................................................156 Font Disks .................................................................................................................158 Fonts .........................................................................................................................159 Send To Designer SE ...............................................................................................159 Thread Colors ...........................................................................................................160 Transferring Files ......................................................................................................162
3D Organizer................................................................................................................162 Browse Files..............................................................................................................162 Changing Preferences ..............................................................................................163 Converting Files ........................................................................................................164 Desktop Background.................................................................................................165 Error Messages.........................................................................................................165 General .....................................................................................................................166 HTML Wizard ............................................................................................................167 Installation and CD....................................................................................................168 Managing Files..........................................................................................................168 Managing Folders .....................................................................................................168 Miscellaneous ...........................................................................................................168 Opening the Program................................................................................................169 Preferences...............................................................................................................169 Printing ......................................................................................................................170 Product Information...................................................................................................170 Saving Embroideries .................................................................................................170
FAQ Lists for Husqvarna Viking 3D Software Page 5

Screen Appearance ..................................................................................................171 Searching ..................................................................................................................171 Send To d-Card Reader/Writer Unit..........................................................................172 Send To Designer SE ...............................................................................................172 Sending Files to Machines ........................................................................................172 Thread Colors ...........................................................................................................172 Transferring Files ......................................................................................................174 Tutorials ....................................................................................................................174 Using the Program ....................................................................................................174 Viewing Files .............................................................................................................175 Zip Files.....................................................................................................................175
General.........................................................................................................................175 Converting Files ........................................................................................................176 Demos and Documentation.......................................................................................176 Downloading Files.....................................................................................................176 Error Messages.........................................................................................................176 General .....................................................................................................................177 Installation and CD....................................................................................................177 Miscellaneous ...........................................................................................................178 Product Information...................................................................................................179 Viewing Files .............................................................................................................179
All Modules..................................................................................................................179 General .....................................................................................................................179 Installation and CD....................................................................................................180 Miscellaneous ...........................................................................................................180 Product Information...................................................................................................181 Screen Appearance ..................................................................................................181 Tutorials ....................................................................................................................181
3D Vision......................................................................................................................182 Acquiring Pictures .....................................................................................................182 Background Viewing .................................................................................................182 Error Messages.........................................................................................................183 General .....................................................................................................................184 Installation and CD....................................................................................................185 Loading Embroideries ...............................................................................................185 Loading Pictures .......................................................................................................185 Miscellaneous ...........................................................................................................186 Printing ......................................................................................................................186 Product Information...................................................................................................186 Saving Embroideries .................................................................................................187 Screen Appearance ..................................................................................................188 Send To d-Card Reader/Writer Unit..........................................................................190 Sending Files to Machines ........................................................................................190 Thread Colors ...........................................................................................................190 Tutorials ....................................................................................................................193 Using 3D Vision.........................................................................................................193 Viewing Files .............................................................................................................193 Working with Embroideries .......................................................................................194
Hardware......................................................................................................................194
FAQ Lists for Husqvarna Viking 3D Software Page 6

d-Card Reader/Writer Unit ........................................................................................194 Dongle.......................................................................................................................195 Downloading Files.....................................................................................................195 Drivers.......................................................................................................................198 Error Messages.........................................................................................................198 General .....................................................................................................................199 Loading Embroideries ...............................................................................................199 Miscellaneous ...........................................................................................................200 Product Information...................................................................................................200 Reader/Writer Unit ....................................................................................................201 Reading from a Card.................................................................................................201 Reading from a Disk..................................................................................................201 Registration ...............................................................................................................201 Saving Embroideries .................................................................................................203 Send To All Devices..................................................................................................204 Setting up the Reader/Writer Unit .............................................................................204 Smart Update ............................................................................................................205 Stitching Out..............................................................................................................208 Thread Colors ...........................................................................................................208 Transferring Files ......................................................................................................215 USB Embroidery Stick...............................................................................................216 Writing to a Card .......................................................................................................217 Writing to a Disk ........................................................................................................217
Send To........................................................................................................................217 Error Messages.........................................................................................................217 General .....................................................................................................................218 Miscellaneous ...........................................................................................................218 Reading from a Disk..................................................................................................219 Send To All Devices..................................................................................................219 Send To d-Card Reader/Writer Unit..........................................................................220 Send To Designer I Floppy Disk ...............................................................................221 Send To Designer SE ...............................................................................................222 Send To Huskygram/POEM......................................................................................223 Send To Rose/Orchidea/#1+/Iris Reader/Writer .......................................................224 Sending Files to Machines ........................................................................................225 Writing to a Disk ........................................................................................................225
Installation ...................................................................................................................226 Demos and Documentation.......................................................................................226 Downloading Files.....................................................................................................226 Drivers.......................................................................................................................227 Error Messages.........................................................................................................228 Installation and CD....................................................................................................230 Miscellaneous ...........................................................................................................232 Opening the Program................................................................................................233 Smart Update ............................................................................................................233 Using the Program ....................................................................................................234 Viewing Files .............................................................................................................235 Zip Files.....................................................................................................................235
Registration .................................................................................................................236
FAQ Lists for Husqvarna Viking 3D Software Page 7

Downloading Files.....................................................................................................236 Error Messages.........................................................................................................236 General .....................................................................................................................237 Miscellaneous ...........................................................................................................239
3D Configure................................................................................................................240 Activation...................................................................................................................240 Dongle.......................................................................................................................241 Downloading Files.....................................................................................................242 Error Messages.........................................................................................................242 General .....................................................................................................................248 Loading Embroideries ...............................................................................................248 Miscellaneous ...........................................................................................................248 Product Information...................................................................................................249 Screen Appearance ..................................................................................................249 Send To All Devices..................................................................................................250 Send To d-Card Reader/Writer Unit..........................................................................250 Send To Designer I Floppy Disk ...............................................................................251 Send To Huskygram/POEM......................................................................................251 Send To Rose/Orchidea/#1+/Iris Reader/Writer .......................................................251 Smart Update ............................................................................................................252 Thread Colors ...........................................................................................................254 Using MyThreads ......................................................................................................257 Using Thread Manager .............................................................................................259
3D Font Digitizing........................................................................................................264 Background Picture...................................................................................................264 Changing Preferences ..............................................................................................265 Control Points, Gap and Kerning ..............................................................................265 Digitizing Characters and Shapes.............................................................................266 Editing Object Properties ..........................................................................................266 Error Messages.........................................................................................................266 Fill Areas using MyFills .............................................................................................269 Fonts .........................................................................................................................269 Loading Pictures .......................................................................................................270 Managing Font and Shapes Files .............................................................................270 Screen Appearance ..................................................................................................271 Thread Colors ...........................................................................................................272 Using Pictures ...........................................................................................................273
Designer SE Communication.....................................................................................274 Error Messages.........................................................................................................274 Fonts .........................................................................................................................275 Send To Designer SE ...............................................................................................275 Transferring Files ......................................................................................................276
3D Fabric Decorator....................................................................................................276 Acquiring Pictures .....................................................................................................276 Changing Preferences ..............................................................................................277 Creating Fabric..........................................................................................................277 Design Appearance...................................................................................................278 Editing Designs .........................................................................................................278 Error Messages.........................................................................................................278
FAQ Lists for Husqvarna Viking 3D Software Page 8

Exporting Motifs to MyMotifs .....................................................................................282 General .....................................................................................................................283 Inserting Motifs from the Database ...........................................................................283 Loading Pictures .......................................................................................................283 Managing MyMotifs ...................................................................................................284 Miscellaneous ...........................................................................................................285 Motif Database ..........................................................................................................285 Opening Files ............................................................................................................285 Opening Motifs from the Database ...........................................................................285 Preferences...............................................................................................................286 Printing ......................................................................................................................286 QuickTrace................................................................................................................286 Registration ...............................................................................................................287 Saving Embroideries .................................................................................................287 Saving Files...............................................................................................................288 Screen Appearance ..................................................................................................288 Send To d-Card Reader/Writer Unit..........................................................................289 Smart Update ............................................................................................................289 Thread Colors ...........................................................................................................289
3D Sketch.....................................................................................................................289 Dongle.......................................................................................................................290 Drawing Stitches .......................................................................................................290 Editing Designs .........................................................................................................290 Error Messages.........................................................................................................290 General .....................................................................................................................292 Graphics Tablet and Pen ..........................................................................................292 Load Design Wizard..................................................................................................294 Loading Embroideries ...............................................................................................294 Miscellaneous ...........................................................................................................296 Opening the Program................................................................................................296 Preferences...............................................................................................................297 Printing ......................................................................................................................297 Saving Embroideries .................................................................................................297 Saving Files...............................................................................................................298 Screen Appearance ..................................................................................................298 Selecting Blocks........................................................................................................299 Sending Files to Machines ........................................................................................299 Thread Colors ...........................................................................................................299 Using the Program ....................................................................................................300 Working with Embroideries .......................................................................................300
FAQ Lists for Husqvarna Viking 3D Software Page 9

Web Sites Listed versions: Not Applicable
Demos and Documentation
G002 I get an error message when I try to open documents in Acrobat Reader, either from CD or when I download from this web site.
Errors such as 'Unable to open document' or 'Could not find ColorSpace named Cs8' appear because you are trying to use an old version of Acrobat Reader. Make sure you are using the latest version of Acrobat (version 5 or above). You can install the current version from your CD. Simply insert the CD and select the option from the menu that appears. Alternatively go to the Acrobat Page at Adobe's web site [http://www.adobe.com] where you can download the latest copy and also check for any conflicting software you may have on your machine.
W003 Why can't I get the Online Demos to work?The overwhelming response to our Online Demos is the cause of most of the problems occurred whilst trying to view our Online Demos. Do try again at another time. You could also try using a different browser. Macromedia Shockwave Player version 9 or higher must be downloaded and installed for the demos to work. If you think your problem is associated with Macromedia Shockwave then visit the Shockwave Player Support Center [http://www.macromedia.com/support/shockwave/ ] to view their technical help.
W004 Whenever I try to run one of the Online Demos I get the message "Your screen size is set to 800 x 600. To view the demos properly you should have a screen resolution of at least 1024 x 768"
If you have your screen resolution of 800 x 600 pixels or less then the Online Demos will not have the space to be viewed and thus will not open up onto your display. Use the following steps to increase your screen resolution; you will also need to ensure that your color palette is set to High Color (16-bit) or greater: 1. First close any programs you are using. 2. Right-click the mouse on the desktop and a pop-up menu will appear. 3. Left-click on Properties and the Display Properties dialog box will appear. 4. Click the Settings tab. 5. Change the Desktop area to 1024 x 768 or greater. 6. Use the drop-down arrow in the box titled Color Palette to select High Color (16-bit) or
greater. 7. Click Apply. The screen will be adjusted, then another message will appear asking if you
wish to keep these settings. Click OK to continue (let the computer restart if required). If you are unable to alter your display, consult your computer retailer.
Downloading Files
G002 I get an error message when I try to open documents in Acrobat Reader, either from CD or when I download from this web site.
FAQ Lists for Husqvarna Viking 3D Software Page 10

Errors such as 'Unable to open document' or 'Could not find ColorSpace named Cs8' appear because you are trying to use an old version of Acrobat Reader. Make sure you are using the latest version of Acrobat (version 5 or above). You can install the current version from your CD. Simply insert the CD and select the option from the menu that appears. Alternatively go to the Acrobat Page at Adobe's web site [http://www.adobe.com] where you can download the latest copy and also check for any conflicting software you may have on your machine.
W001 Is there a way to copy large files downloaded from the site onto floppy disks?
Most Zip programs (such as PkZip and WinZip [http://www.winzip.com/]) will zip a large file to several disks. So if you wish to store a large downloaded file onto floppy, then open this file into one of these programs. Get several blank floppy disks ready. Choose to create a ZIP file onto your A: drive and insert the first disk. The program will automatically split up your large file onto these individual disks. Now you can store them as a backup, or unzip this file onto another computer.
W005 I have downloaded a ZIP file. What do I do with it?ZIP files contain files that have been compressed in size for faster download. ZIP files require a program such as WinZip [http://www.winzip.com/] to extract the file(s) onto your computer. If you have WinZip installed then take the following steps: (otherwise consult the guide for your unzipping program) 1. Download and save the ZIP file into a temporary location on your hard drive. 2. Either open WinZip, click "Open" and find the file you downloaded; or double-click on the
file in Windows® Explorer. 3. The contents of the file are displayed. Click "Extract". 4. Select the folder you wish the files to unzip to in the "Extract to" box, such as
"C:\3DEmbroidery\MyDesigns". 5. Click "Extract" and the files will be placed in your folder. 6. Close WinZip.
Error Messages
G002 I get an error message when I try to open documents in Acrobat Reader, either from CD or when I download from this web site.
Errors such as 'Unable to open document' or 'Could not find ColorSpace named Cs8' appear because you are trying to use an old version of Acrobat Reader. Make sure you are using the latest version of Acrobat (version 5 or above). You can install the current version from your CD. Simply insert the CD and select the option from the menu that appears. Alternatively go to the Acrobat Page at Adobe's web site [http://www.adobe.com] where you can download the latest copy and also check for any conflicting software you may have on your machine.
Miscellaneous
G002 I get an error message when I try to open documents in Acrobat Reader, either from CD or when I download from this web site.
FAQ Lists for Husqvarna Viking 3D Software Page 11

Errors such as 'Unable to open document' or 'Could not find ColorSpace named Cs8' appear because you are trying to use an old version of Acrobat Reader. Make sure you are using the latest version of Acrobat (version 5 or above). You can install the current version from your CD. Simply insert the CD and select the option from the menu that appears. Alternatively go to the Acrobat Page at Adobe's web site [http://www.adobe.com] where you can download the latest copy and also check for any conflicting software you may have on your machine.
W002 When I try to print a page on your web site I get the error message "There are no pages to print"
There is a bug in Netscape Navigator versions 4.5 and previous which prevents some pages with complex programming from printing.
Dongle Listed versions: Not Applicable
Activation
G803 Error "C:DEmbroidery.tmp not found."This message can appear when attempting to Register, Activate Dongle or use Smart Update. This will happen because the login.tmp file has been moved or deleted from the C:\3DEmbroidery\System\Utilities\ folder. After clearing the message, the "Failed to create HTML page" message will also appear. The login.tmp file may have been mistaken for a temporary Windows file by a system maintenance utility, such as a disk cleanup utility. Temporary Windows files can usually be discarded by such utilities to free hard disk space. You will need to replace the login.tmp file. Contact software support who will be able to supply file called "TMP_Files.exe". After obtaining this, double-click on the file to extract a new copy of login.tmp to the correct location. You will then be able to run Register, Activate Dongle and Smart Update.
H002 Error "None of your installed software requires the dongle activation process." when I try to activate my dongle for my 3D Professional Embroidery System
The dongle for the 3D Professional Embroidery System is already fully activated. Therefore, it not necessary to activate it online.
Dongle
G015 Is the 3D Embroidery System compatible with Windows® Vista?The 3D Embroidery System is not designed to operate on Windows® Vista. This is also true for earlier embroidery software. The compatible operating systems are stated on the product boxes. Therefore, it is not guaranteed that the 3D Embroidery System, or previous software, will function correctly on Windows® Vista. However, it is possible to install 3D Embroidery System software on Windows® Vista. To get your dongle working, after installing your 3D Embroidery System software, see FAQ #H013.
FAQ Lists for Husqvarna Viking 3D Software Page 12

There are no other adjustments to the 3D Embroidery System in respect of Windows® Vista. The operation of the Designer SE, Designer I and Parallel Reader/Writer unit should not be affected, apart from driver installation. You may need to answer some security questions in Windows® Vista while installing the hardware drivers, as the drivers were designed for previous operating systems. A workaround is necessary when using the USB Reader/Writer and d-Card Reader/Writer. Each time you use either the USB Reader/Writer or d-Card Reader/Writer to read a card, write a card or send an embroidery with Send 1 or Send 2, you must disconnect and reconnect the unit before using it again to read, write or send. Note that in due course, a new solution will be available for using the USB Reader/Writer and d-Card Reader/Writer with Windows® Vista. If you do not qualify for free upgrades, there may be a handling fee for providing the CD containing the solution as it will not be part of the 3D Embroidery System.
Drivers
G015 Is the 3D Embroidery System compatible with Windows® Vista?The 3D Embroidery System is not designed to operate on Windows® Vista. This is also true for earlier embroidery software. The compatible operating systems are stated on the product boxes. Therefore, it is not guaranteed that the 3D Embroidery System, or previous software, will function correctly on Windows® Vista. However, it is possible to install 3D Embroidery System software on Windows® Vista. To get your dongle working, after installing your 3D Embroidery System software, see FAQ #H013. There are no other adjustments to the 3D Embroidery System in respect of Windows® Vista. The operation of the Designer SE, Designer I and Parallel Reader/Writer unit should not be affected, apart from driver installation. You may need to answer some security questions in Windows® Vista while installing the hardware drivers, as the drivers were designed for previous operating systems. A workaround is necessary when using the USB Reader/Writer and d-Card Reader/Writer. Each time you use either the USB Reader/Writer or d-Card Reader/Writer to read a card, write a card or send an embroidery with Send 1 or Send 2, you must disconnect and reconnect the unit before using it again to read, write or send. Note that in due course, a new solution will be available for using the USB Reader/Writer and d-Card Reader/Writer with Windows® Vista. If you do not qualify for free upgrades, there may be a handling fee for providing the CD containing the solution as it will not be part of the 3D Embroidery System.
H008 When I use Windows® Update, I see an entry to update the drivers for my Aladdin Knowledge Key. Should I install this update?
If your dongle is working correctly then it is not necessary to install this update. If you do not wish to see this update each time you use Windows® Update, select the Hide This Update option and it will not be listed next time you use Windows® Update. If you do install this update, the dongle may stop working with your 3D Embroidery Software. If this is the case, you need to run Windows® Update again and there will be a second update for the dongle. After the second update has installed, the dongle will resume working correctly.
H009 Error: "The file 'aksusb.sys' on Aladdin Install Disk is needed."
FAQ Lists for Husqvarna Viking 3D Software Page 13

This error can occur if you have Windows XP with Service Pack 2 installed on a computer system based around a 64-bit processor. The error appears when attempting to start the 3D Embroidery System, register or use Smart Update. Repeated attempts to use the 3D Embroidery System will give the "Hasp not found (-100)" error. This is resolved in the latest dongle driver, which can be obtained as follows: 1. Go to the Husqvarna Viking Software [http://www.husqvarnavikingsoftware.com] website. 2. On the menu on the left, click Help Desk. 3. Click Other Useful Software. 4. Click the "download the latest Dongle Driver >>" link, then click the Save button to save
the exe file to your hard disk. Make a note of the location where you save it. 5. When the download is complete, use Windows Explorer to browse to the location where
you saved the file, then double-click the file start the HASP Dongle Driver installation. 6. Follow the on-screen instructions to complete the installation. (It is not necessary to
restart your computer after installing the driver.)
H010 Error: "Hasp not found (-100)"This error indicates that the dongle driver is not installed. Download and install the latest dongle driver as follows: 1. Go to the Husqvarna Viking Software [http://www.husqvarnavikingsoftware.com] website. 2. On the menu on the left, click Help Desk. 3. Click Other Useful Software. 4. Click the "download the latest Dongle Driver >>" link, then click the Save button to save
the exe file to your hard disk. Make a note of the location where you save it. 5. When the download is complete, use Windows Explorer to browse to the location where
you saved the file, then double-click the file start the HASP Dongle Driver installation. 6. Follow the on-screen instructions to complete the installation. (It is not necessary to
restart your computer after installing the driver.)
Error Messages
E021 Error message "No dongle attached. Cannot open program."This message will appear when trying to start 3D Embroidery if the 3D Embroidery System cannot detect the dongle (data protection device). Ensure the dongle is plugged into a free USB port of your computer.
E023 Error message "No dongle attached. Cannot complete function."This message may appear when trying to use 3D Embroidery if the 3D Embroidery System cannot detect the dongle (data protection device). Ensure the dongle is plugged into a free USB port of your computer.
H002 Error "None of your installed software requires the dongle activation process." when I try to activate my dongle for my 3D Professional Embroidery System
The dongle for the 3D Professional Embroidery System is already fully activated. Therefore, it not necessary to activate it online.
H004 Error "HASP not found (-3)"
FAQ Lists for Husqvarna Viking 3D Software Page 14

This message may appear if you do not have the dongle inserted in a USB port on your computer when you start the 3D Embroidery System. Click OK to clear the message, insert the dongle and try again. This message may also appear when you have the dongle inserted, but the dongle drivers are not installed on your computer. If this is the case, follow the procedure described in 'DongleSetup.doc' in the \Technical folder of your 3D Embroidery System software CD.
H005 Error "HASP not found (-10)"This message may appear when Fast-User Switching is enabled and the 3D Embroidery System is used at the same time from more than one user account. Fast-User Switching enables multiple user accounts to be logged in at the same time on a Windows XP computer. If you log in as one user, then switch users, log in as a second user and attempt to use the 3D Embroidery System then this message will appear. To fix this, you must log out from both user accounts, then log into the account where you would like to use the 3D Embroidery System.
H009 Error: "The file 'aksusb.sys' on Aladdin Install Disk is needed."This error can occur if you have Windows XP with Service Pack 2 installed on a computer system based around a 64-bit processor. The error appears when attempting to start the 3D Embroidery System, register or use Smart Update. Repeated attempts to use the 3D Embroidery System will give the "Hasp not found (-100)" error. This is resolved in the latest dongle driver, which can be obtained as follows: 1. Go to the Husqvarna Viking Software [http://www.husqvarnavikingsoftware.com] website. 2. On the menu on the left, click Help Desk. 3. Click Other Useful Software. 4. Click the "download the latest Dongle Driver >>" link, then click the Save button to save
the exe file to your hard disk. Make a note of the location where you save it. 5. When the download is complete, use Windows Explorer to browse to the location where
you saved the file, then double-click the file start the HASP Dongle Driver installation. 6. Follow the on-screen instructions to complete the installation. (It is not necessary to
restart your computer after installing the driver.)
H010 Error: "Hasp not found (-100)"This error indicates that the dongle driver is not installed. Download and install the latest dongle driver as follows: 1. Go to the Husqvarna Viking Software [http://www.husqvarnavikingsoftware.com] website. 2. On the menu on the left, click Help Desk. 3. Click Other Useful Software. 4. Click the "download the latest Dongle Driver >>" link, then click the Save button to save
the exe file to your hard disk. Make a note of the location where you save it. 5. When the download is complete, use Windows Explorer to browse to the location where
you saved the file, then double-click the file start the HASP Dongle Driver installation. 6. Follow the on-screen instructions to complete the installation. (It is not necessary to
restart your computer after installing the driver.)
General
G001 General difficulties with hardware and software
FAQ Lists for Husqvarna Viking 3D Software Page 15

To try to determine the cause of any odd difficulties with the 3D Embroidery System, the best method is to reboot the computer in safe mode. If the problem is then solved, you know that some clash of hardware and/or software such as device drivers is to blame. You can then obtain more help from your computer dealer to analyze the cause and reconfigure your computer if necessary. To start Windows in Safe Mode 1. Close all programs. 2. Click Start, and then click Shut Down or Turn Off Computer, whichever is shown. 3. Click Restart. If necessary, click OK to confirm. 4. Your computer will shut down and restart. 5. As your computer restarts, press and hold the F8 key until a menu of windows startup
options appears. 6. Use the up and down arrow keys to highlight Safe mode, and then press ENTER. When you hold down the F8 key, your computer may beep rapidly and report keyboard errors as it restarts. Release the F8 key briefly to skip any errors and press F8 again until you have the Startup Menu on your screen.
Installation and CD
G015 Is the 3D Embroidery System compatible with Windows® Vista?The 3D Embroidery System is not designed to operate on Windows® Vista. This is also true for earlier embroidery software. The compatible operating systems are stated on the product boxes. Therefore, it is not guaranteed that the 3D Embroidery System, or previous software, will function correctly on Windows® Vista. However, it is possible to install 3D Embroidery System software on Windows® Vista. To get your dongle working, after installing your 3D Embroidery System software, see FAQ #H013. There are no other adjustments to the 3D Embroidery System in respect of Windows® Vista. The operation of the Designer SE, Designer I and Parallel Reader/Writer unit should not be affected, apart from driver installation. You may need to answer some security questions in Windows® Vista while installing the hardware drivers, as the drivers were designed for previous operating systems. A workaround is necessary when using the USB Reader/Writer and d-Card Reader/Writer. Each time you use either the USB Reader/Writer or d-Card Reader/Writer to read a card, write a card or send an embroidery with Send 1 or Send 2, you must disconnect and reconnect the unit before using it again to read, write or send. Note that in due course, a new solution will be available for using the USB Reader/Writer and d-Card Reader/Writer with Windows® Vista. If you do not qualify for free upgrades, there may be a handling fee for providing the CD containing the solution as it will not be part of the 3D Embroidery System.
H007 My dongle or other USB device has already been installed, but the Found New Hardware wizard is installing it again
This can happen if you unplug your dongle or other USB device and then plug it back into a different USB port. When this happens, it is detected as a new hardware item and the driver is installed on the alternative USB port. Wait for the hardware wizard to finish installing the driver, then continue using the software as usual.
H009 Error: "The file 'aksusb.sys' on Aladdin Install Disk is needed."
FAQ Lists for Husqvarna Viking 3D Software Page 16

This error can occur if you have Windows XP with Service Pack 2 installed on a computer system based around a 64-bit processor. The error appears when attempting to start the 3D Embroidery System, register or use Smart Update. Repeated attempts to use the 3D Embroidery System will give the "Hasp not found (-100)" error. This is resolved in the latest dongle driver, which can be obtained as follows: 1. Go to the Husqvarna Viking Software [http://www.husqvarnavikingsoftware.com] website. 2. On the menu on the left, click Help Desk. 3. Click Other Useful Software. 4. Click the "download the latest Dongle Driver >>" link, then click the Save button to save
the exe file to your hard disk. Make a note of the location where you save it. 5. When the download is complete, use Windows Explorer to browse to the location where
you saved the file, then double-click the file start the HASP Dongle Driver installation. 6. Follow the on-screen instructions to complete the installation. (It is not necessary to
restart your computer after installing the driver.)
Miscellaneous
H001 General USB ProblemsSome USB ports do not have enough power to drive the dongle. By using a USB hub, which uses a power supply, this can be overcome.
H003 Why doesn't my 3D Embroidery System dongle allow me to open VIP Embroidery System programs?
The 3D Embroidery System dongle is different to the VIP Embroidery System dongle. Hence it is not compatible with VIP Embroidery System programs and may not be used in conjunction with them.
H006 I only have USB 2.0 ports on my computer. Will the dongle and other USB devices work with USB 2.0?
The dongle and all our other USB devices work with USB 2.0 ports.
H007 My dongle or other USB device has already been installed, but the Found New Hardware wizard is installing it again
This can happen if you unplug your dongle or other USB device and then plug it back into a different USB port. When this happens, it is detected as a new hardware item and the driver is installed on the alternative USB port. Wait for the hardware wizard to finish installing the driver, then continue using the software as usual.
Product Information
H001 General USB ProblemsSome USB ports do not have enough power to drive the dongle. By using a USB hub, which uses a power supply, this can be overcome.
H003 Why doesn't my 3D Embroidery System dongle allow me to open VIP Embroidery System programs?
FAQ Lists for Husqvarna Viking 3D Software Page 17

The 3D Embroidery System dongle is different to the VIP Embroidery System dongle. Hence it is not compatible with VIP Embroidery System programs and may not be used in conjunction with them.
3D Embroidery Listed versions: 7.0; 7.0.5; 7.1; 7.2; 7.25
Browse Files
E002 When I use the View function (Camera icon) the program crashesThere is a corrupt embroidery file in the directory you are trying to view. If the program crashes before you are able to select a file then this corrupt file is in the last folder you browsed. To find the corrupt file use File > Open to individually open each file in this folder. When a file is reported to be corrupt use Windows® Explorer to delete it.
Changing Preferences
G429 The 5"x7" Design hoop and the Endless hoop are no longer available in the hoop list.
The 5"x7" Design and Endless hoops were added to the hoop list in the Version 7.2 update. If you have installed a previous version of software after updating to Version 7.2, the hoop list will be replaced and will no longer include the 5"x7" Design and Endless hoops. Click this link to download and install the correct hoop list: Hoops.exe [http://www.vsmsoftware.net/Downloads/Updates/720/Hoops.exe]
ColorSort
E004 ColorSort does not work for the multi-color monogram that I createdWhen creating multi-color lettering, ensure that the Jump Connection is selected. If Running Connection is selected, you will not be able to ColorSort the lettering.
E006 When I ColorSort an embroidery the number of color blocks produced varies
The ColorSort process does not just put the same color blocks together. It checks for overlap between areas, therefore depending on the overlaps, the final number of color blocks may vary, even if you are Combining a similar number of shapes or monograms.
Combining Files
E016 I've made a Mega Hoop (or Plus Hoop) design and the lettering did not split automatically when I selected Combine
The automatic splitting up of lettering does not work after it has been converted to fixed stitches. This occurs if it is a pasted copy or when you switch to the Design Page or Edit Page of the control panel, as well as if it has been previously Combined or Saved.
FAQ Lists for Husqvarna Viking 3D Software Page 18

E017 How can I combine the Plus Hoop designs for the Designer I, Designer II or Platinum Plus?
As a Plus Hoop design will not open in the correct positions when you have a Medium, Large or Mega Hoop selected, you can take the following steps to position them correctly: 1. If the design is on a card, use 3D Reader/Writer to read it and save the design parts as a
series of files. 2. In 3D Embroidery, click the Preferences icon and select the desired Hoop Size. It should
be the Medium Hoop (100mm x 170mm) or larger. Make sure the Orientation is set to Vertical.
3. Click the Screen tab and change the grid size to 35mm, then click OK. 4. Open the three (or two) Plus Hoop design files in the order that they will be stitched out
(e.g. P1 - stitch first, P3 - stitch second, P2 - stitch third). 5. Place the P2 design so that the first stitch, marked by the small cross, is on the center of
the gridlines in the center of the hoop. You may wish to zoom in to help positioning. 6. Place the P1 design so that the first stitch is on the first gridline above the center line. 7. Place the P3 design so that the first stitch is on the first gridline below the center line. 8. Click Combine to merge them into one embroidery file for your embroidery machine, and
save as a new filename. There will be many color changes.
E040 Some of my embroidery disappears on the Edit tabThis can happen if there are more than 99 color changes in an embroidery. This is most likely to happen if you have combined an embroidery with lettering in a multi-color font. ColorSort is recommended to reduce the number of color changes before the lettering is combined with other embroideries. This no longer happens in 3D Embroidery version 7.1 and later. Use Smart Update to update your 3D Embroidery System software.
Creating Lettering
E008 Error: "Please enter an integer between 3 and 120"This message appears if the size entered in the Size Box on the Letter page is below 3mm or above 120mm. The Size setting refers to the height in millimeters of an uppercase 'A' in the selected font. If you wish to increase lettering above this you could click and drag one of the corner boxes or alter the Height or Width proportions.
E009 Error: "Cannot open Font File"This message appears if the font that you have selected is not available. The most likely reason is that it is already open in the optional 3D Font Digitizing module. Close 3D Font Digitizing, then try again. This could also happen if you opened 3D Embroidery, then accidentally moved or deleted the font from the relevant category folder in C:\3DEmbroidery\System\Fonts. Close 3D Embroidery, make sure the file is in the folder, then try again.
E011 Error: "Font file is corrupted; use backup"This message appears when trying to select a lettering style if the file has corrupted. Reinstall the font.
FAQ Lists for Husqvarna Viking 3D Software Page 19

E049 When I use a Script font with the Full Circle line type, the characters are not arranged correctly.
Script fonts use a special connection method that allows adjacent lower case letters to be connected to each other, regardless of the Gap setting. This is not compatible with the way the characters are arranged by the Full Circle line type. Circle Clockwise and Circle Counter-Clockwise are compatible with Script fonts.
Creating Shapes
E010 Error: "Cannot open Shape File"This message appears if the shapes set that you have selected on the Shapes Page is not available. The most likely reason is that it is already open in the optional 3D Font Digitizing module. Close 3D Font Digitizing, then try again. This could also happen if you opened 3D Embroidery, then accidentally moved or deleted that shapes set from the C:\3DEmbroidery\System\Shapes folder. Close 3D Embroidery, make sure the file is in the folder, then try again.
Dongle
H004 Error "HASP not found (-3)"This message may appear if you do not have the dongle inserted in a USB port on your computer when you start the 3D Embroidery System. Click OK to clear the message, insert the dongle and try again. This message may also appear when you have the dongle inserted, but the dongle drivers are not installed on your computer. If this is the case, follow the procedure described in 'DongleSetup.doc' in the \Technical folder of your 3D Embroidery System software CD.
H013 Error "No dongle attached. Cannot open program" when starting my 3D software on Windows® Vista, even though my dongle is inserted.
After you have installed the 3D Embroidery System software on a Windows® Vista computer, download and save the 3D Embroidery Vista Dongle Update [http://www.emnetsoftware.com/downloads/updates/3DEmbroideryVistaDongleUpdate.exe]. After saving the file on your computer, double-click the file to install the dongle update. Note: If the following User Account Control message appears when installing the update: "An unidentified program wants access to your computer", click the 'Allow' option to continue.
Encore
E050 I have used an odd number of repeats in the Encore function and the center of rotation is not in the same place as the center of the circle after I right-click.
This is because the shape of an embroidery becomes a factor when there is an odd number of repeats. For an even number of repeats, the shape of an embroidery is cancelled out by the exact same shape on the opposite side of the circle. For an odd number of repeats, the circle is not 'balanced' in quite the same way, so the center point of the final embroidery may not be in the same place as the original center of the circle after you right-click.
FAQ Lists for Husqvarna Viking 3D Software Page 20

This may also happen with an even number of repeats when the Mirror option is chosen for Position and the embroidery is not horizontally symmetrical. If you regard each pair of mirrored embroideries as a single item, an odd number of pairs may cause the center of rotation to move.
E051 The Mirror option does not seem to have any effect in the Encore function.If your embroidery is horizontally symmetrical before you use the Encore function, the Mirror option will have no apparent effect. However, it will affect stitch order of each alternate copy. For example, clockwise stitching will become counter-clockwise, and so on.
Endless Embroidery
E052 How can I tell if an embroidery is already endless?The Notes for an embroidery will have the words Endless Embroidery added after any other Notes text. If the Notes have been edited so that this is no longer the case, use the slider bars on the Edit tab to see if there are marker stitches at the beginning and end of the embroidery.
E053 I have loaded an embroidery that I made Endless some time ago. How do I know what Fabric Direction was used when I made it endless?
Use the slider bars on the Edit tab to find the locations of the start and end marker stitches. For example, if the start markers are at the top and the end markers are at the bottom, the original Fabric Direction was Up.
E054 I forgot to set a Gap, but it does not appear to have worked when I tried to make the Endless Embroidery again.
This can happen if you use the Repeat Embroidery option and you do not use Undo before trying again. This is because you have already created a repeated sequence with no gaps that then becomes a single embroidery. If you then use the Endless Embroidery function again to try to add a Gap, the whole repeated sequence is treated as a single embroidery. This should be apparent if you look at the Notes, because the word 'Endless' will occur twice at the end of the Notes. Always click Undo to go back to the single copy of the embroidery before trying Endless Embroidery again with different settings.
E055 The icon for the Endless function is always 'grayed out' (unavailable).The Endless function is not available in any of the following situations: • There is no embroidery loaded, so there is nothing that can be made endless: load an
embroidery • A multi-part hoop is selected: use Preferences to select a standard hoop that is
compatible with your embroidery machine • The embroidery is too big for or is outside the current hoop: adjust the embroidery as
needed or choose a larger hoop
Error Messages
B618 Error: "Please select a valid thread."
FAQ Lists for Husqvarna Viking 3D Software Page 21

This message appears if you attempt to click OK in the Color Selection dialog box when MyThreads is selected as the thread range and MyThreads is empty. To prevent this message appearing again, use Thread Manager in 3D Configure to add at least one thread to MyThreads.
G007 Error "Thread range is corrupt or missing. Cannot change thread. Reinstall the thread database."
This message usually means that the database driver is incorrectly installed. First follow the instructions in FAQ #G010 to fix this. If the message still appears, use the following procedure to repair the installation: 1. Right-click the Start button on the taskbar and select Explore from the popup menu. 2. In Explorer, browse to the folder C:\3DEmbroidery\System.
This assumes you have installed your 3D Embroidery System software in the default location of C:\3DEmbroidery. If you have installed the software in a different location, browse to the System folder at that location.
3. Delete the files named "MyThreads.mdb" and "ThreadDataBase.mdb". The file names may simply be shown as "MyThreads" and "ThreadDataBase".
4. Put your 3D Embroidery System software CD in your computer to re-run the installation. The installation should start automatically when you put your software CD in the computer. If this does not happen, browse to the CD with Explorer and double-click "Setup.exe" to start the installation.
5. When the choice appears, select the "Modify or remove" option and click Next. 6. In the next screen, select Repair and click Next. 7. Continue with the installation and follow the on-screen instructions. When the installation
is complete, the MyThreads and standard thread databases will be restored to their original installation state.
If you had previously backed up your MyThreads database, you can now use the Restore option in Thread Manager to restore your MyThreads database. See the on-line help in Thread Manager for more information.
G010 How do I fix the database driver used by my 3D Embroidery System software?
Database drivers are normally found installed on most computers – they are commonly installed as part of the installation of Microsoft® Office or as an upgrade of key components of the operating system. Key components of the 3D Embroidery System need to be able to use these drivers. Therefore, any difficulties in using these drivers may affect the functionality of certain features of the 3D Embroidery System. Examples include changing a thread color in any module and/or Motif Fill/Line properties in 3D Digitizing. If you have Windows® XP with Service Pack 2 installed, use the Database Driver Fix described below. Otherwise, install the drivers manually as follows: Installation of the Database files 1. Insert the 3D Embroidery System CD. 2. Cancel the installation screen if it appears. 3. Use Windows® Explorer to browse to the D:\Technical folder – where D:\ is the name of
your CD or DVD drive. 4. Double click on the Database Drivers folder. 5. Double click on the Jet 4 folder. 6. Double click on the folder that is for your operating system.
FAQ Lists for Husqvarna Viking 3D Software Page 22

7. Double click on the file to start the installation of the Jet 4 Service Pack 8 files. This should take a few moments for the files to be installed.
8. After the installation is complete, browse to the D:\Technical\Database Drivers\MDAC 2.8 folder.
9. Double click on the MDAC_TYP.exe file. The Microsoft Data Access Components 2.8 Setup dialog box will appear.
10. Select the option “I accept all the terms of the preceding license agreement”. 11. Click on the Next button. 12. Click on the Finish button when it appears. This will start the installation process for the
MDAC 2.8 files. 13. After the MDAC 2.8 installation is complete, reboot your computer and continue to use
your 3D Embroidery System. 14. If you are still having difficulties, use the Database Driver Fix that follows. Database Driver Fix 1. Insert the 3D Embroidery System CD. 2. Cancel the installation screen if it appears. 3. Use Windows® Explorer to browse to the D:\Technical folder – where D:\ is the name of
your CD or DVD drive. 4. Double click on the Database Drivers folder. 5. Double click on the MSAccessDbFixer file (this may be shown with a .exe extension). A
window will appear briefly on the screen. 6. Continue to use your 3D Embroidery System.
H013 Error "No dongle attached. Cannot open program" when starting my 3D software on Windows® Vista, even though my dongle is inserted.
After you have installed the 3D Embroidery System software on a Windows® Vista computer, download and save the 3D Embroidery Vista Dongle Update [http://www.emnetsoftware.com/downloads/updates/3DEmbroideryVistaDongleUpdate.exe]. After saving the file on your computer, double-click the file to install the dongle update. Note: If the following User Account Control message appears when installing the update: "An unidentified program wants access to your computer", click the 'Allow' option to continue.
Fonts
A505 I am having trouble with converting a symbol font to the desired size.The sizes of the shapes in a symbol font often vary in size within a single font. The size of converted fonts is set by specifying the height of the uppercase letter A, or whichever symbol or character occupies its position in the font (ASCII character 65). This may affect your converted symbols if the symbol at ASCII 65 is a lot smaller or larger than other symbols in the font. If your symbols convert to unexpectedly small or large sizes, compare the symbols by selecting the font in a word processor and typing on your keyboard. Type in A and some other letters to see how the corresponding shapes differ in size from the shape for A. Alternatively, type in some letters in a normal font then select the letters and change them to the required symbol font. There is a free word processor called WordPad supplied with all versions of Windows® from Windows® 95 onwards.
A507 Error "<i>stitch type</i> requires an output size of between "<i>xx</i> and "<i>yy</i> mm"
FAQ Lists for Husqvarna Viking 3D Software Page 23

This message will appear when you try to set the Output Size too low or too high for the chosen Stitch Type. Change the Output Size accordingly.
E043 Error "Cannot load font file" when I click the Letter or Shape tabThis message may appear when using 3D Embroidery if you are logged in to Windows XP as a non-administrative user. This can happen because file access for non-administrative users has been restricted on the computer. If it is necessary for non-administrative users to use 3D Embroidery, users must be given full control over the C:\3DEmbroidery folder. Do this as follows: 1. Log in as a user that has administrator rights. 2. Open Windows Explorer. 3. Browse to the C:\ drive. 4. Right-click on the C:\3DEmbroidery folder. 5. Click Properties. 6. Click the Security tab. 7. In the list of groups and users, click on the Users or Everyone user group name.
The machine name is shown after Users in the list. For example, Users (MYMACHINE\Users). If both groups are listed, select Users.
8. In the Permissions section of the dialog box there is an Allowcolumn of check boxes. Click the check box next to Full Controlso that it is checked.
9. Click OK. 10. Log off the computer, then log back in as a non-administrative user. 11. Start 3D Embroidery and click on the Letter or Shape tab to confirm that the error no
longer appears. If you do not have a Security tab when you get to step 6, do the following: 1. Click Cancel to close the Properties dialog. 2. In Windows Explorer, click on the Tools menu. 3. Click on Folder Options. The Folder Options dialog will appear. 4. Click on the View tab. 5. Click the 'Use simple file sharing (Recommended)' option so that it is unchecked. 6. Click OK. 7. Right-click the C:\3DEmbroidery folder, click Properties and continue from step 6 above.
E049 When I use a Script font with the Full Circle line type, the characters are not arranged correctly.
Script fonts use a special connection method that allows adjacent lower case letters to be connected to each other, regardless of the Gap setting. This is not compatible with the way the characters are arranged by the Full Circle line type. Circle Clockwise and Circle Counter-Clockwise are compatible with Script fonts.
E701 I can't select a font that is on my computer.The QuickFont Wizard is designed to work with Windows TrueType® and OpenType ® fonts. The QuickFont Wizard does not support Postscript Type 1 fonts. To check Font Properties: 1. Click Start, Control Panel, then select Fonts. 2. Click the desired font to select it. 3. Right-click and select Properties from the menu that appears. 4. Check Type of file. If it is PostScript Metrics or Type 1 Font File it will not work with the
QuickFont Wizard.
FAQ Lists for Husqvarna Viking 3D Software Page 24

General
G001 General difficulties with hardware and softwareTo try to determine the cause of any odd difficulties with the 3D Embroidery System, the best method is to reboot the computer in safe mode. If the problem is then solved, you know that some clash of hardware and/or software such as device drivers is to blame. You can then obtain more help from your computer dealer to analyze the cause and reconfigure your computer if necessary. To start Windows in Safe Mode 1. Close all programs. 2. Click Start, and then click Shut Down or Turn Off Computer, whichever is shown. 3. Click Restart. If necessary, click OK to confirm. 4. Your computer will shut down and restart. 5. As your computer restarts, press and hold the F8 key until a menu of windows startup
options appears. 6. Use the up and down arrow keys to highlight Safe mode, and then press ENTER. When you hold down the F8 key, your computer may beep rapidly and report keyboard errors as it restarts. Release the F8 key briefly to skip any errors and press F8 again until you have the Startup Menu on your screen.
Installation and CD
G601 Whenever I insert my CD it asks if I want to uninstall or modify my softwareAll 3D Embroidery System Software has an automatic installation whenever the CD is inserted. The CD detected your software was already installed so you have the options to uninstall the software or modify the installation. Simply click 'Cancel', and then 'Yes' to confirm it. Then click 'Finish' to close the installation window. When you use the CD again, you may hold down the Shift key for 30 seconds when the CD is inserted if you want to prevent the installation menu appearing.
G602 The programs are not being installed to the correct folderThe installation program will by default put the embroidery system onto drive C:. The drive letter that the embroidery system will install to is shown during the install and can be changed by the user. The drive or partition that the embroidery system is installed to will make no difference to its operation.
G603 I do not have the 3D Embroidery System logos beside each file in Windows Explorer
Your icon association is set up during installation. You will have to re-install.
Lettering
E007 How to use 2 Color Fonts with Multi-part HoopsWhen using a 2 Color Font in the Multi-part Plus Hoop or the Multi-part Mega Hoop, some of the characters in the P2/P3 or M2/M3 positions change to black when the design is combined.
FAQ Lists for Husqvarna Viking 3D Software Page 25

This can be resolved as follows: 1. Open 3D Embroidery. 2. Change the Hoop settings so that you are using the Multi-part hoop of your choice. 3. Click the Letters tab on the Control Panel. 4. Choose the desired 2 Color Font and size settings. 5. Enter the lettering into the Letter textbox and click Apply. 6. Position the lettering as required. 7. Combine the design. Some of the colors will be lost in position P2/M2 and P3/M3
depending on your design. (One letter will be black and the colors in the letters following it will be incorrect).
8. Delete the lettering with the incorrect colors in P2/M3 and P3/M3. 9. Retype the lettering you have deleted. 10. Make sure Multiple is checked and click Apply. 11. Position the two sections of lettering as they were in the original. 12. Combine the design. The lettering should now be correct, if not repeat steps 8 to 11 until
all the lettering is correct. 13. Save the design. The sections of lettering will be saved in the hoop positions where you
placed them.
E028 The letters or shapes I am designing in 3D Font Digitizing are not appearing in 3D Embroidery
3D Embroidery and 3D Font Digitizing cannot have the same font or shapes set open at the same time. Therefore, you must close the font or shapes set in 3D Font Digitizing to make it fully available to 3D Embroidery.
E029 I want to change the size of the lettering, but the control boxes have no effect
For the following Line Types, there are no control boxes to change the size of the characters in the lettering: • Circle Clockwise • Circle Counter-Clockwise • Full Circle • Fit To Straight Line • Fit To Wavy Line Instead, use the Size, Height and Width boxes to change the size of the characters. Note that if you Apply the same text again, or change its Satin or Fill properties, any adjustments you made with the control boxes will be reset.
E030 I am trying to use Full Circle to place text, but only the middle letter is at the bottom of the circle
The '#' character is used to set the split point for Full Circle text. If this character is not entered, the Full Circle does not know where to split the text. When the lettering is initially placed, the text before '#' is at the top of the circle and the text after ’#' is at the bottom of the circle. You can then use the control boxes to move each section of text as desired. If you are having difficulty entering the '#' character with your keyboard, use the Alt key sequence Alt + 35 (ensure Num Lock is enabled on your keyboard, hold down the Alt key, press 3 on the numeric keypad, press 5 then release the Alt key).
FAQ Lists for Husqvarna Viking 3D Software Page 26

E031 I want to change the appearance of the font stitching, but the Satin and Fill buttons are not available
Some fonts and shapes sets have non-uniform properties. For example, they may use more than one pattern for satin or fill, or use the same fill pattern at different angles in different characters or shapes. Therefore, there is no overall uniform property that can be changed, so the Satin and Fill buttons may not be used to change the Satin and Fill Properties. You may wish to use a different font with a similar style that allows you to change its properties, or create a new font with the QuickFont Wizard based on a TrueType® or OpenType® font with a similar style.
E032 I have changed the fill or satin properties, but nothing has changed when I apply the lettering
You have changed a property that is not used by the font you have chosen. For instance, if the font is created from satin columns, changing the fill properties will have no effect on the lettering. Similarly, if the font is an outline font of running, double or triple stitch, neither the fill or satin properties will affect the appearance of the characters.
E033 I have increased the Gap setting, but the lowercase characters are still touching each other
For script fonts, the Gap setting has no effect on adjacent lowercase characters. Script fonts use a special 'continuous' joining method, which places lowercase characters adjacent to each other to give the appearance of handwriting. All the fonts in the Script category use this joining method, and you may also create new fonts with the QuickFont Wizard or the optional 3D Font Digitizing module that use this joining method.
E034 All the lettering appears in uppercase, even though I have typed lowercase characters in the Letters box
You are using an uppercase font. In an uppercase font (with UC in the name), all the lowercase characters are identical to the uppercase characters.
E035 All the lettering appears in lowercase, even though I have typed uppercase characters in the Letters box
You are using an lowercase font. In an lowercase font (with LC in the name), all the uppercase characters are identical to the lowercase characters.
E036 I have placed multiple lettering with different text in each item and I want to change the text that appears in some of them. However, the text in the Letters box stays the same when I select earlier pieces of lettering.
Selecting a previously placed item of lettering does not change the Letter Page settings back to the settings in the chosen lettering. After new lettering has been added, earlier lettering may only be directly changed using the control boxes. Otherwise, re-enter the desired characters and adjust the Letter Page settings as desired before re-applying the lettering.
E037 I want to rotate and mirror my lettering or shape, but there are no handles or icons available for this
FAQ Lists for Husqvarna Viking 3D Software Page 27

Only embroideries or blocks of stitches may be rotated or mirrored. Lettering and shapes must be 'fixed' as embroideries to allow this. Select the Design or Edit Page and all lettering and shapes will be fixed as embroideries. If you select the Edit Page, only the selected embroidery can be adjusted.
E038 I want to copy my lettering or shape, but the Copy icon is not availableOnly embroideries or blocks of stitches may be copied. Lettering and shapes must be 'fixed' as embroideries to allow this. Select the Design or Edit Page and all lettering and shapes will be fixed as embroideries. If you select the Edit Page, only the selected part of the embroidery selected for editing can be copied.
E039 I have finished adjusting my lettering and I want to ColorSort it, but the ColorSort icon is not available
Only embroideries may be ColorSorted. Lettering must be 'fixed' as an embroidery to allow this. Select the Design or Edit Page and all lettering will be fixed as embroideries. If you select the Edit Page, only the selected embroidery can be adjusted.
E040 Some of my embroidery disappears on the Edit tabThis can happen if there are more than 99 color changes in an embroidery. This is most likely to happen if you have combined an embroidery with lettering in a multi-color font. ColorSort is recommended to reduce the number of color changes before the lettering is combined with other embroideries. This no longer happens in 3D Embroidery version 7.1 and later. Use Smart Update to update your 3D Embroidery System software.
E049 When I use a Script font with the Full Circle line type, the characters are not arranged correctly.
Script fonts use a special connection method that allows adjacent lower case letters to be connected to each other, regardless of the Gap setting. This is not compatible with the way the characters are arranged by the Full Circle line type. Circle Clockwise and Circle Counter-Clockwise are compatible with Script fonts.
Loading Embroideries
E002 When I use the View function (Camera icon) the program crashesThere is a corrupt embroidery file in the directory you are trying to view. If the program crashes before you are able to select a file then this corrupt file is in the last folder you browsed. To find the corrupt file use File > Open to individually open each file in this folder. When a file is reported to be corrupt use Windows® Explorer to delete it.
E014 I tried to open some previously made Plus Hoop designs, but they are not in their correct positions
FAQ Lists for Husqvarna Viking 3D Software Page 28

Check the Plus Hoop setting has been chosen. Click Preferences and alter the Hoop Size setting to 170mm x 100mm (Plus Hoop). To load designs in specific positions for the Plus Hoop, click File, Open Plus/Mega Designs Command, P1 and so on.
E015 I tried to open some previously made Mega Hoop designs, but they are not in their correct positions
Check the Mega Hoop multi-part setting has been chosen. Click Preferences and alter the Hoop Size setting to 360mm x 150mm (Mega Multi-Part). To load designs in specific positions for the Mega Hoop, click File, Open Plus/Mega Designs Command, P1 and so on.
E017 How can I combine the Plus Hoop designs for the Designer I, Designer II or Platinum Plus?
As a Plus Hoop design will not open in the correct positions when you have a Medium, Large or Mega Hoop selected, you can take the following steps to position them correctly: 1. If the design is on a card, use 3D Reader/Writer to read it and save the design parts as a
series of files. 2. In 3D Embroidery, click the Preferences icon and select the desired Hoop Size. It should
be the Medium Hoop (100mm x 170mm) or larger. Make sure the Orientation is set to Vertical.
3. Click the Screen tab and change the grid size to 35mm, then click OK. 4. Open the three (or two) Plus Hoop design files in the order that they will be stitched out
(e.g. P1 - stitch first, P3 - stitch second, P2 - stitch third). 5. Place the P2 design so that the first stitch, marked by the small cross, is on the center of
the gridlines in the center of the hoop. You may wish to zoom in to help positioning. 6. Place the P1 design so that the first stitch is on the first gridline above the center line. 7. Place the P3 design so that the first stitch is on the first gridline below the center line. 8. Click Combine to merge them into one embroidery file for your embroidery machine, and
save as a new filename. There will be many color changes.
G401 I can't drag and drop embroidery files from the Open dialog boxTo drag and drop embroidery files onto the work area, right-click Start, then Explore to start Windows® Explorer. Then follow the instructions in the online help under Drag and Drop.
G405 Error "Cannot open embroidery."This message appears if the desired embroidery is not where the module expects it to be, for example if an embroidery was loaded into the module from a floppy disk, then closed and the floppy disk removed. The message would appear if you tried to load the embroidery from the Recent Files list on the File menu.
G406 Error "Unrecognized file format."This message appears if the file you are attempting to load is corrupt. For example, it might have the extension .vp3, yet not be a proper Husqvarna Viking / Pfaff embroidery.
G407 Error: "Embroidery is corrupt"The embroidery is corrupt and cannot be loaded. Refer to source of this file for a solution.
FAQ Lists for Husqvarna Viking 3D Software Page 29
G408 Error "Embroidery XY coordinates incorrect"The embroidery is corrupt and cannot be loaded. Refer to source of this file for a solution.
G409 Error "Unrecognized file extension" when opening a fileThis message appears if you attempt to load a file with an extension that does not belong to any embroidery file types. For example, it would appear if you tried to drag and drop a .doc file onto the screen.
G413 Error "Embroidery not created using licensed software."This message may appear if you attempt to load an embroidery created in third-party software. Such embroideries may cause unpredictable results.
Miscellaneous
G411 Error "Not enough memory to perform operation."This message will appear if system resources are low. Close other programs and try again. If this does not work, try restarting your computer.
G423 When I close 3D Embroidery all my other modules also close3D Embroidery is the central module of the 3D Embroidery System. When 3D Embroidery closes, all other open modules are closed at the same time. If you have created a new file or made changes in another module, you will be prompted to save the file before the module closes.
G425 I have a very large embroidery in the clipboard block. How do I remove it?Copy a small embroidery or a few stitches. This will replace the current contents of the clipboard block. Alternatively, select and copy a small amount of text (highlight the text and press Ctrl+C on the keyboard). The clipboard block will go blank when you do this. Do not use the Print Screen key to clear the clipboard. This does make the clipboard block go blank. However, Print Screen takes a snapshot of whatever is currently displayed on your computer screen and places it in the clipboard as a picture. This is likely to be larger than any embroidery you may copy, and may cause additional difficulties if you are having memory problems.
G601 Whenever I insert my CD it asks if I want to uninstall or modify my softwareAll 3D Embroidery System Software has an automatic installation whenever the CD is inserted. The CD detected your software was already installed so you have the options to uninstall the software or modify the installation. Simply click 'Cancel', and then 'Yes' to confirm it. Then click 'Finish' to close the installation window. When you use the CD again, you may hold down the Shift key for 30 seconds when the CD is inserted if you want to prevent the installation menu appearing.
G603 I do not have the 3D Embroidery System logos beside each file in Windows Explorer
FAQ Lists for Husqvarna Viking 3D Software Page 30

Your icon association is set up during installation. You will have to re-install.
Opening the Program
E021 Error message "No dongle attached. Cannot open program."This message will appear when trying to start 3D Embroidery if the 3D Embroidery System cannot detect the dongle (data protection device). Ensure the dongle is plugged into a free USB port of your computer.
E022 Error message "The program requires a color palette of High Color (16 bit) or higher."
This message appears when attempting to open 3D Embroidery if your computer is set to a display of 256 colors or less. Reset the display as follows: 1. Right-click on the desktop and a shortcut menu appears. 2. Click on Properties and a dialog box appears. 3. Click the Settings tab. 4. Change Color quality to High Color (16 bit) or higher using the drop-down menu. 5. Click Apply, and allow your computer to restart if required.
H004 Error "HASP not found (-3)"This message may appear if you do not have the dongle inserted in a USB port on your computer when you start the 3D Embroidery System. Click OK to clear the message, insert the dongle and try again. This message may also appear when you have the dongle inserted, but the dongle drivers are not installed on your computer. If this is the case, follow the procedure described in 'DongleSetup.doc' in the \Technical folder of your 3D Embroidery System software CD.
H013 Error "No dongle attached. Cannot open program" when starting my 3D software on Windows® Vista, even though my dongle is inserted.
After you have installed the 3D Embroidery System software on a Windows® Vista computer, download and save the 3D Embroidery Vista Dongle Update [http://www.emnetsoftware.com/downloads/updates/3DEmbroideryVistaDongleUpdate.exe]. After saving the file on your computer, double-click the file to install the dongle update. Note: If the following User Account Control message appears when installing the update: "An unidentified program wants access to your computer", click the 'Allow' option to continue.
Preferences
E046 I have selected the correct hoop size, but the graphical representation does not look the same as my real hoop
This will happen if you choose a Universal Hoop that is the same size. The Universal Hoops are shown as plain hoops of the selected size. Use Preferences to choose the desired hoop size, but do not choose a Universal Hoop. The hoop is only shown graphically when 3D mode is selected. Therefore, it is not shown graphically when the Edit tab is selected.
FAQ Lists for Husqvarna Viking 3D Software Page 31

G429 The 5"x7" Design hoop and the Endless hoop are no longer available in the hoop list.
The 5"x7" Design and Endless hoops were added to the hoop list in the Version 7.2 update. If you have installed a previous version of software after updating to Version 7.2, the hoop list will be replaced and will no longer include the 5"x7" Design and Endless hoops. Click this link to download and install the correct hoop list: Hoops.exe [http://www.vsmsoftware.net/Downloads/Updates/720/Hoops.exe]
Printing
E013 Error: "No embroideries available to print. Only embroideries that are combined and inside the hoop can be printed."
This message appears if the embroidery file(s) on screen have not been Combined. To print more than one design, they must be Combined and fit in the selected hoop. If embroideries have not been Combined, and the design that was loaded first has not been moved from the center of the Stitch Area, it will be printed. This message also appears if the embroidery on screen is partially outside the selected hoop. Move the embroidery completely within the four blue corners of the work area and try again.
E042 I tried to print a number of embroideries, but only one appeared on the print-out
Only the embroidery selected on the 3D Embroidery screen is printed, unless all embroideries have been Combined or Saved.
Product Information
G004 What is the price of the software, and where can I get it?Please contact your local dealer for prices and availability on all the Husqvarna Viking software. To find your local dealer see the Husqvarna Viking Dealer Locator [http://www.sew.husqvarna.se/dealers.htm]. You can always find this on the bottom bar of the Husqvarna Viking Software website.
Saving Embroideries
E012 Error: "Embroidery is too large or is not in the hoop"This message appears if an embroidery you are trying to Save is outside the selected hoop or larger than will fit in it. For example, with the 100mm x 100mm hoop selected, an embroidery smaller than 100mm x 100mm might be placed partially outside the work area when you click Save. This message would then appear. Move the embroidery completely within the four blue corners of the work area and try again. An embroidery that is exactly the same height or width as a hoop is still too large to be stitched out in the hoop. For example, it is possible to stitch out an embroidery that is 99.5mm x 99.5mm in a 100mm x 100mm hoop, but an embroidery that is 100mm x 99.5mm is too large.
E018 Error message "Embroidery has too many stitches for file format."
FAQ Lists for Husqvarna Viking 3D Software Page 32

There is a limit on the number of stitches that may be saved to an embroidery file in Pfaff (.pcs) file format. This message appears if the embroidery you attempt to save to this format exceeds this limit.
G402 Error: "Design too large for output file format"Certain formats are limited to the size of hoop used on their specific embroidery machine, for example .sew. If you attempt to save a file in this format that is bigger than the largest available hoop size this message would appear.
G403 I have saved my embroidery as Tajima format, but it now has more colorsIf your original embroidery had a stop command in it then this would be replaced by a color change, thus adding a color for every stop you have in your embroidery. As the Tajima file format does not have a stop command in its format, it requires the machine operator to manually enter stops into the machine. If you save or distribute files in Tajima format, then you must also specify all colors and stops and where they occur in the embroidery.
G404 I have saved an embroidery in .sew format, and two files have been createdJanome software cannot load embroideries with more than 12 colors. If a file to be exported in .sew format has more than 12 color changes, it will automatically be split into multiple files, with the last character of the filename "1", "2", and so on.
G410 Error "Unrecognized file extension" when saving a fileThis message appears if you type an incorrect extension that does not belong to any embroidery file types in the File Name box when trying to save a file.
G412 Error "Cannot save file."The module cannot save the file. Ensure that the disk where you are trying to save the embroidery is not write-protected, then try again. For instance, you have loaded an embroidery from a CD-ROM and then attempt to save the embroidery back to the CD. A CD-ROM is read only, therefore you will not be able to save the embroidery.
G427 The manuals and help say that I can save PES files as version 5, but it only seems to save as version 2.
This is an erratum in the manuals and help. Up to version 7.2, the 3D Embroidery System modules can only save PES files as version 2. PES version 2 has a size restriction of 130mm x 180mm. From version 7.25 onwards, PES files are saved as version 2 if the embroidery is 130mm x 180mm or smaller. Files larger than this are saved as PES version 6. Use Smart Update to ensure your 3D Embroidery System modules are updated to the latest version. See FAQ #B008. Always print a worksheet from the 3D Embroidery System to show the correct colors for your embroidery, before saving it to a format that does not support full thread color information.
Screen Appearance
E003 Some of the icons are 'grayed out'
FAQ Lists for Husqvarna Viking 3D Software Page 33

Certain icons (for example Save As on the Main toolbar and most of the Edit toolbar icons) are only highlighted once an embroidery is shown on the screen.
E024 It seems to take a long time to redraw embroideries when I choose different functions or switch to a new embroidery
The refresh rate of the screen is limited by the power of your computer's processor and RAM as well as the video card and its memory. To get the best performance from your system, try using 2D view as this requires less power than 3D view.
E025 Some of the icons in the Toolbar are 'grayed out'Certain icons (for example Save As on the Main toolbar and all Edit toolbar icons) are only highlighted once an embroidery is shown on the screen.
E026 I have changed grid color and spacing and now I wish to return to the original settings
Use 3D Configure to change the grid color. Follow the instructions in 3D Configure and select Blue Gray (RGB values 102, 102, 153) from the standard color dropdown on the Grid Color button. Use Screen Preferences to change the grid spacing. Set the Grid Size to 10.
E027 I have moved the control panel and I can't put it back in positionIf the control panel is 'floating' on top of the window, double-click the title bar and the control panel will move back to its original position. If the control panel is docked on the wrong side of the window, click and drag the title bar to the middle of the right-hand edge of the window until the outline snaps into position on the right. Release the mouse button and the control panel will be dropped into its original position.
E046 I have selected the correct hoop size, but the graphical representation does not look the same as my real hoop
This will happen if you choose a Universal Hoop that is the same size. The Universal Hoops are shown as plain hoops of the selected size. Use Preferences to choose the desired hoop size, but do not choose a Universal Hoop. The hoop is only shown graphically when 3D mode is selected. Therefore, it is not shown graphically when the Edit tab is selected.
E048 The control panel is not showing or is in the wrong position in 3D Embroidery.
If the control panel is visible but in the wrong position, first try to click and drag its title bar to move it back to its normal position on the right. If this does not work, or the control panel is not visible, use Reset All Modules. Note that Reset All Modules affects all modules in the 3D Embroidery System, so any changes to settings in each module will be reset. The recent files list on the File menu is also cleared, but this does not affect any files you have saved. To use Reset All Modules:
FAQ Lists for Husqvarna Viking 3D Software Page 34

1. Close all 3D Embroidery System modules. Any modules left open will not be affected by Reset All Modules.
2. Start 3D Configure (on the Start menu, select Start, All Programs, 3D Embroidery System, 3D Configure).
3. Click the Reset All Modules button. 4. Click OK to reset, then click OK again to clear the confirmation message. The next time you start 3D Embroidery, the control panel will be in the correct position.
E056 When I hover the mouse pointer over a color in the color worksheet, part of the embroidery changes to an unusual color.
This is called "Highlight Selected Color". It allows you to see where each color is used in an embroidery. For example, if you have several color blocks using the same thread color and you wish to change the color of a specific section, hover over each color in the worksheet in turn until the section you require is highlighted.
G414 I have changed grid color and now I wish to return to the original colorUse 3D Configure to change the grid color. Follow the instructions in 3D Configure and select Blue Gray (RGB values 102, 102, 153) from the standard color drop-down on the Grid Color button. Use Screen Preferences to change the grid spacing.
G415 I have changed the screen background color and now I wish to return to the original light blue
Use 3D Configure to change the background color. Follow the instructions in 3D Configure and select the RGB values 200, 232, 247 in the Colors dialog box.
G416 I wish to change the background color for the work areaUse 3D Configure to alter the background color for the work area. 3D Configure may also be used to turn the texture on or off for modules that use texture.
G418 I can't see some of the floating toolbars or iconsFirst, check View, Customize to see if the missing toolbar has been turned off. If all the toolbar names are checked (so they are turned on) and you still cannot locate a toolbar, it may have been moved to the edge of the screen so it is hard to see. If you move icons around it is possible to delete them. To reset the icons on a toolbar 1. Click View, Customize to see the Customize dialog. 2. Click the Toolbar tab. 3. Click the name of the required toolbar. 4. Click Reset. 5. Click Yes to confirm. The selection of icons on the toolbar and their order will be reset.
G428 The selection outline partly or completely disappears when I move some of my embroideries.
This can happen two reasons: • The embroidery has at least one perfectly vertical or horizontal edge
FAQ Lists for Husqvarna Viking 3D Software Page 35

• The embroidery is composed of very wide satin columns Embroideries with perfectly vertical or horizontal edges The selection box around the selected embroidery is drawn using a method to provide maximum contrast with the background. The outline that shows the shape of the embroidery is drawn using the same method. When the two lines are in the same place, they cancel each other out. If the embroidery is a rectangle or a square, the outline may disappear completely when you move the embroidery. Notice that the scaling, mirror and rotate handles are always visible, so you can use these as cues for positioning embroideries where the edges are not visible. Wide satin columns Satin columns that are made of very long stitches may be interpreted as a series of jump stitches when the outline is detected. Jump stitches are ignored by the outline detection, so wide satin columns may have no outline, or other stitches overlapping the column may be outlined instead. Positioning embroideries with missing outlines Click and drag the embroidery approximately into position. Use the arrow keys on the keyboard to nudge the embroidery into its final position without needing to see the outline.
Selecting Blocks
E041 I used Box Select around an area, but selected some stitches I didn't want. Undo is grayed out so I can't click it.
To cancel a stitch block selection made using Box Select, Freehand Select, Polygon Select or Make Block From Visible Area, click anywhere in the currently active embroidery, but outside the dotted box showing the selected stitches. The stitches will no longer be selected.
Send To d-Card Reader/Writer Unit
A320 I am having difficulty using an embroidery on my machine when I send it to a d-Card from a horizontal hoop with Send 1 or Send 2.
This can happen if you are using a horizontal hoop on screen, and the embroidery is more than 150mm wide. When the embroidery is sent to the d-Card with Send To, the embroidery is not rotated. Before sending the embroidery to a d-Card, change the hoop orientation to vertical and, if the embroidery no longer fits, rotate the embroidery by 90 degrees. If you are using 3D Digitizing, 3D PictureStitch or 3D Cross Stitcher to create the embroidery, copy the finished design to 3D Embroidery to rotate it and setup the vertical hoop.
E047 I have a multi-part hoop selected, so my embroidery is split into more than one section. However, when I use Send 1 or Send 2, only one section of the embroidery is sent to the embroidery machine.
Only the currently selected section can be sent to an embroidery machine when a multi-part hoop is selected. Send the first section and stitch it out. Then adjust the hoop for the next section, send it and stitch it out. Continue until the whole design has been completely stitched out.
FAQ Lists for Husqvarna Viking 3D Software Page 36
Send To Designer I Floppy Disk
E047 I have a multi-part hoop selected, so my embroidery is split into more than one section. However, when I use Send 1 or Send 2, only one section of the embroidery is sent to the embroidery machine.
Only the currently selected section can be sent to an embroidery machine when a multi-part hoop is selected. Send the first section and stitch it out. Then adjust the hoop for the next section, send it and stitch it out. Continue until the whole design has been completely stitched out.
Send To Rose/Orchidea/#1+/Iris Reader/Writer
E047 I have a multi-part hoop selected, so my embroidery is split into more than one section. However, when I use Send 1 or Send 2, only one section of the embroidery is sent to the embroidery machine.
Only the currently selected section can be sent to an embroidery machine when a multi-part hoop is selected. Send the first section and stitch it out. Then adjust the hoop for the next section, send it and stitch it out. Continue until the whole design has been completely stitched out.
Sending Files to Machines
G422 I cannot send a file to an embroidery machineClick the 3D Configure icon to start 3D Configure. This will allow you to adjust the Send 1 and Send 2 options for your embroidery machine.
Shapes
E028 The letters or shapes I am designing in 3D Font Digitizing are not appearing in 3D Embroidery
3D Embroidery and 3D Font Digitizing cannot have the same font or shapes set open at the same time. Therefore, you must close the font or shapes set in 3D Font Digitizing to make it fully available to 3D Embroidery.
E037 I want to rotate and mirror my lettering or shape, but there are no handles or icons available for this
Only embroideries or blocks of stitches may be rotated or mirrored. Lettering and shapes must be 'fixed' as embroideries to allow this. Select the Design or Edit Page and all lettering and shapes will be fixed as embroideries. If you select the Edit Page, only the selected embroidery can be adjusted.
E038 I want to copy my lettering or shape, but the Copy icon is not availableOnly embroideries or blocks of stitches may be copied. Lettering and shapes must be 'fixed' as embroideries to allow this. Select the Design or Edit Page and all lettering and shapes will be fixed as embroideries.
FAQ Lists for Husqvarna Viking 3D Software Page 37

If you select the Edit Page, only the selected part of the embroidery selected for editing can be copied.
E043 Error "Cannot load font file" when I click the Letter or Shape tabThis message may appear when using 3D Embroidery if you are logged in to Windows XP as a non-administrative user. This can happen because file access for non-administrative users has been restricted on the computer. If it is necessary for non-administrative users to use 3D Embroidery, users must be given full control over the C:\3DEmbroidery folder. Do this as follows: 1. Log in as a user that has administrator rights. 2. Open Windows Explorer. 3. Browse to the C:\ drive. 4. Right-click on the C:\3DEmbroidery folder. 5. Click Properties. 6. Click the Security tab. 7. In the list of groups and users, click on the Users or Everyone user group name.
The machine name is shown after Users in the list. For example, Users (MYMACHINE\Users). If both groups are listed, select Users.
8. In the Permissions section of the dialog box there is an Allowcolumn of check boxes. Click the check box next to Full Controlso that it is checked.
9. Click OK. 10. Log off the computer, then log back in as a non-administrative user. 11. Start 3D Embroidery and click on the Letter or Shape tab to confirm that the error no
longer appears. If you do not have a Security tab when you get to step 6, do the following: 1. Click Cancel to close the Properties dialog. 2. In Windows Explorer, click on the Tools menu. 3. Click on Folder Options. The Folder Options dialog will appear. 4. Click on the View tab. 5. Click the 'Use simple file sharing (Recommended)' option so that it is unchecked. 6. Click OK. 7. Right-click the C:\3DEmbroidery folder, click Properties and continue from step 6 above.
Smart Update
B002 Message "We recommend that you check your system is up-to-date regularly by selecting the Smart Update button from 3D Configure"
This message will appear when you start your 3D Embroidery System if you have not run Smart Update in the last 30 days. Use Smart Update to check for new 3D Embroidery System updates and extras such as new fonts. Smart Updates you have downloaded may still be shown if you have not installed them.
Thread Colors
B617 The Yli thread ranges are no longer available in Color Selection or Thread Manager.
FAQ Lists for Husqvarna Viking 3D Software Page 38

This can happen when you install the 3D Embroidery System 7.2 Update. Use Smart Update to obtain the latest Thread Database Update. If a Security Warning appears, click Run to go ahead and run the update program. To install the update when the WinZip Self-Extractor appears, click the Unzip button, then click OK, then click Close.
B618 Error: "Please select a valid thread."This message appears if you attempt to click OK in the Color Selection dialog box when MyThreads is selected as the thread range and MyThreads is empty. To prevent this message appearing again, use Thread Manager in 3D Configure to add at least one thread to MyThreads.
E056 When I hover the mouse pointer over a color in the color worksheet, part of the embroidery changes to an unusual color.
This is called "Highlight Selected Color". It allows you to see where each color is used in an embroidery. For example, if you have several color blocks using the same thread color and you wish to change the color of a specific section, hover over each color in the worksheet in turn until the section you require is highlighted.
G007 Error "Thread range is corrupt or missing. Cannot change thread. Reinstall the thread database."
This message usually means that the database driver is incorrectly installed. First follow the instructions in FAQ #G010 to fix this. If the message still appears, use the following procedure to repair the installation: 1. Right-click the Start button on the taskbar and select Explore from the popup menu. 2. In Explorer, browse to the folder C:\3DEmbroidery\System.
This assumes you have installed your 3D Embroidery System software in the default location of C:\3DEmbroidery. If you have installed the software in a different location, browse to the System folder at that location.
3. Delete the files named "MyThreads.mdb" and "ThreadDataBase.mdb". The file names may simply be shown as "MyThreads" and "ThreadDataBase".
4. Put your 3D Embroidery System software CD in your computer to re-run the installation. The installation should start automatically when you put your software CD in the computer. If this does not happen, browse to the CD with Explorer and double-click "Setup.exe" to start the installation.
5. When the choice appears, select the "Modify or remove" option and click Next. 6. In the next screen, select Repair and click Next. 7. Continue with the installation and follow the on-screen instructions. When the installation
is complete, the MyThreads and standard thread databases will be restored to their original installation state.
If you had previously backed up your MyThreads database, you can now use the Restore option in Thread Manager to restore your MyThreads database. See the on-line help in Thread Manager for more information.
G010 How do I fix the database driver used by my 3D Embroidery System software?
FAQ Lists for Husqvarna Viking 3D Software Page 39

Database drivers are normally found installed on most computers – they are commonly installed as part of the installation of Microsoft® Office or as an upgrade of key components of the operating system. Key components of the 3D Embroidery System need to be able to use these drivers. Therefore, any difficulties in using these drivers may affect the functionality of certain features of the 3D Embroidery System. Examples include changing a thread color in any module and/or Motif Fill/Line properties in 3D Digitizing. If you have Windows® XP with Service Pack 2 installed, use the Database Driver Fix described below. Otherwise, install the drivers manually as follows: Installation of the Database files 1. Insert the 3D Embroidery System CD. 2. Cancel the installation screen if it appears. 3. Use Windows® Explorer to browse to the D:\Technical folder – where D:\ is the name of
your CD or DVD drive. 4. Double click on the Database Drivers folder. 5. Double click on the Jet 4 folder. 6. Double click on the folder that is for your operating system. 7. Double click on the file to start the installation of the Jet 4 Service Pack 8 files. This
should take a few moments for the files to be installed. 8. After the installation is complete, browse to the D:\Technical\Database Drivers\MDAC 2.8
folder. 9. Double click on the MDAC_TYP.exe file. The Microsoft Data Access Components 2.8
Setup dialog box will appear. 10. Select the option “I accept all the terms of the preceding license agreement”. 11. Click on the Next button. 12. Click on the Finish button when it appears. This will start the installation process for the
MDAC 2.8 files. 13. After the MDAC 2.8 installation is complete, reboot your computer and continue to use
your 3D Embroidery System. 14. If you are still having difficulties, use the Database Driver Fix that follows. Database Driver Fix 1. Insert the 3D Embroidery System CD. 2. Cancel the installation screen if it appears. 3. Use Windows® Explorer to browse to the D:\Technical folder – where D:\ is the name of
your CD or DVD drive. 4. Double click on the Database Drivers folder. 5. Double click on the MSAccessDbFixer file (this may be shown with a .exe extension). A
window will appear briefly on the screen. 6. Continue to use your 3D Embroidery System.
G419 "The color xx has been found in your database, but the thread color is not exactly the same."
This message appears if the Thread Range and Color Number of the selected color are identical to those in your thread database, but some aspect of the color is different. It could be a different material or weight, or have additional colors as a variegated thread. This could happen if the design you are attempting to edit was supplied by someone with a different version of the color, for instance if they have edited it in MyThreads, or if they have a later version of the thread database. Use the Import Threads From Embroidery function to add other users’ thread definitions to your MyThreads database.
FAQ Lists for Husqvarna Viking 3D Software Page 40
1. Select Import Threads from Embroidery in the File Menu and an Open dialog box will appear.
2. Select the desired .vp3 embroidery file. 3. Click Open and any custom thread definitions that do not appear in your MyThreads will
be added to the end of your MyThreads list. To check for the latest updates for the 3D Embroidery System, use Smart Update in 3D Configure.
G420 "Could not find xx in your database. Matching to closest thread in yy."This message appears if the Thread Range of the selected color is not found in your thread database. This could happen if the design you are attempting to edit was supplied by someone with a later version of the thread database. To check for the latest updates for the 3D Embroidery System, use Smart Update in 3D Configure.
G421 Error "Databases are corrupt or missing. Cannot edit the thread color."This message appears if there is a problem with your thread database. You will be unable to choose a thread color. First close all the modules of the 3D Embroidery System, close down your computer and restart. If this does not clear the problem, restore a backup database if you have created one using Thread Manager in 3D Configure. Otherwise, you need a new version of the thread database. To check for the latest updates for the 3D Embroidery System, use Smart Update in 3D Configure. Alternatively, you may need to uninstall and reinstall your 3D Embroidery System software.
Tutorials
G005 The window remains blank when I try to use the tutorials.You need version 6 or later of the Macromedia Flash Player to view the tutorials. Visit the Macromedia [http://www.macromedia.com] website and download and install the latest version of the Flash Player.
G011 What version of Macromedia Flash Player do I need to view the tutorials?You need version 6 or later of the Macromedia Flash Player to view the tutorials. Visit the Macromedia [http://www.macromedia.com] website and download and install the latest version of the Flash Player.
Using the Program
E023 Error message "No dongle attached. Cannot complete function."This message may appear when trying to use 3D Embroidery if the 3D Embroidery System cannot detect the dongle (data protection device). Ensure the dongle is plugged into a free USB port of your computer.
Working with Embroideries
E001 I've selected the wrong embroidery to move or manipulate?
FAQ Lists for Husqvarna Viking 3D Software Page 41

To deselect an embroidery, click the mouse on another embroidery. To select the desired embroidery, click on it and an outline box will appear. If one embroidery or piece of lettering is overlapping another making it difficult to select, hold down the Shift key while clicking on the center of the embroidery you wish to select. Release the Shift key, then click on the desired embroidery. Alternatively, press the Tab key to select each embroidery in turn.
E005 Certain functions don't seem to work all the timeWhen creating Lettering, when you switch to the Design Page or Edit Page of the control panel, the letters are automatically fixed and turned into an embroidery. The lettering can then no longer be resized with proportional changes in stitch density.
E019 The embroidery I want to work with appears too small on the screenMake sure the 3D Embroidery window is maximized by clicking the Maximize icon on the title bar. Click Zoom To Fit to expand the hoop so it fills the work area. Also, choose a Hoop Size in Hoop Preferences that is suitable to the embroidery size.
E020 I find it hard to select the part of the embroidery I wish to editMany functions of 3D Embroidery can be used to help see sections of embroideries more easily. They include the Zoom Commands and the Draw Range. The different methods of selection (Box Select, Freehand Select, Polygon Select and Make Block From Visible Area) are also useful for different situations.
3D Disk Manager Listed versions: 7.0; 7.0.5; 7.1; 7.2; 7.25
Catalog Printing
A113 I tried to use the Print Preview but I cannot see the current Design MenuThe Print Preview function always starts at Menu 1. Click Next Page or the Page Down key to see subsequent menus. Set the print range to the desired page numbers that correspond to the menus you wish to print; otherwise four pages will always be printed.
Error Messages
A102 "The design can only be saved and stitched out if it is rotated 90 degrees. Is that OK?"
This message will appear if the embroidery you are attempting to load is more than 150mm wide, but would fit if it was rotated; that is it is between 150mm and 360mm wide, and less than 150mm high. Click Yes to continue.
A103 Error: "Embroidery too big for hoop"This message appears if the embroidery you are trying to load onto the screen is larger than the dimensions that will fit in the optional Mega Hoop (150x360mm).
A104 Error: "Menu is full. % Embroidery Files left out"
FAQ Lists for Husqvarna Viking 3D Software Page 42

If there are 36 embroideries on the design menu into which you are trying to load designs, this message appears. Select another design menu and try again.
A105 Error: "Not enough room on disk"This message appears when you try to load more embroideries if there is already as much data on the design menu(s) as will fit on a floppy disk. Delete one or more embroideries and try again.
A106 Error: "No disk in drive"This message appears if there is no disk inserted in the floppy disk drive of your computer when you select the Write Disk function.
A107 Error: "Disk access denied"This message appears if the disk inserted in the floppy disk drive of your computer when you select the Write Disk function is write-protected.
A108 Error: "Wrong disk size. Use 1.44MB only"This message appears if a 720K floppy disk is inserted in the floppy disk drive of your computer when you select the Write Disk function. Replace it with a 1.44MB disk.
A109 Error: "No disk in drive"This message appears if there is no disk inserted in the floppy disk drive of your computer when you select the Read Disk function.
A110 Error: "Data on disk is corrupt; redo"This message may appear if a disk has been pulled out of the computer during the writing process. Try writing to the disk again.
General
G001 General difficulties with hardware and softwareTo try to determine the cause of any odd difficulties with the 3D Embroidery System, the best method is to reboot the computer in safe mode. If the problem is then solved, you know that some clash of hardware and/or software such as device drivers is to blame. You can then obtain more help from your computer dealer to analyze the cause and reconfigure your computer if necessary. To start Windows in Safe Mode 1. Close all programs. 2. Click Start, and then click Shut Down or Turn Off Computer, whichever is shown. 3. Click Restart. If necessary, click OK to confirm. 4. Your computer will shut down and restart. 5. As your computer restarts, press and hold the F8 key until a menu of windows startup
options appears. 6. Use the up and down arrow keys to highlight Safe mode, and then press ENTER.
FAQ Lists for Husqvarna Viking 3D Software Page 43

When you hold down the F8 key, your computer may beep rapidly and report keyboard errors as it restarts. Release the F8 key briefly to skip any errors and press F8 again until you have the Startup Menu on your screen.
Loading Embroideries
A102 "The design can only be saved and stitched out if it is rotated 90 degrees. Is that OK?"
This message will appear if the embroidery you are attempting to load is more than 150mm wide, but would fit if it was rotated; that is it is between 150mm and 360mm wide, and less than 150mm high. Click Yes to continue.
A103 Error: "Embroidery too big for hoop"This message appears if the embroidery you are trying to load onto the screen is larger than the dimensions that will fit in the optional Mega Hoop (150x360mm).
A104 Error: "Menu is full. % Embroidery Files left out"If there are 36 embroideries on the design menu into which you are trying to load designs, this message appears. Select another design menu and try again.
A105 Error: "Not enough room on disk"This message appears when you try to load more embroideries if there is already as much data on the design menu(s) as will fit on a floppy disk. Delete one or more embroideries and try again.
G401 I can't drag and drop embroidery files from the Open dialog boxTo drag and drop embroidery files onto the work area, right-click Start, then Explore to start Windows® Explorer. Then follow the instructions in the online help under Drag and Drop.
G405 Error "Cannot open embroidery."This message appears if the desired embroidery is not where the module expects it to be, for example if an embroidery was loaded into the module from a floppy disk, then closed and the floppy disk removed. The message would appear if you tried to load the embroidery from the Recent Files list on the File menu.
G406 Error "Unrecognized file format."This message appears if the file you are attempting to load is corrupt. For example, it might have the extension .vp3, yet not be a proper Husqvarna Viking / Pfaff embroidery.
G407 Error: "Embroidery is corrupt"The embroidery is corrupt and cannot be loaded. Refer to source of this file for a solution.
G408 Error "Embroidery XY coordinates incorrect"The embroidery is corrupt and cannot be loaded. Refer to source of this file for a solution.
FAQ Lists for Husqvarna Viking 3D Software Page 44

G409 Error "Unrecognized file extension" when opening a fileThis message appears if you attempt to load a file with an extension that does not belong to any embroidery file types. For example, it would appear if you tried to drag and drop a .doc file onto the screen.
G413 Error "Embroidery not created using licensed software."This message may appear if you attempt to load an embroidery created in third-party software. Such embroideries may cause unpredictable results.
Miscellaneous
A116 Colors of designs appear different on my machine and the computer screen.
The 3D Embroidery System records the actual thread color chosen. The machine uses fewer colors, so there is a conversion when the data is sent to the machine. To ensure that the name shown on the machine matches the color chosen on the computer, use only the Quick Colors and set the default thread manufacturer in 3D Configure to Sulky Rayon. Refer to the document 'Use of Colors in 3D System' in the technical folder on your CD for more information.
G411 Error "Not enough memory to perform operation."This message will appear if system resources are low. Close other programs and try again. If this does not work, try restarting your computer.
Product Information
A115 I can't find 3D Disk Manager.3D Disk Manager is in the QuickLink Accessories. To see the QuickLink Accessories either: • Click the QuickLink menu, then move the mouse pointer down to Accessories.
or • Click the down-arrow next to Accessories on the QuickLink toolbar. In either case, click 3D Disk Manager to start it.
G004 What is the price of the software, and where can I get it?Please contact your local dealer for prices and availability on all the Husqvarna Viking software. To find your local dealer see the Husqvarna Viking Dealer Locator [http://www.sew.husqvarna.se/dealers.htm]. You can always find this on the bottom bar of the Husqvarna Viking Software website.
Reading from a Disk
A109 Error: "No disk in drive"This message appears if there is no disk inserted in the floppy disk drive of your computer when you select the Read Disk function.
FAQ Lists for Husqvarna Viking 3D Software Page 45

A110 Error: "Data on disk is corrupt; redo"This message may appear if a disk has been pulled out of the computer during the writing process. Try writing to the disk again.
A115 I can't find 3D Disk Manager.3D Disk Manager is in the QuickLink Accessories. To see the QuickLink Accessories either: • Click the QuickLink menu, then move the mouse pointer down to Accessories.
or • Click the down-arrow next to Accessories on the QuickLink toolbar. In either case, click 3D Disk Manager to start it.
H204 Does the Designer I use standard floppy disks?The Designer I uses standard 1.44 MB floppy disks. They are used in the same way the cards are used on the #1+/Orchidea and Rose. To send an embroidery directly to a disk from any part of the 3D Embroidery System, ensure the Designer I is selected for Send 1 or Send 2 in 3D Configure. Alternatively, use 3D Disk Manager to read disks and send multiple embroideries to disks. A disk with one or more embroideries on it is placed in the Designer I.
H205 Can I store other files on a Designer I disk?Though it is possible to store other files on the same disk, we do not recommend it. If you keep one or two blank disks just for sending designs to the Designer I, then they can be used just like the cards for the #1+/Orchidea and Rose.
Saving Embroideries
G402 Error: "Design too large for output file format"Certain formats are limited to the size of hoop used on their specific embroidery machine, for example .sew. If you attempt to save a file in this format that is bigger than the largest available hoop size this message would appear.
G404 I have saved an embroidery in .sew format, and two files have been createdJanome software cannot load embroideries with more than 12 colors. If a file to be exported in .sew format has more than 12 color changes, it will automatically be split into multiple files, with the last character of the filename "1", "2", and so on.
G410 Error "Unrecognized file extension" when saving a fileThis message appears if you type an incorrect extension that does not belong to any embroidery file types in the File Name box when trying to save a file.
G412 Error "Cannot save file."The module cannot save the file. Ensure that the disk where you are trying to save the embroidery is not write-protected, then try again. For instance, you have loaded an embroidery from a CD-ROM and then attempt to save the embroidery back to the CD. A CD-ROM is read only, therefore you will not be able to save the embroidery.
FAQ Lists for Husqvarna Viking 3D Software Page 46

G427 The manuals and help say that I can save PES files as version 5, but it only seems to save as version 2.
This is an erratum in the manuals and help. Up to version 7.2, the 3D Embroidery System modules can only save PES files as version 2. PES version 2 has a size restriction of 130mm x 180mm. From version 7.25 onwards, PES files are saved as version 2 if the embroidery is 130mm x 180mm or smaller. Files larger than this are saved as PES version 6. Use Smart Update to ensure your 3D Embroidery System modules are updated to the latest version. See FAQ #B008. Always print a worksheet from the 3D Embroidery System to show the correct colors for your embroidery, before saving it to a format that does not support full thread color information.
Screen Appearance
A111 Some of the icons are 'grayed out'Certain Main toolbar icons (Save As, Multi-Save and Real Size) and all Edit toolbar icons are only highlighted once an embroidery is shown on the screen. This is also true for the corresponding menu options.
G415 I have changed the screen background color and now I wish to return to the original light blue
Use 3D Configure to change the background color. Follow the instructions in 3D Configure and select the RGB values 200, 232, 247 in the Colors dialog box.
G416 I wish to change the background color for the work areaUse 3D Configure to alter the background color for the work area. 3D Configure may also be used to turn the texture on or off for modules that use texture.
G417 I wish to change the background color for the work area and the Real Size window
Use 3D Configure to alter the background color for the work area and Real Size. 3D Configure may also be used to turn the texture on or off.
G418 I can't see some of the floating toolbars or iconsFirst, check View, Customize to see if the missing toolbar has been turned off. If all the toolbar names are checked (so they are turned on) and you still cannot locate a toolbar, it may have been moved to the edge of the screen so it is hard to see. If you move icons around it is possible to delete them. To reset the icons on a toolbar 1. Click View, Customize to see the Customize dialog. 2. Click the Toolbar tab. 3. Click the name of the required toolbar. 4. Click Reset. 5. Click Yes to confirm. The selection of icons on the toolbar and their order will be reset.
FAQ Lists for Husqvarna Viking 3D Software Page 47

Writing to a Disk
A101 Disk Manager created SHV files on my floppy disk. What are they?SHV files, along with MHV, DHV and PHV, are all system files which Disk Manager creates for the Designer I to read. SHV files contain the embroideries and can be opened by the 3D Embroidery System, as with any other embroidery file type.
A106 Error: "No disk in drive"This message appears if there is no disk inserted in the floppy disk drive of your computer when you select the Write Disk function.
A107 Error: "Disk access denied"This message appears if the disk inserted in the floppy disk drive of your computer when you select the Write Disk function is write-protected.
A108 Error: "Wrong disk size. Use 1.44MB only"This message appears if a 720K floppy disk is inserted in the floppy disk drive of your computer when you select the Write Disk function. Replace it with a 1.44MB disk.
A112 I am having problems writing embroideries to a floppy diskFirst try another disk. If the problems are limited to one disk, try formatting it fully. If you still experience problems, throw it away.
A114 I have put a disk of embroideries in my Designer I but they do not appear on the machine LCD
You cannot simply copy embroideries (eg *.hus files) onto a floppy disk. You must use the Send To function or Disk Manager. Use Send To to transfer one embroidery to a floppy disk. Use Disk Manager to transfer multiple embroideries to a floppy disk for your Designer I.
A115 I can't find 3D Disk Manager.3D Disk Manager is in the QuickLink Accessories. To see the QuickLink Accessories either: • Click the QuickLink menu, then move the mouse pointer down to Accessories.
or • Click the down-arrow next to Accessories on the QuickLink toolbar. In either case, click 3D Disk Manager to start it.
H204 Does the Designer I use standard floppy disks?The Designer I uses standard 1.44 MB floppy disks. They are used in the same way the cards are used on the #1+/Orchidea and Rose. To send an embroidery directly to a disk from any part of the 3D Embroidery System, ensure the Designer I is selected for Send 1 or Send 2 in 3D Configure. Alternatively, use 3D Disk Manager to read disks and send multiple embroideries to disks. A disk with one or more embroideries on it is placed in the Designer I.
FAQ Lists for Husqvarna Viking 3D Software Page 48

H205 Can I store other files on a Designer I disk?Though it is possible to store other files on the same disk, we do not recommend it. If you keep one or two blank disks just for sending designs to the Designer I, then they can be used just like the cards for the #1+/Orchidea and Rose.
3D d-Card Reader/Writer Listed versions: 7.0; 7.0.5; 7.1; 7.2; 7.25
Catalog Printing
A314 I tried to use the Print Preview but I cannot see the desired Design MenuThe Print Preview function always starts at Menu 1. Click Next Page or the Page Down key to see subsequent menus. Select the design menu number for the embroideries you wish to print.
Error Messages
A301 Error "No d-Card Reader/Writer unit is connected"This message appears if the d-Card Reader/Writer is not connected correctly to a USB port of your computer when you select the Read d-Card or Write d-Card function. Refer to the hardware installation guide for more details. Check that the d-Card Reader/Writer is securely plugged into the USB port of the computer or hub. Check the cable is plugged in correctly, as shown in the hardware installation guide. If you still have a problem then plug the d-Card Reader/Writer directly into into your computer's USB port. If it is now OK, then the problem may be a damaged or poor quality device or cable If you have a problem installing a USB d-Card Reader/Writer ensure that your BIOS is configured to allow support of Legacy USB devices.
A302 "The design can only be saved and stitched out if it is rotated 90 degrees. Is that OK?"
This message will appear if the embroidery you are attempting to load is more than 150mm wide, but would fit in a Designer II hoop if it was rotated; that is it is between 150mm and 360mm wide, and less than 150mm high. Click Yes to continue.
A303 Error: "Embroidery too big for hoop"This message appears if the embroidery you are trying to load onto the screen is larger than the dimensions that will fit in the optional Mega Hoop (150x360mm).
A304 Error: "Menu full"If there would be more than 35 embroideries on the screen after loading the desired embroideries, this message appears. Delete those you do not need and load again.
A305 Error: "No d-Card is inserted"
FAQ Lists for Husqvarna Viking 3D Software Page 49

This message appears if there is no d-Card inserted in the d-Card Reader/Writer when you select the Write d-Card function.
A306 Error: "Cannot write to d-Card"This message appears if the d-Card is defective or if a d-card is pulled out of the d-Card Reader/Writer during the writing process.
A307 Error: "d-Card is not programmable"This message appears if a Husqvarna Viking read-only Embroidery d-Card is inserted in the d-Card Reader/Writer when you select Write d-Card; replace with a Personal d-Card.
A308 Error: "This d-Card contains a sewing machine upgrade program. Click OK to continue"
This message appears if the Personal d-Card placed in the d-Card Reader/Writer contains a program that can update your Husqvarna Viking Designer II sewing machine software. If you do not wish to update at this time, click OK to continue the Write d-Card procedure. The update program will be erased when the embroideries are written to the d-Card.
A309 Error: "No designs are loaded on the screen"This message appears if there are no embroideries loaded on the screen when you select Write d-Card.
A310 Error: "Too many embroideries for d-Card; only room for % embroideries"If there are more embroideries on the screen than will fit on a d-Card, this message appears when you select the Write Card function. The number of embroideries that can fit in sequence from the top left of the screen is listed. Delete embroideries as required, but unless these are chosen from the bottom right of the screen, the number can only be a guideline. This is because it is an approximation related to the type of stitches in each embroidery file.
A311 Error: "The d-Card is not an Embroidery d-Card"This message appears if the d-Card from which you are trying to load embroideries is another type of d-card, for example a Stitch d-Card.
A312 Error: "Data on d-Card is corrupt; the d-Card may be faulty"This message may appear if a d-Card has been pulled out of the computer during the writing process. Try writing to the d-Card, then use the Read d-Card feature again.
General
G001 General difficulties with hardware and softwareTo try to determine the cause of any odd difficulties with the 3D Embroidery System, the best method is to reboot the computer in safe mode. If the problem is then solved, you know that some clash of hardware and/or software such as device drivers is to blame. You can then obtain more help from your computer dealer to analyze the cause and reconfigure your computer if necessary.
FAQ Lists for Husqvarna Viking 3D Software Page 50

To start Windows in Safe Mode 1. Close all programs. 2. Click Start, and then click Shut Down or Turn Off Computer, whichever is shown. 3. Click Restart. If necessary, click OK to confirm. 4. Your computer will shut down and restart. 5. As your computer restarts, press and hold the F8 key until a menu of windows startup
options appears. 6. Use the up and down arrow keys to highlight Safe mode, and then press ENTER. When you hold down the F8 key, your computer may beep rapidly and report keyboard errors as it restarts. Release the F8 key briefly to skip any errors and press F8 again until you have the Startup Menu on your screen.
Loading Embroideries
A302 "The design can only be saved and stitched out if it is rotated 90 degrees. Is that OK?"
This message will appear if the embroidery you are attempting to load is more than 150mm wide, but would fit in a Designer II hoop if it was rotated; that is it is between 150mm and 360mm wide, and less than 150mm high. Click Yes to continue.
A303 Error: "Embroidery too big for hoop"This message appears if the embroidery you are trying to load onto the screen is larger than the dimensions that will fit in the optional Mega Hoop (150x360mm).
A304 Error: "Menu full"If there would be more than 35 embroideries on the screen after loading the desired embroideries, this message appears. Delete those you do not need and load again.
G401 I can't drag and drop embroidery files from the Open dialog boxTo drag and drop embroidery files onto the work area, right-click Start, then Explore to start Windows® Explorer. Then follow the instructions in the online help under Drag and Drop.
G405 Error "Cannot open embroidery."This message appears if the desired embroidery is not where the module expects it to be, for example if an embroidery was loaded into the module from a floppy disk, then closed and the floppy disk removed. The message would appear if you tried to load the embroidery from the Recent Files list on the File menu.
G406 Error "Unrecognized file format."This message appears if the file you are attempting to load is corrupt. For example, it might have the extension .vp3, yet not be a proper Husqvarna Viking / Pfaff embroidery.
G407 Error: "Embroidery is corrupt"The embroidery is corrupt and cannot be loaded. Refer to source of this file for a solution.
FAQ Lists for Husqvarna Viking 3D Software Page 51

G408 Error "Embroidery XY coordinates incorrect"The embroidery is corrupt and cannot be loaded. Refer to source of this file for a solution.
G409 Error "Unrecognized file extension" when opening a fileThis message appears if you attempt to load a file with an extension that does not belong to any embroidery file types. For example, it would appear if you tried to drag and drop a .doc file onto the screen.
G413 Error "Embroidery not created using licensed software."This message may appear if you attempt to load an embroidery created in third-party software. Such embroideries may cause unpredictable results.
Miscellaneous
A315 There is no light showing on my d-Card Reader/WriterThe green LED on the d-Card Reader/Writer is visible only while you are Reading a d-Card or Writing a d-Card. At all other times it is not lit up, even if the d-Card Reader/Writer is connected correctly to the USB port of your computer.
A316 Can I use the d-Card Reader/Writer with my Mega Hoop?The d-Card Reader/Writer is designed to be compatible with the optional Mega Hoop. It will open, view and save designs up to 150mm x 360mm in size. If the embroidery is more than 150mm wide, but would fit in the Mega Hoop if it was rotated, that is it is between 150mm and 360mm wide, and less than 150mm high the following message will appear: "The design can only be saved and stitched out if it is rotated 90 degrees. Is that OK?" Click Yes to continue.
A317 Pressing the numbers on my Personal d-Card doesn't bring up the desired embroidery on my Designer II LCD panel
If you have the grid set to eight embroideries when you write the d-Card, then there will be eight touch-sensitive areas on the card when you insert it in the machine. If you print a label for the d-Card the positions will correspond to where the pictures are. If you prefer not to print a label, ensure that the grid size is set to 30 embroideries in Settings Preferences to correspond to the 30 numbered positions on the Personal d-Card.
G411 Error "Not enough memory to perform operation."This message will appear if system resources are low. Close other programs and try again. If this does not work, try restarting your computer.
Product Information
A318 I can't find 3D d-Card Reader/Writer.3D d-Card Reader/Writer is in the QuickLink Accessories. To see the QuickLink Accessories either:
FAQ Lists for Husqvarna Viking 3D Software Page 52

• Click the QuickLink menu, then move the mouse pointer down to Accessories. or
• Click the down-arrow next to Accessories on the QuickLink toolbar. In either case, click 3D d-Card Reader/Writer to start it.
G004 What is the price of the software, and where can I get it?Please contact your local dealer for prices and availability on all the Husqvarna Viking software. To find your local dealer see the Husqvarna Viking Dealer Locator [http://www.sew.husqvarna.se/dealers.htm]. You can always find this on the bottom bar of the Husqvarna Viking Software website.
Reading from a d-Card
A301 Error "No d-Card Reader/Writer unit is connected"This message appears if the d-Card Reader/Writer is not connected correctly to a USB port of your computer when you select the Read d-Card or Write d-Card function. Refer to the hardware installation guide for more details. Check that the d-Card Reader/Writer is securely plugged into the USB port of the computer or hub. Check the cable is plugged in correctly, as shown in the hardware installation guide. If you still have a problem then plug the d-Card Reader/Writer directly into into your computer's USB port. If it is now OK, then the problem may be a damaged or poor quality device or cable If you have a problem installing a USB d-Card Reader/Writer ensure that your BIOS is configured to allow support of Legacy USB devices.
A311 Error: "The d-Card is not an Embroidery d-Card"This message appears if the d-Card from which you are trying to load embroideries is another type of d-card, for example a Stitch d-Card.
A312 Error: "Data on d-Card is corrupt; the d-Card may be faulty"This message may appear if a d-Card has been pulled out of the computer during the writing process. Try writing to the d-Card, then use the Read d-Card feature again.
A318 I can't find 3D d-Card Reader/Writer.3D d-Card Reader/Writer is in the QuickLink Accessories. To see the QuickLink Accessories either: • Click the QuickLink menu, then move the mouse pointer down to Accessories.
or • Click the down-arrow next to Accessories on the QuickLink toolbar. In either case, click 3D d-Card Reader/Writer to start it.
Saving Embroideries
G402 Error: "Design too large for output file format"
FAQ Lists for Husqvarna Viking 3D Software Page 53

Certain formats are limited to the size of hoop used on their specific embroidery machine, for example .sew. If you attempt to save a file in this format that is bigger than the largest available hoop size this message would appear.
G404 I have saved an embroidery in .sew format, and two files have been createdJanome software cannot load embroideries with more than 12 colors. If a file to be exported in .sew format has more than 12 color changes, it will automatically be split into multiple files, with the last character of the filename "1", "2", and so on.
G410 Error "Unrecognized file extension" when saving a fileThis message appears if you type an incorrect extension that does not belong to any embroidery file types in the File Name box when trying to save a file.
G412 Error "Cannot save file."The module cannot save the file. Ensure that the disk where you are trying to save the embroidery is not write-protected, then try again. For instance, you have loaded an embroidery from a CD-ROM and then attempt to save the embroidery back to the CD. A CD-ROM is read only, therefore you will not be able to save the embroidery.
G427 The manuals and help say that I can save PES files as version 5, but it only seems to save as version 2.
This is an erratum in the manuals and help. Up to version 7.2, the 3D Embroidery System modules can only save PES files as version 2. PES version 2 has a size restriction of 130mm x 180mm. From version 7.25 onwards, PES files are saved as version 2 if the embroidery is 130mm x 180mm or smaller. Files larger than this are saved as PES version 6. Use Smart Update to ensure your 3D Embroidery System modules are updated to the latest version. See FAQ #B008. Always print a worksheet from the 3D Embroidery System to show the correct colors for your embroidery, before saving it to a format that does not support full thread color information.
Screen Appearance
A313 Some of the icons in 'grayed out'Certain Main toolbar icons (Save As, Multi-Save and Real Size) and all Edit toolbar icons except for Preferences are only highlighted once an embroidery file is shown on the screen. The menu icons (Second Menu, Third Menu and so on) in the Card toolbar are only highlighted if the Read Card feature has been used to read in an Embroidery d-Card with more than 35 embroideries.
G415 I have changed the screen background color and now I wish to return to the original light blue
Use 3D Configure to change the background color. Follow the instructions in 3D Configure and select the RGB values 200, 232, 247 in the Colors dialog box.
G416 I wish to change the background color for the work area
FAQ Lists for Husqvarna Viking 3D Software Page 54

Use 3D Configure to alter the background color for the work area. 3D Configure may also be used to turn the texture on or off for modules that use texture.
G417 I wish to change the background color for the work area and the Real Size window
Use 3D Configure to alter the background color for the work area and Real Size. 3D Configure may also be used to turn the texture on or off.
G418 I can't see some of the floating toolbars or iconsFirst, check View, Customize to see if the missing toolbar has been turned off. If all the toolbar names are checked (so they are turned on) and you still cannot locate a toolbar, it may have been moved to the edge of the screen so it is hard to see. If you move icons around it is possible to delete them. To reset the icons on a toolbar 1. Click View, Customize to see the Customize dialog. 2. Click the Toolbar tab. 3. Click the name of the required toolbar. 4. Click Reset. 5. Click Yes to confirm. The selection of icons on the toolbar and their order will be reset.
Send To d-Card Reader/Writer Unit
A319 How are the extra embroideries arranged on a d-Card when there are more than 30?
There can be up to 35 embroideries on a d-Card, but there are only 30 numbered squares on a Personal d-Card. When the d-Card Reader/Writer screen shows a grid size of 35, five extra positions above and below the function buttons on the card are used, as shown here:
d-Card with 35 embroidery positions
If you have more than 30 embroideries on a d-Card, it is recommended to print a label for the d-Card so you can find the correct number for each embroidery. If you remove some embroideries from the card, use Preferences to change back to 30 or less positions on the screen. The five extra positions will no longer be used.
Working with Embroideries
A319 How are the extra embroideries arranged on a d-Card when there are more than 30?
There can be up to 35 embroideries on a d-Card, but there are only 30 numbered squares on a Personal d-Card. When the d-Card Reader/Writer screen shows a grid size of 35, five extra positions above and below the function buttons on the card are used, as shown here:
d-Card with 35 embroidery positions
If you have more than 30 embroideries on a d-Card, it is recommended to print a label for the d-Card so you can find the correct number for each embroidery.
FAQ Lists for Husqvarna Viking 3D Software Page 55

If you remove some embroideries from the card, use Preferences to change back to 30 or less positions on the screen. The five extra positions will no longer be used.
Writing to a d-Card
A301 Error "No d-Card Reader/Writer unit is connected"This message appears if the d-Card Reader/Writer is not connected correctly to a USB port of your computer when you select the Read d-Card or Write d-Card function. Refer to the hardware installation guide for more details. Check that the d-Card Reader/Writer is securely plugged into the USB port of the computer or hub. Check the cable is plugged in correctly, as shown in the hardware installation guide. If you still have a problem then plug the d-Card Reader/Writer directly into into your computer's USB port. If it is now OK, then the problem may be a damaged or poor quality device or cable If you have a problem installing a USB d-Card Reader/Writer ensure that your BIOS is configured to allow support of Legacy USB devices.
A305 Error: "No d-Card is inserted"This message appears if there is no d-Card inserted in the d-Card Reader/Writer when you select the Write d-Card function.
A306 Error: "Cannot write to d-Card"This message appears if the d-Card is defective or if a d-card is pulled out of the d-Card Reader/Writer during the writing process.
A307 Error: "d-Card is not programmable"This message appears if a Husqvarna Viking read-only Embroidery d-Card is inserted in the d-Card Reader/Writer when you select Write d-Card; replace with a Personal d-Card.
A308 Error: "This d-Card contains a sewing machine upgrade program. Click OK to continue"
This message appears if the Personal d-Card placed in the d-Card Reader/Writer contains a program that can update your Husqvarna Viking Designer II sewing machine software. If you do not wish to update at this time, click OK to continue the Write d-Card procedure. The update program will be erased when the embroideries are written to the d-Card.
A309 Error: "No designs are loaded on the screen"This message appears if there are no embroideries loaded on the screen when you select Write d-Card.
A310 Error: "Too many embroideries for d-Card; only room for % embroideries"If there are more embroideries on the screen than will fit on a d-Card, this message appears when you select the Write Card function. The number of embroideries that can fit in sequence from the top left of the screen is listed. Delete embroideries as required, but unless
FAQ Lists for Husqvarna Viking 3D Software Page 56

these are chosen from the bottom right of the screen, the number can only be a guideline. This is because it is an approximation related to the type of stitches in each embroidery file.
A318 I can't find 3D d-Card Reader/Writer.3D d-Card Reader/Writer is in the QuickLink Accessories. To see the QuickLink Accessories either: • Click the QuickLink menu, then move the mouse pointer down to Accessories.
or • Click the down-arrow next to Accessories on the QuickLink toolbar. In either case, click 3D d-Card Reader/Writer to start it.
A319 How are the extra embroideries arranged on a d-Card when there are more than 30?
There can be up to 35 embroideries on a d-Card, but there are only 30 numbered squares on a Personal d-Card. When the d-Card Reader/Writer screen shows a grid size of 35, five extra positions above and below the function buttons on the card are used, as shown here:
d-Card with 35 embroidery positions
If you have more than 30 embroideries on a d-Card, it is recommended to print a label for the d-Card so you can find the correct number for each embroidery. If you remove some embroideries from the card, use Preferences to change back to 30 or less positions on the screen. The five extra positions will no longer be used.
3D Reader/Writer Listed versions: 7.0; 7.1; 7.2; 7.25
Error Messages
A201 Error message "Reader/Writer not found"For all Reader/Writers, check the following: • The Reader/Writer Unit is connected correctly to the computer. Ensure the connection is
not loose. • You are using the power supply that was provided with your Reader/Writer Unit. • The power supply is switched on and connected to the Reader/Writer Unit. If you have a parallel Reader/Writer, also check the following: • The switch on the Reader/Writer Unit is set to 'Card', not 'Dongle' or 'Printer'. • If you are using an external Zip Drive, see FAQ #H201 for special instructions. • If you have other items plugged into your LPT port then remove them and try again. If
this works then your other hardware can be at fault, or it may be your cable is passing a weak signal.
• Try running your computer in Safe Mode. If this works then it is likely to be another device's driver is accessing your printer port and preventing the Reader/Writer from working. See FAQ #G001 for more information.
FAQ Lists for Husqvarna Viking 3D Software Page 57

Please note that if problems persist then we recommend the use of a bi-directional switch box, or installing a second LPT port on your computer. For users of a Hewlett Packard 660 (or above) or a Lexmark Winwriter series printer, we highly recommend installing a second printer port.
A202 Error message "No card inserted"This message appears if there is no Embroidery Card inserted in the Reader/Writer when you select the Read Card or Write Card function. Also, the card may not be inserted correctly.
A203 Error message "Cannot write to card"This message appears if a Husqvarna Viking preprogrammed Embroidery Card is inserted in the Reader/Writer; replace with a Programmable card. It may also appear if the Programmable card is defective or if a card is pulled out of the Reader/Writer during the writing process. The message will also appear if you are trying to write to a 512 Programmable card via a parallel Reader/Writer. Ensure that you are using the correct card.
A204 Error message "Cannot erase to card"The card is not erasable. This message can appear if a card is pulled out of the Reader/Writer during the erasing process.
A206 Error message "Too many embroidery files for memory card; only room for % embroidery files"
If there are more embroideries on the screen than will fit on a Programmable Embroidery Card, this message appears when you select the Write Card function. The number of embroideries that can fit in sequence from the top left of the screen is listed. Delete embroideries as required, but unless these are chosen from the bottom right of the screen, the number can only be a guideline. This is because it is an approximation related to the type of stitches in each embroidery. The other embroideries on the screen will be 'reshuffled' so there are no empty spaces.
A207 Error message "Data on card is corrupt; redo"This message may appear if a card has been pulled out of the Reader/Writer during the writing process. Try writing and then reading the card again.
A208 The designs on my programmable card have gone corrupt and I can no longer use it
Check first that both your Embroidery Machine and Reader/Writer Unit are reading your cards correctly. Insert a pre-programmed card, such as Embroidery Card 1, and try to read that. If that works then try to erase your faulty programmable card. Do this by inserting the card into the Reader/Writer Unit and run the Reader/Writer software. Do not open any designs, but click 'Send to Card'; this will remove any data on your card and leaves it totally blank. If you have tried this and your card still does not work you require another card. If you are within the 90 day warranty period, you may return it to your dealer and get it exchanged.
FAQ Lists for Husqvarna Viking 3D Software Page 58

A handy hint is to always label your programmable cards, maybe with the date you bought them, or with different colored stickers. This makes it easier to trace a faulty card. Also ensure that you are using the correct type of programmable card with your Reader/Writer unit. The USB Reader/Writer can read from all programmable cards, but they can only write to Programmable 512 cards. The Parallel Reader/Writer can only use Programmable cards (that is, cards that do not have "512" on them).
General
G001 General difficulties with hardware and softwareTo try to determine the cause of any odd difficulties with the 3D Embroidery System, the best method is to reboot the computer in safe mode. If the problem is then solved, you know that some clash of hardware and/or software such as device drivers is to blame. You can then obtain more help from your computer dealer to analyze the cause and reconfigure your computer if necessary. To start Windows in Safe Mode 1. Close all programs. 2. Click Start, and then click Shut Down or Turn Off Computer, whichever is shown. 3. Click Restart. If necessary, click OK to confirm. 4. Your computer will shut down and restart. 5. As your computer restarts, press and hold the F8 key until a menu of windows startup
options appears. 6. Use the up and down arrow keys to highlight Safe mode, and then press ENTER. When you hold down the F8 key, your computer may beep rapidly and report keyboard errors as it restarts. Release the F8 key briefly to skip any errors and press F8 again until you have the Startup Menu on your screen.
Loading Embroideries
A211 Error message "Embroidery file too big for hoop"This message appears if the embroidery you are trying to load onto the screen is larger than the dimensions that will fit in the Husqvarna Viking 100mmx100mm hoop.
G401 I can't drag and drop embroidery files from the Open dialog boxTo drag and drop embroidery files onto the work area, right-click Start, then Explore to start Windows® Explorer. Then follow the instructions in the online help under Drag and Drop.
G405 Error "Cannot open embroidery."This message appears if the desired embroidery is not where the module expects it to be, for example if an embroidery was loaded into the module from a floppy disk, then closed and the floppy disk removed. The message would appear if you tried to load the embroidery from the Recent Files list on the File menu.
G406 Error "Unrecognized file format."This message appears if the file you are attempting to load is corrupt. For example, it might have the extension .vp3, yet not be a proper Husqvarna Viking / Pfaff embroidery.
FAQ Lists for Husqvarna Viking 3D Software Page 59

G407 Error: "Embroidery is corrupt"The embroidery is corrupt and cannot be loaded. Refer to source of this file for a solution.
G408 Error "Embroidery XY coordinates incorrect"The embroidery is corrupt and cannot be loaded. Refer to source of this file for a solution.
G409 Error "Unrecognized file extension" when opening a fileThis message appears if you attempt to load a file with an extension that does not belong to any embroidery file types. For example, it would appear if you tried to drag and drop a .doc file onto the screen.
G413 Error "Embroidery not created using licensed software."This message may appear if you attempt to load an embroidery created in third-party software. Such embroideries may cause unpredictable results.
Miscellaneous
A209 How do I write the designs from a Plus Embroidery Disk (e.g. Cards 15, 18 & 20) to my programmable card?
The numbering system for the Plus Embroidery Disks are as follows (using Card 18 as an example): • Design 1, Position 1 - des18101.hus • Design 1, Position 2 - des18201.hus • Design 1, Position 3 - des18301.hus Design 2, Position 1 - des18102.hus Design 2, Position 2 - des18202.hus Design 2, Position 3 - des18302.hus • Design 3, etc... The "18" designates Embroidery Disk 18, the following digit indicates the position number (P1, P2 or P3), the last two digits (01, 02, 03… 32, 33, 34) indicates the design number as indicated on the included booklet. Each section of the design is written to the card as a separate design. Once the sections are written to the Embroidery Card, all that is needed is for the hoop to be moved into the correct position to sew each section of the design.
A214 My Reader/Writer is not working correctlyCheck the Reader/Writer is connected correctly. Refer to the hardware installation guide for more details.
A215 I am having problems writing embroideries to a Programmable Embroidery Card
FAQ Lists for Husqvarna Viking 3D Software Page 60

First try another card and check the Reader/Writer is connected correctly. If the problems are limited to one card, erase it completely by opening 3D Reader/Writer, then using the Write Card function with no embroideries loaded on the screen.
G411 Error "Not enough memory to perform operation."This message will appear if system resources are low. Close other programs and try again. If this does not work, try restarting your computer.
Product Information
A205 I can't find 3D Reader/Writer.3D Reader/Writer is in the QuickLink Accessories. To see the QuickLink Accessories either: • Click the QuickLink menu, then move the mouse pointer down to Accessories.
or • Click the down-arrow next to Accessories on the QuickLink toolbar. In either case, click 3D Reader/Writer to start it.
G004 What is the price of the software, and where can I get it?Please contact your local dealer for prices and availability on all the Husqvarna Viking software. To find your local dealer see the Husqvarna Viking Dealer Locator [http://www.sew.husqvarna.se/dealers.htm]. You can always find this on the bottom bar of the Husqvarna Viking Software website.
Reading from a Card
A201 Error message "Reader/Writer not found"For all Reader/Writers, check the following: • The Reader/Writer Unit is connected correctly to the computer. Ensure the connection is
not loose. • You are using the power supply that was provided with your Reader/Writer Unit. • The power supply is switched on and connected to the Reader/Writer Unit. If you have a parallel Reader/Writer, also check the following: • The switch on the Reader/Writer Unit is set to 'Card', not 'Dongle' or 'Printer'. • If you are using an external Zip Drive, see FAQ #H201 for special instructions. • If you have other items plugged into your LPT port then remove them and try again. If
this works then your other hardware can be at fault, or it may be your cable is passing a weak signal.
• Try running your computer in Safe Mode. If this works then it is likely to be another device's driver is accessing your printer port and preventing the Reader/Writer from working. See FAQ #G001 for more information.
Please note that if problems persist then we recommend the use of a bi-directional switch box, or installing a second LPT port on your computer. For users of a Hewlett Packard 660 (or above) or a Lexmark Winwriter series printer, we highly recommend installing a second printer port.
FAQ Lists for Husqvarna Viking 3D Software Page 61

A202 Error message "No card inserted"This message appears if there is no Embroidery Card inserted in the Reader/Writer when you select the Read Card or Write Card function. Also, the card may not be inserted correctly.
A205 I can't find 3D Reader/Writer.3D Reader/Writer is in the QuickLink Accessories. To see the QuickLink Accessories either: • Click the QuickLink menu, then move the mouse pointer down to Accessories.
or • Click the down-arrow next to Accessories on the QuickLink toolbar. In either case, click 3D Reader/Writer to start it.
A207 Error message "Data on card is corrupt; redo"This message may appear if a card has been pulled out of the Reader/Writer during the writing process. Try writing and then reading the card again.
A208 The designs on my programmable card have gone corrupt and I can no longer use it
Check first that both your Embroidery Machine and Reader/Writer Unit are reading your cards correctly. Insert a pre-programmed card, such as Embroidery Card 1, and try to read that. If that works then try to erase your faulty programmable card. Do this by inserting the card into the Reader/Writer Unit and run the Reader/Writer software. Do not open any designs, but click 'Send to Card'; this will remove any data on your card and leaves it totally blank. If you have tried this and your card still does not work you require another card. If you are within the 90 day warranty period, you may return it to your dealer and get it exchanged. A handy hint is to always label your programmable cards, maybe with the date you bought them, or with different colored stickers. This makes it easier to trace a faulty card. Also ensure that you are using the correct type of programmable card with your Reader/Writer unit. The USB Reader/Writer can read from all programmable cards, but they can only write to Programmable 512 cards. The Parallel Reader/Writer can only use Programmable cards (that is, cards that do not have "512" on them).
A210 How do I read the designs from Embroidery Card 21?Embroidery Card 21 is a special embroidery card designed specifically for users who wish to create lettering without the use of a computer. It does not store designs in the same way that other cards do and therefore cannot be read back into the computer via the Reader/Writer unit.
A213 My Reader/Writer is not working and I have Nero CD creation softwareCertain versions of the Ahead Nero CD creation software conflict with the Reader/Writer and prevent it from working. This can be resolved with a free upgrade to the latest version of Nero, which you can obtain from the download area of the Ahead Nero [http://www.ahead.de/en] site.
H203 I can’t use my programmable card properly with my Reader/Writer unit.
FAQ Lists for Husqvarna Viking 3D Software Page 62

There are now two Reader/Writer units: Parallel and USB. The USB Reader/Writer is provided with a 512kB Programmable Embroidery Card, and additional 512kB Programmable Embroidery Cards can be bought separately. The USB Reader/Writer can readfrom any Embroidery Card, including the smaller Programmable Embroidery Cards, but it can only write(save designs) to a 512kB Programmable Embroidery Card. A Parallel Reader/Writer may not use 512kB Programmable Embroidery Cards.
Saving Embroideries
G402 Error: "Design too large for output file format"Certain formats are limited to the size of hoop used on their specific embroidery machine, for example .sew. If you attempt to save a file in this format that is bigger than the largest available hoop size this message would appear.
G404 I have saved an embroidery in .sew format, and two files have been createdJanome software cannot load embroideries with more than 12 colors. If a file to be exported in .sew format has more than 12 color changes, it will automatically be split into multiple files, with the last character of the filename "1", "2", and so on.
G410 Error "Unrecognized file extension" when saving a fileThis message appears if you type an incorrect extension that does not belong to any embroidery file types in the File Name box when trying to save a file.
G412 Error "Cannot save file."The module cannot save the file. Ensure that the disk where you are trying to save the embroidery is not write-protected, then try again. For instance, you have loaded an embroidery from a CD-ROM and then attempt to save the embroidery back to the CD. A CD-ROM is read only, therefore you will not be able to save the embroidery.
G427 The manuals and help say that I can save PES files as version 5, but it only seems to save as version 2.
This is an erratum in the manuals and help. Up to version 7.2, the 3D Embroidery System modules can only save PES files as version 2. PES version 2 has a size restriction of 130mm x 180mm. From version 7.25 onwards, PES files are saved as version 2 if the embroidery is 130mm x 180mm or smaller. Files larger than this are saved as PES version 6. Use Smart Update to ensure your 3D Embroidery System modules are updated to the latest version. See FAQ #B008. Always print a worksheet from the 3D Embroidery System to show the correct colors for your embroidery, before saving it to a format that does not support full thread color information.
Screen Appearance
A212 Some of the icons in the toolbar are 'grayed out'Certain Main toolbar icons (Save As, Multi-Save and Real Size) and all Edit toolbar icons are only highlighted once an embroidery is shown on the screen. The menu icons (Second
FAQ Lists for Husqvarna Viking 3D Software Page 63

Menu, Third Menu) in the Card toolbar are only highlighted if the Read Card feature has been used to read in an Embroidery Card with more than 35 embroideries.
G415 I have changed the screen background color and now I wish to return to the original light blue
Use 3D Configure to change the background color. Follow the instructions in 3D Configure and select the RGB values 200, 232, 247 in the Colors dialog box.
G416 I wish to change the background color for the work areaUse 3D Configure to alter the background color for the work area. 3D Configure may also be used to turn the texture on or off for modules that use texture.
G417 I wish to change the background color for the work area and the Real Size window
Use 3D Configure to alter the background color for the work area and Real Size. 3D Configure may also be used to turn the texture on or off.
G418 I can't see some of the floating toolbars or iconsFirst, check View, Customize to see if the missing toolbar has been turned off. If all the toolbar names are checked (so they are turned on) and you still cannot locate a toolbar, it may have been moved to the edge of the screen so it is hard to see. If you move icons around it is possible to delete them. To reset the icons on a toolbar 1. Click View, Customize to see the Customize dialog. 2. Click the Toolbar tab. 3. Click the name of the required toolbar. 4. Click Reset. 5. Click Yes to confirm. The selection of icons on the toolbar and their order will be reset.
Setting up the Reader/Writer Unit
A201 Error message "Reader/Writer not found"For all Reader/Writers, check the following: • The Reader/Writer Unit is connected correctly to the computer. Ensure the connection is
not loose. • You are using the power supply that was provided with your Reader/Writer Unit. • The power supply is switched on and connected to the Reader/Writer Unit. If you have a parallel Reader/Writer, also check the following: • The switch on the Reader/Writer Unit is set to 'Card', not 'Dongle' or 'Printer'. • If you are using an external Zip Drive, see FAQ #H201 for special instructions. • If you have other items plugged into your LPT port then remove them and try again. If
this works then your other hardware can be at fault, or it may be your cable is passing a weak signal.
FAQ Lists for Husqvarna Viking 3D Software Page 64

• Try running your computer in Safe Mode. If this works then it is likely to be another device's driver is accessing your printer port and preventing the Reader/Writer from working. See FAQ #G001 for more information.
Please note that if problems persist then we recommend the use of a bi-directional switch box, or installing a second LPT port on your computer. For users of a Hewlett Packard 660 (or above) or a Lexmark Winwriter series printer, we highly recommend installing a second printer port.
A213 My Reader/Writer is not working and I have Nero CD creation softwareCertain versions of the Ahead Nero CD creation software conflict with the Reader/Writer and prevent it from working. This can be resolved with a free upgrade to the latest version of Nero, which you can obtain from the download area of the Ahead Nero [http://www.ahead.de/en] site.
H201 Are there special instructions for installing my external Zip drive?This only applies if you have a parallel Reader/Writer and want to use an external Zip drive that connects to a parallel printer port (LPT). A parallel Zip drive should always be connected directly to the computer's printer port and the switch box connected to the zip drive's out connector. The Zip drive's cable must be kept as short as possible or you will get data corruption. Also the length of the cable from the Zip drive to the switch box and from the switch box to the Reader/Writer must be as short as possible. Ideally the total length of the cable from the back of the computer to the Reader/Writer should not exceed 2 meters.
H202 How do I connect my printer to the parallel Reader/Writer?Do not plug a printer into the parallel Reader/Writer, even if is says 'Printer' on it. It does not act as a switch-box and printer signals, which aren't blocked, may travel through and compromise your embroidery cards. Instead you must use one of the following options: • Disconnect the Reader/Writer cable when printing. • Connect a switch-box to the computer, and attach both the printer and Reader/Writer to
this. Ensure that this switch-box is manual, for parallel connections, is bi-directional and has a cable no more than 6 feet long.
• Install an extra Parallel (LPT) Port into your computer, and use the Reader/Writer on this. We highly recommend installation of a second printer port if the following printer drivers are installed on your system: Hewlett Packard 660 or above and the Lexmark WinWriter series.
Writing to a Card
A201 Error message "Reader/Writer not found"For all Reader/Writers, check the following: • The Reader/Writer Unit is connected correctly to the computer. Ensure the connection is
not loose. • You are using the power supply that was provided with your Reader/Writer Unit. • The power supply is switched on and connected to the Reader/Writer Unit. If you have a parallel Reader/Writer, also check the following: • The switch on the Reader/Writer Unit is set to 'Card', not 'Dongle' or 'Printer'.
FAQ Lists for Husqvarna Viking 3D Software Page 65

• If you are using an external Zip Drive, see FAQ #H201 for special instructions. • If you have other items plugged into your LPT port then remove them and try again. If
this works then your other hardware can be at fault, or it may be your cable is passing a weak signal.
• Try running your computer in Safe Mode. If this works then it is likely to be another device's driver is accessing your printer port and preventing the Reader/Writer from working. See FAQ #G001 for more information.
Please note that if problems persist then we recommend the use of a bi-directional switch box, or installing a second LPT port on your computer. For users of a Hewlett Packard 660 (or above) or a Lexmark Winwriter series printer, we highly recommend installing a second printer port.
A202 Error message "No card inserted"This message appears if there is no Embroidery Card inserted in the Reader/Writer when you select the Read Card or Write Card function. Also, the card may not be inserted correctly.
A203 Error message "Cannot write to card"This message appears if a Husqvarna Viking preprogrammed Embroidery Card is inserted in the Reader/Writer; replace with a Programmable card. It may also appear if the Programmable card is defective or if a card is pulled out of the Reader/Writer during the writing process. The message will also appear if you are trying to write to a 512 Programmable card via a parallel Reader/Writer. Ensure that you are using the correct card.
A204 Error message "Cannot erase to card"The card is not erasable. This message can appear if a card is pulled out of the Reader/Writer during the erasing process.
A205 I can't find 3D Reader/Writer.3D Reader/Writer is in the QuickLink Accessories. To see the QuickLink Accessories either: • Click the QuickLink menu, then move the mouse pointer down to Accessories.
or • Click the down-arrow next to Accessories on the QuickLink toolbar. In either case, click 3D Reader/Writer to start it.
A206 Error message "Too many embroidery files for memory card; only room for % embroidery files"
If there are more embroideries on the screen than will fit on a Programmable Embroidery Card, this message appears when you select the Write Card function. The number of embroideries that can fit in sequence from the top left of the screen is listed. Delete embroideries as required, but unless these are chosen from the bottom right of the screen, the number can only be a guideline. This is because it is an approximation related to the type of stitches in each embroidery. The other embroideries on the screen will be 'reshuffled' so there are no empty spaces.
FAQ Lists for Husqvarna Viking 3D Software Page 66
A209 How do I write the designs from a Plus Embroidery Disk (e.g. Cards 15, 18 & 20) to my programmable card?
The numbering system for the Plus Embroidery Disks are as follows (using Card 18 as an example): • Design 1, Position 1 - des18101.hus • Design 1, Position 2 - des18201.hus • Design 1, Position 3 - des18301.hus Design 2, Position 1 - des18102.hus Design 2, Position 2 - des18202.hus Design 2, Position 3 - des18302.hus • Design 3, etc... The "18" designates Embroidery Disk 18, the following digit indicates the position number (P1, P2 or P3), the last two digits (01, 02, 03… 32, 33, 34) indicates the design number as indicated on the included booklet. Each section of the design is written to the card as a separate design. Once the sections are written to the Embroidery Card, all that is needed is for the hoop to be moved into the correct position to sew each section of the design.
A213 My Reader/Writer is not working and I have Nero CD creation softwareCertain versions of the Ahead Nero CD creation software conflict with the Reader/Writer and prevent it from working. This can be resolved with a free upgrade to the latest version of Nero, which you can obtain from the download area of the Ahead Nero [http://www.ahead.de/en] site.
H203 I can’t use my programmable card properly with my Reader/Writer unit.There are now two Reader/Writer units: Parallel and USB. The USB Reader/Writer is provided with a 512kB Programmable Embroidery Card, and additional 512kB Programmable Embroidery Cards can be bought separately. The USB Reader/Writer can readfrom any Embroidery Card, including the smaller Programmable Embroidery Cards, but it can only write(save designs) to a 512kB Programmable Embroidery Card. A Parallel Reader/Writer may not use 512kB Programmable Embroidery Cards.
3D Digitizing Listed versions: 7.0; 7.1; 7.2; 7.25
Acquiring Pictures
D001 What DPI setting should I use to scan a picture for digitizing?The correct DPI (dots per inch) setting will depend on the size of the picture to be scanned. The desired picture size for digitizing is approximately 1000 X 1000 pixels. To achieve this take the size of your artwork in inches, such as 8" x 7", and divide the longest side into 1000. In the example, 1000 divided by 8 = 125. The DPI setting of the scanner should then be 125 DPI, and this will produce a picture that is about 1000 x 875 pixels.
FAQ Lists for Husqvarna Viking 3D Software Page 67

D030 Error "Scanner or camera is in use by another application"This message will appear when trying to use your scanner or digital camera if another graphics program is already open that uses the Twain-compliant device. Close 3D Digitizing and the other graphics programs, then reopen 3D Digitizing and try again.
D033 Digitizing crashes very quickly, before I can do any work, and I have a Kodak DC3400 digital camera.
This is caused by a clash with the TWAIN drivers for the Kodak DC3400. First, check the Kodak web site to ensure that you have the latest drivers for your DC3400. If problems persist, you have two options that will allow Digitizing to work correctly: • Remove the Kodak DC3400 software from your system • This is the preferred option, especially if you have a second PC available that you can
use for downloading pictures from the camera. Use the Uninstall option provided with the software.
• Rename a part of the Kodak DC3400 TWAIN driver to disable the driver • This would allow you to re-enable the driver when you wanted to download images (but
not with the Acquire option in Digitizing). You would need to disable the driver again to be able to use Digitizing. See the instructions below.
How to temporarily disable the Kodak DC3400 TWAIN driver 1. Start Windows Explorer and browse to your Windows folder (usually C:\Windows or
C:\WinNT). (In some cases you will be warned about viewing files in the Windows folder. Use the option that allows you to continue.)
2. In the Windows folder, find the folder named "twain_32" and browse its contents. 3. Browse the folder named "DC3400" and you will see a file called "TwainDS.ds". 4. Right-click on "TwainDS.ds" and rename it as "TwainDS.xds". Putting this extra "x" in the
file name extension will cause the TWAIN system to ignore this device, which will allow Digitizing to run correctly.
5. If you need to use the TWAIN driver for the Kodak DC3400 with other software, simply change the file name back to "TwainDS.ds" until you are ready to use Digitizing again.
D037 Error message "Problem with scanner or camera software."This message will appear when trying to use your scanner or digital camera if the device has not been installed correctly. Close 3D Digitizing, follow the manufacturer's instructions for the Twain-compliant device, then reopen 3D Digitizing and try again.
D038 Error message "Your scanner is no longer available for use. Close this program, plug in and switch on your scanner, and run this program again."
This message will appear if the connection to your scanner or digital camera has a problem. Close 3D Digitizing, check the connections to your scanner or digital camera, then reopen 3D Digitizing and try again.
D039 Error message "Failure to acquire picture due to unknown causes."This message will appear in certain circumstances when trying to use your scanner or digital camera, for example if the cable is disconnected during the scan or download. Close 3D Digitizing, check the connections to your scanner or digital camera, then reopen 3D Digitizing and try again.
FAQ Lists for Husqvarna Viking 3D Software Page 68

D052 My scanner or digital camera is not shown when I try to Select Source, or the Select Source button is grayed out
The manufacturer of a TWAIN device must provide a Source Manager and a TWAIN Data source for your device to work with 3D Digitizing. These will normally be installed when you install the software and drivers provided with the device. If you have installed a device and it is not shown in the list then it may not be TWAIN compliant. Refer to the device documentation and manufacturer for assistance.
Background Picture
D004 I loaded a small picture, and it has too many jagged linesAlthough the program automatically doubles the size of a picture if its height and width are less than 500 pixels, this may still produce jagged lines. For a smoother effect, rescan the picture.
D005 The background picture shows more of the picture than I want to digitize.Use the Design Area command to select the part of the picture you wish to digitize. Alternatively, in the Picture window select the part of the Picture you want with Box or Freehand Select then Crop the picture (you can only do this before you start digitizing).
D006 The background image has a thick outline so that QuickStitch™ Fill leaves gaps between color areas
Use the Outline Thinner to narrow the outline to one pixel. This will allow areas to join together better.
D034 Creating MiniPics for 3D Digitizing and 3D PictureStitchBefore Starting An appropriate image editing package, such as Jasc® Paint Shop Pro, is required that will save .ras format, as well as a good knowledge of working with graphic files. About MiniPics Create Medium MiniPics at 400x400 pixels, and Small MiniPics at 250x250 pixels. The color palette can be 256 colors or more. White is treated as transparent when you load a MiniPic, so anything underneath the white part of a MiniPic will show through. If you want an area to be white in your MiniPic, use a "false white" such as very pale yellow, then change it to white with the Flood Fill tool. It is recommended that you create a new folder for saving your own MinPics, for instance: C:\3DEmbroidery\MyDesigns\MyMiniPics. How To Make a MiniPic 1. Use an existing picture:Open an existing image; Either crop around the required area
or resize the whole picture to the size of a Medium or Small MiniPic. 2. Or, create a new MiniPic from scratch:Start a new image and set it to the size of either
a medium (400x400 pixels) or small (250x250 pixels) MiniPic; Use the drawing tools in the graphic package to create the desired picture for the MiniPic.
3. Ensure that the colors are solid color areas. See the existing MiniPics for examples. 4. Save the file in Sun Raster Image format with the “.ras” extension. 5. Start Windows® Explorer and browse to the folder where you saved the “.ras” file.
FAQ Lists for Husqvarna Viking 3D Software Page 69

6. Click on the file to highlight it. 7. Right-click to bring up a popup menu, and select the Rename option from the menu. 8. Edit the file name to change the extension from “.ras” to “.axw” and press Enter. 9. You will be warned about changing the file extension and asked if you want to continue. 10. Click Yes and the change to the file extension will be saved. 11. Start 3D Digitizing or 3D PictureStitch and click the MiniPics icon so that the MiniPics
Viewer appears. 12. Click the button with three dots at the end of the Directory Browser box so that the
Browse For Folder dialog appears. 13. Browse to the folder where you saved your new MiniPic and click OK. 14. The MiniPics View will show your new MiniPic, along with any MiniPics you have already
created. 15. Click the MiniPic and it will be used in the picture.
Creating Embroideries
D008 The size of my embroidery in the 3D Create Stitches dialog box is bigger than the height or width I entered
The design size is set according to the distance between the two outermost control points of the design. The stitches created from the design may go beyond these control points, so the size of the actual embroidery may exceed the height or width specified for the design size.
D009 When I Create Stitches one of my fill areas doesn't fill completely with stitches
Try changing the angle of orientation. Even one degree can be enough to allow the artificial intelligence of the program to fill the object. Another possibility is to move the start point slightly.
D020 My computer takes a long time to draw the stitches when I do 3D Create Stitches
This may happen on older, relatively slow computers. As an alternative, use View, Create Stitches.
D027 Error "Cannot create stitches."This error will occur if you attempt to use 3D Create Stitches or Create Stitches before you have placed any objects in your design. The minimum requirement is one object of any type.
D028 Error "Fill object is too complicated."Appears if a QuickStitch™ or FreeHand™ fill area is too complex for the stitch generation functions. Try changing the angle by as little as one degree. This often lets the shape fill correctly. Another option is to try moving the start point of the fill area.
Creating Stitches
D002 Error "Unable to find start point inside fill object. Re-edit"When a QuickStitch™ Fill is created it is given a start point inside the fill area. If the area is very small or thin, the program may be unable to Create Stitches because it cannot find the
FAQ Lists for Husqvarna Viking 3D Software Page 70

start point. Try clicking on the area and moving the first point. This error sometimes appears after resizing a design or using other edit features. It does not prevent any other stitches from being generated so if the area is very small then its effect on the finished design may not be noticeable. Try a test stitch out to see if your design is affected by not having the area.
D020 My computer takes a long time to draw the stitches when I do 3D Create Stitches
This may happen on older, relatively slow computers. As an alternative, use View, Create Stitches.
D027 Error "Cannot create stitches."This error will occur if you attempt to use 3D Create Stitches or Create Stitches before you have placed any objects in your design. The minimum requirement is one object of any type.
D028 Error "Fill object is too complicated."Appears if a QuickStitch™ or FreeHand™ fill area is too complex for the stitch generation functions. Try changing the angle by as little as one degree. This often lets the shape fill correctly. Another option is to try moving the start point of the fill area.
D062 The motif fill or motif line in 3D Create Stitches does not match the Create window
When you compare the motif fill pattern or motif line in 3D Create Stitches to on the Create window, you may notice that the pattern is repeated a different number of times or that the motifs appear to be a different size. This is because the Create window shows a representation of the motifs only, whereas 3D Create Stitches shows the real stitches that have been created according to the selected design size. Use 3D Create Stitches regularly to see how your finished design will stitch out.
D074 My printout doesn’t show the embroideryThe embroidery will usually be printed with the center of the embroidery at the center of the printout. If the design area command was not used at the beginning of the digitizing process then it is possible that the embroidery may be printed off the page.
Editing Designs
D007 If I try to move the start point of my Design File, there seems to be an extra point after the first Color command
When the initial Jump Stitch or Single Stitch was digitized, its start and end points were both placed by clicking the mouse, rather than clicking and dragging. To solve, click on the extra object and Delete it.
D014 I am starting a new Design and can't change the first colorThe first color can only be changed in the Edit window. Go to the Edit Window and click the first color in the color palette, then select the color you want to start with. Alternatively, simply mark out your Design Area and add a Color Change command. Then when you come to
FAQ Lists for Husqvarna Viking 3D Software Page 71

stitch out your design simply ignore the first color as it is entirely composed of jump stitches and has no effect on the design.
D015 I have finished Inserting new objects, but I can't get back to the end of the Design File
Click the Insert Object icon again to deselect it and complete the insertion. A Jump Stitch is placed from where the new objects end to their insertion point.
D016 I am Inserting new objects but they have been added at the end of the design
If you switch to the Edit or Picture window while you are in Insert then Insert will be turned off and a Jump Stitch will be inserted to jump back to the next point in the design. When you return to the Create window and create objects then you will Add them to the end of the design. You must reselect your Insert point and select Insert Objects again. The Status Bar in the Create window shows whether you are using Add or Insert.
D017 I am Inserting new objects but they are using the last thread color I selected, instead of the thread color that they should have, at the place where I am inserting
This is a temporary effect that lasts only until you have finished inserting, that is when you switch back to Add or go to the Edit or Picture window. If you insert a Color Change then the objects inserted after the Color Change will use the new color as usual. The objects before the Color Change will revert back to the correct color when you switch back to Add.
D018 I can't see or edit a point under a Color Change or Stop commandYou can turn off the markers for Color Change and Stop commands. If you turn the markers off then you can see and select the point underneath. Turn off the markers by un-checking the Color or Stop Markers option in Screen Preferences.
D036 The full list of Motifs is not available when I try to edit Motif Fill/Line Properties on my Windows XP computer.
This happens on Windows XP computers that do not have Service Pack 1 installed. To install Service Pack 1 1. Start Internet Explorer while connected to the internet. 2. Click Tools, Windows Update. The Windows Update page will appear. There may be
some delay while the update software itself is updated. Check for updates, then follow the steps to install Windows XP Service Pack 1 from the Critical Updates.
Installing Windows XP Service Pack 1 will also fix many well known security issues in Windows XP.
D063 I have inserted a new point and moved an outline but there is still an outline in the old position
Some tools in the Create window create more than one outline at a time, such as, Double and Quadruple Trace and FreeHand™ Fill + Border. For example, Quadruple Trace puts four running stitches directly on top of each other. This means that if you want to add and move a new point to change a Quadruple Trace then you will have to do so four times, once
FAQ Lists for Husqvarna Viking 3D Software Page 72

for each of the four lines of running stitch. The same idea applies to an area with a border around it, that is, you will have to change the area and border separately.
D064 I have pasted a block but it is not the original colorA color change is only copied when it is part of the selected block. If you paste a block that does not start with a color change then it will use the color that is active at the point where the block is pasted. If you want to preserve the color make sure that you copy the relevant color change, or add a new color change in the desired color before pasting the block.
D065 The Delete key does not do anything when I have a block of objects selected
The Delete key is used to delete individual objects in the Edit window. However, you can remove a block or group of objects with the Cut command.
D066 I lose my selected block when I move the Start or End slider barThis happens because you could move the slider bar so that part of the selected block would be hidden. This is avoided by automatically deselecting the block.
D067 I did not select all the objects I wanted with Box, Polygon or Freehand Select
Objects must be fully enclosed by the selection line to be selected as part of a block. If even the smallest part of an object is outside the line then it will not be selected.
D068 When I use Insert Designs, the inserted designs seem very smallDesigns elements you add with Insert Designs are initially added to your design at a reduced size in the top left corner of your design. This is to make sure that any inserted design will fit inside the design you are working on. You can freely resize and move an inserted design, which is initially selected as a block when it is inserted. Remember to hold down the Ctrl key when resizing if you want to keep the proportions of the block.
D069 When I use Insert Embroideries, the inserted embroideries seem very smallDesigns elements you add with Insert Embroideries are initially added to your design at a reduced size in the top left corner of your design. This is to make sure that any inserted embroidery will fit inside the design you are working on. You can freely resize and move an inserted embroidery, which is initially selected as a block when it is inserted. Remember to hold down the Ctrl key when resizing if you want to keep the proportions of the block.
D070 I have created satin Border with QuickTrace Constant-Width Satin Trace but I can't change the width of it all at once
QuickTrace Constant-Width Satin Trace will potentially create multiple satin borders, connected by running stitches. The number of separate satin borders will depend on the complexity of the outline. After the satin borders have been created they are then treated as individual objects. You should, therefore, ensure that you select the correct Width with the Quick Border setting in Borders Preferences before you use QuickTrace Constant-Width Satin Trace.
FAQ Lists for Husqvarna Viking 3D Software Page 73

D071 Color Tolerance does not show me all the lines that will be traced by a QuickTrace function
The dashed line used by Color Tolerance only shows the outside of the area that is selected by the current Color Tolerance value. Simply try the QuickTrace function and if the result is not satisfactory then Undo the result and retry the trace with a higher Color Tolerance.
D072 There is no underlay under a fill areaThis will happen when you select Gradient or Multi-Gradient Density for a fill area. Underlay stitches are only generated for fill areas with Normal Density selected. This is because the underlay stitching will spoil the effect of Gradient or Multi-Gradient Density. With Normal Density selected, some fill areas with intricate outlines or complex holes may not be able to create underlay.
D073 The Gradient or Multi-Gradient Density on my fill area does not change very smoothly
If you have a fill area with a complex outline then this may cause the stitches to fill unevenly when you select Gradient or Multi-Gradient density. This is because of the way that the edge of the area interferes with the ideal spacing of the stitches. Gradient and Multi-Gradient density work best for areas with straight or smoothly curving sides. You could replace the Fill Area with a Freehand™ Fill, or edit the area to straighten the side that causes the uneven stitches.
Editing Object Properties
G008 Error "Motif database is missing or corrupt. Cannot change motif."This message usually means that the database driver is incorrectly installed. First follow the instructions in FAQ #G010 to fix this. If the message still appears, use the following procedure to repair the installation: 1. Right-click the Start button on the taskbar and select Explore from the popup menu. 2. In Explorer, browse to the folder C:\3DEmbroidery\System.
This assumes you have installed your 3D Embroidery System software in the default location of C:\3DEmbroidery. If you have installed the software in a different location, browse to the System folder at that location.
3. Delete the file named "SystemMotifs.mdb". The file name may simply be shown as "SystemMotifs".
4. Put your 3D Embroidery System software CD in your computer to re-run the installation. The installation should start automatically when you put your software CD in the computer. If this does not happen, browse to the CD with Explorer and double-click "Setup.exe" to start the installation.
5. When the choice appears, select the "Modify or remove" option and click Next. 6. In the next screen, select Repair and click Next. 7. Continue with the installation and follow the on-screen instructions. When the installation
is complete, the motifs will be restored.
Embossed Fill
D081 When I use text with special Embossed Fill color, the text does not always show up as embossed in the fill area.
FAQ Lists for Husqvarna Viking 3D Software Page 74

This can happen on some computers when ClearType is used to smooth the edges of fonts on the screen. ClearType works by blending the edges of the text to make the text appear smoother so it is easier to read. It is particularly designed for flat TFT and LCD screens. As a result, the blended edge of the text drawn on the Picture page of 3D Digitizing may not give a well defined edge for the special embossed fill color. When this happens, the edge may not show in the embossed fill area that is digitized over this area of the picture. To compensate for the effect of ClearType: 1. Place the text in a different color (other than the special green used for embossed fill). 2. Click the special green used for embossed fill to set it as the foreground color. 3. Click Flood Fill, then click inside the text characters. When you do this, you will be able to
see where ClearType changes the shade along the edges of the text. 4. Use Flood Fill to completely fill over all the shades so that the text characters are solid
areas of the special green. Alternatively, temporarily turn off ClearType as follows: 1. Right-click anywhere on the Windows desktop background and a menu will appear. 2. Click Properties on the menu and the Display Properties dialog will appear. 3. Click the Appearance tab. 4. Click the Effects button, and the Effects dialog box will appear. 5. Click the check box for "Use the following method to smooth edges of screen fonts" so
that it is deselected. 6. Click OK to close the Effects dialog, then click OK to close the Display Properties
properties dialog. 7. In 3D Digitizing, place the desired text in the special green color. 8. Repeat the steps to see the Effects dialog, then click the check box for "Use the following
method to smooth edges of screen fonts" so that it is selected again. 9. Click OK to close the Effects dialog, then click OK to close the Display Properties
properties dialog.
Error Messages
B618 Error: "Please select a valid thread."This message appears if you attempt to click OK in the Color Selection dialog box when MyThreads is selected as the thread range and MyThreads is empty. To prevent this message appearing again, use Thread Manager in 3D Configure to add at least one thread to MyThreads.
D002 Error "Unable to find start point inside fill object. Re-edit"When a QuickStitch™ Fill is created it is given a start point inside the fill area. If the area is very small or thin, the program may be unable to Create Stitches because it cannot find the start point. Try clicking on the area and moving the first point. This error sometimes appears after resizing a design or using other edit features. It does not prevent any other stitches from being generated so if the area is very small then its effect on the finished design may not be noticeable. Try a test stitch out to see if your design is affected by not having the area.
G007 Error "Thread range is corrupt or missing. Cannot change thread. Reinstall the thread database."
This message usually means that the database driver is incorrectly installed. First follow the instructions in FAQ #G010 to fix this.
FAQ Lists for Husqvarna Viking 3D Software Page 75

If the message still appears, use the following procedure to repair the installation: 1. Right-click the Start button on the taskbar and select Explore from the popup menu. 2. In Explorer, browse to the folder C:\3DEmbroidery\System.
This assumes you have installed your 3D Embroidery System software in the default location of C:\3DEmbroidery. If you have installed the software in a different location, browse to the System folder at that location.
3. Delete the files named "MyThreads.mdb" and "ThreadDataBase.mdb". The file names may simply be shown as "MyThreads" and "ThreadDataBase".
4. Put your 3D Embroidery System software CD in your computer to re-run the installation. The installation should start automatically when you put your software CD in the computer. If this does not happen, browse to the CD with Explorer and double-click "Setup.exe" to start the installation.
5. When the choice appears, select the "Modify or remove" option and click Next. 6. In the next screen, select Repair and click Next. 7. Continue with the installation and follow the on-screen instructions. When the installation
is complete, the MyThreads and standard thread databases will be restored to their original installation state.
If you had previously backed up your MyThreads database, you can now use the Restore option in Thread Manager to restore your MyThreads database. See the on-line help in Thread Manager for more information.
G008 Error "Motif database is missing or corrupt. Cannot change motif."This message usually means that the database driver is incorrectly installed. First follow the instructions in FAQ #G010 to fix this. If the message still appears, use the following procedure to repair the installation: 1. Right-click the Start button on the taskbar and select Explore from the popup menu. 2. In Explorer, browse to the folder C:\3DEmbroidery\System.
This assumes you have installed your 3D Embroidery System software in the default location of C:\3DEmbroidery. If you have installed the software in a different location, browse to the System folder at that location.
3. Delete the file named "SystemMotifs.mdb". The file name may simply be shown as "SystemMotifs".
4. Put your 3D Embroidery System software CD in your computer to re-run the installation. The installation should start automatically when you put your software CD in the computer. If this does not happen, browse to the CD with Explorer and double-click "Setup.exe" to start the installation.
5. When the choice appears, select the "Modify or remove" option and click Next. 6. In the next screen, select Repair and click Next. 7. Continue with the installation and follow the on-screen instructions. When the installation
is complete, the motifs will be restored.
G009 Error "Unable to locate Myfills.mdb."This message usually means that the database driver is incorrectly installed. First follow the instructions in FAQ #G010 to fix this. If the message still appears and you had previously backed up your MyFills, use the Restore MyFills option in 3D Digitizing to restore your MyFills database. See the on-line help in 3D Digitizing for more information. If the message still appears, use the following procedure to repair the installation: 1. Right-click the Start button on the taskbar and select Explore from the popup menu.
FAQ Lists for Husqvarna Viking 3D Software Page 76

2. In Explorer, browse to the folder C:\3DEmbroidery\System. This assumes you have installed your 3D Embroidery System software in the default location of C:\3DEmbroidery. If you have installed the software in a different location, browse to the System folder at that location.
3. Delete the file named "MyFills.mdb". The file name may simply be shown as "MyFills".
4. Put your 3D Embroidery System software CD in your computer to re-run the installation. The installation should start automatically when you put your software CD in the computer. If this does not happen, browse to the CD with Explorer and double-click "Setup.exe" to start the installation.
5. When the choice appears, select the "Modify or remove" option and click Next. 6. In the next screen, select Repair and click Next. 7. Continue with the installation and follow the on-screen instructions. When the installation is complete, the MyFills database will be restored to its original installation state. This means that the MyFills database will be empty. If you had any MyFills, you will need to import them again.
G010 How do I fix the database driver used by my 3D Embroidery System software?
Database drivers are normally found installed on most computers – they are commonly installed as part of the installation of Microsoft® Office or as an upgrade of key components of the operating system. Key components of the 3D Embroidery System need to be able to use these drivers. Therefore, any difficulties in using these drivers may affect the functionality of certain features of the 3D Embroidery System. Examples include changing a thread color in any module and/or Motif Fill/Line properties in 3D Digitizing. If you have Windows® XP with Service Pack 2 installed, use the Database Driver Fix described below. Otherwise, install the drivers manually as follows: Installation of the Database files 1. Insert the 3D Embroidery System CD. 2. Cancel the installation screen if it appears. 3. Use Windows® Explorer to browse to the D:\Technical folder – where D:\ is the name of
your CD or DVD drive. 4. Double click on the Database Drivers folder. 5. Double click on the Jet 4 folder. 6. Double click on the folder that is for your operating system. 7. Double click on the file to start the installation of the Jet 4 Service Pack 8 files. This
should take a few moments for the files to be installed. 8. After the installation is complete, browse to the D:\Technical\Database Drivers\MDAC 2.8
folder. 9. Double click on the MDAC_TYP.exe file. The Microsoft Data Access Components 2.8
Setup dialog box will appear. 10. Select the option “I accept all the terms of the preceding license agreement”. 11. Click on the Next button. 12. Click on the Finish button when it appears. This will start the installation process for the
MDAC 2.8 files. 13. After the MDAC 2.8 installation is complete, reboot your computer and continue to use
your 3D Embroidery System. 14. If you are still having difficulties, use the Database Driver Fix that follows. Database Driver Fix
FAQ Lists for Husqvarna Viking 3D Software Page 77

1. Insert the 3D Embroidery System CD. 2. Cancel the installation screen if it appears. 3. Use Windows® Explorer to browse to the D:\Technical folder – where D:\ is the name of
your CD or DVD drive. 4. Double click on the Database Drivers folder. 5. Double click on the MSAccessDbFixer file (this may be shown with a .exe extension). A
window will appear briefly on the screen. 6. Continue to use your 3D Embroidery System.
Fill Areas using MyFills
D019 The fill or MyFill pattern in 3D Create Stitches does not match the Create window
When you compare the fill pattern in 3D Create Stitches to the Create window, you may notice that the pattern is repeated a different number of times. This is because the Create window shows a representation of the pattern only, whereas 3D Create Stitches shows the real stitches that have been created according to the selected design size. Use 3D Create Stitches regularly to see how your finished design will stitch out.
D058 I have loaded a design that uses a MyFill pattern, but the fill area is showing a plain pattern
This will happen if you delete a pattern from your MyFill database and then load a design that uses the pattern. The pattern will use system pattern 3 instead of the deleted MyFill pattern. Either import the deleted pattern picture again, then select it in the MyPatterns tab of Fill Properties, or choose a different pattern.
D059 I have a design from a friend and the MyFill pattern for a fill area is different on my computer
When you have a design from somebody else that contains a fill area with a MyFill pattern, it is likely that their MyFill database will have different patterns to your MyFill database. You must obtain the exported MyFill pattern and import it into your MyFill database, then select the correct pattern in the MyPatterns tab of Fill Properties.
D060 Stepping through the pages of MyFill patterns is very slow on my computerThis may happen on slower computers if you have created a lot of very large MyFill patterns, and also if you have created and then deleted a lot of MyFill patterns. It may help if you backup and then restore the MyFills database using the Backup MyFills and Restore MyFills options on the Import menu of the Edit window. When you restored MyFills, the database size will be optimized which may help improve the speed for selecting MyFills.
G009 Error "Unable to locate Myfills.mdb."This message usually means that the database driver is incorrectly installed. First follow the instructions in FAQ #G010 to fix this. If the message still appears and you had previously backed up your MyFills, use the Restore MyFills option in 3D Digitizing to restore your MyFills database. See the on-line help in 3D Digitizing for more information. If the message still appears, use the following procedure to repair the installation:
FAQ Lists for Husqvarna Viking 3D Software Page 78

1. Right-click the Start button on the taskbar and select Explore from the popup menu. 2. In Explorer, browse to the folder C:\3DEmbroidery\System.
This assumes you have installed your 3D Embroidery System software in the default location of C:\3DEmbroidery. If you have installed the software in a different location, browse to the System folder at that location.
3. Delete the file named "MyFills.mdb". The file name may simply be shown as "MyFills".
4. Put your 3D Embroidery System software CD in your computer to re-run the installation. The installation should start automatically when you put your software CD in the computer. If this does not happen, browse to the CD with Explorer and double-click "Setup.exe" to start the installation.
5. When the choice appears, select the "Modify or remove" option and click Next. 6. In the next screen, select Repair and click Next. 7. Continue with the installation and follow the on-screen instructions. When the installation is complete, the MyFills database will be restored to its original installation state. This means that the MyFills database will be empty. If you had any MyFills, you will need to import them again.
FreeHand™ Fill Areas
D009 When I Create Stitches one of my fill areas doesn't fill completely with stitches
Try changing the angle of orientation. Even one degree can be enough to allow the artificial intelligence of the program to fill the object. Another possibility is to move the start point slightly.
D011 How do I change the color of the border of my FreeHand™ or QuickStitch™ fill area?
To change the color of the border, create the fill area using QuickStitch™ Fill + Border, QuickStitch™ Fill + AutoHole + Border, QuickStitch™ Fill + Border or FreeHand™ Fill + Border. Both the fill area and the border will use the current thread color. Go to the Edit window and you will see the current color three times in the color palette on the right, once for the fill, once for the border and once in case you wish to change the following color. Click the second square on the palette that sets the border color and choose the required thread color.
D019 The fill or MyFill pattern in 3D Create Stitches does not match the Create window
When you compare the fill pattern in 3D Create Stitches to the Create window, you may notice that the pattern is repeated a different number of times. This is because the Create window shows a representation of the pattern only, whereas 3D Create Stitches shows the real stitches that have been created according to the selected design size. Use 3D Create Stitches regularly to see how your finished design will stitch out.
D081 When I use text with special Embossed Fill color, the text does not always show up as embossed in the fill area.
This can happen on some computers when ClearType is used to smooth the edges of fonts on the screen. ClearType works by blending the edges of the text to make the text appear smoother so it is easier to read. It is particularly designed for flat TFT and LCD screens. As a
FAQ Lists for Husqvarna Viking 3D Software Page 79

result, the blended edge of the text drawn on the Picture page of 3D Digitizing may not give a well defined edge for the special embossed fill color. When this happens, the edge may not show in the embossed fill area that is digitized over this area of the picture. To compensate for the effect of ClearType: 1. Place the text in a different color (other than the special green used for embossed fill). 2. Click the special green used for embossed fill to set it as the foreground color. 3. Click Flood Fill, then click inside the text characters. When you do this, you will be able to
see where ClearType changes the shade along the edges of the text. 4. Use Flood Fill to completely fill over all the shades so that the text characters are solid
areas of the special green. Alternatively, temporarily turn off ClearType as follows: 1. Right-click anywhere on the Windows desktop background and a menu will appear. 2. Click Properties on the menu and the Display Properties dialog will appear. 3. Click the Appearance tab. 4. Click the Effects button, and the Effects dialog box will appear. 5. Click the check box for "Use the following method to smooth edges of screen fonts" so
that it is deselected. 6. Click OK to close the Effects dialog, then click OK to close the Display Properties
properties dialog. 7. In 3D Digitizing, place the desired text in the special green color. 8. Repeat the steps to see the Effects dialog, then click the check box for "Use the following
method to smooth edges of screen fonts" so that it is selected again. 9. Click OK to close the Effects dialog, then click OK to close the Display Properties
properties dialog.
FreeHand™ Motif Fill Areas
D061 When I use motif fill areas, the design takes a long time to appear on the Create window
On slower computers, large or complex motif fill areas may take some time to draw in the Create window, particularly if there are holes in the area. This may be noticable when you create new motif fill areas and when you return to the Create window from the Edit or Picture window or another 3D Embroidery System module.
D062 The motif fill or motif line in 3D Create Stitches does not match the Create window
When you compare the motif fill pattern or motif line in 3D Create Stitches to on the Create window, you may notice that the pattern is repeated a different number of times or that the motifs appear to be a different size. This is because the Create window shows a representation of the motifs only, whereas 3D Create Stitches shows the real stitches that have been created according to the selected design size. Use 3D Create Stitches regularly to see how your finished design will stitch out.
General
G001 General difficulties with hardware and softwareTo try to determine the cause of any odd difficulties with the 3D Embroidery System, the best method is to reboot the computer in safe mode. If the problem is then solved, you know that some clash of hardware and/or software such as device drivers is to blame. You can then
FAQ Lists for Husqvarna Viking 3D Software Page 80

obtain more help from your computer dealer to analyze the cause and reconfigure your computer if necessary. To start Windows in Safe Mode 1. Close all programs. 2. Click Start, and then click Shut Down or Turn Off Computer, whichever is shown. 3. Click Restart. If necessary, click OK to confirm. 4. Your computer will shut down and restart. 5. As your computer restarts, press and hold the F8 key until a menu of windows startup
options appears. 6. Use the up and down arrow keys to highlight Safe mode, and then press ENTER. When you hold down the F8 key, your computer may beep rapidly and report keyboard errors as it restarts. Release the F8 key briefly to skip any errors and press F8 again until you have the Startup Menu on your screen.
Importing Embroideries
D056 Some of the satin columns in my imported or inserted embroidery are now fill areas
Some wide areas of satin may be imported as fill areas, depending on their size in the embroidery. This is because any area that is very wide is assumed to be a fill area. Also, all satin columns that have a fill pattern will be imported as fill areas.
Inserting Characters
D044 Error "Cannot open Font File."This message appears if the font that you have selected is not available. The most likely reason is that it is already open in the optional 3D Font Digitizing module. Close 3D Font Digitizing, then try again. This could also happen if you opened 3D Digitizing, then accidentally moved or deleted the font from the relevant category folder in C:\3DEmbroidery\System\Fonts. Close 3D Digitizing, make sure the file is in the folder, then try again.
D045 Error "Font file is corrupt."This message appears when trying to select a character if the font is corrupt. Reinstall the font.
Inserting Embroideries
D056 Some of the satin columns in my imported or inserted embroidery are now fill areas
Some wide areas of satin may be imported as fill areas, depending on their size in the embroidery. This is because any area that is very wide is assumed to be a fill area. Also, all satin columns that have a fill pattern will be imported as fill areas.
Installation and CD
G601 Whenever I insert my CD it asks if I want to uninstall or modify my software
FAQ Lists for Husqvarna Viking 3D Software Page 81

All 3D Embroidery System Software has an automatic installation whenever the CD is inserted. The CD detected your software was already installed so you have the options to uninstall the software or modify the installation. Simply click 'Cancel', and then 'Yes' to confirm it. Then click 'Finish' to close the installation window. When you use the CD again, you may hold down the Shift key for 30 seconds when the CD is inserted if you want to prevent the installation menu appearing.
G602 The programs are not being installed to the correct folderThe installation program will by default put the embroidery system onto drive C:. The drive letter that the embroidery system will install to is shown during the install and can be changed by the user. The drive or partition that the embroidery system is installed to will make no difference to its operation.
G603 I do not have the 3D Embroidery System logos beside each file in Windows Explorer
Your icon association is set up during installation. You will have to re-install.
Loading Designs
D051 When I load a design outline file (.can) created in a previous version of Digitizing, the shapes of some of the objects have changed
3D Digitizing places lines through the center of points that define the shapes of objects, which is different to previous versions of Digitizing. Designs will be updated when they are loaded into 3D Digitizing. This may require some editing of object outlines.
D082 Can I open design outline (.can) files into 3D Digitizing that were made in VIP Digitizing?
Yes. When a .can file from VIP Digitizing is opened in 3D Digitizing, it is automatically converted to a 3D Digitizing design. The way points are used for the object outlines has been improved in 3D Digitizing. The points will remain in the same place, but the outlines now go through all points. This means that the shapes of some areas or lines may change. Use the Edit page to make any necessary adjustments.
Loading Embroideries
G406 Error "Unrecognized file format."This message appears if the file you are attempting to load is corrupt. For example, it might have the extension .vp3, yet not be a proper Husqvarna Viking / Pfaff embroidery.
G407 Error: "Embroidery is corrupt"The embroidery is corrupt and cannot be loaded. Refer to source of this file for a solution.
G408 Error "Embroidery XY coordinates incorrect"The embroidery is corrupt and cannot be loaded. Refer to source of this file for a solution.
FAQ Lists for Husqvarna Viking 3D Software Page 82

Loading Pictures
D004 I loaded a small picture, and it has too many jagged linesAlthough the program automatically doubles the size of a picture if its height and width are less than 500 pixels, this may still produce jagged lines. For a smoother effect, rescan the picture.
D032 When I view some files before opening them in the preview window of the Open dialog box they appear blue
Files saved in Jpg format from Adobe® Photoshop® with non-image data may appear blue in the preview window. This does not affect the way they appear on the main program screen of 3D Digitizing. To avoid this, if you use Adobe® Photoshop® to save .jpg files, make sure to check the Exclude non-image data box. If you do not have access to this program and have received this type of file, open and re-save in another program such as Paint Shop Pro. This automatically removes the non-image data.
D040 Error message "Could not load picture file."This message could appear if the desired picture is not where the module expects it to be or the file you are attempting to load is corrupt. For example, it might have an extension such as .bmp or .jpg, yet not be a proper picture file.
Managing MyFills
D042 Error "Could not restore MyFills."This message appears if there is a problem accessing the MyFills database when attempting to use the Restore MyFills feature. Close your 3D Embroidery System, restart your computer and try again.
D043 "Warning - restoring MyFills will overwrite your existing MyFills."This message appears when you use the Restore MyFills feature to restore a previously backed up copy of your MyFills database. If you wish to continue and restore the selected MyFills backup, click OK. Otherwise click Cancel.
G009 Error "Unable to locate Myfills.mdb."This message usually means that the database driver is incorrectly installed. First follow the instructions in FAQ #G010 to fix this. If the message still appears and you had previously backed up your MyFills, use the Restore MyFills option in 3D Digitizing to restore your MyFills database. See the on-line help in 3D Digitizing for more information. If the message still appears, use the following procedure to repair the installation: 1. Right-click the Start button on the taskbar and select Explore from the popup menu. 2. In Explorer, browse to the folder C:\3DEmbroidery\System.
This assumes you have installed your 3D Embroidery System software in the default location of C:\3DEmbroidery. If you have installed the software in a different location, browse to the System folder at that location.
FAQ Lists for Husqvarna Viking 3D Software Page 83

3. Delete the file named "MyFills.mdb". The file name may simply be shown as "MyFills".
4. Put your 3D Embroidery System software CD in your computer to re-run the installation. The installation should start automatically when you put your software CD in the computer. If this does not happen, browse to the CD with Explorer and double-click "Setup.exe" to start the installation.
5. When the choice appears, select the "Modify or remove" option and click Next. 6. In the next screen, select Repair and click Next. 7. Continue with the installation and follow the on-screen instructions. When the installation is complete, the MyFills database will be restored to its original installation state. This means that the MyFills database will be empty. If you had any MyFills, you will need to import them again.
G010 How do I fix the database driver used by my 3D Embroidery System software?
Database drivers are normally found installed on most computers – they are commonly installed as part of the installation of Microsoft® Office or as an upgrade of key components of the operating system. Key components of the 3D Embroidery System need to be able to use these drivers. Therefore, any difficulties in using these drivers may affect the functionality of certain features of the 3D Embroidery System. Examples include changing a thread color in any module and/or Motif Fill/Line properties in 3D Digitizing. If you have Windows® XP with Service Pack 2 installed, use the Database Driver Fix described below. Otherwise, install the drivers manually as follows: Installation of the Database files 1. Insert the 3D Embroidery System CD. 2. Cancel the installation screen if it appears. 3. Use Windows® Explorer to browse to the D:\Technical folder – where D:\ is the name of
your CD or DVD drive. 4. Double click on the Database Drivers folder. 5. Double click on the Jet 4 folder. 6. Double click on the folder that is for your operating system. 7. Double click on the file to start the installation of the Jet 4 Service Pack 8 files. This
should take a few moments for the files to be installed. 8. After the installation is complete, browse to the D:\Technical\Database Drivers\MDAC 2.8
folder. 9. Double click on the MDAC_TYP.exe file. The Microsoft Data Access Components 2.8
Setup dialog box will appear. 10. Select the option “I accept all the terms of the preceding license agreement”. 11. Click on the Next button. 12. Click on the Finish button when it appears. This will start the installation process for the
MDAC 2.8 files. 13. After the MDAC 2.8 installation is complete, reboot your computer and continue to use
your 3D Embroidery System. 14. If you are still having difficulties, use the Database Driver Fix that follows. Database Driver Fix 1. Insert the 3D Embroidery System CD. 2. Cancel the installation screen if it appears. 3. Use Windows® Explorer to browse to the D:\Technical folder – where D:\ is the name of
your CD or DVD drive.
FAQ Lists for Husqvarna Viking 3D Software Page 84

4. Double click on the Database Drivers folder. 5. Double click on the MSAccessDbFixer file (this may be shown with a .exe extension). A
window will appear briefly on the screen. 6. Continue to use your 3D Embroidery System.
Miscellaneous
D033 Digitizing crashes very quickly, before I can do any work, and I have a Kodak DC3400 digital camera.
This is caused by a clash with the TWAIN drivers for the Kodak DC3400. First, check the Kodak web site to ensure that you have the latest drivers for your DC3400. If problems persist, you have two options that will allow Digitizing to work correctly: • Remove the Kodak DC3400 software from your system • This is the preferred option, especially if you have a second PC available that you can
use for downloading pictures from the camera. Use the Uninstall option provided with the software.
• Rename a part of the Kodak DC3400 TWAIN driver to disable the driver • This would allow you to re-enable the driver when you wanted to download images (but
not with the Acquire option in Digitizing). You would need to disable the driver again to be able to use Digitizing. See the instructions below.
How to temporarily disable the Kodak DC3400 TWAIN driver 1. Start Windows Explorer and browse to your Windows folder (usually C:\Windows or
C:\WinNT). (In some cases you will be warned about viewing files in the Windows folder. Use the option that allows you to continue.)
2. In the Windows folder, find the folder named "twain_32" and browse its contents. 3. Browse the folder named "DC3400" and you will see a file called "TwainDS.ds". 4. Right-click on "TwainDS.ds" and rename it as "TwainDS.xds". Putting this extra "x" in the
file name extension will cause the TWAIN system to ignore this device, which will allow Digitizing to run correctly.
5. If you need to use the TWAIN driver for the Kodak DC3400 with other software, simply change the file name back to "TwainDS.ds" until you are ready to use Digitizing again.
G411 Error "Not enough memory to perform operation."This message will appear if system resources are low. Close other programs and try again. If this does not work, try restarting your computer.
G601 Whenever I insert my CD it asks if I want to uninstall or modify my softwareAll 3D Embroidery System Software has an automatic installation whenever the CD is inserted. The CD detected your software was already installed so you have the options to uninstall the software or modify the installation. Simply click 'Cancel', and then 'Yes' to confirm it. Then click 'Finish' to close the installation window. When you use the CD again, you may hold down the Shift key for 30 seconds when the CD is inserted if you want to prevent the installation menu appearing.
G603 I do not have the 3D Embroidery System logos beside each file in Windows Explorer
Your icon association is set up during installation. You will have to re-install.
FAQ Lists for Husqvarna Viking 3D Software Page 85

Motif Fill Areas
D025 Error "Unable to find start point. Retry using a different position."When you create a QuickStitch™ Fill area, the area is assessed from the point where you clicked. This error will occur when the fill area is complicated and the fill function might not fill the area correctly. Click in a different part of the area to try again. If the error still occurs then try simplifying or splitting up the area in the Picture window.
D036 The full list of Motifs is not available when I try to edit Motif Fill/Line Properties on my Windows XP computer.
This happens on Windows XP computers that do not have Service Pack 1 installed. To install Service Pack 1 1. Start Internet Explorer while connected to the internet. 2. Click Tools, Windows Update. The Windows Update page will appear. There may be
some delay while the update software itself is updated. Check for updates, then follow the steps to install Windows XP Service Pack 1 from the Critical Updates.
Installing Windows XP Service Pack 1 will also fix many well known security issues in Windows XP.
G008 Error "Motif database is missing or corrupt. Cannot change motif."This message usually means that the database driver is incorrectly installed. First follow the instructions in FAQ #G010 to fix this. If the message still appears, use the following procedure to repair the installation: 1. Right-click the Start button on the taskbar and select Explore from the popup menu. 2. In Explorer, browse to the folder C:\3DEmbroidery\System.
This assumes you have installed your 3D Embroidery System software in the default location of C:\3DEmbroidery. If you have installed the software in a different location, browse to the System folder at that location.
3. Delete the file named "SystemMotifs.mdb". The file name may simply be shown as "SystemMotifs".
4. Put your 3D Embroidery System software CD in your computer to re-run the installation. The installation should start automatically when you put your software CD in the computer. If this does not happen, browse to the CD with Explorer and double-click "Setup.exe" to start the installation.
5. When the choice appears, select the "Modify or remove" option and click Next. 6. In the next screen, select Repair and click Next. 7. Continue with the installation and follow the on-screen instructions. When the installation
is complete, the motifs will be restored.
G010 How do I fix the database driver used by my 3D Embroidery System software?
Database drivers are normally found installed on most computers – they are commonly installed as part of the installation of Microsoft® Office or as an upgrade of key components of the operating system. Key components of the 3D Embroidery System need to be able to use these drivers. Therefore, any difficulties in using these drivers may affect the functionality of certain
FAQ Lists for Husqvarna Viking 3D Software Page 86

features of the 3D Embroidery System. Examples include changing a thread color in any module and/or Motif Fill/Line properties in 3D Digitizing. If you have Windows® XP with Service Pack 2 installed, use the Database Driver Fix described below. Otherwise, install the drivers manually as follows: Installation of the Database files 1. Insert the 3D Embroidery System CD. 2. Cancel the installation screen if it appears. 3. Use Windows® Explorer to browse to the D:\Technical folder – where D:\ is the name of
your CD or DVD drive. 4. Double click on the Database Drivers folder. 5. Double click on the Jet 4 folder. 6. Double click on the folder that is for your operating system. 7. Double click on the file to start the installation of the Jet 4 Service Pack 8 files. This
should take a few moments for the files to be installed. 8. After the installation is complete, browse to the D:\Technical\Database Drivers\MDAC 2.8
folder. 9. Double click on the MDAC_TYP.exe file. The Microsoft Data Access Components 2.8
Setup dialog box will appear. 10. Select the option “I accept all the terms of the preceding license agreement”. 11. Click on the Next button. 12. Click on the Finish button when it appears. This will start the installation process for the
MDAC 2.8 files. 13. After the MDAC 2.8 installation is complete, reboot your computer and continue to use
your 3D Embroidery System. 14. If you are still having difficulties, use the Database Driver Fix that follows. Database Driver Fix 1. Insert the 3D Embroidery System CD. 2. Cancel the installation screen if it appears. 3. Use Windows® Explorer to browse to the D:\Technical folder – where D:\ is the name of
your CD or DVD drive. 4. Double click on the Database Drivers folder. 5. Double click on the MSAccessDbFixer file (this may be shown with a .exe extension). A
window will appear briefly on the screen. 6. Continue to use your 3D Embroidery System.
Motif Line
D036 The full list of Motifs is not available when I try to edit Motif Fill/Line Properties on my Windows XP computer.
This happens on Windows XP computers that do not have Service Pack 1 installed. To install Service Pack 1 1. Start Internet Explorer while connected to the internet. 2. Click Tools, Windows Update. The Windows Update page will appear. There may be
some delay while the update software itself is updated. Check for updates, then follow the steps to install Windows XP Service Pack 1 from the Critical Updates.
Installing Windows XP Service Pack 1 will also fix many well known security issues in Windows XP.
G008 Error "Motif database is missing or corrupt. Cannot change motif."
FAQ Lists for Husqvarna Viking 3D Software Page 87

This message usually means that the database driver is incorrectly installed. First follow the instructions in FAQ #G010 to fix this. If the message still appears, use the following procedure to repair the installation: 1. Right-click the Start button on the taskbar and select Explore from the popup menu. 2. In Explorer, browse to the folder C:\3DEmbroidery\System.
This assumes you have installed your 3D Embroidery System software in the default location of C:\3DEmbroidery. If you have installed the software in a different location, browse to the System folder at that location.
3. Delete the file named "SystemMotifs.mdb". The file name may simply be shown as "SystemMotifs".
4. Put your 3D Embroidery System software CD in your computer to re-run the installation. The installation should start automatically when you put your software CD in the computer. If this does not happen, browse to the CD with Explorer and double-click "Setup.exe" to start the installation.
5. When the choice appears, select the "Modify or remove" option and click Next. 6. In the next screen, select Repair and click Next. 7. Continue with the installation and follow the on-screen instructions. When the installation
is complete, the motifs will be restored.
G010 How do I fix the database driver used by my 3D Embroidery System software?
Database drivers are normally found installed on most computers – they are commonly installed as part of the installation of Microsoft® Office or as an upgrade of key components of the operating system. Key components of the 3D Embroidery System need to be able to use these drivers. Therefore, any difficulties in using these drivers may affect the functionality of certain features of the 3D Embroidery System. Examples include changing a thread color in any module and/or Motif Fill/Line properties in 3D Digitizing. If you have Windows® XP with Service Pack 2 installed, use the Database Driver Fix described below. Otherwise, install the drivers manually as follows: Installation of the Database files 1. Insert the 3D Embroidery System CD. 2. Cancel the installation screen if it appears. 3. Use Windows® Explorer to browse to the D:\Technical folder – where D:\ is the name of
your CD or DVD drive. 4. Double click on the Database Drivers folder. 5. Double click on the Jet 4 folder. 6. Double click on the folder that is for your operating system. 7. Double click on the file to start the installation of the Jet 4 Service Pack 8 files. This
should take a few moments for the files to be installed. 8. After the installation is complete, browse to the D:\Technical\Database Drivers\MDAC 2.8
folder. 9. Double click on the MDAC_TYP.exe file. The Microsoft Data Access Components 2.8
Setup dialog box will appear. 10. Select the option “I accept all the terms of the preceding license agreement”. 11. Click on the Next button. 12. Click on the Finish button when it appears. This will start the installation process for the
MDAC 2.8 files. 13. After the MDAC 2.8 installation is complete, reboot your computer and continue to use
your 3D Embroidery System. 14. If you are still having difficulties, use the Database Driver Fix that follows.
FAQ Lists for Husqvarna Viking 3D Software Page 88

Database Driver Fix 1. Insert the 3D Embroidery System CD. 2. Cancel the installation screen if it appears. 3. Use Windows® Explorer to browse to the D:\Technical folder – where D:\ is the name of
your CD or DVD drive. 4. Double click on the Database Drivers folder. 5. Double click on the MSAccessDbFixer file (this may be shown with a .exe extension). A
window will appear briefly on the screen. 6. Continue to use your 3D Embroidery System.
Opening the Program
D083 Error "3D Digitizing MFC Application has encountered a problem and needs to close."
This error can appear when you attempt to start 3D Digitizing. This will happen if you have installed 3D Digitizing as an add-on, and the 3D Embroidery System software that is already installed has a later version than 3D Digitizing. If you have a CD containing 3D Embroidery System Software for version 7.2 or later, install the update for the 3D Embroidery System found in the Patch folder on the CD. If you have updated your 3D Embroidery System to version 7.2 or later using an update obtained with Smart Update, find the update you have already downloaded and run it again. If you are unable to find the update, or you are not sure if you have the latest update, use Smart Update to obtain the latest update, as described in FAQ #B008. When you run the update, you may be asked to choose between Modify, Repair and Remove. This selection appears because you have updated on a previous occasion. Choose the Repair option, and this will ensure all your 3D Embroidery System software is updated.
Optimizing Pictures for Digitizing
D075 What is the best picture size to load for digitizing over?The best size for a background picture for Digitizing is approximately 1000x1000 pixels (or greater). When using pictures significantly smaller than this 3D Digitizing will magnify it, but lines may appear jagged rather than smooth. For example, if a picture is loaded that is less than 500 pixels in both height and width it will automatically be doubled in size. The best way to produce a smooth effect is to rescan the picture.
D076 When should I crop a picture?If the picture you wish to digitize is only a small part of the picture that has been loaded, use Crop to remove the rest of the picture. Also use the Design Area command in the Create window when you start digitizing. This is suitable to select the desired area if the picture you wish to digitize is not much smaller than the picture on the screen.
D077 How can I optimize pictures for QuickStitch™?The QuickStitch™ features use defined color areas to place fill areas, motif fill areas and borders. However, the Color Tolerance function allows you to merge different color shades to change the size of this area. The filters may also be useful to create color areas. For
FAQ Lists for Husqvarna Viking 3D Software Page 89

example, use the Despeckle filter to remove small spots of color that are often found on scanned pictures. Also, some scanned or clip art pictures have thick outlines so there may be gaps between the areas that are larger than desired. Use the Outline Thinner to reduce the thickness of outlines to one pixel automatically.
D078 How can I patch gaps in pictures?If there is a gap where the same color flows into another area, the QuickStitch™ and QuickTrace functions will not work. Because gaps in a picture are often not very large, a good way to check whether a picture is suitable is to test whether the areas will flood fill and 'patch them up’ necessary. How To Use 1. Click the Picture tab at the bottom of the screen. 2. Use Flood Fill to fill an area with the foreground color. If it does not have complete
outlines, more of the picture will be flood filled than expected. 3. Click Undo. 4. Select the foreground color to be the same as the outline around the area. 5. Click Freehand Draw and select the third line thickness. 6. Zoom In to the outline to find the gaps, then draw lines to fill any gaps in the outline. 7. Select another color and test the fill again. When only the expected area is flood filled,
the picture is ready for the QuickStitch™ functions.
Picture Colors
G426 Some of the color values on the Custom tab of the Colors dialog box are not visible.
When this happens, only the Hue and Red color values are visible. The Sat (Saturation), Lum (Luminosity), Green and Blue values do not fit on the dialog box. To fix this, use Smart Update to update your 3D Embroidery System software to the latest version.
Preparing Pictures
D003 The Delete key does not seem to do anything in the Picture windowThe Delete key is not used as a shortcut in the Picture window, only in the Create and Edit windows.
D005 The background picture shows more of the picture than I want to digitize.Use the Design Area command to select the part of the picture you wish to digitize. Alternatively, in the Picture window select the part of the Picture you want with Box or Freehand Select then Crop the picture (you can only do this before you start digitizing).
D006 The background image has a thick outline so that QuickStitch™ Fill leaves gaps between color areas
Use the Outline Thinner to narrow the outline to one pixel. This will allow areas to join together better.
D013 A QuickStitch™ Border has a double layer of stitching in one section
FAQ Lists for Husqvarna Viking 3D Software Page 90

If border areas run into each other, two layers of stitching will be produced by the QuickStitch™ border functions. To avoid this, split the colors on the picture in the picture window, or another graphics package, e.g. put a visual 'end point' for each border area. Alternatively, use the FreeHand™ Satin Border function.
D023 Error "You must select an area first, before applying the crop tool."Use the Box Select feature to select an area of the Picture around which you wish to crop the background.
D024 Error "Cannot rotate - picture will be bigger than 2000 x 2000 pixels if rotated to this extent."
When rotating a picture, certain angles could make the picture larger than the maximum allowed. If this message appears, either rotate the picture to a different angle, or reduce the size of the picture, then try again.
D034 Creating MiniPics for 3D Digitizing and 3D PictureStitchBefore Starting An appropriate image editing package, such as Jasc® Paint Shop Pro, is required that will save .ras format, as well as a good knowledge of working with graphic files. About MiniPics Create Medium MiniPics at 400x400 pixels, and Small MiniPics at 250x250 pixels. The color palette can be 256 colors or more. White is treated as transparent when you load a MiniPic, so anything underneath the white part of a MiniPic will show through. If you want an area to be white in your MiniPic, use a "false white" such as very pale yellow, then change it to white with the Flood Fill tool. It is recommended that you create a new folder for saving your own MinPics, for instance: C:\3DEmbroidery\MyDesigns\MyMiniPics. How To Make a MiniPic 1. Use an existing picture:Open an existing image; Either crop around the required area
or resize the whole picture to the size of a Medium or Small MiniPic. 2. Or, create a new MiniPic from scratch:Start a new image and set it to the size of either
a medium (400x400 pixels) or small (250x250 pixels) MiniPic; Use the drawing tools in the graphic package to create the desired picture for the MiniPic.
3. Ensure that the colors are solid color areas. See the existing MiniPics for examples. 4. Save the file in Sun Raster Image format with the “.ras” extension. 5. Start Windows® Explorer and browse to the folder where you saved the “.ras” file. 6. Click on the file to highlight it. 7. Right-click to bring up a popup menu, and select the Rename option from the menu. 8. Edit the file name to change the extension from “.ras” to “.axw” and press Enter. 9. You will be warned about changing the file extension and asked if you want to continue. 10. Click Yes and the change to the file extension will be saved. 11. Start 3D Digitizing or 3D PictureStitch and click the MiniPics icon so that the MiniPics
Viewer appears. 12. Click the button with three dots at the end of the Directory Browser box so that the
Browse For Folder dialog appears. 13. Browse to the folder where you saved your new MiniPic and click OK. 14. The MiniPics View will show your new MiniPic, along with any MiniPics you have already
created.
FAQ Lists for Husqvarna Viking 3D Software Page 91
15. Click the MiniPic and it will be used in the picture.
D035 Tips on using the Outline Thinner toolIt is important where you click after selecting the Outline Thinner tool. The color you click on is the color that will be thinned. So if you click on a black outline, this outline will be thinned. Alternatively if you click on an area (such as white on a black and white drawing), this area will be thinned and the outline around it will be thickened to compensate. This leaves the drawing indistinguishable from the original. The Outline Thinner tool may not work if your picture has dithering, such as a scanned image or one that has been converted from a JPEG file. These pictures have additional colored pixels that can affect the result.
D041 Error message "Not enough memory to save undo data."This message may appear if you are using a large picture and your computer's memory or hard disk space is relatively low. Close other programs and try again.
D053 I am trying to Resize an area, but nothing happens when I click the Resize icon or select Resize from the Picture menu
To resize when part of a picture is selected, simply click and drag any of the resize handles on the selection box (out to increase size, in to decrease size). When the mouse is over a resize handle on a corner of the selection box, the pointer changes from an arrow to the resize pointer.
D054 I am trying to Rotate an area, but nothing happens when I click the Rotate icon or select Rotate from the Picture menu
To rotate when part of a picture is selected, simply click and drag the round rotate handle on the middle right of the selection box. Click and drag down to rotate clockwise, up to rotate counterclockwise.
D055 The Expander did not expand all my linesThe Expander makes lines thicker around areas in the picture that match the background color. The Expander is intended for use with scanned pictures, such as line art that has been converted to monochrome and despeckled to clean it up.
D081 When I use text with special Embossed Fill color, the text does not always show up as embossed in the fill area.
This can happen on some computers when ClearType is used to smooth the edges of fonts on the screen. ClearType works by blending the edges of the text to make the text appear smoother so it is easier to read. It is particularly designed for flat TFT and LCD screens. As a result, the blended edge of the text drawn on the Picture page of 3D Digitizing may not give a well defined edge for the special embossed fill color. When this happens, the edge may not show in the embossed fill area that is digitized over this area of the picture. To compensate for the effect of ClearType: 1. Place the text in a different color (other than the special green used for embossed fill). 2. Click the special green used for embossed fill to set it as the foreground color.
FAQ Lists for Husqvarna Viking 3D Software Page 92

3. Click Flood Fill, then click inside the text characters. When you do this, you will be able to see where ClearType changes the shade along the edges of the text.
4. Use Flood Fill to completely fill over all the shades so that the text characters are solid areas of the special green.
Alternatively, temporarily turn off ClearType as follows: 1. Right-click anywhere on the Windows desktop background and a menu will appear. 2. Click Properties on the menu and the Display Properties dialog will appear. 3. Click the Appearance tab. 4. Click the Effects button, and the Effects dialog box will appear. 5. Click the check box for "Use the following method to smooth edges of screen fonts" so
that it is deselected. 6. Click OK to close the Effects dialog, then click OK to close the Display Properties
properties dialog. 7. In 3D Digitizing, place the desired text in the special green color. 8. Repeat the steps to see the Effects dialog, then click the check box for "Use the following
method to smooth edges of screen fonts" so that it is selected again. 9. Click OK to close the Effects dialog, then click OK to close the Display Properties
properties dialog.
P002 Error "Please enter an integer between 16 and 2000."When creating a new file, the largest size available is 2000 x 2000. If you enter dimensions smaller than 16 or larger than 2000 pixels, this message will appear. Choose a different size and try again.
Printing
D074 My printout doesn’t show the embroideryThe embroidery will usually be printed with the center of the embroidery at the center of the printout. If the design area command was not used at the beginning of the digitizing process then it is possible that the embroidery may be printed off the page.
Product Information
G004 What is the price of the software, and where can I get it?Please contact your local dealer for prices and availability on all the Husqvarna Viking software. To find your local dealer see the Husqvarna Viking Dealer Locator [http://www.sew.husqvarna.se/dealers.htm]. You can always find this on the bottom bar of the Husqvarna Viking Software website.
QuickStitch™ Borders
D012 I have only selected part of the Picture with the Design Area but QuickStitch™ Fill or QuickStitch™ Border is going outside the Design Area
If you have an area of color that is both inside and outside the Design Area then QuickStitch™ Fill will fill the whole color area with stitches. Either edit the Picture with the Picture window to reduce the size of the color area, use FreeHand™ Fill to fill only the parts you want, or edit the QuickStitch™ Fill area on the Edit window so that the fill area falls inside the Design Area.
FAQ Lists for Husqvarna Viking 3D Software Page 93

D013 A QuickStitch™ Border has a double layer of stitching in one sectionIf border areas run into each other, two layers of stitching will be produced by the QuickStitch™ border functions. To avoid this, split the colors on the picture in the picture window, or another graphics package, e.g. put a visual 'end point' for each border area. Alternatively, use the FreeHand™ Satin Border function.
D031 The border shape created with QuickStitch™ Border/Running Stitch/Double Stitch/Triple Stitch/Applique when I click inside the area is not the one I want
Use Color Tolerance to preview the area that will be used. • Solid Colors. A solid color area must have well defined edges, either by having an outline
of a different color or by being enclosed by other colors. Color Tolerance will show where there are gaps in a border around an area. If the area is not sufficiently well defined, alter the image in the Picture window, or another graphics package, so that the area is enclosed.
• Stippled Colors. Stippled colors (also called 'dithered' colors) are treated the same as solid color areas.
• Graduated Colors. If Color Tolerance is switched off then you will only be able to select a small, single colored part of a graduated color. It is also easier to select a graduated color area when it is enclosed by contrasting colors.
Color Tolerance is switched on with the Color Tolerance option in Screen Preferences. Alternatively, use the relevant FreeHand™ function (FreeHand™ Border, FreeHand™ Running, FreeHand™ Double or FreeHand™ Triple).
QuickStitch™ Fill Areas
D002 Error "Unable to find start point inside fill object. Re-edit"When a QuickStitch™ Fill is created it is given a start point inside the fill area. If the area is very small or thin, the program may be unable to Create Stitches because it cannot find the start point. Try clicking on the area and moving the first point. This error sometimes appears after resizing a design or using other edit features. It does not prevent any other stitches from being generated so if the area is very small then its effect on the finished design may not be noticeable. Try a test stitch out to see if your design is affected by not having the area.
D006 The background image has a thick outline so that QuickStitch™ Fill leaves gaps between color areas
Use the Outline Thinner to narrow the outline to one pixel. This will allow areas to join together better.
D009 When I Create Stitches one of my fill areas doesn't fill completely with stitches
Try changing the angle of orientation. Even one degree can be enough to allow the artificial intelligence of the program to fill the object. Another possibility is to move the start point slightly.
FAQ Lists for Husqvarna Viking 3D Software Page 94

D010 The fill shape created with QuickStitch™ Fill when I click inside the area is not the one I want
The pictures used should have well differentiated color areas, which may be solid or stippled, to fill easily. Clip art is excellent for this purpose. If there is a gap where the same color flows into another area, the fill will not work as expected. If Color Tolerance is switched off then switch it on in Screen Preferences. Color Tolerance will then allow you to preview any area for QuickStitch™ functions, which should reveal any problems with color areas in the picture. You can then alter the picture in the Picture window. Alternatively, use the FreeHand™ Fill functions to place the Fill Area.
D011 How do I change the color of the border of my FreeHand™ or QuickStitch™ fill area?
To change the color of the border, create the fill area using QuickStitch™ Fill + Border, QuickStitch™ Fill + AutoHole + Border, QuickStitch™ Fill + Border or FreeHand™ Fill + Border. Both the fill area and the border will use the current thread color. Go to the Edit window and you will see the current color three times in the color palette on the right, once for the fill, once for the border and once in case you wish to change the following color. Click the second square on the palette that sets the border color and choose the required thread color.
D012 I have only selected part of the Picture with the Design Area but QuickStitch™ Fill or QuickStitch™ Border is going outside the Design Area
If you have an area of color that is both inside and outside the Design Area then QuickStitch™ Fill will fill the whole color area with stitches. Either edit the Picture with the Picture window to reduce the size of the color area, use FreeHand™ Fill to fill only the parts you want, or edit the QuickStitch™ Fill area on the Edit window so that the fill area falls inside the Design Area.
D019 The fill or MyFill pattern in 3D Create Stitches does not match the Create window
When you compare the fill pattern in 3D Create Stitches to the Create window, you may notice that the pattern is repeated a different number of times. This is because the Create window shows a representation of the pattern only, whereas 3D Create Stitches shows the real stitches that have been created according to the selected design size. Use 3D Create Stitches regularly to see how your finished design will stitch out.
D021 When I use QuickStitch™ Fill + AutoHole or QuickStitch™ Fill + AutoHole + Border in an area with a fine border, the fill crosses over the line
When using QuickStitch Fill + AutoHole or QuickStitch Fill + AutoHole + Border there are sometimes problems in cutting out the holes when the fill shapes and holes in the Picture have outlines that are only one pixel thick:
FAQ Lists for Husqvarna Viking 3D Software Page 95

Thin lines allow fills to 'bleed'
This is because of the ability of QuickStitch™ Fill to identify areas of imported Pictures that use stipple fill:
Close up of a stippled image
There are a number of solutions to this: 1. Use the Picture window to thicken any diagonal lines that are one pixel thick 2. Use the Flood Fill tool to change the colors inside the shapes that are causing problems:
FAQ Lists for Husqvarna Viking 3D Software Page 96

Use solid fills instead
3. Immediately after using QuickStitch Fill on your shape, use QuickStitch Hole to cut out
any holes that were missed automatically 4. Immediately after using QuickStitch™ Fill on your shape, use FreeHand Hole to cut out
any holes that were missed by placing points For more details see the program Help, page "QuickStitch Fill + AutoHole and Thin Outlines" in the Troubleshooting chapter.
D025 Error "Unable to find start point. Retry using a different position."When you create a QuickStitch™ Fill area, the area is assessed from the point where you clicked. This error will occur when the fill area is complicated and the fill function might not fill the area correctly. Click in a different part of the area to try again. If the error still occurs then try simplifying or splitting up the area in the Picture window.
D057 I have created a fill area with a hole within a hole by using QuickStitch™ Fill + AutoHole
This can happen when the main area you are filling is a graduated area selected with a high Color Tolerance value. The inner area, where the 'hole within a hole' occurs, will have been selected by the high Color Tolerance. If this happens, use Undo or delete the Fill Area, then use QuickStitch™ Fill, followed immediately by QuickStitch™ Hole to make the required holes.
D081 When I use text with special Embossed Fill color, the text does not always show up as embossed in the fill area.
This can happen on some computers when ClearType is used to smooth the edges of fonts on the screen. ClearType works by blending the edges of the text to make the text appear smoother so it is easier to read. It is particularly designed for flat TFT and LCD screens. As a result, the blended edge of the text drawn on the Picture page of 3D Digitizing may not give a well defined edge for the special embossed fill color. When this happens, the edge may not show in the embossed fill area that is digitized over this area of the picture. To compensate for the effect of ClearType: 1. Place the text in a different color (other than the special green used for embossed fill). 2. Click the special green used for embossed fill to set it as the foreground color. 3. Click Flood Fill, then click inside the text characters. When you do this, you will be able to
see where ClearType changes the shade along the edges of the text. 4. Use Flood Fill to completely fill over all the shades so that the text characters are solid
areas of the special green. Alternatively, temporarily turn off ClearType as follows:
FAQ Lists for Husqvarna Viking 3D Software Page 97

1. Right-click anywhere on the Windows desktop background and a menu will appear. 2. Click Properties on the menu and the Display Properties dialog will appear. 3. Click the Appearance tab. 4. Click the Effects button, and the Effects dialog box will appear. 5. Click the check box for "Use the following method to smooth edges of screen fonts" so
that it is deselected. 6. Click OK to close the Effects dialog, then click OK to close the Display Properties
properties dialog. 7. In 3D Digitizing, place the desired text in the special green color. 8. Repeat the steps to see the Effects dialog, then click the check box for "Use the following
method to smooth edges of screen fonts" so that it is selected again. 9. Click OK to close the Effects dialog, then click OK to close the Display Properties
properties dialog.
QuickStitch™ Motif Fill Areas
D061 When I use motif fill areas, the design takes a long time to appear on the Create window
On slower computers, large or complex motif fill areas may take some time to draw in the Create window, particularly if there are holes in the area. This may be noticable when you create new motif fill areas and when you return to the Create window from the Edit or Picture window or another 3D Embroidery System module.
D062 The motif fill or motif line in 3D Create Stitches does not match the Create window
When you compare the motif fill pattern or motif line in 3D Create Stitches to on the Create window, you may notice that the pattern is repeated a different number of times or that the motifs appear to be a different size. This is because the Create window shows a representation of the motifs only, whereas 3D Create Stitches shows the real stitches that have been created according to the selected design size. Use 3D Create Stitches regularly to see how your finished design will stitch out.
QuickTrace
D026 Error "This is not an appropriate use of this tool. Areas of the image may be too wide."
This happens when you use QuickTrace to follow an outline in the picture and then QuickTrace finds a part of the outline that is very thick. This can be caused by excessively broad outlines or by selecting too much of the picture with a high Color Tolerance value. In this case, QuickTrace does not know where to trace the outline as the problem part of the outline is more like a fill area. Use a lower Color Tolerance value, or use the editing functions in the Picture window to make the outline thinner or break up the outline so that the wide parts are isolated from the rest of the outline.
Saving Designs
D022 Error "Design File is read-only. Cannot continue."This will happen if you attempt to open a design that has been set as read-only, or is read-only because it is stored on a CD-ROM. If the design file is on your hard disk as read-only
FAQ Lists for Husqvarna Viking 3D Software Page 98

then you must change its properties in Windows® Explorer so that it is no longer read-only. For designs on CD-ROMs, use Windows® Explorer to copy them to your hard disk, then change the properties so that they are no longer read-only. (Windows® Explorer Help has information on the read-only attribute.)
D029 Error "No stitch data to save."This message appears if you try to use the Save function when there is no stitch information to save from 3D Create Stitches or Create Stitches (such as when there are only jump stitches in the design).
D046 "Filename already exists. Do you want to replace it?"This happens when you are doing a Save As on the .can design outline file and you have given the name of a file that is already there. It also happens when you are saving a stitch file from 3D Create Stitches and the file already exists. Click Yes or No as appropriate. You may have to replace a stitch file several times if you are creating stitch files to stitch out tests of your design.
D047 "Disk is write-protected. File not saved"This will happen if you try to save a file to a floppy disk that has the write-protect tab open. Either take out the floppy disk and close the write-protect tab, or use a different floppy disk.
Saving Embroideries
G402 Error: "Design too large for output file format"Certain formats are limited to the size of hoop used on their specific embroidery machine, for example .sew. If you attempt to save a file in this format that is bigger than the largest available hoop size this message would appear.
G403 I have saved my embroidery as Tajima format, but it now has more colorsIf your original embroidery had a stop command in it then this would be replaced by a color change, thus adding a color for every stop you have in your embroidery. As the Tajima file format does not have a stop command in its format, it requires the machine operator to manually enter stops into the machine. If you save or distribute files in Tajima format, then you must also specify all colors and stops and where they occur in the embroidery.
G404 I have saved an embroidery in .sew format, and two files have been createdJanome software cannot load embroideries with more than 12 colors. If a file to be exported in .sew format has more than 12 color changes, it will automatically be split into multiple files, with the last character of the filename "1", "2", and so on.
G410 Error "Unrecognized file extension" when saving a fileThis message appears if you type an incorrect extension that does not belong to any embroidery file types in the File Name box when trying to save a file.
FAQ Lists for Husqvarna Viking 3D Software Page 99

G427 The manuals and help say that I can save PES files as version 5, but it only seems to save as version 2.
This is an erratum in the manuals and help. Up to version 7.2, the 3D Embroidery System modules can only save PES files as version 2. PES version 2 has a size restriction of 130mm x 180mm. From version 7.25 onwards, PES files are saved as version 2 if the embroidery is 130mm x 180mm or smaller. Files larger than this are saved as PES version 6. Use Smart Update to ensure your 3D Embroidery System modules are updated to the latest version. See FAQ #B008. Always print a worksheet from the 3D Embroidery System to show the correct colors for your embroidery, before saving it to a format that does not support full thread color information.
Screen Appearance
D048 I have changed grid color and spacing and now I wish to return to the original settings
Use 3D Configure to change the grid color. Follow the instructions in 3D Configure and select Blue Gray (RGB values 102, 102, 153) from the standard color dropdown on the Grid Color button. Use Screen Preferences to change the grid spacing. Set the Grid Size to 50.
D049 I have moved the Edit window control panel, or the Color panel or the Drawing panel in the Picture window, and I can't put it back in position
If the control panel is 'floating' on top of the window, double-click the title bar and the control panel will move back to its original position. If the control panel is docked on the wrong side of the window, click and drag the title bar to the middle of the right-hand edge of the window until the outline snaps into position on the right. Release the mouse button and the control panel will be dropped into its original position.
D050 When I add a new toolbar, it appears on every 3D Digitizing windowIt is not possible to create a custom toolbar that appears on only one window of 3D Digitizing.
D080 One of the control panels is not showing or is in the wrong position in 3D Digitizing.
If the control panel is visible but in the wrong position, double-click its title bar. If it is still in the wrong position, click and drag its title bar to move it back to its normal position. If this does not work, or the control panel is not visible, use Reset All Modules. Note that Reset All Modules affects all modules in the 3D Embroidery System, so any changes to settings in each module will be reset. The recent files list on the File menu is also cleared, but this does not affect any files you have saved. To use Reset All Modules: 1. Close all 3D Embroidery System modules.
Any modules left open will not be affected by Reset All Modules. 2. Start 3D Configure (on the Start menu, select Start, All Programs, 3D Embroidery
System, 3D Configure).
FAQ Lists for Husqvarna Viking 3D Software Page 100

3. Click the Reset All Modules button. 4. Click OK to reset, then click OK again to clear the confirmation message. The next time you start 3D Digitizing, the control panel will be in the correct position.
G414 I have changed grid color and now I wish to return to the original colorUse 3D Configure to change the grid color. Follow the instructions in 3D Configure and select Blue Gray (RGB values 102, 102, 153) from the standard color drop-down on the Grid Color button. Use Screen Preferences to change the grid spacing.
G415 I have changed the screen background color and now I wish to return to the original light blue
Use 3D Configure to change the background color. Follow the instructions in 3D Configure and select the RGB values 200, 232, 247 in the Colors dialog box.
G416 I wish to change the background color for the work areaUse 3D Configure to alter the background color for the work area. 3D Configure may also be used to turn the texture on or off for modules that use texture.
G418 I can't see some of the floating toolbars or iconsFirst, check View, Customize to see if the missing toolbar has been turned off. If all the toolbar names are checked (so they are turned on) and you still cannot locate a toolbar, it may have been moved to the edge of the screen so it is hard to see. If you move icons around it is possible to delete them. To reset the icons on a toolbar 1. Click View, Customize to see the Customize dialog. 2. Click the Toolbar tab. 3. Click the name of the required toolbar. 4. Click Reset. 5. Click Yes to confirm. The selection of icons on the toolbar and their order will be reset.
Send To d-Card Reader/Writer Unit
A320 I am having difficulty using an embroidery on my machine when I send it to a d-Card from a horizontal hoop with Send 1 or Send 2.
This can happen if you are using a horizontal hoop on screen, and the embroidery is more than 150mm wide. When the embroidery is sent to the d-Card with Send To, the embroidery is not rotated. Before sending the embroidery to a d-Card, change the hoop orientation to vertical and, if the embroidery no longer fits, rotate the embroidery by 90 degrees. If you are using 3D Digitizing, 3D PictureStitch or 3D Cross Stitcher to create the embroidery, copy the finished design to 3D Embroidery to rotate it and setup the vertical hoop.
Sending Files to Machines
G422 I cannot send a file to an embroidery machine
FAQ Lists for Husqvarna Viking 3D Software Page 101

Click the 3D Configure icon to start 3D Configure. This will allow you to adjust the Send 1 and Send 2 options for your embroidery machine.
Start Point
D007 If I try to move the start point of my Design File, there seems to be an extra point after the first Color command
When the initial Jump Stitch or Single Stitch was digitized, its start and end points were both placed by clicking the mouse, rather than clicking and dragging. To solve, click on the extra object and Delete it.
Thread Colors
B617 The Yli thread ranges are no longer available in Color Selection or Thread Manager.
This can happen when you install the 3D Embroidery System 7.2 Update. Use Smart Update to obtain the latest Thread Database Update. If a Security Warning appears, click Run to go ahead and run the update program. To install the update when the WinZip Self-Extractor appears, click the Unzip button, then click OK, then click Close.
B618 Error: "Please select a valid thread."This message appears if you attempt to click OK in the Color Selection dialog box when MyThreads is selected as the thread range and MyThreads is empty. To prevent this message appearing again, use Thread Manager in 3D Configure to add at least one thread to MyThreads.
D079 I wish to set a default Thread Range for 3D Digitizing, as I did in previous versions
3D Digitizing does not use a default Thread Range. Instead, the last Thread Range is remembered by the Color Change command. This is not affected by automatically chosen colors, such as Sulky Rayon 40 572 (Blue Ribbon) that is used for the first color in a new design and the Sulky Rayon 40 colors used by the Ctrl+G feature. The first color (Sulky Rayon 40 572) is used for the jump stitches that mark out the Design Area. After placing the Design Area, you should select the first thread color in the design that will be stitched.
G007 Error "Thread range is corrupt or missing. Cannot change thread. Reinstall the thread database."
This message usually means that the database driver is incorrectly installed. First follow the instructions in FAQ #G010 to fix this. If the message still appears, use the following procedure to repair the installation: 1. Right-click the Start button on the taskbar and select Explore from the popup menu. 2. In Explorer, browse to the folder C:\3DEmbroidery\System.
This assumes you have installed your 3D Embroidery System software in the default
FAQ Lists for Husqvarna Viking 3D Software Page 102

location of C:\3DEmbroidery. If you have installed the software in a different location, browse to the System folder at that location.
3. Delete the files named "MyThreads.mdb" and "ThreadDataBase.mdb". The file names may simply be shown as "MyThreads" and "ThreadDataBase".
4. Put your 3D Embroidery System software CD in your computer to re-run the installation. The installation should start automatically when you put your software CD in the computer. If this does not happen, browse to the CD with Explorer and double-click "Setup.exe" to start the installation.
5. When the choice appears, select the "Modify or remove" option and click Next. 6. In the next screen, select Repair and click Next. 7. Continue with the installation and follow the on-screen instructions. When the installation
is complete, the MyThreads and standard thread databases will be restored to their original installation state.
If you had previously backed up your MyThreads database, you can now use the Restore option in Thread Manager to restore your MyThreads database. See the on-line help in Thread Manager for more information.
G010 How do I fix the database driver used by my 3D Embroidery System software?
Database drivers are normally found installed on most computers – they are commonly installed as part of the installation of Microsoft® Office or as an upgrade of key components of the operating system. Key components of the 3D Embroidery System need to be able to use these drivers. Therefore, any difficulties in using these drivers may affect the functionality of certain features of the 3D Embroidery System. Examples include changing a thread color in any module and/or Motif Fill/Line properties in 3D Digitizing. If you have Windows® XP with Service Pack 2 installed, use the Database Driver Fix described below. Otherwise, install the drivers manually as follows: Installation of the Database files 1. Insert the 3D Embroidery System CD. 2. Cancel the installation screen if it appears. 3. Use Windows® Explorer to browse to the D:\Technical folder – where D:\ is the name of
your CD or DVD drive. 4. Double click on the Database Drivers folder. 5. Double click on the Jet 4 folder. 6. Double click on the folder that is for your operating system. 7. Double click on the file to start the installation of the Jet 4 Service Pack 8 files. This
should take a few moments for the files to be installed. 8. After the installation is complete, browse to the D:\Technical\Database Drivers\MDAC 2.8
folder. 9. Double click on the MDAC_TYP.exe file. The Microsoft Data Access Components 2.8
Setup dialog box will appear. 10. Select the option “I accept all the terms of the preceding license agreement”. 11. Click on the Next button. 12. Click on the Finish button when it appears. This will start the installation process for the
MDAC 2.8 files. 13. After the MDAC 2.8 installation is complete, reboot your computer and continue to use
your 3D Embroidery System. 14. If you are still having difficulties, use the Database Driver Fix that follows. Database Driver Fix
FAQ Lists for Husqvarna Viking 3D Software Page 103

1. Insert the 3D Embroidery System CD. 2. Cancel the installation screen if it appears. 3. Use Windows® Explorer to browse to the D:\Technical folder – where D:\ is the name of
your CD or DVD drive. 4. Double click on the Database Drivers folder. 5. Double click on the MSAccessDbFixer file (this may be shown with a .exe extension). A
window will appear briefly on the screen. 6. Continue to use your 3D Embroidery System.
G419 "The color xx has been found in your database, but the thread color is not exactly the same."
This message appears if the Thread Range and Color Number of the selected color are identical to those in your thread database, but some aspect of the color is different. It could be a different material or weight, or have additional colors as a variegated thread. This could happen if the design you are attempting to edit was supplied by someone with a different version of the color, for instance if they have edited it in MyThreads, or if they have a later version of the thread database. Use the Import Threads From Embroidery function to add other users’ thread definitions to your MyThreads database. 1. Select Import Threads from Embroidery in the File Menu and an Open dialog box will
appear. 2. Select the desired .vp3 embroidery file. 3. Click Open and any custom thread definitions that do not appear in your MyThreads will
be added to the end of your MyThreads list. To check for the latest updates for the 3D Embroidery System, use Smart Update in 3D Configure.
G420 "Could not find xx in your database. Matching to closest thread in yy."This message appears if the Thread Range of the selected color is not found in your thread database. This could happen if the design you are attempting to edit was supplied by someone with a later version of the thread database. To check for the latest updates for the 3D Embroidery System, use Smart Update in 3D Configure.
G421 Error "Databases are corrupt or missing. Cannot edit the thread color."This message appears if there is a problem with your thread database. You will be unable to choose a thread color. First close all the modules of the 3D Embroidery System, close down your computer and restart. If this does not clear the problem, restore a backup database if you have created one using Thread Manager in 3D Configure. Otherwise, you need a new version of the thread database. To check for the latest updates for the 3D Embroidery System, use Smart Update in 3D Configure. Alternatively, you may need to uninstall and reinstall your 3D Embroidery System software.
Tutorials
G005 The window remains blank when I try to use the tutorials.
FAQ Lists for Husqvarna Viking 3D Software Page 104

You need version 6 or later of the Macromedia Flash Player to view the tutorials. Visit the Macromedia [http://www.macromedia.com] website and download and install the latest version of the Flash Player.
G011 What version of Macromedia Flash Player do I need to view the tutorials?You need version 6 or later of the Macromedia Flash Player to view the tutorials. Visit the Macromedia [http://www.macromedia.com] website and download and install the latest version of the Flash Player.
Using Pictures
D081 When I use text with special Embossed Fill color, the text does not always show up as embossed in the fill area.
This can happen on some computers when ClearType is used to smooth the edges of fonts on the screen. ClearType works by blending the edges of the text to make the text appear smoother so it is easier to read. It is particularly designed for flat TFT and LCD screens. As a result, the blended edge of the text drawn on the Picture page of 3D Digitizing may not give a well defined edge for the special embossed fill color. When this happens, the edge may not show in the embossed fill area that is digitized over this area of the picture. To compensate for the effect of ClearType: 1. Place the text in a different color (other than the special green used for embossed fill). 2. Click the special green used for embossed fill to set it as the foreground color. 3. Click Flood Fill, then click inside the text characters. When you do this, you will be able to
see where ClearType changes the shade along the edges of the text. 4. Use Flood Fill to completely fill over all the shades so that the text characters are solid
areas of the special green. Alternatively, temporarily turn off ClearType as follows: 1. Right-click anywhere on the Windows desktop background and a menu will appear. 2. Click Properties on the menu and the Display Properties dialog will appear. 3. Click the Appearance tab. 4. Click the Effects button, and the Effects dialog box will appear. 5. Click the check box for "Use the following method to smooth edges of screen fonts" so
that it is deselected. 6. Click OK to close the Effects dialog, then click OK to close the Display Properties
properties dialog. 7. In 3D Digitizing, place the desired text in the special green color. 8. Repeat the steps to see the Effects dialog, then click the check box for "Use the following
method to smooth edges of screen fonts" so that it is selected again. 9. Click OK to close the Effects dialog, then click OK to close the Display Properties
properties dialog.
Using the Program
D083 Error "3D Digitizing MFC Application has encountered a problem and needs to close."
This error can appear when you attempt to start 3D Digitizing. This will happen if you have installed 3D Digitizing as an add-on, and the 3D Embroidery System software that is already installed has a later version than 3D Digitizing.
FAQ Lists for Husqvarna Viking 3D Software Page 105

If you have a CD containing 3D Embroidery System Software for version 7.2 or later, install the update for the 3D Embroidery System found in the Patch folder on the CD. If you have updated your 3D Embroidery System to version 7.2 or later using an update obtained with Smart Update, find the update you have already downloaded and run it again. If you are unable to find the update, or you are not sure if you have the latest update, use Smart Update to obtain the latest update, as described in FAQ #B008. When you run the update, you may be asked to choose between Modify, Repair and Remove. This selection appears because you have updated on a previous occasion. Choose the Repair option, and this will ensure all your 3D Embroidery System software is updated.
3D Stitch Editor Listed versions: 7.0; 7.0.5; 7.1; 7.2; 7.25
Changing Preferences
G429 The 5"x7" Design hoop and the Endless hoop are no longer available in the hoop list.
The 5"x7" Design and Endless hoops were added to the hoop list in the Version 7.2 update. If you have installed a previous version of software after updating to Version 7.2, the hoop list will be replaced and will no longer include the 5"x7" Design and Endless hoops. Click this link to download and install the correct hoop list: Hoops.exe [http://www.vsmsoftware.net/Downloads/Updates/720/Hoops.exe]
Error Messages
B618 Error: "Please select a valid thread."This message appears if you attempt to click OK in the Color Selection dialog box when MyThreads is selected as the thread range and MyThreads is empty. To prevent this message appearing again, use Thread Manager in 3D Configure to add at least one thread to MyThreads.
G007 Error "Thread range is corrupt or missing. Cannot change thread. Reinstall the thread database."
This message usually means that the database driver is incorrectly installed. First follow the instructions in FAQ #G010 to fix this. If the message still appears, use the following procedure to repair the installation: 1. Right-click the Start button on the taskbar and select Explore from the popup menu. 2. In Explorer, browse to the folder C:\3DEmbroidery\System.
This assumes you have installed your 3D Embroidery System software in the default location of C:\3DEmbroidery. If you have installed the software in a different location, browse to the System folder at that location.
3. Delete the files named "MyThreads.mdb" and "ThreadDataBase.mdb". The file names may simply be shown as "MyThreads" and "ThreadDataBase".
4. Put your 3D Embroidery System software CD in your computer to re-run the installation. The installation should start automatically when you put your software CD in the
FAQ Lists for Husqvarna Viking 3D Software Page 106

computer. If this does not happen, browse to the CD with Explorer and double-click "Setup.exe" to start the installation.
5. When the choice appears, select the "Modify or remove" option and click Next. 6. In the next screen, select Repair and click Next. 7. Continue with the installation and follow the on-screen instructions. When the installation
is complete, the MyThreads and standard thread databases will be restored to their original installation state.
If you had previously backed up your MyThreads database, you can now use the Restore option in Thread Manager to restore your MyThreads database. See the on-line help in Thread Manager for more information.
G010 How do I fix the database driver used by my 3D Embroidery System software?
Database drivers are normally found installed on most computers – they are commonly installed as part of the installation of Microsoft® Office or as an upgrade of key components of the operating system. Key components of the 3D Embroidery System need to be able to use these drivers. Therefore, any difficulties in using these drivers may affect the functionality of certain features of the 3D Embroidery System. Examples include changing a thread color in any module and/or Motif Fill/Line properties in 3D Digitizing. If you have Windows® XP with Service Pack 2 installed, use the Database Driver Fix described below. Otherwise, install the drivers manually as follows: Installation of the Database files 1. Insert the 3D Embroidery System CD. 2. Cancel the installation screen if it appears. 3. Use Windows® Explorer to browse to the D:\Technical folder – where D:\ is the name of
your CD or DVD drive. 4. Double click on the Database Drivers folder. 5. Double click on the Jet 4 folder. 6. Double click on the folder that is for your operating system. 7. Double click on the file to start the installation of the Jet 4 Service Pack 8 files. This
should take a few moments for the files to be installed. 8. After the installation is complete, browse to the D:\Technical\Database Drivers\MDAC 2.8
folder. 9. Double click on the MDAC_TYP.exe file. The Microsoft Data Access Components 2.8
Setup dialog box will appear. 10. Select the option “I accept all the terms of the preceding license agreement”. 11. Click on the Next button. 12. Click on the Finish button when it appears. This will start the installation process for the
MDAC 2.8 files. 13. After the MDAC 2.8 installation is complete, reboot your computer and continue to use
your 3D Embroidery System. 14. If you are still having difficulties, use the Database Driver Fix that follows. Database Driver Fix 1. Insert the 3D Embroidery System CD. 2. Cancel the installation screen if it appears. 3. Use Windows® Explorer to browse to the D:\Technical folder – where D:\ is the name of
your CD or DVD drive. 4. Double click on the Database Drivers folder.
FAQ Lists for Husqvarna Viking 3D Software Page 107

5. Double click on the MSAccessDbFixer file (this may be shown with a .exe extension). A window will appear briefly on the screen.
6. Continue to use your 3D Embroidery System.
General
G001 General difficulties with hardware and softwareTo try to determine the cause of any odd difficulties with the 3D Embroidery System, the best method is to reboot the computer in safe mode. If the problem is then solved, you know that some clash of hardware and/or software such as device drivers is to blame. You can then obtain more help from your computer dealer to analyze the cause and reconfigure your computer if necessary. To start Windows in Safe Mode 1. Close all programs. 2. Click Start, and then click Shut Down or Turn Off Computer, whichever is shown. 3. Click Restart. If necessary, click OK to confirm. 4. Your computer will shut down and restart. 5. As your computer restarts, press and hold the F8 key until a menu of windows startup
options appears. 6. Use the up and down arrow keys to highlight Safe mode, and then press ENTER. When you hold down the F8 key, your computer may beep rapidly and report keyboard errors as it restarts. Release the F8 key briefly to skip any errors and press F8 again until you have the Startup Menu on your screen.
Installation and CD
G601 Whenever I insert my CD it asks if I want to uninstall or modify my softwareAll 3D Embroidery System Software has an automatic installation whenever the CD is inserted. The CD detected your software was already installed so you have the options to uninstall the software or modify the installation. Simply click 'Cancel', and then 'Yes' to confirm it. Then click 'Finish' to close the installation window. When you use the CD again, you may hold down the Shift key for 30 seconds when the CD is inserted if you want to prevent the installation menu appearing.
G602 The programs are not being installed to the correct folderThe installation program will by default put the embroidery system onto drive C:. The drive letter that the embroidery system will install to is shown during the install and can be changed by the user. The drive or partition that the embroidery system is installed to will make no difference to its operation.
G603 I do not have the 3D Embroidery System logos beside each file in Windows Explorer
Your icon association is set up during installation. You will have to re-install.
FAQ Lists for Husqvarna Viking 3D Software Page 108

Loading Embroideries
G401 I can't drag and drop embroidery files from the Open dialog boxTo drag and drop embroidery files onto the work area, right-click Start, then Explore to start Windows® Explorer. Then follow the instructions in the online help under Drag and Drop.
G405 Error "Cannot open embroidery."This message appears if the desired embroidery is not where the module expects it to be, for example if an embroidery was loaded into the module from a floppy disk, then closed and the floppy disk removed. The message would appear if you tried to load the embroidery from the Recent Files list on the File menu.
G406 Error "Unrecognized file format."This message appears if the file you are attempting to load is corrupt. For example, it might have the extension .vp3, yet not be a proper Husqvarna Viking / Pfaff embroidery.
G407 Error: "Embroidery is corrupt"The embroidery is corrupt and cannot be loaded. Refer to source of this file for a solution.
G408 Error "Embroidery XY coordinates incorrect"The embroidery is corrupt and cannot be loaded. Refer to source of this file for a solution.
G409 Error "Unrecognized file extension" when opening a fileThis message appears if you attempt to load a file with an extension that does not belong to any embroidery file types. For example, it would appear if you tried to drag and drop a .doc file onto the screen.
G413 Error "Embroidery not created using licensed software."This message may appear if you attempt to load an embroidery created in third-party software. Such embroideries may cause unpredictable results.
S001 When I view Tajima files, the Trim and Stop stitches do not showUnlike Husqvarna Viking/Pfaff (.vp3 and .vip) format files, Tajima (.dst) does not have stitches specially designated as trims or stops. Instead these are replaced as three extra jump stitches instead of a trim and a color change instead of a stop. When the machine is stitching the design, it converts these back to the correct stitch types
Miscellaneous
G411 Error "Not enough memory to perform operation."This message will appear if system resources are low. Close other programs and try again. If this does not work, try restarting your computer.
FAQ Lists for Husqvarna Viking 3D Software Page 109

G425 I have a very large embroidery in the clipboard block. How do I remove it?Copy a small embroidery or a few stitches. This will replace the current contents of the clipboard block. Alternatively, select and copy a small amount of text (highlight the text and press Ctrl+C on the keyboard). The clipboard block will go blank when you do this. Do not use the Print Screen key to clear the clipboard. This does make the clipboard block go blank. However, Print Screen takes a snapshot of whatever is currently displayed on your computer screen and places it in the clipboard as a picture. This is likely to be larger than any embroidery you may copy, and may cause additional difficulties if you are having memory problems.
G601 Whenever I insert my CD it asks if I want to uninstall or modify my softwareAll 3D Embroidery System Software has an automatic installation whenever the CD is inserted. The CD detected your software was already installed so you have the options to uninstall the software or modify the installation. Simply click 'Cancel', and then 'Yes' to confirm it. Then click 'Finish' to close the installation window. When you use the CD again, you may hold down the Shift key for 30 seconds when the CD is inserted if you want to prevent the installation menu appearing.
G603 I do not have the 3D Embroidery System logos beside each file in Windows Explorer
Your icon association is set up during installation. You will have to re-install.
S001 When I view Tajima files, the Trim and Stop stitches do not showUnlike Husqvarna Viking/Pfaff (.vp3 and .vip) format files, Tajima (.dst) does not have stitches specially designated as trims or stops. Instead these are replaced as three extra jump stitches instead of a trim and a color change instead of a stop. When the machine is stitching the design, it converts these back to the correct stitch types
Opening the Program
S020 Error "3D Stitch Editor MFC Application has encountered a problem and needs to close."
This error can appear when you attempt to start 3D Stitch Editor. This will happen if you have installed 3D Stitch Editor as an add-on, and the 3D Embroidery System software that is already installed has a later version than 3D Stitch Editor. If you have a CD containing 3D Embroidery System Software for version 7.2 or later, install the update for the 3D Embroidery System found in the Patch folder on the CD. If you have updated your 3D Embroidery System to version 7.2 or later using an update obtained with Smart Update, find the update you have already downloaded and run it again. If you are unable to find the update, or you are not sure if you have the latest update, use Smart Update to obtain the latest update, as described in FAQ #B008. When you run the update, you may be asked to choose between Modify, Repair and Remove. This selection appears because you have updated on a previous occasion. Choose the Repair option, and this will ensure all your 3D Embroidery System software is updated.
FAQ Lists for Husqvarna Viking 3D Software Page 110

Preferences
G429 The 5"x7" Design hoop and the Endless hoop are no longer available in the hoop list.
The 5"x7" Design and Endless hoops were added to the hoop list in the Version 7.2 update. If you have installed a previous version of software after updating to Version 7.2, the hoop list will be replaced and will no longer include the 5"x7" Design and Endless hoops. Click this link to download and install the correct hoop list: Hoops.exe [http://www.vsmsoftware.net/Downloads/Updates/720/Hoops.exe]
Printing
S010 Error "No embroideries available to print. Only embroideries that are inside the hoop can be printed."
This message appears if the embroidery on screen is partially outside the selected hoop. Move the embroidery completely within the four blue corners of the work area and try again. Alternatively, change the Hoop Use setting in General Preferences to No.
Product Information
G004 What is the price of the software, and where can I get it?Please contact your local dealer for prices and availability on all the Husqvarna Viking software. To find your local dealer see the Husqvarna Viking Dealer Locator [http://www.sew.husqvarna.se/dealers.htm]. You can always find this on the bottom bar of the Husqvarna Viking Software website.
Saving Embroideries
G402 Error: "Design too large for output file format"Certain formats are limited to the size of hoop used on their specific embroidery machine, for example .sew. If you attempt to save a file in this format that is bigger than the largest available hoop size this message would appear.
G403 I have saved my embroidery as Tajima format, but it now has more colorsIf your original embroidery had a stop command in it then this would be replaced by a color change, thus adding a color for every stop you have in your embroidery. As the Tajima file format does not have a stop command in its format, it requires the machine operator to manually enter stops into the machine. If you save or distribute files in Tajima format, then you must also specify all colors and stops and where they occur in the embroidery.
G404 I have saved an embroidery in .sew format, and two files have been createdJanome software cannot load embroideries with more than 12 colors. If a file to be exported in .sew format has more than 12 color changes, it will automatically be split into multiple files, with the last character of the filename "1", "2", and so on.
G410 Error "Unrecognized file extension" when saving a file
FAQ Lists for Husqvarna Viking 3D Software Page 111

This message appears if you type an incorrect extension that does not belong to any embroidery file types in the File Name box when trying to save a file.
G412 Error "Cannot save file."The module cannot save the file. Ensure that the disk where you are trying to save the embroidery is not write-protected, then try again. For instance, you have loaded an embroidery from a CD-ROM and then attempt to save the embroidery back to the CD. A CD-ROM is read only, therefore you will not be able to save the embroidery.
G427 The manuals and help say that I can save PES files as version 5, but it only seems to save as version 2.
This is an erratum in the manuals and help. Up to version 7.2, the 3D Embroidery System modules can only save PES files as version 2. PES version 2 has a size restriction of 130mm x 180mm. From version 7.25 onwards, PES files are saved as version 2 if the embroidery is 130mm x 180mm or smaller. Files larger than this are saved as PES version 6. Use Smart Update to ensure your 3D Embroidery System modules are updated to the latest version. See FAQ #B008. Always print a worksheet from the 3D Embroidery System to show the correct colors for your embroidery, before saving it to a format that does not support full thread color information.
S009 Error "Design is either too big to fit inside hoop, or the design lies outside the hoop area. Please adjust the position of the design or change the hoop."
This message appears if an embroidery you are trying to Save is outside the selected hoop or larger than will fit in it. For example, with the 100mm x 100mm hoop selected, a design smaller than 100mm x 100mm might be placed partially outside the work area when you click Save. This message would then appear. Move the embroidery completely within the four blue corners of the work area and try again. Alternatively, change the Hoop Use setting in General Preferences to No.
S016 Error message "Design has too many stitches for file format."There is a limit on the number of stitches that may be saved to an embroidery file in Pfaff (.pcs) file format. This message appears if the embroidery you attempt to save to this format exceeds this limit.
Screen Appearance
E056 When I hover the mouse pointer over a color in the color worksheet, part of the embroidery changes to an unusual color.
This is called "Highlight Selected Color". It allows you to see where each color is used in an embroidery. For example, if you have several color blocks using the same thread color and you wish to change the color of a specific section, hover over each color in the worksheet in turn until the section you require is highlighted.
G414 I have changed grid color and now I wish to return to the original color
FAQ Lists for Husqvarna Viking 3D Software Page 112

Use 3D Configure to change the grid color. Follow the instructions in 3D Configure and select Blue Gray (RGB values 102, 102, 153) from the standard color drop-down on the Grid Color button. Use Screen Preferences to change the grid spacing.
G415 I have changed the screen background color and now I wish to return to the original light blue
Use 3D Configure to change the background color. Follow the instructions in 3D Configure and select the RGB values 200, 232, 247 in the Colors dialog box.
G416 I wish to change the background color for the work areaUse 3D Configure to alter the background color for the work area. 3D Configure may also be used to turn the texture on or off for modules that use texture.
G418 I can't see some of the floating toolbars or iconsFirst, check View, Customize to see if the missing toolbar has been turned off. If all the toolbar names are checked (so they are turned on) and you still cannot locate a toolbar, it may have been moved to the edge of the screen so it is hard to see. If you move icons around it is possible to delete them. To reset the icons on a toolbar 1. Click View, Customize to see the Customize dialog. 2. Click the Toolbar tab. 3. Click the name of the required toolbar. 4. Click Reset. 5. Click Yes to confirm. The selection of icons on the toolbar and their order will be reset.
G428 The selection outline partly or completely disappears when I move some of my embroideries.
This can happen two reasons: • The embroidery has at least one perfectly vertical or horizontal edge • The embroidery is composed of very wide satin columns Embroideries with perfectly vertical or horizontal edges The selection box around the selected embroidery is drawn using a method to provide maximum contrast with the background. The outline that shows the shape of the embroidery is drawn using the same method. When the two lines are in the same place, they cancel each other out. If the embroidery is a rectangle or a square, the outline may disappear completely when you move the embroidery. Notice that the scaling, mirror and rotate handles are always visible, so you can use these as cues for positioning embroideries where the edges are not visible. Wide satin columns Satin columns that are made of very long stitches may be interpreted as a series of jump stitches when the outline is detected. Jump stitches are ignored by the outline detection, so wide satin columns may have no outline, or other stitches overlapping the column may be outlined instead. Positioning embroideries with missing outlines
FAQ Lists for Husqvarna Viking 3D Software Page 113

Click and drag the embroidery approximately into position. Use the arrow keys on the keyboard to nudge the embroidery into its final position without needing to see the outline.
S014 It seems to take a long time to redraw embroideries when I choose different functions or switch to a new embroidery.
The refresh rate of the screen is limited by the power of your computer's processor and RAM as well as the video card and its memory. To get the best performance from your system, keep the Overview Window closed, as this must be redrawn every time the screen changes. Also try using 2D view as this requires less power than 3D view.
S015 Some of the icons in the Toolbar are 'grayed out'Certain icons (for example Combine, Save As and Print on the Main Toolbar and all Edit Toolbar icons apart from Preferences) are only highlighted once an embroidery is shown on the screen.
S017 I have changed grid color and spacing and now I wish to return to the original settings
Use 3D Configure to change the grid color. Follow the instructions in 3D Configure and select Blue Gray (RGB values 102, 102, 153) from the standard color dropdown on the Grid Color button. Use Screen Preferences to change the grid spacing. Set the Grid Size to 5.
S018 I have moved the control panel and I can't put it back in positionIf the control panel is 'floating' on top of the window, double-click the title bar and the control panel will move back to its original position. If the control panel is docked on the wrong side of the window, click and drag the title bar to the middle of the right-hand edge of the window until the outline snaps into position on the right. Release the mouse button and the control panel will be dropped into its original position.
S019 The control panel is not showing or is in the wrong position in 3D Stitch Editor.
If the control panel is visible but in the wrong position, first try to click and drag its title bar to move it back to its normal position on the right. If this does not work, or the control panel is not visible, use Reset All Modules. Note that Reset All Modules affects all modules in the 3D Embroidery System, so any changes to settings in each module will be reset. The recent files list on the File menu is also cleared, but this does not affect any files you have saved. To use Reset All Modules: 1. Close all 3D Embroidery System modules.
Any modules left open will not be affected by Reset All Modules. 2. Start 3D Configure (on the Start menu, select Start, All Programs, 3D Embroidery
System, 3D Configure). 3. Click the Reset All Modules button. 4. Click OK to reset, then click OK again to clear the confirmation message. The next time you start 3D Stitch Editor, the control panel will be in the correct position.
FAQ Lists for Husqvarna Viking 3D Software Page 114

Selecting Blocks
S003 I find it hard to select the part of the embroidery I wish to editMany functions of 3D Stitch Editor can be used to help see sections of embroideries more easily. They include the Zoom Commands and the Overview Window, as well as Draw Next Color, Draw Previous Color, the slider bars and Ghost Mode. The Coordinates can also be used to help run through designs to find the required stitch or command. The different methods of selection (Box Select, Color Block Select, Freehand Select, Polygon Select and Make Block From Visible Area) are also useful for different situations.
S006 I cannot select the desired color using the Color Block function, because one color is on top of the other
Use Draw Next Color and Draw Previous Color or turn colors off by right-clicking in the Color Worksheet to isolate the desired color area, then click Color Block to select those stitches.
S007 I used Box Select around an area, but selected some stitches I didn't want. Undo is grayed out so I can't click it.
To cancel a stitch block selection made using Box Select, Color Block Select, Freehand Select, Polygon Select or Make Block From Visible Area, click anywhere in the currently active embroidery, but outside the dotted box showing the selected stitches. The stitches will no longer be selected.
Send To d-Card Reader/Writer Unit
A320 I am having difficulty using an embroidery on my machine when I send it to a d-Card from a horizontal hoop with Send 1 or Send 2.
This can happen if you are using a horizontal hoop on screen, and the embroidery is more than 150mm wide. When the embroidery is sent to the d-Card with Send To, the embroidery is not rotated. Before sending the embroidery to a d-Card, change the hoop orientation to vertical and, if the embroidery no longer fits, rotate the embroidery by 90 degrees. If you are using 3D Digitizing, 3D PictureStitch or 3D Cross Stitcher to create the embroidery, copy the finished design to 3D Embroidery to rotate it and setup the vertical hoop.
Sending Files to Machines
G422 I cannot send a file to an embroidery machineClick the 3D Configure icon to start 3D Configure. This will allow you to adjust the Send 1 and Send 2 options for your embroidery machine.
Thread Colors
B617 The Yli thread ranges are no longer available in Color Selection or Thread Manager.
This can happen when you install the 3D Embroidery System 7.2 Update. Use Smart Update to obtain the latest Thread Database Update.
FAQ Lists for Husqvarna Viking 3D Software Page 115

If a Security Warning appears, click Run to go ahead and run the update program. To install the update when the WinZip Self-Extractor appears, click the Unzip button, then click OK, then click Close.
B618 Error: "Please select a valid thread."This message appears if you attempt to click OK in the Color Selection dialog box when MyThreads is selected as the thread range and MyThreads is empty. To prevent this message appearing again, use Thread Manager in 3D Configure to add at least one thread to MyThreads.
E056 When I hover the mouse pointer over a color in the color worksheet, part of the embroidery changes to an unusual color.
This is called "Highlight Selected Color". It allows you to see where each color is used in an embroidery. For example, if you have several color blocks using the same thread color and you wish to change the color of a specific section, hover over each color in the worksheet in turn until the section you require is highlighted.
G007 Error "Thread range is corrupt or missing. Cannot change thread. Reinstall the thread database."
This message usually means that the database driver is incorrectly installed. First follow the instructions in FAQ #G010 to fix this. If the message still appears, use the following procedure to repair the installation: 1. Right-click the Start button on the taskbar and select Explore from the popup menu. 2. In Explorer, browse to the folder C:\3DEmbroidery\System.
This assumes you have installed your 3D Embroidery System software in the default location of C:\3DEmbroidery. If you have installed the software in a different location, browse to the System folder at that location.
3. Delete the files named "MyThreads.mdb" and "ThreadDataBase.mdb". The file names may simply be shown as "MyThreads" and "ThreadDataBase".
4. Put your 3D Embroidery System software CD in your computer to re-run the installation. The installation should start automatically when you put your software CD in the computer. If this does not happen, browse to the CD with Explorer and double-click "Setup.exe" to start the installation.
5. When the choice appears, select the "Modify or remove" option and click Next. 6. In the next screen, select Repair and click Next. 7. Continue with the installation and follow the on-screen instructions. When the installation
is complete, the MyThreads and standard thread databases will be restored to their original installation state.
If you had previously backed up your MyThreads database, you can now use the Restore option in Thread Manager to restore your MyThreads database. See the on-line help in Thread Manager for more information.
G010 How do I fix the database driver used by my 3D Embroidery System software?
Database drivers are normally found installed on most computers – they are commonly installed as part of the installation of Microsoft® Office or as an upgrade of key components of the operating system.
FAQ Lists for Husqvarna Viking 3D Software Page 116

Key components of the 3D Embroidery System need to be able to use these drivers. Therefore, any difficulties in using these drivers may affect the functionality of certain features of the 3D Embroidery System. Examples include changing a thread color in any module and/or Motif Fill/Line properties in 3D Digitizing. If you have Windows® XP with Service Pack 2 installed, use the Database Driver Fix described below. Otherwise, install the drivers manually as follows: Installation of the Database files 1. Insert the 3D Embroidery System CD. 2. Cancel the installation screen if it appears. 3. Use Windows® Explorer to browse to the D:\Technical folder – where D:\ is the name of
your CD or DVD drive. 4. Double click on the Database Drivers folder. 5. Double click on the Jet 4 folder. 6. Double click on the folder that is for your operating system. 7. Double click on the file to start the installation of the Jet 4 Service Pack 8 files. This
should take a few moments for the files to be installed. 8. After the installation is complete, browse to the D:\Technical\Database Drivers\MDAC 2.8
folder. 9. Double click on the MDAC_TYP.exe file. The Microsoft Data Access Components 2.8
Setup dialog box will appear. 10. Select the option “I accept all the terms of the preceding license agreement”. 11. Click on the Next button. 12. Click on the Finish button when it appears. This will start the installation process for the
MDAC 2.8 files. 13. After the MDAC 2.8 installation is complete, reboot your computer and continue to use
your 3D Embroidery System. 14. If you are still having difficulties, use the Database Driver Fix that follows. Database Driver Fix 1. Insert the 3D Embroidery System CD. 2. Cancel the installation screen if it appears. 3. Use Windows® Explorer to browse to the D:\Technical folder – where D:\ is the name of
your CD or DVD drive. 4. Double click on the Database Drivers folder. 5. Double click on the MSAccessDbFixer file (this may be shown with a .exe extension). A
window will appear briefly on the screen. 6. Continue to use your 3D Embroidery System.
G419 "The color xx has been found in your database, but the thread color is not exactly the same."
This message appears if the Thread Range and Color Number of the selected color are identical to those in your thread database, but some aspect of the color is different. It could be a different material or weight, or have additional colors as a variegated thread. This could happen if the design you are attempting to edit was supplied by someone with a different version of the color, for instance if they have edited it in MyThreads, or if they have a later version of the thread database. Use the Import Threads From Embroidery function to add other users’ thread definitions to your MyThreads database. 1. Select Import Threads from Embroidery in the File Menu and an Open dialog box will
appear. 2. Select the desired .vp3 embroidery file.
FAQ Lists for Husqvarna Viking 3D Software Page 117

3. Click Open and any custom thread definitions that do not appear in your MyThreads will be added to the end of your MyThreads list.
To check for the latest updates for the 3D Embroidery System, use Smart Update in 3D Configure.
G420 "Could not find xx in your database. Matching to closest thread in yy."This message appears if the Thread Range of the selected color is not found in your thread database. This could happen if the design you are attempting to edit was supplied by someone with a later version of the thread database. To check for the latest updates for the 3D Embroidery System, use Smart Update in 3D Configure.
G421 Error "Databases are corrupt or missing. Cannot edit the thread color."This message appears if there is a problem with your thread database. You will be unable to choose a thread color. First close all the modules of the 3D Embroidery System, close down your computer and restart. If this does not clear the problem, restore a backup database if you have created one using Thread Manager in 3D Configure. Otherwise, you need a new version of the thread database. To check for the latest updates for the 3D Embroidery System, use Smart Update in 3D Configure. Alternatively, you may need to uninstall and reinstall your 3D Embroidery System software.
Tutorials
G005 The window remains blank when I try to use the tutorials.You need version 6 or later of the Macromedia Flash Player to view the tutorials. Visit the Macromedia [http://www.macromedia.com] website and download and install the latest version of the Flash Player.
G011 What version of Macromedia Flash Player do I need to view the tutorials?You need version 6 or later of the Macromedia Flash Player to view the tutorials. Visit the Macromedia [http://www.macromedia.com] website and download and install the latest version of the Flash Player.
Using the Program
S020 Error "3D Stitch Editor MFC Application has encountered a problem and needs to close."
This error can appear when you attempt to start 3D Stitch Editor. This will happen if you have installed 3D Stitch Editor as an add-on, and the 3D Embroidery System software that is already installed has a later version than 3D Stitch Editor. If you have a CD containing 3D Embroidery System Software for version 7.2 or later, install the update for the 3D Embroidery System found in the Patch folder on the CD. If you have updated your 3D Embroidery System to version 7.2 or later using an update obtained with Smart Update, find the update you have already downloaded and run it again. If you are unable to find the update, or you are not sure if you have the latest update, use Smart Update to obtain the latest update, as described in FAQ #B008.
FAQ Lists for Husqvarna Viking 3D Software Page 118

When you run the update, you may be asked to choose between Modify, Repair and Remove. This selection appears because you have updated on a previous occasion. Choose the Repair option, and this will ensure all your 3D Embroidery System software is updated.
Working with Embroideries
S002 The embroidery I want to work with appears too small on the screenMake sure the 3D Stitch Editor window is maximized by clicking the Maximize icon on the title bar, then maximize the window of the desired embroidery by clicking the Maximize icon on its title bar. Click Zoom To Fit to expand the embroidery so it fills the window or use Zoom In together with the Overview Window to move around the embroidery. Check the Hoop Size in Preferences to make sure the Hoop Size is not too large for the embroidery.
S003 I find it hard to select the part of the embroidery I wish to editMany functions of 3D Stitch Editor can be used to help see sections of embroideries more easily. They include the Zoom Commands and the Overview Window, as well as Draw Next Color, Draw Previous Color, the slider bars and Ghost Mode. The Coordinates can also be used to help run through designs to find the required stitch or command. The different methods of selection (Box Select, Color Block Select, Freehand Select, Polygon Select and Make Block From Visible Area) are also useful for different situations.
S004 I highlighted part of an embroidery, then tried to Compensate the block. The compensation has been applied to the whole embroidery, not just the area selected
Compensation works on the visible part of an embroidery. Hide stitches with Draw Range, Draw Next Color or turn colors off by right-clicking in the Color Worksheet to isolate a specific area before using this function.
S005 I highlighted part of an embroidery, then tried to Break Up Stitches. Stitches have been broken up in the whole embroidery, not just the area selected.
Break Up Stitches works on the visible part of an embroidery. Hide stitches with Draw Range, Draw Next Color or turn colors off by right-clicking in the Color Worksheet to isolate a specific area before using this function.
S006 I cannot select the desired color using the Color Block function, because one color is on top of the other
Use Draw Next Color and Draw Previous Color or turn colors off by right-clicking in the Color Worksheet to isolate the desired color area, then click Color Block to select those stitches.
S007 I used Box Select around an area, but selected some stitches I didn't want. Undo is grayed out so I can't click it.
To cancel a stitch block selection made using Box Select, Color Block Select, Freehand Select, Polygon Select or Make Block From Visible Area, click anywhere in the currently active embroidery, but outside the dotted box showing the selected stitches. The stitches will no longer be selected.
FAQ Lists for Husqvarna Viking 3D Software Page 119

S008 I have started to PatternMake™ an embroidery using the Stamp Fill and realize I have not isolated the part of the design I wish to pattern
Click the Esc button on the computer keyboard and the stamping process is cancelled.
3D Design Splitter Listed versions: 7.0; 7.0.5; 7.1; 7.2; 7.25
General
G001 General difficulties with hardware and softwareTo try to determine the cause of any odd difficulties with the 3D Embroidery System, the best method is to reboot the computer in safe mode. If the problem is then solved, you know that some clash of hardware and/or software such as device drivers is to blame. You can then obtain more help from your computer dealer to analyze the cause and reconfigure your computer if necessary. To start Windows in Safe Mode 1. Close all programs. 2. Click Start, and then click Shut Down or Turn Off Computer, whichever is shown. 3. Click Restart. If necessary, click OK to confirm. 4. Your computer will shut down and restart. 5. As your computer restarts, press and hold the F8 key until a menu of windows startup
options appears. 6. Use the up and down arrow keys to highlight Safe mode, and then press ENTER. When you hold down the F8 key, your computer may beep rapidly and report keyboard errors as it restarts. Release the F8 key briefly to skip any errors and press F8 again until you have the Startup Menu on your screen.
Loading Embroideries
G401 I can't drag and drop embroidery files from the Open dialog boxTo drag and drop embroidery files onto the work area, right-click Start, then Explore to start Windows® Explorer. Then follow the instructions in the online help under Drag and Drop.
G405 Error "Cannot open embroidery."This message appears if the desired embroidery is not where the module expects it to be, for example if an embroidery was loaded into the module from a floppy disk, then closed and the floppy disk removed. The message would appear if you tried to load the embroidery from the Recent Files list on the File menu.
G406 Error "Unrecognized file format."This message appears if the file you are attempting to load is corrupt. For example, it might have the extension .vp3, yet not be a proper Husqvarna Viking / Pfaff embroidery.
G407 Error: "Embroidery is corrupt"The embroidery is corrupt and cannot be loaded. Refer to source of this file for a solution.
FAQ Lists for Husqvarna Viking 3D Software Page 120
G408 Error "Embroidery XY coordinates incorrect"The embroidery is corrupt and cannot be loaded. Refer to source of this file for a solution.
G409 Error "Unrecognized file extension" when opening a fileThis message appears if you attempt to load a file with an extension that does not belong to any embroidery file types. For example, it would appear if you tried to drag and drop a .doc file onto the screen.
G413 Error "Embroidery not created using licensed software."This message may appear if you attempt to load an embroidery created in third-party software. Such embroideries may cause unpredictable results.
S601 Error "Embroidery too big for hoop."This message appears if the embroidery you are trying to load onto the screen is larger than the dimensions that will fit in either the Plus Hoop or creative Big Hoop.
Miscellaneous
G411 Error "Not enough memory to perform operation."This message will appear if system resources are low. Close other programs and try again. If this does not work, try restarting your computer.
Opening the Program
S603 Error "3D Design Splitter MFC Application has encountered a problem and needs to close."
This error can appear when you attempt to start 3D Design Splitter. This will happen if you have installed 3D Stitch Editor as an add-on, and the 3D Embroidery System software that is already installed has a later version than 3D Stitch Editor and 3D Design Splitter. 3D Design Splitter is installed as part of the 3D Stitch Editor add-on. If you have a CD containing 3D Embroidery System Software for version 7.2 or later, install the update for the 3D Embroidery System found in the Patch folder on the CD. If you have updated your 3D Embroidery System to version 7.2 or later using an update obtained with Smart Update, find the update you have already downloaded and run it again. If you are unable to find the update, or you are not sure if you have the latest update, use Smart Update to obtain the latest update, as described in FAQ #B008. When you run the update, you may be asked to choose between Modify, Repair and Remove. This selection appears because you have updated on a previous occasion. Choose the Repair option, and this will ensure all your 3D Embroidery System software is updated.
Product Information
G004 What is the price of the software, and where can I get it?Please contact your local dealer for prices and availability on all the Husqvarna Viking software. To find your local dealer see the Husqvarna Viking Dealer Locator
FAQ Lists for Husqvarna Viking 3D Software Page 121

[http://www.sew.husqvarna.se/dealers.htm]. You can always find this on the bottom bar of the Husqvarna Viking Software website.
Saving Embroideries
G410 Error "Unrecognized file extension" when saving a fileThis message appears if you type an incorrect extension that does not belong to any embroidery file types in the File Name box when trying to save a file.
G412 Error "Cannot save file."The module cannot save the file. Ensure that the disk where you are trying to save the embroidery is not write-protected, then try again. For instance, you have loaded an embroidery from a CD-ROM and then attempt to save the embroidery back to the CD. A CD-ROM is read only, therefore you will not be able to save the embroidery.
Screen Appearance
G415 I have changed the screen background color and now I wish to return to the original light blue
Use 3D Configure to change the background color. Follow the instructions in 3D Configure and select the RGB values 200, 232, 247 in the Colors dialog box.
G416 I wish to change the background color for the work areaUse 3D Configure to alter the background color for the work area. 3D Configure may also be used to turn the texture on or off for modules that use texture.
G418 I can't see some of the floating toolbars or iconsFirst, check View, Customize to see if the missing toolbar has been turned off. If all the toolbar names are checked (so they are turned on) and you still cannot locate a toolbar, it may have been moved to the edge of the screen so it is hard to see. If you move icons around it is possible to delete them. To reset the icons on a toolbar 1. Click View, Customize to see the Customize dialog. 2. Click the Toolbar tab. 3. Click the name of the required toolbar. 4. Click Reset. 5. Click Yes to confirm. The selection of icons on the toolbar and their order will be reset.
G428 The selection outline partly or completely disappears when I move some of my embroideries.
This can happen two reasons: • The embroidery has at least one perfectly vertical or horizontal edge • The embroidery is composed of very wide satin columns Embroideries with perfectly vertical or horizontal edges
FAQ Lists for Husqvarna Viking 3D Software Page 122

The selection box around the selected embroidery is drawn using a method to provide maximum contrast with the background. The outline that shows the shape of the embroidery is drawn using the same method. When the two lines are in the same place, they cancel each other out. If the embroidery is a rectangle or a square, the outline may disappear completely when you move the embroidery. Notice that the scaling, mirror and rotate handles are always visible, so you can use these as cues for positioning embroideries where the edges are not visible. Wide satin columns Satin columns that are made of very long stitches may be interpreted as a series of jump stitches when the outline is detected. Jump stitches are ignored by the outline detection, so wide satin columns may have no outline, or other stitches overlapping the column may be outlined instead. Positioning embroideries with missing outlines Click and drag the embroidery approximately into position. Use the arrow keys on the keyboard to nudge the embroidery into its final position without needing to see the outline.
S602 Some of the icons in the toolbar are 'grayed out'Certain Main toolbar icons (such as Real Size) and all Edit toolbar icons except for Preferences are only highlighted once an embroidery is shown on the screen.
Tutorials
G005 The window remains blank when I try to use the tutorials.You need version 6 or later of the Macromedia Flash Player to view the tutorials. Visit the Macromedia [http://www.macromedia.com] website and download and install the latest version of the Flash Player.
G011 What version of Macromedia Flash Player do I need to view the tutorials?You need version 6 or later of the Macromedia Flash Player to view the tutorials. Visit the Macromedia [http://www.macromedia.com] website and download and install the latest version of the Flash Player.
Using the Program
S603 Error "3D Design Splitter MFC Application has encountered a problem and needs to close."
This error can appear when you attempt to start 3D Design Splitter. This will happen if you have installed 3D Stitch Editor as an add-on, and the 3D Embroidery System software that is already installed has a later version than 3D Stitch Editor and 3D Design Splitter. 3D Design Splitter is installed as part of the 3D Stitch Editor add-on. If you have a CD containing 3D Embroidery System Software for version 7.2 or later, install the update for the 3D Embroidery System found in the Patch folder on the CD. If you have updated your 3D Embroidery System to version 7.2 or later using an update obtained with Smart Update, find the update you have already downloaded and run it again. If you are unable to find the update, or you are not sure if you have the latest update, use Smart Update to obtain the latest update, as described in FAQ #B008.
FAQ Lists for Husqvarna Viking 3D Software Page 123

When you run the update, you may be asked to choose between Modify, Repair and Remove. This selection appears because you have updated on a previous occasion. Choose the Repair option, and this will ensure all your 3D Embroidery System software is updated.
3D PictureStitch Listed versions: 7.0; 7.1; 7.2; 7.25
Acquiring Pictures
P001 3D PictureStitch crashes very quickly, before I can do any work, and I have a Kodak DC3400 digital camera.
This is caused by a clash with the TWAIN drivers for the Kodak DC3400. First, check the Kodak web site to ensure that you have the latest drivers for your DC3400. If problems persist, you have two options that will allow PictureStitch to work correctly: • Remove the Kodak DC3400 software from your system:This is the preferred option,
especially if you have a second PC available that you can use for downloading pictures from the camera. Use the Uninstall option provided with the software.
• Rename a part of the Kodak DC3400 TWAIN driver to disable the driver:This would allow you to re-enable the driver when you wanted to download images (but not with the Acquire option in PictureStitch ). You would need to disable the driver again to be able to use PictureStitch. See the instructions below.
How to temporarily disable the Kodak DC3400 TWAIN driver 1. Start Windows Explorer and browse to your Windows folder (usually C:\Windows or
C:\WinNT). (In some cases you will be warned about viewing files in the Windows folder. Use the option that allows you to continue.)
2. In the Windows folder, find the folder named "twain_32" and browse its contents. 3. Browse the folder named "DC3400" and you will see a file called "TwainDS.ds". 4. Right-click on "TwainDS.ds" and rename it as "TwainDS.xds". Putting this extra "x" in the
file name extension will cause the TWAIN system to ignore this device, which will allow PictureStitch to run correctly.
5. If you need to use the TWAIN driver for the Kodak DC3400 with other software, simply change the file name back to "TwainDS.ds" until you are ready to use PictureStitch again.
P003 Error "Problem with scanner or camera software."This message will appear when trying to use your scanner or digital camera if the device has not been installed correctly. Close 3D PictureStitch, follow the manufacturer's instructions for the Twain-compliant device, then reopen 3D PictureStitch and try again.
P004 Error "Scanner or camera is in use by another application."This message will appear when trying to use your scanner or digital camera if another graphics program is already open that uses the Twain-compliant device. Close 3D PictureStitch and the other graphics programs, then reopen 3D PictureStitch and try again.
P005 Error "Failure to acquire image due to unknown causes."
FAQ Lists for Husqvarna Viking 3D Software Page 124

This message will appear in certain circumstances when trying to use your scanner or digital camera, for example if the cable is disconnected during the scan or download. Close 3D PictureStitch, check the connections to your scanner or digital camera, then reopen 3D PictureStitch and try again.
P014 My scanner or digital camera is not shown when I try to Select Source, or the Select Source button is grayed out
The manufacturer of a TWAIN device must provide a Source Manager and a TWAIN Data source for your device to work with 3D PictureStitch. These will normally be installed when you install the software and drivers provided with the device. If you have installed a device and it is not shown in the list then it may not be TWAIN compliant. Refer to the device documentation and manufacturer for assistance.
Changing Preferences
G429 The 5"x7" Design hoop and the Endless hoop are no longer available in the hoop list.
The 5"x7" Design and Endless hoops were added to the hoop list in the Version 7.2 update. If you have installed a previous version of software after updating to Version 7.2, the hoop list will be replaced and will no longer include the 5"x7" Design and Endless hoops. Click this link to download and install the correct hoop list: Hoops.exe [http://www.vsmsoftware.net/Downloads/Updates/720/Hoops.exe]
Creating Embroideries
P012 The embroideries I create do not have the threads from my preferred thread manufacturer.
In 4-Color Mode and 4-Color Sepia Mode, the four preset Robison-Anton Rayon 40 thread colors are always used. Therefore, when you open embroideries in other 3D Embroidery System modules they must be changed manually if desired to shades in your preferred manufacturer’s thread range. Alternatively, use the 4-Color Custom Mode, and set the desired thread colors in Stitches Preferences. You can use any thread colors from any range, including custom threads you may have added to MyThreads.
P015 I would like to get rid of the lines created from the white background of my picture
After creating and saving an embroidery, open the file in 3D Stitch Editor and use the following instructions. Monochrome Modes 1. Use the Freehand Block Select feature to mark the stitches in the background. 2. Click Delete Stitches. 3. Save the adjusted embroidery. 4-Color Modes 1. Select one of the three color changes (located in the top corners of the embroidery and
shown as blue circles with a white C in the middle). 2. Click and drag it into the area of the embroidery that you wish to keep. 3. Repeat the two previous steps for the other two color changes. 4. Use the Freehand Block Select feature to mark the stitches in the background.
FAQ Lists for Husqvarna Viking 3D Software Page 125

5. Click Delete Stitches. 6. Save the adjusted embroidery.
P016 There is some extra stitching between the border and the pictureIf you select a border area that extends outside the picture area stitches are created using the extra part of the screen. Select a different border area and create stitches again.
Error Messages
B618 Error: "Please select a valid thread."This message appears if you attempt to click OK in the Color Selection dialog box when MyThreads is selected as the thread range and MyThreads is empty. To prevent this message appearing again, use Thread Manager in 3D Configure to add at least one thread to MyThreads.
G007 Error "Thread range is corrupt or missing. Cannot change thread. Reinstall the thread database."
This message usually means that the database driver is incorrectly installed. First follow the instructions in FAQ #G010 to fix this. If the message still appears, use the following procedure to repair the installation: 1. Right-click the Start button on the taskbar and select Explore from the popup menu. 2. In Explorer, browse to the folder C:\3DEmbroidery\System.
This assumes you have installed your 3D Embroidery System software in the default location of C:\3DEmbroidery. If you have installed the software in a different location, browse to the System folder at that location.
3. Delete the files named "MyThreads.mdb" and "ThreadDataBase.mdb". The file names may simply be shown as "MyThreads" and "ThreadDataBase".
4. Put your 3D Embroidery System software CD in your computer to re-run the installation. The installation should start automatically when you put your software CD in the computer. If this does not happen, browse to the CD with Explorer and double-click "Setup.exe" to start the installation.
5. When the choice appears, select the "Modify or remove" option and click Next. 6. In the next screen, select Repair and click Next. 7. Continue with the installation and follow the on-screen instructions. When the installation
is complete, the MyThreads and standard thread databases will be restored to their original installation state.
If you had previously backed up your MyThreads database, you can now use the Restore option in Thread Manager to restore your MyThreads database. See the on-line help in Thread Manager for more information.
G010 How do I fix the database driver used by my 3D Embroidery System software?
Database drivers are normally found installed on most computers – they are commonly installed as part of the installation of Microsoft® Office or as an upgrade of key components of the operating system. Key components of the 3D Embroidery System need to be able to use these drivers. Therefore, any difficulties in using these drivers may affect the functionality of certain
FAQ Lists for Husqvarna Viking 3D Software Page 126

features of the 3D Embroidery System. Examples include changing a thread color in any module and/or Motif Fill/Line properties in 3D Digitizing. If you have Windows® XP with Service Pack 2 installed, use the Database Driver Fix described below. Otherwise, install the drivers manually as follows: Installation of the Database files 1. Insert the 3D Embroidery System CD. 2. Cancel the installation screen if it appears. 3. Use Windows® Explorer to browse to the D:\Technical folder – where D:\ is the name of
your CD or DVD drive. 4. Double click on the Database Drivers folder. 5. Double click on the Jet 4 folder. 6. Double click on the folder that is for your operating system. 7. Double click on the file to start the installation of the Jet 4 Service Pack 8 files. This
should take a few moments for the files to be installed. 8. After the installation is complete, browse to the D:\Technical\Database Drivers\MDAC 2.8
folder. 9. Double click on the MDAC_TYP.exe file. The Microsoft Data Access Components 2.8
Setup dialog box will appear. 10. Select the option “I accept all the terms of the preceding license agreement”. 11. Click on the Next button. 12. Click on the Finish button when it appears. This will start the installation process for the
MDAC 2.8 files. 13. After the MDAC 2.8 installation is complete, reboot your computer and continue to use
your 3D Embroidery System. 14. If you are still having difficulties, use the Database Driver Fix that follows. Database Driver Fix 1. Insert the 3D Embroidery System CD. 2. Cancel the installation screen if it appears. 3. Use Windows® Explorer to browse to the D:\Technical folder – where D:\ is the name of
your CD or DVD drive. 4. Double click on the Database Drivers folder. 5. Double click on the MSAccessDbFixer file (this may be shown with a .exe extension). A
window will appear briefly on the screen. 6. Continue to use your 3D Embroidery System.
General
G001 General difficulties with hardware and softwareTo try to determine the cause of any odd difficulties with the 3D Embroidery System, the best method is to reboot the computer in safe mode. If the problem is then solved, you know that some clash of hardware and/or software such as device drivers is to blame. You can then obtain more help from your computer dealer to analyze the cause and reconfigure your computer if necessary. To start Windows in Safe Mode 1. Close all programs. 2. Click Start, and then click Shut Down or Turn Off Computer, whichever is shown. 3. Click Restart. If necessary, click OK to confirm. 4. Your computer will shut down and restart. 5. As your computer restarts, press and hold the F8 key until a menu of windows startup
options appears.
FAQ Lists for Husqvarna Viking 3D Software Page 127

6. Use the up and down arrow keys to highlight Safe mode, and then press ENTER. When you hold down the F8 key, your computer may beep rapidly and report keyboard errors as it restarts. Release the F8 key briefly to skip any errors and press F8 again until you have the Startup Menu on your screen.
Loading Pictures
P006 Error "Could not load picture file."This message could appears if the desired picture is not where the module expects it to be, for example if it was loaded from a floppy disk, then closed and the floppy disk removed. The message would appear if you try to load the picture from the Recent Files list on the File menu. It could also appear if the file you are attempting to load is corrupt. For example, it might have an extension such as .BMP or .JPG, yet not be a proper picture file.
P009 When I view some files before opening them in the preview Window of the Open dialog box they appear blue.
Files saved in Jpg format from Adobe® Photoshop® with non-image data may appear blue in the preview window. This does not affect the way they appear on the 3D PictureStitch screen. To avoid this, if you use Adobe® Photoshop® to save .jpg files, make sure to check the Exclude non-image data box. If you do not have access to this program and have received this type of file, open and re-save in another program such as Jasc® Paint Shop Pro. This automatically removes the non-image data.
Miscellaneous
G411 Error "Not enough memory to perform operation."This message will appear if system resources are low. Close other programs and try again. If this does not work, try restarting your computer.
Picture Colors
G426 Some of the color values on the Custom tab of the Colors dialog box are not visible.
When this happens, only the Hue and Red color values are visible. The Sat (Saturation), Lum (Luminosity), Green and Blue values do not fit on the dialog box. To fix this, use Smart Update to update your 3D Embroidery System software to the latest version.
Preferences
G429 The 5"x7" Design hoop and the Endless hoop are no longer available in the hoop list.
The 5"x7" Design and Endless hoops were added to the hoop list in the Version 7.2 update. If you have installed a previous version of software after updating to Version 7.2, the hoop list will be replaced and will no longer include the 5"x7" Design and Endless hoops. Click this link to download and install the correct hoop list: Hoops.exe [http://www.vsmsoftware.net/Downloads/Updates/720/Hoops.exe]
FAQ Lists for Husqvarna Viking 3D Software Page 128

Preparing Pictures
D023 Error "You must select an area first, before applying the crop tool."Use the Box Select feature to select an area of the Picture around which you wish to crop the background.
D024 Error "Cannot rotate - picture will be bigger than 2000 x 2000 pixels if rotated to this extent."
When rotating a picture, certain angles could make the picture larger than the maximum allowed. If this message appears, either rotate the picture to a different angle, or reduce the size of the picture, then try again.
D034 Creating MiniPics for 3D Digitizing and 3D PictureStitchBefore Starting An appropriate image editing package, such as Jasc® Paint Shop Pro, is required that will save .ras format, as well as a good knowledge of working with graphic files. About MiniPics Create Medium MiniPics at 400x400 pixels, and Small MiniPics at 250x250 pixels. The color palette can be 256 colors or more. White is treated as transparent when you load a MiniPic, so anything underneath the white part of a MiniPic will show through. If you want an area to be white in your MiniPic, use a "false white" such as very pale yellow, then change it to white with the Flood Fill tool. It is recommended that you create a new folder for saving your own MinPics, for instance: C:\3DEmbroidery\MyDesigns\MyMiniPics. How To Make a MiniPic 1. Use an existing picture:Open an existing image; Either crop around the required area
or resize the whole picture to the size of a Medium or Small MiniPic. 2. Or, create a new MiniPic from scratch:Start a new image and set it to the size of either
a medium (400x400 pixels) or small (250x250 pixels) MiniPic; Use the drawing tools in the graphic package to create the desired picture for the MiniPic.
3. Ensure that the colors are solid color areas. See the existing MiniPics for examples. 4. Save the file in Sun Raster Image format with the “.ras” extension. 5. Start Windows® Explorer and browse to the folder where you saved the “.ras” file. 6. Click on the file to highlight it. 7. Right-click to bring up a popup menu, and select the Rename option from the menu. 8. Edit the file name to change the extension from “.ras” to “.axw” and press Enter. 9. You will be warned about changing the file extension and asked if you want to continue. 10. Click Yes and the change to the file extension will be saved. 11. Start 3D Digitizing or 3D PictureStitch and click the MiniPics icon so that the MiniPics
Viewer appears. 12. Click the button with three dots at the end of the Directory Browser box so that the
Browse For Folder dialog appears. 13. Browse to the folder where you saved your new MiniPic and click OK. 14. The MiniPics View will show your new MiniPic, along with any MiniPics you have already
created. 15. Click the MiniPic and it will be used in the picture.
FAQ Lists for Husqvarna Viking 3D Software Page 129

D035 Tips on using the Outline Thinner toolIt is important where you click after selecting the Outline Thinner tool. The color you click on is the color that will be thinned. So if you click on a black outline, this outline will be thinned. Alternatively if you click on an area (such as white on a black and white drawing), this area will be thinned and the outline around it will be thickened to compensate. This leaves the drawing indistinguishable from the original. The Outline Thinner tool may not work if your picture has dithering, such as a scanned image or one that has been converted from a JPEG file. These pictures have additional colored pixels that can affect the result.
D053 I am trying to Resize an area, but nothing happens when I click the Resize icon or select Resize from the Picture menu
To resize when part of a picture is selected, simply click and drag any of the resize handles on the selection box (out to increase size, in to decrease size). When the mouse is over a resize handle on a corner of the selection box, the pointer changes from an arrow to the resize pointer.
D054 I am trying to Rotate an area, but nothing happens when I click the Rotate icon or select Rotate from the Picture menu
To rotate when part of a picture is selected, simply click and drag the round rotate handle on the middle right of the selection box. Click and drag down to rotate clockwise, up to rotate counterclockwise.
D055 The Expander did not expand all my linesThe Expander makes lines thicker around areas in the picture that match the background color. The Expander is intended for use with scanned pictures, such as line art that has been converted to monochrome and despeckled to clean it up.
P002 Error "Please enter an integer between 16 and 2000."When creating a new file, the largest size available is 2000 x 2000. If you enter dimensions smaller than 16 or larger than 2000 pixels, this message will appear. Choose a different size and try again.
P007 Error "You cannot select a region smaller than 5 x 5 pixels."When using the Box Select or Freehand Select features, this message will appear if the area you try to select is extremely small. Click and drag to select a larger area.
Product Information
G004 What is the price of the software, and where can I get it?Please contact your local dealer for prices and availability on all the Husqvarna Viking software. To find your local dealer see the Husqvarna Viking Dealer Locator [http://www.sew.husqvarna.se/dealers.htm]. You can always find this on the bottom bar of the Husqvarna Viking Software website.
FAQ Lists for Husqvarna Viking 3D Software Page 130

Saving Embroideries
G402 Error: "Design too large for output file format"Certain formats are limited to the size of hoop used on their specific embroidery machine, for example .sew. If you attempt to save a file in this format that is bigger than the largest available hoop size this message would appear.
G404 I have saved an embroidery in .sew format, and two files have been createdJanome software cannot load embroideries with more than 12 colors. If a file to be exported in .sew format has more than 12 color changes, it will automatically be split into multiple files, with the last character of the filename "1", "2", and so on.
G410 Error "Unrecognized file extension" when saving a fileThis message appears if you type an incorrect extension that does not belong to any embroidery file types in the File Name box when trying to save a file.
G427 The manuals and help say that I can save PES files as version 5, but it only seems to save as version 2.
This is an erratum in the manuals and help. Up to version 7.2, the 3D Embroidery System modules can only save PES files as version 2. PES version 2 has a size restriction of 130mm x 180mm. From version 7.25 onwards, PES files are saved as version 2 if the embroidery is 130mm x 180mm or smaller. Files larger than this are saved as PES version 6. Use Smart Update to ensure your 3D Embroidery System modules are updated to the latest version. See FAQ #B008. Always print a worksheet from the 3D Embroidery System to show the correct colors for your embroidery, before saving it to a format that does not support full thread color information.
P012 The embroideries I create do not have the threads from my preferred thread manufacturer.
In 4-Color Mode and 4-Color Sepia Mode, the four preset Robison-Anton Rayon 40 thread colors are always used. Therefore, when you open embroideries in other 3D Embroidery System modules they must be changed manually if desired to shades in your preferred manufacturer’s thread range. Alternatively, use the 4-Color Custom Mode, and set the desired thread colors in Stitches Preferences. You can use any thread colors from any range, including custom threads you may have added to MyThreads.
Saving Pictures
P008 Error "Could not save picture file."When saving a picture file to a floppy disk, this message will appear if the Write-Protect tab is activated. Take the floppy disk out of the drive, flip the tab the other way and try again. It could also appear if the disk is full. This is most likely to occur when saving to a floppy disk; use another disk. If the message appears when attempting to save to hard disk, delete some files then try again.
FAQ Lists for Husqvarna Viking 3D Software Page 131

Screen Appearance
G415 I have changed the screen background color and now I wish to return to the original light blue
Use 3D Configure to change the background color. Follow the instructions in 3D Configure and select the RGB values 200, 232, 247 in the Colors dialog box.
G416 I wish to change the background color for the work areaUse 3D Configure to alter the background color for the work area. 3D Configure may also be used to turn the texture on or off for modules that use texture.
G418 I can't see some of the floating toolbars or iconsFirst, check View, Customize to see if the missing toolbar has been turned off. If all the toolbar names are checked (so they are turned on) and you still cannot locate a toolbar, it may have been moved to the edge of the screen so it is hard to see. If you move icons around it is possible to delete them. To reset the icons on a toolbar 1. Click View, Customize to see the Customize dialog. 2. Click the Toolbar tab. 3. Click the name of the required toolbar. 4. Click Reset. 5. Click Yes to confirm. The selection of icons on the toolbar and their order will be reset.
P010 I wish to change the background color for the work area and the 3D Create Stitches window
Use 3D Configure to alter the background color for the work area and Real Size. 3D Configure may also be used to turn the texture on or off. Note that the 3D Create Stitches window only uses white for the background/fabric color when any 4-color mode is selected. This is so that the colors can be seen clearly. The texture is not used in the 4-color modes.
P011 The stitches appear different in the 3D Create Stitches window compared with other modules
In 3D PictureStitch the view is specially set to give the most realistic representation for PictureStitch embroidery.
P013 I have moved the Color panel or the Drawing panel and I can't put it back in position
If the control panel is 'floating' on top of the window, double-click the title bar and the control panel will move back to its original position. If the control panel is docked on the wrong side of the window, click and drag the title bar to the middle of the right-hand edge of the window until the outline snaps into position on the right. Release the mouse button and the control panel will be dropped into its original position.
FAQ Lists for Husqvarna Viking 3D Software Page 132

P017 One of the control panels is not showing or is in the wrong position in 3D PictureStitch.
If the control panel is visible but in the wrong position, double-click its title bar. If it is still in the wrong position, click and drag its title bar to move it back to its normal position. If this does not work, or the control panel is not visible, use Reset All Modules. Note that Reset All Modules affects all modules in the 3D Embroidery System, so any changes to settings in each module will be reset. The recent files list on the File menu is also cleared, but this does not affect any files you have saved. To use Reset All Modules: 1. Close all 3D Embroidery System modules.
Any modules left open will not be affected by Reset All Modules. 2. Start 3D Configure (on the Start menu, select Start, All Programs, 3D Embroidery
System, 3D Configure). 3. Click the Reset All Modules button. 4. Click OK to reset, then click OK again to clear the confirmation message. The next time you start 3D PictureStitch, the control panel will be in the correct position.
Send To d-Card Reader/Writer Unit
A320 I am having difficulty using an embroidery on my machine when I send it to a d-Card from a horizontal hoop with Send 1 or Send 2.
This can happen if you are using a horizontal hoop on screen, and the embroidery is more than 150mm wide. When the embroidery is sent to the d-Card with Send To, the embroidery is not rotated. Before sending the embroidery to a d-Card, change the hoop orientation to vertical and, if the embroidery no longer fits, rotate the embroidery by 90 degrees. If you are using 3D Digitizing, 3D PictureStitch or 3D Cross Stitcher to create the embroidery, copy the finished design to 3D Embroidery to rotate it and setup the vertical hoop.
Sending Files to Machines
G422 I cannot send a file to an embroidery machineClick the 3D Configure icon to start 3D Configure. This will allow you to adjust the Send 1 and Send 2 options for your embroidery machine.
Splitting Embroideries
S011 Error "The cut line crosses over itself. Please define another cut line and try again."
This message appears when you place a cut line that crosses itself at some point. If you want to split the embroidery then you must redo the cut line, without it crossing over itself.
S012 Error "The cut line finishes in the middle of the embroidery. Please define another cut line and try again."
FAQ Lists for Husqvarna Viking 3D Software Page 133

This message appears when you right-click to end the cut line before the cut line goes all the way through the embroidery. If you want to split the embroidery then you must redo the cut line.
S013 Error "The cut line does not enter the embroidery. Please define another cut line and try again."
This message appears when you right-click to end the cut line before the cut line has crossed any stitches. If you want to split the embroidery then you must redo the cut line.
Thread Colors
B617 The Yli thread ranges are no longer available in Color Selection or Thread Manager.
This can happen when you install the 3D Embroidery System 7.2 Update. Use Smart Update to obtain the latest Thread Database Update. If a Security Warning appears, click Run to go ahead and run the update program. To install the update when the WinZip Self-Extractor appears, click the Unzip button, then click OK, then click Close.
B618 Error: "Please select a valid thread."This message appears if you attempt to click OK in the Color Selection dialog box when MyThreads is selected as the thread range and MyThreads is empty. To prevent this message appearing again, use Thread Manager in 3D Configure to add at least one thread to MyThreads.
G007 Error "Thread range is corrupt or missing. Cannot change thread. Reinstall the thread database."
This message usually means that the database driver is incorrectly installed. First follow the instructions in FAQ #G010 to fix this. If the message still appears, use the following procedure to repair the installation: 1. Right-click the Start button on the taskbar and select Explore from the popup menu. 2. In Explorer, browse to the folder C:\3DEmbroidery\System.
This assumes you have installed your 3D Embroidery System software in the default location of C:\3DEmbroidery. If you have installed the software in a different location, browse to the System folder at that location.
3. Delete the files named "MyThreads.mdb" and "ThreadDataBase.mdb". The file names may simply be shown as "MyThreads" and "ThreadDataBase".
4. Put your 3D Embroidery System software CD in your computer to re-run the installation. The installation should start automatically when you put your software CD in the computer. If this does not happen, browse to the CD with Explorer and double-click "Setup.exe" to start the installation.
5. When the choice appears, select the "Modify or remove" option and click Next. 6. In the next screen, select Repair and click Next. 7. Continue with the installation and follow the on-screen instructions. When the installation
is complete, the MyThreads and standard thread databases will be restored to their original installation state.
FAQ Lists for Husqvarna Viking 3D Software Page 134

If you had previously backed up your MyThreads database, you can now use the Restore option in Thread Manager to restore your MyThreads database. See the on-line help in Thread Manager for more information.
G010 How do I fix the database driver used by my 3D Embroidery System software?
Database drivers are normally found installed on most computers – they are commonly installed as part of the installation of Microsoft® Office or as an upgrade of key components of the operating system. Key components of the 3D Embroidery System need to be able to use these drivers. Therefore, any difficulties in using these drivers may affect the functionality of certain features of the 3D Embroidery System. Examples include changing a thread color in any module and/or Motif Fill/Line properties in 3D Digitizing. If you have Windows® XP with Service Pack 2 installed, use the Database Driver Fix described below. Otherwise, install the drivers manually as follows: Installation of the Database files 1. Insert the 3D Embroidery System CD. 2. Cancel the installation screen if it appears. 3. Use Windows® Explorer to browse to the D:\Technical folder – where D:\ is the name of
your CD or DVD drive. 4. Double click on the Database Drivers folder. 5. Double click on the Jet 4 folder. 6. Double click on the folder that is for your operating system. 7. Double click on the file to start the installation of the Jet 4 Service Pack 8 files. This
should take a few moments for the files to be installed. 8. After the installation is complete, browse to the D:\Technical\Database Drivers\MDAC 2.8
folder. 9. Double click on the MDAC_TYP.exe file. The Microsoft Data Access Components 2.8
Setup dialog box will appear. 10. Select the option “I accept all the terms of the preceding license agreement”. 11. Click on the Next button. 12. Click on the Finish button when it appears. This will start the installation process for the
MDAC 2.8 files. 13. After the MDAC 2.8 installation is complete, reboot your computer and continue to use
your 3D Embroidery System. 14. If you are still having difficulties, use the Database Driver Fix that follows. Database Driver Fix 1. Insert the 3D Embroidery System CD. 2. Cancel the installation screen if it appears. 3. Use Windows® Explorer to browse to the D:\Technical folder – where D:\ is the name of
your CD or DVD drive. 4. Double click on the Database Drivers folder. 5. Double click on the MSAccessDbFixer file (this may be shown with a .exe extension). A
window will appear briefly on the screen. 6. Continue to use your 3D Embroidery System.
G419 "The color xx has been found in your database, but the thread color is not exactly the same."
This message appears if the Thread Range and Color Number of the selected color are identical to those in your thread database, but some aspect of the color is different. It could
FAQ Lists for Husqvarna Viking 3D Software Page 135

be a different material or weight, or have additional colors as a variegated thread. This could happen if the design you are attempting to edit was supplied by someone with a different version of the color, for instance if they have edited it in MyThreads, or if they have a later version of the thread database. Use the Import Threads From Embroidery function to add other users’ thread definitions to your MyThreads database. 1. Select Import Threads from Embroidery in the File Menu and an Open dialog box will
appear. 2. Select the desired .vp3 embroidery file. 3. Click Open and any custom thread definitions that do not appear in your MyThreads will
be added to the end of your MyThreads list. To check for the latest updates for the 3D Embroidery System, use Smart Update in 3D Configure.
G420 "Could not find xx in your database. Matching to closest thread in yy."This message appears if the Thread Range of the selected color is not found in your thread database. This could happen if the design you are attempting to edit was supplied by someone with a later version of the thread database. To check for the latest updates for the 3D Embroidery System, use Smart Update in 3D Configure.
G421 Error "Databases are corrupt or missing. Cannot edit the thread color."This message appears if there is a problem with your thread database. You will be unable to choose a thread color. First close all the modules of the 3D Embroidery System, close down your computer and restart. If this does not clear the problem, restore a backup database if you have created one using Thread Manager in 3D Configure. Otherwise, you need a new version of the thread database. To check for the latest updates for the 3D Embroidery System, use Smart Update in 3D Configure. Alternatively, you may need to uninstall and reinstall your 3D Embroidery System software.
Tutorials
G005 The window remains blank when I try to use the tutorials.You need version 6 or later of the Macromedia Flash Player to view the tutorials. Visit the Macromedia [http://www.macromedia.com] website and download and install the latest version of the Flash Player.
G011 What version of Macromedia Flash Player do I need to view the tutorials?You need version 6 or later of the Macromedia Flash Player to view the tutorials. Visit the Macromedia [http://www.macromedia.com] website and download and install the latest version of the Flash Player.
3D Cross Stitcher Listed versions: 7.0; 7.1; 7.2; 7.25
FAQ Lists for Husqvarna Viking 3D Software Page 136

Acquiring Pictures
C002 Error message "Not enough memory to load this picture."This message may appear if the picture is very large. If you are loading the picture, use picture editing software to reduce it size. If you are acquiring the picture from a scanner or digital camera, change the settings in the acquiring or scanning application so the picture is smaller.
Creating Embroideries
C001 My cross stitch embroidery stitches out of alignmentWhen stitching out an embroidery from 3D Cross Stitcher you are working on a grid of squares. Unlike any other type of embroidery design, you cannot add compensation, or overlap objects to allow for pull of the fabric. If your fabric is not hooped up correctly then gaps can appear between sections, sometimes appearing that stitches are missing altogether. Use extra backing and ensure the fabric is tight in the hoop. Lowering the number of cross threads and enlarging the cross size also helps.
C021 When I use 3D Create Stitches, a progress bar sometimes appears. When it appears, it does not always progress to the end. Have all my stitches been created?
The progress bar only appears when it takes a long time to create the embroidery that is displayed by 3D Create Stitches. The amount of time taken depends on the power of your computer. It appears so that you can see that your computer is creating the stitches. All stitches are created, regardless of how far the progress bar progresses.
C022 The embroidery is larger than the design size I had selected in Hoop Preferences
This may happen if you have French knots on the edges of your design. French knots are drawn by placing their center point on any point that snaps to half grid spacing. Therefore, if they are placed along the edges of the design, half the French knot will be outside the grid. If French knots are placed on all edges of the grid, the resulting embroidery will be larger than the design by the size of a French knot. French knots are only scaled in comparison to the full cross size when the Cross Size in Preferences is set between 2mm and 4mm. The French knots will not be any smaller or larger than they are at these limits.
C023 The embroidery seems to have too many stitchesCheck the Stitches tab in Preference to ensure you do not have a large number of strands for crosses and/or backstitch in the design. Increasing the number of strands will increase the number of stitches.
Designing Fixed Fonts
C026 I have selected a character I have designed, but the Save Char button is greyed out on the Letter tab
FAQ Lists for Husqvarna Viking 3D Software Page 137

The Save Char button is not available if there are more than three colors in the palette. Use Remove Unused Colors in Color Configuration to reduce the palette to the colors used to design the font.
C027 I have saved all my characters, but when I try to use the font there is nothing shown in the preview, and nothing appears on the design when I click Apply
Use Configure Fixed Font on the File menu to check that you have set the Line Height and Baseline values correctly. The Line Height should be the height of the 'A', plus space above for accents on uppercase characters, plus space below for descenders, plus at least one more grid square below for space between multiple lines of text. The Baseline should be the amount of grid squares that is allowed for descenders. If the Baseline is set to the same or greater than the Line Height, this may also cause nothing to appear when the font is used.
Editing Designs
C019 When I use Rotate 90 on a selection, the selection becomes a squareThe selection area is extended by Rotate 90 so that you can clearly see where the selection will be placed by each click of the Rotate 90 icon. The stitches in the selection area are not changed.
C020 Nothing seems to happen sometimes when I use Undo after using EraseEach time you click with Erase, this is recorded as an action you can Undo. If you click in blank space, or you miss the item you are trying to Erase, the action is still recorded for Undo. Hence, when you Undo, the Erase action is undone, even though it seemed to have no effect on the design.
Error Messages
B618 Error: "Please select a valid thread."This message appears if you attempt to click OK in the Color Selection dialog box when MyThreads is selected as the thread range and MyThreads is empty. To prevent this message appearing again, use Thread Manager in 3D Configure to add at least one thread to MyThreads.
C028 Error "Runtime error 201 at 00401CCD".This error only appears if you attempt to run 3D Cross Stitcher under Windows® 98/ME. 3D Embroidery System software is designed to run on Windows® XP. This error does not appear when 3D Cross Stitcher is used on Windows® XP.
C029 Error "System Error. Code 87. The parameter is incorrect".This error only appears if you attempt to run 3D Cross Stitcher under Windows® 98/ME. 3D Embroidery System software is designed to run on Windows® XP. This error does not appear when 3D Cross Stitcher is used on Windows® XP.
FAQ Lists for Husqvarna Viking 3D Software Page 138

G007 Error "Thread range is corrupt or missing. Cannot change thread. Reinstall the thread database."
This message usually means that the database driver is incorrectly installed. First follow the instructions in FAQ #G010 to fix this. If the message still appears, use the following procedure to repair the installation: 1. Right-click the Start button on the taskbar and select Explore from the popup menu. 2. In Explorer, browse to the folder C:\3DEmbroidery\System.
This assumes you have installed your 3D Embroidery System software in the default location of C:\3DEmbroidery. If you have installed the software in a different location, browse to the System folder at that location.
3. Delete the files named "MyThreads.mdb" and "ThreadDataBase.mdb". The file names may simply be shown as "MyThreads" and "ThreadDataBase".
4. Put your 3D Embroidery System software CD in your computer to re-run the installation. The installation should start automatically when you put your software CD in the computer. If this does not happen, browse to the CD with Explorer and double-click "Setup.exe" to start the installation.
5. When the choice appears, select the "Modify or remove" option and click Next. 6. In the next screen, select Repair and click Next. 7. Continue with the installation and follow the on-screen instructions. When the installation
is complete, the MyThreads and standard thread databases will be restored to their original installation state.
If you had previously backed up your MyThreads database, you can now use the Restore option in Thread Manager to restore your MyThreads database. See the on-line help in Thread Manager for more information.
G010 How do I fix the database driver used by my 3D Embroidery System software?
Database drivers are normally found installed on most computers – they are commonly installed as part of the installation of Microsoft® Office or as an upgrade of key components of the operating system. Key components of the 3D Embroidery System need to be able to use these drivers. Therefore, any difficulties in using these drivers may affect the functionality of certain features of the 3D Embroidery System. Examples include changing a thread color in any module and/or Motif Fill/Line properties in 3D Digitizing. If you have Windows® XP with Service Pack 2 installed, use the Database Driver Fix described below. Otherwise, install the drivers manually as follows: Installation of the Database files 1. Insert the 3D Embroidery System CD. 2. Cancel the installation screen if it appears. 3. Use Windows® Explorer to browse to the D:\Technical folder – where D:\ is the name of
your CD or DVD drive. 4. Double click on the Database Drivers folder. 5. Double click on the Jet 4 folder. 6. Double click on the folder that is for your operating system. 7. Double click on the file to start the installation of the Jet 4 Service Pack 8 files. This
should take a few moments for the files to be installed. 8. After the installation is complete, browse to the D:\Technical\Database Drivers\MDAC 2.8
folder. 9. Double click on the MDAC_TYP.exe file. The Microsoft Data Access Components 2.8
Setup dialog box will appear.
FAQ Lists for Husqvarna Viking 3D Software Page 139

10. Select the option “I accept all the terms of the preceding license agreement”. 11. Click on the Next button. 12. Click on the Finish button when it appears. This will start the installation process for the
MDAC 2.8 files. 13. After the MDAC 2.8 installation is complete, reboot your computer and continue to use
your 3D Embroidery System. 14. If you are still having difficulties, use the Database Driver Fix that follows. Database Driver Fix 1. Insert the 3D Embroidery System CD. 2. Cancel the installation screen if it appears. 3. Use Windows® Explorer to browse to the D:\Technical folder – where D:\ is the name of
your CD or DVD drive. 4. Double click on the Database Drivers folder. 5. Double click on the MSAccessDbFixer file (this may be shown with a .exe extension). A
window will appear briefly on the screen. 6. Continue to use your 3D Embroidery System.
Flood Fill
C016 I have loaded a picture as a background only, but Flood Fill covers the whole picture when I try to fill colored areas of the picture
Flood Fill is not affected by areas of color in a background picture. An empty area of the design can be flood filled until it meets existing crosses and backstitch. A connected area of the same colored crosses can be flood filled until it meets an empty area, backstitch or crosses in a different color. To clearly see the areas that will be flood filled, turn off the background picture.
C017 Flood Fill does not fill the whole area as expectedIn some cases, the fill will not go through narrow areas. If the fill could not continuously connect a fill of full crosses through a narrow gap, the gap will act as a barrier to flood fill.
C018 I have a pattern that uses freehand backstitch. When I use it to fill an area it does not seem to fill the area completely or some lines of freehand backstitch appear to be missing.
When a pattern is used to fill an area, freehand backstitch in the pattern will only be placed when both end points lie within the fill area. Long sections of freehand backstitch are less likely to have both ends in the fill area and may not give the desired result. If you wish to use freehand backstitch in a pattern, try to use short sections where possible.
General
G001 General difficulties with hardware and softwareTo try to determine the cause of any odd difficulties with the 3D Embroidery System, the best method is to reboot the computer in safe mode. If the problem is then solved, you know that some clash of hardware and/or software such as device drivers is to blame. You can then obtain more help from your computer dealer to analyze the cause and reconfigure your computer if necessary. To start Windows in Safe Mode
FAQ Lists for Husqvarna Viking 3D Software Page 140

1. Close all programs. 2. Click Start, and then click Shut Down or Turn Off Computer, whichever is shown. 3. Click Restart. If necessary, click OK to confirm. 4. Your computer will shut down and restart. 5. As your computer restarts, press and hold the F8 key until a menu of windows startup
options appears. 6. Use the up and down arrow keys to highlight Safe mode, and then press ENTER. When you hold down the F8 key, your computer may beep rapidly and report keyboard errors as it restarts. Release the F8 key briefly to skip any errors and press F8 again until you have the Startup Menu on your screen.
Installation and CD
G601 Whenever I insert my CD it asks if I want to uninstall or modify my softwareAll 3D Embroidery System Software has an automatic installation whenever the CD is inserted. The CD detected your software was already installed so you have the options to uninstall the software or modify the installation. Simply click 'Cancel', and then 'Yes' to confirm it. Then click 'Finish' to close the installation window. When you use the CD again, you may hold down the Shift key for 30 seconds when the CD is inserted if you want to prevent the installation menu appearing.
G602 The programs are not being installed to the correct folderThe installation program will by default put the embroidery system onto drive C:. The drive letter that the embroidery system will install to is shown during the install and can be changed by the user. The drive or partition that the embroidery system is installed to will make no difference to its operation.
G603 I do not have the 3D Embroidery System logos beside each file in Windows Explorer
Your icon association is set up during installation. You will have to re-install.
Loading Pictures
C002 Error message "Not enough memory to load this picture."This message may appear if the picture is very large. If you are loading the picture, use picture editing software to reduce it size. If you are acquiring the picture from a scanner or digital camera, change the settings in the acquiring or scanning application so the picture is smaller.
C003 Error message "LoadImage: GDI+ out of memory."This message could appear if the selected picture is not a valid picture file. For example, it might have an extension such as .bmp or .jpg, yet not be a proper picture file.
Miscellaneous
G411 Error "Not enough memory to perform operation."
FAQ Lists for Husqvarna Viking 3D Software Page 141

This message will appear if system resources are low. Close other programs and try again. If this does not work, try restarting your computer.
G601 Whenever I insert my CD it asks if I want to uninstall or modify my softwareAll 3D Embroidery System Software has an automatic installation whenever the CD is inserted. The CD detected your software was already installed so you have the options to uninstall the software or modify the installation. Simply click 'Cancel', and then 'Yes' to confirm it. Then click 'Finish' to close the installation window. When you use the CD again, you may hold down the Shift key for 30 seconds when the CD is inserted if you want to prevent the installation menu appearing.
G603 I do not have the 3D Embroidery System logos beside each file in Windows Explorer
Your icon association is set up during installation. You will have to re-install.
Opening Cross Stitch Designs
C004 Error message "Cannot open file "xx.krz". The device is not ready."This message appears if the desired cross stitch design (.krz) file is not where the module expects it to be. For example, if a design was loaded into the program from a floppy disk, then closed and the floppy disk removed. The message would appear if you tried to load the design from the recent files list on the File menu.
C005 Error message "No valid cross stitch data (Unknown file format)."This message appears if the file you are attempting to load is corrupt. For example, it might have a .krz extension, yet not be a proper cross stitch design file.
C015 I can't drag and drop designs from the Open dialog boxTo drag and drop cross stitch designs onto the work area, right-click Start, then Explore to start Windows® Explorer. Then follow the instructions under Drag and Drop.
Product Information
G004 What is the price of the software, and where can I get it?Please contact your local dealer for prices and availability on all the Husqvarna Viking software. To find your local dealer see the Husqvarna Viking Dealer Locator [http://www.sew.husqvarna.se/dealers.htm]. You can always find this on the bottom bar of the Husqvarna Viking Software website.
Saving Cross Stitch Designs
C006 Error message "Cannot create file "xx.krz". Access is denied."This message appears if, for instance, you attempt to save the design to a CD. A CD-ROM is read only, therefore you will not be able to save the design.
FAQ Lists for Husqvarna Viking 3D Software Page 142

Saving Embroideries
E018 Error message "Embroidery has too many stitches for file format."There is a limit on the number of stitches that may be saved to an embroidery file in Pfaff (.pcs) file format. This message appears if the embroidery you attempt to save to this format exceeds this limit.
G402 Error: "Design too large for output file format"Certain formats are limited to the size of hoop used on their specific embroidery machine, for example .sew. If you attempt to save a file in this format that is bigger than the largest available hoop size this message would appear.
G404 I have saved an embroidery in .sew format, and two files have been createdJanome software cannot load embroideries with more than 12 colors. If a file to be exported in .sew format has more than 12 color changes, it will automatically be split into multiple files, with the last character of the filename "1", "2", and so on.
G410 Error "Unrecognized file extension" when saving a fileThis message appears if you type an incorrect extension that does not belong to any embroidery file types in the File Name box when trying to save a file.
G427 The manuals and help say that I can save PES files as version 5, but it only seems to save as version 2.
This is an erratum in the manuals and help. Up to version 7.2, the 3D Embroidery System modules can only save PES files as version 2. PES version 2 has a size restriction of 130mm x 180mm. From version 7.25 onwards, PES files are saved as version 2 if the embroidery is 130mm x 180mm or smaller. Files larger than this are saved as PES version 6. Use Smart Update to ensure your 3D Embroidery System modules are updated to the latest version. See FAQ #B008. Always print a worksheet from the 3D Embroidery System to show the correct colors for your embroidery, before saving it to a format that does not support full thread color information.
Screen Appearance
C008 I can’t see all of the color name on the status barThe status bar shows the full Thread Range and Thread Number for all thread colors in both the Standard Database and MyThreads. The Thread Range and Thread Number are used to uniquely identify each thread color. The names of colors are provided for information only and may not always be visible on the status bar. All color information can be seen in Color Configuration.
C009 I have used a variegated thread, but it is only showing as a single colorOnly the first color in a variegated thread is shown in a cross stitch design. To see the effect of a variegated thread, use 3D Create Stitches.
FAQ Lists for Husqvarna Viking 3D Software Page 143

C010 I have placed backstitch, but it is not visible at all zoom levelsIf the grid color is similar to the color of backstitch, then the backstitch may blend with the grid at certain zoom levels so that it is hard to see. Turn off the grid temporarily to see where you have placed your backstitch. Backstitch may also be easier to see in Block mode.
C011 I have loaded a picture as a background only, but the screen is blank when the Picture Wizard closes
The background picture and grid are not shown at the smallest zoom level. In 3D, the fabric is also not shown at the smallest zoom level. When the Picture Wizard closes, the screen automatically zooms to fit the design size chosen in the Picture Wizard. If the design size was large, then the smallest zoom level is used. As there are no stitches, the screen appears to be blank because the picture, fabric and grid are not shown. Zoom in to see the picture, fabric and grid.
C012 I can't see the picture, fabric or grid when I Zoom To FitThe background picture and grid are not shown at the smallest zoom level. In 3D, the fabric is also not shown at the smallest zoom level. When Zoom To Fit is used, the smallest zoom level may be used if the design is large. Zoom in to see the picture, fabric and grid.
C030 Stitches seem to be missing when I open my cross stitch designs after I have been working for a while.
This will only happen if you have used Hide Colors to hide some of the colors or stitches in a design you were working on previously. The Hide Colors options are not reset automatically until you restart 3D Cross Stitcher. Click the Hide Colors icon, then click Reset.
G414 I have changed grid color and now I wish to return to the original colorUse 3D Configure to change the grid color. Follow the instructions in 3D Configure and select Blue Gray (RGB values 102, 102, 153) from the standard color drop-down on the Grid Color button. Use Screen Preferences to change the grid spacing.
G415 I have changed the screen background color and now I wish to return to the original light blue
Use 3D Configure to change the background color. Follow the instructions in 3D Configure and select the RGB values 200, 232, 247 in the Colors dialog box.
G416 I wish to change the background color for the work areaUse 3D Configure to alter the background color for the work area. 3D Configure may also be used to turn the texture on or off for modules that use texture.
G418 I can't see some of the floating toolbars or iconsFirst, check View, Customize to see if the missing toolbar has been turned off. If all the toolbar names are checked (so they are turned on) and you still cannot locate a toolbar, it may have been moved to the edge of the screen so it is hard to see. If you move icons around it is possible to delete them.
FAQ Lists for Husqvarna Viking 3D Software Page 144

To reset the icons on a toolbar 1. Click View, Customize to see the Customize dialog. 2. Click the Toolbar tab. 3. Click the name of the required toolbar. 4. Click Reset. 5. Click Yes to confirm. The selection of icons on the toolbar and their order will be reset.
Send To d-Card Reader/Writer Unit
A320 I am having difficulty using an embroidery on my machine when I send it to a d-Card from a horizontal hoop with Send 1 or Send 2.
This can happen if you are using a horizontal hoop on screen, and the embroidery is more than 150mm wide. When the embroidery is sent to the d-Card with Send To, the embroidery is not rotated. Before sending the embroidery to a d-Card, change the hoop orientation to vertical and, if the embroidery no longer fits, rotate the embroidery by 90 degrees. If you are using 3D Digitizing, 3D PictureStitch or 3D Cross Stitcher to create the embroidery, copy the finished design to 3D Embroidery to rotate it and setup the vertical hoop.
Sending Files to Machines
G422 I cannot send a file to an embroidery machineClick the 3D Configure icon to start 3D Configure. This will allow you to adjust the Send 1 and Send 2 options for your embroidery machine.
Stitching Out
C001 My cross stitch embroidery stitches out of alignmentWhen stitching out an embroidery from 3D Cross Stitcher you are working on a grid of squares. Unlike any other type of embroidery design, you cannot add compensation, or overlap objects to allow for pull of the fabric. If your fabric is not hooped up correctly then gaps can appear between sections, sometimes appearing that stitches are missing altogether. Use extra backing and ensure the fabric is tight in the hoop. Lowering the number of cross threads and enlarging the cross size also helps.
C024 The embroidery is very thick when it stitches outCheck the Stitches tab in Preference to ensure you do not have a large number of strands for crosses and/or backstitch in the design. Increasing the number of strands will increase the density of stitches.
C025 There seem to be some very thick lines of stitching where I used backstitch in the design
Standard Backstitch and Freehand Backstitch are drawn on two separate layers in 3D Cross Stitcher, but they are stitched out together if they are the same color. In addition to this, Freehand Backstitch can be placed in multiple layers over the same line, as long as the end points of each line are different.
FAQ Lists for Husqvarna Viking 3D Software Page 145

This is used, for example, to place different colors of Freehand Backstitch on top of each other to secure the edges of lace. Each layer will stitch out separately according to the color order in the design, but the same thread color is used in the stitch-out to give a single color to the lace effect.
Thread Colors
B617 The Yli thread ranges are no longer available in Color Selection or Thread Manager.
This can happen when you install the 3D Embroidery System 7.2 Update. Use Smart Update to obtain the latest Thread Database Update. If a Security Warning appears, click Run to go ahead and run the update program. To install the update when the WinZip Self-Extractor appears, click the Unzip button, then click OK, then click Close.
B618 Error: "Please select a valid thread."This message appears if you attempt to click OK in the Color Selection dialog box when MyThreads is selected as the thread range and MyThreads is empty. To prevent this message appearing again, use Thread Manager in 3D Configure to add at least one thread to MyThreads.
C007 "This color is used. Do you really want to delete all stitches with this color?"
This message appears when you click Remove Color in Color Configuration, if there are stitches using the selected color in the cross stitch design. Click Yes to continue, for example, to remove a color that is only used in the background.
G007 Error "Thread range is corrupt or missing. Cannot change thread. Reinstall the thread database."
This message usually means that the database driver is incorrectly installed. First follow the instructions in FAQ #G010 to fix this. If the message still appears, use the following procedure to repair the installation: 1. Right-click the Start button on the taskbar and select Explore from the popup menu. 2. In Explorer, browse to the folder C:\3DEmbroidery\System.
This assumes you have installed your 3D Embroidery System software in the default location of C:\3DEmbroidery. If you have installed the software in a different location, browse to the System folder at that location.
3. Delete the files named "MyThreads.mdb" and "ThreadDataBase.mdb". The file names may simply be shown as "MyThreads" and "ThreadDataBase".
4. Put your 3D Embroidery System software CD in your computer to re-run the installation. The installation should start automatically when you put your software CD in the computer. If this does not happen, browse to the CD with Explorer and double-click "Setup.exe" to start the installation.
5. When the choice appears, select the "Modify or remove" option and click Next. 6. In the next screen, select Repair and click Next. 7. Continue with the installation and follow the on-screen instructions. When the installation
is complete, the MyThreads and standard thread databases will be restored to their original installation state.
FAQ Lists for Husqvarna Viking 3D Software Page 146

If you had previously backed up your MyThreads database, you can now use the Restore option in Thread Manager to restore your MyThreads database. See the on-line help in Thread Manager for more information.
G010 How do I fix the database driver used by my 3D Embroidery System software?
Database drivers are normally found installed on most computers – they are commonly installed as part of the installation of Microsoft® Office or as an upgrade of key components of the operating system. Key components of the 3D Embroidery System need to be able to use these drivers. Therefore, any difficulties in using these drivers may affect the functionality of certain features of the 3D Embroidery System. Examples include changing a thread color in any module and/or Motif Fill/Line properties in 3D Digitizing. If you have Windows® XP with Service Pack 2 installed, use the Database Driver Fix described below. Otherwise, install the drivers manually as follows: Installation of the Database files 1. Insert the 3D Embroidery System CD. 2. Cancel the installation screen if it appears. 3. Use Windows® Explorer to browse to the D:\Technical folder – where D:\ is the name of
your CD or DVD drive. 4. Double click on the Database Drivers folder. 5. Double click on the Jet 4 folder. 6. Double click on the folder that is for your operating system. 7. Double click on the file to start the installation of the Jet 4 Service Pack 8 files. This
should take a few moments for the files to be installed. 8. After the installation is complete, browse to the D:\Technical\Database Drivers\MDAC 2.8
folder. 9. Double click on the MDAC_TYP.exe file. The Microsoft Data Access Components 2.8
Setup dialog box will appear. 10. Select the option “I accept all the terms of the preceding license agreement”. 11. Click on the Next button. 12. Click on the Finish button when it appears. This will start the installation process for the
MDAC 2.8 files. 13. After the MDAC 2.8 installation is complete, reboot your computer and continue to use
your 3D Embroidery System. 14. If you are still having difficulties, use the Database Driver Fix that follows. Database Driver Fix 1. Insert the 3D Embroidery System CD. 2. Cancel the installation screen if it appears. 3. Use Windows® Explorer to browse to the D:\Technical folder – where D:\ is the name of
your CD or DVD drive. 4. Double click on the Database Drivers folder. 5. Double click on the MSAccessDbFixer file (this may be shown with a .exe extension). A
window will appear briefly on the screen. 6. Continue to use your 3D Embroidery System.
G419 "The color xx has been found in your database, but the thread color is not exactly the same."
This message appears if the Thread Range and Color Number of the selected color are identical to those in your thread database, but some aspect of the color is different. It could
FAQ Lists for Husqvarna Viking 3D Software Page 147

be a different material or weight, or have additional colors as a variegated thread. This could happen if the design you are attempting to edit was supplied by someone with a different version of the color, for instance if they have edited it in MyThreads, or if they have a later version of the thread database. Use the Import Threads From Embroidery function to add other users’ thread definitions to your MyThreads database. 1. Select Import Threads from Embroidery in the File Menu and an Open dialog box will
appear. 2. Select the desired .vp3 embroidery file. 3. Click Open and any custom thread definitions that do not appear in your MyThreads will
be added to the end of your MyThreads list. To check for the latest updates for the 3D Embroidery System, use Smart Update in 3D Configure.
G420 "Could not find xx in your database. Matching to closest thread in yy."This message appears if the Thread Range of the selected color is not found in your thread database. This could happen if the design you are attempting to edit was supplied by someone with a later version of the thread database. To check for the latest updates for the 3D Embroidery System, use Smart Update in 3D Configure.
G421 Error "Databases are corrupt or missing. Cannot edit the thread color."This message appears if there is a problem with your thread database. You will be unable to choose a thread color. First close all the modules of the 3D Embroidery System, close down your computer and restart. If this does not clear the problem, restore a backup database if you have created one using Thread Manager in 3D Configure. Otherwise, you need a new version of the thread database. To check for the latest updates for the 3D Embroidery System, use Smart Update in 3D Configure. Alternatively, you may need to uninstall and reinstall your 3D Embroidery System software.
Tutorials
G005 The window remains blank when I try to use the tutorials.You need version 6 or later of the Macromedia Flash Player to view the tutorials. Visit the Macromedia [http://www.macromedia.com] website and download and install the latest version of the Flash Player.
G011 What version of Macromedia Flash Player do I need to view the tutorials?You need version 6 or later of the Macromedia Flash Player to view the tutorials. Visit the Macromedia [http://www.macromedia.com] website and download and install the latest version of the Flash Player.
Using the Picture Wizard
C013 My scanner or digital camera is not shown when I try to Select Source, or the Select Source button is grayed out
FAQ Lists for Husqvarna Viking 3D Software Page 148

The manufacturer of a TWAIN device must provide a Source Manager and a TWAIN Data source for your device to work with 3D Cross Stitcher. These will normally be installed when you install the software and drivers provided with the device. If you have installed a device and it is not shown in the list then it may not be TWAIN compliant. Refer to the device documentation and manufacturer for assistance.
C014 When I choose a Quick Hoop in the Picture Wizard, the Quick Hoop box goes blank again after I have selected one from the list
When a Quick Hoop is selected, the best fit of the current crop area on the picture is used so that it fits inside the chosen hoop. This sets the Height, Width and Cross Size for the design. After the Height, Width and Cross Size have been set, they may no longer be an exact match to the chosen Quick Hoop. Therefore, the Quick Hoop box is shown as blank again, but your design will now fit in the desired hoop.
Using the Program
C028 Error "Runtime error 201 at 00401CCD".This error only appears if you attempt to run 3D Cross Stitcher under Windows® 98/ME. 3D Embroidery System software is designed to run on Windows® XP. This error does not appear when 3D Cross Stitcher is used on Windows® XP.
C029 Error "System Error. Code 87. The parameter is incorrect".This error only appears if you attempt to run 3D Cross Stitcher under Windows® 98/ME. 3D Embroidery System software is designed to run on Windows® XP. This error does not appear when 3D Cross Stitcher is used on Windows® XP.
3D Professional Listed versions: 7.0; 7.0.5; 7.1; 7.2; 7.25
Demos and Documentation
G002 I get an error message when I try to open documents in Acrobat Reader, either from CD or when I download from this web site.
Errors such as 'Unable to open document' or 'Could not find ColorSpace named Cs8' appear because you are trying to use an old version of Acrobat Reader. Make sure you are using the latest version of Acrobat (version 5 or above). You can install the current version from your CD. Simply insert the CD and select the option from the menu that appears. Alternatively go to the Acrobat Page at Adobe's web site [http://www.adobe.com] where you can download the latest copy and also check for any conflicting software you may have on your machine.
Dongle
H002 Error "None of your installed software requires the dongle activation process." when I try to activate my dongle for my 3D Professional Embroidery System
FAQ Lists for Husqvarna Viking 3D Software Page 149

The dongle for the 3D Professional Embroidery System is already fully activated. Therefore, it not necessary to activate it online.
Error Messages
G002 I get an error message when I try to open documents in Acrobat Reader, either from CD or when I download from this web site.
Errors such as 'Unable to open document' or 'Could not find ColorSpace named Cs8' appear because you are trying to use an old version of Acrobat Reader. Make sure you are using the latest version of Acrobat (version 5 or above). You can install the current version from your CD. Simply insert the CD and select the option from the menu that appears. Alternatively go to the Acrobat Page at Adobe's web site [http://www.adobe.com] where you can download the latest copy and also check for any conflicting software you may have on your machine.
G010 How do I fix the database driver used by my 3D Embroidery System software?
Database drivers are normally found installed on most computers – they are commonly installed as part of the installation of Microsoft® Office or as an upgrade of key components of the operating system. Key components of the 3D Embroidery System need to be able to use these drivers. Therefore, any difficulties in using these drivers may affect the functionality of certain features of the 3D Embroidery System. Examples include changing a thread color in any module and/or Motif Fill/Line properties in 3D Digitizing. If you have Windows® XP with Service Pack 2 installed, use the Database Driver Fix described below. Otherwise, install the drivers manually as follows: Installation of the Database files 1. Insert the 3D Embroidery System CD. 2. Cancel the installation screen if it appears. 3. Use Windows® Explorer to browse to the D:\Technical folder – where D:\ is the name of
your CD or DVD drive. 4. Double click on the Database Drivers folder. 5. Double click on the Jet 4 folder. 6. Double click on the folder that is for your operating system. 7. Double click on the file to start the installation of the Jet 4 Service Pack 8 files. This
should take a few moments for the files to be installed. 8. After the installation is complete, browse to the D:\Technical\Database Drivers\MDAC 2.8
folder. 9. Double click on the MDAC_TYP.exe file. The Microsoft Data Access Components 2.8
Setup dialog box will appear. 10. Select the option “I accept all the terms of the preceding license agreement”. 11. Click on the Next button. 12. Click on the Finish button when it appears. This will start the installation process for the
MDAC 2.8 files. 13. After the MDAC 2.8 installation is complete, reboot your computer and continue to use
your 3D Embroidery System. 14. If you are still having difficulties, use the Database Driver Fix that follows. Database Driver Fix 1. Insert the 3D Embroidery System CD.
FAQ Lists for Husqvarna Viking 3D Software Page 150

2. Cancel the installation screen if it appears. 3. Use Windows® Explorer to browse to the D:\Technical folder – where D:\ is the name of
your CD or DVD drive. 4. Double click on the Database Drivers folder. 5. Double click on the MSAccessDbFixer file (this may be shown with a .exe extension). A
window will appear briefly on the screen. 6. Continue to use your 3D Embroidery System.
G605 Error: "Internal Error 2753."There are two versions of this error: • Internal Error 2753. DConfigure.exe • Internal Error 2753. SmartUpdate.exe This error can appear if you attempt to install software that is an earlier version than the software you already have. For example, if you upgrade from 3D Embroidery Studio to the full 3D Professional system without first uninstalling 3D Embroidery Studio. The error only happens after the installation is complete and the 3D Configure Wizard or Registration process is attempting to run. This means that your 3D Embroidery System software has installed correctly. • Click OK to clear the error, then click Finish to close the installation wizard. • Start 3D Configure. • Click the 3D Configure Wizard button to go through the wizard and ensure your settings
are correct. • Click the Register button to register your software. • After your software is registered, use Smart Update to ensure your 3D Embroidery
System is updated to the latest version.
General
G001 General difficulties with hardware and softwareTo try to determine the cause of any odd difficulties with the 3D Embroidery System, the best method is to reboot the computer in safe mode. If the problem is then solved, you know that some clash of hardware and/or software such as device drivers is to blame. You can then obtain more help from your computer dealer to analyze the cause and reconfigure your computer if necessary. To start Windows in Safe Mode 1. Close all programs. 2. Click Start, and then click Shut Down or Turn Off Computer, whichever is shown. 3. Click Restart. If necessary, click OK to confirm. 4. Your computer will shut down and restart. 5. As your computer restarts, press and hold the F8 key until a menu of windows startup
options appears. 6. Use the up and down arrow keys to highlight Safe mode, and then press ENTER. When you hold down the F8 key, your computer may beep rapidly and report keyboard errors as it restarts. Release the F8 key briefly to skip any errors and press F8 again until you have the Startup Menu on your screen.
FAQ Lists for Husqvarna Viking 3D Software Page 151

Installation and CD
G002 I get an error message when I try to open documents in Acrobat Reader, either from CD or when I download from this web site.
Errors such as 'Unable to open document' or 'Could not find ColorSpace named Cs8' appear because you are trying to use an old version of Acrobat Reader. Make sure you are using the latest version of Acrobat (version 5 or above). You can install the current version from your CD. Simply insert the CD and select the option from the menu that appears. Alternatively go to the Acrobat Page at Adobe's web site [http://www.adobe.com] where you can download the latest copy and also check for any conflicting software you may have on your machine.
G015 Is the 3D Embroidery System compatible with Windows® Vista?The 3D Embroidery System is not designed to operate on Windows® Vista. This is also true for earlier embroidery software. The compatible operating systems are stated on the product boxes. Therefore, it is not guaranteed that the 3D Embroidery System, or previous software, will function correctly on Windows® Vista. However, it is possible to install 3D Embroidery System software on Windows® Vista. To get your dongle working, after installing your 3D Embroidery System software, see FAQ #H013. There are no other adjustments to the 3D Embroidery System in respect of Windows® Vista. The operation of the Designer SE, Designer I and Parallel Reader/Writer unit should not be affected, apart from driver installation. You may need to answer some security questions in Windows® Vista while installing the hardware drivers, as the drivers were designed for previous operating systems. A workaround is necessary when using the USB Reader/Writer and d-Card Reader/Writer. Each time you use either the USB Reader/Writer or d-Card Reader/Writer to read a card, write a card or send an embroidery with Send 1 or Send 2, you must disconnect and reconnect the unit before using it again to read, write or send. Note that in due course, a new solution will be available for using the USB Reader/Writer and d-Card Reader/Writer with Windows® Vista. If you do not qualify for free upgrades, there may be a handling fee for providing the CD containing the solution as it will not be part of the 3D Embroidery System.
G202 I have received my free Husqvarna Viking Professional Upgrade Kit but there were no manuals in the kit
The Husqvarna Viking Professional Upgrade Kit is not supplied with printed manuals. However, the reference manuals are supplied on the upgrade CD as PDF documents that you can view on screen or print. They are in the 'Reference Guides' area of the installation. Alternatively, consult the Help system in each program for information on how to use the program features.
G601 Whenever I insert my CD it asks if I want to uninstall or modify my softwareAll 3D Embroidery System Software has an automatic installation whenever the CD is inserted. The CD detected your software was already installed so you have the options to uninstall the software or modify the installation. Simply click 'Cancel', and then 'Yes' to confirm it. Then click 'Finish' to close the installation window. When you use the CD again,
FAQ Lists for Husqvarna Viking 3D Software Page 152

you may hold down the Shift key for 30 seconds when the CD is inserted if you want to prevent the installation menu appearing.
G602 The programs are not being installed to the correct folderThe installation program will by default put the embroidery system onto drive C:. The drive letter that the embroidery system will install to is shown during the install and can be changed by the user. The drive or partition that the embroidery system is installed to will make no difference to its operation.
G603 I do not have the 3D Embroidery System logos beside each file in Windows Explorer
Your icon association is set up during installation. You will have to re-install.
G605 Error: "Internal Error 2753."There are two versions of this error: • Internal Error 2753. DConfigure.exe • Internal Error 2753. SmartUpdate.exe This error can appear if you attempt to install software that is an earlier version than the software you already have. For example, if you upgrade from 3D Embroidery Studio to the full 3D Professional system without first uninstalling 3D Embroidery Studio. The error only happens after the installation is complete and the 3D Configure Wizard or Registration process is attempting to run. This means that your 3D Embroidery System software has installed correctly. • Click OK to clear the error, then click Finish to close the installation wizard. • Start 3D Configure. • Click the 3D Configure Wizard button to go through the wizard and ensure your settings
are correct. • Click the Register button to register your software. • After your software is registered, use Smart Update to ensure your 3D Embroidery
System is updated to the latest version.
Miscellaneous
G002 I get an error message when I try to open documents in Acrobat Reader, either from CD or when I download from this web site.
Errors such as 'Unable to open document' or 'Could not find ColorSpace named Cs8' appear because you are trying to use an old version of Acrobat Reader. Make sure you are using the latest version of Acrobat (version 5 or above). You can install the current version from your CD. Simply insert the CD and select the option from the menu that appears. Alternatively go to the Acrobat Page at Adobe's web site [http://www.adobe.com] where you can download the latest copy and also check for any conflicting software you may have on your machine.
G201 I have not received any free updates for my Professional System
FAQ Lists for Husqvarna Viking 3D Software Page 153

Please ensure that you have registered your Professional Embroidery System package. Then, when new updates are available, you will receive notification on how to obtain it.
G203 I have the 3D Professional Embroidery System, but there is no ReSize Plus software.
There is no dedicated 'resizing' module for the 3D Embroidery System. There is resizing functionality in both 3D Embroidery and 3D Stitch Editor. Additionally, embroideries may be imported into 3D Digitizing where they are converted to design (.can) files. After conversion, the properties, such as fill pattern or density, can be changed as desired.
G423 When I close 3D Embroidery all my other modules also close3D Embroidery is the central module of the 3D Embroidery System. When 3D Embroidery closes, all other open modules are closed at the same time. If you have created a new file or made changes in another module, you will be prompted to save the file before the module closes.
G601 Whenever I insert my CD it asks if I want to uninstall or modify my softwareAll 3D Embroidery System Software has an automatic installation whenever the CD is inserted. The CD detected your software was already installed so you have the options to uninstall the software or modify the installation. Simply click 'Cancel', and then 'Yes' to confirm it. Then click 'Finish' to close the installation window. When you use the CD again, you may hold down the Shift key for 30 seconds when the CD is inserted if you want to prevent the installation menu appearing.
G603 I do not have the 3D Embroidery System logos beside each file in Windows Explorer
Your icon association is set up during installation. You will have to re-install.
Product Information
G004 What is the price of the software, and where can I get it?Please contact your local dealer for prices and availability on all the Husqvarna Viking software. To find your local dealer see the Husqvarna Viking Dealer Locator [http://www.sew.husqvarna.se/dealers.htm]. You can always find this on the bottom bar of the Husqvarna Viking Software website.
G201 I have not received any free updates for my Professional SystemPlease ensure that you have registered your Professional Embroidery System package. Then, when new updates are available, you will receive notification on how to obtain it.
Screen Appearance
G417 I wish to change the background color for the work area and the Real Size window
FAQ Lists for Husqvarna Viking 3D Software Page 154

Use 3D Configure to alter the background color for the work area and Real Size. 3D Configure may also be used to turn the texture on or off.
Smart Update
B002 Message "We recommend that you check your system is up-to-date regularly by selecting the Smart Update button from 3D Configure"
This message will appear when you start your 3D Embroidery System if you have not run Smart Update in the last 30 days. Use Smart Update to check for new 3D Embroidery System updates and extras such as new fonts. Smart Updates you have downloaded may still be shown if you have not installed them.
B009 I believe that 3D Fabric Decorator is available through Smart Update, but it is not listed when I use Smart Update.
3D Fabric Decorator is only available as a Smart Update if: • You purchased a new copy of the full 3D Professional Embroidery System on or after
May 1st 2004. or
• You purchased a new copy of the full VIP Professional Embroidery on or after May 1st 2004, and subsequently received a free upgrade to 3D Professional.
PLEASE NOTE: If you purchased the VIP Embroidery System before May 1st 2004, but received your free upgrade to 3D Professional on or after May 1st 2004, this means your purchase date is not in the qualifying period. Therefore, you will not be eligible to obtain 3D Fabric Decorator as a Smart Update.
Thread Colors
G010 How do I fix the database driver used by my 3D Embroidery System software?
Database drivers are normally found installed on most computers – they are commonly installed as part of the installation of Microsoft® Office or as an upgrade of key components of the operating system. Key components of the 3D Embroidery System need to be able to use these drivers. Therefore, any difficulties in using these drivers may affect the functionality of certain features of the 3D Embroidery System. Examples include changing a thread color in any module and/or Motif Fill/Line properties in 3D Digitizing. If you have Windows® XP with Service Pack 2 installed, use the Database Driver Fix described below. Otherwise, install the drivers manually as follows: Installation of the Database files 1. Insert the 3D Embroidery System CD. 2. Cancel the installation screen if it appears. 3. Use Windows® Explorer to browse to the D:\Technical folder – where D:\ is the name of
your CD or DVD drive. 4. Double click on the Database Drivers folder. 5. Double click on the Jet 4 folder. 6. Double click on the folder that is for your operating system.
FAQ Lists for Husqvarna Viking 3D Software Page 155

7. Double click on the file to start the installation of the Jet 4 Service Pack 8 files. This should take a few moments for the files to be installed.
8. After the installation is complete, browse to the D:\Technical\Database Drivers\MDAC 2.8 folder.
9. Double click on the MDAC_TYP.exe file. The Microsoft Data Access Components 2.8 Setup dialog box will appear.
10. Select the option “I accept all the terms of the preceding license agreement”. 11. Click on the Next button. 12. Click on the Finish button when it appears. This will start the installation process for the
MDAC 2.8 files. 13. After the MDAC 2.8 installation is complete, reboot your computer and continue to use
your 3D Embroidery System. 14. If you are still having difficulties, use the Database Driver Fix that follows. Database Driver Fix 1. Insert the 3D Embroidery System CD. 2. Cancel the installation screen if it appears. 3. Use Windows® Explorer to browse to the D:\Technical folder – where D:\ is the name of
your CD or DVD drive. 4. Double click on the Database Drivers folder. 5. Double click on the MSAccessDbFixer file (this may be shown with a .exe extension). A
window will appear briefly on the screen. 6. Continue to use your 3D Embroidery System.
Tutorials
G005 The window remains blank when I try to use the tutorials.You need version 6 or later of the Macromedia Flash Player to view the tutorials. Visit the Macromedia [http://www.macromedia.com] website and download and install the latest version of the Flash Player.
G011 What version of Macromedia Flash Player do I need to view the tutorials?You need version 6 or later of the Macromedia Flash Player to view the tutorials. Visit the Macromedia [http://www.macromedia.com] website and download and install the latest version of the Flash Player.
3D QuickFont Listed versions: 7.0; 7.1; 7.2; 7.25
Error Messages
A508 Error message "MyFonts folder is full. You must delete some fonts to make room for new fonts."
This message appears if there is no room in the MyFonts folder on the Designer SE to transfer the font you have selected. Delete some fonts, then try again.
B618 Error: "Please select a valid thread."
FAQ Lists for Husqvarna Viking 3D Software Page 156

This message appears if you attempt to click OK in the Color Selection dialog box when MyThreads is selected as the thread range and MyThreads is empty. To prevent this message appearing again, use Thread Manager in 3D Configure to add at least one thread to MyThreads.
G007 Error "Thread range is corrupt or missing. Cannot change thread. Reinstall the thread database."
This message usually means that the database driver is incorrectly installed. First follow the instructions in FAQ #G010 to fix this. If the message still appears, use the following procedure to repair the installation: 1. Right-click the Start button on the taskbar and select Explore from the popup menu. 2. In Explorer, browse to the folder C:\3DEmbroidery\System.
This assumes you have installed your 3D Embroidery System software in the default location of C:\3DEmbroidery. If you have installed the software in a different location, browse to the System folder at that location.
3. Delete the files named "MyThreads.mdb" and "ThreadDataBase.mdb". The file names may simply be shown as "MyThreads" and "ThreadDataBase".
4. Put your 3D Embroidery System software CD in your computer to re-run the installation. The installation should start automatically when you put your software CD in the computer. If this does not happen, browse to the CD with Explorer and double-click "Setup.exe" to start the installation.
5. When the choice appears, select the "Modify or remove" option and click Next. 6. In the next screen, select Repair and click Next. 7. Continue with the installation and follow the on-screen instructions. When the installation
is complete, the MyThreads and standard thread databases will be restored to their original installation state.
If you had previously backed up your MyThreads database, you can now use the Restore option in Thread Manager to restore your MyThreads database. See the on-line help in Thread Manager for more information.
G010 How do I fix the database driver used by my 3D Embroidery System software?
Database drivers are normally found installed on most computers – they are commonly installed as part of the installation of Microsoft® Office or as an upgrade of key components of the operating system. Key components of the 3D Embroidery System need to be able to use these drivers. Therefore, any difficulties in using these drivers may affect the functionality of certain features of the 3D Embroidery System. Examples include changing a thread color in any module and/or Motif Fill/Line properties in 3D Digitizing. If you have Windows® XP with Service Pack 2 installed, use the Database Driver Fix described below. Otherwise, install the drivers manually as follows: Installation of the Database files 1. Insert the 3D Embroidery System CD. 2. Cancel the installation screen if it appears. 3. Use Windows® Explorer to browse to the D:\Technical folder – where D:\ is the name of
your CD or DVD drive. 4. Double click on the Database Drivers folder. 5. Double click on the Jet 4 folder. 6. Double click on the folder that is for your operating system.
FAQ Lists for Husqvarna Viking 3D Software Page 157

7. Double click on the file to start the installation of the Jet 4 Service Pack 8 files. This should take a few moments for the files to be installed.
8. After the installation is complete, browse to the D:\Technical\Database Drivers\MDAC 2.8 folder.
9. Double click on the MDAC_TYP.exe file. The Microsoft Data Access Components 2.8 Setup dialog box will appear.
10. Select the option “I accept all the terms of the preceding license agreement”. 11. Click on the Next button. 12. Click on the Finish button when it appears. This will start the installation process for the
MDAC 2.8 files. 13. After the MDAC 2.8 installation is complete, reboot your computer and continue to use
your 3D Embroidery System. 14. If you are still having difficulties, use the Database Driver Fix that follows. Database Driver Fix 1. Insert the 3D Embroidery System CD. 2. Cancel the installation screen if it appears. 3. Use Windows® Explorer to browse to the D:\Technical folder – where D:\ is the name of
your CD or DVD drive. 4. Double click on the Database Drivers folder. 5. Double click on the MSAccessDbFixer file (this may be shown with a .exe extension). A
window will appear briefly on the screen. 6. Continue to use your 3D Embroidery System.
H817 Error message "Incompatible versions of software found. Please run Smart Update."
This message appears if you attempt to send a font and one of the Designer SE Communication module, 3D QuickFont or Send To module has an earlier and incompatible version than the other(s). Ensure your Designer SE is attached to a USB port of your computer. Start 3D Configure. On the System tab, click the Smart Update button and follow the on-screen instructions to check for later versions of one of the modules. You must have registered your machine before using Smart Update.
Font Disks
A501 Error "No disk in drive."This message will appear when you have checked the Make Disk option, but have not put a floppy disk in the drive before clicking Next on the Output Options page. Disk creation is skipped, so if you wanted to create the disk, click Back on the Print Options page, insert a floppy disk and click Next again.
A502 Error "Font is too large to fit onto one disk. Three font disks will be created, one for each menu. Continue?"
As you increase the Output Size, the number of stitches required to build each character will increase. If the characters are very large then the combined number of stitches for all the characters may mean that the full character set will not fit on a single floppy disk. This message will appear, allowing you to make a three-disk set.
A503 Error "This font is too big to fit onto one disk, or even onto three disks."
FAQ Lists for Husqvarna Viking 3D Software Page 158

This message appears when the font is so large and there are so many stitches that it will not fit onto floppy disks, even when split across three disks. This is most likely to happen with fonts that are created as Fill + Satin Border. This message will inform you of this situation, but no floppy disks will be made. One solution is to create two copies of the font, one as Fill and one as Satin Border and stitch the Satin Border font over the top of the Fill font. Alternatively, reduce the size at which the font is generated and try again.
A506 The kerning character < does not work for my Designer I font disk.Ensure you are using Designer I software version 1.41 or later, as this feature is not available in earlier versions.
Fonts
A504 I can't select a font that is on my computer.3D QuickFont is designed to work with Windows TrueType® and OpenType® fonts. 3D QuickFont does not support Postscript Type 1 fonts. To check Font Properties: 1. Click Start, Control Panel, then select Fonts. 2. Click the desired font to select it. 3. Right-click and select Properties from the menu that appears. 4. Check Type of file. If it is PostScript Metrics or Type 1 Font File it will not work with 3D
QuickFont.
A505 I am having trouble with converting a symbol font to the desired size.The sizes of the shapes in a symbol font often vary in size within a single font. The size of converted fonts is set by specifying the height of the uppercase letter A, or whichever symbol or character occupies its position in the font (ASCII character 65). This may affect your converted symbols if the symbol at ASCII 65 is a lot smaller or larger than other symbols in the font. If your symbols convert to unexpectedly small or large sizes, compare the symbols by selecting the font in a word processor and typing on your keyboard. Type in A and some other letters to see how the corresponding shapes differ in size from the shape for A. Alternatively, type in some letters in a normal font then select the letters and change them to the required symbol font. There is a free word processor called WordPad supplied with all versions of Windows® from Windows® 95 onwards.
A507 Error "<i>stitch type</i> requires an output size of between "<i>xx</i> and "<i>yy</i> mm"
This message will appear when you try to set the Output Size too low or too high for the chosen Stitch Type. Change the Output Size accordingly.
Send To Designer SE
A508 Error message "MyFonts folder is full. You must delete some fonts to make room for new fonts."
This message appears if there is no room in the MyFonts folder on the Designer SE to transfer the font you have selected. Delete some fonts, then try again.
FAQ Lists for Husqvarna Viking 3D Software Page 159

H212 My Designer SE is not connected to my computer. How do I transfer a font to my Designer SE?
Use a USB Embroidery Stick to transfer the .vf3 font file to your Designer SE. When creating the font, ensure that Designer SE and the Save Font File options are selected on the Output Options page. Make a note of the location where the font file is saved. After it has been created, use Windows® Explorer to copy the .vf3 file to a USB Embroidery Stick. Insert the USB Embroidery Stick in your Designer SE and use File Manager to copy the font file to the MyFonts folder.
H817 Error message "Incompatible versions of software found. Please run Smart Update."
This message appears if you attempt to send a font and one of the Designer SE Communication module, 3D QuickFont or Send To module has an earlier and incompatible version than the other(s). Ensure your Designer SE is attached to a USB port of your computer. Start 3D Configure. On the System tab, click the Smart Update button and follow the on-screen instructions to check for later versions of one of the modules. You must have registered your machine before using Smart Update.
Thread Colors
B617 The Yli thread ranges are no longer available in Color Selection or Thread Manager.
This can happen when you install the 3D Embroidery System 7.2 Update. Use Smart Update to obtain the latest Thread Database Update. If a Security Warning appears, click Run to go ahead and run the update program. To install the update when the WinZip Self-Extractor appears, click the Unzip button, then click OK, then click Close.
B618 Error: "Please select a valid thread."This message appears if you attempt to click OK in the Color Selection dialog box when MyThreads is selected as the thread range and MyThreads is empty. To prevent this message appearing again, use Thread Manager in 3D Configure to add at least one thread to MyThreads.
G007 Error "Thread range is corrupt or missing. Cannot change thread. Reinstall the thread database."
This message usually means that the database driver is incorrectly installed. First follow the instructions in FAQ #G010 to fix this. If the message still appears, use the following procedure to repair the installation: 1. Right-click the Start button on the taskbar and select Explore from the popup menu. 2. In Explorer, browse to the folder C:\3DEmbroidery\System.
This assumes you have installed your 3D Embroidery System software in the default location of C:\3DEmbroidery. If you have installed the software in a different location, browse to the System folder at that location.
3. Delete the files named "MyThreads.mdb" and "ThreadDataBase.mdb". The file names may simply be shown as "MyThreads" and "ThreadDataBase".
FAQ Lists for Husqvarna Viking 3D Software Page 160

4. Put your 3D Embroidery System software CD in your computer to re-run the installation. The installation should start automatically when you put your software CD in the computer. If this does not happen, browse to the CD with Explorer and double-click "Setup.exe" to start the installation.
5. When the choice appears, select the "Modify or remove" option and click Next. 6. In the next screen, select Repair and click Next. 7. Continue with the installation and follow the on-screen instructions. When the installation
is complete, the MyThreads and standard thread databases will be restored to their original installation state.
If you had previously backed up your MyThreads database, you can now use the Restore option in Thread Manager to restore your MyThreads database. See the on-line help in Thread Manager for more information.
G010 How do I fix the database driver used by my 3D Embroidery System software?
Database drivers are normally found installed on most computers – they are commonly installed as part of the installation of Microsoft® Office or as an upgrade of key components of the operating system. Key components of the 3D Embroidery System need to be able to use these drivers. Therefore, any difficulties in using these drivers may affect the functionality of certain features of the 3D Embroidery System. Examples include changing a thread color in any module and/or Motif Fill/Line properties in 3D Digitizing. If you have Windows® XP with Service Pack 2 installed, use the Database Driver Fix described below. Otherwise, install the drivers manually as follows: Installation of the Database files 1. Insert the 3D Embroidery System CD. 2. Cancel the installation screen if it appears. 3. Use Windows® Explorer to browse to the D:\Technical folder – where D:\ is the name of
your CD or DVD drive. 4. Double click on the Database Drivers folder. 5. Double click on the Jet 4 folder. 6. Double click on the folder that is for your operating system. 7. Double click on the file to start the installation of the Jet 4 Service Pack 8 files. This
should take a few moments for the files to be installed. 8. After the installation is complete, browse to the D:\Technical\Database Drivers\MDAC 2.8
folder. 9. Double click on the MDAC_TYP.exe file. The Microsoft Data Access Components 2.8
Setup dialog box will appear. 10. Select the option “I accept all the terms of the preceding license agreement”. 11. Click on the Next button. 12. Click on the Finish button when it appears. This will start the installation process for the
MDAC 2.8 files. 13. After the MDAC 2.8 installation is complete, reboot your computer and continue to use
your 3D Embroidery System. 14. If you are still having difficulties, use the Database Driver Fix that follows. Database Driver Fix 1. Insert the 3D Embroidery System CD. 2. Cancel the installation screen if it appears. 3. Use Windows® Explorer to browse to the D:\Technical folder – where D:\ is the name of
your CD or DVD drive.
FAQ Lists for Husqvarna Viking 3D Software Page 161

4. Double click on the Database Drivers folder. 5. Double click on the MSAccessDbFixer file (this may be shown with a .exe extension). A
window will appear briefly on the screen. 6. Continue to use your 3D Embroidery System.
Transferring Files
H212 My Designer SE is not connected to my computer. How do I transfer a font to my Designer SE?
Use a USB Embroidery Stick to transfer the .vf3 font file to your Designer SE. When creating the font, ensure that Designer SE and the Save Font File options are selected on the Output Options page. Make a note of the location where the font file is saved. After it has been created, use Windows® Explorer to copy the .vf3 file to a USB Embroidery Stick. Insert the USB Embroidery Stick in your Designer SE and use File Manager to copy the font file to the MyFonts folder.
3D Organizer Listed versions: 7.0; 7.1; 7.2; 7.25
Browse Files
R019 I can’t see some of my embroidery files in the Thumbnail Pane, even though I can see them listed in the folder in Windows® Explorer.
Embroidery files that are corrupt or invalid will be ignored by 3D Organizer. For instance, a text file that has been renamed so it has a .vp3 extension is not a valid embroidery file so it will be ignored. Try using View, Refresh to see files that have been added to the current folder. The file type may have been deselected from the File Types tab in Preferences. Try the following: 1. Open 3D Organizer. 2. Browse to the folder containing the files. 3. Click on the Preferences icon on the Edit toolbar. 4. Click on the File Types tab. 5. Click on the "Select All Embroidery" button. 6. Click OK to close the Preferences dialog. All valid embroidery files will be shown. The embroidery file may not be included by the settings on your Filter tab of Preferences. Try the following: 1. Open 3D Organizer. 2. Browse to the folder containing the files. 3. Click on the Preferences icon on the Edit toolbar. 4. Click on the Filter tab. 5. Ensure that the Maximum Hoop size setting is set to None and that both checkboxes are
unticked. 6. Click OK. This will clear all filters on the showing of embroideries. If the embroidery is still not shown, use the Search facility to try to find the embroidery file. It may be possible that you may have unknowingly moved the embroidery file from its original location.
FAQ Lists for Husqvarna Viking 3D Software Page 162

If you are still not able to see the required embroidery, use Windows Explorer to ensure that the files that you expected are still in this location. Also check the Recycle Bin.
R020 The other folders collapse when I click a folder to browse its contents.In the Folder pane, you can use the + signs to expand the folders without selecting them to browse their contents. However, when you click a folder to browse it, all other expanded folders are collapsed automatically. If desired, you can use the + signs to expand them again.
R023 I can’t see some of my picture files in the Thumbnail Pane, even though I can see them listed in the folder in Windows® Explorer.
Picture files that are corrupt or invalid will be ignored by 3D Organizer. For instance, a text file that has been renamed so it has a .jpg extension is not a valid JPEG picture file so it will be ignored. Try using View, Refresh to see files that have been added to the current folder. The file type may have been deselected from the File Types tab in Preferences. Try the following: 1. Open 3D Organizer. 2. Browse to the folder containing the files. 3. Click on the Preferences icon on the Edit toolbar. 4. Click on the File Types tab. 5. Click on the "Select All Pictures" button. 6. Click OK to close the Preferences dialog. All valid picture files will be shown. If the picture is still not shown, use the Search facility to try to find the picture file. It may be possible that you may have unknowingly moved the picture file from its original location. If you are still not able to see the required picture, use Windows Explorer to ensure that the files that you expected are still in this location. Also check the Recycle Bin.
R029 I cannot see the contents of my connected Designer SE.It is not possible to browse the contents of a Designer SE from a computer. This means that Designer SE Communication will not browse a connected Designer SE. Use File Manager on the Designer SE to browse both the embroidery machine and your computer.
R030 I have some Zip files containing embroideries, but I am unable to browse inside the Zip files with 3D Organizer.
This can happen if you have any Zip files made with the WinRar file compression utility, because WinRar creates Zip files that are not compatible with 3D Organizer. You may be able to use WinZip [http://www.winzip.com/] to extract the contents of a Zip file created with WinRar.
Changing Preferences
G429 The 5"x7" Design hoop and the Endless hoop are no longer available in the hoop list.
FAQ Lists for Husqvarna Viking 3D Software Page 163

The 5"x7" Design and Endless hoops were added to the hoop list in the Version 7.2 update. If you have installed a previous version of software after updating to Version 7.2, the hoop list will be replaced and will no longer include the 5"x7" Design and Endless hoops. Click this link to download and install the correct hoop list: Hoops.exe [http://www.vsmsoftware.net/Downloads/Updates/720/Hoops.exe]
Converting Files
G006 How do I convert a batch of embroideries to another embroidery file format?
Use Convert to Embroidery in 3D Organizer. First select the embroideries that are to be converted. Embroideries may be converted fromany of the following formats: • Brother/Babylock/Bernina PEC (.pec), Brother/Babylock/Bernina PES (.pes version
2,3,4,5,6), Compucon/Singer PSW (.xxx), Husqvarna Viking / Pfaff (.vp3 and .vip), Husqvarna (.hus, .shv and .dhv), Janome (.jef and .sew), Melco (.exp), Pfaff (.pcs), Tajima (.dst) and Toyota (.10*)
Embroideries can be converted toany of the following formats: • Brother/Babylock/Bernina PEC (.pec), Brother/Babylock/Bernina PES (.pes version 2 or
6), Compucon/Singer PSW (.xxx), Husqvarna Viking / Pfaff (.vp3 and .vip), Husqvarna (.hus), Janome (.jef and .sew), Melco (.exp), Pfaff (.pcs), Tajima (.dst) and Toyota (.10*)
A selection of embroideries converted at the same time is saved in the same folder.
R004 "Conversion is not possible for the selected file format."This message appears if you attempt to convert a picture or Zip file to an embroidery file format, or to convert a Zip file to a picture. Use only embroidery files for conversion to embroidery file formats.
R005 Error: "Unable to open file."This message appears when converting files if a file you are attempting to convert is no longer available. For example, if the file was on a floppy disk and the floppy disk has been removed. In this situation, replace the floppy disk.
R006 Error: "Unable to create file."This message appears when converting files if there is a problem with the target location for a file. For example, when saving converted files to removable media (such as a floppy disk or CD) and the media is removed part way through the conversion process, or if a target file is read-only so it may not be overwritten. Make sure the target location is accessible.
R007 Error: "Unable to create folder" when converting files.When converting files, you can type in a folder name to create one new folder and you will be prompted to create the new folder. This message will then appear if the folder name contains characters that may not be used for folder names (such as quotes, other punctuation marks, etc.), more than one new folder would be created or you have attempted to create a folder in a location that may not be used (such as an empty floppy drive). Ensure the folder name and location are correct.
FAQ Lists for Husqvarna Viking 3D Software Page 164

Desktop Background
R022 Nothing happens when I use any of the Set As Desktop Background options.
This happens when you have Internet Explorer 5.0 or 5.5 installed and you have the View As Active Desktop options selected on the Web tab of Display Properties. Right-click anywhere on your Desktop Background, select Properties, click the Web tab, click View As Active Desktop so it is unchecked and click OK. You will now be able to use the Set As Desktop Background options.
Error Messages
G007 Error "Thread range is corrupt or missing. Cannot change thread. Reinstall the thread database."
This message usually means that the database driver is incorrectly installed. First follow the instructions in FAQ #G010 to fix this. If the message still appears, use the following procedure to repair the installation: 1. Right-click the Start button on the taskbar and select Explore from the popup menu. 2. In Explorer, browse to the folder C:\3DEmbroidery\System.
This assumes you have installed your 3D Embroidery System software in the default location of C:\3DEmbroidery. If you have installed the software in a different location, browse to the System folder at that location.
3. Delete the files named "MyThreads.mdb" and "ThreadDataBase.mdb". The file names may simply be shown as "MyThreads" and "ThreadDataBase".
4. Put your 3D Embroidery System software CD in your computer to re-run the installation. The installation should start automatically when you put your software CD in the computer. If this does not happen, browse to the CD with Explorer and double-click "Setup.exe" to start the installation.
5. When the choice appears, select the "Modify or remove" option and click Next. 6. In the next screen, select Repair and click Next. 7. Continue with the installation and follow the on-screen instructions. When the installation
is complete, the MyThreads and standard thread databases will be restored to their original installation state.
If you had previously backed up your MyThreads database, you can now use the Restore option in Thread Manager to restore your MyThreads database. See the on-line help in Thread Manager for more information.
G010 How do I fix the database driver used by my 3D Embroidery System software?
Database drivers are normally found installed on most computers – they are commonly installed as part of the installation of Microsoft® Office or as an upgrade of key components of the operating system. Key components of the 3D Embroidery System need to be able to use these drivers. Therefore, any difficulties in using these drivers may affect the functionality of certain features of the 3D Embroidery System. Examples include changing a thread color in any module and/or Motif Fill/Line properties in 3D Digitizing. If you have Windows® XP with Service Pack 2 installed, use the Database Driver Fix described below. Otherwise, install the drivers manually as follows:
FAQ Lists for Husqvarna Viking 3D Software Page 165

Installation of the Database files 1. Insert the 3D Embroidery System CD. 2. Cancel the installation screen if it appears. 3. Use Windows® Explorer to browse to the D:\Technical folder – where D:\ is the name of
your CD or DVD drive. 4. Double click on the Database Drivers folder. 5. Double click on the Jet 4 folder. 6. Double click on the folder that is for your operating system. 7. Double click on the file to start the installation of the Jet 4 Service Pack 8 files. This
should take a few moments for the files to be installed. 8. After the installation is complete, browse to the D:\Technical\Database Drivers\MDAC 2.8
folder. 9. Double click on the MDAC_TYP.exe file. The Microsoft Data Access Components 2.8
Setup dialog box will appear. 10. Select the option “I accept all the terms of the preceding license agreement”. 11. Click on the Next button. 12. Click on the Finish button when it appears. This will start the installation process for the
MDAC 2.8 files. 13. After the MDAC 2.8 installation is complete, reboot your computer and continue to use
your 3D Embroidery System. 14. If you are still having difficulties, use the Database Driver Fix that follows. Database Driver Fix 1. Insert the 3D Embroidery System CD. 2. Cancel the installation screen if it appears. 3. Use Windows® Explorer to browse to the D:\Technical folder – where D:\ is the name of
your CD or DVD drive. 4. Double click on the Database Drivers folder. 5. Double click on the MSAccessDbFixer file (this may be shown with a .exe extension). A
window will appear briefly on the screen. 6. Continue to use your 3D Embroidery System.
R027 Error "MyDesigns folder is full. You must delete some designs or folders to make room for designs."
This message appears if there is no room in the MyDesigns folder on the Designer SE to transfer the embroideries you have selected. Delete some embroideries, then try again.
R028 Error "Too many designs have been selected. Only the first 100 will be transferred."
This message appears if more than 100 designs are selected. Click OK to transfer the first 100 embroideries to your Designer SE, or Cancel to change the selection before transferring the embroideries.
General
G001 General difficulties with hardware and softwareTo try to determine the cause of any odd difficulties with the 3D Embroidery System, the best method is to reboot the computer in safe mode. If the problem is then solved, you know that some clash of hardware and/or software such as device drivers is to blame. You can then
FAQ Lists for Husqvarna Viking 3D Software Page 166

obtain more help from your computer dealer to analyze the cause and reconfigure your computer if necessary. To start Windows in Safe Mode 1. Close all programs. 2. Click Start, and then click Shut Down or Turn Off Computer, whichever is shown. 3. Click Restart. If necessary, click OK to confirm. 4. Your computer will shut down and restart. 5. As your computer restarts, press and hold the F8 key until a menu of windows startup
options appears. 6. Use the up and down arrow keys to highlight Safe mode, and then press ENTER. When you hold down the F8 key, your computer may beep rapidly and report keyboard errors as it restarts. Release the F8 key briefly to skip any errors and press F8 again until you have the Startup Menu on your screen.
HTML Wizard
R014 "The HTML Wizard is busy. Please wait until processing is finished, then try again."
If you have selected some embroidery files, then started to Create HTML, then selected more files and selected Create HTML again, this message will appear. Once the first set of files have been processed, you will be able to continue.
R024 How do I publish the HTML pages I made with the HTML Wizard on the home page for my personal website?
Before you can begin, you will need instructions from your Internet Service Provider (ISP) on how you should upload files to your personal website. We are unable to provide instructions on uploading because the procedure is not the same for all ISPs. Your ISP will also tell you the home page address for your personal website. These instructions assume you are making a standalone website using only the files generated by the HTML Wizard. The term uploadrefers to copying files from your computer upto another computer. This is the opposite of download, where you copy files from another computer downto your computer. If you already have a personal website, you may need to consider how to integrate the HTML pages into your website. Such information is beyond the scope of this FAQ. The files generated by the HTML Wizard are stored in C:\3DEmbroidery\HTML (this assumes that you are using the default installation folder C:\3DEmbroidery). Within the HTML folder is a file called 'index.htm'. This is the entry point into the collections you have created with the HTML Wizard. Each collection is stored in a sub-folder of the HTML folder, named according to the collection names you have used. When you upload the HTML pages, you should transfer the 'index.htm' file and all the sub-folders. Upload them so that they stay organized the same way. Do not upload the HTML folder itself. Once the files are uploaded, you can test the result by entering your personal website address into your browser. The file 'index.htm' is automatically detected and loaded by the browser and you will see your collections are now online for your friends and family to see.
R025 Can I use the HTML Themes on my Windows® Desktop?
FAQ Lists for Husqvarna Viking 3D Software Page 167

The HTML Themes are only for use with the 3D Organizer HTML Wizard. They provide a variety of different looks to the HTML pages you can create. They are not Windows® Desktop Themes.
Installation and CD
G601 Whenever I insert my CD it asks if I want to uninstall or modify my softwareAll 3D Embroidery System Software has an automatic installation whenever the CD is inserted. The CD detected your software was already installed so you have the options to uninstall the software or modify the installation. Simply click 'Cancel', and then 'Yes' to confirm it. Then click 'Finish' to close the installation window. When you use the CD again, you may hold down the Shift key for 30 seconds when the CD is inserted if you want to prevent the installation menu appearing.
G602 The programs are not being installed to the correct folderThe installation program will by default put the embroidery system onto drive C:. The drive letter that the embroidery system will install to is shown during the install and can be changed by the user. The drive or partition that the embroidery system is installed to will make no difference to its operation.
G603 I do not have the 3D Embroidery System logos beside each file in Windows Explorer
Your icon association is set up during installation. You will have to re-install.
Managing Files
R021 When I use Cut or Copy on the Edit menu, I am not sure if I will copy the folder or thumbnail selection.
The item that is Cut or Copied will depend on whether the Folder pane or Thumbnail pane is selected, as indicated by which item is highlighted.
Managing Folders
R012 Error: "Unable to create folder."This message will appear if you try to create a new folder and it would be a duplicate folder name, if there is not enough room on the chosen drive or if the drive is write-protected, for example a CD or floppy disk. Ensure the folder name and location are correct.
Miscellaneous
G411 Error "Not enough memory to perform operation."This message will appear if system resources are low. Close other programs and try again. If this does not work, try restarting your computer.
G425 I have a very large embroidery in the clipboard block. How do I remove it?
FAQ Lists for Husqvarna Viking 3D Software Page 168

Copy a small embroidery or a few stitches. This will replace the current contents of the clipboard block. Alternatively, select and copy a small amount of text (highlight the text and press Ctrl+C on the keyboard). The clipboard block will go blank when you do this. Do not use the Print Screen key to clear the clipboard. This does make the clipboard block go blank. However, Print Screen takes a snapshot of whatever is currently displayed on your computer screen and places it in the clipboard as a picture. This is likely to be larger than any embroidery you may copy, and may cause additional difficulties if you are having memory problems.
G601 Whenever I insert my CD it asks if I want to uninstall or modify my softwareAll 3D Embroidery System Software has an automatic installation whenever the CD is inserted. The CD detected your software was already installed so you have the options to uninstall the software or modify the installation. Simply click 'Cancel', and then 'Yes' to confirm it. Then click 'Finish' to close the installation window. When you use the CD again, you may hold down the Shift key for 30 seconds when the CD is inserted if you want to prevent the installation menu appearing.
G603 I do not have the 3D Embroidery System logos beside each file in Windows Explorer
Your icon association is set up during installation. You will have to re-install.
Opening the Program
R001 Error: "3D Organizer requires a color palette of High Color (16 bit) or higher."
This message appears when attempting to open 3D Organizer if your computer is set to a display of 256 colors or less. Reset the display as follows. 1. Right-click on the desktop and a shortcut menu appears. 2. Click on Properties and a dialog box appears. 3. Click the Settings tab. 4. Change Color quality to High Color (16 bit) or higher using the drop-down menu. 5. Click Apply, and allow your computer to restart if required.
Preferences
G429 The 5"x7" Design hoop and the Endless hoop are no longer available in the hoop list.
The 5"x7" Design and Endless hoops were added to the hoop list in the Version 7.2 update. If you have installed a previous version of software after updating to Version 7.2, the hoop list will be replaced and will no longer include the 5"x7" Design and Endless hoops. Click this link to download and install the correct hoop list: Hoops.exe [http://www.vsmsoftware.net/Downloads/Updates/720/Hoops.exe]
R026 Error message "Minimum Stitch Count is greater than Maximum Stitch Count. Please adjust."
FAQ Lists for Husqvarna Viking 3D Software Page 169

If the Minimum Stitch Count is greater than Maximum Stitch Count then no files will be displayed as thumbnails. Change the Minimum Stitch Count to be less than the Maximum Stitch Count. Alternatively, deselect one checkbox.
Printing
R013 "No embroidery available to print."This message will appear if you attempt to Print or Print Preview when you have no embroidery files selected. Select an embroidery file type, then try again.
Product Information
G004 What is the price of the software, and where can I get it?Please contact your local dealer for prices and availability on all the Husqvarna Viking software. To find your local dealer see the Husqvarna Viking Dealer Locator [http://www.sew.husqvarna.se/dealers.htm]. You can always find this on the bottom bar of the Husqvarna Viking Software website.
Saving Embroideries
G402 Error: "Design too large for output file format"Certain formats are limited to the size of hoop used on their specific embroidery machine, for example .sew. If you attempt to save a file in this format that is bigger than the largest available hoop size this message would appear.
G404 I have saved an embroidery in .sew format, and two files have been createdJanome software cannot load embroideries with more than 12 colors. If a file to be exported in .sew format has more than 12 color changes, it will automatically be split into multiple files, with the last character of the filename "1", "2", and so on.
G412 Error "Cannot save file."The module cannot save the file. Ensure that the disk where you are trying to save the embroidery is not write-protected, then try again. For instance, you have loaded an embroidery from a CD-ROM and then attempt to save the embroidery back to the CD. A CD-ROM is read only, therefore you will not be able to save the embroidery.
G427 The manuals and help say that I can save PES files as version 5, but it only seems to save as version 2.
This is an erratum in the manuals and help. Up to version 7.2, the 3D Embroidery System modules can only save PES files as version 2. PES version 2 has a size restriction of 130mm x 180mm. From version 7.25 onwards, PES files are saved as version 2 if the embroidery is 130mm x 180mm or smaller. Files larger than this are saved as PES version 6. Use Smart Update to ensure your 3D Embroidery System modules are updated to the latest version. See FAQ #B008. Always print a worksheet from the 3D Embroidery System to show the correct colors for your embroidery, before saving it to a format that does not support full thread color information.
FAQ Lists for Husqvarna Viking 3D Software Page 170

Screen Appearance
G417 I wish to change the background color for the work area and the Real Size window
Use 3D Configure to alter the background color for the work area and Real Size. 3D Configure may also be used to turn the texture on or off.
G418 I can't see some of the floating toolbars or iconsFirst, check View, Customize to see if the missing toolbar has been turned off. If all the toolbar names are checked (so they are turned on) and you still cannot locate a toolbar, it may have been moved to the edge of the screen so it is hard to see. If you move icons around it is possible to delete them. To reset the icons on a toolbar 1. Click View, Customize to see the Customize dialog. 2. Click the Toolbar tab. 3. Click the name of the required toolbar. 4. Click Reset. 5. Click Yes to confirm. The selection of icons on the toolbar and their order will be reset.
R015 Some of the icons in the Toolbar are 'grayed out'.Certain icons (for example, Cut, Copy and Paste) are only highlighted once a folder or file is selected on the 3D Organizer screen.
R016 I wish to change the background color for the thumbnails and Real Size window.
Use 3D Configure to alter the background color. 3D Configure may also be used to turn the texture on or off.
Searching
R008 "The specified folder does not exist. Please adjust."This message will appear when you try to Search if you entered a folder in the Look in box that does not exist. Edit the folder name and try again.
R009 "Minimum Stitch Count is greater than Maximum Stitch Count. Please adjust."
If the Minimum Stitch Count is greater than Maximum Stitch Count then no files will be found by the Search. Change the Minimum Stitch Count to be less than the Maximum Stitch Count. Alternatively, deselect one checkbox.
R010 "Date From is later than Date To. Please adjust."If the Date From is later than Date To then no files will be found by the Search. You will not be able to Search until you adjust the dates appropriately.
R011 "Folder not found. Search Results."
FAQ Lists for Husqvarna Viking 3D Software Page 171

This message appears if you attempt to select and Go to the Search Results folder from the Address bar. After a Search, the Search Results folder will be shown in the drop-down list of previous Addresses. However, the Address bar may not be used to return to the Search Results. Click the Search Results folder at the bottom of the folder list in the Folder pane instead.
Send To d-Card Reader/Writer Unit
A320 I am having difficulty using an embroidery on my machine when I send it to a d-Card from a horizontal hoop with Send 1 or Send 2.
This can happen if you are using a horizontal hoop on screen, and the embroidery is more than 150mm wide. When the embroidery is sent to the d-Card with Send To, the embroidery is not rotated. Before sending the embroidery to a d-Card, change the hoop orientation to vertical and, if the embroidery no longer fits, rotate the embroidery by 90 degrees. If you are using 3D Digitizing, 3D PictureStitch or 3D Cross Stitcher to create the embroidery, copy the finished design to 3D Embroidery to rotate it and setup the vertical hoop.
Send To Designer SE
R027 Error "MyDesigns folder is full. You must delete some designs or folders to make room for designs."
This message appears if there is no room in the MyDesigns folder on the Designer SE to transfer the embroideries you have selected. Delete some embroideries, then try again.
R028 Error "Too many designs have been selected. Only the first 100 will be transferred."
This message appears if more than 100 designs are selected. Click OK to transfer the first 100 embroideries to your Designer SE, or Cancel to change the selection before transferring the embroideries.
Sending Files to Machines
G422 I cannot send a file to an embroidery machineClick the 3D Configure icon to start 3D Configure. This will allow you to adjust the Send 1 and Send 2 options for your embroidery machine.
Thread Colors
G007 Error "Thread range is corrupt or missing. Cannot change thread. Reinstall the thread database."
This message usually means that the database driver is incorrectly installed. First follow the instructions in FAQ #G010 to fix this. If the message still appears, use the following procedure to repair the installation: 1. Right-click the Start button on the taskbar and select Explore from the popup menu. 2. In Explorer, browse to the folder C:\3DEmbroidery\System.
This assumes you have installed your 3D Embroidery System software in the default
FAQ Lists for Husqvarna Viking 3D Software Page 172

location of C:\3DEmbroidery. If you have installed the software in a different location, browse to the System folder at that location.
3. Delete the files named "MyThreads.mdb" and "ThreadDataBase.mdb". The file names may simply be shown as "MyThreads" and "ThreadDataBase".
4. Put your 3D Embroidery System software CD in your computer to re-run the installation. The installation should start automatically when you put your software CD in the computer. If this does not happen, browse to the CD with Explorer and double-click "Setup.exe" to start the installation.
5. When the choice appears, select the "Modify or remove" option and click Next. 6. In the next screen, select Repair and click Next. 7. Continue with the installation and follow the on-screen instructions. When the installation
is complete, the MyThreads and standard thread databases will be restored to their original installation state.
If you had previously backed up your MyThreads database, you can now use the Restore option in Thread Manager to restore your MyThreads database. See the on-line help in Thread Manager for more information.
G010 How do I fix the database driver used by my 3D Embroidery System software?
Database drivers are normally found installed on most computers – they are commonly installed as part of the installation of Microsoft® Office or as an upgrade of key components of the operating system. Key components of the 3D Embroidery System need to be able to use these drivers. Therefore, any difficulties in using these drivers may affect the functionality of certain features of the 3D Embroidery System. Examples include changing a thread color in any module and/or Motif Fill/Line properties in 3D Digitizing. If you have Windows® XP with Service Pack 2 installed, use the Database Driver Fix described below. Otherwise, install the drivers manually as follows: Installation of the Database files 1. Insert the 3D Embroidery System CD. 2. Cancel the installation screen if it appears. 3. Use Windows® Explorer to browse to the D:\Technical folder – where D:\ is the name of
your CD or DVD drive. 4. Double click on the Database Drivers folder. 5. Double click on the Jet 4 folder. 6. Double click on the folder that is for your operating system. 7. Double click on the file to start the installation of the Jet 4 Service Pack 8 files. This
should take a few moments for the files to be installed. 8. After the installation is complete, browse to the D:\Technical\Database Drivers\MDAC 2.8
folder. 9. Double click on the MDAC_TYP.exe file. The Microsoft Data Access Components 2.8
Setup dialog box will appear. 10. Select the option “I accept all the terms of the preceding license agreement”. 11. Click on the Next button. 12. Click on the Finish button when it appears. This will start the installation process for the
MDAC 2.8 files. 13. After the MDAC 2.8 installation is complete, reboot your computer and continue to use
your 3D Embroidery System. 14. If you are still having difficulties, use the Database Driver Fix that follows. Database Driver Fix
FAQ Lists for Husqvarna Viking 3D Software Page 173

1. Insert the 3D Embroidery System CD. 2. Cancel the installation screen if it appears. 3. Use Windows® Explorer to browse to the D:\Technical folder – where D:\ is the name of
your CD or DVD drive. 4. Double click on the Database Drivers folder. 5. Double click on the MSAccessDbFixer file (this may be shown with a .exe extension). A
window will appear briefly on the screen. 6. Continue to use your 3D Embroidery System.
Transferring Files
R027 Error "MyDesigns folder is full. You must delete some designs or folders to make room for designs."
This message appears if there is no room in the MyDesigns folder on the Designer SE to transfer the embroideries you have selected. Delete some embroideries, then try again.
R028 Error "Too many designs have been selected. Only the first 100 will be transferred."
This message appears if more than 100 designs are selected. Click OK to transfer the first 100 embroideries to your Designer SE, or Cancel to change the selection before transferring the embroideries.
Tutorials
G005 The window remains blank when I try to use the tutorials.You need version 6 or later of the Macromedia Flash Player to view the tutorials. Visit the Macromedia [http://www.macromedia.com] website and download and install the latest version of the Flash Player.
G011 What version of Macromedia Flash Player do I need to view the tutorials?You need version 6 or later of the Macromedia Flash Player to view the tutorials. Visit the Macromedia [http://www.macromedia.com] website and download and install the latest version of the Flash Player.
Using the Program
R002 "Warning. 5,000 files have been found. Program performance may be affected. Do you wish to continue?"
This message appears if 5,000 files are found by a Search or in a single folder. Click Yes to continue listing more files. Click No to stop and only show the 5,000 files found so far. Click Cancel to stop and clear the Thumbnail Pane so that no files are shown.
R003 Error: "15,000 files have been found. No more files will be displayed. To see other files, move to a different folder or change the search criteria."
This message appears if 15,000 files are found by a Search or in a single folder. 3D Organizer will stop displaying additional files. If you have been making a search, change the
FAQ Lists for Husqvarna Viking 3D Software Page 174

Look in: folder or add more information to refine the search criteria. If you are browsing a folder, copy some files to another location.
Viewing Files
R017 Thumbnails are taking a long time to appear on my computer.You can increase the speed for showing thumbnails by displaying 2D thumbnails. Go to Thumbnail Preferences and make sure that 3D Thumbnails is not checked. If desired, you may also turn off the textured background in 3D Configure for faster browsing.
R018 I cannot select a Zip file to see its contents.This happens when a Zip file is stored within another Zip file. 3D Organizer will not browse the contents of a Zip file if it is stored within another Zip file. Use Copy, Copy To Folder or Move To Folder to place the Zip file in a location where you will be able to browse its contents.
R029 I cannot see the contents of my connected Designer SE.It is not possible to browse the contents of a Designer SE from a computer. This means that Designer SE Communication will not browse a connected Designer SE. Use File Manager on the Designer SE to browse both the embroidery machine and your computer.
R030 I have some Zip files containing embroideries, but I am unable to browse inside the Zip files with 3D Organizer.
This can happen if you have any Zip files made with the WinRar file compression utility, because WinRar creates Zip files that are not compatible with 3D Organizer. You may be able to use WinZip [http://www.winzip.com/] to extract the contents of a Zip file created with WinRar.
Zip Files
R030 I have some Zip files containing embroideries, but I am unable to browse inside the Zip files with 3D Organizer.
This can happen if you have any Zip files made with the WinRar file compression utility, because WinRar creates Zip files that are not compatible with 3D Organizer. You may be able to use WinZip [http://www.winzip.com/] to extract the contents of a Zip file created with WinRar.
R031 I am unable to browse inside or create zip files in 3D Organizer.Use Smart Update to obtain the Polar Zip Upgrade. After installing this update, you will be able to browse and create zip files in 3D Organizer. See FAQ #B008 for instructions on how to use Smart Update
General Listed versions: Not Applicable
FAQ Lists for Husqvarna Viking 3D Software Page 175

Converting Files
G006 How do I convert a batch of embroideries to another embroidery file format?
Use Convert to Embroidery in 3D Organizer. First select the embroideries that are to be converted. Embroideries may be converted fromany of the following formats: • Brother/Babylock/Bernina PEC (.pec), Brother/Babylock/Bernina PES (.pes version
2,3,4,5,6), Compucon/Singer PSW (.xxx), Husqvarna Viking / Pfaff (.vp3 and .vip), Husqvarna (.hus, .shv and .dhv), Janome (.jef and .sew), Melco (.exp), Pfaff (.pcs), Tajima (.dst) and Toyota (.10*)
Embroideries can be converted toany of the following formats: • Brother/Babylock/Bernina PEC (.pec), Brother/Babylock/Bernina PES (.pes version 2 or
6), Compucon/Singer PSW (.xxx), Husqvarna Viking / Pfaff (.vp3 and .vip), Husqvarna (.hus), Janome (.jef and .sew), Melco (.exp), Pfaff (.pcs), Tajima (.dst) and Toyota (.10*)
A selection of embroideries converted at the same time is saved in the same folder.
Demos and Documentation
G002 I get an error message when I try to open documents in Acrobat Reader, either from CD or when I download from this web site.
Errors such as 'Unable to open document' or 'Could not find ColorSpace named Cs8' appear because you are trying to use an old version of Acrobat Reader. Make sure you are using the latest version of Acrobat (version 5 or above). You can install the current version from your CD. Simply insert the CD and select the option from the menu that appears. Alternatively go to the Acrobat Page at Adobe's web site [http://www.adobe.com] where you can download the latest copy and also check for any conflicting software you may have on your machine.
Downloading Files
B003 When I use Smart Update, some of the updates I have downloaded are still shown.
Smart Updates you have downloaded may still be shown if you have not installed them. Simply downloading a Smart Update does not automatically install it on your computer. After downloading a Smart Update, find the file where you saved it and double-click it to install.
Error Messages
G002 I get an error message when I try to open documents in Acrobat Reader, either from CD or when I download from this web site.
Errors such as 'Unable to open document' or 'Could not find ColorSpace named Cs8' appear because you are trying to use an old version of Acrobat Reader. Make sure you are using the latest version of Acrobat (version 5 or above). You can install the current version from your CD. Simply insert the CD and select the option from the menu that appears. Alternatively go to the Acrobat Page at Adobe's web site
FAQ Lists for Husqvarna Viking 3D Software Page 176
[http://www.adobe.com] where you can download the latest copy and also check for any conflicting software you may have on your machine.
G012 Error "Unable to load graphics conversion filter. Continue with document conversion? Yes/No"
This message can appear when you open documents from the Technical folder on the CD that have pictures in them. If you do not have any appropriate word processing facilities, Windows® will use WordPad to open the technical documents. WordPad is the free word processor that is provided with Windows®. Click Yes to continue opening the technical document. The message will appear once for each picture in the document. The text in the document will be displayed normally, but the pictures will not be shown. The technical documents are Microsoft® Word® documents (.doc). If you do not have any related Microsoft® applications installed, the picture filters that are needed to show the pictures will not be installed on your computer. However, you can download the free Office File Converter Pack from the Microsoft® web site. This will allow WordPad to show the pictures, and will also stop the error message appearing. This can be obtained as follows: 1. In your web browser, go to Microsoft® (www.microsoft.com) [http://www.microsoft.com]. 2. In the Search Microsoft box, type "oconvpck.exe" and click Go. 3. In the list of results, click the "Download details: Office File Converter Pack" link. 4. A page will appear that describes how to download and install the Office File Converter
Pack. Read the page and follow the download and installation instructions. Once the Office File Converter Pack is installed, you will be able to see the pictures in the technical documents when they are opened in WordPad.
General
G001 General difficulties with hardware and softwareTo try to determine the cause of any odd difficulties with the 3D Embroidery System, the best method is to reboot the computer in safe mode. If the problem is then solved, you know that some clash of hardware and/or software such as device drivers is to blame. You can then obtain more help from your computer dealer to analyze the cause and reconfigure your computer if necessary. To start Windows in Safe Mode 1. Close all programs. 2. Click Start, and then click Shut Down or Turn Off Computer, whichever is shown. 3. Click Restart. If necessary, click OK to confirm. 4. Your computer will shut down and restart. 5. As your computer restarts, press and hold the F8 key until a menu of windows startup
options appears. 6. Use the up and down arrow keys to highlight Safe mode, and then press ENTER. When you hold down the F8 key, your computer may beep rapidly and report keyboard errors as it restarts. Release the F8 key briefly to skip any errors and press F8 again until you have the Startup Menu on your screen.
Installation and CD
G002 I get an error message when I try to open documents in Acrobat Reader, either from CD or when I download from this web site.
FAQ Lists for Husqvarna Viking 3D Software Page 177

Errors such as 'Unable to open document' or 'Could not find ColorSpace named Cs8' appear because you are trying to use an old version of Acrobat Reader. Make sure you are using the latest version of Acrobat (version 5 or above). You can install the current version from your CD. Simply insert the CD and select the option from the menu that appears. Alternatively go to the Acrobat Page at Adobe's web site [http://www.adobe.com] where you can download the latest copy and also check for any conflicting software you may have on your machine.
G012 Error "Unable to load graphics conversion filter. Continue with document conversion? Yes/No"
This message can appear when you open documents from the Technical folder on the CD that have pictures in them. If you do not have any appropriate word processing facilities, Windows® will use WordPad to open the technical documents. WordPad is the free word processor that is provided with Windows®. Click Yes to continue opening the technical document. The message will appear once for each picture in the document. The text in the document will be displayed normally, but the pictures will not be shown. The technical documents are Microsoft® Word® documents (.doc). If you do not have any related Microsoft® applications installed, the picture filters that are needed to show the pictures will not be installed on your computer. However, you can download the free Office File Converter Pack from the Microsoft® web site. This will allow WordPad to show the pictures, and will also stop the error message appearing. This can be obtained as follows: 1. In your web browser, go to Microsoft® (www.microsoft.com) [http://www.microsoft.com]. 2. In the Search Microsoft box, type "oconvpck.exe" and click Go. 3. In the list of results, click the "Download details: Office File Converter Pack" link. 4. A page will appear that describes how to download and install the Office File Converter
Pack. Read the page and follow the download and installation instructions. Once the Office File Converter Pack is installed, you will be able to see the pictures in the technical documents when they are opened in WordPad.
Miscellaneous
G002 I get an error message when I try to open documents in Acrobat Reader, either from CD or when I download from this web site.
Errors such as 'Unable to open document' or 'Could not find ColorSpace named Cs8' appear because you are trying to use an old version of Acrobat Reader. Make sure you are using the latest version of Acrobat (version 5 or above). You can install the current version from your CD. Simply insert the CD and select the option from the menu that appears. Alternatively go to the Acrobat Page at Adobe's web site [http://www.adobe.com] where you can download the latest copy and also check for any conflicting software you may have on your machine.
G423 When I close 3D Embroidery all my other modules also close3D Embroidery is the central module of the 3D Embroidery System. When 3D Embroidery closes, all other open modules are closed at the same time. If you have created a new file or made changes in another module, you will be prompted to save the file before the module closes.
FAQ Lists for Husqvarna Viking 3D Software Page 178

Product Information
G013 What versions of Windows® is the 3D Embroidery System compatible with?
The 3D Embroidery System is optimized to run on Windows® XP, and Windows® XP is also a minimum requirement for the 3D Embroidery System. Therefore, while it may be possible to install the 3D Embroidery System on previous versions of Windows®, the full functionality of the 3D Embroidery System may not be available.
G014 Is the 3D Embroidery System compatible with Service Pack 2 for Windows® XP?
Yes. Service Pack 2 is simply an update for Windows® XP and does not affect compatibility with the 3D Embroidery System.
Viewing Files
G012 Error "Unable to load graphics conversion filter. Continue with document conversion? Yes/No"
This message can appear when you open documents from the Technical folder on the CD that have pictures in them. If you do not have any appropriate word processing facilities, Windows® will use WordPad to open the technical documents. WordPad is the free word processor that is provided with Windows®. Click Yes to continue opening the technical document. The message will appear once for each picture in the document. The text in the document will be displayed normally, but the pictures will not be shown. The technical documents are Microsoft® Word® documents (.doc). If you do not have any related Microsoft® applications installed, the picture filters that are needed to show the pictures will not be installed on your computer. However, you can download the free Office File Converter Pack from the Microsoft® web site. This will allow WordPad to show the pictures, and will also stop the error message appearing. This can be obtained as follows: 1. In your web browser, go to Microsoft® (www.microsoft.com) [http://www.microsoft.com]. 2. In the Search Microsoft box, type "oconvpck.exe" and click Go. 3. In the list of results, click the "Download details: Office File Converter Pack" link. 4. A page will appear that describes how to download and install the Office File Converter
Pack. Read the page and follow the download and installation instructions. Once the Office File Converter Pack is installed, you will be able to see the pictures in the technical documents when they are opened in WordPad.
All Modules Listed versions: Not Applicable
General
G001 General difficulties with hardware and softwareTo try to determine the cause of any odd difficulties with the 3D Embroidery System, the best method is to reboot the computer in safe mode. If the problem is then solved, you know that
FAQ Lists for Husqvarna Viking 3D Software Page 179

some clash of hardware and/or software such as device drivers is to blame. You can then obtain more help from your computer dealer to analyze the cause and reconfigure your computer if necessary. To start Windows in Safe Mode 1. Close all programs. 2. Click Start, and then click Shut Down or Turn Off Computer, whichever is shown. 3. Click Restart. If necessary, click OK to confirm. 4. Your computer will shut down and restart. 5. As your computer restarts, press and hold the F8 key until a menu of windows startup
options appears. 6. Use the up and down arrow keys to highlight Safe mode, and then press ENTER. When you hold down the F8 key, your computer may beep rapidly and report keyboard errors as it restarts. Release the F8 key briefly to skip any errors and press F8 again until you have the Startup Menu on your screen.
Installation and CD
G424 I have installed my 3D Embroidery Software, but I can't see shortcuts to all the modules. Have they installed correctly?
All modules that you have installed are available on the QuickLink toolbar and QuickLink menu. The QuickLink toolbar is shown in every module that uses toolbars. It is shown here for a fully installed 3D Embroidery System:
QuickLink toolbar
In some cases, part of the toolbar may not be fully visible. In this case, the remainder of the toolbar can be seen by clicking the >> symbol at the right end of the toolbar. This will drop down a menu of any options that were not visible. Also notice that the machine accessories are shown only on the Accessories drop-down menu on the toolbar, or on the Accessories sub-menu of the QuickLink menu.
Miscellaneous
G411 Error "Not enough memory to perform operation."This message will appear if system resources are low. Close other programs and try again. If this does not work, try restarting your computer.
G423 When I close 3D Embroidery all my other modules also close3D Embroidery is the central module of the 3D Embroidery System. When 3D Embroidery closes, all other open modules are closed at the same time. If you have created a new file or made changes in another module, you will be prompted to save the file before the module closes.
G424 I have installed my 3D Embroidery Software, but I can't see shortcuts to all the modules. Have they installed correctly?
FAQ Lists for Husqvarna Viking 3D Software Page 180
All modules that you have installed are available on the QuickLink toolbar and QuickLink menu. The QuickLink toolbar is shown in every module that uses toolbars. It is shown here for a fully installed 3D Embroidery System:
QuickLink toolbar
In some cases, part of the toolbar may not be fully visible. In this case, the remainder of the toolbar can be seen by clicking the >> symbol at the right end of the toolbar. This will drop down a menu of any options that were not visible. Also notice that the machine accessories are shown only on the Accessories drop-down menu on the toolbar, or on the Accessories sub-menu of the QuickLink menu.
Product Information
G004 What is the price of the software, and where can I get it?Please contact your local dealer for prices and availability on all the Husqvarna Viking software. To find your local dealer see the Husqvarna Viking Dealer Locator [http://www.sew.husqvarna.se/dealers.htm]. You can always find this on the bottom bar of the Husqvarna Viking Software website.
Screen Appearance
B005 I have used Reset All Modules but the existing settings are still being shown
This will happen if you have a module open when you click Reset All Modules in 3D Configure. Close all 3D Embroidery System modules, then start 3D Configure and click Reset All Modules again.
G415 I have changed the screen background color and now I wish to return to the original light blue
Use 3D Configure to change the background color. Follow the instructions in 3D Configure and select the RGB values 200, 232, 247 in the Colors dialog box.
G417 I wish to change the background color for the work area and the Real Size window
Use 3D Configure to alter the background color for the work area and Real Size. 3D Configure may also be used to turn the texture on or off.
Tutorials
G005 The window remains blank when I try to use the tutorials.You need version 6 or later of the Macromedia Flash Player to view the tutorials. Visit the Macromedia [http://www.macromedia.com] website and download and install the latest version of the Flash Player.
G011 What version of Macromedia Flash Player do I need to view the tutorials?
FAQ Lists for Husqvarna Viking 3D Software Page 181

You need version 6 or later of the Macromedia Flash Player to view the tutorials. Visit the Macromedia [http://www.macromedia.com] website and download and install the latest version of the Flash Player.
3D Vision Listed versions: 7.0; 7.0.5; 7.1; 7.2; 7.25
Acquiring Pictures
V004 Error message "Scanner or camera is in use by another application."This message will appear when trying to use your scanner or digital camera if another graphics program is already open that uses the Twain-compliant device. Close 3D Vision and the other graphics program, then reopen 3D Vision and try again.
V005 Error message "Failure to acquire image due to unknown causes."This message will appear in certain circumstances when trying to use your scanner or digital camera, for example if the cable is disconnected during the scan or download. Close 3D Vision, check the connections to your scanner or digital camera, then reopen 3D Vision and try again.
V006 "Operation was cancelled."This message will appear if you cancel acquiring a picture from within the TWAIN application for your scanner or digital camera.
V007 "Your scanner is no longer available for use. Close this program, plug in and switch on your scanner, and run this program again."
This error appears if your scanner or digital camera was switched off or disconnected.
V014 My scanner or digital camera is not shown when I try to Select Source, or the Select Source button is grayed out
The manufacturer of a TWAIN device must provide a Source Manager and a TWAIN Data source for your device to work with 3D Vision. These will normally be installed when you install the software and drivers provided with the device. If you have installed a device and it is not shown in the list then it may not be TWAIN compliant. Refer to the device documentation and manufacturer for assistance.
Background Viewing
V011 I am trying to load a background Fabric or Garment, but I can’t see the backgrounds in the folder I have selected to browse
When you are using the Background Wizard to load an existing fabric or garment, the viewer will only show the type of background you selected on the first page of the wizard. Hence, if you want to load an existing fabric, you must select fabric in the first page of the wizard. Similarly, if you want to load an existing garment, you must ensure that garment is selected in the first page of the wizard.
FAQ Lists for Husqvarna Viking 3D Software Page 182

Error Messages
B618 Error: "Please select a valid thread."This message appears if you attempt to click OK in the Color Selection dialog box when MyThreads is selected as the thread range and MyThreads is empty. To prevent this message appearing again, use Thread Manager in 3D Configure to add at least one thread to MyThreads.
G007 Error "Thread range is corrupt or missing. Cannot change thread. Reinstall the thread database."
This message usually means that the database driver is incorrectly installed. First follow the instructions in FAQ #G010 to fix this. If the message still appears, use the following procedure to repair the installation: 1. Right-click the Start button on the taskbar and select Explore from the popup menu. 2. In Explorer, browse to the folder C:\3DEmbroidery\System.
This assumes you have installed your 3D Embroidery System software in the default location of C:\3DEmbroidery. If you have installed the software in a different location, browse to the System folder at that location.
3. Delete the files named "MyThreads.mdb" and "ThreadDataBase.mdb". The file names may simply be shown as "MyThreads" and "ThreadDataBase".
4. Put your 3D Embroidery System software CD in your computer to re-run the installation. The installation should start automatically when you put your software CD in the computer. If this does not happen, browse to the CD with Explorer and double-click "Setup.exe" to start the installation.
5. When the choice appears, select the "Modify or remove" option and click Next. 6. In the next screen, select Repair and click Next. 7. Continue with the installation and follow the on-screen instructions. When the installation
is complete, the MyThreads and standard thread databases will be restored to their original installation state.
If you had previously backed up your MyThreads database, you can now use the Restore option in Thread Manager to restore your MyThreads database. See the on-line help in Thread Manager for more information.
G010 How do I fix the database driver used by my 3D Embroidery System software?
Database drivers are normally found installed on most computers – they are commonly installed as part of the installation of Microsoft® Office or as an upgrade of key components of the operating system. Key components of the 3D Embroidery System need to be able to use these drivers. Therefore, any difficulties in using these drivers may affect the functionality of certain features of the 3D Embroidery System. Examples include changing a thread color in any module and/or Motif Fill/Line properties in 3D Digitizing. If you have Windows® XP with Service Pack 2 installed, use the Database Driver Fix described below. Otherwise, install the drivers manually as follows: Installation of the Database files 1. Insert the 3D Embroidery System CD. 2. Cancel the installation screen if it appears.
FAQ Lists for Husqvarna Viking 3D Software Page 183

3. Use Windows® Explorer to browse to the D:\Technical folder – where D:\ is the name of your CD or DVD drive.
4. Double click on the Database Drivers folder. 5. Double click on the Jet 4 folder. 6. Double click on the folder that is for your operating system. 7. Double click on the file to start the installation of the Jet 4 Service Pack 8 files. This
should take a few moments for the files to be installed. 8. After the installation is complete, browse to the D:\Technical\Database Drivers\MDAC 2.8
folder. 9. Double click on the MDAC_TYP.exe file. The Microsoft Data Access Components 2.8
Setup dialog box will appear. 10. Select the option “I accept all the terms of the preceding license agreement”. 11. Click on the Next button. 12. Click on the Finish button when it appears. This will start the installation process for the
MDAC 2.8 files. 13. After the MDAC 2.8 installation is complete, reboot your computer and continue to use
your 3D Embroidery System. 14. If you are still having difficulties, use the Database Driver Fix that follows. Database Driver Fix 1. Insert the 3D Embroidery System CD. 2. Cancel the installation screen if it appears. 3. Use Windows® Explorer to browse to the D:\Technical folder – where D:\ is the name of
your CD or DVD drive. 4. Double click on the Database Drivers folder. 5. Double click on the MSAccessDbFixer file (this may be shown with a .exe extension). A
window will appear briefly on the screen. 6. Continue to use your 3D Embroidery System.
General
G001 General difficulties with hardware and softwareTo try to determine the cause of any odd difficulties with the 3D Embroidery System, the best method is to reboot the computer in safe mode. If the problem is then solved, you know that some clash of hardware and/or software such as device drivers is to blame. You can then obtain more help from your computer dealer to analyze the cause and reconfigure your computer if necessary. To start Windows in Safe Mode 1. Close all programs. 2. Click Start, and then click Shut Down or Turn Off Computer, whichever is shown. 3. Click Restart. If necessary, click OK to confirm. 4. Your computer will shut down and restart. 5. As your computer restarts, press and hold the F8 key until a menu of windows startup
options appears. 6. Use the up and down arrow keys to highlight Safe mode, and then press ENTER. When you hold down the F8 key, your computer may beep rapidly and report keyboard errors as it restarts. Release the F8 key briefly to skip any errors and press F8 again until you have the Startup Menu on your screen.
FAQ Lists for Husqvarna Viking 3D Software Page 184

Installation and CD
G601 Whenever I insert my CD it asks if I want to uninstall or modify my softwareAll 3D Embroidery System Software has an automatic installation whenever the CD is inserted. The CD detected your software was already installed so you have the options to uninstall the software or modify the installation. Simply click 'Cancel', and then 'Yes' to confirm it. Then click 'Finish' to close the installation window. When you use the CD again, you may hold down the Shift key for 30 seconds when the CD is inserted if you want to prevent the installation menu appearing.
Loading Embroideries
G401 I can't drag and drop embroidery files from the Open dialog boxTo drag and drop embroidery files onto the work area, right-click Start, then Explore to start Windows® Explorer. Then follow the instructions in the online help under Drag and Drop.
G405 Error "Cannot open embroidery."This message appears if the desired embroidery is not where the module expects it to be, for example if an embroidery was loaded into the module from a floppy disk, then closed and the floppy disk removed. The message would appear if you tried to load the embroidery from the Recent Files list on the File menu.
G406 Error "Unrecognized file format."This message appears if the file you are attempting to load is corrupt. For example, it might have the extension .vp3, yet not be a proper Husqvarna Viking / Pfaff embroidery.
G407 Error: "Embroidery is corrupt"The embroidery is corrupt and cannot be loaded. Refer to source of this file for a solution.
G408 Error "Embroidery XY coordinates incorrect"The embroidery is corrupt and cannot be loaded. Refer to source of this file for a solution.
G409 Error "Unrecognized file extension" when opening a fileThis message appears if you attempt to load a file with an extension that does not belong to any embroidery file types. For example, it would appear if you tried to drag and drop a .doc file onto the screen.
G413 Error "Embroidery not created using licensed software."This message may appear if you attempt to load an embroidery created in third-party software. Such embroideries may cause unpredictable results.
Loading Pictures
V008 Error message "Could not load picture file."
FAQ Lists for Husqvarna Viking 3D Software Page 185

This message could appear if the desired picture is not where the program expects it to be, for example if it was loaded into the program from a floppy disk, then closed and the floppy disk removed. It could also appear if the file you are attempting to load is corrupt. For example, it might have an extension such as .bmp or .jpg, yet not be a proper image file.
Miscellaneous
G411 Error "Not enough memory to perform operation."This message will appear if system resources are low. Close other programs and try again. If this does not work, try restarting your computer.
G425 I have a very large embroidery in the clipboard block. How do I remove it?Copy a small embroidery or a few stitches. This will replace the current contents of the clipboard block. Alternatively, select and copy a small amount of text (highlight the text and press Ctrl+C on the keyboard). The clipboard block will go blank when you do this. Do not use the Print Screen key to clear the clipboard. This does make the clipboard block go blank. However, Print Screen takes a snapshot of whatever is currently displayed on your computer screen and places it in the clipboard as a picture. This is likely to be larger than any embroidery you may copy, and may cause additional difficulties if you are having memory problems.
G601 Whenever I insert my CD it asks if I want to uninstall or modify my softwareAll 3D Embroidery System Software has an automatic installation whenever the CD is inserted. The CD detected your software was already installed so you have the options to uninstall the software or modify the installation. Simply click 'Cancel', and then 'Yes' to confirm it. Then click 'Finish' to close the installation window. When you use the CD again, you may hold down the Shift key for 30 seconds when the CD is inserted if you want to prevent the installation menu appearing.
Printing
V015 I want to see the whole Garment when I print, but only the design is showing
Printing allows you fit the background or the design to the page. To change this so the whole garment shows: 1. Click File, Page Setup. 2. Click the drop-down arrow at the end of the Scale box and select Background Zoom To
Fit. 3. Click OK. 4. Make a new print and the whole garment will be shown.
Product Information
G004 What is the price of the software, and where can I get it?Please contact your local dealer for prices and availability on all the Husqvarna Viking software. To find your local dealer see the Husqvarna Viking Dealer Locator
FAQ Lists for Husqvarna Viking 3D Software Page 186

[http://www.sew.husqvarna.se/dealers.htm]. You can always find this on the bottom bar of the Husqvarna Viking Software website.
Saving Embroideries
G402 Error: "Design too large for output file format"Certain formats are limited to the size of hoop used on their specific embroidery machine, for example .sew. If you attempt to save a file in this format that is bigger than the largest available hoop size this message would appear.
G403 I have saved my embroidery as Tajima format, but it now has more colorsIf your original embroidery had a stop command in it then this would be replaced by a color change, thus adding a color for every stop you have in your embroidery. As the Tajima file format does not have a stop command in its format, it requires the machine operator to manually enter stops into the machine. If you save or distribute files in Tajima format, then you must also specify all colors and stops and where they occur in the embroidery.
G404 I have saved an embroidery in .sew format, and two files have been createdJanome software cannot load embroideries with more than 12 colors. If a file to be exported in .sew format has more than 12 color changes, it will automatically be split into multiple files, with the last character of the filename "1", "2", and so on.
G410 Error "Unrecognized file extension" when saving a fileThis message appears if you type an incorrect extension that does not belong to any embroidery file types in the File Name box when trying to save a file.
G412 Error "Cannot save file."The module cannot save the file. Ensure that the disk where you are trying to save the embroidery is not write-protected, then try again. For instance, you have loaded an embroidery from a CD-ROM and then attempt to save the embroidery back to the CD. A CD-ROM is read only, therefore you will not be able to save the embroidery.
G427 The manuals and help say that I can save PES files as version 5, but it only seems to save as version 2.
This is an erratum in the manuals and help. Up to version 7.2, the 3D Embroidery System modules can only save PES files as version 2. PES version 2 has a size restriction of 130mm x 180mm. From version 7.25 onwards, PES files are saved as version 2 if the embroidery is 130mm x 180mm or smaller. Files larger than this are saved as PES version 6. Use Smart Update to ensure your 3D Embroidery System modules are updated to the latest version. See FAQ #B008. Always print a worksheet from the 3D Embroidery System to show the correct colors for your embroidery, before saving it to a format that does not support full thread color information.
S016 Error message "Design has too many stitches for file format."
FAQ Lists for Husqvarna Viking 3D Software Page 187

There is a limit on the number of stitches that may be saved to an embroidery file in Pfaff (.pcs) file format. This message appears if the embroidery you attempt to save to this format exceeds this limit.
Screen Appearance
E056 When I hover the mouse pointer over a color in the color worksheet, part of the embroidery changes to an unusual color.
This is called "Highlight Selected Color". It allows you to see where each color is used in an embroidery. For example, if you have several color blocks using the same thread color and you wish to change the color of a specific section, hover over each color in the worksheet in turn until the section you require is highlighted.
G415 I have changed the screen background color and now I wish to return to the original light blue
Use 3D Configure to change the background color. Follow the instructions in 3D Configure and select the RGB values 200, 232, 247 in the Colors dialog box.
G416 I wish to change the background color for the work areaUse 3D Configure to alter the background color for the work area. 3D Configure may also be used to turn the texture on or off for modules that use texture.
G418 I can't see some of the floating toolbars or iconsFirst, check View, Customize to see if the missing toolbar has been turned off. If all the toolbar names are checked (so they are turned on) and you still cannot locate a toolbar, it may have been moved to the edge of the screen so it is hard to see. If you move icons around it is possible to delete them. To reset the icons on a toolbar 1. Click View, Customize to see the Customize dialog. 2. Click the Toolbar tab. 3. Click the name of the required toolbar. 4. Click Reset. 5. Click Yes to confirm. The selection of icons on the toolbar and their order will be reset.
G428 The selection outline partly or completely disappears when I move some of my embroideries.
This can happen two reasons: • The embroidery has at least one perfectly vertical or horizontal edge • The embroidery is composed of very wide satin columns Embroideries with perfectly vertical or horizontal edges The selection box around the selected embroidery is drawn using a method to provide maximum contrast with the background. The outline that shows the shape of the embroidery is drawn using the same method. When the two lines are in the same place, they cancel each other out. If the embroidery is a rectangle or a square, the outline may disappear completely when you move the embroidery. Notice that the scaling, mirror and rotate handles
FAQ Lists for Husqvarna Viking 3D Software Page 188

are always visible, so you can use these as cues for positioning embroideries where the edges are not visible. Wide satin columns Satin columns that are made of very long stitches may be interpreted as a series of jump stitches when the outline is detected. Jump stitches are ignored by the outline detection, so wide satin columns may have no outline, or other stitches overlapping the column may be outlined instead. Positioning embroideries with missing outlines Click and drag the embroidery approximately into position. Use the arrow keys on the keyboard to nudge the embroidery into its final position without needing to see the outline.
V009 Some of the icons in the Toolbar are 'grayed out'Certain icons (for example Save As on the Main toolbar and all Edit toolbar icons) are only highlighted once an embroidery or background is shown on the screen.
V010 I have moved the Color panel and I can't put it back in positionIf the Color panel is 'floating' on top of the window, double-click the title bar and the Color panel will move back to its original position. If the Color panel is docked on the wrong side of the window, click and drag the title bar to the middle of the right-hand edge of the window until the outline snaps into position on the right. Release the mouse button and the Color panel will be dropped into its original position.
V012 The embroidery file I want to work with appears too small on the screenMake sure the window is maximized by clicking the Maximize icon on the title bar. Click Zoom To Fit to expand the embroidery so it fills the window or use Zoom In.
V013 I can’t see my glow-in-the-dark or solar reactive threads with Glow ModeYou embroidery must use threads from either the Robison-Anton Moonglow 40 or the Solar Active Ultra Violet 40 thread ranges to use Glow mode. If you add your own glow-in-the-dark or solar reactive threads to MyThreads, these will not be recognized by Glow mode.
V016 The control panel is not showing or is in the wrong position in 3D Vision. If the control panel is visible but in the wrong position, double-click its title bar. If it is still in the wrong position, click and drag its title bar to move it back to its normal position. If this does not work, or the control panel is not visible, use Reset All Modules. Note that Reset All Modules affects all modules in the 3D Embroidery System, so any changes to settings in each module will be reset. The recent files list on the File menu is also cleared, but this does not affect any files you have saved. To use Reset All Modules: 1. Close all 3D Embroidery System modules.
Any modules left open will not be affected by Reset All Modules. 2. Start 3D Configure (on the Start menu, select Start, All Programs, 3D Embroidery
System, 3D Configure). 3. Click the Reset All Modules button. 4. Click OK to reset, then click OK again to clear the confirmation message. The next time you start 3D Vision, the control panel will be in the correct position.
FAQ Lists for Husqvarna Viking 3D Software Page 189

Send To d-Card Reader/Writer Unit
A320 I am having difficulty using an embroidery on my machine when I send it to a d-Card from a horizontal hoop with Send 1 or Send 2.
This can happen if you are using a horizontal hoop on screen, and the embroidery is more than 150mm wide. When the embroidery is sent to the d-Card with Send To, the embroidery is not rotated. Before sending the embroidery to a d-Card, change the hoop orientation to vertical and, if the embroidery no longer fits, rotate the embroidery by 90 degrees. If you are using 3D Digitizing, 3D PictureStitch or 3D Cross Stitcher to create the embroidery, copy the finished design to 3D Embroidery to rotate it and setup the vertical hoop.
Sending Files to Machines
G422 I cannot send a file to an embroidery machineClick the 3D Configure icon to start 3D Configure. This will allow you to adjust the Send 1 and Send 2 options for your embroidery machine.
Thread Colors
B617 The Yli thread ranges are no longer available in Color Selection or Thread Manager.
This can happen when you install the 3D Embroidery System 7.2 Update. Use Smart Update to obtain the latest Thread Database Update. If a Security Warning appears, click Run to go ahead and run the update program. To install the update when the WinZip Self-Extractor appears, click the Unzip button, then click OK, then click Close.
B618 Error: "Please select a valid thread."This message appears if you attempt to click OK in the Color Selection dialog box when MyThreads is selected as the thread range and MyThreads is empty. To prevent this message appearing again, use Thread Manager in 3D Configure to add at least one thread to MyThreads.
E056 When I hover the mouse pointer over a color in the color worksheet, part of the embroidery changes to an unusual color.
This is called "Highlight Selected Color". It allows you to see where each color is used in an embroidery. For example, if you have several color blocks using the same thread color and you wish to change the color of a specific section, hover over each color in the worksheet in turn until the section you require is highlighted.
G007 Error "Thread range is corrupt or missing. Cannot change thread. Reinstall the thread database."
This message usually means that the database driver is incorrectly installed. First follow the instructions in FAQ #G010 to fix this.
FAQ Lists for Husqvarna Viking 3D Software Page 190
If the message still appears, use the following procedure to repair the installation: 1. Right-click the Start button on the taskbar and select Explore from the popup menu. 2. In Explorer, browse to the folder C:\3DEmbroidery\System.
This assumes you have installed your 3D Embroidery System software in the default location of C:\3DEmbroidery. If you have installed the software in a different location, browse to the System folder at that location.
3. Delete the files named "MyThreads.mdb" and "ThreadDataBase.mdb". The file names may simply be shown as "MyThreads" and "ThreadDataBase".
4. Put your 3D Embroidery System software CD in your computer to re-run the installation. The installation should start automatically when you put your software CD in the computer. If this does not happen, browse to the CD with Explorer and double-click "Setup.exe" to start the installation.
5. When the choice appears, select the "Modify or remove" option and click Next. 6. In the next screen, select Repair and click Next. 7. Continue with the installation and follow the on-screen instructions. When the installation
is complete, the MyThreads and standard thread databases will be restored to their original installation state.
If you had previously backed up your MyThreads database, you can now use the Restore option in Thread Manager to restore your MyThreads database. See the on-line help in Thread Manager for more information.
G010 How do I fix the database driver used by my 3D Embroidery System software?
Database drivers are normally found installed on most computers – they are commonly installed as part of the installation of Microsoft® Office or as an upgrade of key components of the operating system. Key components of the 3D Embroidery System need to be able to use these drivers. Therefore, any difficulties in using these drivers may affect the functionality of certain features of the 3D Embroidery System. Examples include changing a thread color in any module and/or Motif Fill/Line properties in 3D Digitizing. If you have Windows® XP with Service Pack 2 installed, use the Database Driver Fix described below. Otherwise, install the drivers manually as follows: Installation of the Database files 1. Insert the 3D Embroidery System CD. 2. Cancel the installation screen if it appears. 3. Use Windows® Explorer to browse to the D:\Technical folder – where D:\ is the name of
your CD or DVD drive. 4. Double click on the Database Drivers folder. 5. Double click on the Jet 4 folder. 6. Double click on the folder that is for your operating system. 7. Double click on the file to start the installation of the Jet 4 Service Pack 8 files. This
should take a few moments for the files to be installed. 8. After the installation is complete, browse to the D:\Technical\Database Drivers\MDAC 2.8
folder. 9. Double click on the MDAC_TYP.exe file. The Microsoft Data Access Components 2.8
Setup dialog box will appear. 10. Select the option “I accept all the terms of the preceding license agreement”. 11. Click on the Next button. 12. Click on the Finish button when it appears. This will start the installation process for the
MDAC 2.8 files.
FAQ Lists for Husqvarna Viking 3D Software Page 191

13. After the MDAC 2.8 installation is complete, reboot your computer and continue to use your 3D Embroidery System.
14. If you are still having difficulties, use the Database Driver Fix that follows. Database Driver Fix 1. Insert the 3D Embroidery System CD. 2. Cancel the installation screen if it appears. 3. Use Windows® Explorer to browse to the D:\Technical folder – where D:\ is the name of
your CD or DVD drive. 4. Double click on the Database Drivers folder. 5. Double click on the MSAccessDbFixer file (this may be shown with a .exe extension). A
window will appear briefly on the screen. 6. Continue to use your 3D Embroidery System.
G419 "The color xx has been found in your database, but the thread color is not exactly the same."
This message appears if the Thread Range and Color Number of the selected color are identical to those in your thread database, but some aspect of the color is different. It could be a different material or weight, or have additional colors as a variegated thread. This could happen if the design you are attempting to edit was supplied by someone with a different version of the color, for instance if they have edited it in MyThreads, or if they have a later version of the thread database. Use the Import Threads From Embroidery function to add other users’ thread definitions to your MyThreads database. 1. Select Import Threads from Embroidery in the File Menu and an Open dialog box will
appear. 2. Select the desired .vp3 embroidery file. 3. Click Open and any custom thread definitions that do not appear in your MyThreads will
be added to the end of your MyThreads list. To check for the latest updates for the 3D Embroidery System, use Smart Update in 3D Configure.
G420 "Could not find xx in your database. Matching to closest thread in yy."This message appears if the Thread Range of the selected color is not found in your thread database. This could happen if the design you are attempting to edit was supplied by someone with a later version of the thread database. To check for the latest updates for the 3D Embroidery System, use Smart Update in 3D Configure.
G421 Error "Databases are corrupt or missing. Cannot edit the thread color."This message appears if there is a problem with your thread database. You will be unable to choose a thread color. First close all the modules of the 3D Embroidery System, close down your computer and restart. If this does not clear the problem, restore a backup database if you have created one using Thread Manager in 3D Configure. Otherwise, you need a new version of the thread database. To check for the latest updates for the 3D Embroidery System, use Smart Update in 3D Configure. Alternatively, you may need to uninstall and reinstall your 3D Embroidery System software.
V001 Error message "This function is only available in Standard View Mode."
FAQ Lists for Husqvarna Viking 3D Software Page 192

This message appears if you attempt to change colors when you are viewing the embroidery in Realistic mode or Glow mode. Editing is only allowed in Standard mode. Switch back to Standard mode to change colors.
Tutorials
G005 The window remains blank when I try to use the tutorials.You need version 6 or later of the Macromedia Flash Player to view the tutorials. Visit the Macromedia [http://www.macromedia.com] website and download and install the latest version of the Flash Player.
G011 What version of Macromedia Flash Player do I need to view the tutorials?You need version 6 or later of the Macromedia Flash Player to view the tutorials. Visit the Macromedia [http://www.macromedia.com] website and download and install the latest version of the Flash Player.
Using 3D Vision
V001 Error message "This function is only available in Standard View Mode."This message appears if you attempt to change colors when you are viewing the embroidery in Realistic mode or Glow mode. Editing is only allowed in Standard mode. Switch back to Standard mode to change colors.
V002 Error message "Can't create more than 5 Appliqué layers."This message appears if you already have 5 appliqué areas and you try to add another one. 3D Vision allows a maximum of 5 appliqué areas to be placed.
V003 Error message "Fabric tile size too big for program. Please check measurements and re-enter Length. Line length *** is acceptable. Alternatively, go back through the Wizard and use this picture as a Garment."
This message will appear if you attempt to make a fabric swatch (tile) that is higher or wider than 300mm. This can happen, for instance, if you crop the picture to make a narrow strip of fabric and you enter a measurement across the shortest side that would then make the long side longer than 300mm. It could also happen if you enter a large measurement for a line that is only placed across a small part of the picture. You will need to do one of the following: • Redraw the measurement line and re-enter a shorter length value, as indicated by the
acceptable range of values. • Go Back and change the crop area to leave a smaller piece of the fabric. • Go Back and make a garment background from the original picture.
Viewing Files
V001 Error message "This function is only available in Standard View Mode."
FAQ Lists for Husqvarna Viking 3D Software Page 193

This message appears if you attempt to change colors when you are viewing the embroidery in Realistic mode or Glow mode. Editing is only allowed in Standard mode. Switch back to Standard mode to change colors.
Working with Embroideries
V012 The embroidery file I want to work with appears too small on the screenMake sure the window is maximized by clicking the Maximize icon on the title bar. Click Zoom To Fit to expand the embroidery so it fills the window or use Zoom In.
V013 I can’t see my glow-in-the-dark or solar reactive threads with Glow ModeYou embroidery must use threads from either the Robison-Anton Moonglow 40 or the Solar Active Ultra Violet 40 thread ranges to use Glow mode. If you add your own glow-in-the-dark or solar reactive threads to MyThreads, these will not be recognized by Glow mode.
Hardware Listed versions: Not Applicable
d-Card Reader/Writer Unit
H006 I only have USB 2.0 ports on my computer. Will the dongle and other USB devices work with USB 2.0?
The dongle and all our other USB devices work with USB 2.0 ports.
H007 My dongle or other USB device has already been installed, but the Found New Hardware wizard is installing it again
This can happen if you unplug your dongle or other USB device and then plug it back into a different USB port. When this happens, it is detected as a new hardware item and the driver is installed on the alternative USB port. Wait for the hardware wizard to finish installing the driver, then continue using the software as usual.
H209 The USB d-Card Reader/Writer does not function properly with a Toshiba portable computer
There have been problems when trying to use the d-Card Reader/Writer on Toshiba Satellite or Satellite Pro laptop computers with early versions of the USB ports. The best way to avoid any problems is to install a second port by adding a PC-Card with one or two USB ports.
H210 Why does my USB Reader/Writer or dCard Reader/Writer require the drivers reinstalling every time I restart my computer?
This is only known to occur on some computers that use the SIS7001 USB Host Controller. This does not occur with all computers using the SIS7001 USB Host Controller. This can affect other USB devices in a computer where this is happening. This happens because the drivers for the device are ‘lost’ when the computer is restarted. The affected USB devices will start working again if you reinstall the drivers in the Device Manager, accessed via the System icon in the Control Panel. This step would be necessary
FAQ Lists for Husqvarna Viking 3D Software Page 194

each time the drivers are 'lost', so it is possible that this would be required each time the computer is restarted. Alternatively, obtain and install a PCI USB add-in card that does not use the SIS7001 USB Host Controller chip set.
Dongle
H002 Error "None of your installed software requires the dongle activation process." when I try to activate my dongle for my 3D Professional Embroidery System
The dongle for the 3D Professional Embroidery System is already fully activated. Therefore, it not necessary to activate it online.
H006 I only have USB 2.0 ports on my computer. Will the dongle and other USB devices work with USB 2.0?
The dongle and all our other USB devices work with USB 2.0 ports.
H007 My dongle or other USB device has already been installed, but the Found New Hardware wizard is installing it again
This can happen if you unplug your dongle or other USB device and then plug it back into a different USB port. When this happens, it is detected as a new hardware item and the driver is installed on the alternative USB port. Wait for the hardware wizard to finish installing the driver, then continue using the software as usual.
Downloading Files
H213 I am unable to update my Designer SE machine software with Smart Update.
This may be caused by one of the following: • You have not registered your Designer SE • You have registered your Designer SE, but your Designer SE is not currently connected
and communicating with your computer • You have registered your Designer SE, but you have installed version 7.0 or 7.05 3D
Embroidery System software since registering your Designer SE • You do not have an internet connection • You already have the latest software installed on your Designer SE Each of these situations is described in the following sections. Registering your Designer SE All of the following steps must be completed to register your Designer SE (skip any steps that you have already completed): 1. Install the 3D Embroidery System software on the Designer SE support CD. 2. If you did not do so during the software installation, use the supplied USB cable to
connect your Designer SE to your computer and switch on the Designer SE. 3. If the computer asks for the driver to be installed, ensure you have the Designer SE
Support CD in your computer. Follow the on-screen instructions to install the driver automatically.
FAQ Lists for Husqvarna Viking 3D Software Page 195

If you have Windows XP with Service Pack 2 installed, select the 'No, not this time' option when you are asked to connect to Windows Update on the first screen.
4. Ensure the Designer SE Communication utility is communicating with the Designer SE. The icon in the System Tray on the computer screen should be a white embroidery machine like this:
Designer SE Icon white
If there is no icon or it appears to be red, see the section below on ensuring communication with your Designer SE. 5. If you are not already connected to the internet, connect now. 6. Run 3D Configure. 7. Click the Register button. 8. Click Yes when asked if you want to register online. 9. Follow the online registration procedure. Your machine will be listed in the registration
summary. 10. If you wish, you can now get the Designer SE update immediately. Click the button at the
bottom of the summary page that allows you to 'Continue with Smart Update'. 11. Download and install the update on your Designer SE. Ensuring you have Communication between your Designer SE and your Computer Communication between your Designer SE and your computer must be working in order to be able to obtain the Designer SE software update with Smart Update. You can verify this by checking the System Tray on the computer monitor to see if the Designer SE Communication is present. If communication is established, the icon will be a small white sewing machine like this:
Designer SE Icon white
There are two ways to further verify that communication is working correctly: • Double-click the Designer SE Communication icon and the Designer SE Communication
dialog box will appear. Click the Machine Information button to see the machine software numbers and ID number.
Designer SE Machine Info dialog
• On the Designer SE, browse for embroidery files on your computer. (In Designer SE Communication, you must have shared at least one drive that contains embroidery files to use this feature.)
Both of these will only work if communication is correctly established. No icon If there is no icon, this means that the Designer SE Communication function is not running. This may be because you have un-checked the Start Automatically option or you have simply closed the Designer SE Communication function. To restart Designer SE Communication and enable the Start Automatically feature: 1. Start 3D Configure. 2. Click the Send 1 or Send 2 tab. 3. Click the Designer SE Communication button. The icon will appear in the system tray.
Note that if you have now established communication with your Designer SE, you can go ahead and use Smart Update.
4. Right-click the icon in the system tray and a menu will appear.
FAQ Lists for Husqvarna Viking 3D Software Page 196

5. Click the Start Automatically option if it is un-checked. The menu will close. Designer SE rt-click menu
6. Right-click the icon again to confirm that the Start Automatically option is checked. 7. Click anywhere on the desktop to close the menu without taking any further action. The
Designer SE Communication will now appear in the System Tray when your computer starts, and communication with your Designer SE will be automatically established when it is correctly connected and switched on.
Red icon When the Designer SE Communication function is running, but there is no communication with your Designer SE, the icon will have a red circle with a line across it.
Designer SE Icon red
This shows that communication has stopped. This will happen when: • The Designer SE is switched off. • The USB cable is disconnected at either the computer or the Designer SE. • The driver is not installed on the USB port in use. When a USB device is disconnected and plugged into a different USB port, the computer may need to re-install the driver. If you cancel or exit this process before it is complete, then the driver will not be correctly installed on that particular USB port. Therefore, if the computer asks for a driver to be installed when you switch the Designer SE to a different USB port, follow the on-screen instructions to install the drivers automatically. You will need the Designer SE Support CD for this. If you have Windows XP with Service Pack 2 installed, select the 'No, not this time' option when you are asked to connect to Windows Update on the first screen. If you have interrupted the driver installation so that the driver is not correctly installed on the USB port you are currently using, leave the Designer SE switched on and connected to that USB port, then restart your computer. When the computer restarts, the Designer SE will be detected again as new hardware, allowing you to install the driver correctly. Communication Established When communication is correctly established, ensure you are registered. You can run the registration process as often as you like. This has no effect unless you have something new to register. You can now use Smart Update to get your Designer SE update. Version 7.0 or 7.05 3D Embroidery System software was installed after registering your Designer SE You will need to re-run the installation on the Designer SE support CD and use the Repair option, then try Smart Update again. 1. Put the Designer SE Support CD in your computer. 2. The installation process should start (if it does not, browse to the CD and double-click the
Setup.exe file). 3. After the startup screens have displayed, you will be given the options to Modify,
Remove or Repair the installation. 4. Select the Repair option and click Next. 5. When the repair installation has finished, try Smart Update again. No internet connection An internet connection is required for Smart Update. However, you can take your Designer SE to your dealer to be updated.
FAQ Lists for Husqvarna Viking 3D Software Page 197

If you have not already registered your Designer SE, do this first by using a printed registration form. Click Register in 3D Configure and click No when prompted to register online. Fill in the registration details, then print the registration form and send it to the address on the last page of the print out. Latest software is already installed The download page for Smart Update will only show items that you have not installed. This is because Smart Update checks the versions of the software installed on your Designer SE and the 3D Embroidery System software installed on your computer. After downloading an update, you must run it to install it. After this, Smart Update will detect that it has been installed. If your Designer SE and 3D Embroidery System already have all the updates installed, there is no need for you to download any updates so nothing is shown on the Smart Update page.
Drivers
H210 Why does my USB Reader/Writer or dCard Reader/Writer require the drivers reinstalling every time I restart my computer?
This is only known to occur on some computers that use the SIS7001 USB Host Controller. This does not occur with all computers using the SIS7001 USB Host Controller. This can affect other USB devices in a computer where this is happening. This happens because the drivers for the device are ‘lost’ when the computer is restarted. The affected USB devices will start working again if you reinstall the drivers in the Device Manager, accessed via the System icon in the Control Panel. This step would be necessary each time the drivers are 'lost', so it is possible that this would be required each time the computer is restarted. Alternatively, obtain and install a PCI USB add-in card that does not use the SIS7001 USB Host Controller chip set.
Error Messages
H206 Embroideries that should work on the Designer I are rejected or appear corrupt
Can also give the error message 'Wrong hoop for embroidery, change hoop and restart' on the Designer I display. Some conversion programs, such as Buzztools version 3.00 and below (Buzztools have fixed this bug for version 3.01 upwards) produce corrupt HUS files when converting files from other formats. The nature of these corrupt files is that the information stored that specifies the height, and the width of the embroidery is incorrectly encoded in the HUS file by these third-party conversion programs. A standard way to get around the problem is to load the corrupt embroidery into 3D Embroidery, click Center Design and then resave the embroidery; this fixes the corrupt file. An alternative method, particularly if you have many embroideries causing this error, is to load the corrupt embroideries into Disk Manager in the standard way. Then 'Multi-Save' the files (choose File, then Multi-Save) into a new folder. (You can automatically create a new folder by typing it into the dialog-box that appears after choosing Multi-Save). Then reload the fixed files and proceed as normal.
H207 My Designer I keeps telling me my design is too big for the hoop regardless of what hoop I use or where the design is placed
FAQ Lists for Husqvarna Viking 3D Software Page 198

Some corrupt files cause this error, but appear okay on the screen. Open the file in 3D Embroidery, click Center Design and then use Save As to save over the corrupt file. Then try using Send 1, Send 2 or Disk Manager again to transfer the file to floppy disk for your Designer I.
General
G001 General difficulties with hardware and softwareTo try to determine the cause of any odd difficulties with the 3D Embroidery System, the best method is to reboot the computer in safe mode. If the problem is then solved, you know that some clash of hardware and/or software such as device drivers is to blame. You can then obtain more help from your computer dealer to analyze the cause and reconfigure your computer if necessary. To start Windows in Safe Mode 1. Close all programs. 2. Click Start, and then click Shut Down or Turn Off Computer, whichever is shown. 3. Click Restart. If necessary, click OK to confirm. 4. Your computer will shut down and restart. 5. As your computer restarts, press and hold the F8 key until a menu of windows startup
options appears. 6. Use the up and down arrow keys to highlight Safe mode, and then press ENTER. When you hold down the F8 key, your computer may beep rapidly and report keyboard errors as it restarts. Release the F8 key briefly to skip any errors and press F8 again until you have the Startup Menu on your screen.
Loading Embroideries
H214 How are embroideries saved from the Designer SE Interactive Designer screen?
Embroideries are always saved in Husqvarna Viking / Pfaff .vp3 format from the Designer SE Interactive Designer screen. All embroideries and lettering currently on the screen are saved in the .vp3 file. Files can be saved to the Designer SE memory, to a connected USB Embroidery Stick or a connected computer. Thread Colors If a file that does not have full thread definitions is loaded on the Interactive Designer screen and then saved in .vp3 format, colors may be saved with only the RGB value. If the file is later opened in the 3D Embroidery System, attempting to change such a thread color will give the message that it is undefined: "Could not find the chosen thread in your database. Matching to closest thread in yy". It will be automatically converted to the nearest thread color in the Import Thread Range (yy) set in 3D Configure. Embroidery Positions The positions of embroideries in the currently selected hoop are also saved in the .vp3 file. When the embroidery is re-opened on the Interactive Designer screen, the positions are restored. However, the positioning is different than the 3D Embroidery System. When an embroidery (.vp3) saved from the Designer SE is loaded in 3D Embroidery, it will be positioned so that the start of the embroidery is in the center of the hoop. On the Designer SE, the embroidery positions are restored when a .vp3 is loaded, as shown here:
A .vp3 on Interactive Designer screen
FAQ Lists for Husqvarna Viking 3D Software Page 199

(The cross was added to show the center of the hoop. It is not shown on the Interactive Designer screen.) In 3D Embroidery, the .vp3 is loaded so that the start point is in the center of the hoop, as shown here:
A .vp3 in 3D Embroidery
Miscellaneous
H205 Can I store other files on a Designer I disk?Though it is possible to store other files on the same disk, we do not recommend it. If you keep one or two blank disks just for sending designs to the Designer I, then they can be used just like the cards for the #1+/Orchidea and Rose.
H206 Embroideries that should work on the Designer I are rejected or appear corrupt
Can also give the error message 'Wrong hoop for embroidery, change hoop and restart' on the Designer I display. Some conversion programs, such as Buzztools version 3.00 and below (Buzztools have fixed this bug for version 3.01 upwards) produce corrupt HUS files when converting files from other formats. The nature of these corrupt files is that the information stored that specifies the height, and the width of the embroidery is incorrectly encoded in the HUS file by these third-party conversion programs. A standard way to get around the problem is to load the corrupt embroidery into 3D Embroidery, click Center Design and then resave the embroidery; this fixes the corrupt file. An alternative method, particularly if you have many embroideries causing this error, is to load the corrupt embroideries into Disk Manager in the standard way. Then 'Multi-Save' the files (choose File, then Multi-Save) into a new folder. (You can automatically create a new folder by typing it into the dialog-box that appears after choosing Multi-Save). Then reload the fixed files and proceed as normal.
Product Information
H208 What hardware do I need for my machine?To be able to send designs to your machine you will need: Rose #1+ / Orchidea • Reader/Writer unit for USB port (part number 412 7219-01) • or Reader/Writer unit for parallel port (part number 412 6007-02 *) Designer II • d-Card Reader/Writer unit (part number 412 6278-01) Designer I • 3.5" floppy disk drive for your computer * This part number is for the US only. For other countries please contact your local dealer - Husqvarna Viking Dealer Locator [http://www.sew.husqvarna.se/dealers.htm].
FAQ Lists for Husqvarna Viking 3D Software Page 200

Reader/Writer Unit
H006 I only have USB 2.0 ports on my computer. Will the dongle and other USB devices work with USB 2.0?
The dongle and all our other USB devices work with USB 2.0 ports.
H007 My dongle or other USB device has already been installed, but the Found New Hardware wizard is installing it again
This can happen if you unplug your dongle or other USB device and then plug it back into a different USB port. When this happens, it is detected as a new hardware item and the driver is installed on the alternative USB port. Wait for the hardware wizard to finish installing the driver, then continue using the software as usual.
Reading from a Card
H203 I can’t use my programmable card properly with my Reader/Writer unit.There are now two Reader/Writer units: Parallel and USB. The USB Reader/Writer is provided with a 512kB Programmable Embroidery Card, and additional 512kB Programmable Embroidery Cards can be bought separately. The USB Reader/Writer can readfrom any Embroidery Card, including the smaller Programmable Embroidery Cards, but it can only write(save designs) to a 512kB Programmable Embroidery Card. A Parallel Reader/Writer may not use 512kB Programmable Embroidery Cards.
Reading from a Disk
H204 Does the Designer I use standard floppy disks?The Designer I uses standard 1.44 MB floppy disks. They are used in the same way the cards are used on the #1+/Orchidea and Rose. To send an embroidery directly to a disk from any part of the 3D Embroidery System, ensure the Designer I is selected for Send 1 or Send 2 in 3D Configure. Alternatively, use 3D Disk Manager to read disks and send multiple embroideries to disks. A disk with one or more embroideries on it is placed in the Designer I.
H205 Can I store other files on a Designer I disk?Though it is possible to store other files on the same disk, we do not recommend it. If you keep one or two blank disks just for sending designs to the Designer I, then they can be used just like the cards for the #1+/Orchidea and Rose.
Registration
H220 I am unable to register my Designer SE.All of the following steps must be completed to register your Designer SE (skip any steps that you have already completed): 1. Install the 3D Embroidery System software on the Designer SE support CD. 2. If you did not do so during the software installation, use the supplied USB cable to
connect your Designer SE to your computer and switch on the Designer SE.
FAQ Lists for Husqvarna Viking 3D Software Page 201

3. If the computer asks for the driver to be installed, ensure you have the Designer SE Support CD in your computer. Follow the on-screen instructions to install the driver automatically. If you have Windows® XP with Service Pack 2 installed, select the 'No, not this time' option when you are asked to connect to Windows® Update on the first screen.
4. Ensure the Designer SE Communication utility is communicating with the Designer SE. The icon in the System Tray on the computer screen should be a white embroidery machine like this:
Designer SE Icon white
If there is no icon or it appears to be red, see the section below on ensuring communication with your Designer SE. 5. If you are not already connected to the internet, connect now. 6. Run 3D Configure. 7. Click the Register button. 8. Click Yes when asked if you want to register online. 9. Follow the online registration procedure. Your machine will be listed in the registration
summary. No internet connection If you do not have an internet connection, you can register your Designer SE by using a printed registration form. Click Register in 3D Configure and click No when prompted to register online. Fill in the registration details, then print the registration form and send it to the address on the last page of the print out. Ensuring you have Communication between your Designer SE and your Computer Communication between your Designer SE and your computer must be working in order to be able to obtain the Designer SE software update with Smart Update. You can verify this by checking the System Tray on the computer monitor to see if the Designer SE Communication is present. If communication is established, the icon will be a small white sewing machine like this:
Designer SE Icon white
There are two ways to further verify that communication is working correctly: • Double-click the Designer SE Communication icon and the Designer SE Communication
dialog box will appear. Click the Machine Information button to see the machine software numbers and ID number.
Designer SE Machine Info dialog
• On the Designer SE, browse for embroidery files on your computer. (In Designer SE Communication, you must have shared at least one drive that contains embroidery files to use this feature.)
Both of these will only work if communication is correctly established. No icon If there is no icon, this means that the Designer SE Communication function is not running. This may be because you have un-checked the Start Automatically option or you have simply closed the Designer SE Communication function. To restart Designer SE Communication and enable the Start Automatically feature: 1. Start 3D Configure.
FAQ Lists for Husqvarna Viking 3D Software Page 202
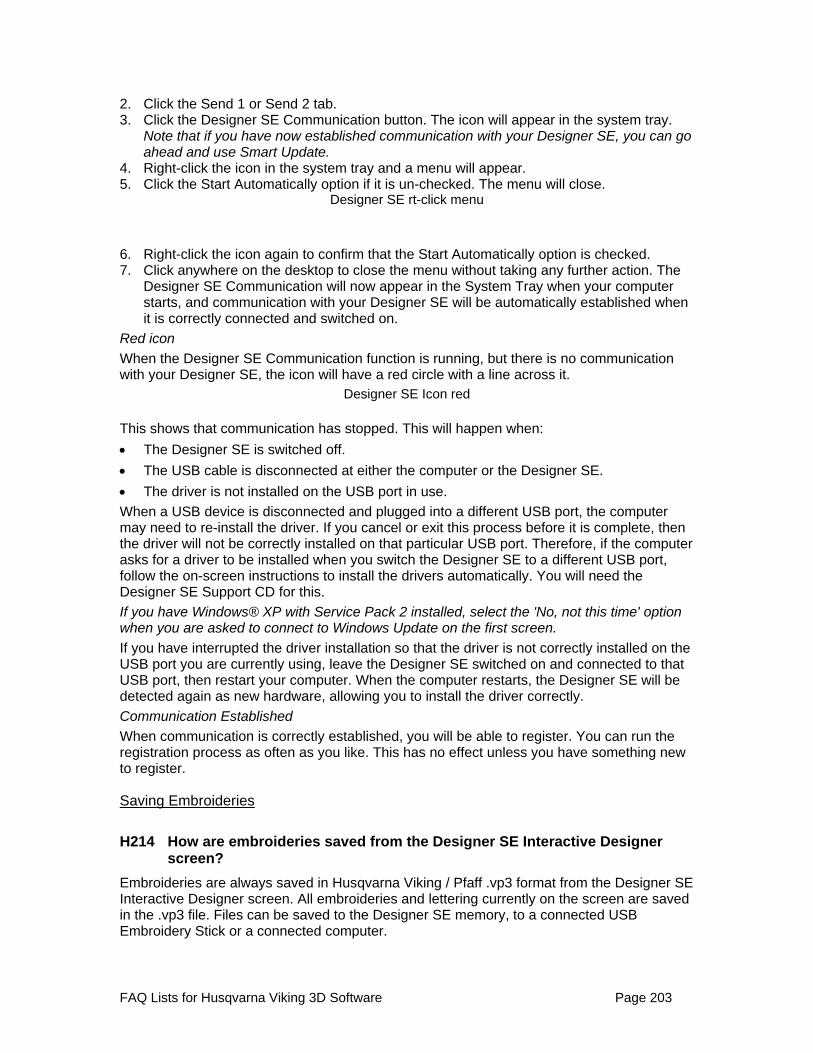
2. Click the Send 1 or Send 2 tab. 3. Click the Designer SE Communication button. The icon will appear in the system tray.
Note that if you have now established communication with your Designer SE, you can go ahead and use Smart Update.
4. Right-click the icon in the system tray and a menu will appear. 5. Click the Start Automatically option if it is un-checked. The menu will close.
Designer SE rt-click menu
6. Right-click the icon again to confirm that the Start Automatically option is checked. 7. Click anywhere on the desktop to close the menu without taking any further action. The
Designer SE Communication will now appear in the System Tray when your computer starts, and communication with your Designer SE will be automatically established when it is correctly connected and switched on.
Red icon When the Designer SE Communication function is running, but there is no communication with your Designer SE, the icon will have a red circle with a line across it.
Designer SE Icon red
This shows that communication has stopped. This will happen when: • The Designer SE is switched off. • The USB cable is disconnected at either the computer or the Designer SE. • The driver is not installed on the USB port in use. When a USB device is disconnected and plugged into a different USB port, the computer may need to re-install the driver. If you cancel or exit this process before it is complete, then the driver will not be correctly installed on that particular USB port. Therefore, if the computer asks for a driver to be installed when you switch the Designer SE to a different USB port, follow the on-screen instructions to install the drivers automatically. You will need the Designer SE Support CD for this. If you have Windows® XP with Service Pack 2 installed, select the 'No, not this time' option when you are asked to connect to Windows Update on the first screen. If you have interrupted the driver installation so that the driver is not correctly installed on the USB port you are currently using, leave the Designer SE switched on and connected to that USB port, then restart your computer. When the computer restarts, the Designer SE will be detected again as new hardware, allowing you to install the driver correctly. Communication Established When communication is correctly established, you will be able to register. You can run the registration process as often as you like. This has no effect unless you have something new to register.
Saving Embroideries
H214 How are embroideries saved from the Designer SE Interactive Designer screen?
Embroideries are always saved in Husqvarna Viking / Pfaff .vp3 format from the Designer SE Interactive Designer screen. All embroideries and lettering currently on the screen are saved in the .vp3 file. Files can be saved to the Designer SE memory, to a connected USB Embroidery Stick or a connected computer.
FAQ Lists for Husqvarna Viking 3D Software Page 203

Thread Colors If a file that does not have full thread definitions is loaded on the Interactive Designer screen and then saved in .vp3 format, colors may be saved with only the RGB value. If the file is later opened in the 3D Embroidery System, attempting to change such a thread color will give the message that it is undefined: "Could not find the chosen thread in your database. Matching to closest thread in yy". It will be automatically converted to the nearest thread color in the Import Thread Range (yy) set in 3D Configure. Embroidery Positions The positions of embroideries in the currently selected hoop are also saved in the .vp3 file. When the embroidery is re-opened on the Interactive Designer screen, the positions are restored. However, the positioning is different than the 3D Embroidery System. When an embroidery (.vp3) saved from the Designer SE is loaded in 3D Embroidery, it will be positioned so that the start of the embroidery is in the center of the hoop. On the Designer SE, the embroidery positions are restored when a .vp3 is loaded, as shown here:
A .vp3 on Interactive Designer screen
(The cross was added to show the center of the hoop. It is not shown on the Interactive Designer screen.) In 3D Embroidery, the .vp3 is loaded so that the start point is in the center of the hoop, as shown here:
A .vp3 in 3D Embroidery
Send To All Devices
H208 What hardware do I need for my machine?To be able to send designs to your machine you will need: Rose #1+ / Orchidea • Reader/Writer unit for USB port (part number 412 7219-01) • or Reader/Writer unit for parallel port (part number 412 6007-02 *) Designer II • d-Card Reader/Writer unit (part number 412 6278-01) Designer I • 3.5" floppy disk drive for your computer * This part number is for the US only. For other countries please contact your local dealer - Husqvarna Viking Dealer Locator [http://www.sew.husqvarna.se/dealers.htm].
Setting up the Reader/Writer Unit
H201 Are there special instructions for installing my external Zip drive?This only applies if you have a parallel Reader/Writer and want to use an external Zip drive that connects to a parallel printer port (LPT). A parallel Zip drive should always be connected directly to the computer's printer port and the switch box connected to the zip drive's out connector. The Zip drive's cable must be kept as short as possible or you will get data corruption. Also the length of the cable from the Zip drive to the switch box and from the switch box to the Reader/Writer must be as short as
FAQ Lists for Husqvarna Viking 3D Software Page 204

possible. Ideally the total length of the cable from the back of the computer to the Reader/Writer should not exceed 2 meters.
H202 How do I connect my printer to the parallel Reader/Writer?Do not plug a printer into the parallel Reader/Writer, even if is says 'Printer' on it. It does not act as a switch-box and printer signals, which aren't blocked, may travel through and compromise your embroidery cards. Instead you must use one of the following options: • Disconnect the Reader/Writer cable when printing. • Connect a switch-box to the computer, and attach both the printer and Reader/Writer to
this. Ensure that this switch-box is manual, for parallel connections, is bi-directional and has a cable no more than 6 feet long.
• Install an extra Parallel (LPT) Port into your computer, and use the Reader/Writer on this. We highly recommend installation of a second printer port if the following printer drivers are installed on your system: Hewlett Packard 660 or above and the Lexmark WinWriter series.
H210 Why does my USB Reader/Writer or dCard Reader/Writer require the drivers reinstalling every time I restart my computer?
This is only known to occur on some computers that use the SIS7001 USB Host Controller. This does not occur with all computers using the SIS7001 USB Host Controller. This can affect other USB devices in a computer where this is happening. This happens because the drivers for the device are ‘lost’ when the computer is restarted. The affected USB devices will start working again if you reinstall the drivers in the Device Manager, accessed via the System icon in the Control Panel. This step would be necessary each time the drivers are 'lost', so it is possible that this would be required each time the computer is restarted. Alternatively, obtain and install a PCI USB add-in card that does not use the SIS7001 USB Host Controller chip set.
Smart Update
H213 I am unable to update my Designer SE machine software with Smart Update.
This may be caused by one of the following: • You have not registered your Designer SE • You have registered your Designer SE, but your Designer SE is not currently connected
and communicating with your computer • You have registered your Designer SE, but you have installed version 7.0 or 7.05 3D
Embroidery System software since registering your Designer SE • You do not have an internet connection • You already have the latest software installed on your Designer SE Each of these situations is described in the following sections. Registering your Designer SE All of the following steps must be completed to register your Designer SE (skip any steps that you have already completed): 1. Install the 3D Embroidery System software on the Designer SE support CD.
FAQ Lists for Husqvarna Viking 3D Software Page 205

2. If you did not do so during the software installation, use the supplied USB cable to connect your Designer SE to your computer and switch on the Designer SE.
3. If the computer asks for the driver to be installed, ensure you have the Designer SE Support CD in your computer. Follow the on-screen instructions to install the driver automatically. If you have Windows XP with Service Pack 2 installed, select the 'No, not this time' option when you are asked to connect to Windows Update on the first screen.
4. Ensure the Designer SE Communication utility is communicating with the Designer SE. The icon in the System Tray on the computer screen should be a white embroidery machine like this:
Designer SE Icon white
If there is no icon or it appears to be red, see the section below on ensuring communication with your Designer SE. 5. If you are not already connected to the internet, connect now. 6. Run 3D Configure. 7. Click the Register button. 8. Click Yes when asked if you want to register online. 9. Follow the online registration procedure. Your machine will be listed in the registration
summary. 10. If you wish, you can now get the Designer SE update immediately. Click the button at the
bottom of the summary page that allows you to 'Continue with Smart Update'. 11. Download and install the update on your Designer SE. Ensuring you have Communication between your Designer SE and your Computer Communication between your Designer SE and your computer must be working in order to be able to obtain the Designer SE software update with Smart Update. You can verify this by checking the System Tray on the computer monitor to see if the Designer SE Communication is present. If communication is established, the icon will be a small white sewing machine like this:
Designer SE Icon white
There are two ways to further verify that communication is working correctly: • Double-click the Designer SE Communication icon and the Designer SE Communication
dialog box will appear. Click the Machine Information button to see the machine software numbers and ID number.
Designer SE Machine Info dialog
• On the Designer SE, browse for embroidery files on your computer. (In Designer SE Communication, you must have shared at least one drive that contains embroidery files to use this feature.)
Both of these will only work if communication is correctly established. No icon If there is no icon, this means that the Designer SE Communication function is not running. This may be because you have un-checked the Start Automatically option or you have simply closed the Designer SE Communication function. To restart Designer SE Communication and enable the Start Automatically feature: 1. Start 3D Configure.
FAQ Lists for Husqvarna Viking 3D Software Page 206

2. Click the Send 1 or Send 2 tab. 3. Click the Designer SE Communication button. The icon will appear in the system tray.
Note that if you have now established communication with your Designer SE, you can go ahead and use Smart Update.
4. Right-click the icon in the system tray and a menu will appear. 5. Click the Start Automatically option if it is un-checked. The menu will close.
Designer SE rt-click menu
6. Right-click the icon again to confirm that the Start Automatically option is checked. 7. Click anywhere on the desktop to close the menu without taking any further action. The
Designer SE Communication will now appear in the System Tray when your computer starts, and communication with your Designer SE will be automatically established when it is correctly connected and switched on.
Red icon When the Designer SE Communication function is running, but there is no communication with your Designer SE, the icon will have a red circle with a line across it.
Designer SE Icon red
This shows that communication has stopped. This will happen when: • The Designer SE is switched off. • The USB cable is disconnected at either the computer or the Designer SE. • The driver is not installed on the USB port in use. When a USB device is disconnected and plugged into a different USB port, the computer may need to re-install the driver. If you cancel or exit this process before it is complete, then the driver will not be correctly installed on that particular USB port. Therefore, if the computer asks for a driver to be installed when you switch the Designer SE to a different USB port, follow the on-screen instructions to install the drivers automatically. You will need the Designer SE Support CD for this. If you have Windows XP with Service Pack 2 installed, select the 'No, not this time' option when you are asked to connect to Windows Update on the first screen. If you have interrupted the driver installation so that the driver is not correctly installed on the USB port you are currently using, leave the Designer SE switched on and connected to that USB port, then restart your computer. When the computer restarts, the Designer SE will be detected again as new hardware, allowing you to install the driver correctly. Communication Established When communication is correctly established, ensure you are registered. You can run the registration process as often as you like. This has no effect unless you have something new to register. You can now use Smart Update to get your Designer SE update. Version 7.0 or 7.05 3D Embroidery System software was installed after registering your Designer SE You will need to re-run the installation on the Designer SE support CD and use the Repair option, then try Smart Update again. 1. Put the Designer SE Support CD in your computer. 2. The installation process should start (if it does not, browse to the CD and double-click the
Setup.exe file). 3. After the startup screens have displayed, you will be given the options to Modify,
Remove or Repair the installation. 4. Select the Repair option and click Next.
FAQ Lists for Husqvarna Viking 3D Software Page 207

5. When the repair installation has finished, try Smart Update again. No internet connection An internet connection is required for Smart Update. However, you can take your Designer SE to your dealer to be updated. If you have not already registered your Designer SE, do this first by using a printed registration form. Click Register in 3D Configure and click No when prompted to register online. Fill in the registration details, then print the registration form and send it to the address on the last page of the print out. Latest software is already installed The download page for Smart Update will only show items that you have not installed. This is because Smart Update checks the versions of the software installed on your Designer SE and the 3D Embroidery System software installed on your computer. After downloading an update, you must run it to install it. After this, Smart Update will detect that it has been installed. If your Designer SE and 3D Embroidery System already have all the updates installed, there is no need for you to download any updates so nothing is shown on the Smart Update page.
Stitching Out
H101 I am stitching out an embroidery that uses variegated thread, but my machine only shows one color where the variegated thread is used
Your embroidery machine does not show variegated colors. Instead, the part of your design using the variegated thread will be displayed in the first color used for the variegated thread. You are recommended to have a printed worksheet to follow when stitching out embroideries. This is useful as an extra reference when changing thread colors on your machine.
Thread Colors
H101 I am stitching out an embroidery that uses variegated thread, but my machine only shows one color where the variegated thread is used
Your embroidery machine does not show variegated colors. Instead, the part of your design using the variegated thread will be displayed in the first color used for the variegated thread. You are recommended to have a printed worksheet to follow when stitching out embroideries. This is useful as an extra reference when changing thread colors on your machine.
H214 How are embroideries saved from the Designer SE Interactive Designer screen?
Embroideries are always saved in Husqvarna Viking / Pfaff .vp3 format from the Designer SE Interactive Designer screen. All embroideries and lettering currently on the screen are saved in the .vp3 file. Files can be saved to the Designer SE memory, to a connected USB Embroidery Stick or a connected computer. Thread Colors If a file that does not have full thread definitions is loaded on the Interactive Designer screen and then saved in .vp3 format, colors may be saved with only the RGB value. If the file is later opened in the 3D Embroidery System, attempting to change such a thread color will give the message that it is undefined: "Could not find the chosen thread in your database.
FAQ Lists for Husqvarna Viking 3D Software Page 208

Matching to closest thread in yy". It will be automatically converted to the nearest thread color in the Import Thread Range (yy) set in 3D Configure. Embroidery Positions The positions of embroideries in the currently selected hoop are also saved in the .vp3 file. When the embroidery is re-opened on the Interactive Designer screen, the positions are restored. However, the positioning is different than the 3D Embroidery System. When an embroidery (.vp3) saved from the Designer SE is loaded in 3D Embroidery, it will be positioned so that the start of the embroidery is in the center of the hoop. On the Designer SE, the embroidery positions are restored when a .vp3 is loaded, as shown here:
A .vp3 on Interactive Designer screen
(The cross was added to show the center of the hoop. It is not shown on the Interactive Designer screen.) In 3D Embroidery, the .vp3 is loaded so that the start point is in the center of the hoop, as shown here:
A .vp3 in 3D Embroidery
H215 How are thread colors used by the Husqvarna Viking Designer SE?Thread Color Representation When true 3D Embroidery System embroidery files in .vp3 format are displayed on the Interactive Designer screen, the thread colors are displayed correctly according to the first color in the thread definition (some threads have multiple colors in the thread definition). However, the thread type and weight is not used. This means the following: • Variegated threads are displayed in the first color in the thread definition • All thread types are displayed as if they are rayon, so, for example, metallic effects will
not be seen • Threads are displayed with the same thread weight, which is approximately equivalent to
40 weight Interactive Designer Screen Display of Colors While the Interactive Designer screen can display the thread colors correctly according to their RGB (red, green, blue) values, some colors may still appear different than they do on a computer monitor. This is because of the inherent differences in the displays themselves. The same colors can even look different on two identical monitors if their brightness, contrast and color settings are different. Thread Names Thread names from .vp3 embroidery files are shown on the Designer SE as the first four characters of the thread range abbreviation, the thread weight and thread number. No thread range, thread weight or manufacturer's thread number is shown for other file types as this information is not present in other file types. The only exception is for .vip embroideries, which shows the thread range for each color in the embroidery. This applies when opening embroideries on the machine in their native format, rather than sending them from the 3D Embroidery System. Thread Conversion Embroideries other than .vp3 are converted to .vp3 when they are sent from the 3D Embroidery System. When .vip embroideries are converted, the equivalent thread ranges are used. For all other embroidery file formats, the threads are converted to the nearest matching color from the Import Thread Range chosen in 3D Configure.
FAQ Lists for Husqvarna Viking 3D Software Page 209

It is also possible, however, to open embroideries directly by browsing the computer from the machine, and to open embroideries that have been placed on the USB Embroidery Stick. In this case, the embroideries are opened in their original format. The thread colors will be displayed in the RGB colors used by the file format. The color changes are numbered and no thread range or thread number information is shown. The only exception is for .vip embroideries, which show the thread ranges for colors in the embroidery. To see the thread numbers in a .vip embroidery, send the embroidery from the 3D Embroidery System. Saving Embroideries from the Designer SE Interactive Designer Screen Embroideries are always saved in Husqvarna Viking / Pfaff .vp3 format from the Designer SE Interactive Designer screen. All embroideries and lettering currently on the screen are saved in the .vp3 file. Files can be saved to the Designer SE memory, a connected USB Embroidery Stick or a connected computer. Errors from Undefined Thread Colors in Embroideries Saved from the Interactive Designer Screen When a file that does not have full thread definitions is loaded on the Interactive Designer screen and then saved in .vp3 format, each color will be saved with only the RGB value (this assumes that colors have not been changed on the Interactive Designer screen). If the file is later opened in the 3D Embroidery System, attempting to change such a thread color will give the message that it is undefined and it will be automatically converted to the nearest thread color in the Import Thread Range set in 3D Configure. Changing Thread Colors to Available Thread Shades A fixed set of 64 thread shades from the Sulky Rayon 40 range is available for changing colors in the Designer SE, as follows: • 1005 Black • 1240 Smokey Gray • 1219 Gray • 1327 Dk. Whisper Gray • 1001 Bright White • 1082 Ecru • 1128 Dk. Ecru • 1266 Toast • 1173 Med. Army Green • 1156 Lt. Army Green • 1211 Lt. Khaki • 1229 Lt. Putty • 1063 Pale Yellow-Green • 1061 Pale Yellow • 1135 Pastel Yellow • 1023 Yellow • 1079 Emerald Green • 1278 Bright Green • 1274 Nile Green • 1100 Lt. Grass Green • 1331 Pale Green • 1104 Pastel Yellow-Green
FAQ Lists for Husqvarna Viking 3D Software Page 210

• 1332 Deep Chartreuse • 1177 Avocado • 1550 Desert Cactus • 1551 Ocean Aqua • 1288 Aqua • 1560 Marine Aqua • 1045 Lt. Teal • 1204 Pastel Jade • 1205 Med. Jade • 1206 Dark Jade • 1042 Blue Ink • 1293 Deep Nassau Blue • 0572 Blue Ribbon • 1226 Dk. Periwinkle • 1165 Lt. Sky Blue • 1248 Med. Pastel Blue • 1196 Blue • 1096 Dk. Turquoise • 1554 Purple Passion • 1192 Fuchsia • 1033 Dk. Orchid • 1080 Orchid • 1111 Pastel Orchid • 1254 Dusty Lavender • 1561 Deep Hyacinth • 1194 Lt. Purple • 1263 Red Jubilee • 1037 Lt. Red • 1317 Poppy • 1019 Peach • 1068 Pink Tint • 1064 Pale Peach • 1154 Coral • 1034 Burgundy • 1058 Tawny Brown • 1056 Med. Tawny Tan • 0621 Sunset • 1021 Maple • 0568 Cinnamon • 1333 Sunflower Gold • 1065 Orange Yellow
FAQ Lists for Husqvarna Viking 3D Software Page 211

• 1185 Golden Yellow If a color in an embroidery is changed to one of these colors, the .vp3 embroidery file will contain the full thread definition for that color when the embroidery is saved from the Interactive Designer screen. This will be displayed and identified correctly if it is loaded into a 3D Embroidery System module.
H216 How are thread colors used by the Husqvarna Viking Designer I?The 3D system records the actual thread color chosen. There are over ten thousand colors available. As the Designer I uses only 15 colors on the Color Touch Screen it is not possible to represent all of these colors. There is therefore a conversion when the data is sent to the machine. This conversion is only for the purpose of the description of the color on the sewing machine, it does not change the stitch data. It is recommended to print out a worksheet that shows the thread definitions for each color change, and this can then be used as a reference rather than the sewing machine. The conversion is a mathematical process. Colors are seen differently in the computer than by the human eye, and some colors may appear to change. The following information explains how this works. Sending an embroidery to a disk In the Designer I there are two stages of conversion. First, colors are mathematically converted down to 29 colors and given color names. Then, the 29 color names are used to create a 15-color image for the Color Touch Screen (Designer I column on the table). The color change number shows the sequence of thread changes on the machine.
Color Table Designer I
The Quick Colors are used as an example. When other colors are used results will differ. Viewing a design on the machine When the design is shown on the Color Touch Screen, it is converted to 15 colors. When the design is selected the color name is shown (Abbreviation on the table). This description may not be as expected, due to the conversion from the thread shade to the 29 color names. However, the actual thread number will be retained if it is a thread number that was available in the VIP Embroidery System thread ranges. Any other thread ranges are converted to the nearest color from the Sulky Rayon 40 thread range. This also applies to file formats that use simple colors instead of thread ranges (.hus, .pcs, etc.) when they are sent directly to a Designer I floppy disk with 3D Organizer. View these thread numbers by selecting Help and touching the view color icon. Reading a design from a disk When a design is read back into the computer, it is shown in the thread shades that could be viewed under Help and then the view color icon. Hence, if there were no colors recognized from the VIP thread ranges, all the thread colors will be from the Sulky Rayon 40 thread range. How to avoid conversions To ensure that the name shown on the machine matches the color chosen on the computer, use only those colors from the Sulky Rayon 40 thread range (Sulky Number on the table) that correspond to the Quick Colors. The image on the machine, however, will be converted down to 15 colors from the 29.
FAQ Lists for Husqvarna Viking 3D Software Page 212

H217 How are thread colors used by the Husqvarna Viking Designer II, Quilt Designer II and Platinum 950E?
The 3D system records the actual thread color chosen. There are over ten thousand colors available. As these machines use fewer colors it is not possible to represent all of these colors. There is therefore a conversion when the data is sent to the machine. This conversion is only for the purpose of the description of the color on the sewing machine, it does not change the stitch data. It is recommended to print out a worksheet that shows the thread definitions for each color change, and this can then be used as a reference rather than the sewing machine. The conversion is a mathematical process. Colors are seen differently in the computer than by the human eye, and some colors may appear to change. The following information explains how this works. Sending a design to a d-Card Colors are mathematically converted down to 29 colors and given abbreviated color names. The color change number shows the sequence of thread changes on the machine.
Color Table
The examples given show the use of the Quick Colors. When other colors are used results will differ. Viewing a design on the Designer II When the design is selected the abbreviated color name (Abbreviation on the table) is shown on the Touch Screen. This description may not be as expected, due to the conversion from the thread shade to the 29 color names. However, the actual thread number will be retained if it is a thread number that was available in the VIP Embroidery System thread ranges. Any other thread ranges are converted to the nearest color from the Sulky Rayon 40 thread range. This also applies to file formats that use simple colors instead of thread ranges (.hus, .pcs, etc.) when they are sent directly to a d-Card with 3D Organizer. View these thread numbers by selecting the Help (?) icon. Reading a design from a d-Card When a design is read back into the computer, it is shown in the thread shades that could be viewed under Help. Hence, if there were no colors recognized from the VIP thread ranges, all the thread colors will be from the Sulky Rayon 40 thread range. How to avoid conversions To ensure that the name shown on the machine matches the color chosen on the computer, use only those colors from the Sulky Rayon 40 thread range (Sulky Number on the table) that correspond to the Quick Colors.
H218 How are thread colors used by the Husqvarna Viking #1+/Orchidea?The 3D system records the actual thread color chosen. There are over ten thousand colors available. As these machines use fewer colors it is not possible to represent all of these colors. There is therefore a conversion when the data is sent to the machine. This conversion is only for the purpose of the description of the color on the sewing machine, it does not change the stitch data. It is recommended to print out a worksheet that shows the thread definitions for each color change, and this can then be used as a reference rather than the sewing machine.
FAQ Lists for Husqvarna Viking 3D Software Page 213

The conversion is a mathematical process. Colors are seen differently in the computer than by the human eye, and some colors may appear to change. The following information explains how this works. Sending a design to a card The data is converted to a special format, which can only hold the stitch data and an abbreviated color name (Abbreviation on the table). The colors are mathematically converted down to 29 colors. The abbreviated color names are shown on the Program display when you press the cursor buttons.
Color Table
The examples given show the use of the Quick Colors. When other colors are used results will differ. Reading a design from a card When the design is read back from the card, the colors are converted to the nearest matching color from the Import Thread Range chosen in 3D Configure. How to avoid conversions To ensure that the name shown on the machine matches the color chosen on the computer, use only those colors from the Sulky Rayon 40 thread range (Sulky Number on the table) that correspond to the Quick Colors. Example of designs changing color when saved to a programmable card for the #1+/Orchidea Here are the original sample designs in VP3 format:
Original embroidery colors
When these two files are saved on a programmable embroidery card the colors change when they are read back. The blue and grey roller skate converts to a pink and grey roller skate and the blue flag turns dark grey and the purple flag turns pink, as shown here:
Embroidery colors changed
Explanation The original files use true thread colors. When the design is saved to the card the program takes the thread shade color in the file and mathematically changes it to the nearest of the 29 Quick Colors. When the design is read back into the computer, the Quick Colors are turned back into the nearest thread color from the Import Thread Range set in 3D Configure (in this case, Sulky Rayon 40). The process is the same as if the file was saved to .hus format.
H219 How are thread colors used by the Husqvarna Viking Rose/Iris?The 3D system records the actual thread color chosen. There are over ten thousand colors available. As these machines use fewer colors it is not possible to represent all of the thread colors. There is therefore a conversion when the data is sent to the machine. This conversion is only for the purpose of transferring embroideries to the sewing machine, it does not change the stitch data. It is recommended to print out a worksheet that shows the thread definitions for each color change, and this can then be used as a reference rather than the sewing machine.
FAQ Lists for Husqvarna Viking 3D Software Page 214

The conversion is a mathematical process. Colors are seen differently in the computer than by the human eye, and some colors may appear to change. The following information explains how this works. Sending a design to a card The data is converted to a special format, which can only hold the stitch data and a color name. The colors are mathematically converted down to 29 colors. The color names cannot be seen on the sewing machine. Refer either to a printed worksheet or the computer screen to decide which color to change to. As the conversion to 29 colors is only performed on the data that is sent to the card, you will see no change.
Color Table Rose/Iris
The examples given show the use of the Quick Colors. When other colors are used results will differ. Reading a design from a card When the design is read back from the card, the colors are converted to the nearest matching color from the Import Thread Range chosen in 3D Configure. How to avoid conversions To ensure that the name shown on the machine matches the color chosen on the computer, use only those colors from the Sulky Rayon 40 thread range (Sulky Number on the table) that correspond to the Quick Colors. Example of designs changing color when saved to a programmable card for the Rose/Iris Here are the original sample designs in VP3 format:
Original embroidery colors
When these two files are saved on a programmable embroidery card the colors change when they are read back. The blue and grey roller skate converts to a pink and grey roller skate and the blue flag turns dark grey and the purple flag turns pink, as shown here:
Embroidery colors changed
Explanation The original files use true thread colors. When the design is saved to the card the program takes the thread shade color in the file and mathematically changes it to the nearest of the 29 Quick Colors. When the design is read back into the computer, the Quick Colors are turned back into the nearest thread color from the Import Thread Range set in 3D Configure (in this case, Sulky Rayon 40). The process is the same as if the file was saved to .hus format.
Transferring Files
H204 Does the Designer I use standard floppy disks?The Designer I uses standard 1.44 MB floppy disks. They are used in the same way the cards are used on the #1+/Orchidea and Rose. To send an embroidery directly to a disk from any part of the 3D Embroidery System, ensure the Designer I is selected for Send 1 or Send
FAQ Lists for Husqvarna Viking 3D Software Page 215

2 in 3D Configure. Alternatively, use 3D Disk Manager to read disks and send multiple embroideries to disks. A disk with one or more embroideries on it is placed in the Designer I.
H206 Embroideries that should work on the Designer I are rejected or appear corrupt
Can also give the error message 'Wrong hoop for embroidery, change hoop and restart' on the Designer I display. Some conversion programs, such as Buzztools version 3.00 and below (Buzztools have fixed this bug for version 3.01 upwards) produce corrupt HUS files when converting files from other formats. The nature of these corrupt files is that the information stored that specifies the height, and the width of the embroidery is incorrectly encoded in the HUS file by these third-party conversion programs. A standard way to get around the problem is to load the corrupt embroidery into 3D Embroidery, click Center Design and then resave the embroidery; this fixes the corrupt file. An alternative method, particularly if you have many embroideries causing this error, is to load the corrupt embroideries into Disk Manager in the standard way. Then 'Multi-Save' the files (choose File, then Multi-Save) into a new folder. (You can automatically create a new folder by typing it into the dialog-box that appears after choosing Multi-Save). Then reload the fixed files and proceed as normal.
H207 My Designer I keeps telling me my design is too big for the hoop regardless of what hoop I use or where the design is placed
Some corrupt files cause this error, but appear okay on the screen. Open the file in 3D Embroidery, click Center Design and then use Save As to save over the corrupt file. Then try using Send 1, Send 2 or Disk Manager again to transfer the file to floppy disk for your Designer I.
H208 What hardware do I need for my machine?To be able to send designs to your machine you will need: Rose #1+ / Orchidea • Reader/Writer unit for USB port (part number 412 7219-01) • or Reader/Writer unit for parallel port (part number 412 6007-02 *) Designer II • d-Card Reader/Writer unit (part number 412 6278-01) Designer I • 3.5" floppy disk drive for your computer * This part number is for the US only. For other countries please contact your local dealer - Husqvarna Viking Dealer Locator [http://www.sew.husqvarna.se/dealers.htm].
USB Embroidery Stick
H221 Error: "Attempting Boot From USB Device. Error loading operating system."
This can happen when you start your computer and your USB Embroidery Stick is connected to a USB port. The error means that your computer is trying to start from an attached USB
FAQ Lists for Husqvarna Viking 3D Software Page 216

storage device (in this case your USB Embroidery Stick) before it attempts to start from your hard disk. To start your computer normally, unplug your USB Embroidery Stick and restart your computer.
Writing to a Card
H203 I can’t use my programmable card properly with my Reader/Writer unit.There are now two Reader/Writer units: Parallel and USB. The USB Reader/Writer is provided with a 512kB Programmable Embroidery Card, and additional 512kB Programmable Embroidery Cards can be bought separately. The USB Reader/Writer can readfrom any Embroidery Card, including the smaller Programmable Embroidery Cards, but it can only write(save designs) to a 512kB Programmable Embroidery Card. A Parallel Reader/Writer may not use 512kB Programmable Embroidery Cards.
Writing to a Disk
H204 Does the Designer I use standard floppy disks?The Designer I uses standard 1.44 MB floppy disks. They are used in the same way the cards are used on the #1+/Orchidea and Rose. To send an embroidery directly to a disk from any part of the 3D Embroidery System, ensure the Designer I is selected for Send 1 or Send 2 in 3D Configure. Alternatively, use 3D Disk Manager to read disks and send multiple embroideries to disks. A disk with one or more embroideries on it is placed in the Designer I.
H205 Can I store other files on a Designer I disk?Though it is possible to store other files on the same disk, we do not recommend it. If you keep one or two blank disks just for sending designs to the Designer I, then they can be used just like the cards for the #1+/Orchidea and Rose.
Send To Listed versions: Not Applicable
Error Messages
H813 Error message "Communication has not been established with the machine. Ensure that the machine is switched on, and the cable is connected between the computer and machine, then click OK."
This message appears if the Husqvarna Viking Designer SE is not connected correctly to a USB port of your computer when you select the Send To function. The error message will appear after trying to connect for 2 seconds. Plug in or turn on the embroidery machine, then click OK.
H814 Error message "Cannot send design. Send currently in progress."This message will appear if you attempt to send a font when another 3D Embroidery System module is already part way through sending to the same machine. Wait until the first module has finished writing and then try again.
FAQ Lists for Husqvarna Viking 3D Software Page 217

H815 Error message "There was an error transferring the File to the machine. Please check all the connections and try again."
This message may appear if there is a communication error while sending a font. Check the cable connections and the settings in 3D Configure. Ensure the Designer SE Communication module is started and try again.
H816 Error message "Designer SE communication module not found."This message appears if you attempt to send a font and the Designer SE Communication module is not running. Start 3D Configure. On a Send tab, click the Designer SE Communication button. Ensure the system tray icon shows that communication is established and try again.
H817 Error message "Incompatible versions of software found. Please run Smart Update."
This message appears if you attempt to send a font and one of the Designer SE Communication module, 3D QuickFont or Send To module has an earlier and incompatible version than the other(s). Ensure your Designer SE is attached to a USB port of your computer. Start 3D Configure. On the System tab, click the Smart Update button and follow the on-screen instructions to check for later versions of one of the modules. You must have registered your machine before using Smart Update.
General
G001 General difficulties with hardware and softwareTo try to determine the cause of any odd difficulties with the 3D Embroidery System, the best method is to reboot the computer in safe mode. If the problem is then solved, you know that some clash of hardware and/or software such as device drivers is to blame. You can then obtain more help from your computer dealer to analyze the cause and reconfigure your computer if necessary. To start Windows in Safe Mode 1. Close all programs. 2. Click Start, and then click Shut Down or Turn Off Computer, whichever is shown. 3. Click Restart. If necessary, click OK to confirm. 4. Your computer will shut down and restart. 5. As your computer restarts, press and hold the F8 key until a menu of windows startup
options appears. 6. Use the up and down arrow keys to highlight Safe mode, and then press ENTER. When you hold down the F8 key, your computer may beep rapidly and report keyboard errors as it restarts. Release the F8 key briefly to skip any errors and press F8 again until you have the Startup Menu on your screen.
Miscellaneous
B006 Do I need to run the 3D Configure Wizard every time that I want to change my Send 1 and/or Send 2 settings?
FAQ Lists for Husqvarna Viking 3D Software Page 218

You have the choice of either using the 3D Configure Wizard to set Send 1 and Send 2, or use the Send 1 and Send 2 tabs in 3D Configure. You can also use the Send 1 and Send 2 tabs to inspect your current Send 1 and Send 2 settings.
Reading from a Disk
H204 Does the Designer I use standard floppy disks?The Designer I uses standard 1.44 MB floppy disks. They are used in the same way the cards are used on the #1+/Orchidea and Rose. To send an embroidery directly to a disk from any part of the 3D Embroidery System, ensure the Designer I is selected for Send 1 or Send 2 in 3D Configure. Alternatively, use 3D Disk Manager to read disks and send multiple embroideries to disks. A disk with one or more embroideries on it is placed in the Designer I.
H205 Can I store other files on a Designer I disk?Though it is possible to store other files on the same disk, we do not recommend it. If you keep one or two blank disks just for sending designs to the Designer I, then they can be used just like the cards for the #1+/Orchidea and Rose.
Send To All Devices
G015 Is the 3D Embroidery System compatible with Windows® Vista?The 3D Embroidery System is not designed to operate on Windows® Vista. This is also true for earlier embroidery software. The compatible operating systems are stated on the product boxes. Therefore, it is not guaranteed that the 3D Embroidery System, or previous software, will function correctly on Windows® Vista. However, it is possible to install 3D Embroidery System software on Windows® Vista. To get your dongle working, after installing your 3D Embroidery System software, see FAQ #H013. There are no other adjustments to the 3D Embroidery System in respect of Windows® Vista. The operation of the Designer SE, Designer I and Parallel Reader/Writer unit should not be affected, apart from driver installation. You may need to answer some security questions in Windows® Vista while installing the hardware drivers, as the drivers were designed for previous operating systems. A workaround is necessary when using the USB Reader/Writer and d-Card Reader/Writer. Each time you use either the USB Reader/Writer or d-Card Reader/Writer to read a card, write a card or send an embroidery with Send 1 or Send 2, you must disconnect and reconnect the unit before using it again to read, write or send. Note that in due course, a new solution will be available for using the USB Reader/Writer and d-Card Reader/Writer with Windows® Vista. If you do not qualify for free upgrades, there may be a handling fee for providing the CD containing the solution as it will not be part of the 3D Embroidery System.
H102 "No stitches to send."This message will appear if you attempt to send an embroidery, but there is no embroidery loaded so no stitches can be sent. Load the desired embroidery and try again.
H801 "Cannot send design. Card write currently in progress."
FAQ Lists for Husqvarna Viking 3D Software Page 219

This message will appear if you attempt to send an embroidery when another 3D Embroidery System module is already part way through sending an embroidery to the same card. Wait until the first module has finished writing and then try again.
H812 I am having problems sending embroideriesOpen the 3D Configure setup utility. On the Send 1 or Send 2 tab, check that the correct option is selected for your embroidery machine or Reader/Writer. For example, if your device uses a Com port, ensure the correct Com port is selected.
Send To d-Card Reader/Writer Unit
A306 Error: "Cannot write to d-Card"This message appears if the d-Card is defective or if a d-card is pulled out of the d-Card Reader/Writer during the writing process.
A315 There is no light showing on my d-Card Reader/WriterThe green LED on the d-Card Reader/Writer is visible only while you are Reading a d-Card or Writing a d-Card. At all other times it is not lit up, even if the d-Card Reader/Writer is connected correctly to the USB port of your computer.
A320 I am having difficulty using an embroidery on my machine when I send it to a d-Card from a horizontal hoop with Send 1 or Send 2.
This can happen if you are using a horizontal hoop on screen, and the embroidery is more than 150mm wide. When the embroidery is sent to the d-Card with Send To, the embroidery is not rotated. Before sending the embroidery to a d-Card, change the hoop orientation to vertical and, if the embroidery no longer fits, rotate the embroidery by 90 degrees. If you are using 3D Digitizing, 3D PictureStitch or 3D Cross Stitcher to create the embroidery, copy the finished design to 3D Embroidery to rotate it and setup the vertical hoop.
G015 Is the 3D Embroidery System compatible with Windows® Vista?The 3D Embroidery System is not designed to operate on Windows® Vista. This is also true for earlier embroidery software. The compatible operating systems are stated on the product boxes. Therefore, it is not guaranteed that the 3D Embroidery System, or previous software, will function correctly on Windows® Vista. However, it is possible to install 3D Embroidery System software on Windows® Vista. To get your dongle working, after installing your 3D Embroidery System software, see FAQ #H013. There are no other adjustments to the 3D Embroidery System in respect of Windows® Vista. The operation of the Designer SE, Designer I and Parallel Reader/Writer unit should not be affected, apart from driver installation. You may need to answer some security questions in Windows® Vista while installing the hardware drivers, as the drivers were designed for previous operating systems. A workaround is necessary when using the USB Reader/Writer and d-Card Reader/Writer. Each time you use either the USB Reader/Writer or d-Card Reader/Writer to read a card, write a card or send an embroidery with Send 1 or Send 2, you must disconnect and reconnect the unit before using it again to read, write or send.
FAQ Lists for Husqvarna Viking 3D Software Page 220

Note that in due course, a new solution will be available for using the USB Reader/Writer and d-Card Reader/Writer with Windows® Vista. If you do not qualify for free upgrades, there may be a handling fee for providing the CD containing the solution as it will not be part of the 3D Embroidery System.
H806 Error "No d-Card Reader/Writer unit is connected."This message appears if the d-Card Reader/Writer is not connected correctly to a USB port of your computer when you select the Send To function. Refer to the hardware installation guide for more details.
H807 Error "No d-Card is inserted."This message appears if there is no d-Card inserted in the d-Card Reader/Writer when you select the Send To function.
H808 Error "d-Card is not programmable."This message appears if a Husqvarna Viking read-only Embroidery d-Card is inserted in the d-Card Reader/ Writer when you select Send To; replace with a Personal d-Card.
H809 Error "This d-Card contains a sewing machine upgrade program. Click OK to continue."
This message appears if the Personal d-Card placed in the d-Card Reader/Writer contains a program that can update your Husqvarna Viking Designer II sewing machine software. If you do not wish to update at this time, click OK to continue the Send To procedure. The update program will be erased when the embroideries are written to the d-Card.
Send To Designer I Floppy Disk
G015 Is the 3D Embroidery System compatible with Windows® Vista?The 3D Embroidery System is not designed to operate on Windows® Vista. This is also true for earlier embroidery software. The compatible operating systems are stated on the product boxes. Therefore, it is not guaranteed that the 3D Embroidery System, or previous software, will function correctly on Windows® Vista. However, it is possible to install 3D Embroidery System software on Windows® Vista. To get your dongle working, after installing your 3D Embroidery System software, see FAQ #H013. There are no other adjustments to the 3D Embroidery System in respect of Windows® Vista. The operation of the Designer SE, Designer I and Parallel Reader/Writer unit should not be affected, apart from driver installation. You may need to answer some security questions in Windows® Vista while installing the hardware drivers, as the drivers were designed for previous operating systems. A workaround is necessary when using the USB Reader/Writer and d-Card Reader/Writer. Each time you use either the USB Reader/Writer or d-Card Reader/Writer to read a card, write a card or send an embroidery with Send 1 or Send 2, you must disconnect and reconnect the unit before using it again to read, write or send. Note that in due course, a new solution will be available for using the USB Reader/Writer and d-Card Reader/Writer with Windows® Vista. If you do not qualify for free upgrades, there may be a handling fee for providing the CD containing the solution as it will not be part of the 3D Embroidery System.
FAQ Lists for Husqvarna Viking 3D Software Page 221

H803 Error "No disk in drive."This message appears if there is no disk inserted in the floppy disk drive of your computer when you select the Send To function.
H804 Error "Disk access denied."This message appears if the disk inserted in the floppy disk drive of your computer when you select the Send To function is write-protected.
H805 Error "Wrong disk size. Use 1.44MB only."This message appears if a 720K floppy disk is inserted in the floppy disk drive of your computer when you select the Send To function. Replace with a 1.44MB disk.
Send To Designer SE
G015 Is the 3D Embroidery System compatible with Windows® Vista?The 3D Embroidery System is not designed to operate on Windows® Vista. This is also true for earlier embroidery software. The compatible operating systems are stated on the product boxes. Therefore, it is not guaranteed that the 3D Embroidery System, or previous software, will function correctly on Windows® Vista. However, it is possible to install 3D Embroidery System software on Windows® Vista. To get your dongle working, after installing your 3D Embroidery System software, see FAQ #H013. There are no other adjustments to the 3D Embroidery System in respect of Windows® Vista. The operation of the Designer SE, Designer I and Parallel Reader/Writer unit should not be affected, apart from driver installation. You may need to answer some security questions in Windows® Vista while installing the hardware drivers, as the drivers were designed for previous operating systems. A workaround is necessary when using the USB Reader/Writer and d-Card Reader/Writer. Each time you use either the USB Reader/Writer or d-Card Reader/Writer to read a card, write a card or send an embroidery with Send 1 or Send 2, you must disconnect and reconnect the unit before using it again to read, write or send. Note that in due course, a new solution will be available for using the USB Reader/Writer and d-Card Reader/Writer with Windows® Vista. If you do not qualify for free upgrades, there may be a handling fee for providing the CD containing the solution as it will not be part of the 3D Embroidery System.
H802 I have installed the software that was with my Designer SE, but I am unable to send any embroideries.
You may not have installed the drivers that allow communication with the Designer SE. This may happen if the 'plug and play' feature in Windows® is not working correctly. This can be resolved as follows: 1. Disconnect your Designer SE from the computer. 2. Restart the computer. 3. Ensure the installation CD provided with the Designer SE is in the computer’s CD drive.
If the installation screen appears when you insert the CD, simply cancel the installation process. This will not affect any installed software.
4. Switch on the Designer SE and connect it to the computer via the USB cable.
FAQ Lists for Husqvarna Viking 3D Software Page 222

5. Windows® should now detect the Designer SE and ask for the driver. If Windows® does not detect the Designer SE, click Start then click Control Panel. Double click Add Hardware, then click Next to search for new hardware.
6. Click Next and the driver should be found automatically on the CD. If the driver is not found automatically, you may need to go back and specify the drive location for the CD. The driver is in the root folder of the CD (that is, it is in the top level of the CD so it is not necessary to search through sub-folders).
H813 Error message "Communication has not been established with the machine. Ensure that the machine is switched on, and the cable is connected between the computer and machine, then click OK."
This message appears if the Husqvarna Viking Designer SE is not connected correctly to a USB port of your computer when you select the Send To function. The error message will appear after trying to connect for 2 seconds. Plug in or turn on the embroidery machine, then click OK.
H814 Error message "Cannot send design. Send currently in progress."This message will appear if you attempt to send a font when another 3D Embroidery System module is already part way through sending to the same machine. Wait until the first module has finished writing and then try again.
H815 Error message "There was an error transferring the File to the machine. Please check all the connections and try again."
This message may appear if there is a communication error while sending a font. Check the cable connections and the settings in 3D Configure. Ensure the Designer SE Communication module is started and try again.
H816 Error message "Designer SE communication module not found."This message appears if you attempt to send a font and the Designer SE Communication module is not running. Start 3D Configure. On a Send tab, click the Designer SE Communication button. Ensure the system tray icon shows that communication is established and try again.
H817 Error message "Incompatible versions of software found. Please run Smart Update."
This message appears if you attempt to send a font and one of the Designer SE Communication module, 3D QuickFont or Send To module has an earlier and incompatible version than the other(s). Ensure your Designer SE is attached to a USB port of your computer. Start 3D Configure. On the System tab, click the Smart Update button and follow the on-screen instructions to check for later versions of one of the modules. You must have registered your machine before using Smart Update.
Send To Huskygram/POEM
H901 Error message "Thread Broken"
FAQ Lists for Husqvarna Viking 3D Software Page 223

This message appears if the top or bottom thread is broken in the Huskygram/POEM embroidery machine. Rethread or thread a new bobbin, then restart.
H902 Error message "Cover open"This message appears if either the top or the hook cover is open in the Huskygram/POEM embroidery machine. Close the cover, then restart.
H903 Error message "The machine will not accept data."Occasionally a Huskygram/POEM machine will switch on in the wrong state and will not accept data. If so switch the Huskygram/POEM off and then back on.
Send To Rose/Orchidea/#1+/Iris Reader/Writer
A203 Error message "Cannot write to card"This message appears if a Husqvarna Viking preprogrammed Embroidery Card is inserted in the Reader/Writer; replace with a Programmable card. It may also appear if the Programmable card is defective or if a card is pulled out of the Reader/Writer during the writing process. The message will also appear if you are trying to write to a 512 Programmable card via a parallel Reader/Writer. Ensure that you are using the correct card.
A204 Error message "Cannot erase to card"The card is not erasable. This message can appear if a card is pulled out of the Reader/Writer during the erasing process.
A215 I am having problems writing embroideries to a Programmable Embroidery Card
First try another card and check the Reader/Writer is connected correctly. If the problems are limited to one card, erase it completely by opening 3D Reader/Writer, then using the Write Card function with no embroideries loaded on the screen.
G015 Is the 3D Embroidery System compatible with Windows® Vista?The 3D Embroidery System is not designed to operate on Windows® Vista. This is also true for earlier embroidery software. The compatible operating systems are stated on the product boxes. Therefore, it is not guaranteed that the 3D Embroidery System, or previous software, will function correctly on Windows® Vista. However, it is possible to install 3D Embroidery System software on Windows® Vista. To get your dongle working, after installing your 3D Embroidery System software, see FAQ #H013. There are no other adjustments to the 3D Embroidery System in respect of Windows® Vista. The operation of the Designer SE, Designer I and Parallel Reader/Writer unit should not be affected, apart from driver installation. You may need to answer some security questions in Windows® Vista while installing the hardware drivers, as the drivers were designed for previous operating systems. A workaround is necessary when using the USB Reader/Writer and d-Card Reader/Writer. Each time you use either the USB Reader/Writer or d-Card Reader/Writer to read a card,
FAQ Lists for Husqvarna Viking 3D Software Page 224

write a card or send an embroidery with Send 1 or Send 2, you must disconnect and reconnect the unit before using it again to read, write or send. Note that in due course, a new solution will be available for using the USB Reader/Writer and d-Card Reader/Writer with Windows® Vista. If you do not qualify for free upgrades, there may be a handling fee for providing the CD containing the solution as it will not be part of the 3D Embroidery System.
H810 Error message "Reader/Writer not found"This message appears if the Reader/Writer is not connected correctly to your computer when you select the Send To function. Refer to the hardware installation guide for more details.
H811 Error message "No card is inserted"This message appears if there is no Embroidery Card inserted in the Reader/Writer when you select the Send To function.
Sending Files to Machines
A114 I have put a disk of embroideries in my Designer I but they do not appear on the machine LCD
You cannot simply copy embroideries (eg *.hus files) onto a floppy disk. You must use the Send To function or Disk Manager. Use Send To to transfer one embroidery to a floppy disk. Use Disk Manager to transfer multiple embroideries to a floppy disk for your Designer I.
G015 Is the 3D Embroidery System compatible with Windows® Vista?The 3D Embroidery System is not designed to operate on Windows® Vista. This is also true for earlier embroidery software. The compatible operating systems are stated on the product boxes. Therefore, it is not guaranteed that the 3D Embroidery System, or previous software, will function correctly on Windows® Vista. However, it is possible to install 3D Embroidery System software on Windows® Vista. To get your dongle working, after installing your 3D Embroidery System software, see FAQ #H013. There are no other adjustments to the 3D Embroidery System in respect of Windows® Vista. The operation of the Designer SE, Designer I and Parallel Reader/Writer unit should not be affected, apart from driver installation. You may need to answer some security questions in Windows® Vista while installing the hardware drivers, as the drivers were designed for previous operating systems. A workaround is necessary when using the USB Reader/Writer and d-Card Reader/Writer. Each time you use either the USB Reader/Writer or d-Card Reader/Writer to read a card, write a card or send an embroidery with Send 1 or Send 2, you must disconnect and reconnect the unit before using it again to read, write or send. Note that in due course, a new solution will be available for using the USB Reader/Writer and d-Card Reader/Writer with Windows® Vista. If you do not qualify for free upgrades, there may be a handling fee for providing the CD containing the solution as it will not be part of the 3D Embroidery System.
Writing to a Disk
H204 Does the Designer I use standard floppy disks?
FAQ Lists for Husqvarna Viking 3D Software Page 225

The Designer I uses standard 1.44 MB floppy disks. They are used in the same way the cards are used on the #1+/Orchidea and Rose. To send an embroidery directly to a disk from any part of the 3D Embroidery System, ensure the Designer I is selected for Send 1 or Send 2 in 3D Configure. Alternatively, use 3D Disk Manager to read disks and send multiple embroideries to disks. A disk with one or more embroideries on it is placed in the Designer I.
H205 Can I store other files on a Designer I disk?Though it is possible to store other files on the same disk, we do not recommend it. If you keep one or two blank disks just for sending designs to the Designer I, then they can be used just like the cards for the #1+/Orchidea and Rose.
Installation Listed versions: Not Applicable
Demos and Documentation
G002 I get an error message when I try to open documents in Acrobat Reader, either from CD or when I download from this web site.
Errors such as 'Unable to open document' or 'Could not find ColorSpace named Cs8' appear because you are trying to use an old version of Acrobat Reader. Make sure you are using the latest version of Acrobat (version 5 or above). You can install the current version from your CD. Simply insert the CD and select the option from the menu that appears. Alternatively go to the Acrobat Page at Adobe's web site [http://www.adobe.com] where you can download the latest copy and also check for any conflicting software you may have on your machine.
Downloading Files
B011 "Error reading setup initialization file" when installing an update downloaded from Smart Update.
Occasionally, there can be difficulties when downloading files over the internet. This may cause a file to contain errors or the file may be incomplete. When this happens to an installation file, the error occurs because the missing or corrupt information means it is not possible to initialize the installation. To resolve this, the file must first be completely removed from your computer. It can then be downloaded again, ready for installation. To remove an incomplete and/or corrupt download file from your computer 1. Delete the saved file. If you have saved it to your Desktop, simply right-click the file and
select the Delete option. Otherwise, you will need to use Windows Explorer to find and delete the file.
2. Start Internet Explorer. 3. Click the Tools menu, then click Internet Options. The Internet Options dialog will appear. 4. You will see an area called Temporary Internet Files. In this area is a Delete Files button.
Click the Delete Files button, then click OK when the confirmation message appears. It is necessary to delete the Temporary Internet Files so that you will download a completely fresh copy of the file. Otherwise, you could be re-saving a corrupt or incomplete copy of the file that may be held by Internet Explorer.
FAQ Lists for Husqvarna Viking 3D Software Page 226

5. The mouse pointer will change to an hour-glass while the files are deleted. This may take some time. When the files are deleted, click Close.
You may now use Smart Update in 3D Configure to obtain the update again. For information on using Smart Update, see FAQ #B008.
G608 I have downloaded the update as a Multiple File Download, but the installation does not work.
The two main situations where this occurs are: • You have an old version of WinZip installed and the following message appears: "Please
insert disk number 1 of the spanned Zip file into drive C:." You are unable to proceed any further.
• You do not have WinZip installed, but you seem to be able to access the 3DEmbroideryPatch72.exe contained in the zip file. However, nothing happens when you try to run it.
You need version 9.0 or later of the WinZip [http://www.winzip.com/] utility to correctly use the Multiple File Download facility. 1. After you have installed WinZip [http://www.winzip.com/], double-click
3DEmbroideryPatch72.zip and the WinZip program will start. You will see that the zip file contains one file called 3DEmbroideryPatch72.exe.
2. Click Extract and you will be able to save 3DEmbroideryPatch72.exe to your hard disk. 3. After saving 3DEmbroideryPatch72.exe, browse to the folder containing the file.
Note that you can save the file directly to your Desktop so that you can access it directly without needing to browse for it.
4. Double-click 3DEmbroideryPatch72.exe and the installation will start.
Drivers
G015 Is the 3D Embroidery System compatible with Windows® Vista?The 3D Embroidery System is not designed to operate on Windows® Vista. This is also true for earlier embroidery software. The compatible operating systems are stated on the product boxes. Therefore, it is not guaranteed that the 3D Embroidery System, or previous software, will function correctly on Windows® Vista. However, it is possible to install 3D Embroidery System software on Windows® Vista. To get your dongle working, after installing your 3D Embroidery System software, see FAQ #H013. There are no other adjustments to the 3D Embroidery System in respect of Windows® Vista. The operation of the Designer SE, Designer I and Parallel Reader/Writer unit should not be affected, apart from driver installation. You may need to answer some security questions in Windows® Vista while installing the hardware drivers, as the drivers were designed for previous operating systems. A workaround is necessary when using the USB Reader/Writer and d-Card Reader/Writer. Each time you use either the USB Reader/Writer or d-Card Reader/Writer to read a card, write a card or send an embroidery with Send 1 or Send 2, you must disconnect and reconnect the unit before using it again to read, write or send. Note that in due course, a new solution will be available for using the USB Reader/Writer and d-Card Reader/Writer with Windows® Vista. If you do not qualify for free upgrades, there may be a handling fee for providing the CD containing the solution as it will not be part of the 3D Embroidery System.
FAQ Lists for Husqvarna Viking 3D Software Page 227

Error Messages
B011 "Error reading setup initialization file" when installing an update downloaded from Smart Update.
Occasionally, there can be difficulties when downloading files over the internet. This may cause a file to contain errors or the file may be incomplete. When this happens to an installation file, the error occurs because the missing or corrupt information means it is not possible to initialize the installation. To resolve this, the file must first be completely removed from your computer. It can then be downloaded again, ready for installation. To remove an incomplete and/or corrupt download file from your computer 1. Delete the saved file. If you have saved it to your Desktop, simply right-click the file and
select the Delete option. Otherwise, you will need to use Windows Explorer to find and delete the file.
2. Start Internet Explorer. 3. Click the Tools menu, then click Internet Options. The Internet Options dialog will appear. 4. You will see an area called Temporary Internet Files. In this area is a Delete Files button.
Click the Delete Files button, then click OK when the confirmation message appears. It is necessary to delete the Temporary Internet Files so that you will download a completely fresh copy of the file. Otherwise, you could be re-saving a corrupt or incomplete copy of the file that may be held by Internet Explorer.
5. The mouse pointer will change to an hour-glass while the files are deleted. This may take some time. When the files are deleted, click Close.
You may now use Smart Update in 3D Configure to obtain the update again. For information on using Smart Update, see FAQ #B008.
G002 I get an error message when I try to open documents in Acrobat Reader, either from CD or when I download from this web site.
Errors such as 'Unable to open document' or 'Could not find ColorSpace named Cs8' appear because you are trying to use an old version of Acrobat Reader. Make sure you are using the latest version of Acrobat (version 5 or above). You can install the current version from your CD. Simply insert the CD and select the option from the menu that appears. Alternatively go to the Acrobat Page at Adobe's web site [http://www.adobe.com] where you can download the latest copy and also check for any conflicting software you may have on your machine.
G012 Error "Unable to load graphics conversion filter. Continue with document conversion? Yes/No"
This message can appear when you open documents from the Technical folder on the CD that have pictures in them. If you do not have any appropriate word processing facilities, Windows® will use WordPad to open the technical documents. WordPad is the free word processor that is provided with Windows®. Click Yes to continue opening the technical document. The message will appear once for each picture in the document. The text in the document will be displayed normally, but the pictures will not be shown. The technical documents are Microsoft® Word® documents (.doc). If you do not have any related Microsoft® applications installed, the picture filters that are needed to show the pictures will not be installed on your computer. However, you can download the free Office
FAQ Lists for Husqvarna Viking 3D Software Page 228

File Converter Pack from the Microsoft® web site. This will allow WordPad to show the pictures, and will also stop the error message appearing. This can be obtained as follows: 1. In your web browser, go to Microsoft® (www.microsoft.com) [http://www.microsoft.com]. 2. In the Search Microsoft box, type "oconvpck.exe" and click Go. 3. In the list of results, click the "Download details: Office File Converter Pack" link. 4. A page will appear that describes how to download and install the Office File Converter
Pack. Read the page and follow the download and installation instructions. Once the Office File Converter Pack is installed, you will be able to see the pictures in the technical documents when they are opened in WordPad.
G604 Error: "Internal Error 2711. DConfigure"This error appears if you attempt to Modify, Repair or Remove the Documentation for 3D Embroidery System 7.2 Upgrade (English only). For instance, you may have installed an add-on module for 3D Embroidery and Smart Update shows that you need the 7.2 documentation upgrade again. When you attempt to re-install the upgrade, you are given options to Modify, Repair or Remove the documentation upgrade, but choosing any of this options results in the error. Resolve this as follows: 1. Click Start to see the Start Menu, then click Control Panel. 2. Click Add or Remove Programs.
If you have Classic View enabled in the Control Panel, you will need to double click the Add or Remove Programs icon.
3. When the list appears, select 3D Embroidery 7.2 Documentation Update. 4. Click the Remove button. 5. Click Yes to confirm removal. Progress bars will be displayed while the update is
removed. The software list will be refreshed when the process is complete. 6. Close Add or Remove Programs. 7. Close the Control Panel. 8. Run 3DEmbroideryDocumentationPatch72.exe again and install the update.
It is not necessary to go to Smart Update and download it again.
G605 Error: "Internal Error 2753."There are two versions of this error: • Internal Error 2753. DConfigure.exe • Internal Error 2753. SmartUpdate.exe This error can appear if you attempt to install software that is an earlier version than the software you already have. For example, if you upgrade from 3D Embroidery Studio to the full 3D Professional system without first uninstalling 3D Embroidery Studio. The error only happens after the installation is complete and the 3D Configure Wizard or Registration process is attempting to run. This means that your 3D Embroidery System software has installed correctly. • Click OK to clear the error, then click Finish to close the installation wizard. • Start 3D Configure. • Click the 3D Configure Wizard button to go through the wizard and ensure your settings
are correct. • Click the Register button to register your software.
FAQ Lists for Husqvarna Viking 3D Software Page 229

• After your software is registered, use Smart Update to ensure your 3D Embroidery System is updated to the latest version.
Installation and CD
G002 I get an error message when I try to open documents in Acrobat Reader, either from CD or when I download from this web site.
Errors such as 'Unable to open document' or 'Could not find ColorSpace named Cs8' appear because you are trying to use an old version of Acrobat Reader. Make sure you are using the latest version of Acrobat (version 5 or above). You can install the current version from your CD. Simply insert the CD and select the option from the menu that appears. Alternatively go to the Acrobat Page at Adobe's web site [http://www.adobe.com] where you can download the latest copy and also check for any conflicting software you may have on your machine.
G012 Error "Unable to load graphics conversion filter. Continue with document conversion? Yes/No"
This message can appear when you open documents from the Technical folder on the CD that have pictures in them. If you do not have any appropriate word processing facilities, Windows® will use WordPad to open the technical documents. WordPad is the free word processor that is provided with Windows®. Click Yes to continue opening the technical document. The message will appear once for each picture in the document. The text in the document will be displayed normally, but the pictures will not be shown. The technical documents are Microsoft® Word® documents (.doc). If you do not have any related Microsoft® applications installed, the picture filters that are needed to show the pictures will not be installed on your computer. However, you can download the free Office File Converter Pack from the Microsoft® web site. This will allow WordPad to show the pictures, and will also stop the error message appearing. This can be obtained as follows: 1. In your web browser, go to Microsoft® (www.microsoft.com) [http://www.microsoft.com]. 2. In the Search Microsoft box, type "oconvpck.exe" and click Go. 3. In the list of results, click the "Download details: Office File Converter Pack" link. 4. A page will appear that describes how to download and install the Office File Converter
Pack. Read the page and follow the download and installation instructions. Once the Office File Converter Pack is installed, you will be able to see the pictures in the technical documents when they are opened in WordPad.
G015 Is the 3D Embroidery System compatible with Windows® Vista?The 3D Embroidery System is not designed to operate on Windows® Vista. This is also true for earlier embroidery software. The compatible operating systems are stated on the product boxes. Therefore, it is not guaranteed that the 3D Embroidery System, or previous software, will function correctly on Windows® Vista. However, it is possible to install 3D Embroidery System software on Windows® Vista. To get your dongle working, after installing your 3D Embroidery System software, see FAQ #H013. There are no other adjustments to the 3D Embroidery System in respect of Windows® Vista. The operation of the Designer SE, Designer I and Parallel Reader/Writer unit should not be affected, apart from driver installation. You may need to answer some security questions in
FAQ Lists for Husqvarna Viking 3D Software Page 230

Windows® Vista while installing the hardware drivers, as the drivers were designed for previous operating systems. A workaround is necessary when using the USB Reader/Writer and d-Card Reader/Writer. Each time you use either the USB Reader/Writer or d-Card Reader/Writer to read a card, write a card or send an embroidery with Send 1 or Send 2, you must disconnect and reconnect the unit before using it again to read, write or send. Note that in due course, a new solution will be available for using the USB Reader/Writer and d-Card Reader/Writer with Windows® Vista. If you do not qualify for free upgrades, there may be a handling fee for providing the CD containing the solution as it will not be part of the 3D Embroidery System.
G605 Error: "Internal Error 2753."There are two versions of this error: • Internal Error 2753. DConfigure.exe • Internal Error 2753. SmartUpdate.exe This error can appear if you attempt to install software that is an earlier version than the software you already have. For example, if you upgrade from 3D Embroidery Studio to the full 3D Professional system without first uninstalling 3D Embroidery Studio. The error only happens after the installation is complete and the 3D Configure Wizard or Registration process is attempting to run. This means that your 3D Embroidery System software has installed correctly. • Click OK to clear the error, then click Finish to close the installation wizard. • Start 3D Configure. • Click the 3D Configure Wizard button to go through the wizard and ensure your settings
are correct. • Click the Register button to register your software. • After your software is registered, use Smart Update to ensure your 3D Embroidery
System is updated to the latest version.
G607 The Import Thread Range is blank, and the drop-down list is empty, when the 3D Configure Wizard runs at the end of installation.
This happens when the database driver is incorrectly installed. Follow the instructions in FAQ #G010 to fix this. After you have fixed the database driver, start 3D Configure and select the desired Import Thread Range.
G609 I have installed an add-on module, but I get the error "MFC Application has encountered a problem and needs to close" every time I try to start it.
This will happen if you have installed an add-on module, and the 3D Embroidery System software that is already installed has a later version than the newly installed add-on module. If you have a CD containing 3D Embroidery System Software for version 7.2 or later, install the update for the 3D Embroidery System found in the Patch folder on the CD. If you have updated your 3D Embroidery System to version 7.2 or later using an update obtained with Smart Update, find the update you have already downloaded and run it again. If you are unable to find the update, or you are not sure if you have the latest update, use Smart Update to obtain the latest update, as described in FAQ #B008.
FAQ Lists for Husqvarna Viking 3D Software Page 231

When you run the update, you may be asked to choose between Modify, Repair and Remove. This selection appears because you have updated on a previous occasion. Choose the Repair option, and this will ensure all your 3D Embroidery System software is updated.
G610 How do I install my 3D Embroidery System software and drivers on Windows® Vista?
The installation of 3D Embroidery System software and drivers on Windows® Vista is identical to installation on Windows® XP. However, Windows® Vista has implemented additional security, mainly in the form of User Account Control. User Account Control is designed to ensure that various tasks, including software installation, only take place when a user gives consent. So, if the following User Account Control message appears: 'An unidentified program wants access to your computer', click the 'Allow' option. If you have disabled User Account Control, this message will not appear. Please note that this information is provided for guidance only. The 3D Embroidery System was created and released before Windows® Vista. You may prefer to upgrade to the 4D Embroidery System. The 4D Embroidery System has been designed for Windows® Vista and Windows® XP. To use your 3D Embroidery System dongle with Windows® Vista, you must download and install the Windows® Vista dongle driver after installing your 3D Embroidery System software. See FAQ #H013.
Miscellaneous
G002 I get an error message when I try to open documents in Acrobat Reader, either from CD or when I download from this web site.
Errors such as 'Unable to open document' or 'Could not find ColorSpace named Cs8' appear because you are trying to use an old version of Acrobat Reader. Make sure you are using the latest version of Acrobat (version 5 or above). You can install the current version from your CD. Simply insert the CD and select the option from the menu that appears. Alternatively go to the Acrobat Page at Adobe's web site [http://www.adobe.com] where you can download the latest copy and also check for any conflicting software you may have on your machine.
G015 Is the 3D Embroidery System compatible with Windows® Vista?The 3D Embroidery System is not designed to operate on Windows® Vista. This is also true for earlier embroidery software. The compatible operating systems are stated on the product boxes. Therefore, it is not guaranteed that the 3D Embroidery System, or previous software, will function correctly on Windows® Vista. However, it is possible to install 3D Embroidery System software on Windows® Vista. To get your dongle working, after installing your 3D Embroidery System software, see FAQ #H013. There are no other adjustments to the 3D Embroidery System in respect of Windows® Vista. The operation of the Designer SE, Designer I and Parallel Reader/Writer unit should not be affected, apart from driver installation. You may need to answer some security questions in Windows® Vista while installing the hardware drivers, as the drivers were designed for previous operating systems. A workaround is necessary when using the USB Reader/Writer and d-Card Reader/Writer. Each time you use either the USB Reader/Writer or d-Card Reader/Writer to read a card,
FAQ Lists for Husqvarna Viking 3D Software Page 232

write a card or send an embroidery with Send 1 or Send 2, you must disconnect and reconnect the unit before using it again to read, write or send. Note that in due course, a new solution will be available for using the USB Reader/Writer and d-Card Reader/Writer with Windows® Vista. If you do not qualify for free upgrades, there may be a handling fee for providing the CD containing the solution as it will not be part of the 3D Embroidery System.
Opening the Program
G609 I have installed an add-on module, but I get the error "MFC Application has encountered a problem and needs to close" every time I try to start it.
This will happen if you have installed an add-on module, and the 3D Embroidery System software that is already installed has a later version than the newly installed add-on module. If you have a CD containing 3D Embroidery System Software for version 7.2 or later, install the update for the 3D Embroidery System found in the Patch folder on the CD. If you have updated your 3D Embroidery System to version 7.2 or later using an update obtained with Smart Update, find the update you have already downloaded and run it again. If you are unable to find the update, or you are not sure if you have the latest update, use Smart Update to obtain the latest update, as described in FAQ #B008. When you run the update, you may be asked to choose between Modify, Repair and Remove. This selection appears because you have updated on a previous occasion. Choose the Repair option, and this will ensure all your 3D Embroidery System software is updated.
Smart Update
B011 "Error reading setup initialization file" when installing an update downloaded from Smart Update.
Occasionally, there can be difficulties when downloading files over the internet. This may cause a file to contain errors or the file may be incomplete. When this happens to an installation file, the error occurs because the missing or corrupt information means it is not possible to initialize the installation. To resolve this, the file must first be completely removed from your computer. It can then be downloaded again, ready for installation. To remove an incomplete and/or corrupt download file from your computer 1. Delete the saved file. If you have saved it to your Desktop, simply right-click the file and
select the Delete option. Otherwise, you will need to use Windows Explorer to find and delete the file.
2. Start Internet Explorer. 3. Click the Tools menu, then click Internet Options. The Internet Options dialog will appear. 4. You will see an area called Temporary Internet Files. In this area is a Delete Files button.
Click the Delete Files button, then click OK when the confirmation message appears. It is necessary to delete the Temporary Internet Files so that you will download a completely fresh copy of the file. Otherwise, you could be re-saving a corrupt or incomplete copy of the file that may be held by Internet Explorer.
5. The mouse pointer will change to an hour-glass while the files are deleted. This may take some time. When the files are deleted, click Close.
You may now use Smart Update in 3D Configure to obtain the update again. For information on using Smart Update, see FAQ #B008.
FAQ Lists for Husqvarna Viking 3D Software Page 233

G604 Error: "Internal Error 2711. DConfigure"This error appears if you attempt to Modify, Repair or Remove the Documentation for 3D Embroidery System 7.2 Upgrade (English only). For instance, you may have installed an add-on module for 3D Embroidery and Smart Update shows that you need the 7.2 documentation upgrade again. When you attempt to re-install the upgrade, you are given options to Modify, Repair or Remove the documentation upgrade, but choosing any of this options results in the error. Resolve this as follows: 1. Click Start to see the Start Menu, then click Control Panel. 2. Click Add or Remove Programs.
If you have Classic View enabled in the Control Panel, you will need to double click the Add or Remove Programs icon.
3. When the list appears, select 3D Embroidery 7.2 Documentation Update. 4. Click the Remove button. 5. Click Yes to confirm removal. Progress bars will be displayed while the update is
removed. The software list will be refreshed when the process is complete. 6. Close Add or Remove Programs. 7. Close the Control Panel. 8. Run 3DEmbroideryDocumentationPatch72.exe again and install the update.
It is not necessary to go to Smart Update and download it again.
G608 I have downloaded the update as a Multiple File Download, but the installation does not work.
The two main situations where this occurs are: • You have an old version of WinZip installed and the following message appears: "Please
insert disk number 1 of the spanned Zip file into drive C:." You are unable to proceed any further.
• You do not have WinZip installed, but you seem to be able to access the 3DEmbroideryPatch72.exe contained in the zip file. However, nothing happens when you try to run it.
You need version 9.0 or later of the WinZip [http://www.winzip.com/] utility to correctly use the Multiple File Download facility. 1. After you have installed WinZip [http://www.winzip.com/], double-click
3DEmbroideryPatch72.zip and the WinZip program will start. You will see that the zip file contains one file called 3DEmbroideryPatch72.exe.
2. Click Extract and you will be able to save 3DEmbroideryPatch72.exe to your hard disk. 3. After saving 3DEmbroideryPatch72.exe, browse to the folder containing the file.
Note that you can save the file directly to your Desktop so that you can access it directly without needing to browse for it.
4. Double-click 3DEmbroideryPatch72.exe and the installation will start.
Using the Program
G609 I have installed an add-on module, but I get the error "MFC Application has encountered a problem and needs to close" every time I try to start it.
This will happen if you have installed an add-on module, and the 3D Embroidery System software that is already installed has a later version than the newly installed add-on module. If you have a CD containing 3D Embroidery System Software for version 7.2 or later, install the update for the 3D Embroidery System found in the Patch folder on the CD.
FAQ Lists for Husqvarna Viking 3D Software Page 234

If you have updated your 3D Embroidery System to version 7.2 or later using an update obtained with Smart Update, find the update you have already downloaded and run it again. If you are unable to find the update, or you are not sure if you have the latest update, use Smart Update to obtain the latest update, as described in FAQ #B008. When you run the update, you may be asked to choose between Modify, Repair and Remove. This selection appears because you have updated on a previous occasion. Choose the Repair option, and this will ensure all your 3D Embroidery System software is updated.
Viewing Files
G012 Error "Unable to load graphics conversion filter. Continue with document conversion? Yes/No"
This message can appear when you open documents from the Technical folder on the CD that have pictures in them. If you do not have any appropriate word processing facilities, Windows® will use WordPad to open the technical documents. WordPad is the free word processor that is provided with Windows®. Click Yes to continue opening the technical document. The message will appear once for each picture in the document. The text in the document will be displayed normally, but the pictures will not be shown. The technical documents are Microsoft® Word® documents (.doc). If you do not have any related Microsoft® applications installed, the picture filters that are needed to show the pictures will not be installed on your computer. However, you can download the free Office File Converter Pack from the Microsoft® web site. This will allow WordPad to show the pictures, and will also stop the error message appearing. This can be obtained as follows: 1. In your web browser, go to Microsoft® (www.microsoft.com) [http://www.microsoft.com]. 2. In the Search Microsoft box, type "oconvpck.exe" and click Go. 3. In the list of results, click the "Download details: Office File Converter Pack" link. 4. A page will appear that describes how to download and install the Office File Converter
Pack. Read the page and follow the download and installation instructions. Once the Office File Converter Pack is installed, you will be able to see the pictures in the technical documents when they are opened in WordPad.
Zip Files
G608 I have downloaded the update as a Multiple File Download, but the installation does not work.
The two main situations where this occurs are: • You have an old version of WinZip installed and the following message appears: "Please
insert disk number 1 of the spanned Zip file into drive C:." You are unable to proceed any further.
• You do not have WinZip installed, but you seem to be able to access the 3DEmbroideryPatch72.exe contained in the zip file. However, nothing happens when you try to run it.
You need version 9.0 or later of the WinZip [http://www.winzip.com/] utility to correctly use the Multiple File Download facility. 1. After you have installed WinZip [http://www.winzip.com/], double-click
3DEmbroideryPatch72.zip and the WinZip program will start. You will see that the zip file contains one file called 3DEmbroideryPatch72.exe.
FAQ Lists for Husqvarna Viking 3D Software Page 235

2. Click Extract and you will be able to save 3DEmbroideryPatch72.exe to your hard disk. 3. After saving 3DEmbroideryPatch72.exe, browse to the folder containing the file.
Note that you can save the file directly to your Desktop so that you can access it directly without needing to browse for it.
4. Double-click 3DEmbroideryPatch72.exe and the installation will start.
Registration Listed versions: Not Applicable
Downloading Files
G802 I did not download the free designs when I registered online. How can I get them?
Obtain your free designs as follows: 1. Ensure your dongle is inserted in your computer. 2. Start 3D Configure. Click the Register button, then click Yes for online registration. 3. Your internet browser will start and show your current registration details. Click the green
continue arrow on the Personal Information and Dealer Information pages. 4. A summary page will show the products you have currently registered. If you are eligible
for any free design downloads, there will be links for these downloads. All free downloads will be shown, including any you may have previously downloaded.
5. Download the free designs as desired. 6. When you have finished downloading, click the red X at the bottom of the summary page
to close the browser window.
Error Messages
G803 Error "C:DEmbroidery.tmp not found."This message can appear when attempting to Register, Activate Dongle or use Smart Update. This will happen because the login.tmp file has been moved or deleted from the C:\3DEmbroidery\System\Utilities\ folder. After clearing the message, the "Failed to create HTML page" message will also appear. The login.tmp file may have been mistaken for a temporary Windows file by a system maintenance utility, such as a disk cleanup utility. Temporary Windows files can usually be discarded by such utilities to free hard disk space. You will need to replace the login.tmp file. Contact software support who will be able to supply file called "TMP_Files.exe". After obtaining this, double-click on the file to extract a new copy of login.tmp to the correct location. You will then be able to run Register, Activate Dongle and Smart Update.
G807 Error "Fabric Decorator 7.2 - The Product License Code '' is not valid.".This message only appears when you have downloaded and installed the first online release of the tutorials for 3D Fabric Decorator 7.2. During this release phase, the tutorial download was only available to dealers with a Not For Sale license. Hence, this error will only affect dealers. At installation time, a partial product code has been erroneously recorded. Although the error appears during registration, this does not affect any details stored on the registration
FAQ Lists for Husqvarna Viking 3D Software Page 236

database. Also, no installed software is affected, including the 3D Fabric Decorator tutorials. Therefore, please ignore this error.
General
H220 I am unable to register my Designer SE.All of the following steps must be completed to register your Designer SE (skip any steps that you have already completed): 1. Install the 3D Embroidery System software on the Designer SE support CD. 2. If you did not do so during the software installation, use the supplied USB cable to
connect your Designer SE to your computer and switch on the Designer SE. 3. If the computer asks for the driver to be installed, ensure you have the Designer SE
Support CD in your computer. Follow the on-screen instructions to install the driver automatically. If you have Windows® XP with Service Pack 2 installed, select the 'No, not this time' option when you are asked to connect to Windows® Update on the first screen.
4. Ensure the Designer SE Communication utility is communicating with the Designer SE. The icon in the System Tray on the computer screen should be a white embroidery machine like this:
Designer SE Icon white
If there is no icon or it appears to be red, see the section below on ensuring communication with your Designer SE. 5. If you are not already connected to the internet, connect now. 6. Run 3D Configure. 7. Click the Register button. 8. Click Yes when asked if you want to register online. 9. Follow the online registration procedure. Your machine will be listed in the registration
summary. No internet connection If you do not have an internet connection, you can register your Designer SE by using a printed registration form. Click Register in 3D Configure and click No when prompted to register online. Fill in the registration details, then print the registration form and send it to the address on the last page of the print out. Ensuring you have Communication between your Designer SE and your Computer Communication between your Designer SE and your computer must be working in order to be able to obtain the Designer SE software update with Smart Update. You can verify this by checking the System Tray on the computer monitor to see if the Designer SE Communication is present. If communication is established, the icon will be a small white sewing machine like this:
Designer SE Icon white
There are two ways to further verify that communication is working correctly: • Double-click the Designer SE Communication icon and the Designer SE Communication
dialog box will appear. Click the Machine Information button to see the machine software numbers and ID number.
Designer SE Machine Info dialog
FAQ Lists for Husqvarna Viking 3D Software Page 237

• On the Designer SE, browse for embroidery files on your computer. (In Designer SE Communication, you must have shared at least one drive that contains embroidery files to use this feature.)
Both of these will only work if communication is correctly established. No icon If there is no icon, this means that the Designer SE Communication function is not running. This may be because you have un-checked the Start Automatically option or you have simply closed the Designer SE Communication function. To restart Designer SE Communication and enable the Start Automatically feature: 1. Start 3D Configure. 2. Click the Send 1 or Send 2 tab. 3. Click the Designer SE Communication button. The icon will appear in the system tray.
Note that if you have now established communication with your Designer SE, you can go ahead and use Smart Update.
4. Right-click the icon in the system tray and a menu will appear. 5. Click the Start Automatically option if it is un-checked. The menu will close.
Designer SE rt-click menu
6. Right-click the icon again to confirm that the Start Automatically option is checked. 7. Click anywhere on the desktop to close the menu without taking any further action. The
Designer SE Communication will now appear in the System Tray when your computer starts, and communication with your Designer SE will be automatically established when it is correctly connected and switched on.
Red icon When the Designer SE Communication function is running, but there is no communication with your Designer SE, the icon will have a red circle with a line across it.
Designer SE Icon red
This shows that communication has stopped. This will happen when: • The Designer SE is switched off. • The USB cable is disconnected at either the computer or the Designer SE. • The driver is not installed on the USB port in use. When a USB device is disconnected and plugged into a different USB port, the computer may need to re-install the driver. If you cancel or exit this process before it is complete, then the driver will not be correctly installed on that particular USB port. Therefore, if the computer asks for a driver to be installed when you switch the Designer SE to a different USB port, follow the on-screen instructions to install the drivers automatically. You will need the Designer SE Support CD for this. If you have Windows® XP with Service Pack 2 installed, select the 'No, not this time' option when you are asked to connect to Windows Update on the first screen. If you have interrupted the driver installation so that the driver is not correctly installed on the USB port you are currently using, leave the Designer SE switched on and connected to that USB port, then restart your computer. When the computer restarts, the Designer SE will be detected again as new hardware, allowing you to install the driver correctly. Communication Established When communication is correctly established, you will be able to register. You can run the registration process as often as you like. This has no effect unless you have something new to register.
FAQ Lists for Husqvarna Viking 3D Software Page 238

Miscellaneous
G801 How do I change my personal information regarding my software registration?
To change your personal information in our database, please do the following: 1. Go to the Database Registration Check
[http://www.husqvarnavikingsoftware.com/registration/checkdatabase.htm] page and click the Enter button.
2. Enter your last name, e-mail address and Zipcode (Postal Code) in the boxes, then click the green arrow to continue. Note that if you have more than one e-mail address, you must enter the e-mail address you provided when you registered.
3. The Personal Information page will show your current registration details. Change the information as desired, then the green arrow to continue.
4. The Dealer Information page will show up to two dealers where you buy your Husqvarna Viking products. Change the information as desired, then the green arrow to continue.
5. A summary page will show the products you have currently registered. If you are eligible for any free design downloads, there will be links for these downloads.
6. Click the red X at the bottom of the page to close the browser window.
G802 I did not download the free designs when I registered online. How can I get them?
Obtain your free designs as follows: 1. Ensure your dongle is inserted in your computer. 2. Start 3D Configure. Click the Register button, then click Yes for online registration. 3. Your internet browser will start and show your current registration details. Click the green
continue arrow on the Personal Information and Dealer Information pages. 4. A summary page will show the products you have currently registered. If you are eligible
for any free design downloads, there will be links for these downloads. All free downloads will be shown, including any you may have previously downloaded.
5. Download the free designs as desired. 6. When you have finished downloading, click the red X at the bottom of the summary page
to close the browser window.
G804 How do I change my personal information for my software registration?Simply click the Registration button in 3D Configure and repeat the registration process. This does not change the registration status of software you have already registered, but it does allow you to change your personal information and/or dealer information. You can also obtain your free designs if you have not already done so. Ensure your dongle is connected to your computer before you start, so that your current registration details can be easily retrieved. If your dongle is not connected or you have 3D Embroidery System software that does not require a dongle, you will need to enter your surname, e-mail address and postcode to find your registration details.
G806 What information is collected about my computer when I register my 3D Embroidery System software or use Smart Update, and what is it used for?
FAQ Lists for Husqvarna Viking 3D Software Page 239

Information about the configuration of your computer is collected when you register and when you use Smart Update. This information is shown on the first screen that appears when you register or use Smart Update. If you register by printed form, the same information is printed after your registration details. This information is only collected for support and no information is collected automatically that could be used for identification of you or your computer. The only personal information collected is the registration information that you provide by filling in the registration details. You can review this information online at any time by repeating the registration process. This does not change the registration status of software that is already registered. No information is passed on to third parties outside the VSM Group. This applies to both the configuration information about your computer and the registration details you have provided.
3D Configure Listed versions: 7.0.5; 7.1; 7.2; 7.25
Activation
B007 Error "The server name or address could not be resolved" when attempting to use Smart Update or Activate Dongle in 3D Configure.
This error may appear if you have Norton Internet Security/Personal Firewall and you attempt to use Smart Update or Activate Dongle from 3D Configure. This error appears when Norton Internet Security prevents Smart Update or Activate Dongle from accessing the internet. This can be resolved as follows: 1. Open Norton Internet Security/Personal Firewall. 2. Click on the Status & Settings option if you are not already on that screen. 3. Click on the Personal Firewall setting. The right hand pane will give more options for the
Personal Firewall setting. 4. Click on the Configure button on this pane. A new window will open. 5. Click on the Programs tab. 6. In the Manual Program Control section, scroll down the list until you see
SmartUpdate.exe. 7. Click on the drop-down arrow in the Internet Access column. 8. Choose the Permit All option. 9. Click OK. This will close the 2nd window. 10. Close down the main Norton Internet Security/Personal Firewall window. You will now be able to use Smart Update and Activate Dongle in 3D Configure. The above instructions apply to the latest version of Norton Internet Security/Personal Firewall available at the time of writing. For previous versions of the Norton Internet Security/Personal Firewall, use an equivalent procedure to give SmartUpdate.exe full access to the internet.
G803 Error "C:DEmbroidery.tmp not found."This message can appear when attempting to Register, Activate Dongle or use Smart Update. This will happen because the login.tmp file has been moved or deleted from the C:\3DEmbroidery\System\Utilities\ folder. After clearing the message, the "Failed to create HTML page" message will also appear.
FAQ Lists for Husqvarna Viking 3D Software Page 240

The login.tmp file may have been mistaken for a temporary Windows file by a system maintenance utility, such as a disk cleanup utility. Temporary Windows files can usually be discarded by such utilities to free hard disk space. You will need to replace the login.tmp file. Contact software support who will be able to supply file called "TMP_Files.exe". After obtaining this, double-click on the file to extract a new copy of login.tmp to the correct location. You will then be able to run Register, Activate Dongle and Smart Update.
Dongle
B007 Error "The server name or address could not be resolved" when attempting to use Smart Update or Activate Dongle in 3D Configure.
This error may appear if you have Norton Internet Security/Personal Firewall and you attempt to use Smart Update or Activate Dongle from 3D Configure. This error appears when Norton Internet Security prevents Smart Update or Activate Dongle from accessing the internet. This can be resolved as follows: 1. Open Norton Internet Security/Personal Firewall. 2. Click on the Status & Settings option if you are not already on that screen. 3. Click on the Personal Firewall setting. The right hand pane will give more options for the
Personal Firewall setting. 4. Click on the Configure button on this pane. A new window will open. 5. Click on the Programs tab. 6. In the Manual Program Control section, scroll down the list until you see
SmartUpdate.exe. 7. Click on the drop-down arrow in the Internet Access column. 8. Choose the Permit All option. 9. Click OK. This will close the 2nd window. 10. Close down the main Norton Internet Security/Personal Firewall window. You will now be able to use Smart Update and Activate Dongle in 3D Configure. The above instructions apply to the latest version of Norton Internet Security/Personal Firewall available at the time of writing. For previous versions of the Norton Internet Security/Personal Firewall, use an equivalent procedure to give SmartUpdate.exe full access to the internet.
G803 Error "C:DEmbroidery.tmp not found."This message can appear when attempting to Register, Activate Dongle or use Smart Update. This will happen because the login.tmp file has been moved or deleted from the C:\3DEmbroidery\System\Utilities\ folder. After clearing the message, the "Failed to create HTML page" message will also appear. The login.tmp file may have been mistaken for a temporary Windows file by a system maintenance utility, such as a disk cleanup utility. Temporary Windows files can usually be discarded by such utilities to free hard disk space. You will need to replace the login.tmp file. Contact software support who will be able to supply file called "TMP_Files.exe". After obtaining this, double-click on the file to extract a new copy of login.tmp to the correct location. You will then be able to run Register, Activate Dongle and Smart Update.
FAQ Lists for Husqvarna Viking 3D Software Page 241

Downloading Files
B011 "Error reading setup initialization file" when installing an update downloaded from Smart Update.
Occasionally, there can be difficulties when downloading files over the internet. This may cause a file to contain errors or the file may be incomplete. When this happens to an installation file, the error occurs because the missing or corrupt information means it is not possible to initialize the installation. To resolve this, the file must first be completely removed from your computer. It can then be downloaded again, ready for installation. To remove an incomplete and/or corrupt download file from your computer 1. Delete the saved file. If you have saved it to your Desktop, simply right-click the file and
select the Delete option. Otherwise, you will need to use Windows Explorer to find and delete the file.
2. Start Internet Explorer. 3. Click the Tools menu, then click Internet Options. The Internet Options dialog will appear. 4. You will see an area called Temporary Internet Files. In this area is a Delete Files button.
Click the Delete Files button, then click OK when the confirmation message appears. It is necessary to delete the Temporary Internet Files so that you will download a completely fresh copy of the file. Otherwise, you could be re-saving a corrupt or incomplete copy of the file that may be held by Internet Explorer.
5. The mouse pointer will change to an hour-glass while the files are deleted. This may take some time. When the files are deleted, click Close.
You may now use Smart Update in 3D Configure to obtain the update again. For information on using Smart Update, see FAQ #B008.
Error Messages
B007 Error "The server name or address could not be resolved" when attempting to use Smart Update or Activate Dongle in 3D Configure.
This error may appear if you have Norton Internet Security/Personal Firewall and you attempt to use Smart Update or Activate Dongle from 3D Configure. This error appears when Norton Internet Security prevents Smart Update or Activate Dongle from accessing the internet. This can be resolved as follows: 1. Open Norton Internet Security/Personal Firewall. 2. Click on the Status & Settings option if you are not already on that screen. 3. Click on the Personal Firewall setting. The right hand pane will give more options for the
Personal Firewall setting. 4. Click on the Configure button on this pane. A new window will open. 5. Click on the Programs tab. 6. In the Manual Program Control section, scroll down the list until you see
SmartUpdate.exe. 7. Click on the drop-down arrow in the Internet Access column. 8. Choose the Permit All option. 9. Click OK. This will close the 2nd window. 10. Close down the main Norton Internet Security/Personal Firewall window. You will now be able to use Smart Update and Activate Dongle in 3D Configure.
FAQ Lists for Husqvarna Viking 3D Software Page 242

The above instructions apply to the latest version of Norton Internet Security/Personal Firewall available at the time of writing. For previous versions of the Norton Internet Security/Personal Firewall, use an equivalent procedure to give SmartUpdate.exe full access to the internet.
B011 "Error reading setup initialization file" when installing an update downloaded from Smart Update.
Occasionally, there can be difficulties when downloading files over the internet. This may cause a file to contain errors or the file may be incomplete. When this happens to an installation file, the error occurs because the missing or corrupt information means it is not possible to initialize the installation. To resolve this, the file must first be completely removed from your computer. It can then be downloaded again, ready for installation. To remove an incomplete and/or corrupt download file from your computer 1. Delete the saved file. If you have saved it to your Desktop, simply right-click the file and
select the Delete option. Otherwise, you will need to use Windows Explorer to find and delete the file.
2. Start Internet Explorer. 3. Click the Tools menu, then click Internet Options. The Internet Options dialog will appear. 4. You will see an area called Temporary Internet Files. In this area is a Delete Files button.
Click the Delete Files button, then click OK when the confirmation message appears. It is necessary to delete the Temporary Internet Files so that you will download a completely fresh copy of the file. Otherwise, you could be re-saving a corrupt or incomplete copy of the file that may be held by Internet Explorer.
5. The mouse pointer will change to an hour-glass while the files are deleted. This may take some time. When the files are deleted, click Close.
You may now use Smart Update in 3D Configure to obtain the update again. For information on using Smart Update, see FAQ #B008.
B601 "The thread ABCDE-9999 already exists in MyThreads database. Do you want to overwrite it?"
This message will appear when you copy a thread from a standard thread range to MyThreads, and the thread has already been copied.
B602 "The Thread Number already exists. The Thread Number field will be set to a unique value. Please re-edit."
This message will appear if you enter a Thread Number that already exists in MyThreads, when adding or editing custom MyThreads. Click OK, and an underline and number will be added to the end of the Thread Number to make it unique. If desired, click in the Thread Number box and re-edit it.
B603 "This action is permanent and may not be reversed. Do you wish to continue?"
This message will appear when you try to delete a thread definition from MyThreads. If you wish to go ahead and delete the thread, click Yes. Otherwise click No.
FAQ Lists for Husqvarna Viking 3D Software Page 243

B604 Error "Thread range is corrupt or missing. Cannot start module. Reinstall the thread database."
This message usually means that the database driver is incorrectly installed. First follow the instructions in FAQ #G010 to fix this. If the message still appears, use the following procedure to repair the installation: 1. Right-click the Start button on the taskbar and select Explore from the popup menu. 2. In Explorer, browse to the folder C:\3DEmbroidery\System.
This assumes you have installed your 3D Embroidery System software in the default location of C:\3DEmbroidery. If you have installed the software in a different location, browse to the System folder at that location.
3. Delete the files named "MyThreads.mdb" and "ThreadDataBase.mdb". The file names may simply be shown as "MyThreads" and "ThreadDataBase".
4. Put your 3D Embroidery System software CD in your computer to re-run the installation. The installation should start automatically when you put your software CD in the computer. If this does not happen, browse to the CD with Explorer and double-click "Setup.exe" to start the installation.
5. When the choice appears, select the "Modify or remove" option and click Next. 6. In the next screen, select Repair and click Next. 7. Continue with the installation and follow the on-screen instructions. When the installation
is complete, the MyThreads and standard thread databases will be restored to their original installation state.
If you had previously backed up your MyThreads database, you can now use the Restore option in Thread Manager to restore your MyThreads database. See the on-line help in Thread Manager for more information.
B605 "Import has detected some new thread ranges. Please go to the VSM Software website to download these."
This message may appear when you use the Import Threads From Embroidery function. This indicates that the embroidery contains standard threads from a later version of the database that you have installed. Use Smart Update to obtain the latest version of the standard thread database.
B606 "Could not back up to the selected path."This message may appear if you attempt to back up your MyThreads database to a folder that is read only (for instance, if you try to back up directly to a CD) or if you are attempting to overwrite an existing file that is read only. Choose a different location or a different backup name.
B607 "Warning! Restoring your MyThreads database will result in loss of all changes. Continue?"
This message appears when you restore a previously backed up copy of your MyThreads database. This message is to inform you that all the threads in the current MyThreads database will be replaced with the restored threads. This action cannot be undone. If you are unsure about continuing, click No, make a new backup of the current MyThreads database and ensure a different name is used for the backup, then start the restore process again.
B608 "There was an error while restoring your database. Please ensure that all 3D system programs are closed and try again."
FAQ Lists for Husqvarna Viking 3D Software Page 244

This message will appear when you try to restore a previously backed up copy of your MyThreads database if there are 3D Embroidery System modules that are using the current MyThreads database. Close all other 3D Embroidery System modules and try again. If the message still appears, restart your computer and try again.
B609 "You must enter something inside the Thread Number field."This message will appear when you try to save a new or edited thread if the Thread Number is blank. The Thread Number may not be blank. Enter a Thread Number and click OK.
B610 How are MyThreads colors used in 3D Embroidery System Files?The 3D Embroidery System will display threads in a file in the same way on any computer where it is installed. That is, the colors used will be the same even if they are reproduced slightly differently on different monitors. You can print a worksheet to see the colors and color names used in a particular design. This is true, even if you do not have all the threads in a design defined in the Standard or MyThreads databases on your computer. This is because 3D Embroidery System designs have complete information for each of the threads it uses. Any of the following file types is a 'design' that has full 3D Embroidery System thread definitions: • Husqvarna Viking/Pfaff .vp3 embroidery file • 3D Digitizing .can design outline file • 3D Cross Stitcher .krz design file • Font .nft file • Shapes .nsp file Only Husqvarna Viking/Pfaff .vp3 embroidery files can be used to import custom thread definitions into your MyThreads database. Each thread used in a design will fall into one of the following categories: • A thread you have added to MyThreads from the Standard Thread Database and which
you have not changed. This will apply to most of your colors if you have used MyThreads to catalogue your thread collection.
• A thread from the Standard Thread Database. • A thread which you formerly added to MyThreads from the Standard Thread Database,
used in some designs and then deleted from MyThreads. • A custom thread that has been added to MyThreads. You could have added this yourself
or added it to MyThreads from a design from somebody else. • A thread from the Standard Thread Database that is not on your own Standard Thread
Database because your database is out of date. • A custom thread defined in the file that does not appear in the your MyThreads
database. The availability of threads in the Standard Thread Database and MyThreads will only affect parts of the 3D Embroidery System where you can change colors, as follows: • Editing modules: 3D Embroidery, 3D Vision and 3D Stitch Editor • Design modules: 3D Digitizing, 3D Cross Stitcher, 3D Font Digitizing, 3D QuickFont See the following for some situations you may encounter according to the availability of thread definitions, as categorized above: • FAQ #B611 (I have a vp3 embroidery from another user that uses a custom thread
definition they designed in MyThreads.)
FAQ Lists for Husqvarna Viking 3D Software Page 245

• FAQ #B612 (I have a design with MyThreads colors that are unmodified copies from the Standard Thread Database, but they are not in my MyThreads list.)
• FAQ #B613 (I have a design with custom colors that have been deleted from MyThreads.)
• FAQ #B614 (I have a .can or .krz design from another user that uses a custom thread definition they designed in MyThreads.)
• FAQ #B615 (I have a design from another user that uses threads from the Standard Thread Database that I do not have.
B611 I have a vp3 embroidery from another user that uses a custom thread definition they designed in MyThreads
If you attempt to change the color, a message will appear to indicate that the thread is not found in MyThreads, and the nearest MyThreads match will be selected. If you wish to keep the thread color, click Cancel in the Color Selection dialog box, then use Import Threads From Embroidery in Thread Manager to load the custom thread definition. Otherwise, select a replacement thread.
B612 I have a design with MyThreads colors that are unmodified copies from the Standard Thread Database, but they are not in my MyThreads list
If you open a file that has colors from MyThreads that are unmodified copies of standard threads, but do not exist as copies in your MyThreads list, the color will be identified and selected in the original thread range when you click the color to change it.
B613 I have a design with custom colors that have been deleted from MyThreadsIf you attempt to change the color, a message will appear to indicate that the thread is not found in MyThreads, and the nearest MyThreads match will be selected. If you wish to keep the thread color, click Cancel in the Color Selection dialog box, then use Import Threads From Embroidery in Thread Manager to load the custom thread definition. Otherwise, select a replacement thread.
B614 I have a .can or .krz design from another user that uses a custom thread definition they designed in MyThreads
If you wish to add the custom MyThreads to your own MyThreads, create a .vp3 embroidery from the design, then use Import Threads From Embroidery in Thread Manager to load the custom thread definition.
B615 I have a design from another user that uses threads from the Standard Thread Database that I do not have
You may not use Import Threads From Embroidery to add these threads to either your Standard Thread Database or MyThreads. Use Smart Update to find and download the latest thread database, which you can then install.
B616 Nothing happens when I click Thread Manager in 3D Configure.This can happen when you are using version 7.0 of the 3D Embroidery System and you install Service Pack 2 for Windows XP. Use Smart Update to update your 3D Embroidery System to version 7.05 or later.
FAQ Lists for Husqvarna Viking 3D Software Page 246

If you are unable to use Smart Update via the Internet, ask your dealer to help you update your 3D Embroidery System.
G010 How do I fix the database driver used by my 3D Embroidery System software?
Database drivers are normally found installed on most computers – they are commonly installed as part of the installation of Microsoft® Office or as an upgrade of key components of the operating system. Key components of the 3D Embroidery System need to be able to use these drivers. Therefore, any difficulties in using these drivers may affect the functionality of certain features of the 3D Embroidery System. Examples include changing a thread color in any module and/or Motif Fill/Line properties in 3D Digitizing. If you have Windows® XP with Service Pack 2 installed, use the Database Driver Fix described below. Otherwise, install the drivers manually as follows: Installation of the Database files 1. Insert the 3D Embroidery System CD. 2. Cancel the installation screen if it appears. 3. Use Windows® Explorer to browse to the D:\Technical folder – where D:\ is the name of
your CD or DVD drive. 4. Double click on the Database Drivers folder. 5. Double click on the Jet 4 folder. 6. Double click on the folder that is for your operating system. 7. Double click on the file to start the installation of the Jet 4 Service Pack 8 files. This
should take a few moments for the files to be installed. 8. After the installation is complete, browse to the D:\Technical\Database Drivers\MDAC 2.8
folder. 9. Double click on the MDAC_TYP.exe file. The Microsoft Data Access Components 2.8
Setup dialog box will appear. 10. Select the option “I accept all the terms of the preceding license agreement”. 11. Click on the Next button. 12. Click on the Finish button when it appears. This will start the installation process for the
MDAC 2.8 files. 13. After the MDAC 2.8 installation is complete, reboot your computer and continue to use
your 3D Embroidery System. 14. If you are still having difficulties, use the Database Driver Fix that follows. Database Driver Fix 1. Insert the 3D Embroidery System CD. 2. Cancel the installation screen if it appears. 3. Use Windows® Explorer to browse to the D:\Technical folder – where D:\ is the name of
your CD or DVD drive. 4. Double click on the Database Drivers folder. 5. Double click on the MSAccessDbFixer file (this may be shown with a .exe extension). A
window will appear briefly on the screen. 6. Continue to use your 3D Embroidery System.
G803 Error "C:DEmbroidery.tmp not found."This message can appear when attempting to Register, Activate Dongle or use Smart Update. This will happen because the login.tmp file has been moved or deleted from the C:\3DEmbroidery\System\Utilities\ folder.
FAQ Lists for Husqvarna Viking 3D Software Page 247

After clearing the message, the "Failed to create HTML page" message will also appear. The login.tmp file may have been mistaken for a temporary Windows file by a system maintenance utility, such as a disk cleanup utility. Temporary Windows files can usually be discarded by such utilities to free hard disk space. You will need to replace the login.tmp file. Contact software support who will be able to supply file called "TMP_Files.exe". After obtaining this, double-click on the file to extract a new copy of login.tmp to the correct location. You will then be able to run Register, Activate Dongle and Smart Update.
General
G001 General difficulties with hardware and softwareTo try to determine the cause of any odd difficulties with the 3D Embroidery System, the best method is to reboot the computer in safe mode. If the problem is then solved, you know that some clash of hardware and/or software such as device drivers is to blame. You can then obtain more help from your computer dealer to analyze the cause and reconfigure your computer if necessary. To start Windows in Safe Mode 1. Close all programs. 2. Click Start, and then click Shut Down or Turn Off Computer, whichever is shown. 3. Click Restart. If necessary, click OK to confirm. 4. Your computer will shut down and restart. 5. As your computer restarts, press and hold the F8 key until a menu of windows startup
options appears. 6. Use the up and down arrow keys to highlight Safe mode, and then press ENTER. When you hold down the F8 key, your computer may beep rapidly and report keyboard errors as it restarts. Release the F8 key briefly to skip any errors and press F8 again until you have the Startup Menu on your screen.
Loading Embroideries
G406 Error "Unrecognized file format."This message appears if the file you are attempting to load is corrupt. For example, it might have the extension .vp3, yet not be a proper Husqvarna Viking / Pfaff embroidery.
G407 Error: "Embroidery is corrupt"The embroidery is corrupt and cannot be loaded. Refer to source of this file for a solution.
G408 Error "Embroidery XY coordinates incorrect"The embroidery is corrupt and cannot be loaded. Refer to source of this file for a solution.
Miscellaneous
B006 Do I need to run the 3D Configure Wizard every time that I want to change my Send 1 and/or Send 2 settings?
FAQ Lists for Husqvarna Viking 3D Software Page 248

You have the choice of either using the 3D Configure Wizard to set Send 1 and Send 2, or use the Send 1 and Send 2 tabs in 3D Configure. You can also use the Send 1 and Send 2 tabs to inspect your current Send 1 and Send 2 settings.
Product Information
G004 What is the price of the software, and where can I get it?Please contact your local dealer for prices and availability on all the Husqvarna Viking software. To find your local dealer see the Husqvarna Viking Dealer Locator [http://www.sew.husqvarna.se/dealers.htm]. You can always find this on the bottom bar of the Husqvarna Viking Software website.
Screen Appearance
B001 When I start 3D Configure, I cannot see the OK, Cancel, Apply and Help buttons at the bottom of the window.
The 3D Embroidery System requires a minimum screen resolution of 1024 by 768 pixels. If your screen resolution is less than this (800 by 600 or less), you will not be able to see all of the screen elements in 3D Configure and other parts of the 3D Embroidery System. Refer to the 3D Embroidery System Getting Started Guide for details on system requirements and changing monitor display properties.
B005 I have used Reset All Modules but the existing settings are still being shown
This will happen if you have a module open when you click Reset All Modules in 3D Configure. Close all 3D Embroidery System modules, then start 3D Configure and click Reset All Modules again.
G414 I have changed grid color and now I wish to return to the original colorUse 3D Configure to change the grid color. Follow the instructions in 3D Configure and select Blue Gray (RGB values 102, 102, 153) from the standard color drop-down on the Grid Color button. Use Screen Preferences to change the grid spacing.
G415 I have changed the screen background color and now I wish to return to the original light blue
Use 3D Configure to change the background color. Follow the instructions in 3D Configure and select the RGB values 200, 232, 247 in the Colors dialog box.
G416 I wish to change the background color for the work areaUse 3D Configure to alter the background color for the work area. 3D Configure may also be used to turn the texture on or off for modules that use texture.
G417 I wish to change the background color for the work area and the Real Size window
FAQ Lists for Husqvarna Viking 3D Software Page 249

Use 3D Configure to alter the background color for the work area and Real Size. 3D Configure may also be used to turn the texture on or off.
G426 Some of the color values on the Custom tab of the Colors dialog box are not visible.
When this happens, only the Hue and Red color values are visible. The Sat (Saturation), Lum (Luminosity), Green and Blue values do not fit on the dialog box. To fix this, use Smart Update to update your 3D Embroidery System software to the latest version.
Send To All Devices
H102 "No stitches to send."This message will appear if you attempt to send an embroidery, but there is no embroidery loaded so no stitches can be sent. Load the desired embroidery and try again.
H801 "Cannot send design. Card write currently in progress."This message will appear if you attempt to send an embroidery when another 3D Embroidery System module is already part way through sending an embroidery to the same card. Wait until the first module has finished writing and then try again.
H812 I am having problems sending embroideriesOpen the 3D Configure setup utility. On the Send 1 or Send 2 tab, check that the correct option is selected for your embroidery machine or Reader/Writer. For example, if your device uses a Com port, ensure the correct Com port is selected.
Send To d-Card Reader/Writer Unit
A306 Error: "Cannot write to d-Card"This message appears if the d-Card is defective or if a d-card is pulled out of the d-Card Reader/Writer during the writing process.
A315 There is no light showing on my d-Card Reader/WriterThe green LED on the d-Card Reader/Writer is visible only while you are Reading a d-Card or Writing a d-Card. At all other times it is not lit up, even if the d-Card Reader/Writer is connected correctly to the USB port of your computer.
H806 Error "No d-Card Reader/Writer unit is connected."This message appears if the d-Card Reader/Writer is not connected correctly to a USB port of your computer when you select the Send To function. Refer to the hardware installation guide for more details.
H807 Error "No d-Card is inserted."This message appears if there is no d-Card inserted in the d-Card Reader/Writer when you select the Send To function.
FAQ Lists for Husqvarna Viking 3D Software Page 250

H808 Error "d-Card is not programmable."This message appears if a Husqvarna Viking read-only Embroidery d-Card is inserted in the d-Card Reader/ Writer when you select Send To; replace with a Personal d-Card.
H809 Error "This d-Card contains a sewing machine upgrade program. Click OK to continue."
This message appears if the Personal d-Card placed in the d-Card Reader/Writer contains a program that can update your Husqvarna Viking Designer II sewing machine software. If you do not wish to update at this time, click OK to continue the Send To procedure. The update program will be erased when the embroideries are written to the d-Card.
Send To Designer I Floppy Disk
H803 Error "No disk in drive."This message appears if there is no disk inserted in the floppy disk drive of your computer when you select the Send To function.
H804 Error "Disk access denied."This message appears if the disk inserted in the floppy disk drive of your computer when you select the Send To function is write-protected.
H805 Error "Wrong disk size. Use 1.44MB only."This message appears if a 720K floppy disk is inserted in the floppy disk drive of your computer when you select the Send To function. Replace with a 1.44MB disk.
Send To Huskygram/POEM
H901 Error message "Thread Broken"This message appears if the top or bottom thread is broken in the Huskygram/POEM embroidery machine. Rethread or thread a new bobbin, then restart.
H902 Error message "Cover open"This message appears if either the top or the hook cover is open in the Huskygram/POEM embroidery machine. Close the cover, then restart.
H903 Error message "The machine will not accept data."Occasionally a Huskygram/POEM machine will switch on in the wrong state and will not accept data. If so switch the Huskygram/POEM off and then back on.
Send To Rose/Orchidea/#1+/Iris Reader/Writer
A203 Error message "Cannot write to card"This message appears if a Husqvarna Viking preprogrammed Embroidery Card is inserted in the Reader/Writer; replace with a Programmable card. It may also appear if the
FAQ Lists for Husqvarna Viking 3D Software Page 251

Programmable card is defective or if a card is pulled out of the Reader/Writer during the writing process. The message will also appear if you are trying to write to a 512 Programmable card via a parallel Reader/Writer. Ensure that you are using the correct card.
A204 Error message "Cannot erase to card"The card is not erasable. This message can appear if a card is pulled out of the Reader/Writer during the erasing process.
A215 I am having problems writing embroideries to a Programmable Embroidery Card
First try another card and check the Reader/Writer is connected correctly. If the problems are limited to one card, erase it completely by opening 3D Reader/Writer, then using the Write Card function with no embroideries loaded on the screen.
H810 Error message "Reader/Writer not found"This message appears if the Reader/Writer is not connected correctly to your computer when you select the Send To function. Refer to the hardware installation guide for more details.
H811 Error message "No card is inserted"This message appears if there is no Embroidery Card inserted in the Reader/Writer when you select the Send To function.
Smart Update
B002 Message "We recommend that you check your system is up-to-date regularly by selecting the Smart Update button from 3D Configure"
This message will appear when you start your 3D Embroidery System if you have not run Smart Update in the last 30 days. Use Smart Update to check for new 3D Embroidery System updates and extras such as new fonts. Smart Updates you have downloaded may still be shown if you have not installed them.
B003 When I use Smart Update, some of the updates I have downloaded are still shown.
Smart Updates you have downloaded may still be shown if you have not installed them. Simply downloading a Smart Update does not automatically install it on your computer. After downloading a Smart Update, find the file where you saved it and double-click it to install.
B004 How often should I run Smart Update?Use Smart Update to check for new 3D Embroidery System updates and extras such as new fonts. It is recommended to run Smart Update at least once every 30 days. The 3D Embroidery System will inform you if you have not used Smart Update in the last 30 days.
FAQ Lists for Husqvarna Viking 3D Software Page 252

B007 Error "The server name or address could not be resolved" when attempting to use Smart Update or Activate Dongle in 3D Configure.
This error may appear if you have Norton Internet Security/Personal Firewall and you attempt to use Smart Update or Activate Dongle from 3D Configure. This error appears when Norton Internet Security prevents Smart Update or Activate Dongle from accessing the internet. This can be resolved as follows: 1. Open Norton Internet Security/Personal Firewall. 2. Click on the Status & Settings option if you are not already on that screen. 3. Click on the Personal Firewall setting. The right hand pane will give more options for the
Personal Firewall setting. 4. Click on the Configure button on this pane. A new window will open. 5. Click on the Programs tab. 6. In the Manual Program Control section, scroll down the list until you see
SmartUpdate.exe. 7. Click on the drop-down arrow in the Internet Access column. 8. Choose the Permit All option. 9. Click OK. This will close the 2nd window. 10. Close down the main Norton Internet Security/Personal Firewall window. You will now be able to use Smart Update and Activate Dongle in 3D Configure. The above instructions apply to the latest version of Norton Internet Security/Personal Firewall available at the time of writing. For previous versions of the Norton Internet Security/Personal Firewall, use an equivalent procedure to give SmartUpdate.exe full access to the internet.
B008 How do I use Smart Update?To use Smart Update: 1. Ensure your dongle supplied with your 3D Embroidery Software is connect to your
computer. 2. Ensure you are connected to the Internet. 3. Run 3D Configure (select Start, All Programs, 3D Embroidery System, 3D Configure). 4. Click the Smart Update button. 5. Your Internet browser will start and display the first Smart Update page. 6. Click the green arrow to see the next page containing the Smart Updates you need.
If you have already downloaded and installed all the Smart Updates you are eligible for, there will be no Smart Updates listed.
7. Click the disk icons for the desired updates and download them. Make a note of where you save the updates.
8. After you have finished downloading the updates, they must still be installed on your computer. If you did not save the updates on your Windows Desktop, use Explorer to browse to the location where you saved the updates.
9. Double-click each new update to install it.
B009 I believe that 3D Fabric Decorator is available through Smart Update, but it is not listed when I use Smart Update.
3D Fabric Decorator is only available as a Smart Update if: • You purchased a new copy of the full 3D Professional Embroidery System on or after
May 1st 2004. or
FAQ Lists for Husqvarna Viking 3D Software Page 253

• You purchased a new copy of the full VIP Professional Embroidery on or after May 1st 2004, and subsequently received a free upgrade to 3D Professional.
PLEASE NOTE: If you purchased the VIP Embroidery System before May 1st 2004, but received your free upgrade to 3D Professional on or after May 1st 2004, this means your purchase date is not in the qualifying period. Therefore, you will not be eligible to obtain 3D Fabric Decorator as a Smart Update.
B011 "Error reading setup initialization file" when installing an update downloaded from Smart Update.
Occasionally, there can be difficulties when downloading files over the internet. This may cause a file to contain errors or the file may be incomplete. When this happens to an installation file, the error occurs because the missing or corrupt information means it is not possible to initialize the installation. To resolve this, the file must first be completely removed from your computer. It can then be downloaded again, ready for installation. To remove an incomplete and/or corrupt download file from your computer 1. Delete the saved file. If you have saved it to your Desktop, simply right-click the file and
select the Delete option. Otherwise, you will need to use Windows Explorer to find and delete the file.
2. Start Internet Explorer. 3. Click the Tools menu, then click Internet Options. The Internet Options dialog will appear. 4. You will see an area called Temporary Internet Files. In this area is a Delete Files button.
Click the Delete Files button, then click OK when the confirmation message appears. It is necessary to delete the Temporary Internet Files so that you will download a completely fresh copy of the file. Otherwise, you could be re-saving a corrupt or incomplete copy of the file that may be held by Internet Explorer.
5. The mouse pointer will change to an hour-glass while the files are deleted. This may take some time. When the files are deleted, click Close.
You may now use Smart Update in 3D Configure to obtain the update again. For information on using Smart Update, see FAQ #B008.
G803 Error "C:DEmbroidery.tmp not found."This message can appear when attempting to Register, Activate Dongle or use Smart Update. This will happen because the login.tmp file has been moved or deleted from the C:\3DEmbroidery\System\Utilities\ folder. After clearing the message, the "Failed to create HTML page" message will also appear. The login.tmp file may have been mistaken for a temporary Windows file by a system maintenance utility, such as a disk cleanup utility. Temporary Windows files can usually be discarded by such utilities to free hard disk space. You will need to replace the login.tmp file. Contact software support who will be able to supply file called "TMP_Files.exe". After obtaining this, double-click on the file to extract a new copy of login.tmp to the correct location. You will then be able to run Register, Activate Dongle and Smart Update.
Thread Colors
B610 How are MyThreads colors used in 3D Embroidery System Files?
FAQ Lists for Husqvarna Viking 3D Software Page 254

The 3D Embroidery System will display threads in a file in the same way on any computer where it is installed. That is, the colors used will be the same even if they are reproduced slightly differently on different monitors. You can print a worksheet to see the colors and color names used in a particular design. This is true, even if you do not have all the threads in a design defined in the Standard or MyThreads databases on your computer. This is because 3D Embroidery System designs have complete information for each of the threads it uses. Any of the following file types is a 'design' that has full 3D Embroidery System thread definitions: • Husqvarna Viking/Pfaff .vp3 embroidery file • 3D Digitizing .can design outline file • 3D Cross Stitcher .krz design file • Font .nft file • Shapes .nsp file Only Husqvarna Viking/Pfaff .vp3 embroidery files can be used to import custom thread definitions into your MyThreads database. Each thread used in a design will fall into one of the following categories: • A thread you have added to MyThreads from the Standard Thread Database and which
you have not changed. This will apply to most of your colors if you have used MyThreads to catalogue your thread collection.
• A thread from the Standard Thread Database. • A thread which you formerly added to MyThreads from the Standard Thread Database,
used in some designs and then deleted from MyThreads. • A custom thread that has been added to MyThreads. You could have added this yourself
or added it to MyThreads from a design from somebody else. • A thread from the Standard Thread Database that is not on your own Standard Thread
Database because your database is out of date. • A custom thread defined in the file that does not appear in the your MyThreads
database. The availability of threads in the Standard Thread Database and MyThreads will only affect parts of the 3D Embroidery System where you can change colors, as follows: • Editing modules: 3D Embroidery, 3D Vision and 3D Stitch Editor • Design modules: 3D Digitizing, 3D Cross Stitcher, 3D Font Digitizing, 3D QuickFont See the following for some situations you may encounter according to the availability of thread definitions, as categorized above: • FAQ #B611 (I have a vp3 embroidery from another user that uses a custom thread
definition they designed in MyThreads.) • FAQ #B612 (I have a design with MyThreads colors that are unmodified copies from the
Standard Thread Database, but they are not in my MyThreads list.) • FAQ #B613 (I have a design with custom colors that have been deleted from
MyThreads.) • FAQ #B614 (I have a .can or .krz design from another user that uses a custom thread
definition they designed in MyThreads.) • FAQ #B615 (I have a design from another user that uses threads from the Standard
Thread Database that I do not have.
FAQ Lists for Husqvarna Viking 3D Software Page 255

B611 I have a vp3 embroidery from another user that uses a custom thread definition they designed in MyThreads
If you attempt to change the color, a message will appear to indicate that the thread is not found in MyThreads, and the nearest MyThreads match will be selected. If you wish to keep the thread color, click Cancel in the Color Selection dialog box, then use Import Threads From Embroidery in Thread Manager to load the custom thread definition. Otherwise, select a replacement thread.
B612 I have a design with MyThreads colors that are unmodified copies from the Standard Thread Database, but they are not in my MyThreads list
If you open a file that has colors from MyThreads that are unmodified copies of standard threads, but do not exist as copies in your MyThreads list, the color will be identified and selected in the original thread range when you click the color to change it.
B613 I have a design with custom colors that have been deleted from MyThreadsIf you attempt to change the color, a message will appear to indicate that the thread is not found in MyThreads, and the nearest MyThreads match will be selected. If you wish to keep the thread color, click Cancel in the Color Selection dialog box, then use Import Threads From Embroidery in Thread Manager to load the custom thread definition. Otherwise, select a replacement thread.
B614 I have a .can or .krz design from another user that uses a custom thread definition they designed in MyThreads
If you wish to add the custom MyThreads to your own MyThreads, create a .vp3 embroidery from the design, then use Import Threads From Embroidery in Thread Manager to load the custom thread definition.
B615 I have a design from another user that uses threads from the Standard Thread Database that I do not have
You may not use Import Threads From Embroidery to add these threads to either your Standard Thread Database or MyThreads. Use Smart Update to find and download the latest thread database, which you can then install.
B616 Nothing happens when I click Thread Manager in 3D Configure.This can happen when you are using version 7.0 of the 3D Embroidery System and you install Service Pack 2 for Windows XP. Use Smart Update to update your 3D Embroidery System to version 7.05 or later. If you are unable to use Smart Update via the Internet, ask your dealer to help you update your 3D Embroidery System.
G010 How do I fix the database driver used by my 3D Embroidery System software?
Database drivers are normally found installed on most computers – they are commonly installed as part of the installation of Microsoft® Office or as an upgrade of key components of the operating system.
FAQ Lists for Husqvarna Viking 3D Software Page 256

Key components of the 3D Embroidery System need to be able to use these drivers. Therefore, any difficulties in using these drivers may affect the functionality of certain features of the 3D Embroidery System. Examples include changing a thread color in any module and/or Motif Fill/Line properties in 3D Digitizing. If you have Windows® XP with Service Pack 2 installed, use the Database Driver Fix described below. Otherwise, install the drivers manually as follows: Installation of the Database files 1. Insert the 3D Embroidery System CD. 2. Cancel the installation screen if it appears. 3. Use Windows® Explorer to browse to the D:\Technical folder – where D:\ is the name of
your CD or DVD drive. 4. Double click on the Database Drivers folder. 5. Double click on the Jet 4 folder. 6. Double click on the folder that is for your operating system. 7. Double click on the file to start the installation of the Jet 4 Service Pack 8 files. This
should take a few moments for the files to be installed. 8. After the installation is complete, browse to the D:\Technical\Database Drivers\MDAC 2.8
folder. 9. Double click on the MDAC_TYP.exe file. The Microsoft Data Access Components 2.8
Setup dialog box will appear. 10. Select the option “I accept all the terms of the preceding license agreement”. 11. Click on the Next button. 12. Click on the Finish button when it appears. This will start the installation process for the
MDAC 2.8 files. 13. After the MDAC 2.8 installation is complete, reboot your computer and continue to use
your 3D Embroidery System. 14. If you are still having difficulties, use the Database Driver Fix that follows. Database Driver Fix 1. Insert the 3D Embroidery System CD. 2. Cancel the installation screen if it appears. 3. Use Windows® Explorer to browse to the D:\Technical folder – where D:\ is the name of
your CD or DVD drive. 4. Double click on the Database Drivers folder. 5. Double click on the MSAccessDbFixer file (this may be shown with a .exe extension). A
window will appear briefly on the screen. 6. Continue to use your 3D Embroidery System.
Using MyThreads
B610 How are MyThreads colors used in 3D Embroidery System Files?The 3D Embroidery System will display threads in a file in the same way on any computer where it is installed. That is, the colors used will be the same even if they are reproduced slightly differently on different monitors. You can print a worksheet to see the colors and color names used in a particular design. This is true, even if you do not have all the threads in a design defined in the Standard or MyThreads databases on your computer. This is because 3D Embroidery System designs have complete information for each of the threads it uses. Any of the following file types is a 'design' that has full 3D Embroidery System thread definitions: • Husqvarna Viking/Pfaff .vp3 embroidery file • 3D Digitizing .can design outline file
FAQ Lists for Husqvarna Viking 3D Software Page 257

• 3D Cross Stitcher .krz design file • Font .nft file • Shapes .nsp file Only Husqvarna Viking/Pfaff .vp3 embroidery files can be used to import custom thread definitions into your MyThreads database. Each thread used in a design will fall into one of the following categories: • A thread you have added to MyThreads from the Standard Thread Database and which
you have not changed. This will apply to most of your colors if you have used MyThreads to catalogue your thread collection.
• A thread from the Standard Thread Database. • A thread which you formerly added to MyThreads from the Standard Thread Database,
used in some designs and then deleted from MyThreads. • A custom thread that has been added to MyThreads. You could have added this yourself
or added it to MyThreads from a design from somebody else. • A thread from the Standard Thread Database that is not on your own Standard Thread
Database because your database is out of date. • A custom thread defined in the file that does not appear in the your MyThreads
database. The availability of threads in the Standard Thread Database and MyThreads will only affect parts of the 3D Embroidery System where you can change colors, as follows: • Editing modules: 3D Embroidery, 3D Vision and 3D Stitch Editor • Design modules: 3D Digitizing, 3D Cross Stitcher, 3D Font Digitizing, 3D QuickFont See the following for some situations you may encounter according to the availability of thread definitions, as categorized above: • FAQ #B611 (I have a vp3 embroidery from another user that uses a custom thread
definition they designed in MyThreads.) • FAQ #B612 (I have a design with MyThreads colors that are unmodified copies from the
Standard Thread Database, but they are not in my MyThreads list.) • FAQ #B613 (I have a design with custom colors that have been deleted from
MyThreads.) • FAQ #B614 (I have a .can or .krz design from another user that uses a custom thread
definition they designed in MyThreads.) • FAQ #B615 (I have a design from another user that uses threads from the Standard
Thread Database that I do not have.
B611 I have a vp3 embroidery from another user that uses a custom thread definition they designed in MyThreads
If you attempt to change the color, a message will appear to indicate that the thread is not found in MyThreads, and the nearest MyThreads match will be selected. If you wish to keep the thread color, click Cancel in the Color Selection dialog box, then use Import Threads From Embroidery in Thread Manager to load the custom thread definition. Otherwise, select a replacement thread.
B612 I have a design with MyThreads colors that are unmodified copies from the Standard Thread Database, but they are not in my MyThreads list
FAQ Lists for Husqvarna Viking 3D Software Page 258

If you open a file that has colors from MyThreads that are unmodified copies of standard threads, but do not exist as copies in your MyThreads list, the color will be identified and selected in the original thread range when you click the color to change it.
B613 I have a design with custom colors that have been deleted from MyThreadsIf you attempt to change the color, a message will appear to indicate that the thread is not found in MyThreads, and the nearest MyThreads match will be selected. If you wish to keep the thread color, click Cancel in the Color Selection dialog box, then use Import Threads From Embroidery in Thread Manager to load the custom thread definition. Otherwise, select a replacement thread.
B614 I have a .can or .krz design from another user that uses a custom thread definition they designed in MyThreads
If you wish to add the custom MyThreads to your own MyThreads, create a .vp3 embroidery from the design, then use Import Threads From Embroidery in Thread Manager to load the custom thread definition.
B615 I have a design from another user that uses threads from the Standard Thread Database that I do not have
You may not use Import Threads From Embroidery to add these threads to either your Standard Thread Database or MyThreads. Use Smart Update to find and download the latest thread database, which you can then install.
Using Thread Manager
B601 "The thread ABCDE-9999 already exists in MyThreads database. Do you want to overwrite it?"
This message will appear when you copy a thread from a standard thread range to MyThreads, and the thread has already been copied.
B602 "The Thread Number already exists. The Thread Number field will be set to a unique value. Please re-edit."
This message will appear if you enter a Thread Number that already exists in MyThreads, when adding or editing custom MyThreads. Click OK, and an underline and number will be added to the end of the Thread Number to make it unique. If desired, click in the Thread Number box and re-edit it.
B603 "This action is permanent and may not be reversed. Do you wish to continue?"
This message will appear when you try to delete a thread definition from MyThreads. If you wish to go ahead and delete the thread, click Yes. Otherwise click No.
B604 Error "Thread range is corrupt or missing. Cannot start module. Reinstall the thread database."
This message usually means that the database driver is incorrectly installed. First follow the instructions in FAQ #G010 to fix this.
FAQ Lists for Husqvarna Viking 3D Software Page 259

If the message still appears, use the following procedure to repair the installation: 1. Right-click the Start button on the taskbar and select Explore from the popup menu. 2. In Explorer, browse to the folder C:\3DEmbroidery\System.
This assumes you have installed your 3D Embroidery System software in the default location of C:\3DEmbroidery. If you have installed the software in a different location, browse to the System folder at that location.
3. Delete the files named "MyThreads.mdb" and "ThreadDataBase.mdb". The file names may simply be shown as "MyThreads" and "ThreadDataBase".
4. Put your 3D Embroidery System software CD in your computer to re-run the installation. The installation should start automatically when you put your software CD in the computer. If this does not happen, browse to the CD with Explorer and double-click "Setup.exe" to start the installation.
5. When the choice appears, select the "Modify or remove" option and click Next. 6. In the next screen, select Repair and click Next. 7. Continue with the installation and follow the on-screen instructions. When the installation
is complete, the MyThreads and standard thread databases will be restored to their original installation state.
If you had previously backed up your MyThreads database, you can now use the Restore option in Thread Manager to restore your MyThreads database. See the on-line help in Thread Manager for more information.
B605 "Import has detected some new thread ranges. Please go to the VSM Software website to download these."
This message may appear when you use the Import Threads From Embroidery function. This indicates that the embroidery contains standard threads from a later version of the database that you have installed. Use Smart Update to obtain the latest version of the standard thread database.
B606 "Could not back up to the selected path."This message may appear if you attempt to back up your MyThreads database to a folder that is read only (for instance, if you try to back up directly to a CD) or if you are attempting to overwrite an existing file that is read only. Choose a different location or a different backup name.
B607 "Warning! Restoring your MyThreads database will result in loss of all changes. Continue?"
This message appears when you restore a previously backed up copy of your MyThreads database. This message is to inform you that all the threads in the current MyThreads database will be replaced with the restored threads. This action cannot be undone. If you are unsure about continuing, click No, make a new backup of the current MyThreads database and ensure a different name is used for the backup, then start the restore process again.
B608 "There was an error while restoring your database. Please ensure that all 3D system programs are closed and try again."
This message will appear when you try to restore a previously backed up copy of your MyThreads database if there are 3D Embroidery System modules that are using the current MyThreads database. Close all other 3D Embroidery System modules and try again. If the message still appears, restart your computer and try again.
FAQ Lists for Husqvarna Viking 3D Software Page 260

B609 "You must enter something inside the Thread Number field."This message will appear when you try to save a new or edited thread if the Thread Number is blank. The Thread Number may not be blank. Enter a Thread Number and click OK.
B610 How are MyThreads colors used in 3D Embroidery System Files?The 3D Embroidery System will display threads in a file in the same way on any computer where it is installed. That is, the colors used will be the same even if they are reproduced slightly differently on different monitors. You can print a worksheet to see the colors and color names used in a particular design. This is true, even if you do not have all the threads in a design defined in the Standard or MyThreads databases on your computer. This is because 3D Embroidery System designs have complete information for each of the threads it uses. Any of the following file types is a 'design' that has full 3D Embroidery System thread definitions: • Husqvarna Viking/Pfaff .vp3 embroidery file • 3D Digitizing .can design outline file • 3D Cross Stitcher .krz design file • Font .nft file • Shapes .nsp file Only Husqvarna Viking/Pfaff .vp3 embroidery files can be used to import custom thread definitions into your MyThreads database. Each thread used in a design will fall into one of the following categories: • A thread you have added to MyThreads from the Standard Thread Database and which
you have not changed. This will apply to most of your colors if you have used MyThreads to catalogue your thread collection.
• A thread from the Standard Thread Database. • A thread which you formerly added to MyThreads from the Standard Thread Database,
used in some designs and then deleted from MyThreads. • A custom thread that has been added to MyThreads. You could have added this yourself
or added it to MyThreads from a design from somebody else. • A thread from the Standard Thread Database that is not on your own Standard Thread
Database because your database is out of date. • A custom thread defined in the file that does not appear in the your MyThreads
database. The availability of threads in the Standard Thread Database and MyThreads will only affect parts of the 3D Embroidery System where you can change colors, as follows: • Editing modules: 3D Embroidery, 3D Vision and 3D Stitch Editor • Design modules: 3D Digitizing, 3D Cross Stitcher, 3D Font Digitizing, 3D QuickFont See the following for some situations you may encounter according to the availability of thread definitions, as categorized above: • FAQ #B611 (I have a vp3 embroidery from another user that uses a custom thread
definition they designed in MyThreads.) • FAQ #B612 (I have a design with MyThreads colors that are unmodified copies from the
Standard Thread Database, but they are not in my MyThreads list.) • FAQ #B613 (I have a design with custom colors that have been deleted from
MyThreads.)
FAQ Lists for Husqvarna Viking 3D Software Page 261

• FAQ #B614 (I have a .can or .krz design from another user that uses a custom thread definition they designed in MyThreads.)
• FAQ #B615 (I have a design from another user that uses threads from the Standard Thread Database that I do not have.
B611 I have a vp3 embroidery from another user that uses a custom thread definition they designed in MyThreads
If you attempt to change the color, a message will appear to indicate that the thread is not found in MyThreads, and the nearest MyThreads match will be selected. If you wish to keep the thread color, click Cancel in the Color Selection dialog box, then use Import Threads From Embroidery in Thread Manager to load the custom thread definition. Otherwise, select a replacement thread.
B612 I have a design with MyThreads colors that are unmodified copies from the Standard Thread Database, but they are not in my MyThreads list
If you open a file that has colors from MyThreads that are unmodified copies of standard threads, but do not exist as copies in your MyThreads list, the color will be identified and selected in the original thread range when you click the color to change it.
B613 I have a design with custom colors that have been deleted from MyThreadsIf you attempt to change the color, a message will appear to indicate that the thread is not found in MyThreads, and the nearest MyThreads match will be selected. If you wish to keep the thread color, click Cancel in the Color Selection dialog box, then use Import Threads From Embroidery in Thread Manager to load the custom thread definition. Otherwise, select a replacement thread.
B614 I have a .can or .krz design from another user that uses a custom thread definition they designed in MyThreads
If you wish to add the custom MyThreads to your own MyThreads, create a .vp3 embroidery from the design, then use Import Threads From Embroidery in Thread Manager to load the custom thread definition.
B615 I have a design from another user that uses threads from the Standard Thread Database that I do not have
You may not use Import Threads From Embroidery to add these threads to either your Standard Thread Database or MyThreads. Use Smart Update to find and download the latest thread database, which you can then install.
B616 Nothing happens when I click Thread Manager in 3D Configure.This can happen when you are using version 7.0 of the 3D Embroidery System and you install Service Pack 2 for Windows XP. Use Smart Update to update your 3D Embroidery System to version 7.05 or later. If you are unable to use Smart Update via the Internet, ask your dealer to help you update your 3D Embroidery System.
FAQ Lists for Husqvarna Viking 3D Software Page 262

B617 The Yli thread ranges are no longer available in Color Selection or Thread Manager.
This can happen when you install the 3D Embroidery System 7.2 Update. Use Smart Update to obtain the latest Thread Database Update. If a Security Warning appears, click Run to go ahead and run the update program. To install the update when the WinZip Self-Extractor appears, click the Unzip button, then click OK, then click Close.
G010 How do I fix the database driver used by my 3D Embroidery System software?
Database drivers are normally found installed on most computers – they are commonly installed as part of the installation of Microsoft® Office or as an upgrade of key components of the operating system. Key components of the 3D Embroidery System need to be able to use these drivers. Therefore, any difficulties in using these drivers may affect the functionality of certain features of the 3D Embroidery System. Examples include changing a thread color in any module and/or Motif Fill/Line properties in 3D Digitizing. If you have Windows® XP with Service Pack 2 installed, use the Database Driver Fix described below. Otherwise, install the drivers manually as follows: Installation of the Database files 1. Insert the 3D Embroidery System CD. 2. Cancel the installation screen if it appears. 3. Use Windows® Explorer to browse to the D:\Technical folder – where D:\ is the name of
your CD or DVD drive. 4. Double click on the Database Drivers folder. 5. Double click on the Jet 4 folder. 6. Double click on the folder that is for your operating system. 7. Double click on the file to start the installation of the Jet 4 Service Pack 8 files. This
should take a few moments for the files to be installed. 8. After the installation is complete, browse to the D:\Technical\Database Drivers\MDAC 2.8
folder. 9. Double click on the MDAC_TYP.exe file. The Microsoft Data Access Components 2.8
Setup dialog box will appear. 10. Select the option “I accept all the terms of the preceding license agreement”. 11. Click on the Next button. 12. Click on the Finish button when it appears. This will start the installation process for the
MDAC 2.8 files. 13. After the MDAC 2.8 installation is complete, reboot your computer and continue to use
your 3D Embroidery System. 14. If you are still having difficulties, use the Database Driver Fix that follows. Database Driver Fix 1. Insert the 3D Embroidery System CD. 2. Cancel the installation screen if it appears. 3. Use Windows® Explorer to browse to the D:\Technical folder – where D:\ is the name of
your CD or DVD drive. 4. Double click on the Database Drivers folder. 5. Double click on the MSAccessDbFixer file (this may be shown with a .exe extension). A
window will appear briefly on the screen. 6. Continue to use your 3D Embroidery System.
FAQ Lists for Husqvarna Viking 3D Software Page 263

3D Font Digitizing Listed versions: 7.0; 7.1; 7.2; 7.25
Background Picture
F015 Why do I need to save an imported picture?When a new picture is loaded, you will probably need to move and resize it. You should save the picture so that you can then reload the picture without having to remember the exact changes you made.
F016 Why does my picture keep disappearing?The picture under the current character or shape is not stored as part of the font or shapes file. It is removed when you do one of the following: • Select a new character or shape to work with • Load a font • Create a new font Hence, if you select a different character or shape, then go back to the one where you loaded the picture, the picture will no longer be in the background. If a new font or character has been selected and Use For Background Picture is checked, a different font character will appear. Reload the previously saved picture.
F017 I only want to work on a small part of a picture, but I can’t make the desired part of the picture big enough. How can I do this?
To digitize over a small part of an existing picture, load the picture into 3D Digitizing, select and copy the desired area of the picture, return back to 3D Font Digitizing and click the Paste Picture icon.
F018 I wish to use a TrueType character as the background picture for a shape, but there is no way to select one when digitizing a shapes set.
This feature is only available when designing fonts. If you wish to have a TrueType® character as the background for a shape (for instance, a character from a symbol font), do one of the following: • Open a font. In the Select Character dialog, select the Use For Background Picture
option. Select the desired font and character and click OK. Resize the picture of the character, then use Save Picture to save the resized picture of the character. Reopen the shapes set, select the desired shape, then use Load Picture to load the picture of the character.
• Create a picture of the desired character in another module, copy the picture and then use Paste Picture to place it in the background for your shape. For instance, use the Text function on the Picture page of 3D Digitizing to make your picture. This is useful if the desired character does not appear in the Select Character dialog, which may happen with symbol fonts.
F019 I am saving pictures for the characters or shapes I am digitizing, but I am worried that they are taking up a lot of space on my computer
FAQ Lists for Husqvarna Viking 3D Software Page 264

If you save pictures for all 224 possible characters in a font, you could use up to 10Mb of hard disk space, using only pictures generated from TrueType® font characters. This is acceptable, given the storage capacity of modern computers.
Changing Preferences
F009 "Stitch object property settings have been changed. New values will be applied to all existing characters/shapes."
This message appears when you are working with a uniform font or shapes set and you change any of the Stitches or Patterns Preferences. This message warns you that the changes you have made will be applied to all relevant object types in the font or shapes set.
F010 "For Uniform Properties Fonts, if a new color is chosen as default thread color, all existing characters will be updated using this new color. Continue?"
This message appears when you are working with a uniform font or shapes set and you attempt to change the Default Thread Color in Font Preferences. This message warns you that the color will be changed in all characters in the font.
F011 "Uniform properties will be applied, therefore individual Fill and Satin settings will be replaced by uniform values."
This message will appear if you check the Uniform Properties option in Font Preferences. This is to warn you that the current settings in Stitches and Patterns Preferences will be applied to all objects in the font or shapes set, as it could take some time.
F012 "Uniform properties will be disabled, therefore Fill and Satin settings will not be able to change in 3D Embroidery."
This message will appear if you uncheck the Uniform Properties option in Font Preferences. This is to warn you that the font or shapes set will no longer allow you to change its properties when it is used in 3D Embroidery.
Control Points, Gap and Kerning
F022 Some of the letters in my font overlap each other when I use it in 3D Embroidery
Control points are the points you place to digitize an object. Jump and Single Stitches have two control points (one at each end), Straight Satin has four control points and Curved Satin has eight control points. The gap (or tracking) between characters is a standard distance between each character, measured using the control points. Occasionally, characters might overlap because there are not enough control points. Similarly, automatic kerning is used in 3D Embroidery to improve the appearance of text by moving certain pairs of characters closer together. There must be enough control points to ensure that the character pairs do not overlap each other. Such issues may be found in a very plain font using only a few satin columns or very simple fill areas. Ensure there are plenty of control points by putting down underlay stitches first.
FAQ Lists for Husqvarna Viking 3D Software Page 265

Digitizing Characters and Shapes
F006 Error message "Letter 'A' (number 65) needs to be created first."This message will appear if you try to select any character other than A (ASCII number 65) for digitizing when A has not yet been digitized.
F007 Error message "Please select a character in the range of (032)-(255)."This message will appear if you enter a number lower than 32 or higher than 255 in the Character number box in the Select Character dialog, and then click Select. You may only use numbers from 032 to 255.
F008 Error message "Please exit Insert Mode to complete the character/shape first before closing current file."
This message will appear if you have activated Insert mode for inserting objects part way through a character, and you then attempt to use a file managing operation such as New, Open or Close. You must turn off Insert mode first.
Editing Object Properties
F020 I am trying to change colors by right-clicking color commands but nothing happens
The font or shapes set has uniform properties, therefore you may not change the properties of any stitch objects. To change the first color of all characters in a uniform properties font or shapes set, change the Default Thread Color in Font Preferences. To change subsequent colors, do one of the following: • Select the Color Change command, remove it with Delete Object, then use Insert Object
to place a new Color Change command with the desired color. or
• Uncheck Uniform Properties in Font Preferences, select the Color Change command, right-click it to change the color as desired, then go back to Font Preferences and check Uniform Properties.
F021 I wish to change the pattern on a fill area, but nothing happens when I right-click with the fill area selected
The font or shapes set has uniform properties, therefore you may not change the properties of individual fill areas. You have the choice of one of the following: • Change the Fill Pattern in Patterns Preferences. This will change the pattern used by all
fill areas in the font or shapes set. or
• Uncheck Uniform Properties in Font Preferences, then right-click the fill area to change its pattern. If you want to have fill areas with differing properties, you must leave the font or shapes set as non-uniform.
Error Messages
B618 Error: "Please select a valid thread."
FAQ Lists for Husqvarna Viking 3D Software Page 266

This message appears if you attempt to click OK in the Color Selection dialog box when MyThreads is selected as the thread range and MyThreads is empty. To prevent this message appearing again, use Thread Manager in 3D Configure to add at least one thread to MyThreads.
G007 Error "Thread range is corrupt or missing. Cannot change thread. Reinstall the thread database."
This message usually means that the database driver is incorrectly installed. First follow the instructions in FAQ #G010 to fix this. If the message still appears, use the following procedure to repair the installation: 1. Right-click the Start button on the taskbar and select Explore from the popup menu. 2. In Explorer, browse to the folder C:\3DEmbroidery\System.
This assumes you have installed your 3D Embroidery System software in the default location of C:\3DEmbroidery. If you have installed the software in a different location, browse to the System folder at that location.
3. Delete the files named "MyThreads.mdb" and "ThreadDataBase.mdb". The file names may simply be shown as "MyThreads" and "ThreadDataBase".
4. Put your 3D Embroidery System software CD in your computer to re-run the installation. The installation should start automatically when you put your software CD in the computer. If this does not happen, browse to the CD with Explorer and double-click "Setup.exe" to start the installation.
5. When the choice appears, select the "Modify or remove" option and click Next. 6. In the next screen, select Repair and click Next. 7. Continue with the installation and follow the on-screen instructions. When the installation
is complete, the MyThreads and standard thread databases will be restored to their original installation state.
If you had previously backed up your MyThreads database, you can now use the Restore option in Thread Manager to restore your MyThreads database. See the on-line help in Thread Manager for more information.
G009 Error "Unable to locate Myfills.mdb."This message usually means that the database driver is incorrectly installed. First follow the instructions in FAQ #G010 to fix this. If the message still appears and you had previously backed up your MyFills, use the Restore MyFills option in 3D Digitizing to restore your MyFills database. See the on-line help in 3D Digitizing for more information. If the message still appears, use the following procedure to repair the installation: 1. Right-click the Start button on the taskbar and select Explore from the popup menu. 2. In Explorer, browse to the folder C:\3DEmbroidery\System.
This assumes you have installed your 3D Embroidery System software in the default location of C:\3DEmbroidery. If you have installed the software in a different location, browse to the System folder at that location.
3. Delete the file named "MyFills.mdb". The file name may simply be shown as "MyFills".
4. Put your 3D Embroidery System software CD in your computer to re-run the installation. The installation should start automatically when you put your software CD in the computer. If this does not happen, browse to the CD with Explorer and double-click "Setup.exe" to start the installation.
5. When the choice appears, select the "Modify or remove" option and click Next.
FAQ Lists for Husqvarna Viking 3D Software Page 267

6. In the next screen, select Repair and click Next. 7. Continue with the installation and follow the on-screen instructions. When the installation is complete, the MyFills database will be restored to its original installation state. This means that the MyFills database will be empty. If you had any MyFills, you will need to import them again.
G010 How do I fix the database driver used by my 3D Embroidery System software?
Database drivers are normally found installed on most computers – they are commonly installed as part of the installation of Microsoft® Office or as an upgrade of key components of the operating system. Key components of the 3D Embroidery System need to be able to use these drivers. Therefore, any difficulties in using these drivers may affect the functionality of certain features of the 3D Embroidery System. Examples include changing a thread color in any module and/or Motif Fill/Line properties in 3D Digitizing. If you have Windows® XP with Service Pack 2 installed, use the Database Driver Fix described below. Otherwise, install the drivers manually as follows: Installation of the Database files 1. Insert the 3D Embroidery System CD. 2. Cancel the installation screen if it appears. 3. Use Windows® Explorer to browse to the D:\Technical folder – where D:\ is the name of
your CD or DVD drive. 4. Double click on the Database Drivers folder. 5. Double click on the Jet 4 folder. 6. Double click on the folder that is for your operating system. 7. Double click on the file to start the installation of the Jet 4 Service Pack 8 files. This
should take a few moments for the files to be installed. 8. After the installation is complete, browse to the D:\Technical\Database Drivers\MDAC 2.8
folder. 9. Double click on the MDAC_TYP.exe file. The Microsoft Data Access Components 2.8
Setup dialog box will appear. 10. Select the option “I accept all the terms of the preceding license agreement”. 11. Click on the Next button. 12. Click on the Finish button when it appears. This will start the installation process for the
MDAC 2.8 files. 13. After the MDAC 2.8 installation is complete, reboot your computer and continue to use
your 3D Embroidery System. 14. If you are still having difficulties, use the Database Driver Fix that follows. Database Driver Fix 1. Insert the 3D Embroidery System CD. 2. Cancel the installation screen if it appears. 3. Use Windows® Explorer to browse to the D:\Technical folder – where D:\ is the name of
your CD or DVD drive. 4. Double click on the Database Drivers folder. 5. Double click on the MSAccessDbFixer file (this may be shown with a .exe extension). A
window will appear briefly on the screen. 6. Continue to use your 3D Embroidery System.
FAQ Lists for Husqvarna Viking 3D Software Page 268

Fill Areas using MyFills
G009 Error "Unable to locate Myfills.mdb."This message usually means that the database driver is incorrectly installed. First follow the instructions in FAQ #G010 to fix this. If the message still appears and you had previously backed up your MyFills, use the Restore MyFills option in 3D Digitizing to restore your MyFills database. See the on-line help in 3D Digitizing for more information. If the message still appears, use the following procedure to repair the installation: 1. Right-click the Start button on the taskbar and select Explore from the popup menu. 2. In Explorer, browse to the folder C:\3DEmbroidery\System.
This assumes you have installed your 3D Embroidery System software in the default location of C:\3DEmbroidery. If you have installed the software in a different location, browse to the System folder at that location.
3. Delete the file named "MyFills.mdb". The file name may simply be shown as "MyFills".
4. Put your 3D Embroidery System software CD in your computer to re-run the installation. The installation should start automatically when you put your software CD in the computer. If this does not happen, browse to the CD with Explorer and double-click "Setup.exe" to start the installation.
5. When the choice appears, select the "Modify or remove" option and click Next. 6. In the next screen, select Repair and click Next. 7. Continue with the installation and follow the on-screen instructions. When the installation is complete, the MyFills database will be restored to its original installation state. This means that the MyFills database will be empty. If you had any MyFills, you will need to import them again.
Fonts
F023 How do I check a Nearest Point Font?After you have created a nearest point font, you should check through it to ensure that all the required characters are present in four versions and have the correctly defined start and end points. Check that all Nearest Point characters are correctly digitized 1. Open the desired font. 2. In the Select Character dialog, select the character you digitized that is first in the
character set. This is so you start at the beginning and work through the characters in order. The character will be displayed, and the Bottom Left To Bottom Right character version is selected automatically.
3. Check that the character start point is at the bottom left of the character. The first object in a character is a Color Change, so this should be easy to identify.
4. Check that the end of the character is at the bottom right, as indicated by the Create Cursor.
5. If the start and end points of the character area in the wrong place, edit the character until the points are positioned correctly.
6. Inspect the Nearest Point indicators on the Status Bar. The first one will be green, and the remaining three should be blue. If any of them are not blue, you have missed digitizing that character version. Go to the relevant character version and digitize it.
7. Click the drop-down arrow next to the Nearest Point icon, and select the Top Left To Top Right icon. The second indicator on the status bar will turn green.
FAQ Lists for Husqvarna Viking 3D Software Page 269

8. Check the start and end points are at the top left and top right respectively. 9. If the start and end points of the character area in the wrong place, edit the character
until the points are positioned correctly. 10. Click the drop-down arrow next to the Nearest Point icon, and select the Top Left To
Bottom Right icon. The third indicator on the status bar will turn green. 11. Check the start and end points are at the top left and bottom right respectively. 12. If the start and end points of the character area in the wrong place, edit the character
until the points are positioned correctly. 13. Click the drop-down arrow next to the Nearest Point icon, and select the Bottom Left To
Top Right icon. The fourth indicator on the status bar will turn green. 14. Check the start and end points are at the bottom left and top right respectively. 15. If the start and end points of the character are in the wrong place, edit the character until
the points are positioned correctly. 16. Use Select Character to select the next character you have digitized, and repeat the
checking process.
Loading Pictures
F013 Error message "Could not load picture file."This message could appear if the desired picture file is not where the module expects it to be, for example if it was loaded from a floppy disk, then closed and the floppy disk removed. The message would appear if you try to load the picture from the Recent Files list on the File menu. It could also appear if the file you are attempting to load is corrupt. For example, it might have an extension such as .bmp or .jpg, yet not be a proper picture file.
Managing Font and Shapes Files
F001 Error message "Unable to create folder on disk to store font."This message may appear if the MyFonts folder has been moved or deleted and you attempt to start 3D Font Digitizing without opening a font or shapes set. In Windows® Explorer, go to C:\3DEmbroidery\System\Fonts and create a new MyFonts folder, then try again.
F002 "Font file exists, overwrite? (If No, try to open existing font file)"This message will appear if you try to make a new font or shapes set and the name you wish to use is already in use. If you click Yes, the existing font or shapes set will be replaced by an empty file.
F003 Error message "Cannot create Font file."This message may appear for the following reasons: • The category folder where you are trying to create the font or shapes set does not exist.
For instance, the folder has been moved or deleted. • You do not have access rights on the computer to create a new font or shapes set in the
relevant folder. This may happen if, for instance, the computer administrator installed the 3D Embroidery System, but you are logged in as a user that does not have full administrative rights.
F004 Error message "Cannot open Font file."
FAQ Lists for Husqvarna Viking 3D Software Page 270

This message may appear when you try to open a file that has been deleted or renamed; for instance, if you try to open such a file from the Recent Files list. This message will also appear if the desired font or shapes file is already open in 3D Embroidery.
F005 Error message "Font file is corrupt."This message may appear if you try to open a font or shapes file that has become corrupted, or if you attempt to open a file with the correct file extension that is not a proper font or shapes file. A file may become corrupt if your computer shuts down while you have the font or shapes set open in 3D Font Digitizing.
Screen Appearance
F014 Some of the icons in the toolbar are 'grayed out'All Edit toolbar icons, except for Select Character and Preferences, are only highlighted once there are stitch objects on the screen.
G414 I have changed grid color and now I wish to return to the original colorUse 3D Configure to change the grid color. Follow the instructions in 3D Configure and select Blue Gray (RGB values 102, 102, 153) from the standard color drop-down on the Grid Color button. Use Screen Preferences to change the grid spacing.
G415 I have changed the screen background color and now I wish to return to the original light blue
Use 3D Configure to change the background color. Follow the instructions in 3D Configure and select the RGB values 200, 232, 247 in the Colors dialog box.
G416 I wish to change the background color for the work areaUse 3D Configure to alter the background color for the work area. 3D Configure may also be used to turn the texture on or off for modules that use texture.
G417 I wish to change the background color for the work area and the Real Size window
Use 3D Configure to alter the background color for the work area and Real Size. 3D Configure may also be used to turn the texture on or off.
G418 I can't see some of the floating toolbars or iconsFirst, check View, Customize to see if the missing toolbar has been turned off. If all the toolbar names are checked (so they are turned on) and you still cannot locate a toolbar, it may have been moved to the edge of the screen so it is hard to see. If you move icons around it is possible to delete them. To reset the icons on a toolbar 1. Click View, Customize to see the Customize dialog. 2. Click the Toolbar tab. 3. Click the name of the required toolbar.
FAQ Lists for Husqvarna Viking 3D Software Page 271

4. Click Reset. 5. Click Yes to confirm. The selection of icons on the toolbar and their order will be reset.
Thread Colors
B618 Error: "Please select a valid thread."This message appears if you attempt to click OK in the Color Selection dialog box when MyThreads is selected as the thread range and MyThreads is empty. To prevent this message appearing again, use Thread Manager in 3D Configure to add at least one thread to MyThreads.
G007 Error "Thread range is corrupt or missing. Cannot change thread. Reinstall the thread database."
This message usually means that the database driver is incorrectly installed. First follow the instructions in FAQ #G010 to fix this. If the message still appears, use the following procedure to repair the installation: 1. Right-click the Start button on the taskbar and select Explore from the popup menu. 2. In Explorer, browse to the folder C:\3DEmbroidery\System.
This assumes you have installed your 3D Embroidery System software in the default location of C:\3DEmbroidery. If you have installed the software in a different location, browse to the System folder at that location.
3. Delete the files named "MyThreads.mdb" and "ThreadDataBase.mdb". The file names may simply be shown as "MyThreads" and "ThreadDataBase".
4. Put your 3D Embroidery System software CD in your computer to re-run the installation. The installation should start automatically when you put your software CD in the computer. If this does not happen, browse to the CD with Explorer and double-click "Setup.exe" to start the installation.
5. When the choice appears, select the "Modify or remove" option and click Next. 6. In the next screen, select Repair and click Next. 7. Continue with the installation and follow the on-screen instructions. When the installation
is complete, the MyThreads and standard thread databases will be restored to their original installation state.
If you had previously backed up your MyThreads database, you can now use the Restore option in Thread Manager to restore your MyThreads database. See the on-line help in Thread Manager for more information.
G010 How do I fix the database driver used by my 3D Embroidery System software?
Database drivers are normally found installed on most computers – they are commonly installed as part of the installation of Microsoft® Office or as an upgrade of key components of the operating system. Key components of the 3D Embroidery System need to be able to use these drivers. Therefore, any difficulties in using these drivers may affect the functionality of certain features of the 3D Embroidery System. Examples include changing a thread color in any module and/or Motif Fill/Line properties in 3D Digitizing. If you have Windows® XP with Service Pack 2 installed, use the Database Driver Fix described below. Otherwise, install the drivers manually as follows: Installation of the Database files
FAQ Lists for Husqvarna Viking 3D Software Page 272

1. Insert the 3D Embroidery System CD. 2. Cancel the installation screen if it appears. 3. Use Windows® Explorer to browse to the D:\Technical folder – where D:\ is the name of
your CD or DVD drive. 4. Double click on the Database Drivers folder. 5. Double click on the Jet 4 folder. 6. Double click on the folder that is for your operating system. 7. Double click on the file to start the installation of the Jet 4 Service Pack 8 files. This
should take a few moments for the files to be installed. 8. After the installation is complete, browse to the D:\Technical\Database Drivers\MDAC 2.8
folder. 9. Double click on the MDAC_TYP.exe file. The Microsoft Data Access Components 2.8
Setup dialog box will appear. 10. Select the option “I accept all the terms of the preceding license agreement”. 11. Click on the Next button. 12. Click on the Finish button when it appears. This will start the installation process for the
MDAC 2.8 files. 13. After the MDAC 2.8 installation is complete, reboot your computer and continue to use
your 3D Embroidery System. 14. If you are still having difficulties, use the Database Driver Fix that follows. Database Driver Fix 1. Insert the 3D Embroidery System CD. 2. Cancel the installation screen if it appears. 3. Use Windows® Explorer to browse to the D:\Technical folder – where D:\ is the name of
your CD or DVD drive. 4. Double click on the Database Drivers folder. 5. Double click on the MSAccessDbFixer file (this may be shown with a .exe extension). A
window will appear briefly on the screen. 6. Continue to use your 3D Embroidery System.
Using Pictures
F015 Why do I need to save an imported picture?When a new picture is loaded, you will probably need to move and resize it. You should save the picture so that you can then reload the picture without having to remember the exact changes you made.
F016 Why does my picture keep disappearing?The picture under the current character or shape is not stored as part of the font or shapes file. It is removed when you do one of the following: • Select a new character or shape to work with • Load a font • Create a new font Hence, if you select a different character or shape, then go back to the one where you loaded the picture, the picture will no longer be in the background. If a new font or character has been selected and Use For Background Picture is checked, a different font character will appear. Reload the previously saved picture.
FAQ Lists for Husqvarna Viking 3D Software Page 273
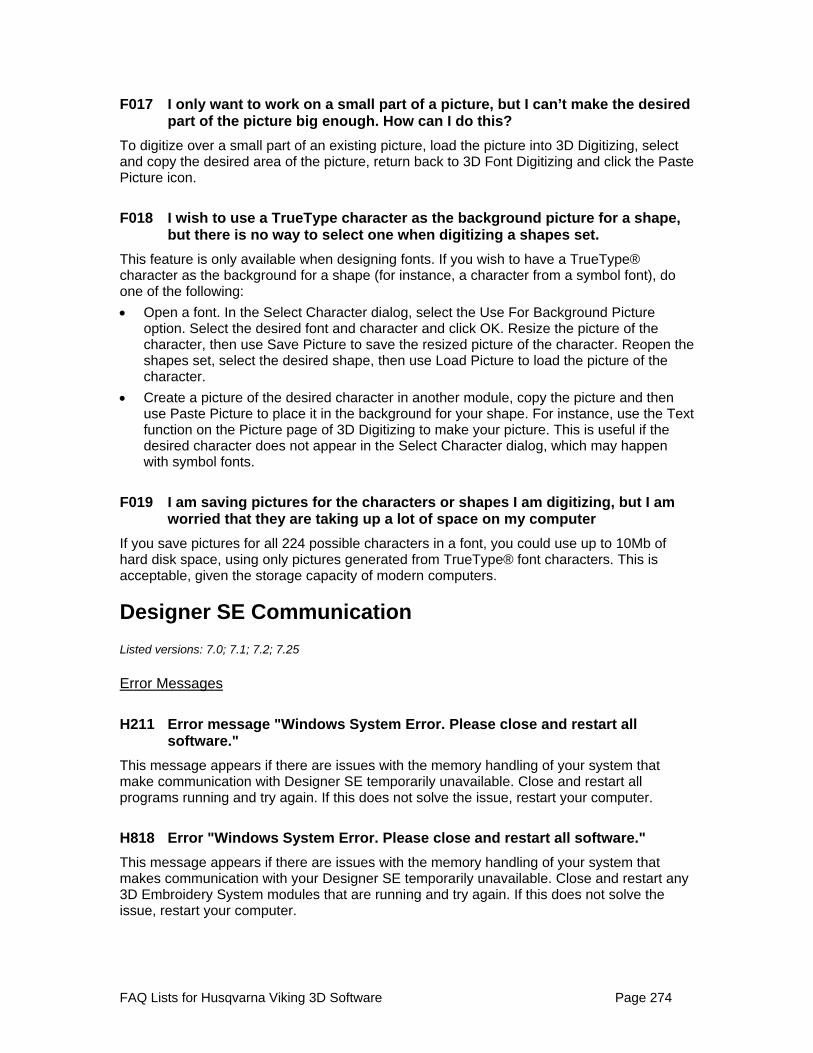
F017 I only want to work on a small part of a picture, but I can’t make the desired part of the picture big enough. How can I do this?
To digitize over a small part of an existing picture, load the picture into 3D Digitizing, select and copy the desired area of the picture, return back to 3D Font Digitizing and click the Paste Picture icon.
F018 I wish to use a TrueType character as the background picture for a shape, but there is no way to select one when digitizing a shapes set.
This feature is only available when designing fonts. If you wish to have a TrueType® character as the background for a shape (for instance, a character from a symbol font), do one of the following: • Open a font. In the Select Character dialog, select the Use For Background Picture
option. Select the desired font and character and click OK. Resize the picture of the character, then use Save Picture to save the resized picture of the character. Reopen the shapes set, select the desired shape, then use Load Picture to load the picture of the character.
• Create a picture of the desired character in another module, copy the picture and then use Paste Picture to place it in the background for your shape. For instance, use the Text function on the Picture page of 3D Digitizing to make your picture. This is useful if the desired character does not appear in the Select Character dialog, which may happen with symbol fonts.
F019 I am saving pictures for the characters or shapes I am digitizing, but I am worried that they are taking up a lot of space on my computer
If you save pictures for all 224 possible characters in a font, you could use up to 10Mb of hard disk space, using only pictures generated from TrueType® font characters. This is acceptable, given the storage capacity of modern computers.
Designer SE Communication Listed versions: 7.0; 7.1; 7.2; 7.25
Error Messages
H211 Error message "Windows System Error. Please close and restart all software."
This message appears if there are issues with the memory handling of your system that make communication with Designer SE temporarily unavailable. Close and restart all programs running and try again. If this does not solve the issue, restart your computer.
H818 Error "Windows System Error. Please close and restart all software."This message appears if there are issues with the memory handling of your system that makes communication with your Designer SE temporarily unavailable. Close and restart any 3D Embroidery System modules that are running and try again. If this does not solve the issue, restart your computer.
FAQ Lists for Husqvarna Viking 3D Software Page 274

Fonts
H212 My Designer SE is not connected to my computer. How do I transfer a font to my Designer SE?
Use a USB Embroidery Stick to transfer the .vf3 font file to your Designer SE. When creating the font, ensure that Designer SE and the Save Font File options are selected on the Output Options page. Make a note of the location where the font file is saved. After it has been created, use Windows® Explorer to copy the .vf3 file to a USB Embroidery Stick. Insert the USB Embroidery Stick in your Designer SE and use File Manager to copy the font file to the MyFonts folder.
Send To Designer SE
A601 I don’t see the Designer SE Communication icon in the system tray when I start my computer.
You have not selected the option to start Designer SE Communication automatically when Windows starts. Resolve this as follows: 1. Start 3D Configure. 2. Click a Send tab. 3. Click the Designer SE Communication button and the icon will appear in the system tray. 4. Position the mouse pointer over the icon in the system tray and right-click. A menu will
appear. 5. Click the Start Automatically option. 6. Right-click the icon again to confirm the Start Automatically option is checked. 7. Click anywhere on the desktop, away from the menu, to close the menu without
changing anything.
H211 Error message "Windows System Error. Please close and restart all software."
This message appears if there are issues with the memory handling of your system that make communication with Designer SE temporarily unavailable. Close and restart all programs running and try again. If this does not solve the issue, restart your computer.
H802 I have installed the software that was with my Designer SE, but I am unable to send any embroideries.
You may not have installed the drivers that allow communication with the Designer SE. This may happen if the 'plug and play' feature in Windows® is not working correctly. This can be resolved as follows: 1. Disconnect your Designer SE from the computer. 2. Restart the computer. 3. Ensure the installation CD provided with the Designer SE is in the computer’s CD drive.
If the installation screen appears when you insert the CD, simply cancel the installation process. This will not affect any installed software.
4. Switch on the Designer SE and connect it to the computer via the USB cable. 5. Windows® should now detect the Designer SE and ask for the driver.
If Windows® does not detect the Designer SE, click Start then click Control Panel. Double click Add Hardware, then click Next to search for new hardware.
FAQ Lists for Husqvarna Viking 3D Software Page 275

6. Click Next and the driver should be found automatically on the CD. If the driver is not found automatically, you may need to go back and specify the drive location for the CD. The driver is in the root folder of the CD (that is, it is in the top level of the CD so it is not necessary to search through sub-folders).
Transferring Files
H212 My Designer SE is not connected to my computer. How do I transfer a font to my Designer SE?
Use a USB Embroidery Stick to transfer the .vf3 font file to your Designer SE. When creating the font, ensure that Designer SE and the Save Font File options are selected on the Output Options page. Make a note of the location where the font file is saved. After it has been created, use Windows® Explorer to copy the .vf3 file to a USB Embroidery Stick. Insert the USB Embroidery Stick in your Designer SE and use File Manager to copy the font file to the MyFonts folder.
3D Fabric Decorator Listed versions: 7.2; 7.25
Acquiring Pictures
F501 Error: "Problem with scanner or camera software."This message will appear when trying to use your scanner or digital camera if the device has not been installed correctly. Close 3D Fabric Decorator, follow the manufacturer's instructions for the Twain-compliant device, then reopen 3D Fabric Decorator and try again.
F502 Error: "Scanner or camera is in use by another application."This message will appear when trying to use your scanner or digital camera if another graphics program is already open that uses the Twain-compliant device. Close 3D Fabric Decorator and the other graphics program, then reopen 3D Fabric Decorator and try again.
F503 Error: "Your scanner is no longer available for use. Close this program, plug in and switch on your scanner, and run this program again."
This error appears if the connection to your scanner or digital camera has a problem. Close 3D Fabric Decorator, check the connections to your scanner or digital camera, then reopen the program and try again.
F504 Error: "Failure to acquire picture due to unknown causes."This message will appear in certain circumstances when trying to use your scanner or digital camera, for example if the cable is disconnected during the scan or download. Close 3D Fabric Decorator, check the connections to your scanner or digital camera, then reopen the program and try again.
FAQ Lists for Husqvarna Viking 3D Software Page 276

Changing Preferences
G429 The 5"x7" Design hoop and the Endless hoop are no longer available in the hoop list.
The 5"x7" Design and Endless hoops were added to the hoop list in the Version 7.2 update. If you have installed a previous version of software after updating to Version 7.2, the hoop list will be replaced and will no longer include the 5"x7" Design and Endless hoops. Click this link to download and install the correct hoop list: Hoops.exe [http://www.vsmsoftware.net/Downloads/Updates/720/Hoops.exe]
Creating Fabric
F015 Why do I need to save an imported picture?When a new picture is loaded, you will probably need to move and resize it. You should save the picture so that you can then reload the picture without having to remember the exact changes you made.
F016 Why does my picture keep disappearing?The picture under the current character or shape is not stored as part of the font or shapes file. It is removed when you do one of the following: • Select a new character or shape to work with • Load a font • Create a new font Hence, if you select a different character or shape, then go back to the one where you loaded the picture, the picture will no longer be in the background. If a new font or character has been selected and Use For Background Picture is checked, a different font character will appear. Reload the previously saved picture.
F515 Error: "Please choose a valid motif pattern."This message appears when you attempt to use MyMotifs as a source for a motif, but it is empty. Choose a motif from a different motif category to continue. Alternatively, cancel the Fabric Wizard, then create and export a motif to MyMotifs.
F516 Error: "Failed to open Clipboard!"This message may appear when you click the Copy button on the Export Options page of the Fabric Wizard. This indicates that your system resources are too low to use the Copy function. Close other programs and try again. If this does not work, try restarting your computer.
F526 None of the standard motif categories are listed and only MyMotifs is shown.
This happens if the SystemMotifs.mdb file is corrupt or missing from the C:\3DEmbroidery\System folder. For example, it may have been moved or deleted. See Fix a Database with Repair Installin FAQ #F514 to reinstall the SystemMotifs.mdb file.
FAQ Lists for Husqvarna Viking 3D Software Page 277

F527 My motifs do not have the same orientation on the fabric as when I designed them, even though the Angle in Motif Options is zero.
This will happen if you have not lined up the start and end stitches in your motif horizontally. When the motif is used, the start and end stitches are forced to be lined up horizontally, so this has the effect of rotating the motif. Edit your motif so that the start and end stitches are lined up, then export it to MyMotifs again.
F528 My motifs are overlapping when I create fabric, even though the Gap and Offset are set to zero.
This will happen if you have not lined up the start and end stitches in your motif horizontally. When the motif is used, the start and end stitches are forced to be lined up horizontally, so this has the effect of rotating the motif. When the motif is rotated, the spacing may no longer be the same, so the motif can overlap unexpectedly. Edit your motif so that the start and end stitches are lined up, then export it to MyMotifs again.
Design Appearance
F525 My motifs are not lined up when there is more than one in Realistic View.The first (+) and last (x) stitch points are not lined up. If you want your motifs to be placed as they appear in the design area, the first and last stitches must be lined up horizontally in the design area. The easiest way to do this is to move them to the same horizontal grid line. If the first and last stitch points are not lined up then the motif will be rotated by when it is used so that they do line up, which may not achieve the desired effect. 3D Fabric Decorator prompts to add an extra stitch to line up the stitches when the motif is exported to MyMotifs.
Editing Designs
T007 Error "Some of the created stitches were outside the area - the stitches will not be added to the design."
This will happen if you attempt to add stitches that would be outside the design area. This is most likely to occur when you place Candlewicking close to the edge of the design, in which case the Candlewick stitch will not be added. You can try again by selecting a center point that is not as close to the edge of the design.
T021 I have selected some stitches but there are no handles on the block so I can only move it.
If you select a small block of stitches, less than 1.5mm high or wide, then the block will not have handles. This is because there is not enough room around the edges of the block for the Scale, Flip and Rotate handles so they do not appear.
Error Messages
B618 Error: "Please select a valid thread."This message appears if you attempt to click OK in the Color Selection dialog box when MyThreads is selected as the thread range and MyThreads is empty. To prevent this message appearing again, use Thread Manager in 3D Configure to add at least one thread to MyThreads.
FAQ Lists for Husqvarna Viking 3D Software Page 278

F013 Error message "Could not load picture file."This message could appear if the desired picture file is not where the module expects it to be, for example if it was loaded from a floppy disk, then closed and the floppy disk removed. The message would appear if you try to load the picture from the Recent Files list on the File menu. It could also appear if the file you are attempting to load is corrupt. For example, it might have an extension such as .bmp or .jpg, yet not be a proper picture file.
F015 Why do I need to save an imported picture?When a new picture is loaded, you will probably need to move and resize it. You should save the picture so that you can then reload the picture without having to remember the exact changes you made.
F016 Why does my picture keep disappearing?The picture under the current character or shape is not stored as part of the font or shapes file. It is removed when you do one of the following: • Select a new character or shape to work with • Load a font • Create a new font Hence, if you select a different character or shape, then go back to the one where you loaded the picture, the picture will no longer be in the background. If a new font or character has been selected and Use For Background Picture is checked, a different font character will appear. Reload the previously saved picture.
F501 Error: "Problem with scanner or camera software."This message will appear when trying to use your scanner or digital camera if the device has not been installed correctly. Close 3D Fabric Decorator, follow the manufacturer's instructions for the Twain-compliant device, then reopen 3D Fabric Decorator and try again.
F502 Error: "Scanner or camera is in use by another application."This message will appear when trying to use your scanner or digital camera if another graphics program is already open that uses the Twain-compliant device. Close 3D Fabric Decorator and the other graphics program, then reopen 3D Fabric Decorator and try again.
F503 Error: "Your scanner is no longer available for use. Close this program, plug in and switch on your scanner, and run this program again."
This error appears if the connection to your scanner or digital camera has a problem. Close 3D Fabric Decorator, check the connections to your scanner or digital camera, then reopen the program and try again.
F504 Error: "Failure to acquire picture due to unknown causes."This message will appear in certain circumstances when trying to use your scanner or digital camera, for example if the cable is disconnected during the scan or download. Close 3D Fabric Decorator, check the connections to your scanner or digital camera, then reopen the program and try again.
FAQ Lists for Husqvarna Viking 3D Software Page 279

F506 Error: "Motif cannot start and end at the same place. Please move the start point to the left of the end point."
This message will appear if the start point marked by a plus (+) sign and the end point marked by a cross (x) sign are in exactly the same grid position. You may not export a motif to the MyMotifs database when its start and end points are in exactly the same position. Motifs must be designed to start on the left and end on the right.
F507 Error: "The start and end points do not line up. Add a stitch?"This message will appear if the start point marked by a plus (+) sign and the end point marked by a cross (x) sign are not horizontally aligned. Click Yes to add a stitch at the end that will line up with the start point then export the result to MyMotifs. Click No to leave the motif as it is and export it to MyMotifs anyway. Click Cancel to do nothing, which will allow you to align the start and end points exactly as desired.
F508 Error: "Could not add motif to MyMotifs."This message will appear under any of the following circumstances: • The MyMotifs.mdb file is read only • You do not have permission to change the MyMotifs.mdb with your current user logon • The MyMotifs.mdb file is corrupt • The MyMotifs.mdb file is missing from the C:\3DEmbroidery\System folder because it
has been moved or deleted If the MyMotifs.mdb file is corrupt or missing, use the Restore MyMotifs function if you have previously made a backup copy of MyMotifs.mdb. Alternatively, see Fix a Database with Repair Installin FAQ #F514 to re-create a blank MyMotifs.mdb file.
F509 Error: "Could not find MyMotifs."This message is most likely to appear because there are no motifs in MyMotifs. This will be the case if you have just installed your 3D Embroidery System software, or if you have previously used Manage MyMotifs to delete everything from MyMotifs. This will also happen if the MyMotifs.mdb file is corrupt or it is missing from the C:\3DEmbroidery\System folder. For example, it may have been moved or deleted. If you have previously made a backup copy of MyMotifs.mdb, use the Restore MyMotifs function. Alternatively, see Fix a Database with Repair Installin FAQ #F514 to re-create a blank MyMotifs.mdb file.
F510 Error: "Could not delete from MyMotifs."This message is most likely to appear because there are no motifs in MyMotifs. This will be the case if you have just installed your 3D Embroidery System software, or if you have previously used Manage MyMotifs to delete everything from MyMotifs. This will also happen if the MyMotifs.mdb file is corrupt or it is missing from the C:\3DEmbroidery\System folder. For example, it may have been moved or deleted. If you have previously made a backup copy of MyMotifs.mdb, use the Restore MyMotifs function. Alternatively, see Fix a Database with Repair Installin FAQ #F514 to re-create a blank MyMotifs.mdb file.
F511 Error: "Unable to locate MyMotifs.mdb."
FAQ Lists for Husqvarna Viking 3D Software Page 280

This message can appear when attempting to backup MyMotifs. It indicates that the MyMotifs.mdb file is missing from the C:\3DEmbroidery\System folder. For example, it may have been moved or deleted. If you have previously made a backup copy of MyMotifs.mdb, use the Restore MyMotifs function. Alternatively, see Fix a Database with Repair Installin FAQ #F514 to re-create a blank MyMotifs.mdb file.
F512 Message: "Warning - restoring MyMotifs will overwrite your existing MyMotifs."
This message appears when you use the Restore MyMotifs function, to warn you that your existing MyMotifs will be overwritten. This means that the restored MyMotifs will entirely replace all of the motifs currently in MyMotifs. Click Yes if you want to go ahead with the restore, or No if you wish to cancel the restore.
F513 Error: "Could not restore MyMotifs."This message can appear when you use the Restore MyMotifs function. This means that the MyMotifs database is read only, or you do not have permission to replace the MyMotifs database.
F517 Error: "Could not open pattern."This message appears when attempting to open a motif file or 9mm or Maxi stitch file that is corrupt. This would also appear on attempting to open a file with a .mot, .9mm or .max extension that is not a motif or stitch design file.
F518 Error "Cannot save file."The module cannot save the file. Ensure that the disk where you are trying to save the motif is not write-protected, then try again.
F519 Error: "Design too large for export format."Certain formats are limited to the number of stitches they can save or the size of hoop used on their specific embroidery machine, for example .sew. If you attempt to save a file in this format that is bigger than the largest available hoop size or has more stitches than are allowed, this message would appear.
F520 Error: "Design is too large or will not fit in hoop."This happens if you attempt to save a motif that has stitches outside the design area. For instance, some of the Maxi machine stitches are longer than the design area but you can still open them with Insert Motif. So if you insert one of these stitches and attempt to save the motif, this message will appear.
F521 Error: "Unrecognized file extension."This message appears if you type an incorrect extension that does not belong to any motif or embroidery file types in the File Name box when trying to save or export a file.
F522 Error: "No stitch data to save."
FAQ Lists for Husqvarna Viking 3D Software Page 281

This message appears on attempting to save when the motif has a start stitch only and there is no background picture.
F523 Error: "No stitches available to print."This message appears if the motif only has a start stitch. To be printed, a motif must have at least one more stitch than just the start stitch.
G411 Error "Not enough memory to perform operation."This message will appear if system resources are low. Close other programs and try again. If this does not work, try restarting your computer.
T006 Error "This is not an appropriate use of this tool. Areas of the image may be too wide."
This happens when you use QuickTrace to follow an outline in the picture and then QuickTrace finds a part of the outline that is very thick. This can be caused by excessively broad outlines. In this case, QuickTrace does not know where to trace the outline as the problem part of the outline is more like a fill area. Change your image and load it again to make the outline narrower or isolate the wide section from the rest of the outline.
T007 Error "Some of the created stitches were outside the area - the stitches will not be added to the design."
This will happen if you attempt to add stitches that would be outside the design area. This is most likely to occur when you place Candlewicking close to the edge of the design, in which case the Candlewick stitch will not be added. You can try again by selecting a center point that is not as close to the edge of the design.
Exporting Motifs to MyMotifs
F506 Error: "Motif cannot start and end at the same place. Please move the start point to the left of the end point."
This message will appear if the start point marked by a plus (+) sign and the end point marked by a cross (x) sign are in exactly the same grid position. You may not export a motif to the MyMotifs database when its start and end points are in exactly the same position. Motifs must be designed to start on the left and end on the right.
F507 Error: "The start and end points do not line up. Add a stitch?"This message will appear if the start point marked by a plus (+) sign and the end point marked by a cross (x) sign are not horizontally aligned. Click Yes to add a stitch at the end that will line up with the start point then export the result to MyMotifs. Click No to leave the motif as it is and export it to MyMotifs anyway. Click Cancel to do nothing, which will allow you to align the start and end points exactly as desired.
F508 Error: "Could not add motif to MyMotifs."This message will appear under any of the following circumstances: • The MyMotifs.mdb file is read only
FAQ Lists for Husqvarna Viking 3D Software Page 282

• You do not have permission to change the MyMotifs.mdb with your current user logon • The MyMotifs.mdb file is corrupt • The MyMotifs.mdb file is missing from the C:\3DEmbroidery\System folder because it
has been moved or deleted If the MyMotifs.mdb file is corrupt or missing, use the Restore MyMotifs function if you have previously made a backup copy of MyMotifs.mdb. Alternatively, see Fix a Database with Repair Installin FAQ #F514 to re-create a blank MyMotifs.mdb file.
General
G001 General difficulties with hardware and softwareTo try to determine the cause of any odd difficulties with the 3D Embroidery System, the best method is to reboot the computer in safe mode. If the problem is then solved, you know that some clash of hardware and/or software such as device drivers is to blame. You can then obtain more help from your computer dealer to analyze the cause and reconfigure your computer if necessary. To start Windows in Safe Mode 1. Close all programs. 2. Click Start, and then click Shut Down or Turn Off Computer, whichever is shown. 3. Click Restart. If necessary, click OK to confirm. 4. Your computer will shut down and restart. 5. As your computer restarts, press and hold the F8 key until a menu of windows startup
options appears. 6. Use the up and down arrow keys to highlight Safe mode, and then press ENTER. When you hold down the F8 key, your computer may beep rapidly and report keyboard errors as it restarts. Release the F8 key briefly to skip any errors and press F8 again until you have the Startup Menu on your screen.
Inserting Motifs from the Database
F505 None of the standard motif categories are listed and only MyMotifs is shown.
This happens if the SystemMotifs.mdb file is corrupt or missing from the C:\3DEmbroidery\System folder. For example, it may have been moved or deleted. See Fix a Database with Repair Installin FAQ #F514 to reinstall the SystemMotifs.mdb file.
F525 My motifs are not lined up when there is more than one in Realistic View.The first (+) and last (x) stitch points are not lined up. If you want your motifs to be placed as they appear in the design area, the first and last stitches must be lined up horizontally in the design area. The easiest way to do this is to move them to the same horizontal grid line. If the first and last stitch points are not lined up then the motif will be rotated by when it is used so that they do line up, which may not achieve the desired effect. 3D Fabric Decorator prompts to add an extra stitch to line up the stitches when the motif is exported to MyMotifs.
Loading Pictures
F013 Error message "Could not load picture file."
FAQ Lists for Husqvarna Viking 3D Software Page 283

This message could appear if the desired picture file is not where the module expects it to be, for example if it was loaded from a floppy disk, then closed and the floppy disk removed. The message would appear if you try to load the picture from the Recent Files list on the File menu. It could also appear if the file you are attempting to load is corrupt. For example, it might have an extension such as .bmp or .jpg, yet not be a proper picture file.
Managing MyMotifs
F509 Error: "Could not find MyMotifs."This message is most likely to appear because there are no motifs in MyMotifs. This will be the case if you have just installed your 3D Embroidery System software, or if you have previously used Manage MyMotifs to delete everything from MyMotifs. This will also happen if the MyMotifs.mdb file is corrupt or it is missing from the C:\3DEmbroidery\System folder. For example, it may have been moved or deleted. If you have previously made a backup copy of MyMotifs.mdb, use the Restore MyMotifs function. Alternatively, see Fix a Database with Repair Installin FAQ #F514 to re-create a blank MyMotifs.mdb file.
F510 Error: "Could not delete from MyMotifs."This message is most likely to appear because there are no motifs in MyMotifs. This will be the case if you have just installed your 3D Embroidery System software, or if you have previously used Manage MyMotifs to delete everything from MyMotifs. This will also happen if the MyMotifs.mdb file is corrupt or it is missing from the C:\3DEmbroidery\System folder. For example, it may have been moved or deleted. If you have previously made a backup copy of MyMotifs.mdb, use the Restore MyMotifs function. Alternatively, see Fix a Database with Repair Installin FAQ #F514 to re-create a blank MyMotifs.mdb file.
F511 Error: "Unable to locate MyMotifs.mdb."This message can appear when attempting to backup MyMotifs. It indicates that the MyMotifs.mdb file is missing from the C:\3DEmbroidery\System folder. For example, it may have been moved or deleted. If you have previously made a backup copy of MyMotifs.mdb, use the Restore MyMotifs function. Alternatively, see Fix a Database with Repair Installin FAQ #F514 to re-create a blank MyMotifs.mdb file.
F512 Message: "Warning - restoring MyMotifs will overwrite your existing MyMotifs."
This message appears when you use the Restore MyMotifs function, to warn you that your existing MyMotifs will be overwritten. This means that the restored MyMotifs will entirely replace all of the motifs currently in MyMotifs. Click Yes if you want to go ahead with the restore, or No if you wish to cancel the restore.
F513 Error: "Could not restore MyMotifs."This message can appear when you use the Restore MyMotifs function. This means that the MyMotifs database is read only, or you do not have permission to replace the MyMotifs database.
FAQ Lists for Husqvarna Viking 3D Software Page 284

Miscellaneous
G411 Error "Not enough memory to perform operation."This message will appear if system resources are low. Close other programs and try again. If this does not work, try restarting your computer.
Motif Database
F514 How do I fix a missing or corrupt MyMotifs database?If the error messages indicate you have a missing or corrupt MyMotifs database, use the following procedure to repair the installation. Also use this if the main SystemMotifs.mdb database is missing or corrupt. Fix a Database with Repair Install 1. Right-click the Start button on the taskbar and select Explore from the popup menu. 2. In Explorer, browse to the folder C:\3DEmbroidery\System.
This assumes you have installed your 3D Embroidery System software in the default location of C:\3DEmbroidery. If you have installed the software in a different location, browse to the System folder at that location.
3. Delete the file named "MyMotifs.mdb" and/or "SystemMotifs.mdb", depending on which is corrupt. The file names may simply be shown as "MyMotifs" and "SystemMotifs".
4. Put your 3D Embroidery System software CD in your computer to re-run the installation. The installation should start automatically when you put your software CD in the computer. If this does not happen, browse to the CD with Explorer and double-click "Setup.exe" to start the installation.
5. When the choice appears, select the "Modify or remove" option and click Next. 6. In the next screen, select Repair and click Next. 7. Continue with the installation and follow the on-screen instructions. When the installation
is complete, the MyMotifs and/or standard motif databases will be restored to their original installation state.
Opening Files
F517 Error: "Could not open pattern."This message appears when attempting to open a motif file or 9mm or Maxi stitch file that is corrupt. This would also appear on attempting to open a file with a .mot, .9mm or .max extension that is not a motif or stitch design file.
Opening Motifs from the Database
F505 None of the standard motif categories are listed and only MyMotifs is shown.
This happens if the SystemMotifs.mdb file is corrupt or missing from the C:\3DEmbroidery\System folder. For example, it may have been moved or deleted. See Fix a Database with Repair Installin FAQ #F514 to reinstall the SystemMotifs.mdb file.
F525 My motifs are not lined up when there is more than one in Realistic View.
FAQ Lists for Husqvarna Viking 3D Software Page 285

The first (+) and last (x) stitch points are not lined up. If you want your motifs to be placed as they appear in the design area, the first and last stitches must be lined up horizontally in the design area. The easiest way to do this is to move them to the same horizontal grid line. If the first and last stitch points are not lined up then the motif will be rotated by when it is used so that they do line up, which may not achieve the desired effect. 3D Fabric Decorator prompts to add an extra stitch to line up the stitches when the motif is exported to MyMotifs.
Preferences
G429 The 5"x7" Design hoop and the Endless hoop are no longer available in the hoop list.
The 5"x7" Design and Endless hoops were added to the hoop list in the Version 7.2 update. If you have installed a previous version of software after updating to Version 7.2, the hoop list will be replaced and will no longer include the 5"x7" Design and Endless hoops. Click this link to download and install the correct hoop list: Hoops.exe [http://www.vsmsoftware.net/Downloads/Updates/720/Hoops.exe]
Printing
F523 Error: "No stitches available to print."This message appears if the motif only has a start stitch. To be printed, a motif must have at least one more stitch than just the start stitch.
QuickTrace
T006 Error "This is not an appropriate use of this tool. Areas of the image may be too wide."
This happens when you use QuickTrace to follow an outline in the picture and then QuickTrace finds a part of the outline that is very thick. This can be caused by excessively broad outlines. In this case, QuickTrace does not know where to trace the outline as the problem part of the outline is more like a fill area. Change your image and load it again to make the outline narrower or isolate the wide section from the rest of the outline.
T019 QuickTrace did not trace all the parts of the picture that I wanted.QuickTrace can only trace a connected section of the picture. If you disconnected sections in your picture (e.g. letters separated by space) you will have to use QuickTrace separately on each section of the picture.
T020 QuickTrace traced the space between two lines.QuickTrace will trace any connected area on the picture, whether it is black or white. For instance, if you have a set of enclosed outlines you have the choice of tracing the black outlines, or the white spaces between the outlines, or both.
FAQ Lists for Husqvarna Viking 3D Software Page 286

Stitch Artist traced star
This also allows you to use QuickTrace on the white lines in a picture that has white shapes on a black background.
Registration
G807 Error "Fabric Decorator 7.2 - The Product License Code '' is not valid.".This message only appears when you have downloaded and installed the first online release of the tutorials for 3D Fabric Decorator 7.2. During this release phase, the tutorial download was only available to dealers with a Not For Sale license. Hence, this error will only affect dealers. At installation time, a partial product code has been erroneously recorded. Although the error appears during registration, this does not affect any details stored on the registration database. Also, no installed software is affected, including the 3D Fabric Decorator tutorials. Therefore, please ignore this error.
Saving Embroideries
G427 The manuals and help say that I can save PES files as version 5, but it only seems to save as version 2.
This is an erratum in the manuals and help. Up to version 7.2, the 3D Embroidery System modules can only save PES files as version 2. PES version 2 has a size restriction of 130mm x 180mm. From version 7.25 onwards, PES files are saved as version 2 if the embroidery is 130mm x 180mm or smaller. Files larger
FAQ Lists for Husqvarna Viking 3D Software Page 287

than this are saved as PES version 6. Use Smart Update to ensure your 3D Embroidery System modules are updated to the latest version. See FAQ #B008. Always print a worksheet from the 3D Embroidery System to show the correct colors for your embroidery, before saving it to a format that does not support full thread color information.
Saving Files
F518 Error "Cannot save file."The module cannot save the file. Ensure that the disk where you are trying to save the motif is not write-protected, then try again.
F519 Error: "Design too large for export format."Certain formats are limited to the number of stitches they can save or the size of hoop used on their specific embroidery machine, for example .sew. If you attempt to save a file in this format that is bigger than the largest available hoop size or has more stitches than are allowed, this message would appear.
F520 Error: "Design is too large or will not fit in hoop."This happens if you attempt to save a motif that has stitches outside the design area. For instance, some of the Maxi machine stitches are longer than the design area but you can still open them with Insert Motif. So if you insert one of these stitches and attempt to save the motif, this message will appear.
F521 Error: "Unrecognized file extension."This message appears if you type an incorrect extension that does not belong to any motif or embroidery file types in the File Name box when trying to save or export a file.
F522 Error: "No stitch data to save."This message appears on attempting to save when the motif has a start stitch only and there is no background picture.
Screen Appearance
F524 I wish to change the background color for the work area.Use 3D Configure to alter the background color for the work area. 3D Configure may usually be used to turn the texture on or off, but this is not available for 3D Fabric Decorator.
G415 I have changed the screen background color and now I wish to return to the original light blue
Use 3D Configure to change the background color. Follow the instructions in 3D Configure and select the RGB values 200, 232, 247 in the Colors dialog box.
G418 I can't see some of the floating toolbars or iconsFirst, check View, Customize to see if the missing toolbar has been turned off. If all the toolbar names are checked (so they are turned on) and you still cannot locate a toolbar, it
FAQ Lists for Husqvarna Viking 3D Software Page 288

may have been moved to the edge of the screen so it is hard to see. If you move icons around it is possible to delete them. To reset the icons on a toolbar 1. Click View, Customize to see the Customize dialog. 2. Click the Toolbar tab. 3. Click the name of the required toolbar. 4. Click Reset. 5. Click Yes to confirm. The selection of icons on the toolbar and their order will be reset.
Send To d-Card Reader/Writer Unit
A320 I am having difficulty using an embroidery on my machine when I send it to a d-Card from a horizontal hoop with Send 1 or Send 2.
This can happen if you are using a horizontal hoop on screen, and the embroidery is more than 150mm wide. When the embroidery is sent to the d-Card with Send To, the embroidery is not rotated. Before sending the embroidery to a d-Card, change the hoop orientation to vertical and, if the embroidery no longer fits, rotate the embroidery by 90 degrees. If you are using 3D Digitizing, 3D PictureStitch or 3D Cross Stitcher to create the embroidery, copy the finished design to 3D Embroidery to rotate it and setup the vertical hoop.
Smart Update
B009 I believe that 3D Fabric Decorator is available through Smart Update, but it is not listed when I use Smart Update.
3D Fabric Decorator is only available as a Smart Update if: • You purchased a new copy of the full 3D Professional Embroidery System on or after
May 1st 2004. or
• You purchased a new copy of the full VIP Professional Embroidery on or after May 1st 2004, and subsequently received a free upgrade to 3D Professional.
PLEASE NOTE: If you purchased the VIP Embroidery System before May 1st 2004, but received your free upgrade to 3D Professional on or after May 1st 2004, this means your purchase date is not in the qualifying period. Therefore, you will not be eligible to obtain 3D Fabric Decorator as a Smart Update.
Thread Colors
B618 Error: "Please select a valid thread."This message appears if you attempt to click OK in the Color Selection dialog box when MyThreads is selected as the thread range and MyThreads is empty. To prevent this message appearing again, use Thread Manager in 3D Configure to add at least one thread to MyThreads.
3D Sketch Listed versions: 7.25
FAQ Lists for Husqvarna Viking 3D Software Page 289

Dongle
H013 Error "No dongle attached. Cannot open program" when starting my 3D software on Windows® Vista, even though my dongle is inserted.
After you have installed the 3D Embroidery System software on a Windows® Vista computer, download and save the 3D Embroidery Vista Dongle Update [http://www.emnetsoftware.com/downloads/updates/3DEmbroideryVistaDongleUpdate.exe]. After saving the file on your computer, double-click the file to install the dongle update. Note: If the following User Account Control message appears when installing the update: "An unidentified program wants access to your computer", click the 'Allow' option to continue.
Drawing Stitches
K009 Some of the stitches I have drawn with Horizontal ZigZag, Rotational ZigZag and/or Calligraphy appear to be broken up.
This can happen in 3D view with any of the zigzag stitches when the ZigZag Width is very low. You have drawn very short stitches close to each other, and this causes them to appear broken up in 3D view. Select 2D view and you will see the stitches. Hence, this is only an issue with displaying the stitches in 3D.
K010 I have chosen a variegated thread for drawing stitches, but only one color is showing.
Variegated threads are stored in the thread database as a sequence of colors, each of which lasts for a specified length. Hence, one of these must be the first color that is defined. While drawing stitches in 3D, only the first color defined for a variegated thread is used for drawing the stitches. When you right-click to finish drawing with the current drawing function, the variegated thread is drawn in all of its colors. In 2D, only the first color of a variegated thread is shown. You must view your embroidery in 3D to see all the shades in a variegated thread.
Editing Designs
K014 I used Erase Stitches and some stitches I want to keep are highlighted.Right-click to finish the Erase Stitches operation. The highlighted stitches will be erased. Click Undo, and the erase operation will be reversed. Use Erase Stitches again to remove the stitches you wanted to erase, without removing the stitches you want to keep.
Error Messages
F519 Error: "Design too large for export format."Certain formats are limited to the number of stitches they can save or the size of hoop used on their specific embroidery machine, for example .sew. If you attempt to save a file in this format that is bigger than the largest available hoop size or has more stitches than are allowed, this message would appear.
G411 Error "Not enough memory to perform operation."
FAQ Lists for Husqvarna Viking 3D Software Page 290

This message will appear if system resources are low. Close other programs and try again. If this does not work, try restarting your computer.
H013 Error "No dongle attached. Cannot open program" when starting my 3D software on Windows® Vista, even though my dongle is inserted.
After you have installed the 3D Embroidery System software on a Windows® Vista computer, download and save the 3D Embroidery Vista Dongle Update [http://www.emnetsoftware.com/downloads/updates/3DEmbroideryVistaDongleUpdate.exe]. After saving the file on your computer, double-click the file to install the dongle update. Note: If the following User Account Control message appears when installing the update: "An unidentified program wants access to your computer", click the 'Allow' option to continue.
K001 Error message "No dongle attached. Cannot open program."This message will appear when trying to start 3D Sketch if the 3D Embroidery System cannot detect the dongle (data protection device). Ensure the dongle is plugged into a free USB port of your computer.
K002 Error message "The program requires a color palette of High Color (16 bit) or higher."
This message appears when attempting to open 3D Sketch if your computer is set to a display of 256 colors or less. Reset the display as follows. 1. Right-click on the desktop and a shortcut menu appears. 2. Click on Properties and a dialog box appears. 3. Click the Settings tab. 4. Change Color quality to High Color (16 bit) or higher using the drop-down menu. 5. Click Apply, and allow your computer to restart if required.
K003 Error message "No dongle attached. Cannot complete function."This message may appear when trying to use 3D Sketch if the 3D Embroidery System cannot detect the dongle (data protection device). Ensure the dongle is plugged into a free USB port of your computer.
K004 Error message "The embroidery is xx.x mm x yy.y mm and does not fit in the chosen hoop. Choose a different embroidery or increase the hoop size."
This message appears on the Load Embroidery page of the Load Design Wizard if you choose an embroidery that will not fit the chosen hoop size, even if it is rotated. If you wish to load the selected embroidery, step back through the wizard, increase the hoop size as necessary and try again.
K005 "The embroidery will only fit the selected hoop if it is rotated 90 degrees. Is that OK?"
This message appears on the Load Embroidery page of the Load Design Wizard if you choose an embroidery that will only fit the chosen hoop size if it is rotated. If you wish to accept the embroidery you have selected, but rotate it to fit in the hoop, click Yes. Otherwise, click No. If you click No because you want to load the embroidery in its original orientation,
FAQ Lists for Husqvarna Viking 3D Software Page 291

you should go back through the Load Design Wizard and change the hoop size or orientation.
K006 Error message "The Minimum ZigZag Width is larger than the Maximum ZigZag Width. Change either the Minimum or Maximum so that the Minimum is the same or smaller than the Maximum."
When setting the Minimum and Maximum ZigZag Width in Stitches Preferences, the Minimum must be the same or smaller than the Maximum. Adjust either the Minimum or Maximum to ensure that the Minimum is not larger than the Maximum ZigZag Width.
General
G001 General difficulties with hardware and softwareTo try to determine the cause of any odd difficulties with the 3D Embroidery System, the best method is to reboot the computer in safe mode. If the problem is then solved, you know that some clash of hardware and/or software such as device drivers is to blame. You can then obtain more help from your computer dealer to analyze the cause and reconfigure your computer if necessary. To start Windows in Safe Mode 1. Close all programs. 2. Click Start, and then click Shut Down or Turn Off Computer, whichever is shown. 3. Click Restart. If necessary, click OK to confirm. 4. Your computer will shut down and restart. 5. As your computer restarts, press and hold the F8 key until a menu of windows startup
options appears. 6. Use the up and down arrow keys to highlight Safe mode, and then press ENTER. When you hold down the F8 key, your computer may beep rapidly and report keyboard errors as it restarts. Release the F8 key briefly to skip any errors and press F8 again until you have the Startup Menu on your screen.
Graphics Tablet and Pen
K601 Error message "Wacom Driver Mismatch" when 3D Sketch is stuck on the splash screen
This error can appear when you attempt to start 3D Sketch. The splash screen for 3D Sketch appears and then stays on the screen. An item appears on the Windows® Taskbar named "Wacom Driver Mismatch". To resolve this, the settings for 3D Sketch must be reset with Reset All Modules in 3D Configure, as follows: 1. Close all 3D Embroidery System modules. 2. Close any other programs you are using. 3. Restart your computer. This will clear the error from the taskbar and close 3D Sketch. 4. Start 3D Configure (on the Start menu, select Start, All Programs, 3D Embroidery
System, 3D Configure). 5. Click the Reset All Modules button.
Any modules that are open will not be affected by Reset All Modules. 6. Click OK to reset, then click OK again to clear the confirmation message. 3D Sketch should now start correctly.
FAQ Lists for Husqvarna Viking 3D Software Page 292

Note that Reset All Modules affects all modules in the 3D Embroidery System, so any changes to settings in each module will be reset. The recent files list on the File menu is also cleared, but this does not affect any files you have saved.
K602 When I right-click using the pen, nothing seems to happen in 3D SketchThe pen must be close to the drawing surface of graphics tablet, but not touching, when you press the right-click button on the pen. If the mouse pointer is moving as you move the pen, then you are close enough to the tablet to use the right-click button. The information provided with the graphics tablet indicates that is recommended to have the tip of the pen within 5mm of the drawing surface when using the button on the pen. Also, the mouse pointer must be over the work area (drawing area) on the 3D Sketch screen when you right-click to cancel a function. If the right-click button on the pen still has no effect, it is likely that the button has been re-assigned to a different function in the table setup utility. Start the tablet setup utility and ensure the button is assigned to the right-click function.
K603 When I move the pen around the edges of the graphics tablet, the mouse pointer does not go all the way to the edges of my screen
This may happen because either: • You are using the default Windows tablet driver instead of the drivers supplied with the
graphics tablet and/or
• The graphics tablet is connected to your computer via an external USB hub To install the correct driver for the graphics tablet 1. Insert the CD provided with the graphics tablet (not the CD for 3D Sketch) in your
computer. 2. From the menu that appears, select the Install Tablet option. (If the menu does not
appear, browse to the CD and double-click the Install.exe file.) 3. Follow the on-screen instructions to install the driver and tablet setup software. When the software and driver installation is complete, the graphics tablet should have coverage of the whole screen. If the graphics tablet is connected via an external USB hub 1. First check what happens when the graphics tablet is connected directly to a USB port
on the computer. If the graphics tablet is still not working correctly, follow the instructions above to ensure the correct driver is installed for the graphics tablet.
2. Reconnect the graphics tablet to the USB hub. If it now functions correctly, no further action is necessary.
3. If the USB hub has a power supply, ensure the power supply is switched on and connected to the USB hub. If the graphics tablet now functions correctly, this means that you must use the USB power supply when using your graphics tablet. If the graphics tablet still does not function correctly, it must be connected directly to a USB port on the computer.
4. If the USB hub is un-powered, it is likely that your computer is unable to provide enough power through the USB sockets to ensure all devices connected to the un-powered hub will function correctly. You must either connect the graphics tablet directly to a USB port on the computer or obtain a powered USB hub that works with your computer.
K604 How do I learn to use the graphics tablet provided with 3D Sketch?
FAQ Lists for Husqvarna Viking 3D Software Page 293

The CD provided with the graphics tablet contains a tutorial about the graphics tablet. To start the tutorial: 1. Insert the CD into your computer. The menu of options on the CD should appear. (If it
does not, browse to the CD and double-click the Install.exe file.) 2. Click the Tutorial option and the tutorial will start. For more detailed information, also see the User's Guide on the CD.
K605 Error message "Script error. Continue?" when installing the driver for the graphics tablet supplied with 3D Sketch
This message is associated with the installation interface. This does not affect the installation of the driver for the graphics tablet. Click Yes to continue.
Load Design Wizard
K004 Error message "The embroidery is xx.x mm x yy.y mm and does not fit in the chosen hoop. Choose a different embroidery or increase the hoop size."
This message appears on the Load Embroidery page of the Load Design Wizard if you choose an embroidery that will not fit the chosen hoop size, even if it is rotated. If you wish to load the selected embroidery, step back through the wizard, increase the hoop size as necessary and try again.
K005 "The embroidery will only fit the selected hoop if it is rotated 90 degrees. Is that OK?"
This message appears on the Load Embroidery page of the Load Design Wizard if you choose an embroidery that will only fit the chosen hoop size if it is rotated. If you wish to accept the embroidery you have selected, but rotate it to fit in the hoop, click Yes. Otherwise, click No. If you click No because you want to load the embroidery in its original orientation, you should go back through the Load Design Wizard and change the hoop size or orientation.
Loading Embroideries
G405 Error "Cannot open embroidery."This message appears if the desired embroidery is not where the module expects it to be, for example if an embroidery was loaded into the module from a floppy disk, then closed and the floppy disk removed. The message would appear if you tried to load the embroidery from the Recent Files list on the File menu.
G406 Error "Unrecognized file format."This message appears if the file you are attempting to load is corrupt. For example, it might have the extension .vp3, yet not be a proper Husqvarna Viking / Pfaff embroidery.
G407 Error: "Embroidery is corrupt"The embroidery is corrupt and cannot be loaded. Refer to source of this file for a solution.
FAQ Lists for Husqvarna Viking 3D Software Page 294

G408 Error "Embroidery XY coordinates incorrect"The embroidery is corrupt and cannot be loaded. Refer to source of this file for a solution.
G409 Error "Unrecognized file extension" when opening a fileThis message appears if you attempt to load a file with an extension that does not belong to any embroidery file types. For example, it would appear if you tried to drag and drop a .doc file onto the screen.
G413 Error "Embroidery not created using licensed software."This message may appear if you attempt to load an embroidery created in third-party software. Such embroideries may cause unpredictable results.
G430 I can't drag and drop embroideries from the Open dialog box.To drag and drop embroideries onto the work area, start 3D Organizer. (Alternatively, if you do not have 3D Organizer, right-click the Windows® Start button, then Explore to start Windows® Explorer.) Then follow the instructions in the online help under Drag and Drop.
K004 Error message "The embroidery is xx.x mm x yy.y mm and does not fit in the chosen hoop. Choose a different embroidery or increase the hoop size."
This message appears on the Load Embroidery page of the Load Design Wizard if you choose an embroidery that will not fit the chosen hoop size, even if it is rotated. If you wish to load the selected embroidery, step back through the wizard, increase the hoop size as necessary and try again.
K005 "The embroidery will only fit the selected hoop if it is rotated 90 degrees. Is that OK?"
This message appears on the Load Embroidery page of the Load Design Wizard if you choose an embroidery that will only fit the chosen hoop size if it is rotated. If you wish to accept the embroidery you have selected, but rotate it to fit in the hoop, click Yes. Otherwise, click No. If you click No because you want to load the embroidery in its original orientation, you should go back through the Load Design Wizard and change the hoop size or orientation.
K008 I need to line up the picture and embroidery for a partially completed 3D Sketch project.
When a picture is loaded for creating a new embroidery, the Hoop Size, Orientation and Picture Height are stored in the Notes for the new embroidery. The Picture Height applies to the size of the picture after it has been cropped and/or rotated. Therefore, if the picture was cropped and/or rotated when the project was started, it should have been saved after finishing the Load Design Wizard so that it can be reloaded when you wish to complete the project.
FAQ Lists for Husqvarna Viking 3D Software Page 295

If a cropped and/or rotated picture was not saved, you may be able to get a similar result again but the alignment may not be exact.
To correctly line up a partially completed project, the same Hoop Size, Orientation and Picture Height must be used again. The best way to keep this information to hand is to print a worksheet for the partially completed embroidery before closing 3D Sketch.
If you did not print a worksheet, open the embroidery directly onto the work area and print a worksheet, then use the Load Design Wizard to load the embroidery and picture together.
When you reload the picture and embroidery in the Load Design Wizard, refer to the Notes on your printed worksheet to ensure you use the same Hoop Size, Orientation and Picture Height.
Miscellaneous
G411 Error "Not enough memory to perform operation."This message will appear if system resources are low. Close other programs and try again. If this does not work, try restarting your computer.
Opening the Program
H013 Error "No dongle attached. Cannot open program" when starting my 3D software on Windows® Vista, even though my dongle is inserted.
After you have installed the 3D Embroidery System software on a Windows® Vista computer, download and save the 3D Embroidery Vista Dongle Update [http://www.emnetsoftware.com/downloads/updates/3DEmbroideryVistaDongleUpdate.exe]. After saving the file on your computer, double-click the file to install the dongle update. Note: If the following User Account Control message appears when installing the update: "An unidentified program wants access to your computer", click the 'Allow' option to continue.
K001 Error message "No dongle attached. Cannot open program."This message will appear when trying to start 3D Sketch if the 3D Embroidery System cannot detect the dongle (data protection device). Ensure the dongle is plugged into a free USB port of your computer.
K002 Error message "The program requires a color palette of High Color (16 bit) or higher."
This message appears when attempting to open 3D Sketch if your computer is set to a display of 256 colors or less. Reset the display as follows. 1. Right-click on the desktop and a shortcut menu appears. 2. Click on Properties and a dialog box appears. 3. Click the Settings tab.
FAQ Lists for Husqvarna Viking 3D Software Page 296

4. Change Color quality to High Color (16 bit) or higher using the drop-down menu. 5. Click Apply, and allow your computer to restart if required.
Preferences
K006 Error message "The Minimum ZigZag Width is larger than the Maximum ZigZag Width. Change either the Minimum or Maximum so that the Minimum is the same or smaller than the Maximum."
When setting the Minimum and Maximum ZigZag Width in Stitches Preferences, the Minimum must be the same or smaller than the Maximum. Adjust either the Minimum or Maximum to ensure that the Minimum is not larger than the Maximum ZigZag Width.
Printing
K015 The page numbers only appear on the worksheet part of the print out.The plan view and the picture pages only have stitches and the picture on the printed page. This is necessary on the sheet that prints the picture, so that only the picture is printed onto the printable fabric or tee shirt transfer paper. Similarly, the plan view should only show the picture and the alignment stitches and/or the embroidery.
Saving Embroideries
E012 Error: "Embroidery is too large or is not in the hoop"This message appears if an embroidery you are trying to Save is outside the selected hoop or larger than will fit in it. For example, with the 100mm x 100mm hoop selected, an embroidery smaller than 100mm x 100mm might be placed partially outside the work area when you click Save. This message would then appear. Move the embroidery completely within the four blue corners of the work area and try again. An embroidery that is exactly the same height or width as a hoop is still too large to be stitched out in the hoop. For example, it is possible to stitch out an embroidery that is 99.5mm x 99.5mm in a 100mm x 100mm hoop, but an embroidery that is 100mm x 99.5mm is too large.
E018 Error message "Embroidery has too many stitches for file format."There is a limit on the number of stitches that may be saved to an embroidery file in Pfaff (.pcs) file format. This message appears if the embroidery you attempt to save to this format exceeds this limit.
F519 Error: "Design too large for export format."Certain formats are limited to the number of stitches they can save or the size of hoop used on their specific embroidery machine, for example .sew. If you attempt to save a file in this format that is bigger than the largest available hoop size or has more stitches than are allowed, this message would appear.
G410 Error "Unrecognized file extension" when saving a file
FAQ Lists for Husqvarna Viking 3D Software Page 297

This message appears if you type an incorrect extension that does not belong to any embroidery file types in the File Name box when trying to save a file.
G412 Error "Cannot save file."The module cannot save the file. Ensure that the disk where you are trying to save the embroidery is not write-protected, then try again. For instance, you have loaded an embroidery from a CD-ROM and then attempt to save the embroidery back to the CD. A CD-ROM is read only, therefore you will not be able to save the embroidery.
Saving Files
F519 Error: "Design too large for export format."Certain formats are limited to the number of stitches they can save or the size of hoop used on their specific embroidery machine, for example .sew. If you attempt to save a file in this format that is bigger than the largest available hoop size or has more stitches than are allowed, this message would appear.
Screen Appearance
E024 It seems to take a long time to redraw embroideries when I choose different functions or switch to a new embroidery
The refresh rate of the screen is limited by the power of your computer's processor and RAM as well as the video card and its memory. To get the best performance from your system, try using 2D view as this requires less power than 3D view.
E026 I have changed grid color and spacing and now I wish to return to the original settings
Use 3D Configure to change the grid color. Follow the instructions in 3D Configure and select Blue Gray (RGB values 102, 102, 153) from the standard color dropdown on the Grid Color button. Use Screen Preferences to change the grid spacing. Set the Grid Size to 10.
G415 I have changed the screen background color and now I wish to return to the original light blue
Use 3D Configure to change the background color. Follow the instructions in 3D Configure and select the RGB values 200, 232, 247 in the Colors dialog box.
G418 I can't see some of the floating toolbars or iconsFirst, check View, Customize to see if the missing toolbar has been turned off. If all the toolbar names are checked (so they are turned on) and you still cannot locate a toolbar, it may have been moved to the edge of the screen so it is hard to see. If you move icons around it is possible to delete them. To reset the icons on a toolbar 1. Click View, Customize to see the Customize dialog. 2. Click the Toolbar tab. 3. Click the name of the required toolbar.
FAQ Lists for Husqvarna Viking 3D Software Page 298

4. Click Reset. 5. Click Yes to confirm. The selection of icons on the toolbar and their order will be reset.
K007 Some of the icons in the Toolbar are 'grayed out'.Certain icons (for example, most of the Edit toolbar icons) are only highlighted once there are stitches on the screen.
Selecting Blocks
E041 I used Box Select around an area, but selected some stitches I didn't want. Undo is grayed out so I can't click it.
To cancel a stitch block selection made using Box Select, Freehand Select, Polygon Select or Make Block From Visible Area, click anywhere in the currently active embroidery, but outside the dotted box showing the selected stitches. The stitches will no longer be selected.
Sending Files to Machines
G422 I cannot send a file to an embroidery machineClick the 3D Configure icon to start 3D Configure. This will allow you to adjust the Send 1 and Send 2 options for your embroidery machine.
Thread Colors
G419 "The color xx has been found in your database, but the thread color is not exactly the same."
This message appears if the Thread Range and Color Number of the selected color are identical to those in your thread database, but some aspect of the color is different. It could be a different material or weight, or have additional colors as a variegated thread. This could happen if the design you are attempting to edit was supplied by someone with a different version of the color, for instance if they have edited it in MyThreads, or if they have a later version of the thread database. Use the Import Threads From Embroidery function to add other users’ thread definitions to your MyThreads database. 1. Select Import Threads from Embroidery in the File Menu and an Open dialog box will
appear. 2. Select the desired .vp3 embroidery file. 3. Click Open and any custom thread definitions that do not appear in your MyThreads will
be added to the end of your MyThreads list. To check for the latest updates for the 3D Embroidery System, use Smart Update in 3D Configure.
G420 "Could not find xx in your database. Matching to closest thread in yy."This message appears if the Thread Range of the selected color is not found in your thread database. This could happen if the design you are attempting to edit was supplied by someone with a later version of the thread database. To check for the latest updates for the 3D Embroidery System, use Smart Update in 3D Configure.
FAQ Lists for Husqvarna Viking 3D Software Page 299

G421 Error "Databases are corrupt or missing. Cannot edit the thread color."This message appears if there is a problem with your thread database. You will be unable to choose a thread color. First close all the modules of the 3D Embroidery System, close down your computer and restart. If this does not clear the problem, restore a backup database if you have created one using Thread Manager in 3D Configure. Otherwise, you need a new version of the thread database. To check for the latest updates for the 3D Embroidery System, use Smart Update in 3D Configure. Alternatively, you may need to uninstall and reinstall your 3D Embroidery System software.
Using the Program
K003 Error message "No dongle attached. Cannot complete function."This message may appear when trying to use 3D Sketch if the 3D Embroidery System cannot detect the dongle (data protection device). Ensure the dongle is plugged into a free USB port of your computer.
Working with Embroideries
K011 The embroidery appears too small on the screen.Make sure the 3D Sketch window is maximized by clicking the Maximize icon on the title bar. Click Zoom To Fit to expand the hoop so it fills the work area. Also, choose a Hoop Size in the Load Design Wizard or Hoop Preferences that is suitable to the embroidery size.
K012 I find it hard to select the part of the embroidery I wish to edit.Many functions of 3D Sketch can be used to help see sections of embroideries more easily. They include the Zoom Commands and hiding thread colors. The different methods of selection (Box Select, Freehand Select, Polygon Select and Make Block From Visible Area) are also useful for different situations.
K013 I have added a Color Change and/or new stitches part way through my embroidery, instead of at the end.
This happens when you have a stitch point part way through your embroidery selected and Insert Mode is on. When Insert Mode is on, new stitches and/or color changes are inserted at the selected stitch point. This also affects stitches added to the embroidery with Paste, and embroideries inserted with Open, View, Find Designs and so on. To ensure you only add stitches and color changes at the end of your embroidery, turn off Insert Mode.
FAQ Lists for Husqvarna Viking 3D Software Page 300