Fall/Winter 2001 - Wasatch Front Historical Gaming Society
16
Fire and Fury has long been a popular set of rules for American Civil War gamers. Using the brigade as the basic unit lets you resolve large, corps sized actions quickly and with a degree of historical accu- racy. When our group de- cided to search for a new set of Napoleonic rules af- ter a scenario where we got through two turns in four hours, we came across Age of Eagles. AOE is the Napoleonic version of Fire and Fury and is available free of charge through the Napole- onic Fire and Fury egroup on Yahoo. The rules au- thor is Col. Bill Gray, a noted Napoleonic expert who has done a very pro- fessional job with the rules. Again, the basic unit is the brigade, with each stand representing a battery of guns, 320 infantry, or 160 cavalry. This lets you do large battles that were a staple of the Napoleonic era. Since the figure scale is larger than the original Fire and Fury the firing ranges and movement are greatly changed. The new combat and movement tables (in full color) greatly aid play and players can fig- ure out the sys- tem fairly quickly. Once you’ve played a few turns the need to refer to the rules is vir- tually non- existent and play is very fast, with our group being able to average 10 turns in 4 hours while using 3-4 corps per side. There is also just enough flavor added to the rules without getting bogged down into detail such as Guard units, Rus- sian 12 gun batteries, and the entire square vs. cav- alry debate is handled by two modifiers. Once you’ve resolved a division sized melee with a few die rolls in- stead of a hundred, you’re hooked! Overall, this is now our choice of rules for this era. See the battle report on page 2 & 3. AGE of EAGLES Review & Battle Report Warhammer ECW review by Dennis Hilton As anyone who has gamed with me knows, Warhammer Ancient Battles is my very favorite of all games to play. Its not only the era that com- pels me, but its also how well I feel WAB captures the flavor of ancient combat like nothing I have ever played before. Plus they are easy to use let alone beau- tiful to look at. And might I say, just plain fun. I was very disap- pointed when I heard that the next supplement was English Civil War. But with that be- ing said I ordered my copy from the fine folks at On Military Mat- ters. A group that seams to always get a big portion of my cash at the conventions not to cont. p. 11 Warning Order is a joint publi- cation of two clubs; the Wasatch Front Historical Gaming Society (WFHGS) and the Northern Utah Tacticians and Strategists (NUTS). Members from both clubs contribute to the publica- tion and try to express the gam- ing interests of both groups. Age of Eagles Battle Report 2,3 CD3 Scenario: Battle of Mechili 6-10 Battleground photos 4 Solitaire Boardgames Review 5 Warhammer ECW Review 1,11 N.U.T.S. Update 12,13 WFHGS Update 14 Inside this issue: WARNING ORDER WASATCH FRONT HISTORICAL GAMING SOCIETY Issue #5 Fall/Winter 2001-2 Russian 1812 Division
Transcript of Fall/Winter 2001 - Wasatch Front Historical Gaming Society

Fire and Fury has long been a popular set of rules for American Civil War gamers. Using the brigade as the basic unit lets you resolve large, corps sized actions quickly and with a degree of historical accu-racy. When our group de-cided to search for a new set of Napoleonic rules af-ter a scenario where we got through two turns in four hours, we came across Age of Eagles.
AOE is the Napoleonic version of Fire and Fury and is available free of charge through the Napole-onic Fire and Fury egroup on Yahoo. The rules au-thor is Col. Bill Gray, a noted Napoleonic expert who has done a very pro-fessional job with the rules.
Again, the basic unit is
the brigade, with each stand representing a battery of guns, 320 infantry, or 160 cavalry. This lets you do large battles that were a staple of the Napoleonic era. Since the figure scale is larger than the original Fire and Fury the firing ranges and movement are greatly changed.
The new combat and movement tables (in full color) greatly aid play and players can fig-ure out the sys-tem fairly quickly. Once you’ve played a few turns the need to refer to the rules is vir-tually non-existent and play is very fast, with our group being able
to average 10 turns in 4 hours while using 3-4 corps per side.
There is also just enough flavor added to the rules without getting bogged down into detail such as Guard units, Rus-sian 12 gun batteries, and the entire square vs. cav-alry debate is handled by two modifiers. Once you’ve resolved a division sized melee with a few die
rolls in-stead of a hundred, you’re hooked! Overall, this is now our choice of rules for this era. See the
battle report on page 2 & 3.
AGE of EAGLES Review & Battle Report
Warhammer ECW review by Dennis Hilton
As anyone who has gamed with me knows, Warhammer Ancient Battles is my very favorite of all games to play. Its not only the era that com-pels me, but its also how well I feel WAB captures the flavor of ancient combat like nothing I have ever played before. Plus they are easy to
use let alone beau-tiful to look at. And might I say, just plain fun. I was very disap-pointed when I heard that the next supplement was English Civil War. But with that be-
ing said I ordered my copy from the fine folks at On Military Mat-ters. A group that seams to always get a big portion of my cash at the conventions not to cont. p. 11
Warning Order is a joint publi-cation of two clubs; the Wasatch Front Historical Gaming Society (WFHGS) and the Northern Utah Tacticians and Strategists (NUTS). Members from both clubs contribute to the publica-tion and try to express the gam-ing interests of both groups.
Age of Eagles Battle Report 2,3
CD3 Scenario: Battle of Mechili 6-10
Battleground photos 4
Solitaire Boardgames Review 5
Warhammer ECW Review 1,11
N.U.T.S. Update 12,13
WFHGS Update 14
Inside this issue:
WA
RN
ING
OR
DE
R
WA
SA
TC
H F
RO
NT
HI
ST
OR
IC
AL
GA
MI
NG
SO
CI
ET
Y
Issue #5
Fall/Winter 2001-2
Russian 1812 Division

After a test game of AOE around Thanksgiving and liking what we saw, we decided to try a larger scenario and try the system out for town combat. The situation was that it is the Spring of 1813 and the Emperor is about to deliver a crushing blow to the Allies about 5 miles from this battlefield. The French and Saxons here are part of a has t-ily thrown together formation to hold on the extreme left flank while the Emperor launches his attack elsewhere. The Prussians and Russians are trying to seize these vital villages and roads to use them to get behind the main French army.
The Allies had one Russian corps with six infantry brigades in two divisions and two cavalry divisions. The Prussians had Yorck’s Advance Guard consisting of
several infantry brigades and attached cavalry. The entire force amounted to two corps of infantry and one corps of cavalry. The Allies could enter anywhere from the opposite long edge and the left side of the board.
The Allied plan was to use one Russian d i-vision and pin the Saxons down while the rest of their force attacked the first village. After seizing it they would then continue on and
assault the second village which would ensure the victory.
The French had a Saxon division, two French divisions, and a cavalry corps of two small divisions. Although the French force was small, it had the benefit of good terrain and interior lines to shift reserves.
The French plan was to hold each vil-lage with a division and a few artillery batteries, then place the third infantry division in the center where it could quickly respond to either village to help it’s defense.
Both sides had good plans and since this was only our second battle we were still trying out tactics as well as figuring out how best to use our brigades.
Page 2
Age of Eagles Scenario Replay
W A R N I N G O R D E R
The battle opened up with the Rus-sians moving on board in two different areas, trying to deploy their massive advantage in artillery where it could do the most damage. The Prussians made straight for the village, trying to deploy their columns of infantry to expand into line the following turn. The Prus-sian cavalry charged the French cav-alry guarding the flank of the village and got entangled in a fierce melee.
The Allies were trying to quickly over-whelm one of the villages before the Sax-ons or the reserves could interfere. The French held back on the first turn, waiting to see where the Russians were going to go and when they veered towards the village to assist the Prussians. The French reserves began moving to launch an immediate counterattack should the need arise. The Prussians on the second turn launch
a hasty attack without artillery sup-port to dislodge the French from the village. The first assault is repulsed and the Prussians move up artillery to give support . On the other flank the Russians begin to deploy towards the Saxon held village while the light cavalry division moves to the extreme left flank to see if there’s any way of getting behind the Saxons.
Prussians and Russians combine for an assault on the 1st village. The village was a formidable de-fensive position with fresh troops deployed on the outskirts.
Russians begin to de-ploy for the attack.
Prussians trying to gain a foot-hold in the village.

I S S U E # 5
The first Russian division and it’s ar-tillery begins to attack the other side of the village and the forested hill. The French reserves are committed to battle and a fierce firefight develops on the hill itself. A Russian infantry brigade charges up the hill and pushes back the French infantry. Then, a French counter-attack pushes the Russian infantry back down the hill. French artillery finally reaches the hilltop and with the infantry repulse a second Russian attack. The Russian attack on the village is bloodily repulsed, with the Russian losing two artillery batteries to a French counterat-tack.
Meanwhile, the Prussian cav and the French cav continue to launch charge and countercharge with neither able to
gain the upper hand. A second attack on the village by the Prussians is repulsed again. The Prussian artillery now tries to batter down the defenders with close range fire. Finally, a third Prussian attack gains a foothold in the village. With the reserves tied up on the hill and the Saxons and the rest of the cavalry involved in a stare down with the second Russian division, the French are unable to coun-terattack.
The Prussian
We concluded that with the first vil-lage in their possession and the hill, the Allies were at a decided advantage and would probably win the game if we had the time to finish. There was still a lot of heavy fighting ahead as the Saxons were-n’t going to just go away, so we figured another 5-6 turns would have been needed to completely finish the game. All in all, the scenario worked out well for only our third game.
The Age of Eagles game system was perfect for this type of battle. You had about three corps a side and plenty of town fighting. With most rules it could
Clearly there was a desperate fight for the village, something that we had not seen in our games in quite some time. The French stubbornly held on to the vil-lage outskirts and the Prussians were re-lentless in their attacks. The Russian at-tack on the hill and village, while suc-cessful at first, was bloodily repulsed, with an entire Russian division mauled. Both sides had a good battle plan with a reasonable level of success for each side.
have taken days just to resolve some of those attacks, but the AOE system han-dled them with only a few die rolls. The action was fast and furious with just enough command and control to make things frustrating and prevent your “perfect” plans from coming to fruition. We are definitely hooked and will be playing these rules from now on.
Page 3
Age of Eagles Scenario replay (cont.) cavalry finally defeats the French cavalry, leaving the flank of the village danger-ously exposed. Obviously the first vil-lage is lost and the French need to extri-cate themselves or become trapped. The Prussians push forward, gaining control
of the village and forcing the French back towards the hill. Finally, with great reluctance, the French abandon the vil-lage outskirts and the hill, trying to make it back to the second vil-lage covered by the re-maining cavalry. With that the game is called and we assess the out-come.
Overview of the battle.
The second Russian division de-ploys in front of the Saxon held village. This division accom-plished its task of pinning the Saxons down and drawing off much needed reserves from the main attack.
Prussian infantry assaults the village.

Since we started playing Battleground a few months ago our collection of fig-ures and vehicles has continued to ex-pand. We have had several fun scenarios and quite a few interesting things happen on the tabletop.
For those of you who have not heard of or tried Battleground, it is a WWII skirmish system designed for 20/25mm figures and vehicles. Each player com-mands 1-2 squads or a few vehicles, which is more than enough for a one night game. There is limited command and control with officers and leaders be-ing able to influence morale checks.
Nearly every type of weapon used during the war is covered along with most of the basic vehicles used by the major powers. Additional supplements
and scenarios add new vehicles and rules, such as airborne troops, night fighting, etc… . Here lies the main problem with Battleground and that is the rules them-selves.
First, they are not very well laid out and trying to find something can be an exercise in frustration. The table of con-tents and index reference sections of the rules, but when you go there the section is wrong or isn’t even written yet! In addition, many vehicles and situations are not covered and trying to understand the intent of the authors is not easy to do.
If you can get through the rules and try a game you soon find out that it is pretty fun and fairly realistic. After a few tries you can soon have the firing and vehicles down which forms the core of
the game. Hidden movement is a must for this system, so if you’re looking for a scenic game with lots of figures on the board you’ve come to the wrong place. If you’re searching for the closest thing to playing Squad Leader on the tabletop, then this is for you.
The rules are supported by an egroup on Yahoo which answers rules questions and has additional rules in the files sec-tion. In 25mm figures are available from a number of firms, including Battle Ho n-ours, Wargames Foundry, Ikon, and Old Glory. The best vehicles are those put out by Solido and available on Ebay. In 20mm there are too many companies to list as well as for 15mm. Whatever scale you choose you will be able to use these rules to simulate small unit actions.
Page 4
BATTLEGROUND Photos & Update
W A R N I N G O R D E R
All figures and vehicles in these pictures are from the collections of Lynn, Pat, Gary, Jeff, Mike, Dennis, and Matt. Vehicles are a combination of Solido, Bandai 1/48th plastic kits, and Wargames Foundry. Figures are from a variety of manufacturers and painted to represent a variety of German and U.S. units.
I S S U E # 5
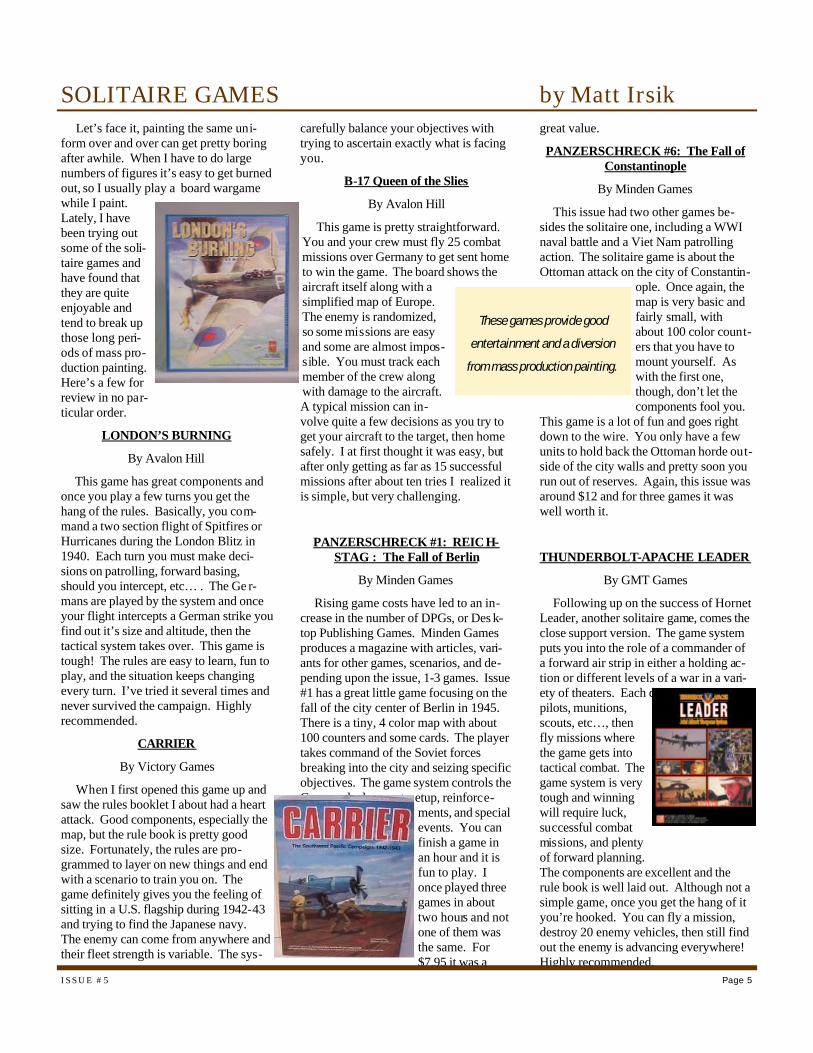
Let’s face it, painting the same uni-form over and over can get pretty boring after awhile. When I have to do large numbers of figures it’s easy to get burned out, so I usually play a board wargame while I paint. Lately, I have been trying out some of the soli-taire games and have found that they are quite enjoyable and tend to break up those long peri-ods of mass pro-duction painting. Here’s a few for review in no par-ticular order.
LONDON’S BURNING
By Avalon Hill
This game has great components and once you play a few turns you get the hang of the rules. Basically, you com-mand a two section flight of Spitfires or Hurricanes during the London Blitz in 1940. Each turn you must make deci-sions on patrolling, forward basing, should you intercept, etc… . The Ge r-mans are played by the system and once your flight intercepts a German strike you find out it’s size and altitude, then the tactical system takes over. This game is tough! The rules are easy to learn, fun to play, and the situation keeps changing every turn. I’ve tried it several times and never survived the campaign. Highly recommended.
CARRIER
By Victory Games
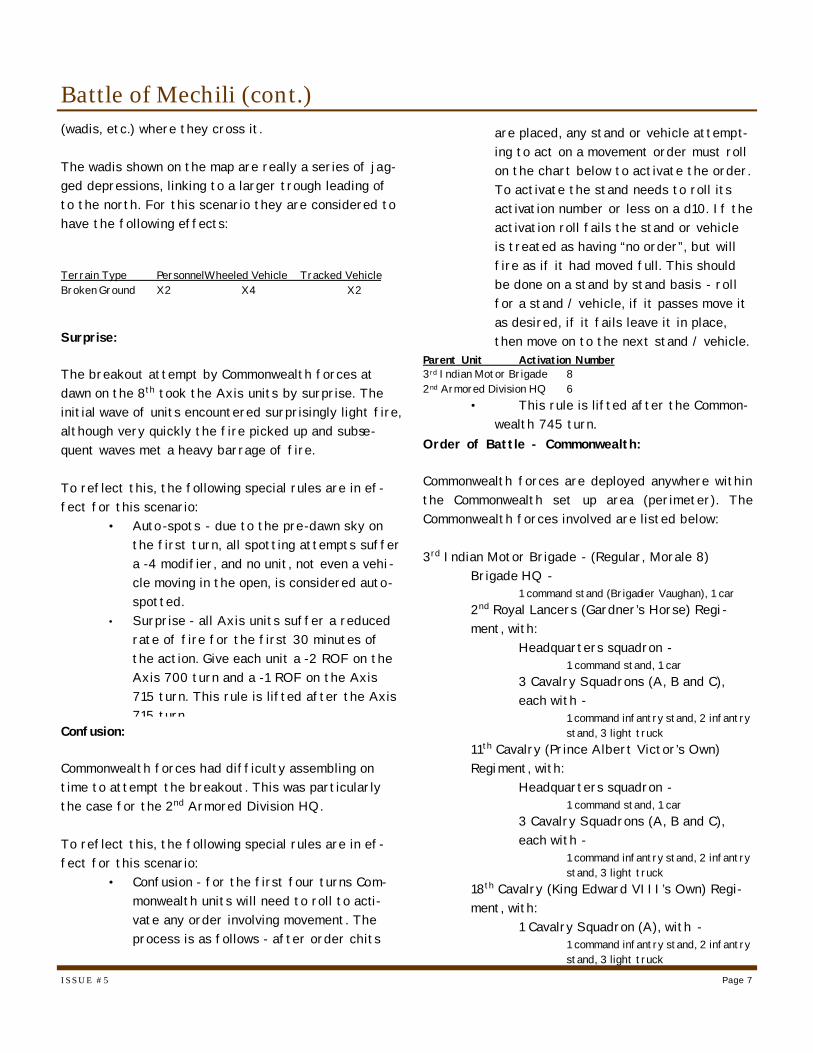
When I first opened this game up and saw the rules booklet I about had a heart attack. Good components, especially the map, but the rule book is pretty good size. Fortunately, the rules are pro-grammed to layer on new things and end with a scenario to train you on. The game definitely gives you the feeling of sitting in a U.S. flagship during 1942-43 and trying to find the Japanese navy. The enemy can come from anywhere and their fleet strength is variable. The sys-
carefully balance your objectives with trying to ascertain exactly what is facing you.
B-17 Queen of the Slies
By Avalon Hill
This game is pretty straightforward. You and your crew must fly 25 combat missions over Germany to get sent home to win the game. The board shows the aircraft itself along with a simplified map of Europe. The enemy is randomized, so some missions are easy and some are almost impos-sible. You must track each member of the crew along with damage to the aircraft. A typical mission can in-volve quite a few decisions as you try to get your aircraft to the target, then home safely. I at first thought it was easy, but after only getting as far as 15 successful missions after about ten tries I realized it is simple, but very challenging.
PANZERSCHRECK #1: REIC H-STAG : The Fall of Berlin
By Minden Games
Rising game costs have led to an in-crease in the number of DPGs, or Des k-top Publishing Games. Minden Games produces a magazine with articles, vari-ants for other games, scenarios, and de-pending upon the issue, 1-3 games. Issue #1 has a great little game focusing on the fall of the city center of Berlin in 1945. There is a tiny, 4 color map with about 100 counters and some cards. The player takes command of the Soviet forces breaking into the city and seizing specific objectives. The game system controls the German deployment, setup, reinforce-
ments, and special events. You can finish a game in an hour and it is fun to play. I once played three games in about two hours and not one of them was the same. For $7.95 it was a
great value.
PANZERSCHRECK #6: The Fall of Constantinople
By Minden Games
This issue had two other games be-sides the solitaire one, including a WWI naval battle and a Viet Nam patrolling action. The solitaire game is about the Ottoman attack on the city of Constantin-
ople. Once again, the map is very basic and fairly small, with about 100 color count-ers that you have to mount yourself. As with the first one, though, don’t let the components fool you.
This game is a lot of fun and goes right down to the wire. You only have a few units to hold back the Ottoman horde out-side of the city walls and pretty soon you run out of reserves. Again, this issue was around $12 and for three games it was well worth it.
THUNDERBOLT-APACHE LEADER
By GMT Games
Following up on the success of Hornet Leader, another solitaire game, comes the close support version. The game system puts you into the role of a commander of a forward air strip in either a holding ac-tion or different levels of a war in a vari-ety of theaters. Each day you must assign pilots, munitions, scouts, etc…, then fly missions where the game gets into tactical combat. The game system is very tough and winning will require luck, successful combat missions, and plenty of forward planning. The components are excellent and the rule book is well laid out. Although not a simple game, once you get the hang of it you’re hooked. You can fly a mission, destroy 20 enemy vehicles, then still find out the enemy is advancing everywhere! Highly recommended.
Page 5
SOLITAIRE GAMES by Matt Irsik
These games provide good
entertainment and a diversion
from mass production painting.

Historical Background: After breaking through the Com-monwealth defenses at Marsa el Bregha, newly arrived German commander Rommel launched his forces in a massive pursuit of the retiring enemy forces. The bulk of the remaining Commonwealth forces were concentrated in the Jebel el Achdar, and withdrew in haste toward Tobruk as German and Italian units pushed through the open desert to their south, outflanking them. On April 5th, the 3rd Indian Motor Brigade, a fresh formation originally planned to reinforce the support Group of the 2nd Armored Division, was sent to the strategic crossroads of Mechili, south of the Jebel, to hold this important position and protect the flank of the with-drawing Commonwealth forces. Over the next several days stragglers from the forward forces joined them, most promi-nently the HQ of the 2nd Ar-mored Division. As Rommel’s forces began to stagger out of the desert on the tracks leading to Mechili, he positioned them to surround the Commonwealth position. Rommel was anxious, wanting to clear out the position and press on into the Allied rear, but needing to bring up sufficient forces to do so. By April 8th the Commonwealth forces had inflicted a signifi-cant delay on Rommel, but now
found themselves virtually sur-rounded. After learning overnight that promised reinforcements would not be arriving, at dawn they opened the battle by at-tempting to break out from their perimeter. Although several squadrons and some AT artillery did manage to escape, the remain-der of the Commonwealth forces failed and surrendered by eve-ning. This scenario recreates the situa-tion on the morning of April 8th. The Commonwealth commanders want to further delay Rommel, and also open a route to withdraw toward Tobruk. Rommel needs to
clear the position as quickly as possible, and also hopes to cap-ture as many of the enemy forces as possible. This makes for a very interesting and fluid situation.
Page 6
Battle of Mechili April 8th, 1941 CD3 scenario by Craig Tyrell
W A R N I N G O R D E R
The map is based on one tabletop - measuring 6’ by 6’.
N
Hill
Trail
Wadi
MechiliFort
CommonwealthSet up Area
Axis Group ASet up Area
Axis Group CSet up Area
AxisGroup
BSet upArea
The Battle of MechiliApril 7, 1941
Axis Entry Edge
Exit Edge
Exit Edge
The terrain around Mechili was mostly open desert, with wadis and hills. El Mechili itself was an old colonial fort, which formed the center of the Commonwealth position. Fort - the fort itself can hold 2 stands, and counts as a stone building. Trails - the trails have no move-ment effect, other than to ne-gate worse than open terrain
I S S U E # 5
(wadis, etc.) where they cross it. The wadis shown on the map are really a series of jag-ged depressions, linking to a larger trough leading of to the north. For this scenario they are considered to have the following effects: Terrain Type Personnel Wheeled Vehicle Tracked Vehicle Broken Ground X2 X4 X2 Surprise: The breakout attempt by Commonwealth forces at dawn on the 8th took the Axis units by surprise. The initial wave of units encountered surprisingly light fire, although very quickly the fire picked up and subse-quent waves met a heavy barrage of fire. To reflect this, the following special rules are in ef-fect for this scenario:
• Auto-spots - due to the pre-dawn sky on the first turn, all spotting attempts suffer a -4 modifier, and no unit, not even a vehi-cle moving in the open, is considered auto-spotted.
• Surprise - all Axis units suffer a reduced rate of fire for the first 30 minutes of the action. Give each unit a -2 ROF on the Axis 700 turn and a -1 ROF on the Axis 715 turn. This rule is lifted after the Axis 715 turn
Page 7
Battle of Mechili (cont.)
Confusion: Commonwealth forces had difficulty assembling on time to attempt the breakout. This was particularly the case for the 2nd Armored Division HQ. To reflect this, the following special rules are in ef-fect for this scenario:
• Confusion - for the first four turns Com-monwealth units will need to roll to acti-vate any order involving movement. The process is as follows - after order chits
are placed, any stand or vehicle attempt-ing to act on a movement order must roll on the chart below to activate the order. To activate the stand needs to roll its activation number or less on a d10. If the activation roll fails the stand or vehicle is treated as having “no order”, but will fire as if it had moved full. This should be done on a stand by stand basis - roll for a stand / vehicle, if it passes move it as desired, if it fails leave it in place, then move on to the next stand / vehicle.
Parent Unit Activation Number 3rd Indian Motor Brigade 8 2nd Armored Division HQ 6
• This rule is lifted after the Common-wealth 745 turn.
Order of Battle - Commonwealth: Commonwealth forces are deployed anywhere within the Commonwealth set up area (perimeter). The Commonwealth forces involved are listed below:
3rd Indian Motor Brigade - (Regular, Morale 8)
Brigade HQ - 1 command stand (Brigadier Vaughan), 1 car
2nd Royal Lancers (Gardner’s Horse) Regi-ment, with:
Headquarters squadron - 1 command stand, 1 car
3 Cavalry Squadrons (A, B and C), each with -
1 command infantry stand, 2 infantry stand, 3 light truck
11th Cavalry (Prince Albert Victor’s Own) Regiment, with:
Headquarters squadron - 1 command stand, 1 car
3 Cavalry Squadrons (A, B and C), each with -
1 command infantry stand, 2 infantry stand, 3 light truck
18th Cavalry (King Edward VIII’s Own) Regi-ment, with:
1 Cavalry Squadron (A), with - 1 command infantry stand, 2 infantry stand, 3 light truck

18th Cavalry (King Edward VIII’s Own) Regi-ment, with:
1 Cavalry Squadron (A), with - 1 command infantry stand, 2 infantry stand, 3 light truck Australian 2/3rd AT Battery [attached],
HQ, with - 1 command stand, 1 light truck
10th AT Battery, with - 3 37mm Bofors ATG portee
11th AT Battery, with - with: (Veteran, Morale 9)
3 37mm Bofors ATG portee “M” Battery, RHA [attached], with: (Experienced, Morale 8)
3 2-pounder ATG portee Note: Command infantry stands have integral Boys AT rifles. 2nd Armored Division - Regular, Morale 8
Division HQ, with: 1 command stand (Gambier-Parry), 1 Dorches-ter ACV, 1 staff radio truck, 1 A13 Cruiser, 1 infantry stand, 1 25-pounder FG, 1 40L56 AAG, 1 gun crew stand, 1 gun crew stand (ds), 1 quad, 2 light truck
Division HQ trains, with: 8 medium supply truck
The Commonwealth forces had recently arrived at Mechili, but they had had time to prepare some de-fensive positions. The Commonwealth player may de-ploy the following defenses as part of his initial setup:
• 4 weapons pits • 12 entrenchments
In addition, all CW forces are considered “concealed” at start and the Axis player must roll to spot them before they are deployed on the table. Support: The Commonwealth forces were promised support, though in reality it did not arrive during the action. As a what if, the Commonwealth force could be aug-
mented with the following forces, which enter the ta-ble from the north or west table edges on a roll of 1-3 on a d10, checking once at the beginning of each Com-monwealth turn on the hour. There is a victory point charge associated with using these forces - see Vic-tory.
104th Royal Horse Artillery, Essex Yeo-manry (experienced, morale 9)
HQ - 1 command stand, 1 FO stand, 2 car 2 Batteries - each with 1 command stand, 1 car, 3 25-pdr FG, 3 gun crew stand (ds), 3 Quad prime mover, 1 me-dium ammo truck, 1 support stand
Remnants, 3rd Armored Brigade, with - Composite squadron - 1 command A13, 1 Mk VIb, 1 M13
Order of Battle - Axis: Axis forces starting on table may be deployed using hidden movement markers in any of the three Axis de-ployment areas shown on the map. No more than 1 group may be deployed in any single area, except Group Bolbrinker may be deployed with Group Schwerin if the Axis commander so wishes. The Axis forces avail-able for the assault on Mechili were the following -
5th Light Division (veteran, morale 9) Divisional HQ (veteran, morale 9)
Headquarters, with: 1 command stand (Streich), 1 kubel-wagen
Group Schwerin, with: (veteran, morale 9)
1 command stand (Schwerin), 1 kubel-wagen, 1 MMG stand, 1 37L45 ATG, 1 gun crew stand, 2 light truck, 1 SP 2cm AA, 1 PzIIC, 1 recon Sdkfz 222
Group Bolbrinker [elements 1st Bn 5th Panzer Regiment] (veteran, morale 9)
Composite company, with: 1 command PzIIC, 1 Pz IVD, 1 recon Sdkfz 222
Group Fabris [elements 3rd Bersaglieri Battal-
Page 8
Battle of Mechili (cont.)
W A R N I N G O R D E R
I S S U E # 5
ion] (experienced, morale 8) Battalion HQ, with:
1 command m/c stand (Fabris), 1 recon m/c infantry stand, 1 engi-neer stand, 1 light truck
1 Motorcycle company, with: 3 m/c infantry stand, 1 m/c MMG stand
142nd AT Gun company, with: 2 gun crew stand, 2 47L32 ATG, 2 light truck, 2 SP 20L65 AAG
2 Batteries, 1/132nd Artillery Regi-ment [attached], each with:
3 gun crew stand (ds), 3 75L27 FG, 3 tractor
Group Montemurro [elements 8th Ber-saglieri Regiment and 12th Bersaglieri Autoporto Battalion] (experienced, morale 8) [later arrival]
HQ, 8th Bersaglieri Regiment, with: 1 command stand (Montemurro), 1 car, 1 recon m/c infantry stand, 2 81mm mortar stand (ds), 1 engi-neer stand, 1 light truck, 2 medium truck
12th Bersaglieri Battalion HQ, with: 1 command stand, 1 car, 1 recon m/c infantry stand
Composite company, with: 2 infantry stand, 2 MMG stand, 1 37L45 ATG, 1 gun crew stand, 1 light truck, 2 medium truck
72nd AT Gun company, with: 1 SP 20L65 AAG, 2 gun crew stand, 2 47L32 ATG, 2 light truck
1 Battery, 1/132nd Artillery Regi-ment [attached], with:
3 gun crew stand (ds), 3 75L27 FG, 3 tractor
2nd MG Group (veteran, morale 9) [later ar-rival]
Headquarters company, with: 1 command stand, 1 car, 1 recon m/c infantry stand
MG company, with: 1 command MMG stand, 2 MMG stand, 1 light truck, 1 medium truck
Heavy company, with:
1 gun crew stand, 1 37L45 ATG, 1 light truck
The Axis player may deploy his initial forces in the areas shown on the scenario map. The remaining forces enter by rolling their entry number or below on a d10 accord-ing to the chart below. The Axis commander may roll once in his command phase of every 4th turn (on the hour). German Arrivals Entry Number Unit Location* 6 Group Bolbrinker* South board edge 6 Group Montemurro South board edge 2 2nd MG group South board edge
* - Group Bolbrinker may either set up as shown on the map or may roll for entry anywhere along the south map edge as above. Scenario Length - The scenario opens with the 7am turn, and ends due to darkness at 6:30pm. Dusk begins reducing visibility from 5:30pm in the evening. Mechili Turn Record Chart Turn Notes Arrivals? Turn Notes Arrivals? 700 1300* 715 1315 730 1330 745 1345 800 1400* 815 1415 830 1430 845 1445 900* 1500* 915 1515 930 1530 945 1545 1000* 1600* 1015 1615 1030 1630 1045 1645 1100* 1700* 1115 1715 1130 1730 Dusk 1145 1745 Dusk 1200* 1800* Dusk 1215 1815 Dusk 1230 Scenario Ends 1245 * - potential Commonwealth VP for holding Mechili Victory Conditions -
Page 9
Battle of Mechili (cont.)
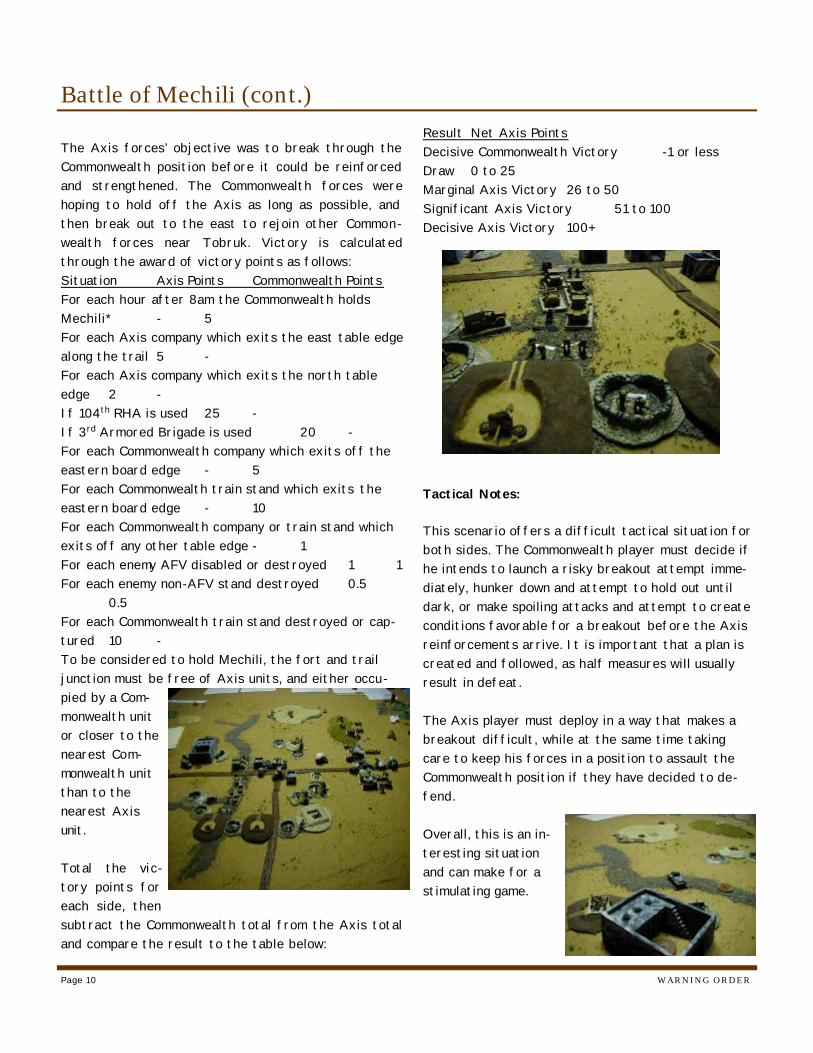
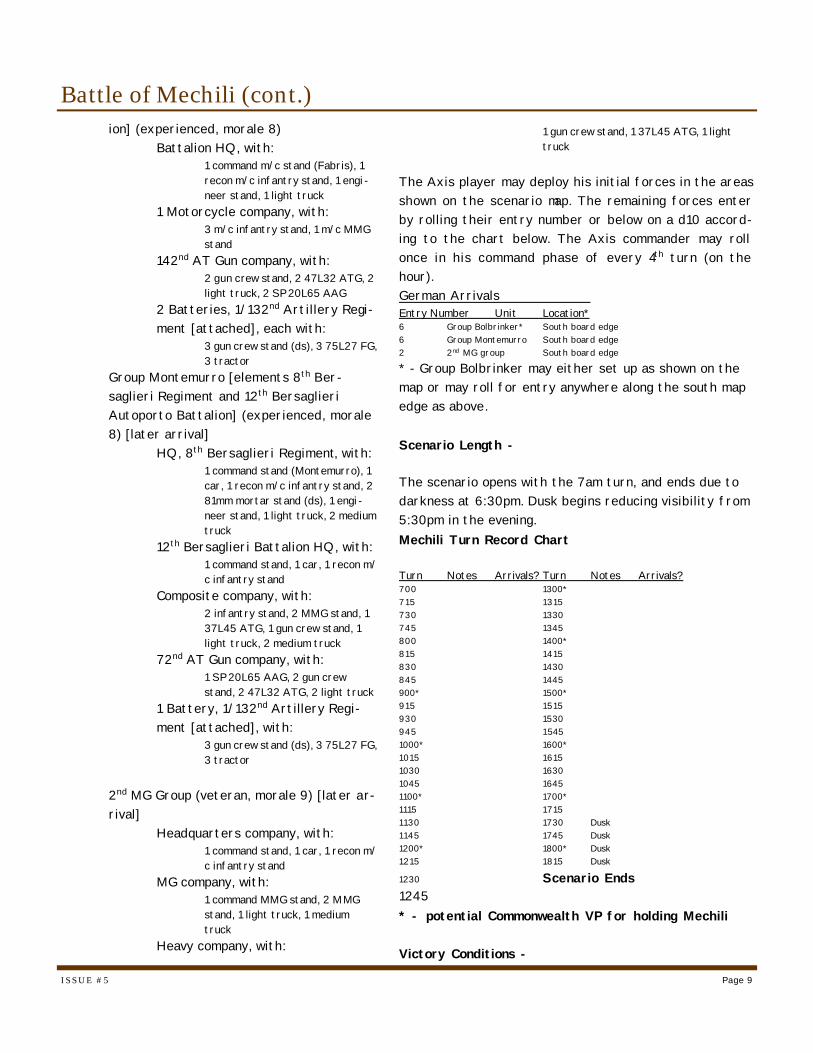
The Axis forces’ objective was to break through the Commonwealth position before it could be reinforced and strengthened. The Commonwealth forces were hoping to hold off the Axis as long as possible, and then break out to the east to rejoin other Common-wealth forces near Tobruk. Victory is calculated through the award of victory points as follows: Situation Axis Points Commonwealth Points For each hour after 8am the Commonwealth holds Mechili* - 5 For each Axis company which exits the east table edge along the trail 5 - For each Axis company which exits the north table edge 2 - If 104th RHA is used 25 - If 3rd Armored Brigade is used 20 - For each Commonwealth company which exits off the eastern board edge - 5 For each Commonwealth train stand which exits the eastern board edge - 10 For each Commonwealth company or train stand which exits off any other table edge - 1 For each enemy AFV disabled or destroyed 1 1 For each enemy non-AFV stand destroyed 0.5 0.5 For each Commonwealth train stand destroyed or cap-tured 10 - To be considered to hold Mechili, the fort and trail junction must be free of Axis units, and either occu-pied by a Com-monwealth unit or closer to the nearest Com-monwealth unit than to the nearest Axis unit. Total the vic-tory points for each side, then subtract the Commonwealth total from the Axis total and compare the result to the table below:
Result Net Axis Points Decisive Commonwealth Victory -1 or less Draw 0 to 25 Marginal Axis Victory 26 to 50 Significant Axis Victory 51 to 100 Decisive Axis Victory 100+
Tactical Notes: This scenario offers a difficult tactical situation for both sides. The Commonwealth player must decide if he intends to launch a risky breakout attempt imme-diately, hunker down and attempt to hold out until dark, or make spoiling attacks and attempt to create conditions favorable for a breakout before the Axis reinforcements arrive. It is important that a plan is created and followed, as half measures will usually result in defeat. The Axis player must deploy in a way that makes a breakout difficult, while at the same time taking care to keep his forces in a position to assault the Commonwealth position if they have decided to de-fend. Overall, this is an in-teresting situation and can make for a stimulating game.
Page 10
Battle of Mechili (cont.)
W A R N I N G O R D E R

I S S U E # 5
mention a few times during the year. I decided to buy them to complete my set. Kind of like I did with Chariot Wars. Though I love ancients I am not sure Gary could ever play an ancient battle without any Romans. I really have never read much about ECW nor had really any real interest to game the era. But being the Notting-ham clone that I am I started to read my trusty Osprey Campaign book that I own on the era. Well, to say the least I was more and more discouraged. As I read I realized that warfare in the 17th century was a whole new baby com-pared to Greeks and Romans slugging it out. I started to wonder how the regi-ments might look. And even bigger is-sue, how they might act. As they are a mix of pike and shot the current addi-tion of Warhammer I did not feel would work very well. Boy was I in for a big shock. As I looked through the rules the first thing I really enjoyed was that on every page of the army lists there is on the border historical commentary. That helps a 17th century moron such as my-self get the feel of the era. But this be-ing fluff I went straight for the issues that I had thought of would be prob-lems. #1 being cavalry. In the ECW there were 2 very distinct schools of thought. First off the standard Euro-pean way that came about using Reiter's or Harquebusier's that part of the unit would ride up to there target and fire there weapons and retire to the rear as another part would replace them and so on. When the enemy was disor-dered then the cavalry would charge. A maneuver called a Caracole. This type of maneuver and training was favored by the Parliamentarian's early on in the war. The Royalist's favored the Swed-ish school of thought brought about by Gustavus Adolphus of not firing there weapons but charge head long into the enemy to break them with shock of im-pact. Warhammer ECW makes a very big distinction between what they call Trotter's and Gallopers. Not only is the movement rate different as the Trotters always moved at a slower pace to keep
there formation in tact but they have differing attributes in combat. #2 issue I had was how would the com-bined pike and shot units be handled? In the Ancient rules there is not really any need to have such differing types of troops that are part of the same unit. In Warhammer ECW 3 units make up 1 regiment. 1 pike and 2 musket. To sup-port one another they have to stay with in 2" of each other. This way one can run there infantry regiments along ei-ther the Dutch philosophy or the Swed-ish. (does I show I have put way to much thought into this)? I wont go into the differences here but they are all part of combat in this era handled nicely by these rules. Also shot can fire 2 ranks deep called "salvo fire." Again another nice idea to make the game look like the era. To make a long story shot I love what I see. There is also a section on cam-paigns as well as detailed army lists on the early Parliamentarians, Royalists, The New Model Army (the beginning
of British units wearing the red coat), and Scottish armies. There is also a section on the army of Montrose. Com-plete with his Irish Brigade. ( I can al-most hear Pat's cheer rise from West Jordan) I am not sure anyone would be inter-ested in getting into this era but if that does happen, I think Warhammer Eng-lish Civil War is a winner. So much so I am left with a feeling of hope that there might be an Armies of Antiquity size supplement for the Thirty Years War.
From the Editor
As with all Warhammer products the rule book is very nicely done. As Dennis stated above the rules are clearly laid out and if you have any familiarity with this system you should be able to pick it up pretty easily. Al-though I have quite a few problems with the ancients rules it looks like this system will work for the ECW. With both sides being able to defend against charges with firepower, it will take away some of the unusual results from the ancients rules where I felt that chargers had too much of an advan-tage. There have been some rules changes from the authors (some are quite important) that they have made available online in the form of an er-rata sheet. Overall, the rules look pretty good and those who have tried them seem to like the playability. The ECW featured numerous sieges, plenty of major battles, and literally hundreds of smaller sized engagements, so the scenario potential is quite vast.
REFERENCE MATERIAL
Although there are thousands of books on the subject, there is little in the way of information on uniforms and flags, particularly on the Royalist side. Osprey has several titles out that have pretty good color plates and will give you a good idea of clothing for that era. The Brassey series of books is also excellent, mixing in color artwork with photos of reenactors. Two sites that are quite helpful are www.warflag.com which offers 25mm ECW flags and www.sealedknot.org which has over a hundred photos of reenactors, including some huge battles along with some uniform and flag information.
FIGURES 25mm 15mm Redoubt Frei Korps Perry Miniatures Minifigs Wargames Foundry Essex Renegade Matchlock Old Glory
Page 11
Warhammer ECW review (cont.)
25mm Old Glory Royalist cavalry.

Last October, my secretary, who teaches American History part time at the Salt Lake Community College, asked me to cover the unit on the Civil War. Naturally I thought a little show and tell would help bring the subject to life, so I dusted off my 25mm soldiers and prepared a diorama. The pivotal Battle of Antietam immediately came to mind, not just as the bloodiest single day of the ACW, but because it ended the first Southern invasion of the north and paved the way for the Emancipa-tion Proclamation. After building some orchards, worm fences, and a stone bridge for General Burnsides to cross, I
set it up in the basement and naturally couldn’t resist the temptation to invite the gang over to fight it out. I tailored the army lists from Fire & Fury’s “Great Eastern Battles” supplement for an ACW variant of our Napoleon Rules! Gary took command of his be-loved Confederate troops, while Craig, my son Chris, and I each took com-mand of Union Corps as they succes-sively entered the fray. The fighting north of Sharpsburg erupted at 6:00 in the morning when Fighting Joe Hooker (no more snide comments please) set his trollops—er, uh, troops forward from the North Woods against Stonewall Jackson's po-sitions on the hill east of Dunkard Church and in the West Woods behind it. The pacifist German sect was very
dismayed to find their modest house of worship become the focal point for the Bloodiest Day of the Civil War. Hooker (a.k.a. Craig) callously ignored their protests and launched his right flank (Doubleday) southward, to clear the open field east of the Hagerstown Pike. His green-clad 2nd US Sharp-shooters faced off against the 16th Ala-bama in the West Woods while his 4th Illinois troops turned to swap fire with a Rebel horse battery posted on Nico-demus hill to his right. Having a pre-monition of great danger, his center (Ricketts) held its position behind the cornfield, and his left (Meade, partial)
only advanced to the edge of the East Woods, to secure them until Mansfield's Corp could arrive. (The Bart Woods were not fea-tured in the terrain, but the Gary Grove played a key role in the Con-federate defense.) Meanwhile, the Un-
ion artillery com-mander, whose brother must have been shelled at Fort Sumter, spotted a large South Caro-
lina regiment (the 12th) just south of the cornfield and continued to target it throughout the battle. Ignoring all other considerations, his guns continued to tear gaps in the Caro-linian ranks until they finally the fled the field. The Confeder-ates had a Whitworth battery (OK, Craig, I give up, what is a wit worth?) which re -turned fire for a time on the Union batteries, but soon found better targets. The attack on his horse battery provoked Fitzhugh Lee to dis-mount his troopers and rush onto the
battlefield to its aid, but their fire was ineffective. The Alabama men, firing from cover, did better against the ex-posed riflemen, who in frustration charged the tree line, only to suffer more casualties to shot, shell, and can-ister from a battery positioned directly in front of the church, then even more in melee. It was too much for them; they broke and ran. Simultaneously, the Illinois men charged uphill, striking F. Lee's men and pushed them back, but were too exhausted to pursue. When the sharpshooters fled, the ex-posed Illinois men fell back, too, while and 23rd Ohio regiment advanced to help cover the gap in the lines. Lee's men mo unted up and the horse guns advanced, while the exuber-ant Alabama troops, flush with victory gleefully charged forward in pursuit—advancing into range of the Yankee reinforcements. Savaged by fire, the rebels were repulsed in turn and limped back to their positions in the woods. Mansfield (Chris) arrived and began to push forward through and to the east of the East Woods, to challenge posses-sion of the center. Meade's Michigan troops skirted behind the cornfield to reunite with their Ohio comrades who were again pressing forward on the Un-ion right, opposite Hood's troops who arrived just in time to shore up the flag-ging Alabama men. In the center, Mansfield aggressively stuck the 5th
Mississippi holding the eastern edge of the hill and forced them beyond the
Page 12
Battle of Sharpsburg Scenario Replay By James Morgan
W A R N I N G O R D E R
Looking north from Sharpsburg past the orchards and a sunken road to the hills and woods beyond.
The Dunkard Church is along the road to the upper right.
The Union lines stabilize and repel the Confederate counterattack from the West Woods
I S S U E # 5
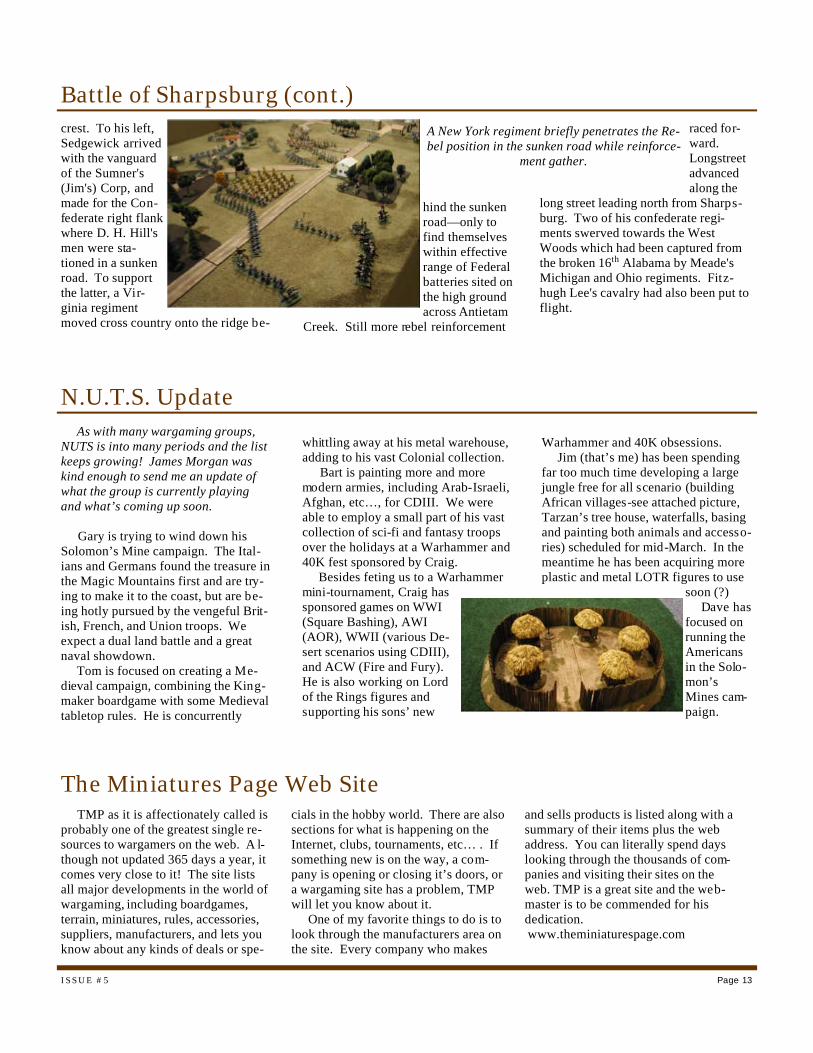
crest. To his left, Sedgewick arrived with the vanguard of the Sumner's (Jim's) Corp, and made for the Con-federate right flank where D. H. Hill's men were sta-tioned in a sunken road. To support the latter, a Vir-ginia regiment moved cross country onto the ridge be-
hind the sunken road—only to find themselves within effective range of Federal batteries sited on the high ground across Antietam
Creek. Still more rebel reinforcement
raced for-ward. Longstreet advanced along the
long street leading north from Sharps-burg. Two of his confederate regi-ments swerved towards the West Woods which had been captured from the broken 16th Alabama by Meade's Michigan and Ohio regiments. Fitz-hugh Lee's cavalry had also been put to flight.
Page 13
Battle of Sharpsburg (cont.) A New York regiment briefly penetrates the Re-bel position in the sunken road while reinforce-
ment gather.
As with many wargaming groups, NUTS is into many periods and the list keeps growing! James Morgan was kind enough to send me an update of what the group is currently playing and what’s coming up soon. Gary is trying to wind down his Solomon’s Mine campaign. The Ital-ians and Germans found the treasure in the Magic Mountains first and are try-ing to make it to the coast, but are be-ing hotly pursued by the vengeful Brit-ish, French, and Union troops. We expect a dual land battle and a great naval showdown. Tom is focused on creating a Me-dieval campaign, combining the King-maker boardgame with some Medieval tabletop rules. He is concurrently
whittling away at his metal warehouse, adding to his vast Colonial collection. Bart is painting more and more modern armies, including Arab-Israeli, Afghan, etc…, for CDIII. We were able to employ a small part of his vast collection of sci-fi and fantasy troops over the holidays at a Warhammer and 40K fest sponsored by Craig. Besides feting us to a Warhammer mini-tournament, Craig has sponsored games on WWI (Square Bashing), AWI (AOR), WWII (various De-sert scenarios using CDIII), and ACW (Fire and Fury). He is also working on Lord of the Rings figures and supporting his sons’ new
Warhammer and 40K obsessions. Jim (that’s me) has been spending far too much time developing a large jungle free for all scenario (building African villages-see attached picture, Tarzan’s tree house, waterfalls, basing and painting both animals and accesso-ries) scheduled for mid-March. In the meantime he has been acquiring more plastic and metal LOTR figures to use
soon (?) Dave has focused on running the Americans in the Solo-mon’s Mines cam-paign.
N.U.T.S. Update
The Miniatures Page Web Site TMP as it is affectionately called is probably one of the greatest single re-sources to wargamers on the web. A l-though not updated 365 days a year, it comes very close to it! The site lists all major developments in the world of wargaming, including boardgames, terrain, miniatures, rules, accessories, suppliers, manufacturers, and lets you know about any kinds of deals or spe-
cials in the hobby world. There are also sections for what is happening on the Internet, clubs, tournaments, etc… . If something new is on the way, a com-pany is opening or closing it’s doors, or a wargaming site has a problem, TMP will let you know about it. One of my favorite things to do is to look through the manufacturers area on the site. Every company who makes
and sells products is listed along with a summary of their items plus the web address. You can literally spend days looking through the thousands of com-panies and visiting their sites on the web. TMP is a great site and the web-master is to be commended for his dedication. www.theminiaturespage.com

The last few months have seen our group do quite a few games in a variety of periods. First off, after much discus-sion we have now chosen Age of Eagles as our choice for Napoleonic rules (see review on page 1). After rebasing Rus-sians for two months we finally played it around the Christmas holidays and we definitely liked what we saw. So now, everyone is working on rebasing their forces and expanding units which will hopefully let us play a campaign at some point.
Warmaster has also been an area where we are expanding our forces rap-idly. We had a chance to play a few games since last issue which only fueled the fire more! I think the reason we like it is because the units are sold in packs, there is command and control, and it looks good as well as it is fun to play. I just ran a very successful tournament at a local hobby store which gave me a chance to see a variety of armies and styles of generalship. This is certainly a game that we will be playing more often in the future.
After changing from the Sudan to the Northwest Frontier we have embarked on a project to build up our forces for this new area. I was having a hard time find-ing Ral Partha figures and they wouldn’t fit with anything else, so our Colonial period was stuck. We have gone to the larger 25mm figures and are slowly and surely building up the collection. We had our first game a few weeks ago using the new, revised version of the Sword and the Flame and the “Continuous Action” sup-plement from an old issue of The Courier. The game went well, so we will be doing this period much more in the future.
One of the newer periods that we have had fun with is the Mongol Invasion of Europe using the Pig Wars rules. These games are pretty free wheeling and every-one has a pretty good time.
Perhaps the biggest event since last issue was when our friend from the group in Sandy, Utah as ked us over for a big Age of Reason battle. They use a great terrain system which really represents a battlefield’s undulations, roads, and river beds very well. It was the largest AOR
units a side! You quickly find out that you lose track of what is happening on
other parts of the field as you are entirely focused on your command. It clearly showed how hard it is for commanders to keep track of large engagements and how little influence you have on overall events. It also showed the need for re-serves and support so that you don’t get stretched too thin. This is certainly some-thing that we will need to do at least once a year.
By next issue we should have more
Northwest Frontier stuff done, more Na-poleonics, and we need to get back to the American Civil War and CD3. Some of us are going to build up forces for War-hammer English Civil War which will take awhile since it is in 25mm. We also need to improve our selection of 25mm terrain for a variety of areas, especially the Northwest Frontier and come up with some ideas for wider rivers.
Page 14
WFHGS Update
W A R N I N G O R D E R
Russian division deploys to attack the French positions.
The fortress I built from plans and card templates off the Web.
Mike’s British and Australian forces advance to meet the Pathans.
25mm Teutonic Knights and Poles
The main Prussian line of battle.
Austrians and Russians move into posi-tion for the attack.
I S S U E # 5
city. They can then be used for games like Battleground, Pig Wars, etc… . Each building has lift off roofs and some have several floors that come apart to place figures inside. The pictures don’t do the first square justice as it is truly incredible to see in person. The first square I saw had a river running through the terrain block with bridges in several
places. Once this is finished it will be an incredible set up, probably one of the most impressive I’ve ever seen. We can only wait for the rest of the squares to be completed and then try it out. Hope-fully, Jim will write an article about how he did this.
Jim Cornell, our group’s master crafts-man, has embarked on an ambitious and incredible project. The goal is to produce 12 two foot squares that can be linked together to form a village or section of a
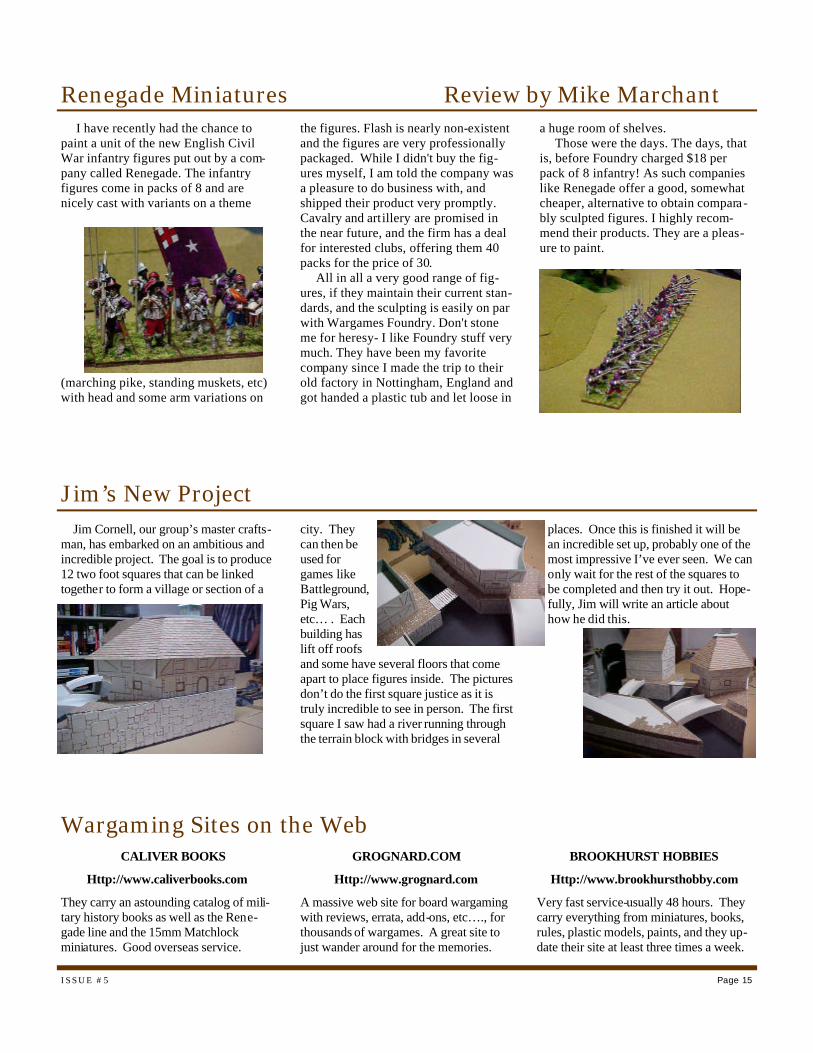
I have recently had the chance to paint a unit of the new English Civil War infantry figures put out by a com-pany called Renegade. The infantry figures come in packs of 8 and are nicely cast with variants on a theme
(marching pike, standing muskets, etc) with head and some arm variations on
the figures. Flash is nearly non-existent and the figures are very professionally packaged. While I didn't buy the fig-ures myself, I am told the company was a pleasure to do business with, and shipped their product very promptly. Cavalry and artillery are promised in the near future, and the firm has a deal for interested clubs, offering them 40 packs for the price of 30. All in all a very good range of fig-ures, if they maintain their current stan-dards, and the sculpting is easily on par with Wargames Foundry. Don't stone me for heresy- I like Foundry stuff very much. They have been my favorite company since I made the trip to their old factory in Nottingham, England and got handed a plastic tub and let loose in
a huge room of shelves. Those were the days. The days, that is, before Foundry charged $18 per pack of 8 infantry! As such companies like Renegade offer a good, somewhat cheaper, alternative to obtain compara-bly sculpted figures. I highly recom-mend their products. They are a pleas-ure to paint.
GROGNARD.COM
Http://www.grognard.com
A massive web site for board wargaming with reviews, errata, add-ons, etc…., for thousands of wargames. A great site to just wander around for the memories.
CALIVER BOOKS
Http://www.caliverbooks.com
They carry an astounding catalog of mili-tary history books as well as the Rene-gade line and the 15mm Matchlock miniatures. Good overseas service.
BROOKHURST HOBBIES
Http://www.brookhursthobby.com
Very fast service-usually 48 hours. They carry everything from miniatures, books, rules, plastic models, paints, and they up-date their site at least three times a week.
Page 15
Jim’s New Project
Renegade Miniatures Review by Mike Marchant
Wargaming Sites on the Web

I was finally able to get the first four issues into a PDF file to put up on
the web site, so we are now an official online journal. I do have plans to
expand the journal to perhaps include games, campaigns, rules supplements,
etc…, in the near future, but it’s going to take a lot of work each issue. For
now I’ve settled on the 14-16 pages per issue which is about as much as a
one man publishing operation can work on successfully. I would like to in-
clude more battle reports, reviews, and special features for future issues.
Now for some editorializing! What is this current trend towards Vam-
pires, Gothic, Street Violence, etc…? I’ve heard explanations ranging from
trying to cash in on the Games Workshop merchandise to the fact that de-
signers have exhausted every period! If historical gamers wanted to do fan-
tasy they would get into Games Workshop stuff, not buy it from Wargames
Foundry. There are many periods still untouched or only with a few offer-
ings. If new companies would quit coming out with another line of ACW or
Napoleonics they might have some success. A great idea would be to launch
a range of 10mm historical armies with units sold in packs ala Warmaster.
WASATCH FRONT HISTORICAL GAMING SOCIETY
of what troops were where and why. You do get to meet many of the Ranger officers and soldiers who will be in-volved as well as your first taste of what Delta Force is.
The mission is fairly well explained and the build up to the events leads you to believe that this was planned out well, just no one expected the amount of resistance they would meet. The next two hours are probably the best firefight and military action on film, definitely rivaling Saving Private Ryan’s opening scenes. The struggles of individual sol-diers, the relief convoys, the massive fire-
fights, and the utter hopeless-ness of the situa-tion are bril-liantly brought to life on the screen. You do get the sense of what it must have been like to have been
Author Mark Bowden wrote Black Hawk Down a few years ago, chronicling the raid in Mogadishu, Somalia by Rang-ers and Delta Force in 1993. Before the book the only thing most Americans knew or saw revolved around the pictures on CNN of s everal dead U.S. soldiers being drug through the street.
Finally a movie version has ar-rived which involves Ridley Scott, the same person responsible for Gladiator. While the movie is almost two and a half hours long I still recommend reading the book as it is almost as exciting as the film. A full accounting of the book would take about s ix hours, but the movie does an excellent job of trying.
The opening scenes depict the country of Somalia and the UN relief operations. You get a pretty good idea of what’s going on here, even though I would have liked a better explanation
going on a routine mission and end up battling for your life.
Are there some flaws?
Yes, but they are few and minor. The results of the raid aren’t detailed enough and the military triumph it was is not dis-cussed (18 killed vs. 1,000 of the enemy). Characters are only given limited screen time and you don’t really get to know them. But these are minor points in an otherwise great war movie.
The sets, equipment, and direc-tion are first rate. The fighting itself is brutally portrayed and this movie will be hard to beat for a long time to come. Hopefully the DVD version will have extra features and scenes to make a great film even better.
Black Hawk Down by Matt Irsik
Email: [email protected]
The Best in Historical Simulations
We’re On The Web! www.wfhgs.com
WFHGS