Exercise 2: Predictive MRP
19
s4h26 – Unit 4 / Exercise 2 s4h26 openSAP: Production Planning with Demand Simulation and Finite Scheduling Exercise 2: Predictive MRP PUBLIC
Transcript of Exercise 2: Predictive MRP
s4h26 – Unit 4 / Exercise 2
s4h26 openSAP: Production Planning with Demand
Simulation and Finite Scheduling
Exercise 2: Predictive MRP
PUBLIC

s4h26 – Exercise 2
2
Contents BEFORE YOU START ........................................................................................................................... 3
Prerequisites for this exercise ........................................................................................................ 3
Logon Data .................................................................................................................................... 3
Logon to system (SAP S/4HANA) .................................................................................................... 3
Used Master data: ......................................................................................................................... 3
Exercise 2: Predictive MRP................................................................................................................. 4
Overview ....................................................................................................................................... 4
Objective ................................................................................................................................... 4
Exercise Description ................................................................................................................... 4
Step 1: Create a simulative scenario for predictive MRP ................................................................ 5
Step 2: Process predictive MRP Simulations ................................................................................. 11
Step 3: Release simulation scenario to productive environment .................................................. 17

s4h26 – Exercise 2
3
BEFORE YOU START
Prerequisites for this exercise
You must have created your own instance “SAP S/4HANA CAL system”. Details are provided on the webpages of the course and in the Exercises of Unit01 of this course.
Execute Exercise 1 “Maintain Planned Independent Requirements” of Unit 4
Logon Data
User: S4H_PPS
Password: Welcome1
Logon to system (SAP S/4HANA)
You will need to access the system using the Windows Remote Desktop connection.
Use the following URL to access the SAP Fiori Launchpad –
https://vhcals4hcs.dummy.nodomain:44301/sap/bc/ui2/flp?sap-client=100&sap-language=EN
The URL is available on the Welcome page of the system.
Logon to the SAP FIORI Launchpad.
Used Master data:
Product Group: R-FIN
Materials: R-FIN-10
R-FIN-20
R-FIN-30
R-FIN-40
R-FIN-50
R-FIN-60

s4h26 – Exercise 2
4
Exercise 2: Predictive MRP
Overview
Estimated time: 20 mins
Objective In this exercise you simulate and evaluate the inactive forecast scenario, which
you have created in exercise 1, in predictive MRP.
Exercise Description
The goal of predictive material and resource planning (pMRP) is to identify potential
capacity and material issues for the long-/midterm planning horizon. Evaluate possible solutions as early as possible in the planning process based on a simplified requirements plan using a simplified material requirements algorithm.
As a result of the simulation, production planners are prepared to take decisions on changed conditions, for example with regards to demand planning, resource plans, preproduction, or make-or-buy decisions.
In the App Schedule Predictive MRP Simulation you define which data is going to be considered as reference data for a simulation. Then you start the creation of a simulation scenario which can be processed in the Process pMRP Simulations app.
Predictive MRP provides information on capacity load and material requirements across all BOM levels for the simulation scenario. KPIs on capacity and material
issues are calculated on-the-fly. The system supports you by providing solution proposals to solve capacity issues. You can check the impact of simulated changes to capacity or demands on the KPIs and different simulation views.
After adjusting some forecast, you release the simulation scenario to the productive environment. This means that planned independent requirements are created and
relevant to the productive MRP.

s4h26 – Exercise 2
5
Step 1: Create a simulative scenario for predictive MRP In this process step, you create a simulative scenario by scheduling a predictive MRP Simulation Creation. What to Do What You Will See
1. Access the SAP FIORI Launchpad. Navigate to Predictive Material and Resource Planning.
2. Select the App Schedule pMRP Simulation Creation.
3. There is an overview of the jobs created on the current date or the day before. Click on Create to maintain a new job for creating a simulation scenario.

s4h26 – Exercise 2
6
4. In the first step you select a template for the simulation scenario. Click on the input help for the job template.
5. To see the full list of available templates, delete the current selection by clicking on the X.
6. Select the template openSAP Demo.
7. Maintain any job name and click on Step 2.

s4h26 – Exercise 2
7
8. The job should be executed immediately as maintained in the template. Click on Step 3.
9. The parameter settings have been copied from the template. Some entries have to be adjusted. Define a new name for the ID for Reference Data (e.g. OPENSAP_DEMO_005) and for Simulation ID (e.g. OPEN_SAP_DEMO_05). The ID for the Reference Data and for the Simulation ID should not be the same. If the name for the ID for Reference Data and for Simulation ID is already exist in the system, you will get an error message in step 14 and have to change the names (e.g. …005 → …006)
10. The bucket category for the planning periods should be set to W for Week.

s4h26 – Exercise 2
8
11. The start and end date of reference defines the horizon for selecting the data for the simulation scenario and simulation horizon in predictive MRP. Select the date of the Monday of the next week as the Start Date of Reference.
12. Select the start date plus approx. 4 months as the End Date of Reference.
13. Scroll down to the object selection. The plant 1710 and the MRP controller RIG are copied from the template. Please check the settings for “Consider inactive PIR versions”. The version should be 05 according to Exercise 1. (05 or version you created in Exercise 1) If there is any other version maintained, delete this setting and select version 05. Click on OK.

s4h26 – Exercise 2
9
14. Click on Check to check the consistency of the settings. You should get the information: “You can go ahead and schedule the job.” If there is any other message, change the settings according to the message. If you get the message “Reference ID OPENSAP_DEMO_005 already exists and cannot be created” go back to step 9 and change the names accordingly.
15. Click on Schedule to start the job.
16. The overview of the jobs will be displayed. It might take some seconds until the job is finished. Click on Go if the status is still in Process.
17. After the job has finished successfully, click on SAP to navigate to the Homepage.

s4h26 – Exercise 2
10

s4h26 – Exercise 2
11
Step 2: Process predictive MRP Simulations In this step you check the results of the predictive MRP Simulation and you have the possibility to adjust the forecast according to the capacity load of the work centers. What to Do What You Will See
1. After executing step 1 you should see the SAP Fiori FIORI Apps of Predictive Material and Resource Planning. (If not, access the FIORI Launchpad and select Predictive Material and Resource Planning as in the first step of this exercise). Select Process pMRP Simulations.
2. An overview of active simulations scenarios is displayed. Usually the scenario, you have created just before, is displayed on the top. Considering the columns “Simulation” and “Reference Data” you should be able to find the simulation you have created. The Simulation Status should be “Created”. Click on the > to the right of the line of the selected scenario to process the simulation.
3. The view Demand Plan Simulation is being loaded. On the top clickable KPIs are displayed showing the number of Capacity Issues, the Delivery Performance and Material Issues for this simulation. It might take some seconds to load all data.

s4h26 – Exercise 2
12
4. In the overview the forecast per material and calendar week is displayed. A forecast is highlighted red, if there is any issue for the production of this forecast.
5. Additional information on the KPIs is provided on clicking on the KPI. If there is any capacity overload for a work center for the simulation horizon, the work center is listed on the issue list. You can access the issue list by changing the simulation view or by clicking on the KPI Capacity Issues. Click on the KPI Capacity Issues. For this exercise there should be a capacity load larger than 100 % for some work centers. For each work center the number of periods with an overload is also displayed.
The capacity load is calculated considering the available capacity per work center and
period and the capacity requirements for producing the forecast. Therefore, the Bill of Material (BOM) and routings of the finished goods are exploded
across all BOM levels in the simulation scenario according to the forecast quantity per period.
In this example there are capacity issues for 6 work centers. The first work center displayed
is R-TEST-1 in plant 1710. There is a capacity overload for 2 weeks.
6. We would like to check the capacity load in more detail. Click on the Drop-Down Menu “Simulation View” and navigate to Capacity Plan Simulation.

s4h26 – Exercise 2
13
7. Depending on your screen size, it might be necessary to scroll to the right to see the periods with overloads for the work center R-ASS-01. Click on one period with overload for work center R-ASS-01.
Example: Overview from Calendar Week 31 to 36
Example: Overview from Calendar Week 36 to 41
In the capacity simulation you see a list of work center with two columns per period and work center. In the left column the capacity requirments per work center and period are
displayed in hours. In the right column the remaining avialable capacity is calculated. If the value is negative and coloured in red, there is an overload for this work center and period.
8. After clicking a red entry, a sub-screen is displayed at the right-hand side to support the planer to solve the capacity issue. The inspector provides the possibility to shift the demand for the top-level materials to solve the capacity issues. Click on Shift Demand for the first material which is displayed on the list.
The screen Inspector provides information on the capacity load for a certain work center an period. In this example the capacity requirements for the work center are 97,2 hours. The
remaining capacity is – 17,2 hours, that means there is an overload.
In case of overload, the top-level materials scheduled for the work center and period are
displayed. For example the material R-FIN-10 requires 14,4 hours on the work center R-ASS-01 to produce the maintained forecast in calendar week 37.

s4h26 – Exercise 2
14
9. The system provides a solution proposal to shift or reduce the forecast for the selected material to reduce the capacity overload. Click on “Adopt Proposal”.
Predictive MRP checks whether there are any other periods with available capacity left to shift the forecast on the top-level material. In the column available quantity, the available
capacity for the periiod and work center is displayed. In the column proposed quantity the system provides a solution proposal for the forecast for the material considering available
remaining capacity of the work center and current forecast of the material.
The user has the possibility to adopt the solution proposal or to adjust the forecast
quantities manually.
10. Click on Apply.
The solution proposal has been adopted and the forecast quantity has been shifted from
week 37 to week 36.
11. If there is still an overload for R-ASS-01, scroll down in the screen of the Top-Level Materials.
The top-level demand has been shifted and all KPIs have been calculated on the fly. The
overload has been reduced for calendar week 37. However, in our example there is still an overload.

s4h26 – Exercise 2
15
12. Click on the Shift Demand for the next material in the list.
13. Check the solution proposal and adopt the proposal. Click on Apply.
14. Click on Simulative Views and select Demand Simulation View.
In this example, the overload for calendar week 37 has been solved for both work centers
R-ASS-01 and R-FIN-01. The number of capacity issues has been decreased from 6 to 3
issues.
The capacity requirements for the work center R-ASS-01 are 80 000 hours which corresponds to the available capacity.
There is still a capacity overload for the work center R-TEST-1. However, there is the
alternative work center R-TEST-2 which can be used. Therefore we accept this overload and do not change any forecast.

s4h26 – Exercise 2
16
15. Click on Simulative Views and select Simulation Components.
The forecast figures have been updated for the materials changed before.
16. After checking the changes of the view Simulation Components, click on SAP to navigate to the home screen.
In the view Simulation Components

s4h26 – Exercise 2
17
Step 3: Release simulation scenario to productive environment In this process step, you release the simulation scenario to productive environment. That means planned independent requirements are created. What to Do What You Will See
1. Select Process pMRP Simulations.
2. An overview of active simulations scenarios is displayed. Select the scenario you have created and click on release.
3. Select the version you have created (according to exercise1 it should be version 05). Select Yes for the field Version Active. Click on Release.
s4h26 – Exercise 2
18
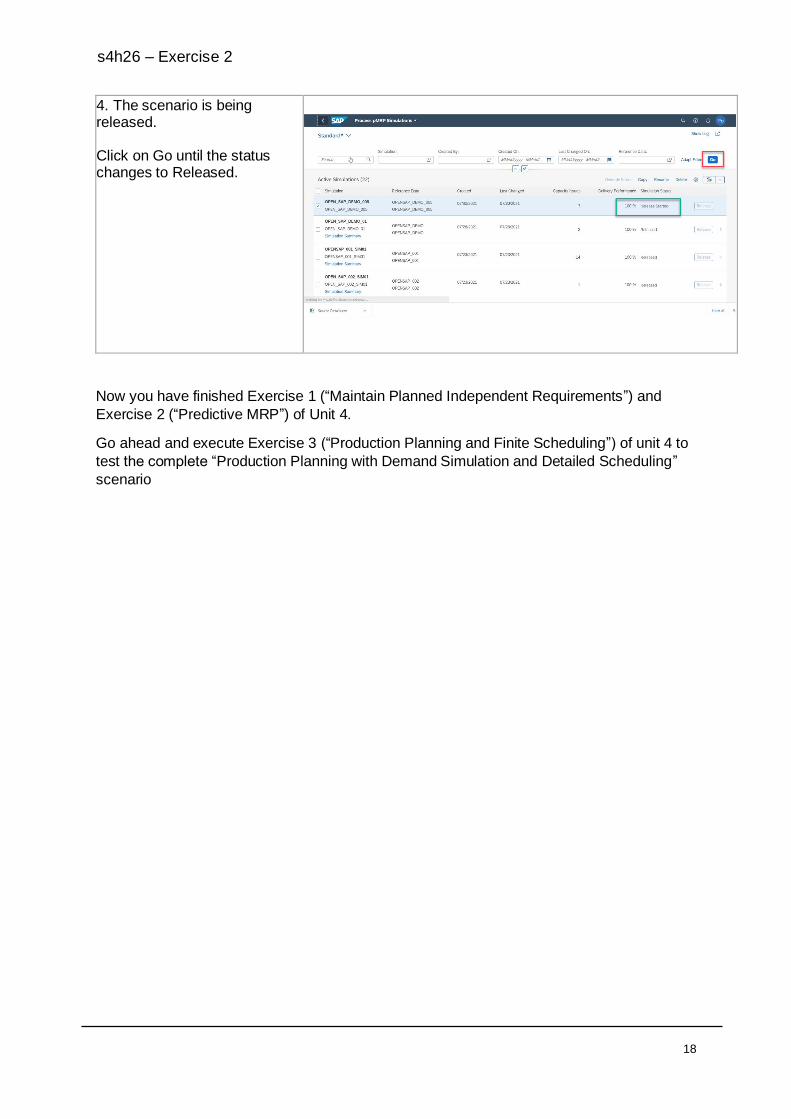
4. The scenario is being released. Click on Go until the status changes to Released.
Now you have finished Exercise 1 (“Maintain Planned Independent Requirements”) and
Exercise 2 (“Predictive MRP”) of Unit 4.
Go ahead and execute Exercise 3 (“Production Planning and Finite Scheduling”) of unit 4 to
test the complete “Production Planning with Demand Simulation and Detailed Scheduling”
scenario

s4h26 – Exercise 2
19
© 2021 SAP SE or an SAP affiliate company. All rights reserved. No part of this publication may be reproduced or transmitted in any form or for any purpose without the express permission of SAP SE or an SAP affiliate company. The information contained herein may be changed without prior notice. Some software products marketed by SAP SE and its distributor s contain proprietary software components of other software vendors. National product specifications may vary. These materials are provided by SAP SE or an SAP affiliate company for informational purposes only, without representation or warranty of any kind, and SAP or its affiliated companies shall not be liable for errors or omissions with respect to the materials. The only warranties for SAP or SAP affiliate company products and services are those that are set forth in the express warranty statements accompanying such products and services, if any. Nothing herein should be construed as constituting an additional warranty. In particular, SAP SE or its affiliated companies have no obligation to pursue any course of business outlined in this document or any related presentation, or to develop or release any functionality mentioned therein. This document, or any related presentation, and SAP SE’s or its affiliated companies’ strategy and possible future developments, products, and/or platform directions and functionality are all subject to change and may be changed by SAP SE or its affiliated companies at any time for any reason without notice. The information in this document is not a commitment, promise, or legal obligation to deliver any material, code, or functionality. All forward-looking statements are subject to various risks and uncertainties that could cause actual results to d iffer materially from expectations. Readers are cautioned not to place undue reliance on these forward-looking statements, and they should not be relied upon in making purchasing decisions. SAP and other SAP products and services mentioned herein as well as their respective logos are trademarks or registered trademarks of SAP SE (or an SAP affiliate company) in Germany and other countries. All other product and service names mentioned are the trademarks of their respective companies. See www.sap.com/copyright for additional trademark information and notices.
Coding Samples Any software coding or code lines/strings (“Code”) provided in this documentation are only examples and are not intended for use in a production system environment. The Code is only intended to better explain and visualize the syntax and phrasing rules for certain SAP coding. SAP does not warrant the correctness or completeness of the Code provided herein and SAP shall not be liable for errors or damages cause by use of the Code, except where such damages were caused by SAP with intent or with gross negligence.
www.sap.com/contactsap