Excelpower p3
264
PART III Understanding Visual Basic for Applications CHAPTER 7 Introducing Visual Basic for Applications CHAPTER 8 VBA Programming Fundamentals CHAPTER 9 Working with VBA Sub Procedures CHAPTER 10 Creating Function Procedures CHAPTER 11 VBA Programming Examples and Techniques
-
Upload
raphael-raudes -
Category
Software
-
view
115 -
download
0
Transcript of Excelpower p3

PART IIIUnderstanding Visual Basic for ApplicationsCHAPTER 7Introducing Visual Basic for Applications
CHAPTER 8VBA Programming Fundamentals
CHAPTER 9Working with VBA Sub Procedures
CHAPTER 10Creating Function Procedures
CHAPTER 11VBA Programming Examples and Techniques


135
7Introducing Visual Basic for ApplicationsIn This Chapter
● Introducing VBA — the programming language built into Excel
● Discovering how VBA differs from traditional spreadsheet macro languages and the Visual Basic language
● Using the Visual Basic Editor (VBE)
● Working in the Code windows in the VBE and customizing the VBE environment
● Using Excel’s macro recorder
● Getting an overview of objects, collections, properties, and methods
● Reviewing a case study of the Comment object
● Looking at specific information and examples of working with Range objects
● Accessing a lot of information about Excel objects, properties, and methods
Getting Some BASIC BackgroundMany hard-core programmers scoff at the idea of programming in BASIC. The name itself (an acronym for Beginner’s All-purpose Symbolic Instruction Code) suggests that BASIC isn’t a pro-fessional language. In fact, BASIC was first developed in the early 1960s as a way to teach pro-gramming techniques to college students. BASIC caught on quickly and is available in hundreds of dialects for many types of computers.
BASIC has evolved and improved over the years. For example, in many early implementations, BASIC was an interpreted language. Each line was interpreted before it was executed, causing slow performance. Most modern dialects of BASIC allow the code to be compiled — converted to machine code — which results in faster and more efficient execution.

Part III: Understanding Visual Basic for Applications136
BASIC gained quite a bit of respectability in 1991 when Microsoft released Visual Basic for Windows. This product made it easy for the masses to develop stand-alone applications for Windows. Visual Basic has very little in common with early versions of BASIC, but Visual Basic is the foundation on which VBA was built.
Delving in to VBAExcel 5 was the first application on the market to feature Visual Basic for Applications (VBA). VBA is best thought of as Microsoft’s common application scripting language, and it’s included with most Office 2010 applications and even in applications from other vendors. Therefore, if you master VBA by using Excel, you’ll be able to jump right in and write macros for other Microsoft (and some non-Microsoft) products. Even better, you’ll be able to create complete solutions that use features across various applications.
Object modelsThe secret to using VBA with other applications lies in understanding the object model for each application. VBA, after all, simply manipulates objects, and each product (Excel, Word, Access, PowerPoint, and so on) has its own unique object model. You can program an application by using the objects that the application exposes.
Excel’s object model, for example, exposes several very powerful data analysis objects, such as worksheets, charts, pivot tables, and numerous mathematical, financial, engineering, and general business functions. With VBA, you can work with these objects and develop automated proce-dures. While you work with VBA in Excel, you gradually build an understanding of the object model. Warning: The object model will be very confusing at first. Eventually, however, the pieces come together — and all of a sudden, you realize that you’ve mastered it!
VBA versus XLMBefore version 5, Excel used a powerful (but very cryptic) macro language called XLM. Later ver-sions of Excel (including Excel 2010) still execute XLM macros, but the capability to record mac-ros in XLM was removed beginning with Excel 97. As a developer, you should be aware of XLM (in case you ever encounter macros written in that system), but you should use VBA for your development work.
Don’t confuse the XLM macro language with eXtensible Markup Language (XML). Although these terms share the same letters, they have nothing in common. XML is a storage format for structured data. The Office 2010 applications use XML as their default file format.

Chapter 7: Introducing Visual Basic for Applications 137
Covering the Basics of VBABefore I get into the meat of things, I suggest that you read through the material in this section to get a broad overview of where I’m heading. I cover these topics in the remainder of this chap-ter.
Following is a quick-and-dirty summary of what VBA is all about:
Code: You perform actions in VBA by executing VBA code. You write (or record) VBA code, which is stored in a VBA module.
Module: VBA modules are stored in an Excel workbook file, but you view or edit a mod-ule by using the Visual Basic Editor (VBE). A VBA module consists of procedures.
Procedures: A procedure is basically a unit of computer code that performs some action. VBA supports two types of procedures: Sub procedures and Function procedures.
● Sub: A Sub procedure consists of a series of statements and can be executed in a number of ways. Here’s an example of a simple Sub procedure called Test: This pro-cedure calculates a simple sum and then displays the result in a message box.
Sub Test() Sum = 1 + 1 MsgBox “The answer is “ & SumEnd Sub
● Function: A VBA module can also have Function procedures. A Function pro-cedure returns a single value (or possibly an array). A Function can be called from another VBA procedure or used in a worksheet formula. Here’s an example of a Function named AddTwo:
Function AddTwo(arg1, arg2) AddTwo = arg1 + arg2End Function
Is VBA becoming obsolete?For the past few years, I’ve heard rumors that Microsoft is going to remove VBA from the Office applications and replace it with .NET. My understanding is that these rumors are completely unfounded. Sure, Microsoft has developed another way to automate Office applications, but VBA will be around for quite a while — at least in Excel for Windows. Microsoft has removed VBA from Excel for Macintosh, but that was no great loss because most Excel VBA apps don’t even attempt to be compatible with the Mac version.
Why will VBA survive? Because literally millions of VBA-based solutions are in use and VBA is much easier to learn and use than the alternative.

Part III: Understanding Visual Basic for Applications138
Objects: VBA manipulates objects contained in its host application. (In this case, Excel is the host application.) Excel provides you with more than 100 classes of objects to manip-ulate. Examples of objects include a workbook, a worksheet, a range on a worksheet, a chart, and a shape. Many more objects are at your disposal, and you can use VBA code to manipulate them. Object classes are arranged in a hierarchy.
Objects also can act as containers for other objects. For example, Excel is an object called Application, and it contains other objects, such as Workbook objects. The Workbook object contains other objects, such as Worksheet objects and Chart objects. A Worksheet object contains objects such as Range objects, PivotTable objects, and so on. The arrangement of these objects is referred to as Excel’s object model.
Collections: Like objects form a collection. For example, the Worksheets collection consists of all the worksheets in a particular workbook. Collections are objects in them-selves.
Object hierarchy: When you refer to a contained or member object, you specify its posi-tion in the object hierarchy by using a period (also known as a dot) as a separator between the container and the member. For example, you can refer to a workbook named Book1.xlsx as
Application.Workbooks(“Book1.xlsx”)
This code refers to the Book1.xlsx workbook in the Workbooks collection. The Workbooks collection is contained in the Excel Application object. Extending this type of referencing to another level, you can refer to Sheet1 in Book1 as
Application.Workbooks(“Book1.xlsx”).Worksheets(“Sheet1”)
You can take it to still another level and refer to a specific cell as follows:
Application.Workbooks(“Book1.xlsx”).Worksheets(“Sheet1”).Range(“A1”)
Active objects: If you omit a specific reference to an object, Excel uses the active objects. If Book1 is the active workbook, the preceding reference can be simplified as
Worksheets(“Sheet1”).Range(“A1”)
If you know that Sheet1 is the active sheet, you can simplify the reference even more:
Range(“A1”)
Objects properties: Objects have properties. A property can be thought of as a setting for an object. For example, a range object has properties such as Value and Address. A chart object has properties such as HasTitle and Type. You can use VBA to determine object properties and also to change them. Some properties are read-only properties and can’t be changed by using VBA.

Chapter 7: Introducing Visual Basic for Applications 139
You refer to properties by combining the object with the property, separated by a period. For example, you can refer to the value in cell A1 on Sheet1 as
Worksheets(“Sheet1”).Range(“A1”).Value
VBA variables: You can assign values to VBA variables. Think of a variable as a name that you can use to store a particular value. To assign the value in cell A1 on Sheet1 to a vari-able called Interest, use the following VBA statement:
Interest = Worksheets(“Sheet1”).Range(“A1”).Value
Object methods: Objects have methods. A method is an action that is performed with the object. For example, one of the methods for a Range object is ClearContents. This method clears the contents of the range. You specify methods by combining the object with the method, separated by a period. For example, to clear the contents of cell A1 on the active worksheet, use
Range(“A1”).ClearContents
Standard programming constructs: VBA also includes many constructs found in modern programming languages, including arrays, loops, and so on.
Events: Some objects recognize specific events, and you can write VBA code that is exe-cuted when the event occurs. For example, opening a workbook triggers a Workbook_Open event. Changing a cell in a worksheet triggers a Worksheet_Change event.
Believe it or not, the preceding section pretty much describes VBA. Now it’s just a matter of learning the details.
An analogyIf you like analogies, here’s one for you that may help you understand the relationships between objects, properties, and methods in VBA. In this analogy, I compare Excel with a fast-food res-taurant chain.
The basic unit of Excel is a Workbook object. In a fast-food chain, the basic unit is an individual restaurant. With Excel, you can add workbooks and close workbooks, and the set of all the open workbooks is known as Workbooks (a collection of Workbook objects). Similarly, the management of a fast-food chain can add restaurants and close restaurants — and all the restaurants in the chain can be viewed as the Restaurants collection — a collection of Restaurant objects.
An Excel workbook is an object, but it also contains other objects, such as worksheets, charts, VBA modules, and so on. Furthermore, each object in a workbook can contain its own objects. For example, a Worksheet object can contain Range objects, PivotTable objects, Shape objects, and so on.
continued

Part III: Understanding Visual Basic for Applications140
Introducing the Visual Basic EditorAll your VBA work is done in the Visual Basic Editor (VBE). The VBE is a separate application that works seamlessly with Excel. By seamlessly, I mean that Excel takes care of the details of opening the VBE when you need it. You can’t run VBE separately; Excel must be running in order for the VBE to run.
VBA modules are stored in workbook files. However, the VBA modules aren’t visible unless you activate the VBE.
continued
Continuing with the analogy, a fast-food restaurant (like a workbook) contains objects, such as the Kitchen, DiningArea, and Tables (a collection). Furthermore, management can add or remove objects from the Restaurant object. For example, management can add more tables to the Tables collection. Each of these objects can contain other objects. For example, the Kitchen object has a Stove object, a VentilationFan object, a Chef object, a Sink object, and so on.
So far, so good. This analogy seems to work. Let’s see whether I can take it further.
Excel objects have properties. For example, a Range object has properties such as Value and Name, and a Shape object has properties such as Width and Height. Not surprisingly, objects in a fast-food restaurant also have properties. The Stove object, for example, has properties such as Temperature and NumberofBurners. The VentilationFan object has its own set of properties (TurnedOn, RPM, and so on).
Besides properties, Excel’s objects also have methods, which perform operations on objects. For example, the ClearContents method erases the contents of a Range object. An object in a fast-food restaurant also has methods. You can easily envision a ChangeThermostat method for a Stove object, or a SwitchOn method for a VentilationFan object.
With Excel, methods sometimes change an object’s properties. The ClearContents method for a Range object changes the Range Value property. Similarly, the ChangeThermostat method on a Stove object affects its Temperature property.
With VBA, you can write procedures to manipulate Excel’s objects. In a fast-food restaurant, the management can give orders to manipulate the objects in the restaurants. (“Turn on the stove and switch the ventilation fan to high.”) Now is it clear?

Chapter 7: Introducing Visual Basic for Applications 141
Displaying Excel’s Developer tabThe Excel Ribbon doesn’t display the Developer tab by default. If you’re going to be working with VBA, it’s essential that you turn on the Developer tab:
1. Right-click the Ribbon and choose Customize the Ribbon.
Excel displays the Customize Ribbon tab of the Excel Options dialog box.
2. In the list box on the right, place a checkmark next to Developer.
3. Click OK.
After you perform these steps, Excel displays a new tab, as shown in Figure 7-1.
Figure 7-1: By default, the Developer tab is not displayed.
Activating the VBEWhen you’re working in Excel, you can switch to the VBE by using either of the following tech-niques:
Press Alt+F11.
Choose Developer➜Code➜Visual Basic.
In addition, you can access two special modules as follows. (These special VBA modules are used for event-handler procedures, which I describe in Chapter 19.)
Right-click a sheet tab and choose View Code, which takes you to the code module for the sheet.
Right-click a workbook’s title bar and choose View Code, which takes you to the code module for the workbook. If the workbook window is maximized in Excel, the workbook window’s title bar is not visible.
Figure 7-2 shows the VBE. Chances are that your VBE window won’t look exactly like the window shown in the figure. This window is highly customizable — you can hide windows, change their sizes, dock them, rearrange them, and so on.

Part III: Understanding Visual Basic for Applications142
Figure 7-2: The Visual Basic Editor window.
The VBE windowsThe VBE has a number of parts. I briefly describe some of the key components in the following list:
VBE menu bar: Although Excel uses a fancy new Ribbon interface, the VBE is still stuck in the menu and toolbar world. The VBE menu bar works like every other menu bar that you’ve encountered. It contains commands that you use to work with the various compo-nents in the VBE. Also, you’ll find that many of the menu commands have shortcut keys associated with them. For example, the View➜Immediate Window command has a short-cut key of Ctrl+G.
The VBE also features shortcut menus. As you’ll discover, you can right-click virtually anything in a VBE window to get a shortcut menu of common commands.
VBE toolbars: The Standard toolbar, which is directly under the menu bar by default, is one of six VBE toolbars available. (The menu bar is also considered a toolbar.) You can customize toolbars, move them around, display other toolbars, and so on. Choose View➜Toolbars➜Customize to work with VBE toolbars.

Chapter 7: Introducing Visual Basic for Applications 143
Project Explorer window: The Project Explorer window displays a tree diagram that con-sists of every workbook that is currently open in Excel (including add-ins and hidden workbooks). Each workbook is known as a project. I discuss the Project Explorer window in more detail in the next section (“Working with the Project Explorer”).
If the Project Explorer window isn’t visible, press Ctrl+R. To hide the Project Explorer win-dow, click the Close button in its title bar or right-click anywhere in the Project Explorer window and select Hide from the shortcut menu.
Code window: A Code window (sometimes known as a Module window) contains VBA code. Every item in a project’s tree has an associated code window. To view a code win-dow for an object, double-click the object in the Project Explorer window. For example, to view the code window for the Sheet1 object, double-click Sheet1 in the Project Explorer window. Unless you’ve added some VBA code, the Code window is empty.
Another way to view the Code window for an object is to select the object in the Project Explorer window and then click the View Code button in the toolbar at the top of the Project Explorer window.
I discuss Code windows later in this chapter (see “Working with Code Windows”).
Immediate window: The Immediate window is most useful for executing VBA statements directly, testing statements, and debugging your code. This window may or may not be visible. If the Immediate window isn’t visible, press Ctrl+G. To close the Immediate win-dow, click the Close button in its title bar (or right-click anywhere in the Immediate win-dow and select Hide from the shortcut menu).
Working with the Project ExplorerWhen you’re working in the VBE, each Excel workbook and add-in that’s currently open is con-sidered a project. You can think of a project as a collection of objects arranged as an expandable tree. You can expand a project by clicking the plus sign (+) at the left of the project’s name in the Project Explorer window. You contract a project by clicking the minus sign (–) to the left of a project’s name. If you try to expand a project that’s protected with a password, you’re prompted to enter the password.
The top of the Project Explorer window contains three icons. The third icon, named Toggle Folder, controls whether the objects in a project are displayed in a hierarchy or are shown in a single nonhierarchical list.
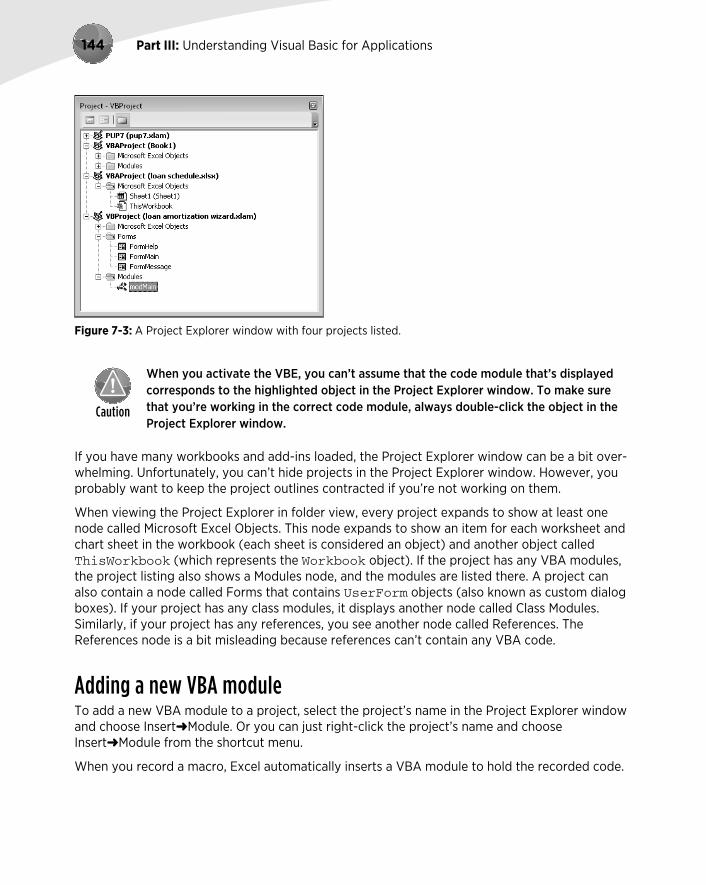
Figure 7-3 shows a Project Explorer window with four projects listed (two XLAM add-ins and two workbooks).
Part III: Understanding Visual Basic for Applications144
Figure 7-3: A Project Explorer window with four projects listed.
When you activate the VBE, you can’t assume that the code module that’s displayed corresponds to the highlighted object in the Project Explorer window. To make sure that you’re working in the correct code module, always double-click the object in the Project Explorer window.
If you have many workbooks and add-ins loaded, the Project Explorer window can be a bit over-whelming. Unfortunately, you can’t hide projects in the Project Explorer window. However, you probably want to keep the project outlines contracted if you’re not working on them.
When viewing the Project Explorer in folder view, every project expands to show at least one node called Microsoft Excel Objects. This node expands to show an item for each worksheet and chart sheet in the workbook (each sheet is considered an object) and another object called ThisWorkbook (which represents the Workbook object). If the project has any VBA modules, the project listing also shows a Modules node, and the modules are listed there. A project can also contain a node called Forms that contains UserForm objects (also known as custom dialog boxes). If your project has any class modules, it displays another node called Class Modules. Similarly, if your project has any references, you see another node called References. The References node is a bit misleading because references can’t contain any VBA code.
Adding a new VBA moduleTo add a new VBA module to a project, select the project’s name in the Project Explorer window and choose Insert➜Module. Or you can just right-click the project’s name and choose Insert➜Module from the shortcut menu.
When you record a macro, Excel automatically inserts a VBA module to hold the recorded code.

Chapter 7: Introducing Visual Basic for Applications 145
Removing a VBA moduleIf you need to remove a VBA module, a class module, or a UserForm from a project, select the module’s name in the Project Explorer window and choose File➜Remove xxx (where xxx is the name of the module). Or you can right-click the module’s name and choose Remove xxx from the shortcut menu. You’re asked whether you want to export the module before removing it. (See the next section for details.)
You can’t remove code modules associated with the workbook (the ThisWorkbook code mod-ule) or with a sheet (for example, the Sheet1 code module).
Exporting and importing objectsExcept for those listed under the References node, you can save every object in a project to a separate file. Saving an individual object in a project is called exporting. It stands to reason that you can also import objects into a project. Exporting and importing objects might be useful if you want to use a particular object (such as a VBA module or a UserForm) in a different project.
To export an object, select it in the Project Explorer window and choose File➜Export File. You get a dialog box that asks for a filename. Note that the object remains in the project. (Only a copy of it is exported.) If you export a UserForm object, any code associated with the UserForm is also exported.
To import a file into a project, select the project’s name in the Project Explorer window and choose File➜Import File. You get a dialog box that asks for a file. You can import only a file that has been exported by choosing the File➜Export File command.
If you want to copy a module or UserForm to another project, you don’t need to export and then import the object. Make sure that both projects are open; then simply activate the Project Explorer and drag the object from one project to the other. The original module or UserForm remains, and a copy is added to the other project.
Working with Code WindowsWhen you become proficient with VBA, you’ll be spending lots of time working in code windows. Each object in a project has an associated code window. To summarize, these objects can be
The workbook itself (ThisWorkbook in the Project Explorer window)
A worksheet or chart sheet in a workbook (for example, Sheet1 or Chart1 in the Project Explorer window)
A VBA module
A class module (a special type of module that lets you create new object classes)
A UserForm

Part III: Understanding Visual Basic for Applications146
Minimizing and maximizing windowsDepending on how many workbooks and add-ins are open, the VBE can have lots of code win-dows, and things can get a bit confusing. Code windows are much like worksheet windows in Excel. You can minimize them, maximize them, rearrange them, and so on. Most people find it most efficient to maximize the Code window that they’re working in. Doing so enables you to see more code and keeps you from getting distracted. To maximize a Code window, click the maxi-mize button in its title bar or just double-click its title bar. To restore a Code window (make it nonmaximized), click the Restore button (below the Application title bar).
Sometimes, you may want to have two or more Code windows visible. For example, you might want to compare the code in two modules or perhaps copy code from one module to another. To view two or more Code windows at once, make sure that the active code window isn’t maxi-mized. Then drag and resize the windows that you want to view.
Minimizing a code window gets it out of the way. You can also click the Close button in a Code window’s title bar to close the window completely. To open it again, just double-click the appro-priate object in the Project Explorer window.
The VBE doesn’t have a menu command to close a workbook. You must reactivate Excel and close it from there. You can, however, use the Immediate window to close a workbook or an add-in. Just activate the Immediate window (press Ctrl+G if it’s not visible), type a VBA statement like the one that follows, and press Enter:
Workbooks(“myaddin.xlam”).Close
As you’ll see, this statement executes the Close method of the Workbook object, which closes a workbook. In this case, the workbook happens to be an add-in.
Storing VBA codeIn general, a code window can hold four types of code:
Sub procedures: A procedure is a set of instructions that performs some action.
Function procedures: A function is a set of instructions that returns a single value or an array (similar in concept to a worksheet function, such as SUM).
Property procedures: These are special procedures used in class modules.
Declarations: A declaration is information about a variable that you provide to VBA. For example, you can declare the data type for variables you plan to use.
A single VBA module can store any number of Sub procedures, Function procedures, and dec-larations. How you organize a VBA module is completely up to you. Some people prefer to keep all their VBA code for an application in a single VBA module; others like to split up the code into several different modules.

Chapter 7: Introducing Visual Basic for Applications 147
Although you have lots of flexibility regarding where to store your VBA code, there are some restrictions. Event handler procedures must be located in the Code window for the object that responds to the event. For example, if you write a procedure that executes when the workbook is opened, that procedure must be located in the Code window for the ThisWorkbook object, and the procedure must have a special name. This concept will become clearer when I discuss events (Chapter 19) and UserForms (Part IV).
Entering VBA codeBefore you can do anything meaningful, you must have some VBA code in a Code window. This VBA code must be within a procedure. A procedure consists of VBA statements. For now, I focus on one type of Code window: a VBA module.
You can add code to a VBA module in three ways:
Enter the code manually. Use your keyboard to type your code.
Use the macro-recorder feature. Use Excel’s macro-recorder feature to record your actions and convert them into VBA code.
Copy and paste. Copy the code from another module and paste it into the module that you’re working in.
Entering code manuallySometimes, the most direct route is the best one. Entering code directly involves . . . well, enter-ing the code directly. In other words, you type the code by using your keyboard. You can use the Tab key to indent the lines that logically belong together — for example, the conditional state-ments between the If and End If statements. Indenting isn’t necessary, but it makes the code easier to read, so it’s a good habit to acquire.
Pause for a terminology breakThroughout this book, I use the terms routine, procedure, and macro. Programming people typi-cally use the word procedure to describe an automated task. In Excel, a procedure is also known as a macro. Technically, a procedure can be a Sub procedure or a Function procedure, both of which are sometimes called routines. I use all these terms pretty much interchangeably. There is, however, an important difference between Sub procedures and Function procedures. This distinction becomes apparent in Chapters 9 and 10.
Part III: Understanding Visual Basic for Applications148
Entering and editing text in a VBA module works just as you would expect. You can select text, copy it or cut it, and then paste it to another location.
A single instruction in VBA can be as long as you need it to be. For readability’s sake, however, you may want to break a lengthy instruction into two or more lines. To do so, end the line with a space followed by an underscore character and then press Enter and continue the instruction on the following line. The following code, for example, is a single VBA statement split over four lines:
MsgBox “Can’t find “ & UCase(SHORTCUTMENUFILE) _ & vbCrLf & vbCrLf & “The file should be located in “ _ & ThisWorkbook.Path & vbCrLf & vbCrLf _ & “You may need to reinstall BudgetMan”, vbCritical, APPNAME
Notice that I indented the last three lines of this statement. Doing so is optional, but it helps clar-ify the fact that these four lines are, in fact, a single statement.
Like Excel, the VBE has multiple levels of Undo and Redo. Therefore, if you find that you deleted an instruction that you shouldn’t have, you can click the Undo button (or press Ctrl+Z) repeatedly until the instruction comes back. After undoing, you can click the Redo button (or press Ctrl+Y) to redo changes that were previously undone. This feature can be a lifesaver, so I recommend that you play around with it until you under-stand how it works.
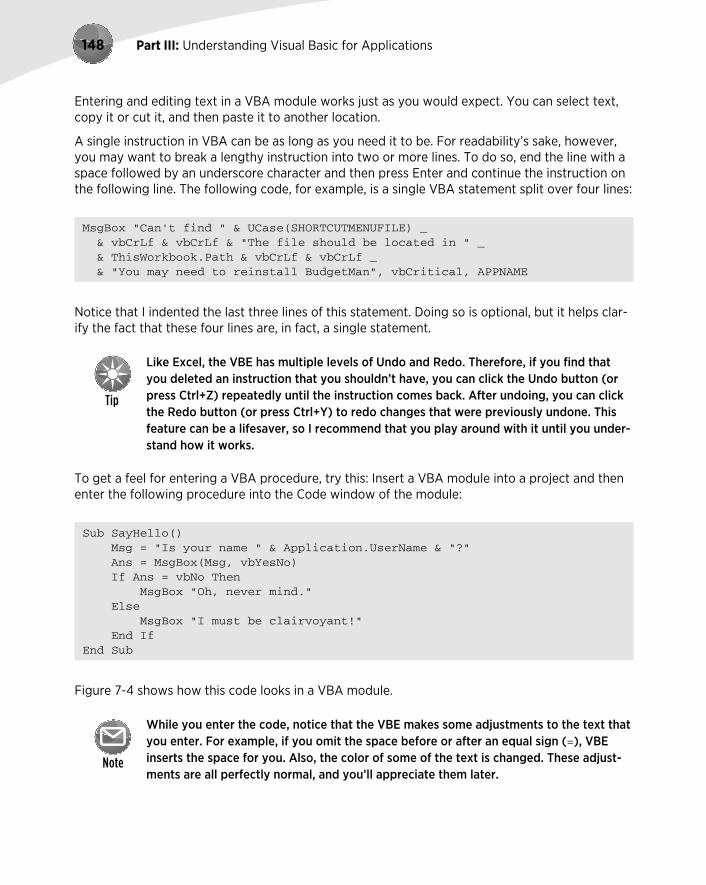
To get a feel for entering a VBA procedure, try this: Insert a VBA module into a project and then enter the following procedure into the Code window of the module:
Sub SayHello() Msg = “Is your name “ & Application.UserName & “?” Ans = MsgBox(Msg, vbYesNo) If Ans = vbNo Then MsgBox “Oh, never mind.” Else MsgBox “I must be clairvoyant!” End IfEnd Sub
Figure 7-4 shows how this code looks in a VBA module.
While you enter the code, notice that the VBE makes some adjustments to the text that you enter. For example, if you omit the space before or after an equal sign (=), VBE inserts the space for you. Also, the color of some of the text is changed. These adjust-ments are all perfectly normal, and you’ll appreciate them later.

Chapter 7: Introducing Visual Basic for Applications 149
Figure 7-4: Your first VBA procedure.
To execute the SayHello procedure, make sure that the cursor is located anywhere within the text that you typed. Then do any of the following:
Press F5.
Choose Run➜Run Sub/UserForm.
Click the Run Sub/UserForm button on the Standard toolbar.
If you entered the code correctly, the procedure executes, and you can respond to a simple dialog box (see Figure 7-5) that displays the username, as listed in the Excel Options dialog box. Notice that Excel is activated when the macro executes. At this point, it’s not important that you under-stand how the code works; that becomes clear later in this chapter and in subsequent chapters.
Figure 7-5: The result of running the procedure in Figure 7-4.

Part III: Understanding Visual Basic for Applications150
Most of the time, you’ll be executing your macros from Excel. However, it’s often more efficient to test your macro by running it directly from the VBE.
What you did in this exercise was write a VBA Sub procedure (also known as a macro). When you issued the command to execute the macro, the VBE quickly compiled the code and executed it. In other words, each instruction was evaluated, and Excel simply did what it was told to do. You can execute this macro any number of times, although it tends to lose its appeal after a while.
For the record, this simple procedure uses the following concepts (all of which I cover later in the book):
Declaring a procedure (the first line)
Assigning a value to variables (Msg and Ans)
Concatenating strings (using the & operator)
Using a built-in VBA function (MsgBox)
Using built-in VBA constants (vbYesNo and vbNo)
Using an If-Then-Else construct
Ending a procedure (the last line)
Not bad for a first effort, eh?
Using the macro recorderAnother way to get code into a VBA module is to record your actions by using the Excel macro recorder.
No matter how hard you try, there is absolutely no way to record the SayHello procedure shown in the previous section. As you’ll see, recording macros is very useful, but it has some limi-tations. In fact, when you record a macro, you almost always need to make adjustments or enter some code manually.
This next example shows how to record a macro that simply changes the page setup to land-scape orientation. If you want to try these, start with a blank workbook:
1. Activate a worksheet in the workbook (any worksheet will do).
2. Choose Developer➜Code➜Record Macro.
Excel displays its Record Macro dialog box.
3. Click OK to accept the default setting for the macro.
Excel automatically inserts a new VBA module into the workbook’s VBA project. From this point on, Excel converts your actions into VBA code. Notice that Excel’s status bar displays a blue square. You can click that control to stop recording.

Chapter 7: Introducing Visual Basic for Applications 151
4. Choose Page Layout➜Page Setup➜Orientation➜Landscape.
5. Select Developer➜Code➜Stop Recording (or click the blue square in the status bar).
Excel stops recording your actions.
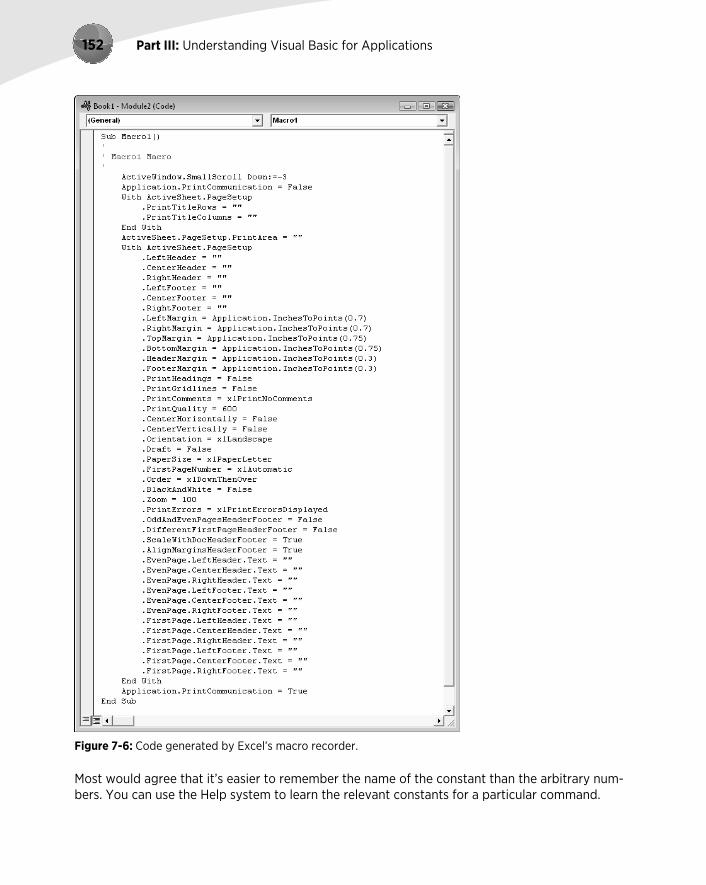
To view the macro, activate the VBE (pressing Alt+F11 is the easiest way) and locate the project in the Project Explorer window. Double-click the Modules node to expand it. Then double-click the Module1 item to display the code window. (If the project already had a Module1, the new macro will be in Module2.) The code generated by this single Excel command is shown in Figure 7-6. Remember that code lines preceded by an apostrophe are comments and are not executed.
You may be surprised by the amount of code generated by this single command. (I know I was the first time I tried something like this.) Although you changed only one simple setting in the Page Setup tab, Excel generates more than 50 lines of code that affects dozens of print settings.
This code listing brings up an important concept. The Excel macro recorder is not the most effi-cient way to generate VBA code. More often than not, the code produced when you record a macro is overkill. Consider the recorded macro that switches to landscape mode. Practically every statement in that macro is extraneous. You can simplify this macro considerably by delet-ing the extraneous code. Deleting extraneous code makes the macro easier to read, and the macro also runs a bit faster because it doesn’t do things that are unnecessary. In fact, you can simplify this recorded macro to the following:
Sub Macro1() With ActiveSheet.PageSetup .Orientation = xlLandscape End WithEnd Sub
I deleted all the code except for the line that sets the Orientation property. Actually, you can simplify this macro even more because the With-End With construct isn’t necessary when you’re changing only one property:
Sub Macro1() ActiveSheet.PageSetup.Orientation = xlLandscapeEnd Sub
In this example, the macro changes the Orientation property of the PageSetup object on the active sheet. By the way, xlLandscape is a built-in constant that’s provided to make things easier for you. The variable xlLandscape has a value of 2, and xlPortrait has a value of 1. The following macro works the same as the preceding Macro1:
Sub Macro1a() ActiveSheet.PageSetup.Orientation = 2End Sub
Part III: Understanding Visual Basic for Applications152
Figure 7-6: Code generated by Excel’s macro recorder.
Most would agree that it’s easier to remember the name of the constant than the arbitrary num-bers. You can use the Help system to learn the relevant constants for a particular command.

Chapter 7: Introducing Visual Basic for Applications 153
You could have entered this procedure directly into a VBA module. To do so, you would have to know which objects, properties, and methods to use. Obviously, recording the macro is much faster, and this example has a built-in bonus: You also learned that the PageSetup object has an Orientation property.
A point that I make clear throughout this book is that recording your actions is perhaps the best way to learn VBA. When in doubt, try recording. Although the result may not be exactly what you want, chances are that it will steer you in the right direction. You can use the Help system to check out the objects, properties, and methods that appear in the recorded code.
I discuss the macro recorder in more detail later in this chapter. See the section “The Macro Recorder.”
Copying VBA codeSo far, I’ve covered typing code directly into a module and recording your actions to generate VBA code. The final method of getting code into a VBA module is to copy it from another mod-ule. For example, you may have written a procedure for one project that would also be useful in your current project. Rather than re-enter the code, you can simply open the workbook, activate the module, and use the normal Clipboard copy-and-paste procedures to copy it into your cur-rent VBA module. After you’ve finished pasting, you can modify the code as necessary.
And don’t forget about the Internet. You’ll find thousands of VBA code examples at Web sites, forums, and blogs. It’s a simple matter to copy code from a browser and paste it into a VBA module.
As I note previously in this chapter, you can also import an entire module that has been exported.
Customizing the VBE EnvironmentIf you’re serious about becoming an Excel programmer, you’ll be spending a lot of time with the VBE window. To help make things as comfortable as possible, the VBE provides quite a few cus-tomization options.
When the VBE is active, choose Tools➜Options. You see a dialog box with four tabs: Editor, Editor Format, General, and Docking. I discuss some of the most useful options on these tabs in the sections that follow. By the way, don’t confuse this Options dialog box with the Excel Options dialog box, which you bring up by choosing Office➜Excel Options in Excel.

Part III: Understanding Visual Basic for Applications154
Using the Editor tabFigure 7-7 shows the options that you access by clicking the Editor tab of the Options dialog box.
Figure 7-7: The Editor tab of the Options dialog box.
Auto Syntax Check optionThe Auto Syntax Check setting determines whether the VBE pops up a dialog box if it discovers a syntax error while you’re entering your VBA code. The dialog box tells you roughly what the problem is. If you don’t choose this setting, VBE flags syntax errors by displaying them in a dif-ferent color from the rest of the code, and you don’t have to deal with any dialog boxes popping up on your screen.
I keep this setting turned off because I find the dialog boxes annoying, and I can usually figure out what’s wrong with an instruction. But if you’re new to VBA, you might find the Auto Syntax Check assistance helpful.
Require Variable Declaration optionIf the Require Variable Declaration option is set, VBE inserts the following statement at the beginning of each new VBA module that you insert:
Option Explicit
If this statement appears in your module, you must explicitly define each variable that you use. Variable declaration is an excellent habit to get into, although it does require additional effort on your part. If you don’t declare your variables, they will all be of the Variant data type, which is flexible but not efficient in terms of storage or speed. I discuss variable declaration in more depth in Chapter 8.

Chapter 7: Introducing Visual Basic for Applications 155
Changing the Require Variable Declaration option affects only new modules, not exist-ing modules.
Auto List Members optionIf the Auto List Members option is set, VBE provides help when you’re entering your VBA code by displaying a list of member items for an object. These items include methods and properties for the object that you typed.
This option is very helpful, and I always keep it turned on. Figure 7-8 shows an example of Auto List Members (which will make a lot more sense when you actually start writing VBA code). In this example, VBE is displaying a list of members for the Application object. The list changes as you type additional characters, showing only the members that begin with the characters you type. You can just select an item from the list and press Tab (or double-click the item), thus avoiding typing it. Using the Auto List Members list also ensures that the item is spelled correctly.
Figure 7-8: An example of Auto List Members.
Auto Quick Info optionIf the Auto Quick Info option is set, the VBE displays information about the arguments available for functions, properties, and methods while you type. This information can be very helpful, and I always leave this setting on. Figure 7-9 shows this feature in action. It’s displaying the syntax for the Cells property.
Figure 7-9: An example of Auto Quick Info offering help about the Cells property.

Part III: Understanding Visual Basic for Applications156
Auto Data Tips optionIf the Auto Data Tips option is set, you can hover your mouse pointer over a variable, and VBE displays the value of the variable. This technique works only when the procedure is paused while debugging. When you enter the wonderful world of debugging, you’ll definitely appreciate this option. I always keep this option turned on.
Auto Indent optionThe Auto Indent setting determines whether VBE automatically indents each new line of code by the same amount as the previous line. I’m a big fan of using indentations in my code, so I keep this option on. You can also specify the number of characters to indent; the default is four.
Use the Tab key, not the space bar, to indent your code. Using the Tab key results in more consistent spacing. In addition, you can use Shift+Tab to unindent a line of code. These keys also work if you select more than one statement.
Drag-and-Drop Text Editing optionThe Drag-and-Drop Text Editing option, when enabled, lets you copy and move text by dragging and dropping. I keep this option turned on, but I never use drag-and-drop editing. I prefer to use keyboard shortcuts for copying and pasting.
Default to Full Module View optionThe Default to Full Module View option specifies how procedures are viewed. If this option is set, procedures in the code window appear as a single scrollable window. If this option is turned off, you can see only one procedure at a time. I keep this setting turned on.
Procedure Separator optionWhen the Procedure Separator option is turned on, the VBE displays separator bars between pro-cedures in a code window (assuming that the Default to Full Module View option is also selected). I like the visual cues that show where my procedures end, so I keep this option turned on.
Using the Editor Format tabFigure 7-10 shows the Editor Format tab of the Options dialog box. The options on this tab con-trol the appearance of the VBE itself.
Code Colors option: The Code Colors option lets you set the text color (foreground and background) and the indicator color displayed for various elements of VBA code. Choosing these colors is largely a matter of individual preference. Personally, I find the default colors to be just fine. But for a change of scenery, I occasionally play around with these settings.

Chapter 7: Introducing Visual Basic for Applications 157
Font option: The Font option lets you select the font that’s used in your VBA modules. For best results, stick with a fixed-width font (monofont) such as Courier New. In a fixed-width font, all characters are exactly the same width. Using fixed-width characters makes your code much more readable because the characters are nicely aligned vertically and you can easily distinguish multiple spaces.
Size setting: The Size setting specifies the size of the font in the VBA modules. This set-ting is a matter of personal preference determined by your video display resolution and your eyesight. The default size of 10 (points) works for me.
Margin Indicator Bar option: The Margin Indicator Bar option controls the display of the vertical margin indicator bar in your modules. You should keep this turned on; otherwise, you won’t be able to see the helpful graphical indicators when you’re debugging your code.
Figure 7-10: The Editor Format tab of the Options dialog box.
Using the General tabFigure 7-11 shows the following options available under the General tab in the Options dialog box:
Form Grid Settings: The options in this section are for UserForms (custom dialog boxes); they let you specify a grid to help align controls on the UserForm. When you have some experience designing UserForms, you can determine whether a grid display is helpful or not.
Show ToolTips check box: This checkbox refers to toolbar buttons. There’s no reason to turn off the ToolTips display.
Collapse Proj. Hides Windows option: If checked, this setting causes the windows to close automatically when you collapse a project in the Project window. I keep this setting turned on.

Part III: Understanding Visual Basic for Applications158
Edit and Continue section: This area contains one option, which may be useful for debugging. When checked, VBA displays a message if your variables are about to lose their values because of a problem.
Error Trapping settings: These settings determine what happens when an error is encountered. If you write any error-handling code, make sure that the Break on Unhandled Errors option is set. If the Break on All Errors option is set, error-handling code is ignored (which is hardly ever what you want). I discuss error-handling techniques in Chapter 9.
Compile settings: The two Compile settings deal with compiling your code. I keep both of these options turned on. Compiling code is virtually instantaneous unless the project is extremely large.
Figure 7-11: The General tab of the Options dialog box.
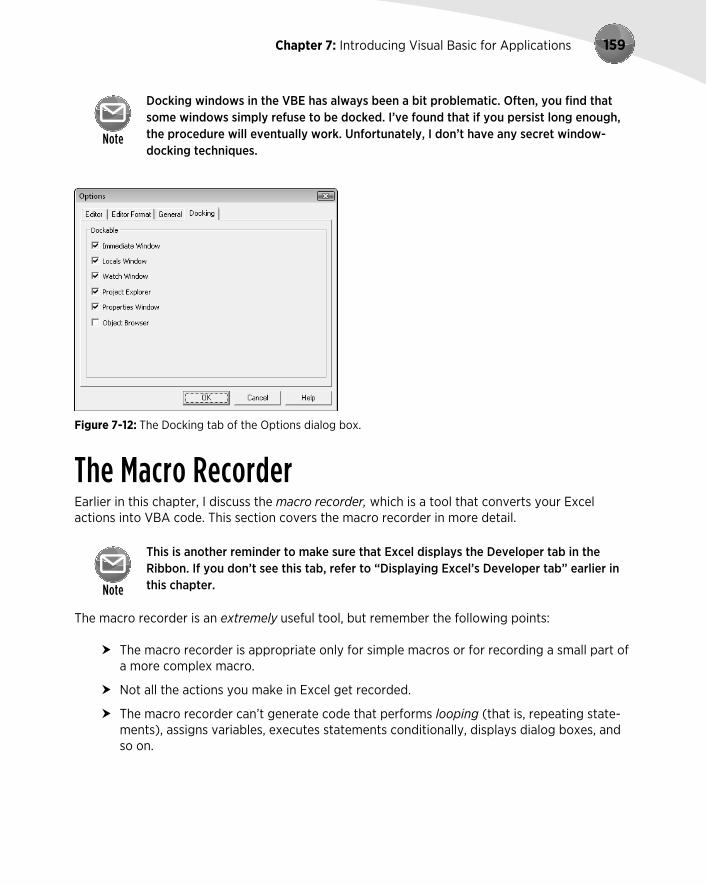
Using the Docking tabFigure 7-12 shows the Docking tab of the Options dialog box. These options determine how the various windows in the VBE behave. When a window is docked, it’s fixed in place along one of the edges of the VBE window. Docking windows makes it much easier to identify and locate a particular window. If you turn off all docking, you have a big mess of windows that are very con-fusing. Generally, you’ll find that the default settings work fine.
To dock a window, just drag it to the desired location. For example, you might want to dock the Project Explorer window to the left side of the screen. Just drag its title bar to the left, and you see an outline that shows it docked. Release the mouse, and the window is docked.
Chapter 7: Introducing Visual Basic for Applications 159
Docking windows in the VBE has always been a bit problematic. Often, you find that some windows simply refuse to be docked. I’ve found that if you persist long enough, the procedure will eventually work. Unfortunately, I don’t have any secret window-docking techniques.
Figure 7-12: The Docking tab of the Options dialog box.
The Macro RecorderEarlier in this chapter, I discuss the macro recorder, which is a tool that converts your Excel actions into VBA code. This section covers the macro recorder in more detail.
This is another reminder to make sure that Excel displays the Developer tab in the Ribbon. If you don’t see this tab, refer to “Displaying Excel’s Developer tab” earlier in this chapter.
The macro recorder is an extremely useful tool, but remember the following points:
The macro recorder is appropriate only for simple macros or for recording a small part of a more complex macro.
Not all the actions you make in Excel get recorded.
The macro recorder can’t generate code that performs looping (that is, repeating state-ments), assigns variables, executes statements conditionally, displays dialog boxes, and so on.

Part III: Understanding Visual Basic for Applications160
The macro recorder always creates Sub procedures. You can’t create a Function pro-cedure by using the macro recorder.
The code that is generated depends on certain settings that you specify.
You’ll often want to clean up the recorded code to remove extraneous commands.
What the macro recorder actually recordsThe Excel macro recorder translates your mouse and keyboard actions into VBA code. I could probably write several pages describing how this translation occurs, but the best way to show you is by example. Follow these steps:
1. Start with a blank workbook.
2. Make sure that the Excel window isn’t maximized.
You don’t want it to fill the entire screen.
3. Press Alt+F11 to activate the VBE window.
Note: Make sure that this window isn’t maximized. Otherwise, you won’t be able to see the VBE window and Excel’s window at the same time.
4. Resize and arrange Excel’s window and the VBE window so that both are visible. (For best results, minimize any other applications that are running.)
5. Activate Excel, choose Developer➜Code➜Record Macro and then click OK to start the macro recorder.
6. Activate the VBE window.
7. In the Project Explorer window, double-click Module1 to display that module in the code window.
8. Close the Project Explorer window in the VBE to maximize the view of the code window.
Your screen layout should look something like the example in Figure 7-13. The size of the win-dows depends on your video resolution. If you happen to have a dual display system, just put the VBA window on one display and the Excel window on the other display.
Now move around in the worksheet and select various Excel commands. Watch while the code is generated in the window that displays the VBA module. Select cells, enter data, format cells, use the Ribbon commands, create a chart, manipulate graphic objects, and so on. I guarantee that you’ll be enlightened while you watch the code being spit out before your very eyes.

Chapter 7: Introducing Visual Basic for Applications 161
Figure 7-13: A convenient window arrangement for watching the macro recorder do its thing.
Relative or absolute recording?When recording your actions, Excel normally records absolute references to cells. In other words, when you select a cell, it will remember that exact cell (not the cell relative to the current active cell). To demonstrate how absolute references work, perform these steps and examine the code:
1. Activate a worksheet and start the macro recorder.
2. Activate cell B1.
3. Enter Jan into cell B1.
4. Move to cell C1 and enter Feb.
5. Continue this process until you’ve entered the first six months of the year in B1:G1.
6. Click cell B1 to activate it again.
7. Stop the macro recorder and examine the new code in the VBE.
Excel generates the following code:
Sub Macro1() Range(“B1”).Select ActiveCell.FormulaR1C1 = “Jan” Range(“C1”).Select ActiveCell.FormulaR1C1 = “Feb” Range(“D1”).Select
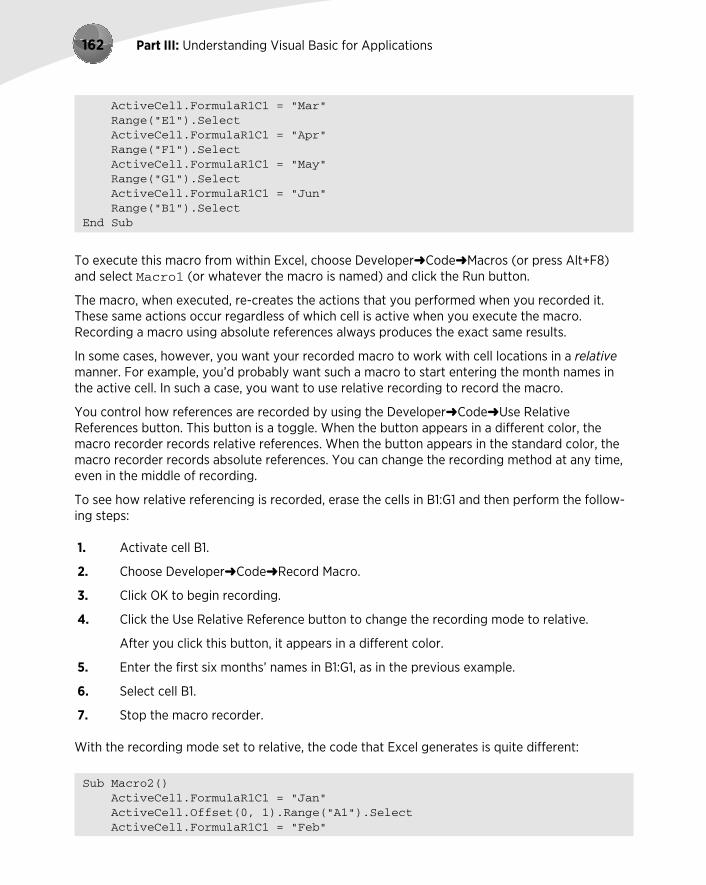
Part III: Understanding Visual Basic for Applications162
ActiveCell.FormulaR1C1 = “Mar” Range(“E1”).Select ActiveCell.FormulaR1C1 = “Apr” Range(“F1”).Select ActiveCell.FormulaR1C1 = “May” Range(“G1”).Select ActiveCell.FormulaR1C1 = “Jun” Range(“B1”).SelectEnd Sub
To execute this macro from within Excel, choose Developer➜Code➜Macros (or press Alt+F8) and select Macro1 (or whatever the macro is named) and click the Run button.
The macro, when executed, re-creates the actions that you performed when you recorded it. These same actions occur regardless of which cell is active when you execute the macro. Recording a macro using absolute references always produces the exact same results.
In some cases, however, you want your recorded macro to work with cell locations in a relative manner. For example, you’d probably want such a macro to start entering the month names in the active cell. In such a case, you want to use relative recording to record the macro.
You control how references are recorded by using the Developer➜Code➜Use Relative References button. This button is a toggle. When the button appears in a different color, the macro recorder records relative references. When the button appears in the standard color, the macro recorder records absolute references. You can change the recording method at any time, even in the middle of recording.
To see how relative referencing is recorded, erase the cells in B1:G1 and then perform the follow-ing steps:
1. Activate cell B1.
2. Choose Developer➜Code➜Record Macro.
3. Click OK to begin recording.
4. Click the Use Relative Reference button to change the recording mode to relative.
After you click this button, it appears in a different color.
5. Enter the first six months’ names in B1:G1, as in the previous example.
6. Select cell B1.
7. Stop the macro recorder.
With the recording mode set to relative, the code that Excel generates is quite different:
Sub Macro2() ActiveCell.FormulaR1C1 = “Jan” ActiveCell.Offset(0, 1).Range(“A1”).Select ActiveCell.FormulaR1C1 = “Feb”

Chapter 7: Introducing Visual Basic for Applications 163
ActiveCell.Offset(0, 1).Range(“A1”).Select ActiveCell.FormulaR1C1 = “Mar” ActiveCell.Offset(0, 1).Range(“A1”).Select ActiveCell.FormulaR1C1 = “Apr” ActiveCell.Offset(0, 1).Range(“A1”).Select ActiveCell.FormulaR1C1 = “May” ActiveCell.Offset(0, 1).Range(“A1”).Select ActiveCell.FormulaR1C1 = “Jun” ActiveCell.Offset(0, -5).Range(“A1”).SelectEnd Sub
To test this macro, start by activating a cell other than cell B1. Then choose the Developer➜Code➜Macros command. Select the macro name and then click the Run button. The month names are entered beginning at the active cell.
Notice that I varied the recording procedure slightly in this example: I activated the beginning cell before I started recording. This step is important when you record macros that use the active cell as a base.
Although it looks rather complicated, this macro is actually quite simple. The first statement sim-ply enters Jan into the active cell. (It uses the active cell because it’s not preceded by a state-ment that selects a cell.) The next statement uses the Select method (along with the Offset property) to move the selection one cell to the right. The next statement inserts more text, and so on. Finally, the original cell is selected by calculating a relative offset rather than an absolute cell. Unlike the preceding macro, this one always starts entering text in the active cell.
You’ll notice that this macro generates code that appears to reference cell A1 — which may seem strange because cell A1 wasn’t even involved in the macro. This code is sim-ply a byproduct of how the macro recorder works. (I discuss the Offset property later in this chapter.) At this point, all you need to know is that the macro works as it should.
The point here is that the recorder has two distinct modes, and you need to be aware of which mode you’re recording in. Otherwise, the result may not be what you expected.
By the way, the code generated by Excel is more complex than it needs to be, and it’s not even the most efficient way to code the operation. The macro that follows, which I entered manually, is a simpler and faster way to perform this same operation. This example demonstrates that VBA doesn’t have to select a cell before it puts information into it — an important concept that can speed things up considerably.
Sub Macro3() ActiveCell.Offset(0, 0) = “Jan” ActiveCell.Offset(0, 1) = “Feb” ActiveCell.Offset(0, 2) = “Mar” ActiveCell.Offset(0, 3) = “Apr” ActiveCell.Offset(0, 4) = “May” ActiveCell.Offset(0, 5) = “Jun”End Sub
Part III: Understanding Visual Basic for Applications164
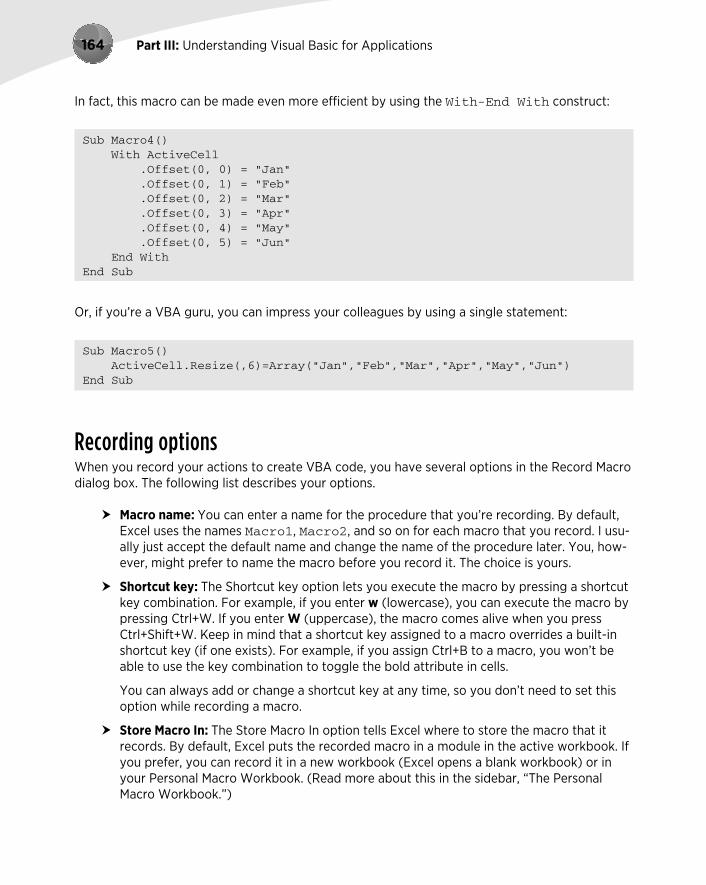
In fact, this macro can be made even more efficient by using the With-End With construct:
Sub Macro4() With ActiveCell .Offset(0, 0) = “Jan” .Offset(0, 1) = “Feb” .Offset(0, 2) = “Mar” .Offset(0, 3) = “Apr” .Offset(0, 4) = “May” .Offset(0, 5) = “Jun” End WithEnd Sub
Or, if you’re a VBA guru, you can impress your colleagues by using a single statement:
Sub Macro5() ActiveCell.Resize(,6)=Array(“Jan”,”Feb”,”Mar”,”Apr”,”May”,”Jun”) End Sub
Recording optionsWhen you record your actions to create VBA code, you have several options in the Record Macro dialog box. The following list describes your options.
Macro name: You can enter a name for the procedure that you’re recording. By default, Excel uses the names Macro1, Macro2, and so on for each macro that you record. I usu-ally just accept the default name and change the name of the procedure later. You, how-ever, might prefer to name the macro before you record it. The choice is yours.
Shortcut key: The Shortcut key option lets you execute the macro by pressing a shortcut key combination. For example, if you enter w (lowercase), you can execute the macro by pressing Ctrl+W. If you enter W (uppercase), the macro comes alive when you press Ctrl+Shift+W. Keep in mind that a shortcut key assigned to a macro overrides a built-in shortcut key (if one exists). For example, if you assign Ctrl+B to a macro, you won’t be able to use the key combination to toggle the bold attribute in cells.
You can always add or change a shortcut key at any time, so you don’t need to set this option while recording a macro.
Store Macro In: The Store Macro In option tells Excel where to store the macro that it records. By default, Excel puts the recorded macro in a module in the active workbook. If you prefer, you can record it in a new workbook (Excel opens a blank workbook) or in your Personal Macro Workbook. (Read more about this in the sidebar, “The Personal Macro Workbook.”)

Chapter 7: Introducing Visual Basic for Applications 165
Excel remembers your choice, so the next time you record a macro, it defaults to the same location you used previously.
Description: If you like, you can enter a description for you macro in the Description box. Text you enter here appears at the beginning of your macro as a comment.
Cleaning up recorded macrosEarlier in this chapter, you see how recording your actions while you issue a single command (the Page Layout➜Page Setup➜Orientation command) produces an enormous amount of VBA code. This example shows how, in many cases, the recorded code includes extraneous commands that you can delete.
The macro recorder doesn’t always generate the most efficient code. If you examine the gener-ated code, you see that Excel generally records what is selected (that is, an object) and then uses the Selection object in subsequent statements. For example, here’s what is recorded if you select a range of cells and then use some buttons on the Home tab to change the numeric for-matting and apply bold and italic:
Range(“A1:C5”).SelectSelection.Style = “Comma”Selection.Font.Bold = TrueSelection.Font.Italic = True
The recorded VBA code works, but it’s just one way to perform these actions. You can also use the more efficient With-End With construct, as follows:
Range(“A1:C5”).SelectWith Selection .Style = “Comma” .Font.Bold = True .Font.Italic = TrueEnd With
The Personal Macro WorkbookWhen you record a macro, one of your options is to record it to your Personal Macro Workbook. If you create some VBA macros that you find particularly useful, you may want to store these routines on your Personal Macro Workbook. This workbook is named Personal.xlsb and is stored in your XLStart directory. Whenever you start Excel, this workbook is loaded, and you have access to the macros stored in the workbook. Personal.xlsb is a hidden workbook, so it’s out of your way when you’re working in Excel.
The Personal.xlsb file doesn’t exist until you record a macro to it.

Part III: Understanding Visual Basic for Applications166
Or you can avoid the Select method altogether and write the code even more efficiently:
With Range(“A1:C5”) .Style = “Comma” .Font.Bold = True .Font.Italic = TrueEnd With
If speed is essential in your application, you always want to examine any recorded VBA code closely to make sure that it’s as efficient as possible.
You, of course, need to understand VBA thoroughly before you start cleaning up your recorded macros. But for now, just be aware that recorded VBA code isn’t always the best, most efficient code.
About the code examplesThroughout this book, I present many small snippets of VBA code to make a point or to provide an example. Often, this code might consist of just a single statement. In some cases, the example consists of only an expression, which isn’t a valid instruction by itself.
For example, the following is an expression:
Range(“A1”).Value
To test an expression, you must evaluate it. The MsgBox function is a handy tool for this:
MsgBox Range(“A1”).Value
To try out these examples, put the statement within a procedure in a VBA module, like this:
Sub Test()‘ statement goes hereEnd Sub
Then put the cursor anywhere within the procedure and press F5 to execute it. Also, make sure that the code is being executed within the proper context. For example, if a statement refers to Sheet1, make sure that the active workbook actually has a sheet named Sheet1.
If the code is just a single statement, you can use the VBE Immediate window. The Immediate window is very useful for executing a statement “immediately” — without having to create a procedure. If the Immediate window isn’t displayed, press Ctrl+G in the VBE.
Just type the VBA statement in the Immediate window and press Enter. To evaluate an expression in the Immediate window, precede the expression with a question mark (?). The question mark is a shortcut for Print. For example, you can type the following into the Immediate window:
? Range(“A1”).Value
The result of this expression is displayed in the next line of the Immediate window.

Chapter 7: Introducing Visual Basic for Applications 167
About Objects and CollectionsIf you’ve worked through the first part of this chapter, you have an overview of VBA, and you know the basics of working with VBA modules in the VBE. You’ve also seen some VBA code and were exposed to concepts like objects and properties. This section gives you additional details about objects and collections of objects.
When you work with VBA, you must understand the concept of objects and Excel’s object model. It helps to think of objects in terms of a hierarchy. At the top of this model is the Application object — in this case, Excel itself. But if you’re programming in VBA with Microsoft Word, the Application object is Word.
The object hierarchyThe Application object (that is, Excel) contains other objects. Here are a few examples of objects contained in the Application object:
Workbooks (a collection of all Workbook objects)
Windows (a collection of all Window objects)
AddIns (a collection of all AddIn objects)
Some objects can contain other objects. For example, the Workbooks collection consists of all open Workbook objects, and a Workbook object contains other objects, a few of which are as follows:
Worksheets (a collection of Worksheet objects)
Charts (a collection of Chart objects)
Names (a collection of Name objects)
Each of these objects, in turn, can contain other objects. The Worksheets collection consists of all Worksheet objects in a Workbook. A Worksheet object contains many other objects, which include the following:
ChartObjects (a collection of ChartObject objects)
Range
PageSetup
PivotTables (a collection of PivotTable objects)
If this seems confusing, trust me, it will make sense, and you’ll eventually realize that this object hierarchy setup is quite logical and well structured. By the way, the complete Excel object model is covered in the Help system.
Part III: Understanding Visual Basic for Applications168
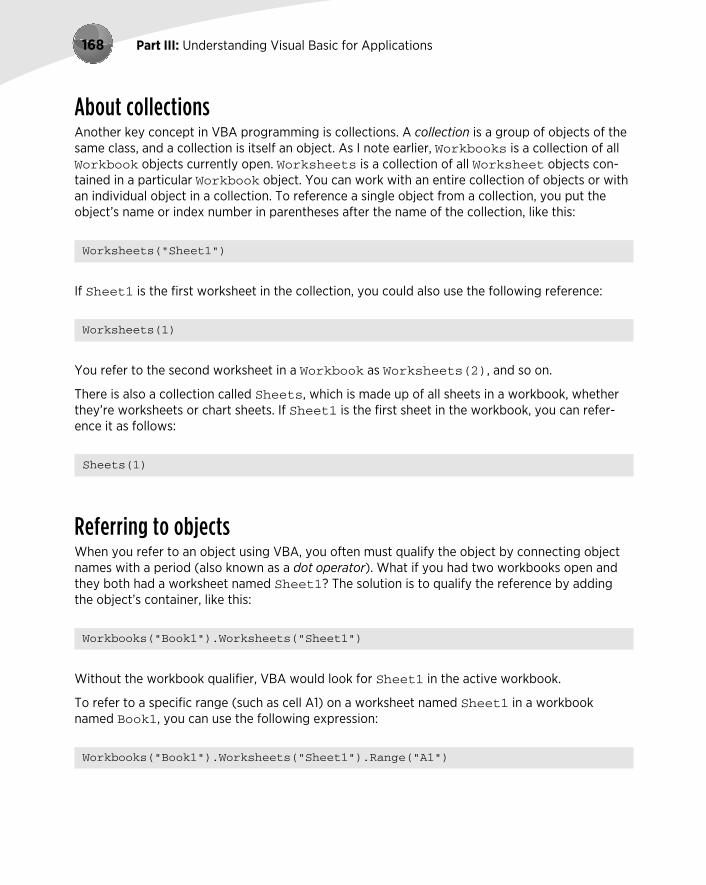
About collectionsAnother key concept in VBA programming is collections. A collection is a group of objects of the same class, and a collection is itself an object. As I note earlier, Workbooks is a collection of all Workbook objects currently open. Worksheets is a collection of all Worksheet objects con-tained in a particular Workbook object. You can work with an entire collection of objects or with an individual object in a collection. To reference a single object from a collection, you put the object’s name or index number in parentheses after the name of the collection, like this:
Worksheets(“Sheet1”)
If Sheet1 is the first worksheet in the collection, you could also use the following reference:
Worksheets(1)
You refer to the second worksheet in a Workbook as Worksheets(2), and so on.
There is also a collection called Sheets, which is made up of all sheets in a workbook, whether they’re worksheets or chart sheets. If Sheet1 is the first sheet in the workbook, you can refer-ence it as follows:
Sheets(1)
Referring to objectsWhen you refer to an object using VBA, you often must qualify the object by connecting object names with a period (also known as a dot operator). What if you had two workbooks open and they both had a worksheet named Sheet1? The solution is to qualify the reference by adding the object’s container, like this:
Workbooks(“Book1”).Worksheets(“Sheet1”)
Without the workbook qualifier, VBA would look for Sheet1 in the active workbook.
To refer to a specific range (such as cell A1) on a worksheet named Sheet1 in a workbook named Book1, you can use the following expression:
Workbooks(“Book1”).Worksheets(“Sheet1”).Range(“A1”)

Chapter 7: Introducing Visual Basic for Applications 169
The fully qualified reference for the preceding example also includes the Application object, as follows:
Application.Workbooks(“Book1”).Worksheets(“Sheet1”).Range(“A1”)
Most of the time, however, you can omit the Application object in your references; it is assumed. If the Book1 object is the active workbook, you can even omit that object reference and use this:
Worksheets(“Sheet1”).Range(“A1”)
And — I think you know where I’m going with this — if Sheet1 is the active worksheet, you can use an even simpler expression:
Range(“A1”)
Contrary to what you might expect, Excel doesn’t have an object that refers to an indi-vidual cell that is called Cell. A single cell is simply a Range object that happens to consist of just one element.
Simply referring to objects (as in these examples) doesn’t do anything. To perform anything meaningful, you must read or modify an object’s properties or specify a method to be used with an object.
Properties and MethodsIt’s easy to be overwhelmed with properties and methods; literally thousands are available. In this section, I describe how to access properties and methods of objects.
Object propertiesEvery object has properties. For example, a Range object has a property called Value. You can write VBA code to display the Value property or write VBA code to set the Value property to a specific value. Here’s a procedure that uses the VBA MsgBox function to pop up a box that dis-plays the value in cell A1 on Sheet1 of the active workbook:
Sub ShowValue() Msgbox Worksheets(“Sheet1”).Range(“A1”).ValueEnd Sub

Part III: Understanding Visual Basic for Applications170
The VBA MsgBox function provides an easy way to display results while your VBA code is executing. I use it extensively throughout this book.
The code in the preceding example displays the current setting of the Value property of a spe-cific cell: cell A1 on a worksheet named Sheet1 in the active workbook. Note that if the active workbook doesn’t have a sheet named Sheet1, the macro generates an error.
What if you want to change the Value property? The following procedure changes the value displayed in cell A1 by changing the cell’s Value property:
Sub ChangeValue() Worksheets(“Sheet1”).Range(“A1”).Value = 123.45End Sub
After executing this routine, cell A1 on Sheet1 has the value 123.45.
You may want to enter these procedures into a module and experiment with them.
Most objects have a default property. For a Range object, the default property is the Value property. Therefore, you can omit the .Value part from the preceding code, and it has the same effect. However, it’s usually considered good programming prac-tice to include the property in your code, even if it is the default property.
The statement that follows accesses the HasFormula and the Formula properties of a Range object:
If Range(“A1”).HasFormula Then MsgBox Range(“A1”).Formula
I use an If-Then construct to display a message box conditionally: If the cell has a formula, then display the formula by accessing the Formula property. If cell A1 doesn’t have a formula, noth-ing happens.
The Formula property is a read-write property, so you can also specify a formula by using VBA:
Range(“D12”).Formula = “=RAND()*100”
Object methodsIn addition to properties, objects also have methods. A method is an action that you perform with an object. Here’s a simple example that uses the Clear method on a Range object. After you execute this procedure, A1:C3 on Sheet1 is empty, and all cell formatting is removed.

Chapter 7: Introducing Visual Basic for Applications 171
Sub ZapRange() Worksheets(“Sheet1”).Range(“A1:C3”).ClearEnd Sub
If you’d like to delete the values in a range but keep the formatting, use the ClearContents method of the Range object.
Most methods also take arguments to define the action further. Here’s an example that copies cell A1 to cell B1 by using the Copy method of the Range object. In this example, the Copy method has one argument (the destination of the copy). Notice that I use the line continuation character sequence (a space followed by an underscore) in this example. You can omit the line continuation sequence and type the statement on a single line.
Sub CopyOne() Worksheets(“Sheet1”).Range(“A1”).Copy _ Worksheets(“Sheet1”).Range(“B1”)End Sub
Specifying arguments for methods and properties
An issue that often leads to confusion among new VBA programmers concerns arguments for methods and properties. Some methods use arguments to further clarify the action to be taken, and some properties use arguments to further specify the property value. In some cases, one or more of the arguments are optional.
If a method uses arguments, place the arguments after the name of the method, separated by commas. If the method uses optional arguments, you can insert blank placeholders for the optional arguments. Later in this sidebar, I show you how to insert these placeholders.
Consider the Protect method for a workbook object. Check the Help system, and you’ll find that the Protect method takes three arguments: password, structure, and windows. These arguments correspond to the three options in the Protect Structure and Windows dialog box.
continued

Part III: Understanding Visual Basic for Applications172
The Comment Object: A Case StudyTo help you better understand the properties and methods available for an object, I focus on a particular object: the Comment object. In Excel, you create a Comment object when you choose the Review➜Comments➜New Comment command to enter a cell comment. In the sections that follow, you get a feel for working with objects.
continued
If you want to protect a workbook named MyBook.xlsx, for example, you might use a state-ment like this:
Workbooks(“MyBook.xlsx”).Protect “xyzzy”, True, False
In this case, the workbook is protected with a password (argument 1). Its structure is protected (argument 2) but not its windows (argument 3).
If you don’t want to assign a password, you can use a statement like this:
Workbooks(“MyBook.xlsx”).Protect , True, False
Notice that the first argument is omitted and that I specified the placeholder by using a comma.
Another approach, which makes your code more readable, is to use named arguments. Here’s an example of how you use named arguments for the preceding example:
Workbooks(“MyBook.xlsx”).Protect Structure:=True, Windows:=False
Using named arguments is a good idea, especially for methods that have many optional argu-ments and also when you need to use only a few of them. When you use named arguments, you don’t need to use a placeholder for missing arguments.
For properties (and methods) that return a value, you must use parentheses around the argu-ments. For example, the Address property of a Range object takes five arguments, all of which are optional. Because the Address property returns a value, the following statement isn’t valid because the parentheses are omitted:
MsgBox Range(“A1”).Address False ‘ invalid
The proper syntax for such a statement requires parentheses, as follows:
MsgBox Range(“A1”).Address(False)
You can also write the statement using a named argument:
MsgBox Range(“A1”).Address(rowAbsolute:=False)
These nuances will become clearer as you gain more experience with VBA.

Chapter 7: Introducing Visual Basic for Applications 173
Viewing Help for the Comment objectOne way to learn about a particular object is to look it up in the Help system. Figure 7-14 shows some Help topics for the Comment object. I found this Help screen by typing comment in the VBE Type a Question for Help box (to the right of the menu bar). Notice that the Help screen has a link at the bottom labeled Comment Object Members. Click that link to view the properties and methods for this object.
Figure 7-14: The main Help screen for the Comment object.
Using the Help systemThe easiest way to get specific help about a particular object, property, or method is to type the word in a code window and press F1. If there is any ambiguity about the word that you typed, you get a dialog box like the one shown in the following figure.
continued

Part III: Understanding Visual Basic for Applications174
Properties of a Comment objectThe Comment object has six properties. Table 7-1 contains a list of these properties, along with a brief description of each. If a property is read-only, your VBA code can read the property but can’t change it.
Table 7-1: Properties of a Comment Object
Property Read-Only Description
Application Yes Returns an object that represents the application that created the comment (that is, Excel).
Author Yes Returns the name of the person who created the comment.
Creator Yes Returns an integer that indicates the application in which the object was created.
Parent Yes Returns the parent object for the comment. (It is always a Range object.)
Shape Yes Returns a Shape object that represents the shape attached to the comment.
Visible No Is True if the comment is visible.
continued
Unfortunately, the items listed in the dialog box aren’t always clear, so locating the correct help topic may require some trial and error. The dialog box in the figure appears when you type Comment and then press F1. In this case, although Comment is an object, it may behave like a property. Clicking the first item displays the help topic for the Comment object; clicking the sec-ond item displays the help topic for the Comment property.

Chapter 7: Introducing Visual Basic for Applications 175
Methods of a Comment objectTable 7-2 shows the methods that you can use with a Comment object. Again, these methods perform common operations that you may have performed manually with a comment at some point . . . but you probably never thought of these operations as methods.
Table 7-2: Methods of a Comment Object
Method Description
Delete Deletes a comment.
Next Returns a Comment object that represents the next comment in the worksheet.
Previous Returns a Comment object that represents the previous comment in the worksheet.
Text Returns or sets the text in a comment (takes three arguments).
You may be surprised to see that Text is a method rather than a property, which leads to an important point: The distinction between properties and methods isn’t always clear-cut, and the object model isn’t perfectly consistent. In fact, it’s not really impor-tant that you distinguish between properties and methods. As long as you get the syn-tax correct, it doesn’t matter whether a word in your code is a property or a method.
The Comments collectionRecall that a collection is a group of like objects. Every worksheet has a Comments collection, which consists of all Comment objects on the worksheet. If the worksheet has no comments, this collection is empty. Comments appear in the collection based on their position in the worksheet: left-to-right and then top-to-bottom.
For example, the following code refers to the first comment on Sheet1 of the active workbook:
Worksheets(“Sheet1”).Comments(1)
The following statement displays the text contained in the first comment on Sheet1:
MsgBox Worksheets(“Sheet1”).Comments(1).Text
Unlike most objects, a Comment object doesn’t have a Name property. Therefore, to refer to a specific comment, you must either use an index number or (more frequently) use the Comment property of a Range object to return a specific comment.

Part III: Understanding Visual Basic for Applications176
The Comments collection is also an object and has its own set of properties and methods. For example, the Comments collection has a Count property that stores the number of items in the collection — which is the number of Comment objects in the active worksheet. The following statement displays the total number of comments on the active worksheet:
MsgBox ActiveSheet.Comments.Count
The next example shows the address of the cell that has the first comment:
MsgBox ActiveSheet.Comments(1).Parent.Address
Here, Comments(1) returns the first Comment object in the Comments collection. The Parent property of the Comment object returns its container, which is a Range object. The message box displays the Address property of the Range. The net effect is that the statement displays the address of the cell that contains the first comment.
You can also loop through all the comments on a sheet by using the For Each-Next construct. (Looping is explained in Chapter 8.) Here’s an example that displays a separate message box for each comment on the active worksheet:
For Each cmt in ActiveSheet.Comments MsgBox cmt.TextNext cmt
If you’d rather not deal with a series of message boxes, use this procedure to print the comments to the Immediate window in the VBE:
For Each cmt in ActiveSheet.Comments Debug.Print cmt.TextNext cmt
About the Comment propertyIn this section, I’ve been discussing the Comment object. If you dig through the Help system, you’ll find that a Range object has a property named Comment. If the cell contains a comment, the Comment property returns a Comment object. For example, the following code refers to the Comment object in cell A1:
Range(“A1”).Comment

Chapter 7: Introducing Visual Basic for Applications 177
If this comment were the first one on the sheet, you could refer to the same Comment object as follows:
ActiveSheet.Comments(1)
To display the comment in cell A1 in a message box, use a statement like this:
MsgBox Range(“A1”).Comment.Text
If cell A1 doesn’t contain a comment, this statement generates an error.
The fact that a property can return an object is a very important concept — a difficult one to grasp, perhaps, but critical to mastering VBA.
Objects within a Comment objectWorking with properties is confusing at first because some properties actually return objects. Suppose that you want to determine the background color of a particular comment on Sheet1. If you look through the list of properties for a Comment object, you won’t find anything that relates to color. Rather, you must do these steps:
1. Use the Comment object’s Shape property to return the Shape object that’s contained in the comment.
2. Use the Shape object’s Fill property to return a FillFormat object.
3. Use the FillFormat object’s ForeColor property to return a ColorFormat object.
4. Use the ColorFormat object’s RGB property to get the color value.
Put another way, getting at the interior color for a Comment object involves accessing other objects contained in the Comment object. Here’s a look at the object hierarchy that’s involved:
Application (Excel)
Workbook object
Worksheet object
Comment object
Shape object
FillFormat object
ColorFormat object

Part III: Understanding Visual Basic for Applications178
I’ll be the first to admit it: This process can get very confusing! But, as an example of the ele-gance of VBA, you can write a single statement to change the color of a comment:
Worksheets(“Sheet1”).Comments(1).Shape.Fill.ForeColor _ .RGB = RGB(0, 255, 0)
Or, if you use the SchemeColor property (which ranges from 0 to 80), the code is
Worksheets(“Sheet1”).Comments(1).Shape.Fill.ForeColor _ .SchemeColor = 12
This type of referencing is certainly not intuitive at first, but it will eventually make sense. Fortunately, recording your actions in Excel almost always yields some insights regarding the hierarchy of the objects involved.
By the way, to change the color of the text in a comment, you need to access the Comment object’s TextFrame object, which contains the Characters object, which contains the Font object. Then you have access to the Font object’s Color or ColorIndex properties. Here’s an example that sets the ColorIndex property to 5:
Worksheets(“Sheet1”).Comments(1) _ .Shape.TextFrame.Characters.Font.ColorIndex = 5
Refer to Chapter 30 for more information on colors.
Determining whether a cell has a commentThe following statement displays the comment in cell A1 of the active sheet:
MsgBox Range(“A1”).Comment.Text
If cell A1 doesn’t have a comment, executing this statement generates a cryptic error message: Object variable or With block variable not set.
To determine whether a particular cell has a comment, you can write code to check whether the Comment object is Nothing. (Yes, Nothing is a valid keyword.) The following statement dis-plays True if cell A1 doesn’t have a comment:
MsgBox Range(“A1”).Comment Is Nothing

Chapter 7: Introducing Visual Basic for Applications 179
Note that I use the Is keyword and not an equal sign.
You can take this one step further and write a statement that displays the cell comment only if the cell actually has a comment (and does not generate an error if the cell lacks a comment). The statement that follows accomplishes this task:
If Not Range(“A1”).Comment Is Nothing Then _ MsgBox Range(“A1”).Comment.Text
Notice that I used the Not keyword, which negates the True value that’s returned if the cell has no comment. The statement, in essence, uses a double-negative to test a condition: If the com-ment isn’t nothing, then display it. If this statement is confusing, think about it for a while, and it will make sense.
Adding a new Comment objectYou may have noticed that the list of methods for the Comment object doesn’t include a method to add a new comment. This is because the AddComment method belongs to the Range object. The following statement adds a comment (an empty comment) to cell A1 on the active worksheet:
Range(“A1”).AddComment
If you consult the Help system, you discover that the AddComment method takes an argument that represents the text for the comment. Therefore, you can add a comment and then add text to the comment with a single statement:
Range(“A1”).AddComment “Formula developed by JW.”
The AddComment method generates an error if the cell already contains a comment. To avoid the error, your code can check whether the cell has a comment before adding one.
If you’d like to see these Comment object properties and methods in action, check out the example workbook on the companion CD-ROM. This workbook, named comment object.xlsm, contains several examples that manipulate Comment objects with VBA code. You probably won’t understand all the code at this point, but you will get a feel for how you can use VBA to manipulate an object.

Part III: Understanding Visual Basic for Applications180
Some Useful Application PropertiesWhen you’re working with Excel, only one workbook at a time can be active. And if the sheet is a worksheet, one cell is the active cell (even if a multicell range is selected). VBA knows about active workbooks, worksheets, and cells and lets you refer to these active objects in a simplified manner. This method of referring to objects is often useful because you won’t always know the exact workbook, worksheet, or range that you want to operate on. VBA makes it easy by provid-ing properties of the Application object. For example, the Application object has an ActiveCell property that returns a reference to the active cell. The following instruction assigns the value 1 to the active cell:
ActiveCell.Value = 1
Notice that I omitted the reference to the Application object in the preceding example because it’s assumed. It’s important to understand that this instruction will fail if the active sheet isn’t a worksheet. For example, if VBA executes this statement when a chart sheet is active, the procedure halts, and you get an error message.
If a range is selected in a worksheet, the active cell is a cell within the selected range. In other words, the active cell is always a single cell (never a multicell range).
The Application object also has a Selection property that returns a reference to whatever is selected, which may be a single cell (the active cell), a range of cells, or an object such as ChartObject, TextBox, or Shape.
Table 7-3 lists the other Application properties that are useful when working with cells and ranges.
Table 7-3: Some Useful Properties of the Application Object
Property Object Returned
ActiveCell The active cell.
ActiveChart The active chart sheet or chart contained in a ChartObject on a worksheet. This property is Nothing if a chart isn’t active.
ActiveSheet The active sheet (worksheet or chart).
ActiveWindow The active window.
ActiveWorkbook The active workbook.
Selection The object selected. (It could be a Range object, Shape, ChartObject, and so on.)
ThisWorkbook The workbook that contains the VBA procedure being executed. This object may or may not be the same as the ActiveWorkbook object.

Chapter 7: Introducing Visual Basic for Applications 181
The advantage of using these properties to return an object is that you don’t need to know which cell, worksheet, or workbook is active, and you don’t need to provide a specific reference to it. This allows you to write VBA code that isn’t specific to a particular workbook, sheet, or range. For example, the following instruction clears the contents of the active cell, even though the address of the active cell isn’t known:
ActiveCell.ClearContents
The example that follows displays a message that tells you the name of the active sheet:
MsgBox ActiveSheet.Name
If you want to know the name and directory path of the active workbook, use a statement like this:
MsgBox ActiveWorkbook.FullName
If a range on a worksheet is selected, you can fill the entire range with a value by executing a sin-gle statement. In the following example, the Selection property of the Application object returns a Range object that corresponds to the selected cells. The instruction simply modifies the Value property of this Range object, and the result is a range filled with a single value:
Selection.Value = 12
Note that if something other than a range is selected (such as a ChartObject or a Shape), the preceding statement generates an error because ChartObject and Shape objects don’t have a Value property.
The following statement, however, enters a value of 12 into the Range object that was selected before a non-Range object was selected. If you look up the RangeSelection property in the Help system, you find that this property applies only to a Window object.
ActiveWindow.RangeSelection.Value = 12
To find out how many cells are selected in the active window, access the Count property. Here’s an example:
MsgBox ActiveWindow.RangeSelection.Count

Part III: Understanding Visual Basic for Applications182
Working with Range ObjectsMuch of the work that you will do in VBA involves cells and ranges in worksheets. The earlier dis-cussion on relative versus absolute macro recording (see “Relative or absolute recording?”) exposes you to working with cells in VBA, but you need to know a lot more.
A Range object is contained in a Worksheet object and consists of a single cell or range of cells on a single worksheet. In the sections that follow, I discuss three ways of referring to Range objects in your VBA code:
The Range property of a Worksheet or Range class object
The Cells property of a Worksheet object
The Offset property of a Range object
The Range propertyThe Range property returns a Range object. If you consult the Help system for the Range prop-erty, you learn that this property has two syntaxes:
object.Range(cell1)object.Range(cell1, cell2)
The Range property applies to two types of objects: a Worksheet object or a Range object. Here, cell1 and cell2 refer to placeholders for terms that Excel recognizes as identifying the range (in the first instance) and delineating the range (in the second instance). Following are a few examples of using the Range property.
You’ve already seen examples like the following one earlier in the chapter. The instruction that follows simply enters a value into the specified cell. In this case, it puts the value 12.3 into cell A1 on Sheet1 of the active workbook:
Worksheets(“Sheet1”).Range(“A1”).Value = 12.3
The Range property also recognizes defined names in workbooks. Therefore, if a cell is named Input, you can use the following statement to enter a value into that named cell:
Worksheets(“Sheet1”).Range(“Input”).Value = 100
The example that follows enters the same value into a range of 20 cells on the active sheet. If the active sheet isn’t a worksheet, the statement causes an error message:
ActiveSheet.Range(“A1:B10”).Value = 2

Chapter 7: Introducing Visual Basic for Applications 183
Working with merged cellsWorking with merged cells can be tricky. If a range contains merged cells, you may need to take some special action with the macros. For example, if cells A1:D1 are merged, the statement that follows selects columns A through D (not just column B, as you might expect):
Columns(“B:B”).Select
I don’t know if this unexpected behavior is intentional or whether it’s a bug. However, it can cause your macro to behave in a manner that you didn’t expect. Merged cells can also cause problems with sorting.
To determine whether a particular range contains any merged cells, you can use the following VBA function. The function returns True if any cell in the argument range is a merged cell. (Refer to Chapter 10 for more information about Function procedures.)
Function ContainsMergedCells(rng As Range) Dim cell As Range ContainsMergedCells = False For Each cell In rng If cell.MergeCells Then ContainsMergedCells = True Exit Function End If Next cellEnd Function
To refer to merged cells, you can reference the entire merged range or just the upper-left cell within the merged range. For example, if a worksheet contains four cells merged into one (A1, B1, A2, and B1), reference the merged cells using either of the following expressions:
Range(“A1:B2”)Range(“A1”)
If you attempt to assign a value to a cell in a merged range that’s not the upper-left cell, VBA ignores the instruction and doesn’t generate an error. For example, the following statement has no effect if A1:B2 is merged:
Range(“B2”).Value = 43
Some operations cause Excel to display a confirmation message. For example, if A1:B2 is merged, the following statement generates a message: This operation will cause some merged cells to unmerge. Do you wish to continue?
Range(“B2”).Delete
Bottom line? Be careful with merged cells. Some have suggested that this feature wasn’t very well thought-out before it was implemented. I tend to agree.

Part III: Understanding Visual Basic for Applications184
The next example produces exactly the same result as the preceding example:
Range(“A1”, “B10”) = 2
The sheet reference is omitted, however, so the active sheet is assumed. Also, the value property is omitted, so the default property (which is Value for a Range object) is assumed. This example also uses the second syntax of the Range property. With this syntax, the first argument is the cell at the top left of the range, and the second argument is the cell at the lower right of the range.
The following example uses the Excel range intersection operator (a space) to return the inter-section of two ranges. In this case, the intersection is a single cell, C6. Therefore, this statement enters 3 into cell C6:
Range(“C1:C10 A6:E6”) = 3
And finally, this next example enters the value 4 into five cells: that is, a noncontiguous range. The comma serves as the union operator.
Range(“A1,A3,A5,A7,A9”) = 4
So far, all the examples have used the Range property on a Worksheet object. As I mentioned, you can also use the Range property on a Range object. This concept can be rather confusing, but bear with me.
Following is an example of using the Range property on a Range object. (In this case, the Range object is the active cell.) This example treats the Range object as if it were the upper-left cell in the worksheet, and then it enters a value of 5 into the cell that would be B2. In other words, the refer-ence returned is relative to the upper-left corner of the Range object. Therefore, the statement that follows enters a value of 5 into the cell directly to the right and one row below the active cell:
ActiveCell.Range(“B2”) = 5
I said this is confusing. Fortunately, you can access a cell relative to a range in a much clearer way: the Offset property. I discuss this property after the next section.
The Cells propertyAnother way to reference a range is to use the Cells property. You can use the Cells prop-erty, like the Range property, on Worksheet objects and Range objects. Check the Help sys-tem, and you see that the Cells property has three syntaxes:
object.Cells(rowIndex, columnIndex)object.Cells(rowIndex)object.Cells

Chapter 7: Introducing Visual Basic for Applications 185
Some examples demonstrate how to use the Cells property. The first example enters the value 9 into cell A1 on Sheet1. In this case, I’m using the first syntax, which accepts the index number of the row (from 1 to 1048576) and the index number of the column (from 1 to 16384):
Worksheets(“Sheet1”).Cells(1, 1) = 9
Here’s an example that enters the value 7 into cell D3 (that is, row 3, column 4) in the active worksheet:
ActiveSheet.Cells(3, 4) = 7
You can also use the Cells property on a Range object. When you do so, the Range object returned by the Cells property is relative to the upper-left cell of the referenced Range. Confusing? Probably. An example may help clear up any confusion. The following instruction enters the value 5 into the active cell. Remember, in this case, the active cell is treated as if it were cell A1 in the worksheet:
ActiveCell.Cells(1, 1) = 5
The real advantage of this type of cell referencing will be apparent when I discuss vari-ables and looping (see Chapter 8). In most cases, you don’t use actual values for the arguments; rather, you use variables.
To enter a value of 5 into the cell directly below the active cell, you can use the following instruction:
ActiveCell.Cells(2, 1) = 5
Think of the preceding example as though it said this: “Start with the active cell and consider this cell as cell A1. Place 5 in the cell in the second row and the first column.”
The second syntax of the Cells method uses a single argument that can range from 1 to 17,179,869,184. This number is equal to the number of cells in an Excel 2010 worksheet. The cells are numbered starting from A1 and continuing right and then down to the next row. The 16,384th cell is XFD1; the 16,385th is A2.
The next example enters the value 2 into cell SZ1 (which is the 520th cell in the worksheet) of the active worksheet:
ActiveSheet.Cells(520) = 2

Part III: Understanding Visual Basic for Applications186
To display the value in the last cell in a worksheet (XFD1048576), use this statement:
MsgBox ActiveSheet.Cells(17179869184)
You can also use this syntax with a Range object. In this case, the cell returned is relative to the Range object referenced. For example, if the Range object is A1:D10 (40 cells), the Cells prop-erty can have an argument from 1 to 40 and can return one of the cells in the Range object. In the following example, a value of 2000 is entered into cell A2 because A2 is the fifth cell (count-ing from the top, to the right, and then down) in the referenced range:
Range(“A1:D10”).Cells(5) = 2000
In the preceding example, the argument for the Cells property isn’t limited to values between 1 and 40. If the argument exceeds the number of cells in the range, the count-ing continues as if the range were taller than it actually is. Therefore, a statement like the preceding one could change the value in a cell that’s outside of the range A1:D10. The statement that follows, for example, changes the value in cell A11:
Range(“A1:D10”).Cells(41)=2000
Getting information from a cellIf you need to get the contents of a cell, VBA provides several properties. Following are the most commonly used properties:
● The Formula property returns the formula, if the cell has one. If the cell doesn’t contain a formula, it returns the value in the cell. The Formula property is a read/write property. Variations on this property include FormulaR1C1, FormulaLocal, and FormulaArray. (Consult the Help system for details.)
● The Value property returns the raw, unformatted value in the cell. This property is a read/write property.
● The Text property returns the text that is displayed in the cell. If the cell contains a numeric value, this property includes all the formatting, such as commas and currency symbols. The Text property is a read-only property.
● The Value2 property is just like the Value property, except that it doesn’t use the Date and Currency data types. Rather, this property converts Date and Currency data types to Variants containing Doubles. If a cell contains the date 12/6/2010, the Value property returns it as a Date, while the Value2 property returns it as a double (for exam-ple, 40518).

Chapter 7: Introducing Visual Basic for Applications 187
The third syntax for the Cells property simply returns all cells on the referenced worksheet. Unlike the other two syntaxes, in this one, the return data isn’t a single cell. This example uses the ClearContents method on the range returned by using the Cells property on the active worksheet. The result is that the content of every cell on the worksheet is cleared:
ActiveSheet.Cells.ClearContents
The Offset propertyThe Offset property, like the Range and Cells properties, also returns a Range object. But unlike the other two methods that I discussed, the Offset property applies only to a Range object and no other class. Its syntax is as follows:
object.Offset(rowOffset, columnOffset)
The Offset property takes two arguments that correspond to the relative position from the upper-left cell of the specified Range object. The arguments can be positive (down or to the right), negative (up or to the left), or zero. The example that follows enters a value of 12 into the cell directly below the active cell:
ActiveCell.Offset(1,0).Value = 12
The next example enters a value of 15 into the cell directly above the active cell:
ActiveCell.Offset(-1,0).Value = 15
If the active cell is in row 1, the Offset property in the preceding example generates an error because it can’t return a Range object that doesn’t exist.
The Offset property is quite useful, especially when you use variables within looping proce-dures. I discuss these topics in the next chapter.
When you record a macro using the relative reference mode, Excel uses the Offset property to reference cells relative to the starting position (that is, the active cell when macro recording begins). For example, I used the macro recorder to generate the following code. I started with the cell pointer in cell B1, entered values into B1:B3, and then returned to B1.
Sub Macro1() ActiveCell.FormulaR1C1 = “1” ActiveCell.Offset(1, 0).Range(“A1”).Select ActiveCell.FormulaR1C1 = “2” ActiveCell.Offset(1, 0).Range(“A1”).Select
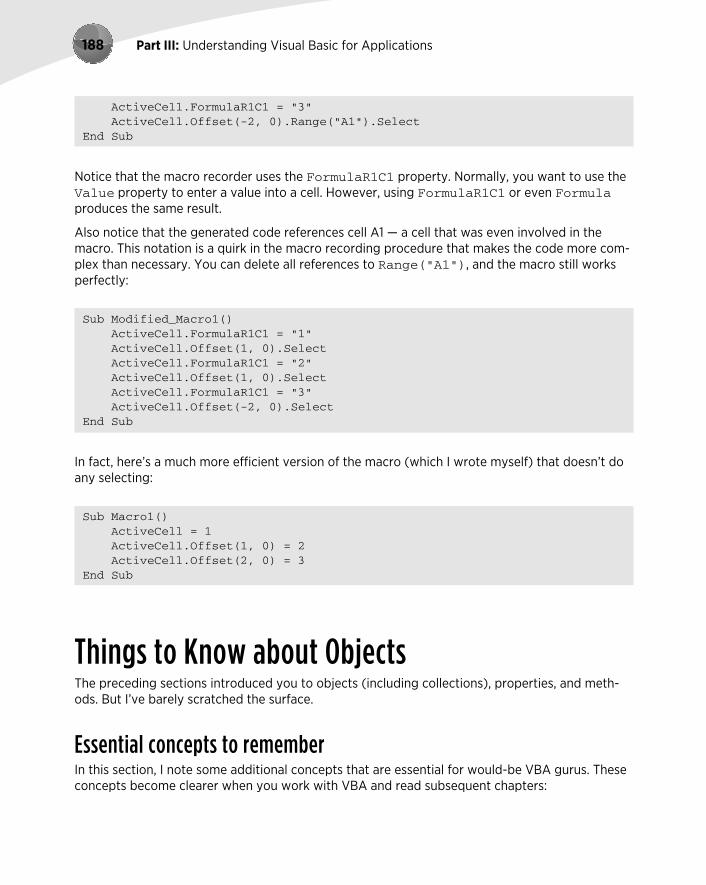
Part III: Understanding Visual Basic for Applications188
ActiveCell.FormulaR1C1 = “3” ActiveCell.Offset(-2, 0).Range(“A1”).SelectEnd Sub
Notice that the macro recorder uses the FormulaR1C1 property. Normally, you want to use the Value property to enter a value into a cell. However, using FormulaR1C1 or even Formula produces the same result.
Also notice that the generated code references cell A1 — a cell that was even involved in the macro. This notation is a quirk in the macro recording procedure that makes the code more com-plex than necessary. You can delete all references to Range(“A1”), and the macro still works perfectly:
Sub Modified_Macro1() ActiveCell.FormulaR1C1 = “1” ActiveCell.Offset(1, 0).Select ActiveCell.FormulaR1C1 = “2” ActiveCell.Offset(1, 0).Select ActiveCell.FormulaR1C1 = “3” ActiveCell.Offset(-2, 0).SelectEnd Sub
In fact, here’s a much more efficient version of the macro (which I wrote myself) that doesn’t do any selecting:
Sub Macro1() ActiveCell = 1 ActiveCell.Offset(1, 0) = 2 ActiveCell.Offset(2, 0) = 3End Sub
Things to Know about ObjectsThe preceding sections introduced you to objects (including collections), properties, and meth-ods. But I’ve barely scratched the surface.
Essential concepts to rememberIn this section, I note some additional concepts that are essential for would-be VBA gurus. These concepts become clearer when you work with VBA and read subsequent chapters:

Chapter 7: Introducing Visual Basic for Applications 189
Objects have unique properties and methods. Each object has its own set of properties and methods. Some objects, however, share some properties (for example, Name) and some methods (such as Delete).
You can manipulate objects without selecting them. This idea may be contrary to how you normally think about manipulating objects in Excel. The fact is that it’s usually more efficient to perform actions on objects without selecting them first. When you record a macro, Excel generally selects the object first. This step isn’t necessary and may actually make your macro run more slowly.
It’s important that you understand the concept of collections. Most of the time, you refer to an object indirectly by referring to the collection that it’s in. For example, to access a Workbook object named Myfile, reference the Workbooks collection as follows:
Workbooks(“Myfile.xlsx”)
This reference returns an object, which is the workbook with which you’re concerned.
Properties can return a reference to another object. For example, in the following state-ment, the Font property returns a Font object contained in a Range object. Bold is a property of the Font object, not the Range object.
Range(“A1”).Font.Bold = True
You can refer to the same object in many different ways. Assume that you have a work-book named Sales, and it’s the only workbook open. Then assume that this workbook has one worksheet, named Summary. You can refer to the sheet in any of the following ways:
Workbooks(“Sales.xlsx”).Worksheets(“Summary”)Workbooks(1).Worksheets(1)Workbooks(1).Sheets(1)Application.ActiveWorkbook.ActiveSheetActiveWorkbook.ActiveSheetActiveSheet
The method that you use is usually determined by how much you know about the work-space. For example, if more than one workbook is open, the second and third methods aren’t reliable. If you want to work with the active sheet (whatever it may be), any of the last three methods would work. To be absolutely sure that you’re referring to a specific sheet on a specific workbook, the first method is your best choice.
Learning more about objects and propertiesIf this is your first exposure to VBA, you’re probably a bit overwhelmed by objects, properties, and methods. I don’t blame you. If you try to access a property that an object doesn’t have, you get a runtime error, and your VBA code grinds to a screeching halt until you correct the problem.
Fortunately, there are several good ways to learn about objects, properties, and methods.

Part III: Understanding Visual Basic for Applications190
Read the rest of the bookDon’t forget, the name of this chapter is “Introducing Visual Basic for Applications.” The remainder of this book covers many additional details and provides many useful and informative examples.
Record your actionsThe absolute best way to become familiar with VBA, without question, is to simply turn on the macro recorder and record some actions that you perform in Excel. This approach is a quick way to learn the relevant objects, properties, and methods for a task. It’s even better if the VBA mod-ule in which the code is being recorded is visible while you’re recording.
Use the Help systemThe main source of detailed information about Excel’s objects, methods, and procedures is the Help system. Many people forget about this resource.
Use the Object BrowserThe Object Browser is a handy tool that lists every property and method for every object available. When the VBE is active, you can bring up the Object Browser in any of the following three ways:
Press F2.
Choose the View➜Object Browser command from the menu.
Click the Object Browser tool on the Standard toolbar.
The Object Browser is shown in Figure 7-15.
The drop-down list in the upper-left corner of the Object Browser includes a list of all object libraries that you have access to:
Excel itself
MSForms (used to create custom dialog boxes)
Office (objects common to all Microsoft Office applications)
Stdole (OLE automation objects)
VBA
The current project (the project that’s selected in the Project Explorer) and any work-books referenced by that project
Your selection in this upper-left drop-down list determines what is displayed in the Classes window, and your selection in the Classes window determines what is visible in the Members Of panel.

Chapter 7: Introducing Visual Basic for Applications 191
Figure 7-15: The Object Browser is a great reference source.
After you select a library, you can search for a particular text string to get a list of properties and methods that contain the text. You do so by entering the text in the second drop-down list and then clicking the binoculars (Search) icon. For example, assume that you’re working on a project that manipulates cell comments:
1. Select the library of interest.
If you’re not sure which object library is appropriate, you can select <All Libraries>.
2. Enter Comment in the drop-down list below the library list.
3. Click the binoculars icon to begin the text search.
The Search Results window displays the matching text. Select an object to display its classes in the Classes window. Select a class to display its members (properties, methods, and constants). Pay attention to the bottom pane, which shows more information about the object. You can press F1 to go directly to the appropriate help topic.
The Object Browser may seem complex at first, but its usefulness to you will increase over time.

Part III: Understanding Visual Basic for Applications192
Experiment with the Immediate windowAs I describe in the sidebar earlier in this chapter (see “About the code examples”), the Immediate window of the VBE is very useful for testing statements and trying out various VBA expressions. I generally keep the Immediate window visible at all times, and I use it frequently to test various expressions and to help in debugging code.

193
8VBA Programming FundamentalsIn This Chapter
● Understanding VBA language elements, including variables, data types, constants, and arrays
● Using VBA built-in functions
● Manipulating objects and collections
● Controlling the execution of your procedures
VBA Language Elements: An OverviewIf you’ve used other programming languages, much of the information in this chapter may sound familiar. However, VBA has a few unique wrinkles, so even experienced programmers may find some new information.
In Chapter 7, I present an overview of objects, properties, and methods, but I don’t tell you much about how to manipulate objects so that they do meaningful things. This chapter gently nudges you in that direction by exploring the VBA language elements, which are the keywords and con-trol structures that you use to write VBA routines.
To get the ball rolling, I start by presenting a simple VBA Sub procedure. The following code, which is stored in a VBA module, calculates the sum of the first 100 positive integers. When the code finishes executing, the procedure displays a message with the result.
Sub VBA_Demo()‘ This is a simple VBA Example Dim Total As Long, i As Long Total = 0 For i = 1 To 100

Part III: Understanding Visual Basic for Applications194
Total = Total + i Next i MsgBox TotalEnd Sub
This procedure uses some common VBA language elements, including:
A comment (the line that begins with an apostrophe)
A variable declaration statement (the line that begins with Dim)
Two variables (Total and i)
Two assignment statements (Total = 0 and Total = Total + i)
A looping structure (For-Next)
A VBA function (MsgBox)
All these language elements are discussed in subsequent sections of this chapter.
VBA procedures need not manipulate any objects. The preceding procedure, for exam-ple, doesn’t do anything with objects. It simply works with numbers.
Entering VBA codeVBA code, which resides in a VBA module, consists of instructions. The accepted practice is to use one instruction per line. This standard isn’t a requirement, however; you can use a colon to separate multiple instructions on a single line. The following example combines four instructions on one line:
Sub OneLine() x= 1: y= 2: z= 3: MsgBox x + y + zEnd Sub
Most programmers agree that code is easier to read if you use one instruction per line:
Sub MultipleLines() x = 1 y = 2 z = 3 MsgBox x + y + zEnd Sub
Chapter 8: VBA Programming Fundamentals 195
CommentsA comment is descriptive text embedded within your code and ignored by VBA. It’s a good idea to use comments liberally to describe what you’re doing because an instruction’s purpose isn’t always obvious.
Each line can be as long as you like; the VBA module window scrolls to the left when you reach the right side. For lengthy lines, you may want to use VBA’s line continuation sequence: a space followed by an underscore (_). For example:
Sub LongLine() SummedValue = _ Worksheets(“Sheet1”).Range(“A1”).Value + _ Worksheets(“Sheet2”).Range(“A1”).ValueEnd Sub
When you record macros, Excel often uses underscores to break long statements into multiple lines.
After you enter an instruction, VBA performs the following actions to improve readability:
● It inserts spaces between operators. If you enter Ans=1+2 (without spaces), for example, VBA converts it to
Ans = 1 + 2
● It adjusts the case of the letters for keywords, properties, and methods. If you enter the following text: Result=activesheet.range(“a1”).value=12
VBA converts it to Result = ActiveSheet.Range(“a1”).Value = 12
Notice that text within quotation marks (in this case, “a1”) isn’t changed.● Because VBA variable names aren’t case-sensitive, the interpreter by default adjusts the
names of all variables with the same letters so that their case matches the case of letters that you most recently typed. For example, if you first specify a variable as myvalue (all lowercase) and then enter the variable as MyValue (mixed case), VBA changes all other occurrences of the variable to MyValue. An exception occurs if you declare the variable with Dim or a similar statement; in this case, the variable name always appears as it was declared.
● VBA scans the instruction for syntax errors. If VBA finds an error, it changes the color of the line and might display a message describing the problem. Choose the Visual Basic Editor Tools➜Options command to display the Options dialog box, where you control the error color (use the Editor Format tab) and whether the error message is displayed (use the Auto Syntax Check option in the Editor tab).

Part III: Understanding Visual Basic for Applications196
You can use a complete line for your comment, or you can insert a comment after an instruction on the same line. A comment is indicated by an apostrophe. VBA ignores any text that follows an apostrophe — except when the apostrophe is contained within quotation marks — up until the end of the line. For example, the following statement doesn’t contain a comment, even though it has an apostrophe:
Msg = “Can’t continue”
The following example shows a VBA procedure with three comments:
Sub CommentDemo()‘ This procedure does nothing of value x = 0 ‘x represents nothingness‘ Display the result MsgBox xEnd Sub
Although the apostrophe is the preferred comment indicator, you can also use the Rem keyword to mark a line as a comment. For example:
Rem -- The next statement prompts the user for a filename
The Rem keyword (short for Remark) is essentially a holdover from older versions of BASIC and is included in VBA for the sake of compatibility. Unlike the apostrophe, Rem can be written only at the beginning of a line, not on the same line as another instruction.
Using comments is definitely a good idea, but not all comments are equally beneficial. To be useful, comments should convey information that’s not immediately obvious from reading the code. Otherwise, you’re just chewing up valuable bytes and increasing the size of your workbook.
Following are a few general tips on making the best use of comments:
Use comments to describe briefly the purpose of each procedure that you write.
Use comments to describe changes that you make to a procedure.
Use comments to indicate that you’re using functions or constructs in an unusual or non-standard manner.
Use comments to describe the purpose of variables so that you and other people can decipher otherwise cryptic names.

Chapter 8: VBA Programming Fundamentals 197
Use comments to describe workarounds that you develop to overcome Excel bugs or limitations.
Write comments while you code rather than after.
In some cases, you may want to test a procedure without including a particular instruc-tion or group of instructions. Instead of deleting the instruction, simply turn it into a comment by inserting an apostrophe at the beginning. VBA then ignores the instruction(s) when the routine is executed. To convert the comment back to an instruction, just delete the apostrophe.
The Visual Basic Editor (VBE) Edit toolbar contains two very useful buttons. (The Edit toolbar isn’t displayed by default. To display this toolbar, choose View➜Toolbars➜Edit.) Select a group of instructions and then click the Comment Block button to convert the instructions to comments. The Uncomment Block button converts a group of comments back to instructions.
Variables, Data Types, and ConstantsVBA’s main purpose in life is to manipulate data. Some data resides in objects, such as worksheet ranges. Other data is stored in variables that you create.
A variable is simply a named storage location in your computer’s memory. Variables can accom-modate a wide variety of data types — from simple Boolean values (True or False) to large, double-precision values (see the following section). You assign a value to a variable by using the equal sign operator (more about this process in the upcoming section, “Assignment Statements”).
You make your life easier if you get into the habit of making your variable names as descriptive as possible. VBA does, however, have a few rules regarding variable names:
You can use alphabetic characters, numbers, and some punctuation characters, but the first character must be alphabetic.
VBA doesn’t distinguish between case. To make variable names more readable, program-mers often use mixed case (for example, InterestRate rather than interestrate).
You can’t use spaces or periods. To make variable names more readable, programmers often use the underscore character (Interest_Rate).
You can’t embed special type declaration characters (#, $, %, &, or !) in a variable name.
Variable names can be as long as 254 characters — but using such long variable names isn’t recommended.

Part III: Understanding Visual Basic for Applications198
The following list contains some examples of assignment expressions that use various types of variables. The variable names are to the left of the equal sign. Each statement assigns the value to the right of the equal sign to the variable on the left.
x = 1InterestRate = 0.075LoanPayoffAmount = 243089.87DataEntered = Falsex = x + 1MyNum = YourNum * 1.25UserName = “Bob Johnson”DateStarted = #12/14/2009#
VBA has many reserved words, which are words that you can’t use for variable or procedure names. If you attempt to use one of these words, you get an error message. For example, although the reserved word Next might make a very descriptive variable name, the following instruction generates a syntax error:
Next = 132
Unfortunately, syntax error messages aren’t always descriptive. If the Auto Syntax Check option is turned on you get the error: Compile error: Expected: variable. If Auto Syntax Check is turned off, attempting to execute this statement results in: Compile error: Syntax error. It would be more helpful if the error message were something like Reserved word used as a variable. So if an instruction produces a strange error message, check the VBA Help system to ensure that your variable name doesn’t have a special use in VBA.
Defining data typesVBA makes life easy for programmers because it can automatically handle all the details involved in dealing with data. Not all programming languages make it so easy. For example, some lan-guages are strictly typed, which means that the programmer must explicitly define the data type for every variable used.
Data type refers to how data is stored in memory — as integers, real numbers, strings, and so on. Although VBA can take care of data typing automatically, it does so at a cost: slower execution and less efficient use of memory. As a result, letting VBA handle data typing may present prob-lems when you’re running large or complex applications. Another advantage of explicitly declar-ing your variables as a particular data type is that VBA can perform some additional error checking at the compile stage. These errors might otherwise be difficult to locate.
Table 8-1 lists VBA’s assortment of built-in data types. (Note that you can also define custom data types, which I describe later in this chapter in “User-Defined Data Types.”)

Chapter 8: VBA Programming Fundamentals 199
Table 8-1: VBA Built-In Data Types
Data Type Bytes Used Range of Values
Byte 1 byte 0 to 255
Boolean 2 bytes True or False
Integer 2 bytes –32,768 to 32,767
Long 4 bytes –2,147,483,648 to 2,147,483,647
Single 4 bytes –3.402823E38 to –1.401298E-45 (for negative values); 1.401298E-45 to 3.402823E38 (for positive values)
Double 8 bytes –1.79769313486232E308 to –4.94065645841247E-324 (negative values);4.94065645841247E-324 to 1.79769313486232E308 (for positive values)
Currency 8 bytes –922,337,203,685,477.5808 to 922,337,203,685,477.5807
Decimal 12 bytes +/–79,228,162,514,264,337,593,543,950,335 with no decimal point;+/–7.9228162514264337593543950335 with 28 places to the right of the decimal
Date 8 bytes January 1, 0100 to December 31, 9999
Object 4 bytes Any object reference
String (variable length)
10 bytes + string length
0 to approximately 2 billion characters
String (fixed length)
Length of string 1 to approximately 65,400 characters
Variant (with numbers)
16 bytes Any numeric value up to the range of a double data type. It can also hold special values, such as Empty, Error, Nothing, and Null.
Variant (with characters)
22 bytes + string length
0 to approximately 2 billion
User-defined Varies Varies by element
The Decimal data type is rather unusual because you can’t actually declare it. In fact, it is a subtype of a variant. You need to use the VBA CDec function to convert a variant to the Decimal data type.
Generally, it’s best to use the data type that uses the smallest number of bytes yet still can han-dle all the data that will be assigned to it. When VBA works with data, execution speed is par-tially a function of the number of bytes that VBA has at its disposal. In other words, the fewer bytes used by data, the faster VBA can access and manipulate the data.
For worksheet calculation, Excel uses the Double data type, so that’s a good choice for process-ing numbers in VBA when you don’t want to lose any precision. For integer calculations, you can

Part III: Understanding Visual Basic for Applications200
use the Integer type (which is limited to values less than or equal to 32,767). Otherwise, use the Long data type. In fact, using the Long data type even for values less than 32,767 is recom-mended, because this data type may be a bit faster than using the Integer type. When dealing with Excel worksheet row numbers, you want to use the Long data type because the number of rows in a worksheet exceeds the maximum value for the Integer data type.
Benchmarking variant data typesTo test whether data typing is important, I developed the following routine, which performs more than 300 million meaningless calculations in a loop and then displays the procedure’s total execution time:
Sub TimeTest() Dim x As Long, y As Long Dim A As Double, B As Double, C As Double Dim i As Long, j As Long Dim StartTime As Date, EndTime As Date‘ Store the starting time StartTime = Timer‘ Perform some calculations x = 0 y = 0 For i = 1 To 10000 x = x + 1 y = x + 1 For j = 1 To 10000 A = x + y + i B = y - x - i C = x / y * i Next j Next i‘ Get ending time EndTime = Timer‘ Display total time in seconds MsgBox Format(EndTime - StartTime, “0.0”)End Sub
On my system, this routine took 7.7 seconds to run. (The time will vary, depending on your sys-tem’s processor speed.) I then commented out the Dim statements, which declare the data types. That is, I turned the Dim statements into comments by adding an apostrophe at the beginning of the lines. As a result, VBA used the default data type, Variant. I ran the proce-dure again. It took 25.4 seconds, more than three times as long as before.
The moral is simple: If you want your VBA applications to run as fast as possible, declare your variables!
A workbook that contains this code is available on the companion CD-ROM in a file named tim-ing text.xlsm.

Chapter 8: VBA Programming Fundamentals 201
Declaring variablesIf you don’t declare the data type for a variable that you use in a VBA routine, VBA uses the default data type, Variant. Data stored as a Variant acts like a chameleon: It changes type, depending on what you do with it.
The following procedure demonstrates how a variable can assume different data types:
Sub VariantDemo() MyVar = “123” MyVar = MyVar / 2 MyVar = ”Answer: ” & MyVar MsgBox MyVarEnd Sub
In the VariantDemo procedure, MyVar starts out as a three-character string. Then this string is divided by two and becomes a numeric data type. Next, MyVar is appended to a string, convert-ing MyVar back to a string. The MsgBox statement displays the final string: Answer: 61.5.
To further demonstrate the potential problems in dealing with Variant data types, try execut-ing this procedure:
Sub VariantDemo2() MyVar = “123” MyVar = MyVar + MyVar MyVar = ”Answer: ” & MyVar MsgBox MyVarEnd Sub
The message box displays Answer: 123123. This is probably not what you wanted. When dealing with variants that contain text strings, the + operator performs string concatenation.
Determining a data typeYou can use the VBA TypeName function to determine the data type of a variable. Here’s a modified version of the previous procedure. This version displays the data type of MyVar at each step. You see that it starts out as a string, is then converted to a double, and finally ends up as a string again.
Sub VariantDemo2() MyVar = “123” MsgBox TypeName(MyVar) MyVar = MyVar / 2 MsgBox TypeName(MyVar) MyVar = “Answer: “ & MyVar MsgBox TypeName(MyVar) MsgBox MyVarEnd Sub

Part III: Understanding Visual Basic for Applications202
Thanks to VBA, the data type conversion of undeclared variables is automatic. This process may seem like an easy way out, but remember that you sacrifice speed and memory — and you run the risk of errors that you may not even know about.
Declaring each variable in a procedure before you use it is an excellent habit. Declaring a variable tells VBA its name and data type. Declaring variables provides two main benefits:
Your programs run faster and use memory more efficiently. The default data type, Variant, causes VBA to repeatedly perform time-consuming checks and reserve more memory than necessary. If VBA knows the data type, it doesn’t have to investigate, and it can reserve just enough memory to store the data.
You avoid problems involving misspelled variable names. This benefit assumes that you use Option Explicit to force yourself to declare all variables (see the next section). Say that you use an undeclared variable named CurrentRate. At some point in your routine, however, you insert the statement CurentRate = .075. This misspelled vari-able name, which is very difficult to spot, will likely cause your routine to give incorrect results.
Forcing yourself to declare all variablesTo force yourself to declare all the variables that you use, include the following as the first instruction in your VBA module:
Option Explicit
When this statement is present, VBA won’t even execute a procedure if it contains an undeclared variable name. VBA issues the error message shown in Figure 8-1, and you must declare the vari-able before you can proceed.
Figure 8-1: VBA’s way of telling you that your procedure contains an undeclared variable.

Chapter 8: VBA Programming Fundamentals 203
To ensure that the Option Explicit statement is inserted automatically whenever you insert a new VBA module, enable the Require Variable Declaration option in the Editor tab of the VBE Options dialog box (choose Tools➜Options). I highly recommend doing so. Be aware, however, that this option doesn’t affect existing modules.
Scoping variablesA variable’s scope determines in which modules and procedures you can use the variable. Table 8-2 lists the three ways in which a variable can be scoped.
Table 8-2: Variable Scope
Scope How a Variable with This Scope Is Declared
Single procedure Include a Dim or Static statement within the procedure.
Single module Include a Dim or Private statement before the first procedure in a module.
All modules Include a Public statement before the first procedure in a module.
I discuss each scope further in the following sections.
Local variablesA local variable is a variable declared within a procedure. You can use local variables only in the procedure in which they’re declared. When the procedure ends, the variable no longer exists, and Excel frees up the memory that the variable used. If you need the variable to retain its value when the procedure ends, declare it as a Static variable. (See “Static variables,” later in this section.)
The most common way to declare a local variable is to place a Dim statement between a Sub statement and an End Sub statement. Dim statements usually are placed right after the Sub statement, before the procedure’s code.
If you’re curious about this word, Dim is a shortened form of Dimension. In old versions of BASIC, this statement was used exclusively to declare the dimensions for an array. In VBA, the Dim keyword is used to declare any variable, not just arrays.
A note about the examples in this chapterThis chapter contains many examples of VBA code, usually presented in the form of simple pro-cedures. These examples demonstrate various concepts as simply as possible. Most of these examples don’t perform any particularly useful task; in fact, the task can often be performed in a different (perhaps more efficient) way. In other words, don’t use these examples in your own work. Subsequent chapters provide many more code examples that are useful.

Part III: Understanding Visual Basic for Applications204
The following procedure uses six local variables declared by using Dim statements:
Sub MySub() Dim x As Integer Dim First As Long Dim InterestRate As Single Dim TodaysDate As Date Dim UserName As String Dim MyValue‘ - [The procedure’s code goes here] -End Sub
Notice that the last Dim statement in the preceding example doesn’t declare a data type; it sim-ply names the variable. As a result, that variable becomes a variant.
You also can declare several variables with a single Dim statement. For example:
Dim x As Integer, y As Integer, z As IntegerDim First As Long, Last As Double
Unlike some languages, VBA doesn’t let you declare a group of variables to be a partic-ular data type by separating the variables with commas. For example, the following statement, although valid, does not declare all the variables as integers:
Dim i, j, k As Integer
In VBA, only k is declared to be an integer; the other variables are declared variants. To declare i, j, and k as integers, use this statement:
Dim i As Integer, j As Integer, k As Integer
If a variable is declared with a local scope, other procedures in the same module can use the same variable name, but each instance of the variable is unique to its own procedure.
In general, local variables are the most efficient because VBA frees up the memory that they use when the procedure ends.
Module-wide variablesSometimes, you want a variable to be available to all procedures in a module. If so, just declare the variable before the module’s first procedure (outside of any procedures or functions).

Chapter 8: VBA Programming Fundamentals 205
In the following example, the Dim statement is the first instruction in the module. Both Procedure1 and Procedure2 have access to the CurrentValue variable.
Dim CurrentValue as LongSub Procedure1()‘ - [Code goes here] -End SubSub Procedure2()‘ - [Code goes here] -End Sub
The value of a module-wide variable retains its value when a procedure ends normally (that is, when it reaches the End Sub or End Function statement). An exception is if the procedure is halted with an End statement. When VBA encounters an End statement, all module-wide vari-ables in all modules lose their values.
Another way of data-typing variablesLike most other dialects of BASIC, VBA lets you append a character to a variable’s name to indi-cate the data type. For example, you can declare the MyVar variable as an integer by tacking % onto the name:
Dim MyVar%
Type-declaration characters exist for most VBA data types. Data types not listed in the following table don’t have type-declaration characters.
Data Type Type-Declaration Character
Integer %
Long &
Single !
Double #
Currency @
String $
This method of data typing is essentially a holdover from BASIC; it’s better to declare your vari-ables by using the other techniques described in this chapter. I list these type declaration char-acters here just in case you encounter them in an older program.

Part III: Understanding Visual Basic for Applications206
Public variablesTo make a variable available to all the procedures in all the VBA modules in a project, declare the variable at the module level (before the first procedure declaration) by using the Public key-word rather than Dim. Here’s an example:
Public CurrentRate as Long
The Public keyword makes the CurrentRate variable available to any procedure in the VBA project, even those in other modules within the project. You must insert this statement before the first procedure in a module (any module). This type of declaration must appear in a standard VBA module, not in a code module for a sheet or a UserForm.
Static variablesStatic variables are a special case. They’re declared at the procedure level, and they retain their value when the procedure ends normally. However, if the procedure is halted by an End state-ment, static variables do lose their values.
You declare static variables by using the Static keyword:
Sub MySub() Static Counter as Long ‘- [Code goes here] -End Sub
Working with constantsA variable’s value may change while a procedure is executing (that’s why it’s called a variable). Sometimes, you need to refer to a named value or string that never changes: a constant.
Using constants throughout your code in place of hard-coded values or strings is an excellent programming practice. For example, if your procedure needs to refer to a specific value (such as an interest rate) several times, it’s better to declare the value as a constant and use the con-stant’s name rather than its value in your expressions. This technique not only makes your code more readable, it also makes it easier to change should the need arise — you have to change only one instruction rather than several.
Declaring constantsYou declare constants with the Const statement. Here are some examples:
Const NumQuarters as Integer = 4Const Rate = .0725, Period = 12Const ModName as String = “Budget Macros”Public Const AppName as String = “Budget Application”
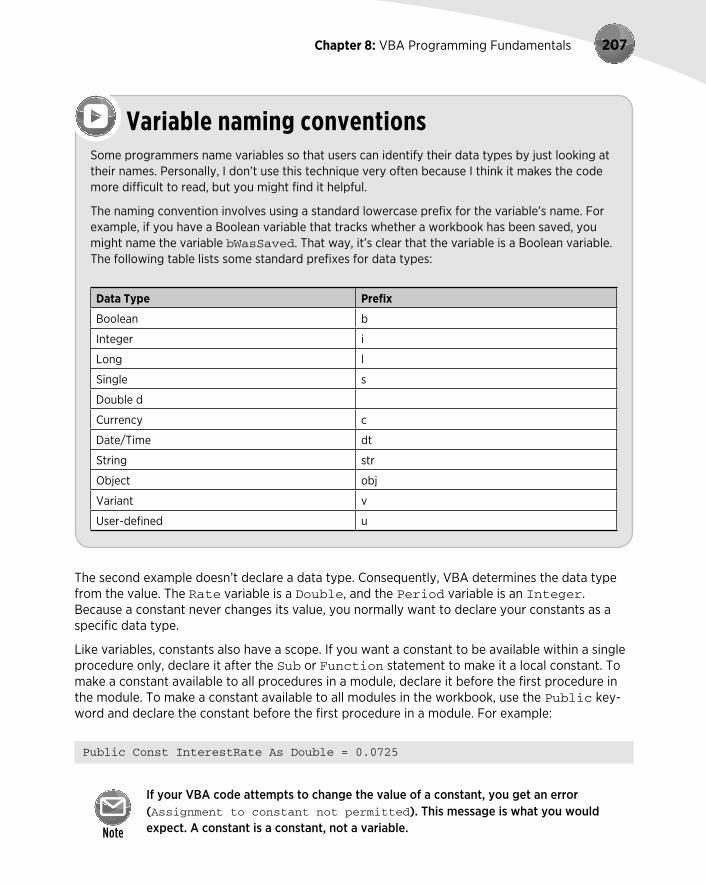
Chapter 8: VBA Programming Fundamentals 207
The second example doesn’t declare a data type. Consequently, VBA determines the data type from the value. The Rate variable is a Double, and the Period variable is an Integer. Because a constant never changes its value, you normally want to declare your constants as a specific data type.
Like variables, constants also have a scope. If you want a constant to be available within a single procedure only, declare it after the Sub or Function statement to make it a local constant. To make a constant available to all procedures in a module, declare it before the first procedure in the module. To make a constant available to all modules in the workbook, use the Public key-word and declare the constant before the first procedure in a module. For example:
Public Const InterestRate As Double = 0.0725
If your VBA code attempts to change the value of a constant, you get an error (Assignment to constant not permitted). This message is what you would expect. A constant is a constant, not a variable.
Variable naming conventionsSome programmers name variables so that users can identify their data types by just looking at their names. Personally, I don’t use this technique very often because I think it makes the code more difficult to read, but you might find it helpful.
The naming convention involves using a standard lowercase prefix for the variable’s name. For example, if you have a Boolean variable that tracks whether a workbook has been saved, you might name the variable bWasSaved. That way, it’s clear that the variable is a Boolean variable. The following table lists some standard prefixes for data types:
Data Type Prefix
Boolean b
Integer i
Long l
Single s
Double d
Currency c
Date/Time dt
String str
Object obj
Variant v
User-defined u
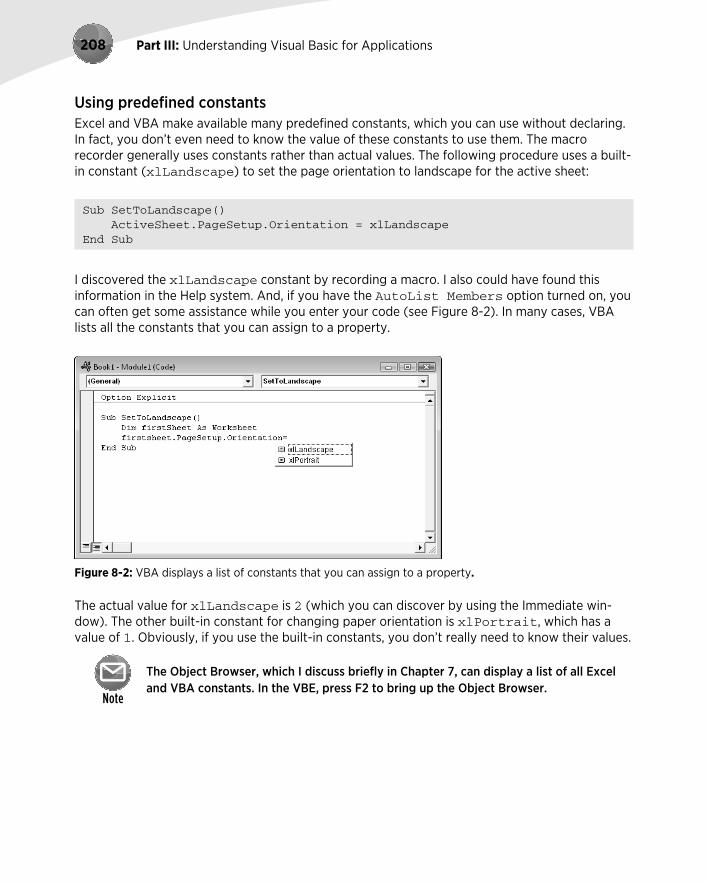
Part III: Understanding Visual Basic for Applications208
Using predefined constantsExcel and VBA make available many predefined constants, which you can use without declaring. In fact, you don’t even need to know the value of these constants to use them. The macro recorder generally uses constants rather than actual values. The following procedure uses a built-in constant (xlLandscape) to set the page orientation to landscape for the active sheet:
Sub SetToLandscape() ActiveSheet.PageSetup.Orientation = xlLandscapeEnd Sub
I discovered the xlLandscape constant by recording a macro. I also could have found this information in the Help system. And, if you have the AutoList Members option turned on, you can often get some assistance while you enter your code (see Figure 8-2). In many cases, VBA lists all the constants that you can assign to a property.
Figure 8-2: VBA displays a list of constants that you can assign to a property.
The actual value for xlLandscape is 2 (which you can discover by using the Immediate win-dow). The other built-in constant for changing paper orientation is xlPortrait, which has a value of 1. Obviously, if you use the built-in constants, you don’t really need to know their values.
The Object Browser, which I discuss briefly in Chapter 7, can display a list of all Excel and VBA constants. In the VBE, press F2 to bring up the Object Browser.

Chapter 8: VBA Programming Fundamentals 209
Working with stringsLike Excel, VBA can manipulate both numbers and text (strings). There are two types of strings in VBA:
Fixed-length strings are declared with a specified number of characters. The maximum length is 65,535 characters.
Variable-length strings theoretically can hold up to 2 billion characters.
Each character in a string requires 1 byte of storage, plus a small amount of storage for the header of each string. When you declare a variable with a Dim statement as data type String, you can specify the length if you know it (that is, a fixed-length string), or you can let VBA han-dle it dynamically (a variable-length string).
In the following example, the MyString variable is declared to be a string with a maximum length of 50 characters. YourString is also declared as a string; but it’s a variable-length string, so its length is unfixed.
Dim MyString As String * 50Dim YourString As String
Working with datesYou can use a string variable to store a date, but if you do, it’s not a real date (meaning you can’t perform date calculations with it). Using the Date data type is a better way to work with dates.
A variable defined as a date uses 8 bytes of storage and can hold dates ranging from January 1, 0100, to December 31, 9999. That’s a span of nearly 10,000 years — more than enough for even the most aggressive financial forecast! The Date data type is also useful for storing time-related data. In VBA, you specify dates and times by enclosing them between two hash marks (#).
The range of dates that VBA can handle is much larger than Excel’s own date range, which begins with January 1, 1900, and extends through December 31, 1999. Therefore, be careful that you don’t attempt to use a date in a worksheet that is outside of Excel’s acceptable date range.
In Chapter 10, I describe some relatively simple VBA functions that enable you to create formulas that work with pre-1900 dates in a worksheet.

Part III: Understanding Visual Basic for Applications210
Here are some examples of declaring variables and constants as Date data types:
Dim Today As DateDim StartTime As DateConst FirstDay As Date = #1/1/2010#Const Noon = #12:00:00#
Dates are always defined using month/day/year format, even if your system is set up to display dates in a different format (for example, day/month/year).
If you use a message box to display a date, it’s displayed according to your system’s short date format. Similarly, a time is displayed according to your system’s time format (either 12- or 24-hour). You can modify these system settings by using the Regional Settings option in the Windows Control Panel.
Assignment StatementsAn assignment statement is a VBA instruction that makes a mathematical evaluation and assigns the result to a variable or an object. Excel’s Help system defines expression as “a combination of keywords, operators, variables, and constants that yields a string, number, or object. An expres-sion can perform a calculation, manipulate characters, or test data.”
I couldn’t have said it better myself. Much of the work done in VBA involves developing (and debugging) expressions. If you know how to create formulas in Excel, you’ll have no trouble creat-ing expressions in VBA. With a worksheet formula, Excel displays the result in a cell. The result of a VBA expression, on the other hand, can be assigned to a variable or used as a property value.
About Excel’s date bugIt is commonly known that Excel has a date bug: It incorrectly assumes that the year 1900 is a leap year. Even though there was no February 29, 1900, Excel accepts the following formula and displays the result as the 29th day of February, 1900:
=Date(1900,2,29)
VBA doesn’t have this date bug. The VBA equivalent of Excel’s DATE function is DateSerial. The following expression (correctly) returns March 1, 1900:
DateSerial(1900,2,29)
Therefore, Excel’s date serial number system doesn’t correspond exactly to the VBA date serial number system. These two systems return different values for dates between January 1, 1900, and February 28, 1900.

Chapter 8: VBA Programming Fundamentals 211
VBA uses the equal sign (=) as its assignment operator. The following are examples of assign-ment statements (the expressions are to the right of the equal sign):
x = 1x = x + 1x = (y * 2) / (z * 2)FileOpen = TrueFileOpen = Not FileOpenRange(“TheYear”).Value = 2010
Expressions can be very complex. You may want to use the line continuation sequence (space followed by an underscore) to make lengthy expressions easier to read.
Often, expressions use functions. These functions can be built-in VBA functions, Excel’s work-sheet functions, or custom functions that you develop in VBA. I discuss built-in VBA functions later in this chapter (see the upcoming section “Built-in Functions”).
Operators play a major role in VBA. Familiar operators describe mathematical operations, includ-ing addition (+), multiplication (*), division (/), subtraction (–), exponentiation (^), and string concatenation (&). Less familiar operators are the backslash (\) (used in integer division) and the Mod operator (used in modulo arithmetic). The Mod operator returns the remainder of one num-ber divided by another. For example, the following expression returns 2:
17 Mod 3
VBA also supports the same comparison operators used in Excel formulas: equal to (=), greater than (>), less than (<), greater than or equal to (>=), less than or equal to (<=), and not equal to (<>).
With one exception, the order of precedence for operators in VBA is exactly the same as in Excel (see Table 8-3). And, of course, you can use parentheses to change the natural order of precedence.
The negation operator (a minus sign) is handled differently in VBA. In Excel, the follow-ing formula returns 25:
=-5^2
In VBA, x equals –25 after this statement is executed:
x = -5 ^ 2
VBA performs the exponentiation operation first and then applies the negation opera-tor. The following statement returns 25:
x = (-5) ^ 2

Part III: Understanding Visual Basic for Applications212
Table 8-3: Operator Precedence
Operator Operation Order of Precedence
^ Exponentiation 1
* and / Multiplication and division 2
+ and - Addition and subtraction 3
& Concatenation 4
=, <, >, <=, >=, <> Comparison 5
In the statement that follows, x is assigned the value 10 because the multiplication operator has a higher precedence than the addition operator.
x = 4 + 3 * 2
To avoid ambiguity, you may prefer to write the statement as follows:
x = 4 + (3 * 2)
In addition, VBA provides a full set of logical operators, shown in Table 8-4. For complete details on these operators (including examples), use the VBA Help system.
Table 8-4: VBA Logical Operators
Operator What It Does
Not Performs a logical negation on an expression.
And Performs a logical conjunction on two expressions.
Or Performs a logical disjunction on two expressions.
Xor Performs a logical exclusion on two expressions.
Eqv Performs a logical equivalence on two expressions.
Imp Performs a logical implication on two expressions.
The following instruction uses the Not operator to toggle the gridline display in the active win-dow. The DisplayGridlines property takes a value of either True or False. Therefore, using the Not operator changes False to True and True to False.
ActiveWindow.DisplayGridlines = _ Not ActiveWindow.DisplayGridlines

Chapter 8: VBA Programming Fundamentals 213
The following expression performs a logical And operation. The MsgBox statement displays True only when Sheet1 is the active sheet and the active cell is in Row 1. If either or both of these conditions aren’t true, the MsgBox statement displays False.
MsgBox ActiveSheet.Name = “Sheet1” And ActiveCell.Row = 1
The following expression performs a logical Or operation. The MsgBox statement displays True when either Sheet1 or Sheet2 is the active sheet.
MsgBox ActiveSheet.Name = “Sheet1” Or ActiveSheet.Name = “Sheet2”
ArraysAn array is a group of elements of the same type that have a common name. You refer to a spe-cific element in the array by using the array name and an index number. For example, you can define an array of 12 string variables so that each variable corresponds to the name of a month. If you name the array MonthNames, you can refer to the first element of the array as MonthNames(0), the second element as MonthNames(1), and so on, up to MonthNames(11).
Declaring arraysYou declare an array with a Dim or Public statement, just as you declare a regular variable. You can also specify the number of elements in the array. You do so by specifying the first index number, the keyword To, and the last index number — all inside parentheses. For example, here’s how to declare an array comprising exactly 100 integers:
Dim MyArray(1 To 100) As Integer
When you declare an array, you need specify only the upper index, in which case VBA assumes that 0 is the lower index. Therefore, the two statements that follow have the same effect:
Dim MyArray(0 to 100) As IntegerDim MyArray(100) As Integer
In both cases, the array consists of 101 elements.

Part III: Understanding Visual Basic for Applications214
By default, VBA assumes zero-based arrays. If you would like VBA to assume that 1 is the lower index for all arrays that declare only the upper index, include the following statement before any procedures in your module:
Option Base 1
Declaring multidimensional arraysThe array examples in the preceding section are one-dimensional arrays. VBA arrays can have up to 60 dimensions, although you’ll rarely need more than three dimensions (a 3-D array). The fol-lowing statement declares a 100-integer array with two dimensions (2-D):
Dim MyArray(1 To 10, 1 To 10) As Integer
You can think of the preceding array as occupying a 10-x-10 matrix. To refer to a specific element in a 2-D array, you need to specify two index numbers. For example, here’s how you can assign a value to an element in the preceding array:
MyArray(3, 4) = 125
Following is a declaration for a 3-D array that contains 1,000 elements (visualize this array as a cube):
Dim MyArray(1 To 10, 1 To 10, 1 To 10) As Integer
Reference an item within the array by supplying three index numbers:
MyArray(4, 8, 2) = 0
Declaring dynamic arraysA dynamic array doesn’t have a preset number of elements. You declare a dynamic array with a blank set of parentheses:
Dim MyArray() As Integer
Before you can use a dynamic array in your code, however, you must use the ReDim statement to tell VBA how many elements are in the array. You can use a variable to assign the number of elements in

Chapter 8: VBA Programming Fundamentals 215
an array. Often the value of the variable isn’t known until the procedure is executing. For example, if the variable x contains a number, you can define the array’s size by using this statement:
ReDim MyArray (1 to x)
You can use the ReDim statement any number of times, changing the array’s size as often as you need to. When you change an array’s dimensions the existing values are destroyed. If you want to preserve the existing values, use ReDim Preserve. For example:
ReDim Preserve MyArray (1 to y)
Arrays crop up later in this chapter when I discuss looping (“Looping blocks of instructions”).
Object VariablesAn object variable is a variable that represents an entire object, such as a range or a worksheet. Object variables are important for two reasons:
They can simplify your code significantly.
They can make your code execute more quickly.
Object variables, like normal variables, are declared with the Dim or Public statement. For example, the following statement declares InputArea as a Range object variable:
Dim InputArea As Range
Use the Set keyword to assign an object to the variable. For example:
Set InputArea = Range(“C16:E16”)
To see how object variables simplify your code, examine the following procedure, which doesn’t use an object variable:
Sub NoObjVar() Worksheets(“Sheet1”).Range(“A1”).Value = 124 Worksheets(“Sheet1”).Range(“A1”).Font.Bold = True Worksheets(“Sheet1”).Range(“A1”).Font.Italic = True Worksheets(“Sheet1”).Range(“A1”).Font.Size = 14 Worksheets(“Sheet1”).Range(“A1”).Font.Name = “Cambria”End Sub

Part III: Understanding Visual Basic for Applications216
This routine enters a value into cell A1 of Sheet1 on the active workbook, applies some formatting, and changes the fonts and size. That’s a lot of typing. To reduce wear and tear on your fingers (and make your code more efficient), you can condense the routine with an object variable:
Sub ObjVar() Dim MyCell As Range Set MyCell = Worksheets(“Sheet1”).Range(“A1”) MyCell.Value = 124 MyCell.Font.Bold = True MyCell.Font.Italic = True MyCell.Font.Size = 14 MyCell.Font.Name = CambriaEnd Sub
After the variable MyCell is declared as a Range object, the Set statement assigns an object to it. Subsequent statements can then use the simpler MyCell reference in place of the lengthy Worksheets(“Sheet1”).Range(“A1”) reference.
After an object is assigned to a variable, VBA can access it more quickly than it can a normal, lengthy reference that has to be resolved. So when speed is critical, use object variables. One way to think about code efficiency is in terms of dot processing. Every time VBA encounters a dot, as in Sheets(1).Range(“A1”), it takes time to resolve the reference. Using an object variable reduces the number of dots to be processed. The fewer the dots, the faster the processing time. Another way to improve the speed of your code is by using the With-End With construct, which also reduces the number of dots to be processed. I discuss this construct later in this chapter.
The true value of object variables becomes apparent when I discuss looping later in this chapter.
User-Defined Data TypesVBA lets you create custom, or user-defined, data types. A user-defined data type can ease your work with some types of data. For example, if your application deals with customer information, you may want to create a user-defined data type named CustomerInfo:
Type CustomerInfo Company As String Contact As String RegionCode As Long Sales As DoubleEnd Type

Chapter 8: VBA Programming Fundamentals 217
You define custom data types at the top of your module, before any procedures.
After you create a user-defined data type, you use a Dim statement to declare a variable as that type. Usually, you define an array. For example:
Dim Customers(1 To 100) As CustomerInfo
Each of the 100 elements in this array consists of four components (as specified by the user-defined data type, CustomerInfo). You can refer to a particular component of the record as follows:
Customers(1).Company = “Acme Tools”Customers(1).Contact = “Tim Robertson”Customers(1).RegionCode = 3Customers(1).Sales = 150674.98
You can also work with an element in the array as a whole. For example, to copy the information from Customers(1) to Customers(2), use this instruction:
Customers(2) = Customers(1)
The preceding example is equivalent to the following instruction block:
Customers(2).Company = Customers(1).CompanyCustomers(2).Contact = Customers(1).ContactCustomers(2).RegionCode = Customers(1).RegionCodeCustomers(2).Sales = Customers(1).Sales
Built-in FunctionsLike most programming languages, VBA has a variety of built-in functions that simplify calcula-tions and operations. Many VBA functions are similar (or identical) to Excel worksheet functions. For example, the VBA function UCase, which converts a string argument to uppercase, is equiva-lent to the Excel worksheet function UPPER.
Appendix B contains a complete list of VBA functions, with a brief description of each. All are thoroughly described in the VBA Help system.

Part III: Understanding Visual Basic for Applications218
To get a list of VBA functions while you’re writing your code, type VBA followed by a period (.). The VBE displays a list of all its members, including functions (see Figure 8-3). The functions are preceded by a green icon.
If this technique doesn’t work for you, make sure that the Auto List Members option is selected. Choose Tools➜Options and then click the Editor tab.
Figure 8-3: Displaying a list of VBA functions in the VBE.
You use functions in VBA expressions in much the same way that you use functions in worksheet formulas. Here’s a simple procedure that calculates the square root of a variable (using the VBA Sqr function), stores the result in another variable, and then displays the result:
Sub ShowRoot() Dim MyValue As Double Dim SquareRoot As Double MyValue = 25 SquareRoot = Sqr(MyValue) MsgBox SquareRootEnd Sub
The VBA Sqr function is equivalent to the Excel SQRT worksheet function.
You can use many (but not all) of Excel’s worksheet functions in your VBA code. The WorksheetFunction object, which is contained in the Application object, holds all the worksheet functions that you can call from your VBA procedures.
To use a worksheet function in a VBA statement, just precede the function name with
Application.WorksheetFunction

Chapter 8: VBA Programming Fundamentals 219
The MsgBox functionThe MsgBox function is one of the most useful VBA functions. Many of the examples in this chapter use this function to display the value of a variable.
This function often is a good substitute for a simple custom dialog box. It’s also an excellent debugging tool because you can insert MsgBox functions at any time to pause your code and display the result of a calculation or assignment.
Most functions return a single value, which you assign to a variable. The MsgBox function not only returns a value but also displays a dialog box that the user can respond to. The value returned by the MsgBox function represents the user’s response to the dialog box. You can use the MsgBox function even when you have no interest in the user’s response but want to take advantage of the message display.
The official syntax of the MsgBox function has five arguments (those in square brackets are optional):
MsgBox(prompt[, buttons][, title][, helpfile, context])
● prompt: (Required) The message displayed in the pop-up display.● buttons: (Optional) A value that specifies which buttons and which icons, if any, appear
in the message box. Use built-in constants — for example, vbYesNo.● title: (Optional) The text that appears in the message box’s title bar. The default is
Microsoft Excel.● helpfile: (Optional) The name of the Help file associated with the message box.● context: (Optional) The context ID of the Help topic. This represents a specific Help topic
to display. If you use the context argument, you must also use the helpfile argument.
You can assign the value returned to a variable, or you can use the function by itself without an assignment statement. This example assigns the result to the variable Ans:
Ans = MsgBox(“Continue?”, vbYesNo + vbQuestion, “Tell me”)If Ans = vbNo Then Exit Sub
Notice that I used the sum of two built-in constants (vbYesNo + vbQuestion) for the but-tons argument. Using vbYesNo displays two buttons in the message box: one labeled Yes and one labeled No. Adding vbQuestion to the argument also displays a question mark icon. When the first statement is executed, Ans contains one of two values, represented by the constant vbYes or vbNo. In this example, if the user clicks the No button, the procedure ends.
See Chapter 12 for more information about the MsgBox function.
The following example demonstrates how to use an Excel worksheet function in a VBA proce-dure. Excel’s infrequently used ROMAN function converts a decimal number into a Roman numeral.

Part III: Understanding Visual Basic for Applications220
Sub ShowRoman() Dim DecValue As Long Dim RomanValue As String DecValue = 1939 RomanValue = Application.WorksheetFunction.Roman(DecValue) MsgBox RomanValueEnd Sub
When you execute this procedure, the MsgBox function displays the string MCMXXXIX. Fans of old movies are often dismayed when they learn that Excel doesn’t have a function to convert a Roman numeral to its decimal equivalent.
Keep in mind that you can’t use worksheet functions that have an equivalent VBA function. For example, VBA can’t access the Excel SQRT worksheet function because VBA has its own version of that function: Sqr. Therefore, the following statement generates an error:
MsgBox Application.WorksheetFunction.Sqrt(123) ‘error
As I describe in Chapter 10, you can use VBA to create custom worksheet functions that work just like Excel’s built-in worksheet functions.
Manipulating Objects and CollectionsAs an Excel programmer, you’ll spend a lot of time working with objects and collections. Therefore, you want to know the most efficient ways to write your code to manipulate these objects and collections. VBA offers two important constructs that can simplify working with objects and collections:
With-End With constructs
For Each-Next constructs
With-End With constructsThe With-End With construct enables you to perform multiple operations on a single object. To start understanding how the With-End With construct works, examine the following proce-dure, which modifies six properties of a selection’s formatting (the selection is assumed to be a Range object):
Sub ChangeFont1() Selection.Font.Name = “Cambria” Selection.Font.Bold = True

Chapter 8: VBA Programming Fundamentals 221
Selection.Font.Italic = True Selection.Font.Size = 12 Selection.Font.Underline = xlUnderlineStyleSingle Selection.Font.ThemeColor = xlThemeColorAccent1End Sub
You can rewrite this procedure using the With-End With construct. The following procedure performs exactly like the preceding one:
Sub ChangeFont2() With Selection.Font .Name = “Cambria” .Bold = True .Italic = True .Size = 12 .Underline = xlUnderlineStyleSingle .ThemeColor = xlThemeColorAccent1 End WithEnd Sub
Some people think that the second incarnation of the procedure is actually more difficult to read. Remember, though, that the objective is increased speed. Although the first version may be more straightforward and easier to understand, a procedure that uses the With-End With construct to change several properties of an object can be faster than the equivalent procedure that explic-itly references the object in each statement.
When you record a VBA macro, Excel uses the With-End With construct every chance it gets. To see a good example of this construct, try recording your actions while you change the page orientation using the Page Layout➜Page Setup➜Orientation com-mand.
For Each-Next constructsRecall from the preceding chapter that a collection is a group of related objects. For example, the Workbooks collection is a collection of all open Workbook objects, and there are many other collections that you can work with.
Suppose that you want to perform some action on all objects in a collection. Or suppose that you want to evaluate all objects in a collection and take action under certain conditions. These occa-sions are perfect for the For Each-Next construct because you don’t have to know how many elements are in a collection to use the For Each-Next construct.

Part III: Understanding Visual Basic for Applications222
The syntax of the For Each-Next construct is
For Each element In collection [instructions] [Exit For] [instructions]Next [element]
The following procedure uses the For Each-Next construct with the Worksheets collection in the active workbook. When you execute the procedure, the MsgBox function displays each worksheet’s Name property. (If five worksheets are in the active workbook, the MsgBox function is called five times.)
Sub CountSheets() Dim Item as Worksheet For Each Item In ActiveWorkbook.Worksheets MsgBox Item.Name Next ItemEnd Sub
In the preceding example, Item is an object variable (more specifically, a Worksheet object). There’s nothing special about the name Item; you can use any valid variable name in its place.
The next example uses For Each-Next to cycle through all objects in the Windows collection and count the number of windows that are hidden.
Sub HiddenWindows() Dim Cnt As Integer Dim Win As Window Cnt = 0 For Each Win In Windows If Not Win.Visible Then Cnt = Cnt + 1 Next Win MsgBox Cnt & “ hidden windows.”End Sub
For each window, if the window is hidden, the Cnt variable is incremented. When the loop ends, the message box displays the value of Cnt.
Here’s an example that closes all workbooks except the active workbook. This procedure uses the If-Then construct to evaluate each workbook in the Workbooks collection.
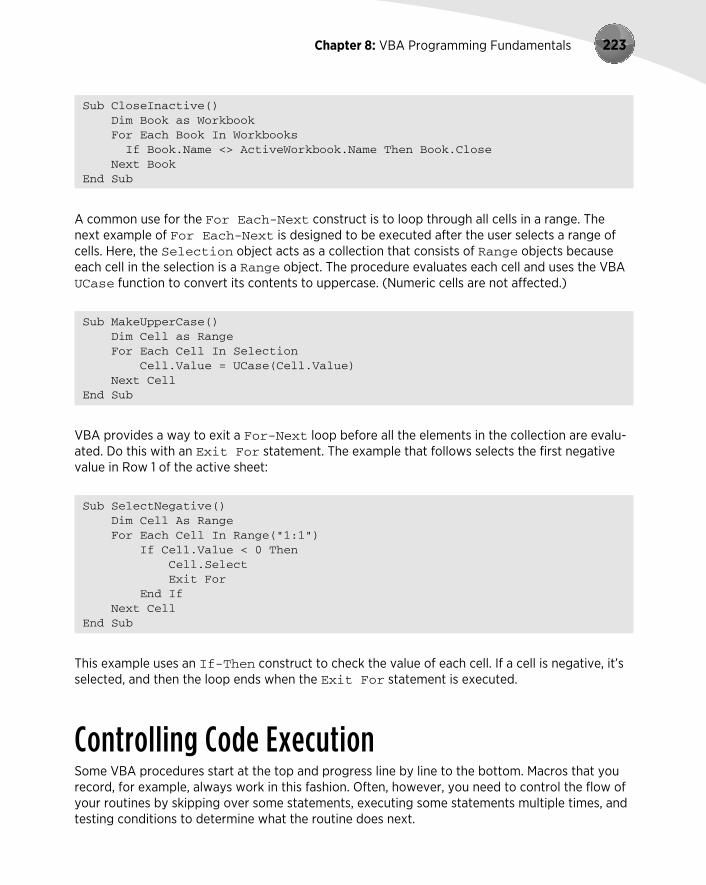
Chapter 8: VBA Programming Fundamentals 223
Sub CloseInactive() Dim Book as Workbook For Each Book In Workbooks If Book.Name <> ActiveWorkbook.Name Then Book.Close Next BookEnd Sub
A common use for the For Each-Next construct is to loop through all cells in a range. The next example of For Each-Next is designed to be executed after the user selects a range of cells. Here, the Selection object acts as a collection that consists of Range objects because each cell in the selection is a Range object. The procedure evaluates each cell and uses the VBA UCase function to convert its contents to uppercase. (Numeric cells are not affected.)
Sub MakeUpperCase() Dim Cell as Range For Each Cell In Selection Cell.Value = UCase(Cell.Value) Next CellEnd Sub
VBA provides a way to exit a For-Next loop before all the elements in the collection are evalu-ated. Do this with an Exit For statement. The example that follows selects the first negative value in Row 1 of the active sheet:
Sub SelectNegative() Dim Cell As Range For Each Cell In Range(“1:1”) If Cell.Value < 0 Then Cell.Select Exit For End If Next CellEnd Sub
This example uses an If-Then construct to check the value of each cell. If a cell is negative, it’s selected, and then the loop ends when the Exit For statement is executed.
Controlling Code ExecutionSome VBA procedures start at the top and progress line by line to the bottom. Macros that you record, for example, always work in this fashion. Often, however, you need to control the flow of your routines by skipping over some statements, executing some statements multiple times, and testing conditions to determine what the routine does next.

Part III: Understanding Visual Basic for Applications224
The preceding section describes the For Each-Next construct, which is a type of loop. This section discusses the additional ways of controlling the execution of your VBA procedures:
GoTo statements
If-Then constructs
Select Case constructs
For-Next loops
Do While loops
Do Until loops
GoTo statementsThe most straightforward way to change the flow of a program is to use a GoTo statement. This statement simply transfers program execution to a new instruction, which must be preceded by a label (a text string followed by a colon, or a number with no colon). VBA procedures can contain any number of labels, but a GoTo statement can’t branch outside of a procedure.
The following procedure uses the VBA InputBox function to get the user’s name. If the name is not Howard, the procedure branches to the WrongName label and ends. Otherwise, the proce-dure executes some additional code. The Exit Sub statement causes the procedure to end.
Sub GoToDemo() UserName = InputBox(“Enter Your Name:”) If UserName <> “Howard” Then GoTo WrongName MsgBox (“Welcome Howard...”)‘ -[More code here] - Exit SubWrongName: MsgBox “Sorry. Only Howard can run this macro.”End Sub
This simple procedure works, but it’s not an example of good programming. In general, you should use the GoTo statement only when you have no other way to perform an action. In fact, the only time you really need to use a GoTo statement in VBA is for error handling (refer to Chapter 9).
Finally, it goes without saying that the preceding example is not intended to demonstrate an effective security technique!
If-Then constructsPerhaps the most commonly used instruction grouping in VBA is the If-Then construct. This common instruction is one way to endow your applications with decision-making capability. Good decision-making is the key to writing successful programs.

Chapter 8: VBA Programming Fundamentals 225
The basic syntax of the If-Then construct is
If condition Then true_instructions [Else false_instructions]
The If-Then construct is used to execute one or more statements conditionally. The Else clause is optional. If included, the Else clause lets you execute one or more instructions when the condition that you’re testing isn’t True.
The following procedure demonstrates an If-Then structure without an Else clause. The example deals with time, and VBA uses a date-and-time serial number system similar to Excel’s. The time of day is expressed as a fractional value — for example, noon is represented as .5. The VBA Time function returns a value that represents the time of day, as reported by the system clock. In the following example, a message is displayed if the time is before noon. If the current system time is greater than or equal to .5, the procedure ends, and nothing happens.
Sub GreetMe1() If Time < 0.5 Then MsgBox “Good Morning”End Sub
Another way to code this routine is to use multiple statements, as follows:
Sub GreetMe1a() If Time < 0.5 Then MsgBox “Good Morning” End IfEnd Sub
Notice that the If statement has a corresponding End If statement. In this example, only one statement is executed if the condition is True. You can, however, place any number of state-ments between the If and End If statements.
If you want to display a different greeting when the time of day is after noon, add another If-Then statement, like so:
Sub GreetMe2() If Time < 0.5 Then MsgBox “Good Morning” If Time >= 0.5 Then MsgBox “Good Afternoon”End Sub
Notice that I used >= (greater than or equal to) for the second If-Then statement. This covers the remote chance that the time is precisely 12:00 noon.
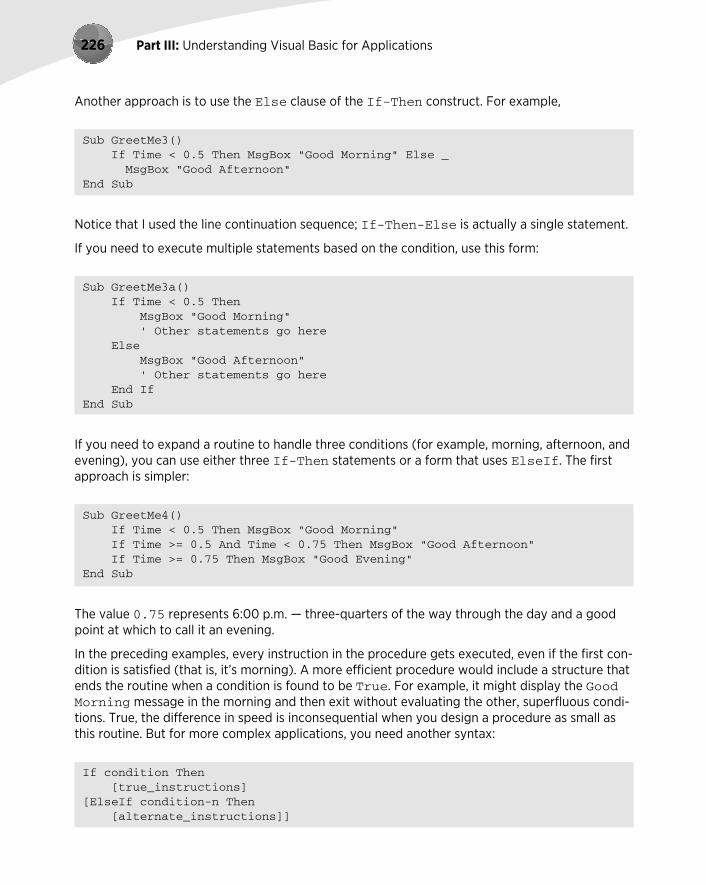
Part III: Understanding Visual Basic for Applications226
Another approach is to use the Else clause of the If-Then construct. For example,
Sub GreetMe3() If Time < 0.5 Then MsgBox “Good Morning” Else _ MsgBox “Good Afternoon”End Sub
Notice that I used the line continuation sequence; If-Then-Else is actually a single statement.
If you need to execute multiple statements based on the condition, use this form:
Sub GreetMe3a() If Time < 0.5 Then MsgBox “Good Morning” ‘ Other statements go here Else MsgBox “Good Afternoon” ‘ Other statements go here End IfEnd Sub
If you need to expand a routine to handle three conditions (for example, morning, afternoon, and evening), you can use either three If-Then statements or a form that uses ElseIf. The first approach is simpler:
Sub GreetMe4() If Time < 0.5 Then MsgBox “Good Morning” If Time >= 0.5 And Time < 0.75 Then MsgBox “Good Afternoon” If Time >= 0.75 Then MsgBox “Good Evening”End Sub
The value 0.75 represents 6:00 p.m. — three-quarters of the way through the day and a good point at which to call it an evening.
In the preceding examples, every instruction in the procedure gets executed, even if the first con-dition is satisfied (that is, it’s morning). A more efficient procedure would include a structure that ends the routine when a condition is found to be True. For example, it might display the Good Morning message in the morning and then exit without evaluating the other, superfluous condi-tions. True, the difference in speed is inconsequential when you design a procedure as small as this routine. But for more complex applications, you need another syntax:
If condition Then [true_instructions][ElseIf condition-n Then [alternate_instructions]]

Chapter 8: VBA Programming Fundamentals 227
[Else [default_instructions]]End If
Here’s how you can use this syntax to rewrite the GreetMe procedure:
Sub GreetMe5() If Time < 0.5 Then MsgBox “Good Morning” ElseIf Time >= 0.5 And Time < 0.75 Then MsgBox “Good Afternoon” Else MsgBox “Good Evening” End IfEnd Sub
With this syntax, when a condition is True, the conditional statements are executed, and the If-Then construct ends. In other words, the extraneous conditions aren’t evaluated. Although this syntax makes for greater efficiency, some find the code to be more difficult to understand.
The following procedure demonstrates yet another way to code this example. It uses nested If-Then-Else constructs (without using ElseIf). This procedure is efficient and also easy to understand. Note that each If statement has a corresponding End If statement.
Sub GreetMe6() If Time < 0.5 Then MsgBox “Good Morning” Else If Time >= 0.5 And Time < 0.75 Then MsgBox “Good Afternoon” Else If Time >= 0.75 Then MsgBox “Good Evening” End If End If End IfEnd Sub
The following is another example that uses the simple form of the If-Then construct. This pro-cedure prompts the user for a value for Quantity and then displays the appropriate discount based on that value. Note that Quantity is declared as a Variant data type. This is because Quantity contains an empty string (not a numeric value) if the InputBox is cancelled. To keep it simple, this procedure doesn’t perform any other error checking. For example, it doesn’t ensure that the quantity entered is a non-negative numeric value.

Part III: Understanding Visual Basic for Applications228
Sub Discount1() Dim Quantity As Variant Dim Discount As Double Quantity = InputBox(“Enter Quantity: “) If Quantity = “” Then Exit Sub If Quantity >= 0 Then Discount = 0.1 If Quantity >= 25 Then Discount = 0.15 If Quantity >= 50 Then Discount = 0.2 If Quantity >= 75 Then Discount = 0.25 MsgBox “Discount: “ & DiscountEnd Sub
Notice that each If-Then statement in this procedure is always executed, and the value for Discount can change. The final value, however, is the desired value.
The following procedure is the previous one rewritten to use the alternate syntax. In this case, the procedure ends after executing the True instruction block.
Sub Discount2() Dim Quantity As Variant Dim Discount As Double Quantity = InputBox(“Enter Quantity: “) If Quantity = “” Then Exit Sub If Quantity >= 0 And Quantity < 25 Then Discount = 0.1 ElseIf Quantity < 50 Then Discount = 0.15 ElseIf Quantity < 75 Then Discount = 0.2 Else Discount = 0.25 End If MsgBox “Discount: “ & DiscountEnd Sub
I find nested If-Then structures rather cumbersome. As a result, I usually use the If-Then structure only for simple binary decisions. When you need to choose among three or more alter-natives, the Select Case structure (discussed next) is often a better construct to use.

Chapter 8: VBA Programming Fundamentals 229
Select Case constructsThe Select Case construct is useful for choosing among three or more options. this construct also works with two options and is a good alternative to If-Then-Else. The syntax for Select Case is as follows:
Select Case testexpression [Case expressionlist-n [instructions-n]] [Case Else [default_instructions]]End Select
The following example of a Select Case construct shows another way to code the GreetMe examples that I presented in the preceding section:
Sub GreetMe() Dim Msg As String Select Case Time Case Is < 0.5 Msg = “Good Morning”
VBA’s IIf functionVBA offers an alternative to the If-Then construct: the IIf function. This function takes three arguments and works much like Excel’s IF worksheet function. The syntax is
IIf(expr, truepart, falsepart)
● expr: (Required) Expression you want to evaluate.● truepart: (Required) Value or expression returned if expr is True.● falsepart: (Required) Value or expression returned if expr is False.
The following instruction demonstrates the use of the IIf function. The message box displays Zero if cell A1 contains a zero or is empty and displays Nonzero if cell A1 contains anything else.
MsgBox IIf(Range(“A1”) = 0, “Zero”, “Nonzero”)
It’s important to understand that the third argument (falsepart) is always evaluated, even if the first argument (expr) is True. Therefore, the following statement generates a Division By Zero error if the value of n is 0 (zero):
MsgBox IIf(n = 0, 0, 1 / n)

Part III: Understanding Visual Basic for Applications230
Case 0.5 To 0.75 Msg = “Good Afternoon” Case Else Msg = “Good Evening” End Select MsgBox MsgEnd Sub
And here’s a rewritten version of the Discount example using a Select Case construct. This procedure assumes that Quantity is always an integer value. For simplicity, the procedure per-forms no error checking.
Sub Discount3() Dim Quantity As Variant Dim Discount As Double Quantity = InputBox(“Enter Quantity: “) Select Case Quantity Case “” Exit Sub Case 0 To 24 Discount = 0.1 Case 25 To 49 Discount = 0.15 Case 50 To 74 Discount = 0.2 Case Is >= 75 Discount = 0.25 End Select MsgBox “Discount: “ & DiscountEnd Sub
The Case statement also can use a comma to separate multiple values for a single case. The fol-lowing procedure uses the VBA WeekDay function to determine whether the current day is a weekend (that is, the Weekday function returns 1 or 7). The procedure then displays an appro-priate message.
Sub GreetUser1() Select Case Weekday(Now) Case 1, 7 MsgBox “This is the weekend” Case Else MsgBox “This is not the weekend” End SelectEnd Sub

Chapter 8: VBA Programming Fundamentals 231
The following example shows another way to code the previous procedure:
Sub GreetUser2() Select Case Weekday(Now) Case 2, 3, 4, 5, 6 MsgBox “This is not the weekend” Case Else MsgBox “This is the weekend” End SelectEnd Sub
Any number of instructions can be written below each Case statement, and they’re all executed if that case evaluates to True. If you use only one instruction per case, as in the preceding exam-ple, you might want to put the instruction on the same line as the Case keyword (but don’t for-get the VBA statement-separator character, the colon). This technique makes the code more compact. For example:
Sub Discount3() Dim Quantity As Variant Dim Discount As Double Quantity = InputBox(“Enter Quantity: “) Select Case Quantity Case “”: Exit Sub Case 0 To 24: Discount = 0.1 Case 25 To 49: Discount = 0.15 Case 50 To 74: Discount = 0.2 Case Is >= 75: Discount = 0.25 End Select MsgBox “Discount: “ & DiscountEnd Sub
VBA exits a Select Case construct as soon as a True case is found. Therefore, for maximum efficiency, you should check the most likely case first.
Select Case structures can also be nested. The following procedure, for example, uses the VBA TypeName function to determine what is selected (a range, nothing, or anything else). If a range is selected, the procedure executes a nested Select Case and tests for the number of cells in the range. If one cell is selected, it displays One cell is selected. Otherwise, it dis-plays a message with the number of selected rows.
Sub SelectionType() Select Case TypeName(Selection) Case “Range” Select Case Selection.Count

Part III: Understanding Visual Basic for Applications232
Case 1 MsgBox “One cell is selected” Case Else MsgBox Selection.Rows.Count & “ rows” End Select Case “Nothing” MsgBox “Nothing is selected” Case Else MsgBox “Something other than a range” End SelectEnd Sub
This procedure also demonstrates the use of Case Else, a catch-all case. You can nest Select Case constructs as deeply as you need, but make sure that each Select Case statement has a corresponding End Select statement.
This procedure demonstrates the value of using indentation in your code to clarify the structure. For example, take a look at the same procedure without the indentations:
Sub SelectionType()Select Case TypeName(Selection)Case “Range”Select Case Selection.CountCase 1MsgBox “One cell is selected”Case ElseMsgBox Selection.Rows.Count & “ rows”End SelectCase “Nothing”MsgBox “Nothing is selected”Case ElseMsgBox “Something other than a range”End SelectEnd Sub
Fairly incomprehensible, eh?
Looping blocks of instructionsLooping is the process of repeating a block of instructions. You might know the number of times to loop, or the number may be determined by the values of variables in your program.
The following code, which enters consecutive numbers into a range, demonstrates what I call a bad loop. The procedure uses two variables to store a starting value (StartVal) and the total number of cells to fill (NumToFill). This loop uses the GoTo statement to control the flow. If the Cnt variable, which keeps track of how many cells are filled, is less than the value of NumToFill, the program control loops back to DoAnother.

Chapter 8: VBA Programming Fundamentals 233
Sub BadLoop() Dim StartVal As Integer Dim NumToFill As Integer Dim Cnt As Integer StartVal = 1 NumToFill = 100 ActiveCell.Value = StartVal Cnt = 1DoAnother: ActiveCell.Offset(Cnt, 0).Value = StartVal + Cnt Cnt = Cnt + 1 If Cnt < NumToFill Then GoTo DoAnother Else Exit SubEnd Sub
This procedure works as intended, so why is it an example of bad looping? Programmers generally frown on using a GoTo statement when not absolutely necessary. Using GoTo statements to loop is contrary to the concept of structured coding. (See the “What is structured programming?” side-bar.) In fact, a GoTo statement makes the code much more difficult to read because representing a loop using line indentations is almost impossible. In addition, this type of unstructured loop makes the procedure more susceptible to error. Furthermore, using lots of labels results in spaghetti code — code that appears to have little or no structure and flows haphazardly.
Because VBA has several structured looping commands, you almost never have to rely on GoTo statements for your decision-making.
For-Next loopsThe simplest type of a good loop is a For-Next loop. Its syntax is
For counter = start To end [Step stepval] [instructions] [Exit For] [instructions]Next [counter]
Following is an example of a For-Next loop that doesn’t use the optional Step value or the optional Exit For statement. This routine executes the Sum = Sum + Sqr(Count) statement 100 times and displays the result — that is, the sum of the square roots of the first 100 integers.
Sub SumSquareRoots() Dim Sum As Double Dim Count As Integer Sum = 0 For Count = 1 To 100 Sum = Sum + Sqr(Count) Next Count MsgBox SumEnd Sub

Part III: Understanding Visual Basic for Applications234
In this example, Count (the loop counter variable) starts out as 1 and increases by 1 each time the loop repeats. The Sum variable simply accumulates the square roots of each value of Count.
When you use For-Next loops, it’s important to understand that the loop counter is a normal variable — nothing special. As a result, it’s possible to change the value of the loop counter within the block of code executed between the For and Next statements. Changing the loop counter inside of a loop, however, is a bad practice and can cause unpredictable results. In fact, you should take precautions to ensure that your code doesn’t change the loop counter.
You can also use a Step value to skip some values in the loop. Here’s the same procedure rewrit-ten to sum the square roots of the odd numbers between 1 and 100:
Sub SumOddSquareRoots() Dim Sum As Double Dim Count As Integer Sum = 0 For Count = 1 To 100 Step 2 Sum = Sum + Sqr(Count) Next Count MsgBox SumEnd Sub
What is structured programming?Hang around with programmers, and sooner or later you’ll hear the term structured programming. You’ll also discover that structured programs are considered superior to unstructured programs.
So what is structured programming? And can you do it with VBA?
The basic premise of structured programming is that a routine or code segment should have only one entry point and one exit point. In other words, a body of code should be a stand-alone unit, and program control should not jump into or exit from the middle of this unit. As a result, structured programming rules out the GoTo statement. When you write structured code, your program progresses in an orderly manner and is easy to follow — as opposed to spaghetti code, in which a program jumps around.
A structured program is easier to read and understand than an unstructured one. More impor-tant, it’s also easier to modify.
VBA is a structured language. It offers standard structured constructs, such as If-Then-Else and Select Case and the For-Next, Do Until, and Do While loops. Furthermore, VBA fully supports modular code construction.
If you’re new to programming, forming good structured-programming habits early is a good idea.

Chapter 8: VBA Programming Fundamentals 235
In this procedure, Count starts out as 1 and then takes on values of 3, 5, 7, and so on. The final value of Count used within the loop is 99. When the loop ends, the value of Count is 101.
A Step value in a For-Next loop can also be negative. The procedure that follows deletes Rows 2, 4, 6, 8, and 10 of the active worksheet:
Sub DeleteRows() Dim RowNum As Long For RowNum = 10 To 2 Step -2 Rows(RowNum).Delete Next RowNumEnd Sub
You may wonder why I used a negative Step value in the DeleteRows procedure. If you use a posi-tive Step value, as shown in the following procedure, incorrect rows are deleted. That’s because the row numbers below a deleted row get a new row number. For example, when Row 2 is deleted, Row 3 becomes the new Row 2. Using a negative Step value ensures that the correct rows are deleted.
Sub DeleteRows2() Dim RowNum As Long For RowNum = 2 To 10 Step 2 Rows(RowNum).Delete Next RowNumEnd Sub
The following procedure performs the same task as the BadLoop example found at the begin-ning of the “Looping blocks of instructions” section. I eliminate the GoTo statement, however, converting a bad loop into a good loop that uses the For-Next structure.
Sub GoodLoop() Dim StartVal As Integer Dim NumToFill As Integer Dim Cnt As Integer StartVal = 1 NumToFill = 100 For Cnt = 0 To NumToFill - 1 ActiveCell.Offset(Cnt, 0).Value = StartVal + Cnt Next CntEnd Sub
For-Next loops can also include one or more Exit For statements within the loop. When this statement is encountered, the loop terminates immediately and control passes to the statement following the Next statement of the current For-Next loop. The following example demon-strates use of the Exit For statement. This procedure determines which cell has the largest value in Column A of the active worksheet:

Part III: Understanding Visual Basic for Applications236
Sub ExitForDemo() Dim MaxVal As Double Dim Row As Long MaxVal = Application.WorksheetFunction.Max(Range(“A:A”)) For Row = 1 To 1048576 If Cells(Row, 1).Value = MaxVal Then Exit For End If Next Row MsgBox “Max value is in Row “ & Row Cells(Row, 1).ActivateEnd Sub
The maximum value in the column is calculated by using the Excel MAX function, and the value is assigned to the MaxVal variable. The For-Next loop checks each cell in the column. If the cell being checked is equal to MaxVal, the Exit For statement terminates the loop and the state-ments following the Next statement are executed. These statements display the row of the max-imum value and activate the cell.
The ExitForDemo procedure is presented to demonstrate how to exit from a For-Next loop. However, it’s not the most efficient way to activate the largest value in a range. In fact, a single statement does the job:
Range(“A:A”).Find(Application.WorksheetFunction.Max _ (Range(“A:A”))).Activate
The previous examples use relatively simple loops. But you can have any number of statements in the loop, and you can even nest For-Next loops inside other For-Next loops. Here’s an example that uses nested For-Next loops to initialize a 10 x 10 x 10 array with the value –1. When the procedure is finished, each of the 1,000 elements in MyArray contains –1.
Sub NestedLoops() Dim MyArray(1 to 10, 1 to 10, 1 to 10) Dim i As Integer, j As Integer, k As Integer For i = 1 To 10 For j = 1 To 10 For k = 1 To 10 MyArray(i, j, k) = -1 Next k Next j Next i’ [More code goes here]End Sub

Chapter 8: VBA Programming Fundamentals 237
Do While loopsThis section describes another type of looping structure available in VBA. Unlike a For-Next loop, a Do While loop executes as long as a specified condition is met.
A Do While loop can have either of two syntaxes:
Do [While condition] [instructions] [Exit Do] [instructions]Loop
or
Do [instructions] [Exit Do] [instructions]Loop [While condition]
As you can see, VBA lets you put the While condition at the beginning or the end of the loop. The difference between these two syntaxes involves the point in time when the condition is eval-uated. In the first syntax, the contents of the loop may never be executed. In the second syntax, the statements inside the loop are always executed at least one time.
The following examples insert a series of dates into the active worksheet. The dates correspond to the days in the current month, and the dates are entered in a column beginning at the active cell.
These examples use some VBA date-related functions:● Date returns the current date.● Month returns the month number for a date supplied as its argument.● DateSerial returns a date for the year, month, and day supplied as arguments.
The first example demonstrates a Do While loop that tests the condition at the beginning of the loop: The EnterDates1 procedure writes the dates of the current month to a worksheet col-umn, beginning with the active cell.
Sub EnterDates1()‘ Do While, with test at the beginning Dim TheDate As Date TheDate = DateSerial(Year(Date), Month(Date), 1) Do While Month(TheDate) = Month(Date) ActiveCell = TheDate

Part III: Understanding Visual Basic for Applications238
TheDate = TheDate + 1 ActiveCell.Offset(1, 0).Activate LoopEnd Sub
This procedure uses a variable, TheDate, which contains the dates that are written to the work-sheet. This variable is initialized with the first day of the current month. Inside of the loop, the value of TheDate is entered into the active cell, TheDate is incremented, and the next cell is activated. The loop continues while the month of TheDate is the same as the month of the current date.
The following procedure has the same result as the EnterDates1 procedure, but it uses the second Do While loop syntax, which checks the condition at the end of the loop.
Sub EnterDates2()‘ Do While, with test at the end Dim TheDate As Date TheDate = DateSerial(Year(Date), Month(Date), 1) Do ActiveCell = TheDate TheDate = TheDate + 1 ActiveCell.Offset(1, 0).Activate Loop While Month(TheDate) = Month(Date)End Sub
The following is another Do While loop example. This procedure opens a text file, reads each line, converts the text to uppercase, and then stores it in the active sheet, beginning with cell A1 and continuing down the column. The procedure uses the VBA EOF function, which returns True when the end of the file has been reached. The final statement closes the text file.
Sub DoWhileDemo1() Dim LineCt As Long Dim LineOfText As String Open “c:\data\textfile.txt” For Input As #1 LineCt = 0 Do While Not EOF(1) Line Input #1, LineOfText Range(“A1”).Offset(LineCt, 0) = UCase(LineOfText) LineCt = LineCt + 1 Loop Close #1End Sub
For additional information about reading and writing text files using VBA, see Chapter 27.

Chapter 8: VBA Programming Fundamentals 239
Do While loops can also contain one or more Exit Do statements. When an Exit Do state-ment is encountered, the loop ends immediately and control passes to the statement following the Loop statement.
Do Until loopsThe Do Until loop structure is very similar to the Do While structure. The difference is evi-dent only when the condition is tested. In a Do While loop, the loop executes while the condi-tion is True; in a Do Until loop, the loop executes until the condition is True.
Do Until also has two syntaxes:
Do [Until condition] [instructions] [Exit Do] [instructions]Loop
or
Do [instructions] [Exit Do] [instructions]Loop [Until condition]
The two examples that follow perform the same action as the Do While date entry examples in the previous section. The difference in these two procedures is where the condition is evaluated (at the beginning or the end of the loop).
Sub EnterDates3()‘ Do Until, with test at beginning Dim TheDate As Date TheDate = DateSerial(Year(Date), Month(Date), 1) Do Until Month(TheDate) <> Month(Date) ActiveCell = TheDate TheDate = TheDate + 1 ActiveCell.Offset(1, 0).Activate LoopEnd Sub
Sub EnterDates4()‘ Do Until, with test at end Dim TheDate As Date TheDate = DateSerial(Year(Date), Month(Date), 1)

Part III: Understanding Visual Basic for Applications240
Do ActiveCell = TheDate TheDate = TheDate + 1 ActiveCell.Offset(1, 0).Activate Loop Until Month(TheDate) <> Month(Date)End Sub
The following example was originally presented for the Do While loop but has been rewritten to use a Do Until loop. The only difference is the line with the Do statement. This example makes the code a bit clearer because it avoids the negative required in the Do While example.
Sub DoUntilDemo1() Dim LineCt As Long Dim LineOfText As String Open “c:\data\textfile.txt” For Input As #1 LineCt = 0 Do Until EOF(1) Line Input #1, LineOfText Range(“A1”).Offset(LineCt, 0) = UCase(LineOfText) LineCt = LineCt + 1 Loop Close #1End Sub
VBA supports yet another type of loop, While Wend. This looping structure is included primarily for compatibility purposes. I mention it here in case you ever encounter such a loop. Here’s how the date entry procedure looks when it’s coded to use a While Wend loop:
Sub EnterDates5() Dim TheDate As Date TheDate = DateSerial(Year(Date), Month(Date), 1) While Month(TheDate) = Month(Date) ActiveCell = TheDate TheDate = TheDate + 1 ActiveCell.Offset(1, 0).Activate WendEnd Sub

241
9Working with VBA Sub ProceduresIn This Chapter
● Declaring and creating VBA Sub procedures
● Executing procedures
● Passing arguments to a procedure
● Using error-handling techniques
● An example of developing a useful procedure
About ProceduresA procedure is a series of VBA statements that resides in a VBA module, which you access in the Visual Basic Editor (VBE). A module can hold any number of procedures. A procedure holds a group of VBA statements that accomplishes a desired task. Most VBA code is contained in procedures.
You have a number of ways to call, or execute, procedures. A procedure is executed from begin-ning to end, but it can also be ended prematurely.
A procedure can be any length, but many people prefer to avoid creating extremely long procedures that perform many different operations. You may find it easier to write several smaller procedures, each with a single purpose. Then, design a main procedure that calls those other procedures. This approach can make your code easier to maintain.
Some procedures are written to receive arguments. An argument is simply information that is used by the procedure and that is passed to the procedure when it is executed. Procedure argu-ments work much like the arguments that you use in Excel worksheet functions. Instructions

Part III: Understanding Visual Basic for Applications242
within the procedure generally perform logical operations on these arguments, and the results of the procedure are usually based on those arguments.
Although this chapter focuses on Sub procedures, VBA also supports Function proce-dures, which I discuss in Chapter 10. Chapter 11 has many additional examples of proce-dures, both Sub and Function, that you can incorporate into your work.
Declaring a Sub procedureA procedure declared with the Sub keyword must adhere to the following syntax:
[Private | Public][Static] Sub name ([arglist]) [instructions] [Exit Sub] [instructions]End Sub
Here’s a description of the elements that make up a Sub procedure:
Private: (Optional) Indicates that the procedure is accessible only to other procedures in the same module.
Public: (Optional) Indicates that the procedure is accessible to all other procedures in all other modules in the workbook. If used in a module that contains an Option Private Module statement, the procedure is not available outside the project.
Static: (Optional) Indicates that the procedure’s variables are preserved when the pro-cedure ends.
Sub: (Required) The keyword that indicates the beginning of a procedure.
name: (Required) Any valid procedure name.
arglist: (Optional) Represents a list of variables, enclosed in parentheses, that receive arguments passed to the procedure. Use a comma to separate arguments. If the proce-dure uses no arguments, a set of empty parentheses is required.
instructions: (Optional) Represents valid VBA instructions.
Exit Sub: (Optional) A statement that forces an immediate exit from the procedure prior to its formal completion.
End Sub: (Required) Indicates the end of the procedure.
With a few exceptions, all VBA instructions in a module must be contained within pro-cedures. Exceptions include module-level variable declarations, user-defined data type definitions, and a few other instructions that specify module-level options (for example, Option Explicit).

Chapter 9: Working with VBA Sub Procedures 243
Scoping a procedureIn the preceding chapter, I note that a variable’s scope determines the modules and procedures in which you can use the variable. Similarly, a procedure’s scope determines which other proce-dures can call it.
Public proceduresBy default, procedures are public — that is, they can be called by other procedures in any module in the workbook. It’s not necessary to use the Public keyword, but programmers often include it for clarity. The following two procedures are both public:
Sub First()‘ ... [code goes here] ...End Sub
Public Sub Second()‘ ... [code goes here] ...End Sub
Private proceduresPrivate procedures can be called by other procedures in the same module but not by procedures in other modules.
When a user displays the Macro dialog box, Excel shows only the public procedures. Therefore, if you have procedures that are designed to be called only by other proce-dures in the same module, you should make sure that those procedures are declared as Private. Doing so prevents the user from running these procedures from the Macro dialog box.
Naming proceduresEvery procedure must have a name. The rules governing procedure names are generally the same as those for variable names. Ideally, a procedure’s name should describe what its con-tained processes do. A good rule is to use a name that includes a verb and a noun (for example, ProcessDate, PrintReport, Sort_Array, or CheckFilename). Unless you’re writing a quick and dirty procedure that you’ll use once and delete, avoid meaningless names such as DoIt, Update, and Fix.
Some programmers use sentence-like names that describe the procedure (for example, WriteReportToTextFile and Get_Print_Options_ and_Print_Report).

Part III: Understanding Visual Basic for Applications244
The following example declares a private procedure named MySub:
Private Sub MySub()‘ ... [code goes here] ...End Sub
You can force all procedures in a module to be private — even those declared with the Public keyword — by including the following statement before your first Sub statement:
Option Private Module
If you write this statement in a module, you can omit the Private keyword from your Sub declarations.
Excel’s macro recorder normally creates new Sub procedures called Macro1, Macro2, and so on. Unless you modify the recorded code, these procedures are all public procedures, and they will never use any arguments.
Executing Sub ProceduresIn this section, I describe the various ways to execute, or call, a VBA Sub procedure:
With the Run➜Run Sub/UserForm command (in the VBE menu). Or you can press the F5 shortcut key, or click the Run Sub/UserForm button on the Standard toolbar.
From Excel’s Macro dialog box.
By using the Ctrl key shortcut assigned to the procedure (assuming that you assigned one).
By clicking a button or a shape on a worksheet. The button or shape must have the pro-cedure assigned to it.
From another procedure that you write. Sub and Function procedures can execute other procedures.
From a custom control in the Ribbon. In addition, built-in Ribbon controls can be “repur-posed” to execute a macro.
From a customized shortcut menu.
When an event occurs. These events include opening the workbook, saving the work-book, closing the workbook, changing a cell’s value, activating a sheet, and many other things.
From the Immediate window in the VBE. Just type the name of the procedure, including any arguments that may apply, and press Enter.

Chapter 9: Working with VBA Sub Procedures 245
I discuss these methods of executing procedures in the following sections.
In many cases, a procedure won’t work properly unless it’s executed in the appropriate context. For example, if a procedure is designed to work with the active worksheet, it will fail if a chart sheet is active. A good procedure incorporates code that checks for the appropriate context and exits gracefully if it can’t proceed.
Executing a procedure with the Run Sub/UserForm commandThe VBE Run➜Run Sub/UserForm menu command is used primarily to test a procedure while you’re developing it. You would never require a user to activate the VBE to execute a procedure. Choose Run➜Run Sub/UserForm in the VBE to execute the current procedure (in other words, the procedure that contains the cursor). Or, press F5, or use the Run Sub/UserForm button on the Standard toolbar.
If the cursor isn’t located within a procedure when you issue the Run Sub/UserForm command, VBE displays its Macro dialog box so that you can select a procedure to execute.
Executing a procedure from the Macro dialog boxChoosing Excel’s Developer➜Code➜Macros command displays the Macro dialog box, as shown in Figure 9-1. (You can also press Alt+F8 to access this dialog box.) Use the Macros In drop-down box to limit the scope of the macros displayed (for example, show only the macros in the active workbook).
The Macro dialog box does not display
Function procedures
Sub procedures declared with the Private keyword
Sub procedures that require one or more arguments
Sub procedures contained in add-ins
Even though procedures stored in an add-in are not listed in the Macro dialog box, you still can execute such a procedure if you know the name. Simply type the procedure name in the Macro Name field in the Macro dialog box and then click Run.

Part III: Understanding Visual Basic for Applications246
Figure 9-1: The Macro dialog box.
Executing a procedure with a Ctrl+shortcut key combinationYou can assign a Ctrl+shortcut key combination to any procedure that doesn’t use any argu-ments. If you assign the Ctrl+U key combo to a procedure named UpdateCustomerList, for example, pressing Ctrl+U executes that procedure.
When you begin recording a macro, the Record Macro dialog box gives you the opportunity to assign a shortcut key. However, you can assign a shortcut key at any time. To assign a Ctrl short-cut key to a procedure (or to change a procedure’s shortcut key), follow these steps:
1. Activate Excel and choose Developer➜Code➜Macros.
2. Select the appropriate procedure from the list box in the Macro dialog box.
3. Click the Options button to display the Macro Options dialog box (see Figure 9-2).
Figure 9-2: The Macro Options dialog box lets you assign a Ctrl key shortcut and an optional description to a procedure.

Chapter 9: Working with VBA Sub Procedures 247
4. Enter a character into the Ctrl+ text box.
Note: The character that you enter into the Ctrl+ text box is case-sensitive. If you enter a lowercase s, the shortcut key combo is Ctrl+S. If you enter an uppercase S, the shortcut key combo is Ctrl+Shift+S.
5. Enter a description (optional). If you enter a description for a macro, it’s displayed at the bottom of the Macro dialog box when the procedure is selected in the list box.
6. Click OK to close the Macro Options dialog box and then click Cancel to close the Macro dialog box.
If you assign one of Excel’s predefined shortcut key combinations to a procedure, your key assignment takes precedence over the predefined key assignment. For example, Ctrl+S is the Excel predefined shortcut key for saving the active workbook. But if you assign Ctrl+S to a procedure, pressing Ctrl+S no longer saves the active workbook.
The following keyboard keys are not used by Excel 2010 for Ctrl+key combinations: E, J, M, and Q. Excel doesn’t use too many Ctrl+Shift+key combinations. In fact, you can use any of them except F, L, N, O, P, and W.
Executing a procedure from the RibbonExcel’s Ribbon user interface was introduced in Excel 2007. In that version, customizing the Ribbon required writing XML code to add a new button (or other control) to the Ribbon. Note that you modify the Ribbon in this way outside of Excel, and you can’t do it using VBA.
Excel 2010 allows users to modify the Ribbon directly from Excel. It’s a simple matter to add a new control to the Ribbon and assign a VBA macro to the control.
Refer to Chapter 22 for more information about customizing the Ribbon.
Executing a procedure from a customized shortcut menuYou can also execute a macro by clicking a menu item in a customized shortcut menu. A shortcut menu appears when you right-click an object or range in Excel.
Refer to Chapter 23 for more information about customizing shortcut menus.

Part III: Understanding Visual Basic for Applications248
Executing a procedure from another procedureOne of the most common ways to execute a procedure is from another VBA procedure. You have three ways to do this:
Enter the procedure’s name, followed by its arguments (if any) separated by commas.
Use the Call keyword followed by the procedure’s name and then its arguments (if any) enclosed in parentheses and separated by commas.
Use the Run method of the Application object. The Run method is useful when you need to run a procedure whose name is assigned to a variable. You can then pass the variable as an argument to the Run method.
The following example demonstrates the first method. In this case, the MySub procedure pro-cesses some statements (not shown), executes the UpdateSheet procedure, and then executes the rest of the statements.
Sub MySub()‘ ... [code goes here] ... UpdateSheet‘ ... [code goes here] ...End Sub
Sub UpdateSheet()‘ ... [code goes here] ...End Sub
The following example demonstrates the second method. The Call keyword executes the Update procedure, which requires one argument; the calling procedure passes the argument to the called procedure. I discuss procedure arguments later in this chapter (see “Passing Arguments to Procedures”).
Sub MySub() MonthNum = InputBox(“Enter the month number: “) Call UpdateSheet(MonthNum)‘ ... [code goes here] ...End Sub
Sub UpdateSheet(MonthSeq)‘ ... [code goes here] ...End Sub
Even though it’s optional, some programmers always use the Call keyword just to make it perfectly clear that another procedure is being called.

Chapter 9: Working with VBA Sub Procedures 249
The next example uses the Run method to execute the UpdateSheet procedure and then to pass MonthNum as the argument.
Sub MySub() MonthNum = InputBox(“Enter the month number: “) Application.Run “UpdateSheet”, MonthNum‘ ... [code goes here] ...End Sub
Sub UpdateSheet(MonthSeq)‘ ... [code goes here] ...End Sub
Perhaps the best reason to use the Run method is when the procedure name is assigned to a variable. In fact, it’s the only way to execute a procedure in such a way. The following example demonstrates this. The Main procedure uses the VBA WeekDay function to determine the day of the week (an integer between 1 and 7, beginning with Sunday). The SubToCall variable is assigned a string that represents a procedure name. The Run method then calls the appropriate procedure (either WeekEnd or Daily).
Sub Main() Dim SubToCall As String Select Case WeekDay(Now) Case 1, 7: SubToCall = “WeekEnd” Case Else: SubToCall = “Daily” End Select Application.Run SubToCallEnd Sub
Sub WeekEnd() MsgBox “Today is a weekend”‘ Code to execute on the weekend‘ goes hereEnd Sub
Sub Daily() MsgBox “Today is not a weekend”‘ Code to execute on the weekdays‘ goes hereEnd Sub
Calling a procedure in a different moduleIf VBA can’t locate a called procedure in the current module, it looks for public procedures in other modules in the same project.
If you need to call a private procedure from another procedure, both procedures must reside in the same module.

Part III: Understanding Visual Basic for Applications250
You can’t have two procedures with the same name in the same module, but you can have iden-tically named procedures in different modules within the project. You can force VBA to execute an ambiguously named procedure — that is, another procedure in a different module that has the same name. To do so, precede the procedure name with the module name and a dot. For exam-ple, say that you define procedures named MySub in Module1 and Module2. If you want a pro-cedure in Module2 to call the MySub in Module1, you can use either of the following statements:
Module1.MySubCall Module1.MySub
If you do not differentiate between procedures that have the same name, you get an Ambiguous name detected error message.
Calling a procedure in a different workbookIn some cases, you may need your procedure to execute another procedure defined in a different workbook. To do so, you have two options: Either establish a reference to the other workbook or use the Run method and specify the workbook name explicitly.
To add a reference to another workbook, choose the VBE’s Tools➜References command. Excel displays the References dialog box (see Figure 9-3), which lists all available references, including all open workbooks. Simply check the box that corresponds to the workbook that you want to add as a reference and then click OK. After you establish a reference, you can call procedures in the workbook as if they were in the same workbook as the calling procedure.
A referenced workbook doesn’t have to be open when you create the reference; it’s treated like a separate object library. Use the Browse button in the References dialog box to establish a refer-ence to a workbook that isn’t open.
Figure 9-3: The References dialog box lets you establish a reference to another workbook.
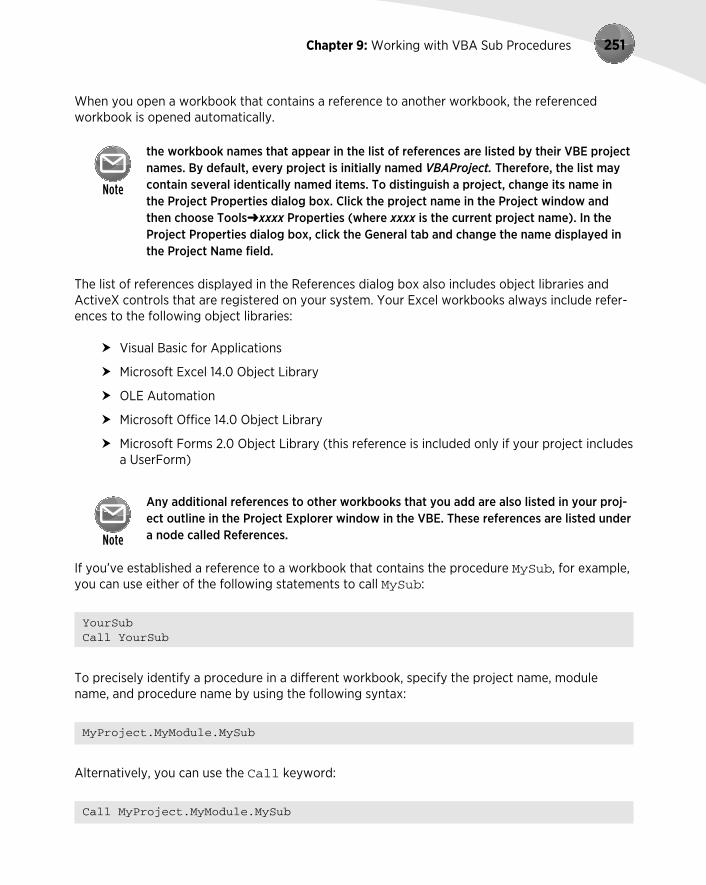
Chapter 9: Working with VBA Sub Procedures 251
When you open a workbook that contains a reference to another workbook, the referenced workbook is opened automatically.
the workbook names that appear in the list of references are listed by their VBE project names. By default, every project is initially named VBAProject. Therefore, the list may contain several identically named items. To distinguish a project, change its name in the Project Properties dialog box. Click the project name in the Project window and then choose Tools➜xxxx Properties (where xxxx is the current project name). In the Project Properties dialog box, click the General tab and change the name displayed in the Project Name field.
The list of references displayed in the References dialog box also includes object libraries and ActiveX controls that are registered on your system. Your Excel workbooks always include refer-ences to the following object libraries:
Visual Basic for Applications
Microsoft Excel 14.0 Object Library
OLE Automation
Microsoft Office 14.0 Object Library
Microsoft Forms 2.0 Object Library (this reference is included only if your project includes a UserForm)
Any additional references to other workbooks that you add are also listed in your proj-ect outline in the Project Explorer window in the VBE. These references are listed under a node called References.
If you’ve established a reference to a workbook that contains the procedure MySub, for example, you can use either of the following statements to call MySub:
YourSubCall YourSub
To precisely identify a procedure in a different workbook, specify the project name, module name, and procedure name by using the following syntax:
MyProject.MyModule.MySub
Alternatively, you can use the Call keyword:
Call MyProject.MyModule.MySub

Part III: Understanding Visual Basic for Applications252
Another way to call a procedure in a different workbook is to use the Run method of the Application object. This technique doesn’t require that you establish a reference, but the workbook that contains the procedure must be open. The following statement executes the Consolidate procedure located in a workbook named budget macros.xlsm:
Application.Run “’budget macros.xlsm’!Consolidate”
Why call other procedures?If you’re new to programming, you may wonder why anyone would ever want to call a proce-dure from another procedure. You may ask, “Why not just put the code from the called proce-dure into the calling procedure and keep things simple?”
One reason is to clarify your code. The simpler your code, the easier it is to maintain and modify. Smaller routines are easier to decipher and then debug. Examine the accompanying procedure, which does nothing but call other procedures. This procedure is very easy to follow.
Sub Main() Call GetUserOptions Call ProcessData Call CleanUp Call CloseItDownEnd Sub
Calling other procedures also eliminates redundancy. Suppose that you need to perform an operation at ten different places in your routine. Rather than enter the code ten times, you can write a procedure to perform the operation and then simply call the procedure ten times. Also, if you need to make a change, you make it only one time rather that ten times.
Also, you may have a series of general-purpose procedures that you use frequently. If you store these in a separate module, you can import the module to your current project and then call these procedures as needed — which is much easier than copying and pasting the code into your new procedures.
Creating several small procedures rather than a single large one is often considered good pro-gramming practice. A modular approach not only makes your job easier but also makes life eas-ier for the people who wind up working with your code.

Chapter 9: Working with VBA Sub Procedures 253
Executing a procedure by clicking an objectExcel provides a variety of objects that you can place on a worksheet or chart sheet, and you can attach a macro to any of these objects. These objects fall into several classes:
ActiveX controls
Forms controls
Inserted objects (Shapes, SmartArt, WordArt, charts, and pictures)
The Developer➜Controls➜Insert drop-down list contains two types of controls that you can insert on a worksheet: Form controls and ActiveX controls. The ActiveX con-trols are similar to the controls that you use in a UserForm. The Forms controls were designed for Excel 5 and Excel 95, but you can still use them in later versions (which may be preferable in some cases).
Unlike the Form controls, you can’t use the ActiveX controls to execute an arbitrary macro. An ActiveX control executes a specially named macro. For example, if you insert an ActiveX button control named CommandButton1, clicking the button executes a macro named CommandButton1_Click, which must be located in the code module for the sheet on which the control was inserted.
Refer to Chapter 13 for information about using controls on worksheets.
To assign a procedure to a Button object from the Form controls, follow these steps:
1. Select Developer➜Controls➜Insert and click the button icon in the Form Controls group.
2. Click the worksheet to create the button.
Or, you can drag your mouse on the worksheet to change the default size of the button.
Excel jumps right in and displays the Assign Macro dialog box (see Figure 9-4). It pro-poses a macro that’s based on the button’s name.
3. Select or enter the macro that you want to assign to the button and then click OK.
You can always change the macro assignment by right-clicking the button and choosing Assign Macro.
To assign a macro to a Shape, SmartArt, WordArt, chart, or picture, right-click the object and choose Assign Macro from the shortcut menu.

Part III: Understanding Visual Basic for Applications254
Figure 9-4: Assigning a macro to a button.
Executing a procedure when an event occursYou might want a procedure to execute when a particular event occurs. Examples of events include opening a workbook, entering data into a worksheet, saving a workbook, clicking a CommandButton ActiveX control, and many others. A procedure that is executed when an event occurs is an event handler procedure. Event handler procedures are characterized by the following:
They have special names that are made up of an object, an underscore, and the event name. For example, the procedure that is executed when a workbook is opened is Workbook_Open.
They’re stored in the Code module for the particular object.
Chapter 19 is devoted to event handler procedures.
Executing a procedure from the Immediate windowYou also can execute a procedure by entering its name in the Immediate window of the VBE. If the Immediate window isn’t visible, press Ctrl+G. The Immediate window executes VBA state-ments while you enter them. To execute a procedure, simply enter the name of the procedure in the Immediate window and press Enter.
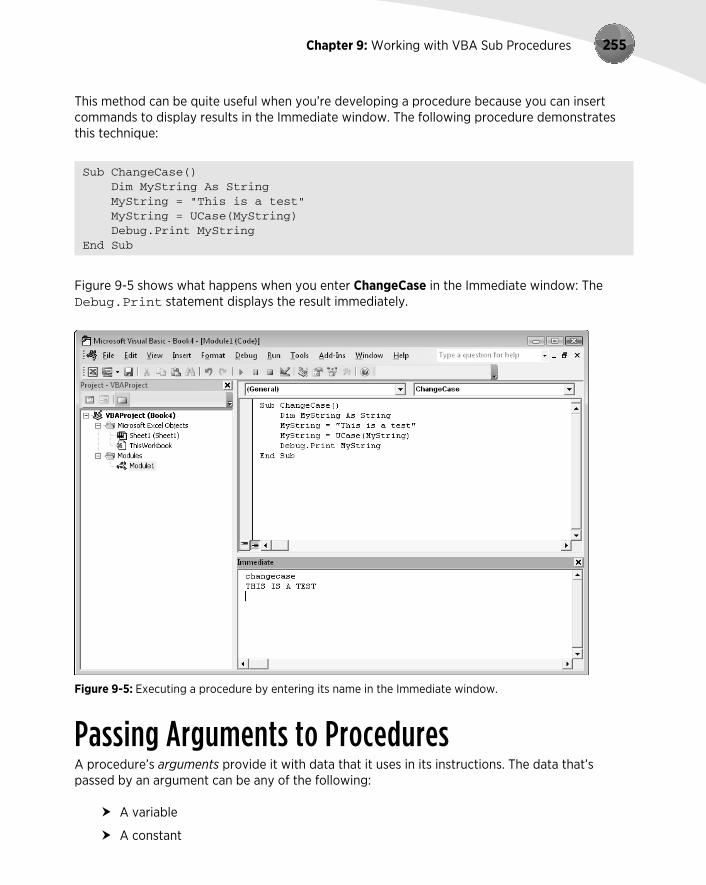
Chapter 9: Working with VBA Sub Procedures 255
This method can be quite useful when you’re developing a procedure because you can insert commands to display results in the Immediate window. The following procedure demonstrates this technique:
Sub ChangeCase() Dim MyString As String MyString = “This is a test” MyString = UCase(MyString) Debug.Print MyStringEnd Sub
Figure 9-5 shows what happens when you enter ChangeCase in the Immediate window: The Debug.Print statement displays the result immediately.
Figure 9-5: Executing a procedure by entering its name in the Immediate window.
Passing Arguments to ProceduresA procedure’s arguments provide it with data that it uses in its instructions. The data that’s passed by an argument can be any of the following:
A variable
A constant
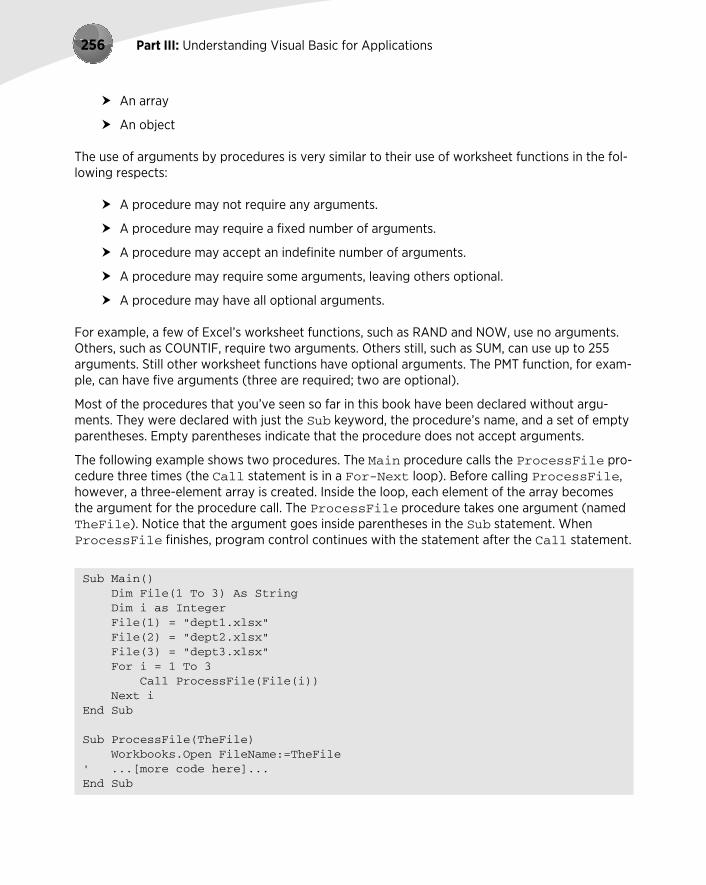
Part III: Understanding Visual Basic for Applications256
An array
An object
The use of arguments by procedures is very similar to their use of worksheet functions in the fol-lowing respects:
A procedure may not require any arguments.
A procedure may require a fixed number of arguments.
A procedure may accept an indefinite number of arguments.
A procedure may require some arguments, leaving others optional.
A procedure may have all optional arguments.
For example, a few of Excel’s worksheet functions, such as RAND and NOW, use no arguments. Others, such as COUNTIF, require two arguments. Others still, such as SUM, can use up to 255 arguments. Still other worksheet functions have optional arguments. The PMT function, for exam-ple, can have five arguments (three are required; two are optional).
Most of the procedures that you’ve seen so far in this book have been declared without argu-ments. They were declared with just the Sub keyword, the procedure’s name, and a set of empty parentheses. Empty parentheses indicate that the procedure does not accept arguments.
The following example shows two procedures. The Main procedure calls the ProcessFile pro-cedure three times (the Call statement is in a For-Next loop). Before calling ProcessFile, however, a three-element array is created. Inside the loop, each element of the array becomes the argument for the procedure call. The ProcessFile procedure takes one argument (named TheFile). Notice that the argument goes inside parentheses in the Sub statement. When ProcessFile finishes, program control continues with the statement after the Call statement.
Sub Main() Dim File(1 To 3) As String Dim i as Integer File(1) = “dept1.xlsx” File(2) = “dept2.xlsx” File(3) = “dept3.xlsx” For i = 1 To 3 Call ProcessFile(File(i)) Next iEnd Sub
Sub ProcessFile(TheFile) Workbooks.Open FileName:=TheFile‘ ...[more code here]...End Sub

Chapter 9: Working with VBA Sub Procedures 257
You can also, of course, pass literals (that is, not variables) to a procedure. For example:
Sub Main() Call ProcessFile(“budget.xlsx”)End Sub
You can pass an argument to a procedure in two ways:
By reference: Passing an argument by reference simply passes the memory address of the variable. Changes to the argument within the procedure are made to the original vari-able. This is the default method of passing an argument.
By value: Passing an argument by value passes a copy of the original variable. Consequently, changes to the argument within the procedure are not reflected in the original variable.
The following example demonstrates this concept. The argument for the Process procedure is passed by reference (the default method). After the Main procedure assigns a value of 10 to MyValue, it calls the Process procedure and passes MyValue as the argument. The Process procedure multiplies the value of its argument (named YourValue) by 10. When Process ends and program control passes back to Main, the MsgBox function displays MyValue: 100.
Sub Main() Dim MyValue As Integer MyValue = 10 Call Process(MyValue) MsgBox MyValueEnd Sub
Sub Process(YourValue) YourValue = YourValue * 10End Sub
If you don’t want the called procedure to modify any variables passed as arguments, you can mod-ify the called procedure’s argument list so that arguments are passed to it by value rather than by reference. To do so, precede the argument with the ByVal keyword. This technique causes the called routine to work with a copy of the passed variable’s data — not the data itself. In the follow-ing procedure, for example, the changes made to YourValue in the Process procedure do not affect the MyValue variable in Main. As a result, the MsgBox function displays 10 and not 100.
Sub Process(ByVal YourValue) YourValue = YourValue * 10End Sub
In most cases, you’ll be content to use the default reference method of passing arguments. However, if your procedure needs to use data passed to it in an argument — and you must keep the original data intact — you’ll want to pass the data by value.

Part III: Understanding Visual Basic for Applications258
A procedure’s arguments can mix and match by value and by reference. Arguments preceded with ByVal are passed by value; all others are passed by reference.
If you pass a variable defined as a user-defined data type to a procedure, it must be passed by reference. Attempting to pass it by value generates an error.
Because I didn’t declare a data type for any of the arguments in the preceding examples, all the arguments have been of the Variant data type. But a procedure that uses arguments can define the data types directly in the argument list. The following is a Sub statement for a proce-dure with two arguments of different data types. The first is declared as an integer, and the sec-ond is declared as a string.
Sub Process(Iterations As Integer, TheFile As String)
Using public variables versus passing arguments to a procedure
In Chapter 8, I point out how a variable declared as Public (at the top of the module) is avail-able to all procedures in the module. In some cases, you may want to access a Public variable rather than pass the variable as an argument when calling another procedure.
For example, the procedure that follows passes the value of MonthVal to the ProcessMonth procedure:
Sub MySub() Dim MonthVal as Integer‘ ... [code goes here] MonthVal = 4 Call ProcessMonth(MonthVal)‘ ... [code goes here]End Sub
An alternative approach, which doesn’t use an argument, is
Public MonthVal as Integer
Sub MySub()‘ ... [code goes here] MonthVal = 4 Call ProcessMonth2‘ ... [code goes here]End Sub
In the revised code, because MonthVal is a public variable, the ProcessMonth2 procedure can access it, thus eliminating the need for an argument for the ProcessMonth2 procedure.

Chapter 9: Working with VBA Sub Procedures 259
When you pass arguments to a procedure, the data that is passed as the argument must match the argument’s data type. For example, if you call Process in the preceding example and pass a string variable for the first argument, you get an error: ByRef argument type mismatch.
Arguments are relevant to both Sub procedures and Function procedures. In fact, arguments are more often used in Function procedures. In Chapter 10, where I focus on Function procedures, I provide additional examples of using arguments with your routines, including how to handle optional arguments.
Error-Handling TechniquesWhen a VBA procedure is running, errors can (and probably will) occur. These include either syn-tax errors (which you must correct before you can execute a procedure) or runtime errors (which occur while the procedure is running). This section deals with runtime errors.
for error-handling procedures to work, the Break on All Errors setting must be turned off. In the VBE, choose Tools➜Options and click the General tab in the Options dialog box. If Break on All Errors is selected, VBA ignores your error-handling code. You’ll usu-ally want to use the Break on Unhandled Errors option.
Normally, a runtime error causes VBA to stop, and the user sees a dialog box that displays the error number and a description of the error. A good application doesn’t make the user deal with these messages. Rather, it incorporates error-handling code to trap errors and take appropriate actions. At the very least, your error-handling code can display a more meaningful error message than the one VBA pops up.
Appendix C lists all the VBA error codes and descriptions.
Trapping errorsYou can use the On Error statement to specify what happens when an error occurs. Basically, you have two choices:
Ignore the error and let VBA continue. Your code can later examine the Err object to determine what the error was and then take action, if necessary.
Jump to a special error-handling section of your code to take action. This section is placed at the end of the procedure and is also marked by a label.

Part III: Understanding Visual Basic for Applications260
To cause your VBA code to continue when an error occurs, insert the following statement in your code:
On Error Resume Next
Some errors are inconsequential, and you can ignore them without causing a problem. But you might want to determine what the error was. When an error occurs, you can use the Err object to determine the error number. You can use the VBA Error function to display the text that corre-sponds to the Err.Number value. For example, the following statement displays the same infor-mation as the normal Visual Basic error dialog box (the error number and the error description):
MsgBox “Error “ & Err & “: “ & Error(Err.Number)
Figure 9-6 shows a VBA error message, and Figure 9-7 shows the same error displayed in a mes-sage box. You can, of course, make the error message a bit more meaningful to your end users by using more descriptive text.
Referencing Err is equivalent to accessing the Number property of the Err object. Therefore, the following two statements have the same effect:
MsgBox ErrMsgBox Err.Number
You also use the On Error statement to specify a location in your procedure to jump to when an error occurs. You use a label to mark the location. For example:
On Error GoTo ErrorHandler
Figure 9-6: VBA error messages aren’t always user friendly.

Chapter 9: Working with VBA Sub Procedures 261
Figure 9-7: You can create a message box to display the error code and description.
Error-handling examplesThe first example demonstrates an error that you can safely ignore. The SpecialCells method selects cells that meet a certain criterion.
The SpecialCells method is equivalent to choosing the Home➜Editing➜Find & Select➜Go To Special command. The Go To Special dialog box provides you with a number of choices. For example, you can select cells that contain a numeric constant (nonformula).
In the example that follows, which doesn’t use any error handling, the SpecialCells method selects all the cells in the current range selection that contain a formula that returns a number. If no cells in the selection qualify, VBA displays the error message shown in Figure 9-8.
Figure 9-8: The SpecialCells method generates this error if no cells are found.
Sub SelectFormulas() Selection.SpecialCells(xlFormulas, xlNumbers).Select‘ ...[more code goes here]End Sub

Part III: Understanding Visual Basic for Applications262
Following is a variation that uses the On Error Resume Next statement to prevent the error message from appearing:
Sub SelectFormulas2() On Error Resume Next Selection.SpecialCells(xlFormulas, xlNumbers).Select On Error GoTo 0‘ ...[more code goes here]End Sub
The On Error GoTo 0 statement restores normal error handling for the remaining statements in the procedure.
The following procedure uses an additional statement to determine whether an error did occur. If so, the user is informed by a message.
Sub SelectFormulas3() On Error Resume Next Selection.SpecialCells(xlFormulas, xlNumbers).Select If Err.Number = 1004 Then MsgBox “No formula cells were found.” On Error GoTo 0‘ ...[more code goes here]End Sub
If the Number property of Err is equal to anything other than 0, then an error occurred. The If statement checks to see if Err.Number is equal to 1004 and displays a message box if it is. In this example, the code is checking for a specific error number. To check for any error, use a state-ment like this:
If Err.Number <> 0 Then MsgBox “An error occurred.”
The next example demonstrates error handling by jumping to a label.
Sub ErrorDemo() On Error GoTo Handler Selection.Value = 123 Exit SubHandler: MsgBox “Cannot assign a value to the selection.”End Sub
The procedure attempts to assign a value to the current selection. If an error occurs (for example, a range isn’t selected or the sheet is protected), the assignment statement results in an error. The On Error statement specifies a jump to the Handler label if an error occurs. Notice the use of

Chapter 9: Working with VBA Sub Procedures 263
the Exit Sub statement before the label. This statement prevents the error-handling code from being executed if no error occurs. If this statement is omitted, the error message is displayed even if an error does not occur.
Sometimes, you can take advantage of an error to get information. The example that follows sim-ply checks whether a particular workbook is open. It doesn’t use any error handling.
Sub CheckForFile1() Dim FileName As String Dim FileExists As Boolean Dim book As Workbook FileName = “BUDGET.XLSX” FileExists = False‘ Cycle through all open workbooks For Each book In Workbooks If UCase(book.Name) = FileName Then FileExists = True Next book‘ Display appropriate message If FileExists Then MsgBox FileName & “ is open.” Else MsgBox FileName & “ is not open.” End IfEnd Sub
Here, a For Each-Next loop cycles through all objects in the Workbooks collection. If the workbook is open, the FileExists variable is set to True. Finally, a message is displayed that tells the user whether the workbook is open.
You can rewrite the preceding routine to use error handling to determine whether the file is open. In the example that follows, the On Error Resume Next statement causes VBA to ignore any errors. The next instruction attempts to reference the workbook by assigning the workbook to an object variable (by using the Set keyword). If the workbook isn’t open, an error occurs. The If-Then-Else structure checks the value property of Err and displays the appro-priate message. This procedure uses no looping, so it’s slightly more efficient.
Sub CheckForFile() Dim FileName As String Dim x As Workbook FileName = “BUDGET.XLSX” On Error Resume Next Set x = Workbooks(FileName) If Err = 0 Then MsgBox FileName & “ is open.” Else MsgBox FileName & “ is not open.” End If On Error GoTo 0End Sub

Part III: Understanding Visual Basic for Applications264
Chapter 11 presents several additional examples that use error handling.
A Realistic Example That Uses Sub ProceduresIn this chapter, I describe the basics of creating Sub procedures. Most of the previous examples, I will admit, have been rather wimpy. The remainder of this chapter is a real-life exercise that dem-onstrates many of the concepts covered in this and the preceding two chapters.
This section describes the development of a useful utility that qualifies as an application as defined in Chapter 5. More important, I demonstrate the process of analyzing a problem and then solving it with VBA. I wrote this section with VBA newcomers in mind. As a result, I don’t simply present the code, but I also show how to find out what you need to know to develop the code.
You can find the completed application, named sheet sorter.xlsm, on the compan-ion CD-ROM.
The goalThe goal of this exercise is to develop a utility that rearranges a workbook by alphabetizing its sheets (something that Excel can’t do on its own). If you tend to create workbooks that consist of many sheets, you know that locating a particular sheet can be difficult. If the sheets are ordered alphabetically, however, it’s easier to find a desired sheet.
Project requirementsWhere to begin? One way to get started is to list the requirements for your application. When you develop your application, you can check your list to ensure that you’re covering all the bases.
Here’s the list of requirements that I compiled for this example application:
1. It should sort the sheets (that is, worksheets and chart sheets) in the active workbook in ascending order of their names.
2. It should be easy to execute.
3. It should always be available. In other words, the user shouldn’t have to open a workbook to use this utility.
4. It should work properly for any workbook that’s open.
5. It should not display any VBA error messages.

Chapter 9: Working with VBA Sub Procedures 265
What you knowOften, the most difficult part of a project is figuring out where to start. In this case, I started by listing things that I know about Excel that may be relevant to the project requirements:
Excel doesn’t have a command that sorts sheets, so I'm not re-inventing the wheel.
I can’t create this type of macro by recording my actions. However, the macro might be useful to provide some key information.
I can move a sheet easily by dragging its sheet tab.
Mental note: Turn on the macro recorder and drag a sheet to a new location to find out what kind of code this action generates.
Excel also has a Move or Copy dialog box, which is displayed when I right-click a sheet tab and choose Move or Copy. Would recording a macro of this command generate dif-ferent code than moving a sheet manually?
I’ll need to know how many sheets are in the active workbook. I can get this information with VBA.
I’ll need to know the names of all the sheets. Again, I can get this information with VBA.
Excel has a command that sorts data in worksheet cells.
Mental note: Maybe I can transfer the sheet names to a range and use this feature. Or, maybe VBA has a sorting method that I can take advantage of.
Thanks to the Macro Options dialog box, it’s easy to assign a shortcut key to a macro.
If a macro is stored in the Personal Macro Workbook, it will always be available.
I need a way to test the application while I develop it. For certain, I don’t want to be test-ing it using the same workbook in which I’m developing the code.
Mental note: Create a dummy workbook for testing purposes.
If I develop the code properly, VBA won’t display any errors.
Mental note: Wishful thinking . . .
The approachAlthough I still didn’t know exactly how to proceed, I could devise a preliminary, skeleton plan that describes the general tasks required:
1. Identify the active workbook.
2. Get a list of all the sheet names in the workbook.
3. Count the sheets.

Part III: Understanding Visual Basic for Applications266
4. Sort the sheet names (somehow).
5. Rearrange the sheets so they correspond to the sorted sheet names.
What you need to knowI saw a few holes in the plan. I knew that I had to determine the following:
How to identify the active workbook
How to count the sheets in the active workbook
How to get a list of the sheet names
How to sort the list
How to rearrange the sheets according to the sorted list
When you lack critical information about specific methods or properties, you can con-sult this book or the VBA Help system. You may eventually discover what you need to know. Your best bet, however, is to turn on the macro recorder and examine the code that it generates when you perform some relevant actions. You’ll almost always get some clues as to how to proceed.
Some preliminary recordingHere’s an example of using the macro recorder to learn about VBA. I started with a workbook that contained three worksheets. Then I turned on the macro recorder and specified my Personal Macro Workbook as the destination for the macro. With the macro recorder running, I dragged the third worksheet to the first sheet position. Here’s the code that was generated by the macro recorder:
Sub Macro1() Sheets(“Sheet3”).Select Sheets(“Sheet3”).Move Before:=Sheets(1)End Sub
I searched the VBA Help for Move and discovered that it’s a method that moves a sheet to a new location in the workbook. It also takes an argument that specifies the location for the sheet. This information is very relevant to the task at hand. Curious, I then turned on the macro recorder to see whether using the Move or Copy dialog box would generate different code. It didn’t.

Chapter 9: Working with VBA Sub Procedures 267
Next, I needed to find out how many sheets were in the active workbook. I searched Help for the word Count and found out that it’s a property of a collection. I activated the Immediate window in the VBE and typed the following statement:
? ActiveWorkbook.Count
Error! After a little more thought, I realized that I needed to get a count of the sheets within a workbook. So I tried this:
? ActiveWorkbook.Sheets.Count
Success. Figure 9-9 shows the result. More useful information.
Figure 9-9: Use the VBE Immediate window to test a statement.
What about the sheet names? Time for another test. I entered the following statement in the Immediate window:
? ActiveWorkbook.Sheets(1).Name
This told me that the name of the first sheet is Sheet3, which is correct (because I’d moved it). More good information to keep in mind.
Then I remembered something about the For Each-Next construct: It’s useful for cycling through each member of a collection. After consulting the Help system, I created a short proce-dure to test it:
Sub Test() For Each Sht In ActiveWorkbook.Sheets MsgBox Sht.Name Next ShtEnd Sub
Another success. This macro displayed three message boxes, each showing a different sheet name.
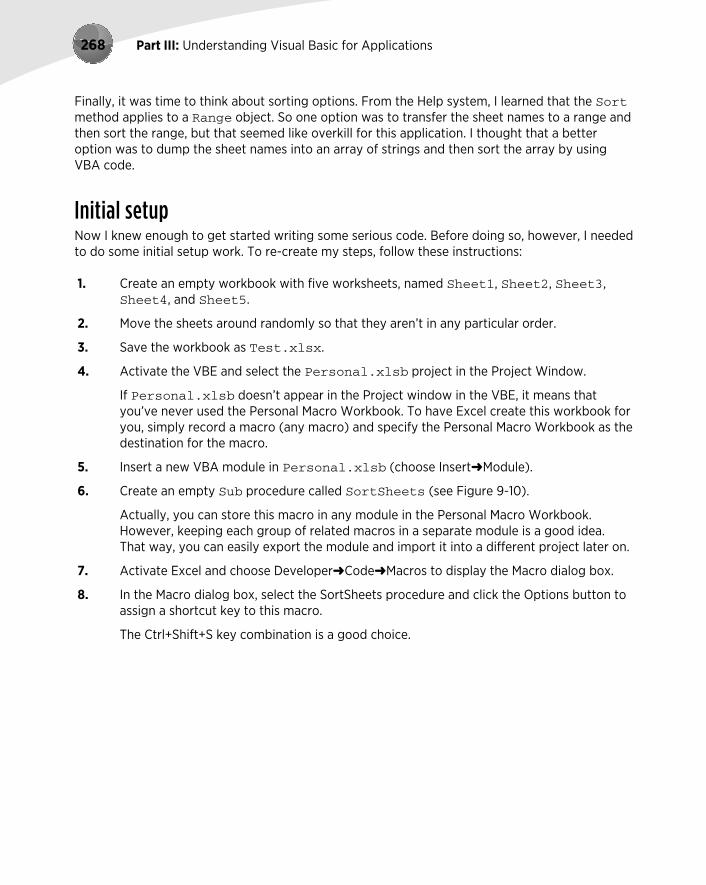
Part III: Understanding Visual Basic for Applications268
Finally, it was time to think about sorting options. From the Help system, I learned that the Sort method applies to a Range object. So one option was to transfer the sheet names to a range and then sort the range, but that seemed like overkill for this application. I thought that a better option was to dump the sheet names into an array of strings and then sort the array by using VBA code.
Initial setupNow I knew enough to get started writing some serious code. Before doing so, however, I needed to do some initial setup work. To re-create my steps, follow these instructions:
1. Create an empty workbook with five worksheets, named Sheet1, Sheet2, Sheet3, Sheet4, and Sheet5.
2. Move the sheets around randomly so that they aren’t in any particular order.
3. Save the workbook as Test.xlsx.
4. Activate the VBE and select the Personal.xlsb project in the Project Window.
If Personal.xlsb doesn’t appear in the Project window in the VBE, it means that you’ve never used the Personal Macro Workbook. To have Excel create this workbook for you, simply record a macro (any macro) and specify the Personal Macro Workbook as the destination for the macro.
5. Insert a new VBA module in Personal.xlsb (choose Insert➜Module).
6. Create an empty Sub procedure called SortSheets (see Figure 9-10).
Actually, you can store this macro in any module in the Personal Macro Workbook. However, keeping each group of related macros in a separate module is a good idea. That way, you can easily export the module and import it into a different project later on.
7. Activate Excel and choose Developer➜Code➜Macros to display the Macro dialog box.
8. In the Macro dialog box, select the SortSheets procedure and click the Options button to assign a shortcut key to this macro.
The Ctrl+Shift+S key combination is a good choice.

Chapter 9: Working with VBA Sub Procedures 269
Figure 9-10: An empty procedure in a module located in the Personal Macro Workbook.
Code writingNow it’s time to write some code. I knew that I needed to put the sheet names into an array of strings. Because I didn’t know yet how many sheets were in the active workbook, I used a Dim statement with empty parentheses to declare the array. I knew that I could use ReDim afterward to redimension the array for the actual number of elements.
I entered the following code, which inserted the sheet names into the SheetNames array. I also added a MsgBox function within the loop just to assure me that the sheets’ names were indeed being entered into the array.
Sub SortSheets()‘ Sorts the sheets of the active workbook Dim SheetNames() as String Dim i as Long Dim SheetCount as Long SheetCount = ActiveWorkbook.Sheets.Count ReDim SheetNames(1 To SheetCount) For i = 1 To SheetCount SheetNames(i) = ActiveWorkbook.Sheets(i).Name MsgBox SheetNames(i) Next iEnd Sub
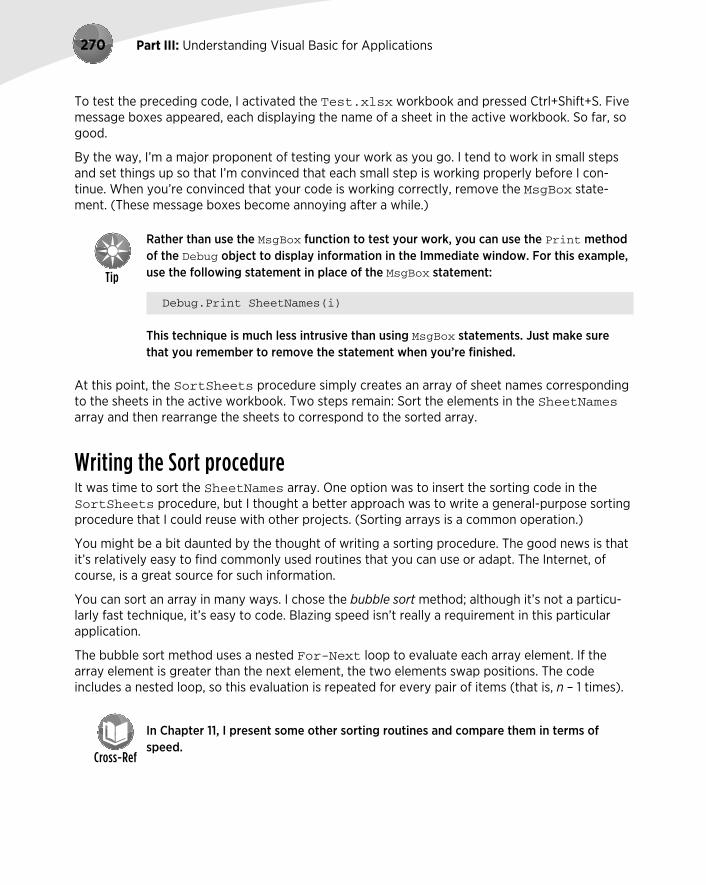
Part III: Understanding Visual Basic for Applications270
To test the preceding code, I activated the Test.xlsx workbook and pressed Ctrl+Shift+S. Five message boxes appeared, each displaying the name of a sheet in the active workbook. So far, so good.
By the way, I’m a major proponent of testing your work as you go. I tend to work in small steps and set things up so that I’m convinced that each small step is working properly before I con-tinue. When you’re convinced that your code is working correctly, remove the MsgBox state-ment. (These message boxes become annoying after a while.)
Rather than use the MsgBox function to test your work, you can use the Print method of the Debug object to display information in the Immediate window. For this example, use the following statement in place of the MsgBox statement:
Debug.Print SheetNames(i)
This technique is much less intrusive than using MsgBox statements. Just make sure that you remember to remove the statement when you’re finished.
At this point, the SortSheets procedure simply creates an array of sheet names corresponding to the sheets in the active workbook. Two steps remain: Sort the elements in the SheetNames array and then rearrange the sheets to correspond to the sorted array.
Writing the Sort procedureIt was time to sort the SheetNames array. One option was to insert the sorting code in the SortSheets procedure, but I thought a better approach was to write a general-purpose sorting procedure that I could reuse with other projects. (Sorting arrays is a common operation.)
You might be a bit daunted by the thought of writing a sorting procedure. The good news is that it’s relatively easy to find commonly used routines that you can use or adapt. The Internet, of course, is a great source for such information.
You can sort an array in many ways. I chose the bubble sort method; although it’s not a particu-larly fast technique, it’s easy to code. Blazing speed isn’t really a requirement in this particular application.
The bubble sort method uses a nested For-Next loop to evaluate each array element. If the array element is greater than the next element, the two elements swap positions. The code includes a nested loop, so this evaluation is repeated for every pair of items (that is, n – 1 times).
In Chapter 11, I present some other sorting routines and compare them in terms of speed.
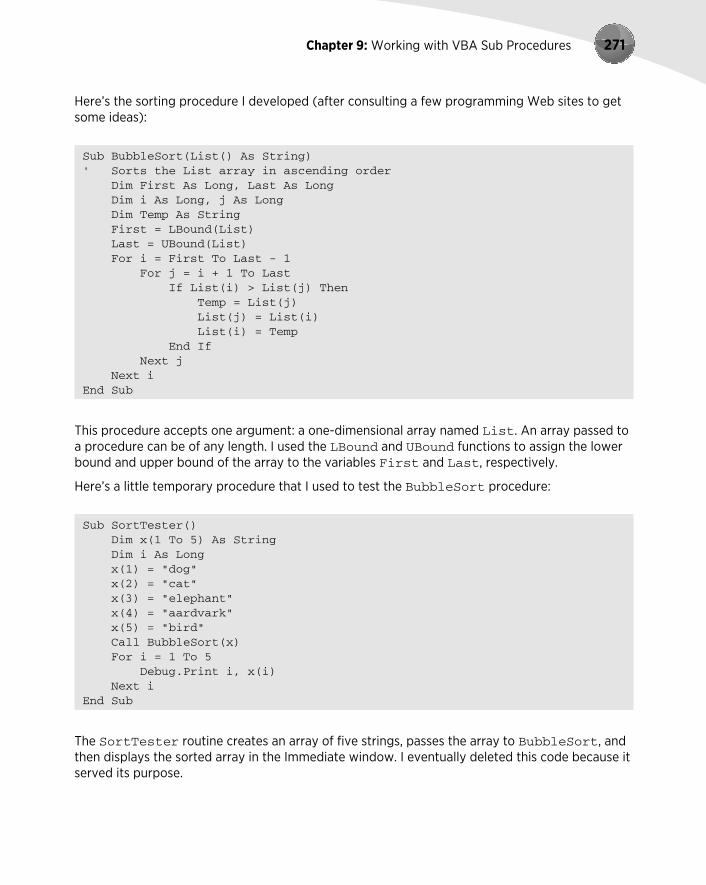
Chapter 9: Working with VBA Sub Procedures 271
Here’s the sorting procedure I developed (after consulting a few programming Web sites to get some ideas):
Sub BubbleSort(List() As String)‘ Sorts the List array in ascending order Dim First As Long, Last As Long Dim i As Long, j As Long Dim Temp As String First = LBound(List) Last = UBound(List) For i = First To Last - 1 For j = i + 1 To Last If List(i) > List(j) Then Temp = List(j) List(j) = List(i) List(i) = Temp End If Next j Next iEnd Sub
This procedure accepts one argument: a one-dimensional array named List. An array passed to a procedure can be of any length. I used the LBound and UBound functions to assign the lower bound and upper bound of the array to the variables First and Last, respectively.
Here’s a little temporary procedure that I used to test the BubbleSort procedure:
Sub SortTester() Dim x(1 To 5) As String Dim i As Long x(1) = “dog” x(2) = “cat” x(3) = “elephant” x(4) = “aardvark” x(5) = “bird” Call BubbleSort(x) For i = 1 To 5 Debug.Print i, x(i) Next iEnd Sub
The SortTester routine creates an array of five strings, passes the array to BubbleSort, and then displays the sorted array in the Immediate window. I eventually deleted this code because it served its purpose.

Part III: Understanding Visual Basic for Applications272
After I was satisfied that this procedure worked reliably, I modified SortSheets by adding a call to the BubbleSort procedure, passing the SheetNames array as an argument. At this point, my module looked like this:
Sub SortSheets() Dim SheetNames() As String Dim SheetCount as Long Dim i as Long SheetCount = ActiveWorkbook.Sheets.Count ReDim SheetNames(1 To SheetCount) For i = 1 To SheetCount SheetNames(i) = ActiveWorkbook.Sheets(i).Name Next i Call BubbleSort(SheetNames)End Sub
Sub BubbleSort(List() As String)‘ Sorts the List array in ascending order Dim First As Long, Last As Long Dim i As Long, j As Long Dim Temp As String First = LBound(List) Last = UBound(List) For i = First To Last - 1 For j = i + 1 To Last If List(i) > List(j) Then Temp = List(j) List(j) = List(i) List(i) = Temp End If Next j Next iEnd Sub
When the SheetSort procedure ends, it contains an array that consists of the sorted sheet names in the active workbook. To verify this, you can display the array contents in the VBE Immediate window by adding the following code at the end of the SortSheets procedure (if the Immediate window is not visible, press Ctrl+G):
For i = 1 To SheetCount Debug.Print SheetNames(i)Next i
So far, so good. Next step: Write some code to rearrange the sheets to correspond to the sorted items in the SheetNames array.

Chapter 9: Working with VBA Sub Procedures 273
The code that I recorded earlier proved useful. Remember the instruction that was recorded when I moved a sheet to the first position in the workbook?
Sheets(“Sheet3”).Move Before:=Sheets(1)
After a little thought, I was able to write a For-Next loop that would go through each sheet and move it to its corresponding sheet location, specified in the SheetNames array:
For i = 1 To SheetCount Sheets(SheetNames(i)).Move Before:=Sheets(i)Next i
For example, the first time through the loop, the loop counter i is 1. The first element in the SheetNames array is (in this example) Sheet1. Therefore, the expression for the Move method within the loop evaluates to
Sheets(“Sheet1”).Move Before:= Sheets(1)
The second time through the loop, the expression evaluates to
Sheets(“Sheet2”).Move Before:= Sheets(2)
I then added the new code to the SortSheets procedure:
Sub SortSheets() Dim SheetNames() As String Dim SheetCount as Long Dim i as Long SheetCount = ActiveWorkbook.Sheets.Count ReDim SheetNames(1 To SheetCount) For i = 1 To SheetCount SheetNames(i) = ActiveWorkbook.Sheets(i).Name Next i Call BubbleSort(SheetNames) For i = 1 To SheetCount ActiveWorkbook.Sheets(SheetNames(i)).Move _ Before:=ActiveWorkbook.Sheets(i) Next iEnd Sub
I did some testing, and it seemed to work just fine for the Test.xlsx workbook.

Part III: Understanding Visual Basic for Applications274
Time to clean things up. I made sure that all the variables used in the procedures were declared, and then I added a few comments and blank lines to make the code easier to read. The SortSheets procedure looked like the following:
Sub SortSheets()‘ This routine sorts the sheets of the‘ active workbook in ascending order.‘ Use Ctrl+Shift+S to execute
Dim SheetNames() As String Dim SheetCount As Long Dim i As Long
‘ Determine the number of sheets & ReDim array SheetCount = ActiveWorkbook.Sheets.Count ReDim SheetNames(1 To SheetCount)
‘ Fill array with sheet names For i = 1 To SheetCount SheetNames(i) = ActiveWorkbook.Sheets(i).Name Next i
‘ Sort the array in ascending order Call BubbleSort(SheetNames)
‘ Move the sheets For i = 1 To SheetCount ActiveWorkbook.Sheets(SheetNames(i)).Move _ Before:= ActiveWorkbook.Sheets(i) Next iEnd Sub
Everything seemed to be working. To test the code further, I added a few more sheets to Test.xlsx and changed some of the sheet names. It worked like a charm.
More testingI was tempted to call it a day. However, just because the procedure worked with the Test.xlsx workbook didn’t mean that it would work with all workbooks. To test it further, I loaded a few other workbooks and retried the routine. I soon discovered that the application wasn’t perfect. In fact, it was far from perfect. I identified the following problems:
Workbooks with many sheets took a long time to sort because the screen was continually updated during the move operations.
Chapter 9: Working with VBA Sub Procedures 275
The sorting didn’t always work. For example, in one of my tests, a sheet named SUMMARY (all uppercase) appeared before a sheet named Sheet1. This problem was caused by the BubbleSort procedure — an uppercase U is “greater than” a lowercase h.
If Excel had no visible workbook windows, pressing the Ctrl+Shift+S shortcut key combo caused the macro to fail.
If the workbook’s structure was protected, the Move method failed.
After sorting, the last sheet in the workbook became the active sheet. Changing the user’s active sheet isn’t a good practice; it’s better to keep the user’s original sheet active.
If I interrupted the macro by pressing Ctrl+Break, VBA displayed an error message.
The macro can’t be reversed (that is, the Undo command is always disabled when a macro is executed). If the user accidentally presses Ctrl+Shift+S, the workbook sheets are sorted, and the only way to get them back to their original order is by doing it manually.
Fixing the problemsFixing the screen-updating problem was a breeze. I inserted the following instruction to turn off screen updating while the sheets were being moved:
Application.ScreenUpdating = False
This statement causes Excel’s windows to freeze while the macro is running. A beneficial side effect is that it also speeds up the macro considerably. After the macro completes it operation, screen updating is turned back on automatically.
It was also easy to fix the problem with the BubbleSort procedure: I used VBA’s UCase func-tion to convert the sheet names to uppercase for the comparison. This caused all the compari-sons to be made by using uppercase versions of the sheet names. The corrected line read as follows:
If UCase(List(i)) > UCase(List(j)) Then
Another way to solve the “case” problem is to add the following statement to the top of your module:
Option Compare Text
This statement causes VBA to perform string comparisons based on a case-insensitive text sort order. In other words, A is considered the same as a.

Part III: Understanding Visual Basic for Applications276
To prevent the error message that appears when no workbooks are visible, I added some error checking. I used On Error Resume Next to ignore the error and then checked the value of Err. If Err is not equal to 0, it means that an error occurred. Therefore, the procedure ends. The error-checking code is
On Error Resume NextSheetCount = ActiveWorkbook.Sheets.CountIf Err <> 0 Then Exit Sub ‘ No active workbook
It occurred to me that I could avoid using On Error Resume Next. The following statement is a more direct approach to determining whether a workbook isn’t visible and doesn’t require any error handling. This statement can go at the top of the SortSheets procedure:
If ActiveWorkbook Is Nothing Then Exit Sub
There’s usually a good reason that a workbook’s structure is protected. I decided that the best approach was to not attempt to unprotect the workbook. Rather, the code should display a mes-sage box warning and let the user unprotect the workbook and re-execute the macro. Testing for a protected workbook structure was easy — the ProtectStructure property of a Workbook object returns True if a workbook is protected. I added the following block of code:
‘ Check for protected workbook structure If ActiveWorkbook.ProtectStructure Then MsgBox ActiveWorkbook.Name & “ is protected.”, _ vbCritical, “Cannot Sort Sheets.” Exit Sub End If
If the workbook’s structure is protected, the user sees a message box like the one shown in Figure 9-11.
Figure 9-11: This message box tells the user that the sheets cannot be sorted.

Chapter 9: Working with VBA Sub Procedures 277
To reactivate the original active sheet after the sorting was performed, I wrote code that assigned the original sheet to an object variable (OldActiveSheet) and then activated that sheet when the routine was finished. Here’s the statement that assigns the variable:
Set OldActive = ActiveSheet
This statement activates the original active worksheet:
OldActive.Activate
Pressing Ctrl+Break normally halts a macro, and VBA usually displays an error message. But because one of my goals was to avoid VBA error messages, I inserted a command to prevent this situation. From the VBA Help system, I discovered that the Application object has an EnableCancelKey property that can disable Ctrl+Break. So I added the following statement at the top of the routine:
Application.EnableCancelKey = xlDisabled
Be very careful when you disable the Cancel key. If your code gets caught in an infinite loop, you can’t break out of it. For best results, insert this statement only after you’re sure that everything is working properly.
To prevent the problem of accidentally sorting the sheets, I added the following statement to the procedure, before the Ctrl+Break key is disabled:
If MsgBox(“Sort the sheets in the active workbook?”, _ vbQuestion + vbYesNo) <> vbYes Then Exit Sub
When the user executes the SortSheets procedure, he sees the message box in Figure 9-12.
Figure 9-12: This message box appears before the sheets are sorted.

Part III: Understanding Visual Basic for Applications278
After I made all these corrections, the SortSheets procedure looked like this:
Option ExplicitSub SortSheets()‘ This routine sorts the sheets of the‘ active workbook in ascending order.‘ Use Ctrl+Shift+S to execute Dim SheetNames() As String Dim i As Long Dim SheetCount As Long Dim OldActiveSheet As Object If ActiveWorkbook Is Nothing Then Exit Sub ‘ No active workbook SheetCount = ActiveWorkbook.Sheets.Count ‘ Check for protected workbook structure If ActiveWorkbook.ProtectStructure Then MsgBox ActiveWorkbook.Name & “ is protected.”, _ vbCritical, “Cannot Sort Sheets.” Exit Sub End If‘ Make user verify If MsgBox(“Sort the sheets in the active workbook?”, _ vbQuestion + vbYesNo) <> vbYes Then Exit Sub‘ Disable Ctrl+Break Application.EnableCancelKey = xlDisabled ‘ Get the number of sheets SheetCount = ActiveWorkbook.Sheets.Count ‘ Redimension the array ReDim SheetNames(1 To SheetCount)‘ Store a reference to the active sheet Set OldActiveSheet = ActiveSheet ‘ Fill array with sheet names For i = 1 To SheetCount SheetNames(i) = ActiveWorkbook.Sheets(i).Name Next i ‘ Sort the array in ascending order Call BubbleSort(SheetNames) ‘ Turn off screen updating Application.ScreenUpdating = False

Chapter 9: Working with VBA Sub Procedures 279
‘ Move the sheets For i = 1 To SheetCount ActiveWorkbook.Sheets(SheetNames(i)).Move _ Before:=ActiveWorkbook.Sheets(i) Next i‘ Reactivate the original active sheet OldActiveSheet.ActivateEnd Sub
Utility availabilityBecause the SortSheets macro is stored in the Personal Macro Workbook, it’s available when-ever Excel is running. At this point, you can execute the macro by selecting the macro’s name from the Macro dialog box (Alt+F8 displays this dialog box) or by pressing Ctrl+Shift+S. Another option is to add a command to the Ribbon.
To add a command, follow these steps:
1. Right-click any area of the Ribbon and choose Customize the Ribbon.
2. In the Customize Ribbon tab of the Excel Options dialog box, choose Macros from the drop-down list labeled Choose Commands From.
3. Click the item labeled PERSONAL.XLSB!SortSheets.
4. Use the controls in the box on the right to specify the ribbon tab and create a new group.
(You can’t add a command to an existing group.)
I created a group named Worksheets in the View tab, and renamed the new item to Short Sheets (see Figure 9-13).
Evaluating the projectSo there you have it. The utility meets all the original project requirements: It sorts all sheets in the active workbook, it can be executed easily, it’s always available, it seems to work for any workbook, and I have yet to see it display a VBA error message.
The procedure still has one slight problem: The sorting is strict and may not always be “logical.” For example, after sorting, Sheet10 is placed before Sheet2. Most would want Sheet2 to be listed before Sheet10. Solving that problem is the beyond the scope of this introductory exercise.

Part III: Understanding Visual Basic for Applications280
Figure 9-13: Adding a new command to the ribbon.

281
10Creating Function ProceduresIn This Chapter
● Understanding the difference between Sub procedures and Function procedures
● Creating custom functions
● Looking at Function procedures and function arguments
● Creating a function that emulates Excel’s SUM function
● Using functions that enable you to work with pre-1900 dates in your worksheets
● Debugging functions, dealing with the Insert Function dialog box, and using add-ins to store custom functions
● Calling the Windows Application Programming Interface (API) to perform otherwise impossible feats
Sub Procedures versus Function ProceduresA function is a VBA procedure that performs calculations and returns a value. You can use these functions in your Visual Basic for Applications (VBA) code or in formulas.
VBA enables you to create Sub procedures and Function procedures. You can think of a Sub procedure as a command that either the user or another procedure can execute. Function pro-cedures, on the other hand, usually return a single value (or an array), just like Excel worksheet functions and VBA built-in functions. As with built-in functions, your Function procedures can use arguments.
Function procedures are quite versatile, and you can use them in two situations:
As part of an expression in a VBA procedure
In formulas that you create in a worksheet

Part III: Understanding Visual Basic for Applications282
In fact, you can use a Function procedure anywhere that you can use an Excel worksheet func-tion or a VBA built-in function. As far as I know, the only exception is that you can’t use a VBA function in a data validation formula.
I cover Sub procedures in the preceding chapter, and in this chapter, I discuss Function procedures.
Chapter 11 has many useful and practical examples of Function procedures. You can incorporate many of these techniques into your work.
Why Create Custom Functions?You’re undoubtedly familiar with Excel worksheet functions; even novices know how to use the most common worksheet functions, such as SUM, AVERAGE, and IF. Excel 2010 includes more than 400 predefined worksheet functions that you can use in formulas. If that’s not enough, how-ever, you can create custom functions by using VBA.
With all the functions available in Excel and VBA, you might wonder why you’d ever need to cre-ate new functions. The answer: to simplify your work. With a bit of planning, custom functions are very useful in worksheet formulas and VBA procedures.
Often, for example, you can create a custom function that can significantly shorten your formu-las. And shorter formulas are more readable and easier to work with. I should also point out, however, that custom functions used in your formulas are usually much slower than built-in func-tions. And, of course, the user must enable macros in order to use these functions.
When you create applications, you may notice that some procedures repeat certain calculations. In such cases, consider creating a custom function that performs the calculation. Then you can simply call the function from your procedure. A custom function can eliminate the need for dupli-cated code, thus reducing errors.
Also, coworkers often can benefit from your specialized functions. And some may be willing to pay you to create custom functions that save them time and work.
Although many cringe at the thought of creating custom worksheet functions, the process isn’t difficult. In fact, I enjoy creating custom functions. I especially like how my custom functions appear in the Insert Function dialog box along with Excel built-in functions, as if I’m re-engineer-ing the software in some way.
In this chapter, I tell you what you need to know to start creating custom functions, and I provide lots of examples.
An Introductory Function ExampleWithout further ado, this section presents an example of a VBA Function procedure.

Chapter 10: Creating Function Procedures 283
The following is a custom function defined in a VBA module. This function, named RemoveVowels, uses a single argument. The function returns the argument, but with all the vowels removed.
Function RemoveVowels(Txt) As String‘ Removes all vowels from the Txt argument Dim i As Long RemoveVowels = “” For i = 1 To Len(Txt) If Not UCase(Mid(Txt, i, 1)) Like “[AEIOU]” Then RemoveVowels = RemoveVowels & Mid(Txt, i, 1) End If Next iEnd Function
This function certainly isn’t the most useful one I’ve written, but it demonstrates some key con-cepts related to functions. I explain how this function works later, in the “Analyzing the custom function” section.
When you create custom functions that will be used in a worksheet formula, make sure that the code resides in a normal VBA module. If you place your custom functions in a code module for a UserForm, a Sheet, or ThisWorkbook, they won’t work in your for-mulas. Your formulas will return a #NAME? error.
Using the function in a worksheetWhen you enter a formula that uses the RemoveVowels function, Excel executes the code to get the value. Here’s an example of how you’d use the function in a formula:
=RemoveVowels(A1)
See Figure 10-1 for examples of this function in action. The formulas are in column B, and they use the text in column A as their arguments. As you can see, the function returns the single argu-ment, but with the vowels removed.
Actually, the function works pretty much like any built-in worksheet function. You can insert it in a formula by choosing Formulas➜Function Library➜Insert Function or by clicking the Insert Function Wizard icon to the left of the formula bar. Either of these actions displays the Insert Function dialog box. In the Insert Function dialog box, your custom functions are located, by default, in the User Defined category.
You can also nest custom functions and combine them with other elements in your formulas. For example, the following formula nests the RemoveVowels function inside Excel’s UPPER func-tion. The result is the original string (sans vowels), converted to uppercase.

Part III: Understanding Visual Basic for Applications284
=UPPER(RemoveVowels(A1))
Figure 10-1: Using a custom function in a worksheet formula.
Using the function in a VBA procedureIn addition to using custom functions in worksheet formulas, you can use them in other VBA proce-dures. The following VBA procedure, which is defined in the same module as the custom RemoveVowels function, first displays an input box to solicit text from the user. Then the procedure uses the VBA built-in MsgBox function to display the user input after the RemoveVowels function processes it (see Figure 10-2). The original input appears as the caption in the message box.
Sub ZapTheVowels() Dim UserInput as String UserInput = InputBox(“Enter some text:”) MsgBox RemoveVowels(UserInput), vbInformation, UserInputEnd Sub
In the example shown in Figure 10-2, the string entered in response to the InputBox function was Excel 2010 Power Programming With VBA. The MsgBox function displays the text without vowels.
Figure 10-2: Using a custom function in a VBA procedure.
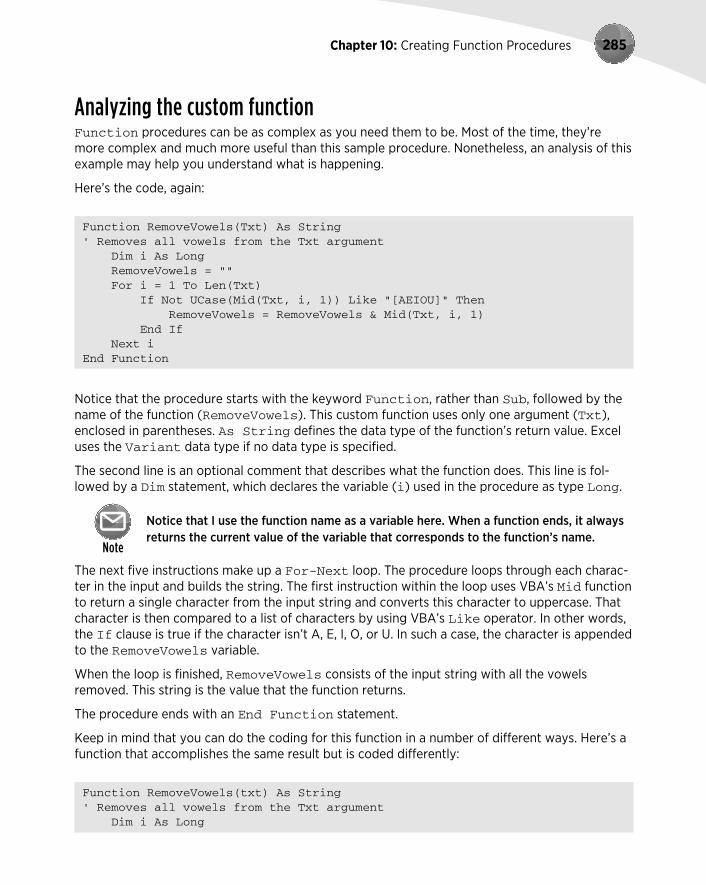
Chapter 10: Creating Function Procedures 285
Analyzing the custom functionFunction procedures can be as complex as you need them to be. Most of the time, they’re more complex and much more useful than this sample procedure. Nonetheless, an analysis of this example may help you understand what is happening.
Here’s the code, again:
Function RemoveVowels(Txt) As String‘ Removes all vowels from the Txt argument Dim i As Long RemoveVowels = “” For i = 1 To Len(Txt) If Not UCase(Mid(Txt, i, 1)) Like “[AEIOU]” Then RemoveVowels = RemoveVowels & Mid(Txt, i, 1) End If Next iEnd Function
Notice that the procedure starts with the keyword Function, rather than Sub, followed by the name of the function (RemoveVowels). This custom function uses only one argument (Txt), enclosed in parentheses. As String defines the data type of the function’s return value. Excel uses the Variant data type if no data type is specified.
The second line is an optional comment that describes what the function does. This line is fol-lowed by a Dim statement, which declares the variable (i) used in the procedure as type Long.
Notice that I use the function name as a variable here. When a function ends, it always returns the current value of the variable that corresponds to the function’s name.
The next five instructions make up a For-Next loop. The procedure loops through each charac-ter in the input and builds the string. The first instruction within the loop uses VBA’s Mid function to return a single character from the input string and converts this character to uppercase. That character is then compared to a list of characters by using VBA’s Like operator. In other words, the If clause is true if the character isn’t A, E, I, O, or U. In such a case, the character is appended to the RemoveVowels variable.
When the loop is finished, RemoveVowels consists of the input string with all the vowels removed. This string is the value that the function returns.
The procedure ends with an End Function statement.
Keep in mind that you can do the coding for this function in a number of different ways. Here’s a function that accomplishes the same result but is coded differently:
Function RemoveVowels(txt) As String‘ Removes all vowels from the Txt argument Dim i As Long
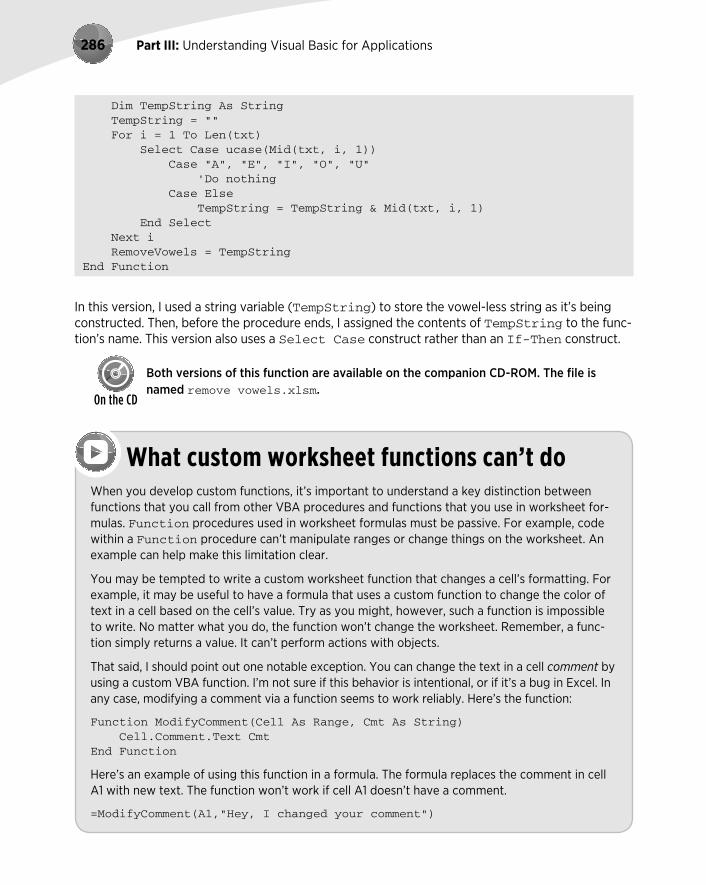
Part III: Understanding Visual Basic for Applications286
Dim TempString As String TempString = “” For i = 1 To Len(txt) Select Case ucase(Mid(txt, i, 1)) Case “A”, “E”, “I”, “O”, “U” ‘Do nothing Case Else TempString = TempString & Mid(txt, i, 1) End Select Next i RemoveVowels = TempStringEnd Function
In this version, I used a string variable (TempString) to store the vowel-less string as it’s being constructed. Then, before the procedure ends, I assigned the contents of TempString to the func-tion’s name. This version also uses a Select Case construct rather than an If-Then construct.
Both versions of this function are available on the companion CD-ROM. The file is named remove vowels.xlsm.
What custom worksheet functions can’t doWhen you develop custom functions, it’s important to understand a key distinction between functions that you call from other VBA procedures and functions that you use in worksheet for-mulas. Function procedures used in worksheet formulas must be passive. For example, code within a Function procedure can’t manipulate ranges or change things on the worksheet. An example can help make this limitation clear.
You may be tempted to write a custom worksheet function that changes a cell’s formatting. For example, it may be useful to have a formula that uses a custom function to change the color of text in a cell based on the cell’s value. Try as you might, however, such a function is impossible to write. No matter what you do, the function won’t change the worksheet. Remember, a func-tion simply returns a value. It can’t perform actions with objects.
That said, I should point out one notable exception. You can change the text in a cell comment by using a custom VBA function. I’m not sure if this behavior is intentional, or if it’s a bug in Excel. In any case, modifying a comment via a function seems to work reliably. Here’s the function:
Function ModifyComment(Cell As Range, Cmt As String) Cell.Comment.Text CmtEnd Function
Here’s an example of using this function in a formula. The formula replaces the comment in cell A1 with new text. The function won’t work if cell A1 doesn’t have a comment.
=ModifyComment(A1,”Hey, I changed your comment”)

Chapter 10: Creating Function Procedures 287
Function ProceduresA custom Function procedure has much in common with a Sub procedure. (For more informa-tion on Sub procedures, see Chapter 9.)
The syntax for declaring a function is as follows:
[Public | Private][Static] Function name ([arglist])[As type] [instructions] [name = expression] [Exit Function] [instructions] [name = expression]End Function
The Function procedure contains the following elements:
Public: (Optional) Indicates that the Function procedure is accessible to all other procedures in all other modules in all active Excel VBA projects.
Private: (Optional) Indicates that the Function procedure is accessible only to other procedures in the same module.
Static: (Optional) Indicates that the values of variables declared in the Function pro-cedure are preserved between calls.
Function: (Required) Indicates the beginning of a procedure that returns a value or other data.
name: (Required) Represents any valid Function procedure name, which must follow the same rules as a variable name.
arglist: (Optional) Represents a list of one or more variables that represent arguments passed to the Function procedure. The arguments are enclosed in parentheses. Use a comma to separate pairs of arguments.
type: (Optional) Is the data type returned by the Function procedure.
instructions: (Optional) Are any number of valid VBA instructions.
Exit Function: (Optional) Is a statement that forces an immediate exit from the Function procedure prior to its completion.
End Function: (Required) Is a keyword that indicates the end of the Function procedure.
A key point to remember about a custom function written in VBA is that a value is always assigned to the function’s name a minimum of one time, generally when it has completed execution.

Part III: Understanding Visual Basic for Applications288
To create a custom function, start by inserting a VBA module. You can use an existing module, as long as it’s a normal VBA module. Enter the keyword Function, followed by the function name and a list of its arguments (if any) in parentheses. You can also declare the data type of the return value by using the As keyword (this is optional, but recommended). Insert the VBA code that performs the work, making sure that the appropriate value is assigned to the term corre-sponding to the function name at least once within the body of the Function procedure. End the function with an End Function statement.
Function names must adhere to the same rules as variable names. If you plan to use your custom function in a worksheet formula, be careful if the function name is also a cell address. For exam-ple, if you use something like J21 as a function name, you can’t use the function in a worksheet formula.
The best advice is to avoid using function names that are also cell references, including named ranges. And, avoid using function names that correspond to Excel’s built-in function names. In the case of a function name conflict, Excel always uses its built-in function.
A function’s scopeIn Chapter 9, I discuss the concept of a procedure’s scope (public or private). The same discus-sion applies to functions: A function’s scope determines whether it can be called by procedures in other modules or in worksheets.
Here are a few things to keep in mind about a function’s scope:
If you don’t declare a function’s scope, its default is Public.
Functions declared As Private don’t appear in Excel’s Insert Function dialog box. Therefore, when you create a function that should be used only in a VBA procedure, you should declare it Private so that users don’t try to use it in a formula.
If your VBA code needs to call a function that’s defined in another workbook, set up a reference to the other workbook by choosing the Visual Basic Editor (VBE) Tools➜References command.
Executing function proceduresAlthough you can execute a Sub procedure in many ways, you can execute a Function proce-dure in only four ways:
Call it from another procedure.
Use it in a worksheet formula.
Use it in a formula that’s used to specify conditional formatting.
Call it from the VBE Immediate window.
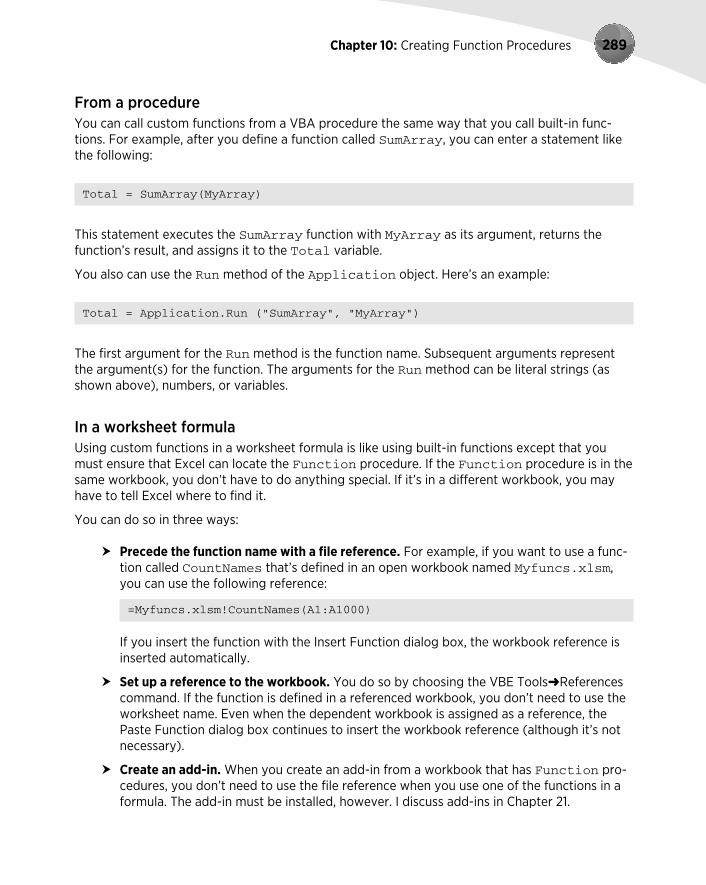
Chapter 10: Creating Function Procedures 289
From a procedureYou can call custom functions from a VBA procedure the same way that you call built-in func-tions. For example, after you define a function called SumArray, you can enter a statement like the following:
Total = SumArray(MyArray)
This statement executes the SumArray function with MyArray as its argument, returns the function’s result, and assigns it to the Total variable.
You also can use the Run method of the Application object. Here’s an example:
Total = Application.Run (“SumArray”, “MyArray”)
The first argument for the Run method is the function name. Subsequent arguments represent the argument(s) for the function. The arguments for the Run method can be literal strings (as shown above), numbers, or variables.
In a worksheet formulaUsing custom functions in a worksheet formula is like using built-in functions except that you must ensure that Excel can locate the Function procedure. If the Function procedure is in the same workbook, you don’t have to do anything special. If it’s in a different workbook, you may have to tell Excel where to find it.
You can do so in three ways:
Precede the function name with a file reference. For example, if you want to use a func-tion called CountNames that’s defined in an open workbook named Myfuncs.xlsm, you can use the following reference:
=Myfuncs.xlsm!CountNames(A1:A1000)
If you insert the function with the Insert Function dialog box, the workbook reference is inserted automatically.
Set up a reference to the workbook. You do so by choosing the VBE Tools➜References command. If the function is defined in a referenced workbook, you don’t need to use the worksheet name. Even when the dependent workbook is assigned as a reference, the Paste Function dialog box continues to insert the workbook reference (although it’s not necessary).
Create an add-in. When you create an add-in from a workbook that has Function pro-cedures, you don’t need to use the file reference when you use one of the functions in a formula. The add-in must be installed, however. I discuss add-ins in Chapter 21.

Part III: Understanding Visual Basic for Applications290
You’ll notice that unlike Sub procedures, your Function procedures don’t appear in the Macro dialog box when you issue the Developer➜Code➜Macros command. In addition, you can’t choose a function when you issue the VBE Run➜Sub/UserForm command (or press F5) if the cursor is located in a Function procedure. (You get the Macro dialog box that lets you choose a macro to run.) As a result, you need to do a bit of extra up-front work to test your functions while you’re developing them. One approach is to set up a simple procedure that calls the func-tion. If the function is designed to be used in worksheet formulas, you’ll want to enter a simple formula to test it.
In a conditional formatting formulaWhen you specify conditional formatting, one of the options is to create a formula. The formula must be a logical formula (that is, it must return either TRUE or FALSE). If the formula returns TRUE, the condition is met, and formatting is applied to the cell.
You can use custom VBA functions in your conditional formatting formulas. For example, here’s a simple VBA function that returns TRUE if its argument is a cell that contains a formula:
Function CELLHASFORMULA(cell) As Boolean CELLHASFORMULA = cell.HasFormulaEnd Function
After defining this function in a VBA module, you can set up a conditional formatting rule so that cells that contain a formula contain different formatting:
1. Select the range that will contain the conditional formatting.
For example, select A1:G20.
2. Choose Home➜Styles➜Conditional Formatting➜New Rule.
3. In the New Formatting Rule dialog box, select the option labeled Use a Formula to Determine Which Cells to Format.
4. Enter this formula in the formula box — but make sure that the cell reference argument corresponds to the upper-left cell in the range that you selected in Step 1:
=CELLHASFORMULA(A1)
5. Click the Format button to specify the formatting for cells that meet this condition.
6. Click OK to apply the conditional formatting rule to the selected range.
Cells in the range that contain a formula will display the formatting you specified. Figure 10-3 shows the New Formatting Rule dialog box, specifying a custom function in a formula.

Chapter 10: Creating Function Procedures 291
Figure 10-3: Using a custom VBA function for conditional formatting.
From the VBE Immediate WindowThe final way to call a Function procedure is from the VBE Immediate window. This method is generally used only for testing purposes. Figure 10-4 shows an example.
Figure 10-4: Calling a Function procedure from the Immediate window.
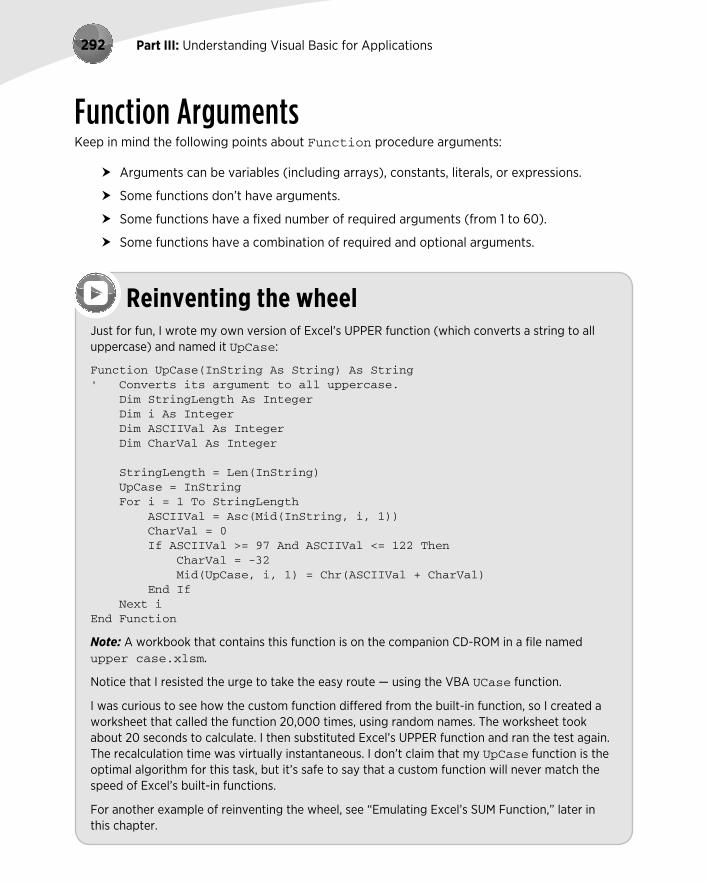
Part III: Understanding Visual Basic for Applications292
Function ArgumentsKeep in mind the following points about Function procedure arguments:
Arguments can be variables (including arrays), constants, literals, or expressions.
Some functions don’t have arguments.
Some functions have a fixed number of required arguments (from 1 to 60).
Some functions have a combination of required and optional arguments.
Reinventing the wheelJust for fun, I wrote my own version of Excel’s UPPER function (which converts a string to all uppercase) and named it UpCase:
Function UpCase(InString As String) As String‘ Converts its argument to all uppercase. Dim StringLength As Integer Dim i As Integer Dim ASCIIVal As Integer Dim CharVal As Integer StringLength = Len(InString) UpCase = InString For i = 1 To StringLength ASCIIVal = Asc(Mid(InString, i, 1)) CharVal = 0 If ASCIIVal >= 97 And ASCIIVal <= 122 Then CharVal = -32 Mid(UpCase, i, 1) = Chr(ASCIIVal + CharVal) End If Next iEnd Function
Note: A workbook that contains this function is on the companion CD-ROM in a file named upper case.xlsm.
Notice that I resisted the urge to take the easy route — using the VBA UCase function.
I was curious to see how the custom function differed from the built-in function, so I created a worksheet that called the function 20,000 times, using random names. The worksheet took about 20 seconds to calculate. I then substituted Excel’s UPPER function and ran the test again. The recalculation time was virtually instantaneous. I don’t claim that my UpCase function is the optimal algorithm for this task, but it’s safe to say that a custom function will never match the speed of Excel’s built-in functions.
For another example of reinventing the wheel, see “Emulating Excel’s SUM Function,” later in this chapter.

Chapter 10: Creating Function Procedures 293
If your formula uses a custom worksheet function and it returns #VALUE!, your function has an error. The error may be caused by logical errors in your code or by passing incorrect arguments to the function. See “Debugging Functions,” later in this chapter.
Function ExamplesIn this section, I present a series of examples that demonstrate how to use arguments effectively with functions. By the way, this discussion also applies to Sub procedures.
Functions with no argumentLike Sub procedures, Function procedures need not have arguments. Excel, for example, has a few built-in functions that don’t use arguments, including RAND, TODAY, and NOW. You can cre-ate similar functions.
This section contains examples of functions that don’t use an argument.
A workbook that contains these functions is available on the companion CD-ROM. The file is named no argument.xlsm.
Here’s a simple example of a function that doesn’t use an argument. The following function returns the UserName property of the Application object. This name appears in the Excel Options dialog box (General tab) and is stored in the Windows Registry.
Function User()‘ Returns the name of the current user User = Application.UserNameEnd Function
When you enter the following formula, the cell returns the name of the current user (assuming that it’s listed properly in the Registry):
=User()
When you use a function with no arguments in a worksheet formula, you must include a set of empty parentheses. This requirement isn’t necessary if you call the function in a VBA procedure, although including the empty parentheses does make it clear that you’re calling a function.
To use this function in another procedure, you can assign it to a variable, use it in an expression, or use it as an argument for another function.

Part III: Understanding Visual Basic for Applications294
The following example calls the User function and uses the return value as an argument for the MsgBox statement. The concatenation operator (&) joins the literal string with the result of the User function.
Sub ShowUser() MsgBox “Your name is “ & User()End Sub
The User function demonstrates how you can create a wrapper function that simply returns a property or the result of a VBA function. Following are three additional wrapper functions that take no argument:
Function ExcelDir() As String‘ Returns the directory in which Excel is installed ExcelDir = Application.PathEnd Function
Function SheetCount()‘ Returns the number of sheets in the workbook SheetCount = Application.Caller.Parent.Parent.Sheets.CountEnd Function
Function SheetName()‘ Returns the name of the worksheet SheetName = Application.Caller.Parent.NameEnd Function
Here’s another example of a function that doesn’t take an argument. I used to use Excel’s RAND function to quickly fill a range of cells with values. But I didn’t like the fact that the random num-bers changed whenever the worksheet was recalculated. So I remedied this issue by converting the formulas to values.
Then I realized that I could create a custom function that returned random numbers that didn’t change. I used the VBA built-in Rnd function, which returns a random number between 0 and 1. The custom function is as follows:
Function StaticRand()‘ Returns a random number that doesn’t ‘ change when recalculated StaticRand = Rnd()End Function
If you want to generate a series of random integers between 0 and 1,000, you can use a formula such as this:
=INT(StaticRand()*1000)
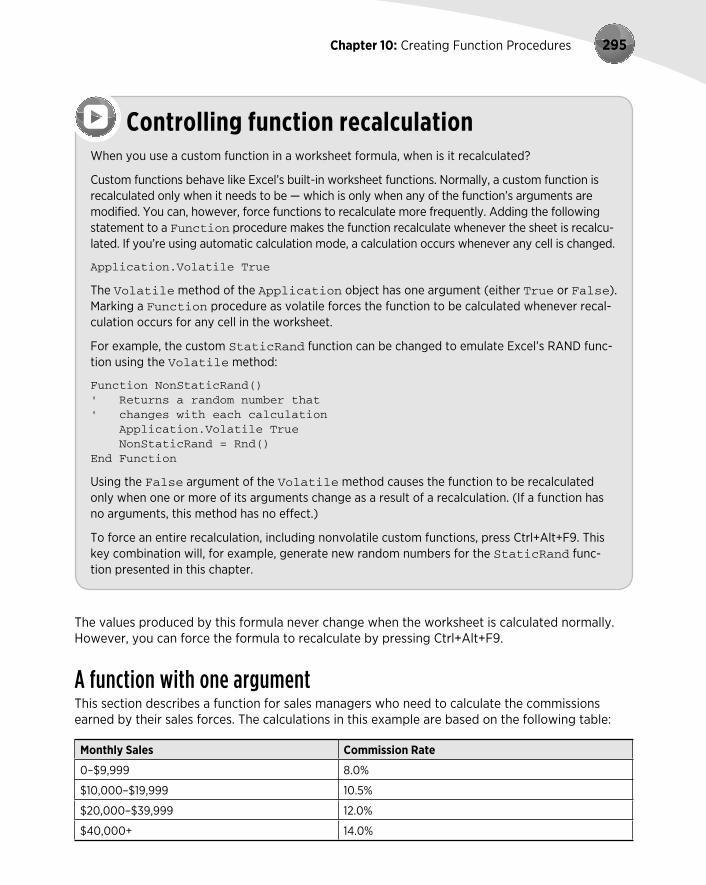
Chapter 10: Creating Function Procedures 295
The values produced by this formula never change when the worksheet is calculated normally. However, you can force the formula to recalculate by pressing Ctrl+Alt+F9.
A function with one argumentThis section describes a function for sales managers who need to calculate the commissions earned by their sales forces. The calculations in this example are based on the following table:
Monthly Sales Commission Rate
0–$9,999 8.0%
$10,000–$19,999 10.5%
$20,000–$39,999 12.0%
$40,000+ 14.0%
Controlling function recalculationWhen you use a custom function in a worksheet formula, when is it recalculated?
Custom functions behave like Excel’s built-in worksheet functions. Normally, a custom function is recalculated only when it needs to be — which is only when any of the function’s arguments are modified. You can, however, force functions to recalculate more frequently. Adding the following statement to a Function procedure makes the function recalculate whenever the sheet is recalcu-lated. If you’re using automatic calculation mode, a calculation occurs whenever any cell is changed.
Application.Volatile True
The Volatile method of the Application object has one argument (either True or False). Marking a Function procedure as volatile forces the function to be calculated whenever recal-culation occurs for any cell in the worksheet.
For example, the custom StaticRand function can be changed to emulate Excel’s RAND func-tion using the Volatile method:
Function NonStaticRand()‘ Returns a random number that ‘ changes with each calculation Application.Volatile True NonStaticRand = Rnd()End Function
Using the False argument of the Volatile method causes the function to be recalculated only when one or more of its arguments change as a result of a recalculation. (If a function has no arguments, this method has no effect.)
To force an entire recalculation, including nonvolatile custom functions, press Ctrl+Alt+F9. This key combination will, for example, generate new random numbers for the StaticRand func-tion presented in this chapter.

Part III: Understanding Visual Basic for Applications296
Note that the commission rate is nonlinear and also depends on the month’s total sales. Employees who sell more earn a higher commission rate.
You can calculate commissions for various sales amounts entered into a worksheet in several ways. If you’re not thinking too clearly, you can waste lots of time and come up with a lengthy formula such as this one:
=IF(AND(A1>=0,A1<=9999.99),A1*0.08, IF(AND(A1>=10000,A1<=19999.99),A1*0.105, IF(AND(A1>=20000,A1<=39999.99),A1*0.12, IF(A1>=40000,A1*0.14,0))))
This approach is bad for a couple of reasons. First, the formula is overly complex, making it diffi-cult to understand. Second, the values are hard-coded into the formula, making the formula diffi-cult to modify.
A better (non-VBA) approach is to use a lookup table function to compute the commissions. For example, the following formula uses VLOOKUP to retrieve the commission value from a range named Table and multiplies that value by the value in cell A1.
=VLOOKUP(A1,Table,2)*A1
Yet another approach (which eliminates the need to use a lookup table) is to create a custom function such as the following:
Function Commission(Sales) Const Tier1 = 0.08 Const Tier2 = 0.105 Const Tier3 = 0.12 Const Tier4 = 0.14‘ Calculates sales commissions Select Case Sales Case 0 To 9999.99: Commission = Sales * Tier1 Case 1000 To 19999.99: Commission = Sales * Tier2 Case 20000 To 39999.99: Commission = Sales * Tier3 Case Is >= 40000: Commission = Sales * Tier4 End SelectEnd Function
After you enter this function in a VBA module, you can use it in a worksheet formula or call the function from other VBA procedures.
Entering the following formula into a cell produces a result of 3,000; the amount — 25,000 — qualifies for a commission rate of 12 percent:
=Commission(25000)

Chapter 10: Creating Function Procedures 297
Even if you don’t need custom functions in a worksheet, creating Function procedures can make your VBA coding much simpler. For example, if your VBA procedure calculates sales com-missions, you can use the exact same function and call it from a VBA procedure. Here’s a tiny procedure that asks the user for a sales amount and then uses the Commission function to cal-culate the commission due:
Sub CalcComm() Dim Sales as Long Sales = InputBox(“Enter Sales:”) MsgBox “The commission is “ & Commission(Sales)End Sub
The CalcComm procedure starts by displaying an input box that asks for the sales amount. Then it displays a message box with the calculated sales commission for that amount.
This Sub procedure works, but it’s rather crude. Following is an enhanced version that displays formatted values and keeps looping until the user clicks No (see Figure 10-5).
Figure 10-5: Using a function to display the result of a calculation.
Sub CalcComm() Dim Sales As Long Dim Msg As String, Ans As String
‘ Prompt for sales amount Sales = Val(InputBox(“Enter Sales:”, _ “Sales Commission Calculator”))
‘ Build the Message Msg = “Sales Amount:” & vbTab & Format(Sales, “$#,##0.00”) Msg = Msg & vbCrLf & “Commission:” & vbTab Msg = Msg & Format(Commission(Sales), “$#,##0.00”) Msg = Msg & vbCrLf & vbCrLf & “Another?”
‘ Display the result and prompt for another Ans = MsgBox(Msg, vbYesNo, “Sales Commission Calculator”) If Ans = vbYes Then CalcCommEnd Sub

Part III: Understanding Visual Basic for Applications298
This function uses two VBA built-in constants: vbTab represents a tab (to space the output), and vbCrLf specifies a carriage return and line feed (to skip to the next line). VBA’s Format func-tion displays a value in a specified format (in this case, with a dollar sign, comma, and two deci-mal places).
In both of these examples, the Commission function must be available in the active workbook; otherwise, Excel displays an error message saying that the function isn’t defined.
A function with two argumentsImagine that the aforementioned hypothetical sales managers implement a new policy to help reduce turnover: The total commission paid is increased by 1 percent for every year that the salesperson has been with the company.
I modified the custom Commission function (defined in the preceding section) so that it takes two arguments. The new argument represents the number of years. Call this new function Commission2:
Function Commission2(Sales, Years)‘ Calculates sales commissions based on ‘ years in service Const Tier1 = 0.08 Const Tier2 = 0.105 Const Tier3 = 0.12 Const Tier4 = 0.14 Select Case Sales Case 0 To 9999.99: Commission2 = Sales * Tier1 Case 1000 To 19999.99: Commission2 = Sales * Tier2
Use arguments, not cell referencesAll ranges that are used in a custom function should be passed as arguments. Consider the fol-lowing function, which returns the value in A1, multiplied by 2:
Function DoubleCell() DoubleCell = Range(“A1”) * 2End Function
Although this function works, at times, it may return an incorrect result. Excel’s calculation engine can’t account for ranges in your code that aren’t passed as arguments. Therefore, in some cases, all precedents may not be calculated before the function’s value is returned. The DoubleCell function should be written as follows, with A1 passed as the argument:
Function DoubleCell(cell) DoubleCell = cell * 2End Function
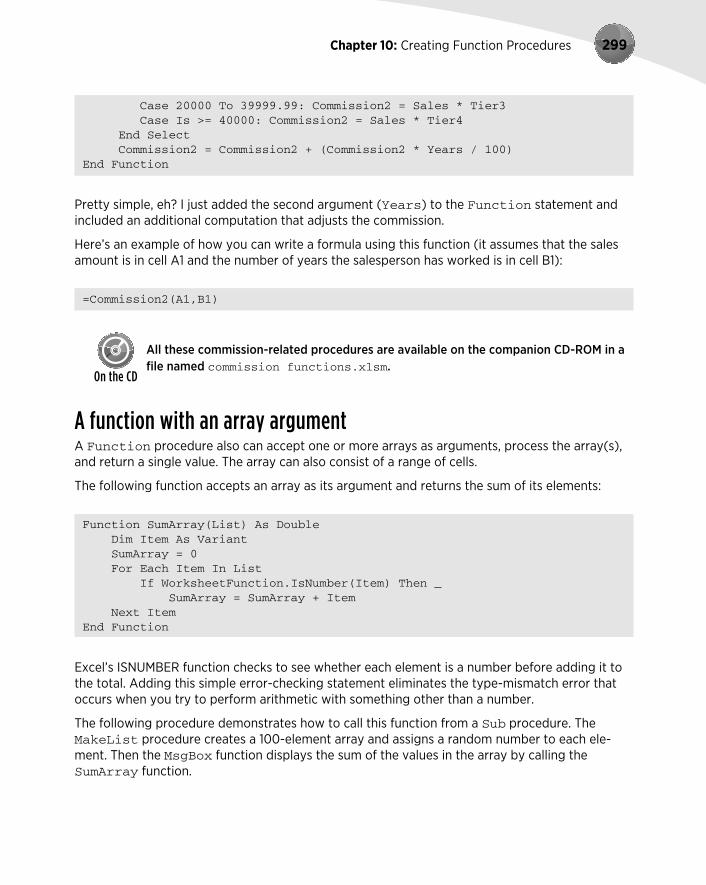
Chapter 10: Creating Function Procedures 299
Case 20000 To 39999.99: Commission2 = Sales * Tier3 Case Is >= 40000: Commission2 = Sales * Tier4 End Select Commission2 = Commission2 + (Commission2 * Years / 100)End Function
Pretty simple, eh? I just added the second argument (Years) to the Function statement and included an additional computation that adjusts the commission.
Here’s an example of how you can write a formula using this function (it assumes that the sales amount is in cell A1 and the number of years the salesperson has worked is in cell B1):
=Commission2(A1,B1)
All these commission-related procedures are available on the companion CD-ROM in a file named commission functions.xlsm.
A function with an array argumentA Function procedure also can accept one or more arrays as arguments, process the array(s), and return a single value. The array can also consist of a range of cells.
The following function accepts an array as its argument and returns the sum of its elements:
Function SumArray(List) As Double Dim Item As Variant SumArray = 0 For Each Item In List If WorksheetFunction.IsNumber(Item) Then _ SumArray = SumArray + Item Next ItemEnd Function
Excel’s ISNUMBER function checks to see whether each element is a number before adding it to the total. Adding this simple error-checking statement eliminates the type-mismatch error that occurs when you try to perform arithmetic with something other than a number.
The following procedure demonstrates how to call this function from a Sub procedure. The MakeList procedure creates a 100-element array and assigns a random number to each ele-ment. Then the MsgBox function displays the sum of the values in the array by calling the SumArray function.

Part III: Understanding Visual Basic for Applications300
Sub MakeList() Dim Nums(1 To 100) As Double Dim i as Integer For i = 1 To 100 Nums(i) = Rnd * 1000 Next i MsgBox SumArray(Nums)End Sub
Notice that the SumArray function doesn’t declare the data type of its argument (it’s a variant). Because it’s not declared as a specific numeric type, the function also works in your worksheet formulas in which the argument is a Range object. For example, the following formula returns the sum of the values in A1:C10:
=SumArray(A1:C10)
You might notice that, when used in a worksheet formula, the SumArray function works very much like Excel’s SUM function. One difference, however, is that SumArray doesn’t accept multi-ple arguments. Understand that this example is for educational purposes only. Using the SumArray function in a formula offers absolutely no advantages over the Excel SUM function.
This example, named array argument.xlsm, is available on the companion CD-ROM.
A function with optional argumentsMany of Excel’s built-in worksheet functions use optional arguments. An example is the LEFT function, which returns characters from the left side of a string. Its syntax is
LEFT(text,num_chars)
The first argument is required, but the second is optional. If the optional argument is omitted, Excel assumes a value of 1. Therefore, the following two formulas return the same result:
=LEFT(A1,1)=LEFT(A1)
The custom functions that you develop in VBA also can have optional arguments. You specify an optional argument by preceding the argument’s name with the keyword Optional. In the argu-ment list, optional arguments must appear after any required arguments.

Chapter 10: Creating Function Procedures 301
Following is a simple function example that returns the user’s name. The function’s argument is optional.
Function User(Optional UpperCase As Variant) If IsMissing(UpperCase) Then UpperCase = False User = Application.UserName If UpperCase Then User = UCase(User)End Function
If the argument is False or omitted, the user’s name is returned without any changes. If the argument is True, the user’s name is converted to uppercase (using the VBA UCase function) before it’s returned. Notice that the first statement in the procedure uses the VBA IsMissing function to determine whether the argument was supplied. If the argument is missing, the state-ment sets the UpperCase variable to False (the default value).
All the following formulas are valid, and the first two produce the same result:
=User()=User(False)=User(True)
If you need to determine whether an optional argument was passed to a function, you must declare the optional argument as a Variant data type. Then you can use the IsMissing function within the procedure, as demonstrated in this example. In other words, the argument for the IsMissing function must always be a Variant data type.
The following is another example of a custom function that uses an optional argument. This func-tion randomly chooses one cell from an input range and returns that cell’s contents. If the second argument is True, the selected value changes whenever the worksheet is recalculated (that is, the function is made volatile). If the second argument is False (or omitted), the function isn’t recalculated unless one of the cells in the input range is modified.
Function DrawOne(Rng As Variant, Optional Recalc As Variant = False)‘ Chooses one cell at random from a range‘ Make function volatile if Recalc is True Application.Volatile Recalc‘ Determine a random cell DrawOne = Rng(Int((Rng.Count) * Rnd + 1))End Function
Notice that the second argument for DrawOne includes the Optional keyword, along with a default value.

Part III: Understanding Visual Basic for Applications302
All the following formulas are valid, and the first two have the same effect:
=DrawOne(A1:A100)=DrawOne(A1:A100,False)=DrawOne(A1:A100,True)
This function might be useful for choosing lottery numbers, picking a winner from a list of names, and so on.
This function is available on the companion CD-ROM. The filename is draw.xlsm.
A function that returns a VBA arrayVBA includes a useful function called Array. The Array function returns a variant that contains an array (that is, multiple values). If you’re familiar with array formulas in Excel, you have a head start on understanding VBA’s Array function. You enter an array formula into a cell by pressing Ctrl+Shift+Enter. Excel inserts curly braces around the formula to indicate that it’s an array formula.
See Chapter 3 for more details on array formulas.
It’s important to understand that the array returned by the Array function isn’t the same as a normal array that’s made up of elements of the Variant data type. In other words, a variant array isn’t the same as an array of variants.
The MonthNames function, which follows, is a simple example that uses VBA’s Array function in a custom function:
Function MonthNames() MonthNames = Array(“Jan”, “Feb”, “Mar”, “Apr”,”May”, “Jun”, _ “Jul”, “Aug”, “Sep”, “Oct”, “Nov”, “Dec”)End Function
The MonthNames function returns a horizontal array of month names. You can create a multicell array formula that uses the MonthNames function. Here’s how to use it: Make sure that the func-tion code is present in a VBA module. Then in a worksheet, select multiple cells in a row (start by selecting 12 cells). Then enter the formula that follows (without the braces) and press Ctrl+Shift+Enter:
{=MonthNames()}

Chapter 10: Creating Function Procedures 303
What if you’d like to generate a vertical list of month names? No problem; just select a vertical range, enter the following formula (without the braces), and then press Ctrl+Shift+Enter:
{=TRANSPOSE(MonthNames())}
This formula uses the Excel TRANSPOSE function to convert the horizontal array to a vertical array.
The following example is a variation on the MonthNames function:
Function MonthNames(Optional MIndex) Dim AllNames As Variant Dim MonthVal As Long AllNames = Array(“Jan”, “Feb”, “Mar”, “Apr”, _ “May”, “Jun”, “Jul”, “Aug”, “Sep”, “Oct”, _ “Nov”, “Dec”) If IsMissing(MIndex) Then MonthNames = AllNames Else Select Case MIndex Case Is >= 1‘ Determine month value (for example, 13=1) MonthVal = ((MIndex - 1) Mod 12) MonthNames = AllNames(MonthVal) Case Is <= 0 ‘ Vertical array MonthNames = Application.Transpose(AllNames) End Select End IfEnd Function
Notice that I use the VBA IsMissing function to test for a missing argument. In this situation, it isn’t possible to specify the default value for the missing argument in the argument list of the function because the default value is defined within the function. You can use the IsMissing function only if the optional argument is a variant.
This enhanced function uses an optional argument that works as follows:
If the argument is missing, the function returns a horizontal array of month names.
If the argument is less than or equal to 0, the function returns a vertical array of month names. It uses Excel’s TRANSPOSE function to convert the array.
If the argument is greater than or equal to 1, it returns the month name that corresponds to the argument value.

Part III: Understanding Visual Basic for Applications304
This procedure uses the Mod operator to determine the month value. The Mod operator returns the remainder after dividing the first operand by the second. Keep in mind that the AllNames array is zero-based and that indices range from 0 to 11. In the statement that uses the Mod operator, 1 is subtracted from the function’s argument. Therefore, an argument of 13 returns 0 (corresponding to Jan), and an argument of 24 returns 11 (corresponding to Dec).
You can use this function in a number of ways, as illustrated in Figure 10-6.
Range A1:L1 contains the following formula entered as an array. Start by selecting A1:L1, enter the formula (without the braces), and then press Ctrl+Shift+Enter.
{=MonthNames()}
Range A3:A14 contains integers from 1 to 12. Cell B3 contains the following (nonarray) formula, which was copied to the 11 cells below it:
=MonthNames(A3)
Range D3:D14 contains the following formula entered as an array:
{=MonthNames(-1)}
Figure 10-6: Different ways of passing an array or a single value to a worksheet.
Range F3 contains this (nonarray) formula:
=MonthNames(3)

Chapter 10: Creating Function Procedures 305
To enter an array formula, you must press Ctrl+Shift+Enter (and don’t enter the curly braces).
The lower bound of an array, created using the Array function, is determined by the lower bound specified with the Option Base statement at the top of the module. If there is no Option Base statement, the default lower bound is 0.
A workbook that demonstrates the MonthNames function is available on the companion CD-ROM. The file is named month names.xslm.
A function that returns an error valueIn some cases, you might want your custom function to return a particular error value. Consider the RemoveVowels function, which I presented earlier in this chapter:
Function RemoveVowels(Txt) As String‘ Removes all vowels from the Txt argument Dim i As Long RemoveVowels = “” For i = 1 To Len(Txt) If Not UCase(Mid(Txt, i, 1)) Like “[AEIOU]” Then RemoveVowels = RemoveVowels & Mid(Txt, i, 1) End If Next iEnd Function
When used in a worksheet formula, this function removes the vowels from its single-cell argu-ment. If the argument is a numeric value, this function returns the value as a string. You may prefer that the function returns an error value (#N/A), rather than the numeric value converted to a string.
You may be tempted simply to assign a string that looks like an Excel formula error value. For example:
RemoveVowels = “#N/A”
Although the string looks like an error value, other formulas that may reference it don’t treat it as such. To return a real error value from a function, use the VBA CVErr function, which converts an error number to a real error.

Part III: Understanding Visual Basic for Applications306
Fortunately, VBA has built-in constants for the errors that you want to return from a custom function. These errors are Excel formula error values and not VBA runtime error values. These constants are as follows:
xlErrDiv0 (for #DIV/0!)
xlErrNA (for #N/A)
xlErrName (for #NAME?)
xlErrNull (for #NULL!)
xlErrNum (for #NUM!)
xlErrRef (for #REF!)
xlErrValue (for #VALUE!)
To return a #N/A error from a custom function, you can use a statement like this:
RemoveVowels = CVErr(xlErrNA)
The revised RemoveVowels function follows. This function uses an If-Then construct to take a different action if the argument isn’t text. It uses Excel’s ISTEXT function to determine whether the argument is text. If the argument is text, the function proceeds normally. If the cell doesn’t contain text (or is empty), the function returns the #N/A error.
Function RemoveVowels(Txt) As Variant‘ Removes all vowels from the Txt argument‘ Returns #VALUE if Txt is not a string Dim i As Long RemoveVowels = “” If Application.WorksheetFunction.IsText(Txt) Then For i = 1 To Len(Txt) If Not UCase(Mid(Txt, i, 1)) Like “[AEIOU]” Then RemoveVowels = RemoveVowels & Mid(Txt, i, 1) End If Next i Else RemoveVowels = CVErr(xlErrNA) End IfEnd Function
Notice that I also changed the data type for the function’s return value. Because the function can now return something other than a string, I changed the data type to Variant.

Chapter 10: Creating Function Procedures 307
A function with an indefinite number of argumentsSome Excel worksheet functions take an indefinite number of arguments. A familiar example is the SUM function, which has the following syntax:
SUM(number1,number2...)
The first argument is required, but you can specify as many as 254 additional arguments. Here’s an example of a SUM function with four range arguments:
=SUM(A1:A5,C1:C5,E1:E5,G1:G5)
You can even mix and match the argument types. For example, the following example uses three arguments: the first is a range, the second is a value, and the third is an expression.
=SUM(A1:A5,12,24*3)
You can create Function procedures that have an indefinite number of arguments. The trick is to use an array as the last (or only) argument, preceded by the keyword ParamArray.
ParamArray can apply only to the last argument in the procedure’s argument list. It’s always a Variant data type, and it’s always an optional argument (although you don’t use the Optional keyword).
Following is a function that can have any number of single-value arguments. (It doesn’t work with multicell range arguments.) It simply returns the sum of the arguments.
Function SimpleSum(ParamArray arglist() As Variant) As Double For Each arg In arglist SimpleSum = SimpleSum + arg Next argEnd Function
To modify this function so that it works with multicell range arguments, you need to add another loop, which processes each cell in each of the arguments:
Function SimpleSum(ParamArray arglist() As Variant) As Double Dim cell As Range For Each arg In arglist For Each cell In arg SimpleSum = SimpleSum + cell Next cell Next argEnd Function

Part III: Understanding Visual Basic for Applications308
The SimpleSum function is similar to Excel’s SUM function, but it’s not nearly as flexible. Try it by using various types of arguments, and you’ll see that it fails if any of the cells contains a non-value, or if you use a literal value for an argument.
Emulating Excel’s SUM functionIn this section, I present a custom function called MySum. Unlike the SimpleSum function listed in the previous section, the MySum function emulates Excel’s SUM function (almost) perfectly.
Before you look at the code for MySum, take a minute to think about the Excel SUM function. It is, in fact, very versatile. It can have as many as 255 arguments (even “missing” arguments), and the arguments can be numerical values, cells, ranges, text representations of numbers, logical values, and even embedded functions. For example, consider the following formula:
=SUM(B1,5,”6”,,TRUE,SQRT(4),A1:A5,D:D,C2*C3)
This perfectly valid formula contains all the following types of arguments, listed here in the order of their presentation:
A single cell reference
A literal value
A string that looks like a value
A missing argument
A logical TRUE value
An expression that uses another function
A simple range reference
A range reference that includes an entire column
An expression that calculates the product of two cells
The MySum function (see Listing 10-1) handles all these argument types.
A workbook containing the MySum function is available on the companion CD-ROM. The file is named mysum function.xlsm.
Listing 10-1: MySum FunctionFunction MySum(ParamArray args() As Variant) As Variant‘ Emulates Excel’s SUM function ‘ Variable declarations

Chapter 10: Creating Function Procedures 309
Dim i As Variant Dim TempRange As Range, cell As Range Dim ECode As String Dim m, n MySum = 0‘ Process each argument For i = 0 To UBound(args)‘ Skip missing arguments If Not IsMissing(args(i)) Then‘ What type of argument is it? Select Case TypeName(args(i)) Case “Range”‘ Create temp range to handle full row or column ranges Set TempRange = Intersect(args(i).Parent.UsedRange, _ args(i)) For Each cell In TempRange If IsError(cell) Then MySum = cell ‘ return the error Exit Function End If If cell = True Or cell = False Then MySum = MySum + 0 Else If IsNumeric(cell) Or IsDate(cell) Then _ MySum = MySum + cell End If Next cell Case “Variant()” n = args(i) For m = LBound(n) To UBound(n) MySum = MySum(MySum, n(m)) ‘recursive call Next m Case “Null” ‘ignore it Case “Error” ‘return the error MySum = args(i) Exit Function Case “Boolean”‘ Check for literal TRUE and compensate If args(i) = “True” Then MySum = MySum + 1 Case “Date” MySum = MySum + args(i) Case Else MySum = MySum + args(i) End Select End If Next iEnd Function

Part III: Understanding Visual Basic for Applications310
Figure 10-7 shows a workbook with various formulas that use SUM and MySum. As you can see, the functions return identical results.
Figure 10-7: Comparing SUM with MySum.
If you’re interested in learning how this function works, create a formula that uses the function. Then, set a breakpoint in the code and step through the statements line by line. (See “Debugging Functions,” later in this chapter.) Try this for several different argument types, and you’ll soon have a good feel for how this function works. As you study the code for MySum, keep the follow-ing points in mind:
Missing arguments (determined by the IsMissing function) are simply ignored.
The procedure uses VBA’s TypeName function to determine the type of argument (Range, Error, and so on). Each argument type is handled differently.
For a range argument, the function loops through each cell in the range, determines the type of data in the cell, and (if appropriate) adds its value to a running total.
The data type for the function is Variant because the function needs to return an error if any of its arguments is an error value.
If an argument contains an error (for example, #DIV/0!), the MySum function simply returns the error — just as Excel’s SUM function does.
Excel’s SUM function considers a text string to have a value of 0 unless it appears as a lit-eral argument (that is, as an actual value, not a variable). Therefore, MySum adds the cell’s value only if it can be evaluated as a number. (VBA’s IsNumeric function is used to determine whether a string can be evaluated as a number.)
For range arguments, the function uses the Intersect method to create a temporary range that consists of the intersection of the range and the sheet’s used range. This tech-nique handles cases in which a range argument consists of a complete row or column, which would take forever to evaluate.
You may be curious about the relative speeds of SUM and MySum. MySum, of course, is much slower, but just how much slower depends on the speed of your system and the formulas them-selves. On my system, a worksheet with 5,000 SUM formulas recalculates instantly. After I replace the SUM functions with MySum functions, it takes about eight seconds. MySum may be improved a bit, but it can never come close to SUM’s speed.
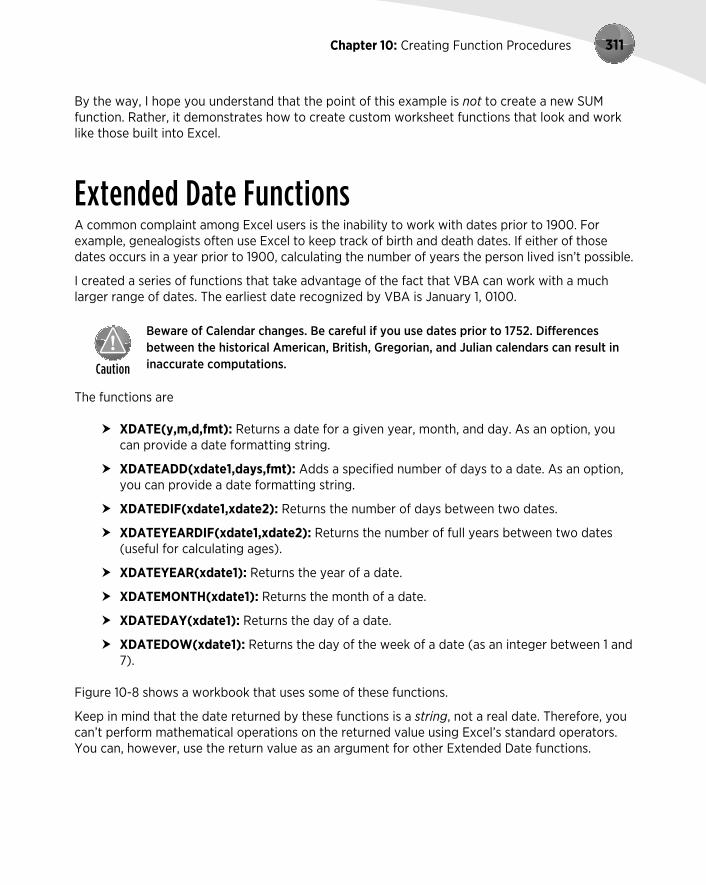
Chapter 10: Creating Function Procedures 311
By the way, I hope you understand that the point of this example is not to create a new SUM function. Rather, it demonstrates how to create custom worksheet functions that look and work like those built into Excel.
Extended Date FunctionsA common complaint among Excel users is the inability to work with dates prior to 1900. For example, genealogists often use Excel to keep track of birth and death dates. If either of those dates occurs in a year prior to 1900, calculating the number of years the person lived isn’t possible.
I created a series of functions that take advantage of the fact that VBA can work with a much larger range of dates. The earliest date recognized by VBA is January 1, 0100.
Beware of Calendar changes. Be careful if you use dates prior to 1752. Differences between the historical American, British, Gregorian, and Julian calendars can result in inaccurate computations.
The functions are
XDATE(y,m,d,fmt): Returns a date for a given year, month, and day. As an option, you can provide a date formatting string.
XDATEADD(xdate1,days,fmt): Adds a specified number of days to a date. As an option, you can provide a date formatting string.
XDATEDIF(xdate1,xdate2): Returns the number of days between two dates.
XDATEYEARDIF(xdate1,xdate2): Returns the number of full years between two dates (useful for calculating ages).
XDATEYEAR(xdate1): Returns the year of a date.
XDATEMONTH(xdate1): Returns the month of a date.
XDATEDAY(xdate1): Returns the day of a date.
XDATEDOW(xdate1): Returns the day of the week of a date (as an integer between 1 and 7).
Figure 10-8 shows a workbook that uses some of these functions.
Keep in mind that the date returned by these functions is a string, not a real date. Therefore, you can’t perform mathematical operations on the returned value using Excel’s standard operators. You can, however, use the return value as an argument for other Extended Date functions.

Part III: Understanding Visual Basic for Applications312
Figure 10-8: The Extended Date functions used in formulas.
The functions are surprisingly simple. For example, here’s the listing for the XDATE function:
Function XDATE(y, m, d, Optional fmt As String) As String If IsMissing(fmt) Then fmt = “Short Date” XDATE = Format(DateSerial(y, m, d), fmt)End Function
The arguments for XDATE are
y: A four-digit year in the range 0100 to 9999
m: A month number (1–12)
d: A day number (1–31)
fmt: (Optional) A date format string
If the fmt argument is omitted, the date is displayed using the system’s short date setting (as specified in the Windows Control Panel).

Chapter 10: Creating Function Procedures 313
If the m or d argument exceeds a valid number, it rolls over into the next year or month. For example, if you specify a month of 13, it’s interpreted as January of the next year.
The VBA code for the Extended Data functions is available on the companion CD-ROM. The filename is extended date function.xlsm. The CD also contains some docu-mentation for these functions in a Word document named extended date func-tions help.docx.
Debugging FunctionsWhen you’re using a formula in a worksheet to test a Function procedure, VBA runtime errors don’t appear in the all-too-familiar, pop-up error box. If an error occurs, the formula simply returns an error value (#VALUE!). Luckily, the lack of a pop-up error message doesn’t present a problem for debugging functions because you have several possible workarounds:
Place MsgBox functions at strategic locations to monitor the value of specific variables. Message boxes in Function procedures do pop up when the procedure is executed. But make sure that you have only one formula in the worksheet that uses your function, or message boxes will appear for each formula that is evaluated, which is a repetition that will quickly become annoying.
Test the procedure by calling it from a Sub procedure, not from a worksheet formula. Runtime errors are displayed in the usual manner, and you can either fix the problem (if you know it) or jump right into the Debugger.
Set a breakpoint in the function and then step through the function. You then can access all the standard VBA debugging tools. To set a breakpoint, move the cursor to the statement at which you want to pause execution and then choose Debug➜Toggle Breakpoint (or press F9). When the function is executing, press F8 to step through the procedure line-by-line.
Use one or more temporary Debug.Print statements in your code to write values to the VBE Immediate window. For example, if you want to monitor a value inside of a loop, use something like the following routine:
Function VowelCount(r) As Long Dim Count As Long Dim i As Long Dim Ch As String * 1 Count = 0 For i = 1 To Len(r) Ch = UCase(Mid(r, i, 1)) If Ch Like “[AEIOU]” Then Count = Count + 1 Debug.Print Ch, i End If

Part III: Understanding Visual Basic for Applications314
Next i VowelCount = CountEnd Function
In this case, the values of two variables, Ch and i, are printed to the Immediate window whenever the Debug.Print statement is encountered. Figure 10-9 shows the result when the function has an argument of Tucson Arizona.
Figure 10-9: Use the Immediate window to display results while a function is running.
Dealing with the Insert Function Dialog BoxExcel’s Insert Function dialog box is a handy tool. When you’re creating a worksheet formula, this tool lets you select a particular worksheet function from a list of functions. These functions are grouped into various categories to make locating a particular function easier. When you select a function and click OK, the Function Arguments dialog box appears to help insert the function’s arguments. Figure 10-10 shows both of these dialog boxes.
The Insert Function dialog box also displays your custom worksheet functions. By default, custom functions are listed under the User Defined category. The Function Arguments dialog box prompts you for a custom function’s arguments.

Chapter 10: Creating Function Procedures 315
Figure 10-10: The Insert Function dialog box makes it easy to enter a function into a formula, and the Function Arguments dialog box prompts for the arguments.
The Insert Function dialog box enables you to search for a function by keyword. Unfortunately, you can’t use this search feature to locate custom functions created in VBA.
Custom Function procedures defined with the Private keyword don’t appear in the Insert Function dialog box. If you develop a function that’s intended to be used only in your other VBA procedures, you should declare it by using the Private keyword. However, declaring the function as Private doesn’t prevent it from being used in a worksheet formula. It just prevents the function from displaying in the Insert Function dialog box.
Using the MacroOptions methodYou can use the MacroOptions method of the Application object to make your functions appear just like built-in functions. Specifically, this method enables you to:
Provide a description of the function
Specify a function category
Provide descriptions for the function arguments.

Part III: Understanding Visual Basic for Applications316
Following is an example of a procedure that uses the MacroOptions method to provide infor-mation about a function.
Sub DescribeFunction() Dim FuncName As String Dim FuncDesc As String Dim FuncCat As Long Dim Arg1Desc As String, Arg2Desc As String
FuncName = “DrawOne” FuncDesc = “Displays the contents of a random cell from a range” FuncCat = 5 ‘Lookup & Reference Arg1Desc = “The range that contains the values” Arg2Desc = “(Optional) If False or missing, a new cell is not “ Arg2Desc = Arg2Desc & “selected when recalculated. If True, a “ Arg2Desc = Arg2Desc & “new cell is selected when recalculated.”
Application.MacroOptions _ Macro:=FuncName, _ Description:=FuncDesc, _ Category:=FuncCat, _ ArgumentDescriptions:=Array(Arg1Desc, Arg2Desc) End Sub
This procedure uses variables to store the various information, and the variables are used as arguments for the MacroOptions method. The function is assigned to function category 5 (Lookup & Reference). Notice that descriptions for the two arguments are indicated by using an array as the last argument for the MacroOptions method.
The ability to provide argument descriptions is new to Excel 2010. If the workbook is opened in an early version of Excel, however, the arguments won’t display the descriptions.
Figure 10-11 shows the Insert Function and Function Arguments dialog boxes after executing this procedure.
You need to execute the DescribeFunction procedure only one time. After doing so, the information assigned to the function is stored in the workbook. You can also omit arguments. For example, if you don’t need the arguments to have descriptions, just omit the ArgumentDescriptions argument.
For information on creating a custom help topic accessible from the Insert Function dialog box, refer to Chapter 24.

Chapter 10: Creating Function Procedures 317
Figure 10-11: The Insert Function and Function Arguments dialog boxes for a custom function.
Specifying a function categoryIf you don’t use the MacroOptions method to specify a different category, your custom work-sheet functions appear in the User Defined category in the Insert Function dialog box. You may prefer to assign your function to a different category. Assigning a function to a category also causes it to appear in the drop-down controls in the Formulas➜Function Library group on the Ribbon.
Table 10-1 lists the category numbers that you can use for the Category argument for the MacroOptions method. Notice that a few of these categories (10 through 13) aren’t normally displayed in the Insert Function dialog box. If you assign your function to one of these categories, the category will appear in the dialog box.
Table 10-1: Function Categories
Category Number Category Name
0 All (no specific category)
1 Financial
2 Date & Time
3 Math & Trig
4 Statistical
5 Lookup & Reference
6 Database
7 Text
8 Logical
9 Information
continued

Part III: Understanding Visual Basic for Applications318
Table 10-1: Function CategoriesCategory Number Category Name
12 Macro Control
13 DDE/External
14 User Defined
15 Engineering
16 Cube
17 Compatibility**The Compatibility category is new to Excel 2010.
You can also create custom function categories. Instead of using a number for the Category argument for MacroOptions, use a text string. The statement that follows creates a new func-tion category named VBA Functions, and assigns the Commission function to this category:
Application.MacroOptions Macro:=”Commission”, Category:=”VBA Functions”
Adding a function description manuallyAs an alternative to using the MacroOptions method to provide a function description, you can use the Macro dialog box.
If you don’t provide a description for your custom function, the Insert Function dialog box displays the following text: No help available.
Follow these steps to provide a description for a custom function:
1. Create your function in the VBE.
2. Activate Excel, making sure that the workbook that contains the function is the active workbook.
3. Choose Developer➜Code➜Macros (or press Alt+F8).
The Macro dialog box lists available procedures, but your functions won’t be in the list.
4. Type the name of your function in the Macro Name box.
5. Click the Options button to display the Macro Options dialog box.
6. Enter the function description in the Description box (see Figure 10-12).
The Shortcut Key field is irrelevant for functions.

Chapter 10: Creating Function Procedures 319
Figure 10-12: Provide a function description in the Macro Options dialog box.
7. Click OK and then click Cancel.
After you perform the preceding steps, the Insert Function dialog box displays the description that you entered in Step 6 when the function is selected.
When you use the Insert Function dialog box to enter a function, the Function Arguments dialog box is displayed after you click OK. For built-in functions, the Function Arguments dialog box dis-plays a description for each of the function’s arguments. Unfortunately, you can’t provide such descriptions for custom function arguments.
Using Add-ins to Store Custom FunctionsYou may prefer to store frequently used custom functions in an add-in file. A primary advantage is that you can use those functions in any workbook.
In addition, you can use the functions in formulas without a filename qualifier. Assume that you have a custom function named ZapSpaces, and that it’s stored in Myfuncs.xlsm. To use this function in a formula in a workbook other than Myfuncs.xlsm, you need to enter the following formula:
=Myfuncs.xlsm!ZapSpaces(A1:C12)
If you create an add-in from Myfuncs.xlsm and the add-in is loaded, you can omit the file ref-erence and enter a formula such as the following:
=ZapSpaces(A1:C12)
I discuss add-ins in Chapter 21.

Part III: Understanding Visual Basic for Applications320
A potential problem with using add-ins to store custom functions is that your workbook is dependent on the add-in file. If you need to share your workbook with a colleague, you also need to share a copy of the add-in that contains the functions.
Using the Windows APIVBA can borrow methods from other files that have nothing to do with Excel or VBA — for exam-ple, the Dynamic Link Library (DLL) files that Windows and other software use. As a result, you can do things with VBA that would otherwise be outside the language’s scope.
The Windows Application Programming Interface (API) is a set of functions available to Windows programmers. When you call a Windows function from VBA, you’re accessing the Windows API. Many of the Windows resources used by Windows programmers are available in DLLs, which store programs and functions and are linked at runtime rather than at compile time.
64-bit Excel and API functionsExcel 2010 adds a new challenge to using Windows API functions in your code because Excel 2010 is also available in a 64-bit version. If you want your code to be compatible with the 32-bit versions (including Excel 2007) and 64-bit version of Excel 2010, you need
to declare your API functions twice, using compiler directives to ensure that the correct declara-tion is used.
For example, the following declaration works with 32-bit Excel versions, but causes a compile error with 64-bit Excel 2010:
Declare Function GetWindowsDirectoryA Lib “kernel32” _ (ByVal lpBuffer As String, ByVal nSize As Long) As Long
In many cases, making the declaration compatible with 64-bit Excel is as simple as adding the word PtrSafe after the Declare keyword. The following declaration is compatible with both 32-bit Excel 2010 and 64-bit Excel 2010:
Declare PtrSafe Function GetWindowsDirectoryA Lib “kernel32” _ (ByVal lpBuffer As String, ByVal nSize As Long) As Long
However, the code will fail in Excel 2007 (and earlier versions) because the PtrSafe keyword is not recognized.
In Chapter 26, I describe how to make API function declarations compatible with all versions of 32-bit Excel and 64-bit Excel 2010.

Chapter 10: Creating Function Procedures 321
Windows API examplesBefore you can use a Windows API function, you must declare the function at the top of your code module. If the code module is for a UserForm, Sheet, or ThisWorkbook, you must declare the API function as Private.
An API function must be declared precisely. The declaration statement tells VBA:
Which API function you’re using
In which library the API function is located
The API function’s arguments
After you declare an API function, you can use it in your VBA code.
Determining the Windows directoryThis section contains an example of an API function that displays the name of the Windows directory — something that’s not possible using standard VBA statements. This code won’t work with Excel 2007.
Here’s the API function declaration:
Declare PtrSafe Function GetWindowsDirectoryA Lib “kernel32” _ (ByVal lpBuffer As String, ByVal nSize As Long) As Long
This function, which has two arguments, returns the name of the directory in which Windows is installed. After calling the function, the Windows directory is contained in lpBuffer, and the length of the directory string is contained in nSize.
After inserting the Declare statement at the top of your module, you can access the function by calling the GetWindowsDirectoryA function. The following is an example of calling the function and displaying the result in a message box:
Sub ShowWindowsDir() Dim WinPath As String * 255 Dim WinDir As String WinPath = Space(255) WinDir = Left(WinPath, GetWindowsDirectoryA _ (WinPath, Len(WinPath))) MsgBox WinDir, vbInformation, “Windows Directory”End Sub
Executing the ShowWindowsDir procedure displays a message box with the Windows directory.

Part III: Understanding Visual Basic for Applications322
Often, you’ll want to create a wrapper for API functions. In other words, you create your own function that uses the API function. This greatly simplifies using the API function. Here’s an exam-ple of a wrapper VBA function:
Function WindowsDir() As String‘ Returns the Windows directory Dim WinPath As String * 255 WinPath = Space(255) WindowsDir = Left(WinPath, GetWindowsDirectoryA _ (WinPath, Len(WinPath)))End Function
After declaring this function, you can call it from another procedure:
MsgBox WindowsDir()
You can even use the function in a worksheet formula:
=WindowsDir()
This example is available on the companion CD-ROM. The filename is windows direc-tory.xlsm, and the API function declaration is compatible with Excel 2007 and later.
The reason for using API calls is to perform actions that would otherwise be impossible (or at least very difficult). If your application needs to find the path of the Windows directory, you could search all day and not find a function in Excel or VBA to do the trick. But knowing how to access the Windows API may solve your problem.
When you work with API calls, system crashes during testing aren’t uncommon, so save your work often.
Detecting the Shift keyHere’s another example: Suppose that you’ve written a VBA macro that will be executed by click-ing a button on a worksheet. Furthermore, suppose that you want the macro to perform differ-ently if the user presses the Shift key when the button is clicked. VBA doesn’t provide a way to detect whether the Shift key is pressed. But you can use the GetKeyState API function to find out. The GetKeyState function tells you whether a particular key is pressed. It takes a single argument, nVirtKey, which represents the code for the key that you’re interested in.
The following code demonstrates how to detect whether the Shift key is pressed when the Button_Click event handler procedure is executed. Notice that I define a constant for the
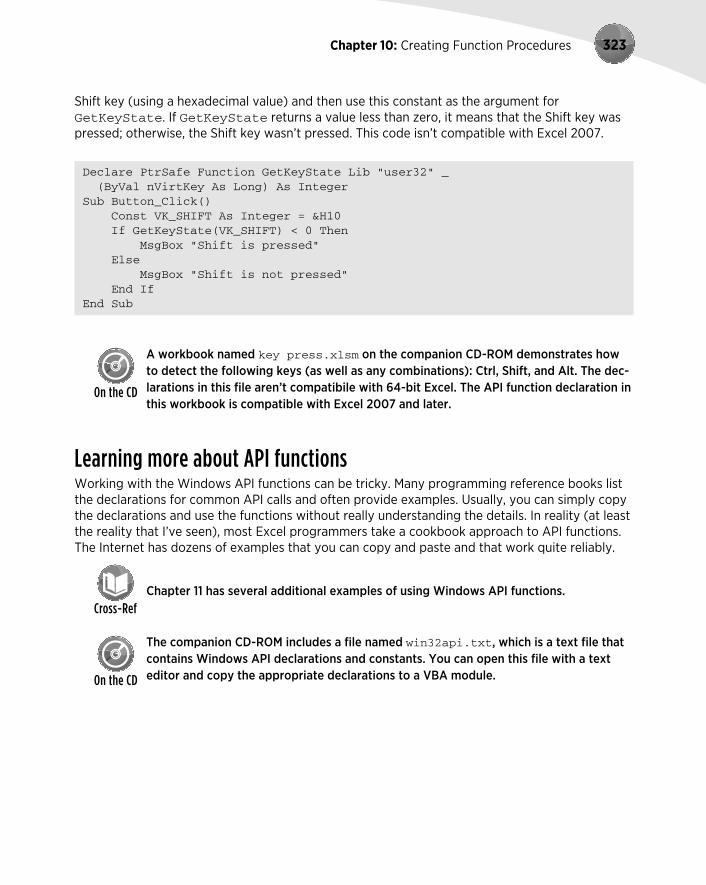
Chapter 10: Creating Function Procedures 323
Shift key (using a hexadecimal value) and then use this constant as the argument for GetKeyState. If GetKeyState returns a value less than zero, it means that the Shift key was pressed; otherwise, the Shift key wasn’t pressed. This code isn’t compatible with Excel 2007.
Declare PtrSafe Function GetKeyState Lib “user32” _ (ByVal nVirtKey As Long) As IntegerSub Button_Click() Const VK_SHIFT As Integer = &H10 If GetKeyState(VK_SHIFT) < 0 Then MsgBox “Shift is pressed” Else MsgBox “Shift is not pressed” End IfEnd Sub
A workbook named key press.xlsm on the companion CD-ROM demonstrates how to detect the following keys (as well as any combinations): Ctrl, Shift, and Alt. The dec-larations in this file aren’t compatibile with 64-bit Excel. The API function declaration in this workbook is compatible with Excel 2007 and later.
Learning more about API functionsWorking with the Windows API functions can be tricky. Many programming reference books list the declarations for common API calls and often provide examples. Usually, you can simply copy the declarations and use the functions without really understanding the details. In reality (at least the reality that I’ve seen), most Excel programmers take a cookbook approach to API functions. The Internet has dozens of examples that you can copy and paste and that work quite reliably.
Chapter 11 has several additional examples of using Windows API functions.
The companion CD-ROM includes a file named win32api.txt, which is a text file that contains Windows API declarations and constants. You can open this file with a text editor and copy the appropriate declarations to a VBA module.

Part III: Understanding Visual Basic for Applications324

325
11VBA Programming Examples and TechniquesIn This Chapter
● Using VBA to work with ranges
● Using VBA to work with workbooks and sheets
● Creating custom functions for use in your VBA procedures and in worksheet formulas
● Trying miscellaneous VBA tricks and techniques
● Using Windows Application Programming Interface (API) functions
Learning by ExampleI believe that learning programming concepts is accelerated by a heavy emphasis on examples. And based on the feedback that I’ve received from readers of previous editions of this book, I have plenty of company. VBA programmers especially benefit from a hands-on approach. A well-thought-out example usually communicates a concept much better than a description of the underlying theory. I decided, therefore, not to write a reference book that painstakingly describes every nuance of VBA. Rather, I prepared numerous examples to demonstrate useful Excel pro-gramming techniques.
The previous chapters in this part provide enough information to get you started. The Help sys-tem provides all the details that I left out. In this chapter, I pick up the pace and present examples that solve practical problems while furthering your knowledge of VBA.
I’ve categorized this chapter’s examples into six groups:
Working with ranges
Working with workbooks and sheets
VBA techniques

Part III: Understanding Visual Basic for Applications326
Functions that are useful in your VBA procedures
Functions that you can use in worksheet formulas
Windows API calls
Subsequent chapters in this book present additional feature-specific examples: charts, pivot tables, events, UserForms, and so on.
Working with RangesThe examples in this section demonstrate how to manipulate worksheet ranges with VBA.
Specifically, I provide examples of copying a range, moving a range, selecting a range, identifying types of information in a range, prompting for a cell value, determining the first empty cell in a column, pausing a macro to allow the user to select a range, counting cells in a range, looping through the cells in a range, and several other commonly used range-related operations.
Copying a rangeExcel’s macro recorder is useful not so much for generating usable code, but for discovering the names of relevant objects, methods, and properties. The code that’s generated by the macro recorder isn’t always the most efficient, but it can usually provide you with several clues.
For example, recording a simple copy-and-paste operation generates five lines of VBA code:
Sub Macro1() Range(“A1”).Select Selection.Copy Range(“B1”).Select ActiveSheet.Paste Application.CutCopyMode = FalseEnd Sub
Using the examples in this chapterNot all the examples in this chapter are intended to be stand-alone programs. They are, how-ever, set up as usable procedures that you can adapt for your own applications.
I urge you to follow along on your computer as you read this chapter. Better yet, modify the examples and see what happens. I guarantee that this hands-on experience will help you more than reading a reference book.

Chapter 11: VBA Programming Examples and Techniques 327
Notice that the generated code selects cell A1, copies it, and then selects cell B1 and performs the paste operation. But in VBA, you don’t need to select an object to work with it. You would never learn this important point by mimicking the preceding recorded macro code, where two state-ments incorporate the Select method. You can replace this procedure with the following much simpler routine, which doesn’t select any cells. It also takes advantage of the fact that the Copy method can use an argument that represents the destination for the copied range.
Sub CopyRange() Range(“A1”).Copy Range(“B1”)End Sub
Both of these macros assume that a worksheet is active and that the operation takes place on the active worksheet. To copy a range to a different worksheet or workbook, simply qualify the range reference for the destination. The following example copies a range from Sheet1 in File1.xlsx to Sheet2 in File2.xlsx. Because the references are fully qualified, this example works regardless of which workbook is active.
Sub CopyRange2() Workbooks(“File1.xlsx”).Sheets(“Sheet1”).Range(“A1”).Copy _ Workbooks(“File2.xlsx”).Sheets(“Sheet2”).Range(“A1”)End Sub
Another way to approach this task is to use object variables to represent the ranges, as shown in the code that follows:
Sub CopyRange3() Dim Rng1 As Range, Rng2 As Range Set Rng1 = Workbooks(“File1.xlsx”).Sheets(“Sheet1”).Range(“A1”) Set Rng2 = Workbooks(“File2.xlsx”).Sheets(“Sheet2”).Range(“A1”) Rng1.Copy Rng2End Sub
As you might expect, copying isn’t limited to one single cell at a time. The following procedure, for example, copies a large range. Notice that the destination consists of only a single cell (which represents the upper-left cell for the destination). Using a single cell for the destination works just like it does when you copy and paste a range manually in Excel.
Sub CopyRange4() Range(“A1:C800”).Copy Range(“D1”)End Sub

Part III: Understanding Visual Basic for Applications328
Moving a rangeThe VBA instructions for moving a range are very similar to those for copying a range, as the fol-lowing example demonstrates. The difference is that you use the Cut method instead of the Copy method. Note that you need to specify only the upper-left cell for the destination range.
The following example moves 18 cells (in A1:C6) to a new location, beginning at cell H1:
Sub MoveRange1() Range(“A1:C6”).Cut Range(“H1”)End Sub
Copying a variably sized rangeIn many cases, you need to copy a range of cells, but you don’t know the exact row and column dimensions of the range. For example, you might have a workbook that tracks weekly sales, and the number of rows changes weekly when you add new data.
Figure 11-1 shows a common type of worksheet. This range consists of several rows, and the num-ber of rows changes each week. Because you don’t know the exact range address at any given time, writing a macro to copy the range requires additional coding.
Figure 11-1: The number of rows in the data range changes every week.
The following macro demonstrates how to copy this range from Sheet1 to Sheet2 (beginning at cell A1). It uses the CurrentRegion property, which returns a Range object that corre-sponds to the block of cells around a particular cell (in this case, A1).
Sub CopyCurrentRegion2() Range(“A1”).CurrentRegion.Copy Sheets(“Sheet2”).Range(“A1”)End Sub

Chapter 11: VBA Programming Examples and Techniques 329
Using the CurrentRegion property is equivalent to choosing the Home➜Editing➜
Find & Select➜Go To Special command and selecting the Current Region option (or by using the Ctrl+Shift+* shortcut). To see how CurrentRegion selection works, record your actions while you issue that command. Generally, the CurrentRegion property setting consists of a rectangular block of cells surrounded by one or more blank rows or columns.
If the range to be copied is a table (specified using Insert➜Tables➜Table), you can use code like this (which assumes the table is named Table1):
Sub CopyTable() Range(“Table1[#All]”).Copy Sheets(“Sheet2”).Range(“A1”)End Sub
Tips for working with rangesWhen you work with ranges, keep the following points in mind:
● Your code doesn’t need to select a range in order to work with it.● You can’t select a range that’s not on the active worksheet. So if your code does select a
range, its worksheet must be active. You can use the Activate method of the Worksheets collection to activate a particular sheet.
● Remember that the macro recorder doesn’t always generate the most efficient code. Often, you can create your macro by using the recorder and then edit the code to make it more efficient.
● Using named ranges in your VBA code is a good idea. For example, referring to Range(“Total”) is better than Range(“D45”). In the latter case, if you add a row above row 45, the cell address will change. You would then need to modify the macro so that it uses the correct range address (D46).
● If you rely on the macro recorder when selecting ranges, make sure that you record the macro using relative references. Use the Developer➜Code➜Use Relative References con-trol to toggle this setting.
● When running a macro that works on each cell in the current range selection, the user might select entire columns or rows. In most cases, you don’t want to loop through every cell in the selection. Your macro should create a subset of the selection consisting of only the nonblank cells. See “Looping through a selected range efficiently,” later in this chapter.
● Excel allows multiple selections. For example, you can select a range, press Ctrl, and select another range. You can test for multiple selections in your macro and take appropriate action. See “Determining the type of selected range,” later in this chapter.
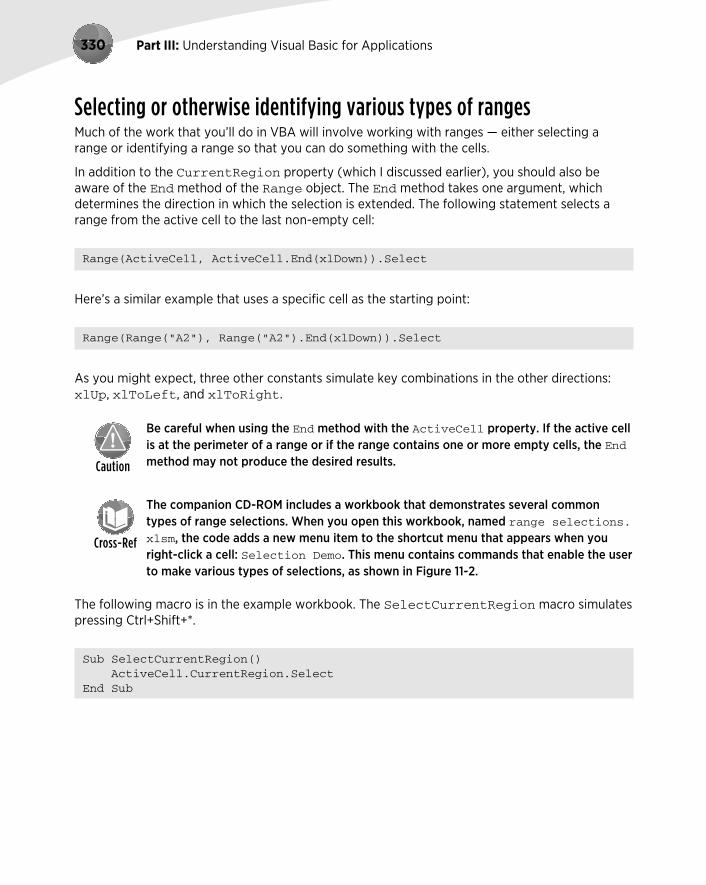
Part III: Understanding Visual Basic for Applications330
Selecting or otherwise identifying various types of rangesMuch of the work that you’ll do in VBA will involve working with ranges — either selecting a range or identifying a range so that you can do something with the cells.
In addition to the CurrentRegion property (which I discussed earlier), you should also be aware of the End method of the Range object. The End method takes one argument, which determines the direction in which the selection is extended. The following statement selects a range from the active cell to the last non-empty cell:
Range(ActiveCell, ActiveCell.End(xlDown)).Select
Here’s a similar example that uses a specific cell as the starting point:
Range(Range(“A2”), Range(“A2”).End(xlDown)).Select
As you might expect, three other constants simulate key combinations in the other directions: xlUp, xlToLeft, and xlToRight.
Be careful when using the End method with the ActiveCell property. If the active cell is at the perimeter of a range or if the range contains one or more empty cells, the End method may not produce the desired results.
The companion CD-ROM includes a workbook that demonstrates several common types of range selections. When you open this workbook, named range selections.xlsm, the code adds a new menu item to the shortcut menu that appears when you right-click a cell: Selection Demo. This menu contains commands that enable the user to make various types of selections, as shown in Figure 11-2.
The following macro is in the example workbook. The SelectCurrentRegion macro simulates pressing Ctrl+Shift+*.
Sub SelectCurrentRegion() ActiveCell.CurrentRegion.SelectEnd Sub

Chapter 11: VBA Programming Examples and Techniques 331
Figure 11-2: This workbook uses a custom shortcut menu to demonstrate how to select variably sized ranges by using VBA.
Often, you won’t want to actually select the cells. Rather, you’ll want to work with them in some way (for example, format them). You can easily adapt the cell-selecting procedures. The follow-ing procedure was adapted from SelectCurrentRegion. This procedure doesn’t select cells; it applies formatting to the range that’s defined as the current region around the active cell. You can also adapt the other procedures in the example workbook in this manner.
Sub FormatCurrentRegion() ActiveCell.CurrentRegion.Font.Bold = TrueEnd Sub
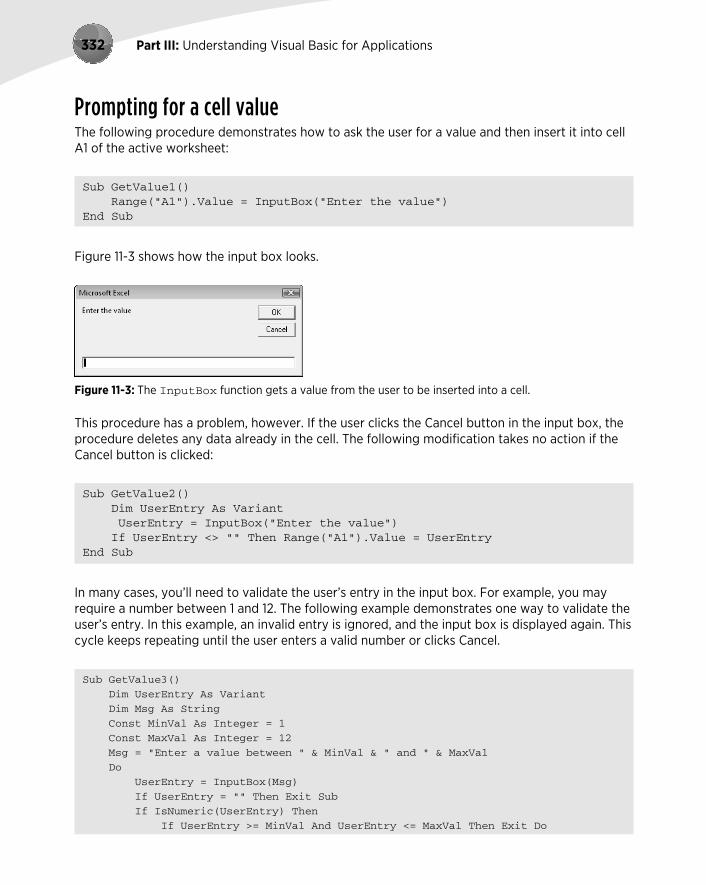
Part III: Understanding Visual Basic for Applications332
Prompting for a cell valueThe following procedure demonstrates how to ask the user for a value and then insert it into cell A1 of the active worksheet:
Sub GetValue1() Range(“A1”).Value = InputBox(“Enter the value”)End Sub
Figure 11-3 shows how the input box looks.
Figure 11-3: The InputBox function gets a value from the user to be inserted into a cell.
This procedure has a problem, however. If the user clicks the Cancel button in the input box, the procedure deletes any data already in the cell. The following modification takes no action if the Cancel button is clicked:
Sub GetValue2() Dim UserEntry As Variant UserEntry = InputBox(“Enter the value”) If UserEntry <> “” Then Range(“A1”).Value = UserEntryEnd Sub
In many cases, you’ll need to validate the user’s entry in the input box. For example, you may require a number between 1 and 12. The following example demonstrates one way to validate the user’s entry. In this example, an invalid entry is ignored, and the input box is displayed again. This cycle keeps repeating until the user enters a valid number or clicks Cancel.
Sub GetValue3()
Dim UserEntry As Variant
Dim Msg As String
Const MinVal As Integer = 1
Const MaxVal As Integer = 12
Msg = “Enter a value between “ & MinVal & “ and “ & MaxVal
Do
UserEntry = InputBox(Msg)
If UserEntry = “” Then Exit Sub
If IsNumeric(UserEntry) Then
If UserEntry >= MinVal And UserEntry <= MaxVal Then Exit Do

Chapter 11: VBA Programming Examples and Techniques 333
End If
Msg = “Your previous entry was INVALID.”
Msg = Msg & vbNewLine
Msg = Msg & “Enter a value between “ & MinVal & “ and “ & MaxVal
Loop
ActiveSheet.Range(“A1”).Value = UserEntry
End Sub
As you can see in Figure 11-4, the code also changes the message displayed if the user makes an invalid entry.
The three GetValue procedures are available on the companion CD-ROM. The filename is inputbox demo.xlsm.
Figure 11-4: Validate a user’s entry with the VBA InputBox function.
Entering a value in the next empty cellA common requirement is to enter a value into the next empty cell in a column or row. The fol-lowing example prompts the user for a name and a value and then enters the data into the next empty row (see Figure 11-5).
Figure 11-5: A macro for inserting data into the next empty row in a worksheet.

Part III: Understanding Visual Basic for Applications334
Sub GetData() Dim NextRow As Long Dim Entry1 As String, Entry2 As String Do ‘Determine next empty row NextRow = Cells(Rows.Count, 1).End(xlUp).Row + 1 ‘ Prompt for the data Entry1 = InputBox(“Enter the name”) If Entry1 = “” Then Exit Sub Entry2 = InputBox(“Enter the amount”) If Entry2 = “” Then Exit Sub ‘ Write the data Cells(NextRow, 1) = Entry1 Cells(NextRow, 2) = Entry2 LoopEnd Sub
To keep things simple, this procedure doesn’t perform any validation. Notice that the loop con-tinues indefinitely. I use Exit Sub statements to get out of the loop when the user clicks Cancel in the input box.
The GetData procedure is available on the companion CD-ROM. The filename is next empty cell.xlsm.
Notice the statement that determines the value of the NextRow variable. If you don’t understand how this statement works, try the manual equivalent: Activate the last cell in column A (cell A1048576 in an Excel 2010 workbook), press End, and then press the up-arrow key. At this point, the last nonblank cell in column A will be selected. The Row property returns this row number, and it’s incremented by 1 in order to get the row of the cell below it (the next empty row). Rather than hard-code the last cell in column A, I used Rows.Count so that this procedure will work with previous versions of Excel (which have fewer rows).
Note that this technique of selecting the next empty cell has a slight glitch. If the column is com-pletely empty, it will calculate row 2 as the next empty row. Writing additional code to account for this possibility would be fairly easy to do.
Pausing a macro to get a user-selected rangeIn some situations, you may need an interactive macro. For example, you can create a macro that pauses while the user specifies a range of cells. The procedure in this section describes how to do this with Excel’s InputBox method.
Don’t confuse Excel’s InputBox method with VBA’s InputBox function. Although these two items have the same name, they’re not the same.

Chapter 11: VBA Programming Examples and Techniques 335
The Sub procedure that follows demonstrates how to pause a macro and let the user select a range. The code then inserts a formula into each cell of the specified range.
Sub GetUserRange() Dim UserRange As Range Prompt = “Select a range for the random numbers.” Title = “Select a range”
‘ Display the Input Box On Error Resume Next Set UserRange = Application.InputBox( _ Prompt:=Prompt, _ Title:=Title, _ Default:=ActiveCell.Address, _ Type:=8) ‘Range selection On Error GoTo 0
‘ Was the Input Box canceled? If UserRange Is Nothing Then MsgBox “Canceled.” Else UserRange.Formula = “=RAND()” End IfEnd Sub
The input box is shown in Figure 11-6.
Figure 11-6: Use an input box to pause a macro.

Part III: Understanding Visual Basic for Applications336
This example, named prompt for a range.xlsm, is available on the companion CD-ROM.
Specifying a Type argument of 8 for the InputBox method is the key to this procedure. Also, note the use of On Error Resume Next. This statement ignores the error that occurs if the user clicks the Cancel button. If so, the UserRange object variable isn’t defined. This example displays a message box with the text Canceled. If the user clicks OK, the macro continues. Using On Error GoTo 0 resumes normal error handling.
By the way, you don’t need to check for a valid range selection. Excel takes care of this task for you.
Make sure that screen updating isn’t turned off when you use the InputBox method to select a range. Otherwise, you won’t be able to make a worksheet selection. Use the ScreenUpdating property of the Application object to control screen updating while a macro is running.
Counting selected cellsYou can create a macro that works with the range of cells selected by the user. Use the Count property of the Range object to determine how many cells are contained in a range selection (or any range, for that matter). For example, the following statement displays a message box that contains the number of cells in the current selection:
MsgBox Selection.Count
With the larger worksheet size in recent versions of Excel 2010, the Count property can generate an error. The Count property uses the Long data type, so the largest value that it can store is 2,147,483,647. For example, if the user selects 2,048 complete col-umns (2,147,483,648 cells), the Count property generates an error. Fortunately, Microsoft added a new property beginning with Excel 2007: CountLarge. CountLarge uses the Double data type, which can handle values up to 1.79+E^308.
Bottom line? In the vast majority of situations, the Count property will work fine. If there’s a chance that you may need to count more cells (such as all cells in a work-sheet), use CountLarge instead of Count.
If the active sheet contains a range named data, the following statement assigns the number of cells in the data range to a variable named CellCount:
CellCount = Range(“data”).Count

Chapter 11: VBA Programming Examples and Techniques 337
You can also determine how many rows or columns are contained in a range. The following expression calculates the number of columns in the currently selected range:
Selection.Columns.Count
And, of course, you can also use the Rows property to determine the number of rows in a range. The following statement counts the number of rows in a range named data and assigns the number to a variable named RowCount:
RowCount = Range(“data”).Rows.Count
Determining the type of selected rangeExcel supports several types of range selections:
A single cell
A contiguous range of cells
One or more entire columns
One or more entire rows
The entire worksheet
Any combination of the preceding (that is, a multiple selection)
As a result, when your VBA procedure processes a user-selected range, you can’t make any pre-sumptions about what that range might be. For example, the range selection might consist of two areas, say A1:A10 and C1:C10. (To make a multiple selection, press Ctrl while you select the ranges with your mouse.)
In the case of a multiple range selection, the Range object comprises separate areas. To deter-mine whether a selection is a multiple selection, use the Areas method, which returns an Areas collection. This collection represents all the ranges within a multiple range selection.
You can use an expression like the following to determine whether a selected range has multiple areas:
NumAreas = Selection.Areas.Count
If the NumAreas variable contains a value greater than 1, the selection is a multiple selection.

Part III: Understanding Visual Basic for Applications338
Following is a function named AreaType, which returns a text string that describes the type of range selection.
Function AreaType(RangeArea As Range) As String‘ Returns the type of a range in an area Select Case True Case RangeArea.Cells.CountLarge = 1 AreaType = “Cell” Case RangeArea.CountLarge = Cells.CountLarge AreaType = “Worksheet” Case RangeArea.Rows.Count = Cells.Rows.Count AreaType = “Column” Case RangeArea.Columns.Count = Cells.Columns.Count AreaType = “Row” Case Else AreaType = “Block” End SelectEnd Function
This function accepts a Range object as its argument and returns one of five strings that describe the area: Cell, Worksheet, Column, Row, or Block. The function uses a Select Case construct to determine which of five comparison expressions is True. For example, if the range consists of a single cell, the function returns Cell. If the number of cells in the range is equal to the number of cells in the worksheet, it returns Worksheet. If the number of rows in the range equals the number of rows in the worksheet, it returns Column. If the number of columns in the range equals the number of columns in the worksheet, the function returns Row. If none of the Case expressions is True, the function returns Block.
Notice that I used the CountLarge property when counting cells. As I noted previously in this chapter, the number of selected cells could potentially exceed the limit of the Count property.
This example is available on the companion CD-ROM in a file named about range selection.xlsm. The workbook contains a procedure (named RangeDescription) that uses the AreaType function to display a message box that describes the current range selection. Figure 11-7 shows an example. Understanding how this routine works will give you a good foundation for working with Range objects.
You might be surprised to discover that Excel allows multiple selections to be identical. For example, if you hold down Ctrl and click five times in cell A1, the selection will have five identical areas. The RangeDescription procedure takes this possibility into account, and doesn’t count the same cell multiple times.

Chapter 11: VBA Programming Examples and Techniques 339
Figure 11-7: A VBA procedure analyzes the currently selected range.
Looping through a selected range efficientlyA common task is to create a macro that evaluates each cell in a range and performs an opera-tion if the cell meets a certain criterion. The procedure that follows is an example of such a macro. The ColorNegative procedure sets the cell’s background color to red for cells that contain a negative value. For non-negative value cells, it sets the background color to none.
This example is for educational purposes only. Using Excel’s conditional formatting is a much better approach.
Sub ColorNegative()‘ Makes negative cells red Dim cell As Range If TypeName(Selection) <> “Range” Then Exit Sub Application.ScreenUpdating = False For Each cell In Selection If cell.Value < 0 Then cell.Interior.Color = RGB(255, 0, 0) Else cell.Interior.Color = xlNone End If Next cellEnd Sub
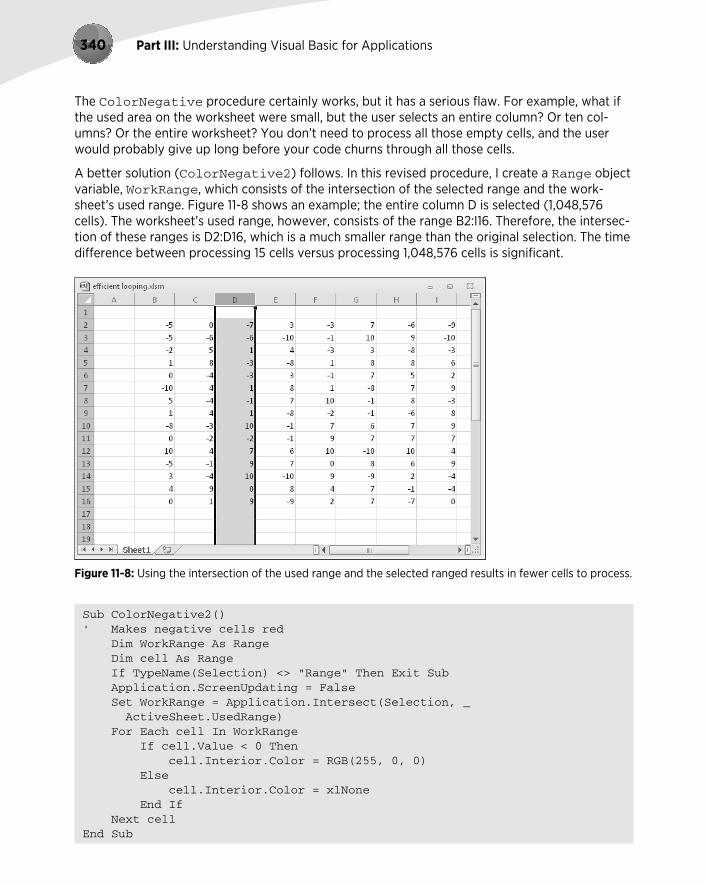
Part III: Understanding Visual Basic for Applications340
The ColorNegative procedure certainly works, but it has a serious flaw. For example, what if the used area on the worksheet were small, but the user selects an entire column? Or ten col-umns? Or the entire worksheet? You don’t need to process all those empty cells, and the user would probably give up long before your code churns through all those cells.
A better solution (ColorNegative2) follows. In this revised procedure, I create a Range object variable, WorkRange, which consists of the intersection of the selected range and the work-sheet’s used range. Figure 11-8 shows an example; the entire column D is selected (1,048,576 cells). The worksheet’s used range, however, consists of the range B2:I16. Therefore, the intersec-tion of these ranges is D2:D16, which is a much smaller range than the original selection. The time difference between processing 15 cells versus processing 1,048,576 cells is significant.
Figure 11-8: Using the intersection of the used range and the selected ranged results in fewer cells to process.
Sub ColorNegative2()‘ Makes negative cells red Dim WorkRange As Range Dim cell As Range If TypeName(Selection) <> “Range” Then Exit Sub Application.ScreenUpdating = False Set WorkRange = Application.Intersect(Selection, _ ActiveSheet.UsedRange) For Each cell In WorkRange If cell.Value < 0 Then cell.Interior.Color = RGB(255, 0, 0) Else cell.Interior.Color = xlNone End If Next cellEnd Sub
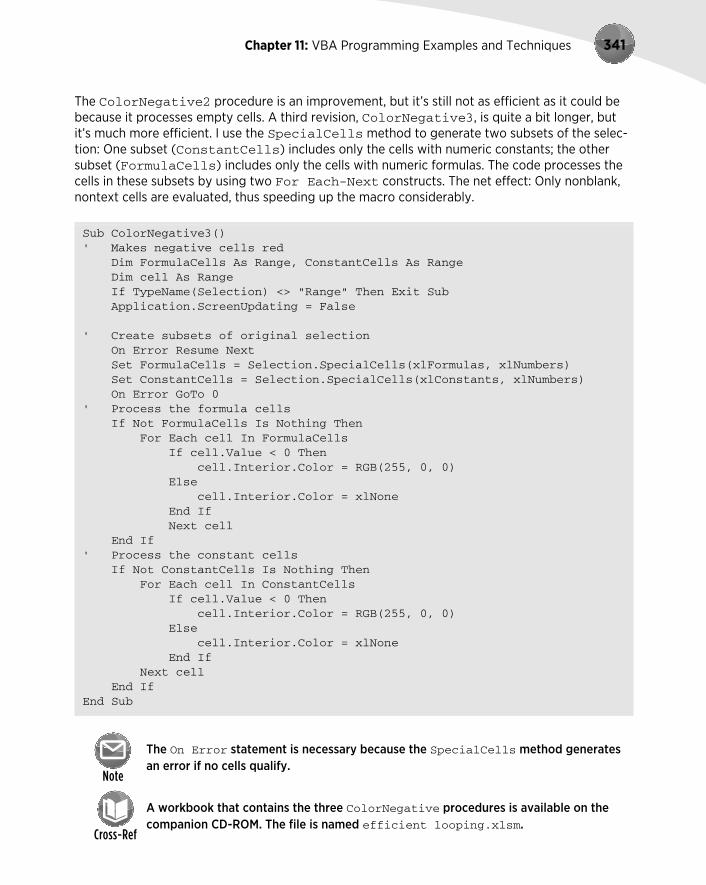
Chapter 11: VBA Programming Examples and Techniques 341
The ColorNegative2 procedure is an improvement, but it’s still not as efficient as it could be because it processes empty cells. A third revision, ColorNegative3, is quite a bit longer, but it’s much more efficient. I use the SpecialCells method to generate two subsets of the selec-tion: One subset (ConstantCells) includes only the cells with numeric constants; the other subset (FormulaCells) includes only the cells with numeric formulas. The code processes the cells in these subsets by using two For Each-Next constructs. The net effect: Only nonblank, nontext cells are evaluated, thus speeding up the macro considerably.
Sub ColorNegative3()‘ Makes negative cells red Dim FormulaCells As Range, ConstantCells As Range Dim cell As Range If TypeName(Selection) <> “Range” Then Exit Sub Application.ScreenUpdating = False ‘ Create subsets of original selection On Error Resume Next Set FormulaCells = Selection.SpecialCells(xlFormulas, xlNumbers) Set ConstantCells = Selection.SpecialCells(xlConstants, xlNumbers) On Error GoTo 0‘ Process the formula cells If Not FormulaCells Is Nothing Then For Each cell In FormulaCells If cell.Value < 0 Then cell.Interior.Color = RGB(255, 0, 0) Else cell.Interior.Color = xlNone End If Next cell End If‘ Process the constant cells If Not ConstantCells Is Nothing Then For Each cell In ConstantCells If cell.Value < 0 Then cell.Interior.Color = RGB(255, 0, 0) Else cell.Interior.Color = xlNone End If Next cell End IfEnd Sub
The On Error statement is necessary because the SpecialCells method generates an error if no cells qualify.
A workbook that contains the three ColorNegative procedures is available on the companion CD-ROM. The file is named efficient looping.xlsm.

Part III: Understanding Visual Basic for Applications342
Deleting all empty rowsThe following procedure deletes all empty rows in the active worksheet. This routine is fast and efficient because it doesn’t check all rows. It checks only the rows in the used range, which is determined by using the UsedRange property of the Worksheet object.
Sub DeleteEmptyRows()
Dim LastRow As Long
Dim r As Long
Dim Counter As Long
Application.ScreenUpdating = False
LastRow = ActiveSheet.UsedRange.Rows.Count + _
ActiveSheet.UsedRange.Rows(1).Row - 1
For r = LastRow To 1 Step -1
If Application.WorksheetFunction.CountA(Rows(r)) = 0 Then
Rows(r).Delete
Counter = Counter + 1
End If
Next r
Application.ScreenUpdating = True
MsgBox Counter & “ empty rows were deleted.”
End Sub
The first step is to determine the last used row and then assign this row number to the LastRow variable. This calculation isn’t as simple as you might think because the used range may or may not begin in row 1. Therefore, LastRow is calculated by determining the number of rows in the used range, adding the first row number in the used range, and subtracting 1.
The procedure uses Excel’s COUNTA worksheet function to determine whether a row is empty. If this function returns 0 for a particular row, the row is empty. Notice that the procedure works on the rows from bottom to top and also uses a negative step value in the For-Next loop. This negative step value is necessary because deleting rows causes all subsequent rows to move up in the worksheet. If the looping occurred from top to bottom, the counter within the loop wouldn’t be accurate after a row is deleted.
The macro uses another variable, Counter, to keep track of how many rows were deleted. This number is displayed in a message box when the procedure ends.
A workbook that contains this example is available on the companion CD-ROM in a file named delete empty rows.xlsm.
Duplicating rows a variable number of timesThe example in this section demonstrates how to use VBA to create duplicates of a row. Figure 11-9 shows a worksheet for an office raffle. Column A contains the name, and column B contains the number of tickets purchased by each person. Column C contains a random number (generated

Chapter 11: VBA Programming Examples and Techniques 343
by the RAND function). The winner will be determined by sorting the data based on column 3 (the highest random number wins).
Figure 11-9: The goal is to duplicate rows based on the value in column B.
The goal is to duplicate the rows so that each person will have a row for each ticket purchased. For example, Barbara purchased two tickets, so she should have two rows. The procedure to insert the new rows is shown here:
Sub DupeRows()
Dim cell As Range
‘ 1st cell with number of tickets
Set cell = Range(“B2”)
Do While Not IsEmpty(cell)
If cell > 1 Then
Range(cell.Offset(1, 0), cell.Offset(cell.Value - 1, _
0)).EntireRow.Insert
Range(cell, cell.Offset(cell.Value - 1, 1)).EntireRow.FillDown
End If
Set cell = cell.Offset(cell.Value, 0)
Loop
End Sub
The cell object variable is initialized to cell B2, the first cell that has a number. The loop inserts new rows and then copies the row using the FillDown method. The cell variable is incre-mented to the next person, and the loop continues until an empty cell is encountered. Figure 11-10 shows the worksheet after running this procedure.
A workbook that contains this example is available on the companion CD-ROM. The file is named duplicate rows.xlsm.
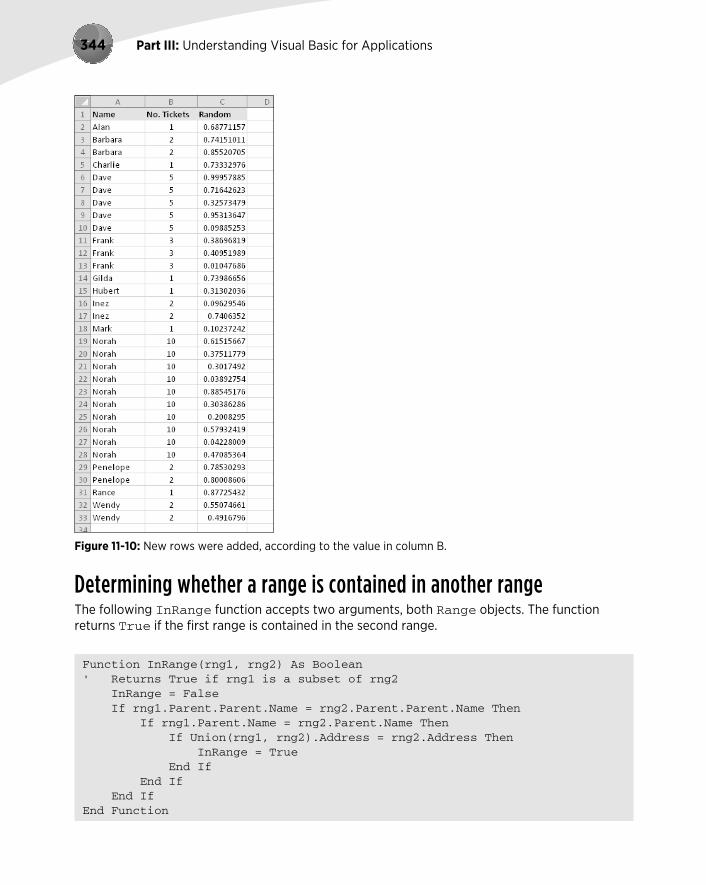
Part III: Understanding Visual Basic for Applications344
Figure 11-10: New rows were added, according to the value in column B.
Determining whether a range is contained in another rangeThe following InRange function accepts two arguments, both Range objects. The function returns True if the first range is contained in the second range.
Function InRange(rng1, rng2) As Boolean‘ Returns True if rng1 is a subset of rng2 InRange = False If rng1.Parent.Parent.Name = rng2.Parent.Parent.Name Then If rng1.Parent.Name = rng2.Parent.Name Then If Union(rng1, rng2).Address = rng2.Address Then InRange = True End If End If End IfEnd Function

Chapter 11: VBA Programming Examples and Techniques 345
The InRange function may appear a bit more complex than it needs to be because the code needs to ensure that the two ranges are in the same worksheet and workbook. Notice that the procedure uses the Parent property, which returns an object’s container object. For example, the following expression returns the name of the worksheet for the rng1 object reference:
rng1.Parent.Name
The following expression returns the name of the workbook for rng1:
rng1.Parent.Parent.Name
VBA’s Union function returns a Range object that represents the union of two Range objects. The union consists of all the cells from both ranges. If the address of the union of the two ranges is the same as the address of the second range, the first range is contained within the second range.
A workbook that contains this function is available on the companion CD-ROM in a file named inrange function.xlsm.
Determining a cell’s data typeExcel provides a number of built-in functions that can help determine the type of data contained in a cell. These include ISTEXT, ISLOGICAL, and ISERROR. In addition, VBA includes functions such as IsEmpty, IsDate, and IsNumeric.
The following function, named CellType, accepts a range argument and returns a string (Blank, Text, Logical, Error, Date, Time, or Number) that describes the data type of the upper-left cell in the range. You can use this function in a worksheet formula or from another VBA procedure.
Function CellType(Rng) As String‘ Returns the cell type of the upper left‘ cell in a range Dim TheCell As Range Set TheCell = Rng.Range(“A1”) Select Case True Case IsEmpty(TheCell) CellType = “Blank” Case Application.IsText(TheCell) CellType = “Text” Case Application.IsLogical(TheCell) CellType = “Logical” Case Application.IsErr(TheCell) CellType = “Error”

Part III: Understanding Visual Basic for Applications346
Case IsDate(TheCell) CellType = “Date” Case InStr(1, TheCell.Text, “:”) <> 0 CellType = “Time” Case IsNumeric(TheCell) CellType = “Number” End SelectEnd Function
Notice the use of the Set TheCell statement. The CellType function accepts a range argu-ment of any size, but this statement causes it to operate on only the upper-left cell in the range (which is represented by the TheCell variable).
A workbook that contains this function is available on the companion CD-ROM. The file is named celltype function.xlsm.
Reading and writing rangesMany VBA tasks involve transferring values either from an array to a range or from a range to an array. Excel reads from ranges much faster than it writes to ranges because the latter operation involves the calculation engine. The WriteReadRange procedure that follows demonstrates the relative speeds of writing and reading a range.
This procedure creates an array and then uses For-Next loops to write the array to a range and then read the range back into the array. It calculates the time required for each operation by using the Excel Timer function.
Sub WriteReadRange() Dim MyArray() Dim Time1 As Double Dim NumElements As Long, i As Long Dim WriteTime As String, ReadTime As String Dim Msg As String NumElements = 60000 ReDim MyArray(1 To NumElements)
‘ Fill the array For i = 1 To NumElements MyArray(i) = i Next i ‘ Write the array to a range Time1 = Timer For i = 1 To NumElements Cells(i, 1) = MyArray(i) Next i
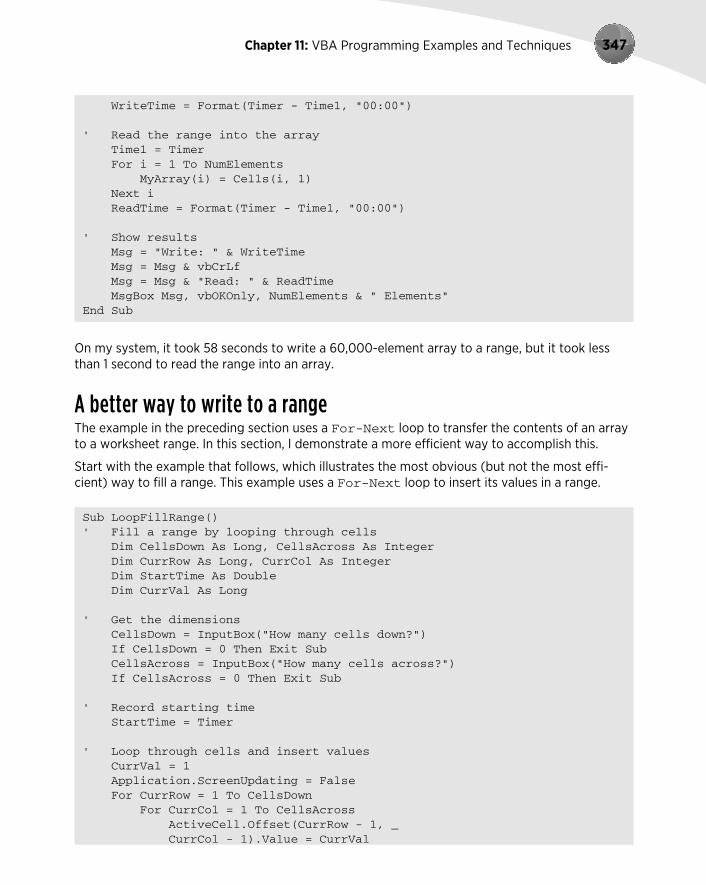
Chapter 11: VBA Programming Examples and Techniques 347
WriteTime = Format(Timer - Time1, “00:00”) ‘ Read the range into the array Time1 = Timer For i = 1 To NumElements MyArray(i) = Cells(i, 1) Next i ReadTime = Format(Timer - Time1, “00:00”) ‘ Show results Msg = “Write: “ & WriteTime Msg = Msg & vbCrLf Msg = Msg & “Read: “ & ReadTime MsgBox Msg, vbOKOnly, NumElements & “ Elements”End Sub
On my system, it took 58 seconds to write a 60,000-element array to a range, but it took less than 1 second to read the range into an array.
A better way to write to a rangeThe example in the preceding section uses a For-Next loop to transfer the contents of an array to a worksheet range. In this section, I demonstrate a more efficient way to accomplish this.
Start with the example that follows, which illustrates the most obvious (but not the most effi-cient) way to fill a range. This example uses a For-Next loop to insert its values in a range.
Sub LoopFillRange()‘ Fill a range by looping through cells Dim CellsDown As Long, CellsAcross As Integer Dim CurrRow As Long, CurrCol As Integer Dim StartTime As Double Dim CurrVal As Long
‘ Get the dimensions CellsDown = InputBox(“How many cells down?”) If CellsDown = 0 Then Exit Sub CellsAcross = InputBox(“How many cells across?”) If CellsAcross = 0 Then Exit Sub
‘ Record starting time StartTime = Timer
‘ Loop through cells and insert values CurrVal = 1 Application.ScreenUpdating = False For CurrRow = 1 To CellsDown For CurrCol = 1 To CellsAcross ActiveCell.Offset(CurrRow - 1, _ CurrCol - 1).Value = CurrVal

Part III: Understanding Visual Basic for Applications348
CurrVal = CurrVal + 1 Next CurrCol Next CurrRow
‘ Display elapsed time Application.ScreenUpdating = True MsgBox Format(Timer - StartTime, “00.00”) & “ seconds”End Sub
The example that follows demonstrates a much faster way to produce the same result. This code inserts the values into an array and then uses a single statement to transfer the contents of an array to the range.
Sub ArrayFillRange()‘ Fill a range by transferring an array Dim CellsDown As Long, CellsAcross As Integer Dim i As Long, j As Integer Dim StartTime As Double Dim TempArray() As Long Dim TheRange As Range Dim CurrVal As Long‘ Get the dimensions CellsDown = InputBox(“How many cells down?”) If CellsDown = 0 Then Exit Sub CellsAcross = InputBox(“How many cells across?”) If CellsAcross = 0 Then Exit Sub‘ Record starting time StartTime = Timer‘ Redimension temporary array ReDim TempArray(1 To CellsDown, 1 To CellsAcross)‘ Set worksheet range Set TheRange = ActiveCell.Range(Cells(1, 1), _ Cells(CellsDown, CellsAcross))‘ Fill the temporary array CurrVal = 0 Application.ScreenUpdating = False For i = 1 To CellsDown For j = 1 To CellsAcross TempArray(i, j) = CurrVal + 1 CurrVal = CurrVal + 1 Next j Next i‘ Transfer temporary array to worksheet TheRange.Value = TempArray‘ Display elapsed time Application.ScreenUpdating = True MsgBox Format(Timer - StartTime, “00.00”) & “ seconds”End Sub
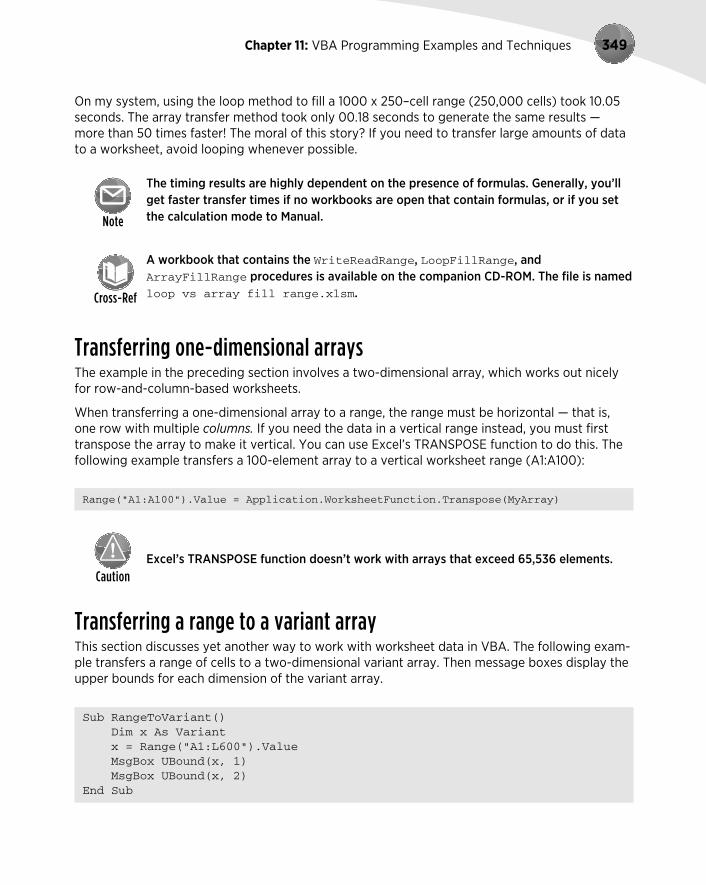
Chapter 11: VBA Programming Examples and Techniques 349
On my system, using the loop method to fill a 1000 x 250–cell range (250,000 cells) took 10.05 seconds. The array transfer method took only 00.18 seconds to generate the same results — more than 50 times faster! The moral of this story? If you need to transfer large amounts of data to a worksheet, avoid looping whenever possible.
The timing results are highly dependent on the presence of formulas. Generally, you’ll get faster transfer times if no workbooks are open that contain formulas, or if you set the calculation mode to Manual.
A workbook that contains the WriteReadRange, LoopFillRange, and ArrayFillRange procedures is available on the companion CD-ROM. The file is named loop vs array fill range.xlsm.
Transferring one-dimensional arraysThe example in the preceding section involves a two-dimensional array, which works out nicely for row-and-column-based worksheets.
When transferring a one-dimensional array to a range, the range must be horizontal — that is, one row with multiple columns. If you need the data in a vertical range instead, you must first transpose the array to make it vertical. You can use Excel’s TRANSPOSE function to do this. The following example transfers a 100-element array to a vertical worksheet range (A1:A100):
Range(“A1:A100”).Value = Application.WorksheetFunction.Transpose(MyArray)
Excel’s TRANSPOSE function doesn’t work with arrays that exceed 65,536 elements.
Transferring a range to a variant arrayThis section discusses yet another way to work with worksheet data in VBA. The following exam-ple transfers a range of cells to a two-dimensional variant array. Then message boxes display the upper bounds for each dimension of the variant array.
Sub RangeToVariant() Dim x As Variant x = Range(“A1:L600”).Value MsgBox UBound(x, 1) MsgBox UBound(x, 2)End Sub

Part III: Understanding Visual Basic for Applications350
In this example, the first message box displays 600 (the number of rows in the original range), and the second message box displays 12 (the number of columns). You’ll find that transferring the range data to a variant array is virtually instantaneous.
The following example reads a range (named data) into a variant array, performs a simple multi-plication operation on each element in the array, and then transfers the variant array back to the range:
Sub RangeToVariant2() Dim x As Variant Dim r As Long, c As Integer‘ Read the data into the variant x = Range(“data”).Value ‘ Loop through the variant array For r = 1 To UBound(x, 1) For c = 1 To UBound(x, 2)‘ Multiply by 2 x(r, c) = x(r, c) * 2 Next c Next r‘ Transfer the variant back to the sheet Range(“data”) = xEnd Sub
You’ll find that this procedure runs amazingly fast. Working with 30,000 cells took less than one second.
A workbook that contains this example is available on the companion CD-ROM. The file is named variant transfer.xlsm.
Selecting cells by valueThe example in this section demonstrates how to select cells based on their value. Oddly, Excel doesn’t provide a direct way to perform this operation. My SelectByValue procedure follows. In this example, the code selects cells that contain a negative value, but you can easily change the code to select cells based on other criteria.
Sub SelectByValue()
Dim Cell As Object
Dim FoundCells As Range
Dim WorkRange As Range
If TypeName(Selection) <> “Range” Then Exit Sub
‘ Check all or selection?
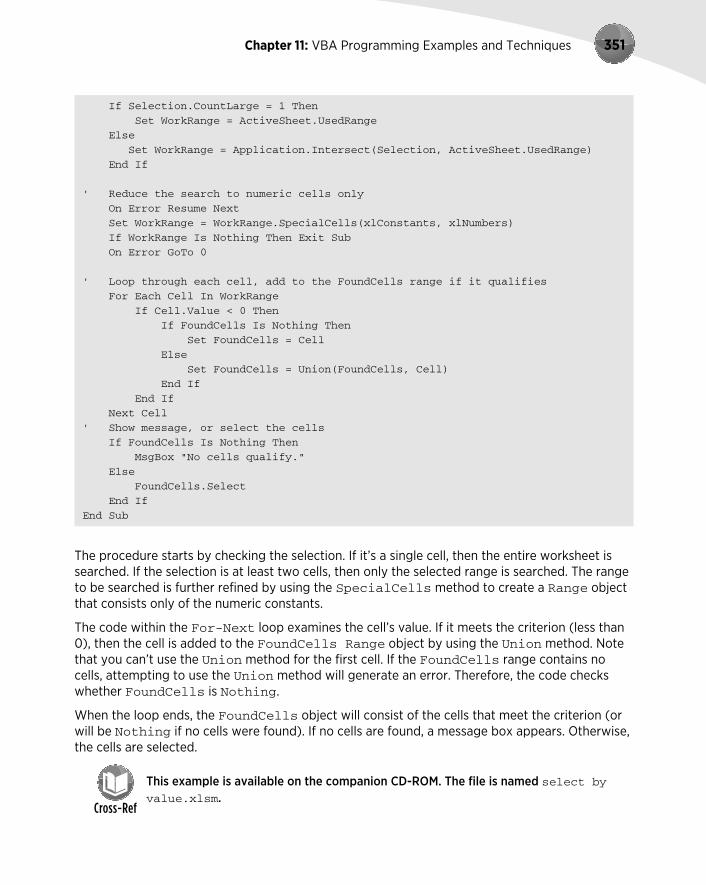
Chapter 11: VBA Programming Examples and Techniques 351
If Selection.CountLarge = 1 Then
Set WorkRange = ActiveSheet.UsedRange
Else
Set WorkRange = Application.Intersect(Selection, ActiveSheet.UsedRange)
End If
‘ Reduce the search to numeric cells only
On Error Resume Next
Set WorkRange = WorkRange.SpecialCells(xlConstants, xlNumbers)
If WorkRange Is Nothing Then Exit Sub
On Error GoTo 0
‘ Loop through each cell, add to the FoundCells range if it qualifies
For Each Cell In WorkRange
If Cell.Value < 0 Then
If FoundCells Is Nothing Then
Set FoundCells = Cell
Else
Set FoundCells = Union(FoundCells, Cell)
End If
End If
Next Cell
‘ Show message, or select the cells
If FoundCells Is Nothing Then
MsgBox “No cells qualify.”
Else
FoundCells.Select
End If
End Sub
The procedure starts by checking the selection. If it’s a single cell, then the entire worksheet is searched. If the selection is at least two cells, then only the selected range is searched. The range to be searched is further refined by using the SpecialCells method to create a Range object that consists only of the numeric constants.
The code within the For-Next loop examines the cell’s value. If it meets the criterion (less than 0), then the cell is added to the FoundCells Range object by using the Union method. Note that you can’t use the Union method for the first cell. If the FoundCells range contains no cells, attempting to use the Union method will generate an error. Therefore, the code checks whether FoundCells is Nothing.
When the loop ends, the FoundCells object will consist of the cells that meet the criterion (or will be Nothing if no cells were found). If no cells are found, a message box appears. Otherwise, the cells are selected.
This example is available on the companion CD-ROM. The file is named select by value.xlsm.
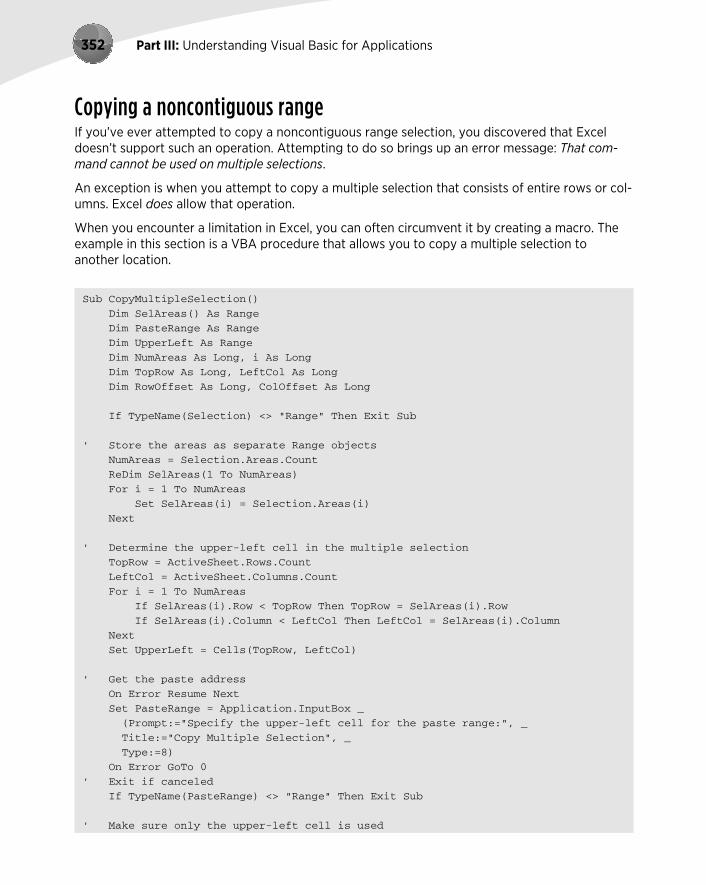
Part III: Understanding Visual Basic for Applications352
Copying a noncontiguous rangeIf you’ve ever attempted to copy a noncontiguous range selection, you discovered that Excel doesn’t support such an operation. Attempting to do so brings up an error message: That com-mand cannot be used on multiple selections.
An exception is when you attempt to copy a multiple selection that consists of entire rows or col-umns. Excel does allow that operation.
When you encounter a limitation in Excel, you can often circumvent it by creating a macro. The example in this section is a VBA procedure that allows you to copy a multiple selection to another location.
Sub CopyMultipleSelection()
Dim SelAreas() As Range
Dim PasteRange As Range
Dim UpperLeft As Range
Dim NumAreas As Long, i As Long
Dim TopRow As Long, LeftCol As Long
Dim RowOffset As Long, ColOffset As Long
If TypeName(Selection) <> “Range” Then Exit Sub
‘ Store the areas as separate Range objects
NumAreas = Selection.Areas.Count
ReDim SelAreas(1 To NumAreas)
For i = 1 To NumAreas
Set SelAreas(i) = Selection.Areas(i)
Next
‘ Determine the upper-left cell in the multiple selection
TopRow = ActiveSheet.Rows.Count
LeftCol = ActiveSheet.Columns.Count
For i = 1 To NumAreas
If SelAreas(i).Row < TopRow Then TopRow = SelAreas(i).Row
If SelAreas(i).Column < LeftCol Then LeftCol = SelAreas(i).Column
Next
Set UpperLeft = Cells(TopRow, LeftCol)
‘ Get the paste address
On Error Resume Next
Set PasteRange = Application.InputBox _
(Prompt:=”Specify the upper-left cell for the paste range:”, _
Title:=”Copy Multiple Selection”, _
Type:=8)
On Error GoTo 0
‘ Exit if canceled
If TypeName(PasteRange) <> “Range” Then Exit Sub
‘ Make sure only the upper-left cell is used

Chapter 11: VBA Programming Examples and Techniques 353
Set PasteRange = PasteRange.Range(“A1”)
‘ Copy and paste each area
For i = 1 To NumAreas
RowOffset = SelAreas(i).Row - TopRow
ColOffset = SelAreas(i).Column - LeftCol
SelAreas(i).Copy PasteRange.Offset(RowOffset, ColOffset)
Next i
End Sub
Figure 11-11 shows the prompt to select the destination location.
The companion CD-ROM contains a workbook with this example, plus another version that warns the user if data will be overwritten. The file is named copy multiple selection.xlsm.
Figure 11-11: Using Excel’s InputBox method to prompt for a cell location.
Working with Workbooks and SheetsThe examples in this section demonstrate various ways to use VBA to work with workbooks and worksheets.

Part III: Understanding Visual Basic for Applications354
Saving all workbooksThe following procedure loops through all workbooks in the Workbooks collection and saves each file that has been saved previously:
Public Sub SaveAllWorkbooks() Dim Book As Workbook For Each Book In Workbooks If Book.Path <> “” Then Book.Save Next BookEnd Sub
Notice the use of the Path property. If a workbook’s Path property is empty, the file has never been saved (it’s a newly created workbook). This procedure ignores such workbooks and saves only the workbooks that have a non-empty Path property.
Saving and closing all workbooksThe following procedure loops through the Workbooks collection. The code saves and closes all workbooks.
Sub CloseAllWorkbooks() Dim Book As Workbook For Each Book In Workbooks If Book.Name <> ThisWorkbook.Name Then Book.Close savechanges:=True End If Next Book ThisWorkbook.Close savechanges:=TrueEnd Sub
The procedure uses an If statement within the For-Next loop to determine whether the work-book is the workbook that contains the code. This statement is necessary because closing the workbook that contains the procedure would end the code, and subsequent workbooks wouldn’t be affected. After all the other workbooks are closed, the workbook that contains the code closes itself.
Hiding all but the selectionThe example in this section hides all rows and columns in a worksheet except those in the current range selection. Figure 11-12 shows an example.

Chapter 11: VBA Programming Examples and Techniques 355
Figure 11-12: All rows and columns are hidden, except for a range (G8:K17).
Sub HideRowsAndColumns()
Dim row1 As Long, row2 As Long
Dim col1 As Long, col2 As Long
If TypeName(Selection) <> “Range” Then Exit Sub
‘ If last row or last column is hidden, unhide all and quit
If Rows(Rows.Count).EntireRow.Hidden Or _
Columns(Columns.Count).EntireColumn.Hidden Then
Cells.EntireColumn.Hidden = False
Cells.EntireRow.Hidden = False
Exit Sub
End If
row1 = Selection.Rows(1).Row
row2 = row1 + Selection.Rows.Count - 1
col1 = Selection.Columns(1).Column
col2 = col1 + Selection.Columns.Count - 1
Application.ScreenUpdating = False
On Error Resume Next
‘ Hide rows
Range(Cells(1, 1), Cells(row1 - 1, 1)).EntireRow.Hidden = True
Range(Cells(row2 + 1, 1), Cells(Rows.Count, 1)).EntireRow.Hidden = True
‘ Hide columns
Range(Cells(1, 1), Cells(1, col1 - 1)).EntireColumn.Hidden = True
Range(Cells(1, col2 + 1), Cells(1, Columns.Count)).EntireColumn.Hidden = True
End Sub
If the range selection consists of a noncontiguous range, the first area is used as the basis for hiding rows and columns.
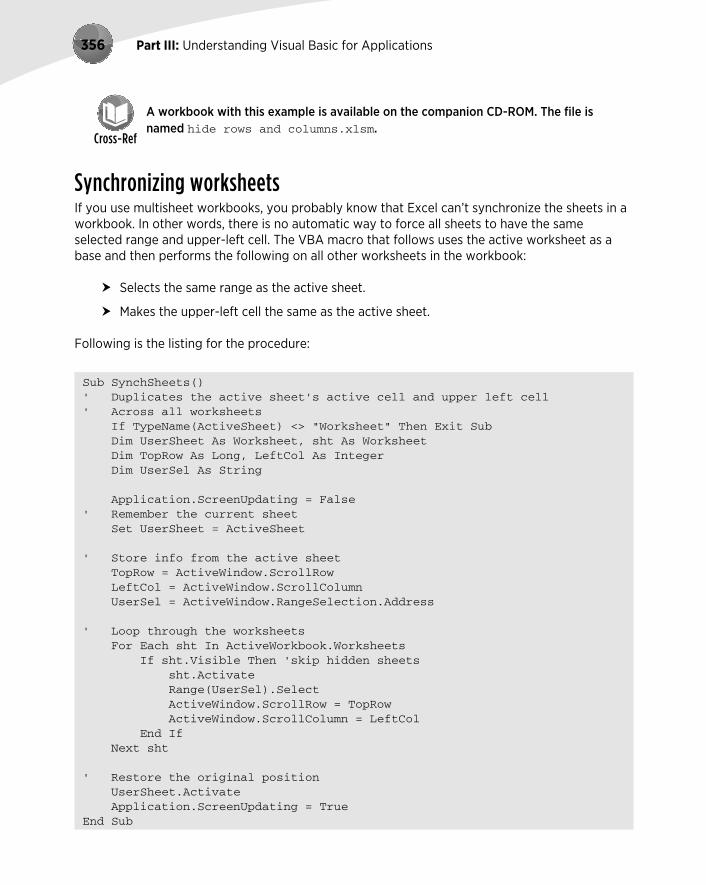
Part III: Understanding Visual Basic for Applications356
A workbook with this example is available on the companion CD-ROM. The file is named hide rows and columns.xlsm.
Synchronizing worksheetsIf you use multisheet workbooks, you probably know that Excel can’t synchronize the sheets in a workbook. In other words, there is no automatic way to force all sheets to have the same selected range and upper-left cell. The VBA macro that follows uses the active worksheet as a base and then performs the following on all other worksheets in the workbook:
Selects the same range as the active sheet.
Makes the upper-left cell the same as the active sheet.
Following is the listing for the procedure:
Sub SynchSheets()‘ Duplicates the active sheet’s active cell and upper left cell‘ Across all worksheets If TypeName(ActiveSheet) <> “Worksheet” Then Exit Sub Dim UserSheet As Worksheet, sht As Worksheet Dim TopRow As Long, LeftCol As Integer Dim UserSel As String Application.ScreenUpdating = False‘ Remember the current sheet Set UserSheet = ActiveSheet ‘ Store info from the active sheet TopRow = ActiveWindow.ScrollRow LeftCol = ActiveWindow.ScrollColumn UserSel = ActiveWindow.RangeSelection.Address ‘ Loop through the worksheets For Each sht In ActiveWorkbook.Worksheets If sht.Visible Then ‘skip hidden sheets sht.Activate Range(UserSel).Select ActiveWindow.ScrollRow = TopRow ActiveWindow.ScrollColumn = LeftCol End If Next sht ‘ Restore the original position UserSheet.Activate Application.ScreenUpdating = TrueEnd Sub

Chapter 11: VBA Programming Examples and Techniques 357
A workbook with this example is available on the companion CD-ROM in a file named synchronize sheets.xlsm.
VBA TechniquesThe examples in this section illustrate common VBA techniques that you might be able to adapt to your own projects.
Toggling a Boolean propertyA Boolean property is one that is either True or False. The easiest way to toggle a Boolean property is to use the Not operator, as shown in the following example, which toggles the WrapText property of a selection.
Sub ToggleWrapText()‘ Toggles text wrap alignment for selected cells If TypeName(Selection) = “Range” Then Selection.WrapText = Not ActiveCell.WrapText End IfEnd Sub
You can modify this procedure to toggle other Boolean properties.
Note that the active cell is used as the basis for toggling. When a range is selected and the prop-erty values in the cells are inconsistent (for example, some cells are bold, and others are not), it’s considered mixed, and Excel uses the active cell to determine how to toggle. If the active cell is bold, for example, all cells in the selection are made not bold when you click the Bold button. this simple procedure mimics the way Excel works, which is usually the best practice.
Note also that this procedure uses the TypeName function to check whether the selection is a range. If the selection isn’t a range, nothing happens.
You can use the Not operator to toggle many other properties. For example, to toggle the dis-play of row and column borders in a worksheet, use the following code:
ActiveWindow.DisplayHeadings = Not ActiveWindow.DisplayHeadings
To toggle the display of gridlines in the active worksheet, use the following code:
ActiveWindow.DisplayGridlines = Not ActiveWindow.DisplayGridlines
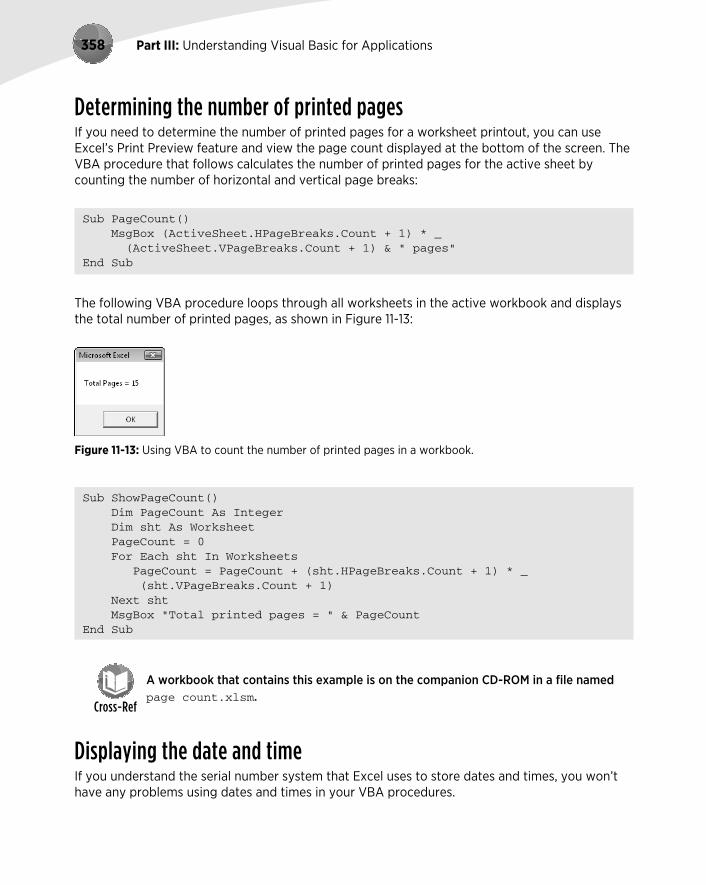
Part III: Understanding Visual Basic for Applications358
Determining the number of printed pagesIf you need to determine the number of printed pages for a worksheet printout, you can use Excel’s Print Preview feature and view the page count displayed at the bottom of the screen. The VBA procedure that follows calculates the number of printed pages for the active sheet by counting the number of horizontal and vertical page breaks:
Sub PageCount() MsgBox (ActiveSheet.HPageBreaks.Count + 1) * _ (ActiveSheet.VPageBreaks.Count + 1) & “ pages”End Sub
The following VBA procedure loops through all worksheets in the active workbook and displays the total number of printed pages, as shown in Figure 11-13:
Figure 11-13: Using VBA to count the number of printed pages in a workbook.
Sub ShowPageCount() Dim PageCount As Integer Dim sht As Worksheet PageCount = 0 For Each sht In Worksheets PageCount = PageCount + (sht.HPageBreaks.Count + 1) * _ (sht.VPageBreaks.Count + 1) Next sht MsgBox “Total printed pages = “ & PageCountEnd Sub
A workbook that contains this example is on the companion CD-ROM in a file named page count.xlsm.
Displaying the date and timeIf you understand the serial number system that Excel uses to store dates and times, you won’t have any problems using dates and times in your VBA procedures.

Chapter 11: VBA Programming Examples and Techniques 359
The DateAndTime procedure displays a message box with the current date and time, as depicted in Figure 11-14. This example also displays a personalized message in the message box title bar.
Figure 11-14: A message box displaying the date and time.
The procedure uses the Date function as an argument for the Format function. The result is a string with a nicely formatted date. I used the same technique to get a nicely formatted time.
Sub DateAndTime()
Dim TheDate As String, TheTime As String
Dim Greeting As String
Dim FullName As String, FirstName As String
Dim SpaceInName As Long
TheDate = Format(Date, “Long Date”)
TheTime = Format(Time, “Medium Time”)
‘ Determine greeting based on time
Select Case Time
Case Is < TimeValue(“12:00”): Greeting = “Good Morning, “
Case Is >= TimeValue(“17:00”): Greeting = “Good Evening, “
Case Else: Greeting = “Good Afternoon, “
End Select
‘ Append user’s first name to greeting
FullName = Application.UserName
SpaceInName = InStr(1, FullName, “ “, 1)
‘ Handle situation when name has no space
If SpaceInName = 0 Then SpaceInName = Len(FullName)
FirstName = Left(FullName, SpaceInName)
Greeting = Greeting & FirstName
‘ Show the message
MsgBox TheDate & vbCrLf & vbCrLf & “It’s “ & TheTime, vbOKOnly, Greeting
End Sub
In the preceding example, I used named formats (Long Date and Medium Time) to ensure that the macro will work properly regardless of the user’s international settings. You can, however, use other formats. For example, to display the date in mm/dd/yy format, you can use a statement like the following:
TheDate = Format(Date, “mm/dd/yy”)

Part III: Understanding Visual Basic for Applications360
I used a Select Case construct to base the greeting displayed in the message box’s title bar on the time of day. VBA time values work just as they do in Excel. If the time is less than .5 (noon), it’s morning. If it’s greater than .7083 (5 p.m.), it’s evening. Otherwise, it’s afternoon. I took the easy way out and used VBA’s TimeValue function, which returns a time value from a string.
The next series of statements determines the user’s first name, as recorded in the General tab in Excel’s Options dialog box. I used VBA’s InStr function to locate the first space in the user’s name. When I first wrote this procedure, I didn’t consider a username that has no space. So when I ran this procedure on a machine with a username of Nobody, the code failed — which goes to show you that I can’t think of everything, and even the simplest procedures can run aground. (By the way, if the user’s name is left blank, Excel always substitutes the name User.) The solution to this problem was to use the length of the full name for the SpaceInName variable so that the Left function extracts the full name.
The MsgBox function concatenates the date and time but uses the built-in vbCrLf constant to insert a line break between them. vbOKOnly is a predefined constant that returns 0, causing the message box to appear with only an OK button. The final argument is the Greeting, con-structed earlier in the procedure.
The DateAndTime procedure is available on the companion CD-ROM in a file named date and time.xlsm.
Getting a list of fontsIf you need to get a list of all installed fonts, you’ll find that Excel doesn’t provide a direct way to retrieve that information. The technique described here takes advantage of the fact that (for com-patibility purposes) Excel 2010 still supports the old CommandBar properties and methods. These properties and methods were used in pre-Excel 2007 versions to work with toolbars and menus.
The ShowInstalledFonts macro displays a list of the installed fonts in column A of the active worksheet. It creates a temporary toolbar (a CommandBar object), adds the Font control, and reads the font names from that control. The temporary toolbar is then deleted.
Sub ShowInstalledFonts() Dim FontList As CommandBarControl Dim TempBar As CommandBar Dim i As Long ‘ Create temporary CommandBar Set TempBar = Application.CommandBars.Add Set FontList = TempBar.Controls.Add(ID:=1728) ‘ Put the fonts into column A Range(“A:A”).ClearContents For i = 0 To FontList.ListCount - 1 Cells(i + 1, 1) = FontList.List(i + 1)

Chapter 11: VBA Programming Examples and Techniques 361
Next i ‘ Delete temporary CommandBar TempBar.DeleteEnd Sub
As an option, you can display each font name in the actual font (as shown in Figure 11-15). To do so, add this statement inside the For-Next loop:
Cells(i+1,1).Font.Name = FontList.List(i+1)
Be aware, however, that using many fonts in a workbook can eat up lots of system resources, and it could even crash your system.
This procedure is available on the companion CD-ROM. The file is named list fonts.xlsm.
Figure 11-15: Listing font names in the actual fonts.

Part III: Understanding Visual Basic for Applications362
Sorting an arrayAlthough Excel has a built-in command to sort worksheet ranges, VBA doesn’t offer a method to sort arrays. One viable (but cumbersome) workaround is to transfer your array to a worksheet range, sort it by using Excel’s commands, and then return the result to your array. But if speed is essential, it’s better to write a sorting routine in VBA.
In this section, I cover four different sorting techniques:
Worksheet sort transfers an array to a worksheet range, sorts it, and transfers it back to the array. This procedure accepts an array as its only argument.
Bubble sort is a simple sorting technique (also used in the Chapter 9 sheet-sorting exam-ple). Although easy to program, the bubble-sorting algorithm tends to be rather slow, especially when the number of elements is large.
Quick sort is a much faster sorting routine than bubble sort, but it is also more difficult to understand. This technique works only with Integer and Long data types.
Counting sort is lightning fast, but also difficult to understand. Like the quick sort, this technique works only with Integer and Long data types.
The companion CD-ROM includes a workbook application (named sorting demo.xlsm) that demonstrates these sorting methods. This workbook is useful for comparing the techniques with arrays of varying sizes. However, you can also copy the procedures and use them in your code.
Figure 11-16 shows the dialog box for this project. I tested the sorting procedures with seven dif-ferent array sizes, ranging from 100 to 100,000 elements. The arrays contained random numbers (of type Long).
Figure 11-16: Comparing the time required to perform sorts of various array sizes.
Table 11-1 shows the results of my tests. A 0.00 entry means that the sort was virtually instanta-neous (less than .01 second).

Chapter 11: VBA Programming Examples and Techniques 363
Table 11-1: Sorting Times (in Seconds) for Four Sort Algorithms Using Randomly Filled Arrays
Array Elements Excel Worksheet Sort VBA Bubble Sort VBA Quick Sort VBA Counting Sort
100 0.04 0.00 0.00 0.02
500 0.02 0.01 0.00 0.01
1,000 0.03 0.03 0.00 0.00
5,000 0.07 0.84 0.01 0.01
10,000 0.09 3.41 0.01 0.01
50,000 0.43 79.95 0.07 0.02
100,000 0.78 301.90 0.14 0.04
The worksheet sort algorithm is amazingly fast, especially when you consider that the values are transferred to the sheet, sorted, and then transferred back to the array.
The bubble sort algorithm is reasonably fast with small arrays, but for larger arrays (more than 10,000 elements), forget it. The quick sort and counting sort algorithms are blazingly fast, but they’re limited to Integer and Long data types.
Processing a series of filesOne common use for macros is to perform repetitive tasks. The example in this section demon-strates how to execute a macro on several different files stored on disk. This example — which may help you set up your own routine for this type of task — prompts the user for a file specifica-tion and then processes all matching files. In this case, processing consists of importing the file and entering a series of summary formulas that describe the data in the file.
Sub BatchProcess() Dim FileSpec As String Dim i As Integer Dim FileName As String Dim FileList() As String Dim FoundFiles As Integer‘ Specify path and file spec FileSpec = ThisWorkbook.Path & “\” & “text??.txt” FileName = Dir(FileSpec) ‘ Was a file found? If FileName <> “” Then FoundFiles = 1 ReDim Preserve FileList(1 To FoundFiles) FileList(FoundFiles) = FileName Else MsgBox “No files were found that match “ & FileSpec Exit Sub

Part III: Understanding Visual Basic for Applications364
End If ‘ Get other filenames Do FileName = Dir If FileName = “” Then Exit Do FoundFiles = FoundFiles + 1 ReDim Preserve FileList(1 To FoundFiles) FileList(FoundFiles) = FileName & “*” Loop‘ Loop through the files and process them For i = 1 To FoundFiles Call ProcessFiles(FileList(i)) Next iEnd Sub
This example, named batch processing.xlsm, is on the companion CD-ROM. It uses three additional files (also on the CD): text01.txt, text02.txt, and text03.txt. You’ll need to modify the routine to import other text files.
The matching filenames are stored in an array named FoundFiles, and the procedure uses a For-Next loop to process the files. Within the loop, the processing is done by calling the ProcessFiles procedure, which follows. This simple procedure uses the OpenText method to import the file and then inserts five formulas. You may, of course, substitute your own routine in place of this one:
Sub ProcessFiles(FileName As String)‘ Import the file Workbooks.OpenText FileName:=FileName, _ Origin:=xlWindows, _ StartRow:=1, _ DataType:=xlFixedWidth, _ FieldInfo:= _ Array(Array(0, 1), Array(3, 1), Array(12, 1))‘ Enter summary formulas Range(“D1”).Value = “A” Range(“D2”).Value = “B” Range(“D3”).Value = “C” Range(“E1:E3”).Formula = “=COUNTIF(B:B,D1)” Range(“F1:F3”).Formula = “=SUMIF(B:B,D1,C:C)”End Sub
For more information about working with files using VBA, refer to Chapter 27.

Chapter 11: VBA Programming Examples and Techniques 365
Some Useful Functions for Use in Your CodeIn this section, I present some custom utility functions that you may find useful in your own appli-cations and that may provide inspiration for creating similar functions. These functions are most useful when called from another VBA procedure. Therefore, they’re declared by using the Private keyword and thus won’t appear in Excel’s Insert Function dialog box.
The examples in this section are available on the companion CD-ROM. The file is named VBA utility functions.xlsm.
The FileExists functionThis function takes one argument (a path with filename) and returns True if the file exists:
Private Function FileExists(fname) As Boolean‘ Returns TRUE if the file exists FileExists = (Dir(fname) <> “”)End Function
The FileNameOnly functionThis function accepts one argument (a path with filename) and returns only the filename. In other words, it strips out the path.
Private Function FileNameOnly(pname) As String‘ Returns the filename from a path/filename string Dim temp As Variant length = Len(pname) temp = Split(pname, Application.PathSeparator) FileNameOnly = temp(UBound(temp))End Function
The function uses the VBA Split function, which accepts a string (that includes delimiter char-acters), and returns a variant array that contains the elements between the delimiter characters. In this case the temp variable contains an array that consists of each text string between the Application.PathSeparater (usually a backslash character). For another example of the Split function, see “Extracting the nth element from a string,” later in this chapter.
If the argument is c:\excel files\2010\backup\budget.xlsx, the function returns the string budget.xlsx.

Part III: Understanding Visual Basic for Applications366
The FileNameOnly function works with any path and filename (even if the file does not exist). If the file exists, the following function is a simpler way to strip off the path and return only the filename:
Private Function FileNameOnly2(pname) As String FileNameOnly2 = Dir(pname)End Function
The PathExists functionThis function accepts one argument (a path) and returns True if the path exists:
Private Function PathExists(pname) As Boolean‘ Returns TRUE if the path exists If Dir(pname, vbDirectory) = “” Then PathExists = False Else PathExists = (GetAttr(pname) And vbDirectory) = vbDirectory End IfEnd Function
The RangeNameExists functionThis function accepts a single argument (a range name) and returns True if the range name exists in the active workbook:
Private Function RangeNameExists(nname) As Boolean‘ Returns TRUE if the range name exists Dim n As Name RangeNameExists = False For Each n In ActiveWorkbook.Names If UCase(n.Name) = UCase(nname) Then RangeNameExists = True Exit Function End If Next nEnd Function

Chapter 11: VBA Programming Examples and Techniques 367
Another way to write this function follows. This version attempts to create an object variable using the name. If doing so generates an error, then the name doesn’t exist.
Private Function RangeNameExists2(nname) As Boolean‘ Returns TRUE if the range name exists Dim n As Range On Error Resume Next Set n = Range(nname) If Err.Number = 0 Then RangeNameExists2 = True _ Else RangeNameExists2 = FalseEnd Function
Testing for membership in a collectionThe following function procedure is a generic function that you can use to determine whether an object is a member of a collection:
Private Function IsInCollection(Coln As Object, _ Item As String) As Boolean Dim Obj As Object On Error Resume Next Set Obj = Coln(Item) IsInCollection = Not Obj Is NothingEnd Function
This function accepts two arguments: the collection (an object) and the item (a string) that might or might not be a member of the collection. The function attempts to create an object variable that represents the item in the collection. If the attempt is successful, the function returns True; otherwise, it returns False.
You can use the IsInCollection function in place of three other functions listed in this chap-ter: RangeNameExists, SheetExists, and WorkbookIsOpen. To determine whether a range named Data exists in the active workbook, call the IsInCollection function with this statement:
MsgBox IsInCollection(ActiveWorkbook.Names, “Data”)
To determine whether a workbook named Budget is open, use this statement:
MsgBox IsInCollection(Workbooks, “budget.xlsx”)
To determine whether the active workbook contains a sheet named Sheet1, use this statement:
MsgBox IsInCollection(ActiveWorkbook.Worksheets, “Sheet1”)

Part III: Understanding Visual Basic for Applications368
The SheetExists functionThis function accepts one argument (a worksheet name) and returns True if the worksheet exists in the active workbook:
Private Function SheetExists(sname) As Boolean‘ Returns TRUE if sheet exists in the active workbook Dim x As Object On Error Resume Next Set x = ActiveWorkbook.Sheets(sname) If Err.Number = 0 Then SheetExists = True _ Else SheetExists = FalseEnd Function
The WorkbookIsOpen functionThis function accepts one argument (a workbook name) and returns True if the workbook is open:
Private Function WorkbookIsOpen(wbname) As Boolean‘ Returns TRUE if the workbook is open Dim x As Workbook On Error Resume Next Set x = Workbooks(wbname) If Err.Number = 0 Then WorkbookIsOpen = True _ Else WorkbookIsOpen = FalseEnd Function
Retrieving a value from a closed workbookVBA doesn’t include a method to retrieve a value from a closed workbook file. You can, however, take advantage of Excel’s ability to work with linked files. This section contains a custom VBA function (GetValue, which follows) that retrieves a value from a closed workbook. It does so by calling an XLM macro, which is an old-style macro used in versions prior to Excel 5. Fortunately, Excel still supports this old macro system.
Private Function GetValue(path, file, sheet, ref)‘ Retrieves a value from a closed workbook Dim arg As String‘ Make sure the file exists If Right(path, 1) <> “\” Then path = path & “\” If Dir(path & file) = “” Then GetValue = “File Not Found” Exit Function End If
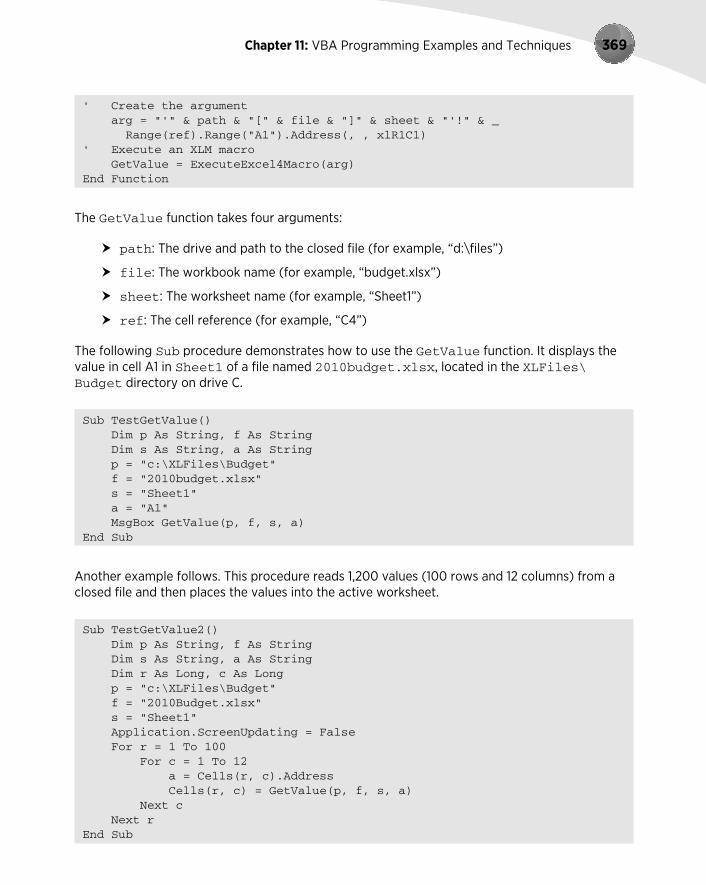
Chapter 11: VBA Programming Examples and Techniques 369
‘ Create the argument arg = “’” & path & “[“ & file & “]” & sheet & “’!” & _ Range(ref).Range(“A1”).Address(, , xlR1C1)‘ Execute an XLM macro GetValue = ExecuteExcel4Macro(arg)End Function
The GetValue function takes four arguments:
path: The drive and path to the closed file (for example, “d:\files”)
file: The workbook name (for example, “budget.xlsx”)
sheet: The worksheet name (for example, “Sheet1”)
ref: The cell reference (for example, “C4”)
The following Sub procedure demonstrates how to use the GetValue function. It displays the value in cell A1 in Sheet1 of a file named 2010budget.xlsx, located in the XLFiles\Budget directory on drive C.
Sub TestGetValue() Dim p As String, f As String Dim s As String, a As String p = “c:\XLFiles\Budget” f = “2010budget.xlsx” s = “Sheet1” a = “A1” MsgBox GetValue(p, f, s, a)End Sub
Another example follows. This procedure reads 1,200 values (100 rows and 12 columns) from a closed file and then places the values into the active worksheet.
Sub TestGetValue2() Dim p As String, f As String Dim s As String, a As String Dim r As Long, c As Long p = “c:\XLFiles\Budget” f = “2010Budget.xlsx” s = “Sheet1” Application.ScreenUpdating = False For r = 1 To 100 For c = 1 To 12 a = Cells(r, c).Address Cells(r, c) = GetValue(p, f, s, a) Next c Next rEnd Sub

Part III: Understanding Visual Basic for Applications370
The GetValue function doesn’t work if used in a worksheet formula. Actually, there is no need to use this function in a formula. You can simply create a link formula to retrieve a value from a closed file.
This example is available on the companion CD-ROM. The file is named value from a closed workbook.xlsm. The example uses a file named myworkbook.xlsx for the closed file.
Some Useful Worksheet FunctionsThe examples in this section are custom functions that you can use in worksheet formulas. Remember, you must define these Function procedures in a VBA module (not a code module associated with ThisWorkbook, a Sheet, or a UserForm).
The examples in this section are available on the companion CD-ROM in a file named worksheet functions.xlsm.
Returning cell formatting informationThis section contains a number of custom functions that return information about a cell’s format-ting. These functions are useful if you need to sort data based on formatting (for example, sort in such a way that all bold cells are together).
You’ll find that these functions aren’t always updated automatically. This is because changing formatting, for example, doesn’t trigger Excel’s recalculation engine. To force a global recalculation (and update all the custom functions), press Ctrl+Alt+F9.
Alternatively, you can add the following statement to your function:
Application.Volatile
When this statement is present, then pressing F9 will recalculate the function.
The following function returns TRUE if its single-cell argument has bold formatting. If a range is passed as the argument, the function uses the upper-left cell of the range.
Function IsBold(cell) As Boolean‘ Returns TRUE if cell is bold IsBold = cell.Range(“A1”).Font.BoldEnd Function

Chapter 11: VBA Programming Examples and Techniques 371
Note that this function works only with explicitly applied formatting. It doesn’t work for format-ting applied using conditional formatting. Excel 2010 introduced a new object, DisplayFormat. This object takes conditional formatting into account. Here’s the IsBold function rewritten so that it also works with bold formatting applied as a result of conditional formatting:
Function IsBold(cell) As Boolean‘ Returns TRUE if cell is bold, even if from conditional formatting IsBold = cell.Range(“A1”).DisplayFormat.Font.BoldEnd Function
The following function returns TRUE if its single-cell argument has italic formatting:
Function IsItalic(cell) As Boolean‘ Returns TRUE if cell is italic IsItalic = cell.Range(“A1”).Font.ItalicEnd Function
Both of the preceding functions will return an error if the cell has mixed formatting — for exam-ple, if only some characters are bold. The following function returns TRUE only if all characters in the cell are bold:
Function AllBold(cell) As Boolean‘ Returns TRUE if all characters in cell are bold If IsNull(cell.Font.Bold) Then AllBold = False Else AllBold = cell.Font.Bold End IfEnd Function
You can simplify the AllBold function as follows:
Function AllBold (cell) As Boolean‘ Returns TRUE if all characters in cell are bold AllBold = Not IsNull(cell.Font.Bold)End Function
The FillColor function returns an integer that corresponds to the color index of the cell’s inte-rior. The actual color depends on the workbook theme that’s applied. If the cell’s interior isn’t filled, the function returns –4142.
This function doesn’t work with fill colors applied in tables (created with Insert➜Tables➜Table) or pivot tables. You need to use the DisplayFormat object to detect that type of fill color, as I described previously.
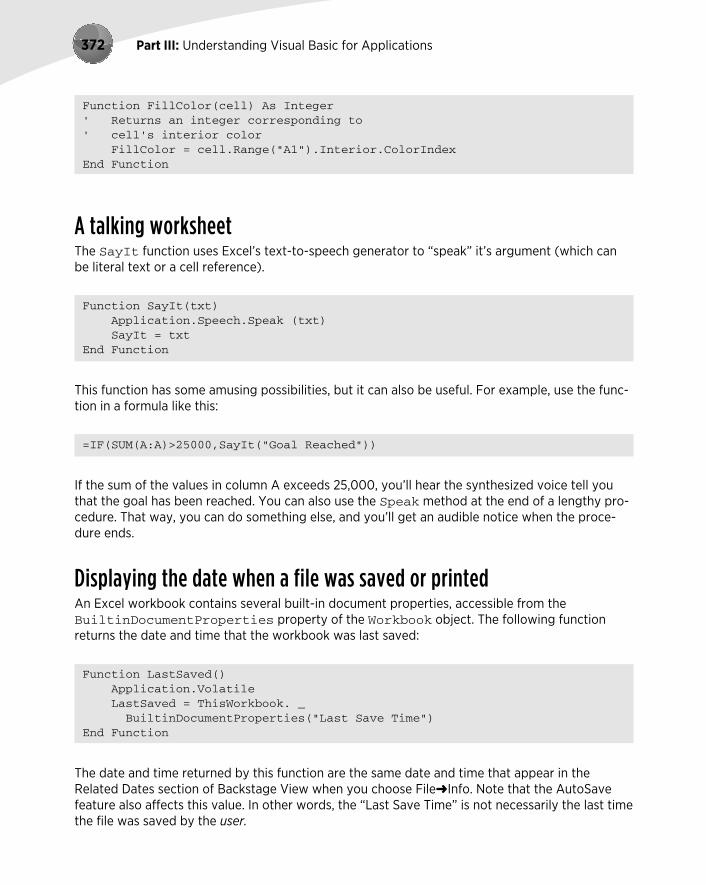
Part III: Understanding Visual Basic for Applications372
Function FillColor(cell) As Integer‘ Returns an integer corresponding to‘ cell’s interior color FillColor = cell.Range(“A1”).Interior.ColorIndexEnd Function
A talking worksheetThe SayIt function uses Excel’s text-to-speech generator to “speak” it’s argument (which can be literal text or a cell reference).
Function SayIt(txt) Application.Speech.Speak (txt) SayIt = txtEnd Function
This function has some amusing possibilities, but it can also be useful. For example, use the func-tion in a formula like this:
=IF(SUM(A:A)>25000,SayIt(“Goal Reached”))
If the sum of the values in column A exceeds 25,000, you’ll hear the synthesized voice tell you that the goal has been reached. You can also use the Speak method at the end of a lengthy pro-cedure. That way, you can do something else, and you’ll get an audible notice when the proce-dure ends.
Displaying the date when a file was saved or printedAn Excel workbook contains several built-in document properties, accessible from the BuiltinDocumentProperties property of the Workbook object. The following function returns the date and time that the workbook was last saved:
Function LastSaved() Application.Volatile LastSaved = ThisWorkbook. _ BuiltinDocumentProperties(“Last Save Time”)End Function
The date and time returned by this function are the same date and time that appear in the Related Dates section of Backstage View when you choose File➜Info. Note that the AutoSave feature also affects this value. In other words, the “Last Save Time” is not necessarily the last time the file was saved by the user.

Chapter 11: VBA Programming Examples and Techniques 373
The following function is similar to LastSaved, but it returns the date and time when the work-book was last printed or previewed. If the workbook has never been printed or previewed, the function returns a #VALUE error.
Function LastPrinted() Application.Volatile LastPrinted = ThisWorkbook. _ BuiltinDocumentProperties(“Last Print Date”)End Function
If you use these functions in a formula, you might need to force a recalculation (by pressing F9) to get the current values of these properties.
Quite a few additional built-in properties are available, but Excel doesn’t use all of them. For example, attempting to access the Number of Bytes property will generate an error. For a list of all built-in properties, consult the Help system.
The preceding LastSaved and LastPrinted functions are designed to be stored in the work-book in which they’re used. In some cases, you may want to store the function in a different workbook (for example, personal.xlsb) or in an add-in. Because these functions reference ThisWorkbook, they won’t work correctly. Following are more general-purpose versions of these functions. These functions use Application.Caller, which returns a Range object that represents the cell that calls the function. The use of Parent.Parent returns the workbook (that is, the parent of the parent of the Range object — a Workbook object). This topic is explained further in the next section.
Function LastSaved2() Application.Volatile LastSaved2 = Application.Caller.Parent.Parent. _ BuiltinDocumentProperties(“Last Save Time”)End Function
Understanding object parentsAs you know, Excel’s object model is a hierarchy: Objects are contained in other objects. At the top of the hierarchy is the Application object. Excel contains other objects, and these objects contain other objects, and so on. The following hierarchy depicts how a Range object fits into this scheme:
Application object
Workbook object
Worksheet object
Range object

Part III: Understanding Visual Basic for Applications374
In the lingo of object-oriented programming, a Range object’s parent is the Worksheet object that contains it. A Worksheet object’s parent is the Workbook object that contains the work-sheet, and a Workbook object’s parent is the Application object.
How can you put this information to use? Examine the SheetName VBA function that follows. This function accepts a single argument (a range) and returns the name of the worksheet that contains the range. It uses the Parent property of the Range object. The Parent property returns an object: the object that contains the Range object.
Function SheetName(ref) As String SheetName = ref.Parent.NameEnd Function
The next function, WorkbookName, returns the name of the workbook for a particular cell. Notice that it uses the Parent property twice. the first Parent property returns a Worksheet object, and the second Parent property returns a Workbook object.
Function WorkbookName(ref) As String WorkbookName = ref.Parent.Parent.NameEnd Function
The AppName function that follows carries this exercise to the next logical level, accessing the Parent property three times (the parent of the parent of the parent). This function returns the name of the Application object for a particular cell. It will, of course, always return Microsoft Excel.
Function AppName(ref) As String AppName = ref.Parent.Parent.Parent.NameEnd Function
Counting cells between two valuesThe following function, named CountBetween, returns the number of values in a range (first argument) that fall between values represented by the second and third arguments:
Function CountBetween(InRange, num1, num2) As Long‘ Counts number of values between num1 and num2 With Application.WorksheetFunction If num1 <= num2 Then CountBetween = .CountIfs(InRange, “>=” & num1, _ InRange, “<=” & num2) Else CountBetween = .CountIfs(InRange, “>=” & num2, _

Chapter 11: VBA Programming Examples and Techniques 375
InRange, “<=” & num1) End If End WithEnd Function
Note that this function uses Excel’s COUNTIFS function. In fact, the CountBetween function is essentially a wrapper that can simplify your formulas.
COUNTIFS was introduced in Excel 2007. Therefore, this function won’t work with pre-vious versions of Excel.
Following is an example formula that uses the CountBetween function. The formula returns the number of cells in A1:A100 that are greater than or equal to 10 and less than or equal to 20.
=CountBetween(A1:A100,10,20)
The function accepts the two numeric argument in either order. So, this formula is equivalent to the previous formula:
=CountBetween(A1:A100,20,10)
Using this VBA function is simpler than entering the following (somewhat confusing) formula:
=COUNTIFS(A1:A100,”>=10”,A1:A100,”<=20”)
Determining the last non-empty cell in a column or rowIn this section, I present two useful functions: LastInColumn returns the contents of the last non-empty cell in a column; LastInRow returns the contents of the last non-empty cell in a row. Each function accepts a range as its single argument. The range argument can be a complete col-umn (for LastInColumn) or a complete row (for LastInRow). If the supplied argument isn’t a complete column or row, the function uses the column or row of the upper-left cell in the range. For example, the following formula returns the last value in column B:
=LastInColumn(B5)
The following formula returns the last value in row 7:
=LastInRow(C7:D9)

Part III: Understanding Visual Basic for Applications376
The LastInColumn function follows:
Function LastInColumn(rng As Range)‘ Returns the contents of the last non-empty cell in a column Dim LastCell As Range Application.Volatile With rng.Parent With .Cells(.Rows.Count, rng.Column) If Not IsEmpty(.Value) Then LastInColumn = .Value ElseIf IsEmpty(.End(xlUp)) Then LastInColumn = “” Else LastInColumn = .End(xlUp).Value End If End With End WithEnd Function
This function is rather complicated, so here are a few points that may help you understand it:
Application.Volatile causes the function to be executed whenever the sheet is calculated.
Rows.Count returns the number of rows in the worksheet. I used the Count property, rather than hard-coding the value, because not all worksheets have the same number of rows.
rng.Column returns the column number of the upper-left cell in the rng argument.
Using rng.Parent causes the function to work properly even if the rng argument refers to a different sheet or workbook.
The End method (with the xlUp argument) is equivalent to activating the last cell in a column, pressing End, and then pressing the up-arrow key.
The IsEmpty function checks whether the cell is empty. If so, it returns an empty string. Without this statement, an empty cell would be returned as 0.
The LastInRow function follows. This function is very similar to the LastInColumn function.
Function LastInRow(rng As Range)‘ Returns the contents of the last non-empty cell in a row Application.Volatile With rng.Parent With .Cells(rng.Row, .Columns.Count) If Not IsEmpty(.Value) Then LastInRow = .Value ElseIf IsEmpty(.End(xlToLeft)) Then

Chapter 11: VBA Programming Examples and Techniques 377
LastInRow = “” Else LastInRow = .End(xlToLeft).Value End If End With End WithEnd Function
Does a string match a pattern?The IsLike function is very simple (but also very useful). This function returns TRUE if a text string matches a specified pattern.
This function, which follows, is remarkably simple. As you can see, the function is essentially a wrapper that lets you take advantage of VBA’s powerful Like operator in your formulas.
Function IsLike(text As String, pattern As String) As Boolean‘ Returns true if the first argument is like the second IsLike = text Like patternEnd Function
This IsLike function takes two arguments:
text: A text string or a reference to a cell that contains a text string
pattern: A string that contains wildcard characters according to the following list:
Character(s) in Pattern Matches in Text
? Any single character
* Zero or more characters
# Any single digit (0–9)
[charlist] Any single character in charlist
[!charlist] Any single character not in charlist
The following formula returns TRUE because * matches any number of characters. It returns TRUE if the first argument is any text that begins with g.
=IsLike(“guitar”,”g*”)
The following formula returns TRUE because ? matches any single character. If the first argument were “Unit12”, the function would return FALSE.
=IsLike(“Unit1”,”Unit?”)

Part III: Understanding Visual Basic for Applications378
The next formula returns TRUE because the first argument is a single character in the second argument.
=ISLIKE(“a”,”[aeiou]”)
The following formula returns TRUE if cell A1 contains a, e, i, o, u, A, E, I, O, or U. Using the UPPER function for the arguments makes the formula not case-sensitive.
=IsLike(UPPER(A1), UPPER(“[aeiou]”))
The following formula returns TRUE if cell A1 contains a value that begins with 1 and has exactly three digits (that is, any integer between 100 and 199).
=IsLike(A1,”1##”)
Extracting the nth element from a stringExtractElement is a custom worksheet function (which you can also call from a VBA proce-dure) that extracts an element from a text string. For example, if a cell contains the following text, you can use the ExtractElement function to extract any of the substrings between the hyphens.
123-456-789-0133-8844
The following formula, for example, returns 0133, which is the fourth element in the string. The string uses a hyphen (-) as the separator.
=ExtractElement(“123-456-789-0133-8844”,4,”-”)
The ExtractElement function uses three arguments:
Txt: The text string from which you’re extracting. It can be a literal string or a cell reference.
n: An integer that represents the element to extract.
Separator: A single character used as the separator.
If you specify a space as the Separator character, multiple spaces are treated as a sin-gle space, which is almost always what you want. If n exceeds the number of elements in the string, the function returns an empty string.

Chapter 11: VBA Programming Examples and Techniques 379
The VBA code for the ExtractElement function follows:
Function ExtractElement(Txt, n, Separator) As String‘ Returns the nth element of a text string, where the‘ elements are separated by a specified separator character Dim AllElements As Variant AllElements = Split(Txt, Separator) ExtractElement = AllElements(n - 1)End Function
This function uses VBA’s Split function, which returns a variant array that contains each ele-ment of the text string. This array begins with 0 (not 1), so using n - 1 references the desired element.
Spelling out a numberThe SPELLDOLLARS function returns a number spelled out in text — as on a check. For example, the following formula returns the string One hundred twenty-three and 45/100 dollars:
=SPELLDOLLARS(123.45)
Figure 11-17 shows some additional examples of the SPELLDOLLARS function. Column C contains formulas that use the function. For example, the formula in C1 is
=SPELLDOLLARS(A1)
Note that negative numbers are spelled out and enclosed in parentheses.
Figure 11-17: Examples of the SPELLDOLLARS function.

Part III: Understanding Visual Basic for Applications380
The SPELLDOLLARS function is too lengthy to list here, but you can view the complete listing in worksheet function.xlsm on the companion CD-ROM.
A multifunctional functionThis example describes a technique that may be helpful in some situations: making a single work-sheet function act like multiple functions. For example, the following VBA listing is for a custom function called StatFunction. It takes two arguments: the range (rng) and the operation (op). Depending on the value of op, the function returns a value computed using any of the following worksheet functions: AVERAGE, COUNT, MAX, MEDIAN, MIN, MODE, STDEV, SUM, or VAR.
For example, you can use this function in your worksheet as follows:
=StatFunction(B1:B24,A24)
The result of the formula depends on the contents of cell A24, which should be a string such as Average, Count, Max, and so on. You can adapt this technique for other types of functions.
Function StatFunction(rng, op) Select Case UCase(op) Case “SUM” StatFunction = WorksheetFunction.Sum(rng) Case “AVERAGE” StatFunction = WorksheetFunction.Average(rng) Case “MEDIAN” StatFunction = WorksheetFunction.Median(rng) Case “MODE” StatFunction = WorksheetFunction.Mode(rng) Case “COUNT” StatFunction = WorksheetFunction.Count(rng) Case “MAX” StatFunction = WorksheetFunction.Max(rng) Case “MIN” StatFunction = WorksheetFunction.Min(rng) Case “VAR” StatFunction = WorksheetFunction.Var(rng) Case “STDEV” StatFunction = WorksheetFunction.StDev(rng) Case Else StatFunction = CVErr(xlErrNA) End SelectEnd Function

Chapter 11: VBA Programming Examples and Techniques 381
The SheetOffset functionYou probably know that Excel’s support for 3-D workbooks is limited. For example, if you need to refer to a different worksheet in a workbook, you must include the worksheet’s name in your for-mula. Adding the worksheet name isn’t a big problem . . . until you attempt to copy the formula across other worksheets. The copied formulas continue to refer to the original worksheet name, and the sheet references aren’t adjusted as they would be in a true 3-D workbook.
The example discussed in this section is a VBA function (named SheetOffset) that enables you to address worksheets in a relative manner. For example, you can refer to cell A1 on the pre-vious worksheet by using this formula:
=SheetOffset(-1,A1)
The first argument represents the relative sheet, and it can be positive, negative, or zero. The second argument must be a reference to a single cell. You can copy this formula to other sheets, and the relative referencing will be in effect in all the copied formulas.
The VBA code for the SheetOffset function follows:
Function SheetOffset(Offset As Long, Optional Cell As Variant)
‘ Returns cell contents at Ref, in sheet offset
Dim WksIndex As Long, WksNum As Long
Dim wks As Worksheet
Application.Volatile
If IsMissing(Cell) Then Set Cell = Application.Caller
WksNum = 1
For Each wks In Application.Caller.Parent.Parent.Worksheets
If Application.Caller.Parent.Name = wks.Name Then
SheetOffset = Worksheets(WksNum + Offset).Range(Cell(1).Address)
Exit Function
Else
WksNum = WksNum + 1
End If
Next wks
End Function
Returning the maximum value across all worksheetsIf you need to determine the maximum value in cell B1 across a number of worksheets, you would use a formula such as this:
=MAX(Sheet1:Sheet4!B1)
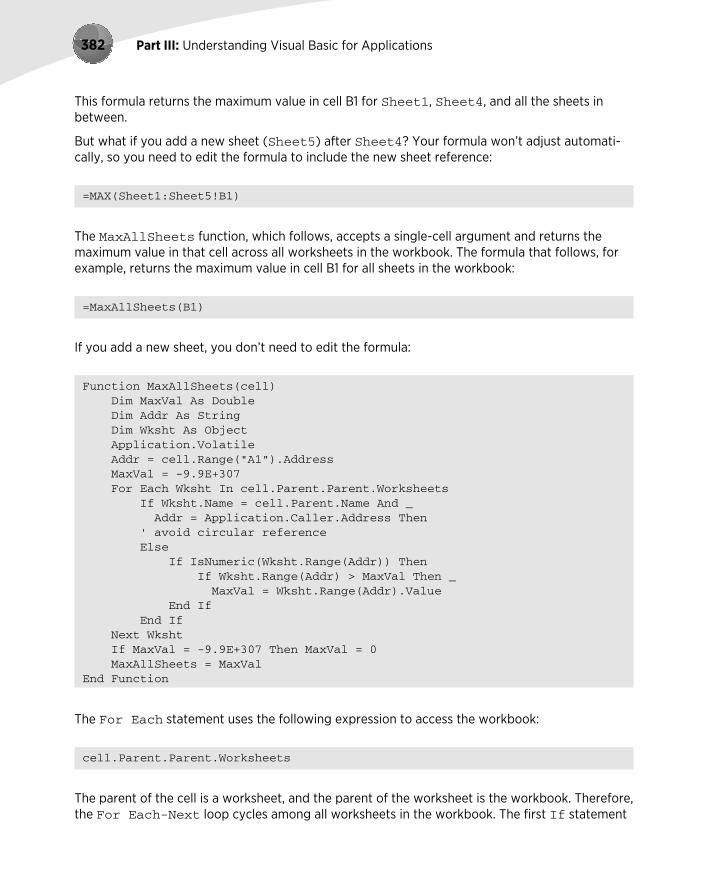
Part III: Understanding Visual Basic for Applications382
This formula returns the maximum value in cell B1 for Sheet1, Sheet4, and all the sheets in between.
But what if you add a new sheet (Sheet5) after Sheet4? Your formula won’t adjust automati-cally, so you need to edit the formula to include the new sheet reference:
=MAX(Sheet1:Sheet5!B1)
The MaxAllSheets function, which follows, accepts a single-cell argument and returns the maximum value in that cell across all worksheets in the workbook. The formula that follows, for example, returns the maximum value in cell B1 for all sheets in the workbook:
=MaxAllSheets(B1)
If you add a new sheet, you don’t need to edit the formula:
Function MaxAllSheets(cell) Dim MaxVal As Double Dim Addr As String Dim Wksht As Object Application.Volatile Addr = cell.Range(“A1”).Address MaxVal = -9.9E+307 For Each Wksht In cell.Parent.Parent.Worksheets If Wksht.Name = cell.Parent.Name And _ Addr = Application.Caller.Address Then ‘ avoid circular reference Else If IsNumeric(Wksht.Range(Addr)) Then If Wksht.Range(Addr) > MaxVal Then _ MaxVal = Wksht.Range(Addr).Value End If End If Next Wksht If MaxVal = -9.9E+307 Then MaxVal = 0 MaxAllSheets = MaxValEnd Function
The For Each statement uses the following expression to access the workbook:
cell.Parent.Parent.Worksheets
The parent of the cell is a worksheet, and the parent of the worksheet is the workbook. Therefore, the For Each-Next loop cycles among all worksheets in the workbook. The first If statement
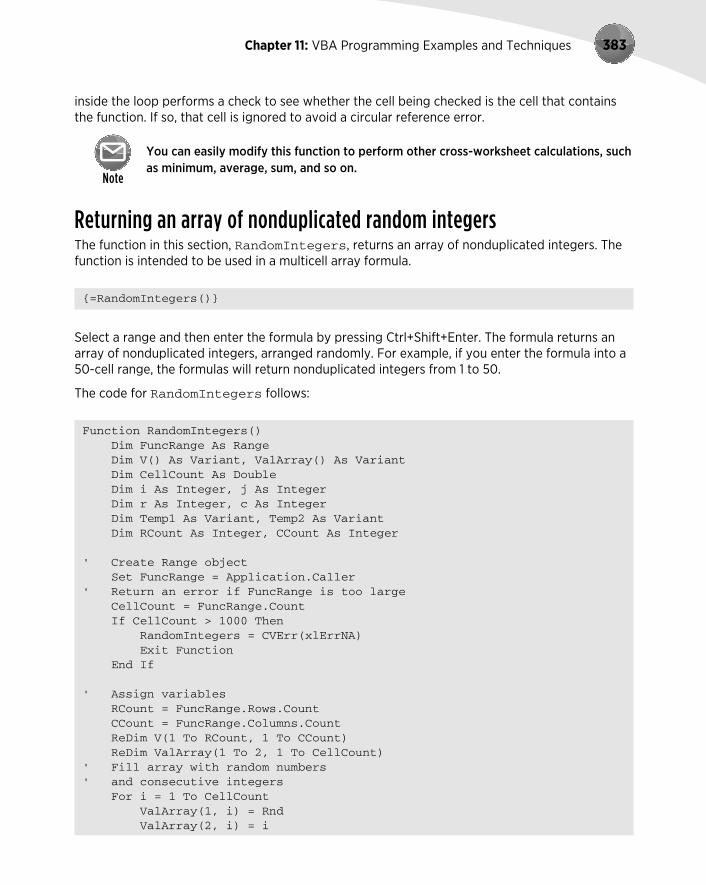
Chapter 11: VBA Programming Examples and Techniques 383
inside the loop performs a check to see whether the cell being checked is the cell that contains the function. If so, that cell is ignored to avoid a circular reference error.
You can easily modify this function to perform other cross-worksheet calculations, such as minimum, average, sum, and so on.
Returning an array of nonduplicated random integersThe function in this section, RandomIntegers, returns an array of nonduplicated integers. The function is intended to be used in a multicell array formula.
{=RandomIntegers()}
Select a range and then enter the formula by pressing Ctrl+Shift+Enter. The formula returns an array of nonduplicated integers, arranged randomly. For example, if you enter the formula into a 50-cell range, the formulas will return nonduplicated integers from 1 to 50.
The code for RandomIntegers follows:
Function RandomIntegers() Dim FuncRange As Range Dim V() As Variant, ValArray() As Variant Dim CellCount As Double Dim i As Integer, j As Integer Dim r As Integer, c As Integer Dim Temp1 As Variant, Temp2 As Variant Dim RCount As Integer, CCount As Integer ‘ Create Range object Set FuncRange = Application.Caller‘ Return an error if FuncRange is too large CellCount = FuncRange.Count If CellCount > 1000 Then RandomIntegers = CVErr(xlErrNA) Exit Function End If ‘ Assign variables RCount = FuncRange.Rows.Count CCount = FuncRange.Columns.Count ReDim V(1 To RCount, 1 To CCount) ReDim ValArray(1 To 2, 1 To CellCount)‘ Fill array with random numbers‘ and consecutive integers For i = 1 To CellCount ValArray(1, i) = Rnd ValArray(2, i) = i

Part III: Understanding Visual Basic for Applications384
Next i‘ Sort ValArray by the random number dimension For i = 1 To CellCount For j = i + 1 To CellCount If ValArray(1, i) > ValArray(1, j) Then Temp1 = ValArray(1, j) Temp2 = ValArray(2, j) ValArray(1, j) = ValArray(1, i) ValArray(2, j) = ValArray(2, i) ValArray(1, i) = Temp1 ValArray(2, i) = Temp2 End If Next j Next i ‘ Put the randomized values into the V array i = 0 For r = 1 To RCount For c = 1 To CCount i = i + 1 V(r, c) = ValArray(2, i) Next c Next r RandomIntegers = VEnd Function
Randomizing a rangeThe RangeRandomize function, which follows, accepts a range argument and returns an array that consists of the input range — in random order:
Function RangeRandomize(rng) Dim V() As Variant, ValArray() As Variant Dim CellCount As Double Dim i As Integer, j As Integer Dim r As Integer, c As Integer Dim Temp1 As Variant, Temp2 As Variant Dim RCount As Integer, CCount As Integer ‘ Return an error if rng is too large CellCount = rng.Count If CellCount > 1000 Then RangeRandomize = CVErr(xlErrNA) Exit Function End If ‘ Assign variables

Chapter 11: VBA Programming Examples and Techniques 385
RCount = rng.Rows.Count CCount = rng.Columns.Count ReDim V(1 To RCount, 1 To CCount) ReDim ValArray(1 To 2, 1 To CellCount)‘ Fill ValArray with random numbers‘ and values from rng For i = 1 To CellCount ValArray(1, i) = Rnd ValArray(2, i) = rng(i) Next i‘ Sort ValArray by the random number dimension For i = 1 To CellCount For j = i + 1 To CellCount If ValArray(1, i) > ValArray(1, j) Then Temp1 = ValArray(1, j) Temp2 = ValArray(2, j) ValArray(1, j) = ValArray(1, i) ValArray(2, j) = ValArray(2, i) ValArray(1, i) = Temp1 ValArray(2, i) = Temp2 End If Next j Next i ‘ Put the randomized values into the V array i = 0 For r = 1 To RCount For c = 1 To CCount i = i + 1 V(r, c) = ValArray(2, i) Next c Next r RangeRandomize = VEnd Function
The code is very similar to that for the RandomIntegers function.
Figure 11-18 shows the function in use. The array formula in B2:B11 is:
{= RangeRandomize(A2:A11)}
This formula returns the contents of A2:A11, but in random order.

Part III: Understanding Visual Basic for Applications386
Figure 11-18: The RangeRandomize function returns the contents of a range, in random order.
Windows API CallsVBA has the capability to use functions that are stored in Dynamic Link Libraries (DLLs). The examples in this section use common Windows API calls to DLLs.
For simplicity, the API function declarations presented in this section work in Excel 2010 only (both the 32-bit and 64-bit versions). However, the example files on the CD-ROM use compiler directives so they will work with previous versions of Excel.
Determining file associationsIn Windows, many file types are associated with a particular application. This association makes it possible to double-click the file to load it into its associated application.
The following function, named GetExecutable, uses a Windows API call to get the full path to the application associated with a particular file. For example, your system has many files with a .txt extension — one named Readme.txt is probably in your Windows directory right now. You can use the GetExecutable function to determine the full path of the application that opens when the file is double-clicked.
Windows API declarations must appear at the top of your VBA module.
Private Declare PtrSafe Function FindExecutableA Lib “shell32.dll” _ (ByVal lpFile As String, ByVal lpDirectory As String, _ ByVal lpResult As String) As Long

Chapter 11: VBA Programming Examples and Techniques 387
Function GetExecutable(strFile As String) As String Dim strPath As String Dim intLen As Integer strPath = Space(255) intLen = FindExecutableA(strFile, “\”, strPath) GetExecutable = Trim(strPath)End Function
Figure 11-19 shows the result of calling the GetExecutable function, with an argument of the filename for an MP3 audio file. The function returns the full path of the application that’s associ-ated with the file.
Figure 11-19: Determining the path and name of the application associated with a particular file.
This example is available on the companion CD-ROM. The filename is file associa-tion.xlsm.
Determining disk drive informationVBA doesn’t have a way to directly get information about disk drives. But with the assistance of three API functions, you can get just about all the information you need.
Figure 11-20 shows the output from a VBA procedure that identifies all connected drives, deter-mines the drive type, and calculates total space, used space, and free space.
The code is rather lengthy, so I don’t list it here, but the interested reader should be able to figure it out by examining the code on the CD-ROM.
This example is available on the companion CD-ROM in a file named drive information.xlsm.

Part III: Understanding Visual Basic for Applications388
Figure 11-20: Using Windows API functions to get disk drive information.
Determining default printer informationThe example in this section uses a Windows API function to return information about the active printer. The information is contained in a single text string. The example parses the string and displays the information in a more readable format.
Private Declare PtrSafe Function GetProfileStringA Lib “kernel32” _ (ByVal lpAppName As String, ByVal lpKeyName As String, _ ByVal lpDefault As String, ByVal lpReturnedString As _ String, ByVal nSize As Long) As Long
Sub DefaultPrinterInfo() Dim strLPT As String * 255 Dim Result As String Call GetProfileStringA _ (“Windows”, “Device”, “”, strLPT, 254) Result = Application.Trim(strLPT) ResultLength = Len(Result) Comma1 = InStr(1, Result, “,”, 1) Comma2 = InStr(Comma1 + 1, Result, “,”, 1)‘ Gets printer’s name Printer = Left(Result, Comma1 - 1)‘ Gets driver Driver = Mid(Result, Comma1 + 1, Comma2 - Comma1 - 1)‘ Gets last part of device line Port = Right(Result, ResultLength - Comma2)‘ Build message Msg = “Printer:” & Chr(9) & Printer & Chr(13) Msg = Msg & “Driver:” & Chr(9) & Driver & Chr(13) Msg = Msg & “Port:” & Chr(9) & Port‘ Display message MsgBox Msg, vbInformation, “Default Printer Information”End Sub

Chapter 11: VBA Programming Examples and Techniques 389
The ActivePrinter property of the Application object returns the name of the active printer (and lets you change it), but there’s no direct way to determine what printer driver or port is being used. That’s why this function may be useful.
Figure 11-21 shows a sample message box returned by this procedure.
Figure 11-21: Getting information about the active printer by using a Windows API call.
This example is available on the companion CD-ROM. The filename is printer info.xlsm.
Determining video display informationThe example in this section uses Windows API calls to determine a system’s current video mode for the primary display monitor. If your application needs to display a certain amount of informa-tion on one screen, knowing the display size helps you scale the text accordingly. In addition, the code determines the number of monitors. If more than one monitor is installed, the procedure reports the virtual screen size.
Declare PtrSafe Function GetSystemMetrics Lib “user32” _ (ByVal nIndex As Long) As LongPublic Const SM_CMONITORS = 80Public Const SM_CXSCREEN = 0Public Const SM_CYSCREEN = 1Public Const SM_CXVIRTUALSCREEN = 78Public Const SM_CYVIRTUALSCREEN = 79
Sub DisplayVideoInfo() Dim numMonitors As Long Dim vidWidth As Long, vidHeight As Long Dim virtWidth As Long, virtHeight As Long Dim Msg As String numMonitors = GetSystemMetrics(SM_CMONITORS) vidWidth = GetSystemMetrics(SM_CXSCREEN) vidHeight = GetSystemMetrics(SM_CYSCREEN) virtWidth = GetSystemMetrics(SM_CXVIRTUALSCREEN) virtHeight = GetSystemMetrics(SM_CYVIRTUALSCREEN)

Part III: Understanding Visual Basic for Applications390
If numMonitors > 1 Then Msg = numMonitors & “ display monitors” & vbCrLf Msg = Msg & “Virtual screen: “ & virtWidth & “ X “ Msg = Msg & virtHeight & vbCrLf & vbCrLf Msg = Msg & “The video mode on the primary display is: “ Msg = Msg & vidWidth & “ X “ & vidHeight Else Msg = Msg & “The video display mode: “ Msg = Msg & vidWidth & “ X “ & vidHeight End If MsgBox MsgEnd Sub
Figure 11-22 shows the message box returned by this procedure when running on a dual-monitor system.
Figure 11-22: Using a Windows API call to determine the video display mode.
This example is available on the companion CD-ROM. The filename is video mode.xlsm.
Adding sound to your applicationsThe example in this section adds some sound capability to Excel. Specifically, it enables your application to play WAV or MIDI files. For example, you might like to play a short sound clip when a dialog box is displayed. Or maybe not. In any case, if you want Excel to play WAV or MIDI files, this section has what you need.
The examples in this section are available on the companion CD-ROM in a file named sound.xlsm.
Playing a WAV fileThe following example contains the API function declaration plus a simple procedure to play a sound file called sound.wav, which is presumed to be in the same directory as the workbook:
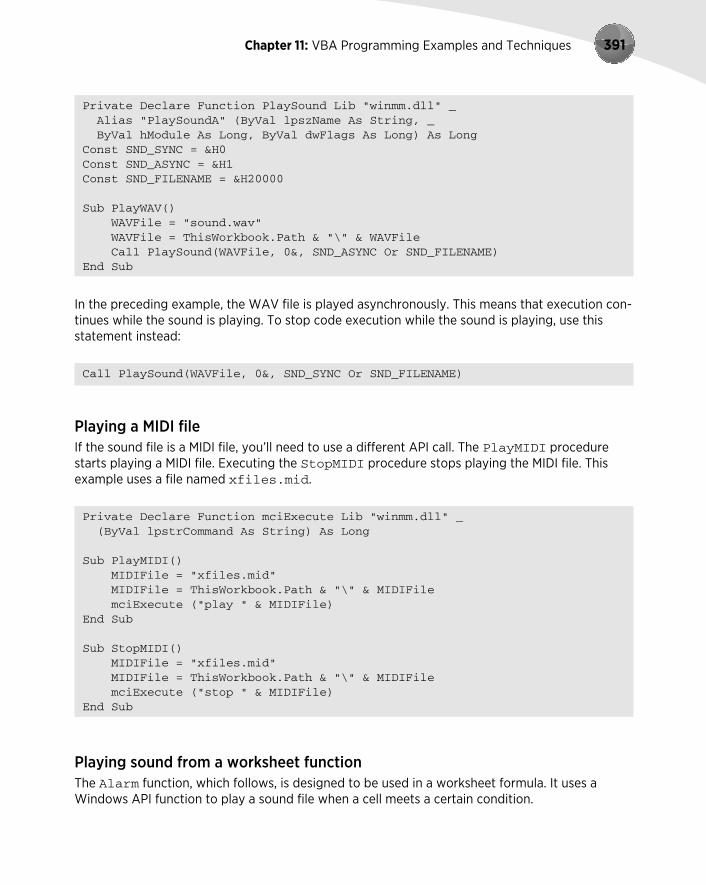
Chapter 11: VBA Programming Examples and Techniques 391
Private Declare Function PlaySound Lib “winmm.dll” _ Alias “PlaySoundA” (ByVal lpszName As String, _ ByVal hModule As Long, ByVal dwFlags As Long) As LongConst SND_SYNC = &H0Const SND_ASYNC = &H1Const SND_FILENAME = &H20000
Sub PlayWAV() WAVFile = “sound.wav” WAVFile = ThisWorkbook.Path & “\” & WAVFile Call PlaySound(WAVFile, 0&, SND_ASYNC Or SND_FILENAME)End Sub
In the preceding example, the WAV file is played asynchronously. This means that execution con-tinues while the sound is playing. To stop code execution while the sound is playing, use this statement instead:
Call PlaySound(WAVFile, 0&, SND_SYNC Or SND_FILENAME)
Playing a MIDI fileIf the sound file is a MIDI file, you’ll need to use a different API call. The PlayMIDI procedure starts playing a MIDI file. Executing the StopMIDI procedure stops playing the MIDI file. This example uses a file named xfiles.mid.
Private Declare Function mciExecute Lib “winmm.dll” _ (ByVal lpstrCommand As String) As Long
Sub PlayMIDI() MIDIFile = “xfiles.mid” MIDIFile = ThisWorkbook.Path & “\” & MIDIFile mciExecute (“play “ & MIDIFile)End Sub
Sub StopMIDI() MIDIFile = “xfiles.mid” MIDIFile = ThisWorkbook.Path & “\” & MIDIFile mciExecute (“stop “ & MIDIFile)End Sub
Playing sound from a worksheet functionThe Alarm function, which follows, is designed to be used in a worksheet formula. It uses a Windows API function to play a sound file when a cell meets a certain condition.

Part III: Understanding Visual Basic for Applications392
Declare Function PlaySound Lib “winmm.dll” _ Alias “PlaySoundA” (ByVal lpszName As String, _ ByVal hModule As Long, ByVal dwFlags As Long) As LongFunction Alarm(Cell, Condition) Dim WAVFile As String Const SND_ASYNC = &H1 Const SND_FILENAME = &H20000 If Evaluate(Cell.Value & Condition) Then WAVFile = ThisWorkbook.Path & “\sound.wav” Call PlaySound(WAVFile, 0&, SND_ASYNC Or SND_FILENAME) Alarm = True Else Alarm = False End IfEnd Function
The Alarm function accepts two arguments: a cell reference and a condition (expressed as a string). The following formula, for example, uses the Alarm function to play a WAV file when the value in cell B13 is greater than or equal to 1000.
=ALARM(B13,”>=1000”)
The function uses VBA’s Evaluate function to determine whether the cell’s value matches the specified criterion. When the criterion is met (and the alarm has sounded), the function returns True; otherwise, it returns False.
The examples in this section are available on the companion CD-ROM in a file named sound.xlsm.
The SayIt function, presented earlier in this chapter, is a much simpler way to use sound in a function.
Reading from and writing to the RegistryMost Windows applications use the Windows Registry database to store settings. (See Chapter 4 for some additional information about the Registry.) Your VBA procedures can read values from the Registry and write new values to the Registry. Doing so requires the following Windows API declarations:
Private Declare PtrSafe Function RegOpenKeyA Lib “ADVAPI32.DLL” _ (ByVal hKey As Long, ByVal sSubKey As String, _ ByRef hkeyResult As Long) As LongPrivate Declare PtrSafe Function RegCloseKey Lib “ADVAPI32.DLL” _
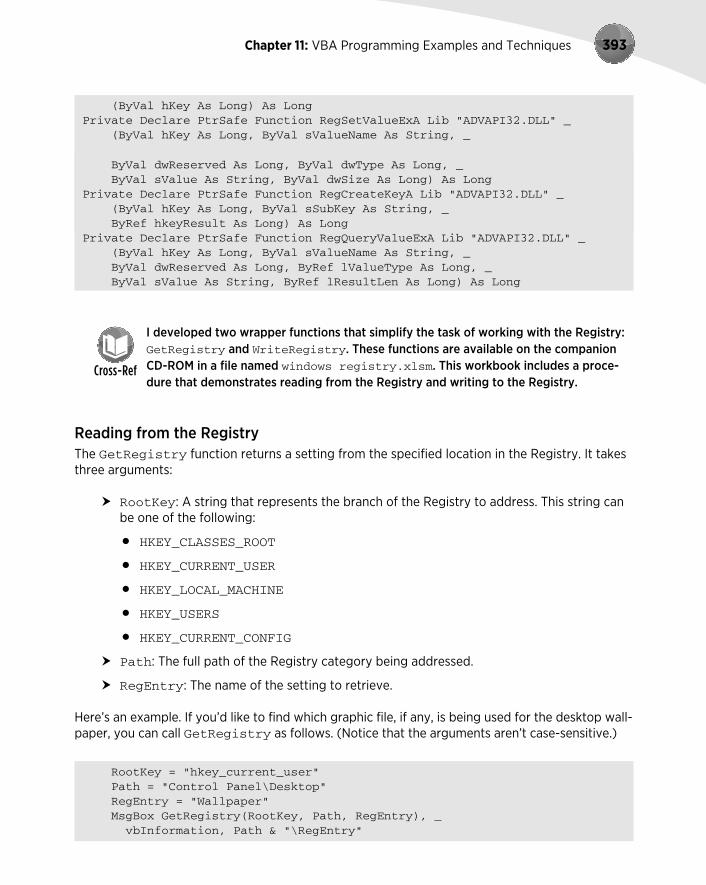
Chapter 11: VBA Programming Examples and Techniques 393
(ByVal hKey As Long) As LongPrivate Declare PtrSafe Function RegSetValueExA Lib “ADVAPI32.DLL” _ (ByVal hKey As Long, ByVal sValueName As String, _
ByVal dwReserved As Long, ByVal dwType As Long, _ ByVal sValue As String, ByVal dwSize As Long) As LongPrivate Declare PtrSafe Function RegCreateKeyA Lib “ADVAPI32.DLL” _ (ByVal hKey As Long, ByVal sSubKey As String, _ ByRef hkeyResult As Long) As LongPrivate Declare PtrSafe Function RegQueryValueExA Lib “ADVAPI32.DLL” _ (ByVal hKey As Long, ByVal sValueName As String, _ ByVal dwReserved As Long, ByRef lValueType As Long, _ ByVal sValue As String, ByRef lResultLen As Long) As Long
I developed two wrapper functions that simplify the task of working with the Registry: GetRegistry and WriteRegistry. These functions are available on the companion CD-ROM in a file named windows registry.xlsm. This workbook includes a proce-dure that demonstrates reading from the Registry and writing to the Registry.
Reading from the RegistryThe GetRegistry function returns a setting from the specified location in the Registry. It takes three arguments:
RootKey: A string that represents the branch of the Registry to address. This string can be one of the following:
● HKEY_CLASSES_ROOT
● HKEY_CURRENT_USER
● HKEY_LOCAL_MACHINE
● HKEY_USERS
● HKEY_CURRENT_CONFIG
Path: The full path of the Registry category being addressed.
RegEntry: The name of the setting to retrieve.
Here’s an example. If you’d like to find which graphic file, if any, is being used for the desktop wall-paper, you can call GetRegistry as follows. (Notice that the arguments aren’t case-sensitive.)
RootKey = “hkey_current_user” Path = “Control Panel\Desktop” RegEntry = “Wallpaper” MsgBox GetRegistry(RootKey, Path, RegEntry), _ vbInformation, Path & “\RegEntry”

Part III: Understanding Visual Basic for Applications394
The message box will display the path and filename of the graphic file (or an empty string if wall-paper isn’t used).
Writing to the RegistryThe WriteRegistry function writes a value to the Registry at a specified location. If the opera-tion is successful, the function returns True; otherwise, it returns False. WriteRegistry takes the following arguments (all of which are strings):
RootKey: A string that represents the branch of the Registry to address. This string may be one of the following:
● HKEY_CLASSES_ROOT
● HKEY_CURRENT_USER
● HKEY_LOCAL_MACHINE
● HKEY_USERS
● HKEY_CURRENT_CONFIG
Path: The full path in the Registry. If the path doesn’t exist, it is created.
RegEntry: The name of the Registry category to which the value will be written. If it doesn’t exist, it is added.
RegVal: The value that you’re writing.
Here’s an example that writes a value representing the time and date Excel was started to the Registry. The information is written in the area that stores Excel’s settings.
Sub Workbook_Open() RootKey = “hkey_current_user” Path = “software\microsoft\office\14.0\excel\LastStarted” RegEntry = “DateTime” RegVal = Now() If WriteRegistry(RootKey, Path, RegEntry, RegVal) Then msg = RegVal & “ has been stored in the registry.” Else msg = “An error occurred” End If MsgBox msgEnd Sub
If you store this routine in the ThisWorkbook module in your personal macro workbook, the setting is automatically updated whenever you start Excel.

Chapter 11: VBA Programming Examples and Techniques 395
An easier way to access the RegistryIf you want to use the Windows Registry to store and retrieve settings for your Excel applica-tions, you don’t have to bother with the Windows API calls. Rather, you can use VBA’s GetSetting and SaveSetting functions.
These two functions are described in the Help system, so I won’t cover the details here. However, it’s important to understand that these functions work only with the following key name:
HKEY_CURRENT_USER\Software\VB and VBA Program Settings
In other words, you can’t use these functions to access any key in the registry. Rather, these functions are most useful for storing information about your Excel application that you need to maintain between sessions.

Part III: Understanding Visual Basic for Applications396