EUT Course 101 Fundamentals and Employee Self...
73
EUT Course – 101 Fundamentals and Employee Self-Service PeopleSoft 9.2 November, 2016
Transcript of EUT Course 101 Fundamentals and Employee Self...

EUT Course – 101
Fundamentals and Employee Self-Service
PeopleSoft 9.2
November, 2016

CAPPS HR/PAYROLL
EUT Course
Page iii
Table of Contents Employee Self Service ................................................................................................. 1
Section 1 - CAPPS Fundamentals .........................................................................................1 Lesson 2 - How to Access CAPPS ............................................................................................................. 1
Learn how to sign-in to the CAPPS system ......................................................................................................... 1 Learn how to change your password .................................................................................................................. 4
Lesson 3 - Using CAPPS Navigation Features .......................................................................................... 7 Learn how to add and delete Favorites .............................................................................................................. 7
Lesson 4 - Using the Search Feature to retrieve information ............................................................... 10 Learn how to use the Basic search feature ....................................................................................................... 10 Learn how to use Operators and Wildcards ..................................................................................................... 12
Section 1 - Timesheet ....................................................................................................... 17 Lesson 3 - Entering Time and Leave ...................................................................................................... 17
Timesheet Components .................................................................................................................................... 17 Positive Time Reporters .................................................................................................................................... 21
Enter Regular Hours Worked - Positive Time Reporter ................................................................................ 21 Enter Time Over 40 hours - Positive Time Reporter ..................................................................................... 24 Entering Leave Time Taken - Positive Time Reporter ................................................................................... 25
Exception Time Reporters ................................................................................................................................. 27 Exception Time Reporters – Enter Overtime/Comp Time Worked .............................................................. 27 Enter Time for Flex Schedule ....................................................................................................................... 28 Enter Annual Leave Taken ............................................................................................................................ 30 Enter Sick Time Taken .................................................................................................................................. 31 Enter Regular Comp Time Taken .................................................................................................................. 32 Enter FLSA Overtime Taken .......................................................................................................................... 33 Enter Leave Without Pay .............................................................................................................................. 34 Enter Multiple Leave Types .......................................................................................................................... 35 Enter Time Worked on a Scheduled Holiday ................................................................................................ 36 Enter Optional Holiday Time Taken and Work a Holiday ............................................................................. 37 Allocating Time Worked to a Labor Account Code....................................................................................... 39 Allocating Time Worked to Multiple Labor Account Codes ......................................................................... 40 Employee Time Certification ........................................................................................................................ 42
Lesson 5 - View Time and Leave Balances ............................................................................................ 43 View Leave Balances/Expirations...................................................................................................................... 43 Employee Monthly Time Report ....................................................................................................................... 44
Section 2 - eProfile ........................................................................................................... 45 Lesson 1 - eProfile Human Resources ................................................................................................... 45
View My Personal Information ......................................................................................................................... 45 Edit Emergency Contacts .................................................................................................................................. 47 Edit Phone Number........................................................................................................................................... 50 Edit Mailing Addresses ...................................................................................................................................... 52 Request Name Change ...................................................................................................................................... 54 Information Release Indicator .......................................................................................................................... 55 Maintain Disability Status ................................................................................................................................. 56 BRP Leveling / Non-Leveling ............................................................................................................................. 57
Section 3 - ePay ................................................................................................................ 58 Lesson 1 - Earnings................................................................................................................................ 58
View/Print Earnings Statement......................................................................................................................... 58 View Compensation History ............................................................................................................................. 60

CAPPS HR/PAYROLL
EUT Course
Page iv
Lesson 2 - Direct Deposit...................................................................................................................... 61 View/Edit Direct Deposit .................................................................................................................................. 61
Lesson 3 - Deductions .......................................................................................................................... 62 Voluntary Deductions ....................................................................................................................................... 62 Charitable Deductions ...................................................................................................................................... 64
Lesson 4 - Tax ....................................................................................................................................... 66 W-4 Tax Information......................................................................................................................................... 66 View/Print W-2 and W-2c Information ............................................................................................................. 67 W-2 and W-2c Consent ..................................................................................................................................... 68
Glossary ................................................................................................................... 69
CAPPS HR/PAYROLL
EUT Course
Page 1
Employee Self Service
Course 99 Fundamentals and Course 100 Employee Self Service Combined
Section 1 - CAPPS Fundamentals
Section 1 - CAPPS Fundamentals
Section 1 - CAPPS Fundamentals has 4 lessons:
Lesson 1 - CAPPS Overview
Lesson 2 - How to Access CAPPS
Lesson 3 - Using CAPPS Navigation Features
Lesson 4 - Using the Search Feature to Retrieve Information
Lesson 2 - How to Access CAPPS
Section 1, Lesson 2
CAPPS Fundamentals
Learn how to sign-in to the CAPPS system
Section 1 - Lesson 2 Exercises - Scenario 1: Learn how to sign-in to the CAPPS system
Procedure
This lesson shows you how to log into the CAPPS Enterprise Portal and the CAPPS HR/Payroll system. It also shows you your menu options and choices.
Step 1. This Login page is the gateway to the CAPPS Enterprise Portal and the CAPPS HR/Payroll system as well as other CAPPS PeopleSoft applications.
It is recommended that you save this URL as a Favorite in your Internet browser.
Step 2. The Login page is where you will enter your User ID and Secure Password in the appropriate
fields.
If you do not have this information, please contact your agency password support personnel.
The Secure Password is Case Sensitive. As you enter your password, the system will mask your entry with asterisks.

CAPPS HR/PAYROLL
EUT Course
Page 2
Step 3. Once you have entered the User ID and Secure Password you will click the Sign In button.
Step 4. This page contains the CAPPS Enterprise Portal. The views on the Portal will vary according to
individual security roles. Next you will take a look at each of the components within the Enterprise Portal.
Step 5. This is the CAPPS HR/Payroll Application Link. This link takes you to the PeopleSoft Menu with choices and options based on (1) your role in the system and (2) your security access to the system. If you are a user with access to both HR/Payroll and Finance applications then you will also see a FIN Application Link further down the page.
Step 6. Below the HR/Payroll application link are the Employee Self-Service and Manager Self-Service
links. The Self-Service options are available to all employees.
Step 7. The Manager Self-Service links are available to any employee with a role as a Manager in the
system. Remember the application links will appear according to the user profile.
Step 8. The Worklist will only appear for users that have Worklist items.
In this example, the user has an HR/Payroll Worklist.
Step 9. Common Links are static and will appear for everyone.
Notice the link to Change Password.
Step 10. Other Portal Links are for users specifically granted access to UAT, Maintenance, and Sandbox.
Step 11. New Content Pagelets appear in this area by suite (HR/Payroll and/or FIN). They will contain
information about downtime, scheduled maintenance, and timely reminders.
Step 12. Next you will see how the Main Menu can be used as an alternate way to access the same information.
Step 13. The CAPPS HR Portal also displays a Main Menu with choices and options based on your role
and security in the system. This is an alternate way to navigate to information in the system.
Step 14. You can access Employee Self-Service from here as well.
CAPPS HR/PAYROLL
EUT Course
Page 3
Step 15. After selecting the HR/Payroll link, you will see the CAPPS HR/Payroll Menu options. Step 16. The system now displays the CAPPS HR/Payroll Application Main Menu.
Please note that in addition to accessing ESS or MSS from the portal (the previous screen shots), you can also navigate to (Employee) Self Service or Manager Self Service from this Menu.
Step 17. Click the Main Menu button to see the same list of menu options and choices. Step 18. Note that you can go to (Employee) Self Service or Manager Self Service from this Main
Menu list as well. Most employees will see a limited number of choices when they login to the CAPPS HR/Payroll system.
Step 19. Because of security requirements, CAPPS logs you out of your application after a period
of inactivity. A few minutes prior to timing out, the system provides a popup warning telling you that your browser session is about to end. If you click OK, though, the timer is reset, and your current session continues.
Step 20. Congratulations! You have successfully completed this lesson.
End of Procedure.

CAPPS HR/PAYROLL
EUT Course
Page 4
Learn how to change your password
Section 1 - Lesson 2 Exercises - Scenario 2: Learn how to change your password
Procedure
This lesson shows you how to reset a forgotten password, how to change a password, and how to set up a Password Hint. Step 1. CAPPS HR/Payroll Password Reset.
If you have forgotten your password, contact your agency password support personnel. You will be sent a temporary password.
Step 2. You will receive a temporary password in an email. Step 3. Enter your User ID and temporary Password to start the process of changing your
password. In this example, you have entered your User ID and Secure Password already.
Step 4. The system tells you that your temporary password has expired.
Click on the link to change your password. Click the Change Password link.
Step 5. Enter the temporary password (the one you received in an email) in the*Current Password field.
Step 6. Enter a *New Password, and enter it again in the *Confirm Password field.
Click the Change Password link.
Step 7. The system confirms that your password has been changed. Step 8. How to Set Up Password Hints
Step 9. In CAPPS HR/Payroll you can set up a password hint so that you can reset your own
password. On the Portal page, you would select the Maintain Password Hint link under the Common Links section.

CAPPS HR/PAYROLL
EUT Course
Page 5
Step 11. The system asks you to select a question from the drop down list.
In this example, your question will be "What was the name of your first pet?" You may use the drop down arrow to select a different question. The Response must be at least 5 characters long. After selecting your question, entering your response information, you will click the Save button.
Step 12. Manual Password Reset
You can also manually reset your own password. This method assumes that you are already logged into the CAPPS Enterprise Portal. You would click the Change Password link near the bottom under Common Links.
Step 13. Enter your current password in the *Current Password field.
Enter a *New Password, and enter it again in the *Confirm Password field. Click the Change Password link.
Step 14. The system confirms that your password has been changed. Step 15. How to use "I forgot/Change my password."
If you have forgotten your password and you have set up a password hint, you can have a temporary password sent to you in an email. The system uses the email address stored in your User ID account. NOTE: You may have an email address on file in the system, but the system will only use a specific email address from the email field labeled "Business" in your User ID profile. If you do not receive the temporary password email, contact your agency password support personnel.
Step 16. To begin, click the I forgot/Change my password link on the CAPPS login page.
Step 17. Enter your User ID, and then click on the Continue button.
Step 18. The system asks you for the Response to your Password Hint that you previously set up.
You then click on the Email New Password button.

CAPPS HR/PAYROLL
EUT Course
Page 6
Step 19. If your Response is valid, the system will email you (to the email address on file) a temporary
password. NOTE: You may have an email address on file in the system, but the system will only use a specific email address from the email field labeled "Business" in your User ID profile. If you do not receive the temporary password email, contact your agency password support personnel.
Step 20. The system sends you an email. Step 21. Enter your User ID and temporary Password to start the process of changing your password.
In this example, we have entered your User ID and Secure Password already.
Step 22. The system tells you that your temporary password has expired.
Click on the link to change your password. Click the Change Password link.
Step 23. Enter the temporary password (the one you received in the email) in the *Current Password
field. Enter a *New Password, and enter it again in the *Confirm Password field. Click the Change Password link.
Step 24. The system confirms that your password has been changed.
Step 25. Congratulations! You have successfully completed this lesson. End of Procedure.
CAPPS HR/PAYROLL
EUT Course
Page 7
Lesson 3 - Using CAPPS Navigation Features
Section 1, Lesson 3
Using CAPPS Navigation Features
Learn how to add and delete Favorites
Section 1 - Lesson 3 Exercises - Scenario 1: Learn how to add and delete Favorites
Procedure In this lesson you will learn how to add and delete Favorites. Step 1. The CAPPS HR/Payroll browser-based interface contains navigation elements that are the
same as those found in other CAPPS applications. After you sign in to CAPPS, your Home page appears.
Step 2. A universal navigation header will be displayed at the top of every page. This header generally contains the following links:
• Home • Worklist • Add to Favorites • Sign out
Some links might not be available to a user; the presence or absence of a link is based on user security settings, as well as application implementation rules.
Step 3. Selecting the Home link will automatically return you this page. Step 4. The Worklist link tells the system to go to your worklist page. Remember that the worklists
for HR/Payroll is available on the Enterprise Portal Page as well.
A worklist is an organized list of items waiting for your attention. The system automatically generates your worklist when you use a workflow-enabled application. The Worklist page provides summary information about all items on your personal worklist.
The Worklist page also provides links for you to view additional details about an item, navigate to a page where you can perform an action (such as Approve) on an item, and (optionally) reassign a work item to someone else.
If you are involved in approving items, those approvals will be worked from the Worklist.

CAPPS HR/PAYROLL
EUT Course
Page 8
Step 5. Add to Favorites is a feature similar to a browser bookmark; use it for frequently used
folders and content pages. Use Add to Favorites to add the current page to your list of favorites; Favorites can be accessed from the Favorites menu in the upper right corner of this page.
Step 6. The Favorites menu grants quick access to frequently used pages that you have added to My Favorites; the system also maintains a list of Recently Used pages in this location. Clicking a link from the Favorites menu is a direct path to the page, and will bypass menu navigation. Click the Favorites button.
Step 7. The Favorites menu has two sections. The top section will list Recently Used pages, or pages that you have accessed. The bottom section allows you to Add or Edit your My Favorites list. This example shows that you recently accessed the Location page.
Step 8. To add a page to the Favorites menu, navigate to the page to be added, then click the Add to Favorites link. In this example you have already navigated to the Location search page. From the Location search page, click the Add to Favorites link.
Step 9. You can either accept the default Description, or enter your own description for this page. In this example, accept the default description of Location. Click the OK button.
Step 10. The system displays a message telling you that the favorite has been saved.
Step 11. Click the OK button.
Step 12. Click the Favorites button to see if Location was added to your list of favorites.
Step 13. Notice how Location has been added to the My Favorites section of the Favorites
menu.
Step 14. You can change the name of a Favorite or delete one from the list. Click the Edit Favorites menu item.
CAPPS HR/PAYROLL
EUT Course
Page 9
Step 15. To edit the name of a Favorite, simply replace the entry 'Location' with one of your own choosing, and then hit the Save button.
Step 16. To delete a favorite, click the minus sign (-) next to the favorite to be deleted.
Click the Delete row 1 button.
Step 17. The system asks you to confirm your deletion. You have the option, of course, to cancel
this deletion. Confirm deletion by clicking the OK button.
Step 18. Save your work. Click the Save button.
Step 19. You will see that Location was removed from the My Favorites list.
Click the Favorites button.
Step 20. Notice how Location is no longer listed under My Favorites.
(Note that Location still appears on the Recently Used list.)
Step 21. Be sure to Sign Out of the CAPPS when you are done.
Step 22. Congratulations! You have successfully completed this lesson.
End of Procedure.

CAPPS HR/PAYROLL
EUT Course
Page 10
Lesson 4 - Using the Search Feature to retrieve information
Section 1, Lesson 4
Using the Search Feature to Retrieve Information
Learn how to use the Basic search feature
Section 1 - Lesson 4 Exercises - Scenario 1: Learn how to use the basic Search feature.
Procedure In this lesson you will learn how to perform a basic search.
After you have navigated to a specific page, the system will display a search page. Search pages are used to define the specific information you want to retrieve. Step 1. The page displayed on the screen is the Basic Search page.
There are two tabs on this page:
1. Find an Existing Value 2. Add a New Value.
The Find an Existing Value tab allows you search for information according to a particular value or values. The Add a New Value allows you to add information in CAPPS. It is important to note that not all users will have security access to perform this task.
Step 2. Typically, a Basic Search page offers one field (or at most two fields) with which you may
search for data.
The drop-down list allows you to pick which key field you want to search (this example shows SetID). A SetID is your agency number with TX for Texas. In this example you will use the Basic Search feature to search on SetID = TX032. Click the Search button.
Step 3. After selecting the Search button, the system will display the search results in a Search Results grid. In this example 10 records were retrieved. The Agency TX032 has 10 physical locations assigned to the Agency.
CAPPS HR/PAYROLL
EUT Course
Page 11
Step 4. On a Basic Search page, you have the option of changing the search criteria.
The Search by drop-down list lets you select a different search key (a different field) to search against. You can enter full or partial values for the key field.
Click the dropdown arrow to the right of the Search by field.
Step 5. Notice the other fields that you may use as Search Criteria. The search criteria options may
vary depending on the navigation used. Step 6. The system has three useful buttons at the bottom of the page.
Previous in List goes to the previous item from the Search Results grid. Step 7. Next in List takes you to the next item from the Search Results Grid. Step 8. To return to the Search Results grid or to start a new Search, click the Return to Search
button.
Step 9. Congratulations! You have successfully completed this lesson. End of Procedure.
CAPPS HR/PAYROLL
EUT Course
Page 12
Learn how to use Operators and Wildcards
Section 1 - Lesson 4 Exercises - Scenario 2: Learn how to use Operators and Wildcards
Procedure
This lesson introduces using Operators and Wildcards while searching in CAPPS HR/Payroll.
Step 1. Take a close look at the Personal Information Search Criteria page. This is an Advanced
Search page, because multiple fields are available for use as criteria in narrowing down a search.
Step 2. The search can be narrowed by entering criteria in more than one field, and by entering a
variety of search Operators. In this example, the displayed operators are "begins with" and "=". (A more complete list of operators will be shown shortly.)
On an Advanced Search page different operators in multiple fields can be used. There is limited information to look up Personal Information for an employee. The entire employee ID is not known, but it starts with a zero. Enter the desired information into the Empl ID begins with field. Enter "0".
Step 3. There could be hundreds (or thousands) of Empl IDs beginning with zero.
It's known that the employee's Name begins with test.
Enter the desired information into the Name field. Enter "test". Step 4. Click the begins with for Last Name dropdown list. Step 5. Here is a complete list of Operators for use in searching a field; not all operators are
appropriate for all types of fields.
begins with: search a text field using a string of alpha and/or numeric characters; the system finds values that match the string at the beginning of the field.
contains: search a text field using a string of alpha and/or numeric characters; the system finds values that match the string as long as the field contains the string of characters, anywhere in the field.
Step 6. = (Equals): search any field for an exact match using a string of characters; the system finds
values that exactly match the string of characters. not = (not equal to): search any field using a string of characters; the system finds values that do NOT exactly match the string of characters.
CAPPS HR/PAYROLL
EUT Course
Page 13
Step 7. < (less than): search any field using a string of characters; the system finds values that are
less than the string of characters. <= (less than or equal to): search any field using a string of characters; the system finds values that are less than or equal to the string of characters. > (greater than): search any field using a string of characters; the system finds values that are greater than the string of characters. >= (greater than or equal to): search any field using a string of characters; the system finds values that are greater than or equal to the string of characters.
Step 8. between: when choosing between, the system opens two criteria fields; enter a minimum
value in the first field, and a maximum value in the second field; search any field using a string of characters; the system finds values that are between the search criteria strings.
Step 9. in: when choosing in, the system allows you to enter a comma separated list of values;
search any field using a string of characters; input multiple comma separated strings; the system finds values that are in your list.
Step 10. The last name contains the letters "rp".
Click the contains list item. Step 11. Enter the desired information into the Last Name contains field. Enter "rp".
Step 12. The search criteria are:
Empl ID begins with '0' Name begins with 'test' Last Name contains 'rp'
Click the Search button to find the record(s) that match these values.
Step 13. Nine records are displayed in the Search Results grid matching these search criteria. Step 14. If the search criteria is for a search that might be used again, save the search.
Click the Save Search Criteria link.
Step 15. The system displays the Save Search As page. Note that this page lists the criteria that will be saved for this search. Give the search a meaningful name. Enter the desired information into the Name of Search: field. Enter "Personal Info 0 TEST RP".

CAPPS HR/PAYROLL
EUT Course
Page 14
Step 16. Click the Save button. Step 17. The system will confirm that it saved your search.
Click the Return to Advanced Search link.
Step 18. A Use Saved Search field appears just under the Search Criteria header; a saved search can be selected from this drop-down list. Once a search has been saved, that specific search record is available for use in this page (as well as other search pages as long as they use the same search record).
Step 19. Any saved search can be deleted by first selecting it in the Use Saved Search field, and then clicking on the Delete Saved Search link.
Step 20. To clear all fields of any search criteria, click the Clear button.
Click the Clear button.
Step 21. In addition to operators, searching in CAPPS HR/Payroll supports wildcards.
Two wildcard characters can help you find information by "standing for" one or more characters in your search string. % (Percent Sign) matches one or more characters. _ (Underscore) matches any single character Wildcard characters can only be used in text fields, and will only work with the first two operators: begins with and contains.
Step 22. For example, using the underscore character, search fr this string:
"st_ve" and the system might find the values: Steve stove
Step 23. To use the percent sign character, search for this string:
"st%" and the system might find the values: Steve stove Stephanie ST

CAPPS HR/PAYROLL
EUT Course
Page 15
Notice that the last value ST, is found because the % character can also mean "no characters".
Step 24. In looking up Personal Information for an employee you know that the Empl ID begins with '0' and also contains '99' but the intervening digits are not known. Enter the desired information into the Empl ID field. Enter "0%99".
Step 25. Click the Search button.
Step 26. The system finds three rows of data: Empl ID 00000000099 and Empl ID 00000000199 and Empl ID 00000000299. The system retrieved 3 rows into the Search Results grid, because each begins with '0' and each contains the characters '99' somewhere after the initial 0.
Step 27. Click the Clear button.
Step 28. While the percent sign matches one or more characters, the underscore wildcard matches a single character only.
Step 29. Enter the desired information into the Empl ID field. Enter "0_99".
Step 30. Click the Search button.
Step 31. The search looked for an Empl ID where the four-digit value begins with '0', has any
character in the second position and ends with '99'. The system returns the message "No matching values were found."
Step 32. Click the Clear button.
Step 33. Enter the desired information into the Empl ID field.
Enter "000000002_1".
Step 34. Click the Search button.
CAPPS HR/PAYROLL
EUT Course
Page 16
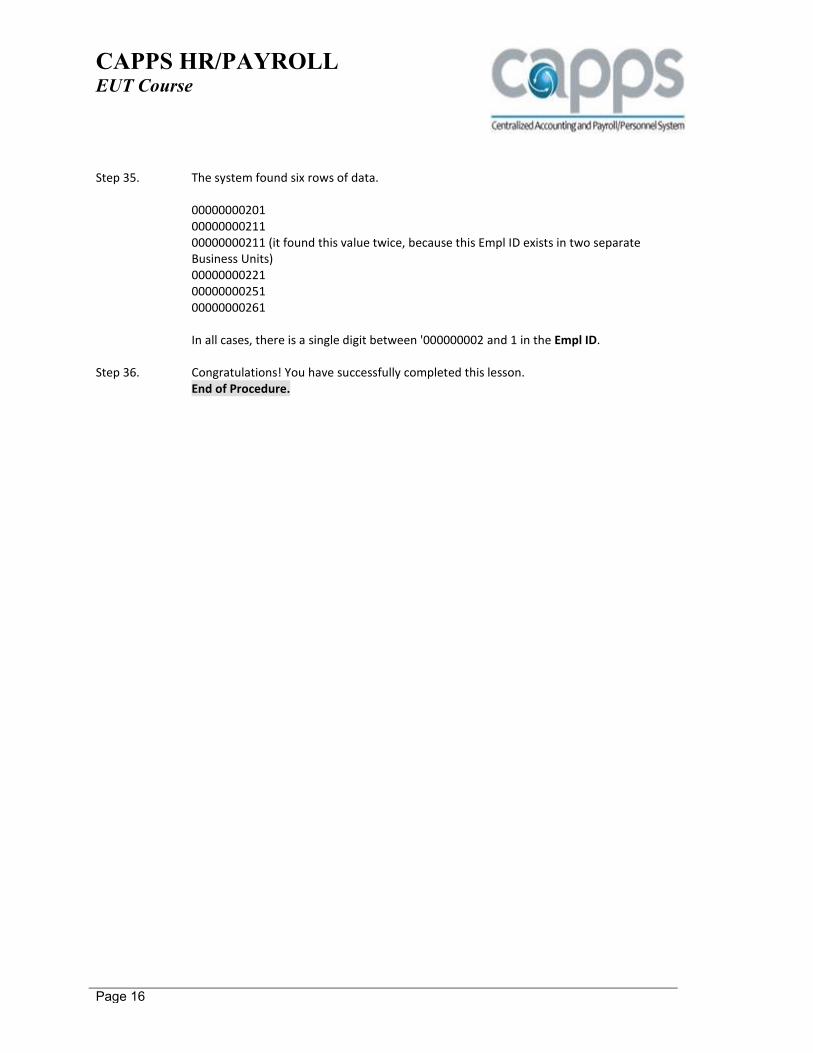
Step 35. The system found six rows of data.
00000000201 00000000211 00000000211 (it found this value twice, because this Empl ID exists in two separate Business Units) 00000000221 00000000251 00000000261 In all cases, there is a single digit between '000000002 and 1 in the Empl ID.
Step 36. Congratulations! You have successfully completed this lesson.
End of Procedure.

CAPPS HR/PAYROLL
EUT Course
Page 17
Section 1 - Timesheet
Section 1 - Timesheet
Section 1 - Timesheet has 5 lessons:
Lesson 1 - Time Reporting Overview
Lesson 2 - Time Reporting Essentials
Lesson 3 - Entering Time and Leave
Lesson 4 - Timesheet Status
Lesson 5 - View Time and Leave Balances
Lesson 3 - Entering Time and Leave
Section 1, Lesson 3
Entering Time and Leave
Timesheet Components
Section 1 - Lesson 3 Exercises - Scenario 1: Timesheet Components
Note: Contingent Workers
Time Reporter Data is not automatically setup for Contingent Workers; therefore you will not have immediate access to the Employee Timesheet. If an agency wants you to have access to the Employee Timesheet then the agency will have to submit an ASP ticket so CPA can set up your Time Reporter Data.
Procedure In this lesson you will be introduced to the various components on the timesheet and when they are used. Step 1. Click the My Time & Leave button.
Step 2. Click the Employee TimeSheet link.
Step 3. The Employee Timesheet search page will automatically open.
It is important to note, the Timesheet displays 31 days starting from the date you enter on the Employee Timesheet search page. The Timesheet defaults to the first day of the current month.
For this reason it is recommended that you always search by the first day of the month. As a result, the Timesheet will then display one month in its entirety.
CAPPS HR/PAYROLL
EUT Course
Page 18
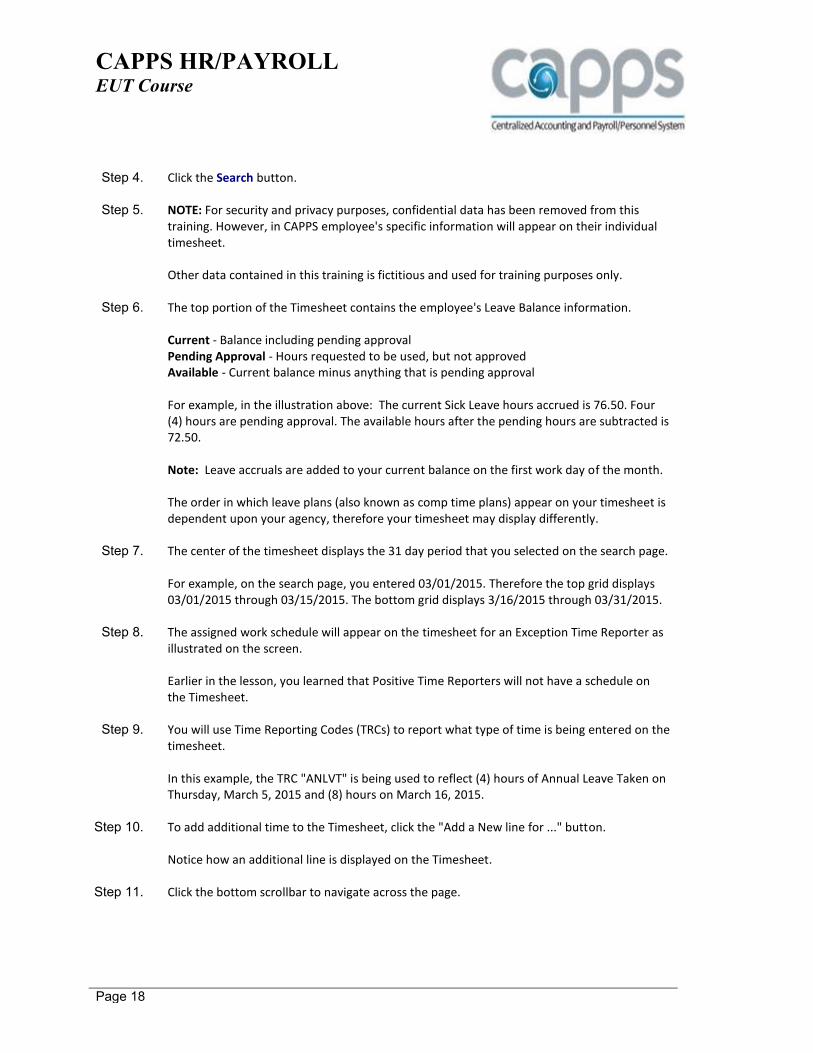
Step 4. Click the Search button.
Step 5. NOTE: For security and privacy purposes, confidential data has been removed from this
training. However, in CAPPS employee's specific information will appear on their individual timesheet. Other data contained in this training is fictitious and used for training purposes only.
Step 6. The top portion of the Timesheet contains the employee's Leave Balance information. Current - Balance including pending approval Pending Approval - Hours requested to be used, but not approved Available - Current balance minus anything that is pending approval
For example, in the illustration above: The current Sick Leave hours accrued is 76.50. Four (4) hours are pending approval. The available hours after the pending hours are subtracted is 72.50. Note: Leave accruals are added to your current balance on the first work day of the month. The order in which leave plans (also known as comp time plans) appear on your timesheet is dependent upon your agency, therefore your timesheet may display differently.
Step 7. The center of the timesheet displays the 31 day period that you selected on the search page.
For example, on the search page, you entered 03/01/2015. Therefore the top grid displays 03/01/2015 through 03/15/2015. The bottom grid displays 3/16/2015 through 03/31/2015.
Step 8. The assigned work schedule will appear on the timesheet for an Exception Time Reporter as
illustrated on the screen. Earlier in the lesson, you learned that Positive Time Reporters will not have a schedule on the Timesheet.
Step 9. You will use Time Reporting Codes (TRCs) to report what type of time is being entered on the timesheet.
In this example, the TRC "ANLVT" is being used to reflect (4) hours of Annual Leave Taken on Thursday, March 5, 2015 and (8) hours on March 16, 2015.
Step 10. To add additional time to the Timesheet, click the "Add a New line for ..." button.
Notice how an additional line is displayed on the Timesheet.
Step 11. Click the bottom scrollbar to navigate across the page.

CAPPS HR/PAYROLL
EUT Course
Page 19
Step 12. You should use the “Override Reason” code only when your manager asks you to enter a
value. It is generally used by agencies to track time being allocated for a specific purpose, such as Military or Disaster.
Step 13. The Labor Account Code (LAC) field is used to track time allocated to a specific project.
Employees should consult with their manager before entering a specific LAC.
Step 14. The Family Medical Leave Act (FMLA) field is used to track time allocated to FMLA leave. It is
only used when an employee is on FMLA leave.
Employees on FMLA should contact their Agency FMLA representative to obtain the FMLA number to be used in this field.
Step 15. The Comments field is available for use by both the employees and managers can enter
information, as needed. It is important to note that both the employee and their manager can read the contents in the comment field.
Step 16. The Delete button will remove the entire row of time. However, once the employee selects the E-Sign & Submit button, the delete button will no longer be available. Click the bottom scrollbar to navigate back across the page.
Step 17. Click on the scroll bar to navigate to the bottom of the page.
Step 18. The Previous button will display the previous month (31 days).
Step 19. The Next button will display the next month (31 days).
Step 20. The View Leave Balances link will provide detailed information for all the employees leave plans also known as comp time plans.
Click the View Leave Balances link.
Step 21. The Leave Time Balance Summary page will appear.
This screen is displaying the details for ONLY one leave plan, (ADMINLEAVE) or Administrative Leave. To view additional leave plan details use the Show Next in Row arrow. This page is currently displaying 1 of 15 (one record of 15 total records.)
CAPPS HR/PAYROLL
EUT Course
Page 20
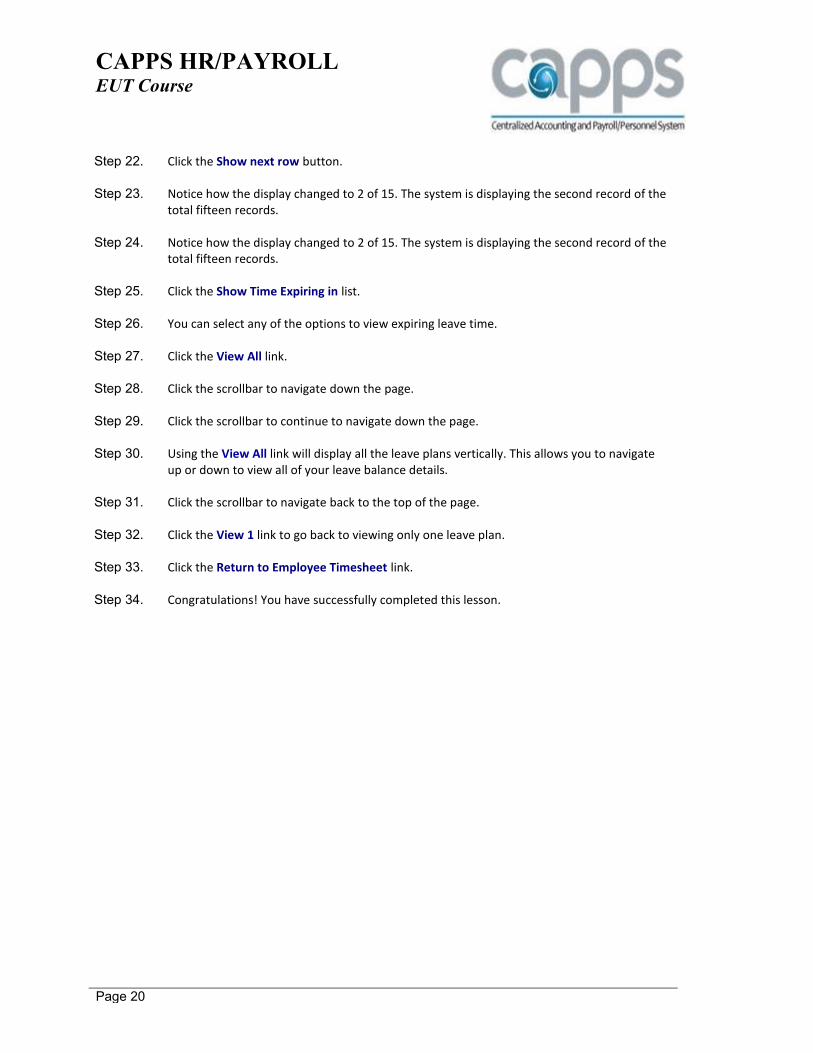
Step 22. Click the Show next row button.
Step 23. Notice how the display changed to 2 of 15. The system is displaying the second record of the total fifteen records.
Step 24. Notice how the display changed to 2 of 15. The system is displaying the second record of the
total fifteen records.
Step 25. Click the Show Time Expiring in list.
Step 26. You can select any of the options to view expiring leave time.
Step 27. Click the View All link.
Step 28. Click the scrollbar to navigate down the page.
Step 29. Click the scrollbar to continue to navigate down the page.
Step 30. Using the View All link will display all the leave plans vertically. This allows you to navigate up or down to view all of your leave balance details.
Step 31. Click the scrollbar to navigate back to the top of the page.
Step 32. Click the View 1 link to go back to viewing only one leave plan.
Step 33. Click the Return to Employee Timesheet link.
Step 34. Congratulations! You have successfully completed this lesson.
CAPPS HR/PAYROLL
EUT Course
Page 21
Positive Time Reporters
Section 1, Lesson 3
Positive Time Reporters
Enter Regular Hours Worked - Positive Time Reporter
Section 1 - Lesson 3 Positive Time Reporters Exercises - Scenario 2:
Enter Regular Hours Worked
Procedure
In this lesson, you will learn how to enter hours worked as a Positive Time Reporter.
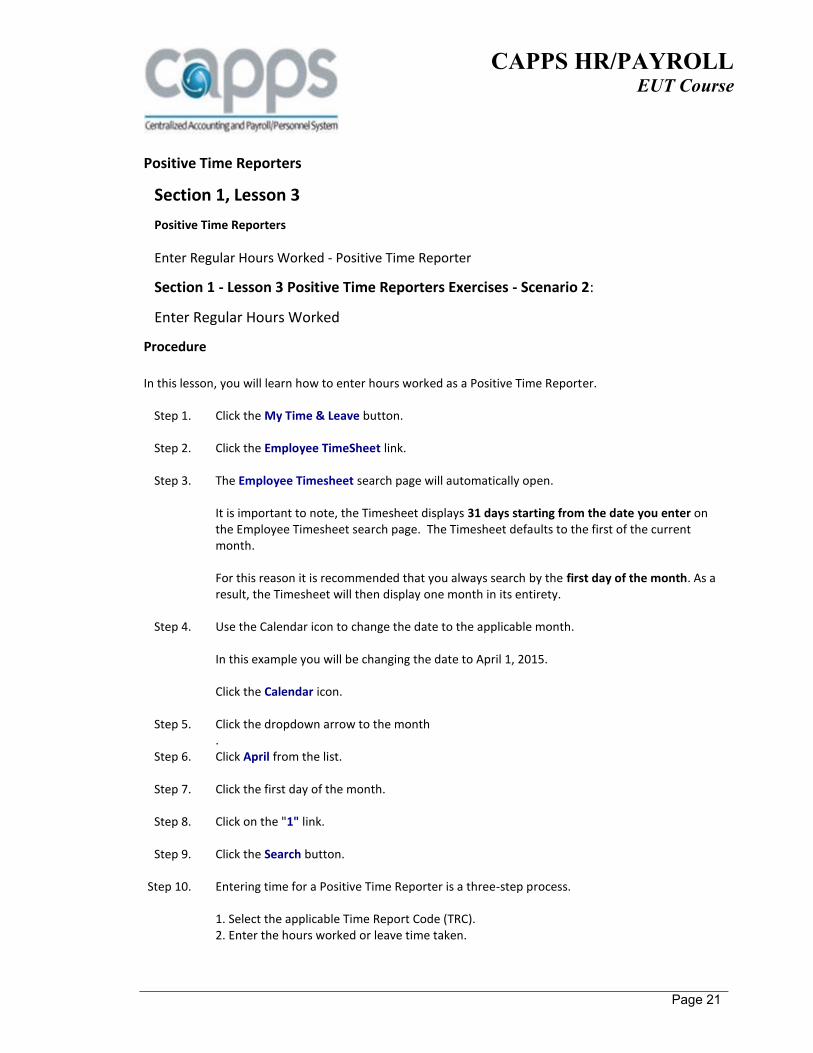
Step 1. Click the My Time & Leave button.
Step 2. Click the Employee TimeSheet link.
Step 3. The Employee Timesheet search page will automatically open.
It is important to note, the Timesheet displays 31 days starting from the date you enter on the Employee Timesheet search page. The Timesheet defaults to the first of the current month. For this reason it is recommended that you always search by the first day of the month. As a result, the Timesheet will then display one month in its entirety.
Step 4. Use the Calendar icon to change the date to the applicable month. In this example you will be changing the date to April 1, 2015. Click the Calendar icon.
Step 5. Click the dropdown arrow to the month .
Step 6. Click April from the list.
Step 7. Click the first day of the month.
Step 8. Click on the "1" link.
Step 9. Click the Search button. Step 10. Entering time for a Positive Time Reporter is a three-step process.
1. Select the applicable Time Report Code (TRC). 2. Enter the hours worked or leave time taken.

CAPPS HR/PAYROLL
EUT Course
Page 22
3. Select the E-Sign & Submit button Step 11. Step 1 - Select the applicable Time Report Code (TRC).
Since you are entering time for Regular Hours Worked you will use the TRC - REGHR. The TRC may be entered directly or by selecting the Look up button. Start by clicking the Look up Time Reporting Code button.
Step 12. Click the scrollbar to navigate down the list.
Step 13. Select the TRC for Regular Hours Worked. Click the REGHR link.
Step 14. Step 2 - Enter the hours worked or leave time taken.
In this example you will enter (8) hours worked on Wednesday, 4/1. Enter "8" in the Wed 4/1 field.
Step 15. Enter "8" in the Thu 4/2 field.
Step 16. Enter "8" in the Fri 4/3 field.
Step 17. Enter "8" in the Mon 4/6 field.
Step 18. Enter "8" in the Tue 4/7 field.
Step 19. Enter "8" in the Wed 4/8 field.
Step 20. Enter "8" in the Thu 4/9 field.
Step 21. Enter "8" in the Fri 4/10 field.
Step 22. Enter "8" in the Mon 4/13 field
Step 23. Enter "8" in the Tue 4/14 field.
Step 24. Enter "8" in the Wed 4/15 field
Step 25. You will enter hours worked for the second half of the month by using the REGHR TRC again.
You can either type it in the field or select the Look up Time Reporting Code button.
Step 26. Click the scrollbar to navigate down the list. Step 27. Select the TRC for Regular Hours Worked.
Click the REGHR link.
Step 28. Enter "8" in the Thu 4/16 field.
CAPPS HR/PAYROLL
EUT Course
Page 23
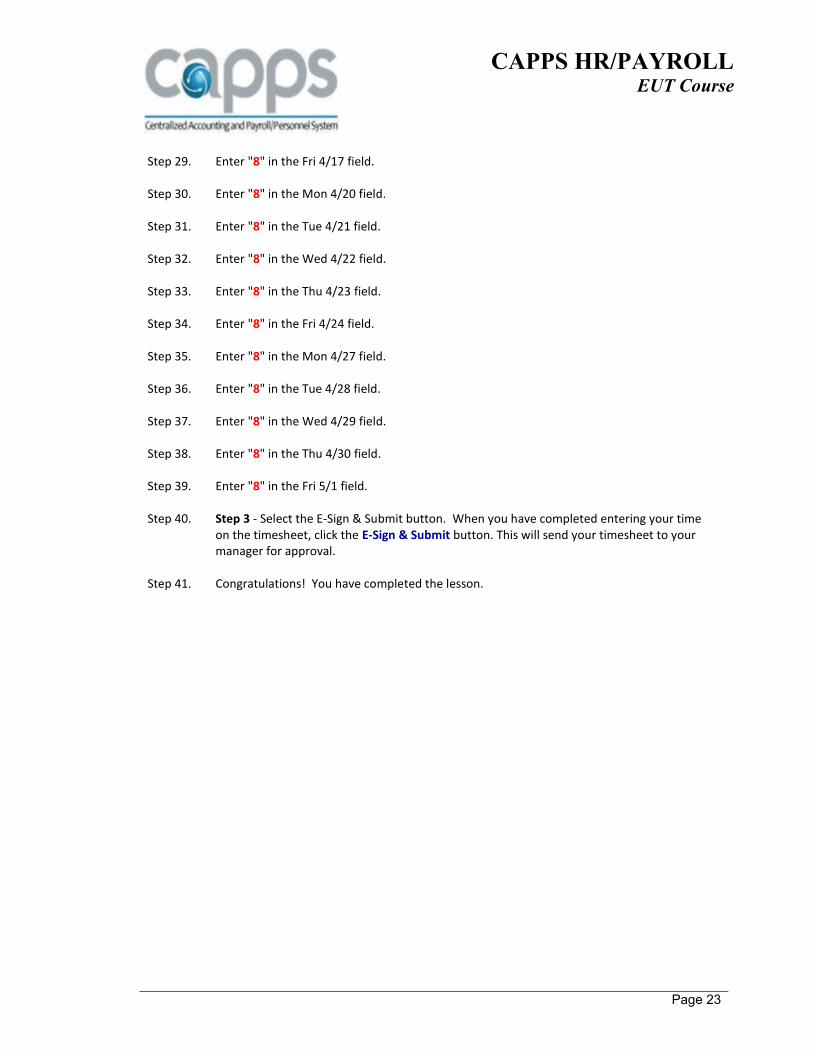
Step 29. Enter "8" in the Fri 4/17 field.
Step 30. Enter "8" in the Mon 4/20 field.
Step 31. Enter "8" in the Tue 4/21 field.
Step 32. Enter "8" in the Wed 4/22 field.
Step 33. Enter "8" in the Thu 4/23 field.
Step 34. Enter "8" in the Fri 4/24 field.
Step 35. Enter "8" in the Mon 4/27 field.
Step 36. Enter "8" in the Tue 4/28 field.
Step 37. Enter "8" in the Wed 4/29 field.
Step 38. Enter "8" in the Thu 4/30 field.
Step 39. Enter "8" in the Fri 5/1 field.
Step 40. Step 3 - Select the E-Sign & Submit button. When you have completed entering your time on the timesheet, click the E-Sign & Submit button. This will send your timesheet to your manager for approval.
Step 41. Congratulations! You have completed the lesson.

CAPPS HR/PAYROLL
EUT Course
Page 24
Enter Time Over 40 hours - Positive Time Reporter
Section 1 - Lesson 3 Positive Time Reporters Exercises
Scenario 3: Enter Time Over 40 Hours
Procedure In this lesson you will learn how to enter time over 40 hours in a work week for a positive time reporter. In this example, a Positive Time Reporter will enter all the hours he/she worked during the week of 4/6-4/10. He/she generally works Monday - Friday, eight hours per day. On Tuesday and Wednesday, he/she worked two hours of overtime. Note: This is a non-exempt employee who banks FLSA overtime for hours worked over 40.
Step 1. Click the My Time & Leave button.
Step 2. Click the Employee TimeSheet link.
Step 3. Click the button to the right of the field
Step 4. Click April from the menu.
Step 5. Click the '1' link for the first of the month.
Step 6. Click the Search button.
Step 7. Click the Look up Time Reporting Code (Alt+5) button.
Step 8. Click the scrollbar to navigate down the selection.
Step 9. Click the Regular Hours Worked link.
Step 10. Enter the actual hours worked into the Mon 4/6 field.
Enter "8.00".
Step 11. Enter the actual hours worked into the Tue 4/7 field.
Enter "10.00".
Step 12. Enter the actual hours worked into the Wed 4/8 field. Enter "10.00".
Step 13. Enter the actual hours worked into the Thu 4/9 field. Enter "8.00".
Step 14. Enter the actual hours worked into the Fri 4/10 field. Enter "8.00".

CAPPS HR/PAYROLL
EUT Course
Page 25
Step 15. The employee has entered a total of 44 regular hours worked for the week of April 6 through
April 10. When Time Administration processes, it will create 40 hours of regular time, and 4 hours of comp time for exempt employees or 6 hours of overtime for non-exempt employees.
Click the E-Sign & Submit button.
Step 16. Click the OK button.
Step 17. Congratulations! You have completed this lesson.
Entering Leave Time Taken - Positive Time Reporter
Section 1 - Lesson 3 Positive Time Reporters Exercises - Scenario 4:
Entering Leave Time Taken
Procedure On 4/20/2015, a Positive Time Reporter, worked four hours and took four hours annual leave. In this lesson you will learn how to enter leave time and regular time worked on the same day. However, you can also enter leave time for an entire day.
Step 1. Click the My Time & Leave button.
Step 2. Click the Employee TimeSheet link.
Step 3. Click the Choose a date (Alt+5) button.
Step 4. Click the drop down arrow.
Step 5. Click April from the list.
Step 6. Click the '1' link for the first of the month.
Step 7. Click the Search button
Step 8. Positive Time Reporters need to enter hours worked and leave hours taken. Click the Look up Time Reporting Code (Alt+5) button.
Step 9. Click the Annual Leave Taken link.
Step 10. Enter the annual leave taken into the Mon 4/20 field. In this example enter "4.00".

CAPPS HR/PAYROLL
EUT Course
Page 26
Step 11. Next, you are going to enter the four hours that he/she actually worked in this example. It is important to note that when you use a different Time Reporting Code (TRC) you must use a different line.
Step 12. Click the Add a New Line for Thursday 04/16/2015 to Friday 05/01/2015 button.
Step 13. Click the Look up Time Reporting Code (Alt+5) button.
Step 14. Click the scrollbar to navigate down the list.
Step 15. Click the REGHR link.
Step 16. Enter the hours that were actually worked into the Mon 4/20 0.00 field. Enter “4.00”.
Step 17. Notice how two lines are now displayed. One for Annual Leave Taken, and one for Regular
Hours Worked
Step 18. Click the scrollbar to navigate down the page.
Step 19. Click the E-Sign & Submit button
Step 20. Click the OK button.
Step 21. Notice the four hours of Annual Leave in a Pending Approval status. When the manager approves the leave, the time will be ready to be processed.
Step 22. Congratulations! You have completed this lesson. End of Procedure.
CAPPS HR/PAYROLL
EUT Course
Page 27
Exception Time Reporters
Section 1, Lesson 3
Exception Time Reporters – Enter Overtime/Comp Time Worked
Section 1 - Lesson 3 Exception Time Reporters Exercises - Scenario 5:
Enter Overtime/Comp Time Worked
Procedure In this lesson you will learn how to enter additional hours worked for an Exception Time Reporter.
Step 1. Click the My Time & Leave button.
Step 2. Click the Employee TimeSheet link.
Step 3. Make sure that you are on the correct month. If not, change the date to the first day of the correct month.
Step 4. Click the Search button.
Step 5. VERY IMPORTANT NOTE:
A good rule to remember: If the Time Reporting Code (TRC) is different, you need a new line to enter time. If it is the same, you can use the same line. For example: if you took Sick Leave on Monday and Tuesday of the same week, you could enter time for both days on the same line
Step 6. Click the Add a New Line ... button.
Step 7. When adding additional time worked you need to add your scheduled hours and the
additional hours worked. In this example, the scheduled hours to work is eight (8). The employee worked two (2) extra hours on Monday and Tuesday, March 9 and 10.
The total Regular Hours worked will be eight scheduled hours plus two overtime hours for a total of 10 hours.
Step 8. The Time Reporting Code for Overtime/Comp /Time is 'REGHR'.
Exempt and Non-exempt employees will both enter additional hours worked in the same way. - Exempt employee's time will bank as Comp Time Earned. - Non-Exempt employee's time will bank FLSA Overtime.
CAPPS HR/PAYROLL
EUT Course
Page 28
Enter the TRC "REGHR"
Step 9. Enter the hours worked into the Mon 3/9 8.00 field. In this example you would enter "10". (i.e., eight regular hours worked plus two overtime hours worked).
Step 10. Enter the hours worked into the Tue 3/10 8.00 field. Enter “10”.
Step 11. The employee worked their regular scheduled hours for the remainder of the week. Therefore, no additional time entry was required.
Step 12. Click the scrollbar to navigate to the bottom of the page.
Step 13. Click the E-Sign & Submit button.
Step 14. Click the OK button.
Step 15. After approval and Time Administration has processed, the system will automatically calculate the hours and apply them to the applicable totals (Comp Time or FLSA Overtime) based on your Exempt or Non-Exempt status.
Step 16. Congratulations! You have successfully completed this lesson. End of Procedure.
Enter Time for Flex Schedule
Section 1 - Lesson 3 Exception Time Reporters Exercises - Scenario 6: Enter Time for a Flex Schedule
Procedure The TRC FLEXS (Flex Schedule) enables you to flex your schedule. In this lesson an Exception Time Reporter was asked by their manager to work on a Saturday rather than their scheduled day. On Thursdays the employee normally works eight hours.
Step 1. Click the My Time & Leave button.
Step 2. Click the Employee TimeSheet link.
Step 3. Click the Choose a date (Alt+5) button.
Step 4. Click drop down arrow.
Step 5. Click April from the list.
Step 6. Click the '1' link to display the whole month of April.

CAPPS HR/PAYROLL
EUT Course
Page 29
Step 7. Click the Search button.
Step 8. Remember, the Exception Time Reporter was asked by his/her manager to work on Saturday
instead of Thursday.
The employee is going to reflect this change on the Timesheet.
Step 9. It is important to note: Exception Time Reporters only need to make changes to their Timesheet when it is different from their schedule. Notice how the employee's schedule on 4/2 reflects eight hours. The employee is not going to work on Thursday. If the employee does not adjust their schedule, they will inaccurately bank comp time or overtime.
Step 10. When flexing your schedule use the TRC FLEXS. Since every different TRC needs its own unique line, the first thing the employee will need to do is add a line.
Click the Add a New Line for Wednesday 04/01/2015 to Wednesday 04/15/2015 button.
Step 11. Click the Look up Time Reporting Code (Alt+5) button.
Step 12. The employee needs to use the FLEXS Time Reporting Code to indicate that he is not working his scheduled time on Thursday. Click the FLEXS link.
Step 13. The employee will enter eight hours of FLEXS time on Thursday.
Enter the schedule hours into the Thu 4/2 field. Enter "8".
Step 14. The employee needs to use the REGHR Time Reporting Code to indicate that he is working on Saturday. Click the Add a New Line for Wednesday 04/01/2015 to Wednesday 04/15/2015 button.
Step 15. Click the Look up Time Reporting Code (Alt+5) button.
Step 16. Click the scrollbar to navigate down the list.
Step 17. The time worked on the unscheduled day will be charged to regular time.
Click the REGHR link.
Step 18. Enter the eight hours worked on the REGHR line in the Sat 4/4 field. Enter "8".

CAPPS HR/PAYROLL
EUT Course
Page 30
Step 19. The employee's timesheet now reflects the time worked on the unscheduled day and the
time not worked on the scheduled day.
Step 20. Click the E-Sign & Submit button.
Step 21. Click the OK button.
Step 22. Congratulations! You have successfully completed this lesson. End of Procedure
Enter Annual Leave Taken
Section 1 - Lesson 3 Exception Time Reporters Exercises - Scenario 7: Enter Annual Leave Taken
Procedure
In this lesson you will learn how to enter Annual Leave. The Exception Time Reporter will enter eight hours of annual leave Monday, March 16.
Step 1. Click the My Time & Leave button.
Step 2. Click the Employee TimeSheet link.
Step 3. Click the Search button.
Step 4. Click the Look up Time Reporting Code (Alt+5) button.
Step 5. Click the ANLVT link for Annual Leave Taken
Step 6. Click in the 3/16 field.
Step 7. Enter the hours for Annual Leave Taken into the Mon 3/16 field. Enter "8.00".
Step 8. Click the scrollbar to navigate down the page.
Step 9. Click the E-Sign & Submit button.
Step 10. Click the OK button.
Step 11. Congratulations! You have successfully completed this lesson. End of Procedure.

CAPPS HR/PAYROLL
EUT Course
Page 31
Enter Sick Time Taken
Section 1 - Lesson 3 Exception Time Reporters Exercises - Scenario 8: Enter Sick Time Taken
Procedure In this lesson you will learn how to enter sick leave. The employee is scheduled to work eight hours on 4/6, however he/she becomes ill and leaves four hours early from work. Remember: Exception Time Reporters only need to enter additional time worked or leave time taken on their timesheet.
Step 1. Click the My Time & Leave button.
Step 2. Click the Employee TimeSheet link.
Step 3. Access the Timesheet for the correct pay period. Click the Choose a date (Alt+5) button.
Step 4. Click the drop down arrow.
Step 5. Click April from the list.
Step 6. Click the '1' link to view the entire month.
Step 7. Click the Search button.
Step 8. The Sick Time Balance displayed at the top for this employee's timesheet is 76.50 hours. To enter sick time on the timesheet the employee must use the correct TRC. Add a new row for the new Time Reporting Code SICKT. Click the Add a New Line for Wednesday 04/01/2015 to Wednesday 04/15/2015 button.
Step 9. Click the Look up Time Reporting Code (Alt+5) button.
Step 10. Scroll down to the Time Reporting Code "SICKT". Click the scrollbar.
Step 11. Click the SICKT link.
Step 12. Enter the sick hours taken into the Mon 4/6 field. Enter "4.00".
Step 13. Click the E-Sign & Submit button.
Step 14. Click the OK button.
CAPPS HR/PAYROLL
EUT Course
Page 32
Step 15. Look at the Leave Balances at the top of the timesheet. Notice that the 4 hours of sick time is
pending approval and the new Available balance is displayed. Once the sick time is approved by the manager, it will be processed by Time Administration.
Step 16. Congratulations! You have successfully completed this lesson.
Enter Regular Comp Time Taken
Section 1 - Lesson 3 Exception Time Reporters Exercises - Scenario 9: Enter Regular Comp Time Taken
Procedure
In this lesson you will learn how to enter Regular Comp Time taken. On 3/17 the employee will not work his/her scheduled hours; instead he/she is going to take eight hours of Comp Time.
Step 1. Click the My Time & Leave button.
Step 2. Click the Employee TimeSheet link.
Step 3. Click the Search button.
Step 4. Click the scrollbar to navigate down the page.
Step 5. The TRC for Comp Time Taken is COMPT. The employee will need to add a new row to record the Time Reporting Code and hours. Click the Add a New Line for Monday 03/16/2015 to Tuesday 03/31/2015 button.
Step 6. Click the Look up Time Reporting Code (Alt+5) button.
Step 7. Choose the Time Reporting Code for Compensatory Time (Comp Time) Taken. Click the COMPT link.
Step 8. Enter the Comp Time hours taken into the Tue 3/17 field.
Enter "8.00".
Step 9. Click the scrollbar to navigate down the page.
Step 10. Click the E-Sign & Submit button.
Step 11. Click the OK button.
Step 12. Once the timesheet is ‘E-Sign and Submitted’, the eight hours of Regular Comptime will
appear in the Pending Approval row of the Leave Balances section of the timesheet.
CAPPS HR/PAYROLL
EUT Course
Page 33
The Available Balance reflects the Current - the Pending Approval hours.
In this example: 26.50 (Current) – 8.00 (Pending Approval) = 18.50 (Available).
Step 13. Congratulations! You have successfully completed this lesson.
Enter FLSA Overtime Taken
Section 1 - Lesson 3 Exception Time Reporters Exercises - Scenario 10: Enter FLSA Overtime Taken
Procedure In this lesson you will learn how to take banked overtime. On 4/1 the employee will not work his/her regular hours; instead he/she will use FLSA overtime hours as their leave time.
Step 1. Click the My Time & Leave button.
Step 2. Click the Employee TimeSheet link
Step 3. Click the Choose a date (Alt+5) button.
Step 4. Click the drop down arrow.
Step 5. Click April from the list.
Step 6. Click the '1' link to view the whole month.
Step 7. Click the Search button
Step 8. The employee is going to use FLSA Overtime to take a day off
Step 9. Click the Add a New Line for Wednesday 04/01/2015 to Wednesday 04/15/2015 button.
Step 10. Click the Look up Time Reporting Code (Alt+5) button
Step 11. The Time Reporting Code for Banked Overtime Taken is "FLSAT". Click the FLSAT link.
Step 12. Enter the leave hours into the Wed 4/1 field. Enter "8.00”.
Step 13. Click the scroll bar.
Step 14. Click the E-Sign & Submit button.
Step 15. Click the OK button.
The eight hours the employee recorded for FLSAT leave is in a Pending Approval status. Once the time is approved by the manager the hours will be processed by Time Administration.

CAPPS HR/PAYROLL
EUT Course
Page 34
Step 16. Congratulations! You have successfully completed this lesson. End of Procedure.
Enter Leave Without Pay
Section 1 - Lesson 3 Exception Time Reporters Exercises - Scenario 11: Enter Leave Without Pay
Procedure In this lesson you will learn how to enter leave without pay. The employee has no leave time available, but needs to take their scheduled days 4/16 and 4/17 off.
Step 1. Click the My Time & Leave button.
Step 2. Click the Employee TimeSheet link
Step 3. The employee was absent from work without pay for two days. The employee will enter it on the timesheet. Click the Choose a date (Alt+5) button.
Step 4. Click the button to the right of the field.
Step 5. Click the April list item
Step 6. Click the 1 link.
Step 7. Click the Search button.
Step 8. Click the scroll bar.
Step 9. Since the employee has exhausted all of their leave, the time must be entered as leave
without pay. Click the Add a New Line for Thursday 04/16/2015 to Friday 05/01/2015 button.
Step 10. Click the Look up Time Reporting Code (Alt+5) button.
Step 11. Various Leave Without Pay options are available. You would select the option that is applicable to your situation. Click the LWPEO link.
Step 12. In this example, we will select the Leave Without Pay - Employee (LWPEO) option.
Step 13. Enter the scheduled hours not worked into the Thu 4/16 field. Enter "8.00".
Step 14. Enter the scheduled hours not worked into the Thu 4/17 field. Enter "8.00".
Step 15. The time has been entered on the days the employee was absent and it has been submitted for approval to the manager. Click the E-Sign & Submit button.
CAPPS HR/PAYROLL
EUT Course
Page 35
Step 16. Click the OK button.
Step 17. Congratulations! You have successfully completed this lesson. End of Procedure.
Enter Multiple Leave Types
Section 1 - Lesson 3 Exception Time Reporters Exercises - Scenario 12: Enter Multiple Leave Types
Procedure In this lesson you will learn how to enter leave time taken for more than one type of leave. In this example, Annual Leave has already been entered. You will be entering Sick Leave on the same week.
Step 1. Click the My Time & Leave button.
Step 2. Click the Employee TimeSheet link.
Step 3. Click the Search button.
Step 4. Annual Leave taken has already been entered on the Timesheet.
Step 5. When entering multiple leave types, it is important to remember to insert a new line when using a different Time Reporting Code on the same grid. Click the Add a New Line for Monday 03/16/2015 to Tuesday 03/31/2015 button.
Step 6. The employee is going to enter Sick Time Taken, so you are adding a new line for the Time Reporting Code SICKT. Click the Look up Time Reporting Code (Alt+5) button.
Step 7. Click the scrollbar to navigate down the list.
Step 8. Click the SICKT link.
Step 9. Enter the sick leave hours into the Wed 3/18 field. Enter "4.00".
Step 10. Click the scrollbar to navigate down the page.
Step 11. Click the E-Sign & Submit button.
Step 12. Click the OK button.
Step 13. Congratulations! You have successfully completed this lesson.

CAPPS HR/PAYROLL
EUT Course
Page 36
Enter Time Worked on a Scheduled Holiday
Section 1 - Lesson 3 Exception Time Reporters Exercises - Scenario 13: Enter Time Worked on a Scheduled Holiday
Procedure In this lesson you will learn how to enter hours worked on a holiday. Note: If you are scheduled on a holiday and do not work on the holiday, you do not enter any hours. The system will compensate the employee according to their eligibility.
Step 1. Click the My Time & Leave button.
Step 2. Click the Employee TimeSheet link.
Step 3. Click the Choose a date (Alt+5) button.
Step 4. Click the drop down arrow.
Step 5. Click May from the list
Step 6. Click the '1' link to display the entire month.
Step 7. Click the Search button.
Step 8. For an employee whose holiday falls on a regularly scheduled workday and the employee
works the only timesheet entry made is REGHW for the number of hours worked for the day. In this example, the employee worked five hours on the holiday. Click the Look up Time Reporting Code (Alt+5) button.
Step 9. Click the scrollbar to navigate down the list.
Step 10. Click the REGHW link.
Step 11. Enter the number of hours that the employee worked on the holiday into the Mon 5/25 field. Enter "5.00".
Step 12. Click the scrollbar to navigate down the page.
Step 13. Click the E-Sign & Submit button.
Step 14. The system reminds you that this is a holiday. Click the OK button.
Step 15. Click the OK button.
CAPPS HR/PAYROLL
EUT Course
Page 37
Step 16. There are other options relating to Holiday hours: Non-Scheduled Holiday: If a holiday falls on a day that the employee is not scheduled and the employee physically works the holiday, then the employee enters their hours worked with the REGHR TRC. This will result in the employee banking comp time for the hours worked. The employee will also earn COMPH in their Comp Time leave balance to account for holiday hours they are eligible for. This will allow them to take the hours for the holiday on another day (Holiday Bank). Work More Than The Authorized Hours: If an employee is authorized for 8 hours on a holiday, but is scheduled for 10 hours and physically works 10 hours, then the employee needs to enter 8 hours REGHW and 2 hours REGHR. If this same employee does not work on the holiday, then they need to enter 2 hours of Leave on the holiday, or CAPPS will automatically deduct available leave up to 2 hours or create an exception if 2 hours of leave is not available. (Note: The available leave must be from one leave type.)
Step 17. Congratulations! You have successfully completed this lesson. End of Procedure
Enter Optional Holiday Time Taken and Work a Holiday
Section 1 - Lesson 3 Exception Time Reporters Exercises - Scenario 14: Enter Optional Holiday Time Taken and Work a Holiday
Procedure In this lesson you will learn how to take an Optional Holiday. The employee has taken March 31, 2015, Cesar Chavez Day, as an optional holiday. The employee will enter it on the timesheet. To make up the Optional Holiday the employee works on San Jacinto Day.
Step 1. Click the My Time & Leave button.
Step 2. Click the Employee TimeSheet link.
Step 3. Click the Search button.
Step 4. Click the scrollbar to navigate down the page.
Step 5. The employee has to add a new line to enter the Time Reporting Code for the optional holiday. Click the Add a New Line for Monday 03/16/2015 to Tuesday 03/31/2015 button.
Step 6. Click the Look up Time Reporting Code (Alt+5) button.
Step 7. Click the scrollbar to navigate down the list.

CAPPS HR/PAYROLL
EUT Course
Page 38
Step 8. The correct Time Reporting Code for an optional holiday is OHCPT. Click the OHCPT link.
Step 9. Enter the hours into the Tue 3/31 field. Enter "8.00".
Step 10. Click the E-Sign & Submit button
Step 11. Click the OK button.
Step 12. Notice the Optional Holiday information at the top of the timesheet with the Leave Balances.
It shows the 8 hours of optional holiday time in a pending approval status with an available balance of -8.00 hours. Before the end of the fiscal year, the employee will have to work on a holiday to replace the time, or pay for the time taken. The optional holiday balance can only be negative until the end of the fiscal year.
Step 13. Employees also have the option to work the holiday and have a positive balance and take another optional holiday off at a later time. At the end of the fiscal year the balance must be zero. If the balance is a positive number the employee will lose the hours.
Step 14. The employee worked on San Jacinto Day so the -8 balance will move back to zero. Click the My Time & Leave button.
Step 15. Click the Employee TimeSheet link.
Step 16. Click the Search button.
Step 17. Click the Add a New Line for Thursday 04/16/2015 to Friday 05/01/2015 button.
Step 18. Enter the desired information into the Time Reporting Code field. Enter "REGOH".
Step 19. Enter the desired information into the Tue 4/21 8.00 field. Enter "8".
Step 20. Click the E-Sign & Submit button.
Step 21. Click the OK button.
Step 22. Click the OK button.
Step 23. Click the OK button.
Step 24. After the hours have been approved by the manager and have been process through Time
Administration the Optional Holiday hours show 0.
Step 25. Congratulations! You have successfully completed this lesson. End of Procedure.
CAPPS HR/PAYROLL
EUT Course
Page 39
Allocating Time Worked to a Labor Account Code
Section 1 - Lesson 3 Exception Time Reporters Exercises - Scenario 15: Allocating Time Worked to a Labor Account Code
Procedure Employee AAA's manager has assigned him/her to work on two projects (Project 1 and Project 2) in the same work week and has requested that the employee use a Labor Account Code. In this lesson you will learn how to allocate hours worked to Project 1. In the next lesson you will learn how to add the additional hours worked during the week for Project 2. Hours worked: 4/6 & 4/7 - Project 1 (Regular Scheduled Hours) 4/8 & 4/9 - Project 2 (Regular Scheduled Hours) Next Lesson
Step 1. Click the My Time & Leave button.
Step 2. Click the Employee TimeSheet link.
Step 3. The Timesheet defaults to the first day of the current month. It is recommended that you
use the first day of the month when accessing the Timesheet. This will display the entire month on the timesheet.
Step 4. Click the Search button.
Step 5. Labor Account Codes (LAC) are used to track hours worked to a specific work assignment, such as a project. As you learned earlier in this course, every time you use a different TRC to report hours worked or leave time taken, you must use a separate line within that grid. You follow this same rule when allocating hours to a Labor Account Code. Each unique LAC will also require its own separate line on the timesheet grid
Step 6. Click the Add a New Line for ... button.
Step 7. Click the Look up Time Reporting Code (Alt+5) button.
Step 8. Click in the Time Reporting Code field.
Step 9. To shorten your search, enter the first few letters of the Time Reporting Code field.
Enter "reg".
Step 10. Click the Look Up button.
Step 11. Click the REGHR link.
CAPPS HR/PAYROLL
EUT Course
Page 40
Step 12. Click in the Mon 4/6 field.
Step 13. Enter the hours worked into the Mon 4/6 field. Employee AAA worked his/her scheduled hours. Enter "8”.
Step 14. Click in the Tue 4/7 field.
Step 15. Enter the hours worked into the Tue 4/7 field. Employee AAA worked his/her scheduled
hours. Enter "8".
Step 16. Click the scrollbar to navigate across the page.
Step 17. Click the Look up Labor Account Code (Alt+5) button.
Step 18. NOTE: Applicable LAC for your agency will be listed in the search results. Your manager should provide you with the LAC information that he/she assigned you to work. If you do not know what LAC to select, do not select one, and refer to your manager for assistance. In this example, click the Project 1 link.
Step 19. Click the scrollbar to navigate back across the page.
Step 20. Click the scrollbar to navigate down the page.
Step 21. Click the E-Sign & Submit button.
Step 22. Click the OK button.
Step 23. Congratulations! You have successfully completed this lesson. End of Procedure.
Allocating Time Worked to Multiple Labor Account Codes
Section 1 - Lesson 3 Exception Time Reporters Exercises - Scenario 16: Allocating Time Worked to Multiple Labor Account Codes
Procedure In the previous scenario you learned how to allocate hours worked to Project 1. In this lesson you learn how to add the additional hours worked during the week for Project 2. Employee AAA's manager has assigned him/her to work on two projects (Project 1 and Project 2) in the same work week. Hours worked: 4/6 & 4/7 - Project 1 (Regular Scheduled Hours) Previous Lesson 4/8 & 4/9 - Project 2 (Regular Scheduled Hours)
CAPPS HR/PAYROLL
EUT Course
Page 41
Step 1. Click the My Time & Leave button.
Step 2. Click the Employee TimeSheet link.
Step 3. Click the Search button.
Labor Account Codes (LAC) are used to track hours worked to a specific work assignment, such as a project.
As you learned earlier in this course, every time you use a different TRC to report hours worked or leave time taken, you must use a separate line within that grid. You follow this same rule when allocating hours to a Labor Account Code. Each unique LAC will also require its own separate line on the timesheet grid.
Step 4. Click the Add a New Line for ... button.
Step 5. Click the Look up Time Reporting Code (Alt+5) button.
Step 6. Click in the Time Reporting Code field.
Step 7. To shorten your search, enter the first few letters of the Time Reporting Code field. Enter
"re"
Step 8. Click the Look Up button.
Step 9. Click the REGHR link.
Step 10. Enter the total hours worked on Project 2 into the Wed 4/8 field. In this example you worked all of your eight scheduled hours. Enter "8".
Step 11. Click in the Thu 4/9 field.
Step 12. Enter the total hours worked on Project 2 into the Thurs 4/9 field. In this example you
worked all of your eight scheduled hours. Enter "8".
Step 13. Click in the scrollbar to navigate across the page.
Step 14. Click the Look up Labor Account Code (Alt+5) button.
NOTE: Applicable LAC for your agency will be listed in the search results. Your manager should provide you with the LAC information that he/she assigned you to work. If you do not know what LAC to select, do not select one, and refer to your manager for assistance. In this example, click the Project 2 link.
Step 15. Click the scrollbar to navigate back across the page.
Step 16. Click the scrollbar to navigate down the page.
Step 17. Click the E-Sign & Submit button.
CAPPS HR/PAYROLL
EUT Course
Page 42
Step 18. Click the OK button.
Step 19. You just learned how to allocate hours worked to two separate Labor Account Codes
(Project 1 and Project 2).
Step 20. What if you worked only partial hours toward your LAC. How would you enter your time? For example: Employee AAA works an 8 hour scheduled day. Only for 3 of those hours he/she worked on Project 1, the remaining 5 hours he/she worked his/her regular job which doesn't require a LAC to be entered in the system. In this case, the employee will need to enter his/her hours on two separate lines on the Timesheet grid. Line 1: Employee AAA will add a new line, enter the TRC REGHR, enter the 3 hours worked on the timesheet, and select the applicable LAC. Line 2: Employee AAA will add a new line, enter the TRC REGHR, enter the remaining 5 hours worked, and leave the LAC field blank.
Step 21. Congratulations! You have successfully completed this lesson. End of Procedure.
Employee Time Certification
Section 1 - Lesson 3 Exception Time Reporters Exercises - Scenario 17: Employee Time Certification
Procedure In this lesson, you will learn how to certify time using the Time Certification page.
Step 1. Click the My Time & Leave button.
Step 2. Agencies can instruct their employees to certify their time by accessing the Time
Certification page and clicking on E-Sign & Certify. Click the Employee Time Certification link.
Step 3. Information contained in the Instructional Text will vary per Agency.
Step 4. Click the E-Sign & Certify button.
Step 5. Click the OK button.
Step 6. Notice how the save action marked the Time Certification with a Date/Time Stamp. Note: Employees can also certify their time by using the Time Certification link at the bottom of their timesheet.
CAPPS HR/PAYROLL
EUT Course
Page 43
Step 7. Congratulations, you have completed this lesson. End of Procedure.
Lesson 5 - View Time and Leave Balances
Section 1, Lesson 5
View Time and Leave Balances
View Leave Balances/Expirations
Section 1 - Lesson 5 Exercises - Scenario 1: View Leave Balances/Expirations
Procedure
In this lesson, you will learn how to view Leave Balances and Expirations.
Step 1. Click the My Time & Leave button.
Step 2. Click the View Leave Balance/Expirations link.
Step 3. Click the Show next row (Alt+.) button.
Step 4. Click the Show next row (Alt+.) button.
Step 5. Click the Show next row (Alt+.) button.
Step 6. Click the Show next row (Alt+.) button.
Step 7. Click the Show next row (Alt+.) button.
Step 8. Click the Show previous row (Alt+,) button.
Step 9. Click the Show Time Expiring in list.
Step 10. We chose the Show All option to view all of the time that will expire for the Extended Sick
Leave category. Click the Show All list item.
Step 11. The Number of Hours Expiring for the Extended Sick Leave are zero. Click the Show next row (Alt+.) button.
Step 12. When we look at the Holiday Comp balance, we can see below that three hours of Holiday Comp will expire on June 19, 2015 and eight hours will expire on August 27, 2015.

CAPPS HR/PAYROLL
EUT Course
Page 44
Step 13. Congratulations! You have successfully completed this lesson.
Employee Monthly Time Report
Section 1 - Lesson 5 Exercises - Scenario 2: Employee Monthly Time Report
Procedure
This report will display beginning and ending balances for all types of leave. It can be run any time during the current month for the previous month's data.
Step 1. Click the My Time & Leave button.
Step 2. Click the Employee Monthly Time Report link.
Step 3. Click the Choose a date (Alt+5) button.
Step 4. Click the drop down list.
Step 5. Click the February list item.
Step 6. Click the 28 link.
Step 7. Click the Run report and email button.
Step 8. Click the OK button.
Step 9. The report displays beginning and ending balances for all types of leave, leave
accrued/earned, leave expiring within the next 3 months, current annual leave balances, projected accruals, carry over maximum and hours converting to sick leave. It can be run any time during the current month for the previous month's data.
Step 10. Congratulations! You have successfully completed this lesson.

CAPPS HR/PAYROLL
EUT Course
Page 45
Section 2 - eProfile
Section 2 - eProfile
Section 2 - eProfile has 1 lesson:
Lesson 1 - eProfile Human Resources
Lesson 1 - eProfile Human Resources
Section 2, Lesson 1
eProfile Human Resources
View My Personal Information
Section 2 - Lesson 1 Exercises - Scenario 1: View My Personal Information
Procedure
View My Personal Information is a central location where users can view, add, edit, and in some cases delete personal information. In this lesson, the user will learn how to complete the following tasks: 1. View your Mailing Address 2. View your Phone Number 3. View your Emergency Contact 4. View your Email Address 5. View your Information Release Indicators 6. View your Disability Indicator Status Although it is possible to add, edit, or delete personal information from the 'My Personal Information' page, how to specifically perform each task for the areas listed above is included in the remaining topics in this section. Note: for security purposes real names, addresses, phone numbers, and other confidential information has been changed or removed from this training lesson.
Step 1. Click the My Profile button.
Step 2. Click the View My Personal Information link.
CAPPS HR/PAYROLL
EUT Course
Page 46
Step 3. The top portion of the 'My Personal Information' page displays the employee's name and address information.
Note: Employee AAA has two addresses listed. The current address is 6001 Baseline Drive SW, Austin, TX. On April 1, 2015 the new address will be 501 Baseline Avenue NW, Austin, TX. Employee AAA knew he/she was going to move on April 1, 2015. Therefore he/she added the information to CAPPS with a future date. It was not necessary for Employee AAA to wait until he/she actually moved before processing his/her address change. To learn how to change an address, refer to Exercise, Scenario 4: Edit Mailing Address.
Step 4. Click the scrollbar to navigate down the page.
Step 5. Next, the 'My Personal Information' page displays the employee's Phone Numbers, Emergency Contact information, and Email Addresses. Each section contains a check mark indicating what should be considered the employee's Preferred or Primary information to be used.
Step 6. Click the scrollbar to navigate down the page. Step 7. Next, the 'My Personal Information' page displays the employee's Information Release
Indicator selections and if the employee filled out the Disability Indicator information. Employee AAA has opted to only release their emergency contact information to the public and not to release any disability information. Note: Selecting a Disability Indicator is not required. This function is completely voluntary on behalf of the employee.
Step 8. Click the scrollbar to navigate down the page. Step 9. The bottom portion of the 'My Personal Information' page displays the employee's
personal information, such as: Employee ID (Empl ID), Gender, Social Security Number, etc. Note: Employee confidential information has been removed from this page.
Step 10. Click the Return to Employee Self-Service link.
Step 11. Congratulations! You have successfully completed this lesson. End of Procedure.

CAPPS HR/PAYROLL
EUT Course
Page 47
Edit Emergency Contacts
Section 2 - Lesson 1 Exercises - Scenario 2: Edit Emergency Contacts
Procedure
In this lesson you will learn how to: 1. Edit an existing emergency contact 2. Add an additional emergency contact Step 1. Click the My Profile button. Step 2. Click the Edit Emergency Contacts link. Step 3. Edit an existing Emergency Contact
In this lesson you will learn how to change your existing contact information to a new emergency contact person. (Changing Friend 1 to Dad) Click the Edit button.
Step 4. Click in the Contact Name field.
Step 5. Press [Delete]. Step 6. Enter the desired information into the Contact Name field. Enter "Dad's Full Name". Step 7. Click the Relationship to Employee list. Step 8. Click the Parent list item.
Step 9. Check the applicable box if the information is the same as the users. This will duplicate the information for the emergency contact.
Step 10. If the information is different it will have to be entered manually. Click the Edit Address button. Click in the Address 1 field. Enter the applicable information into the Address 1 field. In this example use 1234 One Road. Enter "1234 One Road".
CAPPS HR/PAYROLL
EUT Course
Page 48
Step 11. Enter the applicable information into the City field.
In this example use Austin. Enter "Austin".
Step 12. Enter the applicable information into the State field.
In this example use Texas. Enter "TX".
Step 13. Enter the applicable information into the Postal field.
Step 14. In this example use 78731. Enter "78731".
Step 15. Enter the applicable information into the County field.
In this example, use 227 for Travis County. Enter "227".
Step 16. Click the OK button. Step 17. Click the scrollbar to navigate down the page. Step 18. Click in the Telephone field. Step 19. Press [Delete]. Step 20. Enter the desired information into the Telephone field. Enter "512/555-1111". Step 21. Click the scrollbar to navigate down the page. Step 22. Remember to click the Save button before navigating to a different page. If you do NOT
click the Save button the information will be lost. Click the Save button.
Step 23. The system will confirm the information was saved successfully.
Click the OK button.
Step 24. Notice how the system saved Dad's information as the Primary Contact. This is because
he is the only contact listed. When there is more than one contact listed you may select the person who will be your primary contact. For future changes to this emergency contact select the edit pencil icon. To delete this emergency contact select the garbage can.

CAPPS HR/PAYROLL
EUT Course
Page 49
Step 25. Add an additional Emergency Contact
In this lesson you will learn how to add a second emergency contact. (Adding Mom) Click the Add Emergency Contact button.
Step 26. Click in the Contact Name field. Step 27. Enter the desired information into the Contact Name field. Enter "Mom's Full Name". Step 28. Click the Relationship to Employee list. Step 29. Click the Parent list item. Step 30. Click the Edit Address button. Step 31. Click in the Address 1 field. Step 32. Enter the applicable address information into the Address 1 field.
Enter "4321 Second Street".
Step 33. Click in the City field.
Enter the applicable city information into the City field. Enter "Austin".
Step 34. Press [Tab]. Step 35. Enter the applicable State information the State field.
Enter "TX" for Texas.
Step 36. Press [Tab]. Step 37. Enter the applicable Zip Code information into the Postal field. Enter "78742".
Step 38. Press [Tab]. Step 39. The County field does not accept County names. Use the Look up glass to determine the
applicable County number. Step 40. Click the Look up County button. Step 41. Click the scrollbar to move down the page.
CAPPS HR/PAYROLL
EUT Course
Page 50
Step 42. Click the 227 link for Travis County. Step 43. Click the OK button. Step 44. Click the scrollbar to navigate down the page. Step 45. Remember to click the Save button before navigating to a different page. If you do NOT
click the Save button the information will be lost. Step 46. Click the Save button. Step 47. The system will confirm the information was saved successfully.
Click the OK button. Step 48. Congratulations! You have successfully completed this lesson.
End of Procedure.
Edit Phone Number
Section 2 - Lesson 1 Exercises - Scenario 3: Edit Phone Number
Procedure
The Edit Phone Numbers page enables users to modify their personal phone number information. As a user, you now have the ability to ensure that your information is always up-to-date. In this lesson, the user will learn how to complete the following tasks:
1. Designate preferred contact number 2. Delete an old phone number 3. Add a new phone number 4. Add a fax number
Note: for security purposes real names, addresses, and phone numbers have not been used.
Step 1. Click the My Profile button. Step 2. Click the Edit Phone Numbers link.
Step 3. You will designate a Preferred Contact Number.
CAPPS only allows one contact number as the designated preferred number, or the number where you prefer to be reached. It is designated by a check box under the Preferred option. In this example, you will change the preferred designation from the Home phone number to the Business Cell phone number.
CAPPS HR/PAYROLL
EUT Course
Page 51
Click the Preferred option for Business Cell.
Step 4. The Business Cell number is now the designated phone number to be used.
Step 5. Now, you will delete an Old Phone Number.
Step 6. Notice how there is no 'Edit Pencil' icon here. For this reason, you will need to delete the old phone number and add the new phone number to make the change. Click the Delete button to remove the old phone number.
Step 7. The system will prompt you for deleting the number to make sure that is the task that you want to perform. Click the Yes - Delete button.
Step 8. To add the new phone number, click the Add Phone Number button.
Step 9. Click the Phone Type list. Step 10. Click the Home list item. Step 11. Click in the Telephone field. Step 12. Enter the new phone number into the Telephone field.
Enter "512/555-5444".
Step 13. To change your preferred phone number back to your home phone, click
the Preferred option box. Step 14. Remember to click the Save button before navigating to a different page. If you do NOT
click the Save button the information will be lost. Step 15. Click the Save button. Step 16. The system will confirm the information was saved successfully.
Click the OK button.
Step 17. Now, you will add a fax number. Step 18. Click the Add Phone Number button. Step 19. Click the Phone Type list.

CAPPS HR/PAYROLL
EUT Course
Page 52
Step 20. Click the FAX list item.
Step 21. Click in the Telephone field.
Step 22. Enter the fax number into the Telephone field. Enter "512/555-4455".
Step 23. Remember to click the Save button before navigating to a different page. If you
do NOT click the Save button the information will be lost.
Click the Save button.
Step 24. The system will confirm the information was saved successfully.
Click the OK button. Step 25. Congratulations! You have successfully completed this lesson. End of
Procedure.
Edit Mailing Addresses
Section 2 - Lesson 1 Exercises - Scenario 4: Edit Mailing Addresses
Procedure
Addresses are effective dated meaning you can change an address as of a specific date. In this lesson, the user will learn how to change a mailing address and make it effective as of April 1, 2015. Note: for security purposes real names, addresses, and phone numbers have not been used.
Step 1. Click the My Profile button. Step 2. Click the Edit Mailing Address link. Step 3. Click the Edit pencil icon. Step 4. The 'Change As Of' date is the date you want the new address to take effect. In
this example the new address will take effect on April 1, 2015. Click the Choose a date button.
Step 5. Click the dropdown arrow to select the month April. Step 6. Click April from the list.

CAPPS HR/PAYROLL
EUT Course
Page 53
Step 7. Click the number '1' for the date. Note: you can pick any day of the year.
Step 8. Click in the Address 1 field. Step 9. Press [Delete].
Step 10. Enter the new address information into the Address 1 field.
Enter "6001 Baseline Drive SW".
Step 11. Note: Since the City and State did not change, you can skip over the fields.
Click in the Postal field.
Step 12. Press [Backspace].
Step 13. Enter the new Zip Code into the Postal field.
Enter "78731".
Step 14. Remember to click the Save button before navigating to a different page. If you do NOT click
the Save button the information will be lost. Click the Save button.
Step 15. The system will confirm the information was saved successfully. Click the OK button.
Step 16. Notice how the new address has the status of "Future". This is because it is a future dated row. On April 1, 2015 the status will change to "Current".
Step 17. Congratulations! You have successfully completed this lesson. End of Procedure.
CAPPS HR/PAYROLL
EUT Course
Page 54
Request Name Change
Section 2 - Lesson 1 Exercises - Scenario 5: Request Name Change
Note: This functionality is not available to users in agencies which selected Manager Self Service (MSS) Lite.
Procedure
In this lesson you will learn how to change your name in CAPPS. This is generally due to a marriage, divorce, adoption, or another type of a legal name change. Note: for security purposes real names, addresses, and phone numbers have not been used.
Step 1. Click the My Profile button. Step 2. Click the Request Name Change link. Step 3. NOTE: The 'Change As Of' date is the date the name change will take effect in the
system. This date may be changed if needed. Step 4. Click the Edit Name button. Step 5. Click in the Last Name field. Step 6. Enter the new Last Name.
In this example, enter "BBB".
Step 7. Click the Refresh Name button to update the information. Step 8. Notice how the update information is now reflected on the page. Step 9. Click the OK button to accept the change. Step 10. Please be sure to provide the required information to your Human Resources
representative. Step 11. Click the Submit button.
After clicking the Submit button, this information is then forwarded to your manager for approval.
Step 12. Click the OK button to continue.
Step 13. Congratulations! You have successfully completed this lesson.
End of Procedure.

CAPPS HR/PAYROLL
EUT Course
Page 55
Information Release Indicator
Section 2 - Lesson 1 Exercises - Scenario 6: Information Release Indicator
Procedure
In this section, you will learn how to designate if your personal information is released or not released to the public.
Step 1. Click the My Profile button.
Step 2. Click the Information Release Indicator link. Step 3. NOTE: It is important that you read and understand the statements on this page before
selecting an indicator.
If you need assistance before completing this page, contact your Human Resources Representative.
Step 4. It is important to note that if you are a Commissioned Peace Officer you must select the
applicable box. When this box is selected all values are automatically defaulted to 'N' for no release of information.
Step 5. Click the 'Release All Information' box to authorize release of all the information listed
below. Note: It is not recommended by CAPPS that you release personal confidential information. (e.g. Social Security Number) Click the Release All Information option.
Step 6. Click the Release No Information check box. Step 7. Notice how all the values below changed to an 'N' for No Release.
Step 8. If you do not select either box above, you can select each box individually to indicate
whether or not you would like the information released. In this example, click the Emergency Contact Information dropdown arrow to change the value to a 'Y' indicating a Yes to release the information.
Step 9. Click the 'Y' list item.
CAPPS HR/PAYROLL
EUT Course
Page 56
Step 10. Remember to click the Save button before navigating to a different page. If you do NOT
click the Save button the information will be lost. Click the Save button.
Step 11. The system will confirm the information was saved successfully. Click the OK button.
Step 12. Congratulations! You have successfully completed this lesson. End of Procedure.
Maintain Disability Status
Section 2 - Lesson 1 Exercises - Scenario 7: Maintain Disability Status
Procedure
There may be an occasion when an employee may want to provide disability information to their employer. In this lesson, you will learn how to indicate whether or not a disability exists. Information specific to the type of disability will not be requested. Completing this page is completely voluntary. Employees are not required to disclose any information as to whether or not a disability exists. Step 1. Click the My Profile button. Step 2. Click the Maintain Disability Status link. Step 3. When filling out this page, be sure to first read the ADA disability definition. Step 4. In this example, click the 'No' check box. Step 5. Remember to click the Save button before navigating to a different page. If you do NOT
click the Save button the information will be lost. Click the Save button.
Step 6. Congratulations! You have successfully completed this lesson.
End of Procedure.
CAPPS HR/PAYROLL
EUT Course
Page 57
BRP Leveling / Non-Leveling
Section 2 - Lesson 1 Exercises - Scenario 8: BRP Leveling / Non-Leveling
Procedure
In this lesson you will learn how to designate your Benefits Replacement Pay (BRP) option. Step 1. Click the My Profile button. Step 2. Click the BRP Leveling/Non-Leveling link. Step 3. On this page you will select how you would like to receive your Benefit Replacement
Pay (BRP). Leveled - allows you to receive the same BRP payment amount each month of the year. Unleveled - BRP payment amounts will vary each month of the year.
Step 4. Remember to click the Save button before navigating to a different page. If you do NOT
click the Save button the information will be lost. Click the Save button to continue.
Step 5. The system will confirm the information was saved successfully.
Step 6. Congratulations! You have successfully completed this lesson.
End of Procedure.

CAPPS HR/PAYROLL
EUT Course
Page 58
Section 3 - ePay
Section 3 - ePay
Section 3 - ePay has 4 lessons:
Lesson 1 - Earnings
Lesson 2 - Direct Deposit
Lesson 3 - Deductions
Lesson 4 - Tax
Lesson 1 - Earnings
Section 3, Lesson 1
View and Print Earnings Statement
View/Print Earnings Statement
Section 3 - Lesson 1 Exercises - Scenario 1: View/Print Earnings Statement
Procedure
Your Earnings Statement is your paycheck. In this lesson you will learn how to complete the following:
1. View your earnings statement 2. Print your earnings statement
Note: For security purposes information within this lesson has been changed. Step 1. First, we will view your earnings statement.
Step 2. Click the My Pay button. Step 3. Click the View/Print Earnings Statement link. Step 4. Note: Only Earning Statements generated in CAPPS will appear on this page. As time
progresses, additional Earning Statements will be available. Use the 'View All' link to display additional Earning Statements.
Step 5. In this instance there is only one Earnings Statement available to view.
The system is displaying one record, and there is only one record for this employee.
Step 6. Click the date of the Earnings Statement that you want to view.

CAPPS HR/PAYROLL
EUT Course
Page 59
Step 7. In this example, click the 01/21/2015 link.
Step 8. The Earnings Statement for the date you selected will automatically appear.
The top portion of the Earnings Statement contains General and Tax Withholding information.
Click the scroll bar to navigate down the page.
Step 9. The middle portion of the Earnings Statement contains your Paycheck Summary, Earnings, and Tax withholding information. Click the scroll bar to navigate down the page.
Step 10. The bottom portion of the Earnings Statement contains Before and After Tax Deduction,
and Employer Paid Benefits.
The Net Pay Distribution box contains banking information.
Click the scroll bar to navigate to the top of the page.
Step 11. Now, we will print an earnings statement. Begin by right-clicking in any open space with your mouse. Note: You can also use the print icon at the top of the page.
Step 12. Click the Print... option from the menu. Step 13. Select the applicable printer at the top of the pop-up window. Step 14. Click the Print button.
Step 15. Congratulations! You have successfully completed this lesson.
End of Procedure.

CAPPS HR/PAYROLL
EUT Course
Page 60
View Compensation History
Section 3 - Lesson 1 Exercises - Scenario 2: View Compensation History
Procedure
The Compensation History page allows you to view promotion, data, and pay rate changes. In this lesson you will learn how to view a promotion with an increase in pay.
Step 1. Click the My Pay button. Step 2. Click the View Compensation History link. Step 3. Employee AAA was hired 9/1/2014. Notice how the 'From' and 'To Date' fields reflect the
range of 01/01/2014 through 12/31/2014.
In 2015, Employee AAA received a promotion. Next, you will change the 'From' and 'To Date' dates in order to view the promotion details.
Step 4. Click the Choose a date button. Step 5. Click the drop down arrow to change the month. Step 6. Click the month of March. Step 7. Click the drop down arrow to select the year. Step 8. Click the year 2015. Step 9. Click the last day of the month.
Note: you can select any applicable date. Step 10. Click the Refresh Data button.
This will retrieve any new information for the dates you selected.
Step 11. Notice how Employee AAA's promotion is now displayed. The promotion was dated
02/15/2015. In order for it to appear in the results window, the applicable date range needed to be entered.
Step 12. Congratulations! You have successfully completed this lesson.
End of Procedure.
CAPPS HR/PAYROLL
EUT Course
Page 61
Lesson 2 - Direct Deposit
Section 3, Lesson 2
Add or Change Direct Deposit Information
View/Edit Direct Deposit
Section 3 - Lesson 2 Exercises - Scenario 1: View/Edit Direct Deposit
Procedure
In this lesson, you will learn the following:
1. How to view your direct deposit information.
2. How to edit your direct deposit information. Step 1. Click the My Pay button.
Step 2. Click the View/Edit Direct Deposit link. Step 3. The current Direct Deposit information is displayed.
It is important to note that in CAPPS there can only be one account set up for direct deposit.
Step 4. To view Direct Deposit details, click the Savings link.
Step 5. The Direct Deposit Detail page automatically displays. This page contains banking detail
information.
Click the Return to Direct Deposit link.
Step 6. Now, we will edit your direct deposit information.
Employee AAA is changing his/her direct deposit from his/her savings account to his/her checking account. Both accounts are at the same bank. To begin click the Edit button.
Step 7. If you know the Routing Number you can type it directly in the box.
If you do not know the Routing Number, you can use the Look Up Glass to locate your bank's Routing Number. Employee AAA is changing the type of account at the same bank, therefore the routing number will not change.

CAPPS HR/PAYROLL
EUT Course
Page 62
Step 8. Click in the Account Number field. Step 9. Enter the new Bank Account Number into the Account Number field.
Employee AAA Bank checking account number is 111222333. Enter "111222333".
Step 10. Click on the drop down arrow to select 'Checking'. Step 11. Click the Account Type option 'Checking'. Step 12. To accept the change, click the Submit button. Step 13. Congratulations! You have successfully completed this lesson.
End of Procedure.
Lesson 3 - Deductions
Section 3, Lesson 3
View, Add, or Update Voluntary or Charitable Deductions
Voluntary Deductions
Section 3 - Lesson 3 Exercises - Scenario 1: Voluntary Deductions
Procedure
In this lesson you will learn how to add a voluntary deduction with a specific stop date.
Step 1. Click the My Pay button. Step 2. Click the Voluntary Deductions link. Step 3. Notice how Employee AAA has an existing voluntary deduction to Abilene Teachers FCU.
Step 4. The Deduction field identifies the amount being deducted per pay cycle.
The Goal Amount represents the total amount to be deducted. When this amount is reached the deductions will stop. The Goal Balance field represents the total amount deducted to date.
Step 5. Click the Add Deduction button.
CAPPS HR/PAYROLL
EUT Course
Page 63
Step 6. Click the Look up *Type of Deduction button.
Step 7. Click the scrollbar to navigate down the selection list.
Step 8. Click the United Heritage Credit Union link. Step 9. Click in the Enter Amount to be deducted field. Step 10. Enter the amount to be deducted into the Enter Amount to be deducted field.
Step 11. In this example enter "150.00".
Step 12. Option 1 - Goal Amount is used to set the total amount to be deducted.
Option 2 - Deduction Stop Date is used when you want your deductions to stop on a specific date. Select either Option 1 or Option 2 when entering your Voluntary Deduction.
Step 13. Note: If you selected Option 1 when setting up your voluntary deduction and need to stop your deduction you can add a Deduction Stop Date.
Step 14. Note: This lesson is how to add a voluntary deduction with a specific stop date.
Click in the Option 2: Enter Deduction Stop Date field.
Step 15. Enter the date you want the deduction to stop in the Option 2: Enter Deduction Stop
Date field. In this example, enter "12/01/2015".
Step 16. Click the Submit button. Step 17. Click the OK button.
Step 18. Note: Should you need to change an existing voluntary deduction use the Edit button.
Step 19. Congratulations! You have successfully completed this lesson.
End of Procedure.

CAPPS HR/PAYROLL
EUT Course
Page 64
Charitable Deductions
Section 3 - Lesson 3 Exercises - Scenario 2: Charitable Deductions
Procedure
In this lesson you will learn how to add/edit and delete a Charitable Deduction.
Step 1. During the Open Enrollment period for Charitable Contributions (Sept. 1 - Oct 31), you will see an option to select the link for State Employee Charitable Contributions (SECC) under HR/Payroll News & Articles.
Step 2. You are also able to select the My Pay button to the left if you choose to use to navigate instead.
Step 3. Click the My Pay button.
Step 4. Click the Charity Deductions link.
Step 5. Note: Charitable Deductions are taken once a year. Step 6. A maximum of three, (3) deductions may be selected. Step 7. You will be directed to a (State Employee Charitable Campaign) site that interfaces with
CAPPS. Step 8. Click the https://www.secctexasgiving.org/ link.
Step 9. This screen lists the Campaign Areas. The names are in alphabetical order. Step 10. You will select the Campaign Area of your choice and will be taken to the Register
and/or Login page. Step 11. Click the CAPITAL AREA SECC link.
Step 12. If this is your first time Making a Pledge, you will select the Register button. If not,
select the Login button. Step 13. You will then continue through the Campaign site following the detailed
instructions. Those details are not captured in this training. Step 14. Click the REGISTER button.
Step 15. After the enrollment period is over, you have the option to edit or delete an existing Charitable Deduction.
Step 16. The next steps will show you how to edit and delete your deduction.

CAPPS HR/PAYROLL
EUT Course
Page 65
Step 17. Click the My Pay button.
Step 18. Click the Charity Deductions link.
Step 19. After the election period has closed, you can edit or delete your elections throughout the year.
Step 20. Please review the second paragraph in regards to being a new hire, rehire or transfer.
Step 21. To change the amount of your election, Step 22. Click the Edit button.
Step 23. The Charitable campaign election(s) will be listed. Edit the monthly amount being deducted.
Step 24. Don't forget to Save your changes! Step 25. In this exercise, we won't be Saving but will move on to Deleting a deduction.
Step 26. To delete a Charitable election,
Click the Delete button.
Step 27. Review and respond to the message accordingly. Step 28. This is an opportunity for you to confirm the Delete. You will not be able to re-add after
this point. Step 29. In this exercise, you will select Cancel. Step 30. Click the Cancel button.
Step 31. Congratulations! You have successfully completed this lesson.
End of Procedure.
CAPPS HR/PAYROLL
EUT Course
Page 66
Lesson 4 - Tax
Section 3, Lesson 4
View Tax Information
W-4 Tax Information
Section 3 - Lesson 4 Exercises - Scenario 1: W-4 Tax Information
Procedure
In this lesson you will learn how to enter your W-4 tax information in CAPPS.
Step 1. Click the My Pay button. Step 2. Click the W-4 Tax Information link. Step 3. Before entering your W-4 tax information you should always validate that your name, social
security number, and address information is correct.
If your social security number is incorrect, contact your Human Resources office. If your address is incorrect, you can correct (edit) the information in Employee Self Service by navigating to: Self Service > Personal Information > Home & Mailing Address. Use the edit feature (pencil icon) to update your information.
Step 4. Click in the field and enter the total number of Allowances you are claiming in the field. In this example: Enter "1".
Step 5. Click in the field and enter the additional amount, if any, you want withheld from each
paycheck in the field. In this example: enter "50.00". Note: This field is optional.
Step 6. The radio buttons here allow you to select either Single or Married status.
In this example Single is being used.
Step 7. Select the check box for 'Check here and select Single status if married but withholding at
single rate.' if this is applicable for your tax withholding status. In this example, select the box.
Step 8. Click the scrollbar.

CAPPS HR/PAYROLL
EUT Course
Page 67
Step 9. For exempt status, read the conditions listed and check the box if applicable Step 10. When you have completed filling out the W-4 tax data, click the Submit button. Step 11. You will be asked to enter your password in the Password field.
This should be your own unique password. Use the same password that you used to sign-in.
In this example: enter "P@$$w0rd".
Step 12. Click the Continue button.
Step 13. Congratulations! You have successfully completed this lesson. End of Procedure.
View/Print W-2 and W-2c Information
Section 3 - Lesson 4 Exercises - Scenario 2: View/Print W-2 and W-2c Information
Procedure
In this lesson you will learn the following:
o How to print a copy of your W-2. o How to view filing instructions.
Step 1. Click the My Pay button. Step 2. First, we will print a copy of your W-2.
Click the View W-2/W-2c Forms link.
Step 3. Click the Year End Form link. Step 4. Your W-2 Form will appear.
Note: For security purposes confidential information has been removed.
Step 5. Click the Print button.
Step 6. Now, you will view filing instructions.
Click the Filing Instructions link. Step 7. The Filing Instructions document will appear.

CAPPS HR/PAYROLL
EUT Course
Page 68
Step 8. To obtain a copy, click the Print icon. Step 9. Check to make sure you are printing to the applicable printer, and then click the Print icon to
continue. Step 10. Congratulations! You have successfully completed this lesson.
End of Procedure.
W-2 and W-2c Consent
Section 3 - Lesson 4 Exercises - Scenario 3: W-2 and W-2c Consent
Procedure
In this lesson, you will learn how to provide consent to receive an electronic W-2 or W-2c Form. Step 1. Click the My Pay button.
Step 2. Click the W-2/W-2c Consent link. Step 3. Click the scrollbar to view all the content within the description box. Step 4. To receive your W-2 electronically, click the checkbox 'Check here to indicate your consent
to receive electronic W-2 and W-2c forms'. Note: You may also uncheck the box to remove consent.
Step 5. Click the Submit button.
Step 6. Click in the Password field. Step 7. Enter your password (the same password that you logged in with) into the Password field.
In this example enter "P@$$w0rd".
Step 8. Click the Continue button.
Step 9. Congratulations! You have successfully completed this lesson. End of Procedure.

CAPPS HR/PAYROLL
EUT Course
Page 69
Glossary
ESS - ESS stands for Employee Self Service.
MSS - MSS stands for Manager Self Service.
SetID - SetID is a core value for each agency; it identifies the data-set for that particular agency. A SetID always begins with the letters "TX" followed by the Agency Number (e.g., TX304).
Worklist - A Worklist is an organized list of items which require your attention (e.g., approval of one-time merit pay). The system automatically routes an item to the appropriate manager’s (or supervisor’s) worklist.