
EPM Episode #001 Microsoft Project Server 2013 Introducing EPM

EPM-Admin User GuideCommercial Module
Overview of EPMGetting StartedGlobal SettingsAdding a BrandTemplate Creation and Editing (Example with Sangoma Brand)
Line Key TypesConfiguring Line Buttons
Extension MappingAdding a New ExtensionColor Coding of Extensions in Extension Mapping Updating Phone Configurations for Extensions Marked as Yellow
Pushing Config Updates Rebooting the Phone (Sangoma Phones Only)Adding Expansion ModulesBLF SubstitutionVPNHow Extension Mapping Affects Line Keys
Example: 3 Line Keys for the Same ExtensionExample: Using 2 Extensions on the Same Phone
Image ManagementAdding an ImageUsing an Uploaded ImageViewing or Deleting an Image
Basefile EditingCustom Extension Management
Adding a Custom Extension Editing or Deleting a Custom Extension
Firmware ManagementInstalling FirmwareInstalling Custom Firmware
Network ScanSpecific Template Settings per Brand
Aastra Templates Button Types Soft Key Button States
Algo TemplatesDevice Settings
AND TemplatesDevice Settings
Audio Codes TemplatesCisco Templates
Expansion ModulesCortelco Templates
Expansion ModulesCyberData Templates
Device OptionsDigium Templates
Horizontal Soft Key StatesGrandstream Templates
AnsweringButton TypesExpansion ModulesAvailable FXS Devices
Mitel TemplatesButton Types
Mocet Templates Button Types
Obihai TemplatesExpansion Modules
Panasonic TemplatesButton Types
Phoenix Audio TemplatesPolycom Templates
Button TypesPolycom Built-In FeaturesHorizontal Soft Key State InformationExpansion Modules
SNOM Templates
Button TypesExpansion Modules
Xorcom TemplatesButton TypesExpansion Modules
Yealink TemplatesConfig StyleButton TypesExpansion Modules
Overview of EPM
The PBX End Point Manager (EPM) on your phone system lets you manage external device settings such as phones, gateways, and overheadpaging devices. With EPM you can create templates defining the settings you want for a group of devices, and then map extensions to usespecific templates.
The following items are the main parts of EPM:
- These are global settings that EPM will use for all templates, such the external and internal IP addresses of your PBX.Global Settings - This is where you map an extension on the phone system to a specific MAC address of a device and define whatExtension Mapping
template will be used to build the configuration files.- This is where you can see which brands have been set up with a template in EPM. Clicking on a brand name will bring up aBrands
screen to see all the templates that are created for that brand.- Here is where you would add a new brand of phones/devices for which you want to create one or more templates.Add Brand
- Here you can manage uploading images that you can use in any template that supports phone side images.Image Management - This section is for advanced users and should only be used with guidance from support. This allows you to change hardBasefile Edit
coded values of any template settings on any brand of phone. Many settings for a template are set to use hard coded default values, butthese can be changed in the base file edit on a per template basis. You can also add new config file values that we do not let you definein the Template Management section for each brand.
- The premise of EPM is to pull extension information such as SIP passwords and names from within your localCustom Extensions PBX. If you want to set up a phone or a line key on a phone for an extension that does not exist on the local PBX, you would first need todefine the extension information here for EPM to pull from.
- The firmware management section is used to install and update firmware for each brand of phone thatFirmware Managementsupports firmware management. You can choose which firmware version should be installed in two different versions: "Slot 1" and "Slot2." You can then choose on a per template basis which firmware slot to use for that template.
- Network Scan is software that will scan your network for all MAC addresses of all the devices we support. It presentsNetwork Scan you with all MAC addresses for devices that are currently not mapped in Extension Mapping and lets you automatically map those MACaddresses to any extension and template.
Getting Started
When you first log into EPM you will see a menu like this on the right side with the sections as defined above. You can click the menubutton
at any time to expand or collapse the menu.

Global Settings
First, make sure you have some global settings set correctly, so choose the option on theGlobal Settingsright.

Internal IP - You need to set the Internal IP Address to be whatever the IP Address of the PBX is. You willuse this later when creating a template.In our example this is set to 192.168.0.1.
- If you are going to have any phones connecting to the PBX from outside your local network, then make sure to define theExternal IP External IP address or FQDN that will resolve to the External IP Address of your PBX.In our example we have set this to 178.891.919.111.
- This section displays which ports are used for the web server, HTTP provisioning, and RESTful Apps. Ports This information is basedon what you have set up in the Port Mapping section of the System Admin module. For instructions on how to change the ports, see the
wiki.System Admin - Port Management - This is the port for the PBX Admin GUI for controlling the system.Web Server Port
- Set the phone's config to this port number if you are using HTTP provisioning for your phones. All trafficHTTP Provision Port from this port will automatically be directed to the folder that contains your phone configuration and firmware.
- If you are using Phone Apps, this is the port that the applications will use to communicate with the PBX.RESTful Apps Port
- All phones that we support have a Phone Admin Password. You can set this password here, and it will bePhone Admin Password used by all phones as the Admin password for logging into the phone's web GUI. You are required to use at least 6 characters for yourpassword. You can also use this password when using the on the phone to login as a user without knowing the user'sLogin REST Apppassword.

- Some phones, such as Cisco, have both an Admin User and a Normal User. You need to first log in as aPhone User Password Normal User, then log in as the Admin User. The Phone User Password set here defines the password for the Normal User. You arerequired to use at least 6 characters for your password. You can also use this password when using the Login REST App on the phone to
does not have a voicemail password set up.login as a user who
- Most phones will auto sync periodically to see if there are any phone config changes for the phone to apply. You canReSync Time define this interval here in seconds.In our example below, 86400 would tell the phone to check once every 24 hours for new configurations and apply them if found.
- If you want to allow a phone to use the Phone Apps Login/Logout , if supportedXML-API (RestAPI) Default Login hot-desking feature
by the phone, then you need to enable this option. This will cause the system to generate a default config that will present a new userwith a login button on the phone after the previous user logs out. If this default login option is set to then when a user logs a phoneNo, out, there will be no login button available to a new user. Be sure to set this to if you need to enable hot-desking. (Dark blueYes background = selected)
Extension Mapping IP Address and Phone Status - Choose whether to display these items.
IP Address - This will display the IP address that the phone is reporting to your PBX while it is registered to the PBX.Phone Status - This will display the ping time of the phone from the PBX while the phone is registered to the PBX.
Click the button to save your changes when done.Save Global
Adding a Brand
Click the menu button
on the right side to expand the menu.Here you will see a list of phone (manufacturers) that have been activated on your PBX.Brands
Next StepNow that you have some global settings defined, you can create templates for any brand of phone that you would like to connect to thePBX.

To add a new brand, click the button under the section of the menu.Add Brand Advanced
A pop-up will then let you pick which brand you want to add. Click on a brand name.

A new template will be created. You can now set up the template as outlined below for each manufacturer.
Template Creation and Editing (Example with Sangoma Brand)
Click the menu
button on the right to expand the nav menu.Click on the option under brands.Sangoma
In our example we are going to use the Sangoma brand products. Each brand has its own settings and may vary a bit from ourexample. At the end of this wiki guide, we go through any special settings on specific brands.

At this point you can either edit an existing template or create a new template.
To Edit an Existing Template: Click on any template name from the list. A list of all extensions thatare mapped to the template will be listed under the "Used By" section.
Click the button.To Create a New Template: New Template
- Give your template a name, such as “Default.”Template Name
A single template for each brand can be marked as the template. Please review our Default Template- default Hot Desking Primer wikifor EPM and Rest Apps.
- Here you define what IP Address or FQDN you will program the phone with. This will tell the phone how to reachDestination Address
the PBX and where to register. You can either type an IP or FQDN, or select the or button to automatically pull theInternal Externalinformation from the EPM Global Settings.

- The time offset from 0 (GMT) for the time zone where the phone is located, in +/-HH:MM format. For example, Central TimeTime Zonewould be -06:00.
- The IP or FQDN Address of the time server you want the phone to use. We recommend using 0.us.pool.ntp.orgPrimary Time Server
This is used to tell the phone weather it should use daylight savings or not.Daylight Savings-
- Background Image Use this option to change the background image used on your phone. See the Image Management section later in for information on how to upload a background image for devices.this wiki
If the device supports an LCD screen for the line label you can pick between having the extension name, extension number, Line Label-or both show up on the LCD for the line label on the device. Please note, the label portion of your phone is limited in the number ofcharacters it supports. Anything too long will be cropped.
Name- Only the assigned name will show up, for example, "John Doe."Extension- Only the extension number will show up, for example, "4000."Name-Extension- Both the name and number will show up, for example, "John Doe 4000."
- Enable or disable multicast paging on this device. If enabled, you can define a list of addresses it will listen on for aMulticast Enablemulticast page, below.
- List of IP addresses that the device should listen on for multicast pages, separated by commas.Multicast Address
Here you can change the default included dial pattern for the phone. A dial pattern is what the phone looks to for a matchDial Patterns-
for sending calls to the PBX.
- The firmware slot this template will use for the firmware for these devices. Please see the Firmware ManagementFirmware Versionsection for instructions on how to create firmware slots. Each brand has an included recommended firmware slot bylater in this wiki

default, which is the version that we have tested with. This does not mean all features will work or that the firmware is bug-free; it is justthe version we tested with. You can pick between , , and .Recommended Slot 0 Slot 1 Slot 2
Ring Tones- Here you can pick from the 5 included ring tones that you want to set as the default ring tone. This will be used for calls tothis device any time something in the PBX is not explicitly set to override the ring tone. Please see the Sangoma phone wikiRing Tonesfor more information on how Sangoma phones can dynamically change the ring tone from within the PBX based on where the calleroriginated.
and - You can optionally turn on a Screen Saver and what time it should wait before it kicks on.Screen Saver Screen Saver Timeout
Select one of the available types.Screen Saver-
If you do not want to enable the screen saver, select Otherwise, select one of theScreen Saver Timeout- Screen Saver Off.time delay options for how long the phone should wait before turning on the screen saver.
Enable this option if you want to connect an Electronic Hook Switch (EHS) headset to the phone.Headset Settings-
Enable this option if you want to hear a beep on the phone when a call is sent to your device while you are alreadyCall Waiting Signal- on a call. If you set this to , the call is still sent to your device and you can see the inbound call on the screen of the phone, butDisabledan audible call waiting tone will not be played to you.
- If you have a BLF button set up to monitor 1 or more extensions, you can optionally have an audio alert, visual alert, or bothBLF Alert sent to your phone. See the wiki for more information.BLF Alerts
and - The Hotline Dial option allows you to set up the phone to auto-dial a specific extension or phoneHotLine HotLine Destination
number when you take the receiver off hook. This is handy in a lobby area where you can inform the caller to pick up the handset in orderto automatically place a call. You can set this to route the call to a destination such as an extension, outside phone number, queue, ringgroup or IVR.
Pick whether to enable or disable the hotline dial option. If you it, you will see the option to enter a destinationHotLine- Enablebelow.
The destination that the phone will automatically dial when a user takes the receiver off hook.HotLine Destination-

- This is used to tell the phone what IP or FQDN Address it should use to locate and pull firmware andProvision Server Addressconfiguration files from. This is usually your PBX IP or FQDN.
- Define what protocol you want your phones to use when receiving their config files.Provision Server Protocol should be used when phones are local to the PBX, as it's easy to use and requires no setup.TFTP
should be used if your phones are remote, as it requires the phone to know the FTP username and password to receive theFTPconfig file.
If using FTP, you will need to set up an FTP username and password for the PBX. Review this wiki on how to set up anFTP server for phones to receive their configuration files.
When done, do not forget to press the button at the bottom of the page.Save Template
Once you have saved your template, you can now manage the settings for each specific model number/device that you want to set up.
Scroll to the bottom of the template page and click on one of the model numbers under Available Phones.
The first 2-3 buttons should always be set up as line keys. A line key is what allows you to make or receive a call, so if you want tomanage 2 calls at a time, you need to set up 2 line keys.
At this time, Sangoma devices only support TFTP provisioning.

From the drop down, pick .Type Line
Repeat this process to set up 2-3 keys as the Line type. Note that the and columns become unavailable for LineLabel ValueKeys.
Continue your button setup by selecting a for each key you want to configure, and enter a and/or wheneverType Label Valueappropriate.
The information included below explains the various types of Line Keys available on Sangoma phones. This information is also available as astandalone wiki: Line Keys
Line Key Types
Line keys can be set up in End Point Manager with the following options.

Line Key Types:BLF- ("Busy Lamp Field") - Monitors another extension or feature code that has state information on your PBX. The state isindicated by the .BLF buttonCall Park- Used for one-touch .Call ParkingConference- Configures a conference button to allow 5-way .conference callingDTMF- Sends DTMF digits while on a active call, such as having the system dial a feature code while on a active call.Hold- Places the caller on .HoldIntercom- Causes the dialed extension to answer using instead of ringing.Intercom Calling/Auto AnswerLDAP- Button to Launch LDAP directoryLine- Sets up a line key. Each phone needs at least one line key.MultiCast Paging- Starts a page to a specific address.MultiCastRecord- Toggles on-demand call recording. Requires the user to have permissions in the PBX.on-demand recordingRedial- Redials the last number. SpeedDial- Dials the programmed external number. To insert pauses, use a comma. Each comma adds a 500ms pause whendialing.Transfer-Transfers a call to a new recipient.
Voicemail- Dials the voicemail system, allowing the user to .check voicemailXML API- Provides access to the specified .Phone App
Configuring Line Buttons
Go into End Point Manager in your PBX and choose the Sangoma brand in the menu.
Click on the template in End Point Manager that you want to change a button for.

Click on the Models menu tab at the top
Select a model number you want to add manage buttons for.
Make your Line Key button changes.
Save the Model using the button.Save Model

You now need to update the phone configuration file. Choose an option and click the button. The three options at the bottom of theApplytemplate are:
- This will only save your changes into the PBX database. It will not write out new config files for the phones that are usingSavethis template as mapped in the Extension Mapping section of End Point Manager.
Save and Rebuild Config(s)- This will save your changes to the PBX Database and also write out new config files for thephones that are using this template as mapped in the Extension Mapping section of End Point Manager. The phones do notretrieve the updates.
- This will save changes into the PBX database, write out new config files for theSave, Rebuild Config(s) and Update Phones
phones, and also immediately update any phones that are mapped to use this template and currently registered to the PBX. Thismay cause the phones to reboot.
You can optionally change the label name for any button type except Line. The is the name that will be shown on your phoneLabelscreen for that button.
When picking the type, the label name will be whatever you defined in the section of the phone TemplateLine Line LabelSettings. The default is to show the extension number of the device. You can change this to show the name instead, or bothname and extension number.
You can also drag the button to be in a different spot. Left click on the button and while holding down your left mouse drag the button to adifferent spot and release it.In our example we will drag Button 21 up toward the top to make it button 4 on the phone. The button number will not change until yousave the model.

You can optionally change the name to be something different for any button type except Line. The is the name that will beLabel Labelshown on your phone screen for that button.
For the Line type, the Label name will automatically be whatever you defined in the Template Settings section called .Line LabelThe default is to show the extension number of the device. You can change this to show the name instead, or both name andextension number.
You can also drag the button to be in a different position. Left-click on the table row for the button, and while holding down your leftmouse button, drag the button to a different spot and release it.In our example we will drag Button 21 up toward the top to make it button 4 on the phone. Note that it will initially say "21" instead of "4"after dragging it to position 4. However, the number sequence will be corrected after you save your settings.
Once done, click the button to save your settings for this model.Save Model

If you go back into the model number it will show the new numbering.For example, our Intercom button that was 21, is now 4 instead of 21.
You now need to update the phone config. Choose an option from the drop-down and click the button. Your three options at theApplybottom of the template are:
- This will only save your changes into the PBX database. It will write out new config files for the phones that are usingSave notthis template as mapped in Extension Mapping section of End Point Manager.
Save and Rebuild Config(s)- This will save your changes to the PBX database and write out new config files for the phones thatare using this template as mapped in Extension Mapping section of End Point Manager. The phones will retrieve thenotchanges.
- This will do both the Save Template and Rebuild Configs options above. It willSave, Rebuild Config(s) and Update Phonesalso immediately update any phones that are mapped to use this template and currently registered to the PBX with no need toreboot the phones.
Extension Mapping
Now that you have a template created and set up, you can map a device to use this template. Please see the Extension Mapping belowfor information on this.

Extension mapping is where you link an extension to a MAC Address of a phone, and link that phone to a specific template you have created.This will cause EPM to write out the configuration files for that phone based on the template.
To navigate to Extension Mapping:
Click the menu
button on the right to expand the nav menu.
Click on in the nav menu.Extension Mapping
You should see a table similar to this, showing any extensions you have mapped.
Adding a New Extension
On the Extension Mapping home screen, click the button at the top. This will add a new row to the table of extensions.Add Extension
Here you can configure 6 options:In the first column select an on the top and an on the bottom.Extension Number and Name Account
In the second column, select a phone Brand on the top and enter the phone's MAC Address on thebottom.In the third column, select a on the top in and a phone on the bottom.Template Model
Scroll to the bottom and select one of the options from the drop-down menu. Then click the bUse Selectedutton to apply the action. The options are:
- This will save the information to the database and build the config file for that phone, so the phoneSave and Rebuild Config(s)can retrieve the configuration file.

- This will save the information to the database, build the config file for that phone,Save, Rebuild Config(s) and Update Phonesand tell the phone to retrieve its config file. The reboot option will only work if the phone is currently registered with the PBX.
- Deletes the selected Extension from Extension Mapping.Delete Selected
Color Coding of Extensions in Extension Mapping
All the extensions listed in Extension Mapping will either be green or yellow in color.
Green- Means the config file is up to date with all changes saved in the database for this device.Yellow- Means the config file has not been updated with changes made in the template for this device that are saved in the database.
Updating Phone Configurations for Extensions Marked as Yellow
To rebuild the config(s), and optionally update the phones:
Select the desired extensions using the checkboxes in the far left column.
At the bottom of the page, pick one of the following two options and click the button to apply the action.Use Selected
When you use the option for a phone template, instead of a "rebuild" option, the system does not update the configuration files forSaveany extensions mapped to that template. In this case you will see the affected extension(s) in Extension Mapping as yellow instead ofgreen. This color coding means you have changed the template but the extension has not been rebuilt.
To select all extensions in Extension Mapping at once, click on the checkbox in the header row at the top of the table.

- This will save the information to the database and build the config file for that phone, so the phoneSave and Rebuild Config(s)can retrieve the configuration file. This will automatically update the phones.not
- Save, Rebuild Config(s) and Update Phones May cause the phone to reboot. This will save the information to the database,build the config file for that phone, and tell the phone to retrieve its config file. This will only work if the phone is currentlyregistered with the PBX.
Pushing Config Updates Rebooting the Phone (Sangoma Phones Only)
Sangoma phones support the ability to update the phone's running configuration file without rebooting the phone.
Any Sangoma phone set up in Extension Mapping will have a "Push Config"
button under the Action section.
Pressing this button will send an updated configuration to the phone and have it process the changes without a reboot. For this feature to work,your phone has to be registered and connected to the PBX.
Adding Expansion Modules
You can now go back to Extension Mapping select an expansion module to include as a part of a phone's configuration.
Click the menu
button on the right to expand the nav menu.Click on in the nav menu.Extension MappingClick on the Edit Icon
for the extension you want to modify.
Expansion module options will be displayed near the bottom of the window. Use the drop-down menus toselect your expansion module(s).
Support of expansion modules, and the number of expansion modules supported by a specific phone, varies by brand and by model.

Scroll to the bottom and select one of the options from the drop-down menu. Then click the button to apply the action.Apply
The options are: This will save the information to the database but will build the config file for the phone. Save Extension- not
- This will save the information to the database and build the config file for that phone, so the phoneSave and Rebuild Config(s)can retrieve the configuration file. It will update the phone.not
This will save the information to the database, build the config file for that phone,Save, Rebuild Config(s) and Update Device- and tell the phone retrieve its config file.
This will delete the selected extension from Extension Mapping. Delete Extension and Remove Config(s)-
BLF Substitution
Since Busy Lamp Field (BLF) buttons are controlled by a template, and you may share the same template with more than one device, BLFSubstitution simply means, "If my extension is set up as a BLF button in the template, please substitute this button on my device with theextension defined in this field." (Most users don't want to monitor the BLF state of their own phone.)
In our example, we are going to edit extension 4001's advanced settings. Since our extension mapping is using a template that includes a BLF toextension 4001, the system will substitute the BLF 4001 with what we define below.
Click the menu
button on the right to expand the nav menu.Click on in the nav menu.Extension MappingClick on the edit icon
for the extension you want to modify.Next you will tell the system to to replace any BLFs that are set up for this extension with a different BLF and Label.
BLF Label- The replacement labelBLF Substitution- The replacement extension that will be monitored instead of the one originally set
Scroll to the bottom and select one of the options from the drop-down menu. Then click the Apply button to apply the action.
The options are: This will save the information to the database but will build the config file for the phone. Save Extension- not
- This will save the information to the database and build the config file for that phone, so the phoneSave and Rebuild Config(s)can retrieve the configuration file. It will update the phone.notSave, Rebuild Config(s) and Update Device- This will save the information to the database, build the config file for that phone,and tell the phone retrieve its config file.
This will deleteDelete Extension and Remove Config(s)- the selected extension from Extension Mapping.
VPN
If you have licensed the system admin pro module on your PBX and have setup a VPN server you can optionally connect Sangoma Phones to
use the VPN on the PBX direct. You will need to make sure your PBX is set up as a VPN server first, and that you havecreated a client for each phone by following the instructions in the System Admin - VPN Server wiki. Other
NoteIf you select a different brand and/or phone model from this edit window, you will need to apply your settings and come back to edit theextension again, in order for the expansion module options to display correctly.

manufacturer's phones such as Yealink may work but are not supported by us for the VPN option.
After you have set up the VPN server, go to the (EPM) module.End Point Manager Click the menu
button on the right to expand the nav menu.
In the nav menu, go to .Extension MappingClick on the edit icon
for the extension you want to modify.
In the section, use the drop-down menu to pick which VPN client you want to pair with this device. VPN Client Options VPN ClientIf no VPN clients are showing up or new clients your created are not showing up then that means the VPN client has not beenpaired with a .User inside User Management as outlined here
Scroll to the bottom and select one of the options from the drop-down menu. Then click the button to apply the action.Apply
The options are: This will save the information to the database but will build the config file for the phone. Save Extension- not
- This will save the information to the database and build the config file for that phone, so the phoneSave and Rebuild Config(s)can retrieve the configuration file. It will update the phone.not
This will save the information to the database, build the config file for that phone,Save, Rebuild Config(s) and Update Device- and tell the phone retrieve its config file.
This will delete the selected extension from Extension Mapping.Delete Extension and Remove Config(s)-
How Extension Mapping Affects Line Keys
In the template for a phone brand, you pick which buttons on the phone are "line" buttons. For example, with Sangoma phones you can set upany button on the phone to be a line key, then state which account that line key is tied to (i.e. "Account 1," "Account 2," etc.).
In Extension Mapping, you can map a certain extension to an account. This will map the extension to the line key(s) on the phone that areconfigured as belonging to that account.
Example: 3 Line Keys for the Same Extension
In our example below, Line Keys 1 through 3 are set up as Line Keys to Account 1 in our template. All three of these line keys will be for extension5001.
Template Settings:

Extension Mapping Settings Edit Page:
In Extension Mapping, we tied Extension 5001 to Account 1, so now all 3 Line keys for this phone will be set up as Extension 5001.
Extension Mapping View Page:
Example: Using 2 Extensions on the Same Phone
You can have line keys for different extensions on the same phone if you map each extension to a separateaccount, map those extensions to the same MAC address, and set up the phone template to use differentaccounts for its line keys.
In Extension Mapping, you can map each extension on the PBX to a specific phone. By default, if you don't pickan account when adding a new extension, the extension will use "Account 1." If you would like this extension tobelong to Account 2 instead, you would select Account 2 from the drop-down menu.
In our example, we want to use extensions 5001 and 5002 on the same phone, with a line key for each. We will map extension 5001 to Account 1and extension 5002 to Account 2. Each of these two extensions will be its own entry in Extension Mapping, but we will use the same MACaddress and phone template for both.
In our phone template, we will set up 3 line keys: two for one account and one for another account. This will let us use two different extensions onthe same phone. Our line keys 1 and 2 will be for extension 5001, and our line key 3 will be for extension 5002.
Template Settings
In our template, we have selected Account 1 for the first two line keys, and Account 2 for the third line key.

Extension Mapping Settings Edit Page
In Extension Mapping, we have set up extension 5001 to belong to Account 1. We are mapping this extension to MAC address 00505850000Cand using our default-sangoma template for the Sangoma s500 phone.
We have set up our second extension, 5002, to belong to Account 2. We are mapping it to the same MAC address and phone template as above.
Extension Mapping View Page
The same type of technique described above would be used for multi-line systems like Gateways/ATAs and DECT Wireless phones, such as theAastra MBU400 Wireless DECT phones that allow more than one extension to register to the same base station.
In the case of an Aastra MBU400, which supports 8 wireless handsets, each wireless handset is its own extension. To handle this, you wouldcreate 8 extension entries in the Extension Mapping section, all with the same MAC address but with different Accounts. You would pick fromAccounts 1 thru 8 for each device. For each extension, you would define IMEI ID number of each wireless handset.
Image Management
Image Management allows you to upload images such as a company logo. You can then use these images in templates that support backgroundimages. Please note not all phone brands and models support this. See EPM-Supported Devices for a full list of models that support backgroundimages with EPM.
In End Point Manager, click the menu

button on the right to expand the nav menu.Click on in the nav menu, under the Advanced sectionImage Management .
You will now see a list of any images you have uploaded.
Adding an Image
You can upload as many images as you want. Each template in EPM can use a different image or the same image.
Click the button to add a new image. Add Image
Click on the button to pick the image you want to upload from your local computer. Pictures must be a GIF, JPEG, or PNGChoose Fileimage file no greater than 256KB in file size.

Click on the button to save the image. Upload Image EPM will now store the image for you.
Using an Uploaded Image
To use an uploaded image, you will need to edit the brand template as described earlier in this wiki.
Inside each brand template that supports images, you can use a drop-down menu to pick which image to use. The system will then covert youruploaded file into the size and format needed by the devices for that template.
Don't forget to save your template, rebuild the extension(s), and update the phone config file(s) in order to see the new background image on thedevice.
Viewing or Deleting an Image
Click the button if you are not already viewing the list.List Images
To View (and optionally delete): Click the name of the image file. This will display the image, along with a button thatRemove Imageyou can click if you want to delete the image.
To Delete Directly from the List: Click the trash icon for the image.
Basefile Editing
Basefile editing is designed to let you edit all the hidden default settings that EPM hard codes for each template created.

Reveiw our wiki for more in-depth information on basefile editing.EPM-Basefiles
Click the menu
button on the right to expand the nav menu. Click on in the Advanced section in the nav menu.Basefile Edit
You will see a list of all your templates. Click on the name of the template you want to edit.
Pick which model number to edit.
Anything in basefile should only be edited by someone who understands how phone configuration options work and what all the optionsmean.

Click on the option you want to change.
Make your changes.
At the top is a list of models that your change will affect. (Dark blue background = selected.) You can deselect any model numbers you donot want to change. Click the model names to select or deselect them.In the example below, we have selected only the s500 and s700.
Pick the button to save your change, or the button to delete the entry.Change Basefile Delete Entry

Custom Extension Management
In the Extension Mapping section of EPM, you need to choose from a dropdown menu of available extensions to add. This menu automaticallylists any unmapped SIP devices on your phone system. You can map any of these unmapped SIP extension to any device in EPM.
What if you want to add an extension that is not in the list, such as an extension on another PBX? This is where custom extension management comes in.
The section of EPM lets you add custom extensions to the internal dropdown of available extensions that you can mapCustom Ext Managementto a device. It lets you provide information about that extension, such as the password, name, and IP address to which the extension will register.
A good use case for this would be where you need to map an extension from another PBX to line 3 on a device on your PBX.
Adding a Custom Extension
Click the menu
button on the right to expand the nav menu.Click in the Advanced Section of the nav menu.Custom Ext Management

Click on the button at the top of the page.New Custom Extension
Fill in the following information.
- The extension number for this custom extension.Extension Number- The SIP Secret or Password for this extension, as defined on your other PBX, to allow this extension toExtension Password
register.- The name that you want associated with this custom extension, such as "John Doe."Label
- The IP address of where this extension needs to register to.Destination- The SIP port where this extension needs to register to. The default for FreePBX or PBXact systems is port 5060.SIP Port
When done, click the buttonSave Custom Extension .
Now your new custom extension will show up in the dropdown of available extensions in the Extension Mapping section of EPM.
TipYou can also create a custom extension from within the Extension Mapping section of EPM. Click the button and pick Add Extension C
from the dropdown.ustom Extension

Editing or Deleting a Custom Extension
Click the menu
button on the right to expand the nav menu.Click in the Advanced Section of the nav menu.Custom Ext Management
Click on the name of the custom extension to edit.
A window like below will pop up and let you fill in the information. Click the button. Your new custom extension will automaticallySendbe selected in Extension Mapping, where you can finish mapping it.

To edit: Make your changes and click the button.Save Custom Extension
To delete: Click the button.Remove Custom Extension
Firmware Management
You can manage the firmware for most brands of devices supported by End Point Manager.
Installing Firmware
Click the menu
button on the right to expand the nav menu.Click in the Advanced section of the nav menu.Firmware Management

You will now see a list of brands that you can manage firmware for. You will only seeClick on the name of a brand to edit its firmware. brands that have at least one template. (If you have not created a template, see the for instructions.) templates section earlier in this wiki
In our example, we are going to set up Sangoma firmware.
You will see a list of available firmware versions on the left side.

You will need to install firmware into at least one firmware slot. Drag a firmware version from the list into Available Firmwares Firmware or .Slot 1 Firmware Slot 2
Below you will see we dragged version 1.02 into slot 1, and version 1.01 into slot 2. Version 1.02 consistsof different firmware versions for each model of phone listed below the slot number. In slot 1, we see thefirmware for the S700 phone would be 2.0.3.97.
Note: You can remove existing firmware from a slot by dragging it back to the Available Firmwares list. This will allow you toinstall a different firmware version in that slot.
Press the submit button at the bottom of the page.
Once you have installed the firmware, you can go into any of your templates and pick which firmware that template should use for thedevices that are mapped to your template.
Installing Custom FirmwareIf you would like to install your own custom firmware for a phone you can drag version 0.00 into slot 1 or 2. This will reserve thatslot for your custom firmware by following the same step above for Installing FIrmware.

SSH to your PBX and navigate to /tftpboot/brand/slot and put your firmware in place.
Replace /brand with the brand of your phone such as sangoma and replace /slot with 1 or 2 for slot 1 or slot 2.
Network Scan
The Network Scan feature of EPM will attempt to scan the network where the PBX is located and find devices that have not been provisioned yet.Please note, this feature only works for phones on the same actual subnet as the PBX.
The scan results will display the device brand and MAC address and let you map the devices with their MACs to specific extensions. This savesyou from having to locate and type in the MAC address for each phone in the Extension Mapping section. All devices mapped here will show up inthe Extension Mapping section of EPM.
Click the menu
button on the right to expand the nav menu.Click in the Advanced section of the nav menu.Network Scan
The system will detect the subnet that the PBX is on. You can optionally change the subnet if the system detects it incorrectly. Click the S
button to perform the scan.can This Subnet

Devices that haven't been provisioned will show up in a list. (Any devices that have already been provisioned will not show up in the scanresults.)In our example we see the system scanned subnet 10.10.0.0/24 which is the subnet the PBX is on. It found 1 phone that is notyet provisioned with EPM.
From here you can pick which extension, template, and model you want to map the device to. Click the button to save yourSaveselections.Now, the system should map the device and generate a configuration file.If you would like to make further edits or manage this device, visit the Extension Mapping section of EPM.
Specific Template Settings per Brand
Aastra Templates
Button Types For each button you can choose from the following types:
- Busy Lamp Field allows you to program a button to monitor another extension. The light by the button will be red whenever thatBLFextension is on a call. You can also press the button to call the user.
- The same as BLF, but while on a call you can transfer the active call to the extension of that BLF simply by pressing the BLFBLF/XFERbutton.
- Aastra phones support XML apps. Please see the for more info on each each app and how it works.XML Aastra XML App UserGuides- Allows you to program a number that will automatically be dialed when you press this button.Speeddial
- By pressing this button and then dialing an extension, the phone you are dialing will auto answer on the speakerIntercom immediately phone instead of ringing.
Services- The services button will take you to a page that lists all XML apps that the phone supports. Youcan also navigate to any XML app without having that specific XML App mapped to a button.Call List- This will give you a list of all missed and received calls to this phone while it is registered to the PBX.
Below are settings that are unique to Aastra that are different from the standard example we used with the Sangoma brand earlier inthis wiki.

Soft Key Button StatesBy default, a soft key style button will be displayed during all phone states (idle, connected, incoming, outgoing, and busy). You can change this ifdesired, per button, by clicking on the name of the state to deselect or select it. (Dark blue background = selected)
- The phone has no call activity.Idle- The phone has an established call.Connected
- The phone is receiving an inbound call it has not answered yet. Incoming- A user is placing an outbound call that has not been answered by the remote party yet. Outgoing
- The phone is busy, such as navigating menus.Busy
In the example below, Soft Key 1 is only shown when the phone is idle. Soft Key 2 is shown in all states.
Algo Templates
Device Settings
You can define the following options for each device:Algo 8028
- What number to dial when someone presses the intercom button. This can be any phone number orDoor Phone Destination
destination on your PBX, like a ring group, queue, or extension number.- What digit you can press on your phone after answering a call from the Call button that will unlockMomentary Key Press Digit
the door.Algo 8128
Below are settings that are unique to Algo that are different from the standard example we used with the Sangoma brand earlier in thiswiki.

Defines how the LED light will flash.Flash Pattern-Whether the light will be continuous or flash.Cadence-
Defines how long the LED light will be on.On Time- Defines how long the LED light will be off.Off Time-
Defines what causes the LED light to activate.Mode-
Algo 8180
- Here you can pick which ringtone to play when someone dials the Overhead paging destination on the 8180Pager Ring Tone
- Define what volume you want the overhead paging to be at.Pager Volume- Here you can pick which ringtone to play when someone dials the Ringer destination on the 8180Ringer Tone
- Define what volume you want the ringer to be atRinger Volume
AND Templates
Device Settings
All the device settings for the AND Clock are as follows. You can hover over the “?” for more information on each setting.
Below are settings that are unique to AND that are different from the standard example we used with the Sangoma brand earlier in thiswiki.

Audio Codes Templates
(no special settings)
Cisco Templates
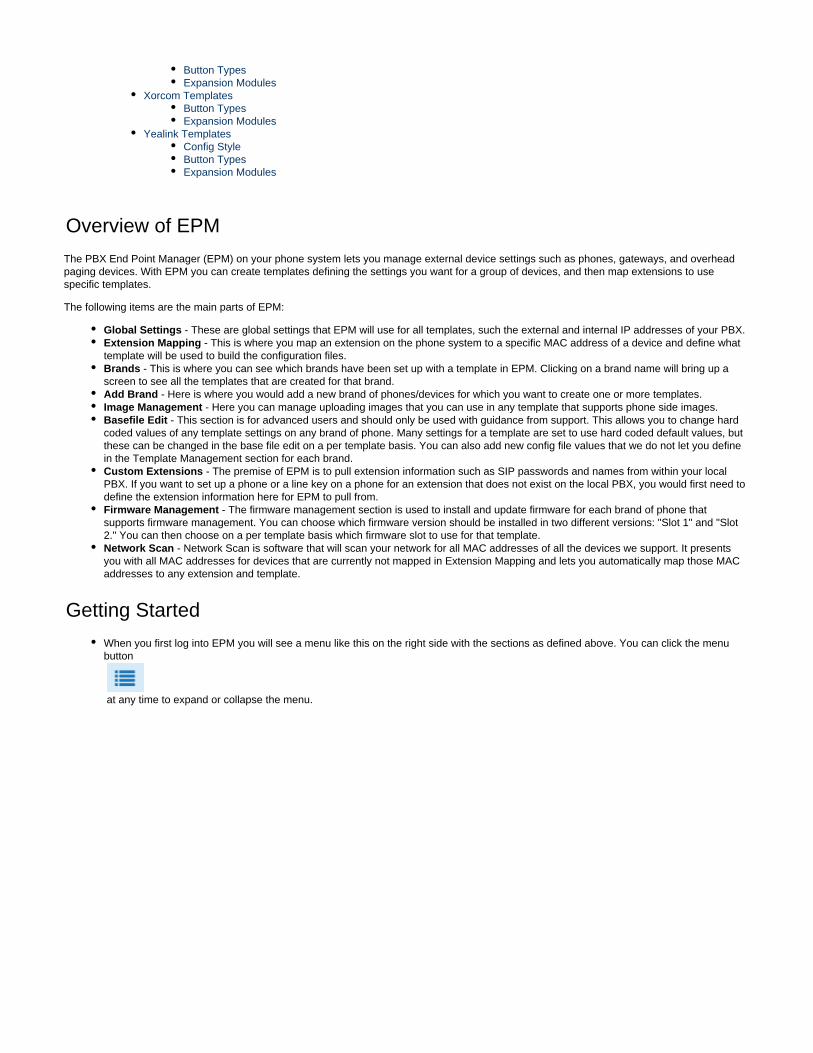
Expansion Modules
Some models of Cisco phones support Expansion modules. You can have a total of 2 expansion modules per phone. You set up the ExpansionModule buttons just like any other phone button. You will use the Extension Mapping section of EPM to actually map which extensions use whichexpansion modules, and in what order.
Cortelco Templates
Expansion Modules
Some models of Cisco phones support Expansion modules. You can have a total of 2 expansion modules per phone. You set up the ExpansionModule buttons just like any other phone button. You will use the Extension Mapping section of EPM to actually map which extensions use which
Below are settings that are unique to Cisco that are different from the standard example we used with the Sangoma brand earlier in thiswiki.
Below are settings that are unique to Cortelco that are different from the standard example we used with the Sangoma brand earlier inthis wiki.

expansion modules, and in what order.
CyberData Templates
Device Options
Different devices have different options, but below is an explanation of all the different options that can be set:
Relay Destination- What number to dial when someone presses the intercom button. This can be any phone number or destination onyour PBX, like a ring group, queue, or extension number.
- What digit you can press on your phone to unlock the door after answering a call from the call button. Momentary Key Press Digit- These are PIN codes that a user can press on the keypad of the device to unlock the door from the keypad. Pincode 1-10
- These are the 15 different paging zones that someone can enter when dialing the zone controller. You can then pickDial Code 00-14which combination of zones for each code will be included in the page.
Below are settings that are unique to CyberData that are different from the standard example we used with the Sangoma brand earlierin this wiki.

Digium Templates
Horizontal Soft Key States
You can change the layout and display of Horizontal Soft Keys (HSKs) for different phone states (idle, hold, incoming, connected, dial, andcalling). Click on the name of a phone state to see the HSK button template for the state.
- The phone has no call activity.Idle- The phone has a call on hold.Hold
- The phone is receiving an inbound call it has not answered yet. Incoming- The phone has an active call.Connected
- The user is dialing a number.Dial- The phone is making an outbound call that has not been answered yet.Calling
Grandstream Templates
Below are settings that are unique to Digium that are different from the standard example we used with the Sangoma brand earlier inthis wiki.
Below are settings that are unique to Grandstream that are different from the standard example we used with the Sangoma brandearlier in this wiki.

Answering
Auto Answer- If you want the device to auto answer to the speaker phone for every call that comes to the device.
Mute Mic- If you have Auto Answer set to Enabled, you can choose if you want the microphone on the phone to be muted by defaultwhen it auto answers.
Auto Off Hook- If you have Auto Answer set to Enabled, and the person calling this device hangs up, thephone can hang up or go back into idle mode.
Button Types
For each button you can pick from the following types:- BLF Busy Lamp Field allows you to program a button to monitor another extension. The light by the button will be red whenever that
extension is on a call. You can also press the button to call the user.- Speed Dial Allows you to program a number that will automatically be dialed when you press this button.- Enter a series of DTMF digits in the Value field to be dialed during the call. Leave the Label field blank.Dial DTMF- Enter the voicemail access number in the Value field. By default this is *97 but refer to the in your PBXVoice Mail Feature Code module
to verify this. Leave the Label field blank.- The last answered calls can be dialed using Call Return. The Label and Value field should be left blank.Call Return
- Enter the number in the value field to be transferred (blind transfer) during the call. Leave the Label field blank.Transfer- Enter the call park extension in the value field to park a call. By default this is 70 but refer to the in yourCall Park Feature Code module
PBX to verify this. Leave the Label field blank.- Enter the intercom feature code in the value field to do the intercom. By default this is *80 but refer to the Intercom Feature Code
in your PBX to verify this. Leave the Label field blank.module
Expansion Modules
Some models of Grandstream phones support expansion modules. You can have a total of 2 expansion modules per phone. You set up theExpansion Module buttons just like any other phone button. You will use the Extension Mapping section of EPM to actually map which extensionsuse which expansion modules, and in what order.
Available FXS Devices
For each gateway that you want to use for faxing, you can decide to use T38 or Passthrough fax mode. Usually, with faxing you will enable T38mode.
Mitel Templates
Below are settings that are unique to Mitel that are different from the standard example we used with the Sangoma brand earlier in this

Button Types
For each button you can pick from the following types:
- Since Mitel phones do not have dedicated line keys, you have to program 1 or more of the buttons on the phone to be the line keyLineso that you can make outbound calls.
- BLF Busy Lamp Field allows you to program a button to monitor another extension. The light by the button will be red whenever thatextension is on a call. You can also press the button to call the user.
- Speed Dial Allows you to program a number that will automatically be dialed when you press this button.
Mocet Templates
Button Types
For each button you can pick from the following types:
- Since Mocet phones do not have dedicated line keys, you have to program 1 or more of the buttons on your phone to be your lineLinekey so that you can make outbound calls.
- BLF Busy Lamp Field allows you to program a button to monitor another extension. The light by the button will be red whenever thatextension is on a call. You can also press the button to call the user.Speed Dial- Allows you to program a number that will automatically be dialed when you press this button.
Obihai Templates
Expansion Modules
Some models of Obihai phones support expansion modules. You can have a total of 2 expansion modules per phone. You set up the ExpansionModule buttons just like any other phone button. You will use the Extension Mapping section of EPM to actually map which extensions use whichexpansion modules, and in what order.
Panasonic Templates
Button Types
For each button you can pick from the following types: - Since Panasonic phones do not have dedicated line keys, you need to program 1 or more of the buttons on your phone to be yourLine
wiki.
Below are settings that are unique to Mocet that are different from the standard example we used with the Sangoma brand earlier in thiswiki.
Below are settings that are unique to Obihai that are different from the standard example we used with the Sangoma brand earlier inthis wiki.
Below are settings that are unique to Panasonic that are different from the standard example we used with the Sangoma brand earlierin this wiki.

line key so that you can make outbound calls. - BLF Busy Lamp Field allows you to program a button to monitor another extension. The light by the button will be red whenever thatextension is on a call. You can also press the button to call the user. Speed Dial- Allows you to program a number that will automatically be dialed when you press this button.
Phoenix Audio Templates
(no special settings)
Polycom Templates
Button Types
For each button you can pick from the following types:- Since Polycom phones do not have dedicated line keys, you have to program 1 or more of the buttons on your phone to be yourLine
line key so that you can make outbound calls. - BLF Busy Lamp Field allows you to program a button to monitor another extension. The light by the button will be red whenever that
extension is on a call. You can also press the button to call the user. Speed Dial- Allows you to program a number that will automatically be dialed when you press this button.
Polycom Built-In Features
You can choose whether you want the following buttons to be displayed on the bottom horizontal row of eachphone.
- Press to start a new call.New Call
- Press to access the call forward application that lets you do phone-side call forwarding at the device level.Call Forward
Horizontal Soft Key State Information
For each horizontal soft key (HSK), you can define when you want the button to be displayed on the phone.
If enabled, the button will be displayed on the phone while on an active call.Active Call- If enabled, the button will be displayed on the phone when the phone is not ringing or on a call.Idle-
In this example the IP650 lets you program 8 horizontal soft keys. These can only be speed dial numbers. As shown below we set up the firstbutton as a speed dial to 9209999999. The action field is where you define the number you want dialed.
Expansion Modules
Some models of Polycom phones support expansion modules. You can have a total of 3 expansion modules per phone. You set up theExpansion Module buttons just like any other phone button. You will use the Extension Mapping section of EPM to actually map which extensions
Below are settings that are unique to Polycom that are different from the standard example we used with the Sangoma brand earlier inthis wiki.
use which expansion modules, and in what order.
SNOM Templates
Button Types
For each button you can pick from the following types:
- Since SNOM phones do not have dedicated line keys, you have to program 1 or more of the buttons on your phone to be your lineLinekey so that you can make outbound calls.
BLF- Busy Lamp Field allows you to program a button to monitor another extension. The light by the buttonwill be red whenever that extension is on a call. You can also press the button to call the user.
Speed Dial- Allows you to program a number that will automatically be dialed when you press this button.
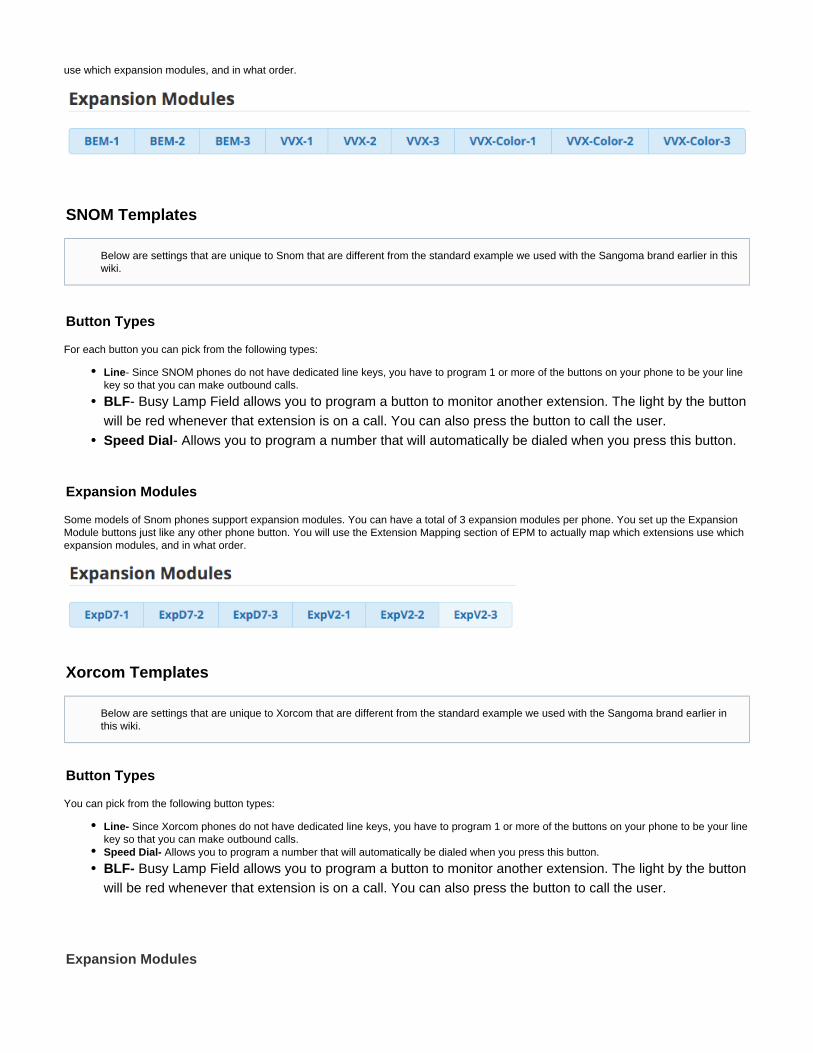
Expansion Modules
Some models of Snom phones support expansion modules. You can have a total of 3 expansion modules per phone. You set up the ExpansionModule buttons just like any other phone button. You will use the Extension Mapping section of EPM to actually map which extensions use whichexpansion modules, and in what order.
Xorcom Templates
Button Types
You can pick from the following button types:
Since Xorcom phones do not have dedicated line keys, you have to program 1 or more of the buttons on your phone to be your lineLine- key so that you can make outbound calls.
Allows you to program a number that will automatically be dialed when you press this button.Speed Dial-
BLF- Busy Lamp Field allows you to program a button to monitor another extension. The light by the buttonwill be red whenever that extension is on a call. You can also press the button to call the user.
Expansion Modules
Below are settings that are unique to Snom that are different from the standard example we used with the Sangoma brand earlier in thiswiki.
Below are settings that are unique to Xorcom that are different from the standard example we used with the Sangoma brand earlier inthis wiki.

Some models of Xorcom phones support expansion modules. You can have a total of 2 expansion modules per phone. You set up the ExpansionModule buttons just like any other phone button. You will use the Extension Mapping section of EPM to actually map which extensions use whichexpansion modules, and in what order.
Yealink Templates
Config Style
Starting with firmware V70, Yealink has changed the way configuration files must be generated. If you are using V70 or newer firmware on yourdevices set to . T4XG and W52P devices will automatically use V70 style configs regardless of what you set here, sinceConfig Style v70 Stylethey only support Firmware V70.
Button Types
You can pick from the following button types:
Since Yealink phones do not have dedicated line keys, you need to program 1 or more of the buttons on your phone to be your line key soLine-that you can make outbound calls.
Speed Dial- Allows you to program a number that will automatically be dialed when you press this button.
Expansion Modules
Some models of Yealink phones support Expansion Modules. You can have a total of 2 expansion modules per phone. You set up the ExpansionModule buttons just like any other phone button. You will use the Extension Mapping section of EPM to actually map which extensions use whichexpansion modules, and in what order.
Below are settings that are unique to Yealink that are different from the standard example we used with the Sangoma brand earlier inthis wiki.


![Microsoft PowerPoint 2007™ · Microsoft PowerPoint 2007™ Templates and Slide Masters Contents Introduction 1 Installed Templates and Themes 2 ... Click on the [Office Button]](https://static.fdocuments.in/doc/165x107/5f896382d02e1f7069244500/microsoft-powerpoint-2007a-microsoft-powerpoint-2007a-templates-and-slide-masters.jpg)