Enjoy Easter! - Primary Success · time I’ve ever sent home a project like this, I’m amazed at...
23
Enjoy Easter!
Transcript of Enjoy Easter! - Primary Success · time I’ve ever sent home a project like this, I’m amazed at...
Enjoy Easter!
2
Easter Fun! A Family Project “I send an egg pattern photocopied onto tag or white construction paper home with each student. The child and his family work together to decorate the egg using whatever materials they have on hand. Once the eggs are returned back to school, they can be used to decorate a bulletin board or displayed in the hallway. Every time I’ve ever sent home a project like this, I’m amazed at the creativity that is used in decorating the item. To use the decorated eggs from above for a bulletin board, you could display them as being hidden in three dimensional grass. Cover the lower part of a bulletin board with several layers of green paper fringed to look like grass. You could also display their eggs in a HUGE basket on a bulletin board, the top half in light blue (sky). Add sprigs of grass by cutting strips or clumps of grass from more green bulletin board paper and stapling it to the ‘grass’ already on the bulletin board. Add a big Easter bunny, flowers, a sun and maybe some butterflies, along with the students’ eggs hidden in the grass. Possible caption: Hippity, Hoppity, Easter’s On It’s Way!. Pile the eggs in the basket with some scattered around the bottom of the basket. You could use Easter basket grass to glue around the top of the basket as if it is stuffed and falling out.”
Artistic Eggs In Germany and Austria, it’s customary to celebrate Easter by hanging hollow eggs from the branches of trees - you can blow real eggs and decorate, or hang paper eggs. Photocopy a plain egg template, cut it out, and the children draw a design on both sides and colour brightly. Use paints or pastels if you wish. Cut out a brown tree shape for your bulletin board You can glue the entire tree to a decorated background (blue construction paper, with green tissue paper for grass and white cotton balls for clouds works very nicely), or bring in a branch that will fit in a vase and hang the finished eggs with thread. Blow out eggs, poking holes in top and bottom of egg. make sure you wash them out. Let them dry. Then take small squares of tissue paper and glue and let the children glue them on. They turn out beautifully. Have the kids paint a sheet with fingerpaint in bright colours. Sprinkle it with it with glitter if you wish. Give the children large egg tracers. They trace the egg shape on the back and cut it out. These are beautiful and a great classroom decoration.

3
Make sun catcher Easter eggs. To do so all you need is contact paper and tissue paper squares. First, peel the paper off the contact paper. Then place one sticky side up in front of each child. They then cover the sticky side with tissue squares. When they are all finished I trim the edges to an egg shape and hang in the window or from the ceiling lights.
Allow the children to paint on white paper using spring colours. They can finger-paint, paint with rolling marbles or tennis balls, spatter paint, etc. You choose! When dry, cut into large egg shapes and place around your room for great colour and no two alike! Use different coloured paper and cut out egg shapes, then take egg shells that have been coloured and crumble them. Then have the children decorate the egg shape with egg shells. Precut egg shapes out of coffee filters. Mix water and yellow food colouring and place mixture in a baby food jar. Do the same for blue. Let the children use eyedroppers or straws to drip colours on the filter shape. The colours will run together and make beautiful eggs. Co-operative Eggs “I have an egg shape master on a piece of 8 1\2 by 11 paper. The egg is divided into 4 parts by 3 wavy lines going across. Each part is numbered 1, 2, 3, or 4, going down from the top (just a tiny number). I have the kids decorate the egg with pencil crayons, any way they want. I encourage designs, not pictures, and in bright colours. When they are done, they cut out the egg and cut it into 4 parts, on the wavy lines. They keep their own top piece (number 1). The others go into bags corresponding with the number....you need 3 bags in front of the room. They each pick a new part that someone else made from each bag. Then they glue the egg back together on another piece of paper, with their piece on the top, and each piece below coming from some one else. We cut these out and put them on a bulletin board for Easter. I have also done this with one LARGE egg, dividing it into strips of paper, so each student gets one piece. They decorate their strip, and then I glue them back together, in order, onto another large piece of paper. This makes one big, colourful egg. Be sure to number them though or you will have quite the puzzle to solve! And make sure they decorate the numbered side...backwards pieces just don't fit.” Talking Eggs “Make construction paper eggs and decorate with lace, sequins, etc. On a speech bubble write what the egg is saying. A great bulletin board display!”
4
Easter Egg Cut-Outs “I got this idea from a convention and I'm envisioning doing "Easter egg cut outs" with it. The instructor had us tape a piece of paper to the table on all 4 sides with masking tape (like a frame). Then we did a wash over the paper with a paintbrush dipped in water. Then we took dried up markers, dipped them in water and made designs on the wet paper. The colors ran together beautifully and when it dried it was very effective. I think I'll cut out egg shapes and try this for Easter. Always was wondering if there was something I could do with all their dried up markers.....” After Valentine’s Day the children should be able to cut out different sizes of hearts. Use this to make an Easter bunny. Paper Maché Easter Eggs MATERIALS: balloons, string, newspaper (torn into strips about 1 by 4 inches), extra newspaper to cover tables, bowls, liquid starch (or paper-maché mix), paint and brushes, egg holders - sentence strips stapled into circle to hold dry egg when painting, then cover strips with construction paper to display eggs. 1. Blow up a balloon and make a knot. 2. Cover balloon with paper-maché strips, overlapping, leaving a small circle or triangle uncovered where you will cut an opening in the egg when dry (also, cover around knot, but not over, so a string can be attached to hang balloon for drying). 3. Repeat step 2 after egg is dry (about 1 day) to add a second layer of paper-maché. 4. When completely dry (about 1 day) pop the balloon. 5. Cut jagged edges around opening to resemble 'cracked' egg. 6. Cover small hole at top of egg with paper and glue 7. Paint the egg. We painted ours a solid colour first, then drew our 'designs' on paper before painting on eggs. This way, the students felt more confident when painting designs on the egg. 9. Set the egg on a 'holder'. (tag-board strip formed into circle) 10. Fill with grass and goodies, (or place a small chick, bunny, duck, etc. inside). One thing that is difficult is trying to keep the balloon from rolling around while you are trying to cover it with paper-maché. I paired my students up, and one held the other's balloon while he covered it with strips. Then they switched places. I took this opportunity to discuss what makes a good partner/teamwork. I was pleasantly surprised at how well they worked together! Allow the children to fingerpaint on large paper using spring colours. When dry, cut into large egg or flower shapes and place around your room for great colour!
5
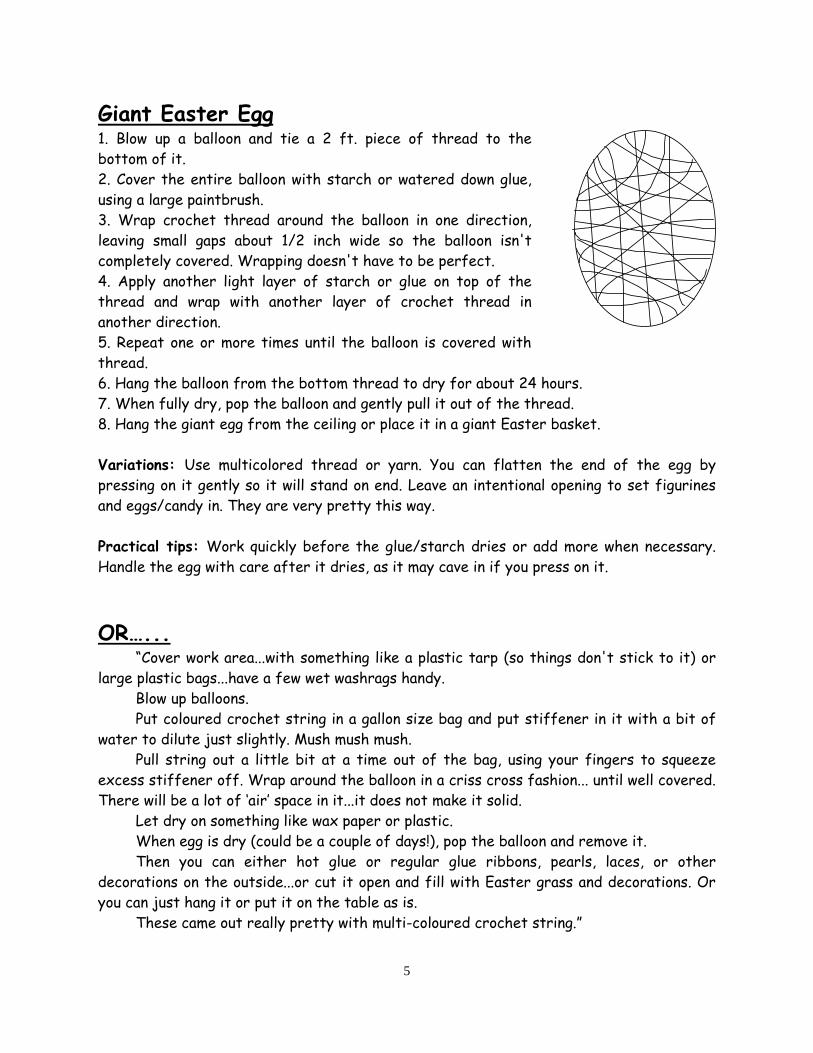
Giant Easter Egg 1. Blow up a balloon and tie a 2 ft. piece of thread to the bottom of it. 2. Cover the entire balloon with starch or watered down glue, using a large paintbrush. 3. Wrap crochet thread around the balloon in one direction, leaving small gaps about 1/2 inch wide so the balloon isn't completely covered. Wrapping doesn't have to be perfect. 4. Apply another light layer of starch or glue on top of the thread and wrap with another layer of crochet thread in another direction. 5. Repeat one or more times until the balloon is covered with thread. 6. Hang the balloon from the bottom thread to dry for about 24 hours. 7. When fully dry, pop the balloon and gently pull it out of the thread. 8. Hang the giant egg from the ceiling or place it in a giant Easter basket. Variations: Use multicolored thread or yarn. You can flatten the end of the egg by pressing on it gently so it will stand on end. Leave an intentional opening to set figurines and eggs/candy in. They are very pretty this way. Practical tips: Work quickly before the glue/starch dries or add more when necessary. Handle the egg with care after it dries, as it may cave in if you press on it.
OR…... “Cover work area...with something like a plastic tarp (so things don't stick to it) or large plastic bags...have a few wet washrags handy. Blow up balloons. Put coloured crochet string in a gallon size bag and put stiffener in it with a bit of water to dilute just slightly. Mush mush mush. Pull string out a little bit at a time out of the bag, using your fingers to squeeze excess stiffener off. Wrap around the balloon in a criss cross fashion... until well covered. There will be a lot of ‘air’ space in it...it does not make it solid. Let dry on something like wax paper or plastic. When egg is dry (could be a couple of days!), pop the balloon and remove it. Then you can either hot glue or regular glue ribbons, pearls, laces, or other decorations on the outside...or cut it open and fill with Easter grass and decorations. Or you can just hang it or put it on the table as is. These came out really pretty with multi-coloured crochet string.”

6
Egg Patterns Cut out a an egg shape from white paper or have students do it. It need to be symmetrical.. Fold in half lengthwise (tall and skinny). Have one student decorate with colourful patterns and designs. Then, have them trade with another student. The second student opens the egg and continues the started pattern. Egg Sun-Catchers: Tape a picture of an egg shape onto each child's desk. Cover the picture with a piece of waxed paper and tape in place. Using a water/glue mixture, put small pieces of cut up tissue paper to cover the picture with tissue paper making sure not to leave any open places. Let dry over night and cut into the shape of the object underneath (I hold the pattern underneath and cut around it). Hang in the window for a pretty stained glass effect. Styrofoam Eggs Buy Styrofoam eggs at a craft store. Tear tissue paper (assorted colours) into irregular 2 - 3 cm. pieces. Working over waxed paper, brush a section of Styrofoam egg with decoupage solution or liquid glue that has been diluted. Place overlapping pieces of tissue paper over this section of the egg. Brush a coat of the decoupage solution over tissue paper. Continue until entire egg is covered. Use toothpicks pushed into the Styrofoam to keep the egg from rolling around while you work. Let dry. Remove toothpicks. Tie Dye Easter Eggs These are very easy to make and no special supplies needed. Boil eggs. Choose 2 or 3 crayons. Sharpen them over a bowl to save the shavings. When eggs are still very hot, roll them into crayon shavings. Let cool. An Egg-cellent Idea! Use a large egg shape….. Pour sweetened condensed milk into several separate containers. Drop a few drops of food colouring into each container. Put a paint brush in each. The students then ‘paint’ the egg shape with the different colours, putting each brush back in the correct colour when finished with it. For an added touch, sprinkle with glitter or candied sprinkles while wet. Allow the papers to dry for several hours. “Pass out a coffee filter to each student. First, colour all over the filter with different coloured washable markers. Then pass out a water dropper to students and let them pinch water droplets all over top of the coloured filter. They will love to see those colours all run into one another! Once they are dry (overnight), instruct them to cut their creation out to the shape of an egg.”
7
Dyeing Eggs …… “It is surprising how many children don’t dye eggs at home, so I always do it at school. I have several parent helpers come in this day, so every child gets lots of time and attention. I ask every child to bring in at least 4 hard boiled eggs and I cook up a dozen in case of cracked ones. I usually buy the dye (several packages), but food colouring works, too - and one year I did natural dyes with Grade Threes and that was interesting. I have several serving spoons that have the bowl at right angles to the handle, and the smaller kids find this easier than a regular spoon. To use food colouring, mix about 20 drops of food colouring with 1 teaspoon of vinegar in a coffee mug. Add 1/2 cup hot water. Let the water cool to room temperature. If necessary you can add a bit more water. You want the coloring to completely cover the egg when put in the cup. I have them write their initials or name with white wax crayon on the egg first, and they are always thrilled to see the name come up when there is colour. Some like to draw flowers or other small pictures with different coloured wax crayons, too. I have empty egg cartons for the finished eggs to be set to dry - I cut them in half so each student has places for 6 eggs and the eggs go home in these. One year I put coffee filters on the table surface (on top of plain paper). All the drips get on the filters and these can be used as butterflies or flowers later on or even after Easter.” “I usually dye eggs as a center during art and I have another activity such as a cut and paste or a colouring page that doesn't require my time. I also always try to have one more adult in the room with me. If the children are drawing designs, I have them do that at their desk and then I call up groups at a time to dye their eggs. I also buy a few sets of dye so that I have at least 2 of each colour. For drying eggs I collect empty egg cartons so that each student has a half of one. These are great for having the kids carry them home. I let each child do up to 4 eggs, but only one at a time. So once everyone has one egg done, then they start on egg 2. Some of them choose to colour with wax crayon or markers on one of the eggs.” For decorating Easter eggs with a glossy finish try mixing sweet and condensed milk with food colouring and paint.
8
Natural Dyes Have a lesson where you discuss how you might colour eggs if you didn’t have any dye or food colouring. Grade Two and Three students will be interested in experimenting with natural dyes. Wash your eggs first with mild dish soap. Hard-boil the eggs well - bring the water to a boil and simmer for at least 15 minutes - or - hard-boil the eggs at the same time as you boil the dye ingredient. Boil the natural vegetable ingredients in water and 2 - 3 tablespoons of vinegar until the water has a deep colour. Usually, the more of the natural ingredient you use and the longer the egg soaks (maybe even overnight) the darker the colour will be. Of course, the juices and spices do not need cooking. REMEMBER: Safety first! Do not eat eggs that sit in hot water for many hours or overnight. Save those for decorations. Red / Pink: red onion skins, beet juice, cranberry juice, frozen raspberries Blue: blueberries; a soft blue is obtained by boiling red cabbage. Slice the cabbage. Cover with water and boil for 30 minutes. This dye will look purple, but will dye the eggs blue. Cabbage dye will only dye the eggs when it cools. Purple / Lavender: grape juice Yellow: yellow onion leaves, turmeric, orange or lemon peels, cumin, carrot tops Orange: paprika Brown: dill seeds, strong coffee Green: grass, spinach, green delicious apple peels, You can rub blueberries and cranberries right on the shells for soft blues and pink. Blend them for another pretty result. If you want your eggs to be a darker shade, cover them with the dye and let them stand overnight in the refrigerator. Polish the eggs with a soft cloth when dry to make them shinier. Orange and a rich, reddish brown are obtained from onion skins. Gather the dry outer skins of onions. It takes several cups of skins. Cover with water and boil for about 30 minutes. Add the eggs. Watch the colour. You can dye various hues of orange to brown depending on length of time in the dye. A clear, bright yellow is obtained from the inner bark of apple branches. Geranium flower petals have a bright dye.
9
To dye the perfect Easter eggs the natural way, here's what to do: 1. Put eggs in a single layer in a pan. Pour water in pan until the eggs are covered. 2. Add about a teaspoon of vinegar. 3. Add the natural dye appropriate to the colour you want your eggs to be. (The more eggs you are dyeing at a time, the more dye you will need to use.) 4. Bring water to a boil, then reduce heat and simmer for 15 minutes. 5. Remove the substance you used to colour the eggs. Put eggs in a bowl. If you want your eggs to be a darker shade, cover them with the dye and let them stand overnight in the refrigerator. You can decorate hard-cooked eggs or emptied eggshells. Hard-cooked eggs are a bit more sturdy than empty shells. They’re easier to work with it you’re afraid the egg might break. If your hard-cooked egg does crack or the design isn’t good enough to keep, you can eat the egg. Emptied eggshells are lightweight. You can hang them on a mobile, an Easter egg tree or a Christmas tree. Emptied eggshells have nothing inside to spoil, so you can keep them on display for years. And, you can use the insides for baking. Emptying Eggs Whether you dye, paint, or decoupage your eggs, they'll last longer if you blow out the contents and remove the white and yolk, leaving only the shell to decorate. You will need: egg, drill with 1/8-inch bit (the small Dremel drills are easier to use), sharp cuticle scissors, bowl, ear syringe, soap and water, bleach 1. Remove the contents of the egg. Make a hole as small as 1/8 inch in each end of a hen's egg. A mini drill and sharp-pointed cuticle scissors are good tools for keeping the holes small. Work over a bowl. The insides may start draining when you pierce the second opening. 2. Keeping the egg over a bowl or the sink, use an ear syringe to blow air into the egg and force the contents out the opposite hole. Rinse the egg with mild soap, water, and a small amount of bleach 3. Slip empty eggshell onto a dowel. For decoupage, you want to avoid getting fingerprints on the eggshell, so slide it onto a 1/8-inch-diameter dowel. To prevent the egg from sliding, wrap a small piece of masking tape around the dowel just above and below the egg. To give eggshells a light flesh tone for a face design, dip them briefly in water that has just a bit of red and yellow colouring. For a deeper skin shade, use red, yellow and just a touch of green.
10
For layers of colour, dip the egg into a light colour first. Then dip it into darker and darker colours. For a two-toned egg, hold the egg in an egg holder from a dyeing kit or in a slotted spoon. Dip only half of the egg into the dye. Lift it out and let it dry, dyed-end down. Then, dye the other half in another colour. If you let the dye cover the centre each time, the middle of the egg will be a third colour, a combination of the two colours you used. You can dip the ends of the egg into still more colours. Uncooked eggs may have an oil coating on their shells. Even cooked eggs can pick up oil from your hands. If dye or paint doesn’t stick to the shell, wipe it lightly with white vinegar to remove the oil. Don’t let the egg sit in vinegar, though, or the shell will dissolve! Marbled eggs Mix dye according to package directions. Add 1 tbsp. vegetable oil to each colour you want to marble. Dye eggs as directed on dye package. When you remove the eggs, the oil will have caused a very nifty marbled effect.
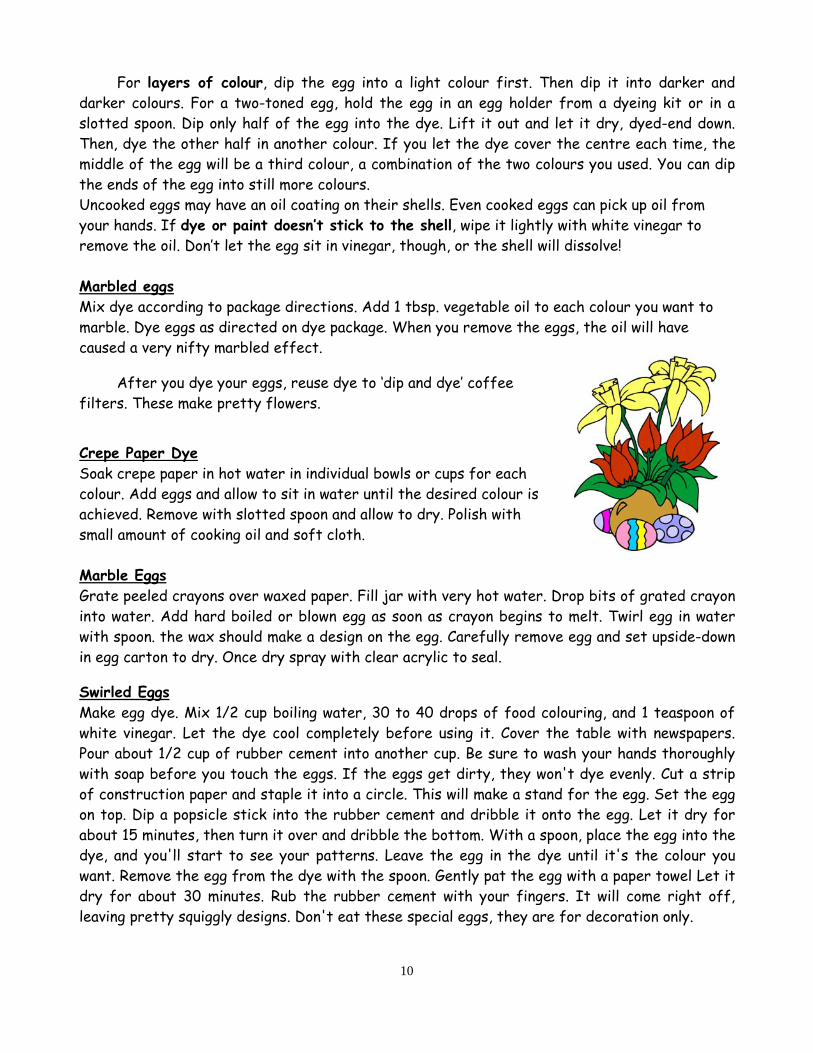
After you dye your eggs, reuse dye to ‘dip and dye’ coffee filters. These make pretty flowers.
Crepe Paper Dye Soak crepe paper in hot water in individual bowls or cups for each colour. Add eggs and allow to sit in water until the desired colour is achieved. Remove with slotted spoon and allow to dry. Polish with small amount of cooking oil and soft cloth. Marble Eggs Grate peeled crayons over waxed paper. Fill jar with very hot water. Drop bits of grated crayon into water. Add hard boiled or blown egg as soon as crayon begins to melt. Twirl egg in water with spoon. the wax should make a design on the egg. Carefully remove egg and set upside-down in egg carton to dry. Once dry spray with clear acrylic to seal.
Swirled Eggs Make egg dye. Mix 1/2 cup boiling water, 30 to 40 drops of food colouring, and 1 teaspoon of white vinegar. Let the dye cool completely before using it. Cover the table with newspapers. Pour about 1/2 cup of rubber cement into another cup. Be sure to wash your hands thoroughly with soap before you touch the eggs. If the eggs get dirty, they won't dye evenly. Cut a strip of construction paper and staple it into a circle. This will make a stand for the egg. Set the egg on top. Dip a popsicle stick into the rubber cement and dribble it onto the egg. Let it dry for about 15 minutes, then turn it over and dribble the bottom. With a spoon, place the egg into the dye, and you'll start to see your patterns. Leave the egg in the dye until it's the colour you want. Remove the egg from the dye with the spoon. Gently pat the egg with a paper towel Let it dry for about 30 minutes. Rub the rubber cement with your fingers. It will come right off, leaving pretty squiggly designs. Don't eat these special eggs, they are for decoration only.

11
Tissue paper dyed eggs This is much less messy than setting out bowls of dye! Spritz or dip egg in water and pick up squares of tissue paper one at a time and lay around the egg. Feel free to use different colours and to overlap them. Spritz with water again if the tissue paper didn't get completely wet. Set aside in a bowl or margarine container to dry. When the egg dries, the tissue paper will fall off, but the pretty colours will stay behind. It gives something of a stained glass look to the eggs. “I usually do it as a center during art and I have another activity such as a cut and paste or a colouring page that doesn't require my time. I also always try to have one more adult in the room with me. If the children are drawing designs, I have them do that at their desk and then I call up groups at a time to dye their eggs. I also buy a few sets of dye so that I have at least 2 of each colour. For drying eggs I collect empty egg cartons so that each student has a half of one. These are great for having the kids carry them home. I let each child do up to 4 eggs, but only one at a time. So once everyone has one egg done, then they start on egg 2. Some of them choose to colour with markers on one of the eggs.” You can ‘dye’ them by wrapping the cooked eggs in tissue paper and wetting it, just make sure its the kind that bleeds. Let the paper dry and it flakes off. It is a little messy! If you cut squares of different colours and over Cut the cardboard toilet paper rolls into little stands to dry your eggs after dyeing. For easy egg dying: Try crepe paper soaked in water- it's very easy but use gloves as the dye is very strong (if the kids wash their hands right away they should be OK). Or else wrap the egg in tissue paper - leave on longer and soak paper in water. You can also dip a brush into food colouring and paint with it right on the eggshell. Use the colouring straight from the bottle or blend colors together to make other colours. To make a stipple pattern on an egg, first dip a clean sponge into food colouring. Then press it onto the shell.

12
Decorating Eggs - Spatter paint eggs - one side at a time and let dry before turning. - Paint small flowers or names with white liquid glue and a fine paint brush. Sprinkle glitter onto the glue. - Sponge paint eggs with one colour or more than one. Tear off a piece of sponge. Dip it into some paint, then dab it onto white paper to see what kind of pattern it will make. Try different bits of sponge until you like the pattern. Pour a little paint onto a piece of foil. Dip the sponge into the paint, then dab the sponge onto white paper to see if the sponge carries too much or too little paint. Correct as needed. Sponge-paint half of the egg; let dry. Sponge-paint the other half of the egg; let dry. Add layers of other colors, if you like, in the same way. - Glue bits of tissue paper all over an egg. Glue all edges so the egg is smooth. - Colour eggs with bits of crepe paper - the colour runs out of the paper. - This perhaps is not good for kids to do, unless safety precautions are taken. Boil eggs, and when they are just out of the boiling water roll them in wax crayon shavings. Use tongs to handle the eggs. - For tie-dyed eggs, wrap elastic bands around an egg before dying. If your children want to dye more eggs than you have ready, cut out egg shapes from white tag, make a small hole and tie a loop of thread to make a loop. These can now be dipped in the dye - as many as they want!
Easter Baskets “Make baskets from the brown lunch bags. Cut the bag off at the desired height and then make a handle and staple on. The children love to make their own ‘grass’ - bring in a paper shredder and give each child a piece of green photocopy paper or tissue paper and run it through the shredder. Decorate the basket with drawings or glue on decorated eggs, rabbits, etc.” “Real grass in a basket: Use the strawberry baskets and weave paper or ribbon through to decorate. Line the inside with saran wrap and put about 4 cm. of soil in the bottom. Plant grass seed. If you do this about 2/3 weeks before Easter you can put your eggs in a basket filled with real grass!”
13
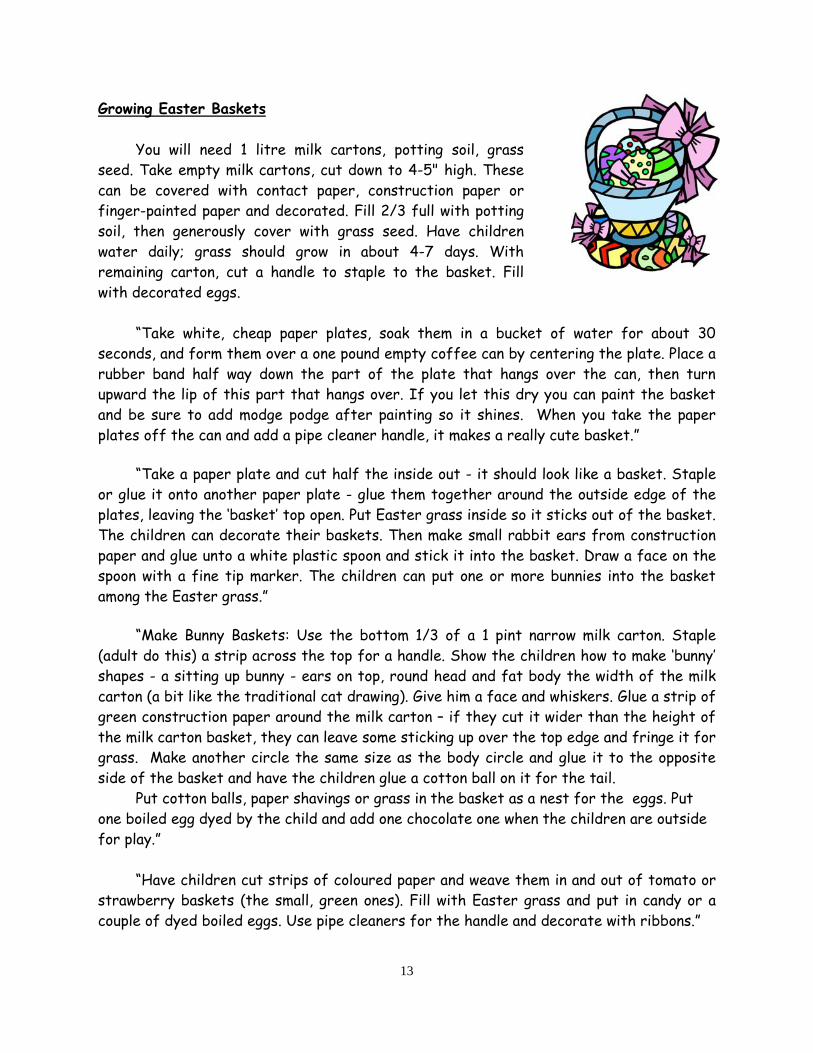
Growing Easter Baskets You will need 1 litre milk cartons, potting soil, grass seed. Take empty milk cartons, cut down to 4-5" high. These can be covered with contact paper, construction paper or finger-painted paper and decorated. Fill 2/3 full with potting soil, then generously cover with grass seed. Have children water daily; grass should grow in about 4-7 days. With remaining carton, cut a handle to staple to the basket. Fill with decorated eggs. “Take white, cheap paper plates, soak them in a bucket of water for about 30 seconds, and form them over a one pound empty coffee can by centering the plate. Place a rubber band half way down the part of the plate that hangs over the can, then turn upward the lip of this part that hangs over. If you let this dry you can paint the basket and be sure to add modge podge after painting so it shines. When you take the paper plates off the can and add a pipe cleaner handle, it makes a really cute basket.” “Take a paper plate and cut half the inside out - it should look like a basket. Staple or glue it onto another paper plate - glue them together around the outside edge of the plates, leaving the ‘basket’ top open. Put Easter grass inside so it sticks out of the basket. The children can decorate their baskets. Then make small rabbit ears from construction paper and glue unto a white plastic spoon and stick it into the basket. Draw a face on the spoon with a fine tip marker. The children can put one or more bunnies into the basket among the Easter grass.” “Make Bunny Baskets: Use the bottom 1/3 of a 1 pint narrow milk carton. Staple (adult do this) a strip across the top for a handle. Show the children how to make ‘bunny’ shapes - a sitting up bunny - ears on top, round head and fat body the width of the milk carton (a bit like the traditional cat drawing). Give him a face and whiskers. Glue a strip of green construction paper around the milk carton – if they cut it wider than the height of the milk carton basket, they can leave some sticking up over the top edge and fringe it for grass. Make another circle the same size as the body circle and glue it to the opposite side of the basket and have the children glue a cotton ball on it for the tail. Put cotton balls, paper shavings or grass in the basket as a nest for the eggs. Put one boiled egg dyed by the child and add one chocolate one when the children are outside for play.” “Have children cut strips of coloured paper and weave them in and out of tomato or strawberry baskets (the small, green ones). Fill with Easter grass and put in candy or a couple of dyed boiled eggs. Use pipe cleaners for the handle and decorate with ribbons.”

14
“Make baskets out of paper soup bowls by covering them with tissue paper and decoupage.” “Have children cut strips of coloured paper and weave them in and out of tomato or strawberry baskets (the small, green ones). Fill with Easter grass and put in candy or a couple of dyed boiled eggs. Use pipe cleaners for the handle and decorate with ribbons.” “Make baskets from the brown lunch bags. Fold the bag top down twice (this makes it more sturdy, too) and then make a handle and staple on. The children love to make their own ‘grass’ - bring in a paper shredder and give each child a piece of green photocopy paper or tissue paper and run it through the shredder. Decorate the basket with drawings or glue on decorated eggs, rabbits, etc.” Bunnies in the Grass You will need: grass seed, potting soil, pot or cup, wide craft stick, white paint, markers, pink felt, misc. craft items like fishing line (whiskers) pipe cleaners, pom-poms, press on eyes or googly eyes. First, have the children place the potting soil in the pot, and sprinkle with grass seed, place a little more soil to cover and water the soil. Next have the children decorate paint their craft sticks white. Then after they are dry decorate them like bunnies. Cut the felt into ears, put on eye nose and whiskers. Stick the stick into the grass pot and place them in a sunny window. In a few days your bunny will be sitting in the grass.
Bunnies and Chicks and Lambs “Cute Chick: Photocopy a big egg onto yellow construction paper. Trace each student’s hands (both of them). Have the students cut out the egg (which becomes the chick’s body) and their hands and glue one hand to each side of the egg to form wings for the chick. Add wiggly eyes and an orange triangle shaped beak.” Bunnies in the Grass Students paint long, large strokes of green paint to create "grass". Let dry. Glue on cotton batting in the shape of bunnies. Somebunny Loves You Have children cut out a rabbit pattern Add features like face and a cottontail. Cover with cotton batting spread thinly. Write ‘Somebunny loves you’ on it and have student give it to their parents.
15
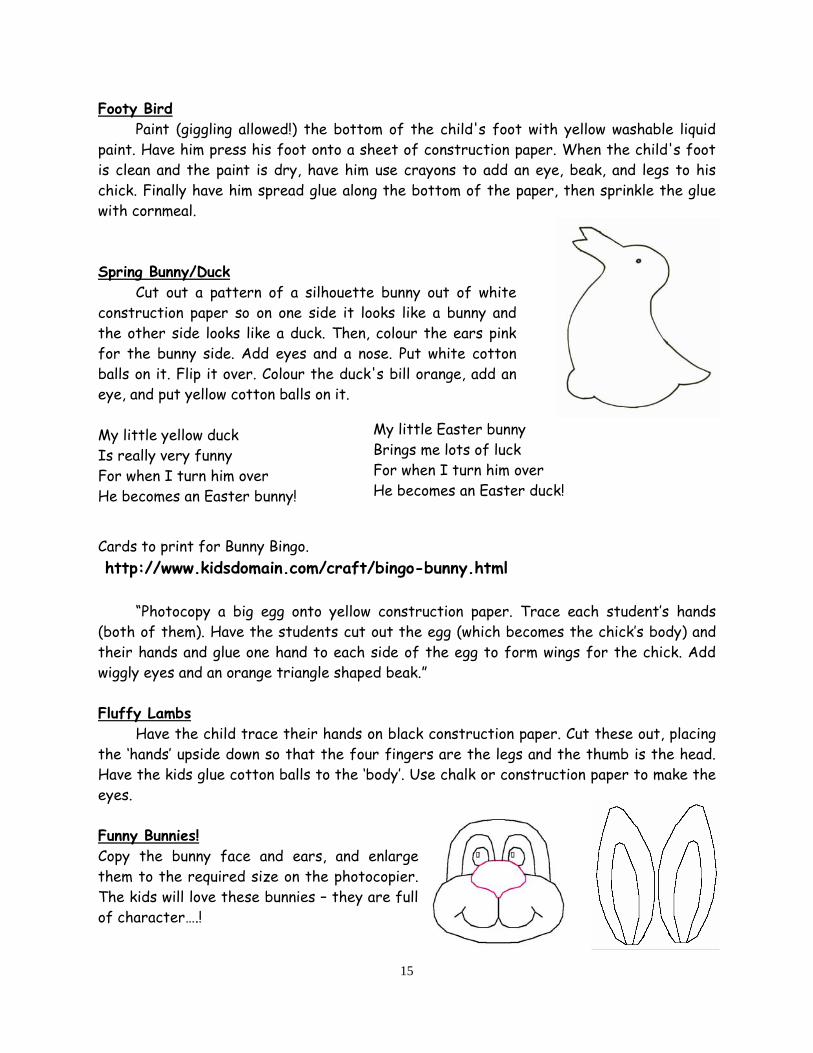
Footy Bird Paint (giggling allowed!) the bottom of the child's foot with yellow washable liquid paint. Have him press his foot onto a sheet of construction paper. When the child's foot is clean and the paint is dry, have him use crayons to add an eye, beak, and legs to his chick. Finally have him spread glue along the bottom of the paper, then sprinkle the glue with cornmeal. Spring Bunny/Duck Cut out a pattern of a silhouette bunny out of white construction paper so on one side it looks like a bunny and the other side looks like a duck. Then, colour the ears pink for the bunny side. Add eyes and a nose. Put white cotton balls on it. Flip it over. Colour the duck's bill orange, add an eye, and put yellow cotton balls on it. My little yellow duck Is really very funny For when I turn him over He becomes an Easter bunny!
Cards to print for Bunny Bingo. .http://www.kidsdomain.com/craft/bingo-bunny.html “Photocopy a big egg onto yellow construction paper. Trace each student’s hands (both of them). Have the students cut out the egg (which becomes the chick’s body) and their hands and glue one hand to each side of the egg to form wings for the chick. Add wiggly eyes and an orange triangle shaped beak.” Fluffy Lambs Have the child trace their hands on black construction paper. Cut these out, placing the ‘hands’ upside down so that the four fingers are the legs and the thumb is the head. Have the kids glue cotton balls to the ‘body’. Use chalk or construction paper to make the eyes. Funny Bunnies! Copy the bunny face and ears, and enlarge them to the required size on the photocopier. The kids will love these bunnies – they are full of character….!
My little Easter bunny Brings me lots of luck For when I turn him over He becomes an Easter duck!

16
Bird’s Nest Basket You can take a small brown lunch sack and roll it from the top all the way down and it makes a perfect bird’s nest. You can have the children go outside and collect twigs, grass, etc., to put in their nests. You can also put in Easter grass and jelly beans and put on a pipe cleaner handle to use it as a little Easter basket. This turns out really cute! Bottom Bunnies! “These are called ‘Bottom Bunnies’! You have the child sit on a piece of poster paper (or butcher paper) and you trace around his legs and bottom. The bottom is the bunny's face and the legs are the ears. Be sure to pose the ears. The bent knee ones make cute lop eared bunnies. Then they decorate with markers, construction paper and wallpaper samples with hats, bows, ties, etc. They love it!” Easter Chicks “To make these adorable Easter chicks, you need one egg cup (cut from a styrofoam egg carton) and two cotton balls for each child, powdered tempera paint, a large Zip-Loc bag, a hole punch, scraps of blue and orange construction paper, blue, scissors and markers. 1. Cut individual egg cups from an egg carton. Make V-shaped notches the top of each to resemble half of a cracked eggshell. 2. With markers, have child write their names on the bottom of the cup and an Easter message on the front if you so choose. 3. Put 2 teaspoons of powdered paint in a Zip-Loc bag with two cotton balls. Seal carefully and shake vigorously. Shake off any excess paint. (You can substitute yellow cotton balls) 4. Cover the inside bottom of the cup with glue. 5. Place 1 cotton ball in the cup for the chicks body. Place a drop of glue on top and add another cotton ball for the head. 6. Punch out two blue dots and glue on for eyes. 7. Cut a small diamond shape from orange paper and fold in half. Glue on for beak. “Colour in a large rabbit. Take water colours and make splashes of colour all over him. Write a funny story of how the Easter bunny got covered in so many colours. (He was dying eggs, the candy machine exploded, etc.)” “Cute Chick: Photocopy a big egg onto yellow construction paper. Trace each student’s hands (both of them). Have the students cut out the egg (which becomes the chick’s body) and their hands and glue one hand to each side of the egg to form wings for the chick. Add wiggly eyes and an orange triangle shaped beak.”

17
Bunnies “Take 2 paper plates...the white cheap ones. Cut one in half. Staple the halves to the top of the back of the whole plate. Have them spaced apart...these are the ears of the rabbit. Have the students colour the rabbit whatever colour they one...drawing eyes, nose, mouth, whiskers. The boys put a bow tie on theirs and the girls put a bow at the bottom of each ear. (These were made from construction paper.)” Chick and Egg “We take old wallpaper books and find a stripe or flower that would make a pretty Easter egg. We trace a tag board egg shape and cut it out. Then we make a zig zag cut across the egg to make it look like it has cracked in half. Next we paste the egg on construction paper with the zig zag cut towards the top. We make the shape of a chick (one large circle with a smaller circle placed on top but a little to the side and of course a triangle for a beak) coming out of the top of the egg. “The last part is time consuming but worth the effort. I have yellow tissue paper cut into small 1 to 1 1/4 inch squares. The children place a little liquid glue on a piece of scratch paper. Then they take a pencil with a good eraser. They place the eraser in the middle of one of the yellow tissue pieces, gently squeeze the tissue around the pencil and dip it in the Elmer's glue and carefully place it on the chick shape. The more they place on the chick the fluffier the chick appears. We have a few dark colored tissue papers so they can give the chick an eye. They use markers to color the beak orange. They really are quite pleased with their pictures.”
Bulletin Boards “A very simple bulletin board that I did was with iridescent blue paper for the sky, bottom 1/3 of the board was green grass. Then I got a really cute graphic of an Easter Bunny and copied it on white construction paper. She is sitting in the middle of the board with the words on either side ‘Hoppy Spring’ in deep pink letters. The students made large eggs with repeating patterns on them and they had to be symmetrical (top matching the bottom). We did that for a math lesson yesterday- (abb/aab type patterns). I stapled their eggs all over the grass and it came out really cute!! It's an easy bulletin board to replace by leaving the background up for the next few months (ladybug – good deeds – tulip stories...)”
18
“My kids wrote spring poems - S is for ; P is for ... The paper I used had a flower border that they coloured with felts. At the bottom I used green butcher paper to look like grass and the children made paper daffodils which I stapled coming out of the grass. Around the poems I put some green crepe paper to look like a vine and every six inches a coffee filter flower. They look great and we have had lots of compliments!” “Have each child colour a coffee filter with their water soluble felt pens. (note: put something underneath as the felt runs through). Then spray the coloured filter with water. The colours run together and they dry quite quickly. I pinched them in the center and put on a small piece of scotch tape then I stapled them to the green vines. You could attach them to pipe cleaners and put in a vase or whatever but they look great.” An Easter Bulletin Board: Make a large bunny and an egg on it. Add students’ stories written on egg shaped papers. Title it: Eggs-citing Easter Stories!
Through the Curriculum Easter Math Egg carton calculations: write the numbers from 1-12 - one number in each section. Add two small wrapped candy eggs. Close the carton and shake. Add the two numbers together. (For multiplication, you might want to write the numbers 1-6 twice. Then, the students would multiply the two numbers indicated.) Learn About Eggs “I had the kids explore an egg by cracking it open into a bowl. That was fun for them to begin with. Then we looked closely at the eggshell and noticed the air sac at one end of the egg. We felt the inside membrane attached to the shell. We tried to look through the shell to notice how porous it is for the air to pass through for the developing chick. We examined the yolk and the white and looked for the white stringy chalaza, that holds the yolk in place. We looked for the white spot on the yolk which if fertilized will develop into a chick. We touched each part of the egg. The kids love it. On another day, we label and colour a large diagram of an egg. “I usually take about 6 kids at a time to do this activity during centre time so the other kids are occupied. Then I can help them with the cracking and supervise them so the egg stays in the bowl!”
19
An Egg Book “One Easter idea that my students enjoyed was to make an Egg book. We created an egg shape book with four pages in it. They decorated the cover to look like an Easter egg. Inside they wrote: An egg can __________. An egg can __________. An egg can ___________. But an egg can't __________. Each sentence was on a different page. We brainstormed ideas and wrote them on the board first, and then the students went to it, writing their sentences and illustrating each page. The books were really cute and the kids enjoyed making them (although, when they got to ‘An egg can't’ they got rather silly with their answers!” Tammy Basket Bonus “This is one of my favorite ideas! Prepare a basket full of bonus-time activities to use as fillers! Write several short activities (see my suggestions below) on separate slips of paper. Fold each slip and place it inside a plastic egg. Place all the eggs in a basket filled with Easter grass. When you have a few spare minutes, open an egg and read aloud the activity for the students to complete!
-Make as many words as you can using only the letters in the words ‘bunny rabbit’. -Name as many animals that you can think of that have a white fur coat. -Name as many words that you can think of that begin with the letter h, like hop. -Name things you may find in an Easter basket. -Name things that would fit into a plastic egg. -Name all the animals that lay eggs. -Name movies or TV shows that have bunnies in them. -Name all the words that rhyme with bunny.
A good idea is to reward a small prize to each winner!!! Easter Story Starters One day, a little chick walked over to another little chick and said, “………… A bunny hopped over to a sleeping bunny and said, “………….. The Easter Bunny was getting ready for his big job. First, he ……. There was a big snowstorm the night before Easter. The Easter Bunny ……… The Easter Bunny got sick the day before Easter. Who will deliver the eggs? One day I saw the Easter Bunny in the woods. He was ……….. On Easter morning we were looking for eggs. We were surprised to find ……… Dozens of eggs fell from the sky on Easter morning! Suddenly the huge egg began to move!
20
Creative Writing Ideas On cutout eggs write the following ‘story starters’ and place in an Easter basket for children to choose: The hen was so surprised when she laid a pink and purple egg! Mom fixed green scrambled eggs for breakfast! ‘Ouch!’ said the hen when she laid a square egg! The little baby chick couldn't find his mother. Suddenly, the huge egg began to move! Dozens of eggs fell from the sky on Easter morning! On Easter morning, Stella looked into her basket and discovered..... James woke up Easter morning to find he had turned into a _____________. I don't want the Easter Bunny to get lost, so I am writing a letter telling how to get to my house. I looked out my window on Easter Sunday and saw a strange rabbit in my garden. Pretend you are the Easter Bunny. Write about a strange adventure you ever had while trying to deliver eggs. I have never seen such a huge Easter egg before. It has a big crack up the side. It is almost Easter and the Easter Bunny is sick. How can I help? Easter Story Go to http://blackdog4kids.com/holiday/easter/story.html There is an Easter story. You can put in the children’s names and make the stories personal. This is a great way to get your reluctant readers interested! Eggs, Eggs, Eggs! Where would we be without eggs? Make a KWL chart with your students. Brainstorm what they know about eggs, what they want to know about eggs and then fill in what they learned about eggs. Have a dozen eggs available. Have a half dozen fresh eggs and a half dozen hard cooked eggs. Compare: weight and buoyancy. Talk about eggs breaking. Then tell the students that they will be able to press as hard as they can and still not break the egg – if they follow directions carefully! Demonstrate how pushing hard on both ends will not break the egg. Have the students try this (over a container – just in case).
21
Have an Egg-celent Day! Have an Egg day, an Egg Week or even an Egg Month! - Read stories about eggs – from dinosaur to turtle to chocolate. - Weigh and measure eggs for math. - Hatch chicks. - Cook eggs in a variety of ways and graph preferences. - Play egg catch (outdoors, of course) and have an egg and spoon relay. - Do art using egg shells. - Plant seeds in an eggshell. have a shell that just has the top off, fill with soil and plant grass. Add a face to go with the grass hair. - Dye eggs using natural dyes. - Learn about animals that come out of an egg. You can do eggs-periments, your bulletin boards can be eggs-splosive, do egg-stention exercises – all eggs-actly right! You must want your class to eggs-cel!
A Spring EGG-stravaganza! EGGS-pand your students' EGGS-citement! Let’s learn about eggs! Eggs are an important part of nature, in foods, in our culture and around the world. Make a KWL chart with your students. Brainstorm what they know about eggs before beginning the unit, what they want to know about eggs and later fill in what they have learned. Have a half dozen fresh eggs and a half dozen hard cooked eggs of differing sizes, brown and white. Compare: the weight, the buoyancy, the colour, size and shape. How fragile are eggs? An egg will break easily if bumped against something, but a great amount of pressure can be placed on the ends without the egg breaking. Have the students try this (over a container - just in case). How do you like your eggs? Brainstorm a list of how the students like their eggs cooked. Graph the results. Open a fresh egg and a hard-boiled egg and discuss what they see. Cook eggs and discuss the changes in matter.
22
Do an egg drop. Students can use a limited amount of materials to use to protect the egg. The eggs are then dropped, seeing which designs worked. Have fun with words that begin with the ‘ex’ letter combination, which (when eggs-agerated) sounds like ‘eggs’ in words such as ‘eggs-cited’, ‘eggs-traordinary’, and ‘eggs-aspirated’. Brainstorm words that begin with ‘ex’ - look in a dictionary to find more. Discuss interesting words like ‘eggs-hale’, ‘eggs-pensive’ and ‘eggs-plode’. Provide students with large, egg-shaped sheets of white paper. Pick one of the words and decorate the egg to show the meaning. Use the plastic eggs for addition and subtraction combinations. Do a probability exercise...put plastic eggs with two colours in a bag. How often will you pull out each colour? Take five or six plastic eggs in different colors and put a different amount of play money in each egg. Have the students open each egg, count out the money, record their results and place the money back in the egg for the next student. Learn about the letter Ee! Have an egg hunt with plastic eggs filled with one item (jelly beans, candy, marshmallows, gummy bears, etc. ). The students find one egg, draw what it looks like, shake, smell, and guess what is inside (draw guess). They will finally get to open it, count the number of contents and then eat, of course. Test two eggs by spinning them to see if a hard boiled egg spins faster or slower than a uncooked egg. Discuss what animals come from eggs. Make an ‘Egg Book’.
Odds and Ends! Easter Take-Home Activity “Send an egg pattern photocopied onto tag or white construction paper home with each student. The student and their family work together to decorate the egg using whatever materials they have on hand. Once the eggs are returned back to school, they can be used to decorate a bulletin board or displayed in the hallway. Every time I’ve ever sent home a project like this, I’m amazed at the creativity that is used in decorating the item.
23
Easter Cards “The children trace an egg shape and cut it out so that one side is on the fold and is not cut. Then they take glue that has been colored with food colouring and decorate their eggs. When they dry they look like stained glass. They always turn out great!” Easter Bonnets: Take two large pieces of coloured butcher paper. Lay them over a child’s head and smooth down over the head. Wrap tape around the head about forehead level several times. (You will likely need help to do this.) Then trim the paper about 5 inches from the tape to leave a hat brim and roll it upwards. It may take some bits of tape to stay up. Then take the hat off and decorate it with paper flowers, etc. A Class Tree Find a fallen tree branch, with a number of little branches - about one metre tall. lay the branch down on newspaper and spraypaint white. It may take several coats. Use a five gallon paint bucket to hold the branch. One way to hold the branch upright in the bucket is to use an old blanket or other fabric items and push them in around the branch - or you can use rocks or sand - but this is very heavy, of course. Cover the top of the blanket with Easter grass. You can add a string of the tiny clear Christmas lights with white cord - this makes the ‘tree’ very special. Hang Easter eggs on the branches. This can be up all year, decorating with different art projects.