Engaging with Nature - · PDF fileEngaging with Nature. ... ever existed on our planet. This...
38
Education NRM energy transport waste air food water biodiversity climate change Engaging with Nature Terrestrial Habitat Quality Assessment Teacher Information Pack www.nrmeducation.net.au
Transcript of Engaging with Nature - · PDF fileEngaging with Nature. ... ever existed on our planet. This...

EducationNRMenergytransportwasteairfoodwaterbiodiversityclimate change
Engaging with Nature
Terrestrial Habitat Quality AssessmentTeacher Information Pack
www.nrmeducation.net.au
WelcomeA great way to learn more about local biodiversity is to take a closer look at what is happening on the land at a site near you. By visiting the site on a regular basis (e.g. once a term) much can be learnt and, with a bit of effort, habitat quality can be improved.
ContentsBackground Information on Biodiversity 3Habitat Quality Assessment Summary Table 6Activity 1: Obtaining an Aerial Photo 7Worksheet 1: Determine the size of the study area in hectares 9Activity 2: Introducing Biodiversity and the Habitat Quality Assessment Activities 10Worksheet 2: Why is Biodiversity Important? 12Activity 3: Number of Large Trees 13Worksheet 3: Number of Large Trees 15Activity 4 How Healthy is that Gum Tree? 16Worksheet 4: How healthy is your tree? 17Activity 5: Canopy Cover 18Worksheet 5: Canopy Cover 20Activity 6: Understorey and Vegetation Structure 21Worksheet 6: Understorey Vegetation 22Activity 7: Weediness 23Worksheet 7: Weediness 25Activity 8: Organic Litter 26Worksheet 8: Organic Litter 27Activity 9: Logs 28Worksheet 9: Logs 29Activity 10: Surrounding Vegetation Connectivity 30Worksheet 10: Surrounding Vegetation Connectivity 32Activity 11: Photopoint monitoring 33Extension Activities1 Create a Herbarium 342 Learning about Local Flora 363 Species diversity activity 364 Ecosystem game 36Glossary 38
AcknowledgementsNRM Education wishes to acknowledge the following organisations who have kindly allowed material to be adapted and used in this document:
• Landlearn / Dept Primary Industries (Vic) www.landlearn.net.au • SA Urban Forests Million Trees Program www.milliontrees.sa.gov.au • Nature Conservation Society of SA www.ncssa.asn.au

Background Information on Biodiversity What is biodiversity?Biodiversity is the variety of all living things, including plants, animals, and micro-organisms, the genes they all contain, and the ecosystems of which they form a part.
Two terms that are often used when discussing biodiversity are habitat and ecosystem:• a habitat is the place or type of site where an organism or population naturally
occurs• an ecosystem describes a community of plants and animals, the interaction
between these and the physical environment in which they live.
Basically, there are three types of biodiversity: species, ecosystem and genetic diversity. We will be looking particularly at the first two of these:
Species DiversityThis includes every organism great and small – from amoebas to elephants – that currently exist, or have ever existed on our planet. This includes plants, fungi, insects, fish, reptiles & amphibians, birds and mammals, plus molluscs, worms, spiders, algae and other micro organisms. Scientists have identified more than 1.9 million living species, with millions more yet to be discovered!
Ecosystem DiversityAn ecosystem is a community of organisms (living things) which depend upon each other for their existence. For example, you might expect to find kangaroos, emus or echidnas in grassy woodland, but not in Antarctica, because these animals need the plants or bugs in the woodland, and conversely the plants need them: plants are tip-pruned by kangaroos, emus disperse and help germinate seed in their scats, and echidnas till the soil which also aids in germination of some seeds.
Examples of some local SA ecosystems are: woodland of the Mt Lofty Ranges, grasslands of the mid-North, mallee scrub, Port Adelaide mangroves, the Port Noarlunga reef, Murray River system, ponds, and caves. On a more global scale, some examples are: oceans, the polar and Antarctic ice sheets, rainforests and deserts.
Genetic diversityGenetic diversity, the third type of diversity, allows for adaptation/evolution in the event of changes on our planet.
Why is biodiversity important?Everything in the natural world is connected. This means that everything we do as humans affects biodiversity, and biodiversity affects us. In the world of which we are a part, the more variety the better. This provides protection against things going wrong. Diverse ecosystems, and therefore diverse species and genes, make for a healthier, more resilient planet.
Biodiversity is important for at least four reasons:
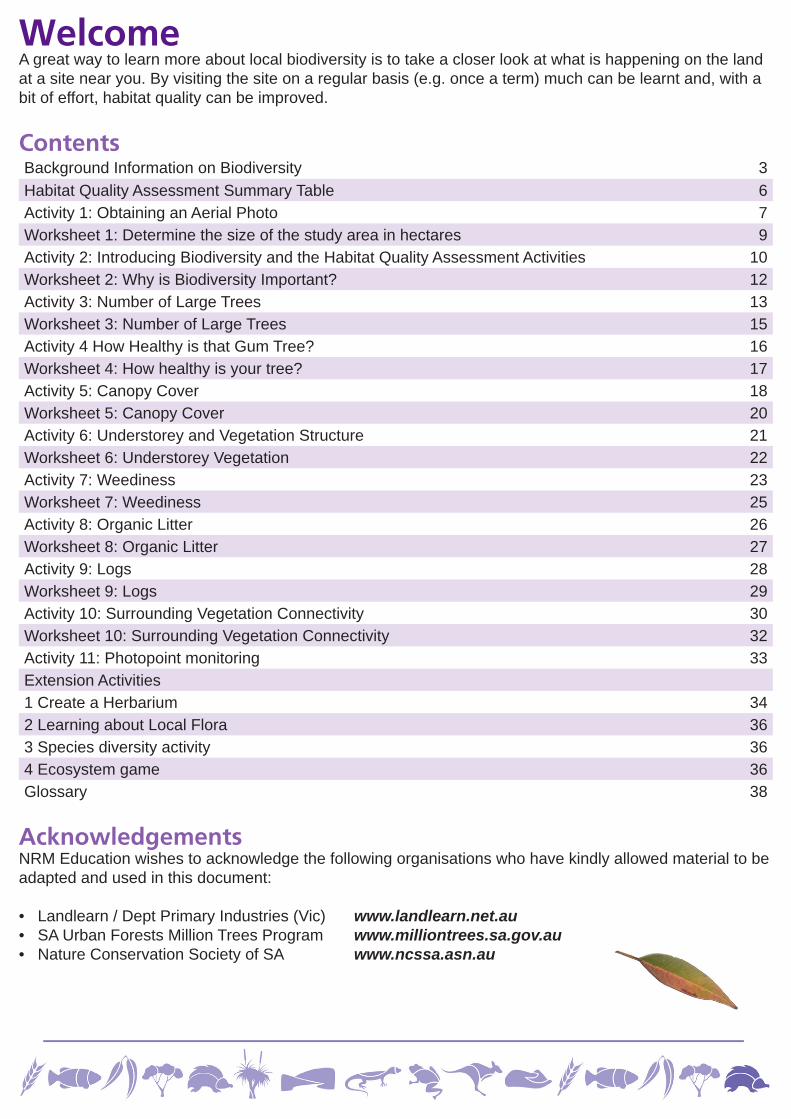
Ecosystem processes and servicesBiodiversity drives many of the processes that make life possible by providing a number of essential ecosystem services:• climate regulation• oxygen production• soil formation • water supply and filtering • pollination of crops and other plants • storing and recycling of nutrients• resistance to feral invasion.
A lessening of biodiversity in an ecosystem weakens the ability of that system to survive and perform the ecosystem services that we as humans benefit so much from.
Aesthetic and cultural reasonsWe all respond in some way to our environment and place subjective value on it with words such as “beauty”. Many Australians place a high value on native plants and animals, which contributes to a sense of cultural identity, pride, spiritual enrichment and recreation.
EthicsNo species or generation has the right to sequester (use up and/or take) Earth’s resources solely for its own benefit. For example, by causing the extinction of a species we are taking away the right of future generations to be able to live with those species, as well as any rights that species may have had to exist on the Earth!
EconomicsBiodiversity contributes significantly to the economy in a number of ways:• it can increase agricultural production through the ecosystem services provided. For example, in
the meat industry, areas of a farm that are protected by vegetation have a 20-30% higher yield than unprotected areas.
• biodiversity also provides resources for the development of foods and medicines.
Why measure biodiversity?Understanding the quality and extent of biodiversity in a given area is important for both the community and land managers. To effectively conserve and encourage biodiversity into areas you must first know the quality of what is there. We hope that this resource will enable you to understand the biodiversity present on a site close to or in your school.
Assessing biodiversity across SANative vegetation communities, or types, vary significantly across SA due to local differences in soil type, climate, elevation and rainfall.
Adelaide was settled by Europeans in 1836. Research has shown that before development and clearing, the Adelaide Plains supported 21 main vegetation types (or associations) ranging from open forests and woodlands to coastal dunes and salt marshes.
You can view a colour map of these vegetation types and find out the original plant community that existed in your local area by going to www.backyards4wildlife.com.au -> Adelaide’s biodiversity -> Interactive Adelaide Map.

Simply click to view the original pre-European vegetation map and then choose either the northern or southern map according to your site location and move the cursor over the map until the name of your particular suburb appears. Click to view a list of plants according to layers of habitat. Then click the green button to download a detailed Historical Plant List for that particular location.
Treat this list as your bible for replanting once you get to your Action Plan, and make sure that you only put back the species which once existed in this special plant community/ecosystem.
If your suburb or locality is not listed, ring the education officer at Urban Forests on 8278 0600, or email [email protected] to get the information for your particular area.
Site investigation using the Habitat Quality Assessment methodThis assessment method will enable you to assess and monitor habitat quality in and around your school. This tool has been adapted from the Landlearn/Biodiversity Up Close Audit (Dept Primary Industries, Vic 2008). It is intended to be used a number of times to provide biodiversity snapshots over time.
The intention is to raise awareness of the factors that contribute to high quality habitat and biodiversity in an area. Simply complete the following Habitat Quality Assessment Summary Table, step by step, according to the notes and accompanying Student Worksheets.
Rating20-27 points Great habitat! When can I move in?15-19 Has potential10-14 Renovator’s delight! <10 I can’t see de trees for deforest!
Teacher notesUndertaking an assessment of habitat quality involves obtaining an aerial photo of the site and measuring nine different variables:• size of site• number of large trees• individual tree health• canopy cover across the site• understorey• weediness• organic litter• logs• surrounding vegetation connectivity.
For each variable there are student worksheets provided at the end of the teachers’ notes. Results should entered online at www.nrmeducation.net.au -> Engaging with Nature -> send us your data and completion of the activity should be recorded in the Habitat Quality Assessment Table.
SuggestionsOnce you have undertaken Terrestrial Habitat Assessment, you may wish to consider taking action for biodiversity. Ideally, this involves developing an action plan to guide your efforts.For more information on developing a plan and undertaking revegetation at your site, consult the teacher resource pack ‘Taking Action for Biodiversity’, available as a separate download.

EducationNRMenergytransportwasteairfoodwaterbiodiversityclimate change
Habitat Quality AssessmentSummary Table
School:______________________________________________________________
Class conducting the assessment:_________________________________________
Site name:________________________________________________________ Site code:_________
Activity Tick when completed
3 points 2 points 1 point 0 points
Aerial Photo / Size of Site >10ha. 2-10ha. <2ha. n/a
Intro to Biodiversity n/a n/a n/a n/a
Number of Large Trees Many large trees 4-5 large trees 1-3 large trees No large trees
on siteHow Healthy is that Gum Tree? In the prime of life! A bit seedy, got
the flu?Call the ambulance!
Write a will, quick!
Canopy Cover >50% 25-50% 5-24% <5%Understorey and Vegetation Structure
Definite layers of shrubs, grasses & groundcovers beneath the overstorey
Some evidence of shrubs, grasses, climbers, moss
Overstorey only, little or no understorey layers
Bare ground
Weediness <5% weed cover 5-24% 25-49% >50% weed cover
Organic Litter Good areas of leaf litter that exclude weeds naturally
Patchy areas of leaf litter
Very little leaf litter
Absence of any organic litter i.e. bare ground
Logs >25m of logs in 1ha. 12-25m of logs/ha. <12m logs No logs
Surrounding Vegetation Connectivity
>20% 5-19% 1-4% 0% cover
Photo point Monitoring n/a n/a n/a n/a
Tally the point scores to give your overall rating out of 27 --->Don’t forget to enter each of your worksheet results online at
www.nrmeducation.net.au -> Engaging with Nature -> send us your data ¨

Activity 1: Obtaining an Aerial PhotoDownload and install the Google Earth mapping tool at http://earth.google.com
1. Enter your suburb in the “Fly to” search engine
2. Zoom in on your study area until it fills the frame of the screen, rotate the image so that the boundaries are square with the frame.
3. File -> Save -> Save Image (Save two images – one close up of the study area and a map showing the land within a 1km radius).
4. The next step is to determine the size of your study area using one of the methods below:
If the shape of your site is roughly square or rectangular, you have two options:
a) Use Google Earth – go to Tools -> Ruler -> Line and change the unit of measurement to ‘metres’. Use this tool to obtain the dimensions of your study area.
b) Take accurate measurements on the ground with your students using a trundle wheel.

If the shape of your site has curved edges or cannot be measured by the above method, there is an easy way to determine its area:
This area function is only available in Google Earth v5.2.1.1547, which can be downloaded from www.filehippo.com/download_google_earth/8157/
1. Use Google Earth and go to Add -> Polygon.2. Once the polygon window has popped up, click the ‘Measurements’ tab and change the ‘Area’ to
‘Hectares’. 3. Then, click and release the left mouse button to add points to trace around the boundary of your site,
eventually meeting back up with the point that you started.
4. The polygon window will display the area of your site in hectares, as well as the perimeter distance.5. You might like to experiment with the Style and Colour of your shaded polygon.
You can save a copy of your shaded site by going to File -> Save -> Save Image.
EducationNRMenergytransportwasteairfoodwaterbiodiversityclimate change
Worksheet 1: Determine the size of the study area in hectaresSchool:__________________________________________________________ Date:_____________
Class conducting the survey:___________________________________________________________
Site name:________________________________________________________ Site code:_________
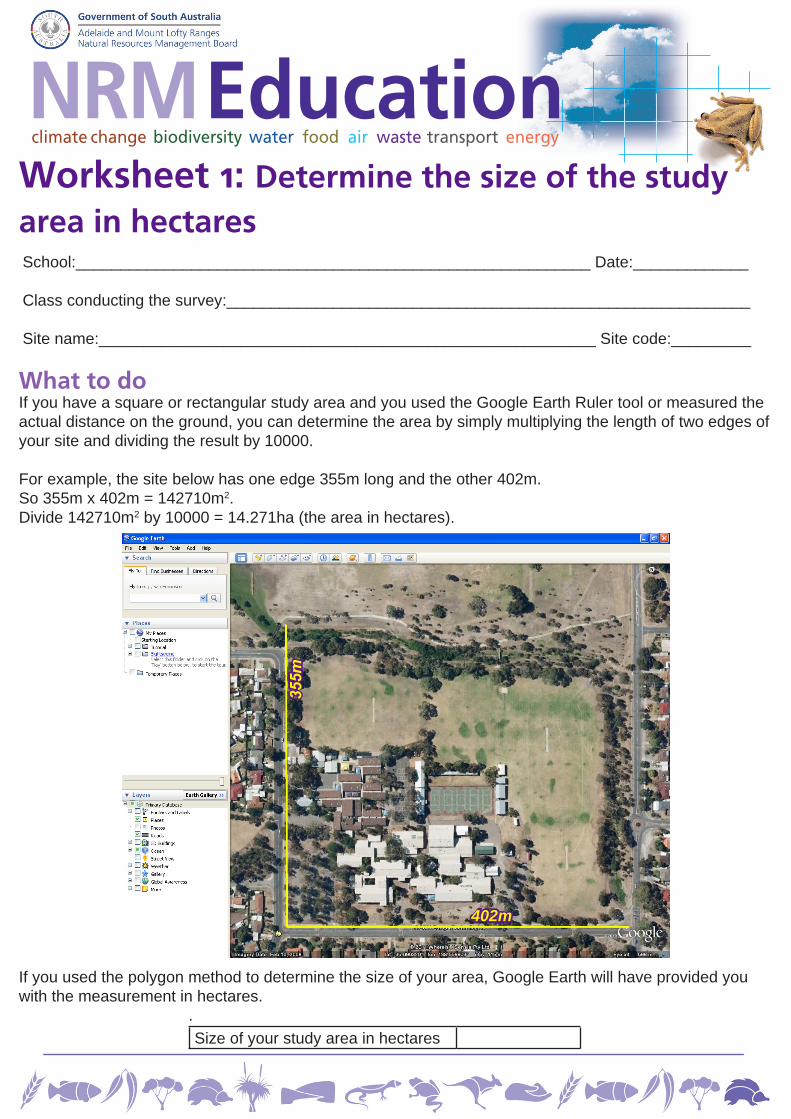
What to doIf you have a square or rectangular study area and you used the Google Earth Ruler tool or measured the actual distance on the ground, you can determine the area by simply multiplying the length of two edges of your site and dividing the result by 10000.
For example, the site below has one edge 355m long and the other 402m.So 355m x 402m = 142710m2.Divide 142710m2 by 10000 = 14.271ha (the area in hectares).
If you used the polygon method to determine the size of your area, Google Earth will have provided you with the measurement in hectares.
.Size of your study area in hectares
402m
355m
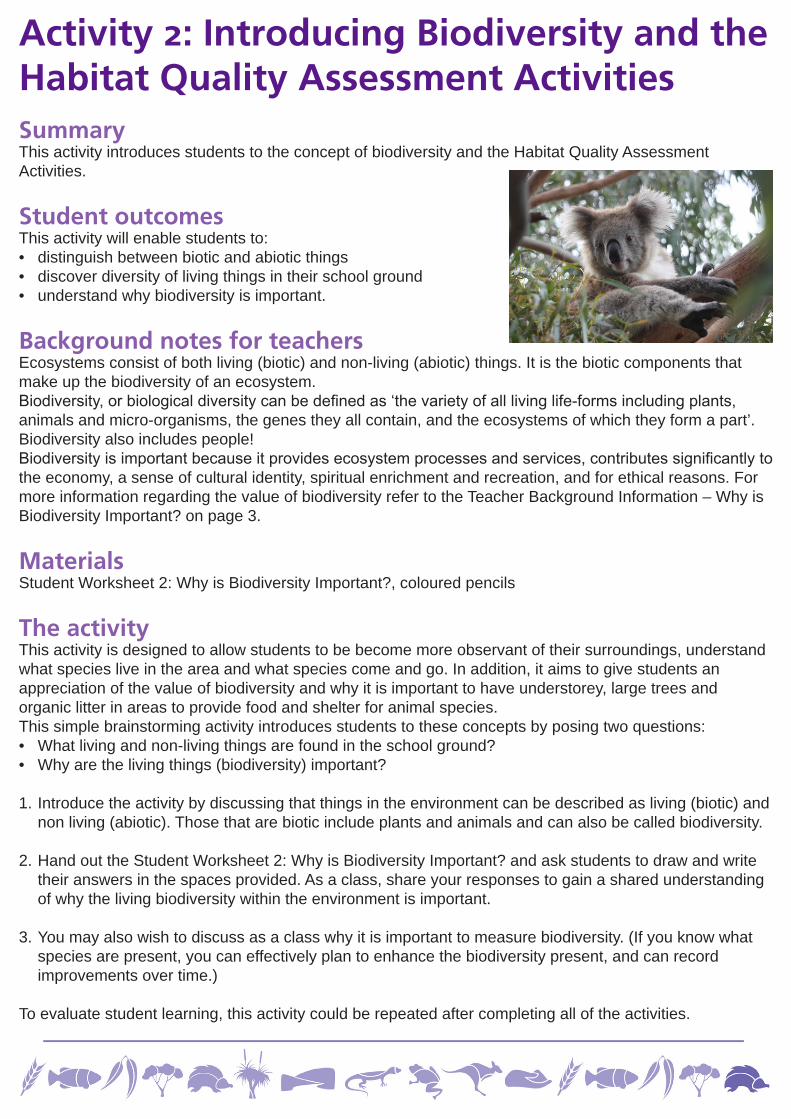
Activity 2: Introducing Biodiversity and the Habitat Quality Assessment Activities SummaryThis activity introduces students to the concept of biodiversity and the Habitat Quality Assessment Activities.
Student outcomesThis activity will enable students to:• distinguish between biotic and abiotic things• discover diversity of living things in their school ground• understand why biodiversity is important.
Background notes for teachersEcosystems consist of both living (biotic) and non-living (abiotic) things. It is the biotic components that make up the biodiversity of an ecosystem.Biodiversity, or biological diversity can be defined as ‘the variety of all living life-forms including plants, animals and micro-organisms, the genes they all contain, and the ecosystems of which they form a part’. Biodiversity also includes people!Biodiversity is important because it provides ecosystem processes and services, contributes significantly to the economy, a sense of cultural identity, spiritual enrichment and recreation, and for ethical reasons. For more information regarding the value of biodiversity refer to the Teacher Background Information – Why is Biodiversity Important? on page 3.
MaterialsStudent Worksheet 2: Why is Biodiversity Important?, coloured pencils
The activityThis activity is designed to allow students to be become more observant of their surroundings, understand what species live in the area and what species come and go. In addition, it aims to give students an appreciation of the value of biodiversity and why it is important to have understorey, large trees and organic litter in areas to provide food and shelter for animal species.This simple brainstorming activity introduces students to these concepts by posing two questions:• What living and non-living things are found in the school ground?• Why are the living things (biodiversity) important?
1. Introduce the activity by discussing that things in the environment can be described as living (biotic) and non living (abiotic). Those that are biotic include plants and animals and can also be called biodiversity.
2. Hand out the Student Worksheet 2: Why is Biodiversity Important? and ask students to draw and write their answers in the spaces provided. As a class, share your responses to gain a shared understanding of why the living biodiversity within the environment is important.
3. You may also wish to discuss as a class why it is important to measure biodiversity. (If you know what species are present, you can effectively plan to enhance the biodiversity present, and can record improvements over time.)
To evaluate student learning, this activity could be repeated after completing all of the activities.

Discussion questionsWhat is the difference between abiotic and biotic things?What is biodiversity?Why is biodiversity important?Why would scientists and land managers want to understand what types of living things are present in an ecosystem?Did you know that you can study the biodiversity in the school ground and local bushland areas?

EducationNRMenergytransportwasteairfoodwaterbiodiversityclimate change
Worksheet 2: Why is Biodiversity Important?What to doWalk around your site and complete the following worksheet. Draw or write your answers in the bubbles!
What living and non-living things are found at your site?
Why are living things important?

Activity 3: Number of Large TreesSummaryDuration: 45 minutesSetting: In the classroom and outdoorsThis activity enables students to identify the habitat value of trees within the study area.
Student outcomesThis activity will enable students to:• Count and measure the number of trees in the study area• Identify trees that provide nesting opportunities for animals• Understand the importance of habitat trees in ecosystems• Interpret their results and make recommendations about future actionsthat can be taken.
Background notes for teachersTrees (including those that are dead) are an important component of an ecosystem as they provide habitat (food, shelter, nesting space, protection from predators) for many animals, as well as canopy cover for many interdependent smaller plants (shrubs, grasses, ground covers, climbers, moss, lichen). Their fallen leaves (leaf litter) and branches also contribute to soil moisture and soil health by putting organic matter back into the soil naturally, and providing habitat for helpful micro-organisms which thrive there.Large trees often provide better habitat as they contain more hollows than small trees, however these hollows can take up to 120 years to form!Because they are old, large trees are difficult to replace. Nesting boxes provide suitable alternative nesting spaces for birds and other animals if there are no large trees with hollows in your study area.
MaterialsStudent Worksheet: Number of Large Trees, pencil, calculator, tape measure.
The activityWalk around the study area and for each tree record if it is:• local native (i.e. occurring naturally in this region), native (from Australia) or exotic (introduced from another country)• dead or alive• a large tree*.
*To determine if a tree is classified as a ‘large tree’, measure the circumference of the tree at chest height (one mtere above the ground) using the tape measure. If it is greater than the benchmark level of 200cm, it is classified as a large tree. Next, calculate the number of large trees per hectare in the study area:i.e.: Number of large trees per hectare = number of large trees in the study area number of hectares in the study area
As a class discuss potential actions that your school can do to protect and improve the number of large trees in the study area.

SuggestionsCreate ‘tree exclosures’ (refer to Tree Exclosure guidelines in ‘Taking Action for Biodiversity’, available as a separate download) beneath any large trees by planting appropriate understorey species (“a tree’s little friends”) beneath the tree’s canopy. This will improve soil health, shade the ground and provide habitat for woodland birds that help keep trees healthy by controlling insect pests such as lerps.
Discussion questionsWhy do you think that large trees are important?How could more habitat for native wildlife that requires tree hollows be provided?Large trees that contain hollows are difficult to replace because they take so long to grow. What can be done to protect and increase the number of large trees in your local area?

EducationNRMenergytransportwasteairfoodwaterbiodiversityclimate change
Worksheet 3: Number of Large TreesSchool:__________________________________________________________ Date:_____________
Class conducting the survey:_________________________________________ Start time:_________
Site name:________________________________________________________ Site code:_________
What to do:Step 1: Walk around the study area and record in the table each tree that you find (dead trees may also be included).Step 2: Record if the tree is native (from Australia) or exotic (introduced from another country).Step 3: Record the circumference of each tree at chest height (1m above ground).Step 4: Record if the tree is a large tree (i.e. has a circumference at chest height >200 cm)
Tree Number Native or Exotic N / E )
Circumference at Chest Height (cm)
Large Tree? (ü / û)
e.g. Tree 1 N 200cm ü
Step 5: How many large trees are found in the study area? _________Step 6: How many native large trees are found in the study area? _______Step 7: Number of large native trees/ha = number of large native trees in study area number of hectares in study area
= _______ ÷ __________ = ________
Large trees are nature’s skyscrapers and are important as they give many different types of animals food and shelter.New words: Hectare, Native, Exotic, Circumference

Activity 4: How Healthy is that Gum Tree?SummaryAn activity for estimating and scoring individual tree health.
Background notes for teachersTree health depends on many factors, both above and below ground, such as:• the tree’s individual position in relation to a wider ecosystem and the plant association to which it
originally belonged (e.g. grey box woodland)• presence or otherwise of natural insect controls to keep foliage healthy• soil condition• what’s happening below the ground (e.g. the effect of bores; watertable changes)• effect of chemicals, fertilisers, cropping, stock grazing• other global factors such as climate change, Greenhouse effect, drought.
Factors Affecting Tree HealthGlobal
Local
Drought
Climate Change
Greenhouse effect
Wind Stress
IsolationLone Paddock Trees
Chemical Spray Drift
Tree Diseases
Soil HealthLeaf LitterPesticidesFertilisers
CompactionVehiclesRoads
Changes to Water TableEffect of bores
Changes to Local River FlowsSalinity
Land Clearance
Lack of Natural Controls
BirdsPossums
Predatory insectsSpidersLizards
Mistletoe
Habitat LayersUnderstorey
Shrubs, Ground-covers, Grasses

EducationNRMenergytransportwasteairfoodwaterbiodiversityclimate change
Worksheet 4: How healthy is your Gum tree?School:__________________________________________________________ Date:_____________
Class conducting the survey:_________________________________________ Start time:_________
Site name:________________________________________________________ Site code:_________
What to doSelect a large gum tree for closer investigation. Standing just beyond the tree’s ‘drip line’ (i.e. the edge of where the branches spread to) so there is no risk of a limb falling on you, look up through the tree’s canopy and make the following observations to gain a score out of twelve.
Look up through the canopy: what can you see?
1A 3 points ¨ 1B 2 points ¨ 1C 1 point ¨Mostly foliage Some blue sky/clouds
between the foliageMostly blue sky/clouds, not much foliage
Leaf condition
2A 3 points ¨ 2B 2 points ¨ 2C 1 point ¨New growth visible at ends of branches with more buds/leaves/flowers than dead woody material
Mixture of new growth and dead limbs
Many dead branches; new growth sprouting from along a branch as opposed to the end of the branch
Habitat layers
3A 3 points ¨ 3B 2 points ¨ 3C 1 point ¨Several layers of understorey: shrubs and/or grasses, ground covers, climbing plants, logs
Some evidence of grasses or understorey shrubs present beneath the tree
Tree is isolated. No native plants growing beneath the tree
Organic matter: look at the condition of the ground beneath the tree
4A 3 points ¨ 4B 2 points ¨ 4C 1 point ¨Lots of leaf litter, so thick that weeds can’t get through Some leaf litter present
Bare ground, with or without weeds OR Lawns (e.g. couch, kikuyu etc) OR Exotic flowerbeds
How healthy is your tree? Scores between 9-12 = this tree is in the prime of life Scores between 7-8 = tree has got the ‘fluScores between 5-6 = call the ambulance! Scores less than 5 = it’s time to make a will
Tally the point scores for each habitat type to give your overall rating --->Don’t forget to enter your results online at
www.nrmeducation.net.au -> Engaging with Nature -> send us your data ¨

Activity 5: Canopy Cover
SummaryDuration: 40 minSetting: OutdoorsNote: measurement of % canopy cover over an entire site may not be applicable to you if, for instance, your site is a coastal or a grassland ecosystem, i.e. naturally without trees
Student outcomesThis activity will enable students to:• understand the importance of canopy cover as in indicator of tree
health• make estimations and take measurements of tree canopy cover• interpret their results and make recommendations about future
actions that can be taken to improve canopy cover.
Background notes for teachersThe canopy layer in a forest refers to the highest level of growth (i.e. the branches and leaves in the crown of trees). The canopy layer of an ecosystem is important as it provides habitat and protection from predators for birds and small mammals such as possums. It also provides an organic layer of leaf litter for the forest floor which is broken down into important soil nutrients by microorganisms and helps to retain soil moisture. Canopy cover describes the proportion of the ground that is shaded when the sun is directly overhead and is a measure of the condition of the trees. If a tree is stressed or sick it will have a lower than average canopy cover.
MaterialsStudent Worksheet 5: Canopy Cover, digital camera (optional), pencil.
The activityDiscuss with students the importance of tree canopy cover as habitat for animals and as an indicator of tree health. Use the canopy cover student worksheet to estimate the canopy cover for the area of study.REMEMBER: you should factor in the areas covered by trees and the areas between trees.
As a class, discuss potential actions that your school can do to improve the canopy cover in the study area.
SuggestionsCreate a tree exclosure(s) under existing trees to improve soil and hence tree health. Refer to Taking Action for Biodiversity (available as a separate download) for guidelines on creating a tree exclosure. Fence off trees to prevent stock damage (if you have stock at school). If required, place guards around trees to protect them from rabbits and humans.

Discussion questionsWhat types of factors could reduce tree canopy cover and how could these impacts be reduced?Why is tree canopy cover important?Was there much variation in the average tree canopy cover for different trees in the study area?Is the canopy cover of the areas being studied healthy?What could be done in the study area to improve the tree canopy cover?
EducationNRMenergytransportwasteairfoodwaterbiodiversityclimate change
Worksheet 5: Canopy CoverSchool:__________________________________________________________ Date:_____________
Class conducting the survey:_________________________________________ Start time:_________
Site name:________________________________________________________ Site code:_________
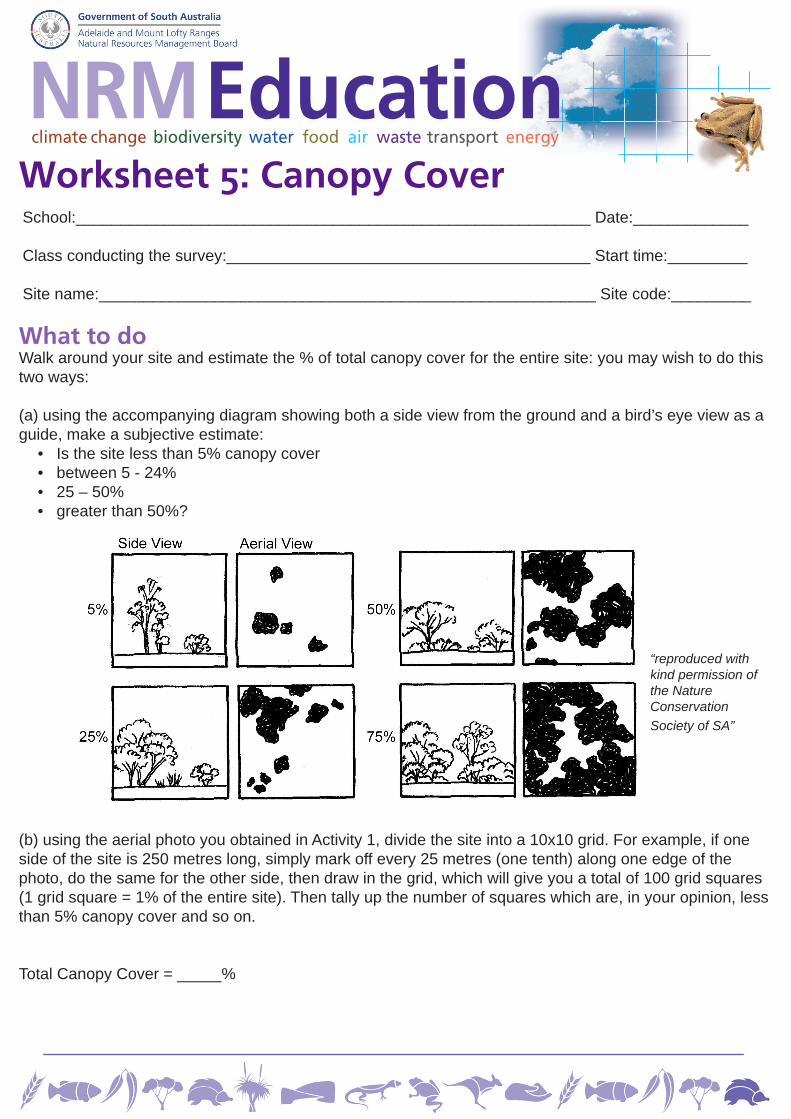
What to doWalk around your site and estimate the % of total canopy cover for the entire site: you may wish to do this two ways:
(a) using the accompanying diagram showing both a side view from the ground and a bird’s eye view as a guide, make a subjective estimate:
• Is the site less than 5% canopy cover• between 5 - 24%• 25 – 50%• greater than 50%?
“reproduced with kind permission of the Nature Conservation Society of SA”
(b) using the aerial photo you obtained in Activity 1, divide the site into a 10x10 grid. For example, if one side of the site is 250 metres long, simply mark off every 25 metres (one tenth) along one edge of the photo, do the same for the other side, then draw in the grid, which will give you a total of 100 grid squares (1 grid square = 1% of the entire site). Then tally up the number of squares which are, in your opinion, less than 5% canopy cover and so on.
Total Canopy Cover = _____%
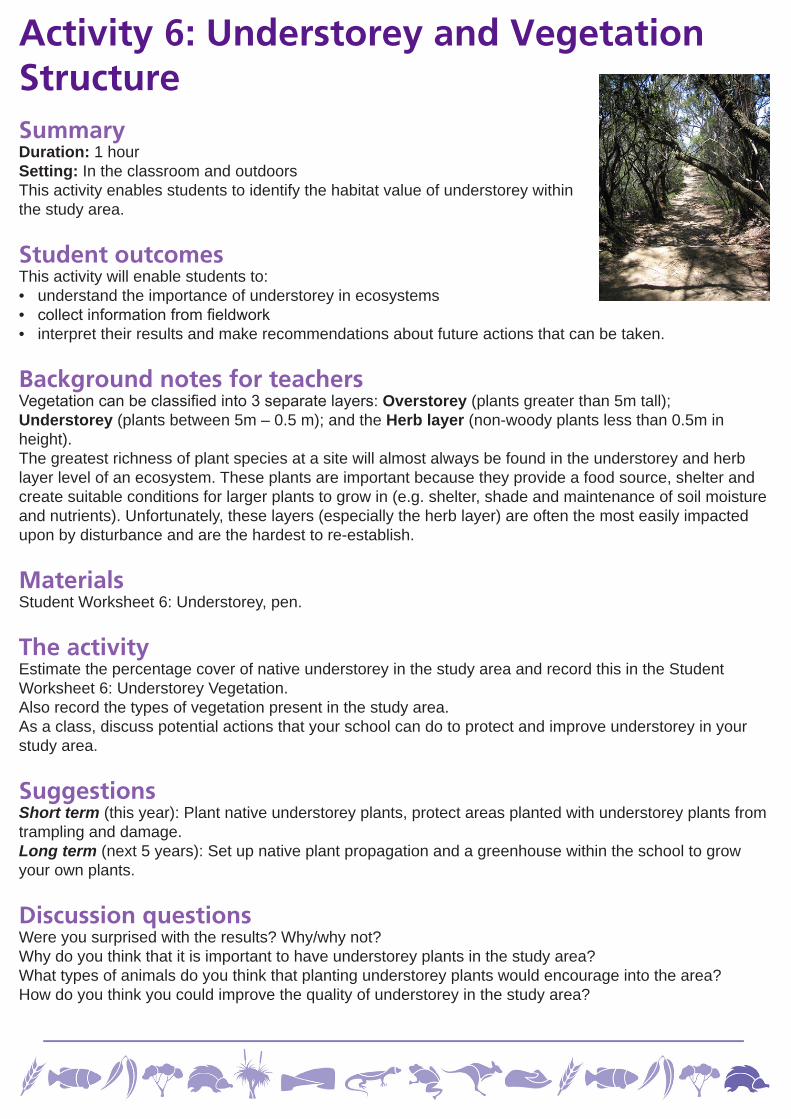
Activity 6: Understorey and Vegetation StructureSummaryDuration: 1 hourSetting: In the classroom and outdoorsThis activity enables students to identify the habitat value of understorey within the study area.
Student outcomesThis activity will enable students to:• understand the importance of understorey in ecosystems• collect information from fieldwork• interpret their results and make recommendations about future actions that can be taken.
Background notes for teachersVegetation can be classified into 3 separate layers: Overstorey (plants greater than 5m tall); Understorey (plants between 5m – 0.5 m); and the Herb layer (non-woody plants less than 0.5m in height).The greatest richness of plant species at a site will almost always be found in the understorey and herb layer level of an ecosystem. These plants are important because they provide a food source, shelter and create suitable conditions for larger plants to grow in (e.g. shelter, shade and maintenance of soil moisture and nutrients). Unfortunately, these layers (especially the herb layer) are often the most easily impacted upon by disturbance and are the hardest to re-establish.
MaterialsStudent Worksheet 6: Understorey, pen.
The activityEstimate the percentage cover of native understorey in the study area and record this in the Student Worksheet 6: Understorey Vegetation.Also record the types of vegetation present in the study area.As a class, discuss potential actions that your school can do to protect and improve understorey in your study area.
SuggestionsShort term (this year): Plant native understorey plants, protect areas planted with understorey plants from trampling and damage.Long term (next 5 years): Set up native plant propagation and a greenhouse within the school to grow your own plants.
Discussion questionsWere you surprised with the results? Why/why not?Why do you think that it is important to have understorey plants in the study area?What types of animals do you think that planting understorey plants would encourage into the area?How do you think you could improve the quality of understorey in the study area?

EducationNRMenergytransportwasteairfoodwaterbiodiversityclimate change
Worksheet 6: Understorey VegetationSchool:__________________________________________________________ Date:_____________
Class conducting the survey:_________________________________________ Start time:_________
Site name:________________________________________________________ Site code:_________
What to doStep 1: Walk around the study area and estimate the percentage cover of native understorey vegetation.
Native understory cover = _____%
Step 2: Tick below the types of native vegetation you find in the study area:
Native Vegetation Present (ü / û)
Tree > 5mShrub (1-5m)Small Shrub < 1mLarge Herb > 0.5mSmall Herb < 0.5mFernMoss / LichenScrambler / ClimberTall grass (or grass-like) > 1mSmall Grass (or grass-like) < 0.5mOther _________
New words: Pollination, Estimate, Percentage, Shrub

Activity 7: WeedinessSummaryDuration: 1 hourSetting: In the classroom and outdoors
Student outcomesThis activity will enable students to:• identify environmental weeds found in the study area• understand the impact of environmental weeds in ecosystems• interpret their results and make recommendations about future actions that can be taken.
Background notes for teachersWeeds are plants that grow in an area where they are not wanted. They are usually exotic species (however can also include native Australian species) and can compete with and limit the growth of indigenous plants. Weeds impact on native insects, birds and animals as they reduce the food source that indigenous plants provide. Weeds also impact on agriculture and the economy, threatening the sustainability of natural ecosystems and agricultural production.
Environmental weeds are plants that threaten natural ecosystems. They can invade native areas and out-compete the plants, resulting in a reduction of plant diversity and loss of habitat for native animals.Weeds can be carried into an area by wind, water, people, animals, vehicles, machinery or they can escape from gardens. It is important to appropriately dispose of weeds - dumping of garden waste in the bush is also a way in which weeds spread.
MaterialsStudent Worksheet 7: Weediness, weed identification books or a list of Environmental Weeds found in your local area, pen.
The activityUsing the weed identification books/lists identify 5-10 environmental weeds for your students to look for in the study area. List these in the student worksheet. Provide students working in the environmental weeds group with photos of weeds to look for.Your local council may have publications to assist with identifying weed species in your local area or you could use the excellent web based tool found www.weeds.org.au/weedident.htm Using the student worksheets, ask students to record the presence of environmental weeds and estimate the percentage cover of these weeds in the study area.
Note: Identifying weeds can be difficult. Consider contacting your local council to assist you with this.
As a class, discuss potential actions that your school can do to reduce the number and impact of environmental weeds in your study area.

SuggestionsShort term (this year): Identify the environmental weeds in the study area, remove them or take action to ensure they do not spread. Weed control techniques include: hand weeding, slashing/mowing/seed head removal, ringbarking of weedy tree species, laying old carpet or black plastic over weed-infested areas for a few weeks or months, or use of herbicides (herbicides are dangerous chemicals and appropriate safety precautions must be taken when using these).Long term (next 5 years): Regularly monitor the study area to ensure that weeds do not start growing accidentally or are planted. Of course the best way to control weeds long term is to plant the area with local native species, thereby out-competing weeds at their own game. Note: re-establishing leaf litter of sufficient depth to inhibit weeds may take 5-10 years to develop.
Discussion questionsWere you surprised that some of the plants in the study area were environmental weeds?Why do you think that it is important to control environmental weeds?What can the community do to control or eliminate weeds?

EducationNRMenergytransportwasteairfoodwaterbiodiversityclimate change
Worksheet 7: WeedinessSchool:__________________________________________________________ Date:_____________
Class conducting the survey:_________________________________________ Start time:_________
Site name:________________________________________________________ Site code:_________
What to doStep 1: Walk around the study area and search for environmental weeds.Step 2: List the different types of environmental weeds that you find in the table below.Step 3: Estimate the percentage cover of weed species found in the study area. ______________
Environmental Weed species % coverCommon name Scientific name
New words: environmental weed, biological control, estimate, percentage

Activity 8: Organic LitterSummaryDuration: 1 hourSetting: In the classroom and outdoors
Student outcomesThis activity will enable students to:• understand the importance of organic litter in ecosystems• collect information from fieldwork• interpret their results and make recommendations about future actions that can be taken in the study
area.
Background notes for teachersOrganic litter is defined as materials that are no longer attached to a plant and have fallen to the ground. This includes fallen leaves, twigs, bark, mulch and small branches less than 30cm in circumference. Organic litter is important because it provides habitat and a food source for many creatures such as insects, spiders and small reptiles. It also breaks down to provide soil nutrients, influences the soil microclimate (i.e. the temperature, moisture level, structure and composition) and influences which plants can germinate on site (recruitment).
MaterialsStudent Worksheet 8: Organic Litter.
The activityWalk around the study site and estimate the percentage cover of organic litter found in the study area.
For the purposes of this activity, other organic forms such as lichen and moss could also be included as they also contribute to a stable soil environment.
As a class, discuss potential actions that your school can do to increase the organic litter in your study area.
SuggestionsAvoid excess tidying of remnant vegetation areas and retain all organic litter for habitat.
Discussion questionsWhy do you think organic litter is important?Organic litter is made up of a range of different materials – what types of things were found in the organic litter in the study area (e.g. leaves, twigs, tanbark and mulch)?Was there any variation in the quality of organic litter found in the study area?How could the organic litter cover be improved in the study area?

EducationNRMenergytransportwasteairfoodwaterbiodiversityclimate change
Worksheet 8: Organic LitterSchool:__________________________________________________________ Date:_____________
Class conducting the survey:_________________________________________ Start time:_________
Site name:________________________________________________________ Site code:_________
What to doStep 1: Estimate the percentage of the study area covered by organic litter. ________________________(Organic litter includes things such as fallen leaves, twigs, bark, mulch and small branches less than 30cm in circumference)
Step 2: Does the quality of the organic litter vary across the site? _________________________________
How? _____________________________________________________________________________________
_____________________________________________________________________________________
_____________________________________________________________________________________
_____________________________________________________________________________________
_____________________________________________________________________________________
_____________________________________________________________________________________
_____________________________________________________________________________________
_____________________________________________________________________________________
New words: Organic Litter, Estimate, Circumference

Activity 9: LogsSummarySetting: In the classroom and outdoorsThis activity enables students to discover the importance of logs and rocks as habitat within the study area.
Student outcomesThis activity will enable students to:• understand the importance of logs in ecosystems• record the number and length of logs in the study area• interpret their results and make recommendations about future actions that can be taken.
Background notes for teachersLogs, whether small, large or rotting provide perfect shelter and nesting places for a range of different animals including echidnas, reptiles, spiders and insects. Logs also provide a food source for insect-eating birds that forage around fallen logs and, as they retain moisture, they are an important habitat for frogs.Unfortunately, people often remove fallen logs from their property or from bush for firewood – reducing the amount of habitat available for these species.
MaterialsStudent Worksheet 9: Logs, pen, tape measure.
The activityWalk around the study area and record on the student worksheet the number of logs present and their length. Logs include stumps, fallen trees or branches that have a circumference of at least 30cm (approximately the size of an adult’s ankle) or a diameter of at least 10cm. Students should disturb the logs as little as possible and be wary of spiders and snakes.
Calculate the length of logs in one hectare:The length of logs per hectare = total length of logs in the study area number of hectares in the study area
As a class, discuss potential actions that your school can do to increase the number of logs in your study area.
SuggestionsAvoid collecting firewood from the area and place signs up explaining why. Avoid excess tidying and introduce logs to the area (do not collect logs from other bushland areas, use logs that have fallen in gardens at school or at home and need to be moved for safety reasons).
Discussion questionsWere you surprised with the results?Why do you think that logs are removed from areas? Are there alternatives?Which species do you think would benefit from logs being present in your study area?What could your school and local community do to improve the number of logs found in bushland areas and to provide habitat for native wildlife?

EducationNRMenergytransportwasteairfoodwaterbiodiversityclimate change
Worksheet 9: LogsSchool:__________________________________________________________ Date:_____________
Class conducting the survey:_________________________________________ Start time:_________
Site name:________________________________________________________ Site code:_________
What to doStep 1: Walk around the study area and record in the table the length of each log that you find (logs include stumps, fallen trees or branches that have a circumference of at least 30cm - approximately the size of an adult ankle).Step 2: Add up all of the log lengths and enter this value into the Total log length box.
Log number Length (m)e.g. log 1 1.6m
Total log length (m)
Step 3: Calculate the Total log length per hectare = Total log length (m) Number of hectares studied
= ________ ÷ ___________=____________
New words: Estimate, Circumference

Activity 10: Surrounding Vegetation ConnectivitySummaryDuration: 20 minutesSetting: In the classroom and outdoors This activity enables students to understand how the biodiversity in the landscape surrounding their study area influences, and is influenced, by the biodiversity in the study area.
Student outcomesThis activity will enable students to:• discover the importance of their study area for biodiversity within the
surrounding landscape• interpret their results and make recommendations about future actions that
can be taken.
Background notes for teachersFragmentation is the process of continuous habitat being broken into smaller pieces. The clearing of land for housing and farmland has resulted in isolated pockets of native vegetation occurring across much of the Australian landscape.
When these patches become cut-off from other areas many plant and animal species become isolated, resulting in biodiversity decline and local extinction of sensitive species.
However, if these pockets are large and connected or close to one another, the impact of this isolation is reduced. Larger patches of vegetation are valuable because they can support a greater diversity and abundance of habitats and therefore species.
Corridors and stepping stones (connections) between patches are important as they allow species to move from one patch to another with reduced risk of predation in search of food, shelter or breeding partners. For example, blue wrens need patches of vegetation to be almost continuous to enable their movement through the landscape.
Another issue to consider is the core area of vegetation patches (i.e. their size, shape and the impact of edges). Where one habitat type (e.g. bushland) meets another type (e.g. paddocks) there is a habitat edge. Species living in these habitat edges are often affected by increased light penetration, winds, increased rates of predation, competition, weed invasion, noise, and adjacent land use including chemical spray drift and soil disturbance. To reduce the effect of these edges on biodiversity it is, therefore, important to have patches that have a large internal area.
MaterialsStudent Worksheet 10: Surrounding Vegetation Conectivity, Aerial maps of the study area showing surrounding 4 square km (from activity 1), coloured pencils.

The activityDiscuss as a class the importance of remnant bushland areas being large and close to other patches of native vegetation. Undertake the following:
The percentage area covered by native vegetation within a 4 square km of the centre point of the site. Include wetlands, lakes, estuaries and rivers in the ‘percentage of native vegetation’.
Simply rule a 1km line on your aerial map from the centre of the study area in each of four directions, N, S, E & W. Now draw in the two other sides of each of the four created squares. Then draw a grid over this four square km area. Shade in the native vegetation areas on the map.
Percentage area covered by native vegetation = number of boxes shaded in x 100 total number of boxes in the grid
Discussion questionsHow could revegetation activities act as a stepping stone between patches or increase the size of other patches of vegetation?

EducationNRMenergytransportwasteairfoodwaterbiodiversityclimate change
Worksheet 10: Surrounding Vegetation ConnectivitySchool:__________________________________________________________ Date:_____________
Class conducting the survey:_________________________________________ Start time:_________
Site name:________________________________________________________ Site code:_________
What to doDetermine the percentage area covered by native vegetation within 1km of the centre point of the site being assessed (include wetlands, lakes, estuaries and rivers in the ‘percentage of native vegetation’).
Draw a grid over the aerial map (showing a 1km area surrounding the study area). Shade in the native vegetation areas on the map.
Count the total number of boxes covering the aerial map: ___________
Count the total number of boxes shaded in: ___________
Calculate the percentage area covered by native vegetation
= number of boxes shaded in x 100 total number of boxes in the grid

Activity 11: Photopoint monitoringSummaryDuration: 45 minSetting: on site
Background notes for teachersPhotopoint monitoring can be an easy and fun way to watch your project grow! It’s a quick way to monitor visible changes in the environment over time. When photos are taken in the same place over and over again, they will show how the plants have grown.
To set up photopoints on your site, simply download ‘The Whys and Hows of Photopoint Monitoring” from http://www.naturalresources.sa.gov.au/files/sharedassets/adelaide_and_mt_lofty_ranges/plants_and_animals/urban_biodiversity/photopoint-monitoring-hows-and-why-fact.pdf and follow the instructions.

Extension Activities1 Create a HerbariumSummaryThis activity enables students to discover the diversity of plant species present in the school ground and why plants are important.
Student outcomesThis activity will enable students to:• identify plants in their school ground• create a herbarium of plant species• make recommendations about future actions that can be taken in the school
ground.
Background notes for teachersPlants are essential for all life on earth. There are approximately 16,000 indigenous plant species found in Australia and they provide biodiversity (including us) with oxygen, food and shelter!
Creating a class or school herbarium is one way for students to gain a greater understanding of the diversity of species present in the school ground. A herbarium is a collection of dried plants that are mounted on pieces of card and systematically arranged. Herbariums are important in the identification and classification of plant species and herbarium collections are found world wide.
The State Herbarium is located in the Adelaide Botanic Gardens. This herbarium was established in the nineteenth century and holds thousands of plant specimens.
By pressing and drying plants they do not shrivel and retain most of their identification characteristics. A correctly pressed and dried plant will last for hundreds of years, and can be used for study even if extinct in the wild.
MaterialsThe Lorax. Dr Seuss, Collins (1971), plant identification books, old phone books or flower presses or two pieces of wooden lattice (A3 size) and 2 pieces of rope.One per student - plant specimen collected from the school ground, two sheets of newspaper or paper towel, two thick cardboard sheets, tape, pencil, one A3 piece of thick card, Herbarium - Plant Collection label.
The activityTo begin this activity, read The Lorax with your students. This story introduces the concept of deforestation and the importance of plants for wildlife species, air quality and as beautiful parts of the landscape. After reading the book, discuss as a class why plants are important and the importance of having a range of plant species present in an ecosystem.

To create a herbariumStep 1: Ask each student to collect one plant specimen from the school ground. Encourage students to select specimens that have flowers or fruit on them and to take samples from a range of species. Samples should be 30-50cm in length and may include the whole plant (if it is small) or a portion of a larger plant. To reduce the impact of this activity on plants in the school ground, encourage sampling from abundant/weedy small species or larger plants.
Step 2: Ask students to place the specimens between the sheets of newspaper/paper towel and then between the two pieces of cardboard.
Step 3: Stack each of these ‘cardboard sandwiches’ in a pile and use the old phone books, flower presses or two pieces of wooden lattice tied with rope to press the specimens. For best results replace the paper towel every couple of days until dry and place in a warm well-aired place (e.g. low temperature oven (40°C), near a heater or clothes’ drier or in full sun on a breezy day). A plant is dry when it becomes stiff (i.e. you can hold the stalk and the leaves do not droop).
Step 4: Once pressed, students should tape their specimen onto the A3 piece of card. They should also cut out and stick a filled-in Herbarium - Plant Collection label to the card.
Step 5: Exhibit the class herbarium in the school ground and make labels identifying the plants that can be placed in the school ground. Over time you will build up a school herbarium of all of the species found in the school ground. You may wish to laminate the sheets.
Discussion questionsWhy are plants important?Why do you think it is important to have a range of plant species present in an ecosystem?What do you think herbariums are used for?

2 Learning about Local FloraLearn to recognise different types of plants and different habitat layers (e.g. trees, taller/smaller shrubs, grasses, climbers, ground covers).
Inspect your site and go to www.backyards4wildlife.com.au ->Resources & downloads ->Local plant database to find local plants of your area. Enter your suburb and colour photos of local plants will come up.Make a list of all the plants in your area.
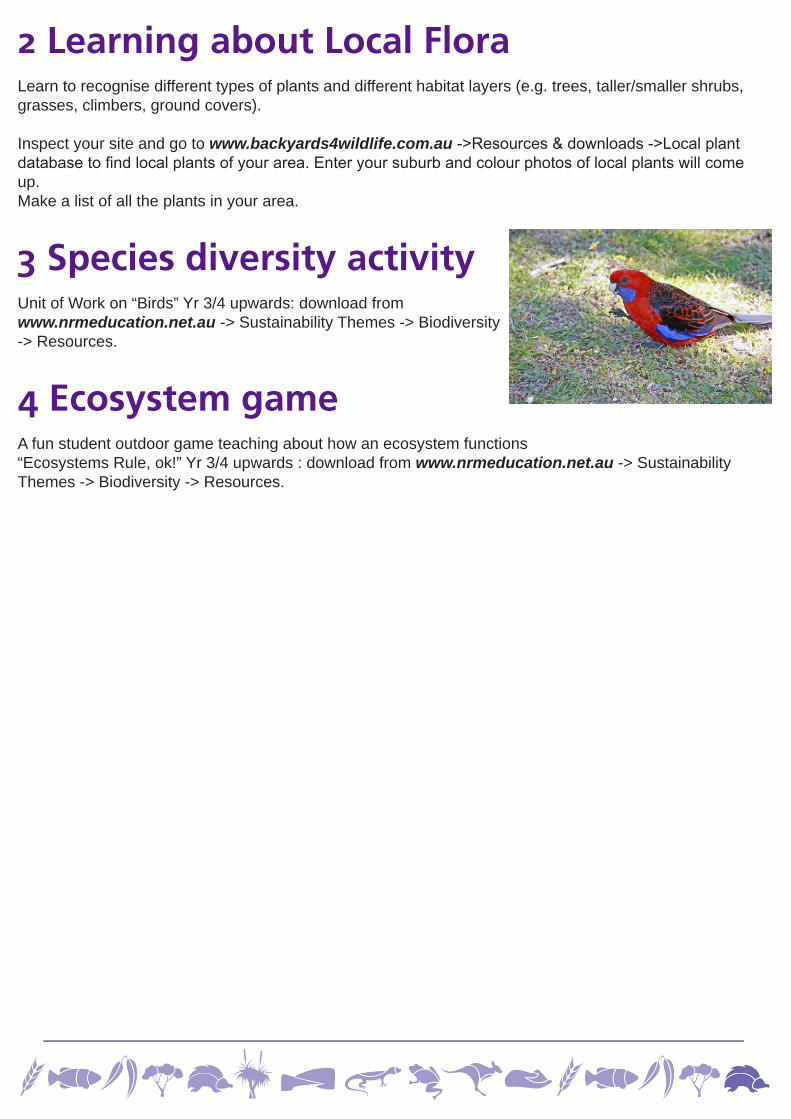
3 Species diversity activityUnit of Work on “Birds” Yr 3/4 upwards: download from www.nrmeducation.net.au -> Sustainability Themes -> Biodiversity -> Resources.
4 Ecosystem gameA fun student outdoor game teaching about how an ecosystem functions“Ecosystems Rule, ok!” Yr 3/4 upwards : download from www.nrmeducation.net.au -> Sustainability Themes -> Biodiversity -> Resources.

GlossaryBiological Control - the control of pests and parasites using other organisms, often natural predators.
Circumference - distance around the outside of a circle, tree trunk or log.
Ecosystem – a community of plants and animals, the interactions between these and the physical environment in which they live.
Environmental Weeds – plants that grown in an area where they are not wanted and that threaten natural ecosystems. Environmental weeds are often exotic plant species.
Estimate – to form an approximate value for a quantity.
Exotic Plants - plants that are not naturally found in Australia and have been introduced into an area.
Habitat – the place or type of site where an organism or population naturally occurs.
Habitat Tree – a tree that provides nesting space or shelter to animals species.
Herb Layer – layer of vegetation dominated by non-woody plants less than 0.5m in height.
Hectare – a unit of land measurement equalling 10,000 m2. (100m x 100m in size).
Herbarium – a collection of dried plants that are mounted on pieces of card and systematically classified.
Indigenous Plants – plants that are locally native i.e. naturally found in Australia and growing in the local area.
Native Plants – plants that are naturally found in Australia (as opposed to exotic plants that people introduce into an area).
Organic Litter – materials that are no longer attached to a plant and have fallen to the ground (includes leaves, twigs, mulch and small branches less than 30 cm in diameter).
Overstorey – the top layer of vegetation (the tree canopy cover) usually greater than 5m in height.
Percentage - a part or portion expressed in hundredths.
Pollination – the transfer of pollen grains from one flower to another.
Regeneration – regrowth of plants.
Shrub - a low growing woody plant, usually with several major branches.
Tally – a method of recording data by making a mark for each positive answer and then counting the number of marks.
Understorey – the layer of vegetation under the tree canopy usually between 0.5 and 5m.
Wetland – an area containing water, whether natural or artificial, permanent or temporary, with water that is static, flowing, fresh, brackish or salty.