Endpoint Protector - User Manual · 4 | My Endpoint Protector | User Manual 2. Cloud Server...
82
Version 4.4.0.8 User Manual
Transcript of Endpoint Protector - User Manual · 4 | My Endpoint Protector | User Manual 2. Cloud Server...
Version 4.4.0.8
User Manual
I | My Endpoint Protector | User Manual
Table of Contents
1. Introduction ........................................... 1
1.1. What is My Endpoint Protector? .......................................... 2
1.2. Licensing ......................................................................... 3
2. Cloud Server Architecture ......................... 4
2.1. Accessing My Endpoint Protector Online Administration and
Reporting Tool ......................................................................... 5
2.1.1. Sign-Up ......................................................................... 5
2.1.2. Login ............................................................................. 5
2.1.3. Forgot your Password ...................................................... 5
2.1.4. Logout ........................................................................... 5
2.2. Online Administration and Reporting Tool - Overview ............ 6
3. My EPP Client System Requirements ........ 10
4. My Endpoint Protector Client ................... 11
4.1. Client Security ................................................................ 11
4.2. Client Installation ............................................................ 11
4.3. DHCP / Manual IP address ................................................ 13
4.4. Client Notifications (Notifier) ............................................ 13
4.5. Client modes for users, computers and groups ................... 13
4.6. Transparent Mode ........................................................... 14
4.7. Stealth Mode .................................................................. 14
4.8. Panic Mode ..................................................................... 14
4.9. Hidden Icon Mode ........................................................... 15
4.10. Silent Mode .................................................................... 15
4.11. Client Software Uninstall Protection ................................... 15
4.12. Offline Functionality for My Endpoint Protector Client ........... 15
4.13. Client Removal ............................................................... 16
4.13.1. Client Removal on Windows OS ...................................... 16
4.13.2. Client removal on MAC OS X ........................................... 16
4.14. Client Upgrade ................................................................ 17
II | My Endpoint Protector | User Manual
5. Device Control ...................................... 18
5.1. Dashboards .................................................................... 18
5.2. Global Rights .................................................................. 19
5.2.1. Effective Rights ............................................................. 20
5.3. Global Settings ............................................................... 20
5.4. Devices.......................................................................... 21
5.4.1. Device Rights ............................................................... 22
5.4.2. Allow or Deny Access to Devices ..................................... 23
5.5. Computers ..................................................................... 23
5.5.1. Computer Rights ........................................................... 25
5.6. Users ............................................................................ 25
5.6.1. User Rights .................................................................. 27
5.7. Groups .......................................................................... 27
5.7.1. Group Rights ................................................................ 28
5.8. Custom Classes .............................................................. 29
6. Content Aware Protection ....................... 30
6.1. Dashboards .................................................................... 31
6.2. Content Aware Policies .................................................... 31
6.2.1. Creating new policies ..................................................... 32
6.2.2. Setting up Standard Content Aware Policies ..................... 33
6.2.2.1. Threshold ..................................................................... 39
6.2.3. Predefined Policies ........................................................ 40
6.2.4. Priorities for Content Aware Policies ................................. 40
6.2.5. How Content Aware Policies Work ................................... 41
6.3. Custom Content Dictionary Blacklists ................................. 42
6.4. Content Aware URL Whitelists ........................................... 43
6.5. Content Aware Domain Whitelists ..................................... 43
6.6. Content Aware Regex Blacklists ........................................ 44
6.7. Content Aware Type Whitelist ........................................... 45
6.8. HIPAA compliant Content Aware Protection ........................ 46
6.8.1. How My Endpoint Protector is HIPAA compliant ................. 47
6.8.2. Use Case Nr. 1 .............................................................. 48
6.8.3. Use Case Nr. 2 .............................................................. 49
III | My Endpoint Protector | User Manual
7. Offline Temporary Password ................... 51
7.1. Device Offline Temporary Password ................................... 52
7.2. Computer Offline Temporary Password .............................. 53
7.3. Content Aware Protection Offline Temporary Password ........ 53
7.4. User Offline Temporary Password action ............................ 53
7.5. Setting the Administrator Contact Information .................... 54
8. Reports and Analysis ............................. 56
8.1. Logs Report .................................................................... 56
8.2. File Tracing .................................................................... 57
8.3. Content Aware Report ..................................................... 58
8.4. Admin Actions ................................................................ 58
8.5. Online Computers ........................................................... 59
8.6. Online Users ................................................................... 59
8.7. Online Devices ................................................................ 59
8.8. Computer History ............................................................ 60
8.9. User History ................................................................... 60
8.10. Device History ................................................................ 61
9. Alerts .................................................. 62
9.1. Define System Alerts ....................................................... 62
9.1.1. System Alerts History .................................................... 63
9.2. Define Alerts .................................................................. 64
9.2.1. Alerts History ............................................................... 65
9.3. Define Content Aware Alerts ............................................. 65
9.3.1. Content Aware Alerts History .......................................... 65
10. Downloads ....................................... 66
10.1. Installation Files and Enrollment ....................................... 66
10.2. EasyLock Encryption Software .......................................... 66
11. My Account ....................................... 68
11.1. Profile Details ................................................................. 68
11.2. Unique ID ...................................................................... 68
IV | My Endpoint Protector | User Manual
11.3. My Subscriptions ............................................................. 69
11.3.1. Trial license .................................................................. 70
11.3.2. Appetizer license ........................................................... 71
11.4. Get a Subscription .......................................................... 71
12. Enforced Encryption with TrustedDevices72
12.1. How a Level 1 TrustedDevice Works .................................. 73
12.2. EasyLock Software for TrustedDevices Level 1 .................... 74
13. Endpoint Protector Product Family ........ 75
14. Support ........................................... 76
15. Important Notice / Disclaimer .............. 77
1 | My Endpoint Protector | User Manual
1. Introduction
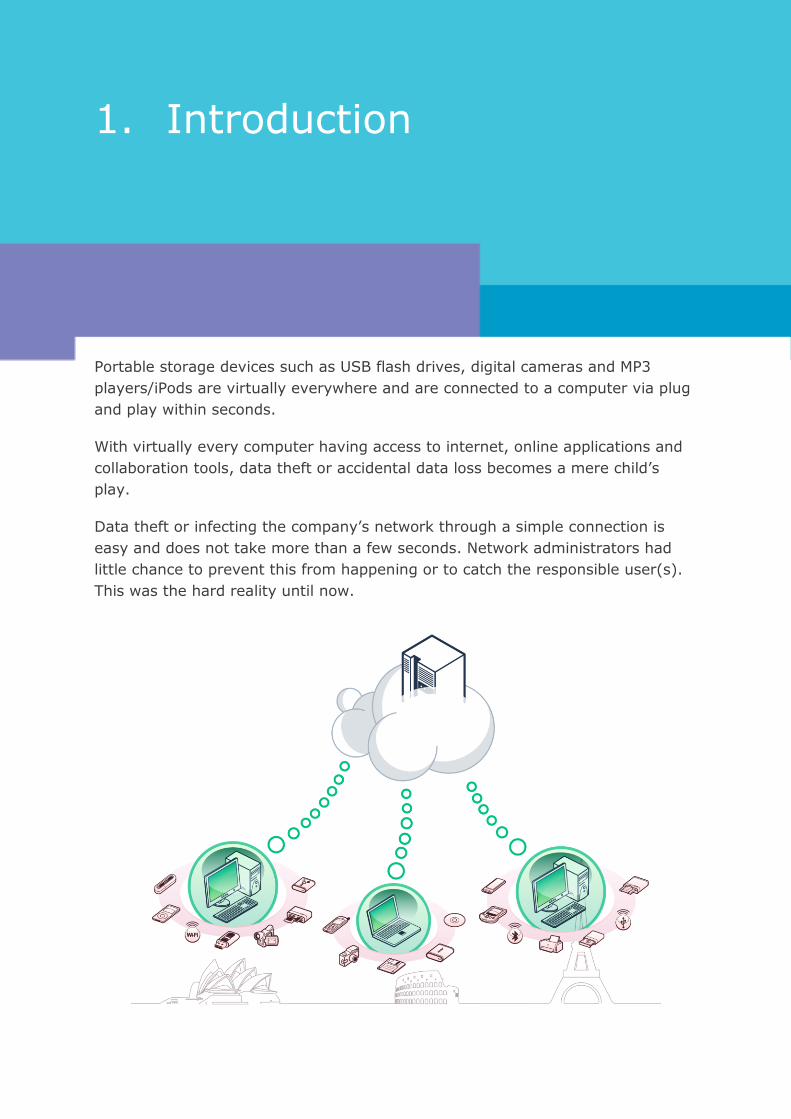
Portable storage devices such as USB flash drives, digital cameras and MP3
players/iPods are virtually everywhere and are connected to a computer via plug
and play within seconds.
With virtually every computer having access to internet, online applications and
collaboration tools, data theft or accidental data loss becomes a mere child’s
play.
Data theft or infecting the company’s network through a simple connection is
easy and does not take more than a few seconds. Network administrators had
little chance to prevent this from happening or to catch the responsible user(s).
This was the hard reality until now.
2 | My Endpoint Protector | User Manual
1.1. What is My Endpoint Protector?
As a SaaS (Software-as-a-Service) My Endpoint Protector has a simple client-
server architecture, providing data security to customers who do not have the
time and resources to manage their own on premise endpoint security solution.
My Endpoint Protector is a full Device Control, Data Loss Prevention (DLP) and
Mobile Device Management (MDM) cloud-based solution available for Windows,
Mac OS X and iOS and Android mobile devices. Portable storage devices such as
USB flash drives, gadgets / tablets, e-mail applications like Outlook and Gmail
and cloud services like Dropbox, iCloud, Google Drive, etc. may cause severe
issues when it comes to controlling use of confidential data. With My Endpoint
Protector you can minimize the risks of data loss, data theft and data leakage
and also manage the mobile device fleet from a single centralized online console
from anywhere, at any time.
My Endpoint Protector allows individuals and companies of all sizes to manage all
their endpoints from one centralized online console, be it Desktops, Notebooks or
Netbooks, used in the office, at home or on the road. My Endpoint Protector
eliminates the risks of data loss and data theft that are posed by portable
devices, data transfers and mobile devices.
Controlling ports, USB devices, data transfers and mobile devices
through a server in the cloud is the best solution to centrally manage
your network, without having to become an expert in installing and
managing servers.
3 | My Endpoint Protector | User Manual
1.2. Licensing
My Endpoint Protector is available as a free version for personal use & small
offices. A commercial version with unlimited features that can scale up to
thousands of computers and devices is also available and it is subject to a
monthly subscription.
The Free version, called an Appetizer License, offers data security for a small
network with up to 5 computers (Windows and Mac OS X) and 5 mobile devices
(Android and iOS). It includes the main features, however there are certain
limitations.
The commercial version includes additional features like Content Aware
Protection for Macs, unlimited number of managed computers and mobile
devices, e-mail alerts, extended reporting options, etc.
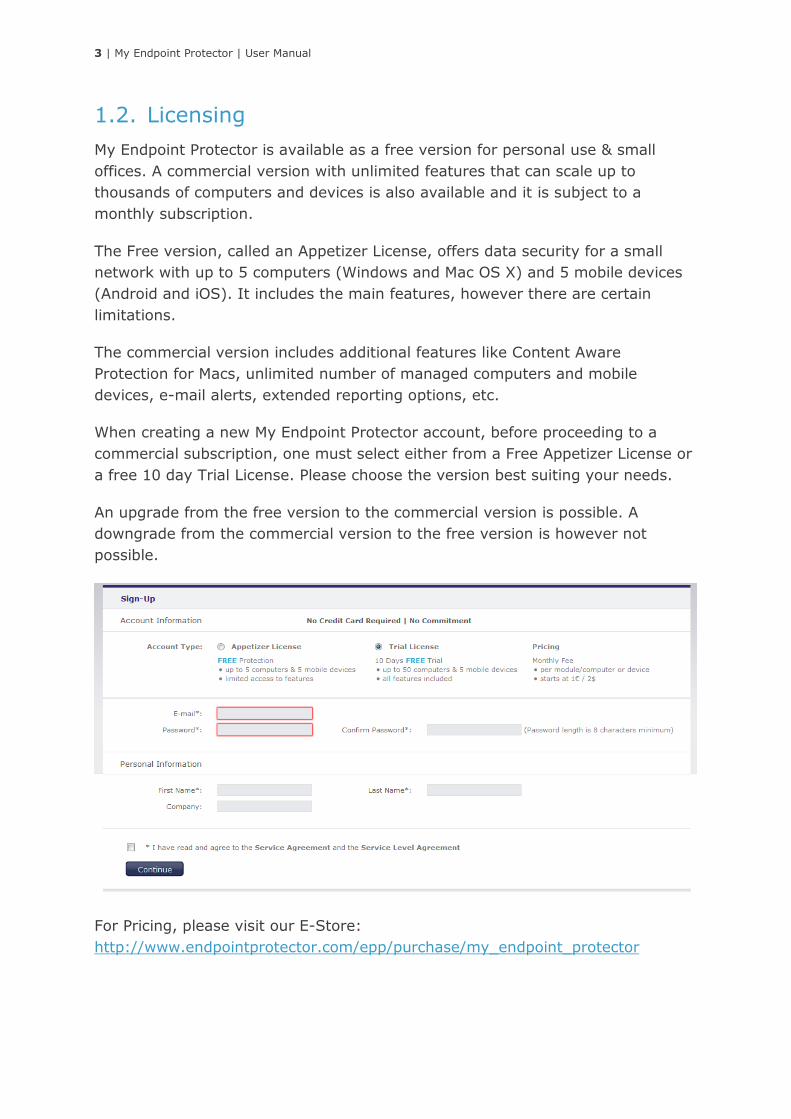
When creating a new My Endpoint Protector account, before proceeding to a
commercial subscription, one must select either from a Free Appetizer License or
a free 10 day Trial License. Please choose the version best suiting your needs.
An upgrade from the free version to the commercial version is possible. A
downgrade from the commercial version to the free version is however not
possible.
For Pricing, please visit our E-Store:
http://www.endpointprotector.com/epp/purchase/my_endpoint_protector

4 | My Endpoint Protector | User Manual
2. Cloud Server Architecture
My Endpoint Protector is a cloud, client-server application. As per any cloud
service, the server part does not require any setup or configurations as it is
hosted and maintained by My Endpoint Protector. The clients have to be
deployed on the endpoint you want to protect.
The functionality of the My Endpoint Protector is designed to be around several
physical entities:
▪ Computers (PCs or MACs with My Endpoint Protector client installed)
▪ Devices (the devices, which are currently supported by My Endpoint
Protector. e.g.: USB devices, digital photo cameras, etc.)
▪ The cloud/server side of My Endpoint Protector is the Administration and
Reporting Tool. It is responsible for centrally managing devices,
computers, users, groups and their behavior together
5 | My Endpoint Protector | User Manual
2.1. Accessing My Endpoint Protector Online
Administration and Reporting Tool
To access the online Administration and Reporting Tool, simply open a browser
and enter the My Endpoint Protector address.
https://my.endpointprotector.com
Here you will need to enter your username and password. For most, the
username is the same as the email address.
If you have not already done so, please sign-up for My Endpoint Protector by
providing your desired login credentials.
2.1.1. Sign-Up
To create a new My Endpoint Protector account, please go to:
https://my.endpointprotector.com/register/register/
Choose a username and password and follow the steps in the sign-up wizard. To
finish the sign-up process, you need to confirm your e-mail address. For this,
please click the confirmation link in the e-mail that you will receive.
2.1.2. Login
To login to your My Endpoint Protector account you need to enter your username
and password here https://my.endpointprotector.com
2.1.3. Forgot your Password
In case you forgot your username and / or password, please provide the e-mail
address used in the registration process. Either click on “Forgot your password?”
or go directly to https://my.endpointprotector.com/resetting/request. You will
receive and automatic email with a secure link that will allow you to reset the
password.
2.1.4. Logout
To Logout of your My Endpoint Protector account simply click the Logout button
located on the top right corner of the Administration and Reporting Tool.
6 | My Endpoint Protector | User Manual
2.2. Online Administration and Reporting Tool -
Overview
In the online Administration and Reporting Tool you can manage the behavior of
your protected computers and get the information regarding their device activity,
file transfers and the mobile device fleet.
Access to Administration and Reporting Tool is restricted by a username and
password pair and requires authorized credential to login.
After logging into My Endpoint Protector, you will see the available sections and
modules.
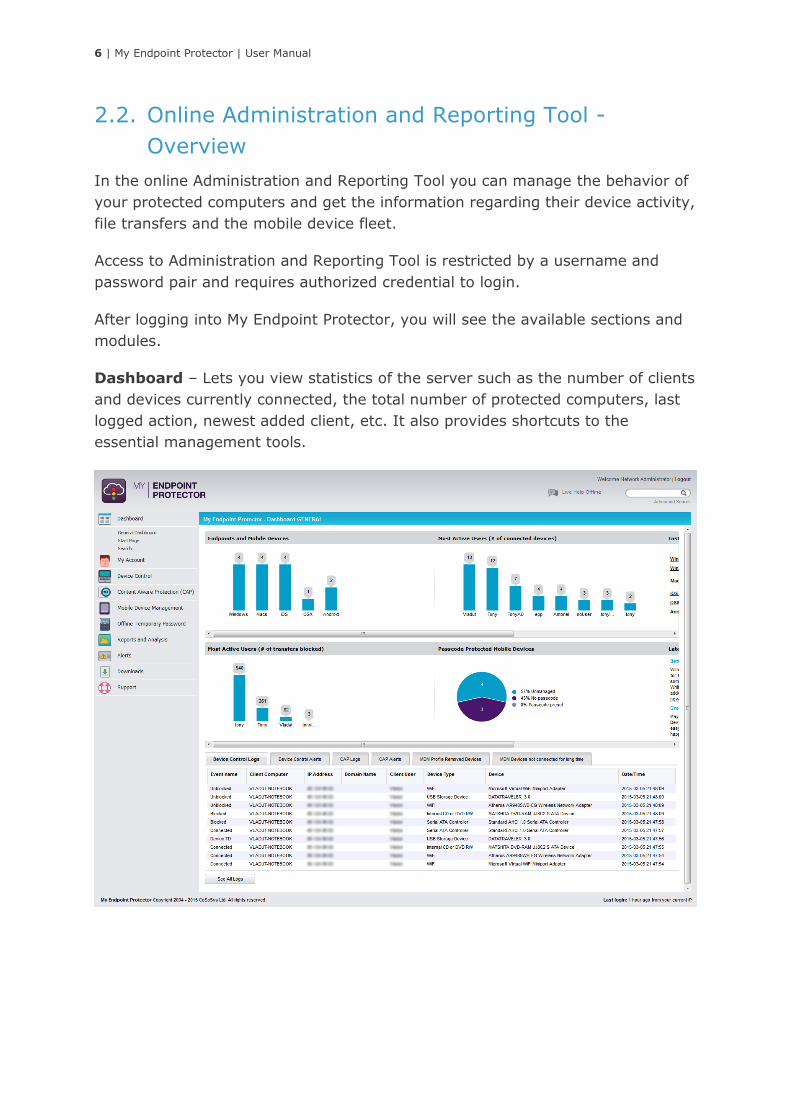
Dashboard – Lets you view statistics of the server such as the number of clients
and devices currently connected, the total number of protected computers, last
logged action, newest added client, etc. It also provides shortcuts to the
essential management tools.

7 | My Endpoint Protector | User Manual
Device Control – Used for administration of Devices, Computers, Groups, and
Client Users.
This is one of the most important module of My Endpoint Protector. In this
section the administrator can set up and enforce security policies by assigning
specific rights to devices, computers and computer groups.
In this module, the administrator can edit, manage rights and settings or even
delete devices, computers or groups. It also provides the option to create groups
and add or remove client users.
Content Aware Protection – Used for administration of File Transfers Policies.
This is also one of the main three modules of My Endpoint Protector. In this
section the administrator can set up and enforce strong content aware security
policies for a better control over data leaving the company network via any
removable media, email, cloud storage or other online applications.
Mobile Device Management – Used for administration of the mobile device
fleet.
Also one of the main three modules of My Endpoint Protector. This section allows
the administrator to create security policies for mobile device.

8 | My Endpoint Protector | User Manual
Besides the security features like Track & Locate, Lock, Wipe, there also
additional features available like Mobile Application Management and Geofencing.
Reports and Analysis – Designed to offer the administrator information
regarding the past and current activity on the system (Server and Clients). It
includes several sections such as Online Computers, User History, Statistics,
Graphics, etc. Several information formats are available for view and export.
Similar to the Dashboard, this module displays usage statistics on past and
current activities, but with more details.
Offline Temporary Password – This section allows the administrator to define
Offline Temporary Passwords as described in paragraph 7 - “Offline Temporary
Password”.
System Alerts – Allows the creation of System Alerts – notifications, set up by
administrators, which will alert them if a certain device was connected or
accessed, a certain user performed a certain action, etc. Please see paragraph
Error! Reference source not found. - “Error! Reference source not found.”
for more details.

9 | My Endpoint Protector | User Manual
Downloads – This section provides the client installation package for all
supported operating systems, as well as EasyLock – the enforce encryption
software.
My Account – Provides information related to your account and allows
subscriptions and clients management.

10 | My Endpoint Protector | User Manual
3. My EPP Client System
Requirements
▪ Supported operating System:
▪ Windows 10 (all versions) 32bit/64bit
▪ Windows 8 (all versions) 32bit/64bit
▪ Windows 7 (all versions) 32bit/64bit
▪ Windows Vista (all versions) 32bit/64bit
▪ Windows XP Home or Professional
(Service Pack 2 - minimal requirements)
▪ Mac OS X 10.5+
▪ Administrative rights on the computer to install the MSI package or the
PKG file for Macs
▪ Fully functional internet connection
▪ 1 GHz processor (or faster recommended)
▪ Minimum of 256 MB RAM
▪ 32 MB of available memory on the hard drive (plus additional space for
optional offline file tracing)
Note!
When using an internal or external firewall, please ensure that the computer you
are installing the client on has the server-specified port open. By default this is
port 443. In case you are behind a router, consult the device’s user manual or
contact the manufacturer of your device about setting up port-forwarding.
11 | My Endpoint Protector | User Manual
4. My Endpoint Protector
Client
The My Endpoint Protector Client is the application which once installed on the
client computers, communicates with the My Endpoint Protector server and
blocks or allows devices and file transfers. It also send notifications in case of
unauthorized access.
4.1. Client Security
The My Endpoint Protector Client has a built in security system, which makes
stopping the service nearly impossible.
This mechanism has been implemented to prevent the circumvention of security
measures enforced by you. If somebody tries to connect unauthorized devices, or
transfer confidential files.
In addition to this, the administrator can set a Client Software Uninstall
Protection Password. Additional information on this will be provided in the
paragraphs below.
4.2. Client Installation
The Client can be downloaded from the My Endpoint Protector User Interface.
Depending on the administrator (first time user or not) and preferred option, the
Client can be downloaded from one of the following: Dashboard > Start Page;
Dashboard > General Dashboard or from Downloads > Installation Files &
Enrollment.
Once the correct My Endpoint Protector installer has been downloaded, run the
executable.

12 | My Endpoint Protector | User Manual
It is important that you enter your correct unique ID when requested.
By default, if the client was downloaded from the My Endpoint Protector account,
the unique ID is already filled in at this stage.
13 | My Endpoint Protector | User Manual
Please ensure that the client computer has full internet access / network
connectivity without any interference from firewalls, etc.
4.3. DHCP / Manual IP address
My Endpoint Protector Client automatically recognizes changes in the network’s
configuration and updates settings accordingly. This means that computers
remain protected both at the office (e.g. DHCP) and at home (e.g. manual IP
address), without having to make any modifications.
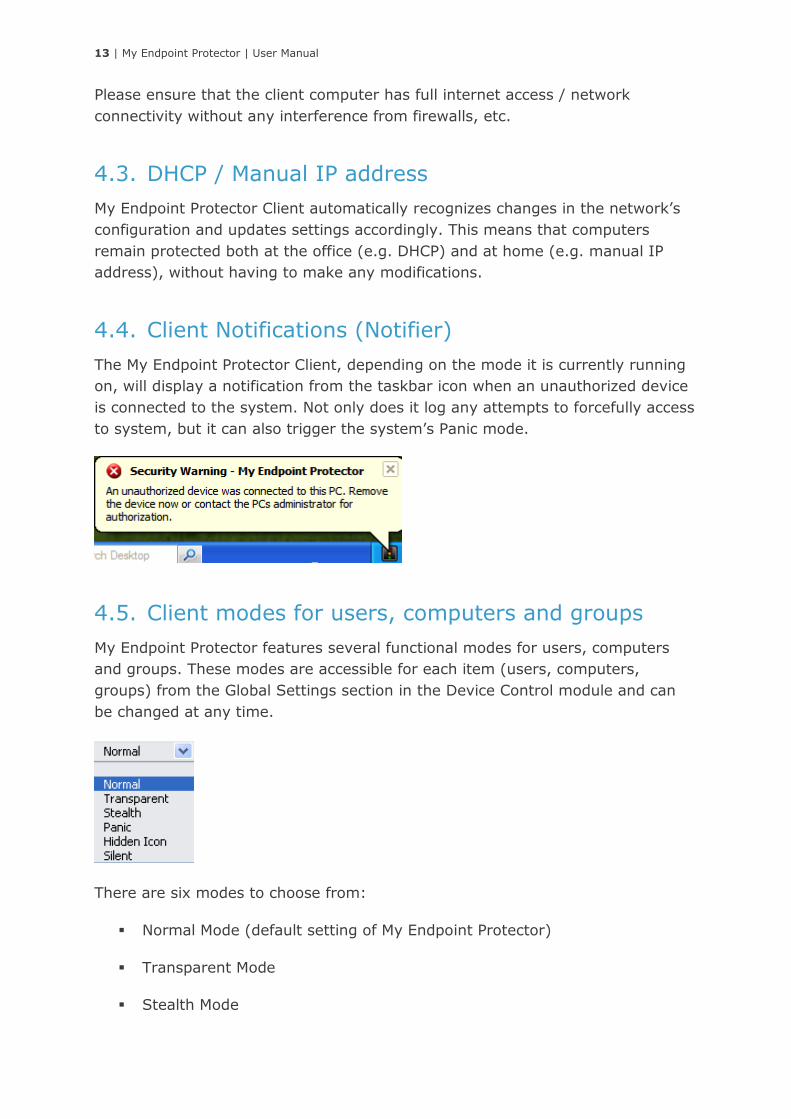
4.4. Client Notifications (Notifier)
The My Endpoint Protector Client, depending on the mode it is currently running
on, will display a notification from the taskbar icon when an unauthorized device
is connected to the system. Not only does it log any attempts to forcefully access
to system, but it can also trigger the system’s Panic mode.
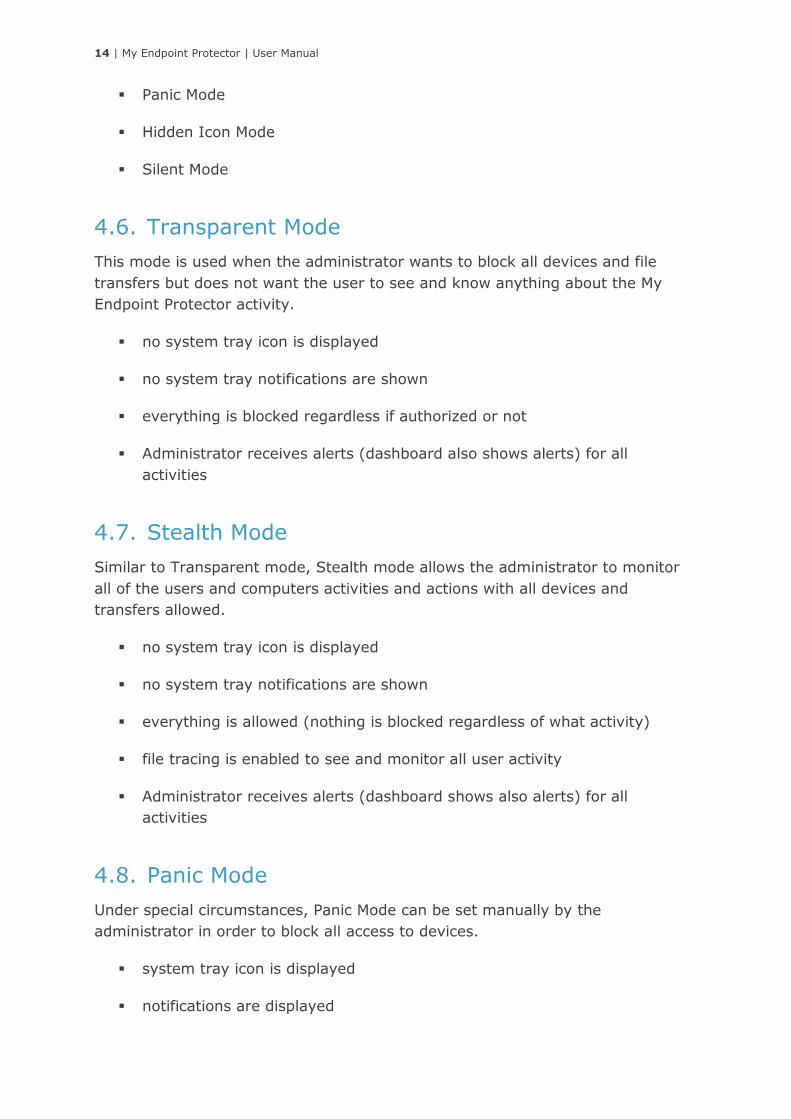
4.5. Client modes for users, computers and groups
My Endpoint Protector features several functional modes for users, computers
and groups. These modes are accessible for each item (users, computers,
groups) from the Global Settings section in the Device Control module and can
be changed at any time.
There are six modes to choose from:
▪ Normal Mode (default setting of My Endpoint Protector)
▪ Transparent Mode
▪ Stealth Mode
14 | My Endpoint Protector | User Manual
▪ Panic Mode
▪ Hidden Icon Mode
▪ Silent Mode
4.6. Transparent Mode
This mode is used when the administrator wants to block all devices and file
transfers but does not want the user to see and know anything about the My
Endpoint Protector activity.
▪ no system tray icon is displayed
▪ no system tray notifications are shown
▪ everything is blocked regardless if authorized or not
▪ Administrator receives alerts (dashboard also shows alerts) for all
activities
4.7. Stealth Mode
Similar to Transparent mode, Stealth mode allows the administrator to monitor
all of the users and computers activities and actions with all devices and
transfers allowed.
▪ no system tray icon is displayed
▪ no system tray notifications are shown
▪ everything is allowed (nothing is blocked regardless of what activity)
▪ file tracing is enabled to see and monitor all user activity
▪ Administrator receives alerts (dashboard shows also alerts) for all
activities
4.8. Panic Mode
Under special circumstances, Panic Mode can be set manually by the
administrator in order to block all access to devices.
▪ system tray icon is displayed
▪ notifications are displayed

15 | My Endpoint Protector | User Manual
▪ everything is blocked regardless if authorized or not
▪ Administrator receives alert (dashboard also shows alerts) when PCs are
going in and out of Panic mode
4.9. Hidden Icon Mode
The Hidden Icon Mode is similar to the Normal mode, the difference consisting in
the fact that the Agent is not visible to the user.
▪ no system tray icon is displayed
▪ no system tray notifications are shown
▪ all set rights and settings are applied
4.10. Silent Mode
The Silent Mode is similar to the Normal mode, the difference consisting in the
fact that the notifications do not pup-up to the user.
4.11. Client Software Uninstall Protection
By defining a password, the administrator can ensure that even if users have
administrator right on their computers, the My Endpoint Protector cannot be
uninstalled. These feature can be found under the Global Settings.
4.12. Offline Functionality for My Endpoint Protector
Client
The My Endpoint Protector Client will store a local event history that will be
submitted and synchronized with the My Endpoint Protector Cloud Server upon
next connection to the network. The client remembers the last settings and
rights. If the protected computer is not connected to the internet, using the
Offline Temporary Password feature, temporary permissions can be given. See
paragraph 8 – Offline Temporary Password.
16 | My Endpoint Protector | User Manual
4.13. Client Removal
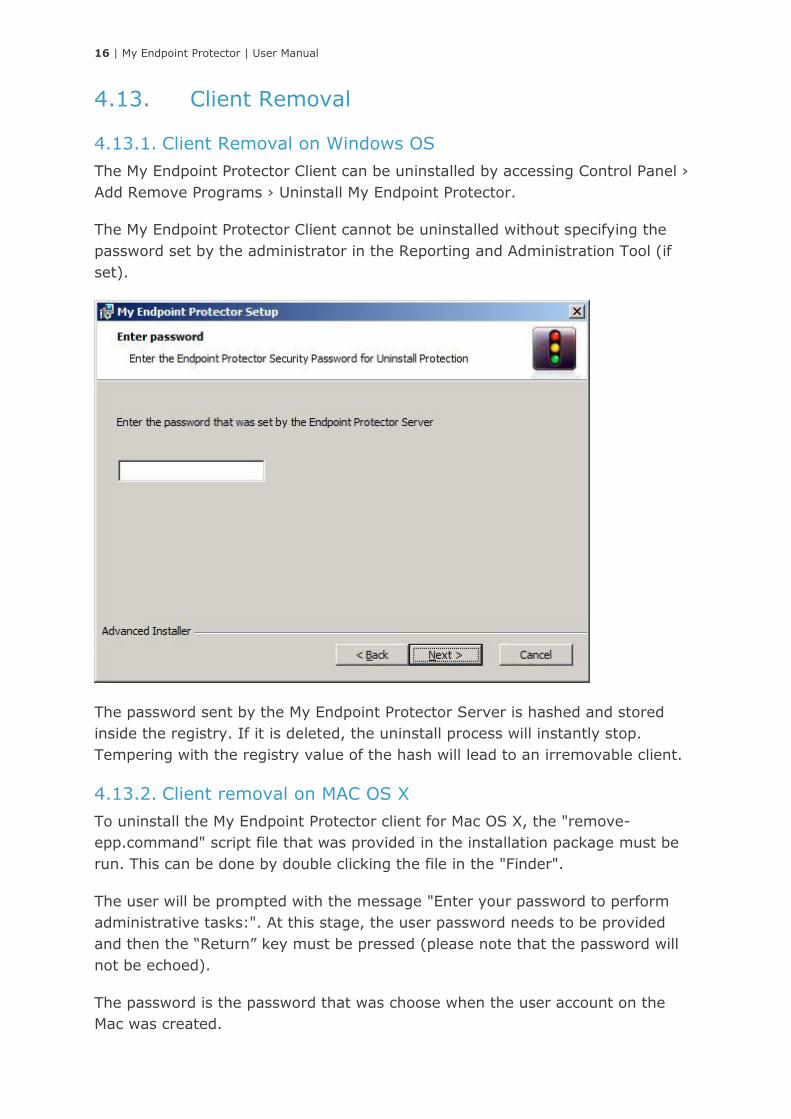
4.13.1. Client Removal on Windows OS
The My Endpoint Protector Client can be uninstalled by accessing Control Panel ›
Add Remove Programs › Uninstall My Endpoint Protector.
The My Endpoint Protector Client cannot be uninstalled without specifying the
password set by the administrator in the Reporting and Administration Tool (if
set).
The password sent by the My Endpoint Protector Server is hashed and stored
inside the registry. If it is deleted, the uninstall process will instantly stop.
Tempering with the registry value of the hash will lead to an irremovable client.
4.13.2. Client removal on MAC OS X
To uninstall the My Endpoint Protector client for Mac OS X, the "remove-
epp.command" script file that was provided in the installation package must be
run. This can be done by double clicking the file in the "Finder".
The user will be prompted with the message "Enter your password to perform
administrative tasks:". At this stage, the user password needs to be provided
and then the “Return” key must be pressed (please note that the password will
not be echoed).
The password is the password that was choose when the user account on the
Mac was created.

17 | My Endpoint Protector | User Manual
Note!
If the Mac user account does not have administrative privileges, un-installment is
not possible.
4.14. Client Upgrade
The My Endpoint Protector Client can be upgraded to the latest version from My
Account > Client Software Upgrade. A 2 Step process will allow for a simple and
easy client upgrade.
After selecting the desired upgrade, a list of computers that have an older client
version installed will be displayed. The administrator simply has to check the
required computers and start the upgrade process.

18 | My Endpoint Protector | User Manual
5. Device Control
My Endpoint Protector supports a wide range of device types which can represent
key sources of security breaches. These devices can be authorized which makes
it possible for the users to view, create or modify their content and for
administrators to view the data transferred to and from the authorized devices.
My Endpoint Protector is designed to be as user friendly as possible, providing
various shortcuts to allowing or denying access to USB and peripheral ports.
Throughout the Device Control sections, there are several ways of managing
devices and reaching the desired tab.
The Device Control module in My Endpoint Protector is extremely granular,
allowing the administrator to define rights per Device, User, Computer, and
Group or Globally through the network. These Rights are assigned with different
priorities, Global Rights having the lowest one and Device Rights the highest. The
main sections of this module and how permissions can be configured are
explained below.
5.1. Dashboards
This section provides a graphical overview regarding the recent (last 30 days)
Device Control activity in your network. The charts display information regarding
the number of protected computers and their operating systems, percentage of
allowed or blocked devices, device types connected, most active users, etc.
Moreover, Latest Logs, Least Connected Computers and Latest Device Control
Alerts are also displayed.

19 | My Endpoint Protector | User Manual
5.2. Global Rights
Global Rights are automatically set for all protected computers. By default, all
USB and peripheral ports are set to Deny Access. The exceptions to this rule are
- WiFi, Bluetooth and Network Share - as internet access, wireless keyboards and
mice are constantly needed. To change rights for a Device Type, simply click on
the dropdown menu and select the desired permission.
In My Endpoint Protector, Global Rights have the lowest priority so if Group
Rights are defined, they will take priority. If there are no rights defined for a
specific computer, and it does not belong to a group, it will inherit the Global
20 | My Endpoint Protector | User Manual
Rights and Settings. If the computer belongs to a group, then it will inherit the
settings of that group.
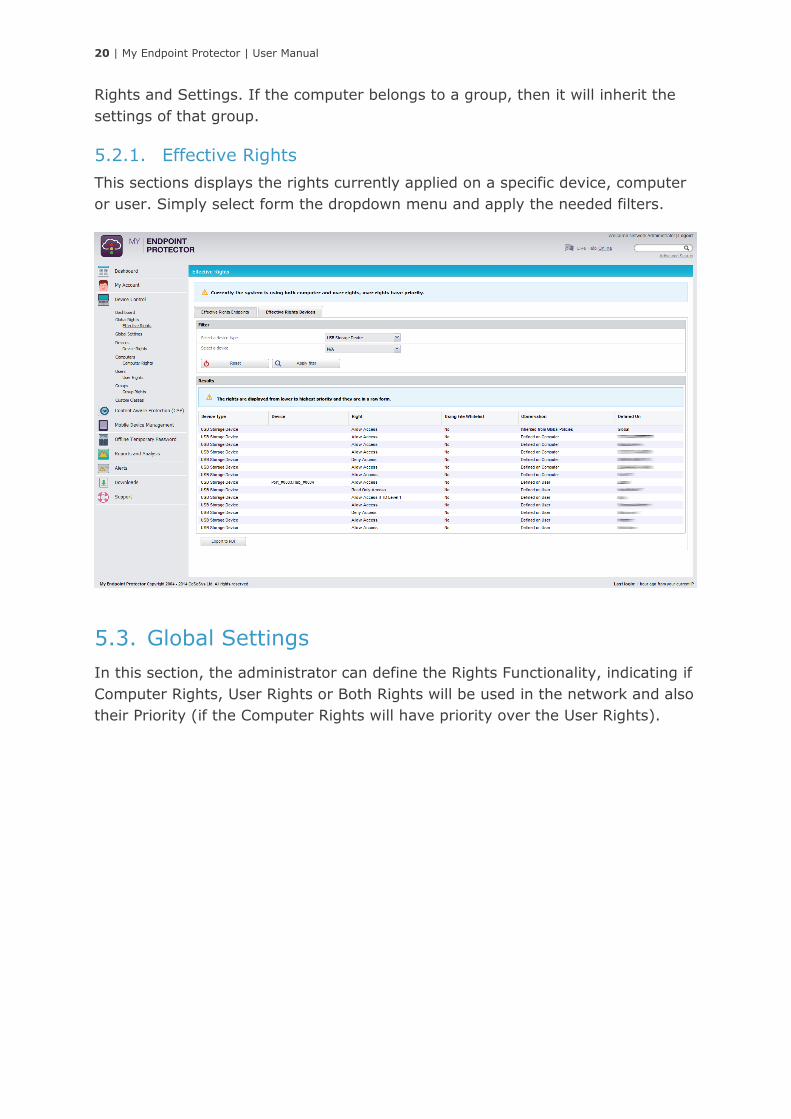
5.2.1. Effective Rights
This sections displays the rights currently applied on a specific device, computer
or user. Simply select form the dropdown menu and apply the needed filters.
5.3. Global Settings
In this section, the administrator can define the Rights Functionality, indicating if
Computer Rights, User Rights or Both Rights will be used in the network and also
their Priority (if the Computer Rights will have priority over the User Rights).
21 | My Endpoint Protector | User Manual
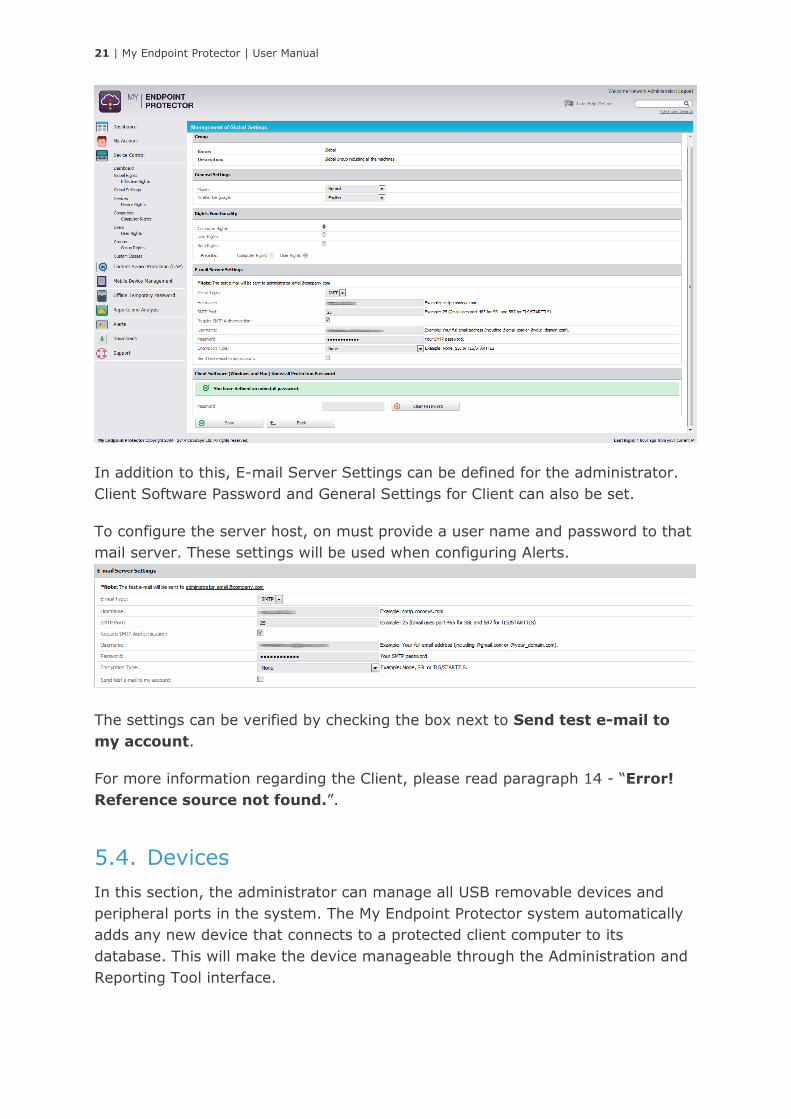
In addition to this, E-mail Server Settings can be defined for the administrator.
Client Software Password and General Settings for Client can also be set.
To configure the server host, on must provide a user name and password to that
mail server. These settings will be used when configuring Alerts.
The settings can be verified by checking the box next to Send test e-mail to
my account.
For more information regarding the Client, please read paragraph 14 - “Error!
Reference source not found.”.
5.4. Devices
In this section, the administrator can manage all USB removable devices and
peripheral ports in the system. The My Endpoint Protector system automatically
adds any new device that connects to a protected client computer to its
database. This will make the device manageable through the Administration and
Reporting Tool interface.

22 | My Endpoint Protector | User Manual
When an unknown device is connected to one of the client computers, the
device’s parameters are stored in the system database as: device data (Vendor
ID, Product ID and Serial Number). The user that connects the device for the
first time is stored as the default user of the device. However the user listed as
the owner of the device can later be changed at any time.
The status column indicates the current rights for the devices.
Red means that the device is blocked in the system.
Green means that the device is allowed on computers or users.
Yellow means that device is allowed on some users or computers with
restrictions.
The actions available to the administrator for this section are: Edit, Manage
Rights, Device History, Export Device History and Delete. They are
available either by right clicking on the desired device or through the icons on
the right side .
Manage Rights is actually a shortcut to the Devices Rights section, and will be
explained below.
5.4.1. Device Rights
My Endpoint Protector can handle a wide variety of devices and device types. It
also offers several methods of usage for each device in particular. This section
allows the administrator to grant or deny complete access to a certain device,
23 | My Endpoint Protector | User Manual
making it usable or obsolete for a certain group, computer or user. This action
can be achieved by right clicking on the desired device and selecting “Edit” or
thorough the key icon on the right side .
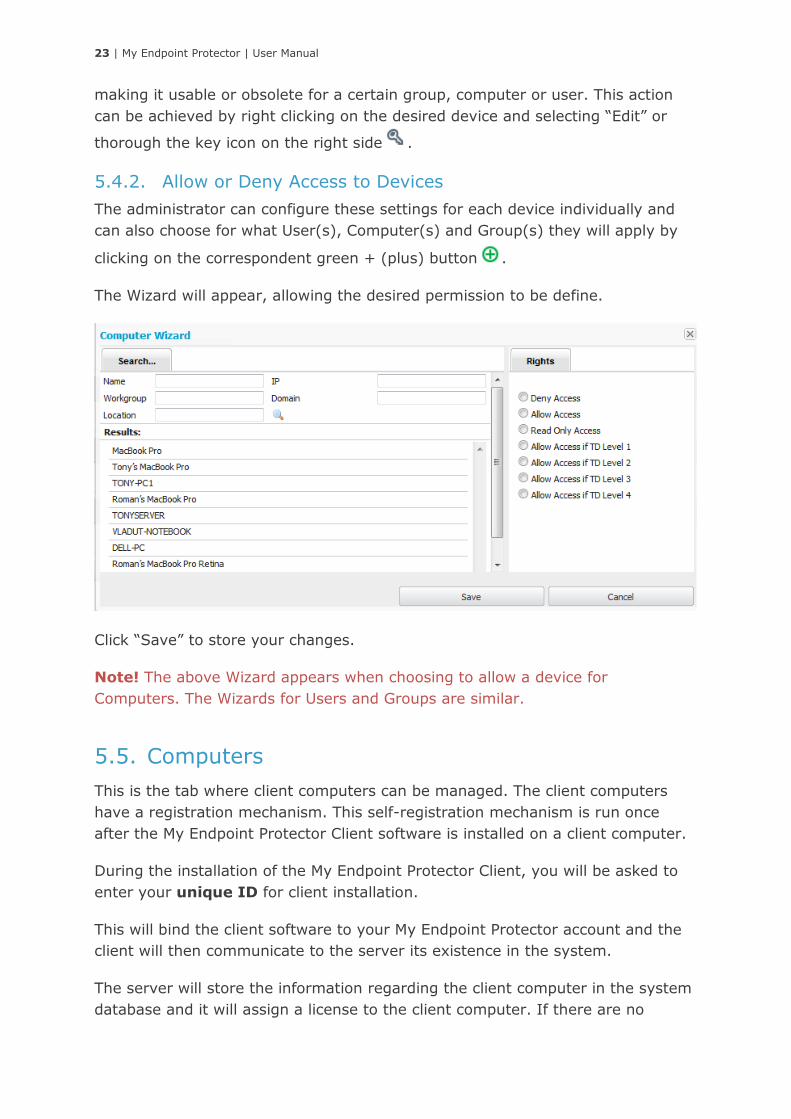
5.4.2. Allow or Deny Access to Devices
The administrator can configure these settings for each device individually and
can also choose for what User(s), Computer(s) and Group(s) they will apply by
clicking on the correspondent green + (plus) button .
The Wizard will appear, allowing the desired permission to be define.
Click “Save” to store your changes.
Note! The above Wizard appears when choosing to allow a device for
Computers. The Wizards for Users and Groups are similar.
5.5. Computers
This is the tab where client computers can be managed. The client computers
have a registration mechanism. This self-registration mechanism is run once
after the My Endpoint Protector Client software is installed on a client computer.
During the installation of the My Endpoint Protector Client, you will be asked to
enter your unique ID for client installation.
This will bind the client software to your My Endpoint Protector account and the
client will then communicate to the server its existence in the system.
The server will store the information regarding the client computer in the system
database and it will assign a license to the client computer. If there are no
24 | My Endpoint Protector | User Manual
subscriptions added to your profile, a demo license will be created and assigned,
which will expire after 10 days for the commercial account.
For a personal free account of My Endpoint Protector a full license is
automatically assigned.
Note!
The self-registration mechanism acts whenever a change in the computer
licensing module is made, and also each time the application client is reinstalled.
The owner of the computer is not saved in the process of the self-
registration.
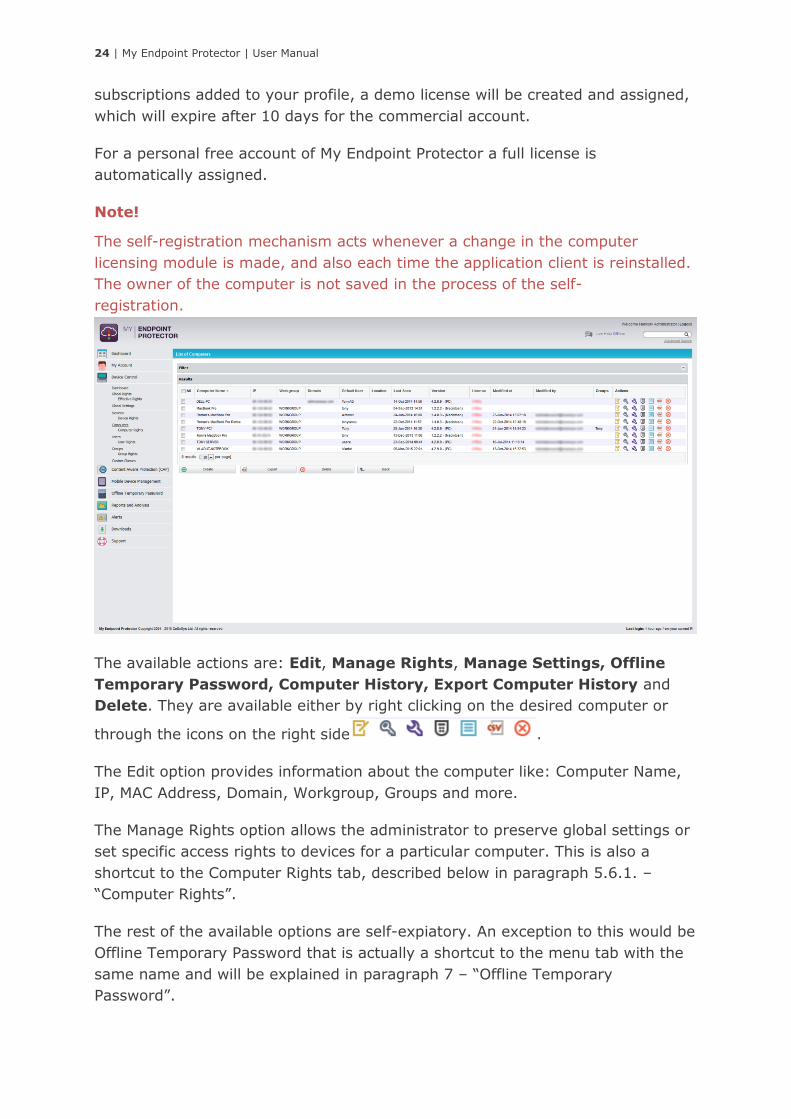
The available actions are: Edit, Manage Rights, Manage Settings, Offline
Temporary Password, Computer History, Export Computer History and
Delete. They are available either by right clicking on the desired computer or
through the icons on the right side .
The Edit option provides information about the computer like: Computer Name,
IP, MAC Address, Domain, Workgroup, Groups and more.
The Manage Rights option allows the administrator to preserve global settings or
set specific access rights to devices for a particular computer. This is also a
shortcut to the Computer Rights tab, described below in paragraph 5.6.1. –
“Computer Rights”.
The rest of the available options are self-expiatory. An exception to this would be
Offline Temporary Password that is actually a shortcut to the menu tab with the
same name and will be explained in paragraph 7 – “Offline Temporary
Password”.
25 | My Endpoint Protector | User Manual
For a better organization and manageability, a computer can be assigned as
belonging to a Group (several computers within the same office which will have
the same access rights or settings). Please read paragraph 5.7. – “Groups” for
more information.
5.5.1. Computer Rights
This section allows the administrator to manage computers’ rights. The actions
available for this section are: Edit and Effective Rights. They are available
either by right clicking on the desired computer or through the icons on the right
side .
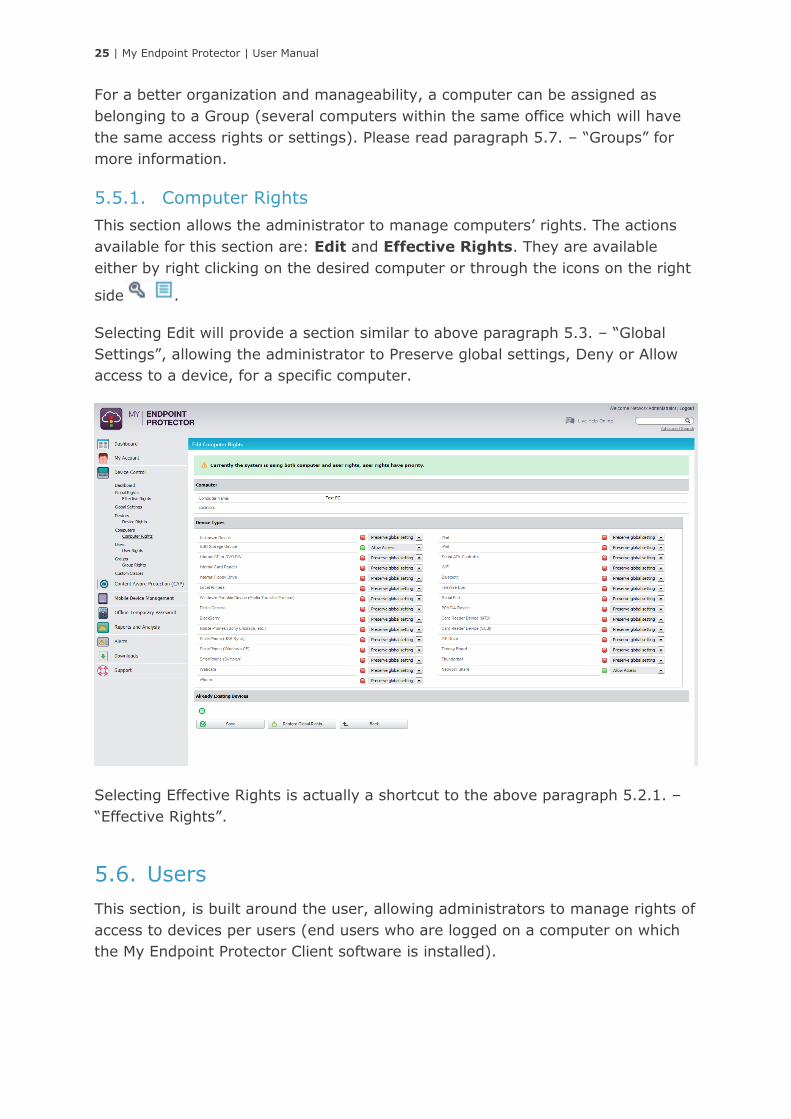
Selecting Edit will provide a section similar to above paragraph 5.3. – “Global
Settings”, allowing the administrator to Preserve global settings, Deny or Allow
access to a device, for a specific computer.
Selecting Effective Rights is actually a shortcut to the above paragraph 5.2.1. –
“Effective Rights”.
5.6. Users
This section, is built around the user, allowing administrators to manage rights of
access to devices per users (end users who are logged on a computer on which
the My Endpoint Protector Client software is installed).
26 | My Endpoint Protector | User Manual
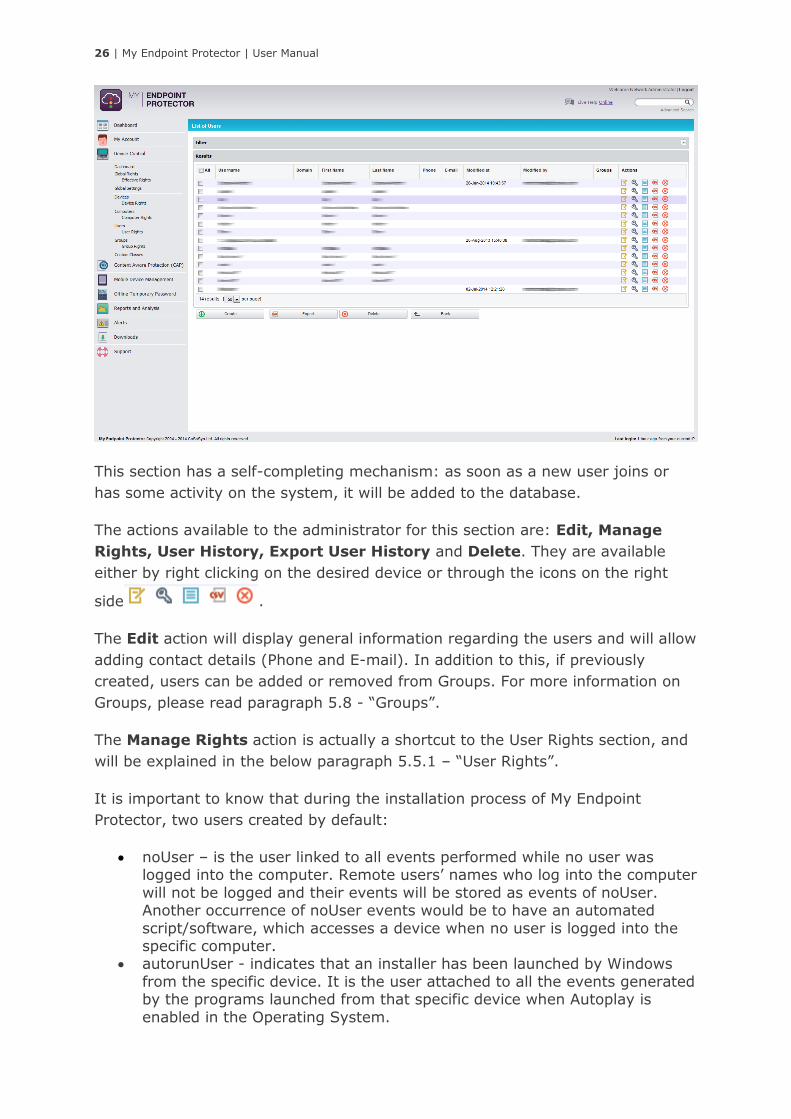
This section has a self-completing mechanism: as soon as a new user joins or
has some activity on the system, it will be added to the database.
The actions available to the administrator for this section are: Edit, Manage
Rights, User History, Export User History and Delete. They are available
either by right clicking on the desired device or through the icons on the right
side .
The Edit action will display general information regarding the users and will allow
adding contact details (Phone and E-mail). In addition to this, if previously
created, users can be added or removed from Groups. For more information on
Groups, please read paragraph 5.8 - “Groups”.
The Manage Rights action is actually a shortcut to the User Rights section, and
will be explained in the below paragraph 5.5.1 – “User Rights”.
It is important to know that during the installation process of My Endpoint
Protector, two users created by default:
• noUser – is the user linked to all events performed while no user was logged into the computer. Remote users’ names who log into the computer
will not be logged and their events will be stored as events of noUser. Another occurrence of noUser events would be to have an automated
script/software, which accesses a device when no user is logged into the specific computer.
• autorunUser - indicates that an installer has been launched by Windows
from the specific device. It is the user attached to all the events generated by the programs launched from that specific device when Autoplay is
enabled in the Operating System.
27 | My Endpoint Protector | User Manual
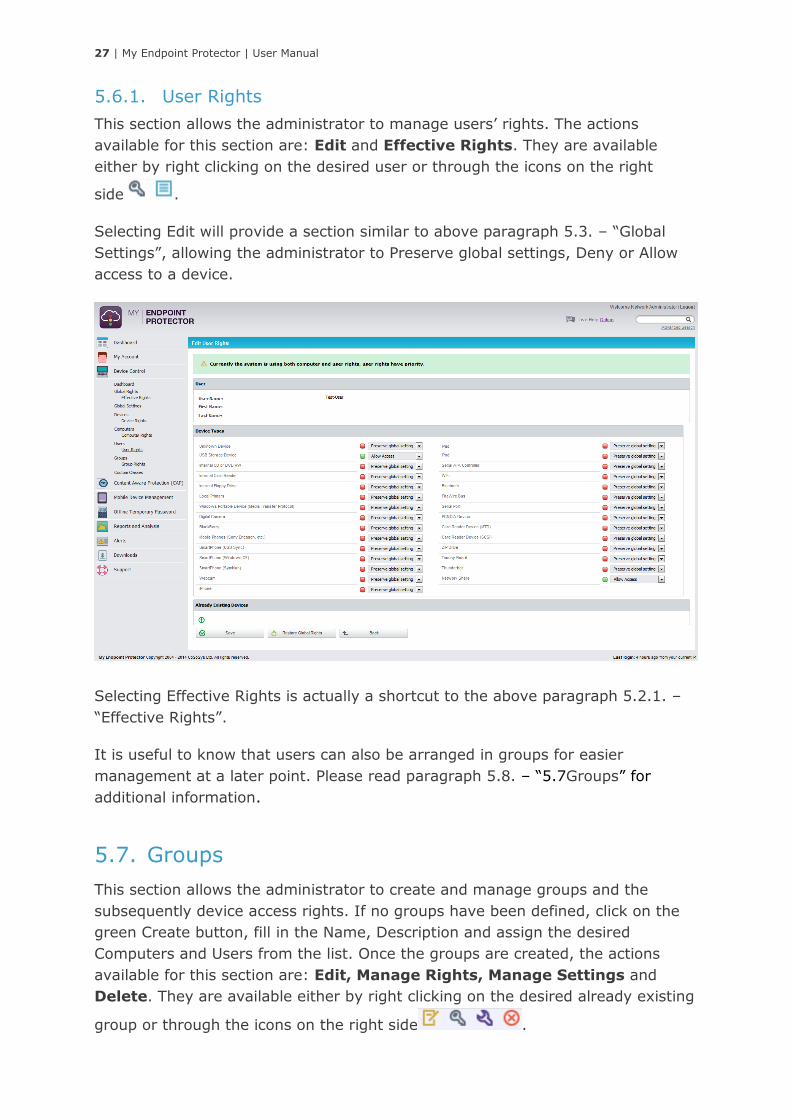
5.6.1. User Rights
This section allows the administrator to manage users’ rights. The actions
available for this section are: Edit and Effective Rights. They are available
either by right clicking on the desired user or through the icons on the right
side .
Selecting Edit will provide a section similar to above paragraph 5.3. – “Global
Settings”, allowing the administrator to Preserve global settings, Deny or Allow
access to a device.
Selecting Effective Rights is actually a shortcut to the above paragraph 5.2.1. –
“Effective Rights”.
It is useful to know that users can also be arranged in groups for easier
management at a later point. Please read paragraph 5.8. – “5.7Groups” for
additional information.
5.7. Groups
This section allows the administrator to create and manage groups and the
subsequently device access rights. If no groups have been defined, click on the
green Create button, fill in the Name, Description and assign the desired
Computers and Users from the list. Once the groups are created, the actions
available for this section are: Edit, Manage Rights, Manage Settings and
Delete. They are available either by right clicking on the desired already existing
group or through the icons on the right side .
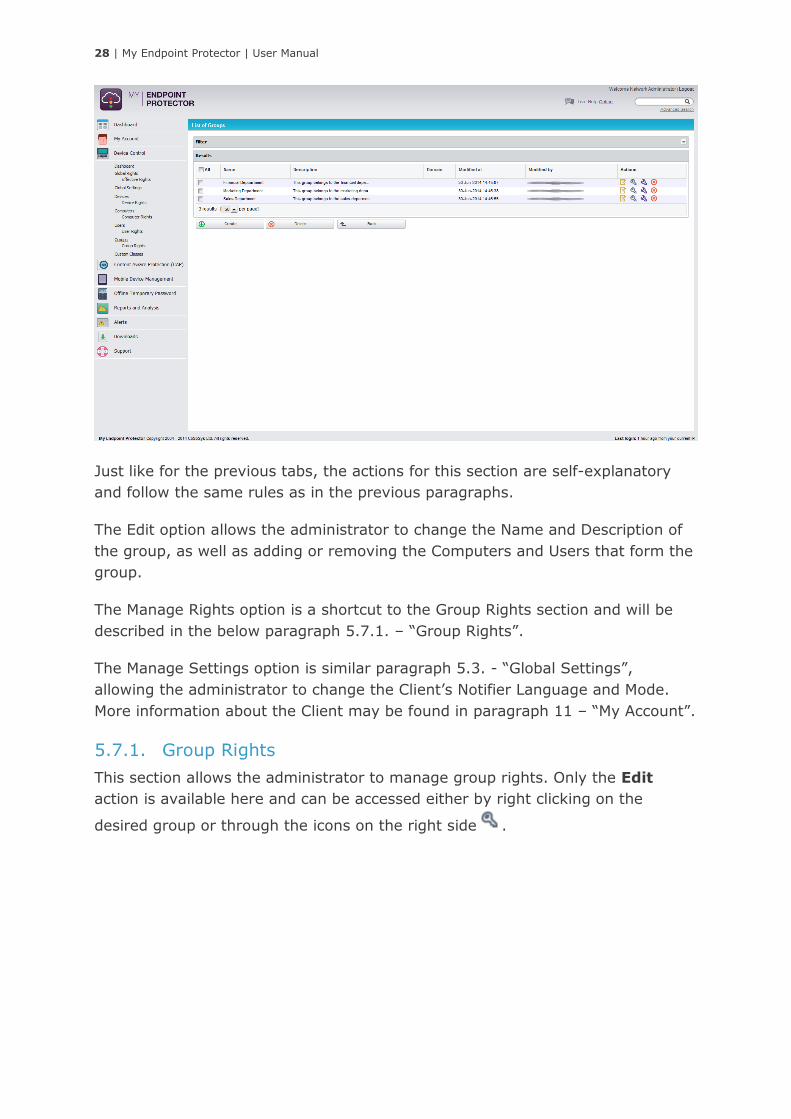
28 | My Endpoint Protector | User Manual
Just like for the previous tabs, the actions for this section are self-explanatory
and follow the same rules as in the previous paragraphs.
The Edit option allows the administrator to change the Name and Description of
the group, as well as adding or removing the Computers and Users that form the
group.
The Manage Rights option is a shortcut to the Group Rights section and will be
described in the below paragraph 5.7.1. – “Group Rights”.
The Manage Settings option is similar paragraph 5.3. - “Global Settings”,
allowing the administrator to change the Client’s Notifier Language and Mode.
More information about the Client may be found in paragraph 11 – “My Account”.
5.7.1. Group Rights
This section allows the administrator to manage group rights. Only the Edit
action is available here and can be accessed either by right clicking on the
desired group or through the icons on the right side .

29 | My Endpoint Protector | User Manual
The administrator can choose to Preserve global settings, Deny or Allow access
to a device, for any given group.
5.8. Custom Classes
This section is responsible for creating new classes of devices for an easier
management throughout the system. It is a powerful function especially for
devices belonging to the same vendor and/or being the same product (same VID
and/or PID).
By selecting Device Control > Custom Classes, the administrator is able to create
and edit custom classes by adding new entities to the existing ones.
30 | My Endpoint Protector | User Manual
6. Content Aware Protection
This module allows the administrator to setup and enforce strong content
filtering policies for selected users, computers or groups and control risks posed
by accidental or intentional file transfers of sensitive company data, such as:
• Personally Identifiable Information (PII): social security numbers (SSN),
driving license numbers, E-MAIL addresses, passport numbers, phone numbers etc.
• Financial and credit card information: credit card numbers for Visa, MasterCard, American Express, JCB, Discover Card, Diners Club, bank account numbers etc.
• Confidential files: sales and marketing reports, technical documents, accounting documents, customer databases etc.
To prevent sensitive data leakage, My Endpoint Protector closely monitors all
activity at endpoints and other exit points:
• Transfers on portable storage and other media devices (USB Drives,
external hard-disks, CDs, DVDs, SD cards etc.), either directly or through
encryption software (e.g. EasyLock)
• Transfers on Local Networks
• Transfers via Internet (E-MAIL clients, file sharing application, Web
Browsers, Instant Messaging, Social Media)
• Transfers to the cloud (iCloud, Google Drive, Dropbox, Microsoft SkyDrive)
• Transfers to Printers
• Transfers through Copy & Paste / Cut & Paste
• Print screens
Note! The Content Aware Protection feature requires separate licensing, in
addition to the My Endpoint Protector license for Device Control.
31 | My Endpoint Protector | User Manual
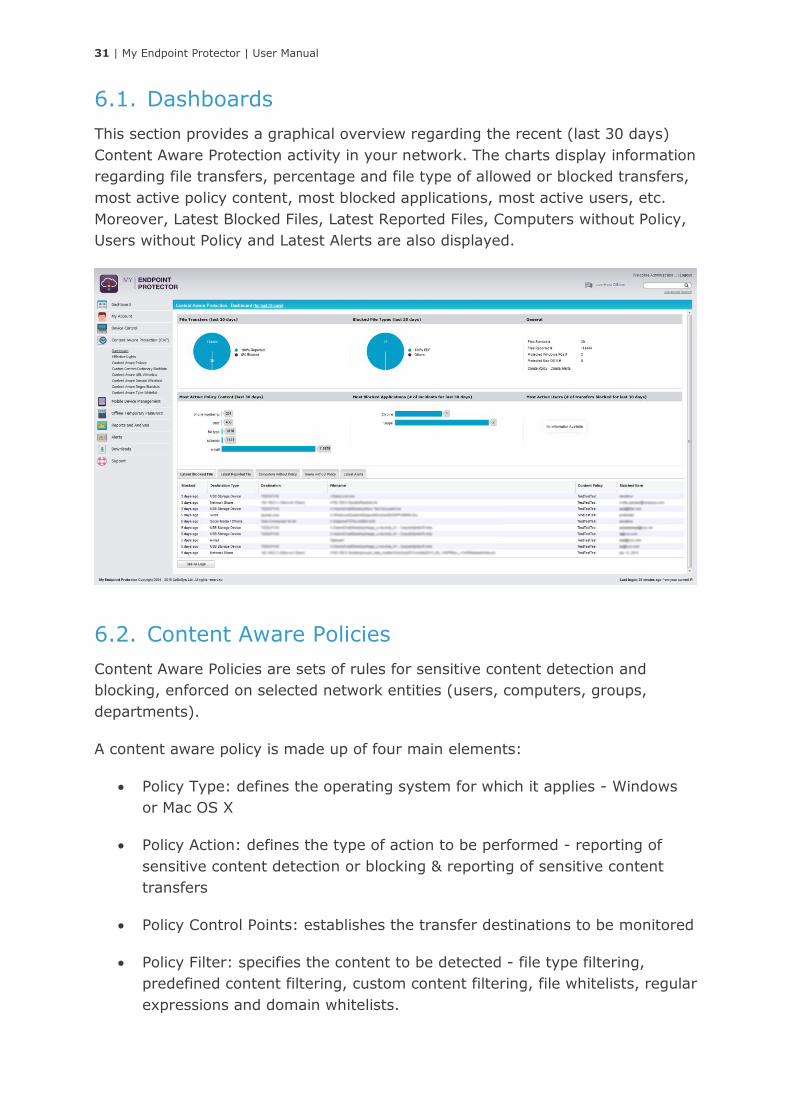
6.1. Dashboards
This section provides a graphical overview regarding the recent (last 30 days)
Content Aware Protection activity in your network. The charts display information
regarding file transfers, percentage and file type of allowed or blocked transfers,
most active policy content, most blocked applications, most active users, etc.
Moreover, Latest Blocked Files, Latest Reported Files, Computers without Policy,
Users without Policy and Latest Alerts are also displayed.
6.2. Content Aware Policies
Content Aware Policies are sets of rules for sensitive content detection and
blocking, enforced on selected network entities (users, computers, groups,
departments).
A content aware policy is made up of four main elements:
• Policy Type: defines the operating system for which it applies - Windows
or Mac OS X
• Policy Action: defines the type of action to be performed - reporting of
sensitive content detection or blocking & reporting of sensitive content
transfers
• Policy Control Points: establishes the transfer destinations to be monitored
• Policy Filter: specifies the content to be detected - file type filtering,
predefined content filtering, custom content filtering, file whitelists, regular
expressions and domain whitelists.

32 | My Endpoint Protector | User Manual
For example, a policy can be setup for the Financial Department of the company
to block Excel reports sent via E-mail or to report all transfers of files containing
personally identifiable and financial information (e.g. credit card numbers, E-
mails, phone numbers, social security numbers etc.).
Additionally, each company can define its own sensitive content data lists as
Custom Content Dictionaries corresponding to their specific domain of activity,
targeted industry and roles. To ease this task, the Content Aware Protection
module comes with a predefined Custom Content Dictionary that covers the most
used sets of confidential terms and expressions.
Identical to the Device Control policies, the Content Aware policies continue to be
enforced on a computer even after it is disconnected from the company network.
6.2.1. Creating new policies
The administrator can easily create and manage Content Aware Policies from the
Content Aware Protection > Content Aware Policies tab.
33 | My Endpoint Protector | User Manual
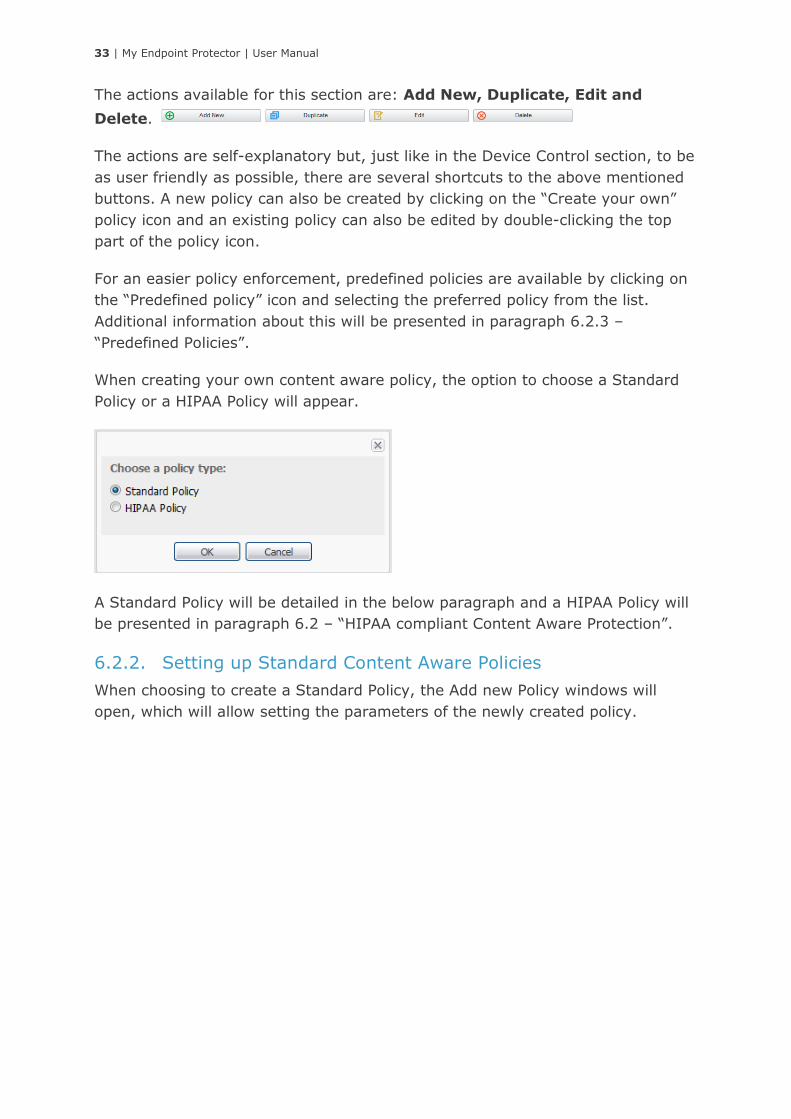
The actions available for this section are: Add New, Duplicate, Edit and
Delete.
The actions are self-explanatory but, just like in the Device Control section, to be
as user friendly as possible, there are several shortcuts to the above mentioned
buttons. A new policy can also be created by clicking on the “Create your own”
policy icon and an existing policy can also be edited by double-clicking the top
part of the policy icon.
For an easier policy enforcement, predefined policies are available by clicking on
the “Predefined policy” icon and selecting the preferred policy from the list.
Additional information about this will be presented in paragraph 6.2.3 –
“Predefined Policies”.
When creating your own content aware policy, the option to choose a Standard
Policy or a HIPAA Policy will appear.
A Standard Policy will be detailed in the below paragraph and a HIPAA Policy will
be presented in paragraph 6.2 – “HIPAA compliant Content Aware Protection”.
6.2.2. Setting up Standard Content Aware Policies
When choosing to create a Standard Policy, the Add new Policy windows will
open, which will allow setting the parameters of the newly created policy.
34 | My Endpoint Protector | User Manual
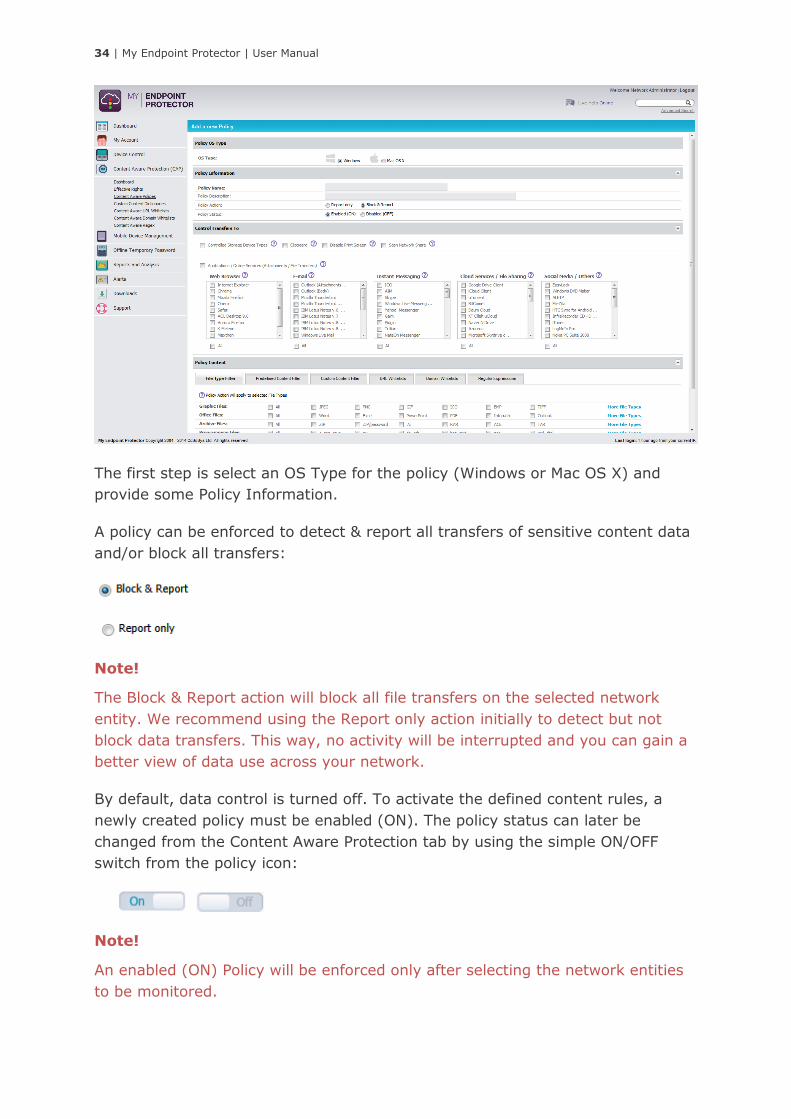
The first step is select an OS Type for the policy (Windows or Mac OS X) and
provide some Policy Information.
A policy can be enforced to detect & report all transfers of sensitive content data
and/or block all transfers:
Note!
The Block & Report action will block all file transfers on the selected network
entity. We recommend using the Report only action initially to detect but not
block data transfers. This way, no activity will be interrupted and you can gain a
better view of data use across your network.
By default, data control is turned off. To activate the defined content rules, a
newly created policy must be enabled (ON). The policy status can later be
changed from the Content Aware Protection tab by using the simple ON/OFF
switch from the policy icon:
Note!
An enabled (ON) Policy will be enforced only after selecting the network entities
to be monitored.
35 | My Endpoint Protector | User Manual
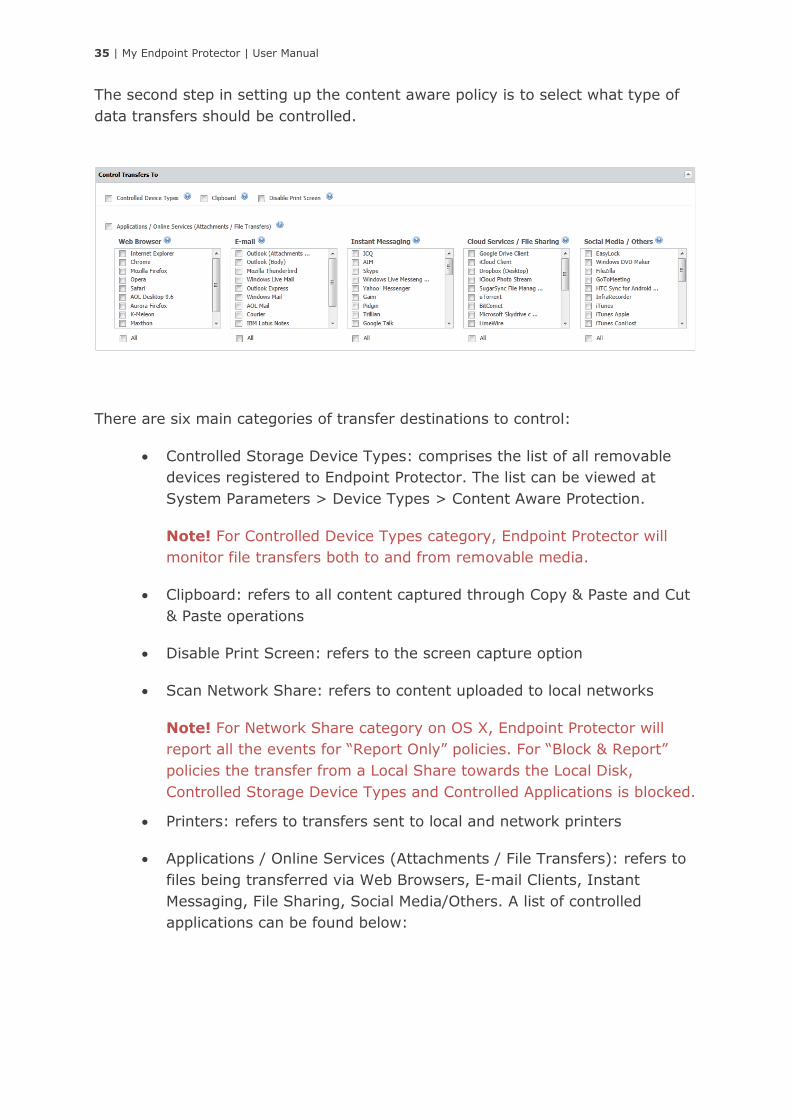
The second step in setting up the content aware policy is to select what type of
data transfers should be controlled.
There are six main categories of transfer destinations to control:
• Controlled Storage Device Types: comprises the list of all removable
devices registered to Endpoint Protector. The list can be viewed at
System Parameters > Device Types > Content Aware Protection.
Note! For Controlled Device Types category, Endpoint Protector will
monitor file transfers both to and from removable media.
• Clipboard: refers to all content captured through Copy & Paste and Cut
& Paste operations
• Disable Print Screen: refers to the screen capture option
• Scan Network Share: refers to content uploaded to local networks
Note! For Network Share category on OS X, Endpoint Protector will
report all the events for “Report Only” policies. For “Block & Report”
policies the transfer from a Local Share towards the Local Disk,
Controlled Storage Device Types and Controlled Applications is blocked.
• Printers: refers to transfers sent to local and network printers
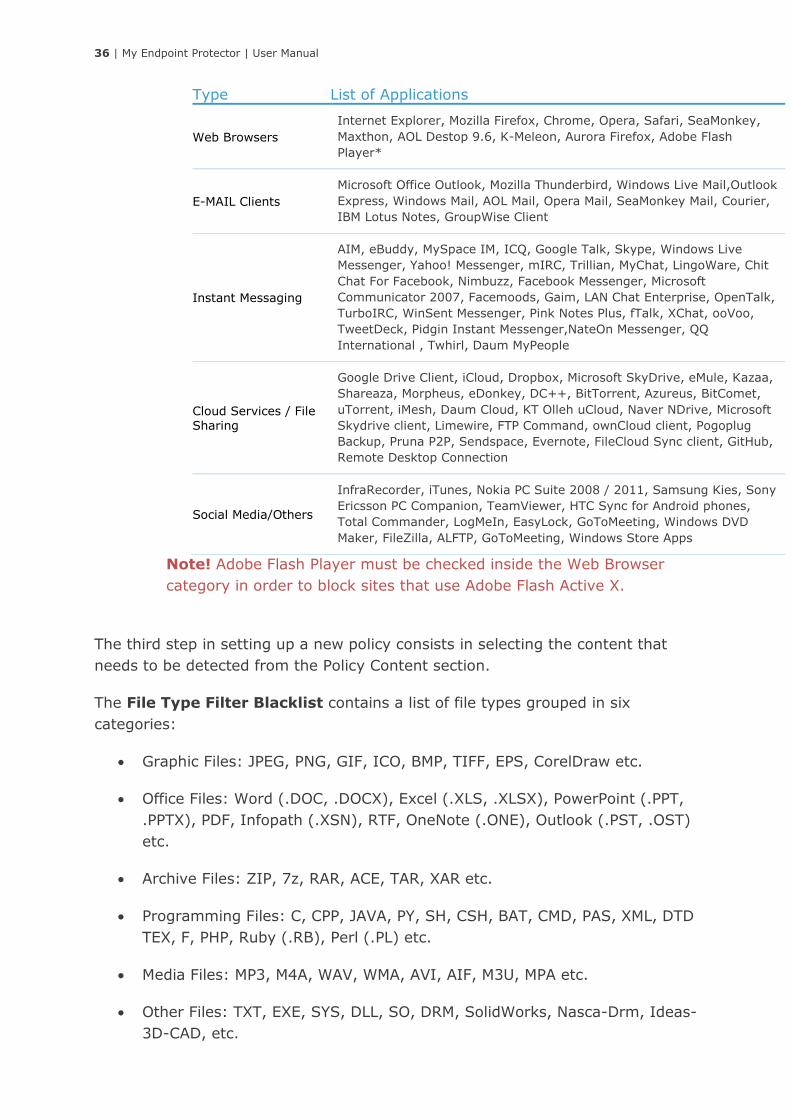
• Applications / Online Services (Attachments / File Transfers): refers to
files being transferred via Web Browsers, E-mail Clients, Instant
Messaging, File Sharing, Social Media/Others. A list of controlled
applications can be found below:
36 | My Endpoint Protector | User Manual
Type List of Applications
Web Browsers
Internet Explorer, Mozilla Firefox, Chrome, Opera, Safari, SeaMonkey,
Maxthon, AOL Destop 9.6, K-Meleon, Aurora Firefox, Adobe Flash
Player*
E-MAIL Clients
Microsoft Office Outlook, Mozilla Thunderbird, Windows Live Mail,Outlook
Express, Windows Mail, AOL Mail, Opera Mail, SeaMonkey Mail, Courier,
IBM Lotus Notes, GroupWise Client
Instant Messaging
AIM, eBuddy, MySpace IM, ICQ, Google Talk, Skype, Windows Live
Messenger, Yahoo! Messenger, mIRC, Trillian, MyChat, LingoWare, Chit
Chat For Facebook, Nimbuzz, Facebook Messenger, Microsoft
Communicator 2007, Facemoods, Gaim, LAN Chat Enterprise, OpenTalk,
TurboIRC, WinSent Messenger, Pink Notes Plus, fTalk, XChat, ooVoo,
TweetDeck, Pidgin Instant Messenger,NateOn Messenger, QQ
International , Twhirl, Daum MyPeople
Cloud Services / File Sharing
Google Drive Client, iCloud, Dropbox, Microsoft SkyDrive, eMule, Kazaa,
Shareaza, Morpheus, eDonkey, DC++, BitTorrent, Azureus, BitComet,
uTorrent, iMesh, Daum Cloud, KT Olleh uCloud, Naver NDrive, Microsoft
Skydrive client, Limewire, FTP Command, ownCloud client, Pogoplug
Backup, Pruna P2P, Sendspace, Evernote, FileCloud Sync client, GitHub,
Remote Desktop Connection
Social Media/Others
InfraRecorder, iTunes, Nokia PC Suite 2008 / 2011, Samsung Kies, Sony
Ericsson PC Companion, TeamViewer, HTC Sync for Android phones,
Total Commander, LogMeIn, EasyLock, GoToMeeting, Windows DVD
Maker, FileZilla, ALFTP, GoToMeeting, Windows Store Apps
Note! Adobe Flash Player must be checked inside the Web Browser
category in order to block sites that use Adobe Flash Active X.
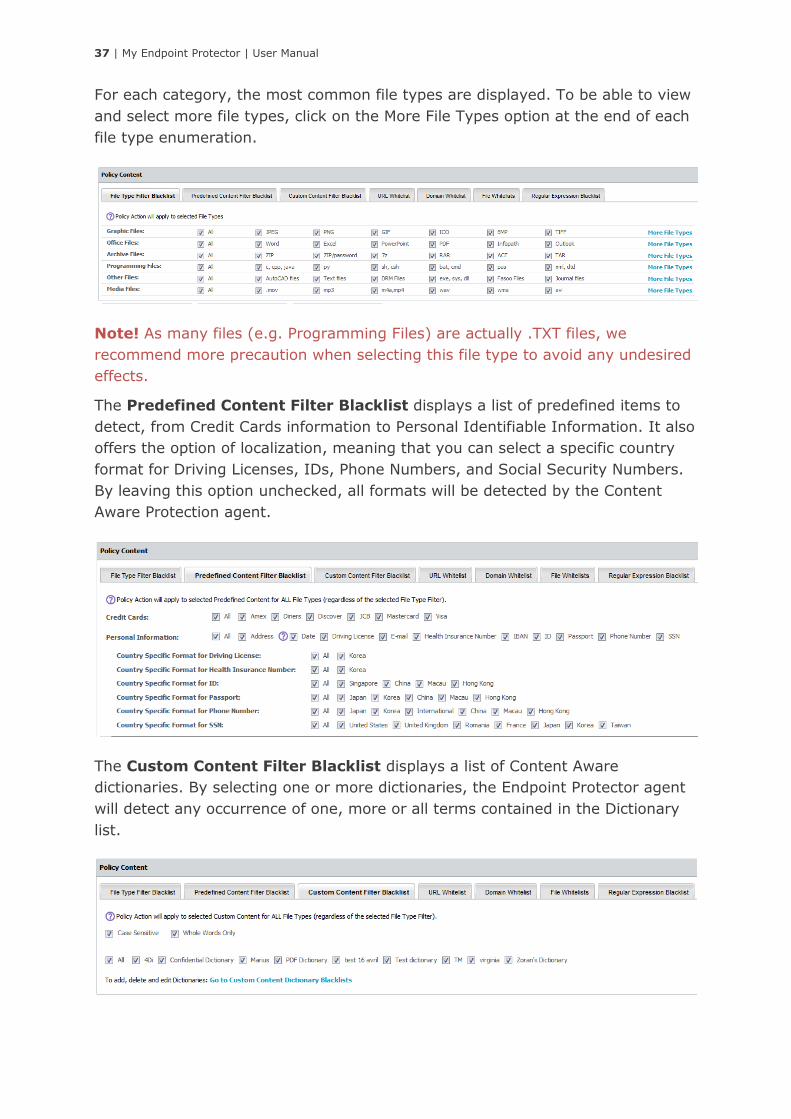
The third step in setting up a new policy consists in selecting the content that
needs to be detected from the Policy Content section.
The File Type Filter Blacklist contains a list of file types grouped in six
categories:
• Graphic Files: JPEG, PNG, GIF, ICO, BMP, TIFF, EPS, CorelDraw etc.
• Office Files: Word (.DOC, .DOCX), Excel (.XLS, .XLSX), PowerPoint (.PPT,
.PPTX), PDF, Infopath (.XSN), RTF, OneNote (.ONE), Outlook (.PST, .OST)
etc.
• Archive Files: ZIP, 7z, RAR, ACE, TAR, XAR etc.
• Programming Files: C, CPP, JAVA, PY, SH, CSH, BAT, CMD, PAS, XML, DTD
TEX, F, PHP, Ruby (.RB), Perl (.PL) etc.
• Media Files: MP3, M4A, WAV, WMA, AVI, AIF, M3U, MPA etc.
• Other Files: TXT, EXE, SYS, DLL, SO, DRM, SolidWorks, Nasca-Drm, Ideas-
3D-CAD, etc.
37 | My Endpoint Protector | User Manual
For each category, the most common file types are displayed. To be able to view
and select more file types, click on the More File Types option at the end of each
file type enumeration.
Note! As many files (e.g. Programming Files) are actually .TXT files, we
recommend more precaution when selecting this file type to avoid any undesired
effects.
The Predefined Content Filter Blacklist displays a list of predefined items to
detect, from Credit Cards information to Personal Identifiable Information. It also
offers the option of localization, meaning that you can select a specific country
format for Driving Licenses, IDs, Phone Numbers, and Social Security Numbers.
By leaving this option unchecked, all formats will be detected by the Content
Aware Protection agent.
The Custom Content Filter Blacklist displays a list of Content Aware
dictionaries. By selecting one or more dictionaries, the Endpoint Protector agent
will detect any occurrence of one, more or all terms contained in the Dictionary
list.

38 | My Endpoint Protector | User Manual
By checking the Case Sensitive option, the agent can differentiate the uppercase
and lowercase letters when inspecting the content.
If the Whole Words Only option is marked, terms from the inspected content are
detected only if they are an identical match with the ones that appear in the
dictionary (e.g. „age“ is in the Dictionary; variations like „aged“, „agent“,
„agency“ etc. will not be reported/blocked).
For e better usability, there is a shortcut to the Custom Content Dictionary
Blacklists tab where dictionaries can be added, edited or deleted. This will be
detailed in paragraph 6.3 – “Custom Content Dictionary Blacklists”.
The URL Whitelist displays a list of URL whitelists. By selecting one or more
whitelists, the Endpoint Protector agent will not scan uploads or attachments to
the web addresses present in the whitelists. Whitelisting works only for Internet
Explorer.
Similar to othe sections, a shortcut to the Content Aware URL Whitelists is
available. More information will detailed in paragraph 6.4 – “Content Aware URL
Whitelists”.
The Domain Whitelist displays a list of domain whitelists. By selecting one or
more whitelists, the Endpoint Protector agent will not scan mails sent to the
recipients or domains present in the whitelists. Whitelisting works for Microsoft
Outlook and Mozilla Thunderbird.
Information on how to add, delete or edit domain whitelists will be presented in
paragraph 6.5 – “Content Aware Domain Whitelists”.
The Regular Expressions shows the list of the created regular expressions and
the administrator can select up to five (5) expressions.
39 | My Endpoint Protector | User Manual
The last step is creating and setting up a policy is to save all the changes.
Once a policy is created, it will be displayed inside the Policies List. To enforce a
content aware policy inside the network, one must select the specific policy that
they want to apply by clicking on it and check the corresponding boxes to the
network entity on which they want to apply the content rules. If a Content Aware
Policy was already enforced on a computer, user, group or department, when
clicking on it, the corresponding network entities on which it was applied will be
highlighted.
The administrator can be notified of each occurrence of an event described in a
newly created policy by setting up a Content Aware alert for that specific policy
from Alerts > Define Content Aware Alerts. Details on how to setup Alerts will be
detailed in paragraph 9 – “Alerts”.
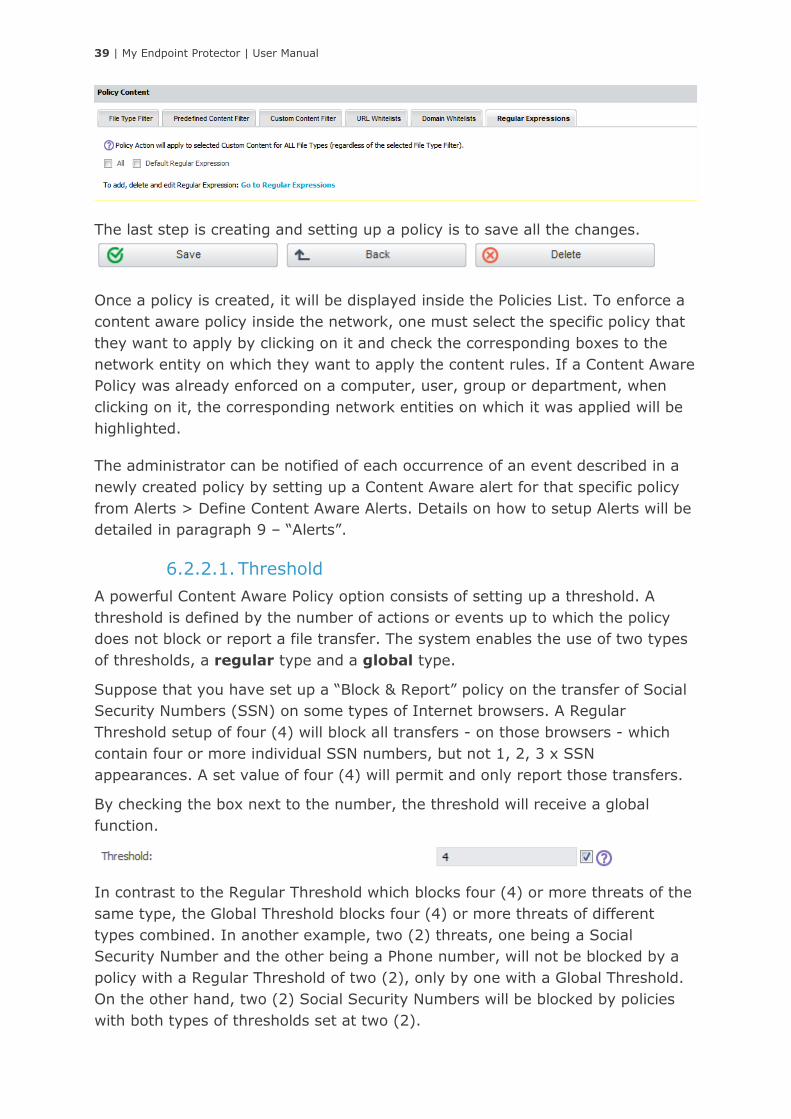
6.2.2.1. Threshold
A powerful Content Aware Policy option consists of setting up a threshold. A
threshold is defined by the number of actions or events up to which the policy
does not block or report a file transfer. The system enables the use of two types
of thresholds, a regular type and a global type.
Suppose that you have set up a “Block & Report” policy on the transfer of Social
Security Numbers (SSN) on some types of Internet browsers. A Regular
Threshold setup of four (4) will block all transfers - on those browsers - which
contain four or more individual SSN numbers, but not 1, 2, 3 x SSN
appearances. A set value of four (4) will permit and only report those transfers.
By checking the box next to the number, the threshold will receive a global
function.
In contrast to the Regular Threshold which blocks four (4) or more threats of the
same type, the Global Threshold blocks four (4) or more threats of different
types combined. In another example, two (2) threats, one being a Social
Security Number and the other being a Phone number, will not be blocked by a
policy with a Regular Threshold of two (2), only by one with a Global Threshold.
On the other hand, two (2) Social Security Numbers will be blocked by policies
with both types of thresholds set at two (2).
40 | My Endpoint Protector | User Manual
The info button next to the checkbox for the Global threshold provides more
examples related to the differences between the Regular and the Global
Threshold.
Note!
Enabling the threshold option will produce no effect when the Policy Action is set
on “Report Only”.
The Threshold option applies only on the “Predefined Content” filter of the
Content Aware Protection module and to the “Personal Information” and
“Internet Protocol (IP) addresses” filters of the HIPAA Content Aware Protection
policies.
As a general rule, it is recommended that “Block & Report” policies that use the
Threshold should be placed with higher priority than “Report Only” policies.
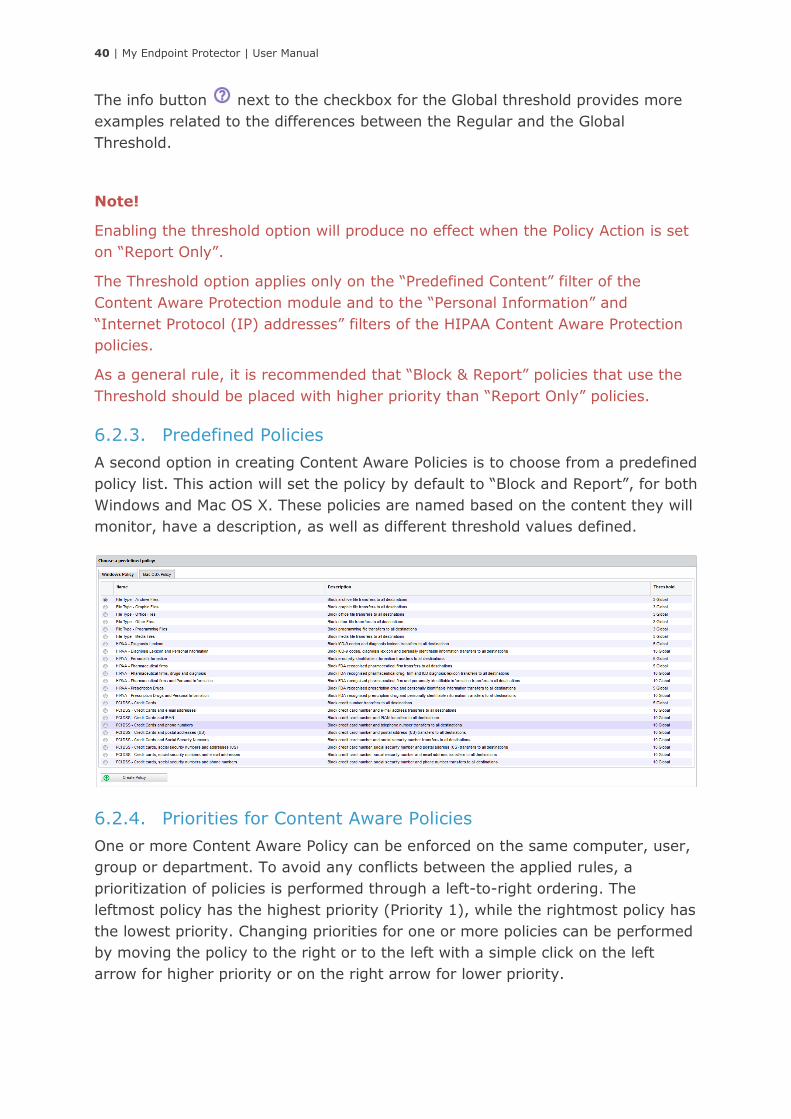
6.2.3. Predefined Policies
A second option in creating Content Aware Policies is to choose from a predefined
policy list. This action will set the policy by default to “Block and Report”, for both
Windows and Mac OS X. These policies are named based on the content they will
monitor, have a description, as well as different threshold values defined.
6.2.4. Priorities for Content Aware Policies
One or more Content Aware Policy can be enforced on the same computer, user,
group or department. To avoid any conflicts between the applied rules, a
prioritization of policies is performed through a left-to-right ordering. The
leftmost policy has the highest priority (Priority 1), while the rightmost policy has
the lowest priority. Changing priorities for one or more policies can be performed
by moving the policy to the right or to the left with a simple click on the left
arrow for higher priority or on the right arrow for lower priority.
41 | My Endpoint Protector | User Manual
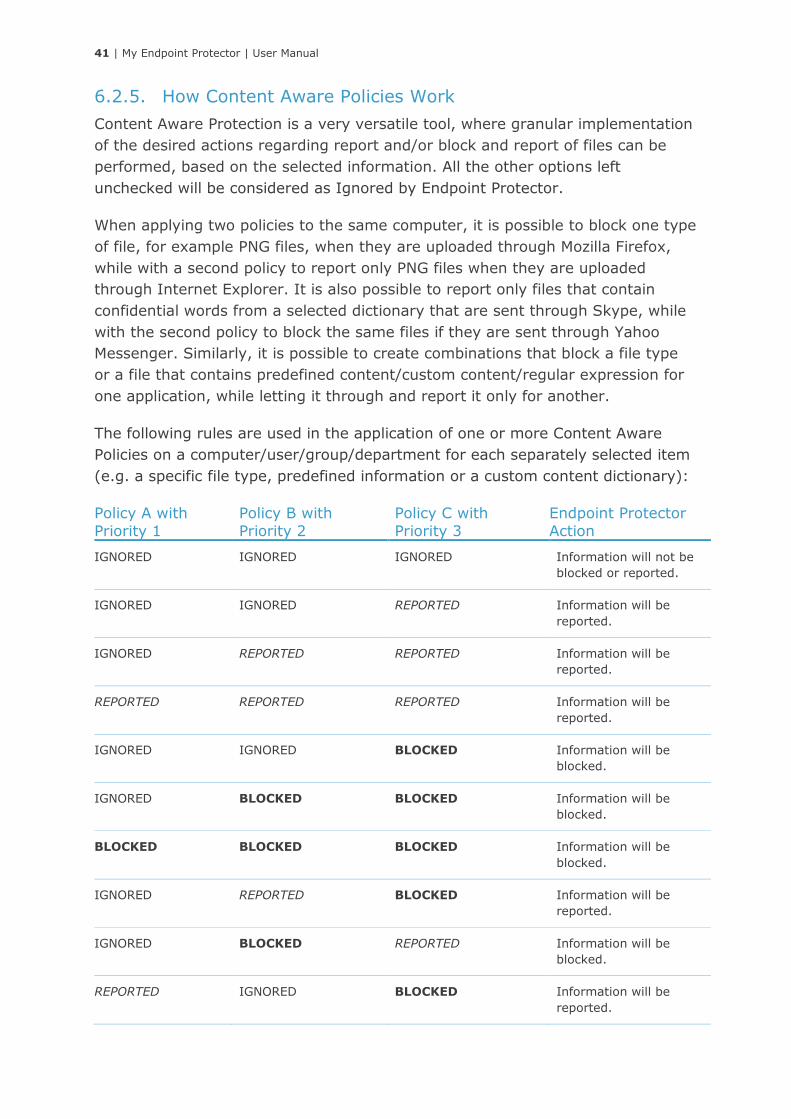
6.2.5. How Content Aware Policies Work
Content Aware Protection is a very versatile tool, where granular implementation
of the desired actions regarding report and/or block and report of files can be
performed, based on the selected information. All the other options left
unchecked will be considered as Ignored by Endpoint Protector.
When applying two policies to the same computer, it is possible to block one type
of file, for example PNG files, when they are uploaded through Mozilla Firefox,
while with a second policy to report only PNG files when they are uploaded
through Internet Explorer. It is also possible to report only files that contain
confidential words from a selected dictionary that are sent through Skype, while
with the second policy to block the same files if they are sent through Yahoo
Messenger. Similarly, it is possible to create combinations that block a file type
or a file that contains predefined content/custom content/regular expression for
one application, while letting it through and report it only for another.
The following rules are used in the application of one or more Content Aware
Policies on a computer/user/group/department for each separately selected item
(e.g. a specific file type, predefined information or a custom content dictionary):
Policy A with
Priority 1
Policy B with
Priority 2
Policy C with
Priority 3
Endpoint Protector
Action
IGNORED IGNORED IGNORED Information will not be
blocked or reported.
IGNORED IGNORED REPORTED Information will be
reported.
IGNORED REPORTED REPORTED Information will be
reported.
REPORTED REPORTED REPORTED Information will be
reported.
IGNORED IGNORED BLOCKED Information will be
blocked.
IGNORED BLOCKED BLOCKED Information will be
blocked.
BLOCKED BLOCKED BLOCKED Information will be
blocked.
IGNORED REPORTED BLOCKED Information will be
reported.
IGNORED BLOCKED REPORTED Information will be
blocked.
REPORTED IGNORED BLOCKED Information will be
reported.
42 | My Endpoint Protector | User Manual
BLOCKED IGNORED REPORTED Information will be
blocked.
REPORTED BLOCKED IGNORED Information will be
reported.
BLOCKED REPORTED IGNORED Information will be
blocked.
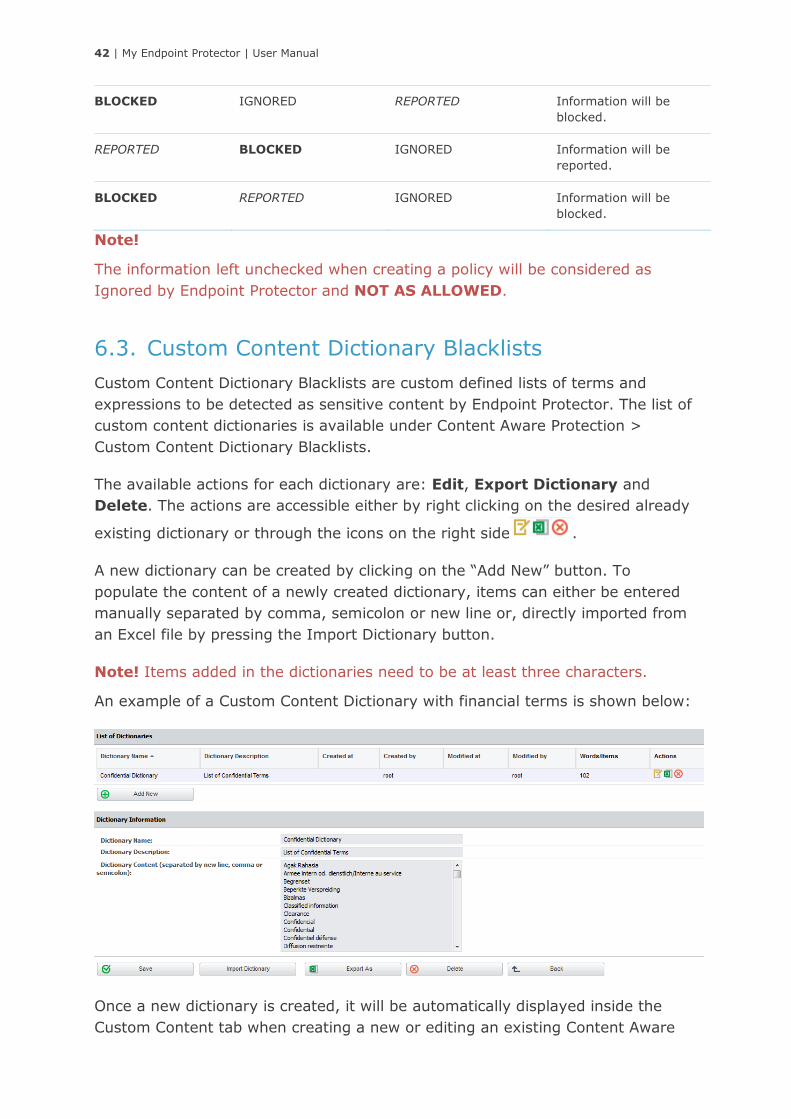
Note!
The information left unchecked when creating a policy will be considered as
Ignored by Endpoint Protector and NOT AS ALLOWED.
6.3. Custom Content Dictionary Blacklists
Custom Content Dictionary Blacklists are custom defined lists of terms and
expressions to be detected as sensitive content by Endpoint Protector. The list of
custom content dictionaries is available under Content Aware Protection >
Custom Content Dictionary Blacklists.
The available actions for each dictionary are: Edit, Export Dictionary and
Delete. The actions are accessible either by right clicking on the desired already
existing dictionary or through the icons on the right side .
A new dictionary can be created by clicking on the “Add New” button. To
populate the content of a newly created dictionary, items can either be entered
manually separated by comma, semicolon or new line or, directly imported from
an Excel file by pressing the Import Dictionary button.
Note! Items added in the dictionaries need to be at least three characters.
An example of a Custom Content Dictionary with financial terms is shown below:
Once a new dictionary is created, it will be automatically displayed inside the
Custom Content tab when creating a new or editing an existing Content Aware
43 | My Endpoint Protector | User Manual
Policy. In this way, the predefined set of dictionaries available Content Aware
Protection module can be extended and tailored to specific need.
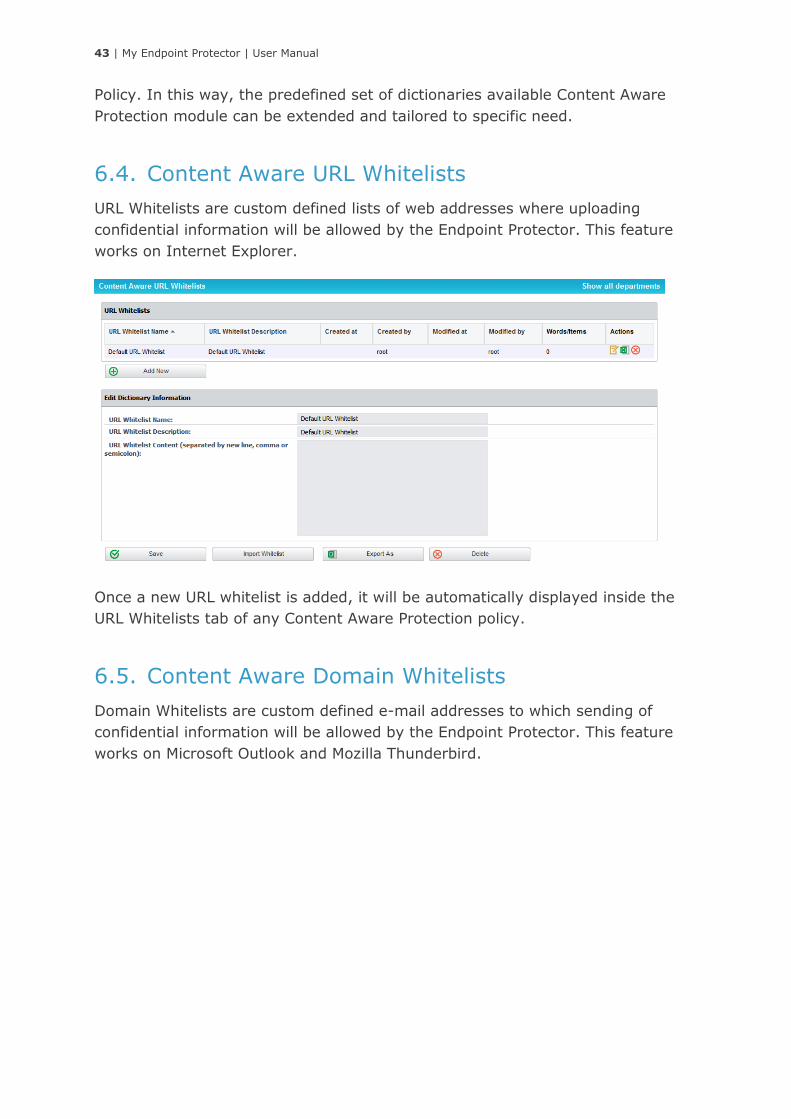
6.4. Content Aware URL Whitelists
URL Whitelists are custom defined lists of web addresses where uploading
confidential information will be allowed by the Endpoint Protector. This feature
works on Internet Explorer.
Once a new URL whitelist is added, it will be automatically displayed inside the
URL Whitelists tab of any Content Aware Protection policy.
6.5. Content Aware Domain Whitelists
Domain Whitelists are custom defined e-mail addresses to which sending of
confidential information will be allowed by the Endpoint Protector. This feature
works on Microsoft Outlook and Mozilla Thunderbird.

44 | My Endpoint Protector | User Manual
Once a new domain whitelist is added, it will be automatically displayed inside
the Domain Whitelists tab of any Content Aware Protection policy.
6.6. Content Aware Regex Blacklists
By definition, Regular Expressions are sequences of characters that form a
search pattern, mainly for use in pattern matching with strings. An administrator
can create a regular expression in order to find a certain recurrence in the data
that is transferred across the protected network.
Example that matches an e-mail: [-0-9a-zA-Z.+_]+@[-0-9a-zA-Z.+_]+\.[a-
zA-Z]{2,4}
Example that matches an IP: (25[0-5]|2[0-4][0-9]|[01]?[0-9][0-
9]?)(\.(25[0-5]|2[0-4][0-9]|[01]?[0-9][0-9]?)){3}
45 | My Endpoint Protector | User Manual
Note!
If possible, avoid using Regular Expressions, as their complexity typically
increases the resources usage. Using a large number of regular expressions as
filtering criteria typically increases CPU usage. Also, improper regular expressions
or improper use can have negative implications.
This feature is provided “as is” and requires advanced knowledge of the Regular
Expression syntax.
The regular expressions feature is provided with no direct support and it is the
responsibility of the customers to learn and implement regular expressions and
to thoroughly test.
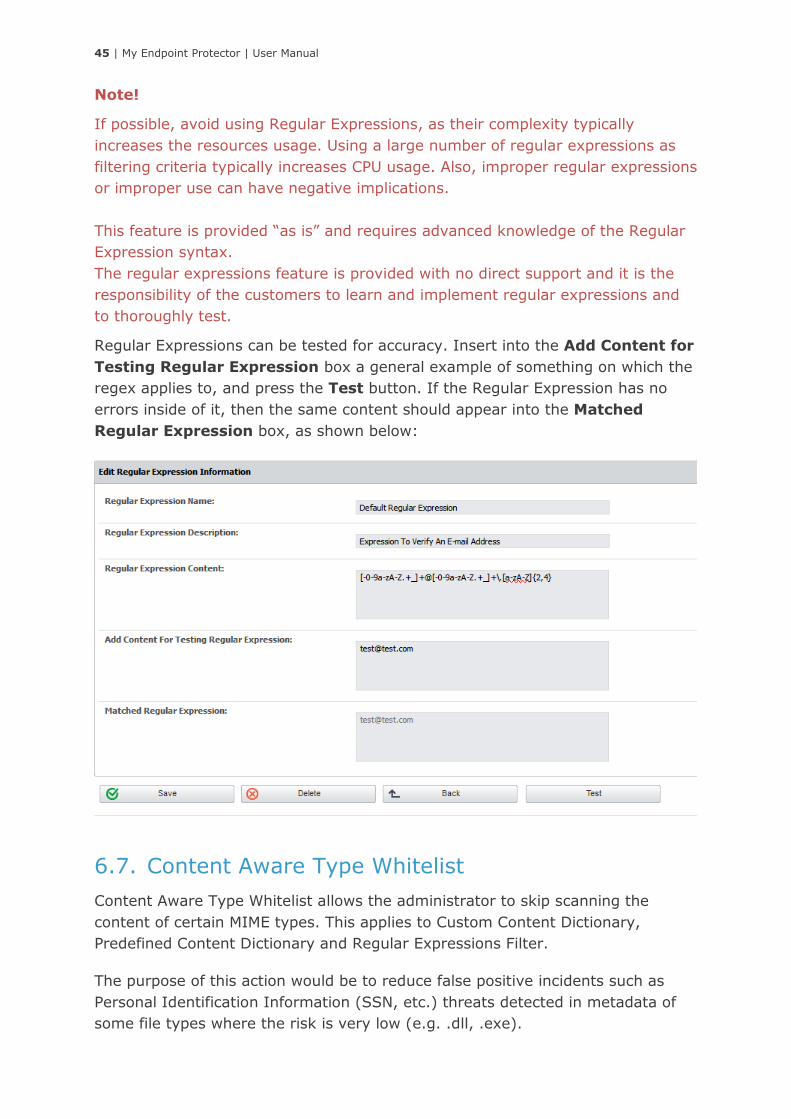
Regular Expressions can be tested for accuracy. Insert into the Add Content for
Testing Regular Expression box a general example of something on which the
regex applies to, and press the Test button. If the Regular Expression has no
errors inside of it, then the same content should appear into the Matched
Regular Expression box, as shown below:
6.7. Content Aware Type Whitelist
Content Aware Type Whitelist allows the administrator to skip scanning the
content of certain MIME types. This applies to Custom Content Dictionary,
Predefined Content Dictionary and Regular Expressions Filter.
The purpose of this action would be to reduce false positive incidents such as
Personal Identification Information (SSN, etc.) threats detected in metadata of
some file types where the risk is very low (e.g. .dll, .exe).
46 | My Endpoint Protector | User Manual
First, when using this feature, a Content Aware Policy that uses a Custom
Content Filter Blacklist has to be set up.
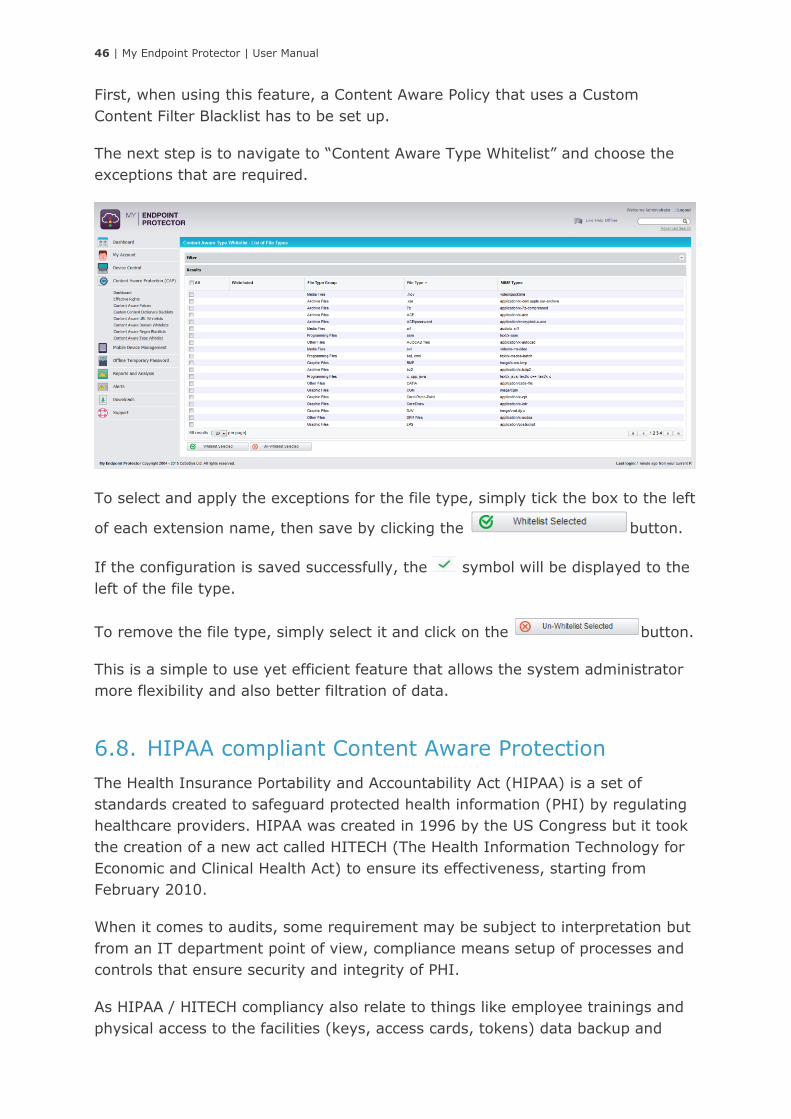
The next step is to navigate to “Content Aware Type Whitelist” and choose the
exceptions that are required.
To select and apply the exceptions for the file type, simply tick the box to the left
of each extension name, then save by clicking the button.
If the configuration is saved successfully, the symbol will be displayed to the
left of the file type.
To remove the file type, simply select it and click on the button.
This is a simple to use yet efficient feature that allows the system administrator
more flexibility and also better filtration of data.
6.8. HIPAA compliant Content Aware Protection
The Health Insurance Portability and Accountability Act (HIPAA) is a set of
standards created to safeguard protected health information (PHI) by regulating
healthcare providers. HIPAA was created in 1996 by the US Congress but it took
the creation of a new act called HITECH (The Health Information Technology for
Economic and Clinical Health Act) to ensure its effectiveness, starting from
February 2010.
When it comes to audits, some requirement may be subject to interpretation but
from an IT department point of view, compliance means setup of processes and
controls that ensure security and integrity of PHI.
As HIPAA / HITECH compliancy also relate to things like employee trainings and
physical access to the facilities (keys, access cards, tokens) data backup and
47 | My Endpoint Protector | User Manual
disposal, Data Loss Prevention and Mobile Device Management solutions cannot
solely ensure compliance.
6.8.1. How My Endpoint Protector is HIPAA compliant
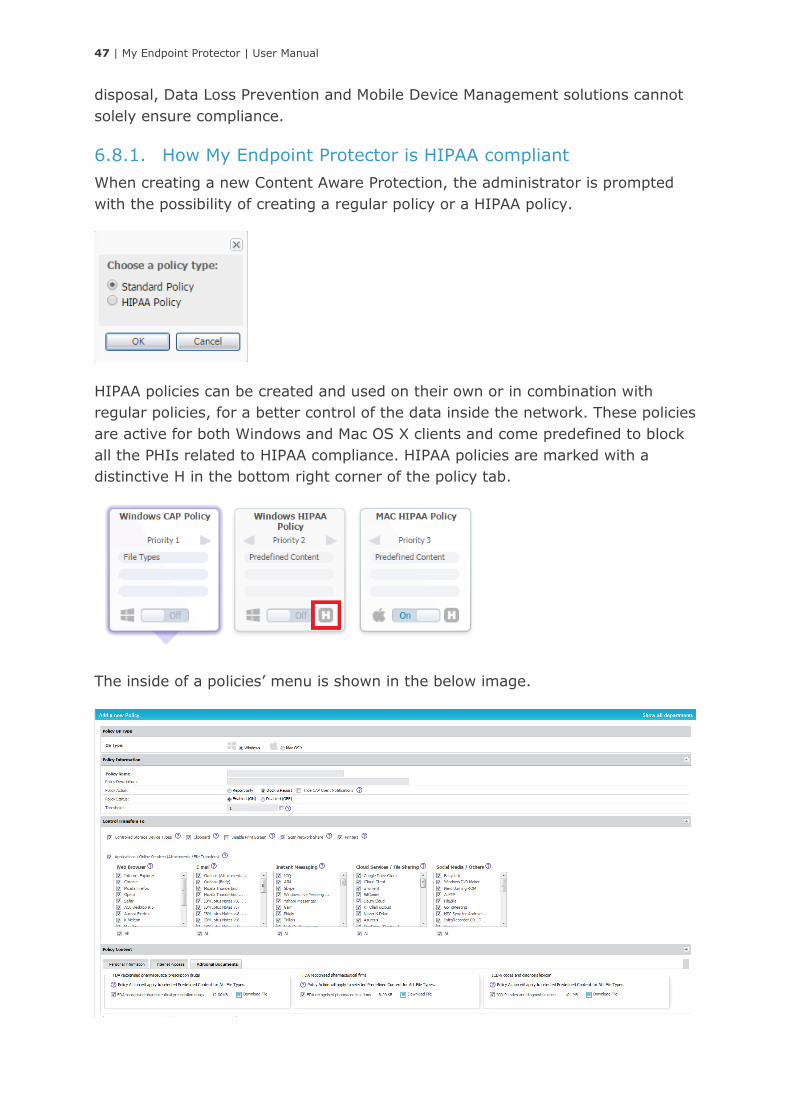
When creating a new Content Aware Protection, the administrator is prompted
with the possibility of creating a regular policy or a HIPAA policy.
HIPAA policies can be created and used on their own or in combination with
regular policies, for a better control of the data inside the network. These policies
are active for both Windows and Mac OS X clients and come predefined to block
all the PHIs related to HIPAA compliance. HIPAA policies are marked with a
distinctive H in the bottom right corner of the policy tab.
The inside of a policies’ menu is shown in the below image.
48 | My Endpoint Protector | User Manual
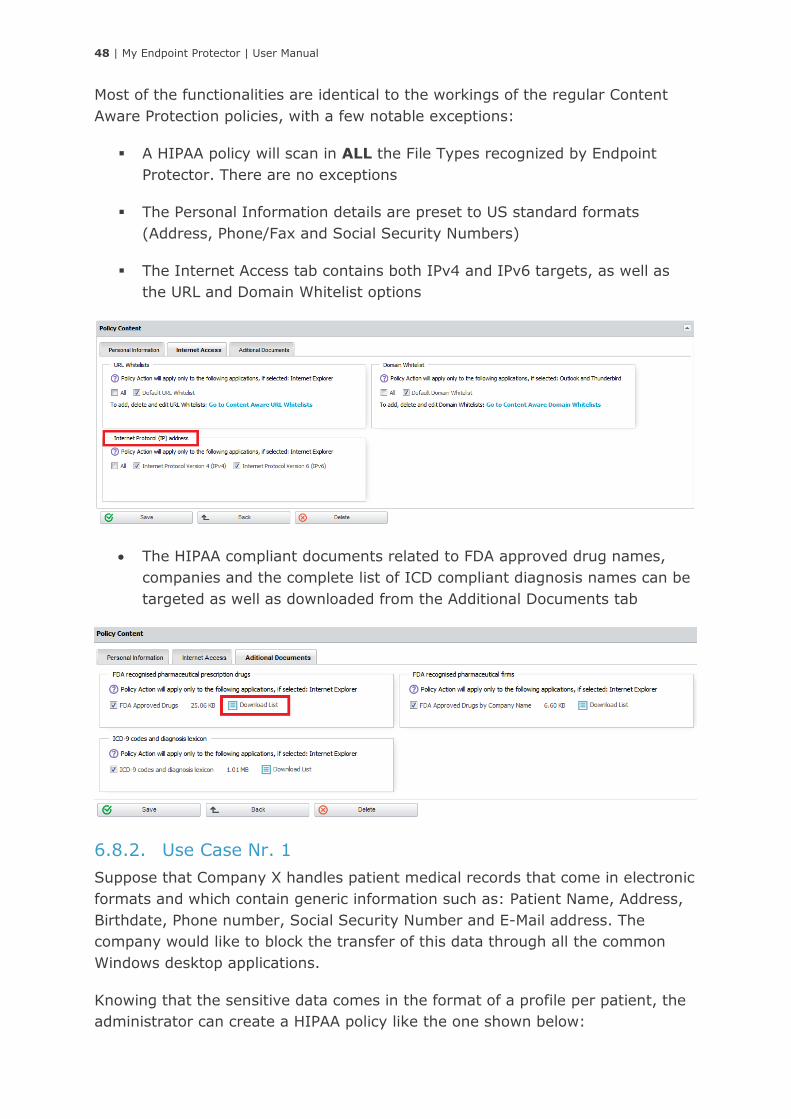
Most of the functionalities are identical to the workings of the regular Content
Aware Protection policies, with a few notable exceptions:
▪ A HIPAA policy will scan in ALL the File Types recognized by Endpoint
Protector. There are no exceptions
▪ The Personal Information details are preset to US standard formats
(Address, Phone/Fax and Social Security Numbers)
▪ The Internet Access tab contains both IPv4 and IPv6 targets, as well as
the URL and Domain Whitelist options
• The HIPAA compliant documents related to FDA approved drug names,
companies and the complete list of ICD compliant diagnosis names can be
targeted as well as downloaded from the Additional Documents tab
6.8.2. Use Case Nr. 1
Suppose that Company X handles patient medical records that come in electronic
formats and which contain generic information such as: Patient Name, Address,
Birthdate, Phone number, Social Security Number and E-Mail address. The
company would like to block the transfer of this data through all the common
Windows desktop applications.
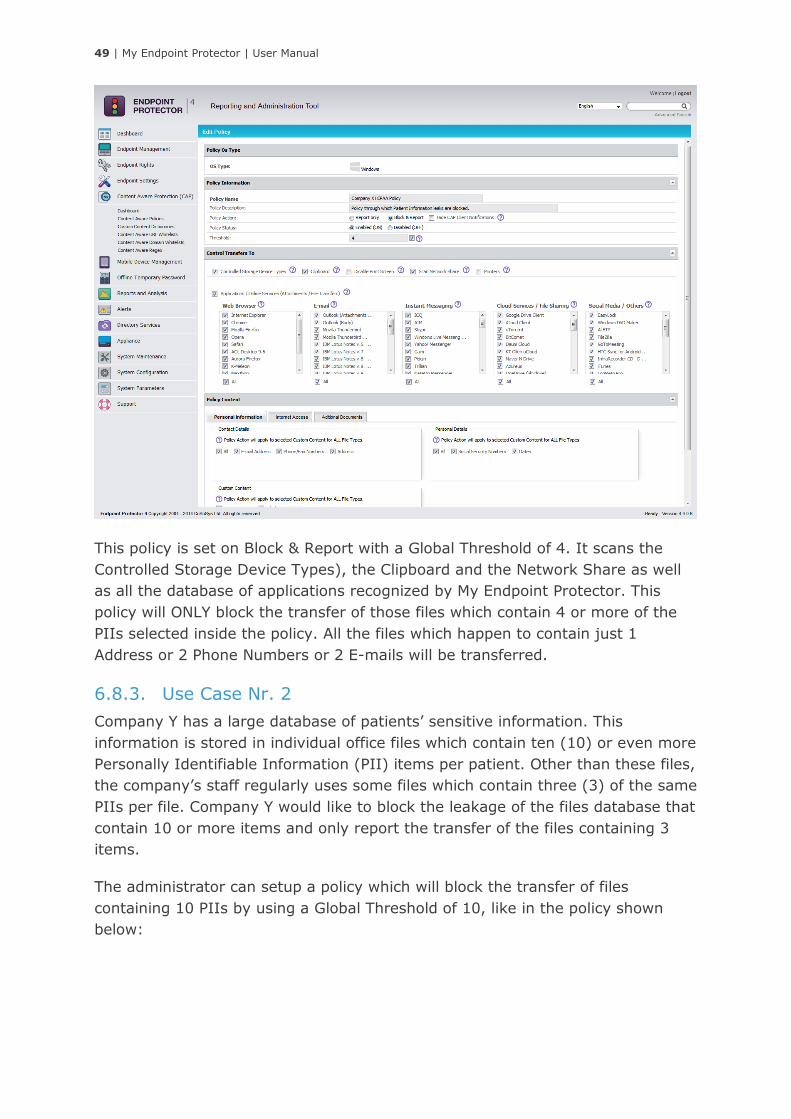
Knowing that the sensitive data comes in the format of a profile per patient, the
administrator can create a HIPAA policy like the one shown below:
49 | My Endpoint Protector | User Manual
This policy is set on Block & Report with a Global Threshold of 4. It scans the
Controlled Storage Device Types), the Clipboard and the Network Share as well
as all the database of applications recognized by My Endpoint Protector. This
policy will ONLY block the transfer of those files which contain 4 or more of the
PIIs selected inside the policy. All the files which happen to contain just 1
Address or 2 Phone Numbers or 2 E-mails will be transferred.
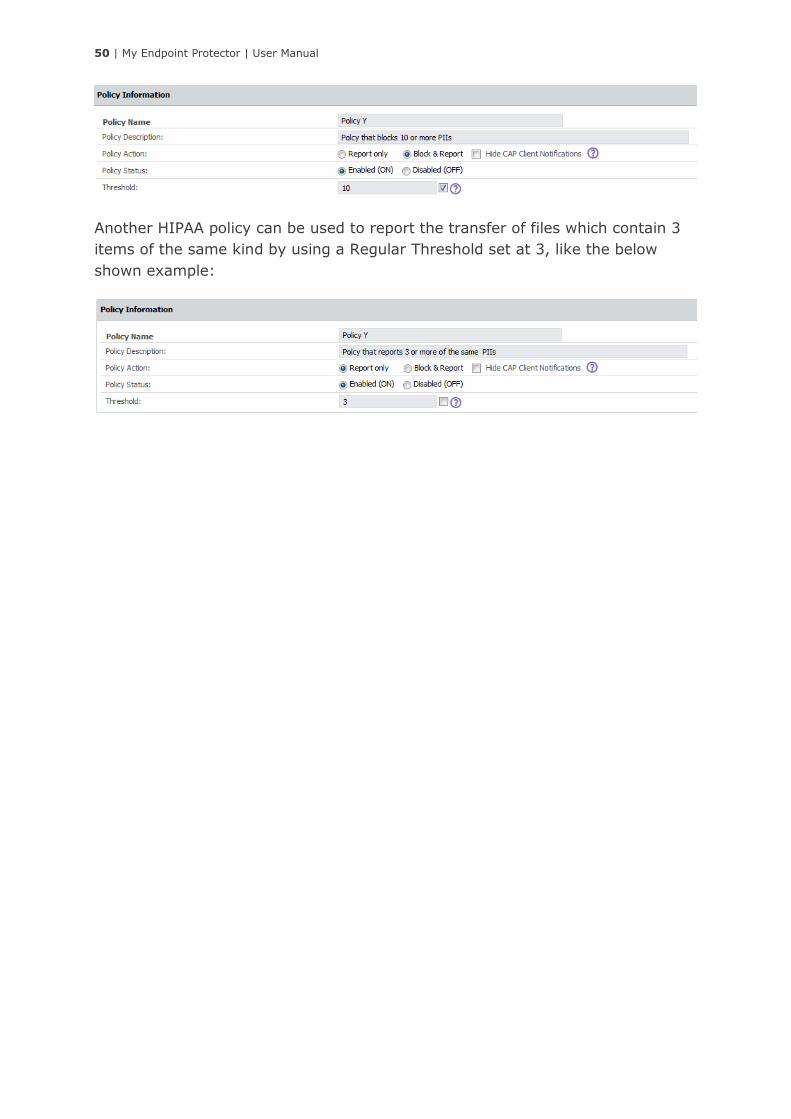
6.8.3. Use Case Nr. 2
Company Y has a large database of patients’ sensitive information. This
information is stored in individual office files which contain ten (10) or even more
Personally Identifiable Information (PII) items per patient. Other than these files,
the company’s staff regularly uses some files which contain three (3) of the same
PIIs per file. Company Y would like to block the leakage of the files database that
contain 10 or more items and only report the transfer of the files containing 3
items.
The administrator can setup a policy which will block the transfer of files
containing 10 PIIs by using a Global Threshold of 10, like in the policy shown
below:
50 | My Endpoint Protector | User Manual
Another HIPAA policy can be used to report the transfer of files which contain 3
items of the same kind by using a Regular Threshold set at 3, like the below
shown example:
51 | My Endpoint Protector | User Manual
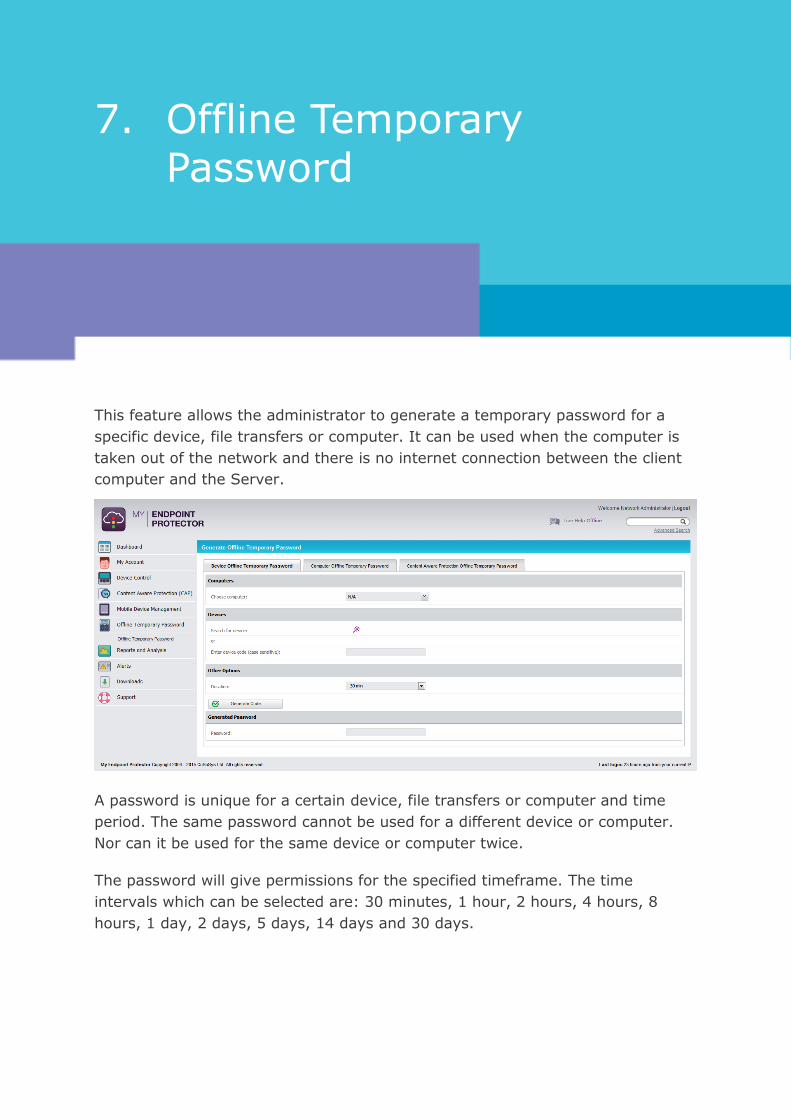
7. Offline Temporary
Password
This feature allows the administrator to generate a temporary password for a
specific device, file transfers or computer. It can be used when the computer is
taken out of the network and there is no internet connection between the client
computer and the Server.
A password is unique for a certain device, file transfers or computer and time
period. The same password cannot be used for a different device or computer.
Nor can it be used for the same device or computer twice.
The password will give permissions for the specified timeframe. The time
intervals which can be selected are: 30 minutes, 1 hour, 2 hours, 4 hours, 8
hours, 1 day, 2 days, 5 days, 14 days and 30 days.
52 | My Endpoint Protector | User Manual
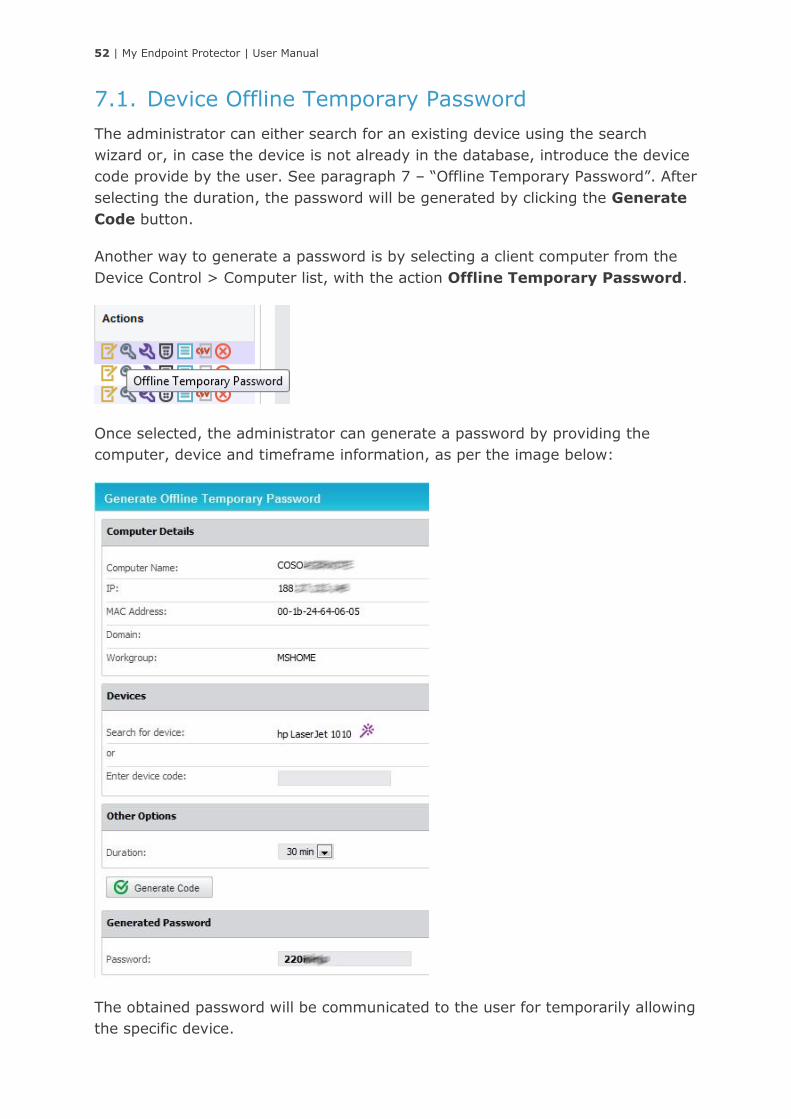
7.1. Device Offline Temporary Password
The administrator can either search for an existing device using the search
wizard or, in case the device is not already in the database, introduce the device
code provide by the user. See paragraph 7 – “Offline Temporary Password”. After
selecting the duration, the password will be generated by clicking the Generate
Code button.
Another way to generate a password is by selecting a client computer from the
Device Control > Computer list, with the action Offline Temporary Password.
Once selected, the administrator can generate a password by providing the
computer, device and timeframe information, as per the image below:
The obtained password will be communicated to the user for temporarily allowing
the specific device.
53 | My Endpoint Protector | User Manual
7.2. Computer Offline Temporary Password
Similar to the device offline temporary password, the administrator can generate
a Computer Offline Temporary Password, allowing the use of all the endpoints on
an offline computer.
After selecting the computer and duration, the password will be generated by
clicking on the Generate Code button. The obtained password will be
communicated to the user for temporarily allowing the use of all the endpoints as
explained in paragraph 7.4.
7.3. Content Aware Protection Offline Temporary
Password
The administrator can also allow the transfer of sensitive data on an offline
computer by generating a Content Aware Protection Offline Temporary Password.
After selecting the computer and duration, the password will be generated by
clicking on Generate Code button. The obtained password will be communicated
to the user for temporarily allowing transfer of sensitive data as explained in
paragraph 7.4.
7.4. User Offline Temporary Password action
Before the administrator can generate a temporary password, this action
typically starts with the user requesting temporary access. For file transfers or
computer Offline Temporary Password (OTP) the administrator can easily identify
the computer based on the user. However, for devices, the user needs to double
click on the My Endpoint Protector client and provide the administrator with the
details of the device. Once an Offline Temporary Password is generated by the
administrator, the user needs to enter it in the My Endpoint Protector client.
54 | My Endpoint Protector | User Manual
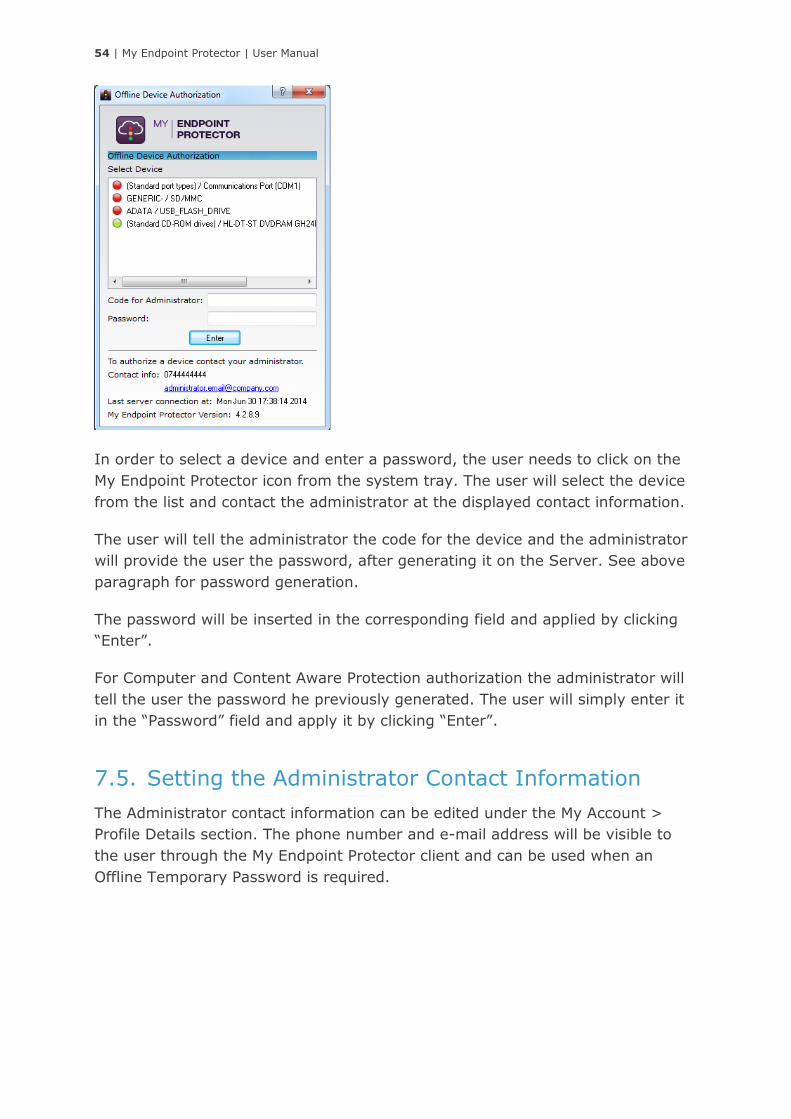
In order to select a device and enter a password, the user needs to click on the
My Endpoint Protector icon from the system tray. The user will select the device
from the list and contact the administrator at the displayed contact information.
The user will tell the administrator the code for the device and the administrator
will provide the user the password, after generating it on the Server. See above
paragraph for password generation.
The password will be inserted in the corresponding field and applied by clicking
“Enter”.
For Computer and Content Aware Protection authorization the administrator will
tell the user the password he previously generated. The user will simply enter it
in the “Password” field and apply it by clicking “Enter”.
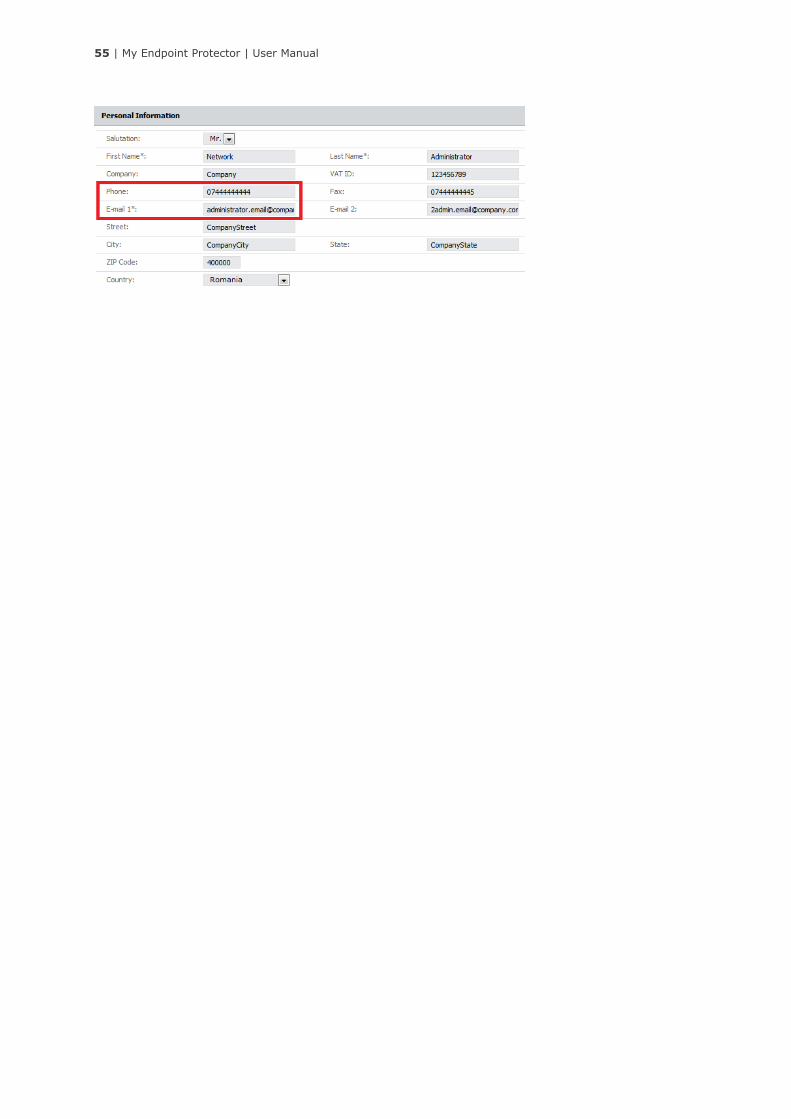
7.5. Setting the Administrator Contact Information
The Administrator contact information can be edited under the My Account >
Profile Details section. The phone number and e-mail address will be visible to
the user through the My Endpoint Protector client and can be used when an
Offline Temporary Password is required.
55 | My Endpoint Protector | User Manual
56 | My Endpoint Protector | User Manual
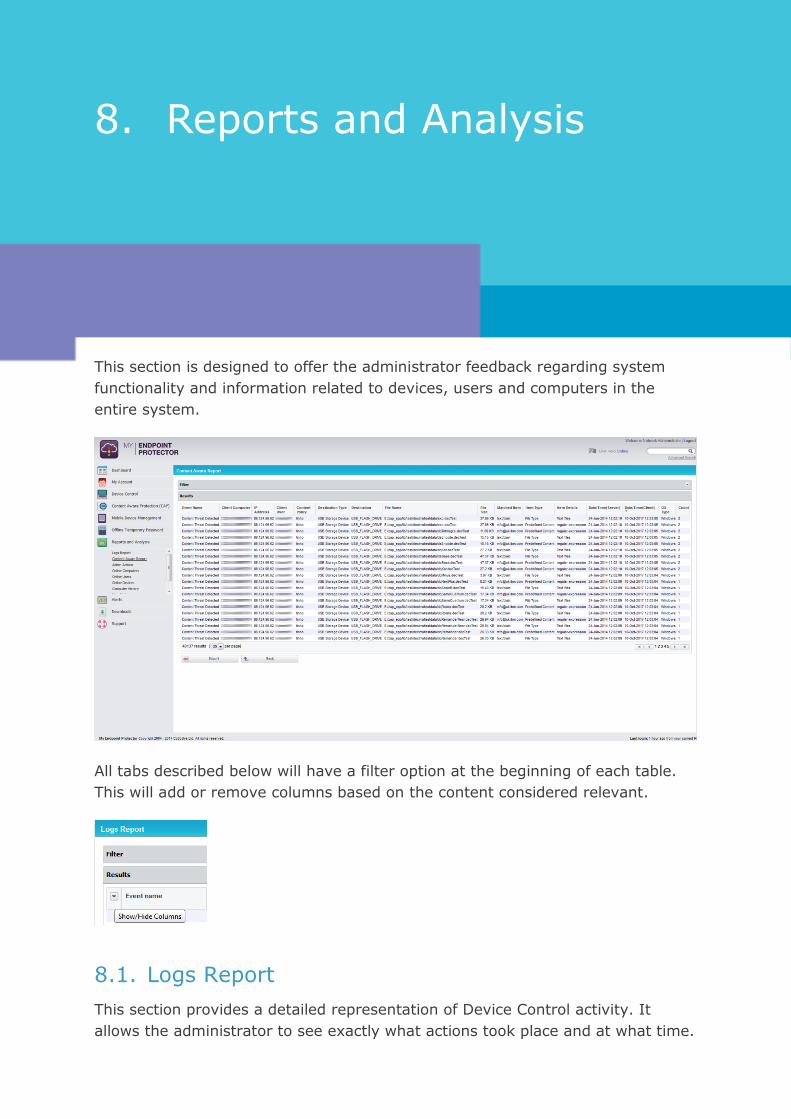
8. Reports and Analysis
This section is designed to offer the administrator feedback regarding system
functionality and information related to devices, users and computers in the
entire system.
All tabs described below will have a filter option at the beginning of each table.
This will add or remove columns based on the content considered relevant.
8.1. Logs Report
This section provides a detailed representation of Device Control activity. It
allows the administrator to see exactly what actions took place and at what time.
57 | My Endpoint Protector | User Manual
This information also contains the computer name, user and device used as well
as the action taken and the files accessed. The granular filter included in this
section is designed to make finding information quick and easy.
The administrator also has the possibility of exporting either the search results or
the entire log report as a .CSV file, which can later be analyzed.
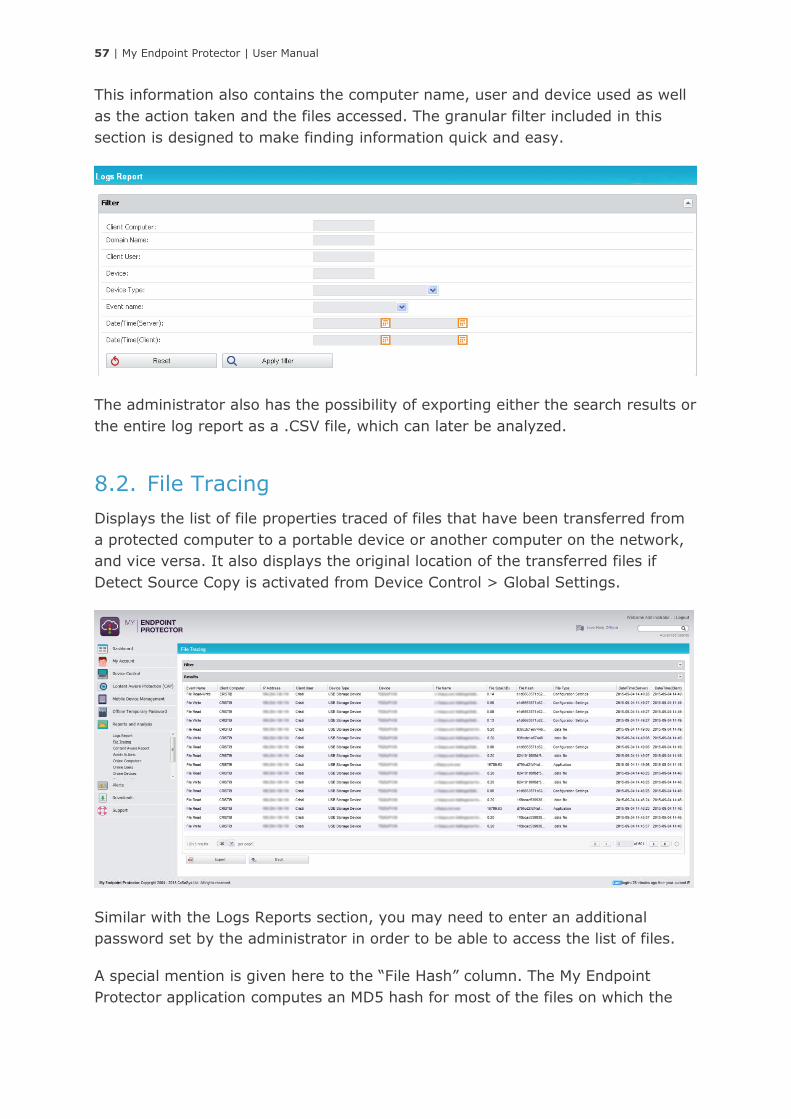
8.2. File Tracing
Displays the list of file properties traced of files that have been transferred from
a protected computer to a portable device or another computer on the network,
and vice versa. It also displays the original location of the transferred files if
Detect Source Copy is activated from Device Control > Global Settings.
Similar with the Logs Reports section, you may need to enter an additional
password set by the administrator in order to be able to access the list of files.
A special mention is given here to the “File Hash” column. The My Endpoint
Protector application computes an MD5 hash for most of the files on which the

58 | My Endpoint Protector | User Manual
File Tracing feature applies to. By this way we ensure that threats coming from
the changing of the content inside of files is mitigated.
8.3. Content Aware Report
This section provides detailed logs of all Content Aware activity. It allows the
administrator to see exactly what data incidents were detected corresponding to
the Content Aware Policies applied and at what time. This information also
contains the computer name, user and transfer destination type, the action taken
and the file inspected. The same granular filter is included, designed to make
finding information quick and easy. The option to export logs as a .CSV file is
also available.
8.4. Admin Actions
Every important action performed by administrator in the interface is recorded.
Right clicking on any action or clicking the View Details button will open the
Admin Actions Details page where further details about the specific event is
shown. The status of the modified features before and after the change took
place can be seen.
Filers can be used to find the desired information and logs can be exported in a
.CSV file.

59 | My Endpoint Protector | User Manual
8.5. Online Computers
This section offers real time monitoring of the client computers registered on the
system, which have an established connection with the server.
Note!
Real time monitoring depends on the Refresh Interval; if the Refresh Interval for
computer X is 1 minute, than the computer X was communicating with the server
in the last 1 minute.
The administrator has the possibility of accessing the log for a certain computer
by right clicking on an item and selecting View Logs. The same action can be
performed by pressing the button the View Logs button . This display only the
activity of that specific computer, for which the button was pushed.
8.6. Online Users
Similar to the above mentioned Online Computers section, it displays a list of
users that are connected to the My Endpoint Protector Server in real time.
8.7. Online Devices
This section offers information regarding the devices connected to the computers
on the system.
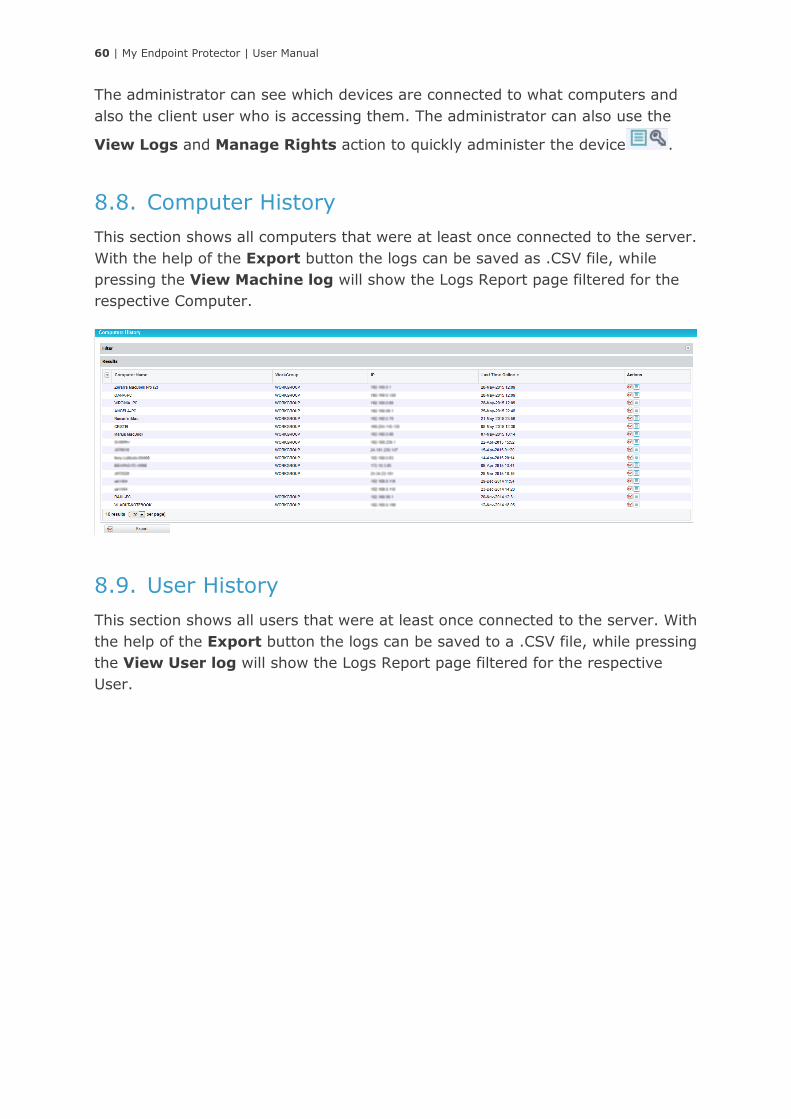
60 | My Endpoint Protector | User Manual
The administrator can see which devices are connected to what computers and
also the client user who is accessing them. The administrator can also use the
View Logs and Manage Rights action to quickly administer the device .
8.8. Computer History
This section shows all computers that were at least once connected to the server.
With the help of the Export button the logs can be saved as .CSV file, while
pressing the View Machine log will show the Logs Report page filtered for the
respective Computer.
8.9. User History
This section shows all users that were at least once connected to the server. With
the help of the Export button the logs can be saved to a .CSV file, while pressing
the View User log will show the Logs Report page filtered for the respective
User.
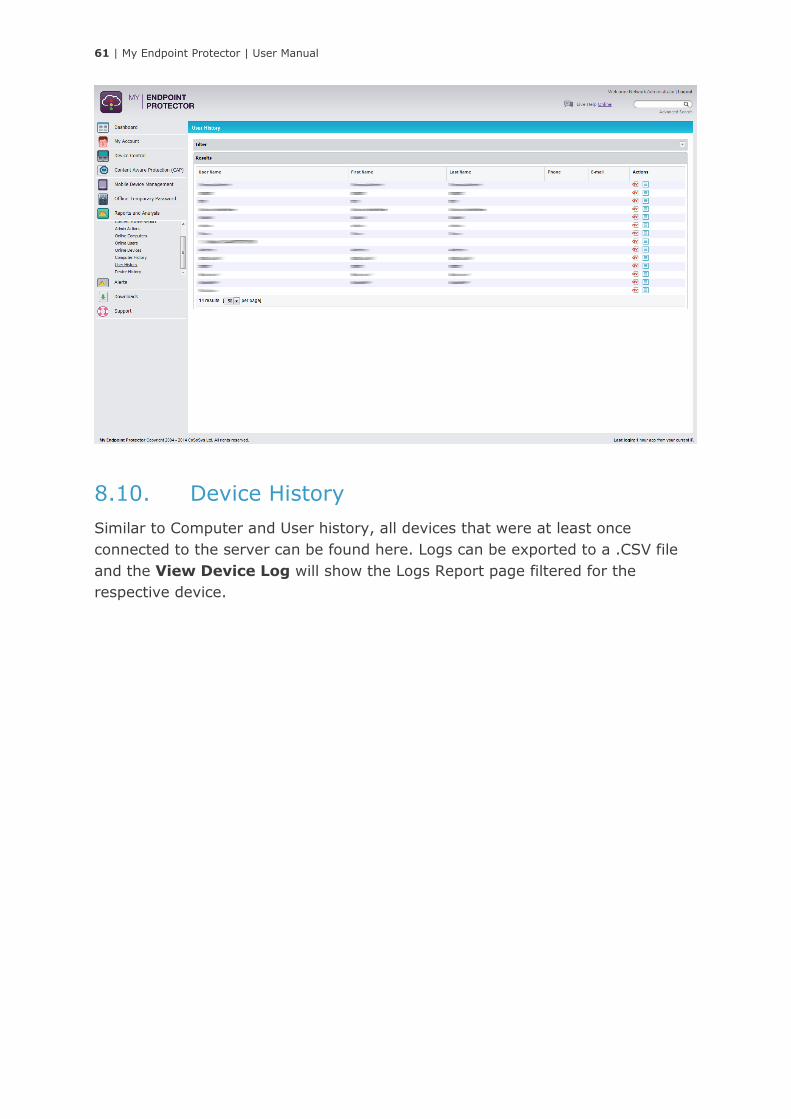
61 | My Endpoint Protector | User Manual
8.10. Device History
Similar to Computer and User history, all devices that were at least once
connected to the server can be found here. Logs can be exported to a .CSV file
and the View Device Log will show the Logs Report page filtered for the
respective device.
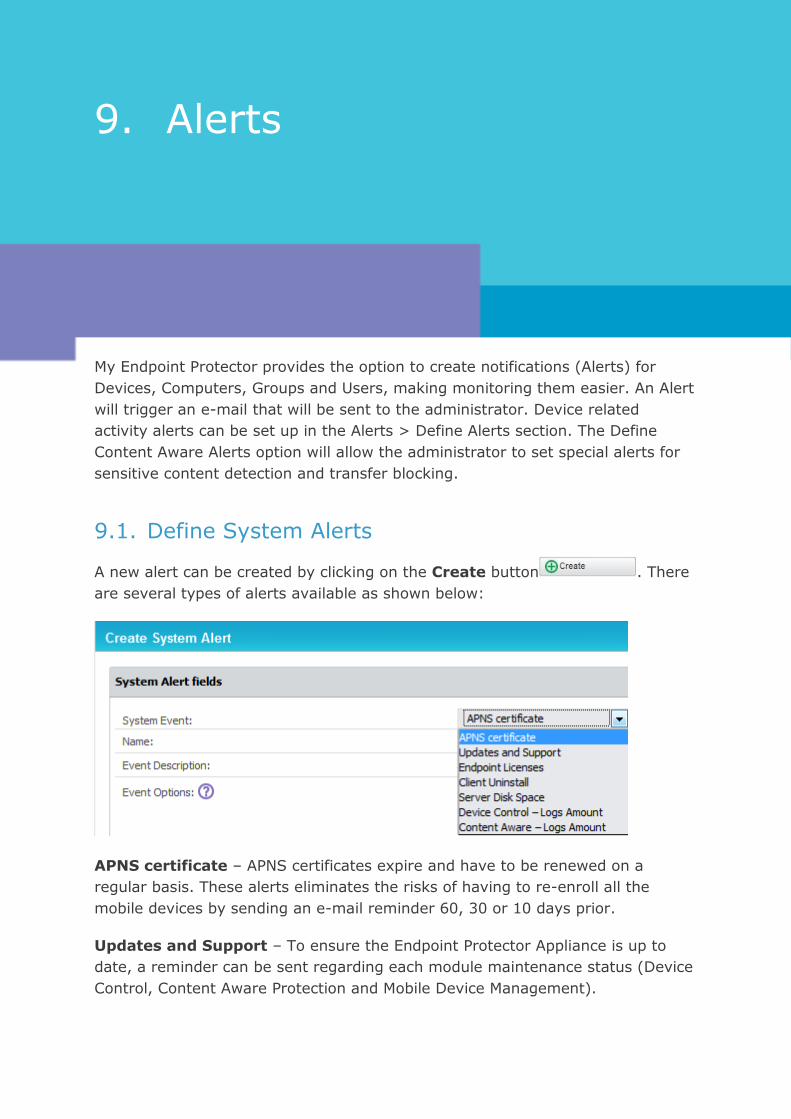
62 | My Endpoint Protector | User Manual
9. Alerts
My Endpoint Protector provides the option to create notifications (Alerts) for
Devices, Computers, Groups and Users, making monitoring them easier. An Alert
will trigger an e-mail that will be sent to the administrator. Device related
activity alerts can be set up in the Alerts > Define Alerts section. The Define
Content Aware Alerts option will allow the administrator to set special alerts for
sensitive content detection and transfer blocking.
9.1. Define System Alerts
A new alert can be created by clicking on the Create button . There
are several types of alerts available as shown below:
APNS certificate – APNS certificates expire and have to be renewed on a
regular basis. These alerts eliminates the risks of having to re-enroll all the
mobile devices by sending an e-mail reminder 60, 30 or 10 days prior.
Updates and Support – To ensure the Endpoint Protector Appliance is up to
date, a reminder can be sent regarding each module maintenance status (Device
Control, Content Aware Protection and Mobile Device Management).
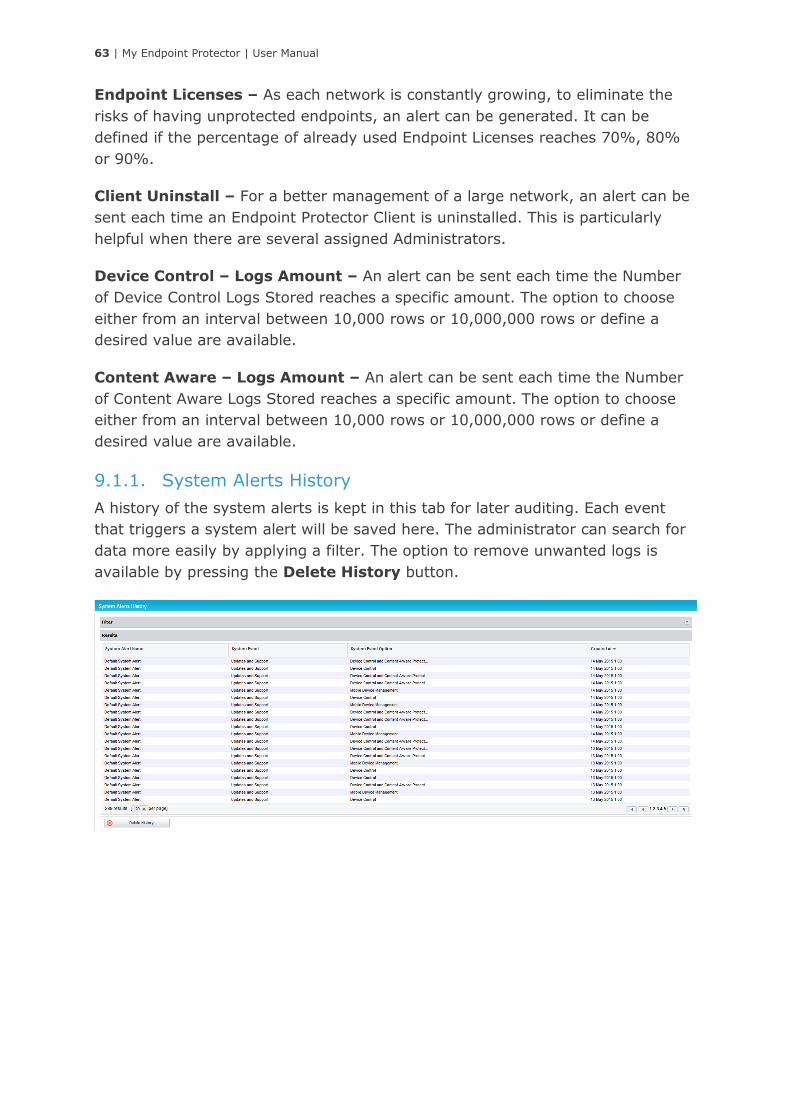
63 | My Endpoint Protector | User Manual
Endpoint Licenses – As each network is constantly growing, to eliminate the
risks of having unprotected endpoints, an alert can be generated. It can be
defined if the percentage of already used Endpoint Licenses reaches 70%, 80%
or 90%.
Client Uninstall – For a better management of a large network, an alert can be
sent each time an Endpoint Protector Client is uninstalled. This is particularly
helpful when there are several assigned Administrators.
Device Control – Logs Amount – An alert can be sent each time the Number
of Device Control Logs Stored reaches a specific amount. The option to choose
either from an interval between 10,000 rows or 10,000,000 rows or define a
desired value are available.
Content Aware – Logs Amount – An alert can be sent each time the Number
of Content Aware Logs Stored reaches a specific amount. The option to choose
either from an interval between 10,000 rows or 10,000,000 rows or define a
desired value are available.
9.1.1. System Alerts History
A history of the system alerts is kept in this tab for later auditing. Each event
that triggers a system alert will be saved here. The administrator can search for
data more easily by applying a filter. The option to remove unwanted logs is
available by pressing the Delete History button.
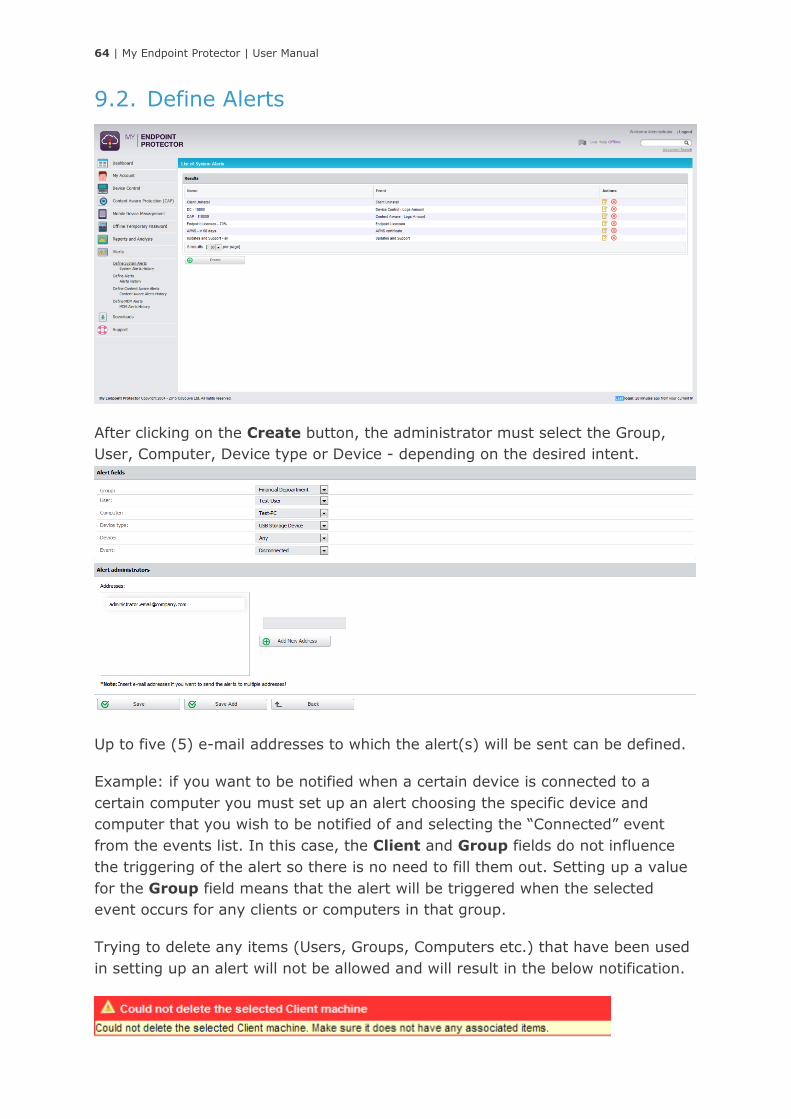
64 | My Endpoint Protector | User Manual
9.2. Define Alerts
After clicking on the Create button, the administrator must select the Group,
User, Computer, Device type or Device - depending on the desired intent.
Up to five (5) e-mail addresses to which the alert(s) will be sent can be defined.
Example: if you want to be notified when a certain device is connected to a
certain computer you must set up an alert choosing the specific device and
computer that you wish to be notified of and selecting the “Connected” event
from the events list. In this case, the Client and Group fields do not influence
the triggering of the alert so there is no need to fill them out. Setting up a value
for the Group field means that the alert will be triggered when the selected
event occurs for any clients or computers in that group.
Trying to delete any items (Users, Groups, Computers etc.) that have been used
in setting up an alert will not be allowed and will result in the below notification.

65 | My Endpoint Protector | User Manual
9.2.1. Alerts History
A history of the alerts is kept in this tab for later auditing. Each event that
triggers an alert will be saved here. The administrators can search for data more
easily with the implemented filter, while if not needed anymore, the logs can be
deleted by pressing Delete History the button.
9.3. Define Content Aware Alerts
The first step in creating a new Content Aware Alert corresponding to the policies
defined in the Content Aware Protection module, is to click on the Create
button .
Then select the Group, Computer, User that you want to monitor, the Content
Aware Policy to be considered, and the event that will trigger the notification.
The filter is designed to make finding information quick and easy.
Example: if you want to be notified when a file containing credit card information
is attached to an e-mail on one of the Financial Departments computers, you
must set up an alert choosing the Financial Department as the monitored entity,
the Content Aware Policy that inspects documents for that type of information
and, finally, selecting the Content Threat Detected event from the events list.
Note!
Before creating the alert, you must ensure that the selected Content Aware
Policy is enabled on the chosen Computer, User, Group or Department.
9.3.1. Content Aware Alerts History
A history of the content aware is kept in this tab for later auditing. Each event
that triggers an alert will be saved here. The administrators can search for data
more easily with the implemented filter, while if not needed anymore, the logs
can be deleted by pressing Delete History the button.
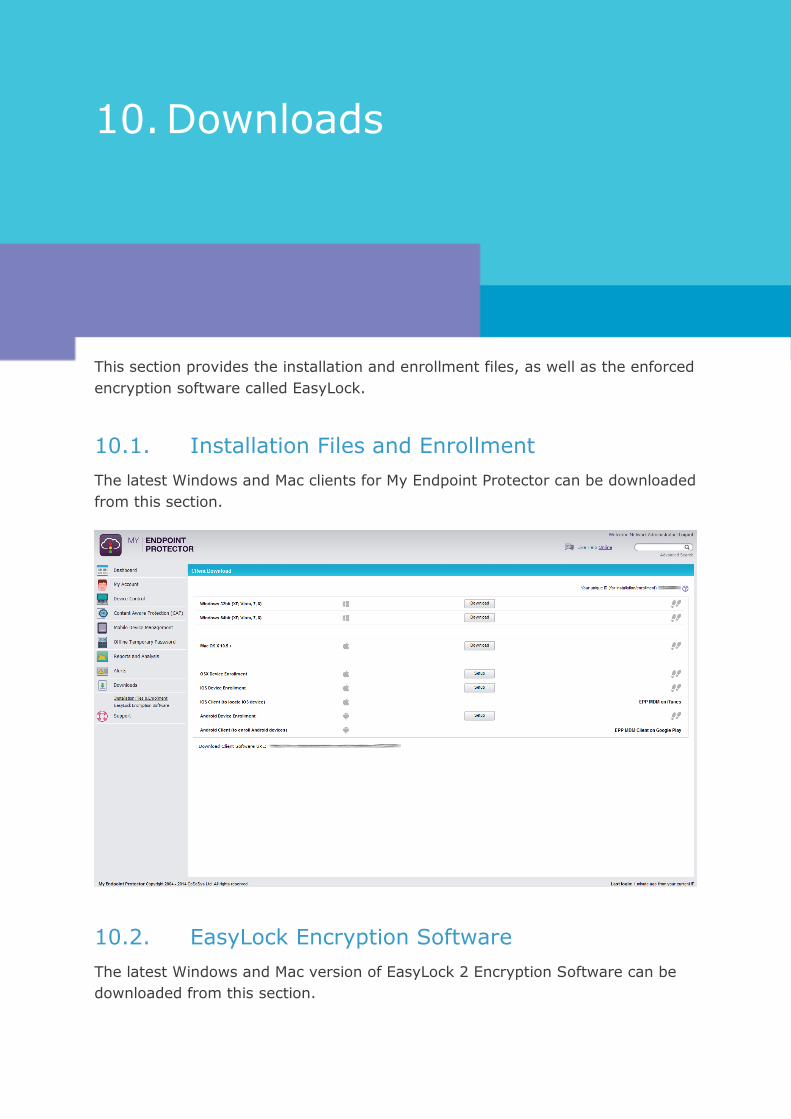
66 | My Endpoint Protector | User Manual
10. Downloads
This section provides the installation and enrollment files, as well as the enforced
encryption software called EasyLock.
10.1. Installation Files and Enrollment
The latest Windows and Mac clients for My Endpoint Protector can be downloaded
from this section.
10.2. EasyLock Encryption Software
The latest Windows and Mac version of EasyLock 2 Encryption Software can be
downloaded from this section.
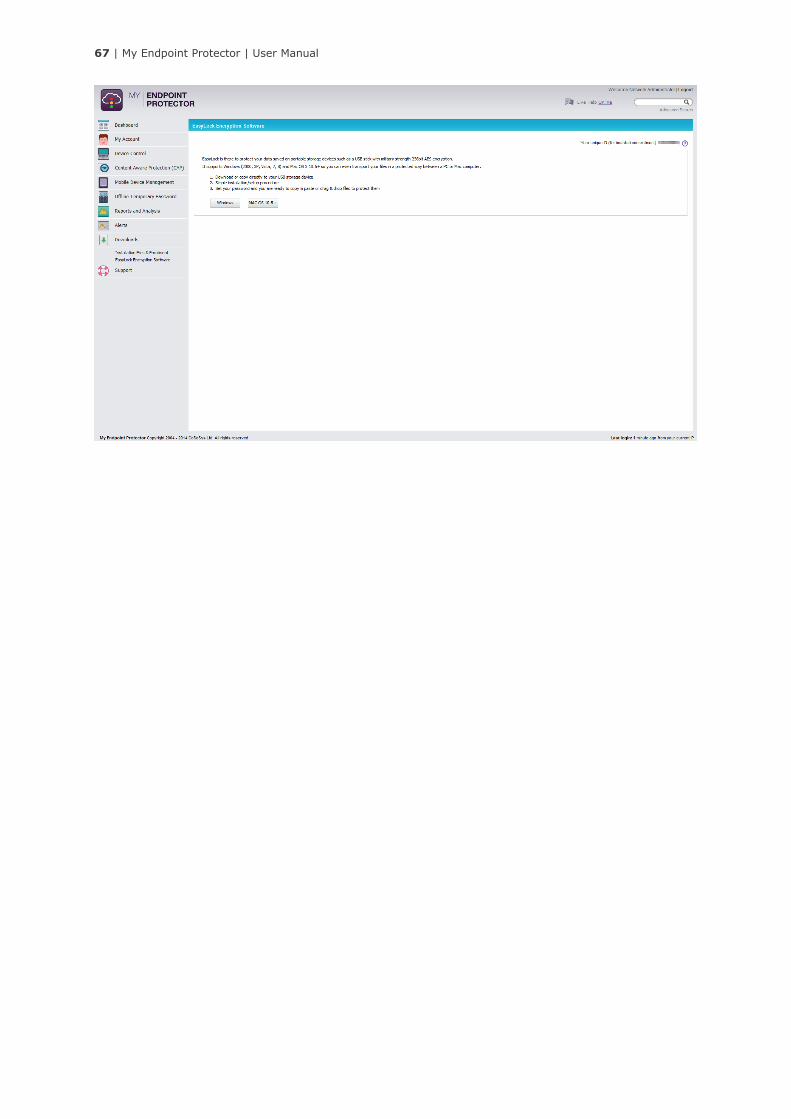
67 | My Endpoint Protector | User Manual

68 | My Endpoint Protector | User Manual
11. My Account
11.1. Profile Details
The administrator’s information can be stored in this section and it can be
change at any time. It includes Login Information, Personal Information and
Other.
Only the contact email address and phone number of the administrator are
visible to the users – through the My Endpoint Protector Client.
11.2. Unique ID
The My Endpoint Protector Unique ID is an important part the account. It is mandatory when installing the My Endpoint Protector client/agent on a new
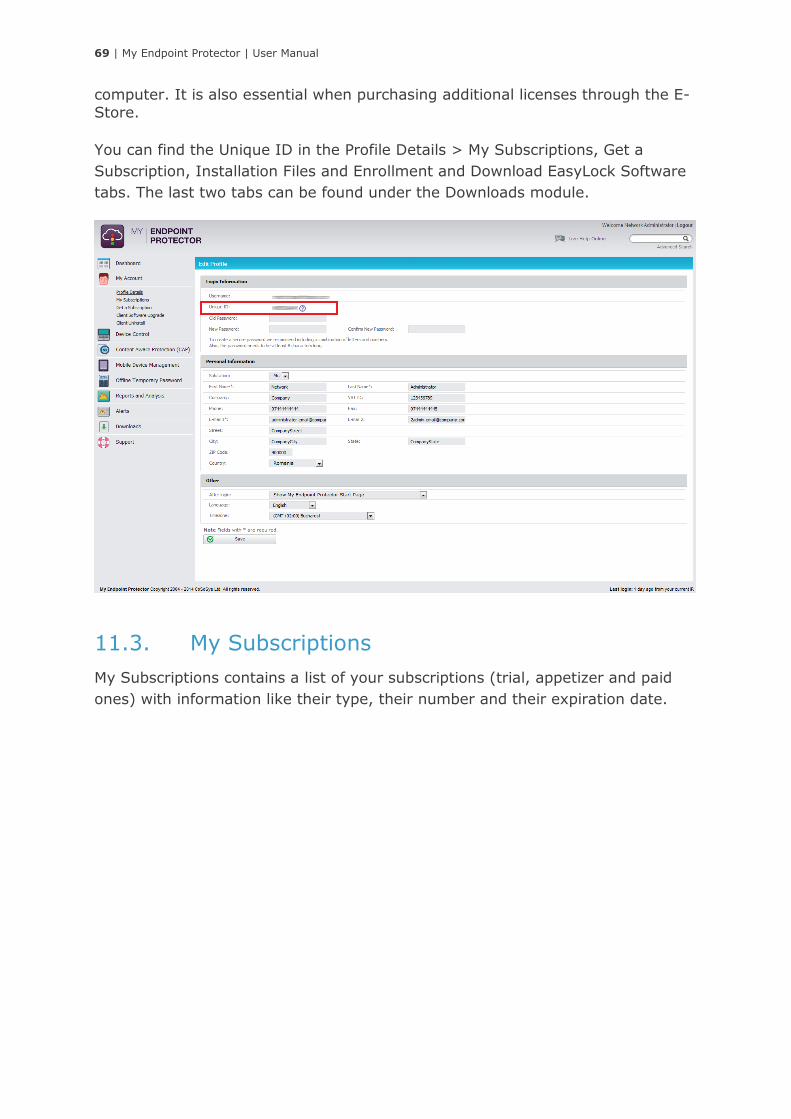
69 | My Endpoint Protector | User Manual
computer. It is also essential when purchasing additional licenses through the E-
Store.
You can find the Unique ID in the Profile Details > My Subscriptions, Get a
Subscription, Installation Files and Enrollment and Download EasyLock Software
tabs. The last two tabs can be found under the Downloads module.
11.3. My Subscriptions
My Subscriptions contains a list of your subscriptions (trial, appetizer and paid
ones) with information like their type, their number and their expiration date.
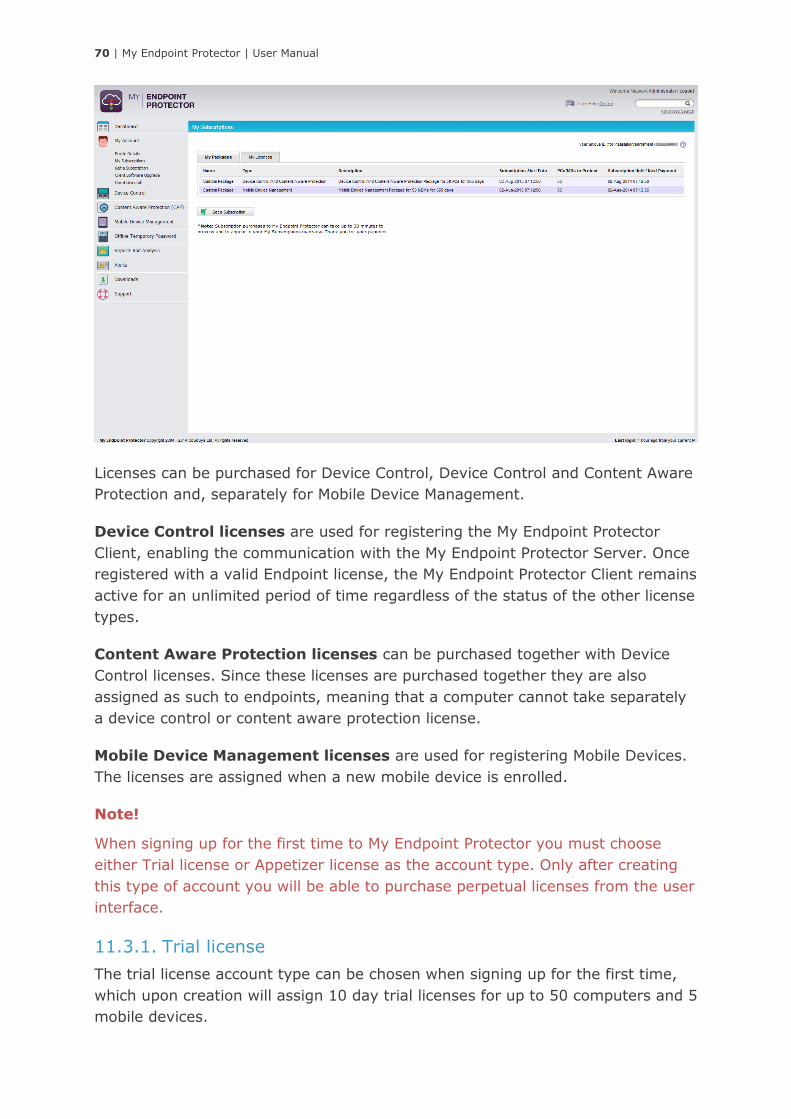
70 | My Endpoint Protector | User Manual
Licenses can be purchased for Device Control, Device Control and Content Aware
Protection and, separately for Mobile Device Management.
Device Control licenses are used for registering the My Endpoint Protector
Client, enabling the communication with the My Endpoint Protector Server. Once
registered with a valid Endpoint license, the My Endpoint Protector Client remains
active for an unlimited period of time regardless of the status of the other license
types.
Content Aware Protection licenses can be purchased together with Device
Control licenses. Since these licenses are purchased together they are also
assigned as such to endpoints, meaning that a computer cannot take separately
a device control or content aware protection license.
Mobile Device Management licenses are used for registering Mobile Devices.
The licenses are assigned when a new mobile device is enrolled.
Note!
When signing up for the first time to My Endpoint Protector you must choose
either Trial license or Appetizer license as the account type. Only after creating
this type of account you will be able to purchase perpetual licenses from the user
interface.
11.3.1. Trial license
The trial license account type can be chosen when signing up for the first time,
which upon creation will assign 10 day trial licenses for up to 50 computers and 5
mobile devices.
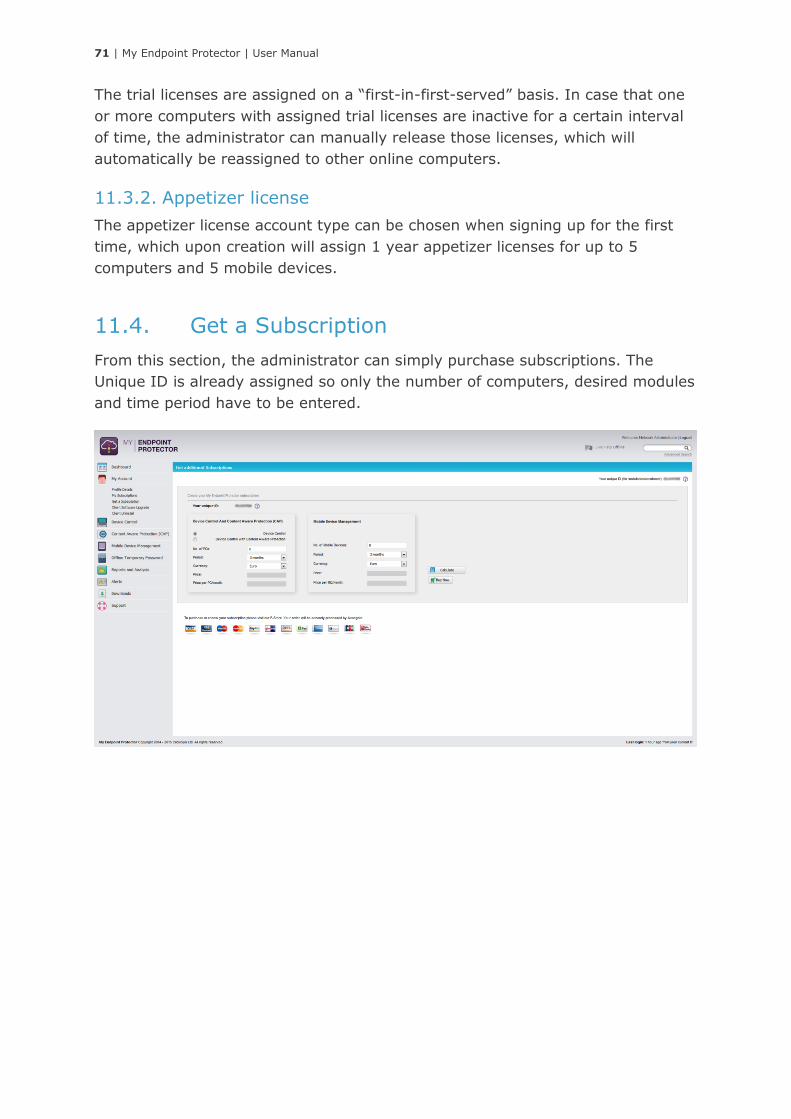
71 | My Endpoint Protector | User Manual
The trial licenses are assigned on a “first-in-first-served” basis. In case that one
or more computers with assigned trial licenses are inactive for a certain interval
of time, the administrator can manually release those licenses, which will
automatically be reassigned to other online computers.
11.3.2. Appetizer license
The appetizer license account type can be chosen when signing up for the first
time, which upon creation will assign 1 year appetizer licenses for up to 5
computers and 5 mobile devices.
11.4. Get a Subscription
From this section, the administrator can simply purchase subscriptions. The
Unique ID is already assigned so only the number of computers, desired modules
and time period have to be entered.

72 | My Endpoint Protector | User Manual
12. Enforced Encryption with
TrustedDevices
Protecting Data in Transit is essential to ensure no third party has access to data
in case a device is lost or stolen. The Enforced Encryption solution gives
administrators the possibility to protect confidential data on portable devices in
case of loss or theft. If a TrustedDevice fails to get authorization from the My
Endpoint Protector server, then it will not be usable.
How does it work?
Enforcing Encryption can be done by using TrustedDevices. TrustedDevices must
receive authorization from the My Endpoint Protector server, otherwise they will
be unusable.
There are four levels of security for TrustedDevices:
▪ Level 1 - Minimum security for office and personal use with a focus on
software based encryption for data security. Offers companies already
regulatory compliance.
Any USB Flash Drive and most other portable storage devices can be
turned into a TrustedDevice Level 1 with EasyLock Software from
CoSoSys.
No hardware upgrade is required.
▪ Level 2 - Medium security level with biometric data protection or advances
software based data encryption.
Requires special hardware that includes security software and that has
been tested for TrustedDevice Level 2.
Hardware is widely available in retail stores.
▪ Level 3 - High security level with strong hardware based encryption that is
mandatory for sensitive enterprise data protection for regulatory
compliance such as SOX, HIPAA, GBLA, PIPED, Basel II, DPA, or PCI
73 | My Endpoint Protector | User Manual
95/46/EC.
Requires special hardware that includes advanced security software and
hardware based encryption and that has been tested for TrustedDevice
Level 3.
▪ Level 4 - Maximum security for military, government and even secret
agent use. Level 4 TrustedDevices include strong hardware based
encryption for data protection and are independently certified (e.g. FIPS
140). These devices have successfully undergone rigorous testing for
software and hardware.
Requires special hardware that is available primarily through security
focused resellers.
12.1. How a Level 1 TrustedDevice Works
User connects Device to My Endpoint Protector protected Client PC. Device is
blocked by My Endpoint Protector (default action).
Device is checked for authorization.
If device is an authorized TrustedDevice Level 1, the EasyLock software on
Device will automatically open.
User can transfer files via Drag & Drop in EasyLock from the PC to the
TrustedDevice.
Data transferred to devices is encrypted via 256bit AES.
User cannot access the device using Windows Explorer or similar applications
(e.g. Total Commander).
User does not have the possibility to copy data in unencrypted state to the
TrustedDevice.
“TrustedDevice” implies that the devices offer a safe, risk-free environment to
transfer sensitive data.
Administrator can audit what user, with what device, on what PC, has transferred
what files.
74 | My Endpoint Protector | User Manual
12.2. EasyLock Software for TrustedDevices Level 1
EasyLock allows portable devices to be identified as TrustedDevices and protects
data on the device with government-approved 256bit AES CBC-mode encryption.
With the intuitive Drag & Drop interface, files can be quickly copied to and from
the device.
To install EasyLock on an USB Flash drive, one has to copy the file
"EasyLock.exe" or “EasyLock.app” to the root folder of a partition associated with
that device.
Managing TrustedDevices from EPP server console
Access to TrustedDevices can be configured from the Global Rights module of My
Endpoint Protector, under Rights tab.
Access the drop-down box next to USB Storage Device and select the desired
level of TrustedDevices you wish to grant access to.
EasyLock is available here:
http://www.endpointprotector.com/en/index.php/products/easylock
Purchase a license here:
http://www.endpointprotector.com/en/index.php/epp/estore
https://secure.avangate.com/order/cart.php?PRODS=1905891
75 | My Endpoint Protector | User Manual
13. Endpoint Protector
Product Family
The Endpoint Protector Product family offers data security solutions for any
environment, from home users to business and enterprise networks. My Endpoint
Protector is part of it and offers your computers and macs the best cloud-based
data loss prevention solution.
Other products from the Endpoint Protector Product family are:
Endpoint Protector 4 On-premise Data Loss Prevention available as hardware
or virtual appliance:
▪ Device Control (for Windows, Mac and Linux)
▪ Content Aware Protection (for Windows and Mac)
▪ Mobile Device Management (for Android and iOS)
Endpoint Protector Basic Stand-alone device control application – no internet
or network connection required.
They offer great advanced features such as:
▪ File Tracing
▪ File Shadowing
▪ File Whitelisting
▪ AD integration
▪ And many more.
More information can be found here http://www.EndpointProtector.com
76 | My Endpoint Protector | User Manual
14. Support
In this section, the administrator can access the user manuals as well as
contacting support directly.
For additional support, the FAQ database can be consulted by following the link:
http://www.endpointprotector.com/support/knowledge-base/
Even if you do not have a problem but are missing some features or just want to
leave us a general comment, we would love to hear from you. Your input is much
appreciated.
77 | My Endpoint Protector | User Manual
15. Important Notice /
Disclaimer
Security safeguards, by their nature, are capable of circumvention. CoSoSys
cannot, and does not, guarantee that data or devices will not be accessed by
unauthorized persons, and CoSoSys disclaims any warranties to that effect to the
fullest extent permitted by law.
© 2004 – 2015 CoSoSys Ltd.; Endpoint Protector Basic, Endpoint Protector, My Endpoint
Protector are trademarks of CoSoSys Ltd. All rights reserved. Windows is registered
trademark of Microsoft Corporation. Macintosh, Mac OS X are trademarks of Apple
Corporation. All other names and trademarks are property of their respective owners.