Emergency First Aid
65
Emergency First Aid Aims: • To attain knowledge and practical competences required to deal with a range of first aid situations • To attain skills and knowledge to deal with emergencies appropriately and safely, to prevent exacerbation of injury, preserve life and prevent lasting harm.
Transcript of Emergency First Aid
Emergency First Aid
Aims:
• To attain knowledge and practical competences required to
deal with a range of first aid situations
• To attain skills and knowledge to deal with emergencies
appropriately and safely, to prevent exacerbation of injury,
preserve life and prevent lasting harm.

First Aid and Role and Responsibilities
of First AiderFirst Aid is the immediate assistance given to someone who is ill or injured before professional help arrives.
3 AIMS of the First Aider to:
- Preserve life
- Prevent the worsening of any injuries or illness
- Promote recovery
Responsibilities include:
First do no harm and apply calculated risk in all situations
Provide first aid that is: EFFECTIVE, SAFE AND PROMPT
Consider the casualty’s response to First Aid and respect individual choice
Ensure no danger to self
Move danger away from casualty
Do not remove casualty unless they are in further danger.

Communication
Between yourself, casualty and other people around you
• Casualty should feel secure
• Explain and gain consent to provide first aid
• Be confident with positive body language
• Do not overplay your knowledge
• Keep and look calm
• Stay in control of the situation
OTHER PEOPLE can:
• Tell you what has happened
• Summon help
• Assist you, stay with casualty
• Make area safe.

Getting Help
Call 999 or 112, free to dial
Ask for ambulance
Assistance from operator
What information will you need to provide?
Exact address or location
Caller’s name and phone number
What happened
Condition and number casualties
Any other information asked for.

Stay on the phone or operator may
phone you back for updates
Use the hands-free facility if you need to attend to the
casualty at the same time
Average call out is between 8 and 19 minutes
If someone else is making the call you should give them as
much information as possible to pass onto operator and
they should return to you for updates
Non emergency NHS number 111
For advice on how to manage a casualty or
whether ambulance required.
Getting Help

First Aid Hygiene/PPE
Consider risk of infection
No vaccinations against Hep C or HIV
Wash hands with soap and water
Use alcohol gel before and after treatment
Cover up any open wounds or cuts you have
Use disposable gloves or improvise
Be careful not to cut yourself on sharp objects
Do not touch any dressings or blood without protection
If performing rescue breaths use a face shield
Dispose of waste properly.
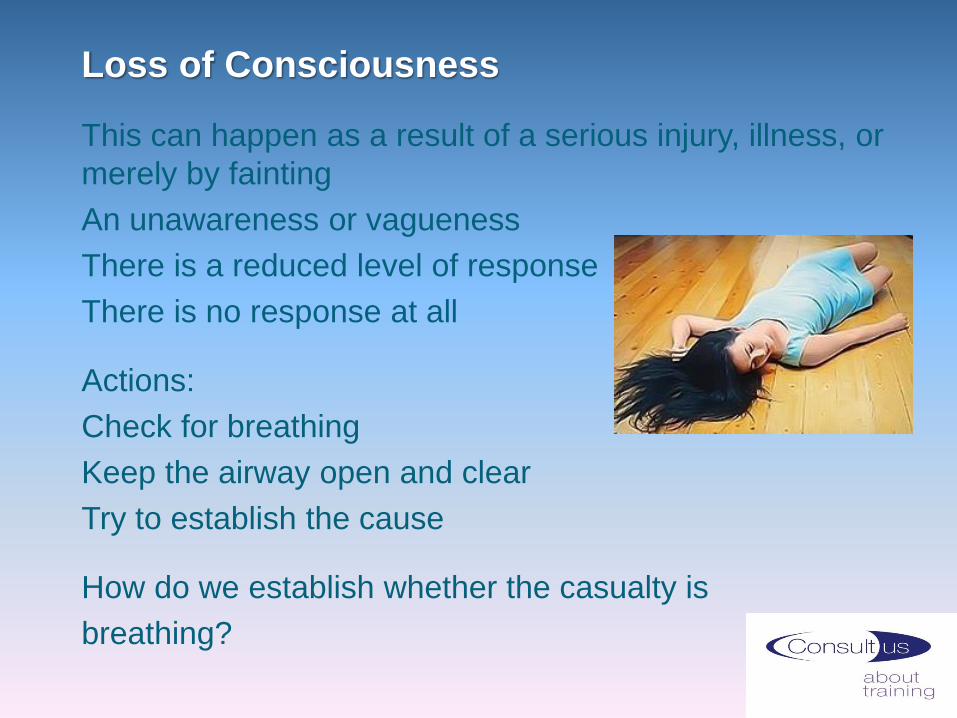
Loss of Consciousness
This can happen as a result of a serious injury, illness, or
merely by fainting
An unawareness or vagueness
There is a reduced level of response
There is no response at all
Actions:
Check for breathing
Keep the airway open and clear
Try to establish the cause
How do we establish whether the casualty is
breathing?
Primary Survey - DRABC
Quickly assess condition and act promptly
Danger -Check for any danger to you, perform scene survey
Response - Check response “Can you hear me?”
Give command “Open your eyes”
Tap shoulders or pinch ear lobe
Airway - Open airway
Breathing - Check for breathing
Circulation – If breathing - Are they bleeding?
If not breathing – Commence CPR

Primary Survey – if there is a response
If casualty responds to voice commands or touch and if they
are in no further danger:
Leave and summon help, or ask someone to dial 999 or 112
Continue to monitor until help arrives
Be prepared to perform primary survey again if casualty
becomes unresponsive.
Primary Survey – if there is no response
If there is no response to voice commands or touch:
Shout for help
Open the airway by lifting the chin and tilting the head
backwards
Check for breathing by looking, listening and feeling for
breath for 10 seconds
Relay your findings to someone and ask them to call 999/112
and to return to you
If breathing normally check for other life threatening
conditions and treat
Place in recovery position and do not leave them at any time
unless you have to summon help.

The Unresponsive Breathing Casualty and the
Recovery Position
An unresponsive casualty is at risk of dying from a blocked
airway by their tongue, vomit or saliva
Placing them in the recovery position ensures the airway is
patent and clear – recheck breathing after positioning
Continue to assess normal breathing, if in doubt start CPR.

Video demonstration – Recovery Position
The video clip shows how to move an unresponsive but
breathing casualty into the recovery position
Verbal instructions and explanations are included
Remember - the reason you are putting the casualty on
their side in this position is to maintain a clear airway in
order to stop the casualty from choking
Watch the video clip of Recovery Position

Non Breathing Casualty
Cardiopulmonary Resuscitation - CPR
The heart and circulatory system pumps blood around the body
When the heart stops within minutes the brain will be starved of oxygen and brain cells will die, such as following cardiac arrest
You can artificially breathe for and pump oxygen around the body by using chest compressions and rescue breaths
You or someone must call 999 telling the operator the
casualty is NOT breathing or NOT breathing NORMALLY
Collect available AED as quickly as possible.

Adult Basic Life Support Algorithm

CPR
Give 30 chest compressions:
This will manually allow blood to still get around body by
compressing the stopped heart
• Compress the chest by 5-6cm at a rate of 100-120
compressions per minute, too fast and the heart can not
refill with blood.
Give 2 rescue breaths:
This will put oxygen into lungs
• Open airway, create good seal around the mouth
• Pinch the soft tissue of the nostrils closed
• Remove your mouth and allow chest to deflate
after each breath.
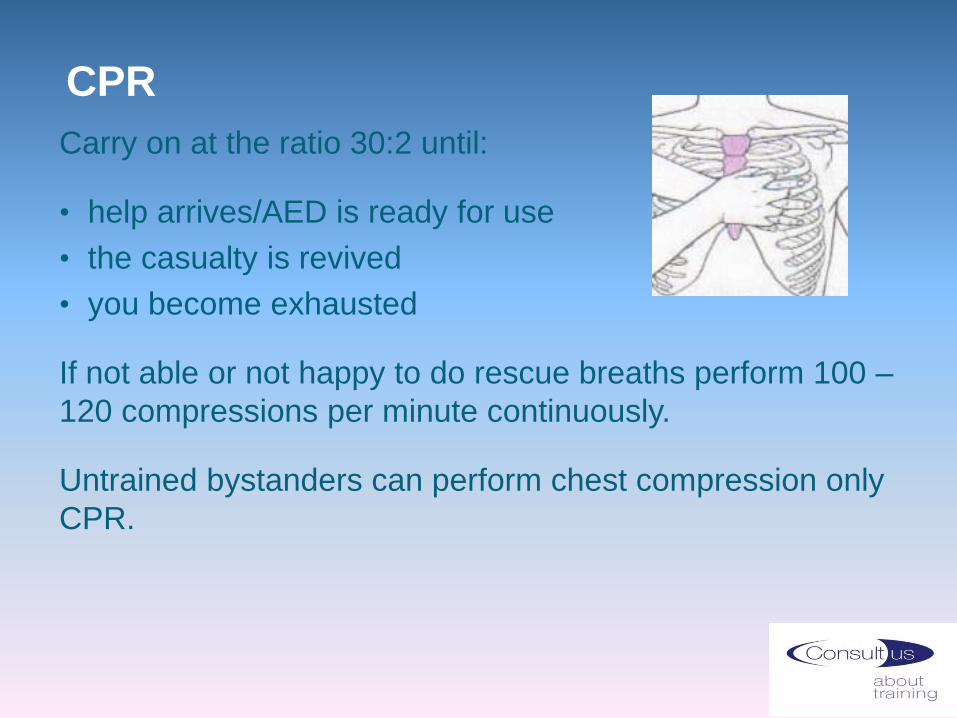
CPR
Carry on at the ratio 30:2 until:
• help arrives/AED is ready for use
• the casualty is revived
• you become exhausted
If not able or not happy to do rescue breaths perform 100 –
120 compressions per minute continuously.
Untrained bystanders can perform chest compression only
CPR.

Video demonstration – Primary Survey
and CPR
The video clip shows the primary survey being carried out
in real time, establishing that the casualty is not breathing
or not breathing normally
The first aider then passes the necessary information to her
helper before immediately commencing uninterrupted CPR
Watch the video clip of Primary Survey and CPR

Precautions during the Coronavirus
Pandemic
Please note the advice for looking, listening and feeling for
breath during primary survey has been temporarily changed to
looking for breath only, in order to minimise transmission risk
during the Coronavirus pandemic
It is also advised that rescue breaths
ideally be carried out with the use of a
resuscitation face shield at all times and that
during the Coronavirus pandemic continuous
compression-only CPR should be considered
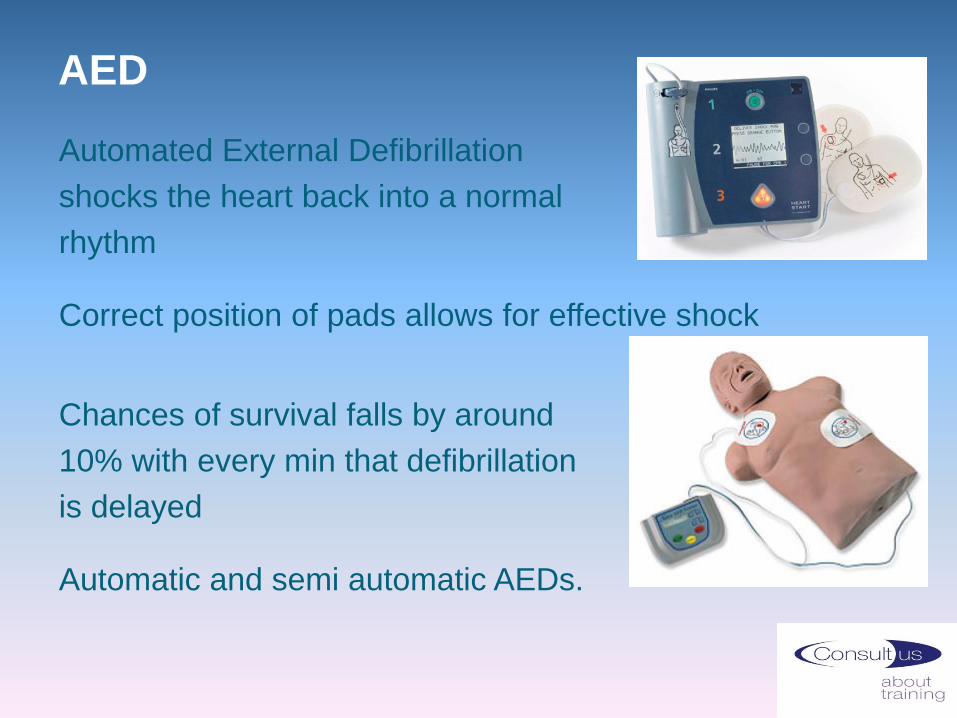
AED
Automated External Defibrillation
shocks the heart back into a normal
rhythm
Correct position of pads allows for effective shock
Chances of survival falls by around
10% with every min that defibrillation
is delayed
Automatic and semi automatic AEDs.

AED for Sudden Cardiac Arrest
Risks to be aware of: water, metal, implants, patches,
explosives
Pads must be in direct contact with skin so skin must be dry
and hairless – AEDs come with razor and scissors
Cut open clothing and underwired bras
Remove necklaces
Remove any medication patches on chest
Follow verbal and visual instructions
AED will not shock unless required.
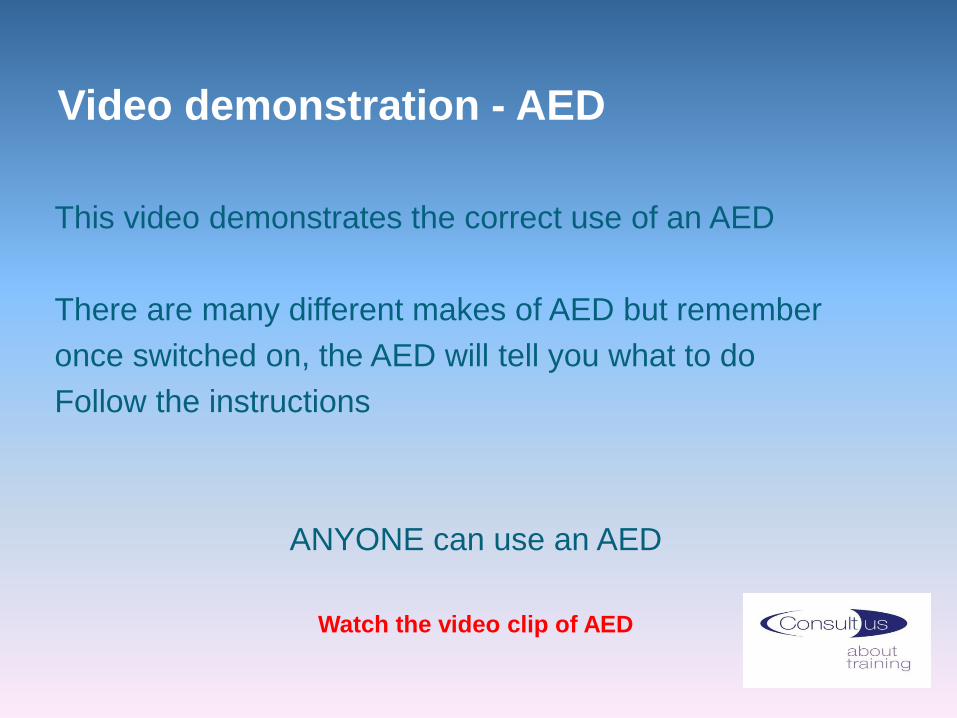
Video demonstration - AED
This video demonstrates the correct use of an AED
There are many different makes of AED but remember
once switched on, the AED will tell you what to do
Follow the instructions
ANYONE can use an AED
Watch the video clip of AED

Do not attempt cardio pulmonary
resuscitation - DNACPR
This is decided by the individual and their family alongside
the medical team - taking into account the individuals’ best
interests and whether it would be inappropriate or
ineffective to attempt CPR
In the event of a cardiac or respiratory arrest – no attempts
at CPR are made
All other treatments and care must be provided
During handover, you should be made aware if your client
has a DNR
The form must be immediately available if it is needed in an
emergency. Keeping it in a prominent place in the home is
important.

Recommended Summary Plan for
Emergency Care and Treatment -
ReSPECT
The ReSPECT process records patient preferences
and clinical recommendations forming a personalised plan for
types of emergency care and treatment choices including
whether CPR should be attempted
It is suitable for, but not exclusive to those with complex health needs,
those coming to the end of their lives and those with a risk of sudden
health deterioration or cardiac arrest
The form remains with the individual and should be immediately
available if it is needed in an emergency
The recorded recommendations are not legally binding.

Choking
Death can occur due to choking
Caused by partial or complete blockage
of the airways
Most incidences are minor, can be
cleared by coughing
Confirm with casualty ‘Are you choking?’
Ask casualty to cough.

Choking – Aim and SymptomsRemove the obstruction as quickly as possible
If not possible, call the emergency services
Symptoms of mild choking include:
• Difficulty speaking
• Difficulty coughing
• Difficulty breathing
• Red face
Symptoms of severe choking include:
• Unable to speak
• Unable to cough
• Unable to breathe
• Red face, later turning to grey
• Indicate their neck or throat is the problem
• Collapse.

Choking – Back Blows
Perform 5 back slaps:
- Stand to the side and slightly behind
- Support their chest, lean them forward
- Give 5 sharp blows between the
shoulder blades with the heel of your hand
- Check mouth
- If choking persists proceed to abdominal thrusts.

Choking – Abdominal Thrusts
Perform 5 abdominal thrusts:
- Stand behind, place arms around their
waist and bend them well forward
- Clench your fist and place it above their belly button
- Place other hand on top and thrust both hands
backwards with a hard upward movement
- Check if the blockage has cleared, if not after 1 cycle
- Call 999/112 and start cycle of back blows and abdominal
thrusts until blockage cleared or medical help arrives
- If casualty becomes unresponsive commence CPR.
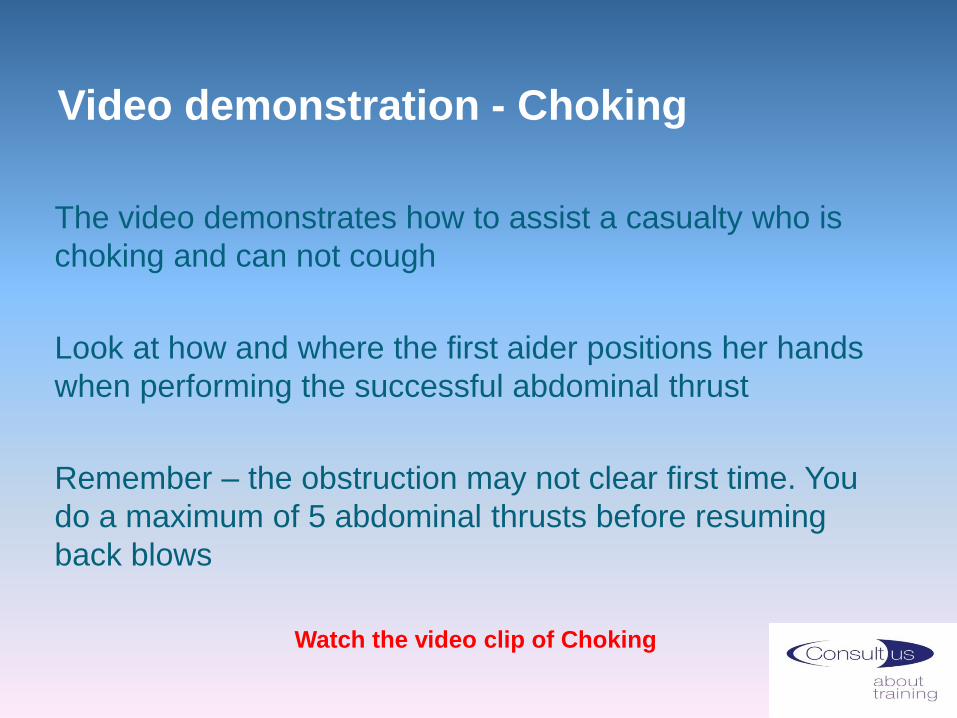
Video demonstration - Choking
The video demonstrates how to assist a casualty who is
choking and can not cough
Look at how and where the first aider positions her hands
when performing the successful abdominal thrust
Remember – the obstruction may not clear first time. You
do a maximum of 5 abdominal thrusts before resuming
back blows
Watch the video clip of Choking

Choking – Aftercare
After successful back slaps casualty must seek
medical attention. Casualty may have a persistent
cough, difficulty with swallowing or feel there is still
something stuck in their throat
After successful abdominal thrusts casualty must be
assessed by the emergency services as this life saving
procedure can cause serious internal injury.
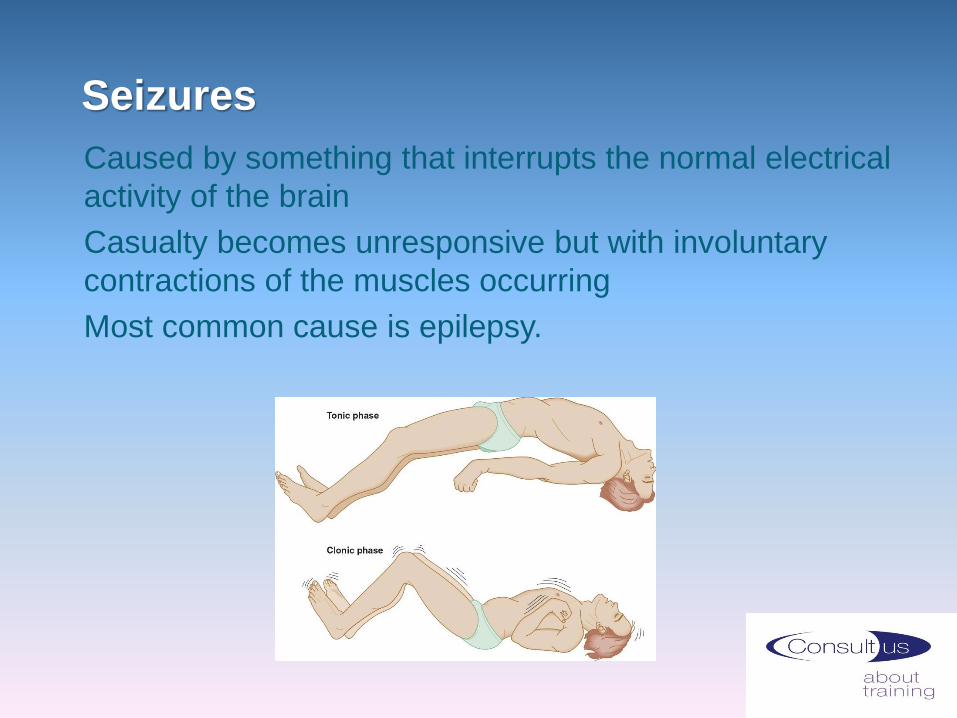
Seizures
Caused by something that interrupts the normal electrical
activity of the brain
Casualty becomes unresponsive but with involuntary
contractions of the muscles occurring
Most common cause is epilepsy.
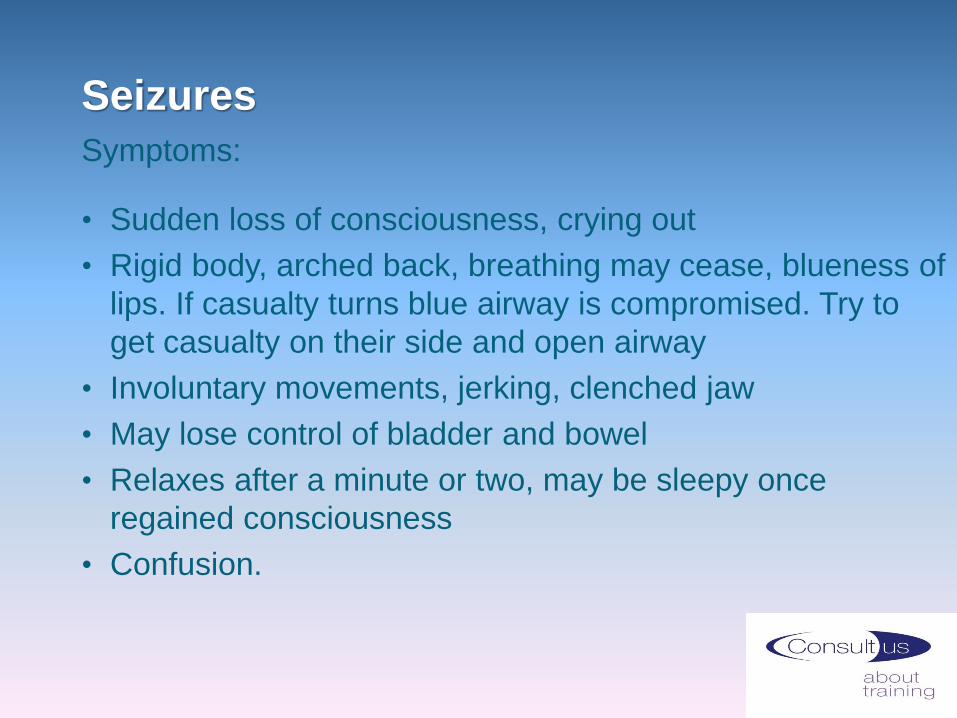
Seizures
Symptoms:
• Sudden loss of consciousness, crying out
• Rigid body, arched back, breathing may cease, blueness of
lips. If casualty turns blue airway is compromised. Try to
get casualty on their side and open airway
• Involuntary movements, jerking, clenched jaw
• May lose control of bladder and bowel
• Relaxes after a minute or two, may be sleepy once
regained consciousness
• Confusion.
Seizures
Make surrounding area safe and protect the head
Note time of start and finish of seizure
Loosen tight clothing
When over, ensure clear airway, place in recovery position
Reassure and make comfortable, casualty remains vulnerable
Allow to compose themselves and offer any help needed
Call 999 if casualty has been in convulsive (Clonic) state for 5 minutes, if seizures are repeated or if unresponsive for more than 10 minutes after seizure has stopped, have injured themselves or if first seizure
Do not attempt to hold casualty down
Do not put anything in the mouth during seizure
Do not move casualty until fully conscious (unless turns blue)
Do not give casualty anything by mouth until fully conscious
Do not leave casualty at anytime unless it is unavoidable.

Wounds and Minor External
Bleeding - Cuts, Grazes, Splinters
A wound is a break in the surface of the skin or body
OPEN wound = everyday cuts, grazes, splinters, deep cuts
Consider risk of infection (Tetanus) and risk of
contamination
Wash hands and wear disposable gloves
Check casualty not allergic to plasters or adhesive tape
Clean area around wound with soap and water wiping away
from wound using clean swab for each stroke
Wash, dry and dress open wound with plaster or dressing
without touching sterile side of dressing
Dispose of soiled waste safely.

Minor External Bleeding
Cuts and Grazes
If wound is dirty such as a graze rinse particles
out with running water
If bleeding does not stop, elevate and add more
padding and secure. If bleeding becomes more severe or does
not stop after 10 minutes, seek medical assistance
Small Splinter
Aim to remove splinter and minimise infection
Using tweezers remove in the direction splinter went in
A little bleeding can remove remaining dirt in the wound
Wash, dry and cover with dressing
If embedded or difficult to dislodge do not probe
deeply
Pad around it, cover and get medical help.

Minor BruiseCLOSED wound = a bruise or internal bleeding
Aim of first aid treatment is to reduce blood
flow to the area and minimise swelling
Raise and support the injured area comfortably
Hold a cold compress such as a flannel soaked in cold water
on bruise for 20 mins. Re-soak flannel regularly to keep it
cool
Or using an ice pack (plastic bag with ice cubes/pack of
frozen peas wrapped in a dry cloth) hold on bruise for 20
mins.
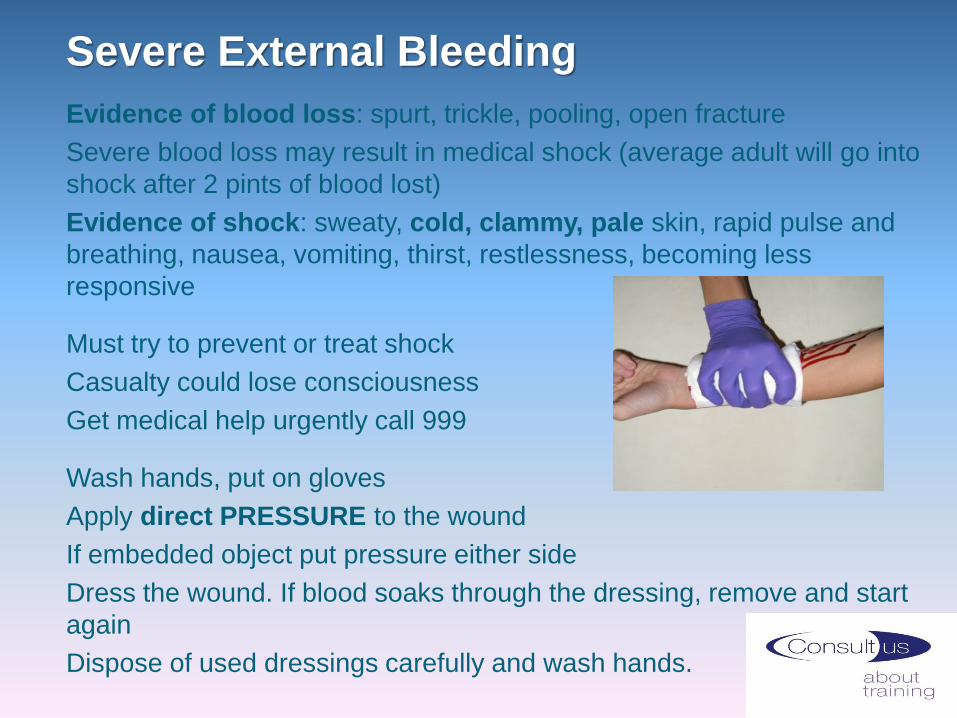
Severe External Bleeding
Evidence of blood loss: spurt, trickle, pooling, open fracture
Severe blood loss may result in medical shock (average adult will go into
shock after 2 pints of blood lost)
Evidence of shock: sweaty, cold, clammy, pale skin, rapid pulse and
breathing, nausea, vomiting, thirst, restlessness, becoming less
responsive
Must try to prevent or treat shock
Casualty could lose consciousness
Get medical help urgently call 999
Wash hands, put on gloves
Apply direct PRESSURE to the wound
If embedded object put pressure either side
Dress the wound. If blood soaks through the dressing, remove and start
again
Dispose of used dressings carefully and wash hands.

Bleeding – Do nots
Do not remove embedded objects from wound
Do not use a tourniquet unless instructed to by 999 operator
Do not expose yourself to contact with the casualty’s blood
Do not allow the casualty to eat or drink
Do not leave the casualty alone unless unavoidable.
Watch the video clip of Bandaging

ShockMedical or hypovolaemic shock is a lack of blood supply to
vital organs (heart, lungs, brain)
Not enough blood being pumped around the body
Most common causes:
• Severe blood loss (external and/or internal)
• Burns
• Broken bones
• Severe vomiting and diarrhoea
Medical shock is a life threatening condition.

Shock - Symptoms
What are the symptoms of medical shock?
Pale, cold, clammy skin
Sweating
May have blue tinge around lips
May complain of feeling thirsty
Feel sick, or vomit
Rapid weak pulse
Rapid, shallow breathing
Restless, decreased level of consciousness.
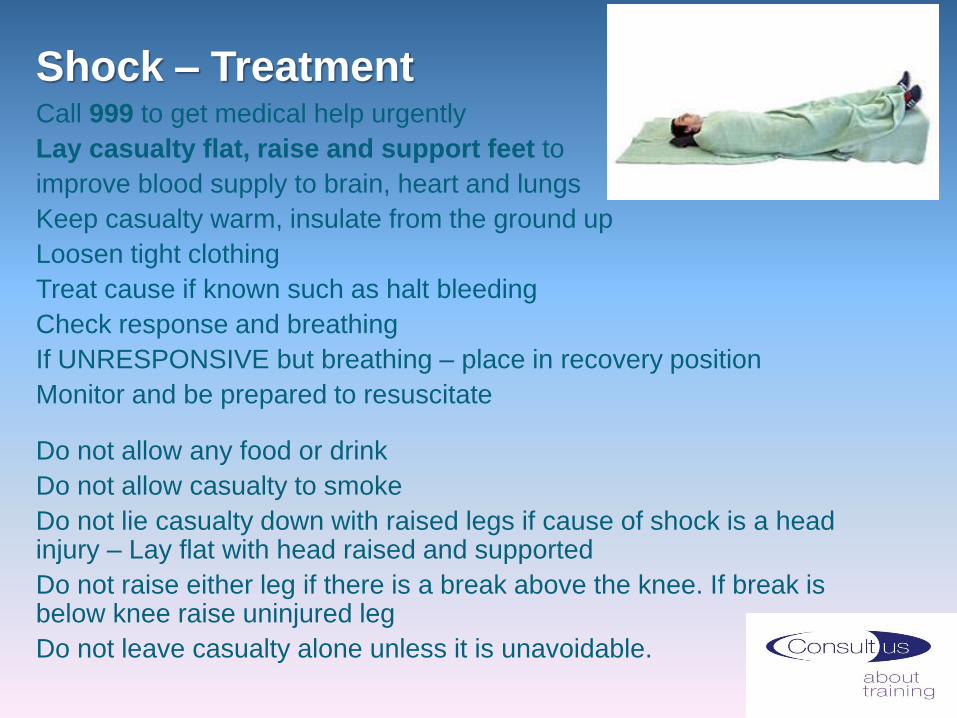
Shock – TreatmentCall 999 to get medical help urgently
Lay casualty flat, raise and support feet to
improve blood supply to brain, heart and lungs
Keep casualty warm, insulate from the ground up
Loosen tight clothing
Treat cause if known such as halt bleeding
Check response and breathing
If UNRESPONSIVE but breathing – place in recovery position
Monitor and be prepared to resuscitate
Do not allow any food or drink
Do not allow casualty to smoke
Do not lie casualty down with raised legs if cause of shock is a head injury – Lay flat with head raised and supported
Do not raise either leg if there is a break above the knee. If break is below knee raise uninjured leg
Do not leave casualty alone unless it is unavoidable.

Minor Burns and Scalds
BURNS are caused by DRY HEAT:
• heat, flames, friction, chemicals, intense cold, radiation, sun
SCALDS are burns caused by WET HEAT:
• moist heat, steam, hot liquids
SYMPTOMS for minor burns/scalds
Skin could be:
• Red
• Swollen
• Blistered
• Painful.

Minor Burns and Scalds
Remove source of heat
Put on disposable gloves
Cool the burn – flood with cool running water for at least 20 minutes
Remove clothing or jewellery in case of swelling
Minimise risk of infection – cover with a burns dressing, non fluffy
sterile dressing or cling film
For burns to hands and feet – plastic bag useful.
Burns and Scalds – Do nots
Do not apply lotions or creams
Do not use fluffy materials or adhesive dressings
Do not bandage tightly
Do not allow casualty to eat or drink
Do not remove clothing or jewellery if it is stuck to the skin
Do not break blisters
Do not overcool
Do not apply a dressing to a facial burn
Remember airway is priority. If someone has burnt their airway they
can have sips of water to cool it.

Fractures
A break or crack in the bone (open, closed, stable, unstable)
Can be difficult to determine whether they have done
damage
Due to accident or injury such as falling
Suspect if:
History of recent fall
Snapping sound heard
Difficulty moving limb
Severe pain, tenderness, bruising, discolouration,
distortion, swelling
Bones protruding through the skin
Limbs out of position.

Fractures
Call for medical assistance 999/112
Protect and support injured limb using padding
If necessary immobilise limb, sling for arm, secure injured leg to uninjured one with bandage
Make casualty as comfortable as possible
Keep casualty calm
Observe for shock and treat if necessary
For open fracture, apply clean padding
around the bone until you can bandage over
it without pressing on the injury
Do not allow the casualty to have anything to eat or drink
Do not move your casualty unless it is necessary
Do not leave the casualty unless it is unavoidable.

Dislocation
A joint injury caused by strong force or muscle contraction
Bone partially or completely pulled out of normal position:
Shoulder, hip, knee, jaw, thumbs, fingers, vertebrae
Can tear tendons, damage nerves and cause fractures
Severe pain, inability to move joint, swelling,
bruising, deformity, shortening, bending of joint
Difficult to distinguish closed fracture from
a dislocation – any doubt treat as fracture.
DislocationDo not attempt to replace dislocation into socket
Do not move casualty until injury supported or immobilised
Remove jewellery and watches in case of swelling
Do not allow casualty to eat or drink
For shoulder dislocation:
Advise casualty to remain still
Support injured arm in comfortable position
Immobilise arm with a sling, if casualty allows
Casualty needs hospital treatment
Treat for shock if necessary but do not raise an injured leg,
elevate uninjured leg only
Monitor casualty.
Watch video clip of Applying a Sling

Sprains and Strains
A sprain affects ligament tissue, a stretch and/or tear to a
ligament (ligaments connect bone to bone)
Caused by a fall, a sudden twist or a blow
May be popping or tearing sound when
injury happened
Pain, swelling, bruising with instability,
and loss of ability to move or use the
joint
A strain is an injury to a muscle or tendon (tendons connect
bone to muscle)
Caused by twisting or pulling after recent trauma or overuse
Pain, limited movement, muscle spasms,
localised swelling, inflammation.

Sprains and Strains – Treatment
Sprains and strains usually treated similarly
Aim is to
• Reduce swelling
• Relieve pain
• Make casualty as comfortable as possible
Treatment can be remembered by RICE
• Rest
• Ice (indirectly) for 20 mins
• Comfortable support
• Elevation.
The casualty should recover within a few days.

Head Injury
Following a head injury symptoms can include:
Open or closed wound
Headache
Nausea and vomiting
Pale, clammy skin
Feeling dizzy or sleepy
Impaired vision
Being unsteady
Memory loss
Could be due to concussion (injury jolts the brain), skull
fracture (break in the skull) or compression injury (causing
bleeding or swelling inside skull pressing
on brain).
Head Injury - Treatment
Sit or lay the casualty down with head raised
If closed wound – apply cold compress
If open wound – apply dressing or bandage
Monitor carefully as condition may change
Consider possible spinal injury
Get medical help if necessary
When should a casualty with a head injury go to
hospital?

Head Injury - 999
Hospitalisation required if:
Previous symptoms worsen
Persistent headache
Vomiting episodes
**The casualty is aged 65 or over**
Seizures
Confusion, dizziness, loss of balance/memory
Difficulty speaking or walking
Casualty is taking anti-clotting medication
Dilated or fixed pupils or double vision
Straw coloured fluid/blood from ears or nose
Casualty under influence of alcohol or drugs
Casualty loses consciousness
If no responsible person to monitor them.

Spinal Injury
Possible causes:
Violent forward or backward bending or
twisting of the spine
Falling from height, horse, motorbike
Falling awkwardly
Diving into shallow water and hitting the bottom
Collapsed rugby scrum
Sudden impact in motor vehicle
Heavy object falling on the back
Injury to the head or face.
Spinal Injury
Symptoms:
Pain in back and/or neck
Deformity or twist in the spine
Bruising/pain in skin over spine
Consider damage to spinal cord – pinched, partly or
completely severed could cause weakness, burning,
tingling, stiffness or loss of limb control
Loss of bladder/bowel control
Breathing difficulties.

Spinal InjuryIf casualty is conscious:
Advise casualty not to move
Call 999/112
Kneel behind casualty’s head, steady and support the head
with spread fingers keeping head, neck and spine in
alignment
Ask helper to place rolled towels/blankets/clothing either side
of the head
Continue to hold head in neutral position until medical help
arrives
Helper should monitor casualty’s vital signs.

The Unresponsive Breathing Casualty with Suspected
Neck or Spinal Injury
Must not be moved unless breathing is compromised
• Do not tilt neck, keep it steady and still
• Steady and support the head and use jaw thrust to open
airway by: Placing hands either side of the face
• With fingertips at the jaw angle gently lift the jaw open

The Unresponsive Breathing Casualty with
Suspected Neck or Spinal Injury
If you hear or suspect fluid build up in the throat whilst
performing jaw thrust technique, airway may be compromised.
Place casualty on their side keeping spine as straight as
possible – ideally you will need helper assistance to do this
If you are alone and need to leave the casualty to get help
and the casualty is unable to maintain an open airway, place
them in the recovery position.

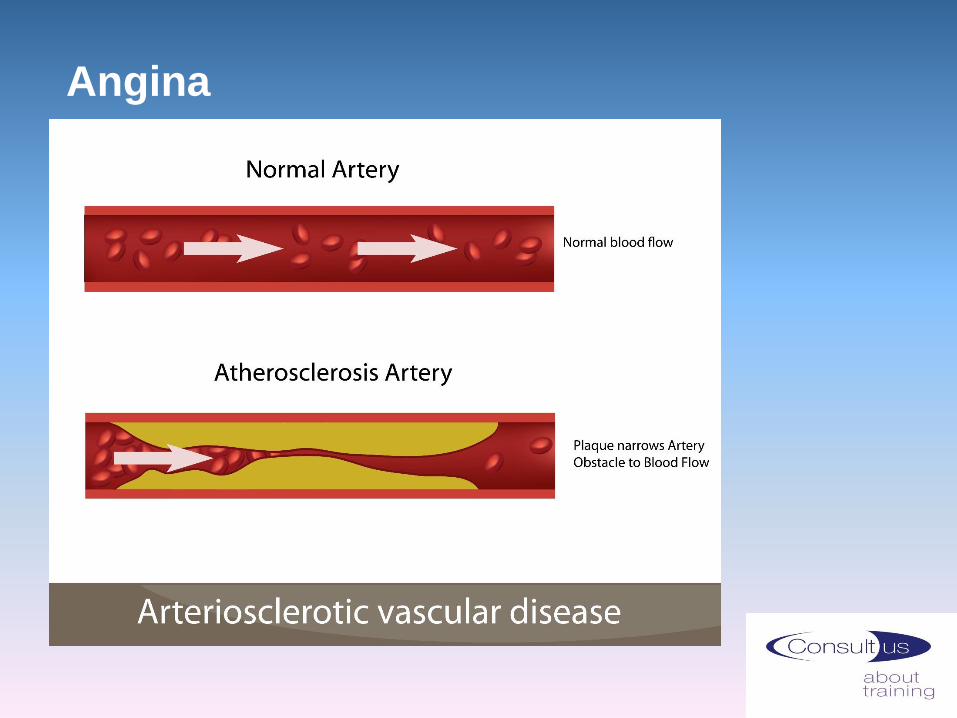
Angina
Pain or discomfort in chest, caused by narrowing
of one or more arteries in the heart muscle
Usually after exertion, in cold weather, emotional upset
Lasts a few minutes
Often confused with indigestion
TREATMENT:
Sit casualty in ‘W’ position with back supported
Nitrates (GTN) given as a mouth spray or dissolvable
tablets/ melts to relieve symptoms
Can cause headaches
If no relief after 2 x meds 5 mins apart, call 999
Remember someone who has angina is much more likely to have a heart
attack.
Angina
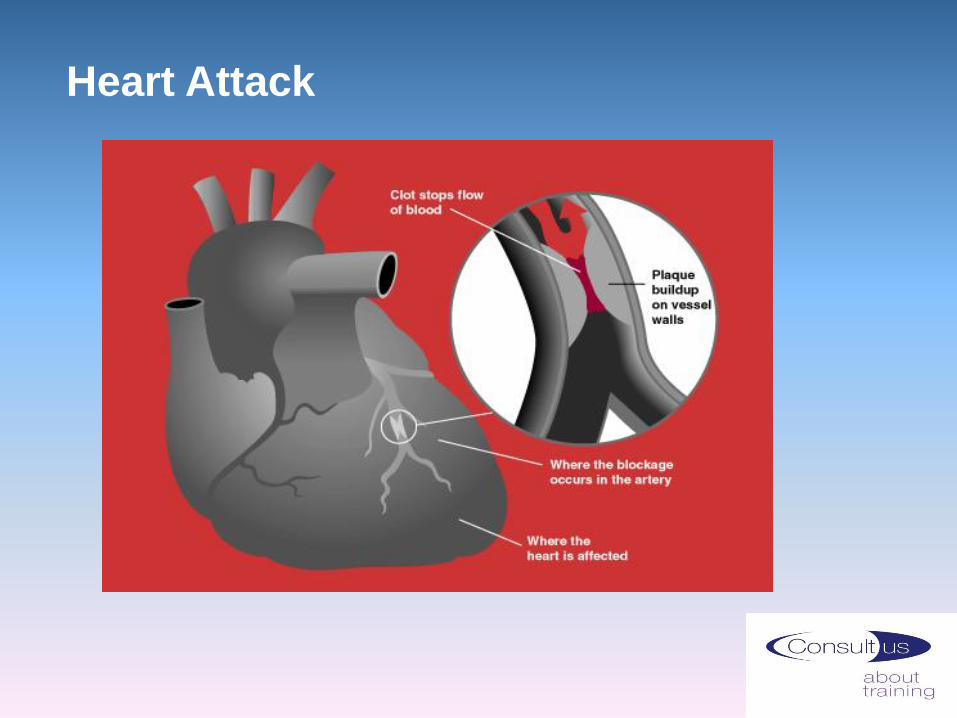
Heart Attack

Heart Attack
Caused by blood supply to the heart muscle suddenly being
completely blocked
Crushing vice like pain in the chest, jaw and down left arm
No response after nitrate spray
Breathless, clammy skin, ashen face, pale
Feel sick
Feel faint
Sense of doom
Sudden collapse.

Heart Attack – Treatment
Keep casualty calm
Sit them down in ‘W’ position
Loosen tight clothing
Summon help as soon as possible, call 999
If casualty has GTN spray, encourage and repeat if
necessary
300mg Aspirin can be chewed if sure casualty not allergic
Ask 999 if you are unsure whether to give Aspirin
Observe closely
If becomes unresponsive, conduct primary survey and if
breathing place in recovery position
Monitor and be prepared to perform CPR.

Stroke
Stroke is caused by part of the brain’s blood supply being cut off
and preventing enough oxygen and nutrients getting to the
brain cells causing their death
Due to a blood clot or a bleed
Stroke
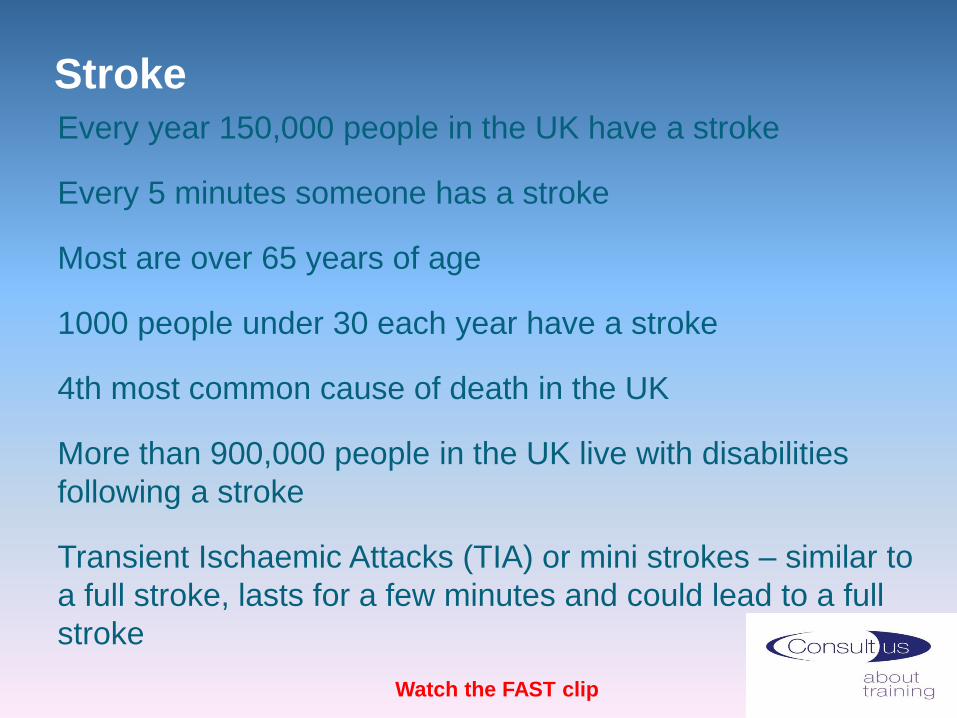
Every year 150,000 people in the UK have a stroke
Every 5 minutes someone has a stroke
Most are over 65 years of age
1000 people under 30 each year have a stroke
4th most common cause of death in the UK
More than 900,000 people in the UK live with disabilities
following a stroke
Transient Ischaemic Attacks (TIA) or mini strokes – similar to
a full stroke, lasts for a few minutes and could lead to a full
stroke
Watch the FAST clip
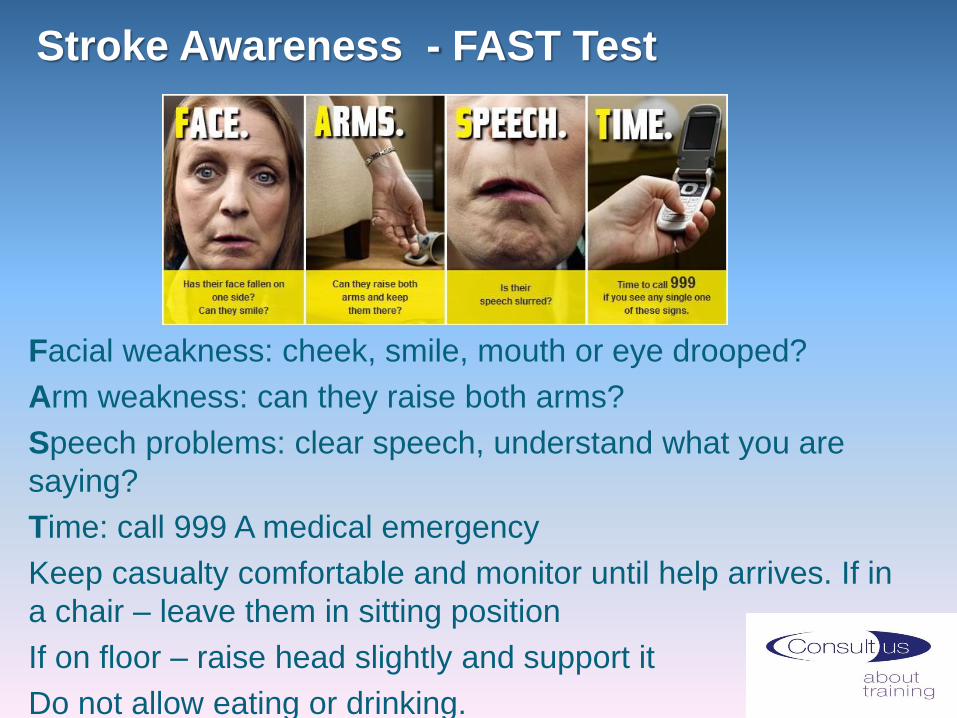
Stroke Awareness - FAST Test
Facial weakness: cheek, smile, mouth or eye drooped?
Arm weakness: can they raise both arms?
Speech problems: clear speech, understand what you are
saying?
Time: call 999 A medical emergency
Keep casualty comfortable and monitor until help arrives. If in
a chair – leave them in sitting position
If on floor – raise head slightly and support it
Do not allow eating or drinking.