
Ellucian / Colleague Student Planning Instructions for Students October 2014.

Ellucian / Colleague
Student Planning
Instructions for
Students

To access Student Planning, log into
My Campus and go to the Quick
Launch Navigation menu.
Click on Web Advisor/CRAB.
Click on Students then Student
Planning.
Welcome to Chesapeake College’s
Student planning site. Student
Planning allows students, with the
help of faculty, to plan out their
entire degree program semester by
semester.
It also allows students to plan,
schedule, and register within one
system.
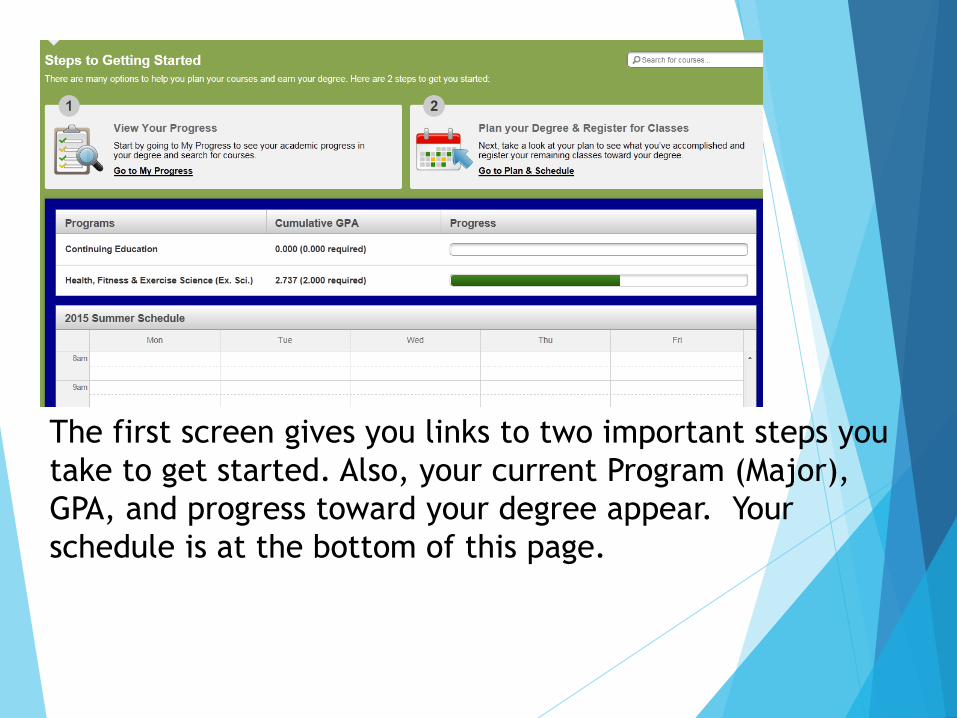
The first screen gives you links to two important steps you
take to get started. Also, your current Program (Major),
GPA, and progress toward your degree appear. Your
schedule is at the bottom of this page.

Click on View Your Progress or the My Progress tab and go to a
screen that looks similar to your AER. Find the courses still
needing completion to meet degree requirements.
Step 1. View Your Progress

Scroll the My Progress page to find the course options that
meet your requirements. Unplanned and incomplete
requirements show as Not Started . The remainder have a
status of Planned, In Progress or Completed. !

When a long list of courses appear that fulfill certain requirements, use the Hide button if you wish.
Click on the course name or the Search button to access
the Course Catalog. Click on My Progress to return to the
program evaluation.

When considering other
majors, you can play
“What If” by clicking on
the View a New Program,
choose a program from
the list in the pop-up box,
and find your progress
toward other majors.

Step 2. Plan Your Degree and Register for Classes
Click on the
Plan &
Schedule tab.
Your current
schedule shows
in Calendar
View. If
needed, use
the right arrow
button next to
the semester
to scroll to the
desired
semester.
Notice – you will see the courses that are in progress (you are
registered for them) in green and the courses you’ve planned
(not registered for but placed on your schedule) are in yellow.
Conflicts are listed on the left.

Under Timeline, you view and change your plan for several
semesters.
Planned courses or entire (planned)semesters are deleted by
clicking on the .

Move courses to another semester by clicking on the course
name. This brings up another dialogue box. Choose the new
term from the drop-down menu.
Note that in this view, a yellow warning appears if you
have not yet taken or planned a pre-requisite. These
warnings also show on your Timeline.
!

Back on the My Progress screen, note that required courses now show up with yellow icons because they are planned. The progress bar at the top is now yellow, too. Completed and registered courses appear in green.Requirements met show with courses marked as fulfilled.

When you finish revising your academic plan, return to Schedule
(Calendar View) to plan your schedule for the upcoming semester. Your
planned courses are listed on the left side of the screen. The pre-
requisite warning and time/date conflicts also show here. You also
find the warning when a section has a waitlist.

View multiple sections for several classes at once when you
click on View Other Sections. All course sections show in light
yellow with a dotted outline. This allows you to spot
conflicts easily. Click on a section to add it to your proposed
schedule. Closed (full) sections appear in red with this icon. !

When finished with your choices, your planned courses appear
in yellow and your registered courses appear in green.

Once finished with scheduling classes, use the Register Now
button to complete the registration process. Find it at the
top right of the Schedule screen when it is available the
first day of registration.

Important features at the top left of your schedule/
Calendar View screen:
Use the arrow buttons to move between semesters.
Click Print for your schedule in a printer-friendly format.
Use Save to iCal to download your schedule to the
electronic calendar on your phone, tablet and/or computer.

Student Planning allows you to leave a note or request a
review of your plan on the Advising screen. A notification
appears at the top of the screen when your plan is ready for
review. The system automatically emails your advisor when
you have requested a review. However, if you are just
leaving them a note, you will need to email them.
NOTES

Course Catalog
Find course descriptions and available sections, searchable
by subject, under Course Catalog.

Choose a subject and the catalog description for each
course appears.
Use the Add Course to Plan button to place a course on your
plan.
To view all courses in all subjects, delete the applied filter
by clicking on the .

Access courses in the current term, by clicking on View
Available Sections.
The Add Section to Schedule button includes the selected
course section to your proposed schedule.

Filter courses by location, days and times, instructors and
type of instruction (on-line, writing intensive, E-term,
etc.) using the left side of the screen.

Download a .pdf version of your unofficial transcript by
clicking on the Unofficial Transcript tab. (Continue to order
official transcripts at www.Chesapeake.edu/transcripts.)
Unofficial Transcripts
Questions?
If you have questions, please contact your faculty or staff
advisor.
For technical questions, contact the Help Desk at 410-822-
5400 X 2224.