ELEC 4601 Microprocessor Systems Lab 5 Tutorial Introduction to PIC Board.
12
ELEC 4601 Microprocessor Systems Lab 5 Tutorial Introduction to PIC Board
-
Upload
colten-jewett -
Category
Documents
-
view
232 -
download
6
Transcript of ELEC 4601 Microprocessor Systems Lab 5 Tutorial Introduction to PIC Board.

ELEC 4601 Microprocessor Systems
Lab 5 Tutorial
Introduction to PIC Board

No more MASM
Lab 5 Introduction to MPLAB IDE
Create a new project Compile a project Transfer the program to the board
This lab will have 3 parts. They will involve polling timers and setting up interrupts.

PIC Board

Wiring up the boardLEDs

PIC board with debugger

Introduction to MPLAB IDE
Start MPLAB IDE v8.15a Select Project
Select Project Wizard… Click Next
Device -> PIC16F917 Click Next
Active Toolsuite -> HI-TECH Universal Toolsuite HI-TECH ANSI C Compiler
Click Next

Continued…
Create New Project File Choose an existing folder or create a folder and
choose a file name and click save Click Next
Skip Step Four by clicking next Select Finish Create a new file by selecting File -> New
Save file as ‘.c’
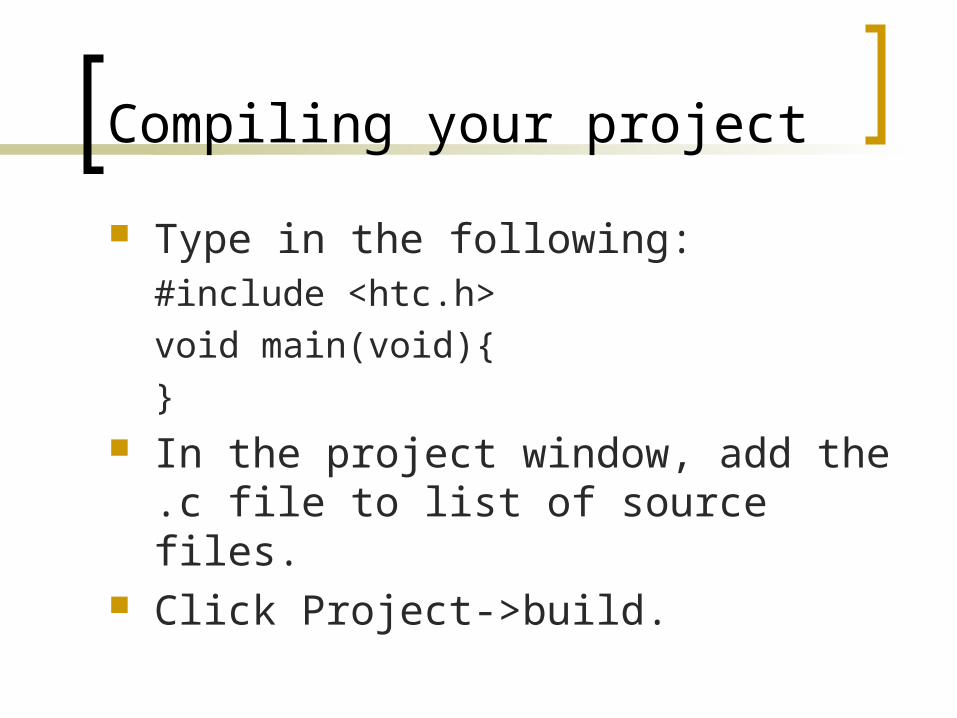
Compiling your project
Type in the following:#include <htc.h>
void main(void){
} In the project window, add the .c file to
list of source files. Click Project->build.
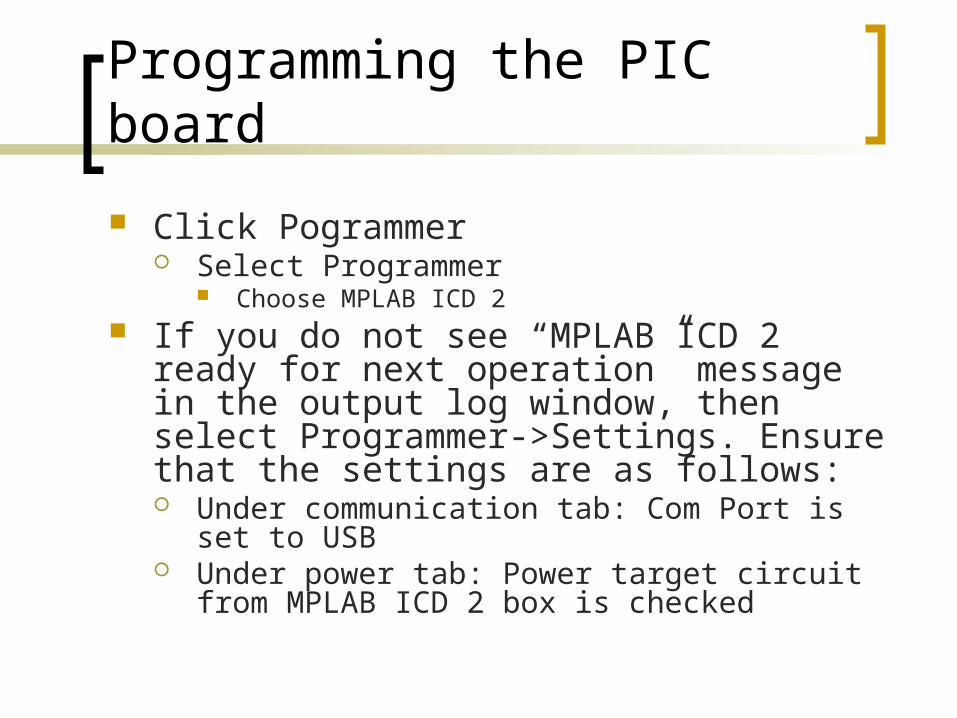
Programming the PIC board
Click Pogrammer Select Programmer
Choose MPLAB ICD 2 If you do not see “MPLAB ICD 2 ready for
next operation” message in the output log window, then select Programmer->Settings. Ensure that the settings are as follows: Under communication tab: Com Port is set to
USB Under power tab: Power target circuit from
MPLAB ICD 2 box is checked

Continued…
Select Program Click Program
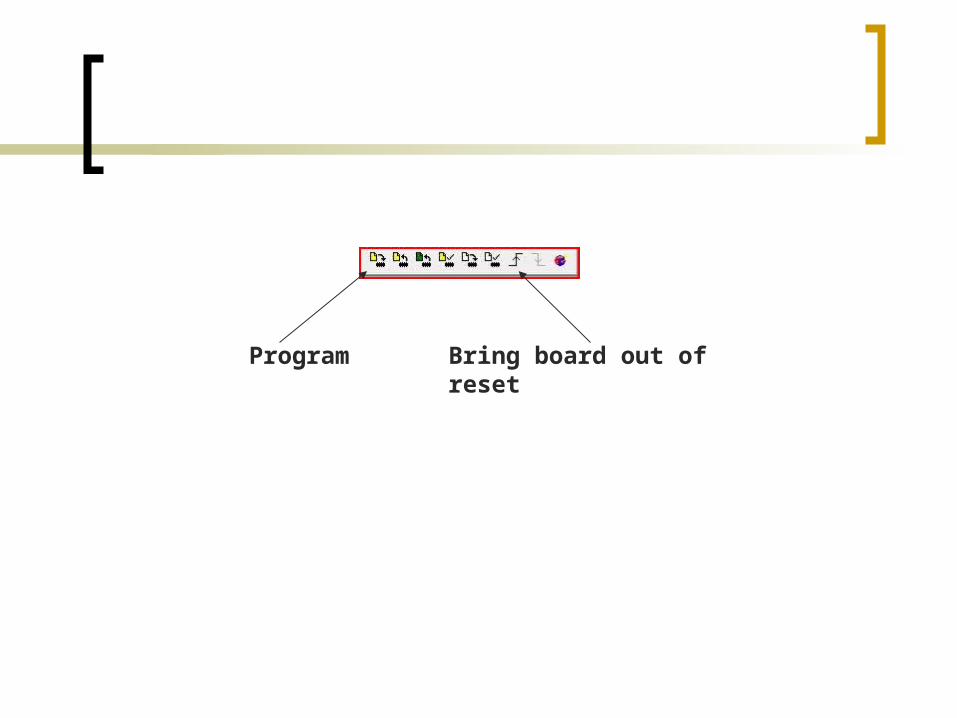
Program Bring board out of reset

Register Access
Table 2-1 to Table 2-4 outline the register map for PIC processor.
They can be accessed by simply assigning them a value.
The following statement will clear Timer 0
TMR0 = 0x00;