EC2 Image Builder - User Guide for EC2 Image Builder · EC2 Image Builder User Guide for EC2 Image...
85
EC2 Image Builder User Guide for EC2 Image Builder
Transcript of EC2 Image Builder - User Guide for EC2 Image Builder · EC2 Image Builder User Guide for EC2 Image...
EC2 Image BuilderUser Guide for EC2 Image Builder

EC2 Image Builder User Guide for EC2 Image Builder
EC2 Image Builder: User Guide for EC2 Image BuilderCopyright © 2020 Amazon Web Services, Inc. and/or its affiliates. All rights reserved.
Amazon's trademarks and trade dress may not be used in connection with any product or service that is notAmazon's, in any manner that is likely to cause confusion among customers, or in any manner that disparages ordiscredits Amazon. All other trademarks not owned by Amazon are the property of their respective owners, who mayor may not be affiliated with, connected to, or sponsored by Amazon.
EC2 Image Builder User Guide for EC2 Image Builder
Table of ContentsWhat Is EC2 Image Builder? ... . . . . . . . . . . . . . . . . . . . . . . . . . . . . . . . . . . . . . . . . . . . . . . . . . . . . . . . . . . . . . . . . . . . . . . . . . . . . . . . . . . . . . . . . . . . . . . . . . . . . . . . . . . . . . . 1
Features of EC2 Image Builder ... . . . . . . . . . . . . . . . . . . . . . . . . . . . . . . . . . . . . . . . . . . . . . . . . . . . . . . . . . . . . . . . . . . . . . . . . . . . . . . . . . . . . . . . . . . . . . . . . . . 1Supported Operating Systems .... . . . . . . . . . . . . . . . . . . . . . . . . . . . . . . . . . . . . . . . . . . . . . . . . . . . . . . . . . . . . . . . . . . . . . . . . . . . . . . . . . . . . . . . . . . . . . . . . . 2Supported Image Formats .... . . . . . . . . . . . . . . . . . . . . . . . . . . . . . . . . . . . . . . . . . . . . . . . . . . . . . . . . . . . . . . . . . . . . . . . . . . . . . . . . . . . . . . . . . . . . . . . . . . . . . . . 2Concepts .... . . . . . . . . . . . . . . . . . . . . . . . . . . . . . . . . . . . . . . . . . . . . . . . . . . . . . . . . . . . . . . . . . . . . . . . . . . . . . . . . . . . . . . . . . . . . . . . . . . . . . . . . . . . . . . . . . . . . . . . . . . . . . . . 2Pricing .... . . . . . . . . . . . . . . . . . . . . . . . . . . . . . . . . . . . . . . . . . . . . . . . . . . . . . . . . . . . . . . . . . . . . . . . . . . . . . . . . . . . . . . . . . . . . . . . . . . . . . . . . . . . . . . . . . . . . . . . . . . . . . . . . . . 3Related AWS Services .... . . . . . . . . . . . . . . . . . . . . . . . . . . . . . . . . . . . . . . . . . . . . . . . . . . . . . . . . . . . . . . . . . . . . . . . . . . . . . . . . . . . . . . . . . . . . . . . . . . . . . . . . . . . . . 3
How EC2 Image Builder Works .... . . . . . . . . . . . . . . . . . . . . . . . . . . . . . . . . . . . . . . . . . . . . . . . . . . . . . . . . . . . . . . . . . . . . . . . . . . . . . . . . . . . . . . . . . . . . . . . . . . . . . . . . . 5Components .... . . . . . . . . . . . . . . . . . . . . . . . . . . . . . . . . . . . . . . . . . . . . . . . . . . . . . . . . . . . . . . . . . . . . . . . . . . . . . . . . . . . . . . . . . . . . . . . . . . . . . . . . . . . . . . . . . . . . . . . . . . 5Default Quotas .... . . . . . . . . . . . . . . . . . . . . . . . . . . . . . . . . . . . . . . . . . . . . . . . . . . . . . . . . . . . . . . . . . . . . . . . . . . . . . . . . . . . . . . . . . . . . . . . . . . . . . . . . . . . . . . . . . . . . . . 6AWS Regions and Endpoints ... . . . . . . . . . . . . . . . . . . . . . . . . . . . . . . . . . . . . . . . . . . . . . . . . . . . . . . . . . . . . . . . . . . . . . . . . . . . . . . . . . . . . . . . . . . . . . . . . . . . . . 6Logs .... . . . . . . . . . . . . . . . . . . . . . . . . . . . . . . . . . . . . . . . . . . . . . . . . . . . . . . . . . . . . . . . . . . . . . . . . . . . . . . . . . . . . . . . . . . . . . . . . . . . . . . . . . . . . . . . . . . . . . . . . . . . . . . . . . . . . . 8Configuration Management .... . . . . . . . . . . . . . . . . . . . . . . . . . . . . . . . . . . . . . . . . . . . . . . . . . . . . . . . . . . . . . . . . . . . . . . . . . . . . . . . . . . . . . . . . . . . . . . . . . . . . . 8
Getting Started with EC2 Image Builder ... . . . . . . . . . . . . . . . . . . . . . . . . . . . . . . . . . . . . . . . . . . . . . . . . . . . . . . . . . . . . . . . . . . . . . . . . . . . . . . . . . . . . . . . . . . . . . 9Prerequisites ... . . . . . . . . . . . . . . . . . . . . . . . . . . . . . . . . . . . . . . . . . . . . . . . . . . . . . . . . . . . . . . . . . . . . . . . . . . . . . . . . . . . . . . . . . . . . . . . . . . . . . . . . . . . . . . . . . . . . . . . . . . . 9
EC2 Image Builder Service-Linked Role .... . . . . . . . . . . . . . . . . . . . . . . . . . . . . . . . . . . . . . . . . . . . . . . . . . . . . . . . . . . . . . . . . . . . . . . . . . . . . . 9Auto Scaling Groups .... . . . . . . . . . . . . . . . . . . . . . . . . . . . . . . . . . . . . . . . . . . . . . . . . . . . . . . . . . . . . . . . . . . . . . . . . . . . . . . . . . . . . . . . . . . . . . . . . . . . . . . . 9Configuration Requirements .... . . . . . . . . . . . . . . . . . . . . . . . . . . . . . . . . . . . . . . . . . . . . . . . . . . . . . . . . . . . . . . . . . . . . . . . . . . . . . . . . . . . . . . . . . . . . 9IAM ..... . . . . . . . . . . . . . . . . . . . . . . . . . . . . . . . . . . . . . . . . . . . . . . . . . . . . . . . . . . . . . . . . . . . . . . . . . . . . . . . . . . . . . . . . . . . . . . . . . . . . . . . . . . . . . . . . . . . . . . . . . . . . . 9
Accessing EC2 Image Builder ... . . . . . . . . . . . . . . . . . . . . . . . . . . . . . . . . . . . . . . . . . . . . . . . . . . . . . . . . . . . . . . . . . . . . . . . . . . . . . . . . . . . . . . . . . . . . . . . . . . . 10Build and Automate an OS Image Deployment Using the EC2 Image Builder Console .... . . . . . . . . . . . . . . . . . . . . . 10
Managing and Running Images Using the EC2 Image Builder Console .... . . . . . . . . . . . . . . . . . . . . . . . . . . . . . . . . . . . . . . . . . . . . . . . . . . 14Edit Configuration Details and Additional Settings .... . . . . . . . . . . . . . . . . . . . . . . . . . . . . . . . . . . . . . . . . . . . . . . . . . . . . . . . . . . . . . . . . . . . . 14Delete Pipeline .... . . . . . . . . . . . . . . . . . . . . . . . . . . . . . . . . . . . . . . . . . . . . . . . . . . . . . . . . . . . . . . . . . . . . . . . . . . . . . . . . . . . . . . . . . . . . . . . . . . . . . . . . . . . . . . . . . . . . . 15Create New Component .... . . . . . . . . . . . . . . . . . . . . . . . . . . . . . . . . . . . . . . . . . . . . . . . . . . . . . . . . . . . . . . . . . . . . . . . . . . . . . . . . . . . . . . . . . . . . . . . . . . . . . . . . 15Working with Image Recipes .... . . . . . . . . . . . . . . . . . . . . . . . . . . . . . . . . . . . . . . . . . . . . . . . . . . . . . . . . . . . . . . . . . . . . . . . . . . . . . . . . . . . . . . . . . . . . . . . . . . 16
Delete an Image Recipe .... . . . . . . . . . . . . . . . . . . . . . . . . . . . . . . . . . . . . . . . . . . . . . . . . . . . . . . . . . . . . . . . . . . . . . . . . . . . . . . . . . . . . . . . . . . . . . . . . 16Create a New Image Recipe Version .... . . . . . . . . . . . . . . . . . . . . . . . . . . . . . . . . . . . . . . . . . . . . . . . . . . . . . . . . . . . . . . . . . . . . . . . . . . . . . . . . 16
Testing .... . . . . . . . . . . . . . . . . . . . . . . . . . . . . . . . . . . . . . . . . . . . . . . . . . . . . . . . . . . . . . . . . . . . . . . . . . . . . . . . . . . . . . . . . . . . . . . . . . . . . . . . . . . . . . . . . . . . . . . . . . . . . . . . . 16Distribution .... . . . . . . . . . . . . . . . . . . . . . . . . . . . . . . . . . . . . . . . . . . . . . . . . . . . . . . . . . . . . . . . . . . . . . . . . . . . . . . . . . . . . . . . . . . . . . . . . . . . . . . . . . . . . . . . . . . . . . . . . . 16Sharing Resources .... . . . . . . . . . . . . . . . . . . . . . . . . . . . . . . . . . . . . . . . . . . . . . . . . . . . . . . . . . . . . . . . . . . . . . . . . . . . . . . . . . . . . . . . . . . . . . . . . . . . . . . . . . . . . . . . . 16Using Documents .... . . . . . . . . . . . . . . . . . . . . . . . . . . . . . . . . . . . . . . . . . . . . . . . . . . . . . . . . . . . . . . . . . . . . . . . . . . . . . . . . . . . . . . . . . . . . . . . . . . . . . . . . . . . . . . . . . 17
Document Sections .... . . . . . . . . . . . . . . . . . . . . . . . . . . . . . . . . . . . . . . . . . . . . . . . . . . . . . . . . . . . . . . . . . . . . . . . . . . . . . . . . . . . . . . . . . . . . . . . . . . . . . . . 17Input and Output Chaining .... . . . . . . . . . . . . . . . . . . . . . . . . . . . . . . . . . . . . . . . . . . . . . . . . . . . . . . . . . . . . . . . . . . . . . . . . . . . . . . . . . . . . . . . . . . . . 18Document Schema and Definitions .... . . . . . . . . . . . . . . . . . . . . . . . . . . . . . . . . . . . . . . . . . . . . . . . . . . . . . . . . . . . . . . . . . . . . . . . . . . . . . . . . . 19Document Example Schemas .... . . . . . . . . . . . . . . . . . . . . . . . . . . . . . . . . . . . . . . . . . . . . . . . . . . . . . . . . . . . . . . . . . . . . . . . . . . . . . . . . . . . . . . . . . 20
Compliance .... . . . . . . . . . . . . . . . . . . . . . . . . . . . . . . . . . . . . . . . . . . . . . . . . . . . . . . . . . . . . . . . . . . . . . . . . . . . . . . . . . . . . . . . . . . . . . . . . . . . . . . . . . . . . . . . . . . . . . . . . . . 23Setting Up and Managing an EC2 Image Builder Image Pipeline Using the AWS CLI ... . . . . . . . . . . . . . . . . . . . . . . . . . . . . . . . . 24
Create a Component Document .... . . . . . . . . . . . . . . . . . . . . . . . . . . . . . . . . . . . . . . . . . . . . . . . . . . . . . . . . . . . . . . . . . . . . . . . . . . . . . . . . . . . . . . . . . . . . . 25Upload Document to Amazon S3 .... . . . . . . . . . . . . . . . . . . . . . . . . . . . . . . . . . . . . . . . . . . . . . . . . . . . . . . . . . . . . . . . . . . . . . . . . . . . . . . . . . . . . . . . . . . . 26Upload Any Resources Referenced by Document .... . . . . . . . . . . . . . . . . . . . . . . . . . . . . . . . . . . . . . . . . . . . . . . . . . . . . . . . . . . . . . . . . . . . . . . 26Create a Component .... . . . . . . . . . . . . . . . . . . . . . . . . . . . . . . . . . . . . . . . . . . . . . . . . . . . . . . . . . . . . . . . . . . . . . . . . . . . . . . . . . . . . . . . . . . . . . . . . . . . . . . . . . . . . . 25Import a Component .... . . . . . . . . . . . . . . . . . . . . . . . . . . . . . . . . . . . . . . . . . . . . . . . . . . . . . . . . . . . . . . . . . . . . . . . . . . . . . . . . . . . . . . . . . . . . . . . . . . . . . . . . . . . . 27Delete a Component .... . . . . . . . . . . . . . . . . . . . . . . . . . . . . . . . . . . . . . . . . . . . . . . . . . . . . . . . . . . . . . . . . . . . . . . . . . . . . . . . . . . . . . . . . . . . . . . . . . . . . . . . . . . . . . 28Create a Basic Image Recipe .... . . . . . . . . . . . . . . . . . . . . . . . . . . . . . . . . . . . . . . . . . . . . . . . . . . . . . . . . . . . . . . . . . . . . . . . . . . . . . . . . . . . . . . . . . . . . . . . . . . 28Delete an Image Recipe .... . . . . . . . . . . . . . . . . . . . . . . . . . . . . . . . . . . . . . . . . . . . . . . . . . . . . . . . . . . . . . . . . . . . . . . . . . . . . . . . . . . . . . . . . . . . . . . . . . . . . . . . . 29Create a Distribution Configuration .... . . . . . . . . . . . . . . . . . . . . . . . . . . . . . . . . . . . . . . . . . . . . . . . . . . . . . . . . . . . . . . . . . . . . . . . . . . . . . . . . . . . . . . . . 29Update a Distribution Configuration .... . . . . . . . . . . . . . . . . . . . . . . . . . . . . . . . . . . . . . . . . . . . . . . . . . . . . . . . . . . . . . . . . . . . . . . . . . . . . . . . . . . . . . . . 30Delete a Distribution Configuration .... . . . . . . . . . . . . . . . . . . . . . . . . . . . . . . . . . . . . . . . . . . . . . . . . . . . . . . . . . . . . . . . . . . . . . . . . . . . . . . . . . . . . . . . . 31Create an Infrastructure Configuration .... . . . . . . . . . . . . . . . . . . . . . . . . . . . . . . . . . . . . . . . . . . . . . . . . . . . . . . . . . . . . . . . . . . . . . . . . . . . . . . . . . . . . 31Update an Infrastructure Configuration .... . . . . . . . . . . . . . . . . . . . . . . . . . . . . . . . . . . . . . . . . . . . . . . . . . . . . . . . . . . . . . . . . . . . . . . . . . . . . . . . . . . . 32Delete an Infrastructure Configuration .... . . . . . . . . . . . . . . . . . . . . . . . . . . . . . . . . . . . . . . . . . . . . . . . . . . . . . . . . . . . . . . . . . . . . . . . . . . . . . . . . . . . . 32Create an Image .... . . . . . . . . . . . . . . . . . . . . . . . . . . . . . . . . . . . . . . . . . . . . . . . . . . . . . . . . . . . . . . . . . . . . . . . . . . . . . . . . . . . . . . . . . . . . . . . . . . . . . . . . . . . . . . . . . . . 33Cancel an Image Creation .... . . . . . . . . . . . . . . . . . . . . . . . . . . . . . . . . . . . . . . . . . . . . . . . . . . . . . . . . . . . . . . . . . . . . . . . . . . . . . . . . . . . . . . . . . . . . . . . . . . . . . . 33
iii
EC2 Image Builder User Guide for EC2 Image Builder
Delete an Image .... . . . . . . . . . . . . . . . . . . . . . . . . . . . . . . . . . . . . . . . . . . . . . . . . . . . . . . . . . . . . . . . . . . . . . . . . . . . . . . . . . . . . . . . . . . . . . . . . . . . . . . . . . . . . . . . . . . . 33Create an Image Pipeline .... . . . . . . . . . . . . . . . . . . . . . . . . . . . . . . . . . . . . . . . . . . . . . . . . . . . . . . . . . . . . . . . . . . . . . . . . . . . . . . . . . . . . . . . . . . . . . . . . . . . . . . 34Update an Image Pipeline .... . . . . . . . . . . . . . . . . . . . . . . . . . . . . . . . . . . . . . . . . . . . . . . . . . . . . . . . . . . . . . . . . . . . . . . . . . . . . . . . . . . . . . . . . . . . . . . . . . . . . . 34Delete an Image Pipeline .... . . . . . . . . . . . . . . . . . . . . . . . . . . . . . . . . . . . . . . . . . . . . . . . . . . . . . . . . . . . . . . . . . . . . . . . . . . . . . . . . . . . . . . . . . . . . . . . . . . . . . . 35Apply a Resource Policy to a Component .... . . . . . . . . . . . . . . . . . . . . . . . . . . . . . . . . . . . . . . . . . . . . . . . . . . . . . . . . . . . . . . . . . . . . . . . . . . . . . . . . 35Apply a Resource Policy to an Image Recipe .... . . . . . . . . . . . . . . . . . . . . . . . . . . . . . . . . . . . . . . . . . . . . . . . . . . . . . . . . . . . . . . . . . . . . . . . . . . . . 36Apply a Resource Policy to an Image .... . . . . . . . . . . . . . . . . . . . . . . . . . . . . . . . . . . . . . . . . . . . . . . . . . . . . . . . . . . . . . . . . . . . . . . . . . . . . . . . . . . . . . . 36Start an Image Pipeline Manually ... . . . . . . . . . . . . . . . . . . . . . . . . . . . . . . . . . . . . . . . . . . . . . . . . . . . . . . . . . . . . . . . . . . . . . . . . . . . . . . . . . . . . . . . . . . . . 36Tag a Resource .... . . . . . . . . . . . . . . . . . . . . . . . . . . . . . . . . . . . . . . . . . . . . . . . . . . . . . . . . . . . . . . . . . . . . . . . . . . . . . . . . . . . . . . . . . . . . . . . . . . . . . . . . . . . . . . . . . . . . . 36Untag a Resource .... . . . . . . . . . . . . . . . . . . . . . . . . . . . . . . . . . . . . . . . . . . . . . . . . . . . . . . . . . . . . . . . . . . . . . . . . . . . . . . . . . . . . . . . . . . . . . . . . . . . . . . . . . . . . . . . . . 37Get Component Details ... . . . . . . . . . . . . . . . . . . . . . . . . . . . . . . . . . . . . . . . . . . . . . . . . . . . . . . . . . . . . . . . . . . . . . . . . . . . . . . . . . . . . . . . . . . . . . . . . . . . . . . . . . . 37Get Component Policy Details ... . . . . . . . . . . . . . . . . . . . . . . . . . . . . . . . . . . . . . . . . . . . . . . . . . . . . . . . . . . . . . . . . . . . . . . . . . . . . . . . . . . . . . . . . . . . . . . . . . 37Get Distribution Configuration Details ... . . . . . . . . . . . . . . . . . . . . . . . . . . . . . . . . . . . . . . . . . . . . . . . . . . . . . . . . . . . . . . . . . . . . . . . . . . . . . . . . . . . . . . 37Get an Image .... . . . . . . . . . . . . . . . . . . . . . . . . . . . . . . . . . . . . . . . . . . . . . . . . . . . . . . . . . . . . . . . . . . . . . . . . . . . . . . . . . . . . . . . . . . . . . . . . . . . . . . . . . . . . . . . . . . . . . . . 38Get Image Pipeline Details ... . . . . . . . . . . . . . . . . . . . . . . . . . . . . . . . . . . . . . . . . . . . . . . . . . . . . . . . . . . . . . . . . . . . . . . . . . . . . . . . . . . . . . . . . . . . . . . . . . . . . . 38Get Image Policy Details ... . . . . . . . . . . . . . . . . . . . . . . . . . . . . . . . . . . . . . . . . . . . . . . . . . . . . . . . . . . . . . . . . . . . . . . . . . . . . . . . . . . . . . . . . . . . . . . . . . . . . . . . . 38Get Image Recipe Details ... . . . . . . . . . . . . . . . . . . . . . . . . . . . . . . . . . . . . . . . . . . . . . . . . . . . . . . . . . . . . . . . . . . . . . . . . . . . . . . . . . . . . . . . . . . . . . . . . . . . . . . . 38Get Image Recipe Policy Details ... . . . . . . . . . . . . . . . . . . . . . . . . . . . . . . . . . . . . . . . . . . . . . . . . . . . . . . . . . . . . . . . . . . . . . . . . . . . . . . . . . . . . . . . . . . . . . . 38Get an Infrastructure Configuration Details ... . . . . . . . . . . . . . . . . . . . . . . . . . . . . . . . . . . . . . . . . . . . . . . . . . . . . . . . . . . . . . . . . . . . . . . . . . . . . . . . 38List Components .... . . . . . . . . . . . . . . . . . . . . . . . . . . . . . . . . . . . . . . . . . . . . . . . . . . . . . . . . . . . . . . . . . . . . . . . . . . . . . . . . . . . . . . . . . . . . . . . . . . . . . . . . . . . . . . . . . . 39List Component Build Versions .... . . . . . . . . . . . . . . . . . . . . . . . . . . . . . . . . . . . . . . . . . . . . . . . . . . . . . . . . . . . . . . . . . . . . . . . . . . . . . . . . . . . . . . . . . . . . . . . 39List Distributions .... . . . . . . . . . . . . . . . . . . . . . . . . . . . . . . . . . . . . . . . . . . . . . . . . . . . . . . . . . . . . . . . . . . . . . . . . . . . . . . . . . . . . . . . . . . . . . . . . . . . . . . . . . . . . . . . . . . 39List Images .... . . . . . . . . . . . . . . . . . . . . . . . . . . . . . . . . . . . . . . . . . . . . . . . . . . . . . . . . . . . . . . . . . . . . . . . . . . . . . . . . . . . . . . . . . . . . . . . . . . . . . . . . . . . . . . . . . . . . . . . . . . 39List Image Build Versions .... . . . . . . . . . . . . . . . . . . . . . . . . . . . . . . . . . . . . . . . . . . . . . . . . . . . . . . . . . . . . . . . . . . . . . . . . . . . . . . . . . . . . . . . . . . . . . . . . . . . . . . 39List Image Pipeline Images .... . . . . . . . . . . . . . . . . . . . . . . . . . . . . . . . . . . . . . . . . . . . . . . . . . . . . . . . . . . . . . . . . . . . . . . . . . . . . . . . . . . . . . . . . . . . . . . . . . . . . 40List Image Pipelines .... . . . . . . . . . . . . . . . . . . . . . . . . . . . . . . . . . . . . . . . . . . . . . . . . . . . . . . . . . . . . . . . . . . . . . . . . . . . . . . . . . . . . . . . . . . . . . . . . . . . . . . . . . . . . . . 40List Image Recipes .... . . . . . . . . . . . . . . . . . . . . . . . . . . . . . . . . . . . . . . . . . . . . . . . . . . . . . . . . . . . . . . . . . . . . . . . . . . . . . . . . . . . . . . . . . . . . . . . . . . . . . . . . . . . . . . . . 40List Infrastructure Configurations .... . . . . . . . . . . . . . . . . . . . . . . . . . . . . . . . . . . . . . . . . . . . . . . . . . . . . . . . . . . . . . . . . . . . . . . . . . . . . . . . . . . . . . . . . . . . 40List All of the Tags for a Specific Resource .... . . . . . . . . . . . . . . . . . . . . . . . . . . . . . . . . . . . . . . . . . . . . . . . . . . . . . . . . . . . . . . . . . . . . . . . . . . . . . . 40
Security in EC2 Image Builder ... . . . . . . . . . . . . . . . . . . . . . . . . . . . . . . . . . . . . . . . . . . . . . . . . . . . . . . . . . . . . . . . . . . . . . . . . . . . . . . . . . . . . . . . . . . . . . . . . . . . . . . . . . 41Data Protection .... . . . . . . . . . . . . . . . . . . . . . . . . . . . . . . . . . . . . . . . . . . . . . . . . . . . . . . . . . . . . . . . . . . . . . . . . . . . . . . . . . . . . . . . . . . . . . . . . . . . . . . . . . . . . . . . . . . . . 41
Encryption and Key Management .... . . . . . . . . . . . . . . . . . . . . . . . . . . . . . . . . . . . . . . . . . . . . . . . . . . . . . . . . . . . . . . . . . . . . . . . . . . . . . . . . . . . 42Internetwork Traffic Privacy .... . . . . . . . . . . . . . . . . . . . . . . . . . . . . . . . . . . . . . . . . . . . . . . . . . . . . . . . . . . . . . . . . . . . . . . . . . . . . . . . . . . . . . . . . . . . 42
Identity and Access Management .... . . . . . . . . . . . . . . . . . . . . . . . . . . . . . . . . . . . . . . . . . . . . . . . . . . . . . . . . . . . . . . . . . . . . . . . . . . . . . . . . . . . . . . . . . . . 42Audience .... . . . . . . . . . . . . . . . . . . . . . . . . . . . . . . . . . . . . . . . . . . . . . . . . . . . . . . . . . . . . . . . . . . . . . . . . . . . . . . . . . . . . . . . . . . . . . . . . . . . . . . . . . . . . . . . . . . . . . 43Authenticating With Identities ... . . . . . . . . . . . . . . . . . . . . . . . . . . . . . . . . . . . . . . . . . . . . . . . . . . . . . . . . . . . . . . . . . . . . . . . . . . . . . . . . . . . . . . . . . 43Managing Access Using Policies ... . . . . . . . . . . . . . . . . . . . . . . . . . . . . . . . . . . . . . . . . . . . . . . . . . . . . . . . . . . . . . . . . . . . . . . . . . . . . . . . . . . . . . . . 43How EC2 Image Builder Works with IAM ..... . . . . . . . . . . . . . . . . . . . . . . . . . . . . . . . . . . . . . . . . . . . . . . . . . . . . . . . . . . . . . . . . . . . . . . . . 43Identity-Based Policy Examples .... . . . . . . . . . . . . . . . . . . . . . . . . . . . . . . . . . . . . . . . . . . . . . . . . . . . . . . . . . . . . . . . . . . . . . . . . . . . . . . . . . . . . . . 46Resource-Based Policy Examples .... . . . . . . . . . . . . . . . . . . . . . . . . . . . . . . . . . . . . . . . . . . . . . . . . . . . . . . . . . . . . . . . . . . . . . . . . . . . . . . . . . . . . 49Service-Linked Roles .... . . . . . . . . . . . . . . . . . . . . . . . . . . . . . . . . . . . . . . . . . . . . . . . . . . . . . . . . . . . . . . . . . . . . . . . . . . . . . . . . . . . . . . . . . . . . . . . . . . . . . 50Troubleshooting IAM ..... . . . . . . . . . . . . . . . . . . . . . . . . . . . . . . . . . . . . . . . . . . . . . . . . . . . . . . . . . . . . . . . . . . . . . . . . . . . . . . . . . . . . . . . . . . . . . . . . . . . . 53
Compliance Validation .... . . . . . . . . . . . . . . . . . . . . . . . . . . . . . . . . . . . . . . . . . . . . . . . . . . . . . . . . . . . . . . . . . . . . . . . . . . . . . . . . . . . . . . . . . . . . . . . . . . . . . . . . . . 54Resilience .... . . . . . . . . . . . . . . . . . . . . . . . . . . . . . . . . . . . . . . . . . . . . . . . . . . . . . . . . . . . . . . . . . . . . . . . . . . . . . . . . . . . . . . . . . . . . . . . . . . . . . . . . . . . . . . . . . . . . . . . . . . . . 55Infrastructure Security ... . . . . . . . . . . . . . . . . . . . . . . . . . . . . . . . . . . . . . . . . . . . . . . . . . . . . . . . . . . . . . . . . . . . . . . . . . . . . . . . . . . . . . . . . . . . . . . . . . . . . . . . . . . . 55Configuration and Vulnerability ... . . . . . . . . . . . . . . . . . . . . . . . . . . . . . . . . . . . . . . . . . . . . . . . . . . . . . . . . . . . . . . . . . . . . . . . . . . . . . . . . . . . . . . . . . . . . . . . 56Best Practices .... . . . . . . . . . . . . . . . . . . . . . . . . . . . . . . . . . . . . . . . . . . . . . . . . . . . . . . . . . . . . . . . . . . . . . . . . . . . . . . . . . . . . . . . . . . . . . . . . . . . . . . . . . . . . . . . . . . . . . . 56
Resource Sharing in EC2 Image Builder ... . . . . . . . . . . . . . . . . . . . . . . . . . . . . . . . . . . . . . . . . . . . . . . . . . . . . . . . . . . . . . . . . . . . . . . . . . . . . . . . . . . . . . . . . . . . . 60Working with Shared Resources .... . . . . . . . . . . . . . . . . . . . . . . . . . . . . . . . . . . . . . . . . . . . . . . . . . . . . . . . . . . . . . . . . . . . . . . . . . . . . . . . . . . . . . . . . . . . . . 60Prerequisites for Sharing Components, Images, and Image Recipes .... . . . . . . . . . . . . . . . . . . . . . . . . . . . . . . . . . . . . . . . . . . . . . 61Related Services .... . . . . . . . . . . . . . . . . . . . . . . . . . . . . . . . . . . . . . . . . . . . . . . . . . . . . . . . . . . . . . . . . . . . . . . . . . . . . . . . . . . . . . . . . . . . . . . . . . . . . . . . . . . . . . . . . . . . 61Sharing Across Regions .... . . . . . . . . . . . . . . . . . . . . . . . . . . . . . . . . . . . . . . . . . . . . . . . . . . . . . . . . . . . . . . . . . . . . . . . . . . . . . . . . . . . . . . . . . . . . . . . . . . . . . . . . . 61Sharing a Component, Image, or Image Recipe .... . . . . . . . . . . . . . . . . . . . . . . . . . . . . . . . . . . . . . . . . . . . . . . . . . . . . . . . . . . . . . . . . . . . . . . . . 61Unsharing a Shared Component, Image, or Image Recipe .... . . . . . . . . . . . . . . . . . . . . . . . . . . . . . . . . . . . . . . . . . . . . . . . . . . . . . . . . . . 62Identifying a Shared Component, Image, or Image Recipe .... . . . . . . . . . . . . . . . . . . . . . . . . . . . . . . . . . . . . . . . . . . . . . . . . . . . . . . . . . 62Shared Component, Image, and Image Recipe Permissions .... . . . . . . . . . . . . . . . . . . . . . . . . . . . . . . . . . . . . . . . . . . . . . . . . . . . . . . . . 62Billing and Metering .... . . . . . . . . . . . . . . . . . . . . . . . . . . . . . . . . . . . . . . . . . . . . . . . . . . . . . . . . . . . . . . . . . . . . . . . . . . . . . . . . . . . . . . . . . . . . . . . . . . . . . . . . . . . . . 63
iv

EC2 Image Builder User Guide for EC2 Image Builder
Instance Limits ... . . . . . . . . . . . . . . . . . . . . . . . . . . . . . . . . . . . . . . . . . . . . . . . . . . . . . . . . . . . . . . . . . . . . . . . . . . . . . . . . . . . . . . . . . . . . . . . . . . . . . . . . . . . . . . . . . . . . . . 63Troubleshooting EC2 Image Builder ... . . . . . . . . . . . . . . . . . . . . . . . . . . . . . . . . . . . . . . . . . . . . . . . . . . . . . . . . . . . . . . . . . . . . . . . . . . . . . . . . . . . . . . . . . . . . . . . . . 64
General Troubleshooting .... . . . . . . . . . . . . . . . . . . . . . . . . . . . . . . . . . . . . . . . . . . . . . . . . . . . . . . . . . . . . . . . . . . . . . . . . . . . . . . . . . . . . . . . . . . . . . . . . . . . . . . . 64Troubleshooting Scenarios .... . . . . . . . . . . . . . . . . . . . . . . . . . . . . . . . . . . . . . . . . . . . . . . . . . . . . . . . . . . . . . . . . . . . . . . . . . . . . . . . . . . . . . . . . . . . . . . . . . . . . . 64
Supported Action Modules .... . . . . . . . . . . . . . . . . . . . . . . . . . . . . . . . . . . . . . . . . . . . . . . . . . . . . . . . . . . . . . . . . . . . . . . . . . . . . . . . . . . . . . . . . . . . . . . . . . . . . . . . . . . . . 66ExecuteBinary .... . . . . . . . . . . . . . . . . . . . . . . . . . . . . . . . . . . . . . . . . . . . . . . . . . . . . . . . . . . . . . . . . . . . . . . . . . . . . . . . . . . . . . . . . . . . . . . . . . . . . . . . . . . . . . . . . . . . . . . 66ExecuteBash .... . . . . . . . . . . . . . . . . . . . . . . . . . . . . . . . . . . . . . . . . . . . . . . . . . . . . . . . . . . . . . . . . . . . . . . . . . . . . . . . . . . . . . . . . . . . . . . . . . . . . . . . . . . . . . . . . . . . . . . . . . 67ExecutePowerShell ... . . . . . . . . . . . . . . . . . . . . . . . . . . . . . . . . . . . . . . . . . . . . . . . . . . . . . . . . . . . . . . . . . . . . . . . . . . . . . . . . . . . . . . . . . . . . . . . . . . . . . . . . . . . . . . . . . 68Reboot .... . . . . . . . . . . . . . . . . . . . . . . . . . . . . . . . . . . . . . . . . . . . . . . . . . . . . . . . . . . . . . . . . . . . . . . . . . . . . . . . . . . . . . . . . . . . . . . . . . . . . . . . . . . . . . . . . . . . . . . . . . . . . . . . . 69UpdateOS .... . . . . . . . . . . . . . . . . . . . . . . . . . . . . . . . . . . . . . . . . . . . . . . . . . . . . . . . . . . . . . . . . . . . . . . . . . . . . . . . . . . . . . . . . . . . . . . . . . . . . . . . . . . . . . . . . . . . . . . . . . . . . 70S3Upload .... . . . . . . . . . . . . . . . . . . . . . . . . . . . . . . . . . . . . . . . . . . . . . . . . . . . . . . . . . . . . . . . . . . . . . . . . . . . . . . . . . . . . . . . . . . . . . . . . . . . . . . . . . . . . . . . . . . . . . . . . . . . . 71S3Download .... . . . . . . . . . . . . . . . . . . . . . . . . . . . . . . . . . . . . . . . . . . . . . . . . . . . . . . . . . . . . . . . . . . . . . . . . . . . . . . . . . . . . . . . . . . . . . . . . . . . . . . . . . . . . . . . . . . . . . . . . 73SetRegistry .... . . . . . . . . . . . . . . . . . . . . . . . . . . . . . . . . . . . . . . . . . . . . . . . . . . . . . . . . . . . . . . . . . . . . . . . . . . . . . . . . . . . . . . . . . . . . . . . . . . . . . . . . . . . . . . . . . . . . . . . . . . 74
STIG Components .... . . . . . . . . . . . . . . . . . . . . . . . . . . . . . . . . . . . . . . . . . . . . . . . . . . . . . . . . . . . . . . . . . . . . . . . . . . . . . . . . . . . . . . . . . . . . . . . . . . . . . . . . . . . . . . . . . . . . . . . . . 76Windows STIG Components .... . . . . . . . . . . . . . . . . . . . . . . . . . . . . . . . . . . . . . . . . . . . . . . . . . . . . . . . . . . . . . . . . . . . . . . . . . . . . . . . . . . . . . . . . . . . . . . . . . . . 76
STIG-Build-Windows-Low Version 1.0.1 .... . . . . . . . . . . . . . . . . . . . . . . . . . . . . . . . . . . . . . . . . . . . . . . . . . . . . . . . . . . . . . . . . . . . . . . . . . . . 76STIG-Build-Windows-Medium Version 1.0.1 .... . . . . . . . . . . . . . . . . . . . . . . . . . . . . . . . . . . . . . . . . . . . . . . . . . . . . . . . . . . . . . . . . . . . . . 76STIG-Build-Windows-High Version 1.0.1 .... . . . . . . . . . . . . . . . . . . . . . . . . . . . . . . . . . . . . . . . . . . . . . . . . . . . . . . . . . . . . . . . . . . . . . . . . . . 77
Linux STIG Components .... . . . . . . . . . . . . . . . . . . . . . . . . . . . . . . . . . . . . . . . . . . . . . . . . . . . . . . . . . . . . . . . . . . . . . . . . . . . . . . . . . . . . . . . . . . . . . . . . . . . . . . . . 78STIG-Build-Linux-Low Version 2.6.0 .... . . . . . . . . . . . . . . . . . . . . . . . . . . . . . . . . . . . . . . . . . . . . . . . . . . . . . . . . . . . . . . . . . . . . . . . . . . . . . . . . 78STIG-Build-Linux-Medium Version 2.6.0 .... . . . . . . . . . . . . . . . . . . . . . . . . . . . . . . . . . . . . . . . . . . . . . . . . . . . . . . . . . . . . . . . . . . . . . . . . . . . 78STIG-Build-Linux-High Version 2.6.0 .... . . . . . . . . . . . . . . . . . . . . . . . . . . . . . . . . . . . . . . . . . . . . . . . . . . . . . . . . . . . . . . . . . . . . . . . . . . . . . . . 78
AWS Glossary .... . . . . . . . . . . . . . . . . . . . . . . . . . . . . . . . . . . . . . . . . . . . . . . . . . . . . . . . . . . . . . . . . . . . . . . . . . . . . . . . . . . . . . . . . . . . . . . . . . . . . . . . . . . . . . . . . . . . . . . . . . . . . . . 80
v
EC2 Image Builder User Guide for EC2 Image BuilderFeatures of EC2 Image Builder
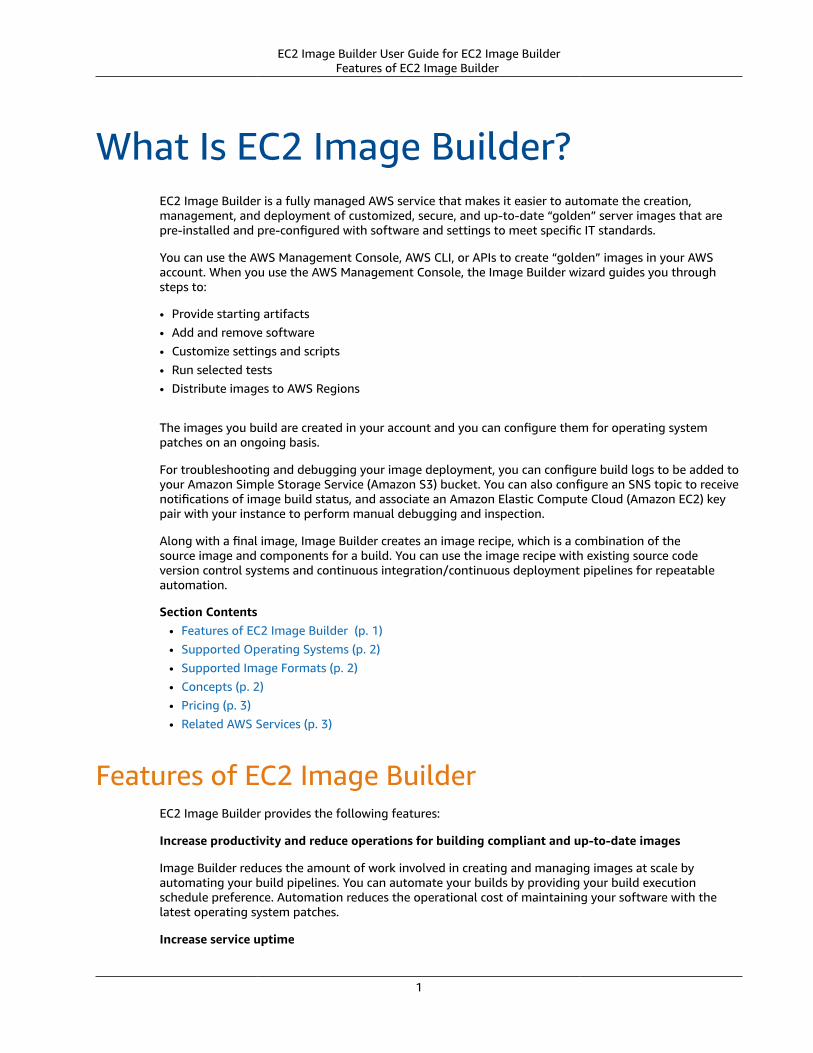
What Is EC2 Image Builder?EC2 Image Builder is a fully managed AWS service that makes it easier to automate the creation,management, and deployment of customized, secure, and up-to-date “golden” server images that arepre-installed and pre-configured with software and settings to meet specific IT standards.
You can use the AWS Management Console, AWS CLI, or APIs to create “golden” images in your AWSaccount. When you use the AWS Management Console, the Image Builder wizard guides you throughsteps to:
• Provide starting artifacts• Add and remove software• Customize settings and scripts• Run selected tests• Distribute images to AWS Regions
The images you build are created in your account and you can configure them for operating systempatches on an ongoing basis.
For troubleshooting and debugging your image deployment, you can configure build logs to be added toyour Amazon Simple Storage Service (Amazon S3) bucket. You can also configure an SNS topic to receivenotifications of image build status, and associate an Amazon Elastic Compute Cloud (Amazon EC2) keypair with your instance to perform manual debugging and inspection.
Along with a final image, Image Builder creates an image recipe, which is a combination of thesource image and components for a build. You can use the image recipe with existing source codeversion control systems and continuous integration/continuous deployment pipelines for repeatableautomation.
Section Contents• Features of EC2 Image Builder (p. 1)• Supported Operating Systems (p. 2)• Supported Image Formats (p. 2)• Concepts (p. 2)• Pricing (p. 3)• Related AWS Services (p. 3)
Features of EC2 Image BuilderEC2 Image Builder provides the following features:
Increase productivity and reduce operations for building compliant and up-to-date images
Image Builder reduces the amount of work involved in creating and managing images at scale byautomating your build pipelines. You can automate your builds by providing your build executionschedule preference. Automation reduces the operational cost of maintaining your software with thelatest operating system patches.
Increase service uptime
1
EC2 Image Builder User Guide for EC2 Image BuilderSupported Operating Systems
Image Builder allows you to test your images before deployment with both AWS-provided andcustomized tests. AWS will distribute your image only if all of the configured tests have succeeded.
Raise the security bar for deployments
Image Builder allows you to create images that remove unnecessary exposure to component securityvulnerabilities. You can apply AWS security settings to create secure, out-of-the-box images that meetindustry and internal security criteria. Image Builder also provides collections of settings for companiesin regulated industries. You can use these settings to help you quickly and easily build compliant imagesfor STIG standards. For a complete list of STIG components available through Image Builder, see EC2Image Builder STIG Components (p. 76).
Centralized enforcement and lineage tracking
Using built-in integrations with AWS Organizations, Image Builder enables you to enforce policies thatrestrict accounts to run instances only from approved AMIs.
Supported Operating SystemsImage Builder supports the following operating systems:
• Amazon Linux 2
• Windows Server 2019/2016/2012 R2
Supported Image FormatsYou can choose an existing AMI as a starting point to build your images.
NoteIf your source image is an encrypted AMI, you must use the Image Builder CLI or SDK. See thedocumentation for the CreateImageRecipe action.
ConceptsThe following terminology and concepts are central to your understanding and use of EC2 Image Builder.
AMI
An Amazon Machine Image (AMI) is the basic unit of deployment in Amazon EC2. An AMI is a pre-configured VM image that contains the OS and preinstalled software to deploy EC2 instances. For moreinformation, see Amazon Machine Images (AMI).
Image Pipeline
An image pipeline is the automation configuration for building secure OS images on AWS. The ImageBuilder image pipeline is associated with an image recipe that defines the build, validation, andtest phases for an image build lifecycle. An image pipeline can be associated with an infrastructureconfiguration that defines where your image is built. You can define attributes, such as instance type,subnets, security groups, logging, and other infrastructure-related configurations. You can also associateyour image pipeline with a distribution configuration to define how you would like to deploy your image.
Image Recipe
2
EC2 Image Builder User Guide for EC2 Image BuilderPricing
An Image Builder image recipe is a document that defines the source image and the components to beapplied to the source image to produce the desired configuration for the output image. You can use animage recipe to duplicate builds. Image Builder image recipes can be shared, branched, and edited usingthe console wizard, the AWS CLI, or the API. You can use image recipes with your version control softwareto maintain shareable versioned image recipes.
Source Image
The source image is the selected image and OS used in your image recipe document along withthe components. The source image and the component definitions combined produce the desiredconfiguration for the output image.
Build Components
Build components are orchestration documents that define a sequence of steps for downloading,installing, and configuring software packages. They also define validation and security hardening steps.A component is defined using a YAML document format (as described in the following Document entry).
Test Components
Test components are orchestration documents that define tests to run on software packages. Acomponent is defined using a YAML document format (see the following Document entry).
Document
A declarative document that uses the YAML format to list the execution steps for build, validation, andtest of an AMI on an instance. The document is input to a configuration management application, whichruns locally on an Amazon EC2 instance to execute the document steps.
PricingThere is no cost to use EC2 Image Builder. There may be costs associated with launching an AmazonEC2 instance and storing logs on Amazon S3, for validating images with Amazon Inspector, and forAMI storage for Amazon EBS Snapshots, depending on the configuration of your image. If you enableSystems Manager Advanced Tier and run EC2 instances with on-premises activation, you may be chargedfor resources through Systems Manager.
Related AWS ServicesEC2 Image Builder uses other AWS services to build images. Depending on your Image Builder imagerecipe configuration, the following services may be used.
AWS License Manager
AWS License Manager allows you to create and apply license configurations from an account licenseconfiguration store. For each AMI, you can use Image Builder to attach to a preexisting licenseconfiguration that your AWS account has access to as part of the Image Builder workflow. Licenseconfigurations can be applied only to AMIs. Image Builder can use only preexisting license configurationsand cannot directly create or modify license configurations. License Manager settings will not replicateacross AWS Regions that must be enabled in your account, for example, between the ap-east-1 (HKG)and the me-south-1 (BAH) Regions.
AWS Organizations
AWS Organizations allows you to apply Service Control Policies (SCP) on accounts in your organization.You can create, manage, enable, and disable individual policies. Similar to all other AWS artifacts and
3
EC2 Image Builder User Guide for EC2 Image BuilderRelated AWS Services
services, Image Builder honors the policies defined in AWS Organizations. AWS provides template SCPsfor common scenarios, such as enforcing constraints on member accounts to launch instances with onlyapproved AMIs.
Amazon Inspector
Image Builder uses Amazon Inspector as the default vulnerability scanning agent to establish securitybaselines for Amazon Linux 2, Windows Server 2012, and Windows Server 2016. For more information,see What is Amazon Inspector?
AWS Systems Manager (SSM) Automation
A Systems Manager automation document defines the actions that Systems Manager performs onyour managed instances and AWS resources. SSM documents use JSON or YAML and include steps andparameters that you specify. The steps you specify run in sequential order. Automation documents areSystems Manager documents of type Automation, as opposed to Command and Policy documents. Formore information, see AWS Systems Manager Automation.
AWS Resource Access Manager
AWS Resource Access Manager (AWS RAM) lets you share your resources with any AWS account orthrough AWS Organizations. If you have multiple AWS accounts, you can create resources centrally anduse AWS RAM to share those resources with other accounts. EC2 Image Builder allows sharing for thefollowing resources: components, images, and image recipes. For more information about AWS RAM, seethe AWS Resource Access Manager User Guide. For information about sharing Image Builder resources,see Resource Sharing in EC2 Image Builder (p. 60).
4
EC2 Image Builder User Guide for EC2 Image BuilderComponents
How EC2 Image Builder WorksWhen you use the EC2 Image Builder console to create a golden image, a wizard guides you through thefollowing steps.
1. Select source image. You select a source OS image, for example, an existing AMI.2. Create image recipe. You add components to create an image recipe for your image pipeline.
Components are the building blocks that are consumed by an image recipe, for example, packages forinstallation, security hardening steps, and tests. The selected OS and components make up an imagerecipe. Components are installed in the order in which they are specified and cannot be reorderedafter selection.
3. Output. Image Builder creates an OS image in the selected output format.4. Distribute. You distribute your image to selected AWS Regions after it passes tests in the image
pipeline.
The images that you build from the golden image are in your AWS account. You can configure yourimage pipeline to produce updated and patched versions of your AMI by entering a build schedule.When the build is complete, you can receive notification via Amazon Simple Notification Service (SNS).In addition to producing a final image, Image Builder generates an image recipe that can be used withexisting version control systems and continuous integration/continuous deployment (CI/CD) pipelines forrepeatable automation. You can share and create new versions of your image recipe.
Section Contents• Components (p. 5)• Default Quotas (p. 6)• AWS Regions and Endpoints (p. 6)• Logs (p. 8)• Configuration Management (p. 8)
ComponentsAn Amazon Machine Image (AMI) is the basic unit of deployment in Amazon EC2. It is a preconfiguredVirtual Machine (VM) image that contains the OS and software to deploy EC2 instances.
An AMI includes the following components:
• A template for the root volume of the VM. When you launch an EC2 VM, the root device volumecontains the image to boot the instance. When instance store is used, the root device is an instancestore volume created from a template in Amazon S3. For more information, see Amazon EC2 RootDevice Volume.
• When Amazon EBS is used, the root device is an EBS volume created from an EBS snapshot.• Launch permissions that determine the AWS accounts that can launch VMs with the AMI.• Block device mapping data that specifies the volumes to attach to the instance after launch.• A unique resource identifier per Region per account.• Metadata payloads such as tags, and properties such as Region, operating system, architecture, root
device type, provider, launch permissions, storage for the root device, and signing status.• An AMI signature to protect against unauthorized tampering. For more information, see Instance
Identity Documents.
5

EC2 Image Builder User Guide for EC2 Image BuilderDefault Quotas
Default QuotasThe following table provides the default quotas for EC2 Image Builder. Unless otherwise noted, eachquota is per AWS Region. Please contact AWS Support to request an increase in your service quota.
Name Description Default Quota
Concurrent builds The maximum number ofconcurrent builds that can be inprogress in this account in thecurrent Region.
100 builds per account perRegion
Components The maximum number of EC2Image Builder components thatyou can create in an account inthe current Region.
1,000 components per accountper Region
Component size The maximum size of the datafield of an EC2 Image Buildercomponent.
16 KB
Image pipelines The maximum number of EC2Image Builder image pipelinesthat you can create in anaccount in the current Region.
75 image pipelines per accountper Region
Image recipes The maximum number of EC2Image Builder image recipes thatyou can create in an account inthe current Region.
1,000 image recipes per accountper Region
Components per image recipe The maximum number of EC2Image Builder components thatcan be associated with a singleEC2 Image Builder image recipe.
20 components per image perRegion
Infrastructure configurations The maximum number of EC2Image Builder infrastructureconfigurations that you cancreate in an account in thecurrent Region.
1,000 configurations per accountper Region
Distribution configurations The maximum number of EC2Image Builder distributionconfigurations that you cancreate in an account in thecurrent Region.
1,000 configurations per accountper Region
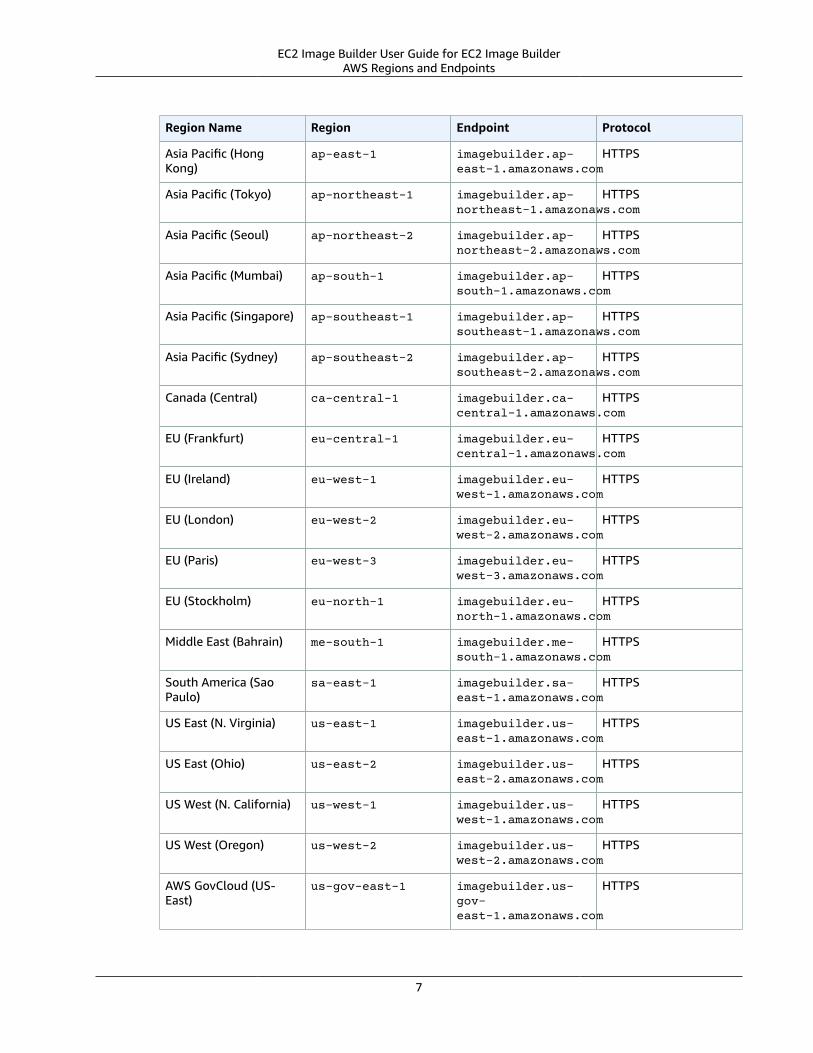
AWS Regions and EndpointsThe following AWS Regions and endpoints are currently supported by EC2 Image Builder.
6
EC2 Image Builder User Guide for EC2 Image BuilderAWS Regions and Endpoints
Region Name Region Endpoint Protocol
Asia Pacific (HongKong)
ap-east-1 imagebuilder.ap-east-1.amazonaws.com
HTTPS
Asia Pacific (Tokyo) ap-northeast-1 imagebuilder.ap-northeast-1.amazonaws.com
HTTPS
Asia Pacific (Seoul) ap-northeast-2 imagebuilder.ap-northeast-2.amazonaws.com
HTTPS
Asia Pacific (Mumbai) ap-south-1 imagebuilder.ap-south-1.amazonaws.com
HTTPS
Asia Pacific (Singapore) ap-southeast-1 imagebuilder.ap-southeast-1.amazonaws.com
HTTPS
Asia Pacific (Sydney) ap-southeast-2 imagebuilder.ap-southeast-2.amazonaws.com
HTTPS
Canada (Central) ca-central-1 imagebuilder.ca-central-1.amazonaws.com
HTTPS
EU (Frankfurt) eu-central-1 imagebuilder.eu-central-1.amazonaws.com
HTTPS
EU (Ireland) eu-west-1 imagebuilder.eu-west-1.amazonaws.com
HTTPS
EU (London) eu-west-2 imagebuilder.eu-west-2.amazonaws.com
HTTPS
EU (Paris) eu-west-3 imagebuilder.eu-west-3.amazonaws.com
HTTPS
EU (Stockholm) eu-north-1 imagebuilder.eu-north-1.amazonaws.com
HTTPS
Middle East (Bahrain) me-south-1 imagebuilder.me-south-1.amazonaws.com
HTTPS
South America (SaoPaulo)
sa-east-1 imagebuilder.sa-east-1.amazonaws.com
HTTPS
US East (N. Virginia) us-east-1 imagebuilder.us-east-1.amazonaws.com
HTTPS
US East (Ohio) us-east-2 imagebuilder.us-east-2.amazonaws.com
HTTPS
US West (N. California) us-west-1 imagebuilder.us-west-1.amazonaws.com
HTTPS
US West (Oregon) us-west-2 imagebuilder.us-west-2.amazonaws.com
HTTPS
AWS GovCloud (US-East)
us-gov-east-1 imagebuilder.us-gov-east-1.amazonaws.com
HTTPS
7
EC2 Image Builder User Guide for EC2 Image BuilderLogs
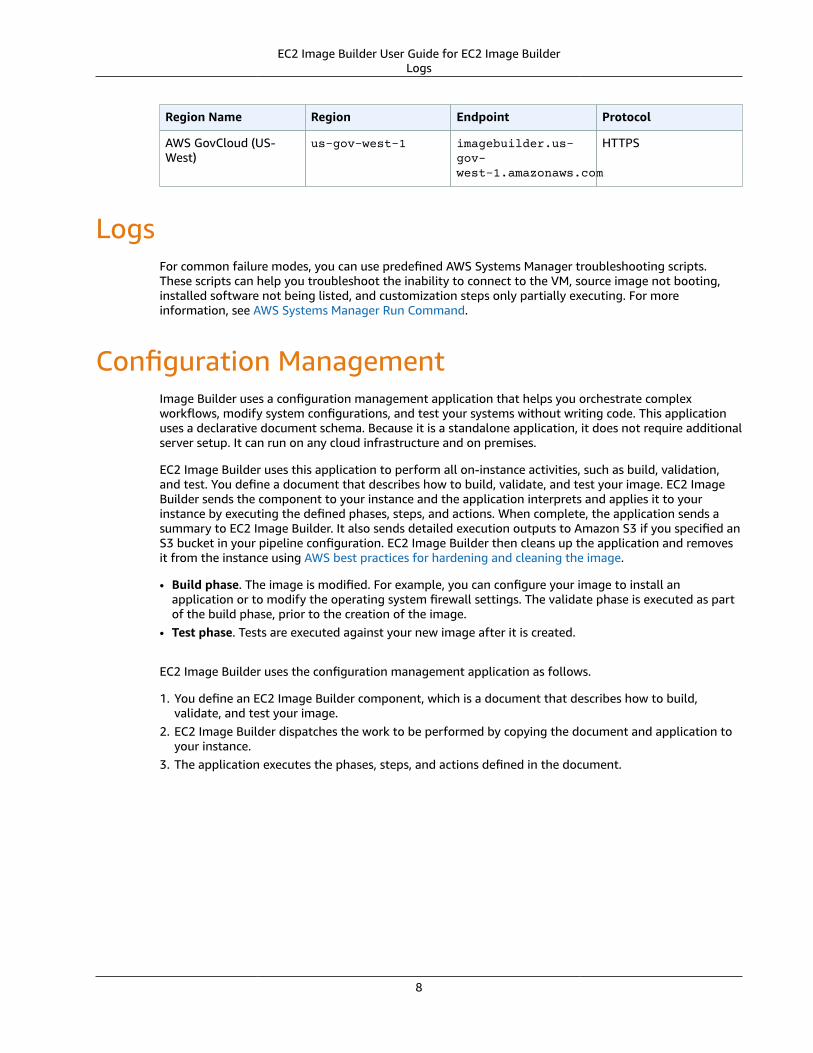
Region Name Region Endpoint Protocol
AWS GovCloud (US-West)
us-gov-west-1 imagebuilder.us-gov-west-1.amazonaws.com
HTTPS
LogsFor common failure modes, you can use predefined AWS Systems Manager troubleshooting scripts.These scripts can help you troubleshoot the inability to connect to the VM, source image not booting,installed software not being listed, and customization steps only partially executing. For moreinformation, see AWS Systems Manager Run Command.
Configuration ManagementImage Builder uses a configuration management application that helps you orchestrate complexworkflows, modify system configurations, and test your systems without writing code. This applicationuses a declarative document schema. Because it is a standalone application, it does not require additionalserver setup. It can run on any cloud infrastructure and on premises.
EC2 Image Builder uses this application to perform all on-instance activities, such as build, validation,and test. You define a document that describes how to build, validate, and test your image. EC2 ImageBuilder sends the component to your instance and the application interprets and applies it to yourinstance by executing the defined phases, steps, and actions. When complete, the application sends asummary to EC2 Image Builder. It also sends detailed execution outputs to Amazon S3 if you specified anS3 bucket in your pipeline configuration. EC2 Image Builder then cleans up the application and removesit from the instance using AWS best practices for hardening and cleaning the image.
• Build phase. The image is modified. For example, you can configure your image to install anapplication or to modify the operating system firewall settings. The validate phase is executed as partof the build phase, prior to the creation of the image.
• Test phase. Tests are executed against your new image after it is created.
EC2 Image Builder uses the configuration management application as follows.
1. You define an EC2 Image Builder component, which is a document that describes how to build,validate, and test your image.
2. EC2 Image Builder dispatches the work to be performed by copying the document and application toyour instance.
3. The application executes the phases, steps, and actions defined in the document.
8
EC2 Image Builder User Guide for EC2 Image BuilderPrerequisites
Getting Started with EC2 ImageBuilder
This section contains information you need to set up your environment and create an image pipelinewith EC2 Image Builder.
Section Contents• Prerequisites (p. 9)• Accessing EC2 Image Builder (p. 10)• Build and Automate an OS Image Deployment Using the EC2 Image Builder Console (p. 10)
PrerequisitesThe following prerequisites must be verified in order to create an image pipeline with EC2 Image Builder.
EC2 Image Builder Service-Linked RoleEC2 Image Builder uses a service-linked role to grant permissions to other AWS services on your behalf.You don't need to manually create a service-linked role. When you create your first Image Builderresource in the AWS Management Console, the AWS CLI, or the AWS API, Image Builder creates theservice-linked role for you. For more information about the service-linked role that Image Builder createsin your account, see Using Service-Linked Roles for EC2 Image Builder (p. 50).
Auto Scaling GroupsEC2 Image Builder uses Auto Scaling groups to launch instances during the build and test phases of theimage pipeline. When you use Amazon EC2 Auto Scaling, a required service-linked role is created in youraccount. If this role is not present in your account when you use Image Builder, the Image Builder service-linked role will create if for you.
Configuration Requirements• EC2 Image Builder does not support encrypted AMIs as the source or output image of a pipeline.• You must specify a VPC in the infrastructure configuration. Image Builder does not support EC2-
Classic.• Image Builder does not support Amazon VPC endpoints (PrivateLink).• Instances used to build images and run tests using Image Builder must have access to the Systems
Manager service. All build activity is orchestrated by SSM Automation. Therefore, the SSM Agentmust be installed on the source image. For more information, see Install and Configure SSM Agent onAmazon EC2 Windows Instances and Install and Configure SSM Agent on Amazon EC2 Linux Instances.
IAMThe IAM role that you associate with your instance profile must have permissions to run the buildand test components included in your image. The following IAM role policies must be attached tothe IAM role that is associated with the instance profile: EC2InstanceProfileForImageBuilder andAmazonSSMManagedInstanceCore.
9
EC2 Image Builder User Guide for EC2 Image BuilderAccessing EC2 Image Builder
If you configure logging, the instance profile specified in your infrastructure configuration must haves3:PutObject permissions for the target bucket.
Accessing EC2 Image BuilderYou can manage EC2 Image Builder from one of the following interfaces.
• EC2 Image Builder console landing page. From the EC2 Image Builder landing page.• AWS Command Line Interface (AWS CLI). You can use the AWS CLI to access AWS API operations.
For more information, see Installing the AWS Command Line Interface in the AWS Command LineInterface User Guide.
• AWS Tools for SDKs. You can use AWS SDKs and Tools to access and manage Image Builder using yourpreferred language.
Build and Automate an OS Image DeploymentUsing the EC2 Image Builder Console
The following steps guide you through an image deployment with Image Builder from the EC2 ImageBuilder console.
1. From the EC2 Image Builder landing page, select Create image pipeline.2. The following tabs contain information about each of the pages for which you must provide input to
create your image pipeline.Define Recipe
a. On the Define Recipe page, create an image recipe, which includes your source image andcomponents.i. Choose your source image. The source image includes the image OS and the image to
configure. After selecting your image OS, choose from the following options to select animage to configure.A. Select an image from the managed images, which includes Image Builder images to
help you get started, images that you have already created, and images that have beenshared with you. To select an image, enter the image ARN in the text box, or selectBrowse images to view managed images. All managed images provided by AWS are 64-bit operating systems.
B. Use a custom AMI by entering the AMI ID.
Select the checkbox "Always build latest version" if you want Image Builder to use semanticversioning to set the version number for your image. If this box is not selected, ImageBuilder will always use the same version number. Checking this box does not initiateautomatic builds when there are updates to your selected image version unless you have setthe build pipeline to run automatically using the job scheduler under Configure Pipeline.
ii. Select the Build components. Components are installation packages, security hardeningsteps, and tests to be consumed by the image recipe when building your image. After animage recipe has been created, its components cannot be modified or replaced. If you wantto update the components in an image recipe, create a new image recipe or image recipeversion.
ImportantComponents are installed in the order they are selected. You cannot reordercomponents after they have been selected.
Components include two component types.
10
EC2 Image Builder User Guide for EC2 Image BuilderBuild and Automate an OS Image Deployment
Using the EC2 Image Builder Console
A. Build components. Build components are installation packages and security hardeningsteps. You can enter a component ARN or browse and select from a list of ImageBuilder components to help you get started. To create a new component, select CreateComponent. See Create New Component (p. 15) for information about how to create acomponent. Enter or select the components in the order that you want them to run in theimage build pipeline.
B. Tests. Test components are tests to perform on the output image built by your imagepipeline. Enter a test component ARN or browse and select from a list of Image Buildertest components to help you get started. To create a new component, select CreateComponent. See Create New Component (p. 15) for information about how to create acomponent. Enter or select the components in the order that you want them to run in theimage build pipeline.
After you have entered your source image and components, select Next.
Configure Pipeline
a. From the Configure Pipeline page, define the image pipeline infrastructure and build schedule.
i. Provide the following specifications under Pipeline details.
A. Enter a Name for your image pipeline. You must use a unique name for your imagepipeline.
B. Provide an optional Description for your image deployment pipeline.
C. Select an IAM role to associate with the instance profile or Create a new role.If you create a new role, Image Builder will take you to the IAM console. As astarting point, use the following IAM role policies (you must attach both policies):EC2InstanceProfileForImageBuilder and AmazonSSMManagedInstanceCore.
ImportantMake sure that your role has permissions to run the build and test componentsincluded in your image. If you have logging configured, the instance profilespecified in your InfrastructureConfiguration must have the necessarypermissions (s3:PutObject) for the target bucket. You can do this by including aninline policy in the role associated with the instance profile or by atttaching theS3FullAccess managed policy to the instance profile.
ii. Select a Build schedule to run your image pipeline.
A. If you select Manual, you can choose when to run the pipeline. When you want to run thepipeline, select Run pipeline on the Pipeline details page.
B. If you select Schedule builder, you can set the build pipeline to run automatically usingthe job scheduler. Enter the cadence after Run pipeline every. You can select to run thepipeline daily, weekly, or monthly. In order to set the build pipeline to build from thelatest image version, you must select the checkbox Always build latest version underDefine Recipe.
C. If you select CRON expression, you can set the build pipeline to run using a syntax thatspecifies the time and intervals to run it. Enter the expression in the text box.
iii. Optionally, enter the Infrastructure specifications to define the infrastructure for yourimage. These settings are associated with the EC2 instance that is launched in your accountfor the purpose of building the image.
A. Select an Instance type. The instance type selected should adhere to the requirementsof the software that you plan to run on your instance. For more information about EC2instance types, see Instance Types in the EC2 User Guide.
B. If you want to receive notifications and alerts from Image Builder regarding any stepsperformed in your image pipeline, you can enter an SNS topic ARN to be notified by theAWS Simple Notification Service (SNS). For more information, see the Amazon SimpleNotification Service Developer Guide.
C. Under Troubleshooting settings, provide the following information. These settings areuseful for performing troubleshooting on your instance if the image build fails.
11
EC2 Image Builder User Guide for EC2 Image BuilderBuild and Automate an OS Image Deployment
Using the EC2 Image Builder Console
I. Under Key pair name, select an existing key pair from the dropdown list or create anew one.
1. If you select Create key pair name to create a new key pair, you are directed to theAmazon EC2 console.
2. From the Amazon EC2 console, choose Create a new key pair.
3. Enter a name for the key pair.
4. Then choose Download Key Pair.
ImportantThis is the only chance for you to save the private key file, so be sure todownload it and save it in a safe place. You must provide the name ofyour key pair when you launch an instance, and provide the correspondingprivate key each time that you connect to the instance.
5. Return to the Image Builder console and choose the refresh icon next to the Key pairname dropdown. The newly created key pair appears in the dropdown list. For moreinformation about key pairs, see Amazon EC2 Key Pairs.
II. Select whether or not you want to Terminate your instance upon failure by selectingthe check box. If you want to be able to troubleshoot the instance when the imagebuild fails, then make sure the check box is not checked.
NoteIf the option to terminate your instance upon failure is not selected, theAuto Scaling group and launch template used to launch the instance are notremoved from your account when the build fails. You must remove the AutoScaling group and launch template resources manually.
III.Under S3 Logs, select the S3 bucket to which you want to send your instance log files.To browse and select your Amazon S3 bucket locations, select Browse S3.
IV.Under Advanced Settings, provide the following information if you want to select aVPC to launch your instance.
1. Select a Virtual Private Cloud into which to launch your instance. For moreinformation about VPCs, see the VPC User Guide. You can also choose to Createa new VPC. If you select to do this, you will be taken to the VPC console. In orderto allow communication between your VPC and the internet, you must enable thisconnectivity with an internet gateway. To add an internet gateway to your VPC,follow the steps in Creating and Attaching an Internet Gateway in the Amazon VPCUser Guide.
2. If you select a VPC, choose the Public subnet ID associated with your selected VPCor select Create new subnet. For more information, see VPCs and Subnets.
3. If you select a VPC, select the Security groups that are associated with your VPC,or select Create a new security group. For help with security groups, see SecurityGroups for Your VPC.
NoteEC2 Image Builder does not support EC2-Classic. If you build an image in an AWSRegion where your account uses EC2-Classic or does not have a default VPC, youmust select a VPC configuration. For more information, see Default VPC andDefault Subnets in the Amazon VPC User Guide.
After you have entered all of your infrastructure specifications, choose Next.
Configure additional settings
a. From the Configure additional settings page, you can optionally define the test anddistribution settings, along with other optional configuration parameters that are performedafter the image is built. If you want to define these configurations, provide the followinginformation.
12
EC2 Image Builder User Guide for EC2 Image BuilderBuild and Automate an OS Image Deployment
Using the EC2 Image Builder Console
i. Under Associate license configuration to AMI, you can choose to associate the output AMIwith a pre-existing license configuration that you created with AWS License Manager. Selectone or more unique license configuration IDs from the dropdown. If you want to create anew license configuration, select Create new License Configuration. This will take you to theLicense Manager console. For more information, see What Is AWS License Manager?
ii. Provide the following specifications under Output AMI.A. Enter a Name for your output AMI. When the image pipeline has completed, this will be
the name of the created AMI.B. Under AMI tags, add a Key and optional Value tag for your image. For more information
about tagging resources, see Tagging Your Amazon EC2 Resources.iii. Under AMI distribution settings, you can specify other AWS Regions to which you would like
your AMI to be copied. You can also configure permissions for the outbound AMI. You canchoose to allow all AWS accounts, or only specific accounts, to launch the created AMI. If youchoose to allow all AWS accounts to launch the AMI, the output AMI will be public.A. Select the AWS Regions to distribute the AMI. Your current Region is included by default.B. Under Launch permissions, you can set the AMI as Private or Public. The default setting
is Private. When you set launch permissions to private, you can grant permissions tospecific AWS accounts. If you set them to public, all AWS users will have access to theoutput AMI.I. Select Public or Private.II. If you select Private, enter the account numbers of the accounts to which you want to
grant launch permissions and select Add.3. On the Review and create page, you can review all of your settings before you create your image
pipeline. Review your Recipe details, your Pipeline configuration details, and your Additionalsettings. If you want to make changes, select Edit to return to the specification settings that you wantto change or update. When the settings reflect your desired configuration, select Create Pipeline.
4. If the creation of your image pipeline fails, you will receive a message with the returned errors.Address these errors and try to create your pipeline again.
5. When your image pipeline creation succeeds, you are taken to the Image pipelines page. From here,you can manage, delete, disable, view details about, and run your image pipeline.
13
EC2 Image Builder User Guide for EC2 Image BuilderEdit Configuration Details and Additional Settings
Managing and Running Images Usingthe EC2 Image Builder Console
This section contains information to help you manage and run images with EC2 Image Builder using theImage Builder console.
Section Contents
• Edit Configuration Details and Additional Settings (p. 14)
• Delete Pipeline (p. 15)
• Create New Component (p. 15)
• Working with Image Recipes (p. 16)
• Testing (p. 16)
• Distribution (p. 16)
• Sharing Resources (p. 16)
• Using Documents (p. 17)
• Compliance (p. 23)
Edit Configuration Details and Additional SettingsAfter you have created an image pipeline, you can edit its configuration details and additional settings.To edit the configuration details and additional settings, use the following steps.
1. To edit configuration details, including description, build schedule, or infrastructure details, navigateto the Image pipelines page and select the check box next to the name of the pipeline that you wantto edit. Then select the View details button.
2. On the Image pipeline details page, note the Summary details of the image pipeline, and the Outputimage, Configuration, and Image recipe tabs.
3. Under the Configuration tab, select Edit next to Configuration details.
4. On the Edit configuration details page, you can edit your configuration. Then select Save changes.
5. To edit additional settings, including associated licenses, AMI distribution settings, image exportsettings, and SNS notification settings, navigate to the Image pipelines page and select the check boxnext to the name of the pipeline that you want to edit. Select View details.
NoteLicense Manager settings will not replicate across AWS Regions that must be enabled in youraccount, for example, between the ap-east-1 (HKG) and the me-south-1 (BAH) Regions.
6. On the Image pipeline detail page, under the Configuration tab, select Edit next to Additionalsettings.
7. On the Edit additional settings page, you can edit your configuration. Then select Save changes.
After an image recipe has been created, its components cannot be modified or replaced. If you want toupdate the components in an image recipe, create a new recipe or recipe version.
14
EC2 Image Builder User Guide for EC2 Image BuilderDelete Pipeline
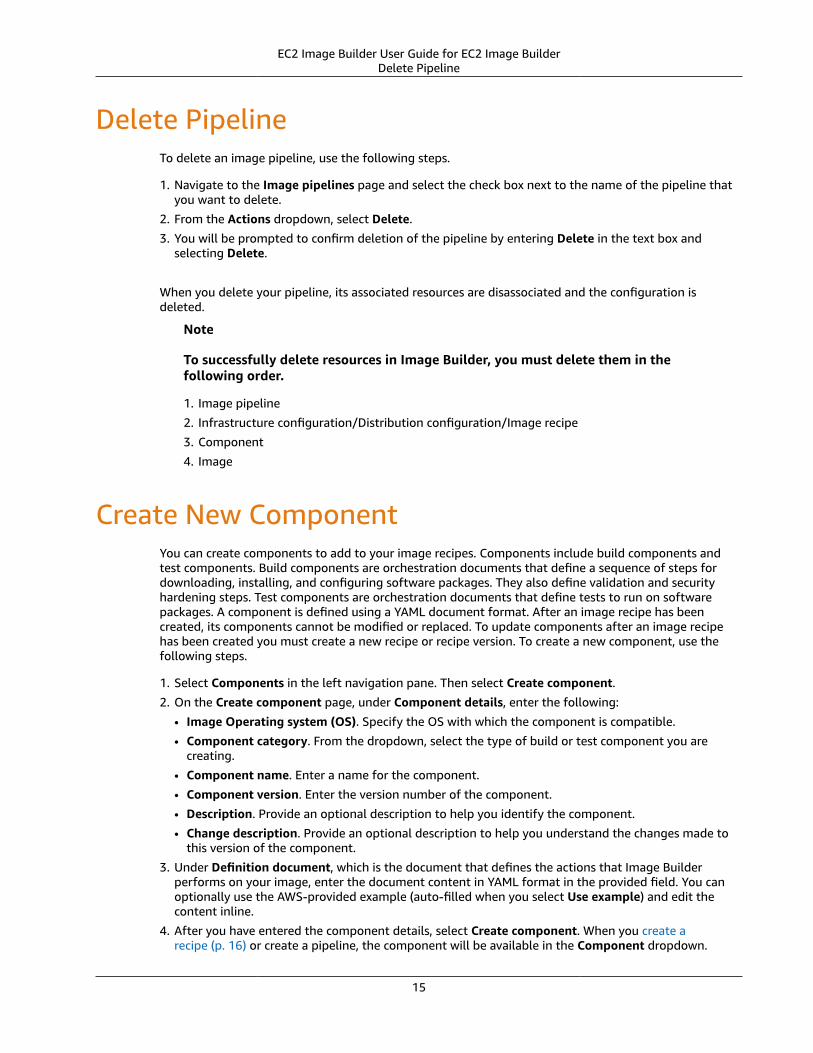
Delete PipelineTo delete an image pipeline, use the following steps.
1. Navigate to the Image pipelines page and select the check box next to the name of the pipeline thatyou want to delete.
2. From the Actions dropdown, select Delete.
3. You will be prompted to confirm deletion of the pipeline by entering Delete in the text box andselecting Delete.
When you delete your pipeline, its associated resources are disassociated and the configuration isdeleted.
Note
To successfully delete resources in Image Builder, you must delete them in thefollowing order.
1. Image pipeline
2. Infrastructure configuration/Distribution configuration/Image recipe
3. Component
4. Image
Create New ComponentYou can create components to add to your image recipes. Components include build components andtest components. Build components are orchestration documents that define a sequence of steps fordownloading, installing, and configuring software packages. They also define validation and securityhardening steps. Test components are orchestration documents that define tests to run on softwarepackages. A component is defined using a YAML document format. After an image recipe has beencreated, its components cannot be modified or replaced. To update components after an image recipehas been created you must create a new recipe or recipe version. To create a new component, use thefollowing steps.
1. Select Components in the left navigation pane. Then select Create component.
2. On the Create component page, under Component details, enter the following:
• Image Operating system (OS). Specify the OS with which the component is compatible.
• Component category. From the dropdown, select the type of build or test component you arecreating.
• Component name. Enter a name for the component.
• Component version. Enter the version number of the component.
• Description. Provide an optional description to help you identify the component.
• Change description. Provide an optional description to help you understand the changes made tothis version of the component.
3. Under Definition document, which is the document that defines the actions that Image Builderperforms on your image, enter the document content in YAML format in the provided field. You canoptionally use the AWS-provided example (auto-filled when you select Use example) and edit thecontent inline.
4. After you have entered the component details, select Create component. When you create arecipe (p. 16) or create a pipeline, the component will be available in the Component dropdown.
15
EC2 Image Builder User Guide for EC2 Image BuilderWorking with Image Recipes
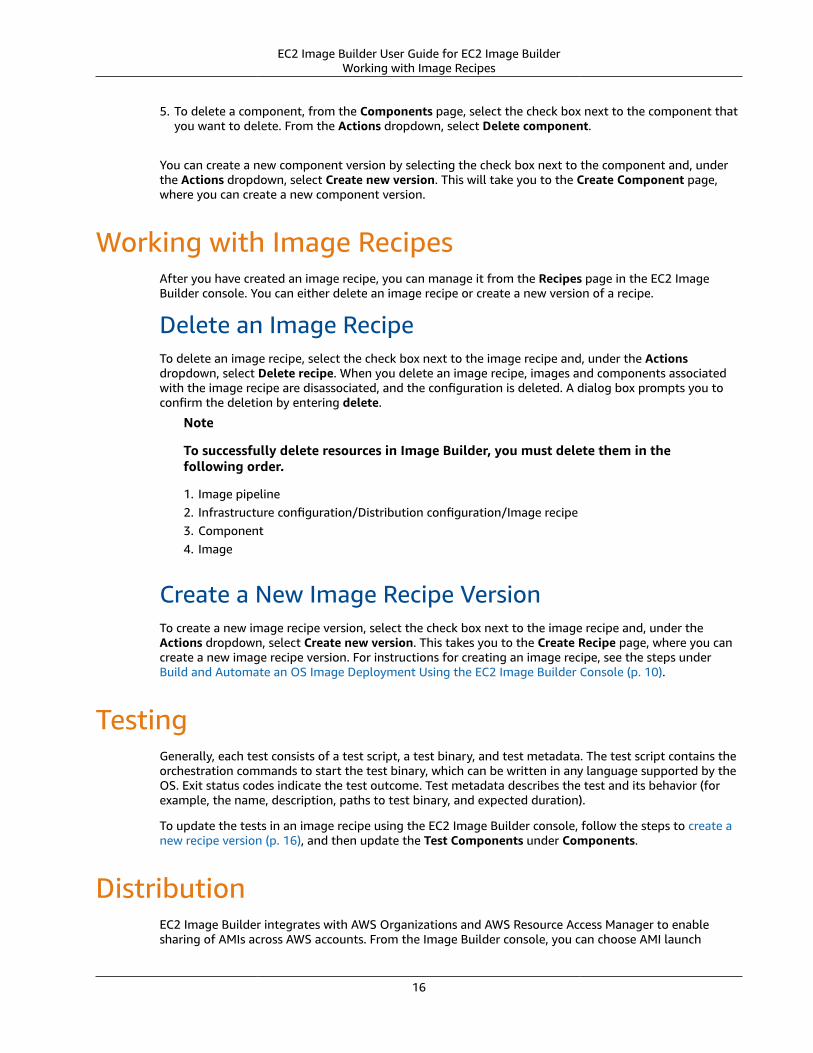
5. To delete a component, from the Components page, select the check box next to the component thatyou want to delete. From the Actions dropdown, select Delete component.
You can create a new component version by selecting the check box next to the component and, underthe Actions dropdown, select Create new version. This will take you to the Create Component page,where you can create a new component version.
Working with Image RecipesAfter you have created an image recipe, you can manage it from the Recipes page in the EC2 ImageBuilder console. You can either delete an image recipe or create a new version of a recipe.
Delete an Image RecipeTo delete an image recipe, select the check box next to the image recipe and, under the Actionsdropdown, select Delete recipe. When you delete an image recipe, images and components associatedwith the image recipe are disassociated, and the configuration is deleted. A dialog box prompts you toconfirm the deletion by entering delete.
Note
To successfully delete resources in Image Builder, you must delete them in thefollowing order.
1. Image pipeline2. Infrastructure configuration/Distribution configuration/Image recipe3. Component4. Image
Create a New Image Recipe VersionTo create a new image recipe version, select the check box next to the image recipe and, under theActions dropdown, select Create new version. This takes you to the Create Recipe page, where you cancreate a new image recipe version. For instructions for creating an image recipe, see the steps underBuild and Automate an OS Image Deployment Using the EC2 Image Builder Console (p. 10).
TestingGenerally, each test consists of a test script, a test binary, and test metadata. The test script contains theorchestration commands to start the test binary, which can be written in any language supported by theOS. Exit status codes indicate the test outcome. Test metadata describes the test and its behavior (forexample, the name, description, paths to test binary, and expected duration).
To update the tests in an image recipe using the EC2 Image Builder console, follow the steps to create anew recipe version (p. 16), and then update the Test Components under Components.
DistributionEC2 Image Builder integrates with AWS Organizations and AWS Resource Access Manager to enablesharing of AMIs across AWS accounts. From the Image Builder console, you can choose AMI launch
16
EC2 Image Builder User Guide for EC2 Image BuilderSharing Resources
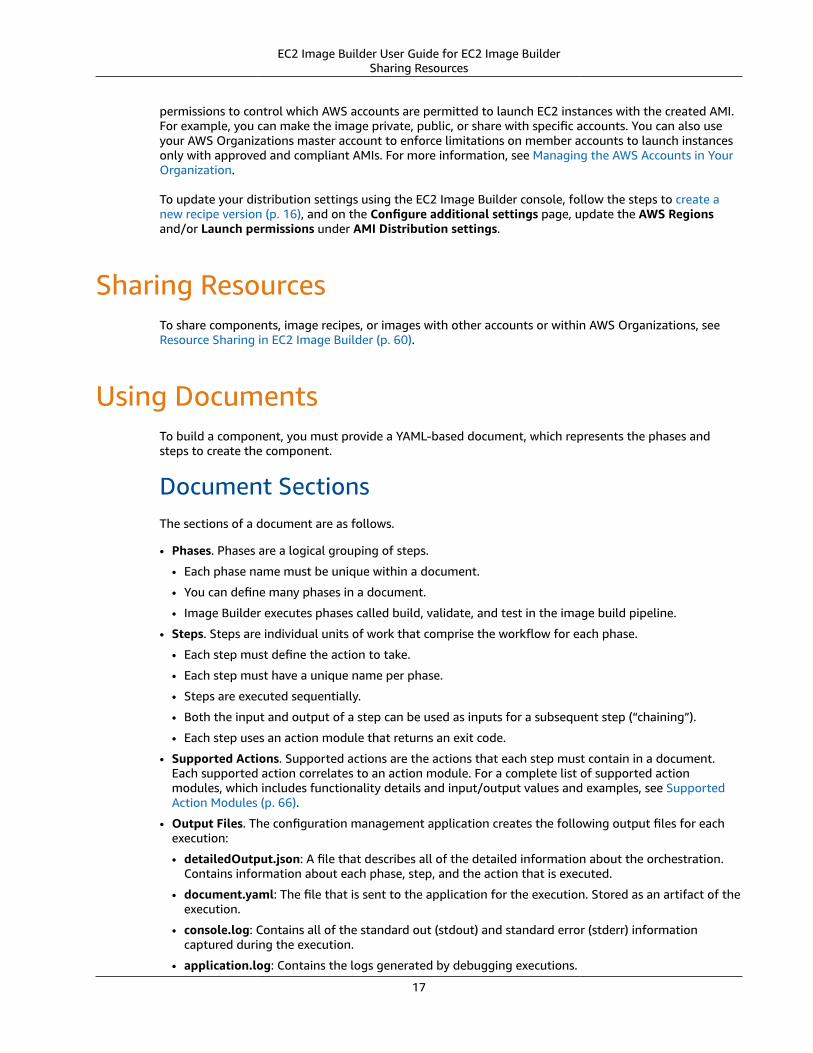
permissions to control which AWS accounts are permitted to launch EC2 instances with the created AMI.For example, you can make the image private, public, or share with specific accounts. You can also useyour AWS Organizations master account to enforce limitations on member accounts to launch instancesonly with approved and compliant AMIs. For more information, see Managing the AWS Accounts in YourOrganization.
To update your distribution settings using the EC2 Image Builder console, follow the steps to create anew recipe version (p. 16), and on the Configure additional settings page, update the AWS Regionsand/or Launch permissions under AMI Distribution settings.
Sharing ResourcesTo share components, image recipes, or images with other accounts or within AWS Organizations, seeResource Sharing in EC2 Image Builder (p. 60).
Using DocumentsTo build a component, you must provide a YAML-based document, which represents the phases andsteps to create the component.
Document SectionsThe sections of a document are as follows.
• Phases. Phases are a logical grouping of steps.
• Each phase name must be unique within a document.
• You can define many phases in a document.
• Image Builder executes phases called build, validate, and test in the image build pipeline.
• Steps. Steps are individual units of work that comprise the workflow for each phase.
• Each step must define the action to take.
• Each step must have a unique name per phase.
• Steps are executed sequentially.
• Both the input and output of a step can be used as inputs for a subsequent step (“chaining”).
• Each step uses an action module that returns an exit code.
• Supported Actions. Supported actions are the actions that each step must contain in a document.Each supported action correlates to an action module. For a complete list of supported actionmodules, which includes functionality details and input/output values and examples, see SupportedAction Modules (p. 66).
• Output Files. The configuration management application creates the following output files for eachexecution:
• detailedOutput.json: A file that describes all of the detailed information about the orchestration.Contains information about each phase, step, and the action that is executed.
• document.yaml: The file that is sent to the application for the execution. Stored as an artifact of theexecution.
• console.log: Contains all of the standard out (stdout) and standard error (stderr) informationcaptured during the execution.
• application.log: Contains the logs generated by debugging executions.
17
EC2 Image Builder User Guide for EC2 Image BuilderInput and Output Chaining
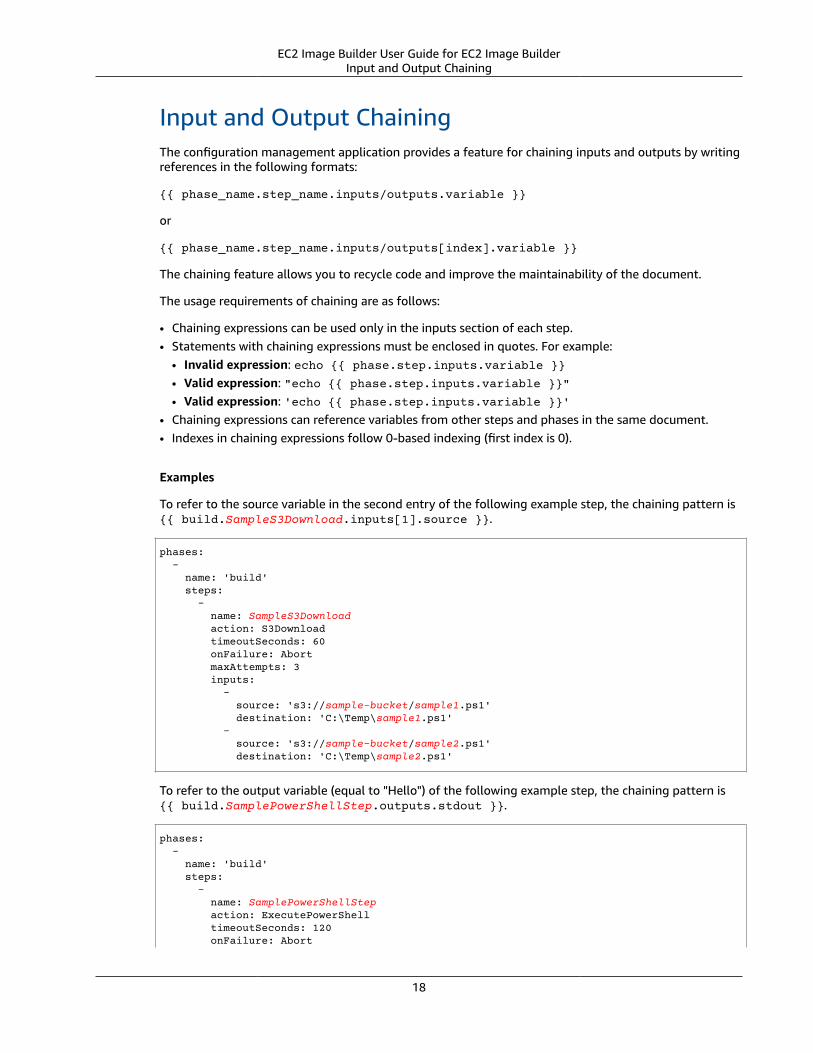
Input and Output ChainingThe configuration management application provides a feature for chaining inputs and outputs by writingreferences in the following formats:
{{ phase_name.step_name.inputs/outputs.variable }}
or
{{ phase_name.step_name.inputs/outputs[index].variable }}
The chaining feature allows you to recycle code and improve the maintainability of the document.
The usage requirements of chaining are as follows:
• Chaining expressions can be used only in the inputs section of each step.• Statements with chaining expressions must be enclosed in quotes. For example:
• Invalid expression: echo {{ phase.step.inputs.variable }}• Valid expression: "echo {{ phase.step.inputs.variable }}"• Valid expression: 'echo {{ phase.step.inputs.variable }}'
• Chaining expressions can reference variables from other steps and phases in the same document.• Indexes in chaining expressions follow 0-based indexing (first index is 0).
Examples
To refer to the source variable in the second entry of the following example step, the chaining pattern is{{ build.SampleS3Download.inputs[1].source }}.
phases: - name: 'build' steps: - name: SampleS3Download action: S3Download timeoutSeconds: 60 onFailure: Abort maxAttempts: 3 inputs: - source: 's3://sample-bucket/sample1.ps1' destination: 'C:\Temp\sample1.ps1' - source: 's3://sample-bucket/sample2.ps1' destination: 'C:\Temp\sample2.ps1'
To refer to the output variable (equal to "Hello") of the following example step, the chaining pattern is{{ build.SamplePowerShellStep.outputs.stdout }}.
phases: - name: 'build' steps: - name: SamplePowerShellStep action: ExecutePowerShell timeoutSeconds: 120 onFailure: Abort
18
EC2 Image Builder User Guide for EC2 Image BuilderDocument Schema and Definitions
maxAttempts: 3 inputs: commands: - 'echo "Hello"'
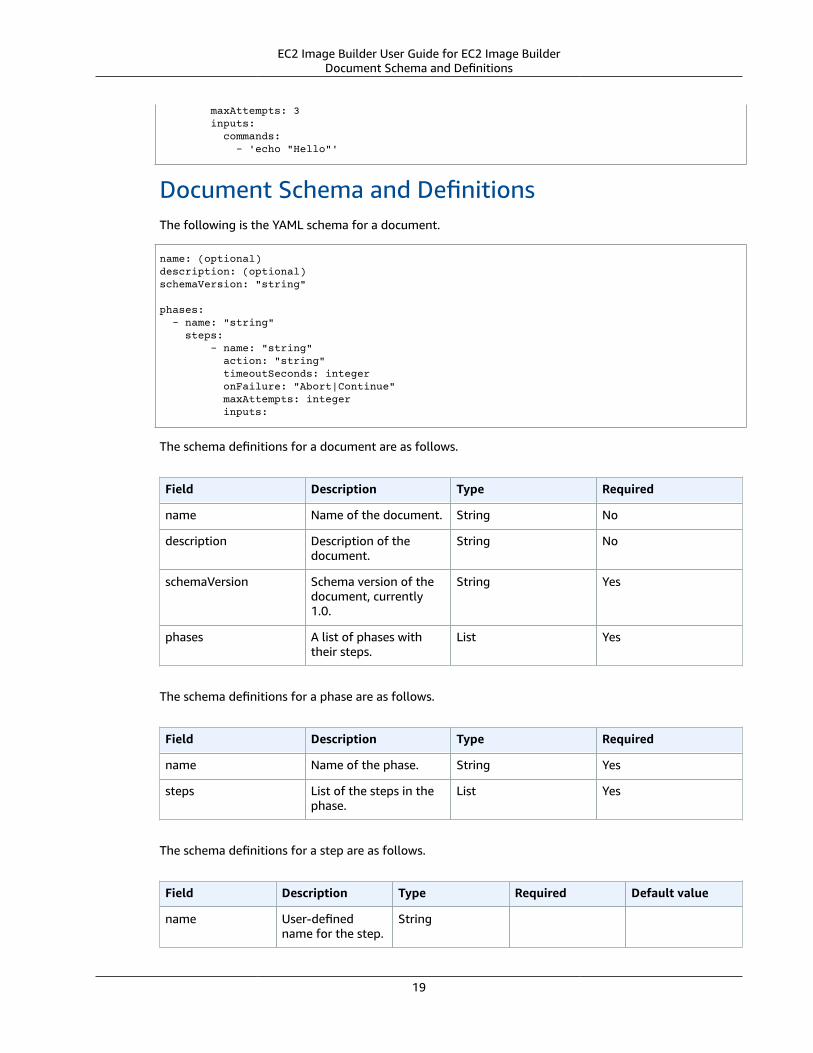
Document Schema and DefinitionsThe following is the YAML schema for a document.
name: (optional)description: (optional)schemaVersion: "string"
phases: - name: "string" steps: - name: "string" action: "string" timeoutSeconds: integer onFailure: "Abort|Continue" maxAttempts: integer inputs:
The schema definitions for a document are as follows.
Field Description Type Required
name Name of the document. String No
description Description of thedocument.
String No
schemaVersion Schema version of thedocument, currently1.0.
String Yes
phases A list of phases withtheir steps.
List Yes
The schema definitions for a phase are as follows.
Field Description Type Required
name Name of the phase. String Yes
steps List of the steps in thephase.
List Yes
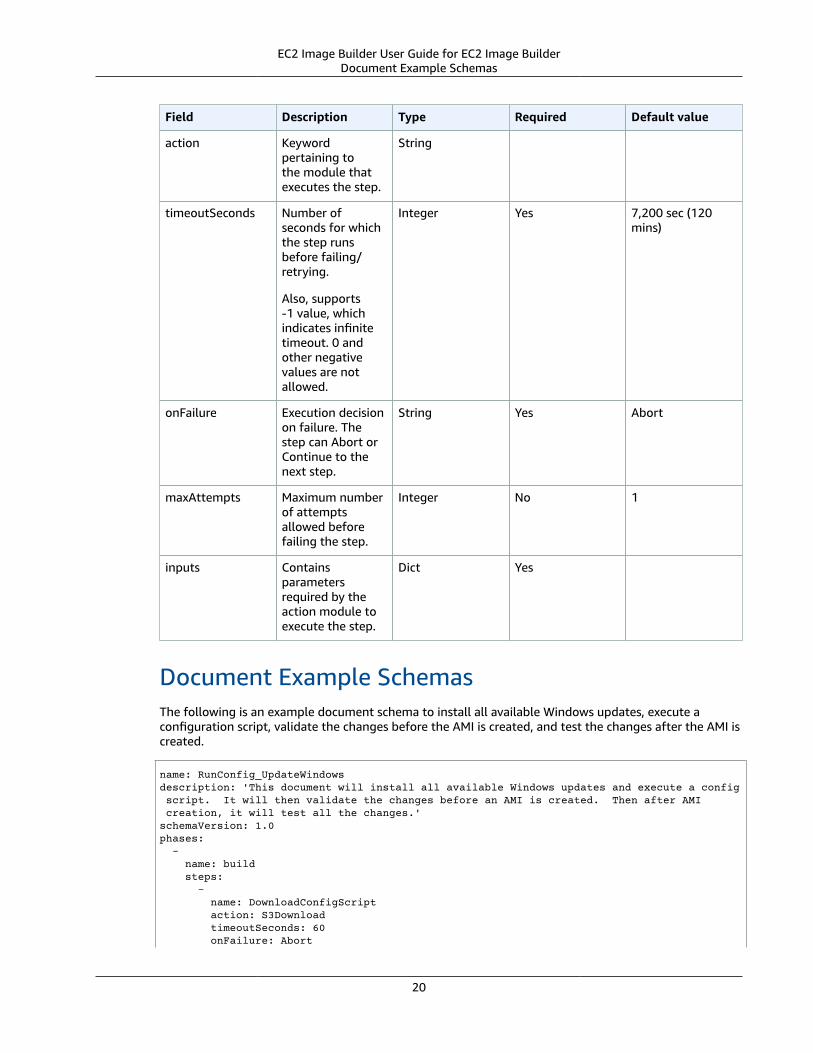
The schema definitions for a step are as follows.
Field Description Type Required Default value
name User-definedname for the step.
String
19
EC2 Image Builder User Guide for EC2 Image BuilderDocument Example Schemas
Field Description Type Required Default value
action Keywordpertaining tothe module thatexecutes the step.
String
timeoutSeconds Number ofseconds for whichthe step runsbefore failing/retrying.
Also, supports-1 value, whichindicates infinitetimeout. 0 andother negativevalues are notallowed.
Integer Yes 7,200 sec (120mins)
onFailure Execution decisionon failure. Thestep can Abort orContinue to thenext step.
String Yes Abort
maxAttempts Maximum numberof attemptsallowed beforefailing the step.
Integer No 1
inputs Containsparametersrequired by theaction module toexecute the step.
Dict Yes
Document Example SchemasThe following is an example document schema to install all available Windows updates, execute aconfiguration script, validate the changes before the AMI is created, and test the changes after the AMI iscreated.
name: RunConfig_UpdateWindowsdescription: 'This document will install all available Windows updates and execute a config script. It will then validate the changes before an AMI is created. Then after AMI creation, it will test all the changes.'schemaVersion: 1.0phases: - name: build steps: - name: DownloadConfigScript action: S3Download timeoutSeconds: 60 onFailure: Abort
20
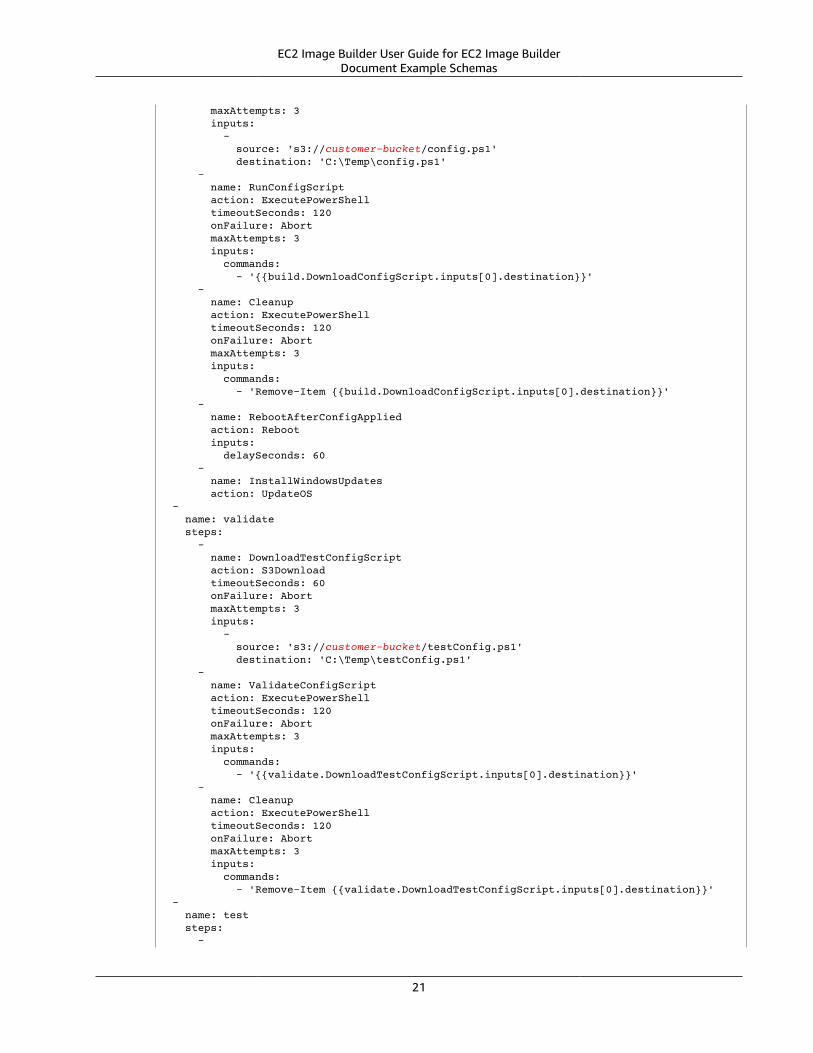
EC2 Image Builder User Guide for EC2 Image BuilderDocument Example Schemas
maxAttempts: 3 inputs: - source: 's3://customer-bucket/config.ps1' destination: 'C:\Temp\config.ps1' - name: RunConfigScript action: ExecutePowerShell timeoutSeconds: 120 onFailure: Abort maxAttempts: 3 inputs: commands: - '{{build.DownloadConfigScript.inputs[0].destination}}' - name: Cleanup action: ExecutePowerShell timeoutSeconds: 120 onFailure: Abort maxAttempts: 3 inputs: commands: - 'Remove-Item {{build.DownloadConfigScript.inputs[0].destination}}' - name: RebootAfterConfigApplied action: Reboot inputs: delaySeconds: 60 - name: InstallWindowsUpdates action: UpdateOS - name: validate steps: - name: DownloadTestConfigScript action: S3Download timeoutSeconds: 60 onFailure: Abort maxAttempts: 3 inputs: - source: 's3://customer-bucket/testConfig.ps1' destination: 'C:\Temp\testConfig.ps1' - name: ValidateConfigScript action: ExecutePowerShell timeoutSeconds: 120 onFailure: Abort maxAttempts: 3 inputs: commands: - '{{validate.DownloadTestConfigScript.inputs[0].destination}}' - name: Cleanup action: ExecutePowerShell timeoutSeconds: 120 onFailure: Abort maxAttempts: 3 inputs: commands: - 'Remove-Item {{validate.DownloadTestConfigScript.inputs[0].destination}}' - name: test steps: -
21
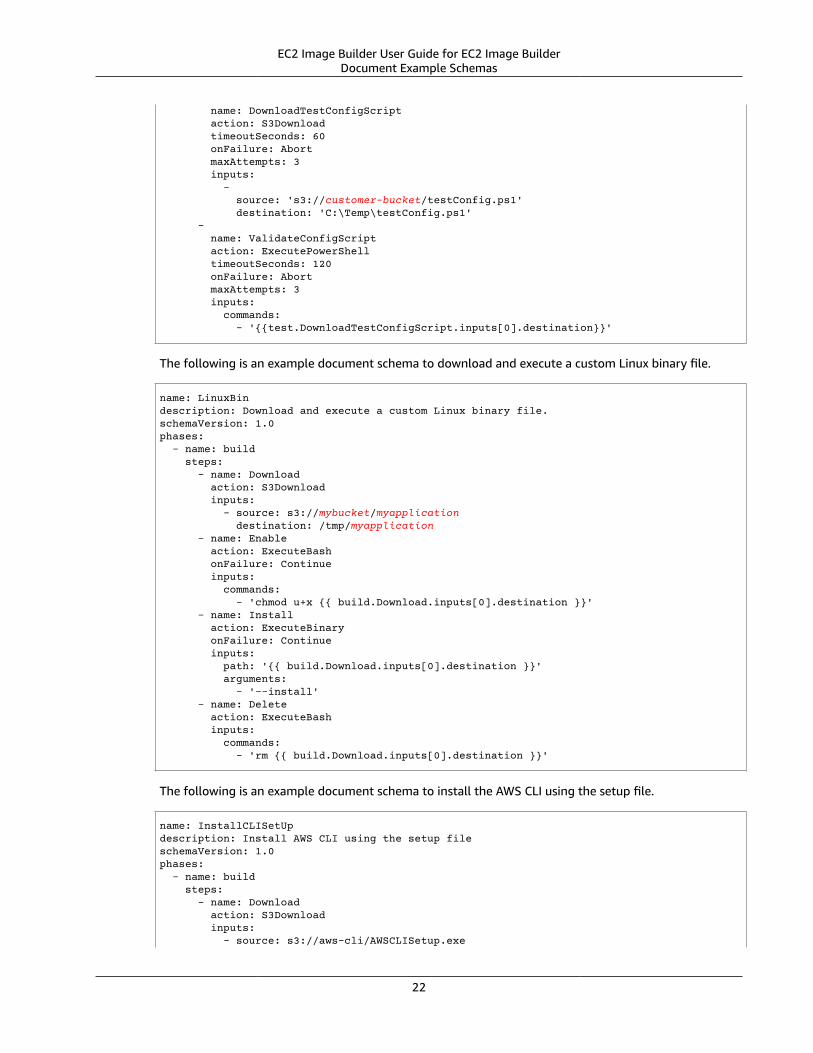
EC2 Image Builder User Guide for EC2 Image BuilderDocument Example Schemas
name: DownloadTestConfigScript action: S3Download timeoutSeconds: 60 onFailure: Abort maxAttempts: 3 inputs: - source: 's3://customer-bucket/testConfig.ps1' destination: 'C:\Temp\testConfig.ps1' - name: ValidateConfigScript action: ExecutePowerShell timeoutSeconds: 120 onFailure: Abort maxAttempts: 3 inputs: commands: - '{{test.DownloadTestConfigScript.inputs[0].destination}}'
The following is an example document schema to download and execute a custom Linux binary file.
name: LinuxBindescription: Download and execute a custom Linux binary file.schemaVersion: 1.0phases: - name: build steps: - name: Download action: S3Download inputs: - source: s3://mybucket/myapplication destination: /tmp/myapplication - name: Enable action: ExecuteBash onFailure: Continue inputs: commands: - 'chmod u+x {{ build.Download.inputs[0].destination }}' - name: Install action: ExecuteBinary onFailure: Continue inputs: path: '{{ build.Download.inputs[0].destination }}' arguments: - '--install' - name: Delete action: ExecuteBash inputs: commands: - 'rm {{ build.Download.inputs[0].destination }}'
The following is an example document schema to install the AWS CLI using the setup file.
name: InstallCLISetUpdescription: Install AWS CLI using the setup fileschemaVersion: 1.0phases: - name: build steps: - name: Download action: S3Download inputs: - source: s3://aws-cli/AWSCLISetup.exe
22
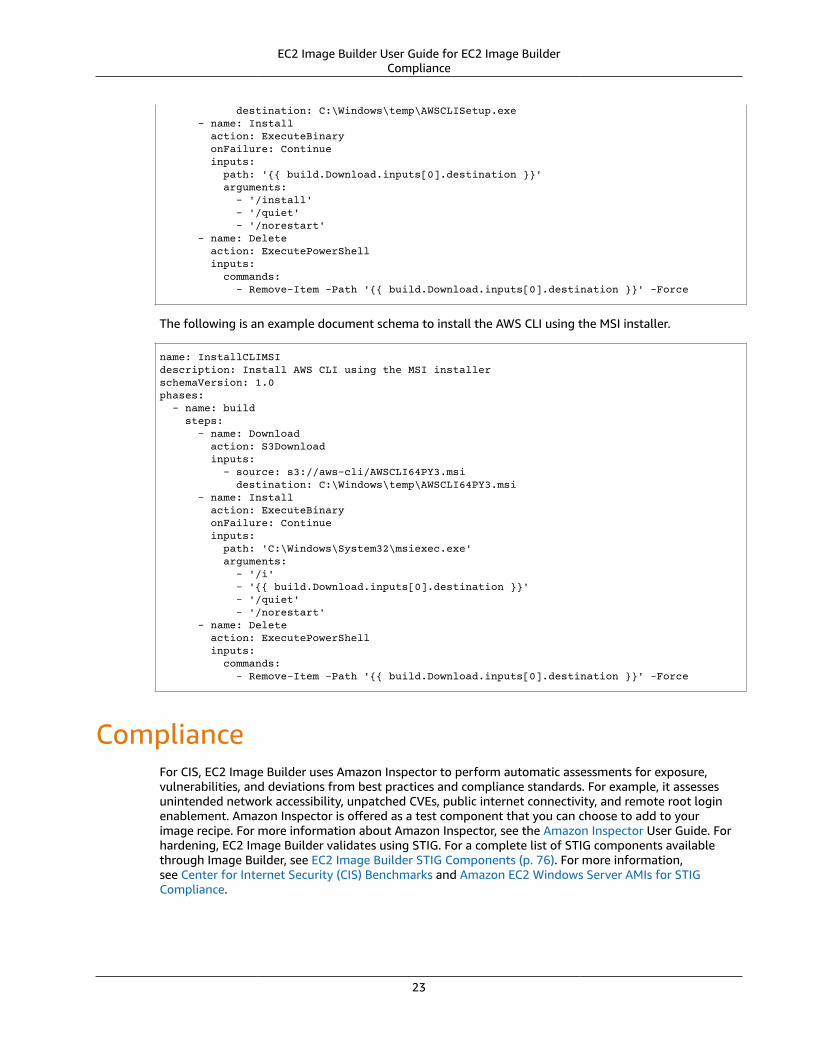
EC2 Image Builder User Guide for EC2 Image BuilderCompliance
destination: C:\Windows\temp\AWSCLISetup.exe - name: Install action: ExecuteBinary onFailure: Continue inputs: path: '{{ build.Download.inputs[0].destination }}' arguments: - '/install' - '/quiet' - '/norestart' - name: Delete action: ExecutePowerShell inputs: commands: - Remove-Item -Path '{{ build.Download.inputs[0].destination }}' -Force
The following is an example document schema to install the AWS CLI using the MSI installer.
name: InstallCLIMSIdescription: Install AWS CLI using the MSI installerschemaVersion: 1.0phases: - name: build steps: - name: Download action: S3Download inputs: - source: s3://aws-cli/AWSCLI64PY3.msi destination: C:\Windows\temp\AWSCLI64PY3.msi - name: Install action: ExecuteBinary onFailure: Continue inputs: path: 'C:\Windows\System32\msiexec.exe' arguments: - '/i' - '{{ build.Download.inputs[0].destination }}' - '/quiet' - '/norestart' - name: Delete action: ExecutePowerShell inputs: commands: - Remove-Item -Path '{{ build.Download.inputs[0].destination }}' -Force
ComplianceFor CIS, EC2 Image Builder uses Amazon Inspector to perform automatic assessments for exposure,vulnerabilities, and deviations from best practices and compliance standards. For example, it assessesunintended network accessibility, unpatched CVEs, public internet connectivity, and remote root loginenablement. Amazon Inspector is offered as a test component that you can choose to add to yourimage recipe. For more information about Amazon Inspector, see the Amazon Inspector User Guide. Forhardening, EC2 Image Builder validates using STIG. For a complete list of STIG components availablethrough Image Builder, see EC2 Image Builder STIG Components (p. 76). For more information,see Center for Internet Security (CIS) Benchmarks and Amazon EC2 Windows Server AMIs for STIGCompliance.
23
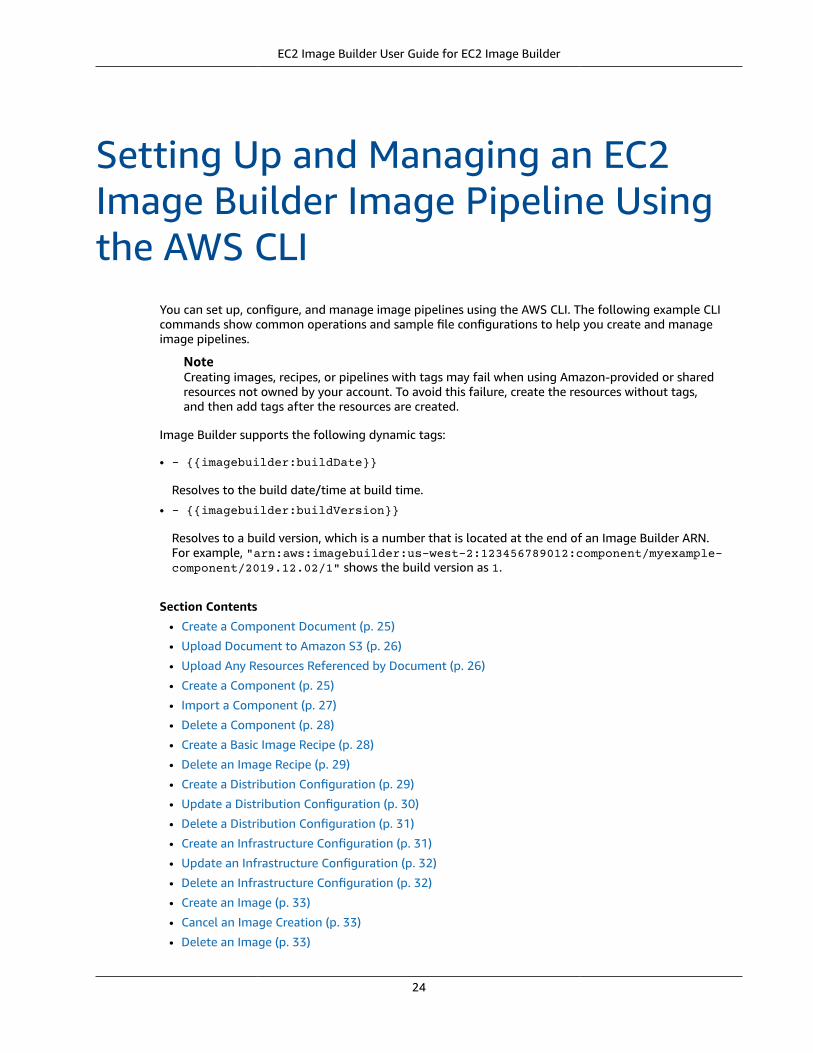
EC2 Image Builder User Guide for EC2 Image Builder
Setting Up and Managing an EC2Image Builder Image Pipeline Usingthe AWS CLI
You can set up, configure, and manage image pipelines using the AWS CLI. The following example CLIcommands show common operations and sample file configurations to help you create and manageimage pipelines.
NoteCreating images, recipes, or pipelines with tags may fail when using Amazon-provided or sharedresources not owned by your account. To avoid this failure, create the resources without tags,and then add tags after the resources are created.
Image Builder supports the following dynamic tags:
• - {{imagebuilder:buildDate}}
Resolves to the build date/time at build time.
• - {{imagebuilder:buildVersion}}
Resolves to a build version, which is a number that is located at the end of an Image Builder ARN.For example, "arn:aws:imagebuilder:us-west-2:123456789012:component/myexample-component/2019.12.02/1" shows the build version as 1.
Section Contents
• Create a Component Document (p. 25)
• Upload Document to Amazon S3 (p. 26)
• Upload Any Resources Referenced by Document (p. 26)
• Create a Component (p. 25)
• Import a Component (p. 27)
• Delete a Component (p. 28)
• Create a Basic Image Recipe (p. 28)
• Delete an Image Recipe (p. 29)
• Create a Distribution Configuration (p. 29)
• Update a Distribution Configuration (p. 30)
• Delete a Distribution Configuration (p. 31)
• Create an Infrastructure Configuration (p. 31)
• Update an Infrastructure Configuration (p. 32)
• Delete an Infrastructure Configuration (p. 32)
• Create an Image (p. 33)
• Cancel an Image Creation (p. 33)
• Delete an Image (p. 33)
24
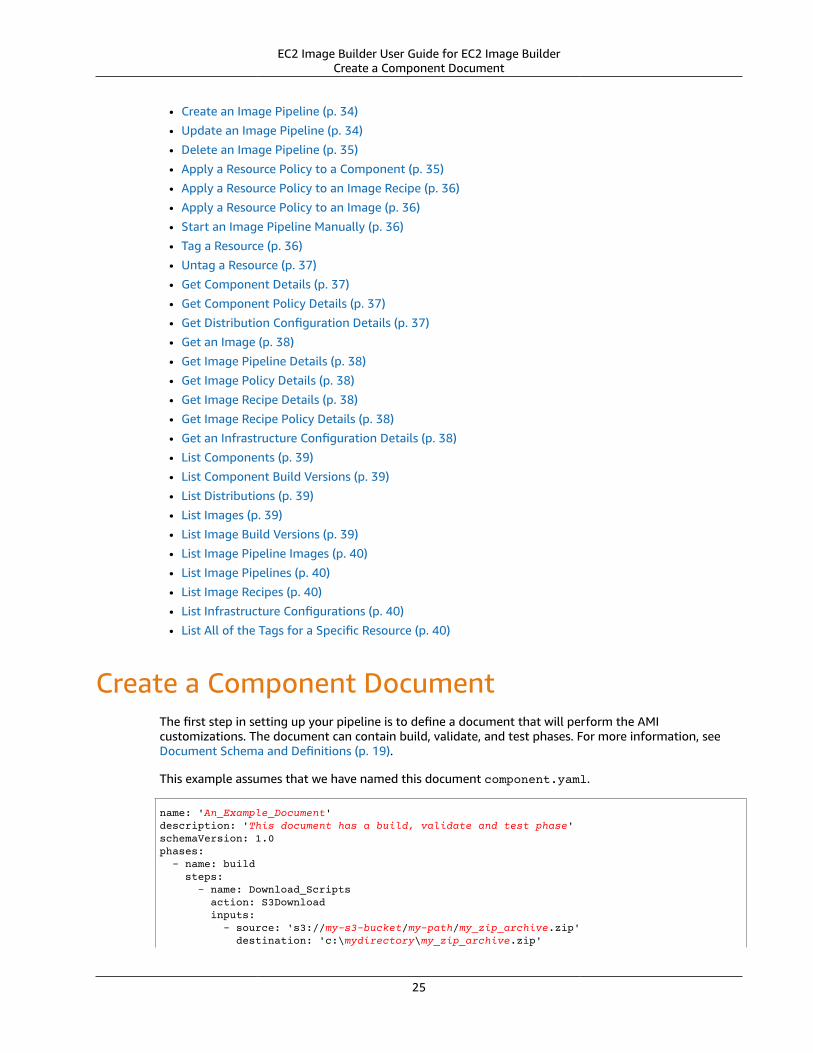
EC2 Image Builder User Guide for EC2 Image BuilderCreate a Component Document
• Create an Image Pipeline (p. 34)
• Update an Image Pipeline (p. 34)
• Delete an Image Pipeline (p. 35)
• Apply a Resource Policy to a Component (p. 35)
• Apply a Resource Policy to an Image Recipe (p. 36)
• Apply a Resource Policy to an Image (p. 36)
• Start an Image Pipeline Manually (p. 36)
• Tag a Resource (p. 36)
• Untag a Resource (p. 37)
• Get Component Details (p. 37)
• Get Component Policy Details (p. 37)
• Get Distribution Configuration Details (p. 37)
• Get an Image (p. 38)
• Get Image Pipeline Details (p. 38)
• Get Image Policy Details (p. 38)
• Get Image Recipe Details (p. 38)
• Get Image Recipe Policy Details (p. 38)
• Get an Infrastructure Configuration Details (p. 38)
• List Components (p. 39)
• List Component Build Versions (p. 39)
• List Distributions (p. 39)
• List Images (p. 39)
• List Image Build Versions (p. 39)
• List Image Pipeline Images (p. 40)
• List Image Pipelines (p. 40)
• List Image Recipes (p. 40)
• List Infrastructure Configurations (p. 40)
• List All of the Tags for a Specific Resource (p. 40)
Create a Component DocumentThe first step in setting up your pipeline is to define a document that will perform the AMIcustomizations. The document can contain build, validate, and test phases. For more information, seeDocument Schema and Definitions (p. 19).
This example assumes that we have named this document component.yaml.
name: 'An_Example_Document'description: 'This document has a build, validate and test phase'schemaVersion: 1.0phases: - name: build steps: - name: Download_Scripts action: S3Download inputs: - source: 's3://my-s3-bucket/my-path/my_zip_archive.zip' destination: 'c:\mydirectory\my_zip_archive.zip'
25
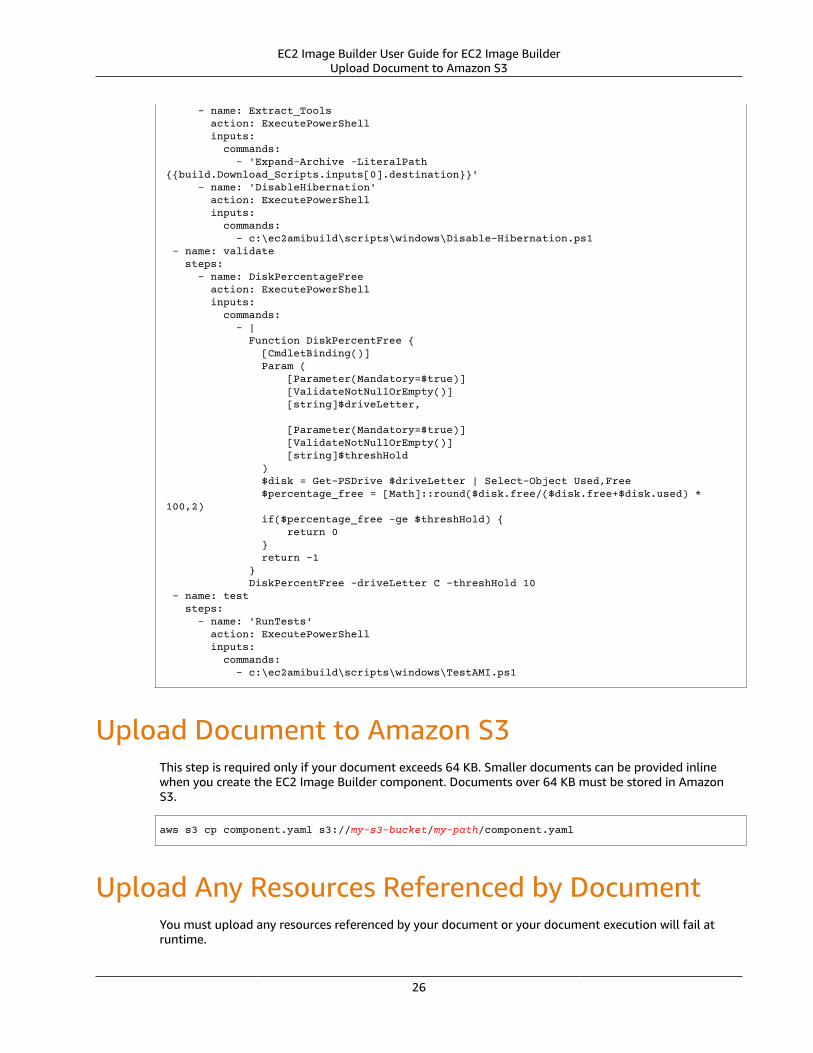
EC2 Image Builder User Guide for EC2 Image BuilderUpload Document to Amazon S3
- name: Extract_Tools action: ExecutePowerShell inputs: commands: - 'Expand-Archive -LiteralPath {{build.Download_Scripts.inputs[0].destination}}' - name: 'DisableHibernation' action: ExecutePowerShell inputs: commands: - c:\ec2amibuild\scripts\windows\Disable-Hibernation.ps1 - name: validate steps: - name: DiskPercentageFree action: ExecutePowerShell inputs: commands: - | Function DiskPercentFree { [CmdletBinding()] Param ( [Parameter(Mandatory=$true)] [ValidateNotNullOrEmpty()] [string]$driveLetter,
[Parameter(Mandatory=$true)] [ValidateNotNullOrEmpty()] [string]$threshHold ) $disk = Get-PSDrive $driveLetter | Select-Object Used,Free $percentage_free = [Math]::round($disk.free/($disk.free+$disk.used) * 100,2) if($percentage_free -ge $threshHold) { return 0 } return -1 } DiskPercentFree -driveLetter C -threshHold 10 - name: test steps: - name: 'RunTests' action: ExecutePowerShell inputs: commands: - c:\ec2amibuild\scripts\windows\TestAMI.ps1
Upload Document to Amazon S3This step is required only if your document exceeds 64 KB. Smaller documents can be provided inlinewhen you create the EC2 Image Builder component. Documents over 64 KB must be stored in AmazonS3.
aws s3 cp component.yaml s3://my-s3-bucket/my-path/component.yaml
Upload Any Resources Referenced by DocumentYou must upload any resources referenced by your document or your document execution will fail atruntime.
26
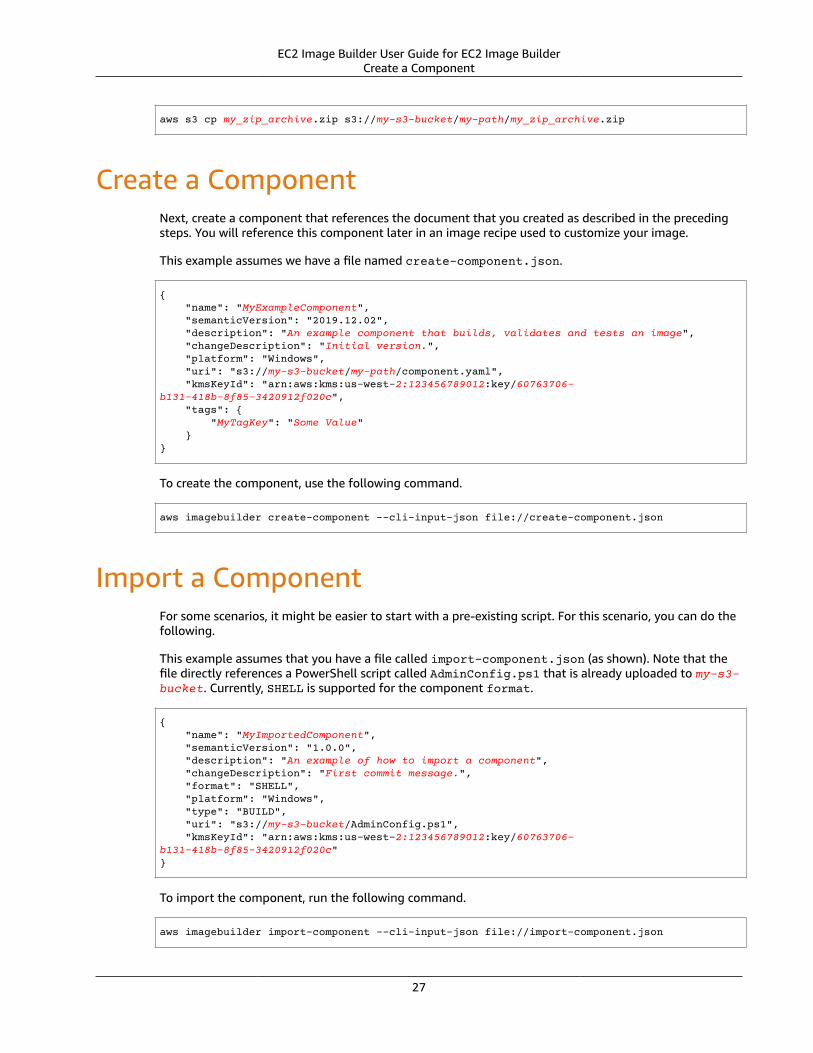
EC2 Image Builder User Guide for EC2 Image BuilderCreate a Component
aws s3 cp my_zip_archive.zip s3://my-s3-bucket/my-path/my_zip_archive.zip
Create a ComponentNext, create a component that references the document that you created as described in the precedingsteps. You will reference this component later in an image recipe used to customize your image.
This example assumes we have a file named create-component.json.
{ "name": "MyExampleComponent", "semanticVersion": "2019.12.02", "description": "An example component that builds, validates and tests an image", "changeDescription": "Initial version.", "platform": "Windows", "uri": "s3://my-s3-bucket/my-path/component.yaml", "kmsKeyId": "arn:aws:kms:us-west-2:123456789012:key/60763706-b131-418b-8f85-3420912f020c", "tags": { "MyTagKey": "Some Value" }}
To create the component, use the following command.
aws imagebuilder create-component --cli-input-json file://create-component.json
Import a ComponentFor some scenarios, it might be easier to start with a pre-existing script. For this scenario, you can do thefollowing.
This example assumes that you have a file called import-component.json (as shown). Note that thefile directly references a PowerShell script called AdminConfig.ps1 that is already uploaded to my-s3-bucket. Currently, SHELL is supported for the component format.
{ "name": "MyImportedComponent", "semanticVersion": "1.0.0", "description": "An example of how to import a component", "changeDescription": "First commit message.", "format": "SHELL", "platform": "Windows", "type": "BUILD", "uri": "s3://my-s3-bucket/AdminConfig.ps1", "kmsKeyId": "arn:aws:kms:us-west-2:123456789012:key/60763706-b131-418b-8f85-3420912f020c"}
To import the component, run the following command.
aws imagebuilder import-component --cli-input-json file://import-component.json
27
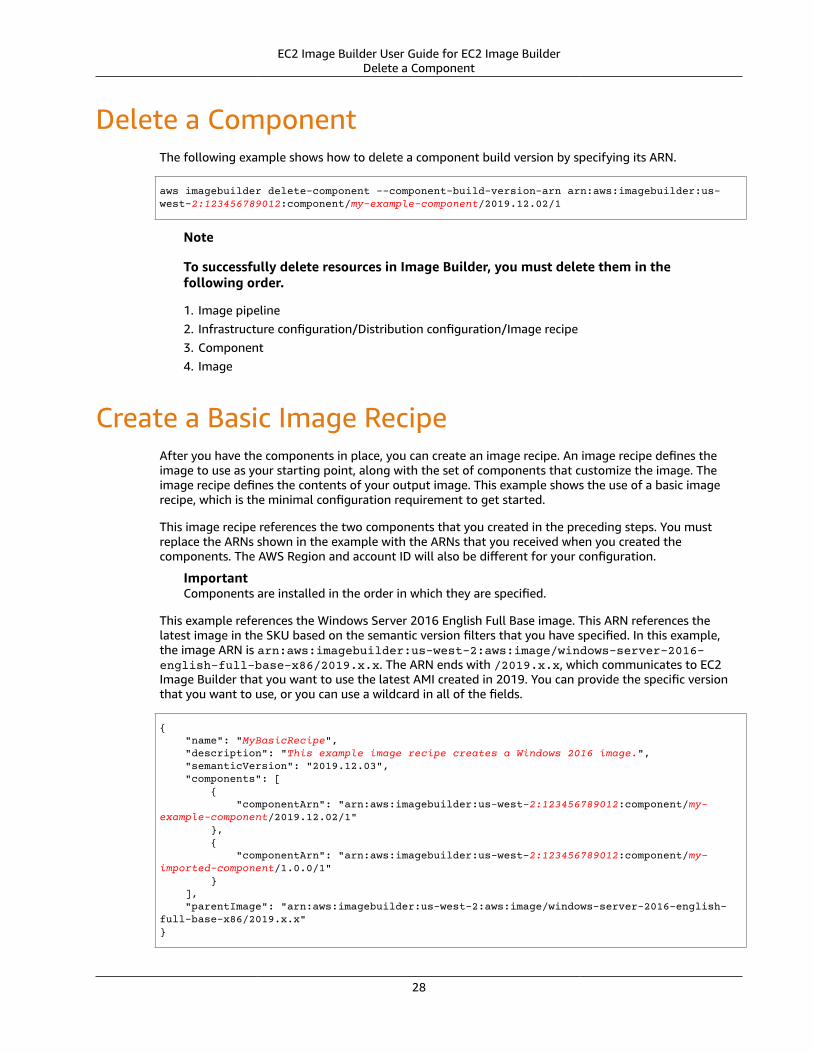
EC2 Image Builder User Guide for EC2 Image BuilderDelete a Component
Delete a ComponentThe following example shows how to delete a component build version by specifying its ARN.
aws imagebuilder delete-component --component-build-version-arn arn:aws:imagebuilder:us-west-2:123456789012:component/my-example-component/2019.12.02/1
Note
To successfully delete resources in Image Builder, you must delete them in thefollowing order.
1. Image pipeline2. Infrastructure configuration/Distribution configuration/Image recipe3. Component4. Image
Create a Basic Image RecipeAfter you have the components in place, you can create an image recipe. An image recipe defines theimage to use as your starting point, along with the set of components that customize the image. Theimage recipe defines the contents of your output image. This example shows the use of a basic imagerecipe, which is the minimal configuration requirement to get started.
This image recipe references the two components that you created in the preceding steps. You mustreplace the ARNs shown in the example with the ARNs that you received when you created thecomponents. The AWS Region and account ID will also be different for your configuration.
ImportantComponents are installed in the order in which they are specified.
This example references the Windows Server 2016 English Full Base image. This ARN references thelatest image in the SKU based on the semantic version filters that you have specified. In this example,the image ARN is arn:aws:imagebuilder:us-west-2:aws:image/windows-server-2016-english-full-base-x86/2019.x.x. The ARN ends with /2019.x.x, which communicates to EC2Image Builder that you want to use the latest AMI created in 2019. You can provide the specific versionthat you want to use, or you can use a wildcard in all of the fields.
{ "name": "MyBasicRecipe", "description": "This example image recipe creates a Windows 2016 image.", "semanticVersion": "2019.12.03", "components": [ { "componentArn": "arn:aws:imagebuilder:us-west-2:123456789012:component/my-example-component/2019.12.02/1" }, { "componentArn": "arn:aws:imagebuilder:us-west-2:123456789012:component/my-imported-component/1.0.0/1" } ], "parentImage": "arn:aws:imagebuilder:us-west-2:aws:image/windows-server-2016-english-full-base-x86/2019.x.x"}
28
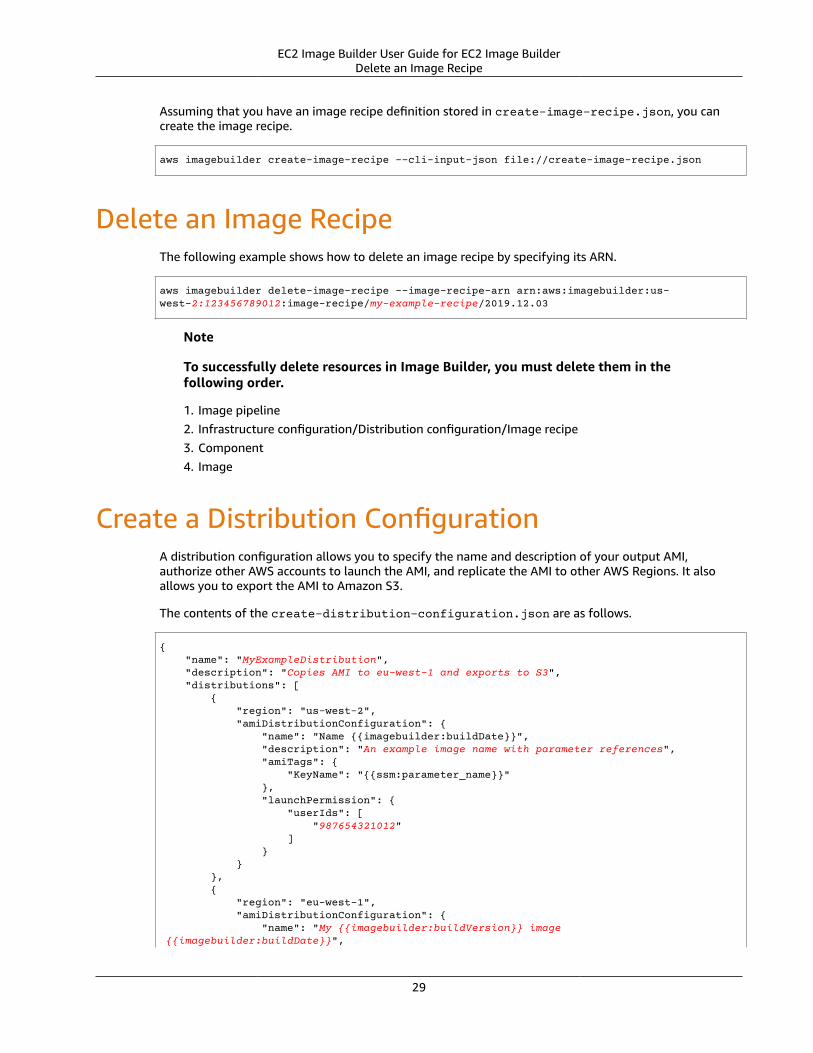
EC2 Image Builder User Guide for EC2 Image BuilderDelete an Image Recipe
Assuming that you have an image recipe definition stored in create-image-recipe.json, you cancreate the image recipe.
aws imagebuilder create-image-recipe --cli-input-json file://create-image-recipe.json
Delete an Image RecipeThe following example shows how to delete an image recipe by specifying its ARN.
aws imagebuilder delete-image-recipe --image-recipe-arn arn:aws:imagebuilder:us-west-2:123456789012:image-recipe/my-example-recipe/2019.12.03
Note
To successfully delete resources in Image Builder, you must delete them in thefollowing order.
1. Image pipeline2. Infrastructure configuration/Distribution configuration/Image recipe3. Component4. Image
Create a Distribution ConfigurationA distribution configuration allows you to specify the name and description of your output AMI,authorize other AWS accounts to launch the AMI, and replicate the AMI to other AWS Regions. It alsoallows you to export the AMI to Amazon S3.
The contents of the create-distribution-configuration.json are as follows.
{ "name": "MyExampleDistribution", "description": "Copies AMI to eu-west-1 and exports to S3", "distributions": [ { "region": "us-west-2", "amiDistributionConfiguration": { "name": "Name {{imagebuilder:buildDate}}", "description": "An example image name with parameter references", "amiTags": { "KeyName": "{{ssm:parameter_name}}" }, "launchPermission": { "userIds": [ "987654321012" ] } } }, { "region": "eu-west-1", "amiDistributionConfiguration": { "name": "My {{imagebuilder:buildVersion}} image {{imagebuilder:buildDate}}",
29
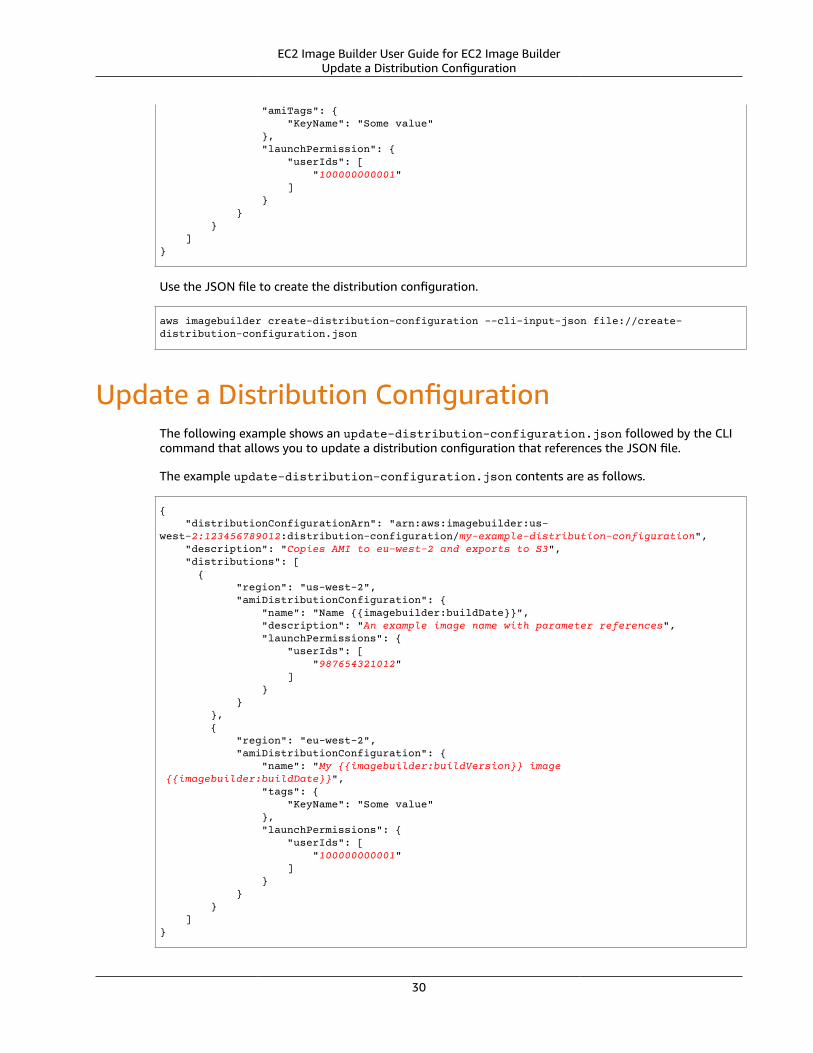
EC2 Image Builder User Guide for EC2 Image BuilderUpdate a Distribution Configuration
"amiTags": { "KeyName": "Some value" }, "launchPermission": { "userIds": [ "100000000001" ] } } } ]}
Use the JSON file to create the distribution configuration.
aws imagebuilder create-distribution-configuration --cli-input-json file://create-distribution-configuration.json
Update a Distribution ConfigurationThe following example shows an update-distribution-configuration.json followed by the CLIcommand that allows you to update a distribution configuration that references the JSON file.
The example update-distribution-configuration.json contents are as follows.
{ "distributionConfigurationArn": "arn:aws:imagebuilder:us-west-2:123456789012:distribution-configuration/my-example-distribution-configuration", "description": "Copies AMI to eu-west-2 and exports to S3", "distributions": [ { "region": "us-west-2", "amiDistributionConfiguration": { "name": "Name {{imagebuilder:buildDate}}", "description": "An example image name with parameter references", "launchPermissions": { "userIds": [ "987654321012" ] } } }, { "region": "eu-west-2", "amiDistributionConfiguration": { "name": "My {{imagebuilder:buildVersion}} image {{imagebuilder:buildDate}}", "tags": { "KeyName": "Some value" }, "launchPermissions": { "userIds": [ "100000000001" ] } } } ]}
30
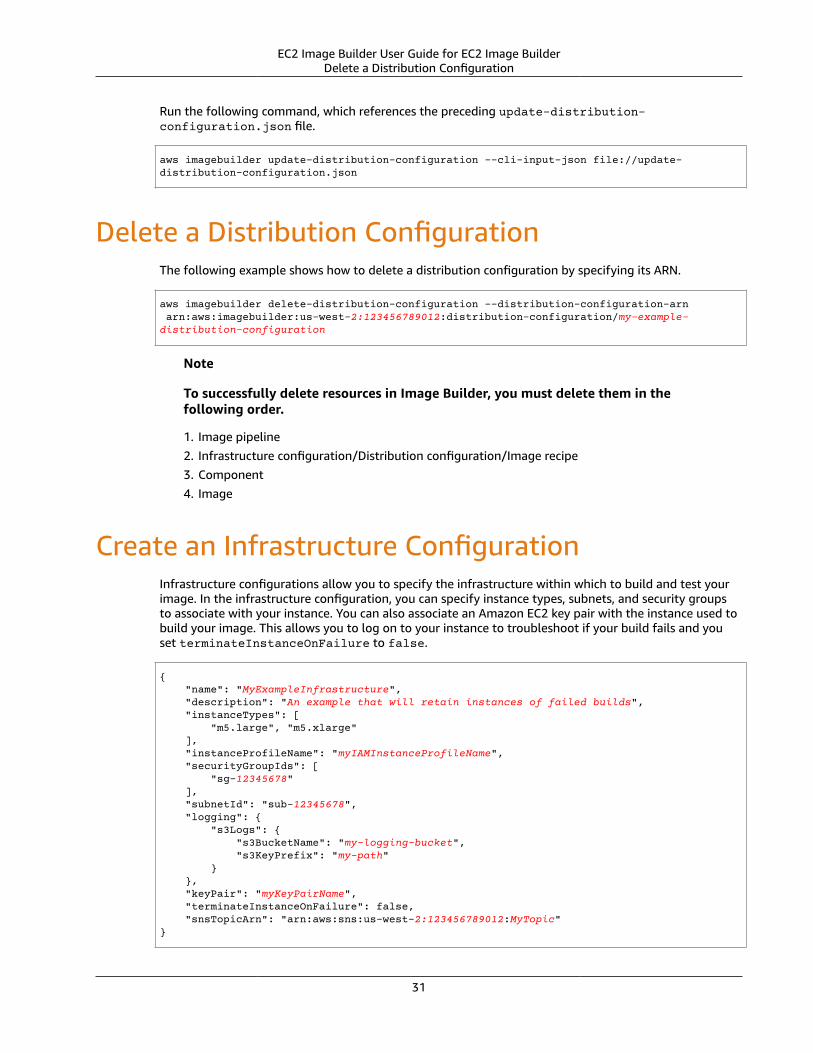
EC2 Image Builder User Guide for EC2 Image BuilderDelete a Distribution Configuration
Run the following command, which references the preceding update-distribution-configuration.json file.
aws imagebuilder update-distribution-configuration --cli-input-json file://update-distribution-configuration.json
Delete a Distribution ConfigurationThe following example shows how to delete a distribution configuration by specifying its ARN.
aws imagebuilder delete-distribution-configuration --distribution-configuration-arn arn:aws:imagebuilder:us-west-2:123456789012:distribution-configuration/my-example-distribution-configuration
Note
To successfully delete resources in Image Builder, you must delete them in thefollowing order.
1. Image pipeline2. Infrastructure configuration/Distribution configuration/Image recipe3. Component4. Image
Create an Infrastructure ConfigurationInfrastructure configurations allow you to specify the infrastructure within which to build and test yourimage. In the infrastructure configuration, you can specify instance types, subnets, and security groupsto associate with your instance. You can also associate an Amazon EC2 key pair with the instance used tobuild your image. This allows you to log on to your instance to troubleshoot if your build fails and youset terminateInstanceOnFailure to false.
{ "name": "MyExampleInfrastructure", "description": "An example that will retain instances of failed builds", "instanceTypes": [ "m5.large", "m5.xlarge" ], "instanceProfileName": "myIAMInstanceProfileName", "securityGroupIds": [ "sg-12345678" ], "subnetId": "sub-12345678", "logging": { "s3Logs": { "s3BucketName": "my-logging-bucket", "s3KeyPrefix": "my-path" } }, "keyPair": "myKeyPairName", "terminateInstanceOnFailure": false, "snsTopicArn": "arn:aws:sns:us-west-2:123456789012:MyTopic"}
31
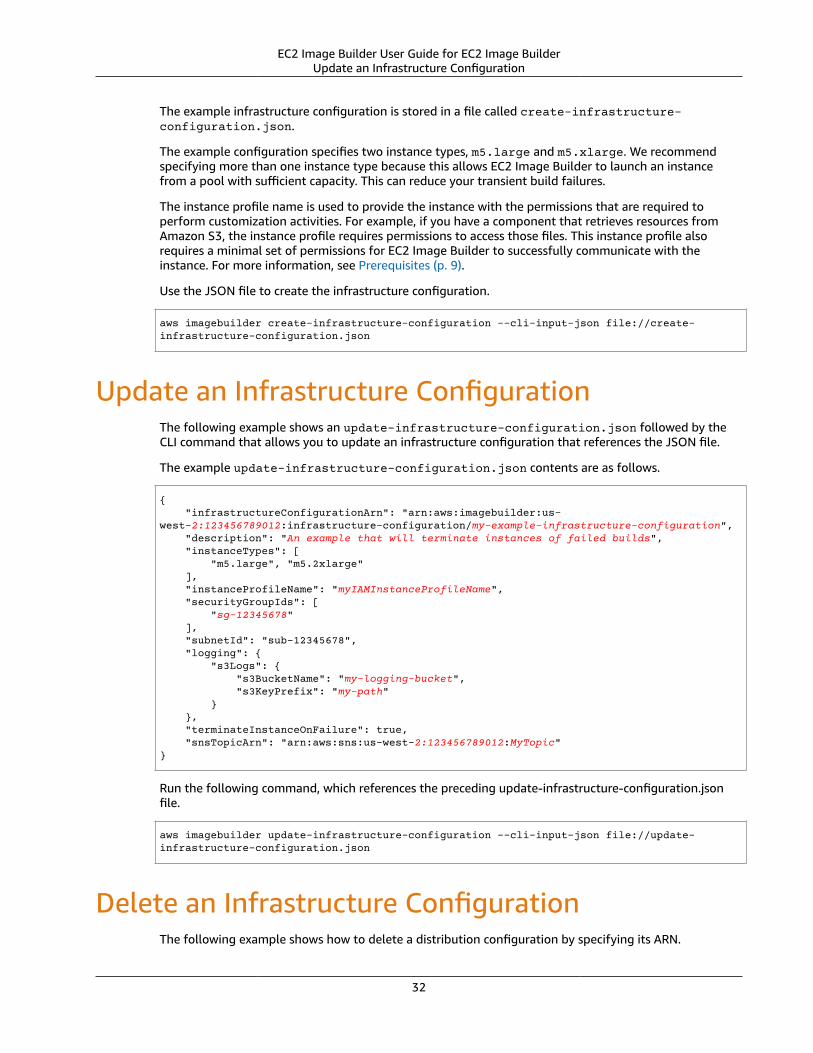
EC2 Image Builder User Guide for EC2 Image BuilderUpdate an Infrastructure Configuration
The example infrastructure configuration is stored in a file called create-infrastructure-configuration.json.
The example configuration specifies two instance types, m5.large and m5.xlarge. We recommendspecifying more than one instance type because this allows EC2 Image Builder to launch an instancefrom a pool with sufficient capacity. This can reduce your transient build failures.
The instance profile name is used to provide the instance with the permissions that are required toperform customization activities. For example, if you have a component that retrieves resources fromAmazon S3, the instance profile requires permissions to access those files. This instance profile alsorequires a minimal set of permissions for EC2 Image Builder to successfully communicate with theinstance. For more information, see Prerequisites (p. 9).
Use the JSON file to create the infrastructure configuration.
aws imagebuilder create-infrastructure-configuration --cli-input-json file://create-infrastructure-configuration.json
Update an Infrastructure ConfigurationThe following example shows an update-infrastructure-configuration.json followed by theCLI command that allows you to update an infrastructure configuration that references the JSON file.
The example update-infrastructure-configuration.json contents are as follows.
{ "infrastructureConfigurationArn": "arn:aws:imagebuilder:us-west-2:123456789012:infrastructure-configuration/my-example-infrastructure-configuration", "description": "An example that will terminate instances of failed builds", "instanceTypes": [ "m5.large", "m5.2xlarge" ], "instanceProfileName": "myIAMInstanceProfileName", "securityGroupIds": [ "sg-12345678" ], "subnetId": "sub-12345678", "logging": { "s3Logs": { "s3BucketName": "my-logging-bucket", "s3KeyPrefix": "my-path" } }, "terminateInstanceOnFailure": true, "snsTopicArn": "arn:aws:sns:us-west-2:123456789012:MyTopic"}
Run the following command, which references the preceding update-infrastructure-configuration.jsonfile.
aws imagebuilder update-infrastructure-configuration --cli-input-json file://update-infrastructure-configuration.json
Delete an Infrastructure ConfigurationThe following example shows how to delete a distribution configuration by specifying its ARN.
32
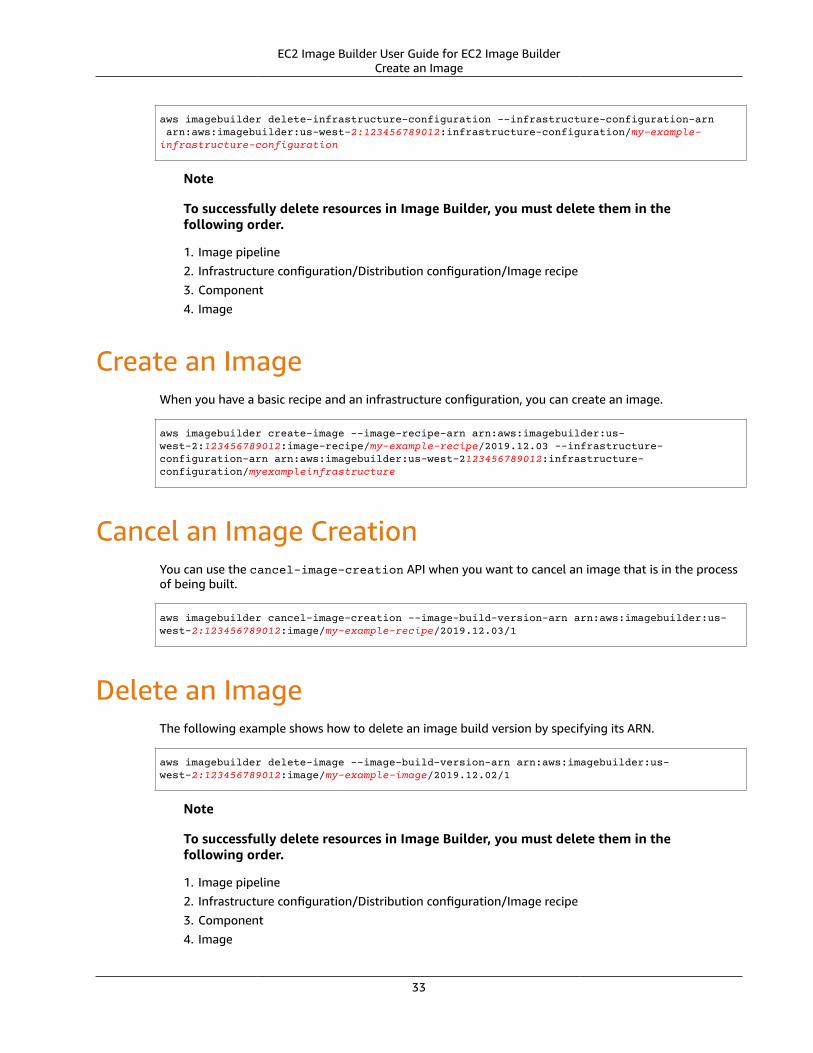
EC2 Image Builder User Guide for EC2 Image BuilderCreate an Image
aws imagebuilder delete-infrastructure-configuration --infrastructure-configuration-arn arn:aws:imagebuilder:us-west-2:123456789012:infrastructure-configuration/my-example-infrastructure-configuration
Note
To successfully delete resources in Image Builder, you must delete them in thefollowing order.
1. Image pipeline2. Infrastructure configuration/Distribution configuration/Image recipe3. Component4. Image
Create an ImageWhen you have a basic recipe and an infrastructure configuration, you can create an image.
aws imagebuilder create-image --image-recipe-arn arn:aws:imagebuilder:us-west-2:123456789012:image-recipe/my-example-recipe/2019.12.03 --infrastructure-configuration-arn arn:aws:imagebuilder:us-west-2123456789012:infrastructure-configuration/myexampleinfrastructure
Cancel an Image CreationYou can use the cancel-image-creation API when you want to cancel an image that is in the processof being built.
aws imagebuilder cancel-image-creation --image-build-version-arn arn:aws:imagebuilder:us-west-2:123456789012:image/my-example-recipe/2019.12.03/1
Delete an ImageThe following example shows how to delete an image build version by specifying its ARN.
aws imagebuilder delete-image --image-build-version-arn arn:aws:imagebuilder:us-west-2:123456789012:image/my-example-image/2019.12.02/1
Note
To successfully delete resources in Image Builder, you must delete them in thefollowing order.
1. Image pipeline2. Infrastructure configuration/Distribution configuration/Image recipe3. Component4. Image
33
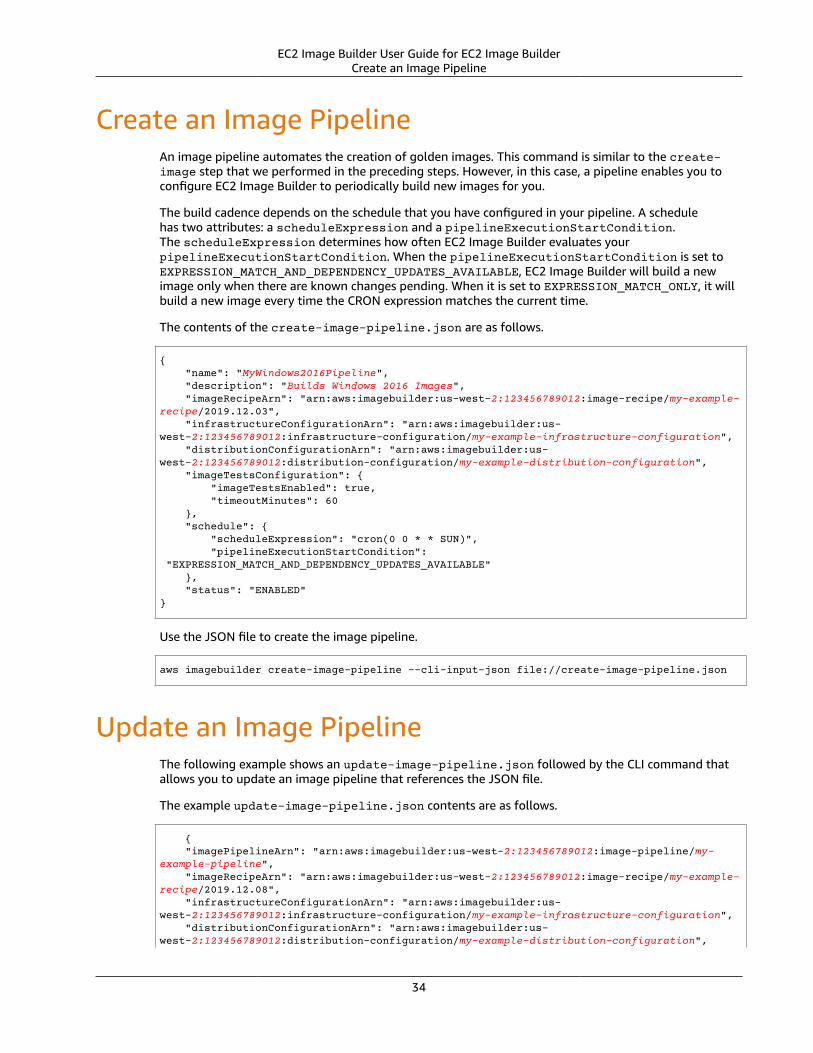
EC2 Image Builder User Guide for EC2 Image BuilderCreate an Image Pipeline
Create an Image PipelineAn image pipeline automates the creation of golden images. This command is similar to the create-image step that we performed in the preceding steps. However, in this case, a pipeline enables you toconfigure EC2 Image Builder to periodically build new images for you.
The build cadence depends on the schedule that you have configured in your pipeline. A schedulehas two attributes: a scheduleExpression and a pipelineExecutionStartCondition.The scheduleExpression determines how often EC2 Image Builder evaluates yourpipelineExecutionStartCondition. When the pipelineExecutionStartCondition is set toEXPRESSION_MATCH_AND_DEPENDENCY_UPDATES_AVAILABLE, EC2 Image Builder will build a newimage only when there are known changes pending. When it is set to EXPRESSION_MATCH_ONLY, it willbuild a new image every time the CRON expression matches the current time.
The contents of the create-image-pipeline.json are as follows.
{ "name": "MyWindows2016Pipeline", "description": "Builds Windows 2016 Images", "imageRecipeArn": "arn:aws:imagebuilder:us-west-2:123456789012:image-recipe/my-example-recipe/2019.12.03", "infrastructureConfigurationArn": "arn:aws:imagebuilder:us-west-2:123456789012:infrastructure-configuration/my-example-infrastructure-configuration", "distributionConfigurationArn": "arn:aws:imagebuilder:us-west-2:123456789012:distribution-configuration/my-example-distribution-configuration", "imageTestsConfiguration": { "imageTestsEnabled": true, "timeoutMinutes": 60 }, "schedule": { "scheduleExpression": "cron(0 0 * * SUN)", "pipelineExecutionStartCondition": "EXPRESSION_MATCH_AND_DEPENDENCY_UPDATES_AVAILABLE" }, "status": "ENABLED"}
Use the JSON file to create the image pipeline.
aws imagebuilder create-image-pipeline --cli-input-json file://create-image-pipeline.json
Update an Image PipelineThe following example shows an update-image-pipeline.json followed by the CLI command thatallows you to update an image pipeline that references the JSON file.
The example update-image-pipeline.json contents are as follows.
{ "imagePipelineArn": "arn:aws:imagebuilder:us-west-2:123456789012:image-pipeline/my-example-pipeline", "imageRecipeArn": "arn:aws:imagebuilder:us-west-2:123456789012:image-recipe/my-example-recipe/2019.12.08", "infrastructureConfigurationArn": "arn:aws:imagebuilder:us-west-2:123456789012:infrastructure-configuration/my-example-infrastructure-configuration", "distributionConfigurationArn": "arn:aws:imagebuilder:us-west-2:123456789012:distribution-configuration/my-example-distribution-configuration",
34
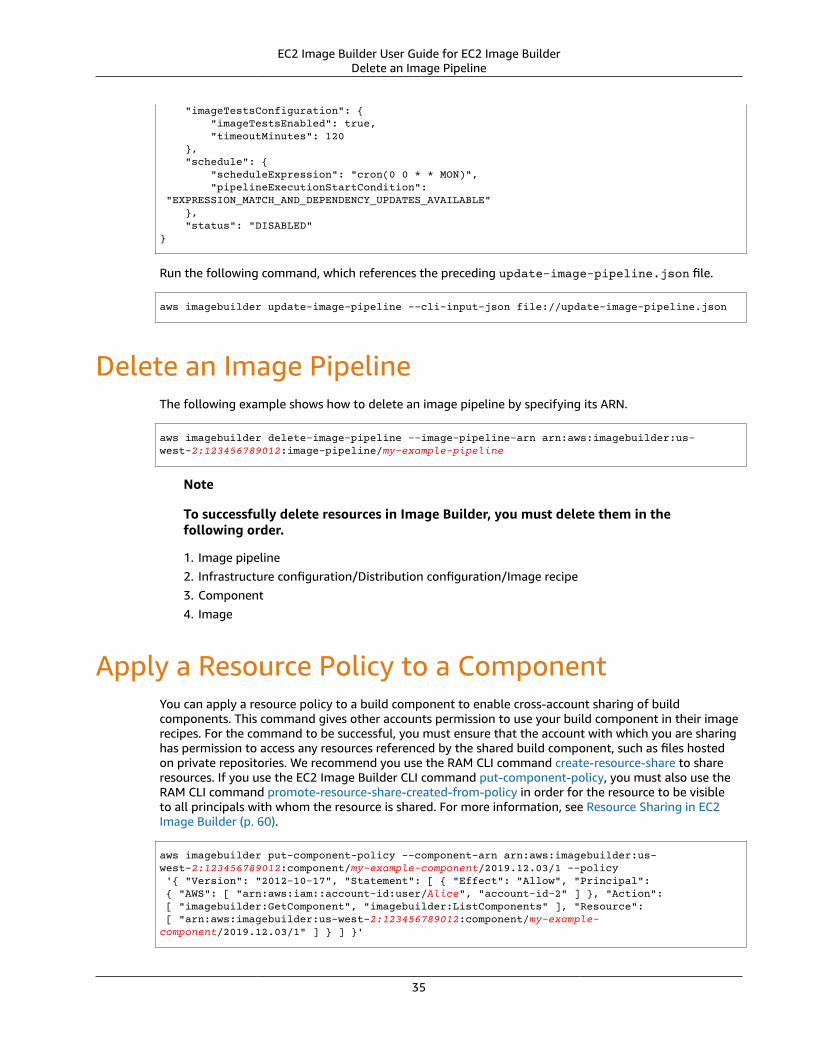
EC2 Image Builder User Guide for EC2 Image BuilderDelete an Image Pipeline
"imageTestsConfiguration": { "imageTestsEnabled": true, "timeoutMinutes": 120 }, "schedule": { "scheduleExpression": "cron(0 0 * * MON)", "pipelineExecutionStartCondition": "EXPRESSION_MATCH_AND_DEPENDENCY_UPDATES_AVAILABLE" }, "status": "DISABLED"}
Run the following command, which references the preceding update-image-pipeline.json file.
aws imagebuilder update-image-pipeline --cli-input-json file://update-image-pipeline.json
Delete an Image PipelineThe following example shows how to delete an image pipeline by specifying its ARN.
aws imagebuilder delete-image-pipeline --image-pipeline-arn arn:aws:imagebuilder:us-west-2:123456789012:image-pipeline/my-example-pipeline
Note
To successfully delete resources in Image Builder, you must delete them in thefollowing order.
1. Image pipeline2. Infrastructure configuration/Distribution configuration/Image recipe3. Component4. Image
Apply a Resource Policy to a ComponentYou can apply a resource policy to a build component to enable cross-account sharing of buildcomponents. This command gives other accounts permission to use your build component in their imagerecipes. For the command to be successful, you must ensure that the account with which you are sharinghas permission to access any resources referenced by the shared build component, such as files hostedon private repositories. We recommend you use the RAM CLI command create-resource-share to shareresources. If you use the EC2 Image Builder CLI command put-component-policy, you must also use theRAM CLI command promote-resource-share-created-from-policy in order for the resource to be visibleto all principals with whom the resource is shared. For more information, see Resource Sharing in EC2Image Builder (p. 60).
aws imagebuilder put-component-policy --component-arn arn:aws:imagebuilder:us-west-2:123456789012:component/my-example-component/2019.12.03/1 --policy '{ "Version": "2012-10-17", "Statement": [ { "Effect": "Allow", "Principal": { "AWS": [ "arn:aws:iam::account-id:user/Alice", "account-id-2" ] }, "Action": [ "imagebuilder:GetComponent", "imagebuilder:ListComponents" ], "Resource": [ "arn:aws:imagebuilder:us-west-2:123456789012:component/my-example-component/2019.12.03/1" ] } ] }'
35
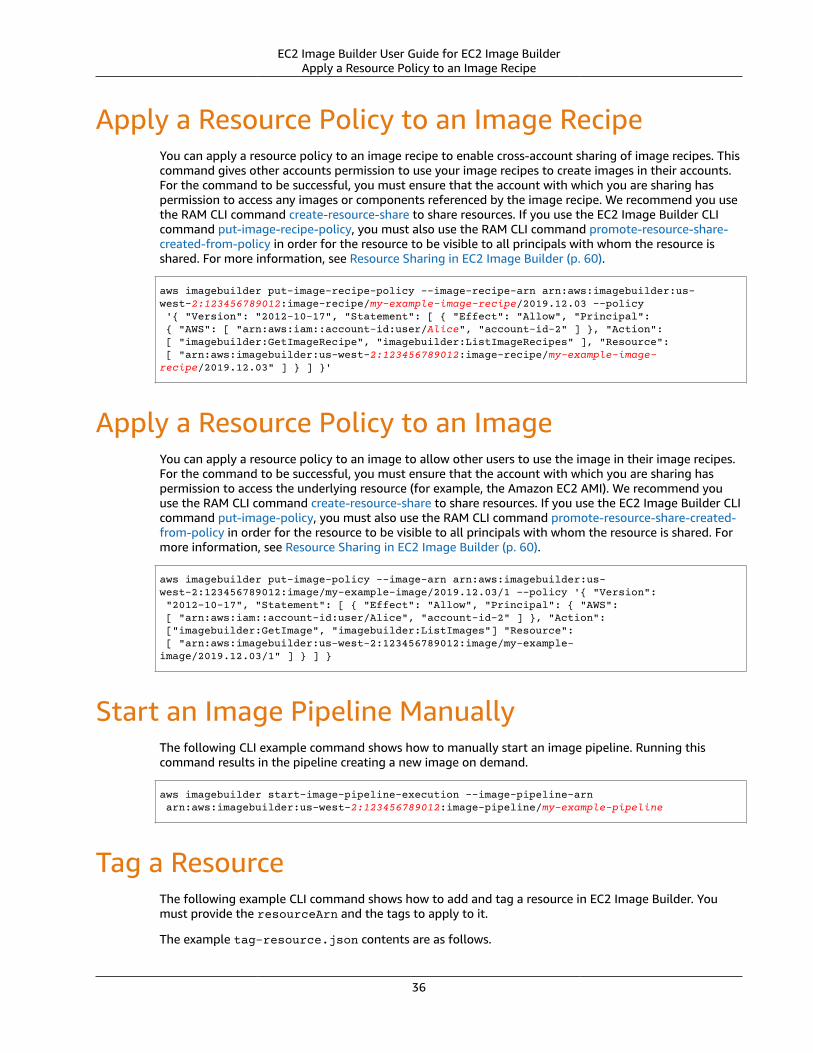
EC2 Image Builder User Guide for EC2 Image BuilderApply a Resource Policy to an Image Recipe
Apply a Resource Policy to an Image RecipeYou can apply a resource policy to an image recipe to enable cross-account sharing of image recipes. Thiscommand gives other accounts permission to use your image recipes to create images in their accounts.For the command to be successful, you must ensure that the account with which you are sharing haspermission to access any images or components referenced by the image recipe. We recommend you usethe RAM CLI command create-resource-share to share resources. If you use the EC2 Image Builder CLIcommand put-image-recipe-policy, you must also use the RAM CLI command promote-resource-share-created-from-policy in order for the resource to be visible to all principals with whom the resource isshared. For more information, see Resource Sharing in EC2 Image Builder (p. 60).
aws imagebuilder put-image-recipe-policy --image-recipe-arn arn:aws:imagebuilder:us-west-2:123456789012:image-recipe/my-example-image-recipe/2019.12.03 --policy '{ "Version": "2012-10-17", "Statement": [ { "Effect": "Allow", "Principal": { "AWS": [ "arn:aws:iam::account-id:user/Alice", "account-id-2" ] }, "Action": [ "imagebuilder:GetImageRecipe", "imagebuilder:ListImageRecipes" ], "Resource": [ "arn:aws:imagebuilder:us-west-2:123456789012:image-recipe/my-example-image-recipe/2019.12.03" ] } ] }'
Apply a Resource Policy to an ImageYou can apply a resource policy to an image to allow other users to use the image in their image recipes.For the command to be successful, you must ensure that the account with which you are sharing haspermission to access the underlying resource (for example, the Amazon EC2 AMI). We recommend youuse the RAM CLI command create-resource-share to share resources. If you use the EC2 Image Builder CLIcommand put-image-policy, you must also use the RAM CLI command promote-resource-share-created-from-policy in order for the resource to be visible to all principals with whom the resource is shared. Formore information, see Resource Sharing in EC2 Image Builder (p. 60).
aws imagebuilder put-image-policy --image-arn arn:aws:imagebuilder:us-west-2:123456789012:image/my-example-image/2019.12.03/1 --policy '{ "Version": "2012-10-17", "Statement": [ { "Effect": "Allow", "Principal": { "AWS": [ "arn:aws:iam::account-id:user/Alice", "account-id-2" ] }, "Action": ["imagebuilder:GetImage", "imagebuilder:ListImages"] "Resource": [ "arn:aws:imagebuilder:us-west-2:123456789012:image/my-example-image/2019.12.03/1" ] } ] }
Start an Image Pipeline ManuallyThe following CLI example command shows how to manually start an image pipeline. Running thiscommand results in the pipeline creating a new image on demand.
aws imagebuilder start-image-pipeline-execution --image-pipeline-arn arn:aws:imagebuilder:us-west-2:123456789012:image-pipeline/my-example-pipeline
Tag a ResourceThe following example CLI command shows how to add and tag a resource in EC2 Image Builder. Youmust provide the resourceArn and the tags to apply to it.
The example tag-resource.json contents are as follows.
36
https://docs.aws.amazon.com/cli/latest/reference/ram/promote-resource-share-created-from-policy.html
https://docs.aws.amazon.com/cli/latest/reference/ram/promote-resource-share-created-from-policy.html
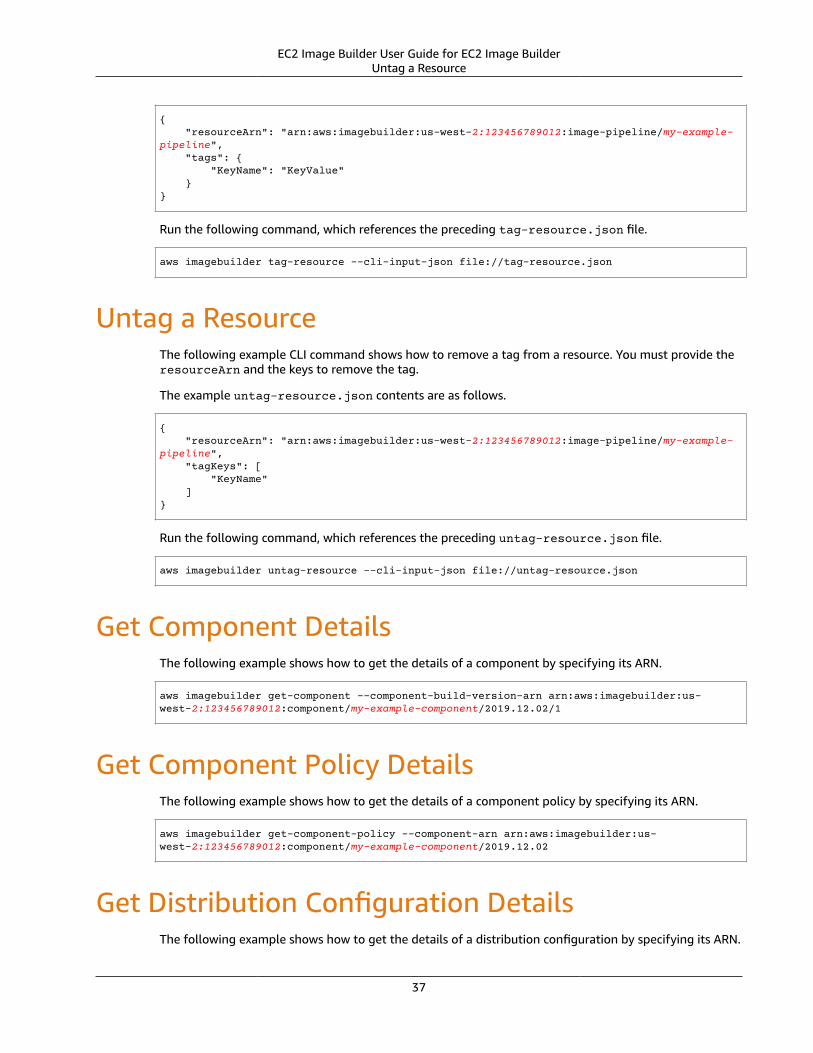
EC2 Image Builder User Guide for EC2 Image BuilderUntag a Resource
{ "resourceArn": "arn:aws:imagebuilder:us-west-2:123456789012:image-pipeline/my-example-pipeline", "tags": { "KeyName": "KeyValue" }}
Run the following command, which references the preceding tag-resource.json file.
aws imagebuilder tag-resource --cli-input-json file://tag-resource.json
Untag a ResourceThe following example CLI command shows how to remove a tag from a resource. You must provide theresourceArn and the keys to remove the tag.
The example untag-resource.json contents are as follows.
{ "resourceArn": "arn:aws:imagebuilder:us-west-2:123456789012:image-pipeline/my-example-pipeline", "tagKeys": [ "KeyName" ]}
Run the following command, which references the preceding untag-resource.json file.
aws imagebuilder untag-resource --cli-input-json file://untag-resource.json
Get Component DetailsThe following example shows how to get the details of a component by specifying its ARN.
aws imagebuilder get-component --component-build-version-arn arn:aws:imagebuilder:us-west-2:123456789012:component/my-example-component/2019.12.02/1
Get Component Policy DetailsThe following example shows how to get the details of a component policy by specifying its ARN.
aws imagebuilder get-component-policy --component-arn arn:aws:imagebuilder:us-west-2:123456789012:component/my-example-component/2019.12.02
Get Distribution Configuration DetailsThe following example shows how to get the details of a distribution configuration by specifying its ARN.
37
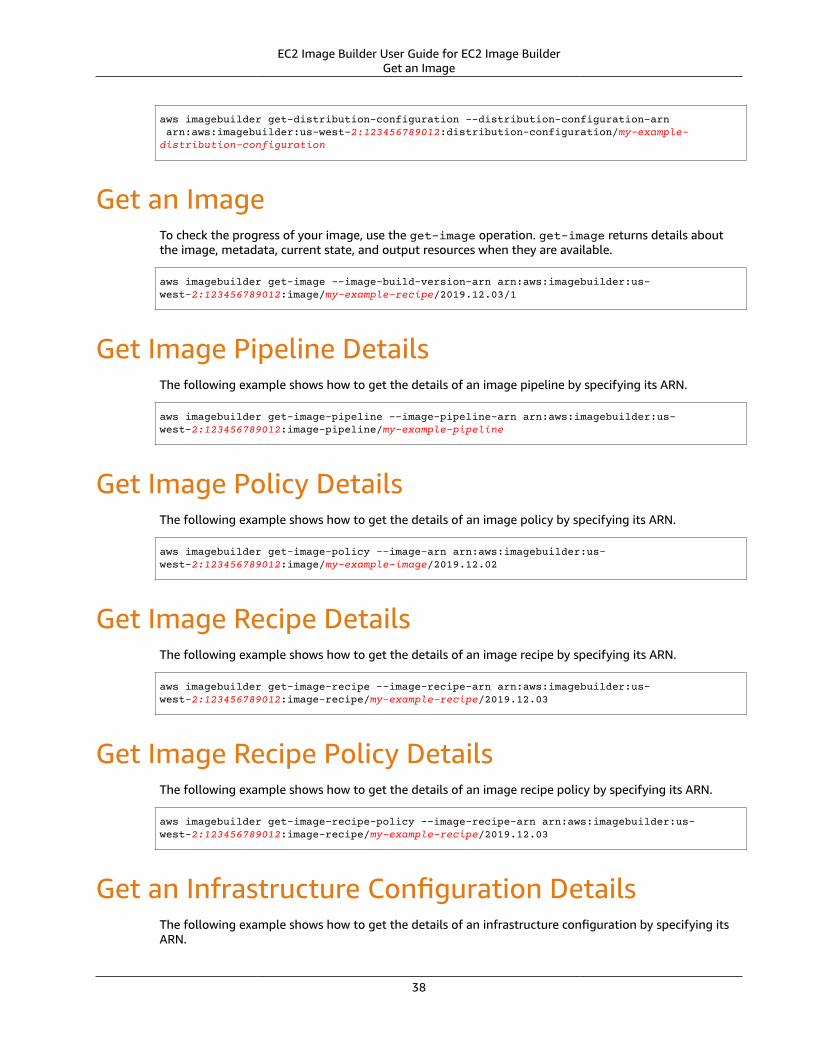
EC2 Image Builder User Guide for EC2 Image BuilderGet an Image
aws imagebuilder get-distribution-configuration --distribution-configuration-arn arn:aws:imagebuilder:us-west-2:123456789012:distribution-configuration/my-example-distribution-configuration
Get an ImageTo check the progress of your image, use the get-image operation. get-image returns details aboutthe image, metadata, current state, and output resources when they are available.
aws imagebuilder get-image --image-build-version-arn arn:aws:imagebuilder:us-west-2:123456789012:image/my-example-recipe/2019.12.03/1
Get Image Pipeline DetailsThe following example shows how to get the details of an image pipeline by specifying its ARN.
aws imagebuilder get-image-pipeline --image-pipeline-arn arn:aws:imagebuilder:us-west-2:123456789012:image-pipeline/my-example-pipeline
Get Image Policy DetailsThe following example shows how to get the details of an image policy by specifying its ARN.
aws imagebuilder get-image-policy --image-arn arn:aws:imagebuilder:us-west-2:123456789012:image/my-example-image/2019.12.02
Get Image Recipe DetailsThe following example shows how to get the details of an image recipe by specifying its ARN.
aws imagebuilder get-image-recipe --image-recipe-arn arn:aws:imagebuilder:us-west-2:123456789012:image-recipe/my-example-recipe/2019.12.03
Get Image Recipe Policy DetailsThe following example shows how to get the details of an image recipe policy by specifying its ARN.
aws imagebuilder get-image-recipe-policy --image-recipe-arn arn:aws:imagebuilder:us-west-2:123456789012:image-recipe/my-example-recipe/2019.12.03
Get an Infrastructure Configuration DetailsThe following example shows how to get the details of an infrastructure configuration by specifying itsARN.
38
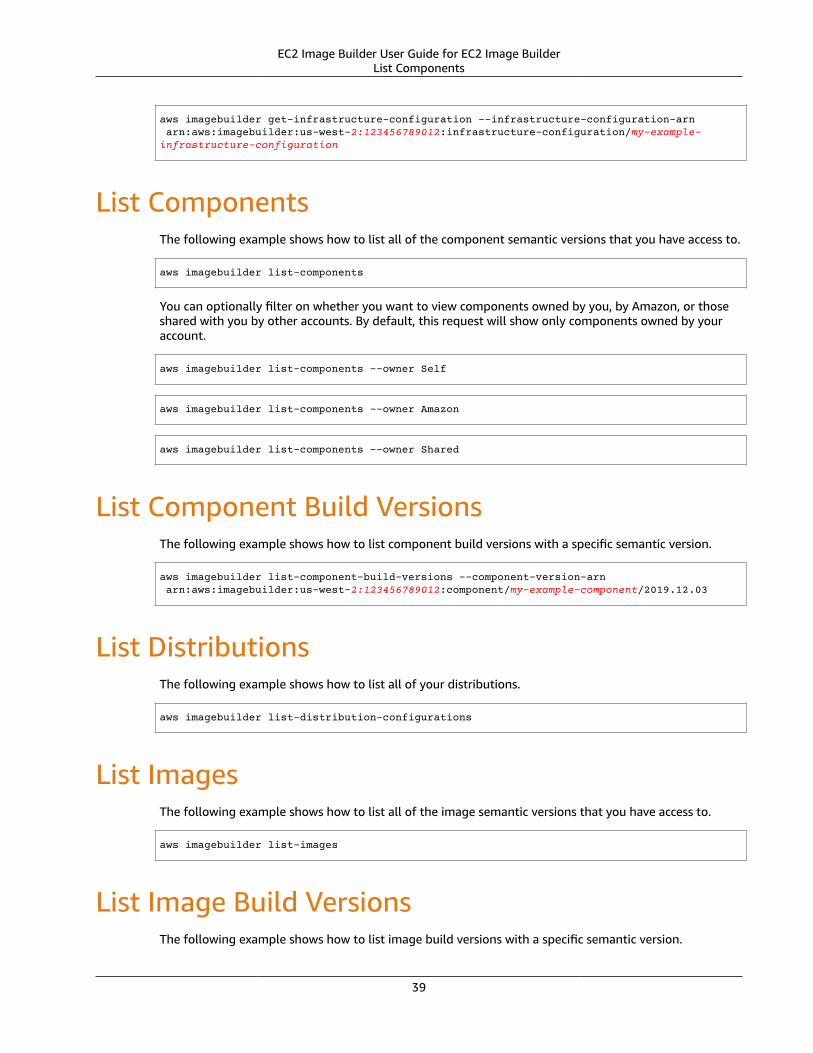
EC2 Image Builder User Guide for EC2 Image BuilderList Components
aws imagebuilder get-infrastructure-configuration --infrastructure-configuration-arn arn:aws:imagebuilder:us-west-2:123456789012:infrastructure-configuration/my-example-infrastructure-configuration
List ComponentsThe following example shows how to list all of the component semantic versions that you have access to.
aws imagebuilder list-components
You can optionally filter on whether you want to view components owned by you, by Amazon, or thoseshared with you by other accounts. By default, this request will show only components owned by youraccount.
aws imagebuilder list-components --owner Self
aws imagebuilder list-components --owner Amazon
aws imagebuilder list-components --owner Shared
List Component Build VersionsThe following example shows how to list component build versions with a specific semantic version.
aws imagebuilder list-component-build-versions --component-version-arn arn:aws:imagebuilder:us-west-2:123456789012:component/my-example-component/2019.12.03
List DistributionsThe following example shows how to list all of your distributions.
aws imagebuilder list-distribution-configurations
List ImagesThe following example shows how to list all of the image semantic versions that you have access to.
aws imagebuilder list-images
List Image Build VersionsThe following example shows how to list image build versions with a specific semantic version.
39

EC2 Image Builder User Guide for EC2 Image BuilderList Image Pipeline Images
aws imagebuilder list-image-build-versions --image-version-arn arn:aws:imagebuilder:us-west-2:123456789012:image/my-example-image/2019.12.03
List Image Pipeline ImagesThe following example shows how to list all images created by a specific image pipeline.
aws imagebuilder list-image-pipeline-images --image-pipeline-arn arn:aws:imagebuilder:us-west-2:123456789012:image-pipeline/my-example-pipeline
List Image PipelinesThe following example shows how to list all of your image pipelines.
aws imagebuilder list-image-pipelines
List Image RecipesThe following example shows how to list all of your image recipes.
aws imagebuilder list-image-recipes
List Infrastructure ConfigurationsThe following example shows how to list of all of your infrastructure configurations.
aws imagebuilder list-infrastructure-configurations
List All of the Tags for a Specific ResourceThe following example shows how to list all the tags for a specific resource.
aws imagebuilder list-tags-for-resource --resource-arn arn:aws:imagebuilder:us-west-2:123456789012:image-pipeline/my-example-pipeline
40

EC2 Image Builder User Guide for EC2 Image BuilderData Protection
Security in EC2 Image BuilderCloud security at AWS is the highest priority. As an AWS customer, you benefit from a data center andnetwork architecture that is built to meet the requirements of the most security-sensitive organizations.
Security is a shared responsibility between AWS and you. The shared responsibility model describes thisas security of the cloud and security in the cloud:
• Security of the cloud – AWS is responsible for protecting the infrastructure that runs AWS services inthe AWS Cloud. AWS also provides you with services that you can use securely. Third-party auditorsregularly test and verify the effectiveness of our security as part of the AWS Compliance Programs. Tolearn about the compliance programs that apply to EC2 Image Builder, see AWS Services in Scope byCompliance Program.
• Security in the cloud – Your responsibility is determined by the AWS service that you use. You are alsoresponsible for other factors including the sensitivity of your data, your company’s requirements, andapplicable laws and regulations.
This documentation helps you understand how to apply the shared responsibility model when usingImage Builder. The following topics show you how to configure Image Builder to meet your security andcompliance objectives. You also learn how to use other AWS services that help you to monitor and secureyour Image Builder resources.
Topics• Data Protection in EC2 Image Builder (p. 41)• Identity and Access Management for EC2 Image Builder (p. 42)• Compliance Validation for EC2 Image Builder (p. 54)• Resilience in EC2 Image Builder (p. 55)• Infrastructure Security in EC2 Image Builder (p. 55)• Patch Management in EC2 Image Builder (p. 56)• Security Best Practices for EC2 Image Builder (p. 56)
Data Protection in EC2 Image BuilderEC2 Image Builder conforms to the AWS shared responsibility model, which includes regulations andguidelines for data protection. AWS is responsible for protecting the global infrastructure that runs allthe AWS services. AWS maintains control over data hosted on this infrastructure, including the securityconfiguration controls for handling customer content and personal data. AWS customers and APNPartners, acting either as data controllers or data processors, are responsible for any personal data thatthey put in the AWS Cloud.
For data protection purposes, we recommend that you protect AWS account credentials and set upindividual user accounts with AWS Identity and Access Management (IAM), so that each user is given onlythe permissions necessary to fulfill their job duties. We also recommend that you secure your data in thefollowing ways:
• Use multi-factor authentication (MFA) with each account.• Use SSL/TLS to communicate with AWS resources.• Set up API and user activity logging with AWS CloudTrail.• Use AWS encryption solutions, along with all default security controls within AWS services.
41
EC2 Image Builder User Guide for EC2 Image BuilderEncryption and Key Management
• Use advanced managed security services such as Amazon Macie, which assists in discovering andsecuring personal data that is stored in Amazon S3, or Amazon GuardDuty, which continuouslymonitors for malicious activity and unauthorized behavior to protect your AWS accounts andworkloads.
We strongly recommend that you never put sensitive identifying information, such as your customers'account numbers, into free-form fields such as a Name field. This includes when you work with ImageBuilder or other AWS services using the console, API, AWS CLI, or AWS SDKs. Any data that you enter intoImage Builder or other services might get picked up for inclusion in diagnostic logs. When you providea URL to an external server, don't include credentials information in the URL to validate your request tothat server.
All images created by Image Builder and the Amazon EC2 instances used to build them are located inyour account. Therefore, any of your content that is included in the images or instances remains outsideof the Image Builder service. The Image Builder service stores the component definitions that you create.You can upload custom component definitions that are stored in the Image Builder service. Customcomponents are encrypted with your KMS key or a KMS key owned by Image Builder.
For more information about data protection, see the AWS Shared Responsibility Model and GDPR blogpost on the AWS Security Blog.
Encryption and Key Management in EC2 ImageBuilderImage Builder encrypts data in transit and at rest by default. Custom components defined in the servicecan be added to your image pipelines and shared with other customer accounts. You are not required toshare your components to build images.
Custom components are encrypted with your KMS key or a KMS key owned by Image Builder. ImageBuilder does not store any of your logs in the service. All logs are saved on your Amazon EC2 instancethat is used to build the image, or in your SSM automation logs.
You can manage your keys through AWS KMS. You cannot manage the Image Builder AWS KMS keyowned by Image Builder.
For more information about managing your AWS KMS keys with AWS Key Management Service, seeGetting Started in the AWS Key Management Service Developer Guide.
Internetwork Traffic Privacy in EC2 Image BuilderConnections are secured between Image Builder and on-premises locations, between AZs within an AWSRegion, and between AWS Regions through HTTPS. There are no direct connections between accounts.
Identity and Access Management for EC2 ImageBuilder
Topics• Audience (p. 43)• Authenticating With Identities (p. 43)• Managing Access Using Policies (p. 43)• How EC2 Image Builder Works with IAM (p. 43)
42

EC2 Image Builder User Guide for EC2 Image BuilderAudience
• EC2 Image Builder Identity-Based Policy Examples (p. 46)• EC2 Image Builder Resource-Based Policy Examples (p. 49)• Using Service-Linked Roles for EC2 Image Builder (p. 50)• Troubleshooting EC2 Image Builder Identity and Access (p. 53)
AudienceHow you use AWS Identity and Access Management (IAM) differs, depending on the work you do in EC2Image Builder.
Service user – If you use the EC2 Image Builder service to do your job, then your administrator providesyou with the credentials and permissions that you need. As you use more EC2 Image Builder features todo your work, you might need additional permissions. Understanding how access is managed can helpyou request the right permissions from your administrator. If you cannot access a feature in EC2 ImageBuilder, see Troubleshooting EC2 Image Builder Identity and Access (p. 53).
Service administrator – If you're in charge of EC2 Image Builder resources at your company, youprobably have full access to EC2 Image Builder. It's your job to determine which EC2 Image Builderfeatures and resources your employees should access. You must then submit requests to your IAMadministrator to change the permissions of your service users. Review the information on this page tounderstand the basic concepts of IAM. To learn more about how your company can use IAM with EC2Image Builder, see How EC2 Image Builder Works with IAM (p. 43).
IAM administrator – If you're an IAM administrator, you might want to learn details about how you canwrite policies to manage access to EC2 Image Builder. To view example EC2 Image Builder identity-basedpolicies that you can use in IAM, see EC2 Image Builder Identity-Based Policy Examples (p. 46).
Authenticating With IdentitiesFor detailed information about how to provide authentication for people and processes in your AWSaccount, see Identities in the IAM User Guide.
Managing Access Using PoliciesFor detailed information about how to manage access in AWS by creating policies and attaching them toIAM identities or AWS resources, see Policies and Permissions in the IAM User Guide.
How EC2 Image Builder Works with IAMBefore you use IAM to manage access to Image Builder, you should understand what IAM featuresare available to use with Image Builder. To get a high-level view of how Image Builder and other AWSservices work with IAM, see AWS Services That Work with IAM in the IAM User Guide.
Topics• Image Builder Identity-Based Policies (p. 43)• Image Builder Resource-Based Policies (p. 45)• Authorization Based on Image Builder Tags (p. 45)• Image Builder IAM Roles (p. 45)
Image Builder Identity-Based PoliciesWith IAM identity-based policies, you can specify allowed or denied actions and resources as well asthe conditions under which actions are allowed or denied. Image Builder supports specific actions,
43
EC2 Image Builder User Guide for EC2 Image BuilderHow EC2 Image Builder Works with IAM
resources, and condition keys. To learn about all of the elements that you use in a JSON policy, seeActions, Resources, and Condition Keys for Amazon EC2 Image Builder in the IAM User Guide.
Actions
Policy actions in Image Builder use the following prefix before the action: imagebuilder:. Policystatements must include either an Action or NotAction element. Image Builder defines its own set ofactions that describe tasks that you can perform with this service.
To specify multiple actions in a single statement, separate them with commas as follows:
"Action": [ "imagebuilder:action1", "imagebuilder:action2"
You can specify multiple actions using wildcards (*). For example, to specify all actions that begin withthe word List, include the following action:
"Action": "imagebuilder:List*"
To see a list of Image Builder actions, see Actions, Resources, and Condition Keys for AWS Services in theIAM User Guide.
Resources
The Resource element specifies the object or objects to which the action applies. Statements mustinclude either a Resource or a NotResource element. You specify a resource using an ARN or using thewildcard (*) to indicate that the statement applies to all resources.
The Image Builder instance resource has the following ARN.
arn:aws:imagebuilder:region:account-id:resource:resource-id
For more information about the format of ARNs, see Amazon Resource Names (ARNs) and AWS ServiceNamespaces.
For example, to specify the i-1234567890abcdef0 instance in your statement, use the following ARN.
"Resource": "arn:aws:imagebuilder:us-east-1:123456789012:instance/i-1234567890abcdef0"
To specify all instances that belong to a specific account, use the wildcard (*).
"Resource": "arn:aws:imagebuilder:us-east-1:123456789012:instance/*"
Some Image Builder actions, such as those for creating resources, cannot be performed on a specificresource. In those cases, you must use the wildcard (*).
"Resource": "*"
Many EC2 Image Builder API actions involve multiple resources. To specify multiple resources in a singlestatement, separate the ARNs with commas.
"Resource": [ "resource1", "resource2"
44
EC2 Image Builder User Guide for EC2 Image BuilderHow EC2 Image Builder Works with IAM
Condition Keys
Image Builder does not provide any service-specific condition keys, but it does support using some globalcondition keys. To see all AWS global condition keys, see AWS Global Condition Context Keys in the IAMUser Guide.
Examples
To view examples of Image Builder identity-based policies, see EC2 Image Builder Identity-Based PolicyExamples (p. 46).
Image Builder Resource-Based PoliciesResource-based policies are JSON policy documents that specify what actions a specified principal canperform on the Image Builder resource and under what conditions. Image Builder supports resource-based permissions policies for components, images, and image recipes. Resource-based policies let yougrant usage permission to other accounts on a per-resource basis. You can also use a resource-basedpolicy to allow an AWS service to access your components, images, and image recipes.
To enable cross-account access, you can specify an entire account or IAM entities in another account asthe principal in a resource-based policy. Adding a cross-account principal to a resource-based policy isonly half of establishing the trust relationship. When the principal and the resource are in different AWSaccounts, you must also grant the principal entity permission to access the resource. Grant permission byattaching an identity-based policy to the entity. However, if a resource-based policy grants access to aprincipal in the same account, no additional identity-based policy is required. For more information, seeHow IAM Roles Differ from Resource-based Policies in the IAM User Guide.
To learn how to attach a resource-based policy to a component, image, or image recipe, see ResourceSharing in EC2 Image Builder (p. 60).
NoteWhen you update a resource policy using Image Builder, the update will appear in the RAMconsole.
Authorization Based on Image Builder TagsYou can attach tags to Image Builder resources or pass tags in a request to Image Builder. To controlaccess based on tags, you provide tag information in the condition element of a policy using theimagebuilder:ResourceTag/key-name, aws:RequestTag/key-name, or aws:TagKeys conditionkeys. For more information about tagging Image Builder resources, see Tag a Resource (p. 36).
Image Builder IAM RolesAn IAM role is an entity within your AWS account that has specific permissions.
Using Temporary Credentials with Image Builder
You can use temporary credentials to sign in with federation, assume an IAM role, or to assume a cross-account role. You obtain temporary security credentials by calling AWS STS API operations such asAssumeRole or GetFederationToken.
Service-Linked Roles
Service-linked roles allow AWS services to access resources in other services to complete an action onyour behalf. Service-linked roles appear in your IAM account and are owned by the service. An IAMadministrator can view but not edit the permissions for service-linked roles.
45
EC2 Image Builder User Guide for EC2 Image BuilderIdentity-Based Policy Examples
Image Builder supports service-linked roles. For details about creating or managing Image Builderservice-linked roles, see Using Service-Linked Roles for EC2 Image Builder (p. 50).
Service Roles
This feature allows a service to assume a service role on your behalf. This role allows the service toaccess resources in other services to complete an action on your behalf. Service roles appear in yourIAM account and are owned by the account. This means that an IAM administrator can change thepermissions for this role. However, doing so might break the functionality of the service.
EC2 Image Builder Identity-Based Policy ExamplesBy default, IAM users and roles don't have permission to create or modify Image Builder resources.They also can't perform tasks using the AWS Management Console, AWS CLI, or AWS API. An IAMadministrator must create IAM policies that grant users and roles permission to perform specific APIoperations on the specified resources they need. The administrator must then attach those policies tothe IAM users or groups that require those permissions.
To learn how to create an IAM identity-based policy using JSON policy documents, see Creating Policieson the JSON Tab in the IAM User Guide.
Topics
• Policy Best Practices (p. 46)
• Using the Image Builder Console (p. 46)
Policy Best Practices
Identity-based policies are very powerful. They determine whether someone can create, access, or deleteEC2 Image Builder resources in your account. These actions can incur costs for your AWS account. Whenyou create or edit identity-based policies, follow these guidelines and recommendations:
• Get Started Using AWS Managed Policies – To start using EC2 Image Builder quickly, use AWSmanaged policies to give your employees the permissions they need. These policies are alreadyavailable in your account and are maintained and updated by AWS. For more information, see GetStarted Using Permissions With AWS Managed Policies in the IAM User Guide.
• Grant Least Privilege – When you create custom policies, grant only the permissions requiredto perform a task. Start with a minimum set of permissions and grant additional permissions asnecessary. Doing so is more secure than starting with permissions that are too lenient and then tryingto tighten them later. For more information, see Grant Least Privilege in the IAM User Guide.
• Enable MFA for Sensitive Operations – For extra security, require IAM users to use multi-factorauthentication (MFA) to access sensitive resources or API operations. For more information, see UsingMulti-Factor Authentication (MFA) in AWS in the IAM User Guide.
• Use Policy Conditions for Extra Security – To the extent that it's practical, define the conditions underwhich your identity-based policies allow access to a resource. For example, you can write conditions tospecify a range of allowable IP addresses that a request must come from. You can also write conditionsto allow requests only within a specified date or time range, or to require the use of SSL or MFA. Formore information, see IAM JSON Policy Elements: Condition in the IAM User Guide.
Using the Image Builder Console
To access the EC2 Image Builder console, you must have a minimum set of permissions. Thesepermissions must allow you to list and view details about the Image Builder resources in your AWS
46
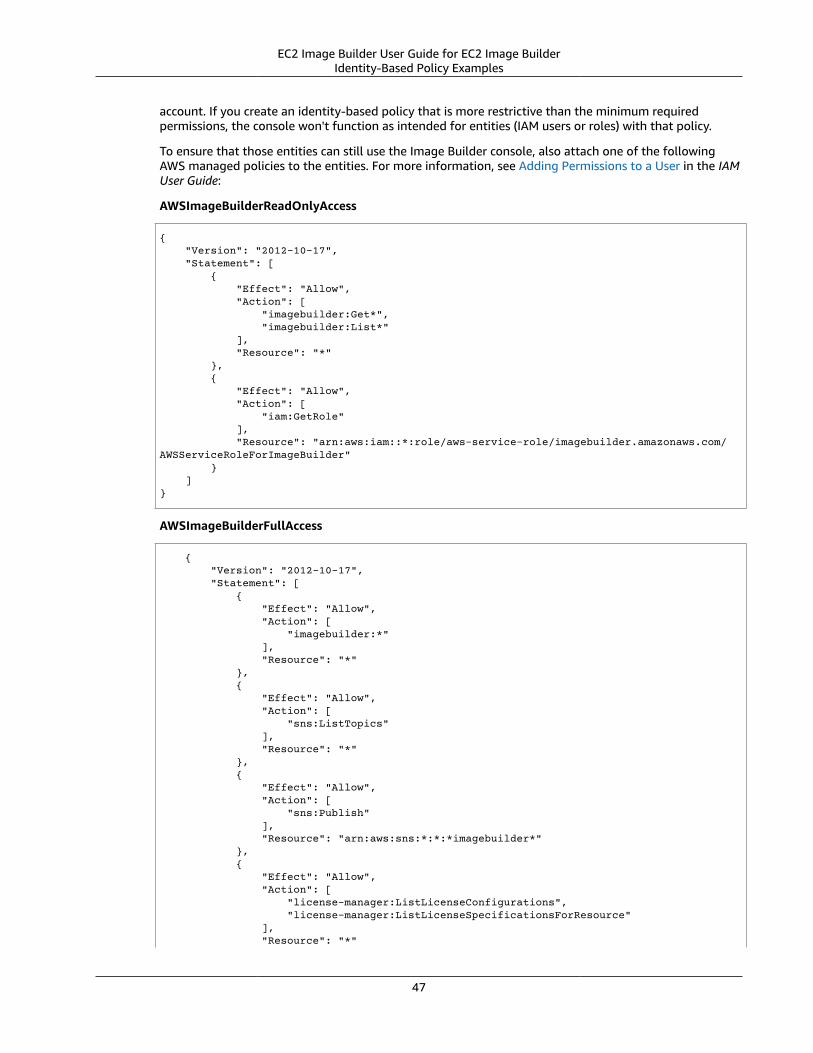
EC2 Image Builder User Guide for EC2 Image BuilderIdentity-Based Policy Examples
account. If you create an identity-based policy that is more restrictive than the minimum requiredpermissions, the console won't function as intended for entities (IAM users or roles) with that policy.
To ensure that those entities can still use the Image Builder console, also attach one of the followingAWS managed policies to the entities. For more information, see Adding Permissions to a User in the IAMUser Guide:
AWSImageBuilderReadOnlyAccess
{ "Version": "2012-10-17", "Statement": [ { "Effect": "Allow", "Action": [ "imagebuilder:Get*", "imagebuilder:List*" ], "Resource": "*" }, { "Effect": "Allow", "Action": [ "iam:GetRole" ], "Resource": "arn:aws:iam::*:role/aws-service-role/imagebuilder.amazonaws.com/AWSServiceRoleForImageBuilder" } ]}
AWSImageBuilderFullAccess
{ "Version": "2012-10-17", "Statement": [ { "Effect": "Allow", "Action": [ "imagebuilder:*" ], "Resource": "*" }, { "Effect": "Allow", "Action": [ "sns:ListTopics" ], "Resource": "*" }, { "Effect": "Allow", "Action": [ "sns:Publish" ], "Resource": "arn:aws:sns:*:*:*imagebuilder*" }, { "Effect": "Allow", "Action": [ "license-manager:ListLicenseConfigurations", "license-manager:ListLicenseSpecificationsForResource" ], "Resource": "*"
47
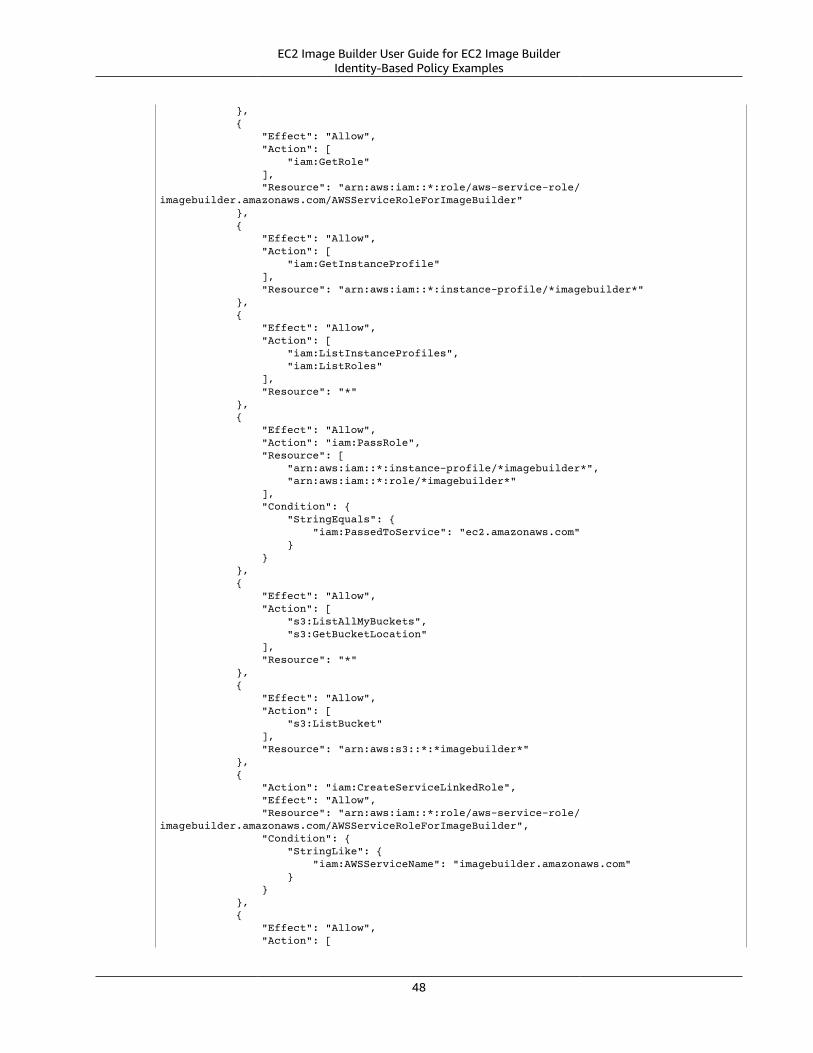
EC2 Image Builder User Guide for EC2 Image BuilderIdentity-Based Policy Examples
}, { "Effect": "Allow", "Action": [ "iam:GetRole" ], "Resource": "arn:aws:iam::*:role/aws-service-role/imagebuilder.amazonaws.com/AWSServiceRoleForImageBuilder" }, { "Effect": "Allow", "Action": [ "iam:GetInstanceProfile" ], "Resource": "arn:aws:iam::*:instance-profile/*imagebuilder*" }, { "Effect": "Allow", "Action": [ "iam:ListInstanceProfiles", "iam:ListRoles" ], "Resource": "*" }, { "Effect": "Allow", "Action": "iam:PassRole", "Resource": [ "arn:aws:iam::*:instance-profile/*imagebuilder*", "arn:aws:iam::*:role/*imagebuilder*" ], "Condition": { "StringEquals": { "iam:PassedToService": "ec2.amazonaws.com" } } }, { "Effect": "Allow", "Action": [ "s3:ListAllMyBuckets", "s3:GetBucketLocation" ], "Resource": "*" }, { "Effect": "Allow", "Action": [ "s3:ListBucket" ], "Resource": "arn:aws:s3::*:*imagebuilder*" }, { "Action": "iam:CreateServiceLinkedRole", "Effect": "Allow", "Resource": "arn:aws:iam::*:role/aws-service-role/imagebuilder.amazonaws.com/AWSServiceRoleForImageBuilder", "Condition": { "StringLike": { "iam:AWSServiceName": "imagebuilder.amazonaws.com" } } }, { "Effect": "Allow", "Action": [
48

EC2 Image Builder User Guide for EC2 Image BuilderResource-Based Policy Examples
"ec2:DescribeImages", "ec2:DescribeVpcs", "ec2:DescribeRegions", "ec2:DescribeVolumes", "ec2:DescribeSubnets", "ec2:DescribeKeyPairs", "ec2:DescribeSecurityGroups" ], "Resource": "*" } ] }
ImportantIn addition to the AWSImageBuilderFullAccess policy, you must attach the following custompolicy and include the resources you want to use that do not have "imagebuilder" in the resourcename:
{ "Version": "2012-10-17", "Statement": [ { "Effect": "Allow", "Action": [ "sns:Publish" ], "Resource": "sns topic arn" }, { "Effect": "Allow", "Action": [ "iam:GetInstanceProfile" ], "Resource": "instance profile role arn" }, { "Effect": "Allow", "Action": "iam:PassRole", "Resource": "instance profile role arn" "Condition": { "StringEquals": { "iam:PassedToService": "ec2.amazonaws.com" } } }, { "Effect": "Allow", "Action": [ "s3:ListBucket" ], "Resource": "bucket arn" } ]}
You don't need to allow minimum console permissions for users that are making calls to only the AWSCLI or the AWS API. Instead, allow access to only the actions that match the API operation that you'retrying to perform.
EC2 Image Builder Resource-Based Policy ExamplesTo learn how to create a component, see Create New Component (p. 15).
49
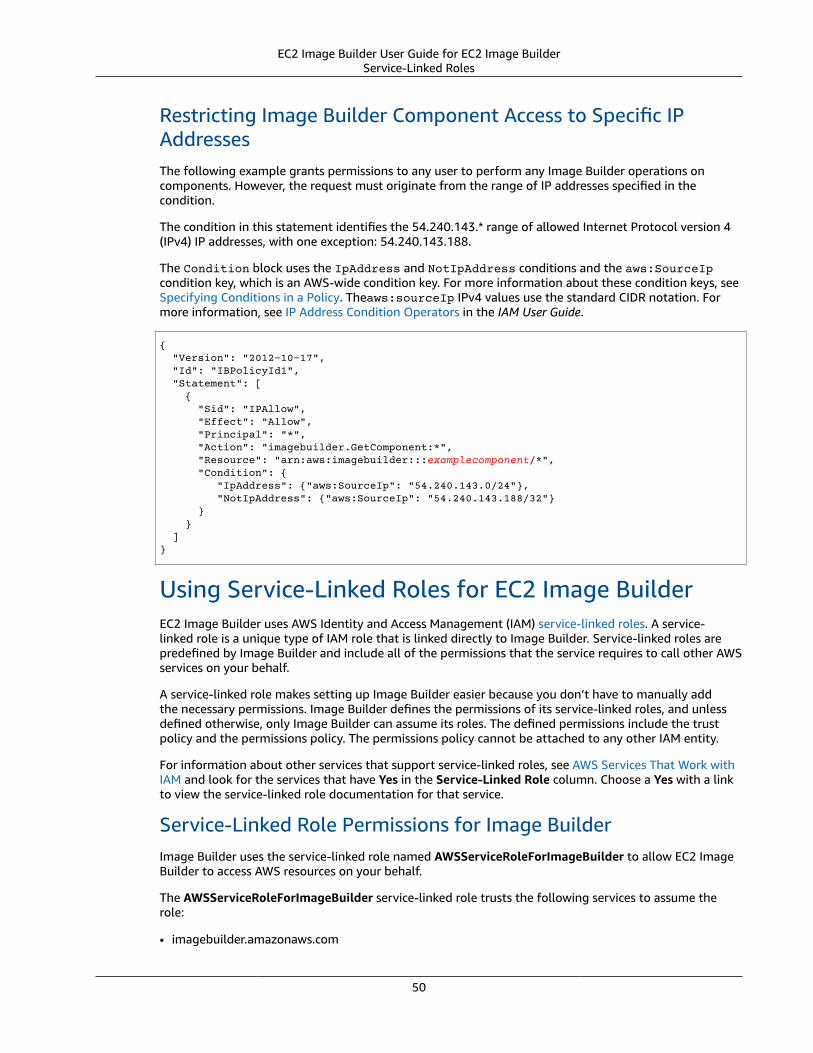
EC2 Image Builder User Guide for EC2 Image BuilderService-Linked Roles
Restricting Image Builder Component Access to Specific IPAddressesThe following example grants permissions to any user to perform any Image Builder operations oncomponents. However, the request must originate from the range of IP addresses specified in thecondition.
The condition in this statement identifies the 54.240.143.* range of allowed Internet Protocol version 4(IPv4) IP addresses, with one exception: 54.240.143.188.
The Condition block uses the IpAddress and NotIpAddress conditions and the aws:SourceIpcondition key, which is an AWS-wide condition key. For more information about these condition keys, seeSpecifying Conditions in a Policy. Theaws:sourceIp IPv4 values use the standard CIDR notation. Formore information, see IP Address Condition Operators in the IAM User Guide.
{ "Version": "2012-10-17", "Id": "IBPolicyId1", "Statement": [ { "Sid": "IPAllow", "Effect": "Allow", "Principal": "*", "Action": "imagebuilder.GetComponent:*", "Resource": "arn:aws:imagebuilder:::examplecomponent/*", "Condition": { "IpAddress": {"aws:SourceIp": "54.240.143.0/24"}, "NotIpAddress": {"aws:SourceIp": "54.240.143.188/32"} } } ]}
Using Service-Linked Roles for EC2 Image BuilderEC2 Image Builder uses AWS Identity and Access Management (IAM) service-linked roles. A service-linked role is a unique type of IAM role that is linked directly to Image Builder. Service-linked roles arepredefined by Image Builder and include all of the permissions that the service requires to call other AWSservices on your behalf.
A service-linked role makes setting up Image Builder easier because you don’t have to manually addthe necessary permissions. Image Builder defines the permissions of its service-linked roles, and unlessdefined otherwise, only Image Builder can assume its roles. The defined permissions include the trustpolicy and the permissions policy. The permissions policy cannot be attached to any other IAM entity.
For information about other services that support service-linked roles, see AWS Services That Work withIAM and look for the services that have Yes in the Service-Linked Role column. Choose a Yes with a linkto view the service-linked role documentation for that service.
Service-Linked Role Permissions for Image BuilderImage Builder uses the service-linked role named AWSServiceRoleForImageBuilder to allow EC2 ImageBuilder to access AWS resources on your behalf.
The AWSServiceRoleForImageBuilder service-linked role trusts the following services to assume therole:
• imagebuilder.amazonaws.com
50
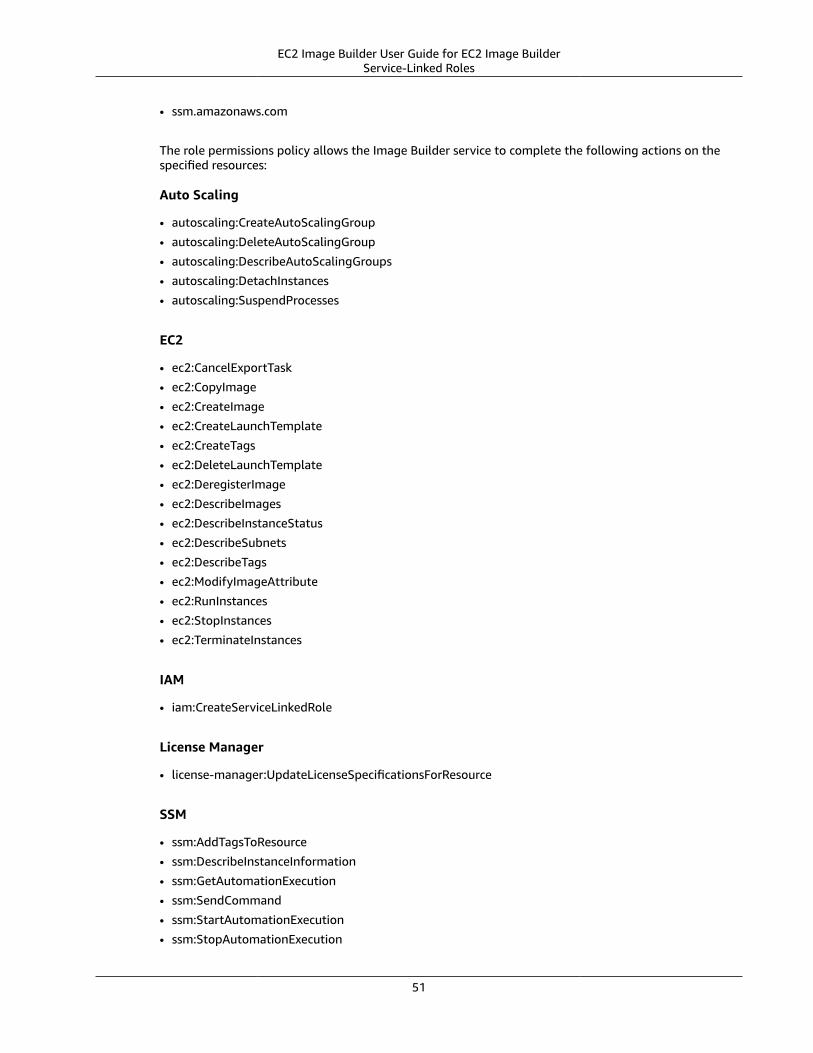
EC2 Image Builder User Guide for EC2 Image BuilderService-Linked Roles
• ssm.amazonaws.com
The role permissions policy allows the Image Builder service to complete the following actions on thespecified resources:
Auto Scaling
• autoscaling:CreateAutoScalingGroup
• autoscaling:DeleteAutoScalingGroup
• autoscaling:DescribeAutoScalingGroups
• autoscaling:DetachInstances
• autoscaling:SuspendProcesses
EC2
• ec2:CancelExportTask
• ec2:CopyImage
• ec2:CreateImage
• ec2:CreateLaunchTemplate
• ec2:CreateTags
• ec2:DeleteLaunchTemplate
• ec2:DeregisterImage
• ec2:DescribeImages
• ec2:DescribeInstanceStatus
• ec2:DescribeSubnets
• ec2:DescribeTags
• ec2:ModifyImageAttribute
• ec2:RunInstances
• ec2:StopInstances
• ec2:TerminateInstances
IAM
• iam:CreateServiceLinkedRole
License Manager
• license-manager:UpdateLicenseSpecificationsForResource
SSM
• ssm:AddTagsToResource
• ssm:DescribeInstanceInformation
• ssm:GetAutomationExecution
• ssm:SendCommand
• ssm:StartAutomationExecution
• ssm:StopAutomationExecution
51
EC2 Image Builder User Guide for EC2 Image BuilderService-Linked Roles
SNS
• sns:Publish
You must configure permissions to allow an IAM entity (such as a user, group, or role) to create, edit, ordelete a service-linked role. For more information, see Service-Linked Role Permissions in the IAM UserGuide.
Creating a Service-Linked Role for EC2 Image BuilderYou don't need to manually create a service-linked role. When you create your first Image Builderresource in the AWS Management Console, the AWS CLI, or the AWS API, Image Builder creates theservice-linked role for you.
ImportantIf you delete this service-linked role, and then need to create it again, you can use the sameprocess to recreate the role in your account. When you create your first EC2 Image Builderresource, Image Builder creates the service-linked role for you again.
You can also use the IAM console to create a service-linked role with the EC2 Image Builder use case.In the AWS CLI or the AWS API, create a service-linked role with the imagebuilder.amazonaws.comservice name. For more information, see Creating a Service-Linked Role in the IAM User Guide. If youdelete this service-linked role, you can use this same process to create the role again.
Editing a Service-Linked Role for Image BuilderUse the Image Builder console, the AWS CLI, or the AWS API to change the description, trust policy, orpermission policy, including adding additional policies, of the AWSServiceRoleForImageBuilder service-linked role. After you create a service-linked role, you cannot change the name of the role becausevarious entities might reference the role. However, you can edit only the description of the role usingIAM, the AWS CLI, or the API. For more information, see Editing a Service-Linked Role in the IAM UserGuide.
Deleting a Service-Linked Role for Image BuilderYou can use the IAM console, the AWS CLI, or the AWS API to manually delete the service-linked role.To do this, you must first manually clean up the resources for your service-linked role and then you canmanually delete it.
NoteIf the Image Builder service is using the role when you try to delete the resources, the deletionmight fail. If that happens, wait for a few minutes and try the operation again.
To delete Image Builder resources used by the AWSServiceRoleForImageBuilder
1. Either wait for current image builds to finish, or explicitly cancel them using the cancel-image-creationAPI. To cancel image builds on the Image Builder console, select the Stop Pipeline action button foreach pipeline.
2. Delete all pipelines or change the build schedule for all image pipelines to Manual using the ImageBuilder console or CLI.
To Manually Delete the Service-Linked Role Using IAMUse the IAM console, the AWS CLI, or the AWS API to delete the AWSServiceRoleForImageBuilderservice-linked role. For more information, see Deleting a Service-Linked Role in the IAM User Guide.
52
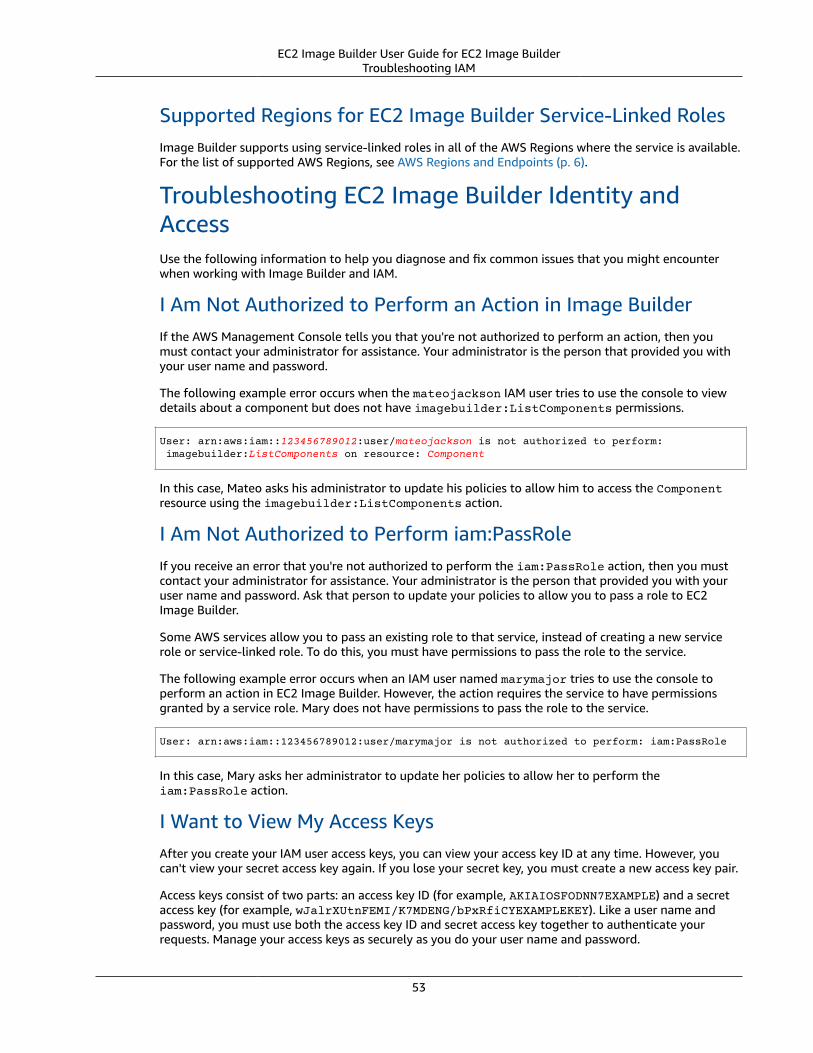
EC2 Image Builder User Guide for EC2 Image BuilderTroubleshooting IAM
Supported Regions for EC2 Image Builder Service-Linked RolesImage Builder supports using service-linked roles in all of the AWS Regions where the service is available.For the list of supported AWS Regions, see AWS Regions and Endpoints (p. 6).
Troubleshooting EC2 Image Builder Identity andAccessUse the following information to help you diagnose and fix common issues that you might encounterwhen working with Image Builder and IAM.
I Am Not Authorized to Perform an Action in Image BuilderIf the AWS Management Console tells you that you're not authorized to perform an action, then youmust contact your administrator for assistance. Your administrator is the person that provided you withyour user name and password.
The following example error occurs when the mateojackson IAM user tries to use the console to viewdetails about a component but does not have imagebuilder:ListComponents permissions.
User: arn:aws:iam::123456789012:user/mateojackson is not authorized to perform: imagebuilder:ListComponents on resource: Component
In this case, Mateo asks his administrator to update his policies to allow him to access the Componentresource using the imagebuilder:ListComponents action.
I Am Not Authorized to Perform iam:PassRoleIf you receive an error that you're not authorized to perform the iam:PassRole action, then you mustcontact your administrator for assistance. Your administrator is the person that provided you with youruser name and password. Ask that person to update your policies to allow you to pass a role to EC2Image Builder.
Some AWS services allow you to pass an existing role to that service, instead of creating a new servicerole or service-linked role. To do this, you must have permissions to pass the role to the service.
The following example error occurs when an IAM user named marymajor tries to use the console toperform an action in EC2 Image Builder. However, the action requires the service to have permissionsgranted by a service role. Mary does not have permissions to pass the role to the service.
User: arn:aws:iam::123456789012:user/marymajor is not authorized to perform: iam:PassRole
In this case, Mary asks her administrator to update her policies to allow her to perform theiam:PassRole action.
I Want to View My Access KeysAfter you create your IAM user access keys, you can view your access key ID at any time. However, youcan't view your secret access key again. If you lose your secret key, you must create a new access key pair.
Access keys consist of two parts: an access key ID (for example, AKIAIOSFODNN7EXAMPLE) and a secretaccess key (for example, wJalrXUtnFEMI/K7MDENG/bPxRfiCYEXAMPLEKEY). Like a user name andpassword, you must use both the access key ID and secret access key together to authenticate yourrequests. Manage your access keys as securely as you do your user name and password.
53

EC2 Image Builder User Guide for EC2 Image BuilderCompliance Validation
ImportantDo not provide your access keys to a third party, even to help find your canonical user ID. Bydoing this, you might give someone permanent access to your account.
When you create an access key pair, you are prompted to save the access key ID and secret access key ina secure location. The secret access key is available only at the time you create it. If you lose your secretaccess key, you must add new access keys to your IAM user. You can have a maximum of two access keys.If you already have two, you must delete one key pair before creating a new one. To view instructions,see Managing Access Keys in the IAM User Guide.
I'm an Administrator and Want to Allow Others to Access ImageBuilderTo allow others to access EC2 Image Builder, you must create an IAM entity (user or role) for the personor application that needs access. They will use the credentials for that entity to access AWS. You mustthen attach a policy to the entity that grants them the correct permissions in EC2 Image Builder.
To get started right away, see Creating Your First IAM Delegated User and Group in the IAM User Guide.
I Want to Allow People Outside of My AWS Account to AccessMy Image Builder ResourcesYou can create a role that users in other accounts or people outside of your organization can use toaccess your resources. You can specify who is trusted to assume the role. For services that supportresource-based policies, you can use those policies to grant people access to your resources.
To learn more, consult the following:
• To learn whether EC2 Image Builder supports these features, see How EC2 Image Builder Works withIAM (p. 43).
• To learn how to provide access to your resources across AWS accounts that you own, see ProvidingAccess to an IAM User in Another AWS Account That You Own in the IAM User Guide.
• To learn how to provide access to your resources to third-party AWS accounts, see Providing Access toAWS Accounts Owned by Third Parties in the IAM User Guide.
• To learn how to provide access through identity federation, see Providing Access to ExternallyAuthenticated Users (Identity Federation) in the IAM User Guide.
• To learn the difference between using roles and resource-based policies for cross-account access, seeHow IAM Roles Differ from Resource-based Policies in the IAM User Guide.
Compliance Validation for EC2 Image BuilderEC2 Image Builder is not in scope of any AWS compliance programs.
For a list of AWS services in scope of specific compliance programs, see AWS Services in Scope byCompliance Program. For general information, see AWS Compliance Programs.
You can download third-party audit reports using AWS Artifact. For more information, see DownloadingReports in AWS Artifact.
Your compliance responsibility when using Image Builder is determined by the sensitivity of your data,your company's compliance objectives, and applicable laws and regulations. AWS provides the followingresources to help with compliance:
54
EC2 Image Builder User Guide for EC2 Image BuilderResilience
• Security and Compliance Quick Start Guides – These deployment guides discuss architecturalconsiderations and provide steps for deploying security- and compliance-focused baselineenvironments on AWS.
• AWS Compliance Resources – This collection of workbooks and guides might apply to your industryand location.
• Evaluating Resources with Rules in the AWS Config Developer Guide – The AWS Config service assesseshow well your resource configurations comply with internal practices, industry guidelines, andregulations.
• AWS Security Hub – This AWS service provides a comprehensive view of your security state within AWSthat helps you check your compliance with security industry standards and best practices.
For STIG compliance, use the Amazon-provided STIG components provided in the Image Builder serviceto help you scan for misconfigurations and to run a remediation script. We cannot guarantee that imagesbuilt using Image Builder are STIG compliant. You must confirm image compliance with your complianceteams. For a complete list of STIG components available through Image Builder, see EC2 Image BuilderSTIG Components (p. 76).
Resilience in EC2 Image BuilderThe AWS global infrastructure is built around AWS Regions and Availability Zones. AWS Regions providemultiple physically separated and isolated Availability Zones, which are connected with low-latency,high-throughput, and highly redundant networking. With Availability Zones, you can design and operateapplications and databases that automatically fail over between zones without interruption. AvailabilityZones are more highly available, fault tolerant, and scalable than traditional single or multiple datacenter infrastructures.
The EC2 Image Builder service allows you to distribute images built in one Region with other Regions,giving them multi-Region resiliency for AMIs. There is no mechanism to "back up" image pipelines,recipes, or components. You can store the recipe and component documents outside of the ImageBuilder service, such as in an Amazon S3 bucket.
The EC2 Image Builder cannot be configured for High Availability (HA). You can distribute images tomultiple Regions to make the images more highly available.
For more information about AWS Regions and Availability Zones, see AWS Global Infrastructure.
Infrastructure Security in EC2 Image BuilderAs a managed service, EC2 Image Builder is protected by the AWS global network security proceduresthat are described in the Amazon Web Services: Overview of Security Processes whitepaper.
You use AWS published API calls to access Image Builder through the network. Clients must supportTransport Layer Security (TLS) 1.0 or later. We recommend TLS 1.2 or later. Clients must also supportcipher suites with perfect forward secrecy (PFS) such as Ephemeral Diffie-Hellman (DHE) or Elliptic CurveEphemeral Diffie-Hellman (ECDHE). Most modern systems such as Java 7 and later support these modes.
Additionally, requests must be signed by using an access key ID and a secret access key that is associatedwith an IAM principal. Or you can use the AWS Security Token Service (AWS STS) to generate temporarysecurity credentials to sign requests.
Instances used to build images and run tests using Image Builder must have access to the Amazon EC2Systems Manager service. Therefore, in order to use the service, Internet access cannot be prevented.
55
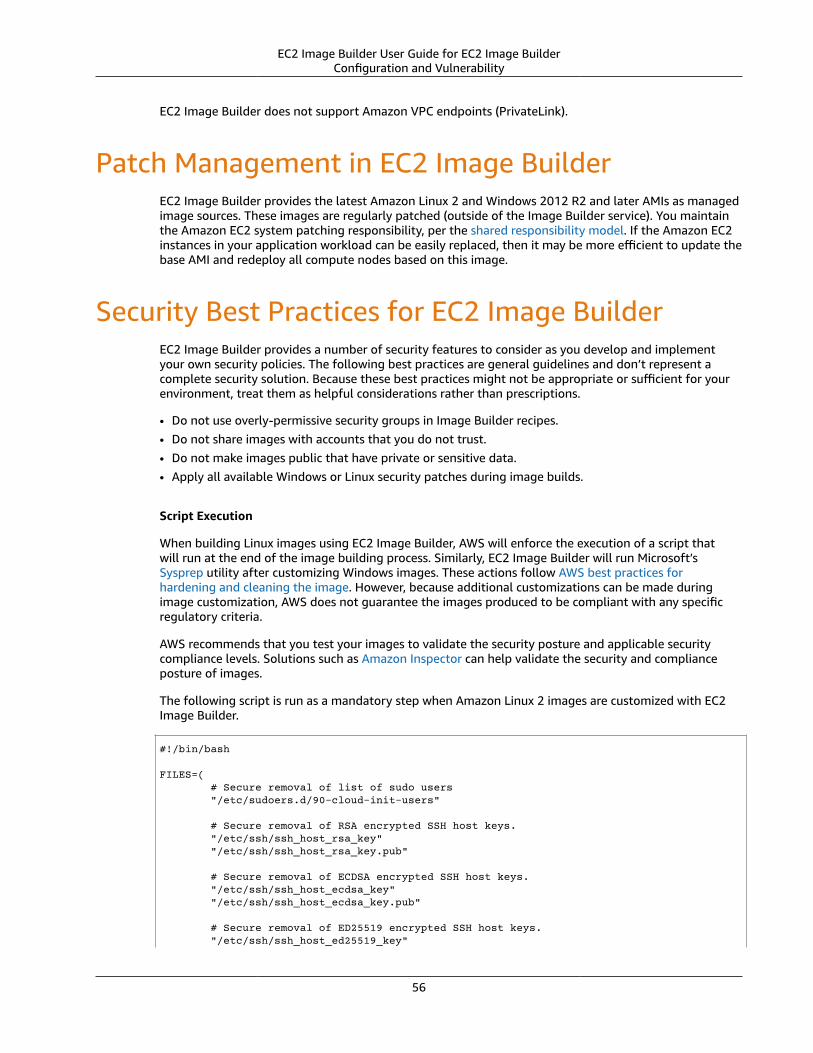
EC2 Image Builder User Guide for EC2 Image BuilderConfiguration and Vulnerability
EC2 Image Builder does not support Amazon VPC endpoints (PrivateLink).
Patch Management in EC2 Image BuilderEC2 Image Builder provides the latest Amazon Linux 2 and Windows 2012 R2 and later AMIs as managedimage sources. These images are regularly patched (outside of the Image Builder service). You maintainthe Amazon EC2 system patching responsibility, per the shared responsibility model. If the Amazon EC2instances in your application workload can be easily replaced, then it may be more efficient to update thebase AMI and redeploy all compute nodes based on this image.
Security Best Practices for EC2 Image BuilderEC2 Image Builder provides a number of security features to consider as you develop and implementyour own security policies. The following best practices are general guidelines and don’t represent acomplete security solution. Because these best practices might not be appropriate or sufficient for yourenvironment, treat them as helpful considerations rather than prescriptions.
• Do not use overly-permissive security groups in Image Builder recipes.• Do not share images with accounts that you do not trust.• Do not make images public that have private or sensitive data.• Apply all available Windows or Linux security patches during image builds.
Script Execution
When building Linux images using EC2 Image Builder, AWS will enforce the execution of a script thatwill run at the end of the image building process. Similarly, EC2 Image Builder will run Microsoft’sSysprep utility after customizing Windows images. These actions follow AWS best practices forhardening and cleaning the image. However, because additional customizations can be made duringimage customization, AWS does not guarantee the images produced to be compliant with any specificregulatory criteria.
AWS recommends that you test your images to validate the security posture and applicable securitycompliance levels. Solutions such as Amazon Inspector can help validate the security and complianceposture of images.
The following script is run as a mandatory step when Amazon Linux 2 images are customized with EC2Image Builder.
#!/bin/bash
FILES=( # Secure removal of list of sudo users "/etc/sudoers.d/90-cloud-init-users" # Secure removal of RSA encrypted SSH host keys. "/etc/ssh/ssh_host_rsa_key" "/etc/ssh/ssh_host_rsa_key.pub"
# Secure removal of ECDSA encrypted SSH host keys. "/etc/ssh/ssh_host_ecdsa_key" "/etc/ssh/ssh_host_ecdsa_key.pub"
# Secure removal of ED25519 encrypted SSH host keys. "/etc/ssh/ssh_host_ed25519_key"
56
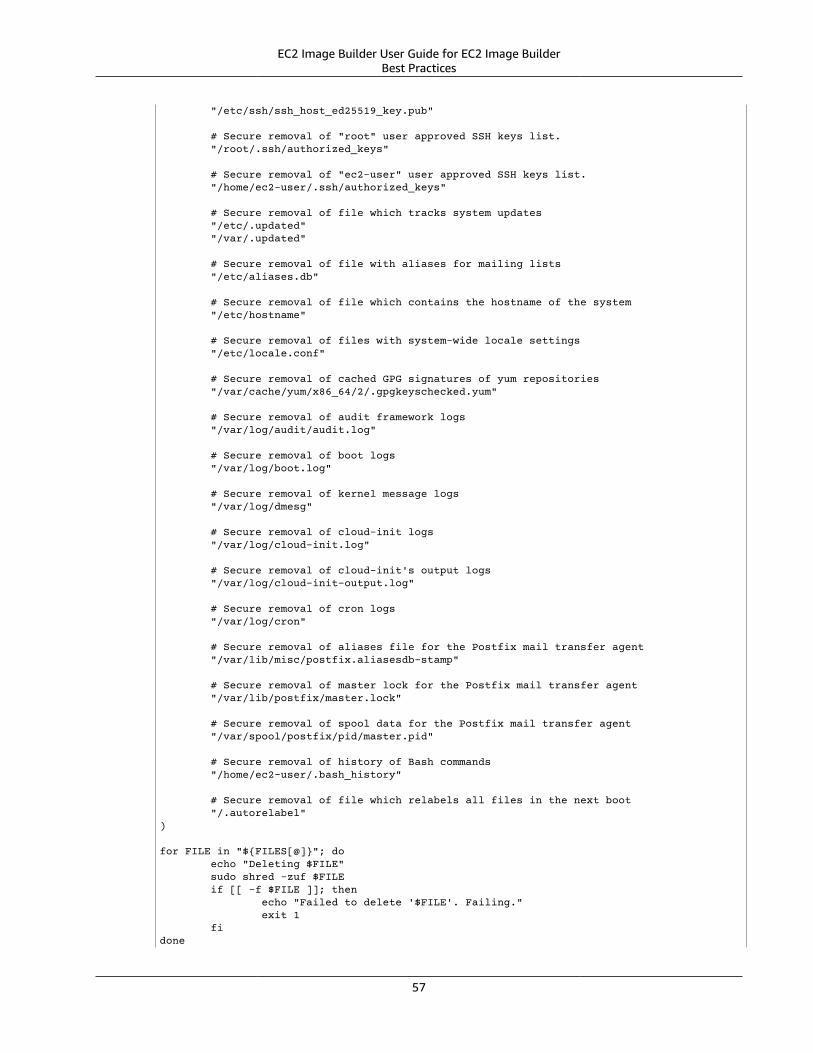
EC2 Image Builder User Guide for EC2 Image BuilderBest Practices
"/etc/ssh/ssh_host_ed25519_key.pub"
# Secure removal of "root" user approved SSH keys list. "/root/.ssh/authorized_keys"
# Secure removal of "ec2-user" user approved SSH keys list. "/home/ec2-user/.ssh/authorized_keys"
# Secure removal of file which tracks system updates "/etc/.updated" "/var/.updated"
# Secure removal of file with aliases for mailing lists "/etc/aliases.db"
# Secure removal of file which contains the hostname of the system "/etc/hostname"
# Secure removal of files with system-wide locale settings "/etc/locale.conf"
# Secure removal of cached GPG signatures of yum repositories "/var/cache/yum/x86_64/2/.gpgkeyschecked.yum"
# Secure removal of audit framework logs "/var/log/audit/audit.log"
# Secure removal of boot logs "/var/log/boot.log"
# Secure removal of kernel message logs "/var/log/dmesg"
# Secure removal of cloud-init logs "/var/log/cloud-init.log"
# Secure removal of cloud-init's output logs "/var/log/cloud-init-output.log"
# Secure removal of cron logs "/var/log/cron"
# Secure removal of aliases file for the Postfix mail transfer agent "/var/lib/misc/postfix.aliasesdb-stamp"
# Secure removal of master lock for the Postfix mail transfer agent "/var/lib/postfix/master.lock"
# Secure removal of spool data for the Postfix mail transfer agent "/var/spool/postfix/pid/master.pid"
# Secure removal of history of Bash commands "/home/ec2-user/.bash_history"
# Secure removal of file which relabels all files in the next boot "/.autorelabel")
for FILE in "${FILES[@]}"; do echo "Deleting $FILE" sudo shred -zuf $FILE if [[ -f $FILE ]]; then echo "Failed to delete '$FILE'. Failing." exit 1 fidone
57
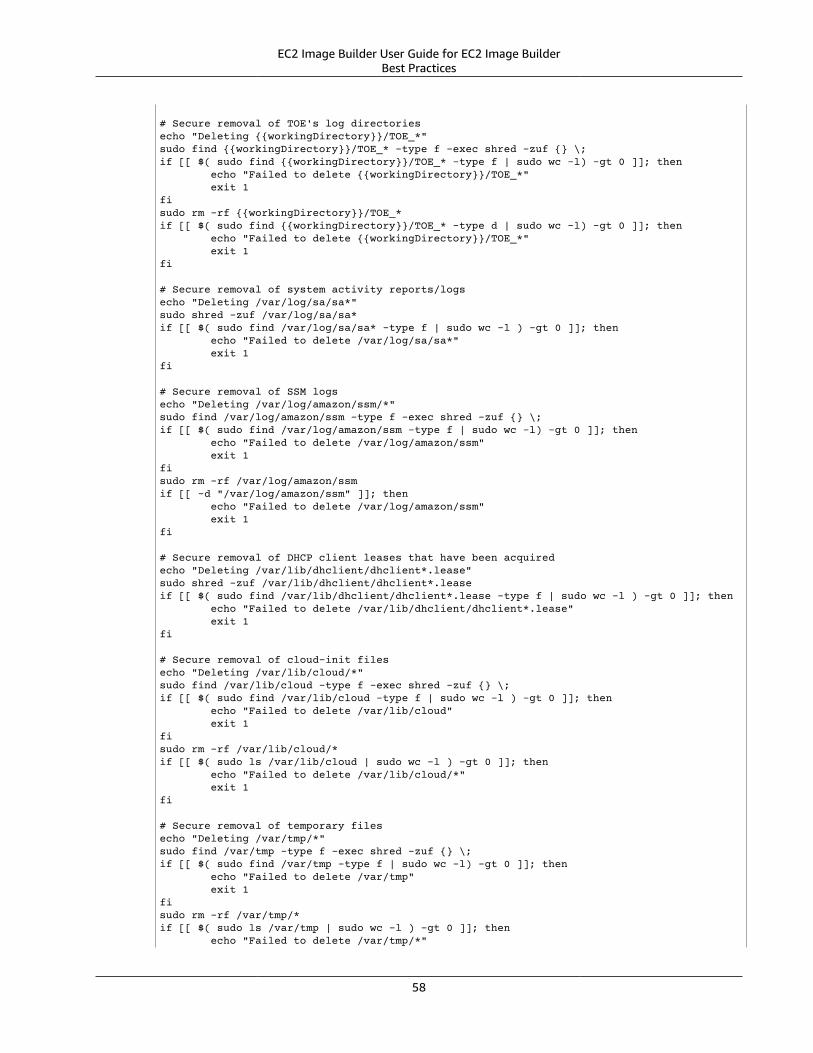
EC2 Image Builder User Guide for EC2 Image BuilderBest Practices
# Secure removal of TOE's log directoriesecho "Deleting {{workingDirectory}}/TOE_*"sudo find {{workingDirectory}}/TOE_* -type f -exec shred -zuf {} \;if [[ $( sudo find {{workingDirectory}}/TOE_* -type f | sudo wc -l) -gt 0 ]]; then echo "Failed to delete {{workingDirectory}}/TOE_*" exit 1fisudo rm -rf {{workingDirectory}}/TOE_*if [[ $( sudo find {{workingDirectory}}/TOE_* -type d | sudo wc -l) -gt 0 ]]; then echo "Failed to delete {{workingDirectory}}/TOE_*" exit 1fi
# Secure removal of system activity reports/logsecho "Deleting /var/log/sa/sa*"sudo shred -zuf /var/log/sa/sa*if [[ $( sudo find /var/log/sa/sa* -type f | sudo wc -l ) -gt 0 ]]; then echo "Failed to delete /var/log/sa/sa*" exit 1fi
# Secure removal of SSM logsecho "Deleting /var/log/amazon/ssm/*"sudo find /var/log/amazon/ssm -type f -exec shred -zuf {} \;if [[ $( sudo find /var/log/amazon/ssm -type f | sudo wc -l) -gt 0 ]]; then echo "Failed to delete /var/log/amazon/ssm" exit 1fisudo rm -rf /var/log/amazon/ssmif [[ -d "/var/log/amazon/ssm" ]]; then echo "Failed to delete /var/log/amazon/ssm" exit 1fi
# Secure removal of DHCP client leases that have been acquiredecho "Deleting /var/lib/dhclient/dhclient*.lease"sudo shred -zuf /var/lib/dhclient/dhclient*.leaseif [[ $( sudo find /var/lib/dhclient/dhclient*.lease -type f | sudo wc -l ) -gt 0 ]]; then echo "Failed to delete /var/lib/dhclient/dhclient*.lease" exit 1fi
# Secure removal of cloud-init filesecho "Deleting /var/lib/cloud/*"sudo find /var/lib/cloud -type f -exec shred -zuf {} \;if [[ $( sudo find /var/lib/cloud -type f | sudo wc -l ) -gt 0 ]]; then echo "Failed to delete /var/lib/cloud" exit 1fisudo rm -rf /var/lib/cloud/*if [[ $( sudo ls /var/lib/cloud | sudo wc -l ) -gt 0 ]]; then echo "Failed to delete /var/lib/cloud/*" exit 1fi
# Secure removal of temporary filesecho "Deleting /var/tmp/*"sudo find /var/tmp -type f -exec shred -zuf {} \;if [[ $( sudo find /var/tmp -type f | sudo wc -l) -gt 0 ]]; then echo "Failed to delete /var/tmp" exit 1fisudo rm -rf /var/tmp/*if [[ $( sudo ls /var/tmp | sudo wc -l ) -gt 0 ]]; then echo "Failed to delete /var/tmp/*"
58
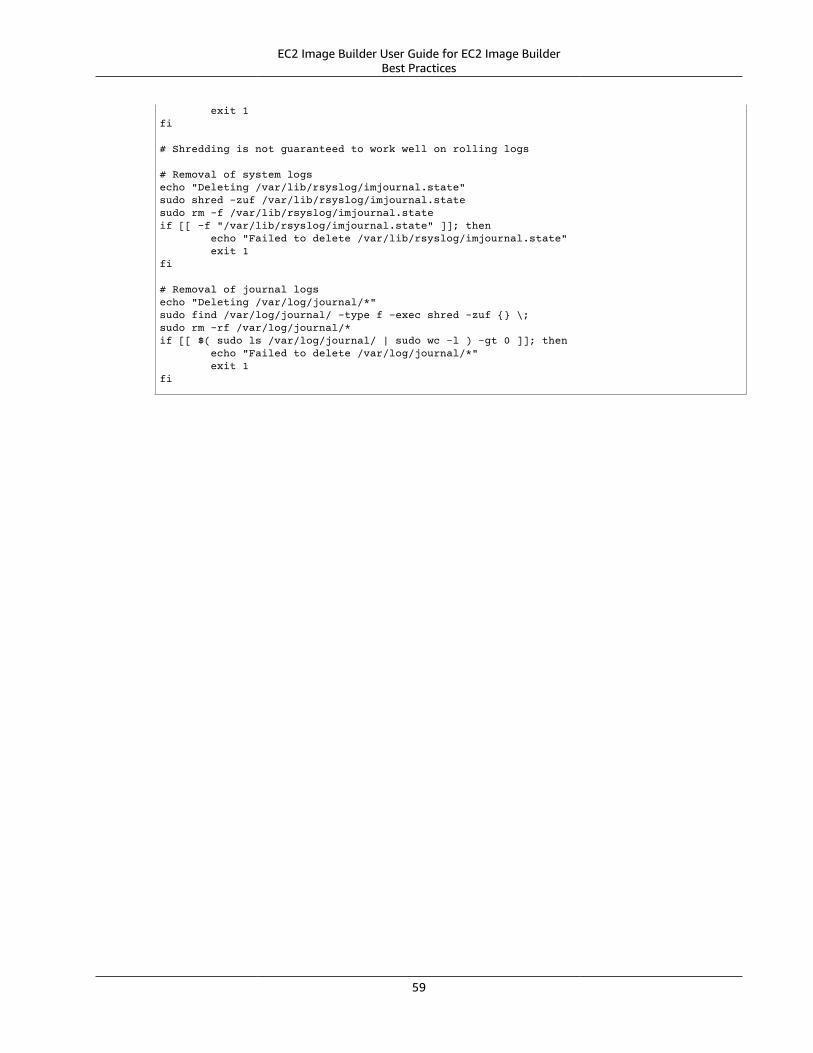
EC2 Image Builder User Guide for EC2 Image BuilderBest Practices
exit 1fi
# Shredding is not guaranteed to work well on rolling logs
# Removal of system logsecho "Deleting /var/lib/rsyslog/imjournal.state"sudo shred -zuf /var/lib/rsyslog/imjournal.statesudo rm -f /var/lib/rsyslog/imjournal.stateif [[ -f "/var/lib/rsyslog/imjournal.state" ]]; then echo "Failed to delete /var/lib/rsyslog/imjournal.state" exit 1fi
# Removal of journal logsecho "Deleting /var/log/journal/*"sudo find /var/log/journal/ -type f -exec shred -zuf {} \;sudo rm -rf /var/log/journal/*if [[ $( sudo ls /var/log/journal/ | sudo wc -l ) -gt 0 ]]; then echo "Failed to delete /var/log/journal/*" exit 1fi
59
EC2 Image Builder User Guide for EC2 Image BuilderWorking with Shared Resources
Resource Sharing in EC2 ImageBuilder
EC2 Image Builder integrates with AWS Resource Access Manager (AWS RAM) to allow you to sharecertain resources with any AWS account or through AWS Organizations. EC2 Image Builder resources thatcan be shared are:
• Components
• Images
• Image recipes
This section provides information to help you share these EC2 Image Builder resources.
Section Contents
• Working with Shared Components, Images, and Image Recipes in EC2 Image Builder (p. 60)
• Prerequisites for Sharing Components, Images, and Image Recipes (p. 61)
• Related Services (p. 61)
• Sharing Across Regions (p. 61)
• Sharing a Component, Image, or Image Recipe (p. 61)
• Unsharing a Shared Component, Image, or Image Recipe (p. 62)
• Identifying a Shared Component, Image, or Image Recipe (p. 62)
• Shared Component, Image, and Image Recipe Permissions (p. 62)
• Billing and Metering (p. 63)
• Instance Limits (p. 63)
Working with Shared Components, Images, andImage Recipes in EC2 Image Builder
Component, image, and image recipe sharing enables resource owners to share software configurationswith other AWS accounts or within an AWS organization. You can manage resource sharing centrally, anddefine a set of accounts with which the configuration can be shared.
In this model, the AWS account that owns the component, image, or image recipe (owners) shares itwith other AWS accounts (consumers). Consumers can associate a shared component with their imagepipelines to automatically consume updates to the shared component, image, or image recipe.
A component, image, or image recipe owner can share these resources with:
• Specific AWS accounts inside or outside of its organization in AWS Organizations
• An organizational unit inside its organization in AWS Organizations
• Its entire organization in AWS Organizations
60
EC2 Image Builder User Guide for EC2 Image BuilderPrerequisites for Sharing Components,
Images, and Image Recipes
Prerequisites for Sharing Components, Images,and Image Recipes
To share a component, image, or image recipe:
• You must own it in your AWS account. You cannot share resources that have been shared with you.• It must not be encrypted.• You must enable sharing with AWS Organizations to share these resources with your organization
or an organizational unit in AWS Organizations. For more information, see Enable Sharing with AWSOrganizations in the AWS Resource Access Manager User Guide.
• You are responsible for ensuring that dependencies external to these resources, or underlyingresources that are managed outside of AWS, are also shared with consumers. EC2 Image Builder doesnot manage dependencies external to EC2 Image Builder.
Related ServicesAWS Resource Access Manager
Component, image, and image recipe sharing integrates with AWS Resource Access Manager (AWS RAM).AWS RAM is a service that enables you to share your AWS resources with any AWS account or throughAWS Organizations. With AWS RAM, you share resources that you own by creating a resource share. Aresource share specifies the resources to share and the consumers with whom to share them. Consumerscan be individual AWS accounts, organizational units, or an entire organization in AWS Organizations.
For more information about AWS RAM, see the AWS RAM User Guide.
Sharing Across RegionsShared components, images, and image recipes can only be shared in a specified AWS Region. When youshare these resources, they will not replicate across Regions.
Sharing a Component, Image, or Image RecipeTo share a component, image, or image recipe, you must add it to a resource share. A resource share isan AWS Resource Access Manager resource that lets you share your resources across AWS accounts. Aresource share specifies the resources to share and the consumers with whom they are shared. To addthe component, image, or image recipe to a new resource share, you must first create the resource shareusing the AWS Resource Access Manager console.
If you are part of an organization in AWS Organizations and sharing within your organization is enabled,consumers in your organization are automatically granted access to the shared component, image, orimage recipe. Otherwise, consumers receive an invitation to join the resource share and are grantedaccess to the shared resource after accepting the invitation.
You can share a component, image, or image recipe that you own using the AWS Resource AccessManager console or the AWS CLI.
To share a component, image, or image recipe that you own using the AWS Resource Access Managerconsole
61
EC2 Image Builder User Guide for EC2 Image BuilderUnsharing a Shared Component, Image, or Image Recipe
See Creating a Resource Share in the AWS Resource Access Manager User Guide.
To share a component, image, or image recipe that you own using the AWS CLI
Use the create-resource-share command.
Unsharing a Shared Component, Image, or ImageRecipe
To unshare a shared component, image, or image recipe that you own, you must remove it from theresource share. You can do this using the AWS Resource Access Manager console or the AWS CLI.
NoteTo unshare a component, image, or image recipe, the consumer cannot have any dependencieson them. The consumer must remove any dependencies on the shared resources before theowner can unshare them.
To unshare a shared component, image, or image recipe that you own using the AWS Resource AccessManager console
See Updating a Resource Share in the AWS Resource Access Manager User Guide.
To unshare a shared component, image, or image recipe that you own using the AWS CLI
Use the disassociate-resource-share command.
Identifying a Shared Component, Image, or ImageRecipe
Owners and consumers can identify shared components, images, and image recipes using the AWS CLI.
Identify a Shared Component
Use the list-components command. The command returns the components that you own and thecomponents that are shared with you. get-component shows the AWS account ID of the componentowner.
Identify a Shared Image
Use the list-images command. The command returns the images that you own and images that areshared with you. get-image shows the AWS account ID of the image owner.
Identify a Shared Image Recipe
Use the list-image-recipes command. The command returns the image recipes that you own andimage recipes that are shared with you. get-image-recipe shows the AWS account ID of the imagerecipe owner.
Shared Component, Image, and Image RecipePermissions
Permissions for Owners
62

EC2 Image Builder User Guide for EC2 Image BuilderBilling and Metering
Owners cannot delete a shared component, image, or image recipe until it is no longer shared. An ownercannot unshare these resources until none of the consumers depend on them.
Permissions for Consumers
Consumers can only read a component, image, or image recipe. Consumers cannot modify them in anyway, and they cannot view or modify these resources if they are owned by other consumers or the ownerof the resource. Consumers can use shared components and images in image recipes to create goldenimages. Consumers can use shared image recipes to create golden images.
Billing and MeteringThere is no charge to use EC2 Image Builder.
Instance LimitsShared components, images, and image recipes count towards only the corresponding resource limits ofthe owner. The resource limits of the consumers are not affected by the resources that have been sharedwith them.
63
EC2 Image Builder User Guide for EC2 Image BuilderGeneral Troubleshooting
Troubleshooting EC2 Image BuilderEC2 Image Builder integrates with AWS services for monitoring and troubleshooting to help youtroubleshoot image build issues. EC2 Image Builder tracks and displays the progress for each step in theimage building process. Logs are exported to an Amazon S3 location that you provide. For advancedtroubleshooting, you can run predefined commands and scripts using AWS Systems Manager (SSM) RunCommand.
General TroubleshootingIf an Image Builder pipeline fails, Image Builder will return an error message that describes the failure.Image Builder will also return an SSM execution ID in the failure message, such as the one in thefollowing example.
SSM execution 'aaaaaaaa-bbbb-cccc-dddd-example12345' failed with status…
Image Builder uses AWS Systems Manager (SSM) Automation to orchestrate actions when an imageis built. To review additional details to help troubleshoot a build failure, search the SSM Automationconsole for the execution ID provided by Image Builder and review the Automation execution.
All build activity is also logged in AWS CloudTrail if it is enabled in your account. Filter CloudTrail eventsby the source “ssm.amazonaws.com", or search for the Amazon EC2 instance ID returned in the executionlog to see more details about the pipeline execution.
By default, the Amazon EC2 instance that is used for build and test activity is terminated when thepipeline completes. If you encounter pipeline failures, you have the option to retain this instance fortroubleshooting. Unselect the “Terminate instance on failure” option for your pipeline if you experiencefailures and want to access the instance to debug the issues.
Troubleshooting Scenarios• Build fails with "AccessDenied: Access Denied status code: 403"
• Issue: The instance profile role does not have the required permissions to access APIs or resourcesused by components, or for logging to S3. Most commonly, this occurs when the instance profilerole does not have PutObject permissions for your S3 buckets, or when the instance profile doesnot have the following role policies associated with it: EC2InstanceProfileForImageBuilder andAmazonSSMManagedInstanceCore.
• Resolution: Add a policy to your instance profile role that grants permission to access APIsand resources used in the recipe, or attach the EC2InstanceProfileForImageBuilder andAmazonSSMManagedInstanceCore IAM role policies to the instance profile.
• Issue: The instance profile role does not have the required permissions to access APIs or resourcesused by components, or for logging to S3. Most commonly, this occurs when the instance profile roledoes not have PutObject permissions for your S3 buckets.
• Resolution: Add a policy to your instance profile role that grants permission to access APIs andresources used in the recipe, and run the pipeline again.
• Build fails with "An error occurred (ValidationError) when calling the CreateAutoScalingGroupoperation: Provided Auto Scaling group launches instances into EC2-Classic, which is notcompatible with a mixed instances policy"
64

EC2 Image Builder User Guide for EC2 Image BuilderTroubleshooting Scenarios
• Issue: Image Builder attempted to launch an instance into an Amazon EC2-Classic network. ImageBuilder only supports VPC networking for build operations.
• Resolution: Specify a specific VPC in your pipeline's infrastructure settings.• Build fails with "status = 'TimedOut'" and "failure message = 'Step timed out while step is verifying
the SSM Agent availability on the target instance(s)'"• Issue: The instance launched to perform the build operations and execute components was not able
to access the Systems Manager endpoint.• Resolutions: Ensure that the subnet used for your image build has access to and routes to the
Systems Manager endpoint.
65
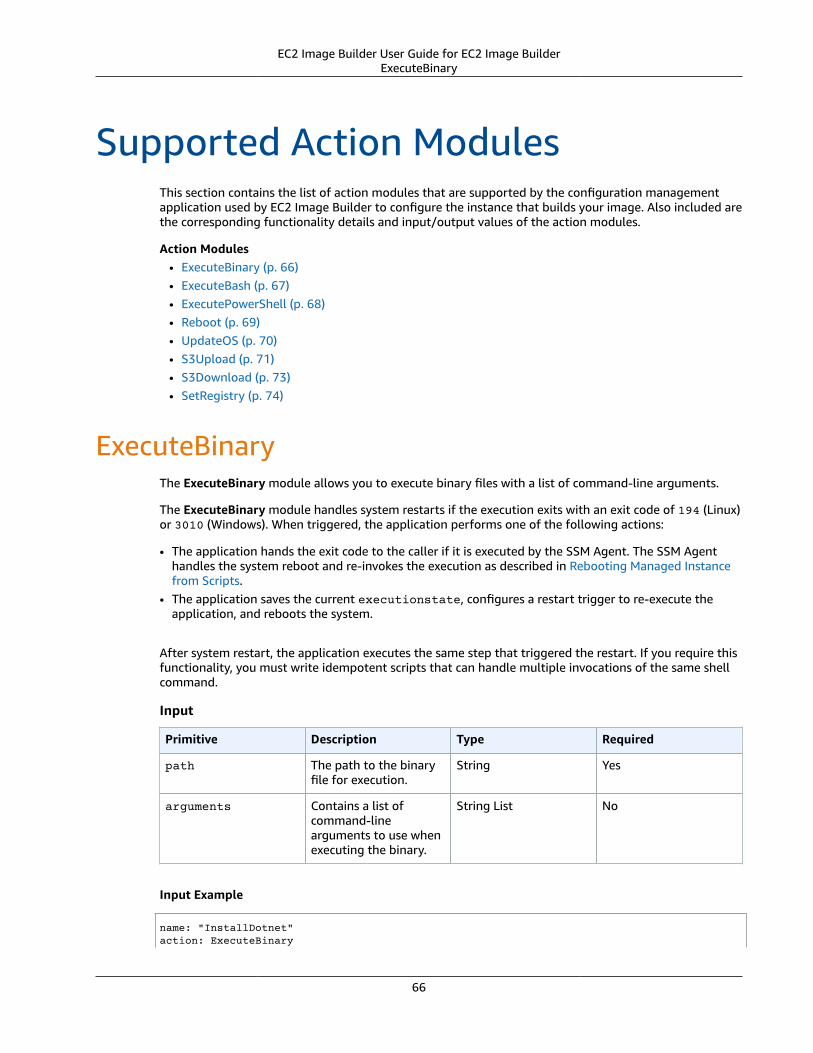
EC2 Image Builder User Guide for EC2 Image BuilderExecuteBinary
Supported Action ModulesThis section contains the list of action modules that are supported by the configuration managementapplication used by EC2 Image Builder to configure the instance that builds your image. Also included arethe corresponding functionality details and input/output values of the action modules.
Action Modules• ExecuteBinary (p. 66)• ExecuteBash (p. 67)• ExecutePowerShell (p. 68)• Reboot (p. 69)• UpdateOS (p. 70)• S3Upload (p. 71)• S3Download (p. 73)• SetRegistry (p. 74)
ExecuteBinaryThe ExecuteBinary module allows you to execute binary files with a list of command-line arguments.
The ExecuteBinary module handles system restarts if the execution exits with an exit code of 194 (Linux)or 3010 (Windows). When triggered, the application performs one of the following actions:
• The application hands the exit code to the caller if it is executed by the SSM Agent. The SSM Agenthandles the system reboot and re-invokes the execution as described in Rebooting Managed Instancefrom Scripts.
• The application saves the current executionstate, configures a restart trigger to re-execute theapplication, and reboots the system.
After system restart, the application executes the same step that triggered the restart. If you require thisfunctionality, you must write idempotent scripts that can handle multiple invocations of the same shellcommand.
Input
Primitive Description Type Required
path The path to the binaryfile for execution.
String Yes
arguments Contains a list ofcommand-linearguments to use whenexecuting the binary.
String List No
Input Example
name: "InstallDotnet"action: ExecuteBinary
66
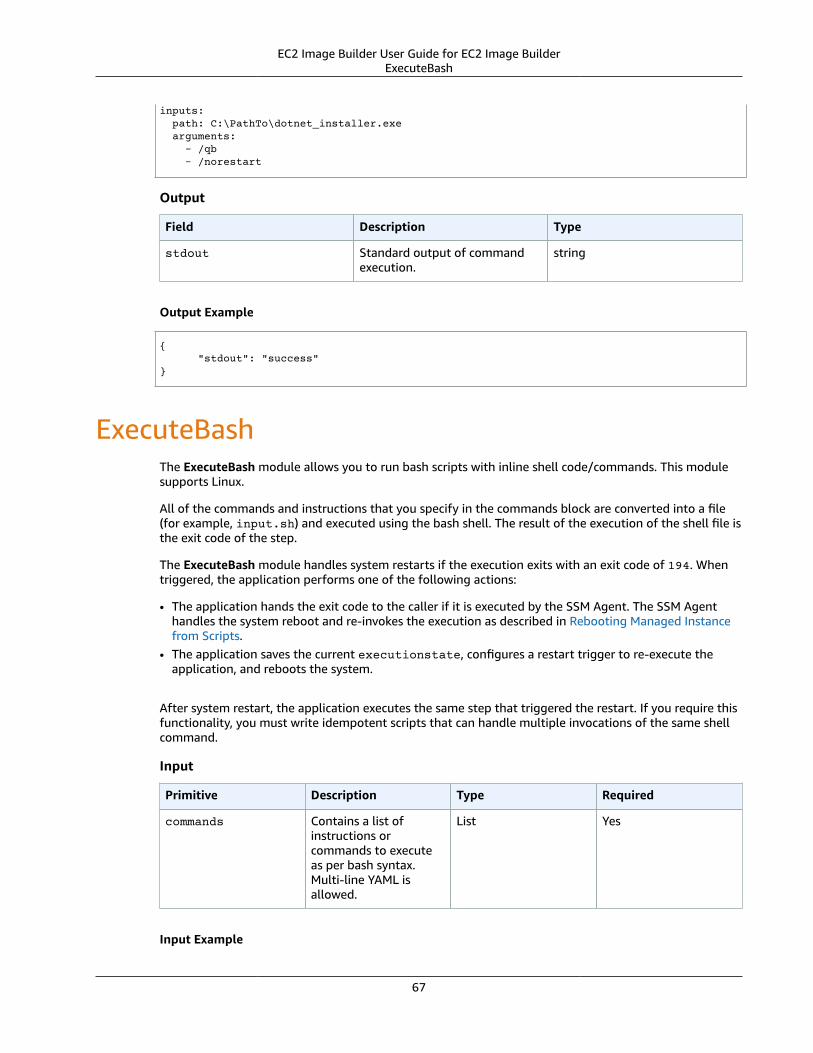
EC2 Image Builder User Guide for EC2 Image BuilderExecuteBash
inputs: path: C:\PathTo\dotnet_installer.exe arguments: - /qb - /norestart
Output
Field Description Type
stdout Standard output of commandexecution.
string
Output Example
{ "stdout": "success"}
ExecuteBashThe ExecuteBash module allows you to run bash scripts with inline shell code/commands. This modulesupports Linux.
All of the commands and instructions that you specify in the commands block are converted into a file(for example, input.sh) and executed using the bash shell. The result of the execution of the shell file isthe exit code of the step.
The ExecuteBash module handles system restarts if the execution exits with an exit code of 194. Whentriggered, the application performs one of the following actions:
• The application hands the exit code to the caller if it is executed by the SSM Agent. The SSM Agenthandles the system reboot and re-invokes the execution as described in Rebooting Managed Instancefrom Scripts.
• The application saves the current executionstate, configures a restart trigger to re-execute theapplication, and reboots the system.
After system restart, the application executes the same step that triggered the restart. If you require thisfunctionality, you must write idempotent scripts that can handle multiple invocations of the same shellcommand.
Input
Primitive Description Type Required
commands Contains a list ofinstructions orcommands to executeas per bash syntax.Multi-line YAML isallowed.
List Yes
Input Example
67
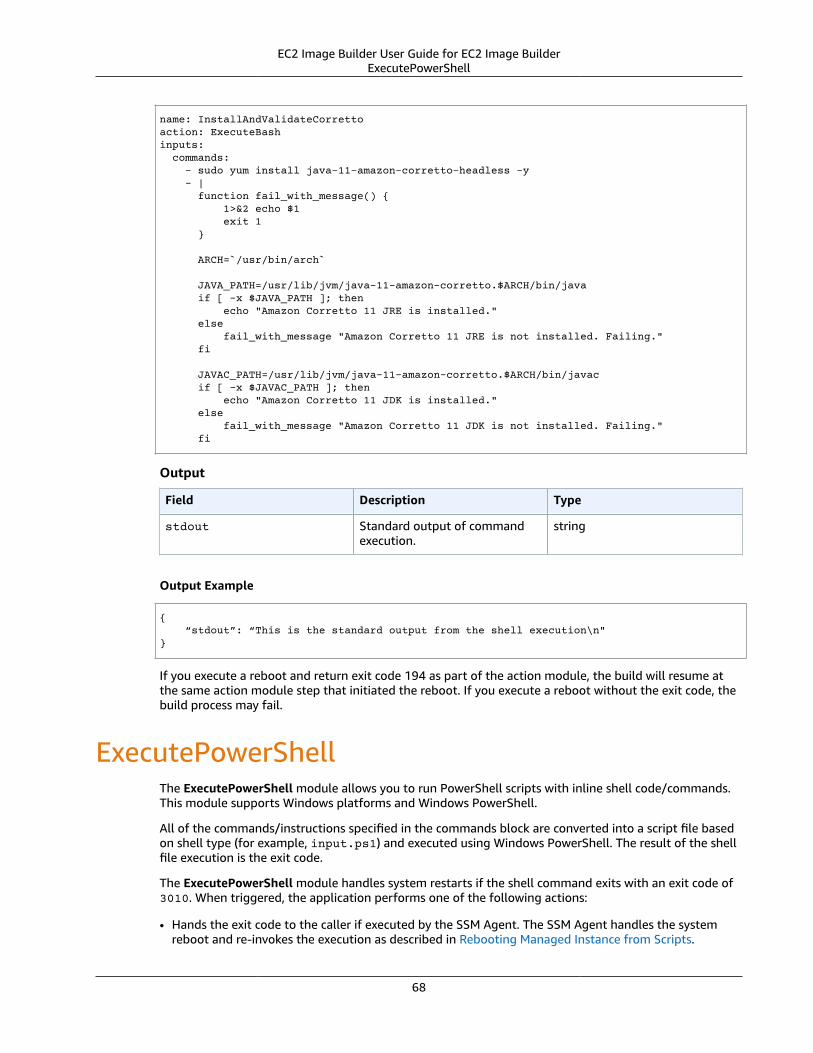
EC2 Image Builder User Guide for EC2 Image BuilderExecutePowerShell
name: InstallAndValidateCorrettoaction: ExecuteBashinputs: commands: - sudo yum install java-11-amazon-corretto-headless -y - | function fail_with_message() { 1>&2 echo $1 exit 1 }
ARCH=`/usr/bin/arch`
JAVA_PATH=/usr/lib/jvm/java-11-amazon-corretto.$ARCH/bin/java if [ -x $JAVA_PATH ]; then echo "Amazon Corretto 11 JRE is installed." else fail_with_message "Amazon Corretto 11 JRE is not installed. Failing." fi
JAVAC_PATH=/usr/lib/jvm/java-11-amazon-corretto.$ARCH/bin/javac if [ -x $JAVAC_PATH ]; then echo "Amazon Corretto 11 JDK is installed." else fail_with_message "Amazon Corretto 11 JDK is not installed. Failing." fi
Output
Field Description Type
stdout Standard output of commandexecution.
string
Output Example
{ “stdout”: “This is the standard output from the shell execution\n"}
If you execute a reboot and return exit code 194 as part of the action module, the build will resume atthe same action module step that initiated the reboot. If you execute a reboot without the exit code, thebuild process may fail.
ExecutePowerShellThe ExecutePowerShell module allows you to run PowerShell scripts with inline shell code/commands.This module supports Windows platforms and Windows PowerShell.
All of the commands/instructions specified in the commands block are converted into a script file basedon shell type (for example, input.ps1) and executed using Windows PowerShell. The result of the shellfile execution is the exit code.
The ExecutePowerShell module handles system restarts if the shell command exits with an exit code of3010. When triggered, the application performs one of the following actions:
• Hands the exit code to the caller if executed by the SSM Agent. The SSM Agent handles the systemreboot and re-invokes the execution as described in Rebooting Managed Instance from Scripts.
68
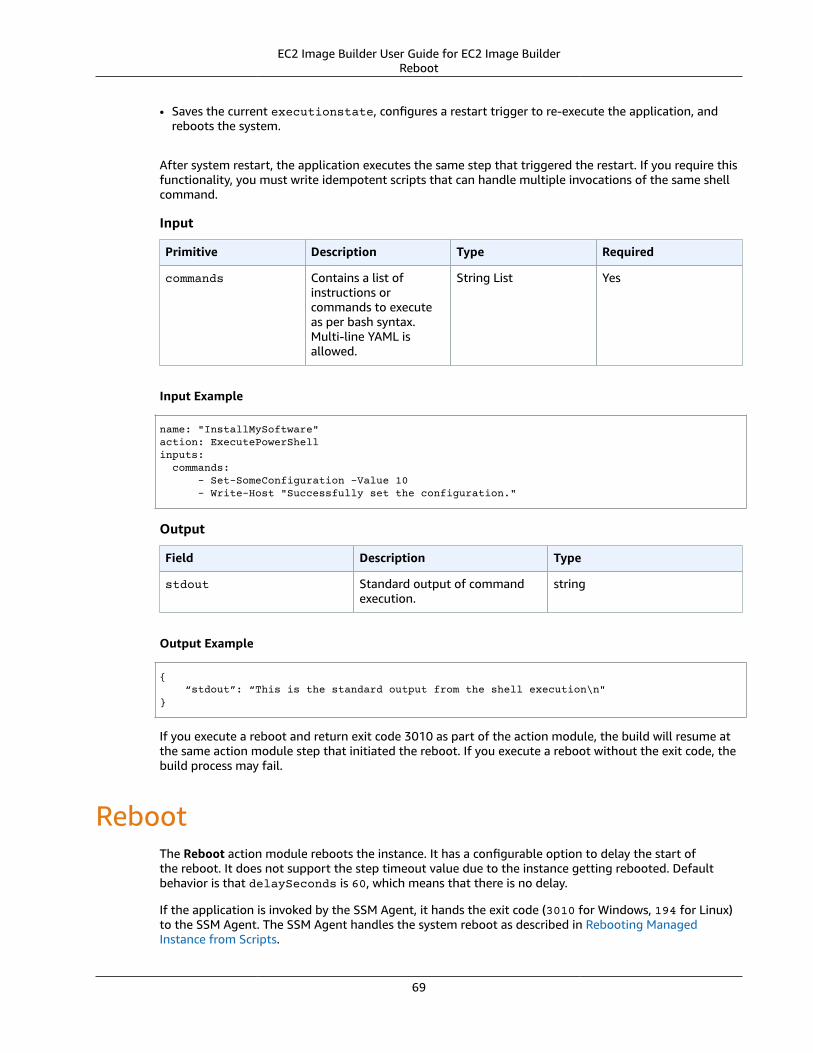
EC2 Image Builder User Guide for EC2 Image BuilderReboot
• Saves the current executionstate, configures a restart trigger to re-execute the application, andreboots the system.
After system restart, the application executes the same step that triggered the restart. If you require thisfunctionality, you must write idempotent scripts that can handle multiple invocations of the same shellcommand.
Input
Primitive Description Type Required
commands Contains a list ofinstructions orcommands to executeas per bash syntax.Multi-line YAML isallowed.
String List Yes
Input Example
name: "InstallMySoftware"action: ExecutePowerShellinputs: commands: - Set-SomeConfiguration -Value 10 - Write-Host "Successfully set the configuration."
Output
Field Description Type
stdout Standard output of commandexecution.
string
Output Example
{ “stdout”: “This is the standard output from the shell execution\n"}
If you execute a reboot and return exit code 3010 as part of the action module, the build will resume atthe same action module step that initiated the reboot. If you execute a reboot without the exit code, thebuild process may fail.
RebootThe Reboot action module reboots the instance. It has a configurable option to delay the start ofthe reboot. It does not support the step timeout value due to the instance getting rebooted. Defaultbehavior is that delaySeconds is 60, which means that there is no delay.
If the application is invoked by the SSM Agent, it hands the exit code (3010 for Windows, 194 for Linux)to the SSM Agent. The SSM Agent handles the system reboot as described in Rebooting ManagedInstance from Scripts.
69
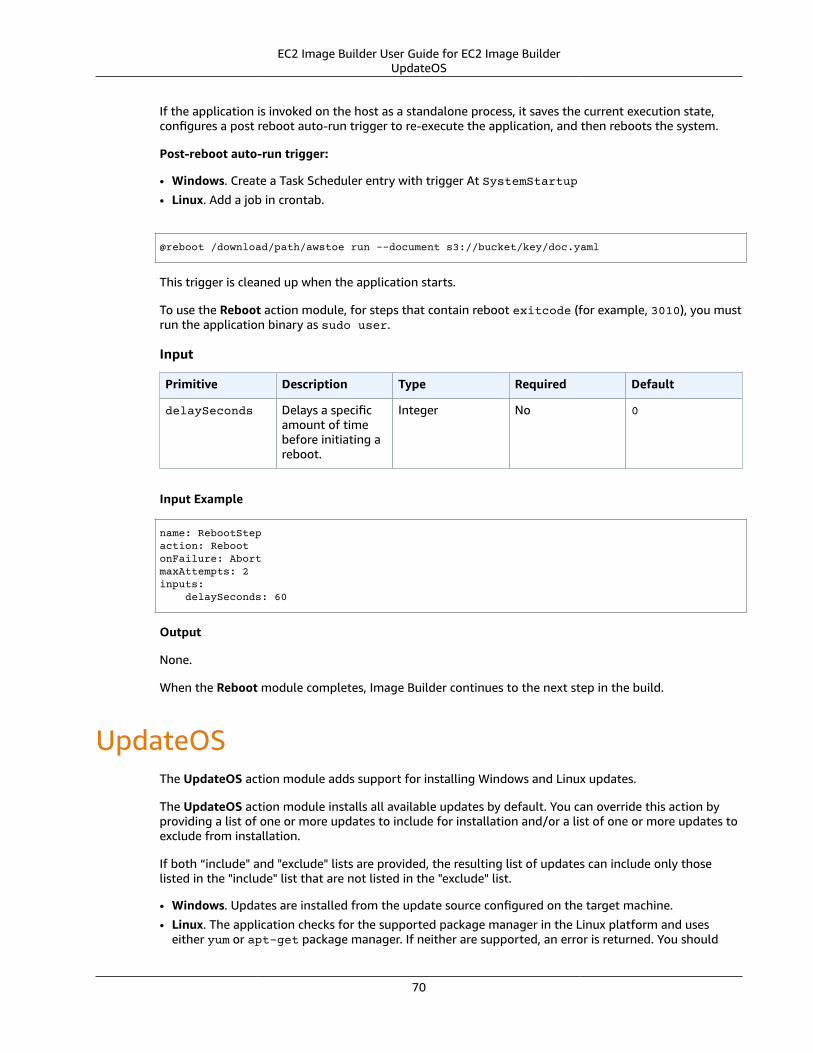
EC2 Image Builder User Guide for EC2 Image BuilderUpdateOS
If the application is invoked on the host as a standalone process, it saves the current execution state,configures a post reboot auto-run trigger to re-execute the application, and then reboots the system.
Post-reboot auto-run trigger:
• Windows. Create a Task Scheduler entry with trigger At SystemStartup
• Linux. Add a job in crontab.
@reboot /download/path/awstoe run --document s3://bucket/key/doc.yaml
This trigger is cleaned up when the application starts.
To use the Reboot action module, for steps that contain reboot exitcode (for example, 3010), you mustrun the application binary as sudo user.
Input
Primitive Description Type Required Default
delaySeconds Delays a specificamount of timebefore initiating areboot.
Integer No 0
Input Example
name: RebootStepaction: RebootonFailure: AbortmaxAttempts: 2inputs: delaySeconds: 60
Output
None.
When the Reboot module completes, Image Builder continues to the next step in the build.
UpdateOSThe UpdateOS action module adds support for installing Windows and Linux updates.
The UpdateOS action module installs all available updates by default. You can override this action byproviding a list of one or more updates to include for installation and/or a list of one or more updates toexclude from installation.
If both “include" and "exclude" lists are provided, the resulting list of updates can include only thoselisted in the "include" list that are not listed in the "exclude" list.
• Windows. Updates are installed from the update source configured on the target machine.
• Linux. The application checks for the supported package manager in the Linux platform and useseither yum or apt-get package manager. If neither are supported, an error is returned. You should
70
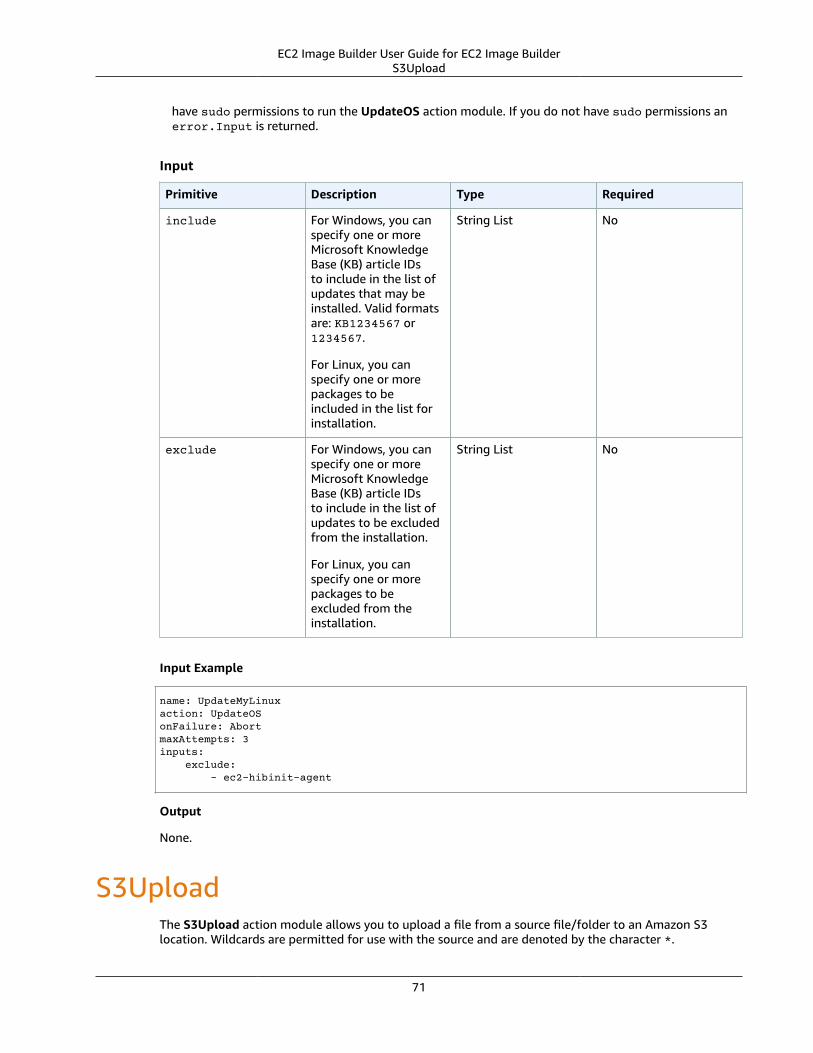
EC2 Image Builder User Guide for EC2 Image BuilderS3Upload
have sudo permissions to run the UpdateOS action module. If you do not have sudo permissions anerror.Input is returned.
Input
Primitive Description Type Required
include For Windows, you canspecify one or moreMicrosoft KnowledgeBase (KB) article IDsto include in the list ofupdates that may beinstalled. Valid formatsare: KB1234567 or1234567.
For Linux, you canspecify one or morepackages to beincluded in the list forinstallation.
String List No
exclude For Windows, you canspecify one or moreMicrosoft KnowledgeBase (KB) article IDsto include in the list ofupdates to be excludedfrom the installation.
For Linux, you canspecify one or morepackages to beexcluded from theinstallation.
String List No
Input Example
name: UpdateMyLinuxaction: UpdateOSonFailure: AbortmaxAttempts: 3inputs: exclude: - ec2-hibinit-agent
Output
None.
S3UploadThe S3Upload action module allows you to upload a file from a source file/folder to an Amazon S3location. Wildcards are permitted for use with the source and are denoted by the character *.
71
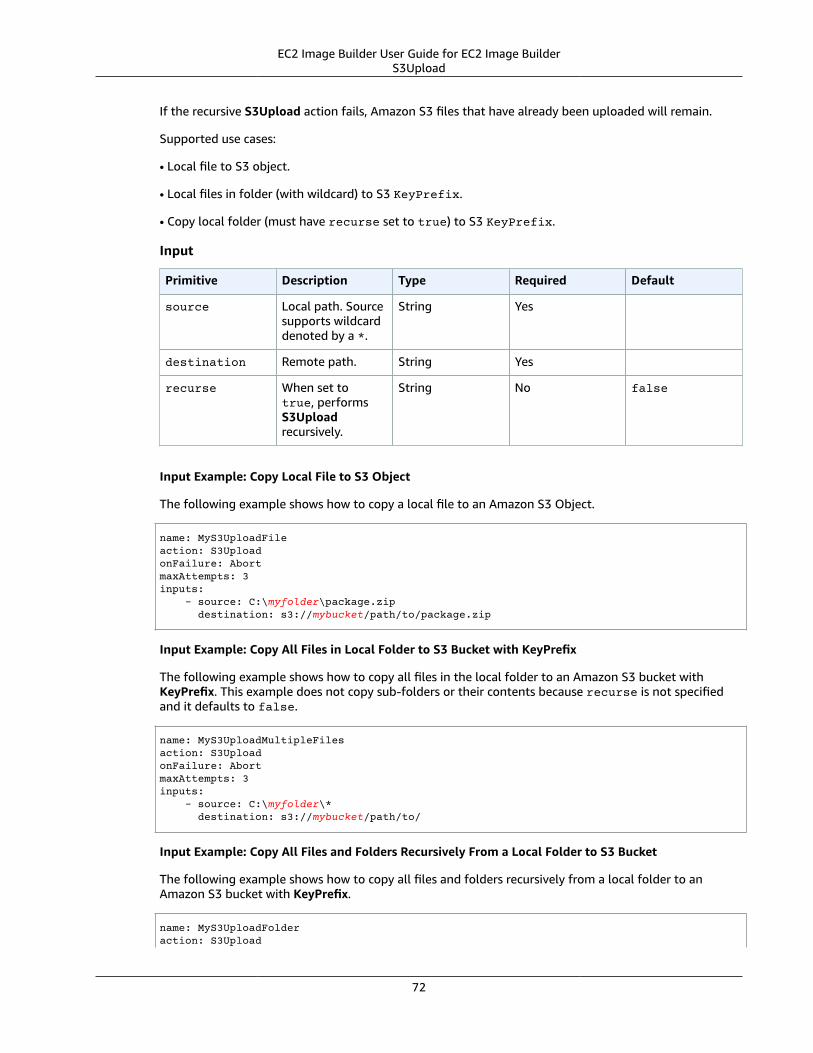
EC2 Image Builder User Guide for EC2 Image BuilderS3Upload
If the recursive S3Upload action fails, Amazon S3 files that have already been uploaded will remain.
Supported use cases:
• Local file to S3 object.
• Local files in folder (with wildcard) to S3 KeyPrefix.
• Copy local folder (must have recurse set to true) to S3 KeyPrefix.
Input
Primitive Description Type Required Default
source Local path. Sourcesupports wildcarddenoted by a *.
String Yes
destination Remote path. String Yes
recurse When set totrue, performsS3Uploadrecursively.
String No false
Input Example: Copy Local File to S3 Object
The following example shows how to copy a local file to an Amazon S3 Object.
name: MyS3UploadFileaction: S3UploadonFailure: AbortmaxAttempts: 3inputs: - source: C:\myfolder\package.zip destination: s3://mybucket/path/to/package.zip
Input Example: Copy All Files in Local Folder to S3 Bucket with KeyPrefix
The following example shows how to copy all files in the local folder to an Amazon S3 bucket withKeyPrefix. This example does not copy sub-folders or their contents because recurse is not specifiedand it defaults to false.
name: MyS3UploadMultipleFilesaction: S3UploadonFailure: AbortmaxAttempts: 3inputs: - source: C:\myfolder\* destination: s3://mybucket/path/to/
Input Example: Copy All Files and Folders Recursively From a Local Folder to S3 Bucket
The following example shows how to copy all files and folders recursively from a local folder to anAmazon S3 bucket with KeyPrefix.
name: MyS3UploadFolderaction: S3Upload
72
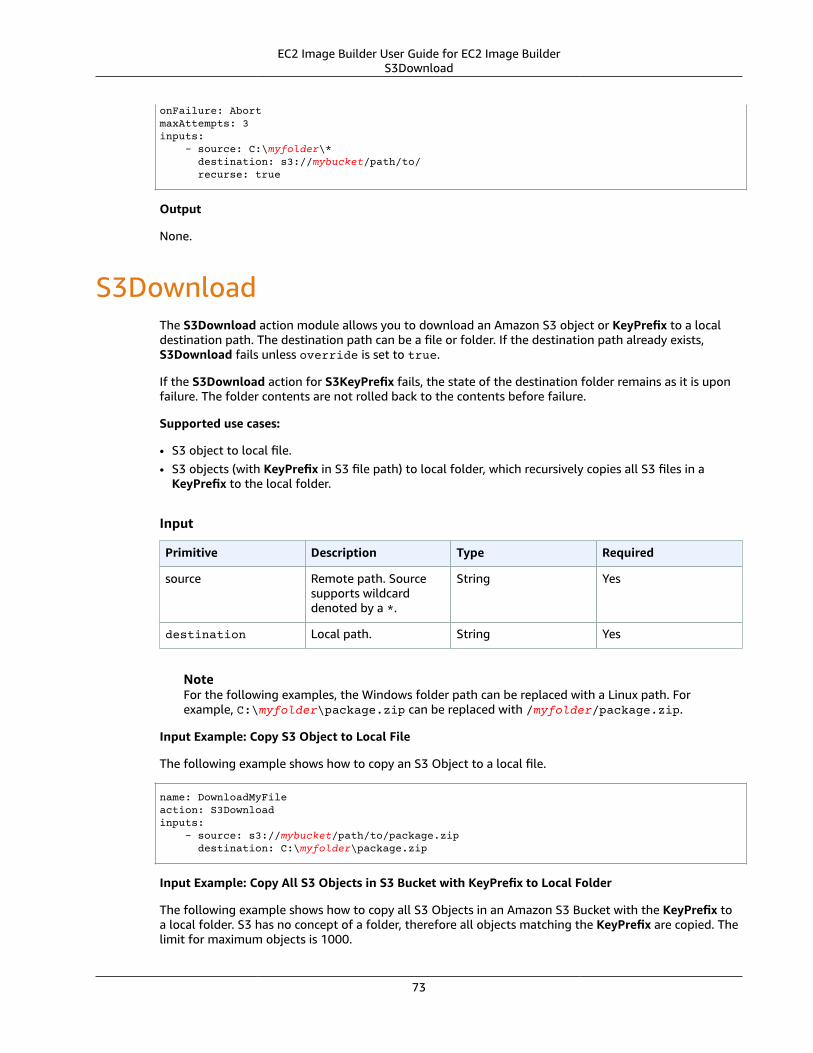
EC2 Image Builder User Guide for EC2 Image BuilderS3Download
onFailure: AbortmaxAttempts: 3inputs: - source: C:\myfolder\* destination: s3://mybucket/path/to/ recurse: true
Output
None.
S3DownloadThe S3Download action module allows you to download an Amazon S3 object or KeyPrefix to a localdestination path. The destination path can be a file or folder. If the destination path already exists,S3Download fails unless override is set to true.
If the S3Download action for S3KeyPrefix fails, the state of the destination folder remains as it is uponfailure. The folder contents are not rolled back to the contents before failure.
Supported use cases:
• S3 object to local file.• S3 objects (with KeyPrefix in S3 file path) to local folder, which recursively copies all S3 files in a
KeyPrefix to the local folder.
Input
Primitive Description Type Required
source Remote path. Sourcesupports wildcarddenoted by a *.
String Yes
destination Local path. String Yes
NoteFor the following examples, the Windows folder path can be replaced with a Linux path. Forexample, C:\myfolder\package.zip can be replaced with /myfolder/package.zip.
Input Example: Copy S3 Object to Local File
The following example shows how to copy an S3 Object to a local file.
name: DownloadMyFileaction: S3Downloadinputs: - source: s3://mybucket/path/to/package.zip destination: C:\myfolder\package.zip
Input Example: Copy All S3 Objects in S3 Bucket with KeyPrefix to Local Folder
The following example shows how to copy all S3 Objects in an Amazon S3 Bucket with the KeyPrefix toa local folder. S3 has no concept of a folder, therefore all objects matching the KeyPrefix are copied. Thelimit for maximum objects is 1000.
73
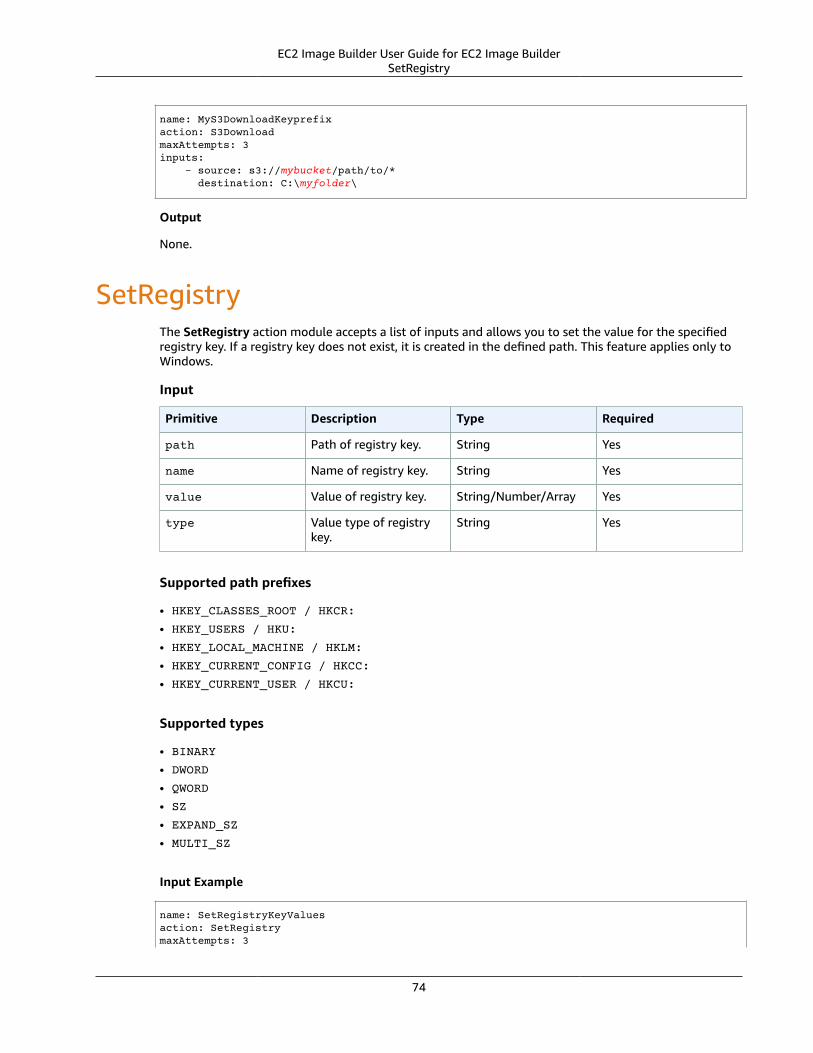
EC2 Image Builder User Guide for EC2 Image BuilderSetRegistry
name: MyS3DownloadKeyprefixaction: S3DownloadmaxAttempts: 3inputs: - source: s3://mybucket/path/to/* destination: C:\myfolder\
Output
None.
SetRegistryThe SetRegistry action module accepts a list of inputs and allows you to set the value for the specifiedregistry key. If a registry key does not exist, it is created in the defined path. This feature applies only toWindows.
Input
Primitive Description Type Required
path Path of registry key. String Yes
name Name of registry key. String Yes
value Value of registry key. String/Number/Array Yes
type Value type of registrykey.
String Yes
Supported path prefixes
• HKEY_CLASSES_ROOT / HKCR:
• HKEY_USERS / HKU:
• HKEY_LOCAL_MACHINE / HKLM:
• HKEY_CURRENT_CONFIG / HKCC:
• HKEY_CURRENT_USER / HKCU:
Supported types
• BINARY
• DWORD
• QWORD
• SZ
• EXPAND_SZ
• MULTI_SZ
Input Example
name: SetRegistryKeyValuesaction: SetRegistrymaxAttempts: 3
74
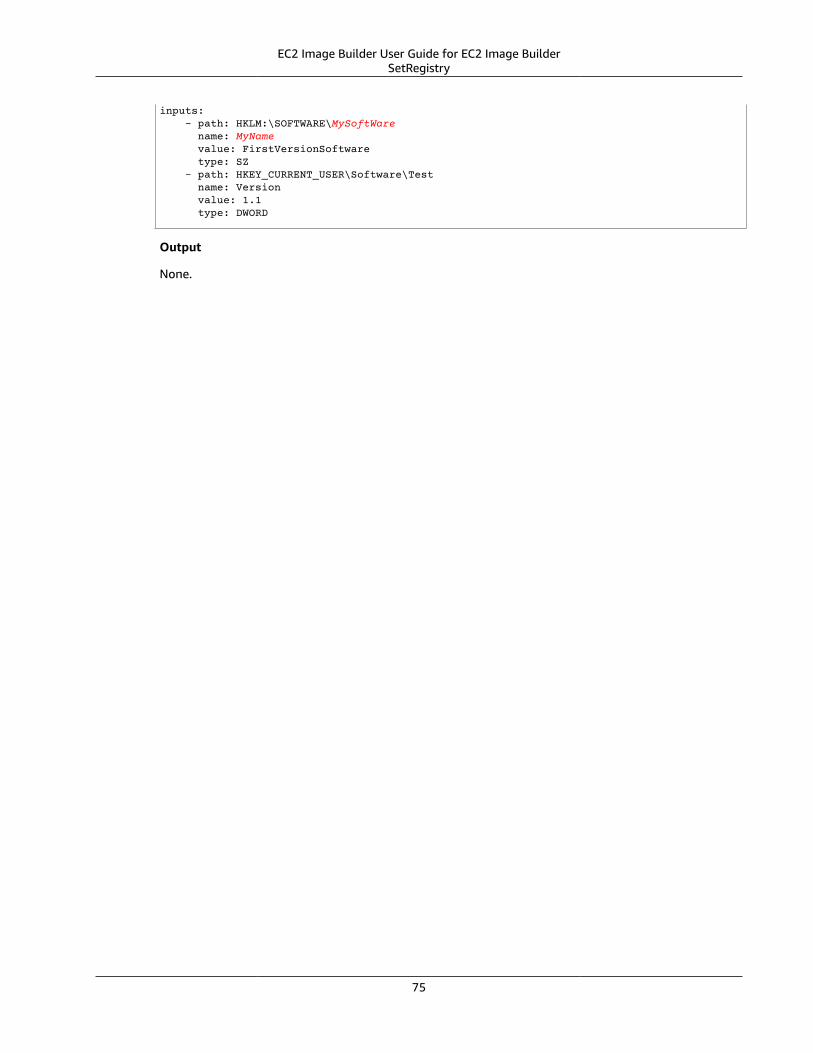
EC2 Image Builder User Guide for EC2 Image BuilderSetRegistry
inputs: - path: HKLM:\SOFTWARE\MySoftWare name: MyName value: FirstVersionSoftware type: SZ - path: HKEY_CURRENT_USER\Software\Test name: Version value: 1.1 type: DWORD
Output
None.
75

EC2 Image Builder User Guide for EC2 Image BuilderWindows STIG Components
EC2 Image Builder STIG ComponentsSecurity Technical Implementation Guides (STIGs) are the configuration standards created by theDefense Information Systems Agency (DISA) to secure information systems and software. To makeyour systems compliant with STIG standards, you must install, configure, and test a variety of securitysettings.
EC2 Image Builder provides STIG components to help you quickly build compliant images for STIGstandards. These STIG components scan for misconfigurations and run a remediation script. STIG-compliant components install InstallRoot on Windows AMIs from the Department of Defense (DoD) toinstall and update the DoD certificates and remove unnecessary certificates to maintain STIG compliance.There are no additional charges for using STIG-compliant components.
Topics• Windows STIG Components (p. 76)• Linux STIG Components (p. 78)
Windows STIG ComponentsWindows STIG components are designed for standalone servers and apply Local Group Policy.
STIG-Build-Windows-Low Version 1.0.1The following STIG settings have not been applied due to organization-specific policies and/or technicallimitations. All other applicable STIGs have been applied. For a complete list, see 2019, 2016, and 2012.For instructions on how to view the complete list, see How to View SRGs and STIGs .
• Windows Server 2019 STIG V1 Release 3:
V-93149, V-93187, V-93229, and V-93231• Windows Server 2016 STIG V1 Release 11:
V-73307, V-73649, and V-90357• Windows Server 2012R2 STIG V2 Release 18:
V-1076, V-1112, V-3472, V-4445, V-26359, V-36678, V-36733, V-40172, and V-40173• Microsoft .NET Framework STIG 4.0 V1 Release 9:
V-30937 and V-30972• Windows Firewall STIG V1 Release 7:
All STIG settings applied.• Internet Explorer 11 STIG V1 Release 14:
All STIG settings applied.
STIG-Build-Windows-Medium Version 1.0.1The following STIG settings have not been applied due to organization-specific policies and/or technicallimitations. All other applicable STIGs have been applied. For a complete list, see 2019, 2016, and 2012.For instructions on how to view the complete list, see How to View SRGs and STIGs .
76
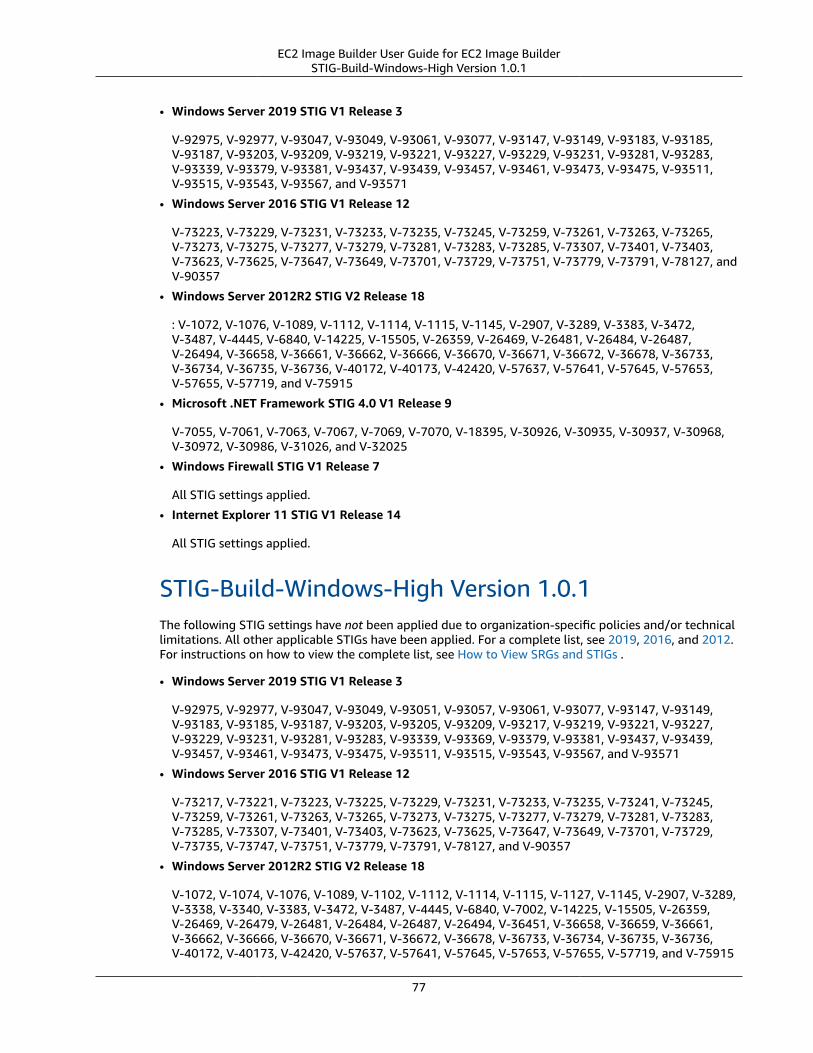
EC2 Image Builder User Guide for EC2 Image BuilderSTIG-Build-Windows-High Version 1.0.1
• Windows Server 2019 STIG V1 Release 3
V-92975, V-92977, V-93047, V-93049, V-93061, V-93077, V-93147, V-93149, V-93183, V-93185,V-93187, V-93203, V-93209, V-93219, V-93221, V-93227, V-93229, V-93231, V-93281, V-93283,V-93339, V-93379, V-93381, V-93437, V-93439, V-93457, V-93461, V-93473, V-93475, V-93511,V-93515, V-93543, V-93567, and V-93571
• Windows Server 2016 STIG V1 Release 12
V-73223, V-73229, V-73231, V-73233, V-73235, V-73245, V-73259, V-73261, V-73263, V-73265,V-73273, V-73275, V-73277, V-73279, V-73281, V-73283, V-73285, V-73307, V-73401, V-73403,V-73623, V-73625, V-73647, V-73649, V-73701, V-73729, V-73751, V-73779, V-73791, V-78127, andV-90357
• Windows Server 2012R2 STIG V2 Release 18
: V-1072, V-1076, V-1089, V-1112, V-1114, V-1115, V-1145, V-2907, V-3289, V-3383, V-3472,V-3487, V-4445, V-6840, V-14225, V-15505, V-26359, V-26469, V-26481, V-26484, V-26487,V-26494, V-36658, V-36661, V-36662, V-36666, V-36670, V-36671, V-36672, V-36678, V-36733,V-36734, V-36735, V-36736, V-40172, V-40173, V-42420, V-57637, V-57641, V-57645, V-57653,V-57655, V-57719, and V-75915
• Microsoft .NET Framework STIG 4.0 V1 Release 9
V-7055, V-7061, V-7063, V-7067, V-7069, V-7070, V-18395, V-30926, V-30935, V-30937, V-30968,V-30972, V-30986, V-31026, and V-32025
• Windows Firewall STIG V1 Release 7
All STIG settings applied.
• Internet Explorer 11 STIG V1 Release 14
All STIG settings applied.
STIG-Build-Windows-High Version 1.0.1The following STIG settings have not been applied due to organization-specific policies and/or technicallimitations. All other applicable STIGs have been applied. For a complete list, see 2019, 2016, and 2012.For instructions on how to view the complete list, see How to View SRGs and STIGs .
• Windows Server 2019 STIG V1 Release 3
V-92975, V-92977, V-93047, V-93049, V-93051, V-93057, V-93061, V-93077, V-93147, V-93149,V-93183, V-93185, V-93187, V-93203, V-93205, V-93209, V-93217, V-93219, V-93221, V-93227,V-93229, V-93231, V-93281, V-93283, V-93339, V-93369, V-93379, V-93381, V-93437, V-93439,V-93457, V-93461, V-93473, V-93475, V-93511, V-93515, V-93543, V-93567, and V-93571
• Windows Server 2016 STIG V1 Release 12
V-73217, V-73221, V-73223, V-73225, V-73229, V-73231, V-73233, V-73235, V-73241, V-73245,V-73259, V-73261, V-73263, V-73265, V-73273, V-73275, V-73277, V-73279, V-73281, V-73283,V-73285, V-73307, V-73401, V-73403, V-73623, V-73625, V-73647, V-73649, V-73701, V-73729,V-73735, V-73747, V-73751, V-73779, V-73791, V-78127, and V-90357
• Windows Server 2012R2 STIG V2 Release 18
V-1072, V-1074, V-1076, V-1089, V-1102, V-1112, V-1114, V-1115, V-1127, V-1145, V-2907, V-3289,V-3338, V-3340, V-3383, V-3472, V-3487, V-4445, V-6840, V-7002, V-14225, V-15505, V-26359,V-26469, V-26479, V-26481, V-26484, V-26487, V-26494, V-36451, V-36658, V-36659, V-36661,V-36662, V-36666, V-36670, V-36671, V-36672, V-36678, V-36733, V-36734, V-36735, V-36736,V-40172, V-40173, V-42420, V-57637, V-57641, V-57645, V-57653, V-57655, V-57719, and V-75915
77
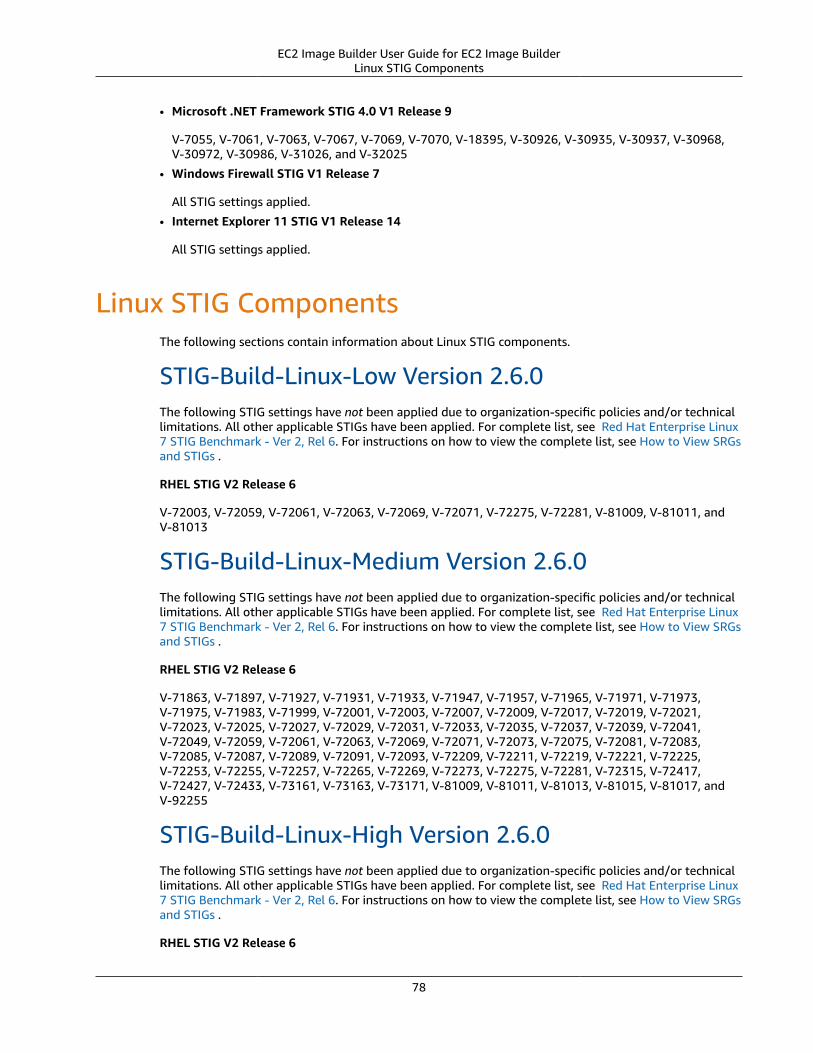
EC2 Image Builder User Guide for EC2 Image BuilderLinux STIG Components
• Microsoft .NET Framework STIG 4.0 V1 Release 9
V-7055, V-7061, V-7063, V-7067, V-7069, V-7070, V-18395, V-30926, V-30935, V-30937, V-30968,V-30972, V-30986, V-31026, and V-32025
• Windows Firewall STIG V1 Release 7
All STIG settings applied.
• Internet Explorer 11 STIG V1 Release 14
All STIG settings applied.
Linux STIG ComponentsThe following sections contain information about Linux STIG components.
STIG-Build-Linux-Low Version 2.6.0The following STIG settings have not been applied due to organization-specific policies and/or technicallimitations. All other applicable STIGs have been applied. For complete list, see Red Hat Enterprise Linux7 STIG Benchmark - Ver 2, Rel 6. For instructions on how to view the complete list, see How to View SRGsand STIGs .
RHEL STIG V2 Release 6
V-72003, V-72059, V-72061, V-72063, V-72069, V-72071, V-72275, V-72281, V-81009, V-81011, andV-81013
STIG-Build-Linux-Medium Version 2.6.0The following STIG settings have not been applied due to organization-specific policies and/or technicallimitations. All other applicable STIGs have been applied. For complete list, see Red Hat Enterprise Linux7 STIG Benchmark - Ver 2, Rel 6. For instructions on how to view the complete list, see How to View SRGsand STIGs .
RHEL STIG V2 Release 6
V-71863, V-71897, V-71927, V-71931, V-71933, V-71947, V-71957, V-71965, V-71971, V-71973,V-71975, V-71983, V-71999, V-72001, V-72003, V-72007, V-72009, V-72017, V-72019, V-72021,V-72023, V-72025, V-72027, V-72029, V-72031, V-72033, V-72035, V-72037, V-72039, V-72041,V-72049, V-72059, V-72061, V-72063, V-72069, V-72071, V-72073, V-72075, V-72081, V-72083,V-72085, V-72087, V-72089, V-72091, V-72093, V-72209, V-72211, V-72219, V-72221, V-72225,V-72253, V-72255, V-72257, V-72265, V-72269, V-72273, V-72275, V-72281, V-72315, V-72417,V-72427, V-72433, V-73161, V-73163, V-73171, V-81009, V-81011, V-81013, V-81015, V-81017, andV-92255
STIG-Build-Linux-High Version 2.6.0The following STIG settings have not been applied due to organization-specific policies and/or technicallimitations. All other applicable STIGs have been applied. For complete list, see Red Hat Enterprise Linux7 STIG Benchmark - Ver 2, Rel 6. For instructions on how to view the complete list, see How to View SRGsand STIGs .
RHEL STIG V2 Release 6
78

EC2 Image Builder User Guide for EC2 Image BuilderSTIG-Build-Linux-High Version 2.6.0
V-71855, V-71863, V-71897, V-71927, V-71931, V-71933, V-71937, V-71939, V-71947, V-71957,V-71965, V-71971, V-71973, V-71975, V-71983, V-71989, V-71991, V-71997, V-71999, V-72001,V-72003, V-72007, V-72009, V-72017, V-72019, V-72021, V-72023, V-72025, V-72027, V-72029,V-72031, V-72033, V-72035, V-72037, V-72039, V-72041, V-72049, V-72059, V-72061, V-72063,V-72067, V-72069, V-72071, V-72073, V-72075, V-72081, V-72083, V-72085, V-72087, V-72089,V-72091, V-72093, V-72209, V-72211, V-72213, V-72219, V-72221, V-72225, V-72253, V-72255,V-72257, V-72265, V-72269, V-72273, V-72275, V-72281, V-72315, V-72417, V-72427, V-72433,V-73161, V-73163, V-73171, V-81009, V-81011, V-81013, V-81015, V-81017, V-92255, and V-94843
79

EC2 Image Builder User Guide for EC2 Image Builder
AWS GlossaryFor the latest AWS terminology, see the AWS Glossary in the AWS General Reference.
80