
(Ebook) Delphi - Modelmaker Design Patterns - Mmdesignpatterns
55
Design Patterns Reference ModelMaker 5 Including a Design Patterns Example ModelMaker c/o Gerrit Beuze and Rene Post Stenenkruis 27 B 6862 XG Oosterbeek Netherlands http:\\www.modelmaker.demon.nl info@ modelmaker.demon.nl
Transcript of (Ebook) Delphi - Modelmaker Design Patterns - Mmdesignpatterns
Design Patterns Reference ModelMaker 5 Including a Design Patterns Example
ModelMaker c/o Gerrit Beuze and Rene Post Stenenkruis 27 B 6862 XG Oosterbeek Netherlands http:\\www.modelmaker.demon.nl info@ modelmaker.demon.nl
ModelMaker 5
DesignPatterns5, ������ 2
Copyright © 1997-1999 by: ModelMaker c/o Gerrit Beuze and Rene Post Stenenkruis 27 B 6862 XG Oosterbeek Netherlands http:\\www.modelmaker.demon.nl info@ modelmaker.demon.nl All rights reserved. All brand and product names are trademarks or registered trademarks of their respective holders. The latest version of this manual will be availabe on the ModelMaker website.
: G. Beuze

ModelMaker 5
DesignPatterns5, ������ 3
Contents Introduction 5
Design Patterns 6 Introduction 6 What is a design pattern 6 Patterns in ModelMaker 7 Applying patterns 7
Supported patterns 8
Wrapper pattern 9 Origin 9 Intent 9 Motivation 9 Implementation 10 How to apply the pattern 11 How the pattern acts on changes 12
Mediator pattern 13 Origin 13 Intent 13 Motivation 13 Implementation 14 How to apply the pattern 16 How the pattern acts on changes 17
Singleton pattern 18 Origin 18 Intent 18 Motivation 18 Implementation 18 How to apply the pattern 21 How the pattern acts on changes 21
Decorator pattern 21 Origin 21 Intent 22 Motivation 22 Implementation 23 How to apply the pattern 26 How the pattern acts on changes 28
Lock pattern 28 Origin 28 Intent 28 Motivation 28 Implementation 29 How to apply the pattern 30 How the pattern acts on changes 30
Visitor pattern 31 Origin 31
ModelMaker 5
DesignPatterns5, ������ 4
Intent 31 Motivation 31 Implementation 33 How to apply the pattern 35 How the pattern acts on changes 36
Observer pattern 37 Origin 37 Intent 37 Motivation 37 Implementation 37 Transforming events using the Observer Wizard 40 How to apply the pattern 40 How the pattern acts on changes 40
Reference Count pattern 40 Origin 40 Intent 41 Implementation 41
Patterns example 42 Introduction 42
The TProgressor class 42 Creating the TProgressor class interface 44 Implementing the TProgressor class 45
Applying a Singleton pattern 47 Making TProgressor a singleton class 47 Testing the Singleton behaviour 48 The Singleton pattern reflecting changes 49
Applying an Observer pattern 49 The need for an Observer pattern 49 Transforming events using the Observer Wizard 49 Checking the result 50 The finishing touch 51
Applying a Wrapper pattern 52 The need for a Wrapper pattern 52 Wrapping TProgressor 52 Checking the result 52 The Wrapper pattern reflecting changes 53
Deleting and invalidating patterns 53
Bibliography 55

Introduction ModelMaker represents a brand new way to develop classes and component packages for Borland Delphi. ModelMaker is a class tree oriented CASE tool specifically designed for generating native Delphi code (in fact it was made using Delphi and ModelMaker). Delphi's Object Pascal language is fully supported by ModelMaker. From the start ModelMaker was designed to be a smart and highly productive tool. It has been used to create classes for both real-time / technical and database type applications. In ModelMaker you'll find a synergy of ideas from the cutting edge of object-oriented and component-based technology. It was inspired by the work of methodologists like Ivar Jacobson (OOSE), Ralph Johnson (design patterns) and Karl Lieberherr (adaptive software). A unique feature, currently not found in any development environment for Delphi, is the support for design patterns. A number of patterns from the book ‘Design Patterns, Elements of Reusable Object Oriented Software’ by [Gam+] are implemented as ‘ready to use’ active agents. A ModelMaker Pattern will not only insert Delphi style code fragments to implement a specific pattern, but it also stays ‘alive’ to update this code to reflect any changes made to the design. As a result, ModelMaker lets you:
• Produce designs and code of unequalled quality. • Think of designing code instead of typing code. • Design without compromising. • Refine and experiment with your designs until they feel just right. • Create and maintain magnitudes larger models in magnitudes less time. • Document you designs in UML style diagrams. • Document your units in help files by clicking a single button.
• In short: save time and money, making better software.
This manual contains the Design Patterns reference and a design patterns demo. Before you go through this manual and demo you should be fairly accustomed with ModelMaker. Refer to the Users manual for “Getting Started”and “Basic concepts”.
ModelMaker 5
DesignPatterns5, ������ 6
Design Patterns
Introduction
When developing ModelMaker we were inspired a lot by the book ‘Design Patterns, Elements of Reusable Object-Oriented Software’ [Gam+] We decided to make design patterns an integral part of ModelMaker’s modelling engine. Thus enabling us to support design patterns in a brand new way: as active agents looking over your shoulder while you are editing your model and automatically reflecting changes where ever needed, keeping the pattern’s implementation up to date. Now that’s nice, but what is a design pattern? The next paragraph will summarise what does [Gam+] say about this. And how patterns are implemented in ModelMaker.
What is a design pattern
[Gam+, page 1] starts quoting and commenting the pattern guru Christopher Alexander who says: “Each pattern describes a problem which occurs over and over again in our environment, and then describes the core of the solution to that problem, in such a way that you can use this solution a million times over, without ever doing it the same way twice”. Even though Alexander was talking about patterns in buildings and towns, what he says is true about object oriented design patterns. Our solutions are expressed in terms of objects and interfaces instead of walls and doors, but at the core of both kinds of patterns is a solution to a problem in a context. A design pattern is a proven solution for a general design problem. It consists of communicating classes and objects that are customised to solve the problem in a particular context. The usefulness of the solution a pattern presents has been proven in many designs. As such it captures design experience of experienced programmers. A designer who is familiar with such patterns can apply them immediately to design problems without having to rediscover them. This way design patterns make it easier to reuse successful designs and architectures. Expressing proven techniques as design patterns makes them more accessible to developers of new systems. Design patterns help you choose design alternatives that make a system reusable and avoid alternatives that compromise reusability. Design patterns can even improve the documentation and maintenance of existing systems by furnishing an explicit specification of class and objects interactions and their underlying ‘intend’. Put simply, design patterns help a designer get a design ‘right’ faster. The design patterns as described by [Gam+] and as used in ModelMaker are not about designs such as linked lists and hash tables that can be encoded in classes and reused as is. Nor are they complex, domain specific designs for an entire application or subsystem.
ModelMaker 5
DesignPatterns5, ������ 7
Patterns in ModelMaker
In ModelMaker patterns are part of the modelling engine, just like classes and units. Before you apply a specific pattern, you have to provide it’s context, such as selecting the class(es) and / or member(s) on which to operate. When a pattern is applied, it will insert (user adjustable) code into the model. This usually consists of classes, members or code sections in methods. The total of all inserted parts makes up the complete implementation of the pattern. So far the pattern is like a smart macro which is able to reason about what to insert where. The power of ModelMaker is that patterns stay alive after inserting the pattern related code. Because the pattern is alive, it can reflect changes in the model to the pattern related code or even automatically add or delete members if needed. As a bonus you get an implementation in Delphi’s Object Pascal of the most common patterns. We’ve been using the supported patterns a lot in many projects and of course in developing ModelMaker itself. It is important to notice that you won’t see a pattern it self somewhere in the unit’s source code. The pattern is represented there only by means of the classes, members and code sections it inserted. A pattern is the ‘Owner’ of anything it inserts. This implicates for example that only the pattern can update pattern related sections of code in a method. Furthermore, whenever you remove the pattern from the model, it will withdraw and delete all classes, members and sections of code it ‘Owns’. Even if you added your own sections of code to a method the patterns owns. Therefore be careful inserting sections of code in pattern owned methods. Sometimes it is wiser to add a new method which contains your code which is then called from within the pattern’s method or vice versa. You can apply a pattern multiple times in a model or even on the same class. You should however make sure that each pattern has it’s own unique context. For example: it does not make sense to apply a singleton pattern twice on the same class (which is the only context a singleton pattern needs), and the second singleton pattern applied, will not create correct code since it will conflict with the first singleton’s code. Patterns might even interact with or extend each other as will be show in the patterns demo in the next chapter.
Applying patterns
All patterns active in the model are displayed in the Patterns view - refer to the GUI reference for details on this view. In this view you apply new patterns or delete existing ones. On top of the Patterns view you’ll find the Pattern palette. This palette contains all patterns ordered by type, just like Delphi’s Component Palette. Patterns are applied by clicking the appropriate button in the pattern palette. Usually you need to provide a context for the pattern before it actually can be applied. This consists at least of selecting a class or class member on which the pattern will operate. Please refer to the sections describing the specific patterns for more precise details about a pattern’s initial context.
ModelMaker 5
DesignPatterns5, ������ 8
If patterns become ‘invalid’ because you removed some essential part of the pattern, the pattern will delete all it’s owned classes, members and sections of code. The pattern is not active anymore and must be manually deleted from the patterns view. This pattern is displayed in the patterns view as ‘INVALID’. You can also tell a pattern to withdraw it’s ownership from all parts it inserted (classes, members and sections of code) without removing those parts. Use the ‘Release Ownership’ on a pattern. The pattern itself will become invalid, but all parts become user owned which means you can manually edit or delete them. The next sections will describe the specific patterns and give some code examples. In these examples we’’ use the following styles: pattern generated code » code you must enter manually other code (usually generated automatically by ModelMaker)
Supported patterns
When deciding which of the patterns as described in [Gam+] to support, we found that many patterns could be expressed using the same class and instance relations. For example the structure of a Proxy pattern is the same as a that for a Decorator pattern. Also many patterns can be implemented very easy using ModelMaker’s ability to override methods and keep overridden methods restricted to their origins. Some patterns were hard to implement the ModelMaker way and little would be gained in doing so. Other patterns are so class library restricted that it didn’t feel right to implement them in a generic tool. This reduced the number of patterns to the following list. Supported patterns are:
• Wrapper pattern (also called ‘Adapter’), converts the interface of a class into another interface clients expect.
• Mediator pattern, creates event handlers for a ‘used’ class and wires them. • Singleton pattern, ensures a class only has one instance, and provides a global point of
access to it. • Decorator pattern, attaches additional responsibilities to an object dynamically. • Lock pattern, provides a mechanism to temporarily lock some aspect of a class. • Visitor pattern, represents an operation to be performed on the elements of an object
structure by a class. • Observer pattern, defines a one-to-many dependency between objects so that when one
object changes state, all its dependents are notified. • Reference Count pattern: which has basically the implemnetation as a Lock pattern, and is
used to control the life cycle of an object.
ModelMaker 5
DesignPatterns5, ������ 9
As we keep in touch with the pattern community, new patterns will be supported in time. We’re also open to suggestions from users, so if you come up with new ideas about (generic) patterns to implement, please inform us.
Wrapper pattern
Origin
ModelMaker’s Wrapper pattern is based on the ‘Adapter’ or ‘Wrapper’ pattern described in [Gam+, pages 139..150]. For a more detailed description refer to this book.
Intent
‘A wrapper converts the interface of a class into another interface clients expect. Wrappers let classes work together that couldn’t otherwise because of incompatible interfaces’ [Gam+ 139].
Motivation
In Delphi’s Object Pascal language polymorphism is based on class type rather than on the supported interfaces. This implicates that although two classes can support the same interface, they must have the same ancestor in order to be polymorphically exchangeable for client object. Sometimes you want existing but unrelated classes to work together. The wrapper pattern lets you wrap (parts of) the interface of a class by an other class. This simulates multiple inheritance in Delphi by use of ‘uses’ relations. You could for example have an existing class TSample inheriting from TObject which you want to add to Delphi’s component palette. However, Components must descend from TComponent. Assuming that there is a good reason for not changing TSample’s ancestor class to TComponent (for example you don’t have the source), you could create a new class TSampleWrapper which inherits from TComponent and which ‘uses’ or ‘consists of’ a TSample. Since the TSampleWrapper is a TComponent descendant it can be added to the component palette. You could now ‘wrap’ the interface of TSample and make it available in the TSampleWrapper class. The TSampleWrapper delegates the actual behaviour to it’s wrapped Sample. It does this by calling the appropriate method in Sample or access the appropriate property in Sample. Another reason to use a wrapper pattern is that it helps to stick to the ‘Law of Demeter’. This law basically tells you not to reference objects more than one level deep. Assume the interfaces of the classes TSample and TSampleWrapper to be like: type TSample = class (TObject) private FSomeValue: Integer; public function SomeAction(const Data: string): Boolean;

ModelMaker 5
DesignPatterns5, ������ 10
property SomeValue: Integer read FSomeValue write FSomeValue; end; TSampleWrapper = class (TComponent) private FSample: TSample; public property Sample: TSample read FSample; end; According to Demeter’s law calling SampleWrapper.Sample is fine, but SampleWrapper.Sample.SomeAction is not good practice. It would be better to define a SomeAction method in TSampleWrapper which calls the Sample.SomeAction method. Actually, code like ListBox.Canvas.Brush.Color violates this law, since we reference three levels deep.
Implementation
We’ll use the above described classes to demonstrate the implementation of a wrapper using ModelMaker’s wrapper pattern. In the example TSampleWrapper ‘consists of’ a TSample which is referenced in the Sample property. The ModelMaker wrapper pattern can now make the method SomeAction and property SomeValue available to the TSampleWrapper interface and fully implement the wrapped members. TSampleWrapper = class (TComponent) private FSample: TSample; protected function GetSomeValue: Integer; procedure SetSomeValue(Value: Integer); public function SomeAction(const Data: string): Boolean; » property Sample: TSample read FSample; property SomeValue: Integer read GetSomeValue write SetSomeValue; end; This allows users of TSampleWrapper for example to access the SomeAction method immediately without referencing the SampleWrapper.Sample.SomeAction. The implementation for this interface will be: (note that this is fully implemented, and ready to compile) function TSampleWrapper.GetSomeValue: Integer; begin Result := Sample.SomeValue; end; procedure TSampleWrapper.SetSomeValue(Value: Integer); begin Sample.SomeValue := Value; end; function TSampleWrapper.SomeAction(const Data: string): Boolean; begin Result := Sample.SomeAction(Data); end; In this example you see some of the wrapper’s functionality. In general:

ModelMaker 5
DesignPatterns5, ������ 11
• All members in the wrapper class have the same attributes (Name, Data type, Visibility etc.) as the members they wrap.
• Properties are wrapped using properties using read and / or write access methods to access the wrapped property.
• Fields are also wrapped using properties using read and write access methods to access the wrapped field.
• Events are wrapped by events, using read and write access methods to access the wrapped event rather than event handlers.
• Methods are wrapped by methods which simply pass on the call and parameters to the wrapped class, returning whatever the wrapped method returned.
How to apply the pattern
The wrapper pattern’s initial context consists of the wrapper class and a reference to the wrapped class. The reference must be a class member in the wrapper class. It can be a property, field or method with data type ‘class’, such as the Sample property in the above example, the field FSample could also be used as reference. This wrapped class has to be part of the current model, but may be marked place holder. The visibility (private, public etc.) of the reference is irrelevant. To apply the pattern:
1. In the Classes view, select the wrapper class (TSampleWrapper in the above example). 2. Make sure you have created a class member in the wrapper class which serves as a
reference to the class to be wrapped, and select this reference by clicking it (Sample in the above example).
3. Click the ‘Add Wrapper Pattern’ button in the Pattern view’s palette.

ModelMaker 5
DesignPatterns5, ������ 12
4. The wrapper pattern editor will appear. In this dialog, select the members to wrap using the filters (usually methods, properties, sometimes events) and click OK. The pattern will now be listed in the Patterns view and members and code will be inserted for each wrapped member.
How the pattern acts on changes
The pattern will reflect any changes made to the wrapped members in the wrapped class. For example changing the parameters of method SomeAction will be reflected to the wrapped method SomeAction. Also changes in the class reference’s name are reflected: changing Sample to ‘TheSample’ will cause all related code in the wrapping class to be updated. Notice that most attributes such as Name, Data type etc. of members in the wrapper class cannot be changed manually anymore since the wrapper pattern takes care of keeping the members in the wrapper class coupled to the corresponding members in the wrapped class. Therefore the only place to change the attributes of a wrapped member in the wrapper class is in the method that’s being wrapped! If wrapped members are deleted from the wrapped class, they will also be deleted from the wrapping class. Be aware that this will also remove any methods and their implementation needed to access the wrapped members, even if you added some user owned fragments to these methods. So if you delete TSample.SomeAction in the example, the pattern will delete the TSampleWrapper.SomeAction method.
Inheritance filter
Scope filter
Member type filter
ModelMaker 5
DesignPatterns5, ������ 13
If new members are added to the wrapped class that need to be wrapped, or you want to ‘unwrap’ some members, select the pattern in the Patterns view and click the ‘Edit pattern’ button. The wrapper pattern editor will appear and you may select the new set of members to be wrapped. If you delete the wrapper pattern or the reference to the wrapped part, the pattern will delete all wrapped members in the wrapper class. If you delete the wrapper class, the wrapped class or the reference to the wrapped class, the pattern will become ‘invalid’ and all wrapped members in the wrapper class will be deleted.
Mediator pattern
The mediator pattern as currently implemented will become obsolete in future versions of ModelMaker. It will be replaced by new design tools. Although future versions will still support the pattern and the pattern is found to fairly stable and reliable, it is not maintained anymore.
Origin
ModelMaker’s Mediator pattern is based on the Mediator pattern as described in [Gam+, pages 273..282]. The Delphi implementation is ours.
Intent
‘Define an object that encapsulates how a set of objects interact. Mediator promotes loose coupling by keeping objects from referring to each other explicitly, and it lets you vary their interaction independently’. [Gam+, page 273]
Motivation
‘Object oriented design encourages the distribution of behaviour among objects. Such distribution can result in an object structure with many connections between objects; in the worst case, every object ends up knowing about every other. Though partitioning a system into many objects generally enhances reusability, proliferating interconnections tend to reduce it again. Lots of interconnections make it less likely that an object can work without the support of others - the system acts as though it were monolithic. Moreover it can be difficult to change the systems’ behaviour in any significant way, since behaviour is distributed among many objects. As a result, you may be forced to define many subclasses to customise the system’s behaviour.’ [Gam+ page 273]. Although there’s a lot more to tell about mediators, we won’t get into details here, please refer to [Gam+]. That’s not because you don’t need mediators, but because you already are familiar with them: Delphi provides great mediators.
ModelMaker 5
DesignPatterns5, ������ 14
Developers at Borland probably were aware of the above mentioned paragraphs when designing the Delphi Object Pascal language and the VCL components. Their solution to this problem is essentially: events (or method pointers). The use of events makes de-coupling of objects possible. The class TForm is their standard mediator class which handles (wires) events from components put on the form. They even delivered a great tool with it: the Object Inspector. Being able to delegate behaviour to another class using events, saves you, for example, from subclassing TButton when you need a button that interacts with an TEdit control. The mediator is the form which handles all events and takes corresponding actions, coupling all related components together with snippets of code. Great. So what’s the need for a Mediator pattern? Delphi’s Object Inspector uses RTTI and form designers to create event handlers on forms and Delphi’s component streaming mechanism takes care of actually wiring these events at run time. If you ever manually created event handlers you know that you have to:
• Create a event handler method with the correct parameter list and possibly the correct function result.
• Wire the event handler to the event with code like: FSample.OnChange := SampleChange;
• Make sure you unwire the event again in appropriate cases to avoid wired objects from calling destroyed or otherwise illegal objects. This now is what ModelMaker’s mediator pattern is able to do for you. In order to construct a correct event handler method it needs the event type definition. Remember however that while designing your code in ModelMaker there is no RTTI information available. Therefore ModelMaker uses an event library which defines the event type definitions. The mediator pattern relies on these event type definitions to construct and update event handlers.
Implementation
Suppose we’ve created a class TComPort which encapsulates a serial port device driver. This class defines a series of events to asynchronously inform clients of state changes: data triggers, line errors etc. A TController class could ‘use a’ TComPort class to transmit data through a serial port. This TController class would typically wire and handle the Comport events to update it’s internal state. We’ll use this example to demonstrate ModelMaker’s mediator pattern. Here’s an abstract of the interface and implementation of TComport and TController without the mediator: type » TLineEvent = procedure (Sender: TObject; Error: TLineError) of object; » TTriggerEvent = procedure (Sender: TObject; Trigger: TTrigger) of object; TComPort = class (TObject)
TController TComPortComPort
ModelMaker 5
DesignPatterns5, ������ 15
published » property OnDataReceived: TTriggerEvent read FOnDataReceived write FOnDataReceived; » property OnLineEvent: TLineEvent read FOnLineEvent write FOnLineEvent; » property OnTimeOut: TNotifyEvent read FOnTimeOut write FOnTimeOut; » property OnTransmitted: TNotifyEvent read FOnTransmitted write FOnTransmitted; end; » TController = class (TObject) private FComPort: TComPort; public » constructor Create; » destructor Destroy; override; » property ComPort: TComPort read FComPort; end; implementation constructor TController.Create; begin inherited Create; » FComPort := TComPort.Create; end; destructor TController.Destroy; begin » FComPort.Free; inherited Destroy; end; Now have a look at the same abstract for class TController with the mediator applied to this structure: TController = class (TObject) private FComPort: TComPort; protected procedure ComPortDataReceived(Sender: TObject; Trigger: TTrigger); procedure ComPortLineEvent(Sender: TObject; Error: TLineError); procedure ComPortTimeOut(Sender: TObject); procedure ComPortTransmitted(Sender: TObject); procedure UnwireComPort; procedure WireComPort; public » constructor Create; » destructor Destroy; override; » property ComPort: TComPort read FComPort; end; implementation constructor TController.Create; begin inherited Create; » FComPort := TComPort.Create; { now wire comport calling the method created by the mediator } » WireComport; end; destructor TController.Destroy; begin { make sure the comport is unwired again } » UnwireComport; » FComPort.Free; inherited Destroy; end;

ModelMaker 5
DesignPatterns5, ������ 16
procedure TController.ComPortDataReceived(Sender: TObject; Trigger: TTrigger); begin end; procedure TController.ComPortLineEvent(Sender: TObject; Error: TLineError); begin end; procedure TController.ComPortTimeOut(Sender: TObject); begin end; procedure TController.ComPortTransmitted(Sender: TObject); begin end; procedure TController.UnwireComPort; begin FComPort.OnDataReceived := nil; FComPort.OnLineEvent := nil; FComPort.OnTimeOut := nil; FComPort.OnTransmitted := nil; end; procedure TController.WireComPort; begin FComPort.OnDataReceived := ComPortDataReceived; FComPort.OnLineEvent := ComPortLineEvent; FComPort.OnTimeOut := ComPortTimeOut; FComPort.OnTransmitted := ComPortTransmitted; end;
In this example notice:
• The wiring of the comport in constructor Create by a call to WireComPort. This method is optionally created by the mediator.
• The corresponding unwiring in destructor Destroy by a call to UnwireComPort. This method is optionally created by the mediator.
• The event handler methods which all have the correct signature (as defined in the event library), just like the Object Inspector would do.
How to apply the pattern
The mediator pattern’s initial context consists of the class you want to create event handlers in (TController in the example), and a reference to the class containing the events to be handled (ComPort in the example). The reference must be a class member in the mediator class. It can be a property, field or method with data type ‘class’, such as the ComPort property in the above example, the field FComPort could also have been used as reference. This mediated class has to be part of the current model, but may be marked place holder. The visibility (private, public etc.) of the reference is irrelevant. To apply the pattern:
1. In the Classes view, select the mediator class (TController in the above example). 2. Make sure you have created a class member in the mediator class which serves as a
reference to the class to be mediated, and select this reference by clicking it (ComPort in the above example).
3. Click the ‘Add Mediator Pattern’ button in the Pattern view’s palette.
ModelMaker 5
DesignPatterns5, ������ 17
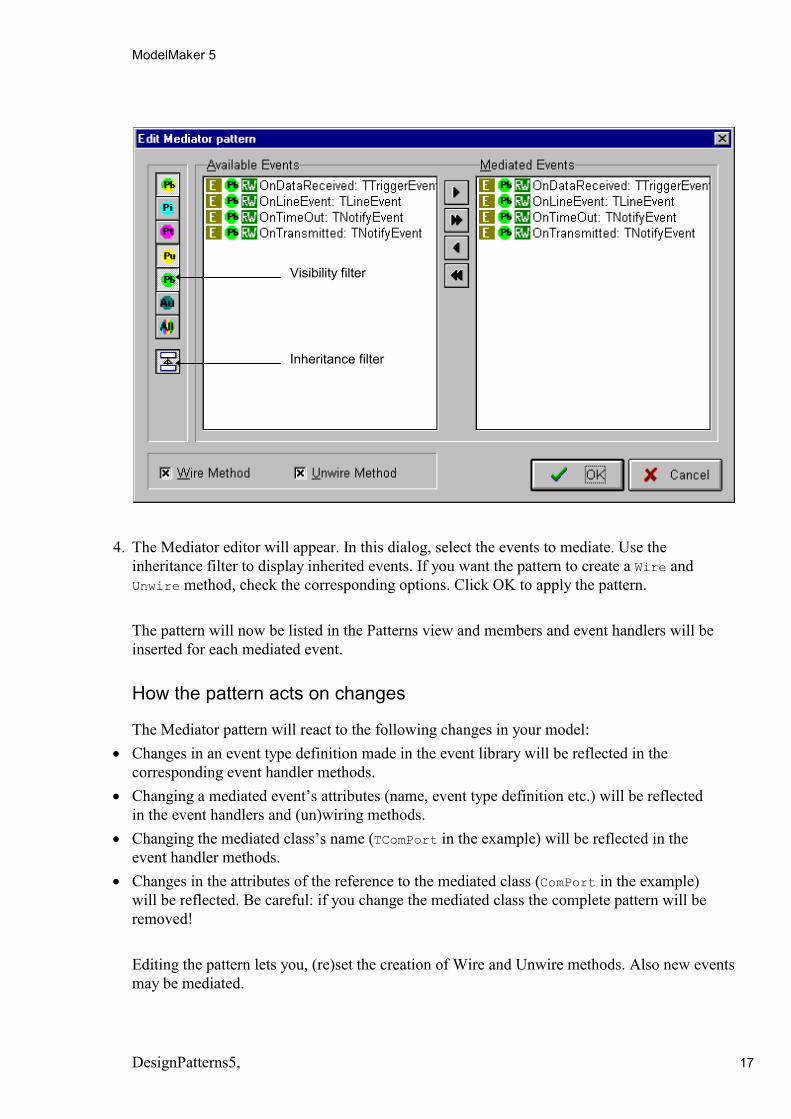
4. The Mediator editor will appear. In this dialog, select the events to mediate. Use the inheritance filter to display inherited events. If you want the pattern to create a Wire and Unwire method, check the corresponding options. Click OK to apply the pattern. The pattern will now be listed in the Patterns view and members and event handlers will be inserted for each mediated event.
How the pattern acts on changes
The Mediator pattern will react to the following changes in your model: • Changes in an event type definition made in the event library will be reflected in the
corresponding event handler methods. • Changing a mediated event’s attributes (name, event type definition etc.) will be reflected
in the event handlers and (un)wiring methods. • Changing the mediated class’s name (TComPort in the example) will be reflected in the
event handler methods. • Changes in the attributes of the reference to the mediated class (ComPort in the example)
will be reflected. Be careful: if you change the mediated class the complete pattern will be removed! Editing the pattern lets you, (re)set the creation of Wire and Unwire methods. Also new events may be mediated.
Visibility filter
Inheritance filter
ModelMaker 5
DesignPatterns5, ������ 18
If you delete the pattern, it will remove all event handlers and the wire and unwire methods. The same will happen if you invalidate the pattern by deleting the reference or the mediated class.
Singleton pattern
Origin
ModelMaker’s singleton pattern is based on the singleton pattern as described in [Gam+, pages 127..134]. The Delphi implementation for the pattern is ours.
Intent
Ensure a class only has one instance, and provide a global point of access to it [Gam+,p127].
Motivation
The motivation is based on [Gam+, page 127]. It’s important for some classes to have exactly one instance. Although there can be many printers in a system, there should be only one printer spooler. There should be only one file system (or file system manager) and one window manager. How do we ensure that a class has only one instance and that the instance is easily accessible? A global variable makes an object accessible, but it doesn’t keep you from instantiating multiple objects. Global variables also tend to pollute the name space. A better solution is to make the class itself responsible for keeping track of it’s sole instance. The class can ensure that no other instance can be created (by intercepting requests to create new objects), and it can provide a way to access the instance. This is the singleton pattern. Typical use of this pattern is in service like classes. The ModelMaker singleton also adds automatic instantiation to this pattern. As soon as you reference the instance, it is instantiated automatically.
Implementation
Consider for example a class TProgressor which could be used as a low level service to deal with time consuming processes. Typical methods would be: StartProgress, EndProgress, Abort and typical properties would be Progress, Aborted etc. The following example shows part of TProgressor’s interface: type TProgressor = class (TObject) private FProgress: Integer; protected
ModelMaker 5
DesignPatterns5, ������ 19
procedure SetProgress(Value: Integer); public » procedure StartProgress; » property Progress: Integer read FProgress write SetProgress; end; Refer to The TProgressor class, page 42, where this class is explained in more detail. Applying the singleton pattern to this class results in the following interface: type TProgressor = class (TObject) private FProgress: Integer; protected constructor CreateInstance; class function AccessInstance(Request: Integer): TProgressor; procedure SetProgress(Value: Integer); public constructor Create; destructor Destroy; override; class function Instance: TProgressor; class procedure ReleaseInstance; » procedure StartProgress; » property Progress: Integer read FProgress write SetProgress; end;
Let’s have a look at the public interface first:
• The class function Instance is used to access the single instance of this class. The first time this class method is called, the instance is actually created.
• The constructor Create is overridden to raise an exception if you attempt to create an instance without using the Instance method. This will prevent you from accidentally creating multiple instances.
• Calling ReleaseInstance will clean up the single instance if it existed. You would typically call this method in a clean up section. In Delphi 1 from an exit procedure, in Delphi 2/3/4 in a unit’s finalization section. Don’t call the TProgressor.Instance.Free to clean up the instance, since this will first create it, if it hadn’t been created before.
• Destroy co-operates in the instance bookkeeping. Now let’s have a look at the actual implementation of this pattern. constructor TProgressor.Create; begin inherited Create; raise Exception.CreateFmt('Access class %s through Instance only', [ClassName]); end; constructor TProgressor.CreateInstance; begin inherited Create; end; destructor TProgressor.Destroy; begin if AccessInstance(0) = Self then AccessInstance(2); inherited Destroy; end; class function TProgressor.AccessInstance(Request: Integer): TProgressor;
ModelMaker 5
DesignPatterns5, ������ 20
const FInstance: TProgressor = nil; begin case Request of 0 : ; 1 : if not Assigned(FInstance) then FInstance := CreateInstance; 2 : FInstance := nil; else raise Exception.CreateFmt('Illegal request %d in AccessInstance', [Request]); end; Result := FInstance; end; class function TProgressor.Instance: TProgressor; begin Result := AccessInstance(1); end; class procedure TProgressor.ReleaseInstance; begin AccessInstance(0).Free; end; procedure TProgressor.SetProgress(Value: Integer); begin » { Place here the implementation of the progress mechanism ] end; procedure TProgressor.StartProgress; begin » { Placehere the implementation of the progress mechanism ] end;
The secret of this pattern is in the AccessInstance method. This method uses a typed constant to store the instance. We needed to use this work around because Delphi doesn’t support (static) class fields in classes. Depending on the parameter Request the method will either return the instance (Request = 0), create an instance (Request = 1), reset the instance to nil (Request =2). Delphi 2/3/4 allow this use of typed constants only if the $J+ compiler switch is set. By making the constructor CreateInstance protected, we assure that no other class is able to call this constructor. It may however be made virtual and can be overridden in descendant classes. In that case the first class to call Instance will determine the actual type to be instantiated. The only code you manually need to add, is the clean up code in the unit’s initialization or finalization section. This could be something like: (example shows Delphi 1.0 code, for Delphi 2/3/4 code refer to Making TProgressor a singleton class, page 47): unit <!Unitname!>; ... ... implementation ... ... procedure ShutDown; far; begin » TProgressor.ReleaseInstance;
ModelMaker 5
DesignPatterns5, ������ 21
end; initialization MMWIN:START INITIALIZATION » AddExitProc(ShutDown); end. You can now use the TProgressor class as follows: procedure TSomeClass.DoSomething; var I: Integer; begin » TProgressor.Instance.StartProgress; » for I := 0 to 100 do » begin » TProgressor.Instance.Progress := I; » ..{ do something useful } » end; » TProgressor.Instance.EndProgress; end;
How to apply the pattern
This pattern is very simple to apply: 1. In the Classes view, select the class to which the pattern should be applied. 2. In the Patterns view, click the ‘Add Singleton Pattern’ Button.
The pattern is applied immediately. There are no attributes to be set.
How the pattern acts on changes
The only change the pattern reflects, is a change in the class’s name to which the pattern applies, the changed class name to will be propagated to the appropriate code in method AccessInstance. The pattern cannot be ‘edited’ in the pattern view, since there’s nothing to edit. If you remove the pattern, all associated methods are also removed.
Decorator pattern
Origin
ModelMaker’s Decorator pattern is based on the Decorator pattern as described in [Gam+, pages 175..184].
ModelMaker 5
DesignPatterns5, ������ 22
Intent
‘Attach additional responsibilities to an object dynamically. Decorators provide a flexible alternative to subclassing for extending functionality’ [Gam+ page 175].
Motivation
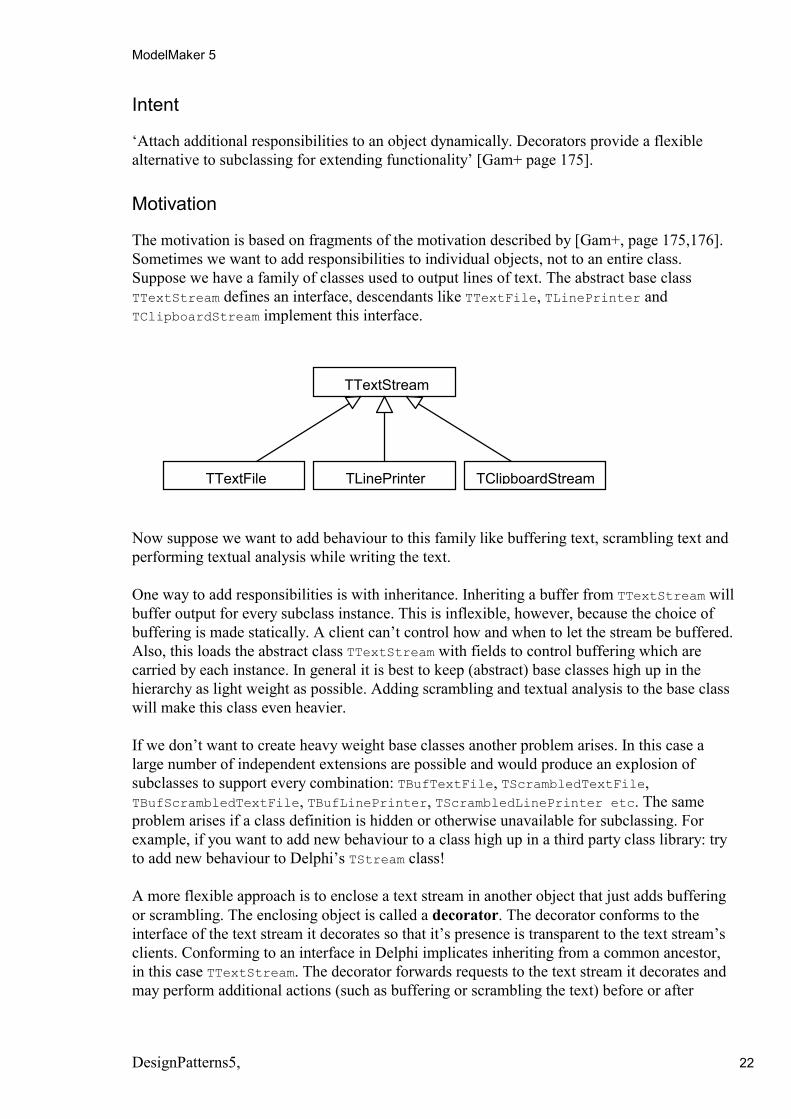
The motivation is based on fragments of the motivation described by [Gam+, page 175,176]. Sometimes we want to add responsibilities to individual objects, not to an entire class. Suppose we have a family of classes used to output lines of text. The abstract base class TTextStream defines an interface, descendants like TTextFile, TLinePrinter and TClipboardStream implement this interface.
Now suppose we want to add behaviour to this family like buffering text, scrambling text and performing textual analysis while writing the text. One way to add responsibilities is with inheritance. Inheriting a buffer from TTextStream will buffer output for every subclass instance. This is inflexible, however, because the choice of buffering is made statically. A client can’t control how and when to let the stream be buffered. Also, this loads the abstract class TTextStream with fields to control buffering which are carried by each instance. In general it is best to keep (abstract) base classes high up in the hierarchy as light weight as possible. Adding scrambling and textual analysis to the base class will make this class even heavier. If we don’t want to create heavy weight base classes another problem arises. In this case a large number of independent extensions are possible and would produce an explosion of subclasses to support every combination: TBufTextFile, TScrambledTextFile, TBufScrambledTextFile, TBufLinePrinter, TScrambledLinePrinter etc. The same problem arises if a class definition is hidden or otherwise unavailable for subclassing. For example, if you want to add new behaviour to a class high up in a third party class library: try to add new behaviour to Delphi’s TStream class! A more flexible approach is to enclose a text stream in another object that just adds buffering or scrambling. The enclosing object is called a decorator. The decorator conforms to the interface of the text stream it decorates so that it’s presence is transparent to the text stream’s clients. Conforming to an interface in Delphi implicates inheriting from a common ancestor, in this case TTextStream. The decorator forwards requests to the text stream it decorates and may perform additional actions (such as buffering or scrambling the text) before or after
TTextStream
TClipboardStreamTLinePrinterTTextFile
ModelMaker 5
DesignPatterns5, ������ 23
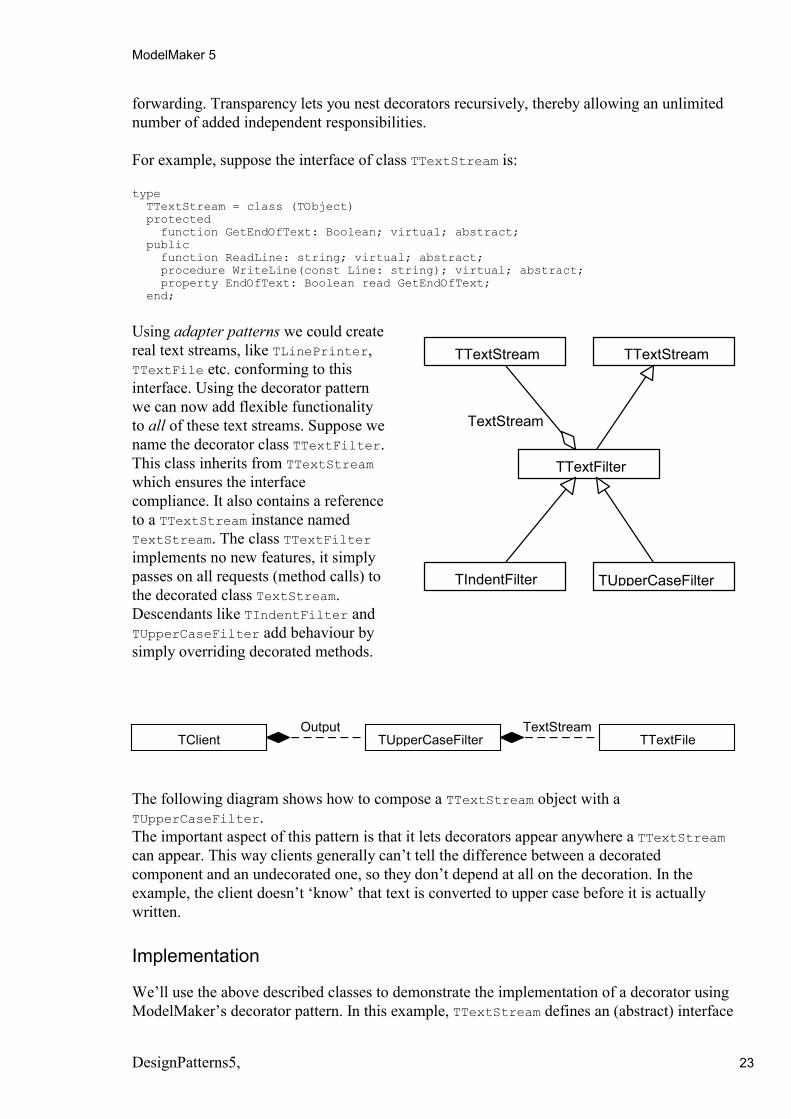
forwarding. Transparency lets you nest decorators recursively, thereby allowing an unlimited number of added independent responsibilities. For example, suppose the interface of class TTextStream is: type TTextStream = class (TObject) protected function GetEndOfText: Boolean; virtual; abstract; public function ReadLine: string; virtual; abstract; procedure WriteLine(const Line: string); virtual; abstract; property EndOfText: Boolean read GetEndOfText; end;
Using adapter patterns we could create real text streams, like TLinePrinter, TTextFile etc. conforming to this interface. Using the decorator pattern we can now add flexible functionality to all of these text streams. Suppose we name the decorator class TTextFilter. This class inherits from TTextStream which ensures the interface compliance. It also contains a reference to a TTextStream instance named TextStream. The class TTextFilter implements no new features, it simply passes on all requests (method calls) to the decorated class TextStream. Descendants like TIndentFilter and TUpperCaseFilter add behaviour by simply overriding decorated methods.
The following diagram shows how to compose a TTextStream object with a TUpperCaseFilter. The important aspect of this pattern is that it lets decorators appear anywhere a TTextStream can appear. This way clients generally can’t tell the difference between a decorated component and an undecorated one, so they don’t depend at all on the decoration. In the example, the client doesn’t ‘know’ that text is converted to upper case before it is actually written.
Implementation
We’ll use the above described classes to demonstrate the implementation of a decorator using ModelMaker’s decorator pattern. In this example, TTextStream defines an (abstract) interface
TTextStream
TTextFilter
TTextStream
TextStream
TIndentFilter TUpperCaseFilter
TClient TUpperCaseFilter TTextFileOutput TextStream
ModelMaker 5
DesignPatterns5, ������ 24
which is decorated by a TTextFilter class. ModelMaker’s decorator pattern will create the TTextFilter class and let you select which methods to decorate. Here’s the implementation: type TTextStream = class (TObject) protected function GetEndOfText: Boolean; virtual; abstract; public function ReadLine: string; virtual; abstract; procedure WriteLine(const Line: string); virtual; abstract; property EndOfText: Boolean read GetEndOfText; end; TTextFilter = class (TTextStream) private FOwnsStream: Boolean; FTextStream: TTextStream; protected function GetEndOfText: Boolean; override; function GetTextStream: TTextStream; procedure SetTextStream(Value: TTextStream); public constructor Create(ATextStream: TTextStream; AOwnsStream: Boolean); destructor Destroy; override; function ReadLine: string; override; procedure WriteLine(const Line: string); override; property OwnsStream: Boolean read FOwnsStream write FOwnsStream; property TextStream: TTextStream read GetTextStream write SetTextStream; end;
In this interface, notice:
• The property TextStream which contains the reference to the decorated text stream. This property uses read and write access methods. This provides flexibility for descendants. A certain kind of proxy pattern, as described in [Gam+, pages 207], has the same structure as a decorator pattern. By using a read access method the pattern can be used to implement this kind of proxy pattern as well.
• The property OwnsStream which controls ownership of the property TextStream. You’ll see in the implementation that a TTextFilter will free an owned text stream if OwnsStream is set True. This helps in cleaning up structures using decorators.
• Both TextStream and OwnsStream are passed in the constructor Create. This is optional. • The overridden methods ReadLine, WriteLine and GetEndOfText. These are the methods
that implement the actual decoration. Now let’s have a look at the implementation: constructor TTextFilter.Create(ATextStream: TTextStream; AOwnsStream: Boolean); begin inherited Create; TextStream := ATextStream; OwnsStream := AOwnsStream; end; destructor TTextFilter.Destroy; begin TextStream := nil; inherited Destroy; end; function TTextFilter.GetEndOfText: Boolean; begin Result := TextStream.GetEndOfText;
ModelMaker 5
DesignPatterns5, ������ 25
end; function TTextFilter.GetTextStream: TTextStream; begin Result := FTextStream; end; function TTextFilter.ReadLine: string; begin Result := TextStream.ReadLine; end; procedure TTextFilter.SetTextStream(Value: TTextStream); begin if Value <> FTextStream then begin if OwnsTextStream then FTextStream.Free; FTextStream := Value; end; end; procedure TTextFilter.WriteLine(const Line: string); begin TextStream.WriteLine(Line); end;
Some interesting aspects in this implementation are:
• The decoration behaviour: methods ReadLine, WriteLine and GetEndOfText simply call the corresponding methods in TextStream.
• The SetTextStream method which takes care of actually freeing owned text streams before assigning a new value.
• The destructor Destroy uses this feature by setting TextStream := nil which will cause SetTextStream to free the current text stream if it’s owned. It’s really easy to create a text filter converting text to uppercase now, using ModelMaker’s method override wizard: type TUpperCaseFilter = class (TTextFilter) public » function ReadLine: string; override; » procedure WriteLine(const Line: string); override; end; implementation function TUpperCaseFilter.ReadLine: string; begin » Result := UpperCase(inherited ReadLine); end; procedure TUpperCaseFilter.WriteLine(const Line: string); begin » inherited WriteLine(UpperCase(Line)); end;
This filter could now be used to decorate any text stream target: function TClient.CreateOutput: TTextStream; begin » { create the base stream, depending on some setting } » case Destination of » dsFile: Result := TTextFile.Create(GetFileName, fmCreate);
ModelMaker 5
DesignPatterns5, ������ 26
» dsPrinter: Result := TLinePrinter.Create; » end; » { decide whether to use decorator or not, also depending on some setting » Note that it NOT important whether we decorate a LinePrinter or TextFile } » if ConvertToUpperCase then » Result := TUpperCaseFilter.Create(Result, True); end; procedure TClient.ListContents; var T: TTextStream; begin T := CreateOutput; { At this point, we don't know if we're talking to a decorated output or not } try { list contents to T } T.WriteLine('Contents'); finally T.Free; end; end;
It’s not spectacular, but it demonstrates the implementation and use of a decorator. You could imagine far more complex functionality to add using decorators, such as buffering, scrambling textual analysis etc.
How to apply the pattern
To apply a decorator pattern: 1. You must have created the class to decorate manually, including the interface to be
decorated: TTextStream and it’s methods in the motivation and implementation example. 2. In the Classes view, select the class to decorate. 3. In the Patterns view, click the button ‘Add Decorator Pattern’. 4. The decorator editor will appear. After you made your choices, such as the decorator class
name, and you click OK, the pattern will be applied.
ModelMaker 5
DesignPatterns5, ������ 27
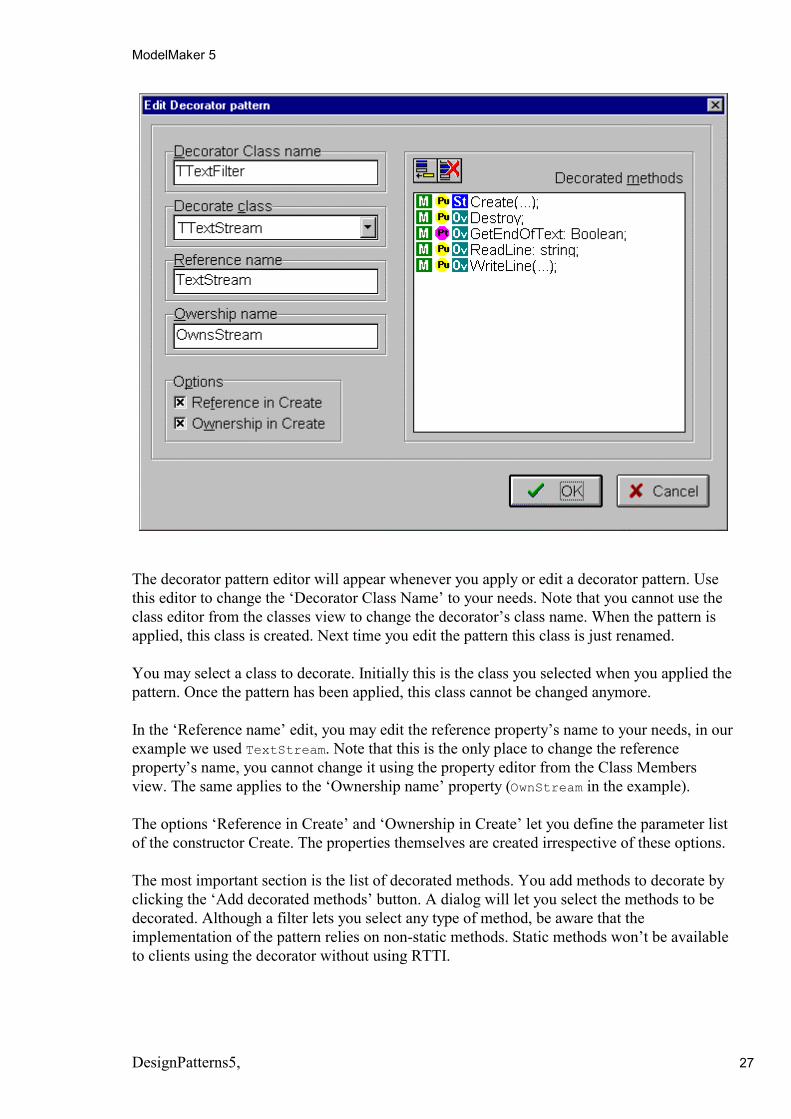
The decorator pattern editor will appear whenever you apply or edit a decorator pattern. Use this editor to change the ‘Decorator Class Name’ to your needs. Note that you cannot use the class editor from the classes view to change the decorator’s class name. When the pattern is applied, this class is created. Next time you edit the pattern this class is just renamed. You may select a class to decorate. Initially this is the class you selected when you applied the pattern. Once the pattern has been applied, this class cannot be changed anymore. In the ‘Reference name’ edit, you may edit the reference property’s name to your needs, in our example we used TextStream. Note that this is the only place to change the reference property’s name, you cannot change it using the property editor from the Class Members view. The same applies to the ‘Ownership name’ property (OwnStream in the example). The options ‘Reference in Create’ and ‘Ownership in Create’ let you define the parameter list of the constructor Create. The properties themselves are created irrespective of these options. The most important section is the list of decorated methods. You add methods to decorate by clicking the ‘Add decorated methods’ button. A dialog will let you select the methods to be decorated. Although a filter lets you select any type of method, be aware that the implementation of the pattern relies on non-static methods. Static methods won’t be available to clients using the decorator without using RTTI.
ModelMaker 5
DesignPatterns5, ������ 28
How the pattern acts on changes
The Decorator Pattern will reflect the following changes in your model: • Changes in attributes (parameter list, method kind etc.) of a decorated method will be
propagated to the method header and implementation code. • Deleting a decorated method in the decorated class, will automatically remove the
corresponding method in the decorator class. If you edit the pattern from the patterns view, you may add new methods to decorate or remove decorated methods, edit the decorator class’s name and the property names. The pattern will reflect the changes to the model. The pattern will be invalidated if you delete the decorated class, since there’s nothing to decorate anymore. If you delete the pattern, or it is invalidated, the pattern will delete the decorator class, including all it’s members. Any classes descending from the decorator class will be untouched, although their ancestors will have changed.
Lock pattern
Origin
ModelMaker’s lock pattern is based on Delphi’s update locking mechanism in the TStrings class.
Intent
Provide a mechanism to temporarily lock some aspects of a class.
Motivation
Often you’ll find that a object dispatches notifications as a result of changing it’s internal state. Clients will handle these notifications to synchronise with the object. If multiple changes are to be applied at once, this will result in multiple notifications and subsequent synchronisations. The lock pattern let’s you temporarily lock an aspect of the class, avoiding unneeded notifications. Locking can be applied nested. Consider for example a TBag class which implements collection like behaviour. TBag dispatches an OnChange event each time something changes. If we wanted to add multiple objects to a bag, this would result in multiple change notifications. A GUI control wiring the OnChange event would have to be repainted each time, resulting in a poor performance. The lock pattern enables locking the bag before adding the objects. When the objects are added, the bag is unlocked again, which will result in a single dispatch of OnChange. The advantage
ModelMaker 5
DesignPatterns5, ������ 29
of using a lock pattern rather than setting a Boolean flag, for example FUpdating, is that calls to Lock and Unlock can be nested.
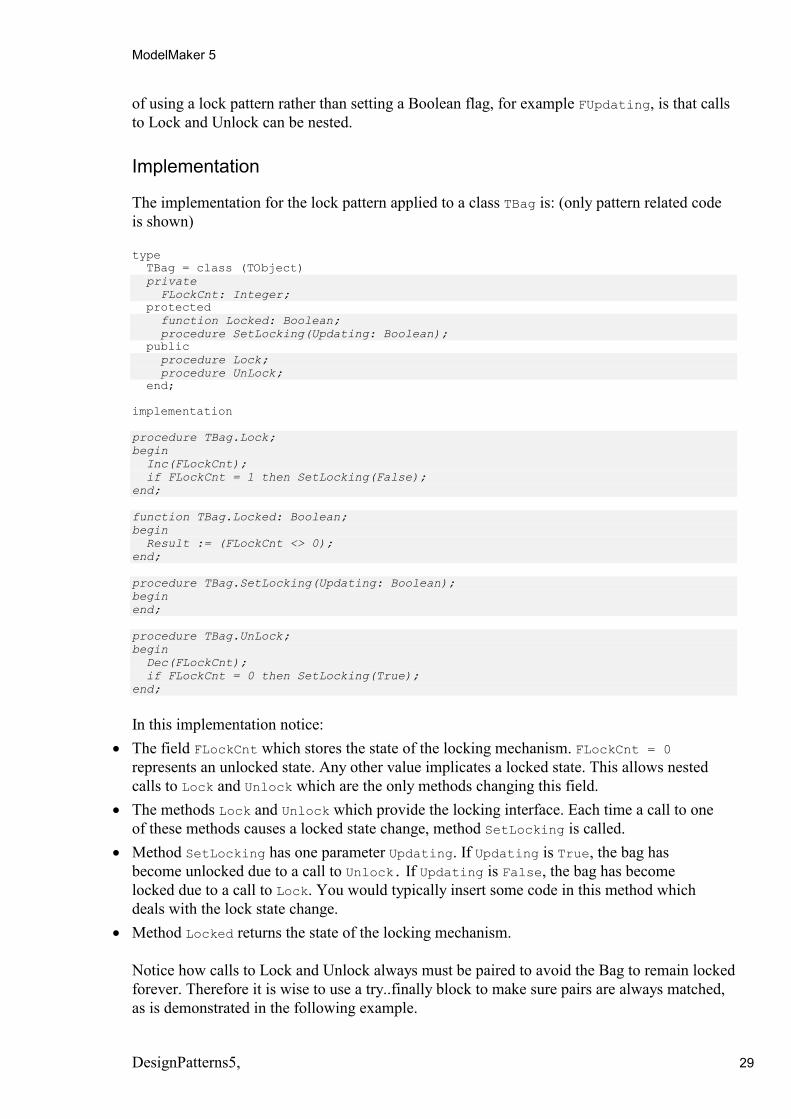
Implementation
The implementation for the lock pattern applied to a class TBag is: (only pattern related code is shown) type TBag = class (TObject) private FLockCnt: Integer; protected function Locked: Boolean; procedure SetLocking(Updating: Boolean); public procedure Lock; procedure UnLock; end; implementation procedure TBag.Lock; begin Inc(FLockCnt); if FLockCnt = 1 then SetLocking(False); end; function TBag.Locked: Boolean; begin Result := (FLockCnt <> 0); end; procedure TBag.SetLocking(Updating: Boolean); begin end; procedure TBag.UnLock; begin Dec(FLockCnt); if FLockCnt = 0 then SetLocking(True); end;
In this implementation notice:
• The field FLockCnt which stores the state of the locking mechanism. FLockCnt = 0 represents an unlocked state. Any other value implicates a locked state. This allows nested calls to Lock and Unlock which are the only methods changing this field.
• The methods Lock and Unlock which provide the locking interface. Each time a call to one of these methods causes a locked state change, method SetLocking is called.
• Method SetLocking has one parameter Updating. If Updating is True, the bag has become unlocked due to a call to Unlock. If Updating is False, the bag has become locked due to a call to Lock. You would typically insert some code in this method which deals with the lock state change.
• Method Locked returns the state of the locking mechanism. Notice how calls to Lock and Unlock always must be paired to avoid the Bag to remain locked forever. Therefore it is wise to use a try..finally block to make sure pairs are always matched, as is demonstrated in the following example.
ModelMaker 5
DesignPatterns5, ������ 30
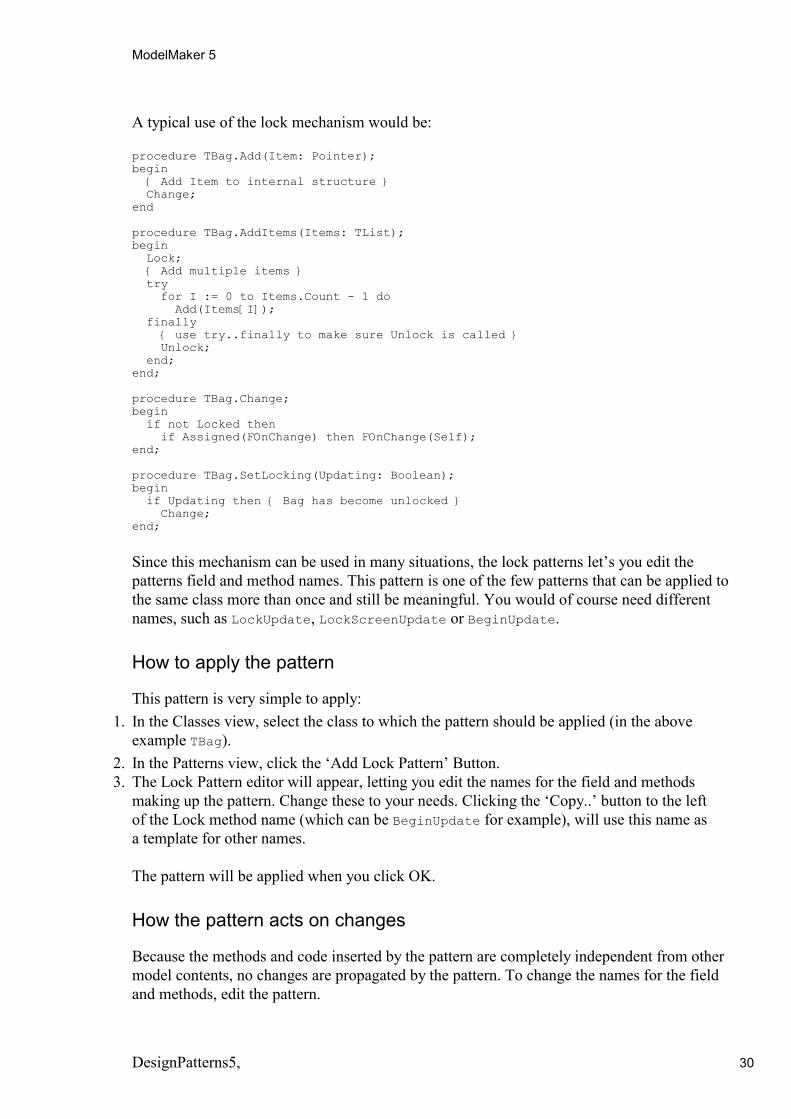
A typical use of the lock mechanism would be: procedure TBag.Add(Item: Pointer); begin { Add Item to internal structure } Change; end procedure TBag.AddItems(Items: TList); begin Lock; { Add multiple items } try for I := 0 to Items.Count - 1 do Add(Items[I]); finally { use try..finally to make sure Unlock is called } Unlock; end; end; procedure TBag.Change; begin if not Locked then if Assigned(FOnChange) then FOnChange(Self); end; procedure TBag.SetLocking(Updating: Boolean); begin if Updating then { Bag has become unlocked } Change; end;
Since this mechanism can be used in many situations, the lock patterns let’s you edit the patterns field and method names. This pattern is one of the few patterns that can be applied to the same class more than once and still be meaningful. You would of course need different names, such as LockUpdate, LockScreenUpdate or BeginUpdate.
How to apply the pattern
This pattern is very simple to apply: 1. In the Classes view, select the class to which the pattern should be applied (in the above
example TBag). 2. In the Patterns view, click the ‘Add Lock Pattern’ Button. 3. The Lock Pattern editor will appear, letting you edit the names for the field and methods
making up the pattern. Change these to your needs. Clicking the ‘Copy..’ button to the left of the Lock method name (which can be BeginUpdate for example), will use this name as a template for other names. The pattern will be applied when you click OK.
How the pattern acts on changes
Because the methods and code inserted by the pattern are completely independent from other model contents, no changes are propagated by the pattern. To change the names for the field and methods, edit the pattern.
ModelMaker 5
DesignPatterns5, ������ 31
If you delete the pattern, it will delete the inserted members. If you delete the class the pattern is applied to, the pattern is invalidated.
Visitor pattern
Origin
ModelMaker’s Visitor pattern is based on the Visitor pattern as described in [Gam+, pages 331..344]. The implementation in Delphi’s Object Pascal language is ours.
Intent
‘Represents an operation to be performed on the elements of an object structure. Visitor lets you define a new operation without changing the classes of the elements on which it operates’ [Gam+, page 331].
Motivation
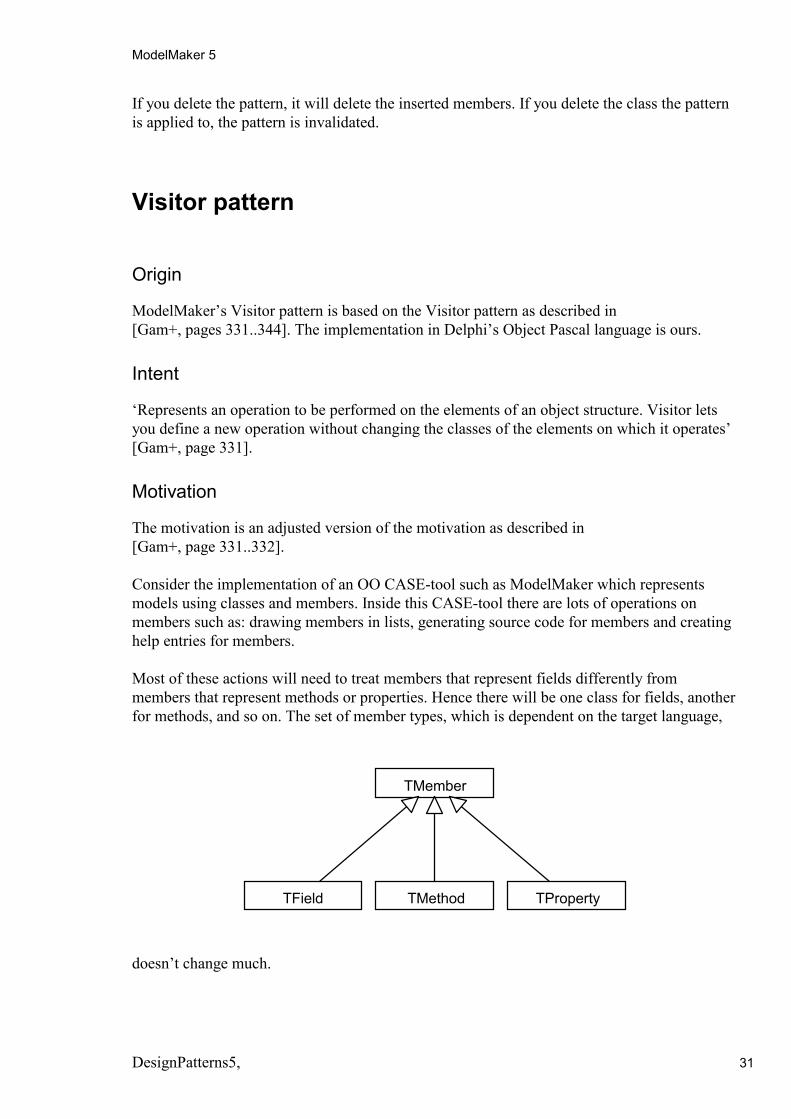
The motivation is an adjusted version of the motivation as described in [Gam+, page 331..332]. Consider the implementation of an OO CASE-tool such as ModelMaker which represents models using classes and members. Inside this CASE-tool there are lots of operations on members such as: drawing members in lists, generating source code for members and creating help entries for members. Most of these actions will need to treat members that represent fields differently from members that represent methods or properties. Hence there will be one class for fields, another for methods, and so on. The set of member types, which is dependent on the target language,
doesn’t change much.
TMember
TField TMethod TProperty

ModelMaker 5
DesignPatterns5, ������ 32
This diagram shows part of the member hierarchy. The problem here is that distributing all these operations across the various member classes leads to a system that’s hard to understand, maintain and change. It will be confusing to have drawing behaviour code mixed with code generation or help file generation code. Moreover adding a new operation usually will have to be implemented in all off the member classes, which will spread the related code around and requires recompiling all of these classes. It would be better if each new operation could be added separately, and the member classes were independent of the operations that apply to them. We can have both by packaging related operations from each class in a separate object, called a visitor, and passing it to members of a class’s member list as it’s traversed. When an member ‘accepts’ the visitor, it sends a request to the visitor that encodes the member’s class. It also includes the member as an argument. The visitor will then execute the operation for that member. For example, a code generator that didn’t use visitors might generate source code for a member by calling that member’s TMember.WriteInterfaceCode(Output: TStream); abstract method. Each member would implement WriteInterfaceCode by writing appropriate code to the output. If the generator created code using visitors, then it would create a TInterfaceCodeVisitor object and call the AcceptVisitor method on the member list with that visitor object as argument. Each member would implement AcceptVisitor by calling back on the visitor: a field calls the VisitField method on the visitor, a method calls VisitMethod. What used to be the WriteInterfaceCode operation in class TField, is now the VisitField method call on TInterfaceCodeVisitor. To make visitors work for more than just interface code generation, we need an abstract parent class TMemberVisitor for all visitors of a member list. TMemberVisitor must declare a method for each member class. An application that needs to generate HTML style output for members, will define a new subclass of TMemberVisitor and will no longer need to add application specific code to the member classes. The visitor pattern encapsulates the operations.
With the Visitor pattern, you define two class hierarchies: one for the elements being operated on (the TMember hierarchy) and one for the visitors that define operations on the elements (the TMemberVisitor hierarchy). You create a new operation by adding a subclass to the visitor class hierarchy. As long as we don’t have to add new member types, we can simply add new functionality by defining new TMemberVisitor subclasses. Refer to [Gam+] for applicability and more examples of this highly interesting pattern.
TMemberVisitor
TMemberDrawVisitor TMemberHelpVisitor TCodeGenerationVisitor

ModelMaker 5
DesignPatterns5, ������ 33
Implementation
The following code demonstrates the implementation of the visitor pattern applied to the TMember example described above. type TMember = class (TObject) public procedure AcceptMemberVisitor(Visitor: TMemberVisitor); virtual; end; TField = class (TMember) public procedure AcceptMemberVisitor(Visitor: TMemberVisitor); override; end; TMethod = class (TMember) public procedure AcceptMemberVisitor(Visitor: TMemberVisitor); override; end; TProperty = class (TMember) public procedure AcceptMemberVisitor(Visitor: TMemberVisitor); override; end; TMemberVisitor = class (TObject) public procedure VisitField(Instance: TField); virtual; procedure VisitMember(Instance: TMember); virtual; procedure VisitMethod(Instance: TMethod); virtual; procedure VisitProperty(Instance: TProperty); virtual; end; implementation { TMember } procedure TMember.AcceptMemberVisitor(Visitor: TMemberVisitor); begin Visitor.VisitMember(Self); end; { TField } procedure TField.AcceptMemberVisitor(Visitor: TMemberVisitor); begin Visitor.VisitField(Self); end; { TMethod } procedure TMethod.AcceptMemberVisitor(Visitor: TMemberVisitor); begin Visitor.VisitMethod(Self); end; { TProperty } procedure TProperty.AcceptMemberVisitor(Visitor: TMemberVisitor); begin Visitor.VisitProperty(Self); end; { TMemberVisitor } procedure TMemberVisitor.VisitField(Instance: TField); begin end; procedure TMemberVisitor.VisitMember(Instance: TMember); begin end;
ModelMaker 5
DesignPatterns5, ������ 34
procedure TMemberVisitor.VisitMethod(Instance: TMethod); begin end; procedure TMemberVisitor.VisitProperty(Instance: TProperty); begin end;
In this implementation notice:
• The AcceptMemberVisitor methods in TMember, TField, TMethod and TProperty. These methods are inserted by the pattern and make up the first half of the pattern. These methods are fully implemented.
• The VisitMember, VisitField etc. methods in the TMemberVisitor class. These methods make up the second half of the pattern. Since TMemberVisitor is an abstract class, these methods are implemented by doing nothing. The useful implementations must come from descendant visitor classes. You might want to add code like:
procedure TMemberVisitor.VisitField(Instance: TField); begin » VisitMember(Instance); end;
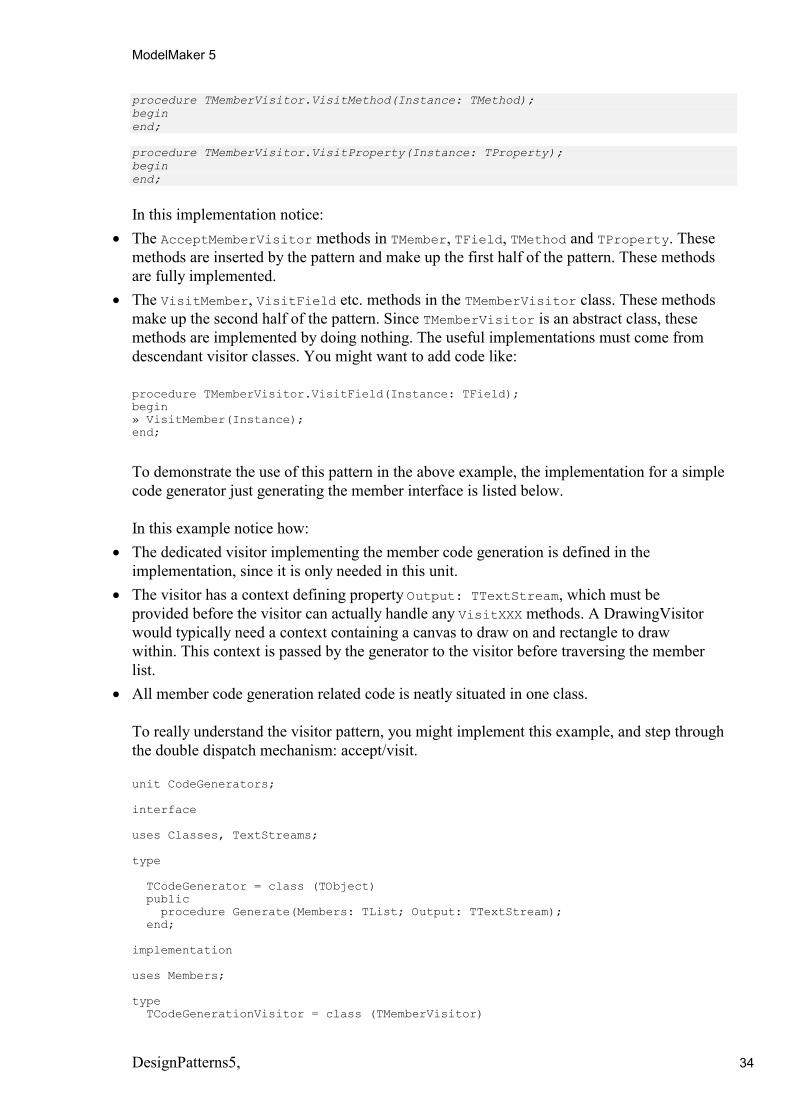
To demonstrate the use of this pattern in the above example, the implementation for a simple code generator just generating the member interface is listed below. In this example notice how:
• The dedicated visitor implementing the member code generation is defined in the implementation, since it is only needed in this unit.
• The visitor has a context defining property Output: TTextStream, which must be provided before the visitor can actually handle any VisitXXX methods. A DrawingVisitor would typically need a context containing a canvas to draw on and rectangle to draw within. This context is passed by the generator to the visitor before traversing the member list.
• All member code generation related code is neatly situated in one class. To really understand the visitor pattern, you might implement this example, and step through the double dispatch mechanism: accept/visit. unit CodeGenerators; interface uses Classes, TextStreams; type TCodeGenerator = class (TObject) public procedure Generate(Members: TList; Output: TTextStream); end; implementation uses Members; type TCodeGenerationVisitor = class (TMemberVisitor)

ModelMaker 5
DesignPatterns5, ������ 35
private FOutput: TTextStream; public procedure VisitField(Instance: TField); override; procedure VisitMethod(Instance: TMethod); override; procedure VisitProperty(Instance: TProperty); override; property Output: TTextStream read FOutput write FOutput; end; { TCodeGenerationVisitor } procedure TCodeGenerationVisitor.VisitField(Instance: TField); begin Output.WriteLnFmt(' %s: %s;', [Instance.Name, Instance.DataName]); end; procedure TCodeGenerationVisitor.VisitMethod(Instance: TMethod); var MKStr, DTStr: string; begin case Instance.MethodKind of mkConstructor: MKStr := 'constructor'; mkDestructor: MKStr := 'destructor'; mkProcedure: MKStr := 'procedure'; mkFuntion: MKStr := 'function'; end; if Instance.MethodKind = mkFunction then DTStr := ': ' + Instance.DataName else DTStr := ''; { for sure this is not complete, but is demonstrates that methods get generated } Output.WriteLnFmt(' %s %s%s%s;' [MKStr, Instance.Name, Instance.Parameters, DTStr]); end; procedure TCodeGenerationVisitor.VisitProperty(Instance: TProperty); begin Output.WriteLnFmt(' property %s: %s read %s write %s;', [Instance.Name, Instance.DataName, Instance.ReadSpecifier, Instance.WriteSpecifier]); end; { TCodeGenerator } procedure TCodeGenerator.Generate(Members: TList; Output: TTextStream); var I: Integer; begin { write the class definition } Output.WriteLine('TSample = class (TObject)'); { now add the member's interfaces using a code visitor } Visitor := TCodeGenerationVisitor.Create; try { provide context to visitor, so that it can handle VisitXXX methods } for I := 0 to Members.Count - 1 do { here the miracle happens: Accept will invoke VisitField, VisitMethod etc. to be called on the visitor } TMember(Members[I]).AcceptMemberVisitor(Visitor); finally Visitor.Free; end; { write the end of the class's interface definition } Output.WriteLine('end;'); end;
How to apply the pattern
To apply the pattern:
ModelMaker 5
DesignPatterns5, ������ 36
1. In the Classes view, create the class to be visited, TMember in the motivation example, and perhaps it’s descendant classes.
2. In the Classes view, create a visitor class, TMemberVisitor in the motivation example, containing no members.
3. Select the class to be visited, to provide an initial context to the pattern. 4. In the Patterns view, click the button ‘Add Visitor Pattern’. 5. The visitor editor dialog will appear, in which you define the participant classes. 6. When you click OK, the pattern will be applied.
Usually the visitor class is not a descendant of the visited class. Note that it is possible to define visitor and visited class to be the same class (although this does not seem practical).
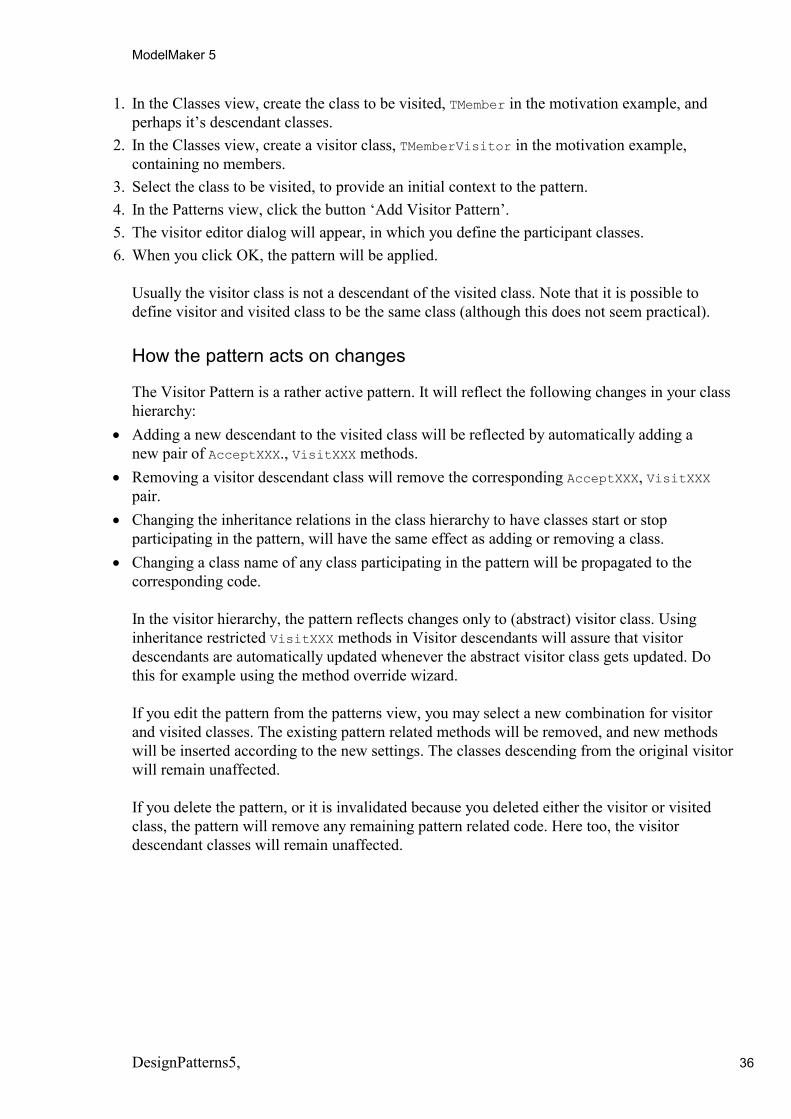
How the pattern acts on changes
The Visitor Pattern is a rather active pattern. It will reflect the following changes in your class hierarchy:
• Adding a new descendant to the visited class will be reflected by automatically adding a new pair of AcceptXXX., VisitXXX methods.
• Removing a visitor descendant class will remove the corresponding AcceptXXX, VisitXXX pair.
• Changing the inheritance relations in the class hierarchy to have classes start or stop participating in the pattern, will have the same effect as adding or removing a class.
• Changing a class name of any class participating in the pattern will be propagated to the corresponding code. In the visitor hierarchy, the pattern reflects changes only to (abstract) visitor class. Using inheritance restricted VisitXXX methods in Visitor descendants will assure that visitor descendants are automatically updated whenever the abstract visitor class gets updated. Do this for example using the method override wizard. If you edit the pattern from the patterns view, you may select a new combination for visitor and visited classes. The existing pattern related methods will be removed, and new methods will be inserted according to the new settings. The classes descending from the original visitor will remain unaffected. If you delete the pattern, or it is invalidated because you deleted either the visitor or visited class, the pattern will remove any remaining pattern related code. Here too, the visitor descendant classes will remain unaffected.

ModelMaker 5
DesignPatterns5, ������ 37
Observer pattern
Origin
ModelMaker’s Observer pattern is based on the Observer pattern as described in [Gam+, pages 293..303]. The implementation in Delphi’s Object Pascal language is ours.
Intent
‘Define a one-to-many dependency between objects so that when one object changes state, all its dependants are notified and updated automatically’ [Gam+, p293]
Motivation
‘A common side-effect of partitioning a system into a collection of co-operating classes, is the need to maintain consistency between related objects. You don’t want to achieve consistency by making the classes tightly coupled, because that reduces their reusability’ [Gam+, p293]. Delphi’s events (which are actually method pointers) let you deal with this problem in a structured manner. Events let you decouple classes that need to co-operate. For example: The TButton.OnClick event is dispatched ‘to whom it may concern’, the button does not store a (typed) reference to the class handling the event. In fact the event might not even be handled at all. In terms of the observer pattern the object dispatching an event is called subject, the object handling the event is called observer. So Delphi’s events take care of decoupling classes, but what if you want to handle an event in more than one place? ‘An observer pattern describes how to establish one-to-many notifications. A subject may have any number of observers. All observers are notified whenever the subject undergoes a change in state (such as a button being clicked). In response each observer may query the subject to synchronise its state with the subject’s state’ [Gam+, p 294]. ‘This kind of interaction is also known as publish-subscribe, the subject is the publisher of notifications. It sends out these notifications without having to know who it’s observers are. Any number of observers can subscribe to receive notifications’ [Gam+, p 294].
Implementation
The implementation of the observer pattern is taking advantage of Delphi’s events to deal with decoupling classes. The one-to-many aspect is implemented by registering and un-registering dedicated observers. The one-to-many mechanism is actually implemented by iterating over the list of observers. A pleasant side-effect of ModelMaker’s Observer Pattern is that it will create an observer class which is a TComponent descendant that can be added to the component palette. This allows you to use the Object Inspector to create event handlers for the observers.
ModelMaker 5
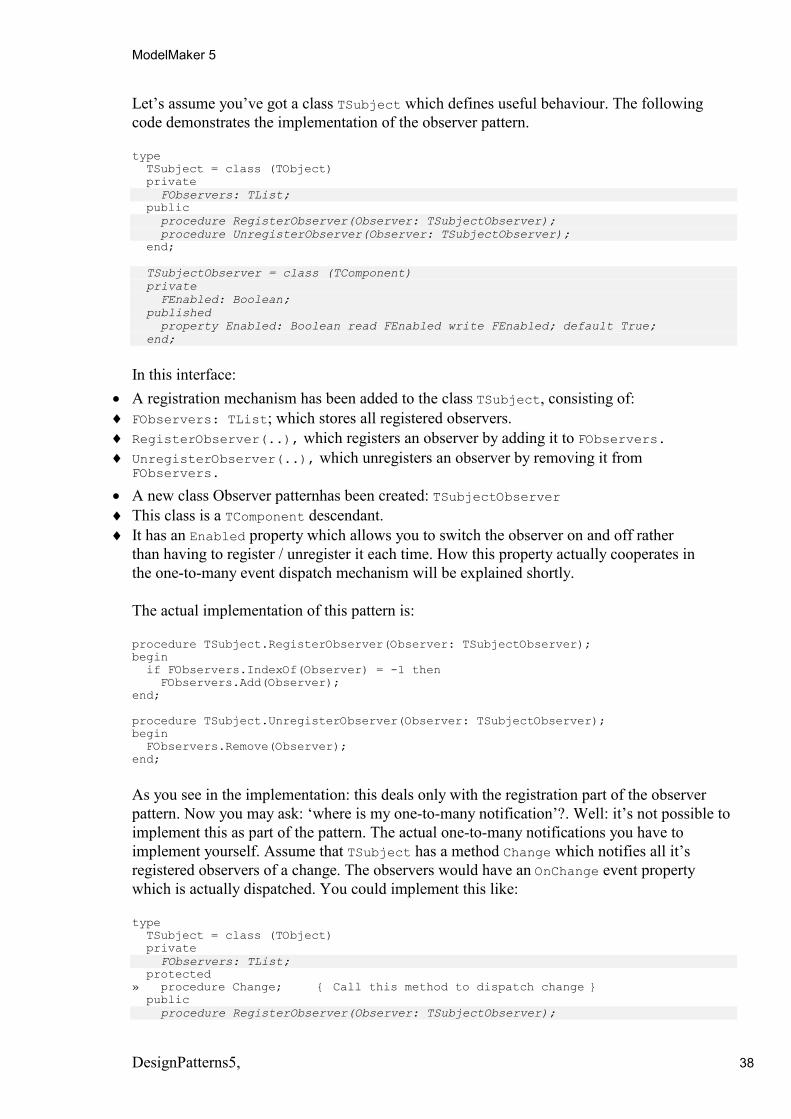
DesignPatterns5, ������ 38
Let’s assume you’ve got a class TSubject which defines useful behaviour. The following code demonstrates the implementation of the observer pattern. type TSubject = class (TObject) private FObservers: TList; public procedure RegisterObserver(Observer: TSubjectObserver); procedure UnregisterObserver(Observer: TSubjectObserver); end; TSubjectObserver = class (TComponent) private FEnabled: Boolean; published property Enabled: Boolean read FEnabled write FEnabled; default True; end;
In this interface:
• A registration mechanism has been added to the class TSubject, consisting of: ♦ FObservers: TList; which stores all registered observers. ♦ RegisterObserver(..), which registers an observer by adding it to FObservers. ♦ UnregisterObserver(..), which unregisters an observer by removing it from
FObservers. • A new class Observer patternhas been created: TSubjectObserver ♦ This class is a TComponent descendant. ♦ It has an Enabled property which allows you to switch the observer on and off rather
than having to register / unregister it each time. How this property actually cooperates in the one-to-many event dispatch mechanism will be explained shortly. The actual implementation of this pattern is: procedure TSubject.RegisterObserver(Observer: TSubjectObserver); begin if FObservers.IndexOf(Observer) = -1 then FObservers.Add(Observer); end; procedure TSubject.UnregisterObserver(Observer: TSubjectObserver); begin FObservers.Remove(Observer); end;
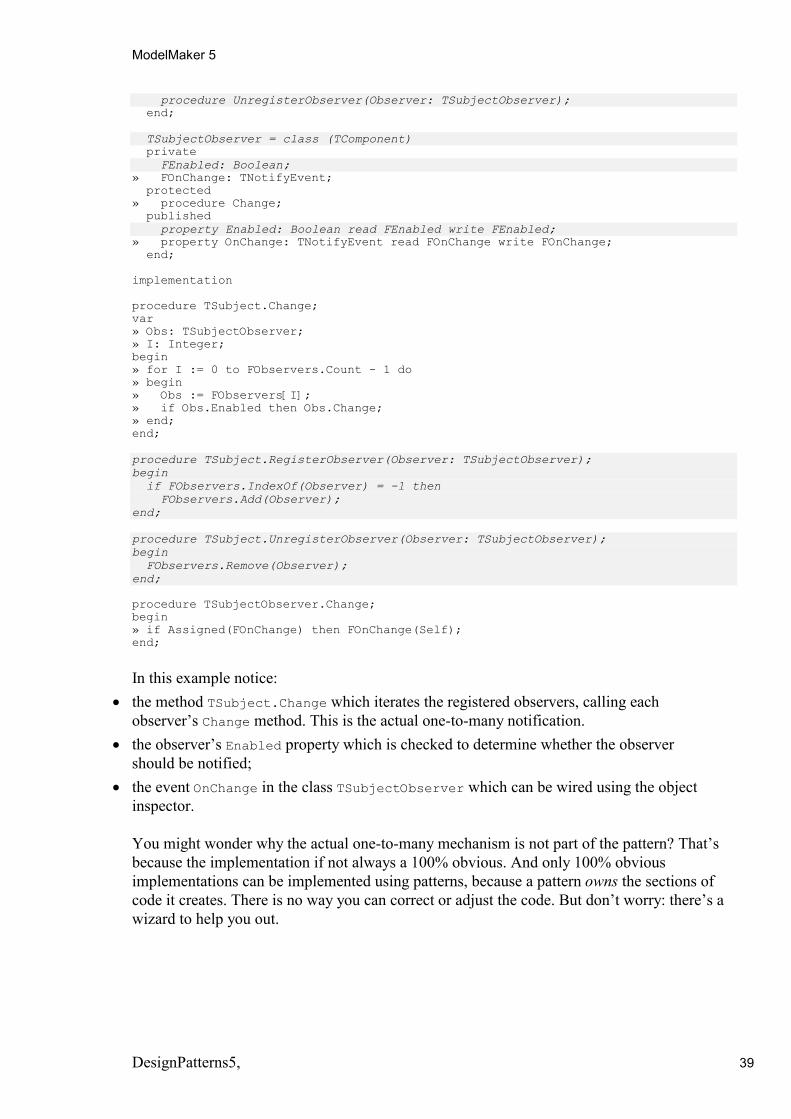
As you see in the implementation: this deals only with the registration part of the observer pattern. Now you may ask: ‘where is my one-to-many notification’?. Well: it’s not possible to implement this as part of the pattern. The actual one-to-many notifications you have to implement yourself. Assume that TSubject has a method Change which notifies all it’s registered observers of a change. The observers would have an OnChange event property which is actually dispatched. You could implement this like: type TSubject = class (TObject) private FObservers: TList; protected » procedure Change; { Call this method to dispatch change } public procedure RegisterObserver(Observer: TSubjectObserver);
ModelMaker 5
DesignPatterns5, ������ 39
procedure UnregisterObserver(Observer: TSubjectObserver); end; TSubjectObserver = class (TComponent) private FEnabled: Boolean; » FOnChange: TNotifyEvent; protected » procedure Change; published property Enabled: Boolean read FEnabled write FEnabled; » property OnChange: TNotifyEvent read FOnChange write FOnChange; end; implementation procedure TSubject.Change; var » Obs: TSubjectObserver; » I: Integer; begin » for I := 0 to FObservers.Count - 1 do » begin » Obs := FObservers[I]; » if Obs.Enabled then Obs.Change; » end; end; procedure TSubject.RegisterObserver(Observer: TSubjectObserver); begin if FObservers.IndexOf(Observer) = -1 then FObservers.Add(Observer); end; procedure TSubject.UnregisterObserver(Observer: TSubjectObserver); begin FObservers.Remove(Observer); end; procedure TSubjectObserver.Change; begin » if Assigned(FOnChange) then FOnChange(Self); end;
In this example notice:
• the method TSubject.Change which iterates the registered observers, calling each observer’s Change method. This is the actual one-to-many notification.
• the observer’s Enabled property which is checked to determine whether the observer should be notified;
• the event OnChange in the class TSubjectObserver which can be wired using the object inspector. You might wonder why the actual one-to-many mechanism is not part of the pattern? That’s because the implementation if not always a 100% obvious. And only 100% obvious implementations can be implemented using patterns, because a pattern owns the sections of code it creates. There is no way you can correct or adjust the code. But don’t worry: there’s a wizard to help you out.
ModelMaker 5
DesignPatterns5, ������ 40
Transforming events using the Observer Wizard
Since it often occurs in the middle of a design process that you decide you need to transform a ‘one-to-one’ event mechanism into a ‘one-to-many’, ModelMaker has a wizard which does this transformation for you. This wizard will:
• Apply an observer pattern to the currently selected class. • Transform the events in this class into one-to-many events dispatched by the observer
class, much like the Change method and OnChange events in the above example. This wizard is demonstrated in Patterns example, Transforming events using the Observer Wizard, page 49.
How to apply the pattern
This pattern is very simple to apply: 1. In the Classes view, make sure the class TComponent exists, since it will be used as
ancestor for the observer class. 2. Select the class to which the pattern should be applied. 3. In the Patterns view, click the ‘Add Observer Pattern’ button. The pattern will be applied. 4. The Class editor dialog will appear, containing the newly created observer class. Change
the name of the observer class and the ancestor to any name that suits you best.
How the pattern acts on changes
The only change the pattern reflects, is a change in the observer class’s name. The changed class name to will be propagated to the registration mechanism methods: RegisterObserver and UnregisterObserver. Editing the pattern’s attributes, is the same as editing the observer class’s attributes. If you remove the pattern, the registration mechanism and the observer class will be removed. Be careful doing this, since the observer class may contain code you added yourself. If you delete the subject class, the pattern will invalidate itself, and remove the observer class too. The observer class is owned by the pattern, and can only be deleted by deleting (or invalidating) the pattern.
Reference Count pattern
Origin
ModelMaker’s Observer pattern is based on the Lock pattern.
ModelMaker 5
DesignPatterns5, ������ 41
Intent
The pattern is used to control the life cycle of an object through reference counting. As long as the object is referenced it should be available. When it is no longer referenced, it should destroy itself.
Implementation
The Reference Count pattern’s implementation is basically the same as the Lock pattern. Only the method names have been predefined and are fixed. The patterns is applied on the currently selected class, like the Lock pattern. The SetReferenced method implements a default behaviour which is non-pattern owned so you can edit it if you want a different behaviour. The Reference Count pattern can be used in cooperation with the singleton pattern.
ModelMaker 5
DesignPatterns5, ������ 42
Patterns example
Introduction
This demo will guide you through the application of three patterns: the singleton pattern, the observer pattern and the wrapper pattern. All patterns will act on the same class structure, so it is necessary to work through this demo step by step. You should have read the chapter Design Patterns in order to fully understand what’s going on. That chapter gives an overview of how to use patterns and the pattern specific details are described for each pattern. You should also be fairly familiar with the basic principles of creating classes with ModelMaker as described in the User Manual: you should be able to create a (placeholder) class, create a unit and generate a source file. In this demo we will do the following:
1. Create a simple class TProgressor which we will use as a base for the demo. 2. Make TProgressor a singleton class by applying a singleton pattern, assuring that only one
progressor instance is always and automatically available through a central access point. 3. Create one-to-many notifications rather than one-to-one TNotifyEvent properties by using
an observer pattern. The TProgressorObserver class we create will be a TComponent descendant so that it can be inserted in Delphi’s component palette.
4. Wrap the TProgressor interface in the TProgressorObserver using a wrapper pattern, to make the interface available to the observer and it’s clients.
5. Demonstrate how the patterns interact and react to changes. 6. Demonstrate deleting and invalidating patterns.
After finishing the complete dome you’ll be amazed how much code was automatically generated, implementing powerful features.
The TProgressor class
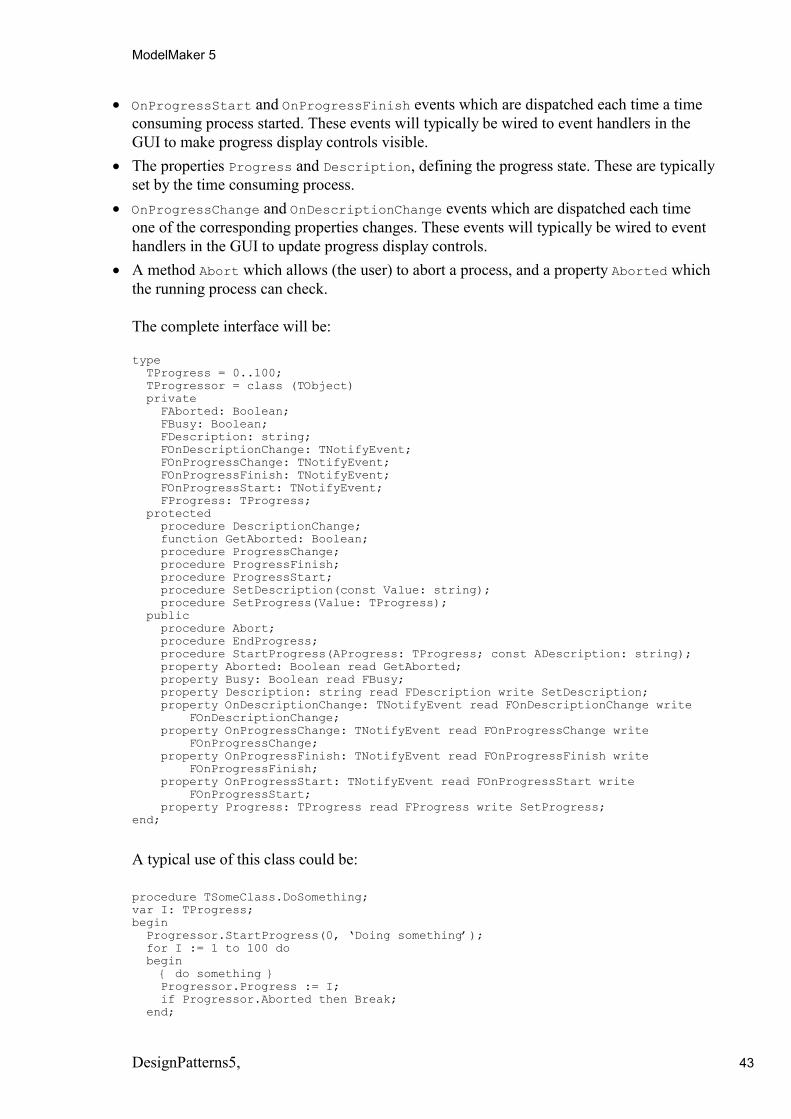
In this demo we’ll create the class TProgressor which we will use as a base for the rest of the demo. Although it is a fake class, assume it to have this useful functionality: The class should serve as a central mechanism for decoupling ‘time consuming processes’ (such as loading files) from the GUI. The public interface supports:
• StartProgress and EndProgress methods which allow to mark the beginning and end of a time consuming process.
ModelMaker 5
DesignPatterns5, ������ 43
• OnProgressStart and OnProgressFinish events which are dispatched each time a time consuming process started. These events will typically be wired to event handlers in the GUI to make progress display controls visible.
• The properties Progress and Description, defining the progress state. These are typically set by the time consuming process.
• OnProgressChange and OnDescriptionChange events which are dispatched each time one of the corresponding properties changes. These events will typically be wired to event handlers in the GUI to update progress display controls.
• A method Abort which allows (the user) to abort a process, and a property Aborted which the running process can check. The complete interface will be: type TProgress = 0..100; TProgressor = class (TObject) private FAborted: Boolean; FBusy: Boolean; FDescription: string; FOnDescriptionChange: TNotifyEvent; FOnProgressChange: TNotifyEvent; FOnProgressFinish: TNotifyEvent; FOnProgressStart: TNotifyEvent; FProgress: TProgress; protected procedure DescriptionChange; function GetAborted: Boolean; procedure ProgressChange; procedure ProgressFinish; procedure ProgressStart; procedure SetDescription(const Value: string); procedure SetProgress(Value: TProgress); public procedure Abort; procedure EndProgress; procedure StartProgress(AProgress: TProgress; const ADescription: string); property Aborted: Boolean read GetAborted; property Busy: Boolean read FBusy; property Description: string read FDescription write SetDescription; property OnDescriptionChange: TNotifyEvent read FOnDescriptionChange write FOnDescriptionChange; property OnProgressChange: TNotifyEvent read FOnProgressChange write FOnProgressChange; property OnProgressFinish: TNotifyEvent read FOnProgressFinish write FOnProgressFinish; property OnProgressStart: TNotifyEvent read FOnProgressStart write FOnProgressStart; property Progress: TProgress read FProgress write SetProgress; end;
A typical use of this class could be: procedure TSomeClass.DoSomething; var I: TProgress; begin Progressor.StartProgress(0, ‘Doing something’); for I := 1 to 100 do begin { do something } Progressor.Progress := I; if Progressor.Aborted then Break; end;
ModelMaker 5
DesignPatterns5, ������ 44
Progressor.EndProgress; end;
The GUI could be coupled to the progressor like this: procedure TMainForm.RunBtnClick(Sender: TObject); begin DoSomething; end; procedure TMainForm.AbortBtnClick(Sender: TObject); begin Progressor.Aborted := True; { abort whatever is going on } end; procedure TMainForm.ProgressorProgressStart(Sender: TObject); begin { make the progress display controls visible } ProgressGauge.Visible := True; AbortBtn.Visible := True; end; procedure TMainForm.ProgressorProgressFinish(Sender: TObject); begin { make the progress display controls invisible } ProgressGauge.Visible := False; AbortBtn.Visible := False; end; procedure TMainForm.ProgressorProgressChange(Sender: TObject); begin { update the gauge } ProgressGauge.Progress := Progressor.Progress; end; procedure TMainForm.ProgressorDescriptionChange(Sender: TObject); begin { update the label displaying what’s going on } ProgressLabel.Progress := Progressor.Description; end;
In this demo we won’t focus on features of the progressor class, nor on the implementation of the methods.
Creating the TProgressor class interface
We’ll now create the TProgressor class using ModelMaker. To do so: 1. Create a new model starting with the default template selecting ‘File|New from default’.
In the Classes view:
2. Make sure the TComponent class is in the model, otherwise add it, marked as placeholder. 3. Select the class TObject 4. Add a new class TProgressor as a descendant to TObject.
In the Class Members view:
5. Add a property ‘Progress’ of ‘user defined’ data type TProgress. Select for read access a field (FProgress will be created) and for write access a method (SetProgress will be created). Click OK. We will use SetProgress to dispatch the OnProgressChange event.
ModelMaker 5
DesignPatterns5, ������ 45
6. Add a property ‘Description’ of data type string. Select for read access a field (FDescription will be created) and for write access a method (SetDescription will be created). Click OK. We will use SetDescription to dispatch the OnDescriptionChange event.
7. Add a read only property ‘Busy’ of data type Boolean. Select for read access a field (FBusy will be created) and for write access ‘none’ (read only access). Click OK. This property keeps track of the ‘busy’ state. It will be set internally when StartProgress and EndProgress are called.
8. Add a read only property ‘Aborted’ of data type Boolean. Select for read access a method (GetAborted will be created) and for write access ‘none’ (read only access). Also set the option ‘State Field’, this will create the FAborted field . Click OK. The field FAborted will keep track of the ‘user aborted’ state. It will be set internally when StartProgress or Abort is called. The method GetAborted will check FAborted and the Application’s property Terminated.
9. Now add the events ‘OnProgressChange’, ‘OnDescriptionChange’, ‘OnProgressStart’ and ‘OnProgressFinish’ all of event type TNotifyEvent. For all events set the options ‘Dispatch method’ and use the default dispatch method name by clicking the hand-down button next to the event name edit. Also make all visibilities public since we have no RTTI available for this class (or you must enable the $M+ compiler switch).
10.Now add the public interface methods: Abort, StartProgress and EndProgress according to the above described interface. Don’t implement them yet.
At this stage your complete interface should be defined. Create a new unit (for example PATDEMO.PAS and add this class to the unit, generate the unit and check the interface in Delphi. You must manually add the ‘type TProgress = 0..100;’ declaration to the unit’s interface, remember to do this in ModelMaker!
Implementing the TProgressor class
If you created the interface as described above, you’ll see that all dispatch methods for the events are already fully implemented. For example: method DescriptionChange: TProgressor.DescriptionChange; begin if Assigned(FOnDescriptionChange) then FOnDescriptionChange(Self); end;
Now finish implementing the class described below, using the Method code editor, and regenerate your unit: (Lines marked with a » have to be added manually) procedure TProgressor.Abort; begin » FAborted := True; end; procedure TProgressor.DescriptionChange; begin if Assigned(FOnDescriptionChange) then FOnDescriptionChange(Self); end; procedure TProgressor.EndProgress; begin » FBusy := False; » ProgressFinish;
ModelMaker 5
DesignPatterns5, ������ 46
end; function TProgressor.GetAborted: Boolean; begin » Result := FAborted or Application.Terminated; end; procedure TProgressor.ProgressChange; begin if Assigned(FOnProgressChange) then FOnProgressChange(Self); end; procedure TProgressor.ProgressFinish; begin if Assigned(FOnProgressFinish) then FOnProgressFinish(Self); end; procedure TProgressor.ProgressStart; begin if Assigned(FOnProgressStart) then FOnProgressStart(Self); end; procedure TProgressor.SetDescription(const Value: string); begin » if Value <> FDescription then » begin » FDescription := Value; » DescriptionChange; » end; end; procedure TProgressor.SetProgress(Value: TProgress); begin if Value <> FProgress then begin FProgress := Value; ProgressChange; end; end; procedure TProgressor.StartProgress(AProgress: TProgress; const ADescription: string); begin FBusy := True; FAborted := False; Progress := AProgress; Description := ADescription; ProgressStart; end;
Yes, it’s obvious that this class is not intended for multi-level progressing since StartProgress and EndProgress cannot be nested. We’ll leave implementing that feature for you, just as updating the screen’s cursor and blocking the screen’s user interface to avoid re-entrancy etc.

ModelMaker 5
DesignPatterns5, ������ 47
Applying a Singleton pattern
Making TProgressor a singleton class
Now that you have created the basic TProgressor class, let’s use patterns to improve it. The first thing we are going to do, is make it a singleton. This will take care of:
• Assuring that only one TProgressor instance is created. • Providing a central access point to the single instance of the progressor for all client
objects. • Automatic instantiation of the single instance, as soon as it is referred to (and no sooner). • Avoiding name space pollution introduced by global vars.
To do this is really simple:
1. In the Classes view, select the class TProgressor to provide the correct context for the singleton pattern.
2. In the Patterns view, on tab page ‘structural’, click the button ‘Add Singleton Pattern’. Congratulation, you just have applied the singleton pattern. It’s as easy as that. You might want to check the code in Delphi’s editor and compare it with the code as described in Singleton pattern, page 18, which also describes the purpose of all inserted methods. The main member the singleton pattern inserted is the class method Instance. This method now provides the central access point to the TProgressor class. It also takes care of creating an instance the first time it is called. The only thing there remains to do manually, is clean up the instance when the application terminates. In Delphi 1.0 you do this by adding an exit procedure in the unit’s initialization section and implementing this exit procedure: unit <!UnitName!>; ... ... implementation ... ... ... procedure ShutDown; far; begin { This will free the instance, if we had one. Do NOT call TProgressor.Instance.Free, since that will create the instance, even if it never had been created before } » TProgressor.ReleaseInstance; end; initialization MMWIN:START INITIALIZATION
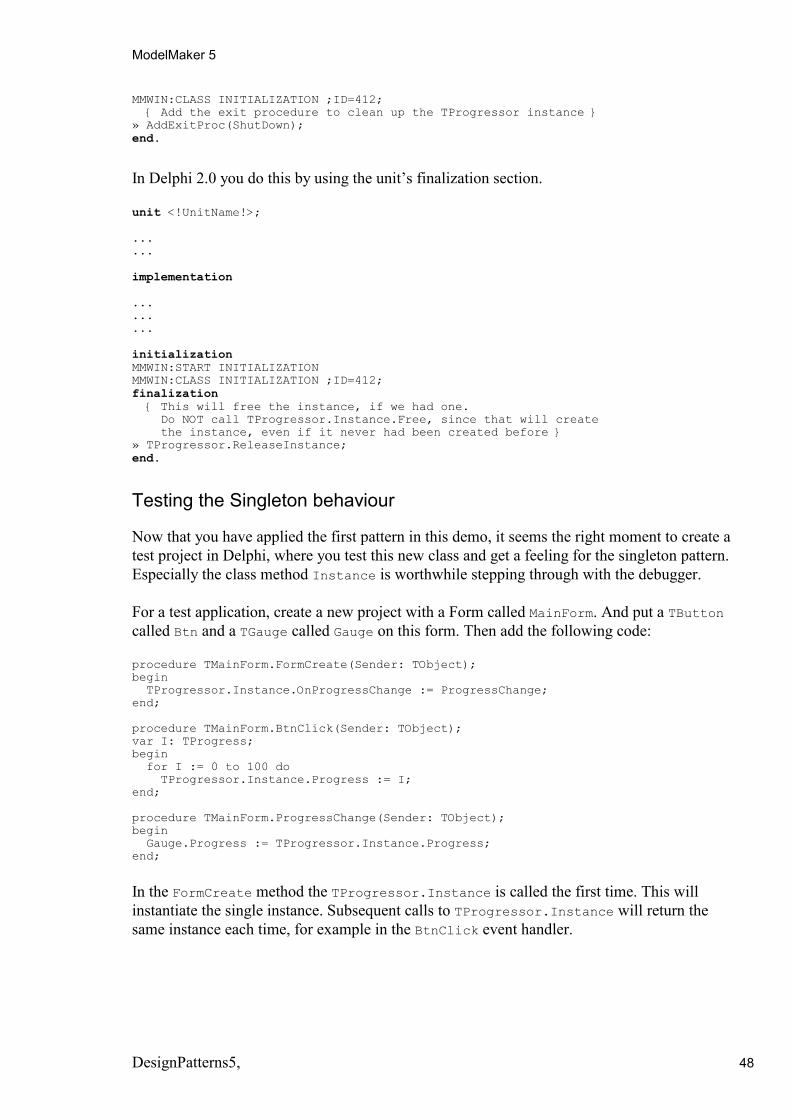
ModelMaker 5
DesignPatterns5, ������ 48
MMWIN:CLASS INITIALIZATION ;ID=412; { Add the exit procedure to clean up the TProgressor instance } » AddExitProc(ShutDown); end. In Delphi 2.0 you do this by using the unit’s finalization section. unit <!UnitName!>; ... ... implementation ... ... ... initialization MMWIN:START INITIALIZATION MMWIN:CLASS INITIALIZATION ;ID=412; finalization { This will free the instance, if we had one. Do NOT call TProgressor.Instance.Free, since that will create the instance, even if it never had been created before } » TProgressor.ReleaseInstance; end.
Testing the Singleton behaviour
Now that you have applied the first pattern in this demo, it seems the right moment to create a test project in Delphi, where you test this new class and get a feeling for the singleton pattern. Especially the class method Instance is worthwhile stepping through with the debugger. For a test application, create a new project with a Form called MainForm. And put a TButton called Btn and a TGauge called Gauge on this form. Then add the following code: procedure TMainForm.FormCreate(Sender: TObject); begin TProgressor.Instance.OnProgressChange := ProgressChange; end; procedure TMainForm.BtnClick(Sender: TObject); var I: TProgress; begin for I := 0 to 100 do TProgressor.Instance.Progress := I; end; procedure TMainForm.ProgressChange(Sender: TObject); begin Gauge.Progress := TProgressor.Instance.Progress; end;
In the FormCreate method the TProgressor.Instance is called the first time. This will instantiate the single instance. Subsequent calls to TProgressor.Instance will return the same instance each time, for example in the BtnClick event handler.
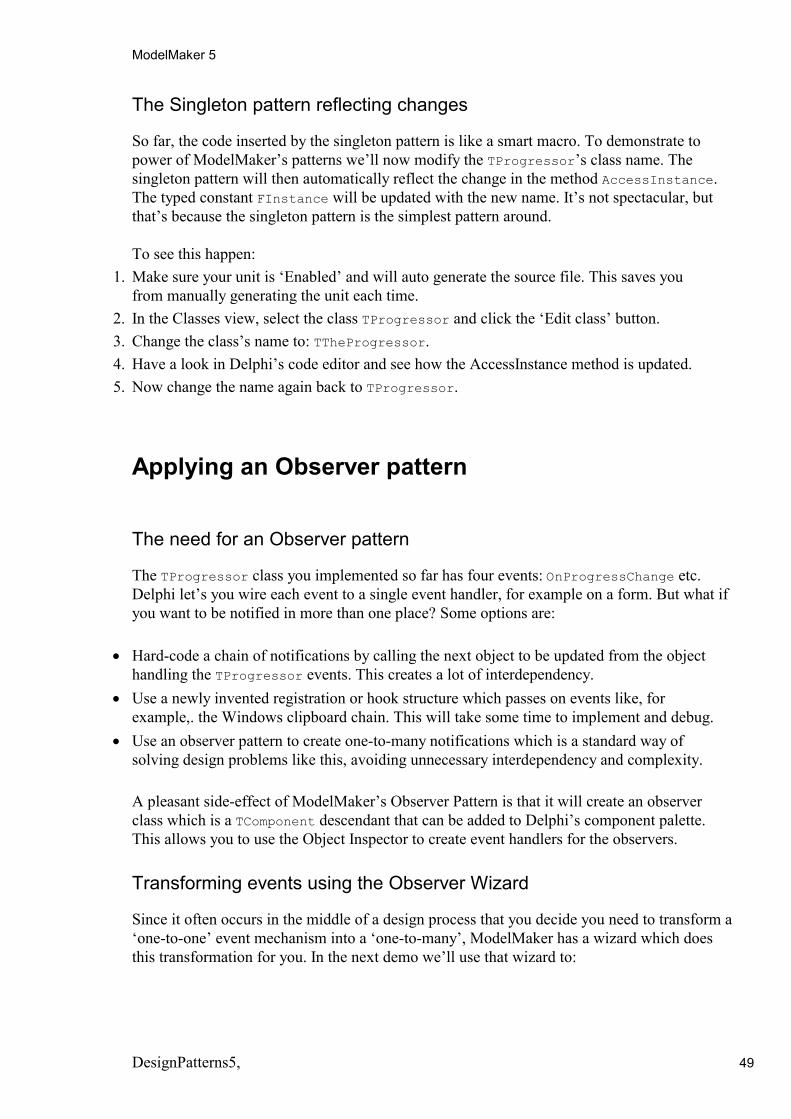
ModelMaker 5
DesignPatterns5, ������ 49
The Singleton pattern reflecting changes
So far, the code inserted by the singleton pattern is like a smart macro. To demonstrate to power of ModelMaker’s patterns we’ll now modify the TProgressor’s class name. The singleton pattern will then automatically reflect the change in the method AccessInstance. The typed constant FInstance will be updated with the new name. It’s not spectacular, but that’s because the singleton pattern is the simplest pattern around. To see this happen:
1. Make sure your unit is ‘Enabled’ and will auto generate the source file. This saves you from manually generating the unit each time.
2. In the Classes view, select the class TProgressor and click the ‘Edit class’ button. 3. Change the class’s name to: TTheProgressor. 4. Have a look in Delphi’s code editor and see how the AccessInstance method is updated. 5. Now change the name again back to TProgressor.
Applying an Observer pattern
The need for an Observer pattern
The TProgressor class you implemented so far has four events: OnProgressChange etc. Delphi let’s you wire each event to a single event handler, for example on a form. But what if you want to be notified in more than one place? Some options are:
• Hard-code a chain of notifications by calling the next object to be updated from the object handling the TProgressor events. This creates a lot of interdependency.
• Use a newly invented registration or hook structure which passes on events like, for example,. the Windows clipboard chain. This will take some time to implement and debug.
• Use an observer pattern to create one-to-many notifications which is a standard way of solving design problems like this, avoiding unnecessary interdependency and complexity. A pleasant side-effect of ModelMaker’s Observer Pattern is that it will create an observer class which is a TComponent descendant that can be added to Delphi’s component palette. This allows you to use the Object Inspector to create event handlers for the observers.
Transforming events using the Observer Wizard
Since it often occurs in the middle of a design process that you decide you need to transform a ‘one-to-one’ event mechanism into a ‘one-to-many’, ModelMaker has a wizard which does this transformation for you. In the next demo we’ll use that wizard to:

ModelMaker 5
DesignPatterns5, ������ 50
• Apply an observer pattern to the TProgressor class. This will create a new (observer) class TProgressorObserver, including registration mechanisms in TProgressor.
• Transform the events in the existing TProgressor class into one-to-many events dispatched by the TProgressorObserver class. Here’s how to apply the observer pattern by running the wizard:
1. In the Classes view, make sure that a (placeholder) class TComponent exists. 2. In the Classes view select the TProgressor class. 3. In the Classes view, click the right mouse button, to let the pop-up menu appear. In this
pop up menu select ‘Wizards|Run Observer Wizard’. 4. A Dialog will appear asking you to confirm the action. Click OK. 5. The observer wizard dialog will appear. In this dialog make sure all available events are
included in the list on the right: ‘events to move to observer’. 6. Click OK.
The observer pattern has now been applied and the events have been transformed.
Checking the result
Now we’ll have a look to what happened to your model (What have I done?) In the Classes view you’ll see:
• that a class TProgressorObserver has been created. In the Class Members view you’ll see:
• TProgressor’s observer registration mechanism, consisting of: ♦ FObservers: TList; which stores all registered observers. ♦ RegisterObserver(..), which registers an observer by adding it to FObservers. ♦ UnregisterObserver(..), which unregisters an observer by removing it from
FObservers. • That all events have been removed from TProgressor, however the dispatch methods still
exist. Therefore any code relying on these dispatch methods (such as SetProgress which calls ProgressChange) will be unaffected. In the Method Code view you’ll see:
• That the implementation for all event dispatch methods (such as ProgressChange) has been changed into an iteration over the registered observers and calling the observer’s event distpatch methods. This is the actual one-to-many notification mechanism. Now have a look at the TProgressorObserver class’s members and notice that all transformed events have been added to the observer class including their corresponding dispatch methods. Also an Enabled property has been added. This property let’s you switch the observer on and off rather than having to register / unregister it each time. The observed class TProgressor checks this property in its dispatched methods, like TProgressor.Progresschange.
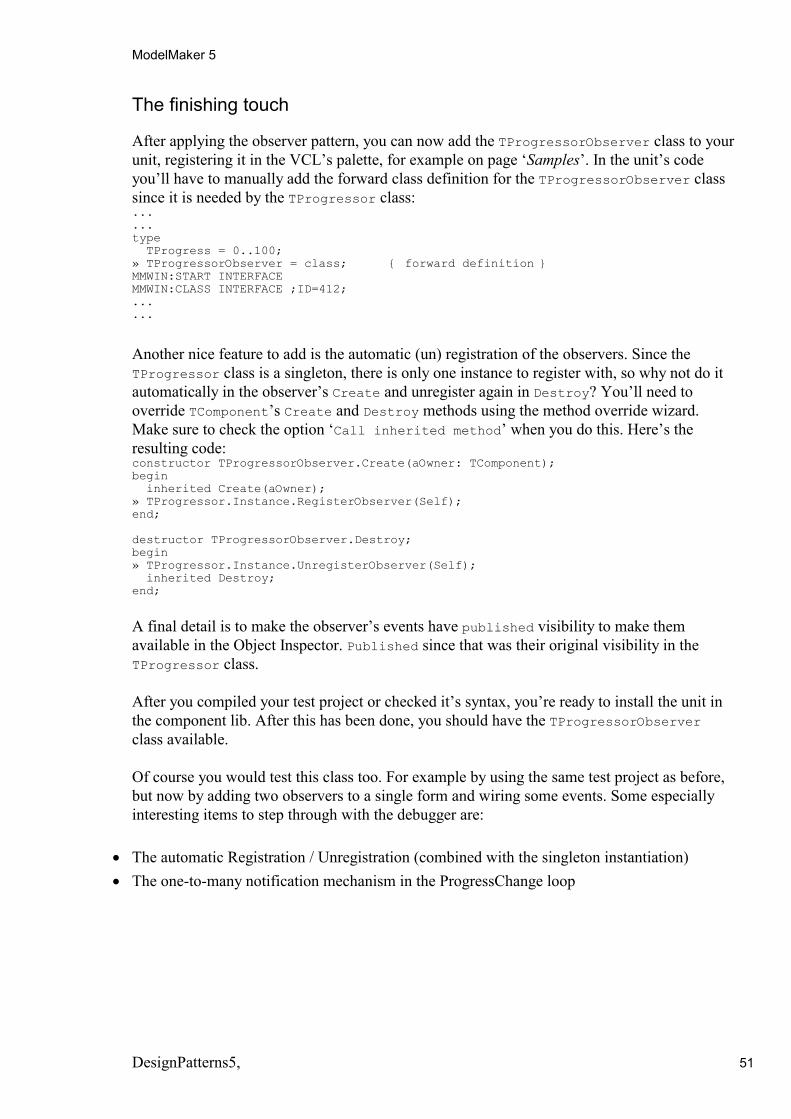
ModelMaker 5
DesignPatterns5, ������ 51
The finishing touch
After applying the observer pattern, you can now add the TProgressorObserver class to your unit, registering it in the VCL’s palette, for example on page ‘Samples’. In the unit’s code you’ll have to manually add the forward class definition for the TProgressorObserver class since it is needed by the TProgressor class: ... ... type TProgress = 0..100; » TProgressorObserver = class; { forward definition } MMWIN:START INTERFACE MMWIN:CLASS INTERFACE ;ID=412; ... ...
Another nice feature to add is the automatic (un) registration of the observers. Since the TProgressor class is a singleton, there is only one instance to register with, so why not do it automatically in the observer’s Create and unregister again in Destroy? You’ll need to override TComponent’s Create and Destroy methods using the method override wizard. Make sure to check the option ‘Call inherited method’ when you do this. Here’s the resulting code: constructor TProgressorObserver.Create(aOwner: TComponent); begin inherited Create(aOwner); » TProgressor.Instance.RegisterObserver(Self); end; destructor TProgressorObserver.Destroy; begin » TProgressor.Instance.UnregisterObserver(Self); inherited Destroy; end;
A final detail is to make the observer’s events have published visibility to make them available in the Object Inspector. Published since that was their original visibility in the TProgressor class. After you compiled your test project or checked it’s syntax, you’re ready to install the unit in the component lib. After this has been done, you should have the TProgressorObserver class available. Of course you would test this class too. For example by using the same test project as before, but now by adding two observers to a single form and wiring some events. Some especially interesting items to step through with the debugger are:
• The automatic Registration / Unregistration (combined with the singleton instantiation) • The one-to-many notification mechanism in the ProgressChange loop
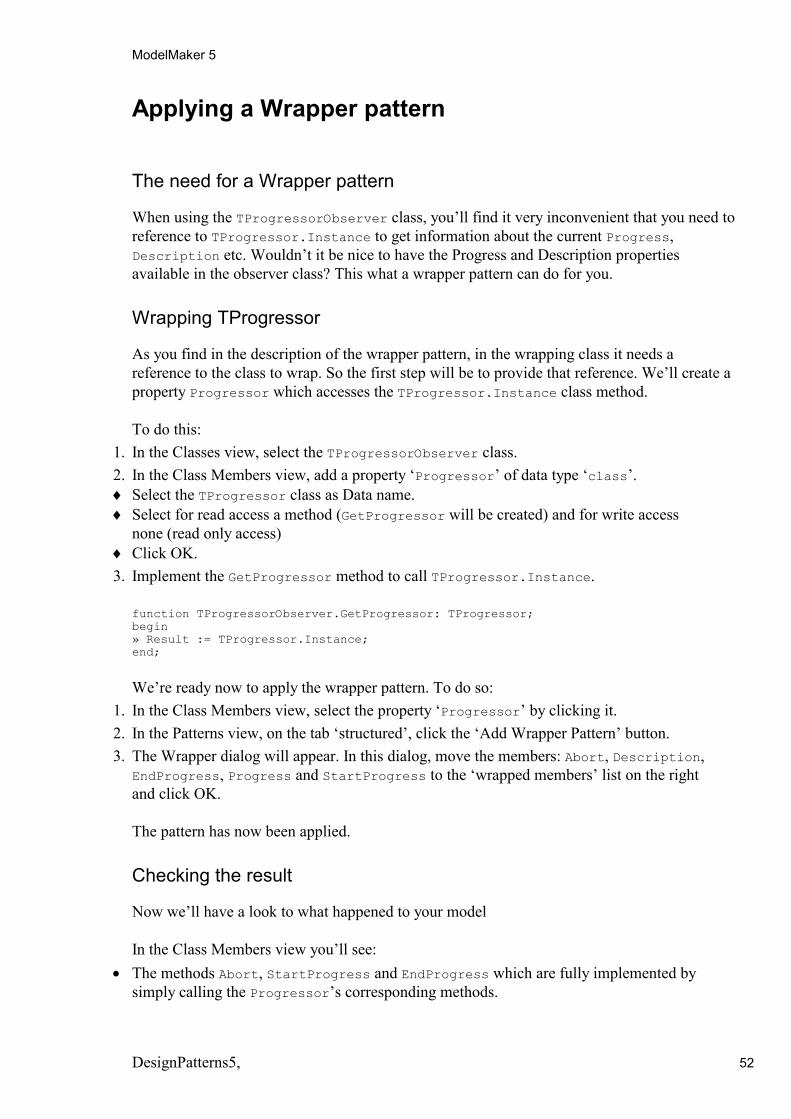
ModelMaker 5
DesignPatterns5, ������ 52
Applying a Wrapper pattern
The need for a Wrapper pattern
When using the TProgressorObserver class, you’ll find it very inconvenient that you need to reference to TProgressor.Instance to get information about the current Progress, Description etc. Wouldn’t it be nice to have the Progress and Description properties available in the observer class? This what a wrapper pattern can do for you.
Wrapping TProgressor
As you find in the description of the wrapper pattern, in the wrapping class it needs a reference to the class to wrap. So the first step will be to provide that reference. We’ll create a property Progressor which accesses the TProgressor.Instance class method. To do this:
1. In the Classes view, select the TProgressorObserver class. 2. In the Class Members view, add a property ‘Progressor’ of data type ‘class’. ♦ Select the TProgressor class as Data name. ♦ Select for read access a method (GetProgressor will be created) and for write access
none (read only access) ♦ Click OK. 3. Implement the GetProgressor method to call TProgressor.Instance.
function TProgressorObserver.GetProgressor: TProgressor; begin » Result := TProgressor.Instance; end;
We’re ready now to apply the wrapper pattern. To do so:
1. In the Class Members view, select the property ‘Progressor’ by clicking it. 2. In the Patterns view, on the tab ‘structured’, click the ‘Add Wrapper Pattern’ button. 3. The Wrapper dialog will appear. In this dialog, move the members: Abort, Description,
EndProgress, Progress and StartProgress to the ‘wrapped members’ list on the right and click OK. The pattern has now been applied.
Checking the result
Now we’ll have a look to what happened to your model In the Class Members view you’ll see:
• The methods Abort, StartProgress and EndProgress which are fully implemented by simply calling the Progressor’s corresponding methods.
ModelMaker 5
DesignPatterns5, ������ 53
• Properties Progress and Description, together with their access methods GetXXX, and SetXXX. The access methods simply read or write the Progressor.XXX properties. Have a look in the Delphi code editor, to see how much has actually been inserted by the three patterns. You’ll see that apart from the automatic registration in Create and Destroy, the class TProgressorObserver is completely generated by patterns or other automatic code!
The Wrapper pattern reflecting changes
To demonstrate the power of patterns in reflecting changes in the model, we’ll play around a bit. Make sure the unit’s automatic code generation feature ‘Enabled’ is switched on. Let’s see what happens if we change the parameter list in method StartProgress in the observed class TProgressor. Select TProgressor.StartProgress in the Class Members view. Edit it’s attributes (double click it) and clear the parameter list. Notice how the pattern will reflect this change by clearing the parameter list in method TProgressObserver.StartProgress and in the implementation which calls to Progressor.StartProgress. Something similar will happen if you’d change the StartProgress method in to a function returning a Boolean. Do this now and notice how the pattern updates TProgressObserver.StartProgress’s declaration and implementation. Restore the original situation again. Assume now you want to ‘unwrap’ the StartProgress method. To do this, select the Wrapper pattern in the Patterns view, and double click it. The wrapper editor will appear again. Move the StartProgress method back to ‘available members’ list on the left and Click OK. Notice how the pattern has removed the StartProgress method from TProgressObserver. To wrap this method again, simple start the Wrapper editor again from the Patterns view and add it again.
Deleting and invalidating patterns
The last thing to do in this demo is to demonstrate what happens if we delete the patterns we applied so far. Delete the Singleton pattern first. (If you want to delete a pattern, click the ‘Delete pattern’ in the Patterns view.) Notice how all methods related to that pattern are removed from the TProgressor class. Of course the clean up code we added manually is not removed and yes: the code won’t compile anymore, since the TProgressor.Instance method which is needed in TProgressorObserver has been removed too. You could of course simply apply the singleton pattern again to restore the code. But we’ll leave that exercise to you. Now let’s do something more interesting: invalidate a pattern. The wrapper pattern needs a reference to the class it wraps. In our case we choose the TProgressorObserver.Progressor property. What if we deleted that property? Let’s find out and delete it from the class. Select the property progressor and click the ‘Delete members’ button in the Class Members view. Now that cleans up a bit: as soon as the pattern
ModelMaker 5
DesignPatterns5, ������ 54
notices it’s reference is deleted, it starts deleting all wrapped members (Abort, Progress etc). If you look at the patterns view, you’ll see that the pattern has become INVALID. You must remove this pattern now manually. Some other patterns may be re-validated, the wrapper pattern not. Now delete the invalidated wrapper pattern. At this stage only the observer pattern is left. You could invalidate this by deleting the TProgressorObserver class, but instead you can delete the pattern straight away. If you have done this, notice how the class TProgressorObserver is deleted and how the registration mechanism has been removed from TProgressor. We are back to were we started from. The only exception is that the Observer Wizard, which is not a part of the pattern, converted event into iterations, this is all there remains from our pattern experiments. You could remove the converted dispatch methods and manually add events again. And then we’re back where we started: a single class TProgressor.

ModelMaker 5
DesignPatterns5, ������ 55
Bibliography [Gam+] Addison Wesley, Erich gamma, Richard Helm, Ralph Johnson, John Vlissides,
Design Patterns, Elements of Reusable Object-Oriented Software. 1995. ISBN 0-201 -63361-2.
[CWG1] Delphi 1.0 Component writers guide, Borland [CWG2] Delphi 2.0 Component writers guide, Borland [DUG1] Delphi 1.0 User guide, Borland [DUG2] Delphi 2.0 User guide, Borland