EATON Drivetrain - Navistar Learning
120
® Study Guide EATON ® Drivetrain TMT-130701 EATON ® Drivetrain Study Guide TMT-130701 A NAVISTAR COMPANY
Transcript of EATON Drivetrain - Navistar Learning
®
Study Guide EATON
® Drivetrain TM
T-130701
EATON®
DrivetrainStudy GuideTMT-130701
A NAV I STAR C O M PANY
©2007 International Truck and Engine Corporation, 4201 Winfield Road, Warrenville, IL 60555.
All rights reserved.
No part of this publication may be duplicated or stored in an information retrieval system without the express written permission of
International Truck and Engine Corporation.
Module I .............................................................................3
Section 1: Overview ............................................................................ 3
Section 2: Introduction to Service ................................................... 5Transmission Model Identification Information ..................... 5
Section 3: Gearing Components ..................................................... 7Initial Gearing .............................................................................. 7Torque Transmission .................................................................. 7Torque Transmission: Synchronizers ...................................... 8Torque Transmission: Sliding Clutch ..................................... 8Synchronizer Function ............................................................... 8Rotational Speed Changed ..................................................... 8Synchronizer Operation ............................................................ 9
Section 4: Power Flow ...................................................................... 11Gear Operation ......................................................................... 11
Section 5: Inspection ........................................................................ 13Inspection Chart ....................................................................... 14
Section 6: Lubrication ....................................................................... 15Lubricant Chart ......................................................................... 15Maintaining Proper Lube Level .............................................. 15
Section 7: In-Vehicle Service ........................................................... 17Service Manual: In-Vehicle Service Station ....................... 17Bench Service .......................................................................... 17
Table of Contents
Table of ContentsModule II ..........................................................................21
Section 1: Taming Torsionals........................................................... 21
Section 2: Beyond the Limits .......................................................... 31
Section 3: SPL Driveline Service ...................................................43Universal Joint Assembly ........................................................46Slip Member Boot Assembly .................................................50
Section 4: Medium Duty Solo® Clutch Service Parts I & II ...... 57Removal Procedure ..................................................................58Solo® Removal/Installation Procedures ..............................60Inspection ...................................................................................62How It Works ............................................................................64Solo® 1401 Installation—Single Plate ...................................65Solo® 1402 Installation—Two-Plate .......................................67Transmission Installation .........................................................69Set-Up Procedure ....................................................................72Alternative Set-Up Procedure ................................................75Resetting Procedure (Solo® Out of Truck) .........................77
Section 5: Drive Axle Failure Analysis Parts I & II ....................... 81Shock Failures ........................................................................... 81Fatigue Failures .........................................................................85Spinout Failures ........................................................................88Improper Lubrication................................................................89Normal Wear .............................................................................93Oil Seal General Inspection ...................................................99Axle Housing Failures ............................................................101
Section 6: Spur Gear Life ..............................................................105Understanding Spur Gear Life ............................................105Initial Pitting .............................................................................105Moderate Pitting .....................................................................105Gear Lubrication .....................................................................109Replacement Factors ............................................................ 111Gear Tooth Fractures ............................................................ 113
Table of Contents

2 EATON® Drivetrain
Overview
Welcome to the Roadranger® System Technician training program. This is a familiarization program on the FS5406 and 6406 transmissions.
This program provides you with an overview for servicing the 5406 and 6406 Eaton® Fuller® Transmissions used on the International® NGV medium duty products. It also details the Roadranger® drivetrain components and provides service references for those transmissions.
Module I
Section 1
Module I
Section 1Objectives
At the end of this course, you should be able to:
• Describe the internal gearing and power flow, along with model information of the 5406 and 6406 Eaton® Fuller® transmissions.
• Use the primary service manual, TRSM-0110 for servicing the transmissions.
Objectives
At the end of this course, you should be able to:
• Describe the internal gearing and power flow, along with model information of the 5406 and 6406 Eaton® Fuller® transmissions.
• Use the primary service manual, TRSM-0110 for servicing the transmissions.
Module I, Section 1: Overview 3

NOTES
4 EATON® Drivetrain
Introduction to Service
This section provides a basic introduction to internal gearing and power flow, along with model information.
The 5406/6406 Eaton® Fuller® transmissions are fully synchronized units with six forward speeds and reverse.
Transmission Model Identification Information
The transmission model, designation, and other transmission identification information are stamped on the Transmission Tag, which is attached to the side of the case.
When calling for service assistance or parts, you should have the model and serial number of the unit being serviced available.
The serial number is the sequential identification number of the transmission.
The Bill of Material, or Customer Number, is also referred to as the “TA” number, and is located below the model and serial numbers. It’s a reference
“Eaton® Fuller® transmissions are fully synchronized units with six forward speeds and reverse.”
“Eaton® Fuller® transmissions are fully synchronized units with six forward speeds and reverse.”
Section 2
Module I, Section 2: Introduction to Service 5
number used by Eaton®, and is often helpful if you call for technical support.
The model number gives basic information about the transmission. The first two or three letters show that it is a Fuller® synchronized transmission. If overdrive gearing is used, an “O” is shown.
The first digit shows the nominal torque capacity in hundreds of foot-pounds.
The next digit shows the design level.
Two digits are used to show the number of forward speeds available.
And the letter at the end denotes the specific gear ratio set used.
“The model number gives basic
information about the transmission.”
“The model number gives basic
information about the transmission.”
6 EATON® Drivetrain
Gearing Components
Initial Gearing
Now let’s take a look at the internal gearing for FS5406/6406 Eaton® Fuller® transmissions. First, we’ll look at the major assemblies. Later, you’ll examine the individual parts.
Torque from the engine is applied to the input shaft, and is eventually transmitted to the output shaft and yoke to apply torque to the drive shaft.
In the 5406/6406, this torque is transmitted directly through the transmission only in one gear position, as sixth gear, or direct drive.
Torque Transmission
In all other gear positions, the torque flows into the counter shaft, from the input shaft, and is transmitted through the counter shaft gearing.
It then flows back up to the selected main shaft gear to continue torque application to the output side of the main shaft.
Section 3Section 3
“… torque is transmitted directly through the transmission only in one gear position.”
“… torque is transmitted directly through the transmission only in one gear position.”
Module I, Section 3: Gearing Components 7
Torque Transmission: Synchronizers
Depending on which gear is locked to the main shaft, one of the synchronizers will determine the gearing combination between the drive gear on the counter shaft and the driven gear on the main shaft.
This will allow the input shaft and main shaft to rotate at different speeds, resulting in torque multiplication in varying road speeds.
Torque Transmission: Sliding Clutch
These transmissions have a sliding clutch whose function is to lock the reverse gear to the main shaft, causing the main shaft to reverse its rotation, relative to the input shaft.
Synchronizer Function
The primary function of a synchronizer assembly is to allow the vehicle operator to make clash-free shifts.
Rotational Speed Changed
How is this done? To begin with, the rotational speed of the gear being selected is either decreased or
“The primary function of a synchronizer
assembly is to allow the vehicle operator to make
clash-free shifts.”
“The primary function of a synchronizer
assembly is to allow the vehicle operator to make
clash-free shifts.”
8 EATON® Drivetrain
increased by the synchronizer, allowing both this gear and the main shaft to become synchronized.
Synchronizer Operation
At this point, the synchronizer will complete its task by locking the intended gear to the main shaft, allowing torque to be transmitted outward to the drive shaft.
As the driver moves the shift lever to engage a different gear, a force is created on the synchronizer. The synchronizer rubs against the intended engagement gear creating “cone torque,” which creates a blocking force.
This torque is greatest initially and decreases as speed becomes closer, or nearer, to “synchronous.” Therefore, the blocking force also decreases as synchronous forces are reached.
When the force on the shift knob exceeds the blocking force, engagement occurs, and the gear is locked to the main shaft.
“… the blocking force also decreases as synchronous forces are reached.”
“… the blocking force also decreases as synchronous forces are reached.”
Module I, Section 3: Gearing Components 9

NOTES
10 EATON® Drivetrain
Power Flow
Gear Operation
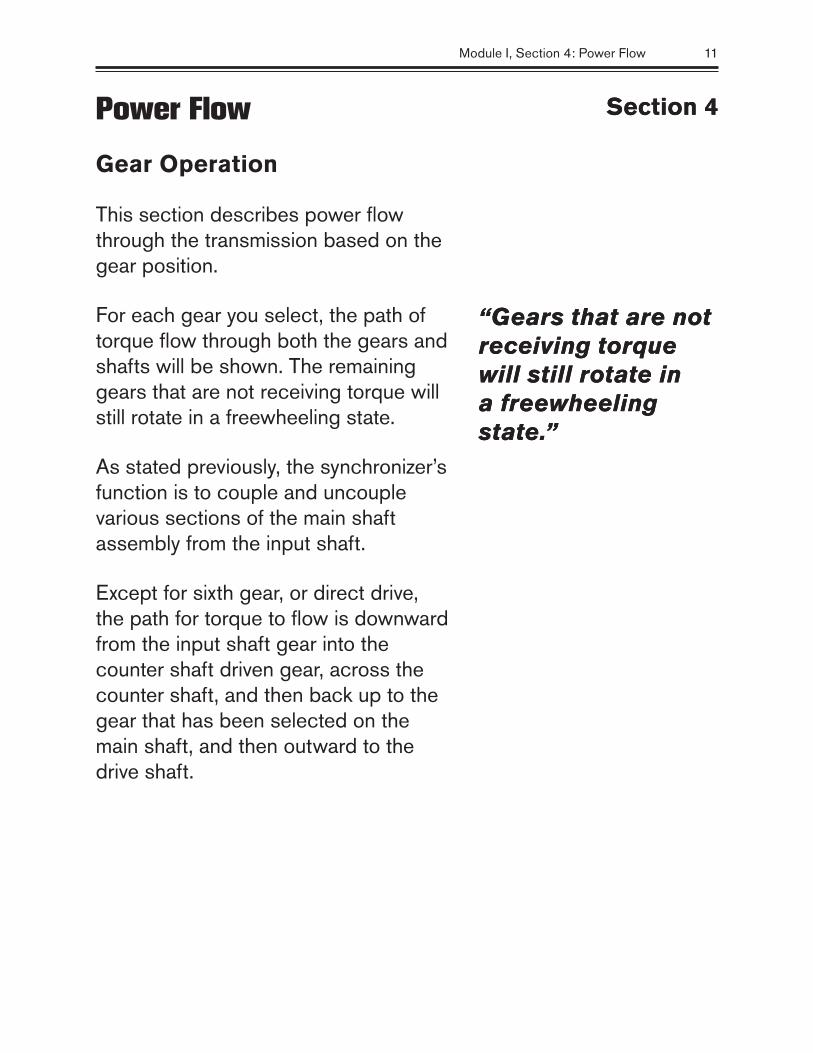
This section describes power flow through the transmission based on the gear position.
For each gear you select, the path of torque flow through both the gears and shafts will be shown. The remaining gears that are not receiving torque will still rotate in a freewheeling state.
As stated previously, the synchronizer’s function is to couple and uncouple various sections of the main shaft assembly from the input shaft.
Except for sixth gear, or direct drive, the path for torque to flow is downward from the input shaft gear into the counter shaft driven gear, across the counter shaft, and then back up to the gear that has been selected on the main shaft, and then outward to the drive shaft.
Section 4Section 4
“Gears that are not receiving torque will still rotate in a freewheeling state.”
“Gears that are not receiving torque will still rotate in a freewheeling state.”
Module I, Section 4: Power Flow 11

NOTES
12 EATON® Drivetrain
Inspection
General inspection details are provided in the Service Manual. There are 10 specific areas to inspect on a periodic basis:
1. Clutch mounting housing
2. Clutch pedal shaft and bores
3. Lubricant
4. Filler and drain plugs
5. Capscrews and gaskets
6. Gear shift lever
7. Universal joint companion flange, or yoke nut
8. Output shaft
9. Splines on output shaft
10. Main shaft rear bearing cover
If the driveline is dropped, you should also check the U-joint companion flange, or yoke nut for tightness and output shaft radial clearance.
If the yoke is removed, you should make a visual inspection of the output shaft
Section 5Section 5
“There are 10 specific areas to inspect on a periodic basis.”
“There are 10 specific areas to inspect on a periodic basis.”
Module I, Section 5: Inspection 13
splines for wear, and main shaft rear bearing cover oil seal for leaks.
Inspection Chart
In addition, the Inspection Chart details areas which should be examined at any scheduled PM. These include:
• Speedometer connections
• Rear bearing cover nuts
• Output yoke retaining nut
• PTO cover and openings
• Front bearing cover
• Oil drain plug, oil fill plug
“The Inspection Chart details areas
which should be examined at any scheduled PM.”
“The Inspection Chart details areas
which should be examined at any scheduled PM.”
14 EATON® Drivetrain
Lubrication
Nothing is more important for ensuring long transmission life than lubrication. The Maintenance Interval Chart shows recommended intervals for checking lubricant level and changing the fluid depending on the vehicle use and duty cycle. For any type of use, the most important listing on the chart is the initial lube change from the factory.
Lubricant Chart
The Lubricant Chart shows the types of approved and recommended lubricants under various ambient operating temperature ranges. Eaton® specifically prohibits the use of oil additives and friction modifiers and stresses that using lubricants that are not approved will affect warranty coverage.
Maintaining Proper Lube Level
Along with using the recommended lubricants, nothing is more important than maintaining the proper lube level.
Eaton® Fuller® transmissions are designed so that the internal parts operate in an oil-circulating bath, created by the motion of the gears and
Section 6Section 6
For a complete list of Eaton®-approved synthetic lubricants, call the Roadranger® call center at 1-800-826-4357.
NOTEFor a complete list of Eaton®-approved synthetic lubricants, call the Roadranger® call center at 1-800-826-4357.
NOTE
“Maintaining proper lube level is critical for long component life.”
“Maintaining proper lube level is critical for long component life.”
Module I, Section 6: Lubrication 15
shafts. Maintaining proper lube level is critical for long component life.
The levels should be checked periodically, and verified to be at the level at the bottom of the fill hole. The most reliable method for verifying this level is for the oil to run out when the fill plug is removed. It is difficult to make this determination visually, and using your finger to verify that you can feel the lube level is not adequate.
Touching the lube with your finger may result in the lube level being as much as one inch below the bottom of the fill hole. This could mean that the oil level is actually up to one gallon below the recommended level.
“The most reliable method for
verifying this level is for the oil to run
out when the fill plug is removed.”
“The most reliable method for
verifying this level is for the oil to run
out when the fill plug is removed.”
16 EATON® Drivetrain
In-Vehicle Service
Service Manual: In-Vehicle Service Station
The Service Manual coverage for in-vehicle service is broken into two sections. These sections provide step-by-step procedures, list assembly torques, requirements for sealants, and special tool needs.
The first section covers the shift bar housing, and includes removal and installation procedures for the shift bar housing and gear shift lever.
The second section details procedures for removal and installation of the output yoke or companion flange.
Bench Service
The majority of the service manual is devoted to the complete transmission overhaul procedures for bench service.
These sections include complete disassembly, reassembly and adjustment procedures, including step-by-step instruction and hundreds of photographs.
The first section covers the shift bar housing disassembly and reassembly.
Section 7Section 7
“The majority of the service manual is devoted to the complete transmission overhaul procedures for bench service.”
“The majority of the service manual is devoted to the complete transmission overhaul procedures for bench service.”
Module I, Section 7: In-Vehicle Service 17
Illustrations and procedures assist in the correct assembly sequence of interlock balls, detent balls, and springs.
In instances where special tools are required for bench overhaul, they are referenced within the procedures and summarized in tables.
Section two covers main section disassembly, which removes the main shaft, input shaft, and counter shaft assemblies.
The third section covers disassembly and reassembly of the main shaft.
The fourth section covers disassembly and reassembly of the counter shaft.
And the fifth section covers reassembly of the main section through the installation of the counter shaft assembly, and the procedures for checking and adjusting counter shaft end play.
The fifth section also includes a table that shows the specifications for the various models covered by the service manual. The procedures and specifications for checking and adjusting main shaft end play for the various models are also covered.
“Illustrations and procedures
assist in the correct assembly
sequence.”
“Illustrations and procedures
assist in the correct assembly
sequence.”
18 EATON® Drivetrain
NOTES
Module I, Section 7: In-Vehicle Service 19

NOTES
20 EATON® Drivetrain

Introduction
This module is made up of six videos, two of which consist of two parts. Throughout this module, there are references to images and audio, therefore it is in your best interest to view the videos while reviewing the information in this Study Guide.
Taming Torsionals
Not a pretty sight. Worse, none of these failures had to happen. Many came without warning, putting the truck on the side of the road. Don’t be the next victim.
Every ride has its shakes and rattles. And so it’s often hard to pick up on a problem that’s taking more and more of today’s trucks off the road: destructive drivetrain vibration.
Maybe you’ll feel it when you shift, or if you’re lucky, hear it in the cab. And maybe you or your driver will think it’s worth checking out. But maybe not. Drivetrain vibration can be a quiet, quick and deadly component killer.
Lon MillerSenior Product Service ManagerEaton® Fuller® Transmissions
“We were receiving a staggering number of calls on unexplainable failures that
Module IIModule II
Section 1Section 1
Overview
Shows the negative effects of driveline torsional vibrations.
Overview
Shows the negative effects of driveline torsional vibrations.
Module II, Section 1: Taming Torsionals 21
we tied to driveline torsionals, engine torsionals, different types of drive system vibrations. These failures have typically been broken master clutch springs, the centers breaking out of the master clutches, broken input shafts, gear teeth breakage, spline wear, synchro-pin breakage, U-joint failures and power divider failures. And a lot of the work we’ve done with our driveline vibration analyzer, and just through field experience, has shown these to be the result of either engine or drivetrain vibration.”
There are two reasons why this problem is growing. First, many in the industry today are spec’ing trucks. On the one hand, with high-torque engines, and on the other, with gear ratios set for fuel economy—a combination that can spawn destructive vibration. Angles at the U-joints can also generate bad vibes, often made worse by driver adjustment of air bag suspensions.
Lon MillerSenior Product Service ManagerEaton® Fuller® Transmissions
“Many of the component failures that we have went out and investigated, which were unexplainable, that’s why we were involved in them. The fleet or the customer had no idea why they were occurring or what was causing them. We were able to find out that these were being caused by engine or drivetrain vibration. A lot of these vibrations were
“Angles at the U-joints can
also generate bad vibes”
“Angles at the U-joints can
also generate bad vibes”
22 EATON® Drivetrain
built right into the vehicle; it’s a natural phenomena, that the engine as it’s pulled down in the operating range can get into a resonant condition where it sends vibrations into the drive system.
Excessive or unequal joint working angles are another source of drivetrain vibrations. And a lot of these types of vibrations cause component failures. What we’ve done and found to be the most effective method of damping these out are the soft damped clutches, such as the Eaton-Valeo™ 16–17" GD, the Dana Spicer® 151/2", 7-spring, and the Rockwell 151/2", 7-spring with friction damping.
We’ve put these in a number of vehicles that would have had component failure, and the vehicles have been running for a year or better now with no repeat failure. When we inspect some of these vehicles, the clutch, all the drive components are in excellent condition. Therefore we very strongly believe the clutches are the answer to these damaging vibrations.”
The standard heavy truck clutch consists basically of three steel plates riveted together. The outer two connect to the engine flywheel. The inner plate to the transmission input shaft.
Module II, Section 1: Taming Torsionals 23

Twisting against each other, these plates work to cushion the difference in energy, or energy spikes, transmitted from the flywheel to the transmission shaft with each engine firing. And in doing so, limit drivetrain vibration.
But let’s look at what happens with the energy the standard clutch can’t cushion. The latest research indicates that energy pulses transmitted through the clutch actually torque the drivetrain out of shape. Stress that can fail components. The problem magnifies severalfold with destructive resonances.
Every drivetrain has what’s called a torsional resonance, the point at which components begin to oscillate in unison under tremendous stress. This happens whenever the frequency of the engine firing pulses, or the frequency of vibration at the U-joints matches the frequency of this resonance.
This time trace of transmission input torque shows that when the engine and the drivetrain are not in resonance, the transmission receives only minor energy pulses through the clutch with each engine firing, the small, manageable spikes indicated.
But when the drivetrain and engine are in resonance it’s another story. Natural dynamics at resonance amplify the
“These plates work to cushion
the difference in energy.”
“These plates work to cushion
the difference in energy.”
24 EATON® Drivetrain
energy of each engine pulse, in this case sending 3400 ft.-lbs. of torque down the drivetrain with every firing. No component can live very long under such pounding.
Roy BoespflugMaintenance Shop SupervisorBonneville Transloaders, Inc.
“Driveline vibrations have been an ongoing problem with us since we’ve spec’d out units with electronic engines. We’ve had clutch failures, we’ve had transmission range failures, we’ve had low mileage, actually U-joint failures. We attribute the majority of this—more or less all of it—to the driveline vibrations.”
Richard PatrutDirector—ServiceKenworth Truck Company
“The drivetrain torsional vibrations took on a whole new characteristic with the introduction of electronic engines. Engines with high torque rise at low rpm. The result was a vibration in the drivetrain that was irritating to the customer. In the field we began to get complaints and the way we corrected them was by installing soft dampened clutches, which tended to take the vibration out of the drivetrain. We then took a proactive approach and last September we started putting soft damped clutches in our products as standard equipment. This allows us to deliver a product to the customer where we know we will not be presenting them with a product that has an inherent vibration built into it.”
Module II, Section 1: Taming Torsionals 25
Roy BoespflugMaintenance Shop SupervisorBonneville Transloaders, Inc.
“I’m definitely a believer in soft damped clutches. From my past experience and what I’ve seen so far in the soft damped clutches they have, and/or reduce, the downtime on the equipment.”
Today’s soft clutches, also known as spring-damped clutches, feature longer travel springs, which allow a greater twist between the plates, and more cushioning. Some of the newest models feature friction materials and designs for more controlled damping, even at resonance.
Overall, soft clutches are far more capable of cushioning engine spikes and also act to lower the rpm at which the engines or U-joints excite the drive-train, where less damage can occur.
Let’s take a closer look. We used a typically spec’d vehicle to test the effects of a soft clutch on drivetrain vibration. The test vehicle was equipped with a 6-cylinder engine, 6 x 4 drive, 10-speed transmission, 235" wheelbase and 10-spring standard Spicer® clutch.
Let’s look at the midrange and top gear. In tenth, the engine firing frequency coincides with drivetrain torsional resonance, at about 700 rpm. In sixth
“Today’s soft clutches, also
known as spring-damped clutches,
feature longer travel springs.”
“Today’s soft clutches, also
known as spring-damped clutches,
feature longer travel springs.”
26 EATON® Drivetrain
gear, 1100 rpm. At these rpm for these gears on this truck, drivetrain vibration will be its most destructive.
Spec’ing the truck for a shorter wheelbase, direct drive transmission, or 4 x 2 configuration, drive these resonant speeds up into more frequent operating rpm, thus further increasing the likelihood of drivetrain damage. Specify all these changes into the same truck, and the worse case scenario indicates resonance at 1700 rpm in sixth, and 1100 rpm in tenth. A truck no doubt spec’d to fail.
Spec’ing a soft clutch drives the resonance speeds down, in this case to below 900 rpm in sixth gear, and under 600 in tenth. And again, the lower the rpm at which a drivetrain hits resonance, the less likely damage will occur.
The best preventive measure against drivetrain vibration? Spec a soft clutch as original equipment, and continue to do so as part of the vehicle’s scheduled maintenance. Soft clutches can also be retrofitted, but costs are substantially higher.
Gene SteinMgr. Sales & Application Eng.Spicer® Clutch
“In most cases, we find that the soft rate, long travel dampers do mitigate the
“Spec’ing a soft clutch drives the resonance speeds down.”
“Spec’ing a soft clutch drives the resonance speeds down.”
Module II, Section 1: Taming Torsionals 27
problems that are caused by system’s effects. What I mean by that is it reduces the peaks that are produced by the driveline. And, in most of the cases, the 7-spring, 9-spring have taken care of those problems. We recommend soft rate dampers for torsional vibration issues.”
Jerry MontgomeryVice President—EngineeringRockwell Clutch Company
“We have developed a product and other companies have developed products to attack this issue. It’s what the industry is starting to call a soft clutch, a long travel dampened clutch, a 7-spring clutch. A number of names, but it changes the torsional modes that take place in the complete powertrain system. What it does is take the resonate point and moves it out of the operating range. So if the driver is running between 1000–1400 rpm, he’s not likely to encounter these damaging torsional vibrations. The soft dampened clutch also addresses another problem that we just discovered recently and this is a noise problem more so than a damaging torque problem. But nevertheless it’s an irritant and it tends to come into the driveline somewhere around 1500–1700 rpm.”
Roger HobbieManager—Eaton® Roadranger®
Field Marketing
“The issue today in the heavy-duty truck market with driveline torsional problems causing damage to the various components in the driveline is one of
28 EATON® Drivetrain
the hottest issues recognized in the industry. And the issue about spec’ing a soft dampened clutch to help control these damaging levels of vibration is one of the hottest issues today. And it’s being recognized by the fleet operators as something they have to do to basically control the overall performance of the entire drivetrain.”
Even the best components can fall victim to drivetrain vibration. Any truck, any component. Don’t be the next victim.
Jerry MontgomeryVice President—EngineeringRockwell Clutch Company
“In trying to address what a large fleet or small fleet should do, or anyone buying a truck today, my recommendation would be that they specify a soft damp clutch.”
Roy BoespflugMaintenance Shop SupervisorBonneville Transloaders, Inc.
“Definitely use a soft damp clutch. Definitely use it.”
Lon MillerSenior Product Service ManagerEaton® Fuller® Transmissions
“When you’re spec’ing a truck, spec a soft damp clutch.”
Module II, Section 1: Taming Torsionals 29

NOTES
30 EATON® Drivetrain
Beyond the Limits
We’re at the Eaton® proving ground in Marshall, MI, to demonstrate some things not to do to your drivetrain. This is a program about driving and working smart. About how not to twist the main shaft or burn a synchro, or break the teeth in your transmission or axle through improper driving and maintenance practices.
At Eaton®, we’ve seen it all. A graveyard of failed parts. Failures that cost you time and miles. Failures that go beyond our warranty and cost you money.
We’re at the track to show you how they happen. Specifically:
• Main shaft failures from starting up in too high a gear.
• Synchronizer failures from improper shifting.
• Gear failures from running low in lube.
• Medium duty hard shifting and synchronizer failures from clutch drag.
• And axle and other drivetrain failures from inter-axle and wheel diff spinouts.
Section 2Section 2
Overview
Shows what can and cannot be done to the drivetrain—how avoiding improper driving and maintenance practices can increase the life of the drivetrain.
Overview
Shows what can and cannot be done to the drivetrain—how avoiding improper driving and maintenance practices can increase the life of the drivetrain.
Module II, Section 2: Beyond the Limits 31
• Improperly engaging the inter-axle differential lockout.
• Mismatched tires.
• Impact or shock loads.
• And from improperly adjusting ride height.
Common failures. And none of them have to happen.
So let’s begin with what can be a serious error. Pulling out with the transmission in high instead of low range. That is, with the range selector up, instead of down. Start up in 6th or any other gear too high for the road and the stress you’ll place on the drivetrain can easily twist or break a transmission main shaft, leaving you at the side of the road, and facing a costly repair.
Take the time to do it right. Make sure you’re in low gear and low range. If need be, recheck the position of the range selector. Low gear allows the vehicle to start up when you release the clutch, while laying off the accelerator. It can mean the difference between a smooth start or a rocky ending.
Once underway, shifting too fast during a range shift, or failing to fully engage the gear when float shifting, or just as
“Start up in 6th or any other gear
too high for the road and the
stress you’ll place on the drivetrain can easily twist
or break a transmission.”
“Start up in 6th or any other gear
too high for the road and the
stress you’ll place on the drivetrain can easily twist
or break a transmission.”
32 EATON® Drivetrain
importantly, changing ranges while in neutral, may not give the transmission the opportunity to complete the shift. In time—sometimes a very short time—you’ll burn up your high-range synchronizer or main shaft washer.
So shift smart. Always pre-select range changes when in gear. It’s just a matter of developing the right habit. Also, give the transmission enough time to complete each shift, and always make sure you’re fully engaged. Trust us. You’ll get there just as fast shifting right, as wrong.
Those of you driving medium duties could face the same failure, and more, if the master clutch is not properly adjusted. A properly adjusted clutch provides a smooth start up, no grinding, and easy shifts into gear.
Improper adjustment is a different story. The driver must often force the lever to complete a shift. These forces act to wear the synchro.
Add road speed, and the stresses get even greater. Shifts become hard and sudden. The results can be costly and easily prevented.
Consult your OEM service manual for proper clutch adjustment, and take the
“Always pre-select range changes when in gear.”
“Always pre-select range changes when in gear.”
Module II, Section 2: Beyond the Limits 33
time to get the miles you expect out of your transmission.
It’s even easier to avoid still another very costly failure: low levels of transmission lube from either lack of maintenance or a leak from a transmission cooler line, will raise temperatures inside the transmission to the point of failure.
Proper maintenance procedures are usually outlined by the vehicle manufacturer. And always check underneath before hitting the road. Debris can kick up and damage an oil cooler at any time. It’s a small price to pay compared to replacing a transmission.
Now let’s move downstream to the rest of the drivetrain, and especially the tandem drive axles. We’re out on the skid pad to demonstrate some all too common errors that can leave a truck dead on the road.
The first is spinning out on wet surfaces, or mud or ice. Prolonged wheel spin can damage the inter-axles and wheel differentials, and leave you with failures like these. Worse, any sudden change in traction will send shock loads through the drivetrain beyond what even the best components can handle.
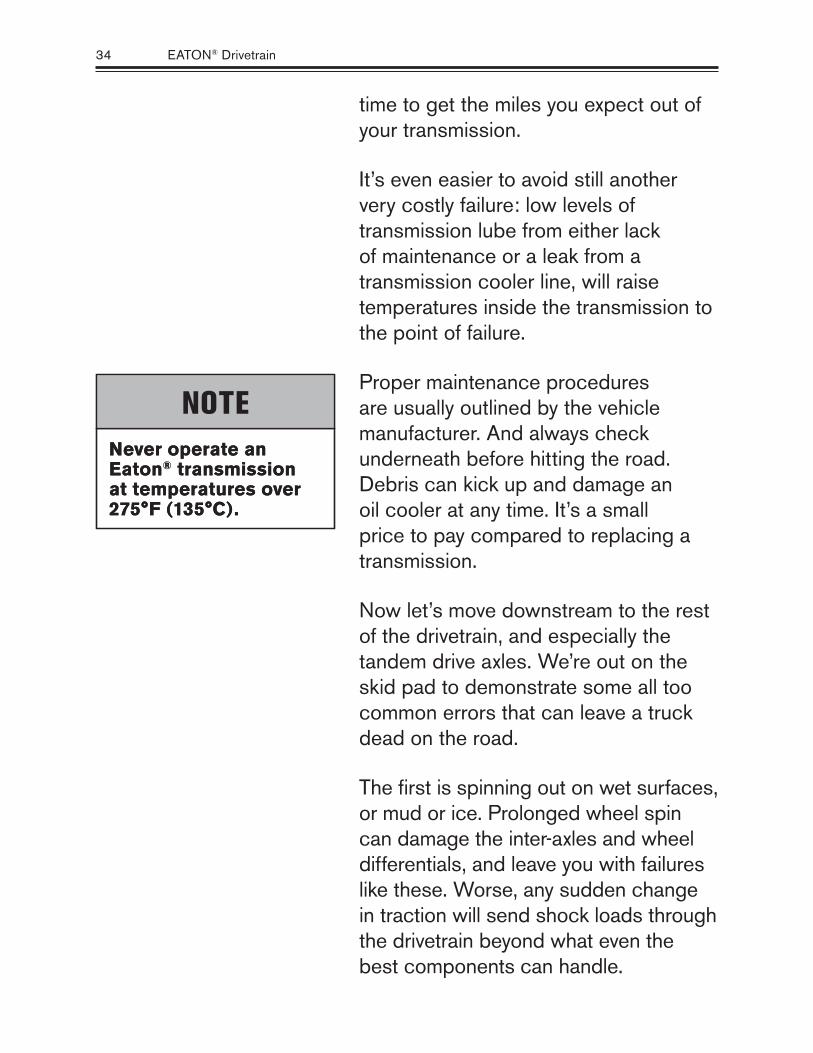
Never operate an Eaton® transmission at temperatures over 275°F (135°C).
NOTENever operate an Eaton® transmission at temperatures over 275°F (135°C).
NOTE
34 EATON® Drivetrain
The key on changing surfaces is slow and smooth. Take your time, and keep your teeth.
Off road, locking the inter-axle differential gets you out of most trouble. With the vehicle at rest and the differential locked, it’s nice and easy and out.
Bad things can happen however, when the driver attempts to lock the differential with the wheels spinning at different speeds.
Once again, this time on pavement. Listen to the video as the differentials struggle to lock the tandems. Unnecessary wear and tear that could end your ride.
It’s this simple: repeated abuse adds up to downtime. It may catch up to you tomorrow or next week or next month, but always when you least expect it.
Finally, let’s look at several seemingly harmless practices that can shorten the life of your axles well before their time.
First, always match your tires for size. Different sized tires on a tandem rotate at different speeds. If you’re running on dry pavement and the inter-axle differential lock is engaged, the axle turning slower acts to drag on the power divider, and over time can cause
“It’s this simple: repeated abuse adds up to downtime.”
“It’s this simple: repeated abuse adds up to downtime.”
Module II, Section 2: Beyond the Limits 35
premature failure. So match your tires and lock the differential only in adverse conditions.
If you’re not sure you’ve mounted matched tires, use this simple technique:
• Be sure all the tires are properly inflated.
• With a tape or string, measure the outside circumference of each tire. Tire to tire, the measurements should be within 1.25% of each other.
Don’t trust eyeing the tires. Take the time and be sure your tires will work together.
When ready to roll, make sure the trailer sits high enough so that the fifth wheel can slide into position without lifting the load. The trailer in the video is sitting too low, and the shock on the drivetrain from lifting a full load can twist the input shaft, output shaft, axle shaft, and break more than a few gear teeth.
By the way, you’ll get the same results slamming into the bay wall. It doesn’t take much of a punch to send damaging shock loads down the drivetrain.
“Take the time and be sure your tires
will work together.”
“Take the time and be sure your tires
will work together.”
36 EATON® Drivetrain
When sliding the fifth wheel, use the lowest gear, release the tractor brakes and let the clutch out with no throttle. Three notes here:
• Always use the landing gear to take the weight off the trailer.
• If the fifth wheel doesn’t slide the first time, place the truck in reverse, push slightly and repeat the sequence.
• Use the same procedure to slide the trailer tandem.
Finally, let’s talk about drivetrain vibration. Improperly inflated suspension airbags position the driveline to generate these vibrations. Some drivers like to soften the ride by overriding the setting for the volume of air in the tractor airbags. The consequences can be disastrous.
Airbag height changed just 1" off their OEM factory setting creates 2–4 degrees of improper driveline angles. Bad angles that cause damaging vibrations.
We mounted the Eaton® driveline vibration analyzer on the truck to show the impacts. The laptop is capturing driveline vibrations, represented by the horizontal line, in real time. Here’s
“When sliding the fifth wheel, use the lowest gear.”
“When sliding the fifth wheel, use the lowest gear.”
Module II, Section 2: Beyond the Limits 37
the readout for a truck with properly inflated airbags. Now look at the same driveline with partially inflated airbags. The vibration through the drivetrain has increased dramatically, and with it the chances you’ll face these kinds of failures when you least expect them.
One last note, today’s electronic engines make changing engine horsepower and torque easy. Just be sure the rest of your drivetrain can handle the changes.
• Increase horsepower too high and you may need a transmission cooler.
• Increase torque, and you’ll likely create a mismatch between the engine, transmission and/or axle ratings.
These changes could put your drivetrain components at risk and void your Eaton® warranty. Be sure to check with your OEM or component manufacturer before making any changes.
Sure, things happen. But some things shouldn’t. The failures presented here are all avoidable. They’re the result of taking drivetrain components beyond the limits and beyond our warranty.
“Today’s electronic engines make
changing engine horsepower and
torque easy.”
“Today’s electronic engines make
changing engine horsepower and
torque easy.”
Engine rerates may void your Eaton® warranty.
CauTiON!
Engine rerates may void your Eaton® warranty.
CauTiON!
38 EATON® Drivetrain
There’s a lot of road out there. And miles mean money. So remember these 12 smart driving and maintenance tips:
1. Always check which range you’re in at start-up. Select the best low gear.
2. Select your range while in gear; never in neutral.
3. Give your transmission the time it needs to complete the shift.
4. Keep the clutch properly adjusted, especially in medium duties.
5. Keep lubes up to proper levels, and always check for leaks.
6. Never operate the transmission over 275°F (135°C).
7. Avoid wheel spinouts.
8. NEVER engage the inter-axle differential lock with wheels turning at different speeds.
9. Match your tires for size after you check the air pressure.
10. Check the trailer height before hooking up.
Module II, Section 2: Beyond the Limits 39
11. And, easy does it backing into the bay.
12. Leave the airbags alone. Drivetrain vibrations can be damaging.
And finally, take care when changing horsepower and torque ratings on electronic engines. Keep in mind the rest of the drivetrain. All in all, remember the Golden Rule: Treat your drivetrain the same way you want it to treat you. All that’s left then is to enjoy the road.
“All in all, remember the
Golden Rule: Treat your drivetrain the
same way you want it to treat you.”
“All in all, remember the
Golden Rule: Treat your drivetrain the
same way you want it to treat you.”
40 EATON® Drivetrain

NOTES
Module II, Section 2: Beyond the Limits 41

NOTES
42 EATON® Drivetrain
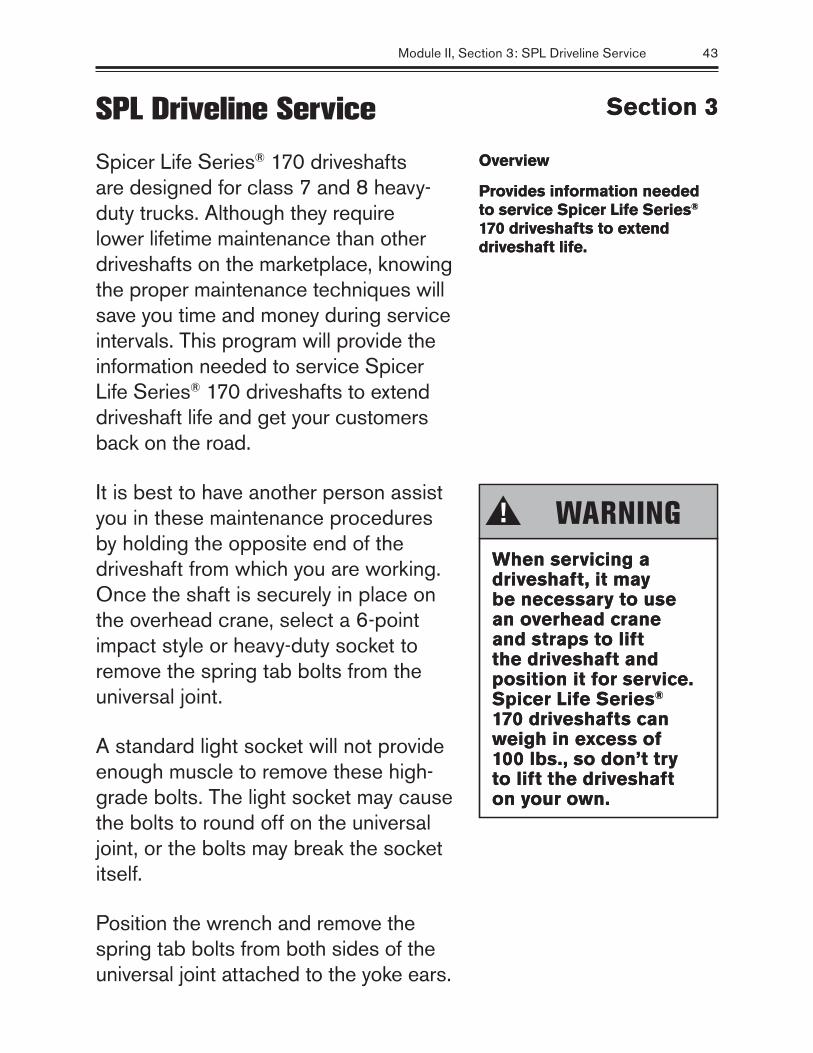
SPL Driveline Service
Spicer Life Series® 170 driveshafts are designed for class 7 and 8 heavy-duty trucks. Although they require lower lifetime maintenance than other driveshafts on the marketplace, knowing the proper maintenance techniques will save you time and money during service intervals. This program will provide the information needed to service Spicer Life Series® 170 driveshafts to extend driveshaft life and get your customers back on the road.
It is best to have another person assist you in these maintenance procedures by holding the opposite end of the driveshaft from which you are working. Once the shaft is securely in place on the overhead crane, select a 6-point impact style or heavy-duty socket to remove the spring tab bolts from the universal joint.
A standard light socket will not provide enough muscle to remove these high-grade bolts. The light socket may cause the bolts to round off on the universal joint, or the bolts may break the socket itself.
Position the wrench and remove the spring tab bolts from both sides of the universal joint attached to the yoke ears.
Section 3Section 3
Overview
Provides information needed to service Spicer Life Series® 170 driveshafts to extend driveshaft life.
Overview
Provides information needed to service Spicer Life Series® 170 driveshafts to extend driveshaft life.
When servicing a driveshaft, it may be necessary to use an overhead crane and straps to lift the driveshaft and position it for service. Spicer Life Series® 170 driveshafts can weigh in excess of 100 lbs., so don’t try to lift the driveshaft on your own.
WarNiNg!
When servicing a driveshaft, it may be necessary to use an overhead crane and straps to lift the driveshaft and position it for service. Spicer Life Series® 170 driveshafts can weigh in excess of 100 lbs., so don’t try to lift the driveshaft on your own.
WarNiNg!
Module II, Section 3: SPL Driveline Service 43
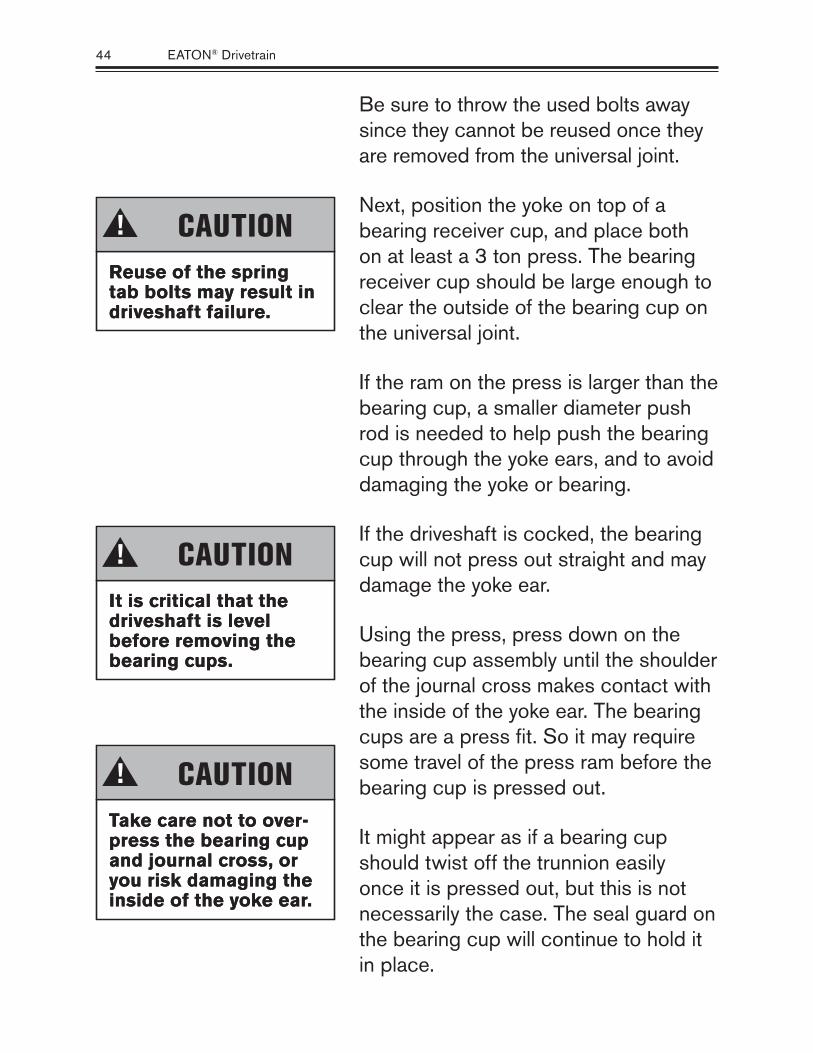
Be sure to throw the used bolts away since they cannot be reused once they are removed from the universal joint.
Next, position the yoke on top of a bearing receiver cup, and place both on at least a 3 ton press. The bearing receiver cup should be large enough to clear the outside of the bearing cup on the universal joint.
If the ram on the press is larger than the bearing cup, a smaller diameter push rod is needed to help push the bearing cup through the yoke ears, and to avoid damaging the yoke or bearing.
If the driveshaft is cocked, the bearing cup will not press out straight and may damage the yoke ear.
Using the press, press down on the bearing cup assembly until the shoulder of the journal cross makes contact with the inside of the yoke ear. The bearing cups are a press fit. So it may require some travel of the press ram before the bearing cup is pressed out.
It might appear as if a bearing cup should twist off the trunnion easily once it is pressed out, but this is not necessarily the case. The seal guard on the bearing cup will continue to hold it in place.
Reuse of the spring tab bolts may result in driveshaft failure.
CauTiON!
Reuse of the spring tab bolts may result in driveshaft failure.
CauTiON!
It is critical that the driveshaft is level before removing the bearing cups.
CauTiON!
It is critical that the driveshaft is level before removing the bearing cups.
CauTiON!
Take care not to over-press the bearing cup and journal cross, or you risk damaging the inside of the yoke ear.
CauTiON!
Take care not to over-press the bearing cup and journal cross, or you risk damaging the inside of the yoke ear.
CauTiON!
44 EATON® Drivetrain
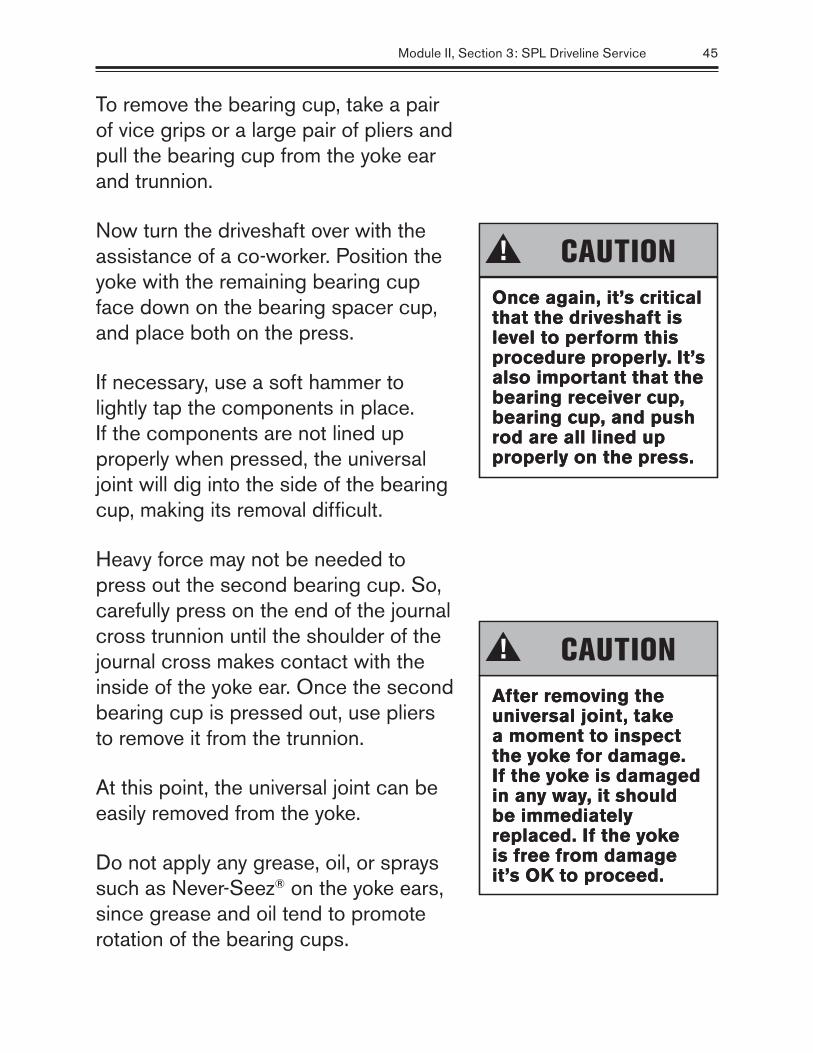
To remove the bearing cup, take a pair of vice grips or a large pair of pliers and pull the bearing cup from the yoke ear and trunnion.
Now turn the driveshaft over with the assistance of a co-worker. Position the yoke with the remaining bearing cup face down on the bearing spacer cup, and place both on the press.
If necessary, use a soft hammer to lightly tap the components in place. If the components are not lined up properly when pressed, the universal joint will dig into the side of the bearing cup, making its removal difficult.
Heavy force may not be needed to press out the second bearing cup. So, carefully press on the end of the journal cross trunnion until the shoulder of the journal cross makes contact with the inside of the yoke ear. Once the second bearing cup is pressed out, use pliers to remove it from the trunnion.
At this point, the universal joint can be easily removed from the yoke.
Do not apply any grease, oil, or sprays such as Never-Seez® on the yoke ears, since grease and oil tend to promote rotation of the bearing cups.
Once again, it’s critical that the driveshaft is level to perform this procedure properly. It’s also important that the bearing receiver cup, bearing cup, and push rod are all lined up properly on the press.
CauTiON!
Once again, it’s critical that the driveshaft is level to perform this procedure properly. It’s also important that the bearing receiver cup, bearing cup, and push rod are all lined up properly on the press.
CauTiON!
After removing the universal joint, take a moment to inspect the yoke for damage. If the yoke is damaged in any way, it should be immediately replaced. If the yoke is free from damage it’s OK to proceed.
CauTiON!
After removing the universal joint, take a moment to inspect the yoke for damage. If the yoke is damaged in any way, it should be immediately replaced. If the yoke is free from damage it’s OK to proceed.
CauTiON!
Module II, Section 3: SPL Driveline Service 45
Universal Joint Assembly
Select a new Spicer® universal joint kit package for the Spicer Life Series® driveshaft you’re servicing. The shaft in the video is a Spicer Life Series® 170.
The package will include:
• A new journal cross
• Four bearing cups
• Installation hardware
• Other assorted hardware
The installation tools included with the kit allow you to approximate the height needed to assemble the universal joint into the yoke.
New bearing cups are shipped with these red needle-retaining plugs. The plugs are designed to keep the needles from falling down during shipping, and they must be removed before beginning assembly of the new universal joint.
The service manual for the Spicer Life Series® 170 driveshaft recommends greasing the bearing cup assemblies before installation of the universal joint. However, this step can also be completed after installation. The grease that is used during the pre-purging
“The plugs are designed to keep the needles from
falling down during shipping and must
be removed.”
“The plugs are designed to keep the needles from
falling down during shipping and must
be removed.”
46 EATON® Drivetrain
operation demonstrated in this program will work its way into these assemblies, making greasing after installation the preferred method.
On the new journal cross, note that there is a zerk fitting in the center of the cross. Position the journal cross into the yoke cross-holes with the zerk fitting facing inward, toward the tubing.
The zerk fitting should be perpendicular to the yoke cross holds. The position of the zerk fitting is critical, since you will need to access the fitting during pre-purging of the universal joint.
Install the cross end so that it hangs loosely in the yoke end.
Do not lay the shaft down with the trunnion unprotected or you may damage the new journal cross.
Once again, the driveshaft must be level at all times for the installation procedure to be successful.
Place the first bearing cup on the bottom of the trunnion hanging loosely from the yoke end. Next, place the first installation tool on the bottom of the bearing cup. Hold the components in place and gently position the assembly on the press.
“The position of the zerk fitting is critical.”
“The position of the zerk fitting is critical.”
Module II, Section 3: SPL Driveline Service 47
Cover the top yoke ear with a flat metal plate that is approximately 1/2" thick. Press the bearing cup into place by pushing the yoke onto the bearing cup assembly until the installation height tool is flush with the cross-hole face. Leave the installation height tool in place for now.
While pushing the bearing cup into place, guide the driveshaft to keep it level as the bearing cup is forced down into the end yoke.
After the first bearing cup is pressed in place, position the second bearing cup and installation tool on top of the trunnion and at the opposite end of the journal cross. Once again, place a flat metal plate over the bearing cup assembly, and press the bearing cup into place. Push until both installation height tools are flush with the cross-hole face.
Remember that the installation tools are not designed for exact positioning during installation. However, these tools make it close enough for the spring tabs to finish the job.
The spring tabs must be within 0.015" of the correct position for the installation to be successful. This generally leaves around 0.214" of bearing cup protruding above the yoke. You may tap the spring
If the components seem to press in easily, the yoke end may be loose and may need to be replaced.
CauTiON!
If the components seem to press in easily, the yoke end may be loose and may need to be replaced.
CauTiON!
If the universal joint is not centered properly, the installation will not be successful. The driveshaft will run out and vibration can occur.
CauTiON!
If the universal joint is not centered properly, the installation will not be successful. The driveshaft will run out and vibration can occur.
CauTiON!
48 EATON® Drivetrain

tabs lightly with a hammer to help put them in the correct position.
Use a ratchet with a 6.8 mm socket to snug all the spring tab bolts in place. Then torque the bolts using a torque wrench. The proper torque specifications are listed on the back of the installation kit box. The specifications are provided in ft.-lbs., as well as in the metric equivalent.
For our Spicer Life Series® 170 driveshaft, the spring tab bolts should be torqued to 25–30 ft.-lbs.
After the spring tab bolts are torqued in place, check the universal joint for stiffness. Universal joint movement in the yoke ears should feel stiff but smooth. The plastic wear washers in the bearing cups tend to increase stiffness, but they will break in over time.
Tap lightly with a hammer on the bearing cups after installation to snap the bearing cups flat, and place the two remaining bearing cups on the two remaining trunnions.
The next step in the installation process is to pre-purge the universal joint with grease. Spicer® recommends that universal joints are pre-purged before installing the driveshaft on the vehicle. It may be difficult to
“After the spring tab bolts are torqued in place, check the universal joint for stiffness.”
“After the spring tab bolts are torqued in place, check the universal joint for stiffness.”
Module II, Section 3: SPL Driveline Service 49
purge the universal joint once it’s on the vehicle, and the driveshaft may need to be removed again.
Place a large C-clamp on the trunnions at the sides of the universal joint opposite the yoke ears. Snug the clamp into place but do NOT over-tighten it.
Place a grease gun on the zerk and apply the grease. Be sure to use a high quality, N.L.G.I., E.P. Grade 2 lubricating grease for this procedure.
The grease should be applied to the zerk until grease comes out of all four bearing cups on the universal joint.
Once the grease is visible at all four locations, remove the grease gun and squeeze the C-clamp to force out any excess grease.
Wipe off any excess grease on the universal joint and remove the C-clamp.
Slip Member Boot Assembly
When the universal joint kit is properly installed it’s time to service the slip member boot. The boot’s purpose is to prevent lubricant from escaping or dirt from entering into the slip spline members.
“The grease should be applied to the zerk until grease
comes out of all four bearing
cups on the universal joint.”
“The grease should be applied to the zerk until grease
comes out of all four bearing
cups on the universal joint.”
50 EATON® Drivetrain
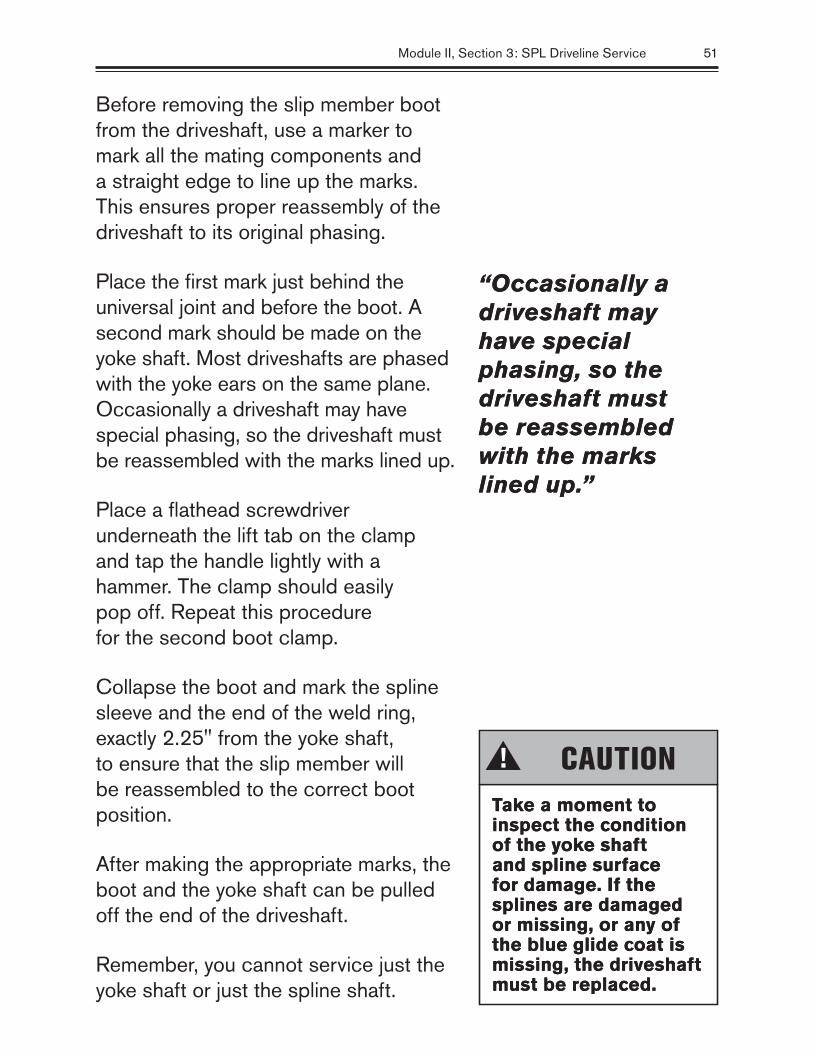
Before removing the slip member boot from the driveshaft, use a marker to mark all the mating components and a straight edge to line up the marks. This ensures proper reassembly of the driveshaft to its original phasing.
Place the first mark just behind the universal joint and before the boot. A second mark should be made on the yoke shaft. Most driveshafts are phased with the yoke ears on the same plane. Occasionally a driveshaft may have special phasing, so the driveshaft must be reassembled with the marks lined up.
Place a flathead screwdriver underneath the lift tab on the clamp and tap the handle lightly with a hammer. The clamp should easily pop off. Repeat this procedure for the second boot clamp.
Collapse the boot and mark the spline sleeve and the end of the weld ring, exactly 2.25" from the yoke shaft, to ensure that the slip member will be reassembled to the correct boot position.
After making the appropriate marks, the boot and the yoke shaft can be pulled off the end of the driveshaft.
Remember, you cannot service just the yoke shaft or just the spline shaft.
“Occasionally a driveshaft may have special phasing, so the driveshaft must be reassembled with the marks lined up.”
“Occasionally a driveshaft may have special phasing, so the driveshaft must be reassembled with the marks lined up.”
Take a moment to inspect the condition of the yoke shaft and spline surface for damage. If the splines are damaged or missing, or any of the blue glide coat is missing, the driveshaft must be replaced.
CauTiON!
Take a moment to inspect the condition of the yoke shaft and spline surface for damage. If the splines are damaged or missing, or any of the blue glide coat is missing, the driveshaft must be replaced.
CauTiON!
Module II, Section 3: SPL Driveline Service 51
Both need to be in good condition and both need to be serviced at the same time. If either is damaged, these components must be replaced in pairs.
Also, if the boot has been damaged, water or other contaminants may have leaked into the driveshaft assembly, damaging the splines.
After performing a careful inspection of all the components, wipe off any small amounts of rust or dirt that may be trapped in the splines on the yoke shaft and spline shaft. Both the yoke shaft and the spline shaft must be clean, dry and free of rust, dirt, or solvents.
To replace the slip member boot assembly, use a Spicer® slip member boot replacement kit. The kit includes the boot, two boot clamps, and the grease packet containing N.L.G.I. E.P. Grade 2 grease.
There’s a measured amount of grease in the packet and all grease should be used to thoroughly coat the yoke shaft and spline shaft. Use a paintbrush to apply the grease liberally to the female spline shaft. Make sure each spline tooth is thoroughly coated with grease. However, be sure that the grease does not come in contact with the tube itself. It can make the tube extremely slippery and erase the marks you have in place
Next inspect the spline sleeve for damage. Once again, if the splines are damaged the driveshaft must be replaced.
CauTiON!
Next inspect the spline sleeve for damage. Once again, if the splines are damaged the driveshaft must be replaced.
CauTiON!
If this occurs, the slip spline male and female components must be replaced.
CauTiON!
If this occurs, the slip spline male and female components must be replaced.
CauTiON!
52 EATON® Drivetrain
for phasing. It can also cause the boot to slip once it’s clamped.
Next, coat the glide-coat portion of the yoke shaft with grease, but take care not to get any grease on the outside of the weld ring. Also, too much grease on the glide coat will cause the grease to ride up when the yoke shaft and spline shaft are mated, making the driveshaft slippery and difficult to handle.
The new boot should be completely dry for installation. Take the metal boot clamps from the replacement kit and put them on the ends of the new boot. The boot should then be installed on the yoke shaft first.
Once the slip member boot is in place on the yoke shaft, insert the yoke shaft into the spline shaft. The phasing marks that you made earlier should line up.
Position the end of the boot at the 2.25" mark made on the yoke shaft shoulder. Pull the boot clamps up on the boot. At this point the boot should be fully seated against the yoke shaft shoulder, and 2.25" away from the universal joint.
Select one of the recommended installation tools from the Spicer Life Series® service manual. Apply the clamp tool to the first clamp. When the lock tag on the clamp starts to
“… take care not to get any grease on the outside of the weld ring.”
“… take care not to get any grease on the outside of the weld ring.”
Module II, Section 3: SPL Driveline Service 53
curl up slightly, relieve the pressure of the tool. Don’t apply too much force or you risk breaking the clamp.
When performing this procedure with Snap-On® tool number YA3080, a torque wrench can be used to ensure proper tightening of the boot clamp. Consult the Spicer Life Series® service manual for the correct torque specifications.
If the lock tag sticks out slightly after installation tap it gently in place with a hammer. The lock tag should not be sticking out too high or the clamp can be torn off the boot.
Complete the installation by repeating this procedure for the second metal boot clamp.
Spicer® offers a complete range of driveshaft and universal joint solutions for most heavy-duty applications. But proper maintenance is essential for long service life.
The clamp should be in the groove on the boot and not on the yoke shaft shoulder. If the boot is not clamped properly, water will leak into the boot causing rust and premature wear.
CauTiON!
The clamp should be in the groove on the boot and not on the yoke shaft shoulder. If the boot is not clamped properly, water will leak into the boot causing rust and premature wear.
CauTiON!
54 EATON® Drivetrain
NOTES
Module II, Section 3: SPL Driveline Service 55

NOTES
56 EATON® Drivetrain

Medium Duty Solo® Clutch Service Parts I & II
Eaton® Fuller® designs and engineers adjustment-free clutches. Check the Eaton® Fuller® medium duty clutch application sheet for the proper application.
Eaton® Fuller® stamped-angle spring clutches should be replaced when adjustment cannot correct for a loss of free pedal, or cannot compensate for a slipping clutch.
Eaton® Fuller® Solo® clutches should be replaced when the wear-indicating tab is at the replace position.
Eaton® has two versions of the Solo®. One for standard stroke linkages, and one for short stroke linkages. The short-stroke Solo® is designed for use with hydraulic type linkages, and also the GM truck cable linkage system.
Of these two types of Solo® clutches, you have a choice between the original Solo® or the maintenance-free version. Both are available in a single or double disc model.
The original version uses a common release yoke combined with a greasable release bearing. The non-
Section 4Section 4
Overview
Shows medium duty Solo® clutch removal and reinstallation procedures.
Overview
Shows medium duty Solo® clutch removal and reinstallation procedures.
Module II, Section 4: Medium Duty Solo® Clutch Service 57
sealed bearing requires lubrication every 10,000 miles using an E.P. Grade 2 grease.
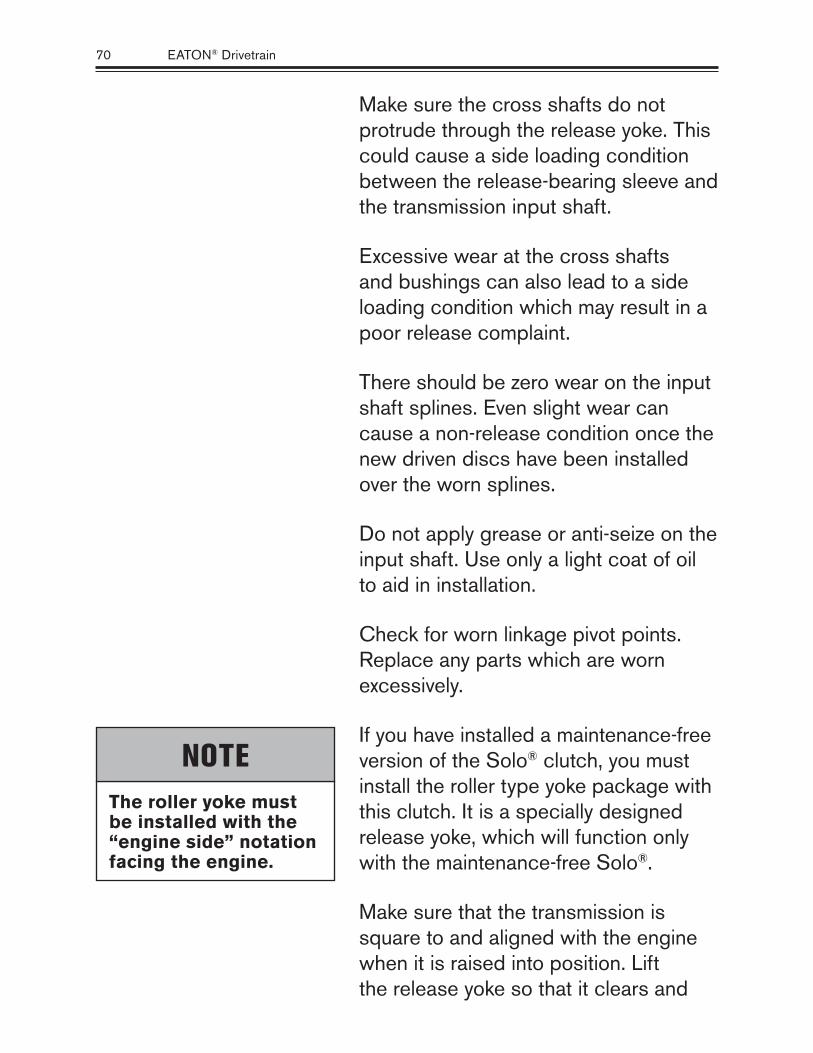
On the other hand, the maintenance-free version requires the use of a special roller yoke combined with a lubed-for-life release bearing. The sealed bearing requires no further lubrication. The roller yoke is packaged with the clutch. For further details, refer to the medium duty application guide.
Removal Procedure
Attach either a sling or a jack to the transmission. Next, remove the transmission mounting bolts and disconnect the external clutch linkage, making sure the release yoke will clear the release bearing as you move the transmission rearward. Don’t let the rear of the transmission drop or hang unsupported.
The discs can be bent or distorted, preventing the clutch from releasing cleanly, should you desire to reuse it.
Install a spline-aligning tool through the release bearing into the driven discs, and also into the inner race of the flywheel pilot bearing. You can use an old transmission input shaft for this purpose.
“Don’t let the rear of the transmission
drop or hang unsupported.”
“Don’t let the rear of the transmission
drop or hang unsupported.”
58 EATON® Drivetrain
If the clutch being replaced is a two-plate angle spring, pull the bearing back using the release tool shown in the video, and insert two 5/8"-thick shipping blocks.
If the clutch is a single plate angle spring, insert two 13/4" thick shipping blocks on the single plate model. This will prevent breaking the retainer and keep the levers from coming out of the retainer slot.
Installing the wooden shipping blocks also helps ensure that the clutch will release cleanly should you wish to reinstall it.
If you are removing a Solo®, do not unbolt the clutch from the flywheel unless you first install four shipping resetting bolts. The medium duty 14" Solo® uses 3/8"-16 x 11/4" coarse thread.
Install the bolts finger-tight, plus one turn. Now you can carefully remove the clutch.
The out-of-truck resetting procedure will be described later in this program. Failure to first install the four shipping bolts prior to the clutch’s removal from the flywheel will necessitate the use of this resetting procedure.
“… the wooden shipping blocks also help ensure that the clutch will release cleanly.”
“… the wooden shipping blocks also help ensure that the clutch will release cleanly.”
Module II, Section 4: Medium Duty Solo® Clutch Service 59
Remove two of the mounting bolts at the top of the clutch cover and install two guide studs in their place.
Take out the remaining six mounting bolts and carefully remove the clutch.
Solo® Removal/Installation Procedures (Two People Required)
If you need to temporarily remove a Solo® clutch, the following nine-step procedure must be performed prior to the clutch’s removal from the flywheel. Failure to perform these steps will cause the Solo® to drag or to not release upon reinstallation.
Also, if the Solo® clutch was removed without first installing the four shipping bolts and you now wish to reinstall the clutch, you must perform the out-of-truck resetting procedures described later in this program.
The first step in the removal and installation of a Solo® clutch is to fully depress the clutch pedal and hold at this position.
Next, slide the wear indicating tab to the far left and hold at this new position.
Let up on the clutch pedal. The tab will remain at the new position.
Since this part is heavy, you may want to use a hoist to ensure easier handling of the clutch.
CauTiON!
Since this part is heavy, you may want to use a hoist to ensure easier handling of the clutch.
CauTiON!
If the wear-indicating tab is at or near the replace position you can disregard the following nine-step process and install a new Solo® clutch at this time.
NOTEIf the wear-indicating tab is at or near the replace position you can disregard the following nine-step process and install a new Solo® clutch at this time.
NOTE
60 EATON® Drivetrain
Carefully remove the transmission, being sure to support its weight, so that no damage will occur to the release bearing assembly and driven discs.
Install four 3/8"-16 x 11/4" coarse thread machine screws, finger tight. Using a 9/16" wrench, tighten each bolt one turn. These four shipping bolts will cage the pressure plate, thus preventing the four plate spacers from moving out of position during the clutch’s removal from the flywheel.
Carefully remove the clutch from the flywheel, being sure to mark all the clutch parts so they can be properly oriented during reinstallation.
Inspect the ceramic buttons and their mating parts for an oily or grease covered condition, being sure to eliminate the source of any contamination before the clutch is reinstalled.
Please note Eaton® Fuller® does not recommend the reuse of contaminated discs. You must replace with new discs.
Using a 9/16" wrench, progressively tighten the four shipping bolts in a crisscross pattern until the face of the pressure plate is a minimum of 0.525" below the mounting surface.
Failure to perform this step properly may cause the Solo® clutch to drag or to not release upon reinstallation.
NOTEFailure to perform this step properly may cause the Solo® clutch to drag or to not release upon reinstallation.
NOTE
Module II, Section 4: Medium Duty Solo® Clutch Service 61
Reinstall the clutch according to the Solo® installation procedures shown later in this program, being careful to properly reorient the clutch parts.
Inspection
Inspect the mating surfaces of both the flywheel housing and the transmission bell housing. Any appreciable wear on either housing will cause misalignment.
Most wear will be found on the lower half of these surfaces, with the most common wear areas between the 3 and 8 o’clock positions.
Replace the clutch housing if it is worn.
Before you begin the following run-out checks, remove the two guide studs installed earlier, and also make sure that all gauging surfaces have been wiped clean.
Begin the first run-out check by securing the dial indicator’s base to the engine housing with the gauge finger on the face of the flywheel. Rotate the flywheel one full revolution.
For a Solo® clutch, the maximum allowable total run-out is 0.007".
“Most wear will be found on the
lower half of these surfaces.”
“Most wear will be found on the
lower half of these surfaces.”
62 EATON® Drivetrain
Proceed to the second run-out check by moving the gauge finger so that it contacts the pilot bearing bore surface.
Again, rotate the flywheel one full revolution. The maximum total allowable run out is 0.0005".
Begin the third run-out check by securing the dial indicator’s base to the center of the flywheel. Next, move the gauge finger until it contacts the flywheel-housing pilot.
Rotate the flywheel one full revolution and mark the high and low points.
The total indicated difference between the high and low points must be 0.008" or less.
For the fourth and final run-out check, secure the dial indicator’s base to the outer edge of the flywheel. Move the gauge finger until it contacts the base of the flywheel housing. Again, rotate the flywheel one full revolution while you mark the high and low points. The total run-out should not exceed 0.008".
This completes the inspection portion of the clutch job.
If any of the four previous limits are exceeded, the problem must be corrected, or the resulting misalignment will cause disc/damper failures and potential damage to other drivetrain components.
CauTiON!
If any of the four previous limits are exceeded, the problem must be corrected, or the resulting misalignment will cause disc/damper failures and potential damage to other drivetrain components.
CauTiON!
Module II, Section 4: Medium Duty Solo® Clutch Service 63

How It Works
A closer look at Solo® components reveals how engineers at Eaton® have been able to create and adjust the free clutch.
Critical to the clutch’s success are its pressure plate and plate spacers, which are exclusive to the Solo® design. There are four plate spacers located symmetrically about the Solo®. The plate spacers assure a proper plate separation throughout the life of the clutch, and sense the need for clutch adjustment.
Solo® also includes patented cams made of a strong composite material that withstands the harshest of conditions. And because there are no threads, the possibility of frozen rings is eliminated.
Atop the cams is a wear-indicating tab that mirrors the movement of the cams. This highly visible tab can be seen through an opening in the bell housing to determine the remaining clutch life.
So how exactly does the revolutionary Solo® work?
When the installation process is completed the transmission is installed as in the past and the clutch linkage is
“The plate spacers assure a proper plate separation
throughout the life of the clutch.”
64 EATON® Drivetrain
hooked up. This is where it really gets easy.
To set the clutch, actuate the pedal in the cab five times. As the release yoke pulls the release bearing back, the cams set the release bearing to the proper position.
The clutch linkage is then set to 1/8" between the yoke and the wear pads. Now the clutch is set and with each ensuing push of the pedal, the cams adjust for any wear in the clutch. As wear occurs, the plate spacers will reset themselves to allow the cams to sense for wear.
The plate spacers set on the engaged stroke to compensate for wear. The cams will reposition themselves on the next release stroke to compensate for the wear. When no clutch wear has taken place, the cams will not reposition.
Solo® 1401 Installation—Single Plate
Install a new premium grade pilot bearing C3 to C4 to C5 fit.
This bearing must have a press fit.
Install two 3/8"-16 x 3" guide studs. Install the disc by inserting the aligning
“As wear occurs, the plate spacers will reset themselves.”
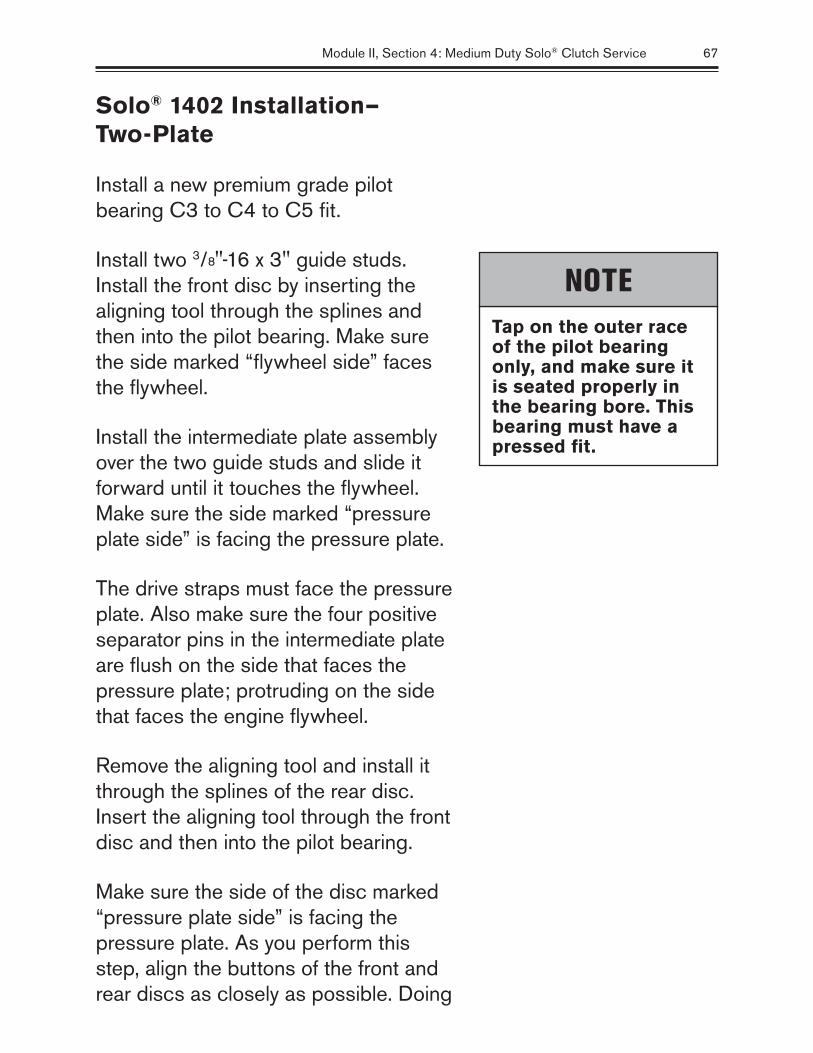
Tap on the outer race of the pilot bearing only, and make sure it is seated properly in the bearing bore.
NOTE
Module II, Section 4: Medium Duty Solo® Clutch Service 65
tool through the splines and then into the pilot bearing. Make sure the side marked “pressure plate side” faces the pressure plate.
With the aligning tool still in place, carefully slide the clutch assembly over the aligning tool and onto the two guide studs.
Start eight 3/8", Grade 5 or better mounting bolts with lock washers and tighten them finger tight. Using a torque wrench, progressively tighten the eight bolts in a crisscross pattern, starting with the lower left-hand bolt. The final torque of each bolt should be 30–35 ft.-lb.
Failure to tighten the bolts in this manner can cause permanent damage to the clutch cover, creating an out of balance condition, or cause the release bearing to be stuck rearward toward the nose of the transmission.
Remove the four yellow shipping resetting bolts in a progressive crisscross pattern. This will allow the pressure plate to move toward the engine and will clamp the disc to the flywheel. Save these bolts for future resetting or removal of the Solo®.
“Failure to tighten the bolts in this
manner can cause permanent
damage.”
66 EATON® Drivetrain
Solo® 1402 Installation—Two-Plate
Install a new premium grade pilot bearing C3 to C4 to C5 fit.
Install two 3/8"-16 x 3" guide studs. Install the front disc by inserting the aligning tool through the splines and then into the pilot bearing. Make sure the side marked “flywheel side” faces the flywheel.
Install the intermediate plate assembly over the two guide studs and slide it forward until it touches the flywheel. Make sure the side marked “pressure plate side” is facing the pressure plate.
The drive straps must face the pressure plate. Also make sure the four positive separator pins in the intermediate plate are flush on the side that faces the pressure plate; protruding on the side that faces the engine flywheel.
Remove the aligning tool and install it through the splines of the rear disc. Insert the aligning tool through the front disc and then into the pilot bearing.
Make sure the side of the disc marked “pressure plate side” is facing the pressure plate. As you perform this step, align the buttons of the front and rear discs as closely as possible. Doing
Tap on the outer race of the pilot bearing only, and make sure it is seated properly in the bearing bore. This bearing must have a pressed fit.
NOTE
Module II, Section 4: Medium Duty Solo® Clutch Service 67
68 EATON® Drivetrain
so will aid the function of the positive separator pins.
With the aligning tools still in position, carefully slide the clutch assembly over the aligning tool and the two guide studs until it rests against the intermediate plate assembly. Start eight 3/8", Grade 5 or better mounting bolts with lock washers, and tighten them finger tight.
Using a torque wrench, progressively tighten the eight bolts in a crisscross pattern by starting with the lower left hand bolt. The final torque of each bolt should be 35–40 ft.-lb.
Failure to tighten the bolts in this manner can cause permanent damage to the clutch cover or create an out-of-balance condition.
Remove the four yellow shipping resetting bolts in a progressive crisscross pattern. This will allow the pressure plate to move toward the engine and clamp the discs to the flywheel. Save these bolts for future resetting or removal of a Solo®.
Do not tamper with the four plate spacer bolts located next to each shipping bolt. They are designed for factory use only.
“Tighten the eight bolts in a
crisscross pattern.”

You may now remove the aligning tool. Using a lightweight hammer and a 1/4", flat-nose punch, lightly tap the four positive separator pins via the access holes on the clutch cover until each pin is touching the flywheel.
Failure to set these pins properly will cause the clutch to drag, resulting in a poor release complaint. Installation of the Solo® 1402 clutch is now complete.
Transmission Installation
Before installing the transmission, make sure it has been shifted into gear. If the truck is equipped with a non-synchronized transmission, install a new Eaton® Fuller® clutch brake at this time, being sure to check the front of the transmission bearing cap for excessive wear. Replace the cap if worn excessively.
Clutch brakes will never be used with synchronized transmissions.
Check the release yoke fingers for excessive wear. Replace if excessively worn. Coat the yoke fingers with grease to prolong the life of both the fingers and also the wear pads on the release bearing. Check the cross shafts and bushings for excessive wear. Replace if worn excessively.
“Clutch brakes will never be used with synchronized transmissions.”
Module II, Section 4: Medium Duty Solo® Clutch Service 69
Make sure the cross shafts do not protrude through the release yoke. This could cause a side loading condition between the release-bearing sleeve and the transmission input shaft.
Excessive wear at the cross shafts and bushings can also lead to a side loading condition which may result in a poor release complaint.
There should be zero wear on the input shaft splines. Even slight wear can cause a non-release condition once the new driven discs have been installed over the worn splines.
Do not apply grease or anti-seize on the input shaft. Use only a light coat of oil to aid in installation.
Check for worn linkage pivot points. Replace any parts which are worn excessively.
If you have installed a maintenance-free version of the Solo® clutch, you must install the roller type yoke package with this clutch. It is a specially designed release yoke, which will function only with the maintenance-free Solo®.
Make sure that the transmission is square to and aligned with the engine when it is raised into position. Lift the release yoke so that it clears and
The roller yoke must be installed with the “engine side” notation facing the engine.
NOTE
70 EATON® Drivetrain

is rotated over the wear pads of the release bearing as the transmission is moved forward.
Be careful. The release yoke fingers must not be elevated to the straight-out position. Both the clutch cover and release yoke fingers can be damaged when moving the transmission forward.
Move the transmission forward but NEVER force the transmission into the clutch cover or flywheel housing. If it doesn’t enter freely, investigate the cause and make any necessary changes.
Do not use the clutch release arm to pull the transmission into the engine housing. Doing so will cause the release bearing to adjust too closely to the transmission, the bearing cap or clutch brake. As a result, you might experience a dragging clutch due to shortened bearing travel.
Do not let the rear of the transmission drop or hang unsupported in the driven discs. The discs can be bent or distorted and will cause a no-release condition or broken damper disc.
Mate the transmission with the engine flywheel housing and install the mounting bolts. Torque the bolts based upon the manufacturer’s
“NEVER force the transmission into the clutch cover or flywheel housing.”
Module II, Section 4: Medium Duty Solo® Clutch Service 71
recommendations. This completes the transmission portion of the clutch job.
Set-Up Procedure
To properly set up the Solo®, the yoke must move the release bearing until one of the following occurs:
1. The bearing hits the transmission nose.
2. The bearing hits the clutch brake. This is for non-synchronized transmissions.
3. The bearing cannot be further moved and has hit the internal stop of the clutch cover.
Adjust the truck linkage until you have zero clearance between the release bearing wear pads and release yoke.
Setting the yoke to contact the bearing pads will allow for maximum stroke to the bearing and allow the clutch to set itself to the specific truck. The bearing must move slightly more than 9/16" in order for the Solo® to adjust fully.
Fully depress and release the clutch pedal in the cab five times. Indications that the Solo® is adjusting will be:
1. A gain in the free pedal in the cab.
“To properly set up the Solo®, the yoke
must move the release bearing …”
72 EATON® Drivetrain
2. Movement of the wear indicator on the clutch away from the “new” position, slightly toward the “replace” position.
3. The release bearing seats itself closer to the transmission nose.
Note, the Solo® will set itself based on the distance you pull the bearing. Do not attempt to adjust the bearing position by prying or hitting on the wear indicator, for it is easily broken off.
In addition, manually moving the wear indicating tab will not alter the final position of the release bearing.
The wear indicator is a visual indication of when to replace the clutch. If the tab has been broken, it has no effect on the function or life of the clutch.
If the bearing movement is not stopped at the end of the stroke by the transmission, clutch brake or internal stop, again reset the yoke clearance to zero, and again depress and release the pedal five times.
Any gain in free play in the clutch pedal indicates this second adjustment was necessary. The Solo® should now be fully adjusted.
“The Solo® will set itself based on the distance you pull the bearing.”
Module II, Section 4: Medium Duty Solo® Clutch Service 73
The next step is to adjust the truck linkage and create a minimum of 1/16" clearance between the release yoke fingers and the bearing pads. This setting will create the correct free pedal in the cab.
In some trucks, the pedal may stop off the floor. This is an acceptable condition and is the result of a linkage designed for maximum bearing movement.
However, if you prefer to lower the pedal at the end of the stroke you must reduce the total in-cab pedal movement.
For example, if you have a 12" pedal movement, lower the pedal one inch to create an 11" pedal movement. This will lower the pedal by one inch at the end of the stroke. You may need to modify or adjust the upper pedal stop bumper.
Now reset the 1/16" minimum clearance between the release yoke and bearing.
If a clutch brake is used, verify that the clutch brake squeeze begins approximately 1/2–1" from the end of the pedal stroke.
Adjusting the linkage to decrease the amount of free travel will increase the amount of clutch brake squeeze.
“… create a minimum of 1/16"
clearance between the release yoke
fingers and the bearing pads.”
74 EATON® Drivetrain
Inversely, adjusting the linkage to increase the amount of free travel will decrease the amount of clutch brake squeeze.
Lubricate the release bearing until lube purges out of the opening onto the transmission shaft. This will lube the bearing and bushing. Apply lube to the release yoke fingers as well as the cross shafts.
Alternative Set-Up Procedure
If you can access the external clutch arm attached to the cross shaft you can use the alternative set up procedure. Place a pipe or tool over the release arm and rotate the cross shaft to move the release bearing toward the transmission until it stops.
The bearing should be moved until it contacts the transmission nose, hits the clutch brake, or is limited by the internal stop inside the clutch. Repeat this procedure five times.
Indications that the Solo® is adjusting will be:
1. Movement of the wear tab from the new position slightly toward the replace position.
Clutch brake squeeze should be verified by inserting a 0.01" feeler gauge between the bearing and clutch brake.
NOTE
Module II, Section 4: Medium Duty Solo® Clutch Service 75
2. The release bearing will seat itself closer to the transmission nose.
3. There will be an increase in free play at the clutch pedal.
Now install the truck linkage. Adjust the linkage to set the clearance between the release yoke fingers and the release bearing pads to a minimum of 1/16". This will create the correct free pedal in the cab.
Also, manually moving the wear-indicating tab will not alter the final position of the release bearing.
The wear indicator is a visual indication of when to replace the clutch. If the tab has been broken, it has no effect on the function or life of the clutch.
If a clutch brake is used, verify that the clutch brake squeeze begins approximately 1/2–1" from the end of the pedal stroke. Adjusting the linkage to decrease the amount of free travel will increase the amount of clutch brake squeeze.
Inversely, adjusting the linkage to increase the amount of free travel will decrease the amount of clutch brake squeeze.
The Solo® will set itself based on the distance you pull the bearing. Do not attempt to adjust the bearing position by prying or hitting the wear indicator, for it is easily broken off.
NOTE
76 EATON® Drivetrain
Lubricate the release bearing until lube purges out of the opening, onto the transmission input shaft. Including the release bearing, this excess grease will also prolong the life of the bronze bushing inside the release sleeve.
Do not be concerned if grease gets onto the clutch brake, since it will not affect the brake’s ability to stop the input shaft.
Apply lube to the release yoke fingers, as well as the cross shaft.
Resetting Procedure (Solo® Out of Truck)
The following resetting procedure is necessary if you removed the clutch from the flywheel without first installing the four shipping bolts and now wish to reinstall the Solo® clutch.
Failure to observe the following resetting procedures will prevent the clutch from releasing upon reinstallation.
Please note for future reference, this information is also available in the Installation and Adjustment Wall Chart packaged with each Solo® clutch.
Support the clutch in an armor press, allowing approximately 1" of space beneath the release bearing.
“Do not be concerned if grease gets onto the clutch brake.”
To prevent damage between the internal stop of the Solo® and the clutch cover, do not over-stroke the retainer assembly.
CauTiON!
Module II, Section 4: Medium Duty Solo® Clutch Service 77
Center the ram and move the retainer downward until you can slide the wear-indicating tab to the new position.
While holding the tab at its new position, install four 3/8"-16 x 11/4" course thread shipping bolts until they are finger tight. A magnet can be used to hold the tab while installing these bolts. You may now retract the armor press ram.
Using a 9/16" wrench, progressively hand-tighten these four shipping bolts until the face of the pressure plate is a minimum of 0.525" below the cover’s mounting surface. This will allow the four plate spacers to be repositioned.
For additional technical information, refer to both the Installation and Adjustment Wall Chart packaged with each Solo® clutch and the Troubleshooting Manual.
Recommended vehicle loads should not be exceeded. The clutch should be used only for recommended applications.
Drivers should be properly trained in the starting, shifting, and operation of the clutch.
Drivers should report erratic clutch operation as soon as possible to permit
Failure to perform this step properly may cause the Solo® clutch to drag or not release upon reinstallation.
NOTE
The major cause of clutch failure is excessive heat. Excessive heat generated from the flywheel, driven discs, intermediate plate and pressure plate can cause the metal to flow and the friction material to be destroyed. If this occurs, the clutch can burst, resulting in property damage, serious bodily injury, or death.
WarNiNg!
78 EATON® Drivetrain
maintenance personnel to inspect, adjust or lubricate as required.
Mechanics must be familiar with the proper clutch adjustment, linkage adjustment, lubrication and other maintenance and troubleshooting procedures outlined in the Failure Analysis Guide and the Eaton® Service Manual.
Module II, Section 4: Medium Duty Solo® Clutch Service 79

NOTES
80 EATON® Drivetrain
Drive Axle Failure Analysis Parts I & II
Drive axle failures fall into one of five basic categories. They are:
1. Shock failures
2. Fatigue failures
3. Spin-out failures
4. Lubrication failures
5. Normal wear
Shock Failures
First, let’s talk about shock failures. Shock damage occurs when gear teeth or shafts are stressed beyond the strength limitations of the material. The failure could be immediate from a sudden shock, or it could be a progressive failure after an initial shock cracks a tooth or shaft surface.
Shock caused immediate damage to the ring gear, as shown in the video. One violent shock impact broke the ring gear teeth that were enmeshed at the time of impact. This is indicated by the clean-cut, light colored gray surface of the fractures, which follow the contour of the teeth. It is similar in appearance to broken concrete.
Section 5
Overview
Provides information about drive axle failures due to shock, fatigue, spinout, lack of lubrication and normal wear and tear.
Module II, Section 5: Drive Axle Failure Analysis 81
82 EATON® Drivetrain
The teeth on the sliding clutch gear broke in the area that meshes with the planetary idler pinions, as shown in the video. A severe shock load caused an instant fracture of the four clutch gear teeth that were enmesh with the planetary idler pinions. This occurred when the vehicle was started in high range with a heavy load.
One sudden shock impact fractured the engaged teeth of the two helical gears shown in the video. The adjacent teeth were damaged by broken metal pieces. Sliding clutches and power dividers bear the brunt of impacts and shocks.
One section of the clutch was completely fractured, as shown in the video. An instantaneous shock created the rough surface pattern on the fracture. This was probably caused by attempting to engage the inter-axle differential lockout while the wheels were still spinning.
Shock impacts subject shafts to extreme twisting forces called torsional forces. An instantaneous break due to excessive torsional forces is usually indicated by a smooth, flat fracture pattern.
A single severe shock load created the smooth, flat break of the broken output shaft, as shown in the video. Note
“Shock impacts subject shafts to extreme twisting
forces called torsional forces.”
how the splines are bent. The splines withstood the impact, but the shaft broke at its most vulnerable point.
This damage was caused by abusive operation such as a spinning wheel suddenly hitting dry pavement, or a rough trailer hook-up, or engaging the inter-axle differential lockout with wheels spinning.
Torsional shock loads can also cause rough surface fractures. When the break is at a constant section of a shaft it will usually be at a 45 degree angle, as seen on the drive pinion shaft in the video. Abusive truck operation usually causes this type of shaft failure.
One example is starting a truck from a dead stop on a hill or steep grade. If the truck rolls backward before completing clutch engagement this sudden reversal in pinion rotation creates a severe shock impact on the pinion.
A severe blow caused the output shaft torsional shock failure shown in the video to begin. Note the twisted splines. A final shock impact fractured the shaft at the section change. The direction of the spline twist indicates that the break occurred with the truck moving forward.
“Torsional shock loads can also cause rough surface fractures.”
Module II, Section 5: Drive Axle Failure Analysis 83
This shock impact could have occurred when attempting to adjust the position of a trailer’s sliding tandem.
Another torsional shock failure is shown in the video. Again, an initial shock set the stage for this shaft failure. Note the twisted splines. One final blow fractured the shaft. The direction of the spline twist indicates that the break occurred with the truck operating in reverse.
This could have happened when backing the truck into a loading dock, backing into a low trailer hitch, or attempting to adjust the position of a trailer sliding tandem.
When the initial shock impact is not enough to cause an immediate, complete fracture, the tooth or shaft will crack and a progressive failure will occur. The flat rough break at the sectional change of the input shaft shown in the video was caused by multiple shock loads.
The initial impacts probably cracked the surface at the section change and one final blow completed the fracture. This torsional shock failure is generally caused by abusive truck operations such as a spinning wheel hitting dry surface, or incorrect operation of an
“This torsional shock failure is
generally caused by abusive truck
operations.”
84 EATON® Drivetrain
inter-axle differential lockout, or abusive clutch operation.
Axle shafts bear the brunt of maximum torque in the drivetrain. The angled fracture and rough surface pattern on the shaft break shown in the video indicate that the torsional failure was caused by one severe shock load. Abusive truck operation is again a likely cause.
A severely damaged wheel differential is shown in the video. An initial severe shock fractured the spider arms and side pinions of the wheel differential. Continued operations damaged the side gear teeth.
Fatigue Failures
Now let’s look at fatigue failures. These failures are usually defined as a progressive destruction of shaft or gear tooth material. This type of failure is usually caused by overloading. There are three kinds of fatigue failures: surface, torsional and bending.
Surface failures are usually identified by cracked or pivot and spalled tooth surfaces and are generally caused by repeated light overloading. As the failure progresses, the surface material flakes away. In some instances an
“There are three kinds of fatigue failures: surface, torsional and bending.”
Module II, Section 5: Drive Axle Failure Analysis 85
elliptical design will be created in the fracture pattern.
The drive pinion failure shown in the video started with cracked teeth. The three pinion teeth enmesh were subjected to an initial severe shock. The material at the tooth core distorted and the tooth’s surface cracked on all three teeth. Continued operation resulted in a fatigue failure or case crushing.
The pinion shown in the video was also subjected to severe service, as indicated by the polished bearing journals. Severe service could have created a high pressure on one side of the bearing. This would seize the rollers so they would skid rather than roll. Then the inner race would turn on its journal and create the polished surface.
Flakes of metal have broken off the pinion tooth surface and created a spalled condition, as shown in the video. This fatigue failure started with pits just below the pitch line of the tooth and advanced to spalling of the tooth-working surface.
Spalling is usually caused by continuous overloading which creates severe pressures between the mesh teeth. Another cause could be lubricant breakdown, contamination, an incorrect lubricant, or low lube level.
“Spalling is usually caused by continuous overloading.”
86 EATON® Drivetrain
An initial shock load on the helical gear teeth enmesh started the fatigue failure shown in the video by cracking the case-hardened tooth surface. Repeated loads caused a progression of fractures. This is evidenced by beach marks, which resemble the pattern that waves create in sand. This failure could have been caused by engaging the lockout with the wheels spinning.
When this condition exists, inspect mating helical gear teeth for damage. Also check the lockout sliding clutch for cracks.
The second kind of fatigue failure is torsional failure. These failures in shafts are usually indicated by a star-shaped fracture pattern. Cracks start on the outside of the shaft and progress inward toward the center. Repeated overloads finally fracture the shaft.
A crosscut section of a shaft, which failed from torsional fatigue, is shown in the video. An extremely high load caused the surface to crack initially. Then, under normal operation the cracks progressed to the center of the core until the shaft failed completely.
Bending failure is the third kind of fatigue failure. In shafts, rotating and bending forces will usually cause a scalloped or spiral type fracture pattern.
“Torsional failures in shafts are usually indicated by a star-shaped fracture pattern.”
Module II, Section 5: Drive Axle Failure Analysis 87
Overloads will progressively crack the shaft and gradually weaken it until a complete fracture occurs.
Torsional and bending forces caused the pinion shaft shown in the video to fail. Note the conical or circular pattern of the fracture. The initial damage was probably caused by operational overloads or primary shock loads as evidenced by the smooth, scalloped design in the fracture. One final blow completed the fracture.
Note the rough section of fracture at the center of the pinion head. Operational overload or abusive truck operation caused this failure.
In gears, bending forces will generally crack the tooth’s surface. As the crack continues to grow a beach mark design is formed in the fractured pattern. The tooth is finally weakened to a point where it will break.
Spinout Failures
Now, let’s look at spinout, the third type of failure. Excessive wheel spinning, called spinout, can cause excessive damage to wheel and inter-axle differentials.
Friction-caused heat is the damaging factor. When the wheel spins because
“Bending forces will generally
crack the tooth’s surface.”
88 EATON® Drivetrain
of traction loss, the speed of some of the differential gears increases greatly while others remain idle.
As the heat developed soars, the lube film breaks down and metal-to-metal contact occurs causing damage. If spinout is allowed to continue long enough, the axle can break down completely.
Spinout is the greatest killer of wheel differentials and caused the damage shown in the video. Heat developed by excessive spinout caused this failure. When metal-to-metal contact occurred, the pinions froze to the spider arms, causing fracture.
Improper Lubrication
The fourth type of axle failure is caused by improper lubrication, which falls into four categories.
Lube contaminated by moisture or wear particles can cause etching, scoring and pitting on contact surfaces.
Inadequate lubrication can create friction, cause overheating, break down the protective film and, finally, result in seizure of mating parts.
Improper lube or the wrong type of lubricant for the working environment
“Spinout is the greatest killer of wheel differentials.”
“Inadequate lubrication can create friction.”
Module II, Section 5: Drive Axle Failure Analysis 89
will not provide the lubricating film that is required to prevent metal-to-metal contact. Incorrect viscosity can cause a breakdown of the lube film.
Inadequate lube damaged a ring gear, as shown in the video. This gear has a black and charred appearance, which indicates overheating. Lack of lubrication caused the dry-pinion tooth surfaces to melt. The metal lifted off the pinion and fused to the ring gear teeth. This is usually caused by low lubricant.
A close-up view of the tooth’s surface is shown in the video. When this type of ring gear and pinion failure occurs, be sure to check bearings and related parts for damage. They were also subjected to excessively high temperatures.
A drive pinion with scuffed and scored teeth is shown in the video. When this condition occurs with a charred appearance, overheating is indicated.
Lack of lubrication caused the tooth’s surfaces to partially melt, as shown in the video. This, in turn, caused a scuffed and scored surface. The primary cause was insufficient lubricant level. When overheating occurs, check bearings and related parts for damage.
“When overheating occurs, check bearings and related parts for damage.”
90 EATON® Drivetrain
Wheel differential side gears can be damaged, as shown in the video. This failure was caused by contamination. Other parts failed and the resulting metal particles contaminated the lubricant. This resulted in tooth fracture and abrasive wear.
Inspect for other damaged axle parts to find out what caused the original lube contamination.
A worn wheel differential case is shown in the video. Note the scoring and wear of the case surface where it comes in contact with the thrust washers. Excessive spinout or low lube level initiated this damage.
The lube became contaminated and continued operation caused the scoring and excessive wear shown. When this condition exists, inspect all thrust washers, side pinions and other parts for damage.
These parts could have been damaged initially by spin out or low lube level, or by the resultant contaminated lube.
Planetary units in the secondary gearing are subjected to high torque. Even though they are strong and durable, failures do occur.
Module II, Section 5: Drive Axle Failure Analysis 91
A sliding clutch gear with pitted and spalled teeth is shown in the video. The rough condition of the tooth surfaces started with pits below the tooth centerline. The pitting worked its way above the tooth centerline. The continued operation caused flakes of metal to break off the tooth surfaces until spalling occurred.
The mating idler pinion, which also shows signs of pitting and spalling, is shown in the video. This type of damage is usually caused by contaminated lube or continuous overloading, which puts severe pressures on the working surfaces of enmesh teeth. This breaks down the lube film and causes pitting.
Lubricant contaminated with fine particles caused the scoring of the bushing, as shown in the video. Note the deep, fine scratches. Minor damage has also occurred on the gear thrust washer-mating surface.
When this condition exists, check the input shaft journal and the inter-axle differential parts for damage. Also check the bushing and the end of the output shaft for a similar condition. If scored, check the input shaft-mating journal.
Pitting and spalling of the bronze thrust washer was caused by corrosive
“This type of damage is
usually caused by contaminated
lube or continuous overloading.”
92 EATON® Drivetrain
etching, as shown in the video. Deep scoring occurred near the inside diameter.
Contaminated lube caused pitting, which developed into the spalled condition shown in the video. Metallic pieces from the spalling caused deep scoring near the inside diameter of the washer.
Check and clean the magnetic drain plug any time you change lube to remove metallic particles that may be present from normal wear or parts failure.
A drain plug with an excessive accumulation is shown in the video. This condition, especially if accompanied by large particles, is a definite indication of trouble in the axle.
Disassembly and inspection of axle parts is recommended.
Normal Wear
Normal wear is the fifth type of axle failure. It’s important to recognize normal wear to eliminate unnecessary parts replacement.
During initial operation, break-in wear will occur in any mechanical assembly. Burnishing or minor scratches do not
“Check and clean the magnetic drain plug any time you change lube.”
Module II, Section 5: Drive Axle Failure Analysis 93
usually affect the part’s usefulness. Some marks and surface patterns on metal finishes are natural designs peculiar to manufacturing operations.
For instance, the horizontal lines on the tooth faces of the idler pinion, as shown in the video, are normal manufacturing marks. These lines are not harmful to the life of the pinion. The rippling effect shown on the top land of the sliding clutch teeth is also a normal manufacturing mark. The small chip marks at the left end of the teeth are normal after considerable mileage.
The side gear thrust washer has numerous scoring marks and pitting, as shown in the video. Excessive wear is indicated. Replace this washer. Minor abrasions are indications of normal wear, and such washers have service life left in them.
However, to achieve maximum value from an axle rebuild, Eaton® recommends that low cost parts, such as thrust washers, be replaced regardless of their apparent condition.
The teeth on the drive pinion shown in the video show excessive wear through the case-hardened surface and into the core material.
“Some marks and surface patterns
on metal finishes are natural
designs peculiar to manufacturing
operations.”
94 EATON® Drivetrain
Pinion teeth are case-hardened for high tolerance to wear. The softer core provides the toughness required to withstand bending or shock loads. Once the outer surface is penetrated, wear occurs rapidly, even under normal operation.
If this failure occurred at low mileage the pinion teeth surfaces may have been incorrectly heat-treated, resulting in what is called a soft gear. Examine the mating parts for damage.
If this condition exists, mating parts will not show similar damage. A charred appearance on the pinion teeth would indicate lack of lube.
When a pinion is damaged, as shown in the video, check other axle parts for damage due to lube contamination.
Improper shifting caused excessive wear on the teeth of the shifting plates, as shown in the video. Note the crack in the high-speed clutch plate. This was caused by excessive periodic shock loads.
The mating sliding clutch gear is shown in the video. Note where more wear has occurred on the high-speed side of the sliding clutch gear. This was probably caused by improper shifting.
“Pinion teeth are case-hardened for high tolerance to wear.”
Module II, Section 5: Drive Axle Failure Analysis 95

96 EATON® Drivetrain
Under normal operating conditions, bronze idler pins may show minor abrasion or wear on the surface contacting the pinion.
If the entire pin surface was in this normal wear condition, it would be considered acceptable for reuse.
However, when abrasions or scoring is 1/64" or more, as shown on the right side of the pin in the video, the pin should be replaced.
Metal particles in the lubricant caused abrasive wear of the idler pin, as shown in the video. The pin-to-idler mating surface is scored and worn. Note the eccentric pattern of wear at the right end. Mild or slight scoring of the pin surface will not affect operation.
The maximum tolerance for pin-fit in the case or idler pinions is 1/64", provided all pins are worn approximately the same.
Each part of the inter-axle differential has been subjected to wear, as shown in the video. Let’s look at each part:
1. The spider arms are worn and scored. The shiny areas indicate wear due to excessive differentiation.
2. The bushings are scored.
“Under normal operating
conditions, bronze idler pins may show minor
abrasion or wear.”
3. The thrusts washers are worn.
4. The side pinion teeth are worn.
5. The edges are chipped.
6. A close look at the spider shows irregular shaped splines due to wear. This type of wear is usually accelerated by excessive endplay in the differential.
A worn inter-axle differential case is shown in the video. Metal-to-metal contact between thrust washers and the case caused this wear pattern on the case wall. A smooth circular pattern is normal. However, this example has deep ridges at the end of the pattern. The case should be replaced.
We have examined failures involving gears, shafts and cases. Now let’s look at bearings. Primarily, tapered rolling bearings.
The bearing cup in the video displays an uneven wear pattern, typical of low mileage with light or moderate loads. It is caused by the bearing preload applied during assembly and will gradually become more even as mileage increases. If not otherwise damaged, parts showing this wear pattern can be reused.
“Metal-to-metal contact between thrust washers and the case caused this wear pattern on the case wall.”
Module II, Section 5: Drive Axle Failure Analysis 97
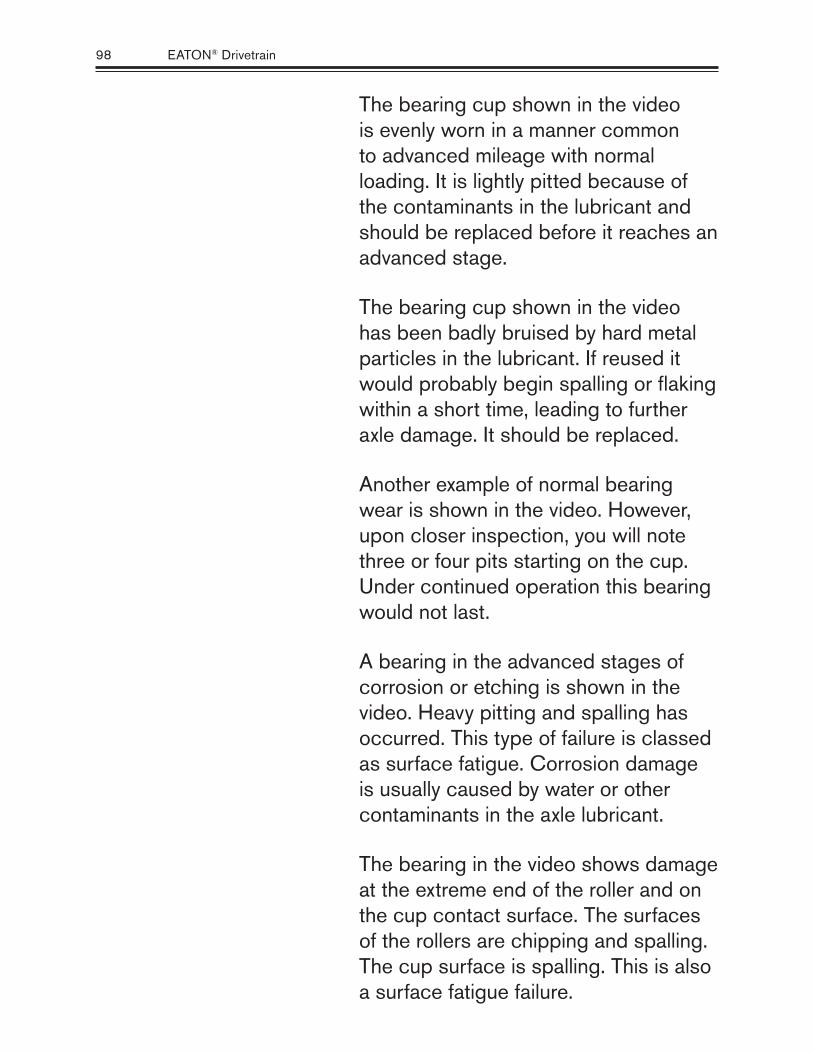
The bearing cup shown in the video is evenly worn in a manner common to advanced mileage with normal loading. It is lightly pitted because of the contaminants in the lubricant and should be replaced before it reaches an advanced stage.
The bearing cup shown in the video has been badly bruised by hard metal particles in the lubricant. If reused it would probably begin spalling or flaking within a short time, leading to further axle damage. It should be replaced.
Another example of normal bearing wear is shown in the video. However, upon closer inspection, you will note three or four pits starting on the cup. Under continued operation this bearing would not last.
A bearing in the advanced stages of corrosion or etching is shown in the video. Heavy pitting and spalling has occurred. This type of failure is classed as surface fatigue. Corrosion damage is usually caused by water or other contaminants in the axle lubricant.
The bearing in the video shows damage at the extreme end of the roller and on the cup contact surface. The surfaces of the rollers are chipping and spalling. The cup surface is spalling. This is also a surface fatigue failure.
98 EATON® Drivetrain
Oil seals are a critical part of the drive axle. All parts of the seal must be in good condition to prevent lube leakage. With reference to the seal drawing in the video, here’s what to watch for:
• A new seal lip has a sharp edge. Normal wear will dull this edge. Check the lip. If the sharp edge is flattened greatly, replace the seal.
• Check the seal’s lip contact area. If this area is over 1/32", the seal may be excessively worn or the material may have lost its consistency. Check the yoke for a rough or scored condition. If it exists, replace the seal and yoke.
• Check for bonding separation of the seal from the outer shell. This could change the flexibility of the seal lip and cause leaks. Replace the seal.
• Check the seal spring. If it has lost its tension, replace the seal.
Oil Seal General Inspection
Here are some additional seal inspections you should make:
Check the seal lip for cuts, nicks or other defects. Do this carefully. The smallest defect on the lip could cause a leak.
“All parts of the seal must be in good condition to prevent lube leakage.”
Module II, Section 5: Drive Axle Failure Analysis 99
Check the seal for a hardened, brittle or cracked condition. This is usually caused by excessive temperatures. If the seal lip is not flexible and free of defects, it will leak.
Check for an accumulation of sludge and other contamination. Look inside under the seal lip and the casing. The seal should be clean and free of contaminants.
Check how the seal fits on the yoke. If it feels loose, the seal lip may have lost its material consistency. Replace the seal.
Also check the yoke for damage. Scoring of this yoke’s seal surface was caused by abrasive elements. A hardened or faulty seal lip or lack of initial lubrication at the lip could also cause this condition.
The outer shell of the seal is still another area that requires close inspection. Here are three failure possibilities:
• Light and dark areas on the seal’s outer shell could indicate that the seal area was distorted or the mounting bore out-of-round. Leakage would occur between the seal shell and the mounting bore. Replace all faulty parts.
“If the seal lip is not flexible and free of defects
it will leak.”
100 EATON® Drivetrain
• Deep scratches will cause leakage between the cover and the seal’s outer case. This condition could have been caused by a burr or other contaminants in the seal’s mounting bore which were not cleaned out during installation.
• A bent or damaged outer shell may cause leakage. This damage probably occurred during installation.
Axle Housing Failures
The final drive axle component we’re going to look at is the axle housing. Overloading and misapplications are the most common causes of housing failures. Fatigue failures and cracks can also shorten the life of the housing.
Most fatigue failures are caused by loose, over-torqued, or incorrect clamping hardware. The following are typical examples.
Over-tightening clamp hardware caused the condition shown in the video. Sufficient clamp load at the spring pad area is important to keep the joint tight. However, this must be done using OEM specification. Also, pre-designed hardware must be used.
“Deep scratches will cause leakage between the cover and the seal’s outer case.”
Module II, Section 5: Drive Axle Failure Analysis 101
When this condition exists, inspect the housing for cracks. If no cracks exist, use new clamping hardware with OEM-specified parts and torque specifications. If correct hardware does not fit properly, replace the housing.
Loose clamping hardware can cause cracks at the top and/or bottom of the axle housing. Wear spots in the spring pad area indicate loose hardware. Also, oil leakage from the same area is an obvious sign of a crack. Replace a cracked housing.
To prevent repeat failure, always use OEM-specified clamping hardware and torque specifications.
The fatigue cracks shown in the video are peculiar to this type of suspension bracket. They start at the bracket weld and progress as illustrated. This type of failure is generally caused by misapplication or a material or weld problem.
“Always use OEM-specified
clamping hardware and torque
specifications.”
102 EATON® Drivetrain

Another indication of a crack would be a wet spot caused by lube leakage. When this condition exists, replace the axle housing.
The housing spindle shown in the video was damaged by seized bearings or loose bearing adjustment. Lube deficiency is the most common cause of scored or worn spindles.
If scoring is excessive, or if wear has progressed to a point where the bearing is loose on the spindle, replace the housing and spindle assembly. In a cast steel housing, the spindle can be replaced.
“Lube deficiency is the most common cause of scored or worn spindles.”
Module II, Section 5: Drive Axle Failure Analysis 103

NOTES
104 EATON® Drivetrain
Spur Gear Life
Understanding Spur Gear Life
Spur gears are the most important part in the transmission. The precision-machined teeth on these hardened steel components transmit the truck engine’s power into usable speed and torque ratios. Sometimes spur gears fail in service, but failure is less likely in twin counter-shaft Fuller® transmissions because the actual load is distributed among a set of three meshing gears.
Initial Pitting
Signs of changes or distress on gear tooth surfaces may suggest that a gear needs replacing. But most often these surface changes may actually heal over with use.
Moderate Pitting
Gears that appear to be getting ready to fail may give many more miles of trouble-free service, especially if the transmission is going back into the same type of use.
This program will help you to identify common gear problems, to determine a cause, and to decide by visual inspection whether certain gears should
Section 6
Overview
Shows how to identify gear problems, determine their cause and decide whether certain gears need to be replaced.
Module II, Section 6: Spur Gear Life 105
be replaced during a rebuild. Let’s see how Fuller® gears are designed and manufactured to minimize problems.
The engine’s power is transmitted between gear teeth in a sliding motion, then a rolling motion, then sliding again as the gears rotate. A thin film of lubricant is carried through mesh to prevent metal-to-metal contact. Because most loading occurs at full mesh, gear tooth profiles are designed to minimize wear caused by sliding motion.
Since it’s impossible for any manufacturer to make every tooth profile exactly the same, manufacturing tolerances have been established that will not shorten gear life. Although different gear teeth may vary slightly in shape, each surface must fit within specified tolerances, as shown in the video.
Gear teeth are designed with their pitch lines parallel to the centerline of the shaft. The angle between pitch line and centerline is referred to as lead. As with tooth profile, tolerances have been established to allow meshing of gears with slight lead variations in opposite directions.
In addition, Fuller® transmission main shaft gears are crowned or curved slightly to prevent heavy loads from
“Gear tooth profiles are designed
to minimize wear caused by sliding motion.”
106 EATON® Drivetrain
being concentrated on the ends of the teeth. When you hold a new gear in your hand, the tooth surfaces, or flanks, appear relatively smooth.
But if you compare a gear flank with a bearing surface, for example, the gear is relatively rough.
Let’s look at part of a pilot-bearing surface under a microscope, magnified 600 times. You can see in the video that even the smoothest looking surface contains irregular hills and valleys. The gear tooth flank on the right, also magnified 600 times, shows how irregular the surface of a gear can be. Keep in mind that in both examples the area you are looking at is only 0.005" wide.
Surface irregularity can be a wear factor when gear teeth slide over one another.
At any time within the life of a transmission, the gearing may have to adjust to different operating conditions. In fact, the gears are constantly readjusting to one another, resulting in changes in surface appearance. These changes in appearance should not be considered a problem and no strength or life is lost when they occur.
One of the most commonly observed changes is what we refer to as frosting.
“Surface irregularity can be a wear factor when gear teeth slide over one another.”
Module II, Section 6: Spur Gear Life 107

Frosting looks like a band of whitish discoloration starting near the bottom of the tooth. But it is really a concentration of tiny pits resulting from the removal of slight variations in form as the teeth adjust to a common pitch line. Frosting is quite normal and should not be a reason to replace a gear.
In normal service, the band of frosting will usually be replaced by a very shiny area. This normal polishing process is called healing and does not reduce gear life. Frosting may occur on other parts of the tooth when mating teeth are within tolerances, but have lead variations in opposite directions.
Slight wear, called offset frosting, may take place until the load is evenly distributed across the entire width of the tooth. Then healing should occur with no further wear.
Initial pitting is another result of normal changes in gear service. Lubricant fills the irregularities we saw in the microscopic views of tooth surfaces. But sometimes, under repeated heavy loads, the oil pressure developed between teeth may start small surface fractures that eventually break up to form tiny pits.
“Frosting is quite normal and should not be a reason to
replace a gear.”
108 EATON® Drivetrain

Slightly rougher than frosting, initial pitting will not cause noise. And like frosting, usually heals over.
The gear shown in the video shows both frosting and initial pitting, but it should not be replaced because both distress signs are likely to heal over without further problems.
Because the Fuller® twin counter-shaft design distributes the load more evenly over a set of three gears instead of only two, we sometimes see combinations of minor distress forms or acceleration of healing not normally seen in a single countershaft transmission.
There are several factors that may cause progressive forms of surface distress. For example, inadequate lubrication can cause frosting and pitting to advance to a more severe stage instead of healing over.
Gear Lubrication
Because of this, it is extremely important to use the correct type of lubricant. Be sure it is of adequate viscosity. Maintain proper lube level, and change lubricant at recommended intervals.
If you tear down a transmission that has had considerable use, you may see moderate pitting, as shown in the video.
“Inadequate lubrication can cause frosting and pitting to advance to a more severe stage instead of healing over.”
Module II, Section 6: Spur Gear Life 109
The gear has pitting about twice the size of initial pitting on approximately half of a tooth’s surface. And it has lived about half of its expected life. The teeth have not been weakened significantly and there is no danger of breakage.
As with gears that show frosting or initial pitting, this type of moderate pitting will not cause a noise complaint because of the overall involute, or curved form of the tooth, has not been affected.
The gear shown in the video also has pitting on approximately 50% of the tooth’s surface. But unlike the previous gears shown, this gear should be replaced. The pitting is concentrated at the pitch line, which changes the involute form. Although the teeth have not been significantly weakened, noise can be generated because the involute form no longer falls within the tolerance band discussed earlier.
This gear should be replaced because noise and fatigue fractures may occur. Notice that the pit craters are much larger and deeper than in moderate pitting. This kind of destructive pitting can cause very serious problems.
You’ve just seen, in destructive pitting, one example of the kind of distress sign that means the gear should be replaced.
“… noise can be generated because
the involute form no longer falls within the
tolerance band.”
110 EATON® Drivetrain
Let’s pause for a moment and review the factors to consider when deciding whether to replace a certain gear or reinstall the old one.
Replacement Factors
The first thing to think about is how much longer the transmission is expected to be in service.
The second factor is the kind of service. For example, in a transmission that is expected to give 500,000 miles of service, you find moderate pitting of the main drive gear at 300,000 miles. If there is not a noise complaint and the transmission is going back into the same operation, there should be no reason to replace the gear.
On the other hand, rougher driving conditions may increase wear. If a transmission previously driven under moderate highway conditions is going to be rebuilt and installed in a truck operating under more severe conditions, then gears that are already showing signs of advanced stages of distress cannot be expected to wear at the same rate as in the past.
Another factor is noise. If a noise complaint has been traced to a particular gear set, the noise may be a sign of future trouble. The entire gear
“The first thing to think about is how much longer the transmission is expected to be in service.”
Module II, Section 6: Spur Gear Life 111
set should be replaced, regardless of its appearance.
Finally, if you don’t know the history of the transmission, its application, any previous noise complaints, or its expected life, then questionable gears should be replaced.
We’ve looked at examples of minor and progressive forms of gear tooth surface distress. Problems that may not require replacing the gears. Now let’s examine the kinds of trouble that always require replacing. Replacing not just the single distress gear, but the gears it mates with as well.
Spalling, as shown in the video, is the result of extreme overloading for a short period of time. It appears as these craters that are similar to destructive pitting, except that the pits are wider and shallower. This gear and its mates should all be replaced.
Scoring, as shown in the video, is caused by high temperature, metal-to-metal contact resulting from insufficient oil film between mating teeth. The extreme heat causes an alternate welding and tearing of metal, which is rapidly worn away from the tooth’s surface. Replace.
“If you don’t know the history of the
transmission … then questionable
gears should be replaced.”
112 EATON® Drivetrain
Burning is another problem resulting from extremely high operating temperatures. When inspecting a transmission with a burned headset like the one shown in the video, it’s not unusual to find the main drive gear badly scored with only slight visible damage to the mating gears. This difference in wear occurs because the teeth of the main drive gear make contact almost three times as often as the teeth of the mating countershaft gears.
When replacing a burned main drive gear, also replace the mating gears, even if there is no visible damage.
Gear Tooth Fractures
Finally, there are three types of fractures that always require replacing. When a gear tooth breaks out, not only will that gear fail, but loose pieces of metal can cause further serious damage to other parts of the transmission.
The three types of gear tooth fractures are:
• Impact fractures.
• Fatigue fractures.
• Stringers, or gas pockets.
“When replacing a burned main drive gear, also replace the mating gears, even if there is no visible damage.”
Module II, Section 6: Spur Gear Life 113
An impact fracture, as shown in the video, is caused either by a shock load or by a foreign object passing through the gear mesh. An impact fracture can be identified by a bump on the compression side of the fractured area. The more cycles the gear runs after the fracture, the smaller the bump will be.
In addition to the gear, which has a tooth fracture, the other two gears of that set should also be replaced. Even though they may look undamaged, all gearing should be inspected for possible damage caused by the broken tooth running through the transmissions.
Fatigue fractures like those shown in the video are caused by extremely high stresses on a gear tooth over a period of time. Fatigue fractures are identified by beach marks on the fractured area. These marks are made as the tooth progressively cracks under a load heavy enough to enlarge the crack, but not great enough to break off the entire tooth at one time.
Finally, stringers or gas pockets are the result of undetectable flaws or weak points in the metal the gear was made from. These fractures can be identified by the differences in the fracture’s shape and metal texture in the brake’s surface.
“Fatigue fractures are identified by
beach marks on the fractured area.”
114 EATON® Drivetrain
Again, as with other fractures, it’s very important to inspect all gearing in the transmission for possible damage caused by loose particles of metal.
You’ve seen examples of the major kinds of spur gear wear problems that you’re likely to encounter in a normal transmission tear down and rebuild. Remember that these wear or distress signs are typical, but they may not always appear at the same time in the life of a transmission.
For example, frosting—a normal occurrence during break-in of a new unit—may be found occasionally at high mileage. No failure will occur. And as gears continue to adjust to one another the distress is likely to heal over.
The more severe examples can occur at any time when a transmission is operated under adverse conditions or is subject to abuse.
We’ve tried to help you diagnose common spur gear problems. Your mechanical skills, along with the information in this program will help you determine what caused the specific spur gear condition, and whether that gear should be replaced.
“It’s very important to inspect all gearing in the transmission for possible damage caused by loose particles of metal.”
Module II, Section 6: Spur Gear Life 115

NOTES
116 EATON® Drivetrain