Django Training Notes - Linfiniti.comlinfiniti.com/downloads/django_training_linfiniti.pdf ·...
45
Django Training Notes (c) 2009 Linfiniti Consulting cc. High Level Overview of Django 1. Django Installation 2. Initial project setup 3.1. Checking your project into SVN 3.2. Setup your Database connection 3. Make an application 4.1. Create a model 4.2. Test drive the model 4.3. Create a default admin view for the doodle model 4. Models 5.1. Field Types 5.2. Verbose Names 5.3. Choices 5.4. Relationship fields 5.5. One last thing 5. Views 6.1. Hello World 6.2. A view that takes a parameter 6.3. A view that works with models 6.4. A view of a single object 6.5. Dealing with errors 6.6. Deleting an object 6.7. Creating a model 6.8. Last but not least, update a model 6.9. CRUD ! 6.10. Now you try! 6. Forms 7.1. A first form 7.2. Customising the form experience - Form Field Parameters 7.3. Customising the form experience - Form Field Widgets 7.4. Specifying Widget Attributes 7.5. Now you try! 7.6. Custom Form Widgets 7. Using Templates 8.1. A simple example 8.2. Project-wide Templates 8.3. Template Block Inheritance 8.4. Template Programming 8.5. Now you try 8. Custom Template Tags 9.1. A new package 9.2. A simple example 9.3. Passing a template variable to a custom tag 9.4. Now you try 9. CSS and other media resources 10.1. Creating the media root 10. Django T raining Notes 1 of 45 18/11/2009 12:30
Transcript of Django Training Notes - Linfiniti.comlinfiniti.com/downloads/django_training_linfiniti.pdf ·...

Django Training Notes
(c) 2009 Linfiniti Consulting cc.
High Level Overview of Django1.Django Installation2.Initial project setup
3.1. Checking your project into SVN3.2. Setup your Database connection
3.
Make an application4.1. Create a model4.2. Test drive the model4.3. Create a default admin view for the doodle model
4.
Models5.1. Field Types5.2. Verbose Names5.3. Choices5.4. Relationship fields5.5. One last thing
5.
Views6.1. Hello World6.2. A view that takes a parameter6.3. A view that works with models6.4. A view of a single object6.5. Dealing with errors6.6. Deleting an object6.7. Creating a model6.8. Last but not least, update a model6.9. CRUD !6.10. Now you try!
6.
Forms7.1. A first form7.2. Customising the form experience - Form Field Parameters7.3. Customising the form experience - Form Field Widgets7.4. Specifying Widget Attributes7.5. Now you try!7.6. Custom Form Widgets
7.
Using Templates8.1. A simple example8.2. Project-wide Templates8.3. Template Block Inheritance8.4. Template Programming8.5. Now you try
8.
Custom Template Tags9.1. A new package9.2. A simple example9.3. Passing a template variable to a custom tag9.4. Now you try
9.
CSS and other media resources10.1. Creating the media root
10.
Django Training Notes
1 of 45 18/11/2009 12:30

10.2. Installing openlayers into your media_root10.3. Installing jquery and jquery-ui into your media_root
A little ajax example11.1. Adding includes for jquery11.2. Creating a menu11.3. Including the menu in our base template11.4. Creating the landing page11.5. Setting CSS for the site
11.
Authentication12.1. User Registration12.2. Users and permissions
12.
Creating custom decorators13.1. Doing it the non-decorator way13.2. Doing it the decorator way13.3. Now you try
13.
Middleware14.1. Strip white space14.2. Html Tidy14.3. Now you try - Logging Middleware
14.
Querying and Filtering15.Spatial filters and queries16.Fixtures17.Unit Tests18.Deploying on apache19.Things you can't do in Django20.Setting up the SVN repository21.Ideas22.
1. High Level Overview of Django
Django Training Notes
2 of 45 18/11/2009 12:30

Django is an application framework based on the Model, View, Controller (MVC)concept.
As we can see in the above diagram, a typical application workflow is as follows:
A user opens their browser and points it at a django urlThe url request is transported via the http:// protocol to a hostThe host runs a web server such as apache with the mod_python moduleinstalled receives the request and passes it into the django applicationBefore django does anything with the request, it passes it through 0 or moremiddleware layers which if needed clean up or pre-parse the http requestThe middleware then forwards the request to the controllerThe controller looks at the url structure (e.g. http://somehost.com/doodle/makedoodle/) and determines which view is associated with the requestThe view (e.g. makedoodle) typically will create or instantiate a model (e.g. adoodle model)The view then typically will use a template to render the model as an html webpageThe template may include reusable snippets called templatetags for commonlyrepeated html phrasesIf the view requires user input, it can do this by creating a form instance andrendering the form into the templateForms are autogenerated using standard widgets (button, input, select etc) or you
Django Training Notes
3 of 45 18/11/2009 12:30
can create custom widgetsOnce the response is rendered by the view, it is passed on to the middlewarelayerThe middleware can post-parse the response (e.g. to format it nicely) beforesending it back to the web serverThe web server passes the response over the http:// protocol to the client browserThe user sees a page appear in the browser
You will notice quite a few 'typically' and 'can' qualifiers in the above scenario. This isbecause, Django is extremely flexible and you can adapt this work flow according toyour needs. This includes e.g. having a view return a response without using anymodels, any forms, any templates. Similarly templates need not use customtemplatetags, forms need not use custom widgets etc.
Now that we have an overview in place, lets dive in and try Django out!
2. Django Installation
Django is available in apt, but this will be one of the few times I break my rule aboutpreferring apt installed packages over hand installed.
cd installers/wget http://www.djangoproject.com/download/1.1/tarball/cd /tmp/tar xfz ~/installers/Django-1.1.tar.gz cd Django-1.1/sudo python setup.py install
For good measure, add the following to your path in ~/.bashrc
export PATH=/usr/local/lib/python2.6/dist-packages/django/bin/:$PATH
3. Initial project setup
A project can contain one or more applications. We will use the postgis backend herethough various other backends are supported and more are on the way...
export PATH=/usr/local/lib/python2.6/dist-packages/django/bin/:$PATHcd ~/dev/pythondjango-admin.py startproject django_projectscd django_projects/createdb django_projectscreatelang plpgsql django_projectspsql django_projects < /usr/share/postgresql-8.3-postgis/lwpostgis.sqlpsql django_projects < /usr/share/postgresql-8.3-postgis/spatial_ref_sys.sql
3.1. Checking your project into SVN
Now is the time to check your project into subversion (username: <yourfirstname>password: <yourfirstname>):
cd ~/dev/pythonmv django_projects django_projects_presvnsvn co https://192.168.1.1/svn/trunk/<yourname> django_projectsmv django_projects_presvn/* django_projects
Django Training Notes
4 of 45 18/11/2009 12:30

cd django_projectsmv settings.py settings.py.templsvn add *svn commit -m "Initial import of my django_projects"cp settings.py.templ settings.py
What did we just do? We moved the generated project directory aside, and checked outyour personal svn workspace into a directory of the same name as your project. Thenwe moved the generated project files into you svn enabled directory. Before committingyour initial project to svn I also renamed settings.py to settings.py.templ. Settings.pycontains sensitive data such as database connection passwords and so on that youwouldn't typically want inside of subversion. Once the project has been committed tosvn, I create then a settings.pl file from the versioned one, which we will edit below.
Note if you make any changes to settings.py (e.g. adding new logic to it) you shouldmirror those changes in both settings.py and settings.py.templ, but keep the templversion redacted always so that it doesnt contain any sensitive data.
The rest of this tutorial assumes you use svn to commit each of your changes as theyare made (you will be prompted to do this regularly). You can visit the local tracinstance to browse your commit history and also compare notes with other participantsif you can't get things to work.
To browse the svn repo using trac, go to:
https://192.168.1.1/browser/trunk
3.2. Setup your Database connection
At this point you should fill in the database connection settings e.g.(settings.py):
DATABASE_ENGINE = 'postgresql_psycopg2' # 'postgresql_psycopg2', 'postgresql', 'mysql', 'sqlite3' or DATABASE_NAME = 'django_projects' # Or path to database file if using sqlite3.DATABASE_USER = 'foouser' # Not used with sqlite3.DATABASE_PASSWORD = 'foopassword' # Not used with sqlite3.DATABASE_HOST = 'localhost' # Set to empty string for localhost. Not used with sqlite3.DATABASE_PORT = '5432' # Set to empty string for default. Not used with sqlite3.
Also set the time zone:
TIME_ZONE = 'Africa/Johannesburg'
Then save and close the settings.py file and do:
python manage.py runserver
You should now be able to visit your project here:
http://localhost:8000
Note you can use any port you like.
Your browser should show a message something like this:
It worked!Congratulations on your first Django-powered page.
Of course, you haven't actually done any work yet. Here's what to do next:
Django Training Notes
5 of 45 18/11/2009 12:30
* If you plan to use a database, edit the DATABASE_* settings in django_projects/settings.py. * Start your first app by running python django_projects/manage.py startapp [appname].
You're seeing this message because you have DEBUG = True in your Djangosettings file and you haven't configured any URLs. Get to work!
4. Make an application
As we said in step one, a project contains one or more applications. All apps in theproject use a global settings and urls file (which we will look at in more detail just now).First we will create a simple application.
First kill the server by pressing ctrl-c and then do:
python manage.py startapp doodle
Doing that creates a new directory under our project called doodle:
[django_projects] ls doodle/__init__.py models.py views.py
models.py - where we define our models views.py - where we define our views
Where is the controller? urls.py in the top level project dir is our controller - it decodesurls and sends requests on to the correct view class.
Now we have an application we can visit it like this:
http://localhost:8000/doodle/
4.1. Create a model
Now the fun starts. Django has a fun, intuitive and powerful way to define models. Eachmodel is a python class. Edit doodle/models.py and add:
# our base classfrom django.db import models# import GeoDjango stuff to support spatial data typesfrom django.contrib.gis.db import models# use python time goodiesimport datetime
class Doodle(models.Model): name = models.CharField(max_length=255) doodle = models.LineStringField(srid=4326,null=True, blank=True) doodle_date = models.DateTimeField('DateAdded', auto_now=True, auto_now_add=False) objects = models.GeoManager()
class Meta: db_table = 'doodle' verbose_name = ('Doodle') verbose_name_plural = ('Doodle') ordering = ('doodle_date',)
Next we must be sure our application is registered in the project settings.py:
INSTALLED_APPS = (
Django Training Notes
6 of 45 18/11/2009 12:30
'django.contrib.auth', 'django.contrib.contenttypes', 'django.contrib.sessions', 'django.contrib.sites', #register our simple app... 'doodle', )
Nifty - now lets deploy our new model!
python manage.py syncdb
You will see output something like this:
Creating table auth_permissionCreating table auth_groupCreating table auth_userCreating table auth_messageCreating table django_content_typeCreating table django_sessionCreating table django_siteCreating table doodle
Installing custom SQL for doodle.Doodle model
You just installed Django's auth system, which means you don't have any superusers defined.Would you like to create one now? (yes/no): yes Username (Leave blank to use 'timlinux'): E-mail address: [email protected]: Password (again): Superuser created successfully.Installing index for auth.Permission modelInstalling index for auth.Message model
What just happened? Django just created the backend tables for the Object RelationalMapping (ORM) between our model and the backend:
[django_projects] psql django_projectsWelcome to psql 8.3.5, the PostgreSQL interactive terminal.
\copyright for distribution terms\h for help with SQL commands\? for help with psql commands\g or terminate with semicolon to execute query\q to quitdoodle=# \dList of relationsSchema | Name | Type | Owner --------+-----------------------------------+----------+----------public | auth_group | table | timlinuxpublic | auth_group_id_seq | sequence | timlinuxpublic | auth_group_permissions | table | timlinuxpublic | auth_group_permissions_id_seq | sequence | timlinuxpublic | auth_message | table | timlinuxpublic | auth_message_id_seq | sequence | timlinuxpublic | auth_permission | table | timlinuxpublic | auth_permission_id_seq | sequence | timlinuxpublic | auth_user | table | timlinuxpublic | auth_user_groups | table | timlinuxpublic | auth_user_groups_id_seq | sequence | timlinuxpublic | auth_user_id_seq | sequence | timlinuxpublic | auth_user_user_permissions | table | timlinux
Django Training Notes
7 of 45 18/11/2009 12:30

public | auth_user_user_permissions_id_seq | sequence | timlinuxpublic | django_content_type | table | timlinuxpublic | django_content_type_id_seq | sequence | timlinuxpublic | django_session | table | timlinuxpublic | django_site | table | timlinuxpublic | django_site_id_seq | sequence | timlinuxpublic | doodle | table | timlinux <-- w00t!public | geometry_columns | table | timlinuxpublic | spatial_ref_sys | table | timlinux
Lets take a look at the table it created:
doodle=# \d doodleTable "public.doodle"Column | Type | Modifiers -------------+--------------------------+-----------------------------------------------------id | integer | not null default nextval('doodle_id_seq'::regclass)name | character varying(255) | not nulldoodle_date | timestamp with time zone | not nulldoodle | geometry | Indexes:"doodle_pkey" PRIMARY KEY, btree (id)"doodle_doodle_id" gist (doodle)Check constraints:"enforce_dims_doodle" CHECK (ndims(doodle) = 2)"enforce_geotype_doodle" CHECK (geometrytype(doodle) = 'LINESTRING'::text OR doodle IS NULL)"enforce_srid_doodle" CHECK (srid(doodle) = 4326)
4.2. Test drive the model
Django provides a python shell for interactive testing of models. This is the same as anormal python shell but it sets up all the environment variables / python path etc.needed to find your classes.
[django_projects] python manage.py shellPython 2.5.2 (r252:60911, Oct 5 2008, 19:29:17) [GCC 4.3.2] on linux2Type "help", "copyright", "credits" or "license" for more information.(InteractiveConsole)>>> from doodle.models import *>>> myDoodle = Doodle()>>> myDoodle.name = "foo">>> print myDoodle.name>>> myDoodle.doodle = 'LINESTRING(0 0, 10 10)'>>> print myDoodle.doodleLINESTRING (0.0000000000000000 0.0000000000000000, 10.0000000000000000 10.0000000000000000)>>> myDoodle.save()>>> myDoodle2=Doodle.objects.get(id=1)>>> myDoodle2.nameu'foo'>>> quit()
Here are the commands again without the shell output:
python manage.py shellfrom doodle.models import *myDoodle = Doodle()myDoodle.name = "foo"myDoodle.doodle = 'LINESTRING(0 0, 10 10)'myDoodle.save()myDoodle2=Doodle.objects.get(id=1)myDoodle2.namequit()
Django Training Notes
8 of 45 18/11/2009 12:30

Lets see what the above code does in the backend:
psql django_projectsdoodle=# select id,name,doodle_date,asText(doodle) as doodle from doodle;id | name | doodle_date | doodle ---+------+-------------------------------+----------------------- 1 | foo | 2009-02-08 00:29:47.961586+02 | LINESTRING(0 0,10 10)(1 row)
So in a few minutes we have created an object relational mapped code base that youcan use from any python context (not just Django web apps.
4.3. Create a default admin view for the doodle model
Django has a powerful autogenerated admin interface that you can use to manage thedata in your models. Lets add the admin view for our doodle model:
vim doodle/admin.py
Now add this:
from django.contrib.gis import adminfrom models import *
class DoodleAdmin(admin.GeoModelAdmin): field = (None, {'fields': ('name')}) field = (None, {'fields': ('doodle')}) field = (None, {'fields': ('doodle_date')}) list_display = ('name', 'doodle_date', 'doodle') list_filter = ('name', 'doodle_date')
#Register each model with its associated admin classadmin.site.register(Doodle, DoodleAdmin)
Note that our model inherits from admin.GeoModelAdmin which will enable the adminenvironment to generate maps for the admin user interface.
see full admin docs online
Lastly, register the django admin app with the controller:
vim urls.py
And uncomment these lines near the top:
from django.contrib import adminadmin.autodiscover()
....and uncomment the admin root...
# Uncomment the next line to enable the admin:(r'^admin/(.*)', admin.site.root),
Lastly edit settings adding admin and gis apps to the installed apps list:
INSTALLED_APPS = ( 'django.contrib.auth', 'django.contrib.contenttypes',
Django Training Notes
9 of 45 18/11/2009 12:30
'django.contrib.sessions', 'django.contrib.sites', # Add the next line for admin 'django.contrib.admin', # And the next line for the django gis components 'django.contrib.gis', 'doodle', )
We need to tell django about our new admin model so we re-run syncdb:
python manage.py syncdb
It should report something like this:
Creating table django_admin_logInstalling index for admin.LogEntry model
Now kill and restart the django server:
ctrl-cpython manage.py runserver
If you point your browser to : http://localhost:8000/admin/ you should now get a log inprompt and after that see the doodle model listed.
You can play around adding and deleting doodles using the admin interface.
In practice we probably won't use the admin interface very much since we will spendmost of the time on this course learning to build our own custom user interfaces.However it is good to remember the admin functionality exists because its really quickand easy to slap a simple web application together using only models and the webadmin interface.
5. Models
In our quickstart run through in the previous section we created a simple model andsaw how you can manipulate the model using the django python console. We also sawthat you can create a user interface for the model quickly by using the adminapplication that comes as a standard part of django.
The heart of Django is the Object Relational Mapping (ORM) functionality it provides.With Django, you program and think in python and the application framework does allthe nuts and bolts stuff behind the scenes or serialising your saved models into thedatabase and deserialising the models again when you need to access them.
We saw a simple example of this, for example by doing:
myDoodle.save()
A record was created in the database representing the model. And when we did:
myDoodle2 = Doodle.objects.get(id=1)
The django framework took care of deserialising the model from the database andmaking it available to us as a python object.
Django Training Notes
10 of 45 18/11/2009 12:30

Models are always defined in <yourapp>/models.py.
Defining a model is simply a matter of adding a new class to the above file.
The model creation consists of four steps:
Create a new class that inherits from models.Model in <yourapp>/models.py. Thisclass will be mapped to a table entity on the database backend.
1.
Add the property definitions to your class. These will be mapped to fields in thetable on the database backend.
2.
Define the metadata inner class. This provides you a way to specify how themodels should be shown to the users and created in the database. For example,you can use the metadata inner class to specify a non-default backend tablename.
3.
Use the manage.py syncdb command to create the backend database model andperform an integrity check of the model.
4.
Lets look again at the model definition we created earlier, but with some extracomments:
# Our base classfrom django.db import models# import GeoDjango stuff to support spatial data typesfrom django.contrib.gis.db import models# Use python time goodiesimport datetime
# A class defines our model if it inherits from models.modelclass Doodle(models.Model): # Create a name field name = models.CharField(max_length=255) # And a geometry field for our doodle doodle = models.LineStringField(srid=4326,null=True, blank=True) # Lastly make an auto populated date field doodle_date = models.DateTimeField('DateAdded', auto_now=True, auto_now_add=False) # Model manager that must be added to any model with a geometry objects = models.GeoManager()
# Metadata inner class class Meta: # Name the table should be given on the database backend (optional) db_table = 'doodle' # Name to be used in the user interface (generated web pages) for this model verbose_name = ('Doodle') # Plural name to be used in the user interface verbose_name_plural = ('Doodle') # Column ordering to be used by default if a collection of model instances is # obtained. ordering = ('doodle_date',)
5.1. Field Types
Django field documentation
There are a number of different field types you can use, including special types that willbuild foriegn key constraints, multikey join tables, lookup lists and so on. Here is acomplete list of allowed types:
Standard field types:
Django Training Notes
11 of 45 18/11/2009 12:30

AutoFieldBooleanFieldCharFieldCommaSeparatedIntegerFieldDateFieldDateTimeFieldDecimalFieldEmailFieldFileFieldFilePathFieldFloatFieldImageFieldIntegerFieldIPAddressFieldNullBooleanFieldPositiveIntegerFieldPositiveSmallIntegerFieldSlugFieldSmallIntegerFieldTextFieldTimeFieldURLFieldXMLField
Relationship fields:
ForeignKeyManyToManyFieldOneToOneField
Spatial field types:
PointFieldLineStringFieldPolygonFieldMultiPointFieldMultiLineStringFieldMultiPolygonFieldGeometryCollectionField
5.2. Verbose Names
You can use verbose_name to give the model field a more friendly name that will beshown on forms etc. Note: for foreign key and other relationship fields, you must placethe verbose name after the relation name. e.g.
status = models.ForeignKey(Status,verbose_name="Order Status")
5.3. Choices
If you want to restrict the values that a user can choose from in order to populate thefield. You can do this using a list e.g.:
myChoices = (("a" , "Pothole"), ("b" , "Road Sign"), ("c" , "Vagrants"))
Then when you create your field you would do:
name = models.CharField(max_length=255,choices=myChoices)
If you open the doodle model in the admin web interface, you should see that the text
Django Training Notes
12 of 45 18/11/2009 12:30

field for name is now replaced with a combo with the items listed in myChoices in it.
Personally I think using the choices option is usually better implemented using aseparate model and then using a relationship field. If you are really sure the choices listwill never change, you could use it. Let me show you how we would rather implementthe choice using a second model and a relationship field.
5.4. Relationship fields
First delete the myChoices... line we created above. Next add a new class to models.py(put it before the doodle class) that looks like this:
class DoodleType(models.Model): name = models.CharField(max_length=255) objects = models.Manager()
def __unicode__(self): return self.name
class Meta: db_table = 'doodletype' verbose_name = ('Doodle Type') verbose_name_plural = ('Doodle Types') ordering = ('name',)
Next, change the model.name field from a charfield to one that looks like this:
type = models.ForeignKey(DoodleType) name = models.CharField(max_length=255)
To register the changes in our models, you need to run syncdb again. However we havechanged an existing model's field type (Doodle.name) which means that model's tabledefinition also needs to be synced to the database. Before we can do that we need todrop its table. We will discuss later how to deal with data that may be in a table if youneed to replace it with one that contains existing functionality:
echo "drop table doodle;" > psql django_projectspython manage.py syncdb
or
python manage.py sqlreset doodle | psql django_projects
Finally to test, we need to add a new entry to doodle/admin.py...:
from django.contrib.gis import adminfrom models import *
class DoodleTypeAdmin(admin.ModelAdmin): list_display = ('name',)
class DoodleAdmin(admin.GeoModelAdmin): field = (None, {'fields': ('name')}) field = (None, {'fields': ('doodle')}) field = (None, {'fields': ('doodle_date')}) list_display = ('name', 'doodle_date', 'doodle') list_filter = ('name', 'doodle_date')
Django Training Notes
13 of 45 18/11/2009 12:30

#Register each model with its associated admin classadmin.site.register(DoodleType, DoodleTypeAdmin)admin.site.register(Doodle, DoodleAdmin)
Registering the DoodleType model in the admin interface is much simpler since it doesnot contain any geometry fields. Django only needs the line
admin.site.register(DoodleType, DoodleTypeAdmin)
added to admin.py and it will do all the rest. If you go back to your doodle admininterface now it should look something like this:
You will notice there is now a little + icon next to the Name field. If you click on it, theadmin interface will pop up a form where you can manage the list of names in theDoodleType model.
5.5. One last thing
If you were alert, you might have wondered what is to prevent the same DoodleTypename being added twice. In fact django automatically added a unique constraint tothat field:
django_projects=# \d doodletypeTable "public.doodletype" Column | Type | Modifiers --------+------------------------+---------------------------------------------------------
Django Training Notes
14 of 45 18/11/2009 12:30

id | integer | not null default nextval('doodletype_id_seq'::regclass) name | character varying(255) | not nullIndexes:"doodletype_pkey" PRIMARY KEY, btree (id)"doodletype_name_key" UNIQUE, btree (name)
So you will see in the next snippet what would happen if you try to insert a duplicaterecord:
django_projects=# select * from doodletype; id | name ----+------ 1 | Test(1 row)
django_projects=# insert into doodletype (name) values ('Test'); ERROR: duplicate key value violates unique constraint "doodletype_name_key"
Once again django just takes care of stuff for you in the background and you don'tneed to worry about too many small details...
6. Views
Ok by now you should understand the basic concept of a model - you define it using apython class, synchronise the database to your model definitions, and then you canadd the model to the admin user interface if you want to get a quick & dirty UI for yourmodels.
Invariably however, you will want to create your own views and forms. In other words,you will want your site to have its own unique look and feel and user interactions,rather than the canned environment of the admin interface.
To do that will start by delving into views a little.
6.1. Hello World
I bet you have been waiting for this moment :-) While a model represents an object orentity, a view represents a particular 'view' of an object or group of objects. We canalso have a view that does not reflect the state of any particular object, but rather justsome hard coded information - which is what we will look at first...
Open up your doodle/views.py file. It should contain something like this:
# Create your views here.
Looks like someone was here before us then eh? The views stub was created when wecreated our application. Views in django are simply function definitions so we cancreate one like this:
from django.http import HttpResponse
def helloWorld(theRequest): return HttpResponse("<h1>Hello World</h1>")
Thats about the simplest view you can make. The HttpResponse class knows how toreturn any string you give it as a web page back to the clients browser.
Django Training Notes
15 of 45 18/11/2009 12:30

You will notice that the helloWorld view takes a single parameter 'theRequest' which isan object containing all of the request context information from the client. For exampleit has any form post variables, the user agent (which browser is being used) etc. Sincethis is a really simple view the request parameter is actually ignored, but we will seelater how to make good use of it.
So how does the client (i.e. you operating your web browser) get to see the view? Youneed to add a rule to our controller. This is done in the urls.py file:
from django.conf.urls.defaults import *# So we can find our hello world viewsfrom doodle.views import *
# Uncomment the next two lines to enable the admin:from django.contrib import adminadmin.autodiscover()
urlpatterns = patterns('', # Example: # (r'^django_projects/', include('django_projects.foo.urls')),
# Uncomment the admin/doc line below and add 'django.contrib.admindocs' # to INSTALLED_APPS to enable admin documentation: # (r'^admin/doc/', include('django.contrib.admindocs.urls')),
# Uncomment the next line to enable the admin: (r'^admin/', include(admin.site.urls)), # For our hello world view (r'^helloWorld/', helloWorld),)
Earlier we used our urls.py file to configure support for the admin interface. Now I haveadded the following two lines to support our hello world view:
# So we can find our hello world viewsfrom doodle.views import *
...and...
# For our hellow world view (r'^helloWorld/', helloWorld),
The first new line just lets the controller (urls.py) know where to find our views(doodle.views). The second addition adds a rule to urlpatterns. The rule is a regularexpression saying 'if the url starts with helloWorld, render the helloWorld view'. Simpleeh?
Try pointing your browser to your django instance now and see if you get a hello worldmessage back:
http://localhost:8000/helloWorld/
should show:
Hello World
6.2. A view that takes a parameter
Django Training Notes
16 of 45 18/11/2009 12:30

Django uses restful style urls to pass instructions and parameters to the controller.Say, for example, you want to get a personalised greeting when you connect to a viewe.g.:
Hello Tim!
First we would defined a new view that takes a parameter (in doodle/views.py):
def helloPerson(theRequest,thePerson): return HttpResponse("<h1>Hello " + str(thePerson) + "!</h1>")
So that will take an extra parameter and print it in the response. Of course we still needto add a rule to our controller...(in urls.py):
# For our hello person view(r'^helloPerson/(?P<thePerson>[a-zA-Z]+)/$', helloPerson),
Ok that looks a bit greek like? Lets break it down:
r <-- what follows in quotes is a regular expression^ <-- carat means 'start of the line' note the http://localhost:8000/ part of the url is ignored in url matchinghelloPerson/ <-- the literal string is matched here(?P<thePerson>[a-zA-Z]+) <-- match any number of upper case or lower case letters to the view parameter 'thePerson'/$ <-- end of the line
So in plain english it means 'if the url starts with /helloPerson/ followed by any sequenceof upper or lower case characters, assign that character sequence to a variable called"thePerson" and pass it on to the helloPerson view.
Make sense? It will make more sense as you get a bit more experience with django. Letstest out our new view:
http://localhost:8000/helloPerson/Tim/
...should show this...
Hello Tim!
6.3. A view that works with models
Ok thats very nifty but in the real world, nine times out of ten you want your view tointeract with model data. First add a few more entries to your DoodleType table usingthe admin web interface. Now lets make a view that shows a list of DoodleTypes (indoodle/views.py):
from doodle.models import *def listDoodleTypes(theRequest): myObjects = DoodleType.objects.all() # Optional - sort descending: #myObjects = DoodleType.objects.all().order_by("-name") myResult = "<h1>doodle types</h1>" for myObject in myObjects: myResult = myResult +str(myObject.id) + " : " + str(myObject.name) + "<br />" return HttpResponse(myResult)
Django Training Notes
17 of 45 18/11/2009 12:30

The view simply gets all the DoodleType objects (remember django's ORM seamlesslypulls these from the database backend for you) and the loops through them buildingup a string. The string is then returned to the browser using the HttpResponse call.
Before we can see the view, you need to add a new rule to the controller. Sensing aryhthmn here? Good it is the same process over and over - create models, make viewson to your models, define controller rules so that you can get to your views. So to makeour new controller rule, we add a line in urls.py:
# For our list doodle types view(r'^listDoodleTypes/', listDoodleTypes),
Now point your browser at the new view:
http://localhost:8000/listDoodleTypes/
and you should see something like this:
Doodle TypesTest Type 1Test Type 2
6.4. A view of a single object
Ok so now we have a view that is driven by the data in our model. What if we want tosee just a specific model instance? We can use the get() call to do that (indoodle/views.py):
def showDoodleType(theRequest, theId): myObject = DoodleType.objects.get(id=theId) myResult = "<h1>Doodle Type Details</h1>" myResult = myResult + "Id: " + str(myObject.id) + "<br />" myResult = myResult + "Name: " + str(myObject.name) + "<br />" return HttpResponse(myResult)
And a rule to our controller (urls.py):
# For our show doodle type view(r'^showDoodleType/(?P<theId>\d/$)', showDoodleType),
Test by going to:
http://localhost:8000/showDoodleType/1/
...which should show something like :
Doodle Type DetailsId: 1Name: Test Type 1
6.5. Dealing with errors
One common error you may encounter is a url asking for a non existant object e.g.:
http://localhost:8000/showDoodleType/999/
You can use normal python error checking to deal with this, but django provides a
Django Training Notes
18 of 45 18/11/2009 12:30

shortcut to deal with these situations in its aptly named shortcuts module. Lets adaptour showDoodleType view to be a little more robust:
from django.shortcuts import get_object_or_404
def showDoodleType(theRequest, theId): # Old way: # myObject = DoodleType.objects.get(id=theId) # New way: myObject = get_object_or_404(DoodleType, id=theId) myResult = "<h1>Doodle Type Details</h1>" myResult = myResult + "Id: " + str(myObject.id) + "<br />" myResult = myResult + "Name: " + str(myObject.name) + "<br />" return HttpResponse(myResult)
6.6. Deleting an object
To your views.py add:
def deleteDoodleType(theRequest, theId): myObject = get_object_or_404(DoodleType, id=theId) myResult = "<h1>Doodle Type Deleted:</h1>" myResult = myResult + "Id: " + str(myObject.id) + "<br />" myResult = myResult + "Name: " + str(myObject.name) + "<br />" myObject.delete() return HttpResponse(myResult)
And to the urls.py add:
# For our delete doodle type view(r'^deleteDoodleType/(?P<theId>\d)/$', deleteDoodleType),
Then test:
http://localhost:8000/deleteDoodleType/1/
Result:
Doodle Type Deleted:Id: 1Name: Test
6.7. Creating a model
To your views.py add:
def createDoodleType(theRequest, theName): myObject = DoodleType() myObject.name = theName myObject.save() myResult = "<h1>Doodle Type Created:</h1>" myResult = myResult + "Id: " + str(myObject.id) + "<br />" myResult = myResult + "Name: " + str(myObject.name) + "<br />" return HttpResponse(myResult)
And to the urls.py add:
# For our delete doodle type view(r'^createDoodleType/(?P<theName>[a-zA-Z]+)/$', createDoodleType),
Django Training Notes
19 of 45 18/11/2009 12:30
Then test:
http://localhost:8000/createDoodleType/Squiggle/
Result:
Doodle Type Created:Id: 2Name: Squiggle
6.8. Last but not least, update a model
To your views.py add:
def updateDoodleType(theRequest, theId, theName): myObject = get_object_or_404(DoodleType, id=theId) myObject.name = theName myObject.save() myResult = "<h1>Doodle Type Updated:</h1>" myResult = myResult + "Id: " + str(myObject.id) + "<br />" myResult = myResult + "Name: " + str(myObject.name) + "<br />" return HttpResponse(myResult)
And to the urls.py add:
# For our update doodle type view(r'^updateDoodleType/(?P<theId>\d)/(?P<theName>[a-zA-Z]+)/$', updateDoodleType),
You will see above that we provide for two parameters to be passed to the URL - firstthe id, and then the new name for the doodle.
Then test:
http://localhost:8000/updateDoodleType/2/Squaggle/
Result:
Doodle Type Created:Id: 2Name: Squaggle
6.9. CRUD !
Now we have crud facilities in our application!:
create objectsremove objectsupdate objectsdelete objects
CRUD is the basis for pretty much any data driven application so we are well on our wayto being able to create something useful.
6.10. Now you try!
To see just how well you have grasped everything so far here is a little challenge:
Django Training Notes
20 of 45 18/11/2009 12:30

1) Create a new model definition, sync it to the database.2) Create controller rules to allow you to do CRUD with your model3) Implement the view logic to support CRUD4) Add a view method to show a listing of all your objects
and for bonus points
5) Create a controller rule and view method that will delete all of your objects.
7. Forms
You may have realised by now that the system for updating and adding data outlined inthe above examples is not very flexible. For example it is not possible to upload files orpost large tracts of text or deal with long complicated forms using the simple restparameter approach. Never fear though, Django has a robust form handlinginfrastructure that will let you deal with user submitted data in a much more elegantway.
7.1. A first form
Lets update that addDoodleType view a little to make use of the forms capability.Before we can modify the view, we should first create our form. Forms are managed inthe <yourapp>/forms.py file. Unlike the urls, models and views files, the forms.py file isnot created for you automatically by django when you create your app, so you need tocreate it yourself.
from doodle.models import *from django import forms
class DoodleTypeForm(forms.ModelForm): """ A form that creates a DoodleType """ class Meta: model = DoodleType
Pretty simple eh? Like models a form inherits from a base class and uses a Meta innerclass to define some data - in this case what model is associated with the form.
Now we need to adapt our existing view to make use of the form. Our original viewlooked like this:
def createDoodleType(theRequest, theName): myObject = DoodleType() myObject.name = theName myObject.save() myResult = "<h1>Doodle Type Created:</h1>" myResult = myResult + "Id: " + str(myObject.id) + "<br />" myResult = myResult + "Name: " + str(myObject.name) + "<br />" return HttpResponse(myResult)
The logic for our new form based view looks like this:
from django.http import HttpResponseRedirectfrom doodle.forms import *
# Form based so no passing new doodle properties as parametersdef createDoodleType(theRequest):
Django Training Notes
21 of 45 18/11/2009 12:30

# Next two lines contain just enough html to create a form element # The action is left blank so the form will post back to itself myStartString = """<form action="" method="post" accept-charset="utf-8" class="horizontal">""" myEndString = """<button type="submit">Save</button></form>"""
# Now we test to see if the http request is a POST request if theRequest.method == 'POST': # Now create a form instance using the POST request as a parameter # the form will try to create a valid DoodleType object based on the # contents of the post request myForm = DoodleTypeForm(theRequest.POST) # If it had enough info to make a valid DoodleType object... if myForm.is_valid(): # Save the form which creates a new object instance myObject = myForm.save() # Redirect the users browser so they can see the new instance return HttpResponseRedirect("/showDoodleType/"+str(myObject.id)+"/") else: # Otherwise the form is not valid so redisplay it with validation messages # form.as_p() means 'render the form within html paragraph elements' return HttpResponse(myStartString + myForm.as_p() + myEndString) else: # No post so make a new empty form myForm = DoodleTypeForm() # Show the form in the users browser return HttpResponse(myStartString + myForm.as_p() + myEndString)
There is a bit more code here than our previous version, but the amount of code staysthe same regarless of how many fields you have in your form, and also most of theabove is just comments to explain what is going on.
Note: You can also render your form using as_ul, as_table (or of course as_p)
We need to make a small change to the contoller rule since we are no longer passingthe DoodleType properties as part of the URL:
(r'^createDoodleType/(?P<theName>[a-zA-Z]+)/$', createDoodleType),
becomes
(r'^createDoodleType/$', createDoodleType),
Now we can head back to our browser and give it a whirl:
http://localhost:8000/createDoodleType/
Which should show you a visually stunning form, something like this:
7.2. Customising the form experience - Form Field Parameters
Django Form Field Documentation
Django will create default widgets for your form based on the model field type. If youleave the form field list blank as we have done in our example above, the field labels,help text etc are also all carried over from your model definitions, left blank, or defaults
Django Training Notes
22 of 45 18/11/2009 12:30
are applied. To improve the experience for your users you can customise the way eachform field is presented to the user. Here is an example:
class DoodleTypeForm(forms.ModelForm): """ A form that creates a DoodleType """ name = forms.CharField(label="Doodle Name:", required=True, help_text="Please enter the name for this doodle type", error_messages={'required': '''Please enter your doodle type - I can\'t stand it when people leave out important details!'''} ) class Meta: model = DoodleType
Note: You can have bound and unbound forms. Bound forms are linked to a modelinstance, whereas unbound forms aren't. Unbound forms can be useful when you wantto collect data from a user, but don't want that data to be turned into a modelinstance. For the discussion in this tutorial though, we are going to stick with boundforms.
7.3. Customising the form experience - Form Field Widgets
Django Form Widget Documentation
What if you don't want to show the default widget type in your form. For example theforms.CharField will show a simple text entry box by default on your form. We can specifya different widget in the form definition - here I am electing to use a text area ratherthan a text input:
class DoodleTypeForm(forms.ModelForm): """ A form that creates a DoodleType """ name = forms.CharField(label="Doodle Name:", widget=forms.Textarea, # <-- specify the textarea widget! required=True, help_text="Please enter the name for this doodle type", error_messages={'required': '''Please enter your doodle type - I can\'t stand it when people leave out important details!'''} ) class Meta: model = DoodleType
Django provides quite a few widgets that can be dropped in - just bear in mind that thefield type in your model must be appropriate to the widget!
# Basic Form Field Types
BooleanFieldCharFieldChoiceFieldTypedChoiceFieldDateFieldDateTimeFieldDecimalFieldEmailFieldFileFieldFilePathFieldFloatFieldImageField
Django Training Notes
23 of 45 18/11/2009 12:30

IntegerFieldIPAddressFieldMultipleChoiceFieldNullBooleanFieldRegexFieldTimeFieldURLField
# Fields which handle relationships
ModelChoiceFieldModelMultipleChoiceField
7.4. Specifying Widget Attributes
Django renders the widgets in a default way. If you want to give each widget specificproperties, you can do this by passing a dictionary of attributes like this:
class DoodleTypeForm(forms.ModelForm): """ A form that creates a DoodleType """ name = forms.CharField(label="Doodle Name:", widget=forms.Textarea(attrs={ 'size' : '40', 'style' : 'background: cyan; height: 20px; display: block;'}), required=True, help_text="Please enter the name for this doodle type", error_messages={'required': '''Please enter your doodle type - I can\'t stand it when people leave out important details!'''} ) class Meta: model = DoodleType
In the above example, I have added the 'attrs' parameter to the widget and then I couldspecify arbitary parameters. In this case I told django to make the text area 40 charsand set the css style for it. The rendered output for the form looks like this:
<form action="" method="post" accept-charset="utf-8" class="horizontal"> <p> <label for="id_name">Doodle Name:</label> <textarea style="background: cyan; height: 20px; display: block;" rows="10" name="name" id="id_name" cols="40" size="40"></textarea> Please enter the name for this doodle type </p> <button type="submit">Save</button></form>
Ok that is no thing of beauty, but is should give you the idea!
7.5. Now you try!
At the end of the section on views, I tasked you to create a custom model and view.Now see if you can implement a spiffy looking form!
7.6. Custom Form Widgets
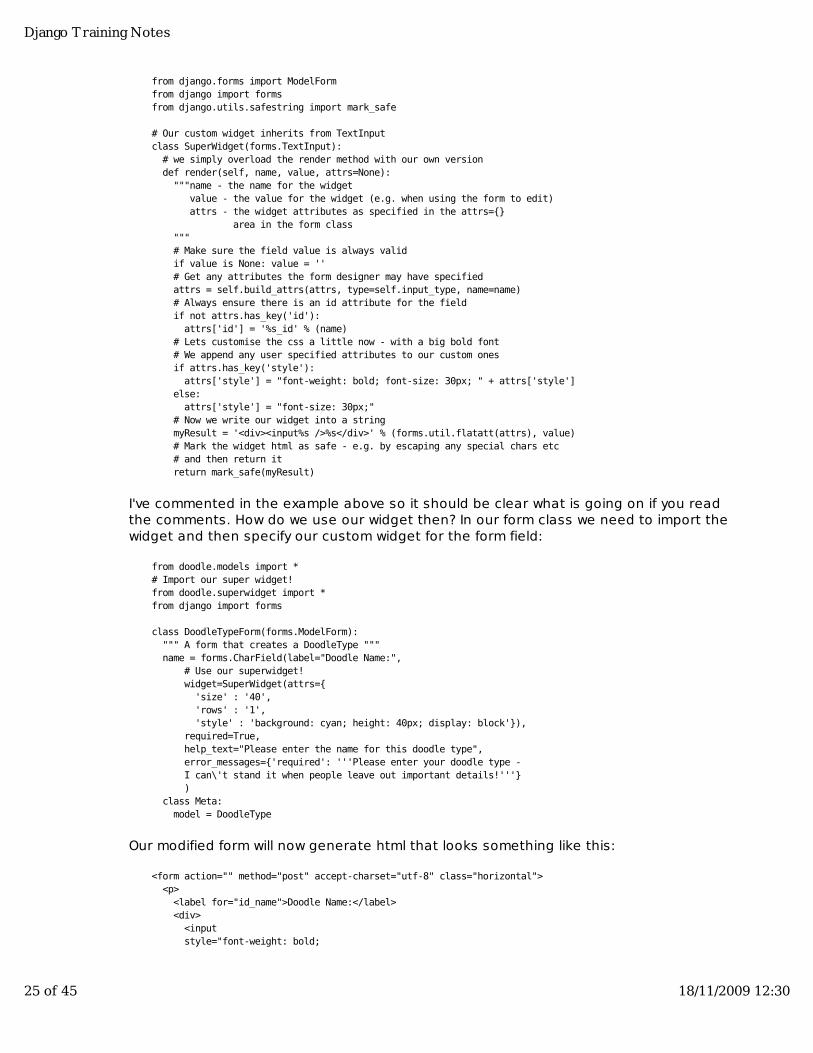
Sometimes the built in form widgets won't suit your needs. In this case you can createyour own widgets!
Here is a simple example (saved to doodle/superwidget.py):
Django Training Notes
24 of 45 18/11/2009 12:30
from django.forms import ModelFormfrom django import formsfrom django.utils.safestring import mark_safe
# Our custom widget inherits from TextInputclass SuperWidget(forms.TextInput): # we simply overload the render method with our own version def render(self, name, value, attrs=None): """name - the name for the widget value - the value for the widget (e.g. when using the form to edit) attrs - the widget attributes as specified in the attrs={} area in the form class """ # Make sure the field value is always valid if value is None: value = '' # Get any attributes the form designer may have specified attrs = self.build_attrs(attrs, type=self.input_type, name=name) # Always ensure there is an id attribute for the field if not attrs.has_key('id'): attrs['id'] = '%s_id' % (name) # Lets customise the css a little now - with a big bold font # We append any user specified attributes to our custom ones if attrs.has_key('style'): attrs['style'] = "font-weight: bold; font-size: 30px; " + attrs['style'] else: attrs['style'] = "font-size: 30px;" # Now we write our widget into a string myResult = '<div><input%s />%s</div>' % (forms.util.flatatt(attrs), value) # Mark the widget html as safe - e.g. by escaping any special chars etc # and then return it return mark_safe(myResult)
I've commented in the example above so it should be clear what is going on if you readthe comments. How do we use our widget then? In our form class we need to import thewidget and then specify our custom widget for the form field:
from doodle.models import *# Import our super widget!from doodle.superwidget import *from django import forms
class DoodleTypeForm(forms.ModelForm): """ A form that creates a DoodleType """ name = forms.CharField(label="Doodle Name:", # Use our superwidget! widget=SuperWidget(attrs={ 'size' : '40', 'rows' : '1', 'style' : 'background: cyan; height: 40px; display: block'}), required=True, help_text="Please enter the name for this doodle type", error_messages={'required': '''Please enter your doodle type - I can\'t stand it when people leave out important details!'''} ) class Meta: model = DoodleType
Our modified form will now generate html that looks something like this:
<form action="" method="post" accept-charset="utf-8" class="horizontal"> <p> <label for="id_name">Doodle Name:</label> <div> <input style="font-weight: bold;
Django Training Notes
25 of 45 18/11/2009 12:30

font-size: 30px; background: cyan; height: 40px; display: block" rows="1" name="name" type="text" id="id_name" size="40" /> </div> Please enter the name for this doodle type </p> <button type="submit">Save</button></form>
Your html will probably render everything in one straight line - I've formatted it a little forclarity. Here is a screenie of what the (still ugly) widget looks like:
8. Using Templates
So far we have hand crafted the html we return from each view as an HTTPResponse.Obviously this can get a bit laborious, especially if you are designing a complex website. Naturally, the Django developers thought of this and cae up with a neat solution -templates. Django templates allow you to mix static html and dynamically generatedcontent which you can pass to the template using your view.
Application specific templates are saved under <project>/<appname>/templates/ - e.g.django_projects/doodle/templates/foo.html
8.1. A simple example
Lets look at a simple template (doodle/templates/doodle.html):
<div id="heading">Welcome to Doodle App!</div><div id="viewdata">{{ myData|safe }}</div><div id="footer">---</div>
We also need to tell our view (doodle/views.py) to use the template. I will update thelistDoodleTypes view to use our new template:
from django.shortcuts import render_to_response
def listDoodleTypes(theRequest): myObjects = DoodleType.objects.all() myResult = "<h1>Doodle Types</h1>" for myObject in myObjects: myResult = myResult +str(myObject.id) + " : " + str(myObject.name) + "<br />" # Use our nifty template to render our response rather! return render_to_response("doodle.html", {'myData' : myResult})
Django Training Notes
26 of 45 18/11/2009 12:30

As you can see there are only two things we changed in order to make use of our newtemplate - adding the render_to_response import in the header section of the views.pyfile, and returning a render_to_response for our listDoodleTypes method. The render toresponse method takes two parameters - the name of a template, and a dictionary ofparameters to pass to the template. In this case we are passing only the 'myResult'string, which will be visible to the template as a variable called 'myData'.
8.2. Project-wide Templates
Project wide templates can also be created under <project>/templates/ - e.g.django_projects/templates/foo.html
One really neat thing about django templates is that they support inheritance so youcan make a master template in your <project>/templates/ folder and then have all yourapplication level templates inherit from this. By doing this you can simply create asite-wide look and feel accross all your applications. Simply define your css and toplevel page layout in the <projects>/templates/base.html for example, and then in yourapplication templates you worry about things that are specific to your applicationrequirements only.
Here is another template which I will save under django_projects/templates:
<html> <head> <style type="text/css"> body {color:sienna} #heading {font-size: 3em;} div {margin-left:20px; border-top: solid 1px;} </style> </head> <body> {% block content %}{% endblock %} </body></html>
So that gives us a simple page structure with a few lines of css thrown in. Theinteresting part here is the {% block content %}{% endblock %} tag added to thebody. Django templates are just normal html with {% %} and {{ }} tags mixed in. The{% %} tags can be thought of as methods - they call some python logic internally. The{{ }} can be thought of as variables - the value of the variable named between {{ }}will be inserted into the generated html.
When you add a block tag to a template, an inheriting template can override it. Let'smodify the doodle/templates/doodle.hml template to see how this is done:
{% extends "base.html" %}{% block content %}<div id="heading">Welcome to Doodle App!</div><div id="viewdata">{{ myData|safe }}</div><div id="footer"></div>{% endblock %}
The |safe appended to our variable name is a template filter that will allow injection ofliteral html into the rendered template. If you don't use it, any html elements insidemyData will be printed as text rather than used as html markup.
Before we can test drive our hierachical template structure, there is one more thing weneed to do. Django knows to look in your <appname>/templates/ directory for
Django Training Notes
27 of 45 18/11/2009 12:30

templates, but we need to 'register' the projects-wide template directory in our settingsfile.
import osROOT_PROJECT_FOLDER = os.path.dirname(__file__)
TEMPLATE_DIRS = ( # Put strings here, like "/home/html/django_templates" or "C:/www/django/templates". # Always use forward slashes, even on Windows. # Don't forget to use absolute paths, not relative paths. os.path.join(ROOT_PROJECT_FOLDER, 'templates'),)
The above just computes what the django project directory is and adds the projecttemplates directory to the template search path.
Now we are ready to test drive our templates:
http://localhost:8000/listDoodleTypes/
You should land up with something looking like this:
8.3. Template Block Inheritance
If you want your child template to append to, rather than replace the content of theparent templates block, you can do something like this:
Parent Block:
{% block content %} Content for the parent{% end block %}
Child Block:
{% block content %} {{ block.super }} Content for the child{% end block %}
If you render that you will see output like this:
Content for the parentContent for the child
Django Training Notes
28 of 45 18/11/2009 12:30

8.4. Template Programming
Detailed Template Reference
The templating language can do more than insert blocks and do variable substitution.It's a mini programming language - designed to be simple to learn so that non-technicalpeople (==designers) can use it. Lets rewrite our doodleTypesList view so that wemake better use of the template and separate presentation and markup from'business logic'. First the view can be rewritten from this:
def listDoodleTypes(theRequest): myObjects = DoodleType.objects.all() myResult = "<h1>Doodle Types</h1>" for myObject in myObjects: myResult = myResult +str(myObject.id) + " : " + str(myObject.name) + "<br />" # Use our nifty template to render our response rather! return render_to_response("doodle.html", {'myData' : myResult})
to this:
def listDoodleTypes(theRequest): myTitle = "Doodle Types" myObjects = DoodleType.objects.all() return render_to_response("doodle.html", { 'myTitle' : myTitle, 'myObjects' : myObjects, })
Can you see that firstly our code is much simpler now (always a good thing inprogramming!) and secondly the view itself doesn't deal with the presentation itself,only with what should be presented. It then hands that data over to the template.
We need to adjust our template too so that it can accommodate our refactored view.So we change the template (doodle/templates/doodle.html) from this:
{% extends "base.html" %}{% block content %}<div id="heading">Welcome to Doodle App!</div><div id="viewdata">{{ myData|safe }}</div><div id="footer"></div>{% endblock %}
to this:
{% extends "base.html" %}{% block content %} <div id="heading">{{ myTitle }}</div> <div id="viewdata"> {% for myObject in myObjects %} <p>{{ myObject.name }}</p> {% endfor %} </div> <div id="footer"></div>{% endblock %}
You can see that we have constructed a simple for loop using template tags, and theniterated through the list of objects. We can get any property of the objects simply byusing the '.' reference to it. Note that you can't invoke methods on the object in this
Django Training Notes
29 of 45 18/11/2009 12:30

way, only retrieve its properties. We also accessed the myTitle variable that was passedto the template.
Using some more tags and filters we can extend our template to look like this:
{% extends "base.html" %}{% block content %} <div id="heading">{{ myTitle }}</div> <div id="viewdata"> {% for myObject in myObjects %} <p class="{% cycle 'oddrow' 'evenrow' %}">{{forloop.counter}}){{ myObject.name }}</p> {% endfor %} </div> <div id="footer"> <p>{{ myObjects|length }} items in total.</p> </div>{% endblock %}
I also added a couple of css class rules to the templates/base.html file:
.oddrow {background: #fcfcfc;} .evenrow {background: #ededed;}
These are just a few of the tags and filters you can use which can be quickly explained:
{{myTitle}} - Simply substitutes in the title passed in from our view. The css in ourbase template will ensure that it comes out in nice large text.{% for myObject in myObjects %} - This will iterate through the objects passed tothe template from the view.{% cycle 'oddrow' 'evenrow' %} - This will substitute with the strings 'oddrow' and'evenrow' on alternating iterations of the loop. You can have more than twooptions listed in this way.{{forloop.counter}} - This prints the iteration number for the for loop, starting atbase 1 (you can use forloop.counter0) for a base 0 counter.{{ object.name }} - This will be substituted with the property 'name' of the currentobject iteration.{{ myObjects|length }} - Is substituted with the number of objects in themyObjects collection.
The end product from the above looks like this:
8.5. Now you try
Django Training Notes
30 of 45 18/11/2009 12:30

Implement CRUD views, templates etc for the Doodle model. Don't worry aboutdisplaying the geometry field as a map at this stage, we will be getting there shortly.
9. Custom Template Tags
As well as the out-of-the-box template tags and filters, you can create your templatetags. The big advantage here is that you can put any python logic you like into yourcustom tage, whereas in the template you can only use the simplified template syntax.
9.1. A new package
To create a custom tag, first we make a package:
mkdir <yourapp>/templatetagstouch <yourapp>/templatetags/__init__.py
9.2. A simple example
There are various ways you can go about creating a custom tag, but if yourrequirements are simple, you can do it like this (e.g. doodle/templatetags/supertag.py):
from django import templatefrom django.conf import settingsregister = template.Library() @register.simple_tagdef supertag( theText ): return '''<div class="supertag">''' + theText + '''</div>'''
All this will do is wrap whatever text is passed to it inside a div of class 'supertag'. [email protected]_tag decoration will ensure the new tag is properly registered (its asyntactic shortcut).
You can now use the custom tag in your templates like this:
{# Note don't use quotes below! #}{% load supertag %}
{% supertag "Some Message" %}
9.3. Passing a template variable to a custom tag
Simply insert it without {{ }} surrounding it and then receive it like any other pythonparameter in your template code e.g.:
In the view:
{{{ sampleView(theRequest): return render_to_response('example.html', {'myLayers':[layer1,layer2,layer2]}) }}}
In the template:
{# Custom tag defined in <yourapp>/templatetags/ #}{% load customtag %} {# myLayers passed to form by the view{% CustomTag myLayers %}
Django Training Notes
31 of 45 18/11/2009 12:30

In the template tag:
from django import templatefrom django.conf import settingsregister = template.Library() @register.simple_tagdef OpenLayersTag( theLayers ): // do stuff with theLayers
9.4. Now you try
Write a custom tag that will return the number of doodles. The tag should take noparameters.
10. CSS and other media resources
We are going to be moving on to some more complex examples shortly but before wedo that we need to do some groundwork so that we can use image, css, js etc in ourtemplates.
10.1. Creating the media root
Note You can improve performance by serving these resources from the apachewebserver itself rather than via django & mod_python, however the approach shownhere makes for a simple configuration.
You need to create a resources folder where we can store javascript, images and cssfiles. To do this first edit settings.py and add (comment out the existing equivalententries):
# We previously added these two lines# When setting up project wide templatesimport osROOT_PROJECT_FOLDER = os.path.dirname(__file__)# Now replace the values in settings with theseMEDIA_ROOT = os.path.join(ROOT_PROJECT_FOLDER,'static')MEDIA_URL = '/static/'
Now make a directory called static with css, js and img subfolders:
mkdir -p static/cssmkdir -p static/jsmkdir -p static/img
Register the media dir with urls.py
from settings import MEDIA_ROOT
In the urls list lower down, add:
(r'^static/(?P<path>.*)$', 'django.views.static.serve', {'document_root': MEDIA_ROOT, 'show_indexes': True}),
You should now be able to point your browser to this url and see a media listing:
http://localhost:8000/static/
Django Training Notes
32 of 45 18/11/2009 12:30
10.2. Installing openlayers into your media_root
For serving up openlayers views we need to first unpack openlayers into the jsdirectory:
cd static/jswget http://openlayers.org/download/OpenLayers-2.8.tar.gztar xfz OpenLayers-2.8.tar.gz
10.3. Installing jquery and jquery-ui into your media_root
Jquery is a javascript library with many handy features. JQuery-ui adds some graphicaluser interface components to the jquery ui. In particular, jquery makes creating ajaxenabled sites really easy, and it can also help to make it graphically pleasing sincejquery-ui is themable via css.
cd staticwget http://jqueryui.com/download/jquery-ui-1.7.2.custom.zipunzip jquery-ui-1.7.2.custom.zip
Jquery-ui includes jquery so when you unzip the bundle, jquery and jquery-ui are placedin your js directory, the default 'smoothness' jquery css theme is placed in your css dir.An index.html file is placed in your static/ directory. If you open that in your webbrowser, you will get a preview of the various default ui widgets provided. You can getmore widgets from http://jqueryui.com so poke around there if you are looking forsomething more. There is also a really nice theme builder on http://jqueryui.com so youcan create a theme that matches the look and feel of your site and drop it into yourcss directory. If you do that your jqueryui widgets will blend in nicely with the rest of yoursite.
11. A little ajax example
11.1. Adding includes for jquery
Lets take our newly added static resources infrastructure for a little test drive bymaking a simple ajax menu. The first thing we need to do is include our jquery lib,jqueryui lib and jquery css into our top level template's <head> section(templates/base.html):
{# Jquery css #} <link rel="stylesheet" href="/static/css/smoothness/jquery-ui-1.7.2.custom.css" type="text/css" media="screen" title="no title" charset="utf-8"/> {# Jquery lib #} <script type="text/javascript" charset="utf-8" src="/static/js/jquery-1.3.2.min.js"></script> {# Jquery-ui lib #} <script type="text/javascript" charset="utf-8" src="/static/js/jquery-ui-1.7.2.custom.min.js"></script>
You won't immediately see any difference when you load one of your views but we haveadded the infrastructure to allow us to use jquery on any of our pages.
Django Training Notes
33 of 45 18/11/2009 12:30

11.2. Creating a menu
Lets add a menu to our base template. Because I like to keep things neat, I'll keep thetemplate in its own little template file and then include it into the base template. Firstour include snippet (templates/menu.html):
<div id="menu"> <p> <a href="" onclick='$("#content").load("/listDoodles/"); return false;'> List Doodles </a> </p> <p> <a href="" onclick='$("#content").load("/listDoodleTypes/"); return false;'> List Doodle Types </a> </p></div>
So the onclick event when clicking the link will use jquery to load the view listDoodles(that you made in the CRUD now you try earlier) or listDoodleTypes into the elementwith id of 'content'. Simple eh?
Of course since we are changing the way that list doodle types is used (it now will be anhtml snippet loaded into an existing page), we should not let its template inherit frombase.html anymore otherwise we will see a page within a page and things can quicklybecome very recursive!
So here is what our tweaked doodle.html template is going to look like:
{# no longer extends base... #}{% load supertag %} {# Custom tag defined in bees/templatetags/ #}{# no longer needs block content #} <div id="heading">{{ myTitle }}</div> {% supertag "Supertag Example" %} <div id="viewdata"> {% for myObject in myObjects %} <p class="{% cycle 'oddrow' 'evenrow' %}"> {{forloop.counter}}){{ myObject.name }} </p> {% endfor %} </div> <div id="footer"> <p>{{ myObjects|length }} items in total.</p> </div>
11.3. Including the menu in our base template
We will tell base to include our new menu snippet:
<body> {% include "menu.html" %} <div id="content"> {% block content %}{% endblock %} </div>
Django Training Notes
34 of 45 18/11/2009 12:30
</body>
We also created a div element with an id of 'content' so that our ajax load request hasa destination container that exists.
11.4. Creating the landing page
Since none the doodletypes view now no longer will render inside the base template,we need a new way to manage user interactions. We will create a new view that will beour 'landing page'. The landing page will display a short welcome message(implemented in a template!) and the menu (which we detailed above). When the userclicks on a menu link, the content frame only will change thanks to our ajax goodness.To create the landing page we need a controller (urls.py) entry, a view(doodle/views.py) and a template (doodle/templates/index.html). Notice we have nomodel since the landing page won't be displaying any application data.
urls.py:
# For our landing page (r'^$', landingPage),
views.py:
def landingPage(theRequest): return render_to_response("index.html")
index.html:
{% extends "base.html" %}{% block content %}<h1>Welcome to Doodle World!</h1><p>As a fellow doodle lover, we are sure you will appreciate the finecollection of fresh doodles we have on offer. Feel free to browse around andadd, create, update, delete etc. doodles! Enjoy yourself, life's a doodle!</p>{% endblock %}
Now point your browser at:
http://localhost:8000/
And you should see the landing page and be able to navigate using our spiffy ajaxmenus.
11.5. Setting CSS for the site
Lets round things off in this section by fixing the rather haphazard css implementation Iintroduced in earler sections with something a little neater. We will also make use ofthe jquery-ui widgets to smarten things up a little.
There are two things we should do in our site with css:
dictate the layout (repeat after me: "tables are for tabular data not content!")1.dictate the appearance2.
There are many free resources online where you can simply download and use layoutsand styles - for example http://free-css.com. First lets install a layout:
Django Training Notes
35 of 45 18/11/2009 12:30

cd static/jswget http://www.free-css.com/assets/files/free-css-layouts/download/page1/layout8.zipunzip layout8.zip
You can get a preview of the layout (two column, nav to the left) here:
http://localhost:8000/static/css/index.html
If you look at the html of the above page, you will see that the document should have astructure something like this:
body container header wrapper content navigation extra footer
So to make use of the css layout, we can simply adapt our base template(templates/base.html):
<html> <head> <title>My Projects</title> {# css layout #} <link rel="stylesheet" type="text/css" href="/static/css/styles.css" /> {# Jquery css #} <link rel="stylesheet" href="/static/css/smoothness/jquery-ui-1.7.2.custom.css" type="text/css" media="screen" title="no title" charset="utf-8"/> {# Jquery lib #} <script type="text/javascript" charset="utf-8" src="/static/js/jquery-1.3.2.min.js"></script> {# Jquery-ui lib #} <script type="text/javascript" charset="utf-8" src="/static/js/jquery-ui-1.7.2.custom.min.js"></script> </head> <body> <div id="container"> <div id="header"> {% block header %} <h1>Welcome to DoodleSite!</h1> {% endblock %} </div> <div id="wrapper"> <div id="content"> {% block content %}{% endblock %} </div> </div> <div id="navigation"> {% block navigation %} {% include "menu.html" %} {% endblock %} </div> <div id="extra"> {% block extra %} <h3>Extra Info</h3> {% endblock %} </div>
Django Training Notes
36 of 45 18/11/2009 12:30

<div id="footer"> {% block footer %} (C) 2009 The Doodle Factory {% endblock %} </div> </div> </body></html>
Ok, its still not the most beautiful site in the world, but I hope at this point some lightbulbs are lighting up inside your head! Every part of the template can be defined with adefault state in our base template. Views can create content which gets inserted intoany part of the base template in either two way - either using ajax to render the viewinto a div element, or by template inheritance where the child templates simplyredeclare the parts (block content, block navigation etc) that they want to change. Allthe content automatically gets its look and feel from the css in use. Its a really simpleeasy to understand and scalable solution!
If you chose a different template for your site, just adapt the process described aboveaccordingly.
12. Authentication
[Django Authentication Docs file:///home/timlinux/dev/python/django_training/django_training.html#toc52]
12.1. User Registration
Django includes a complete authentication system that gets installed when you createa new project. If you want out of the box login screen functionality, you should installthe [django registration app http://bitbucket.org/ubernostrum/django-registration/wiki/Home]:
sudo apt-get install python-setuptoolssudo easy_install django-registration
Next add the activation days key and registration app to your settings.py:
# For django registrationACCOUNT_ACTIVATION_DAYS = 2 EMAIL_HOST = 'localhost' DEFAULT_FROM_EMAIL = '[email protected]' #where to take the user after they logged inLOGIN_REDIRECT_URL = '/' #where to take the user if they try to access a page requiring a logged in userLOGIN_URL = '/accounts/login/'
INSTALLED_APPS = ('django.contrib.auth','django.contrib.contenttypes','django.contrib.sessions','django.contrib.sites','registration',...etc...)
To your controller add the url handler for registration pages (urls.py):
Django Training Notes
37 of 45 18/11/2009 12:30

(r'^accounts/', include('registration.urls')),
In your <project>/templates dir unpack the registration templates:
wget http://linfiniti.com/downloads/registration_templates.tar.gzcd templatestar xvfz registration_templates.tar.gz
Lasty in your views.py use the login required decorator to ensure that users are loggedin before they can view a given page.
Django provides built in decorators that provide shortcuts for checking that a user isauthenticated:
from django.contrib.auth.decorators import login_required
@login_requireddef someView(request): if not request.user.is_staff: raise http.Http404
12.2. Users and permissions
You can find out the user's status by getting the user object from the request passedto a view.
def someView(request): if not (request.user.is_authenticated() and request.user.is_staff): raise http.Http404
13. Creating custom decorators
We have see decorators used in a few contexts now - for example to ensure that a useris authenticated before they can access a page, or to simplify the process of writing aform widget. Lets look a bit more closely at how to write a decorator that can be usedto pass the user's authentication context over to a template.
13.1. Doing it the non-decorator way
Normally if you want to access user data from a form, you need to callrender_to_response, passing it the context parameter e.g.:
@login_requireddef foo(theRequest): myData = "Hello World" render_to_response("bar.html",{"myData" : myData}, context_instance=RequestContext(theRequest))
With the render context passed to the template, you are then able to write templateconditional logic like this:
{% if user.is_authenticated %} <p>You are logged in as {{user}}</p>{% endif %}
Django Training Notes
38 of 45 18/11/2009 12:30

13.2. Doing it the decorator way
Here is how we can do the same thing using a decorator pattern(doodle/renderDecorator.py):
"""This is a decorator that when used will always pass the RequestContext over to the template. This is needed in tandem with the authentication stuff so that the templates can know who the logged in users is and perform conditional rendering based on that. example useage in your view:
from doodle.renderDecorator import renderWithContext
@renderWithContext('demo.html') def demo(request): return {}
The template will then have the RequestContext passed to it along automatically, along with any other parameters your view defines. """from django.shortcuts import render_to_responsefrom django.template import RequestContext
class renderWithContext(object): def __init__(self, template_name): self.template_name = template_name
def __call__(self, func): def rendered_func(request, *args, **kwargs): items = func(request, *args, **kwargs) return render_to_response(self.template_name, items, context_instance=RequestContext(request))
return rendered_func
With the above, we could rewrite our previous example like this:
from doodle.renderDecorator import renderWithContext
@renderWithContext('bar.html') @login_requireddef foo(theRequest): myData = "Hello World" render_to_response({"myData" : myData})
Note: there are some situations in which the above won't work well, for example whenyou do an http redirect.
13.3. Now you try
Write some logic that will show the name of the logged in user on all pages.
Add a link for the user to logout if he is logged in, and to log in if he is logged out.
14. Middleware
Middleware in Django runs before a web request is delivered to the django controller,and after the view creates a response. It is normally used to do some pre- and
Django Training Notes
39 of 45 18/11/2009 12:30

post-processing on the data moving in and out of django.
One thing middleware can be useful for is to alter the final rendered product producedby your view. For example we can use it to format the rendered HTML nicely and to stripout excessive white space from the HTML.
Since middleware may be used by multiple applications in your project, we will create apython package in the root of your project dir:
mkdir middlewaretouch middleware/__init__.py
14.1. Strip white space
Suppose your template renders html that looks like this:
<p>Message 1</p>
<p>Message 2</p>
We can use the [Strip White Space middleware http://code.djangoproject.com/wiki/StripWhitespaceMiddleware] to tidy it up.
First create this file in middleware/stripwhitespace.py :
#Tightens up response content by removed superflous line breaks and whitespace.#By Doug Van Horn
import reclass StripWhitespaceMiddleware: #Strips leading and trailing whitespace from response content. def __init__(self): self.whitespace = re.compile('\s*\n')
def process_response(self, request, response): if("text" in response['Content-Type'] ): new_content = self.whitespace.sub('\n', response.content) response.content = new_content return response else: return response
The code uses a regular expression to replace whitespace. To make use of themiddleware, you need to add to your project settings.py file a couple of lines:
from middleware.stripwhitespace import StripWhitespaceMiddleware
MIDDLEWARE_CLASSES = ( . . other stuff here . 'middleware.stripwhitespace.StripWhitespaceMiddleware', . . .)
Here is a look at my generated html before applying the strip white space middleware:
Django Training Notes
40 of 45 18/11/2009 12:30
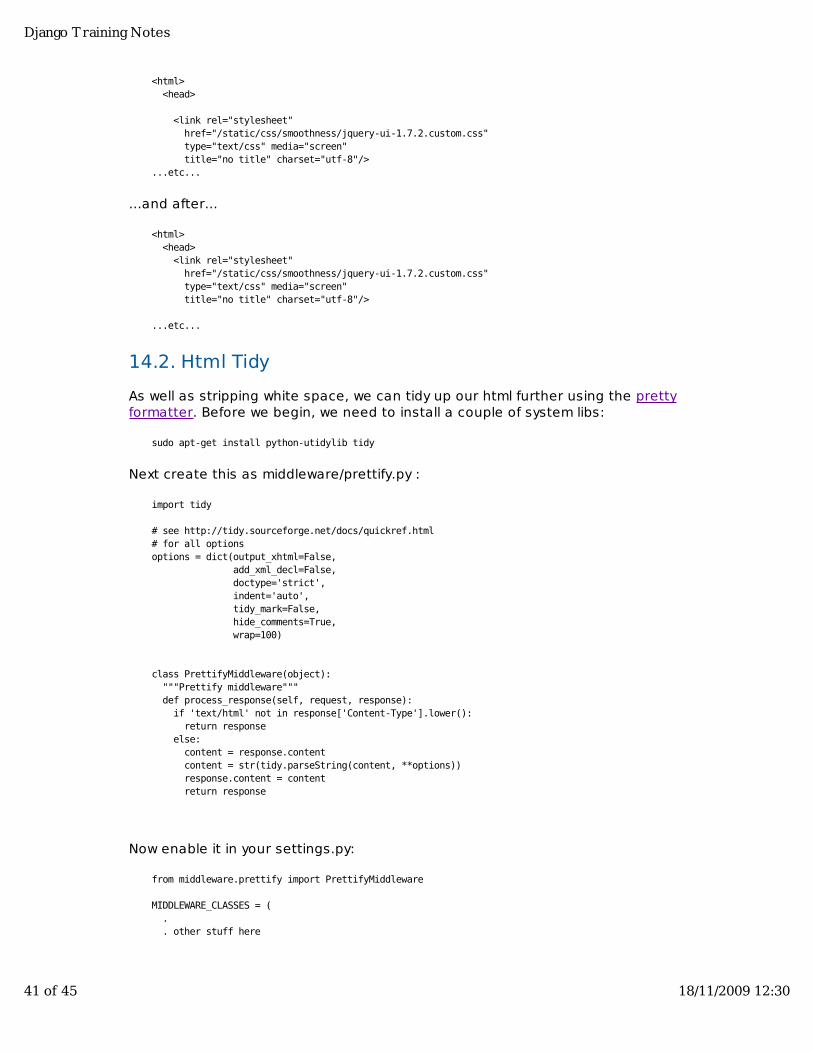
<html> <head> <link rel="stylesheet" href="/static/css/smoothness/jquery-ui-1.7.2.custom.css" type="text/css" media="screen" title="no title" charset="utf-8"/>...etc...
...and after...
<html> <head> <link rel="stylesheet" href="/static/css/smoothness/jquery-ui-1.7.2.custom.css" type="text/css" media="screen" title="no title" charset="utf-8"/>
...etc...
14.2. Html Tidy
As well as stripping white space, we can tidy up our html further using the prettyformatter. Before we begin, we need to install a couple of system libs:
sudo apt-get install python-utidylib tidy
Next create this as middleware/prettify.py :
import tidy
# see http://tidy.sourceforge.net/docs/quickref.html# for all optionsoptions = dict(output_xhtml=False, add_xml_decl=False, doctype='strict', indent='auto', tidy_mark=False, hide_comments=True, wrap=100)
class PrettifyMiddleware(object): """Prettify middleware""" def process_response(self, request, response): if 'text/html' not in response['Content-Type'].lower(): return response else: content = response.content content = str(tidy.parseString(content, **options)) response.content = content return response
Now enable it in your settings.py:
from middleware.prettify import PrettifyMiddleware
MIDDLEWARE_CLASSES = ( . . other stuff here
Django Training Notes
41 of 45 18/11/2009 12:30

. 'middleware.stripwhitespace.StripWhitespaceMiddleware', 'middleware.prettify.PrettifyMiddleware', . . .)
Lets once again look at the before and after:
<html> <head> <link rel="stylesheet" href="/static/css/smoothness/jquery-ui-1.7.2.custom.css" type="text/css" media="screen" title="no title" charset="utf-8"/> <script type="text/javascript" charset="utf-8" src="/static/js/jquery-1.3.2.min.js"></script> <script type="text/javascript" charset="utf-8" src="/static/js/jquery-ui-1.7.2.custom.min.js"></script> <style type="text/css"> body {color:sienna} #heading {font-size: 3em;} div {margin-left:20px; border-top: solid 1px;} .oddrow {background: #fcfcfc;} .evenrow {background: #ededed;} </style> </head> <body>
<div id="menu"> <p> <a href="" onclick='$("#content").load("/listDoodles/"); return false;'> List Doodles </a> </p> <p> <a href="" onclick='$("#content").load("/listDoodleTypes/"); return false;'> List Doodle Types </a>
</p></div> <div id="content"> <h1>Welcome to Doodle World!</h1><p>As a fellow doodle lover, we are sure you will appreciate the finecollection of fresh doodles we have on offer. Feel free to browse around andadd, create, update, delete etc. doodles! Enjoy yourself, life's a doodle!</p>
</div> <div id="footer">
<p>You are logged in as timlinux</p> </div> </body>
Django Training Notes
42 of 45 18/11/2009 12:30
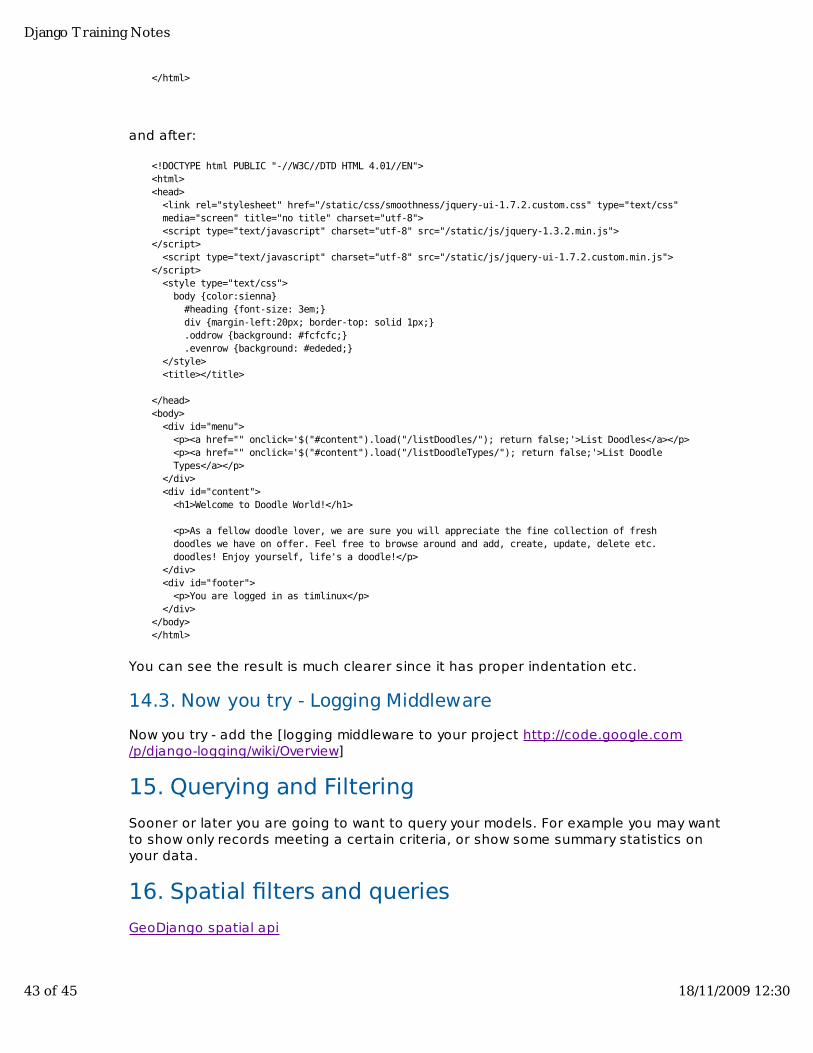
</html>
and after:
<!DOCTYPE html PUBLIC "-//W3C//DTD HTML 4.01//EN"><html><head> <link rel="stylesheet" href="/static/css/smoothness/jquery-ui-1.7.2.custom.css" type="text/css" media="screen" title="no title" charset="utf-8"> <script type="text/javascript" charset="utf-8" src="/static/js/jquery-1.3.2.min.js"></script> <script type="text/javascript" charset="utf-8" src="/static/js/jquery-ui-1.7.2.custom.min.js"></script> <style type="text/css"> body {color:sienna} #heading {font-size: 3em;} div {margin-left:20px; border-top: solid 1px;} .oddrow {background: #fcfcfc;} .evenrow {background: #ededed;} </style> <title></title>
</head><body> <div id="menu"> <p><a href="" onclick='$("#content").load("/listDoodles/"); return false;'>List Doodles</a></p> <p><a href="" onclick='$("#content").load("/listDoodleTypes/"); return false;'>List Doodle Types</a></p> </div> <div id="content"> <h1>Welcome to Doodle World!</h1>
<p>As a fellow doodle lover, we are sure you will appreciate the fine collection of fresh doodles we have on offer. Feel free to browse around and add, create, update, delete etc. doodles! Enjoy yourself, life's a doodle!</p> </div> <div id="footer"> <p>You are logged in as timlinux</p> </div></body></html>
You can see the result is much clearer since it has proper indentation etc.
14.3. Now you try - Logging Middleware
Now you try - add the [logging middleware to your project http://code.google.com/p/django-logging/wiki/Overview]
15. Querying and Filtering
Sooner or later you are going to want to query your models. For example you may wantto show only records meeting a certain criteria, or show some summary statistics onyour data.
16. Spatial filters and queries
GeoDjango spatial api
Django Training Notes
43 of 45 18/11/2009 12:30

17. Fixtures
18. Unit Tests
19. Deploying on apache
Up until now we have used only the built in development server that comes with django.When you deploy live you should ideally create a virtual host in apache something likethis:
<VirtualHost *> ServerAdmin [email protected] ServerName doodle.linfiniti.com ServerAlias www.doodle.linfiniti.com LogLevel warn
CustomLog /var/log/apache2/django_project.access.log combined # Possible values include: debug, info, notice, warn, error, crit, # alert, emerg. ErrorLog /var/log/apache2/doodle.error.log
ServerSignature Off
<Location "/"> SetHandler python-program PythonHandler django.core.handlers.modpython SetEnv DJANGO_SETTINGS_MODULE settings PythonPath "['/opt/django_project/'] + sys.path" PythonOption django.root /django_project PythonDebug On </Location></VirtualHost>
20. Things you can't do in Django
Models with composite keys are not supported.
You can probably cheat a little by adding a constraint in your fixtures:
ALTER TABLE framecommon ADD CONSTRAINT unique_localization_and_segment UNIQUE (localization_id, segment_id);
21. Setting up the SVN repository
# # Short lived track instance for django course 2009#<Location /django-course-aug2009-svn> DAV svn SVNPath /home/timlinux/svn/django-course-Aug2009 AuthType Basic AuthName "linfiniti.com" AuthUserFile /home/timlinux/auth/dav_svn_django-course-Aug2009.passwd Require valid-user</Location><Location "/projects/django-course-aug2009/login"> AuthType Basic AuthName "linfiniti.com.django-course-2009" AuthUserFile /home/timlinux/auth/dav_svn_django-course-Aug2009.passwd
Django Training Notes
44 of 45 18/11/2009 12:30

Require valid-user</Location>
sudo chgrp -R timlinux /home/timlinux/svn/svnadmin create /home/timlinux/svn/django-course-Aug2009sudo chown -R www-data:timlinux /home/timlinux/svn/django-course-Aug2009sudo chmod -R ug+ws /home/timlinux/svn/django-course-Aug2009/htpasswd -c /home/timlinux/auth/dav_svn_django-course-Aug2009.passwd timlinuxhtpasswd /home/timlinux/auth/dav_svn_django-course-Aug2009.passwd clintonhtpasswd /home/timlinux/auth/dav_svn_django-course-Aug2009.passwd graemehtpasswd /home/timlinux/auth/dav_svn_django-course-Aug2009.passwd caseycd /tmp/svn co https://linfiniti.com/django-course-aug2009-svn course
sudo trac-admin /home/timlinux/trac/django-course-aug2009 initenvsudo chown -R www-data /home/timlinux/trac/django-course-aug2009/sudo trac-admin trac/django-course-aug2009/ \ permission add timlinux TRAC_ADMIN
22. Ideas
Spellcheck this document! (thanks Casey!)1.Create a flowchart checklist with procedure for adding a new model / form / formfields / updating settings etc
2.
Django Training Notes
45 of 45 18/11/2009 12:30