
Digital Photo - May 2013
11
-
Upload
wwwphotoanswerscouk -
Category
Documents
-
view
225 -
download
2
description
Practical Photography magazine is the perfect read for anyone wanting to get more from their Digital SLR. It teaches you all the camera skills you need, inspires creativity, and keeps you informed of the latest photo gear launches. It’s ideal for anyone who is passionate about taking better photographs.
Transcript of Digital Photo - May 2013


in his elementThis amazing image was captured during a three-week trip to Indonesia when Tristan Cardew was trying out his new underwater housing on his Canon EOS 1D Mark II. He spent a lot of time in the surf shooting from diferent angles and trying not to get in the surfers’ way or get hammered by the surf himself! He doesn’t like
to use the word ‘luck’ in relation to his photography, but says there was “some other element apart from pure skill involved in capturing this shot”. Post-capture work in Photoshop was minimal – Tristan made some simple Curves adjustments and increased Saturation slightly.
Camera Canon EOS 1D Mark II N & Canon 15mm f/2.8 fisheye lens with AquaTech DV-4 housing and LP-1 dome port Exposure 1/1600sec @ f/8, ISO 400 Software Photoshop Visit www.tristancardew.com
// inspiring images
Digital Photo 7
24 Digital Photo
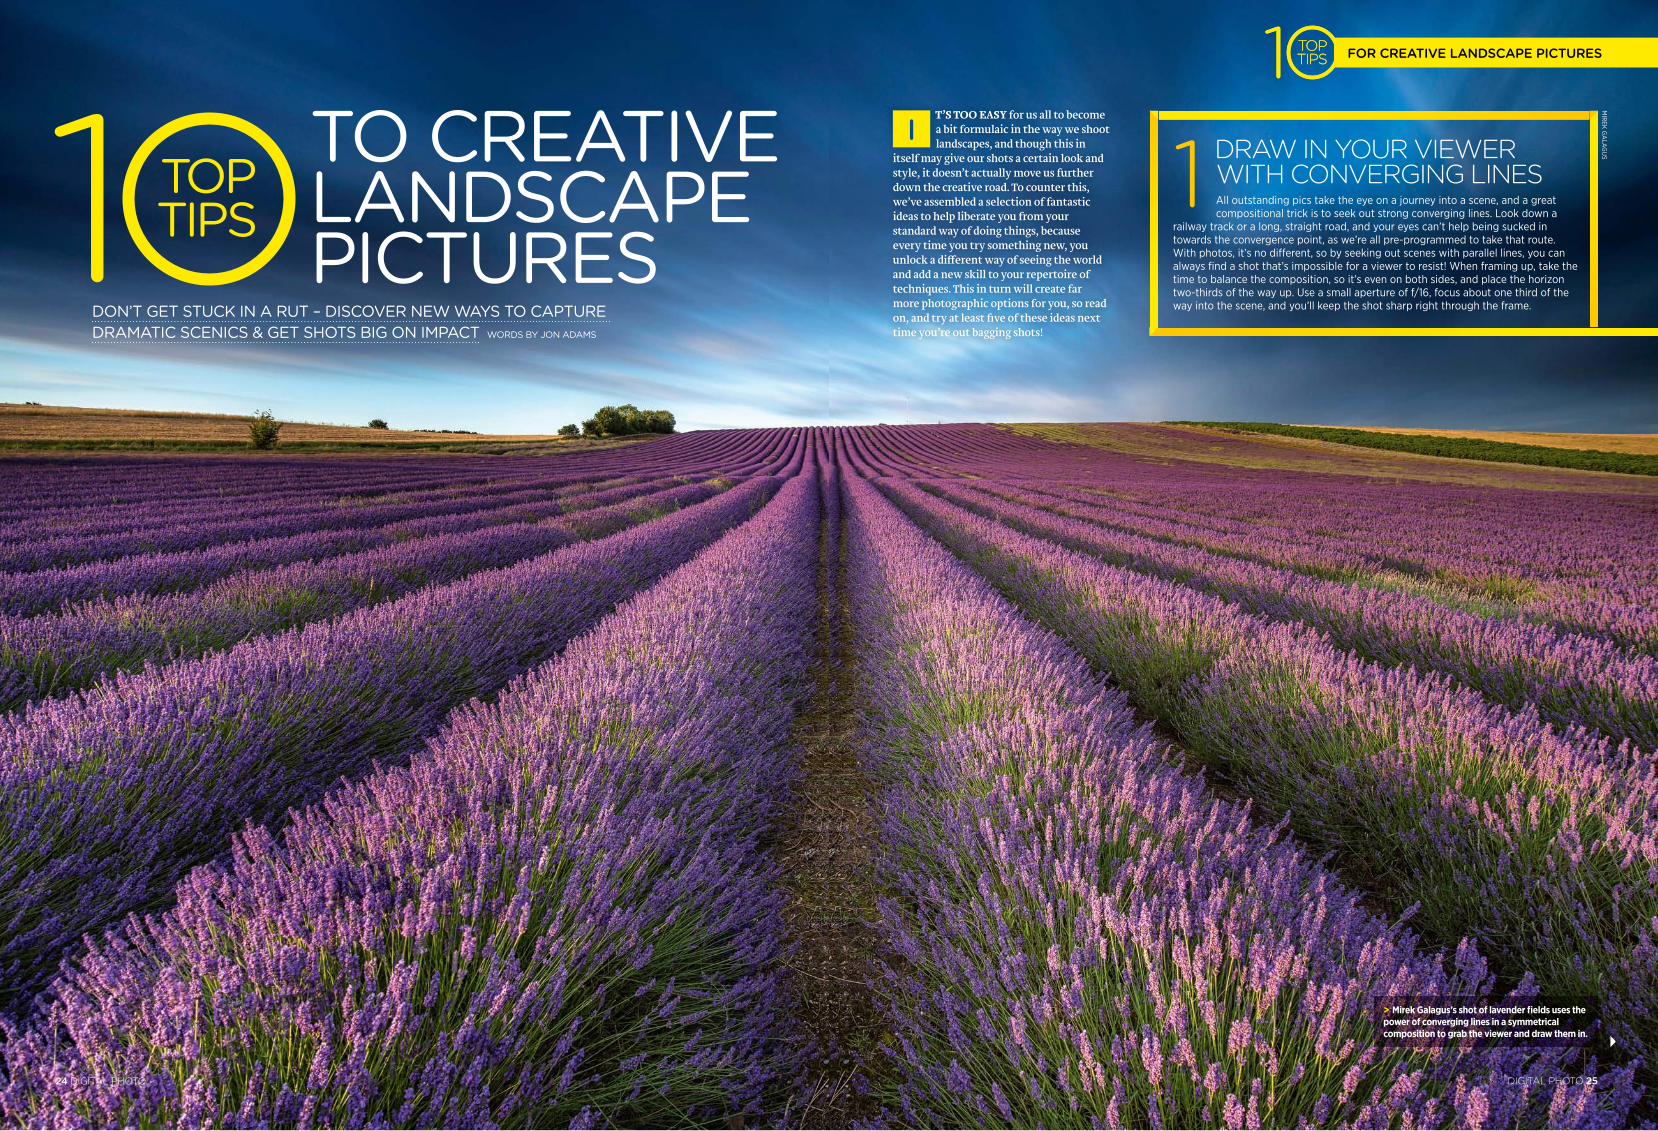
don’t get stuck in a rut – discover new ways to capture dramatic scenics & get shots big on impact words by jon adams
to creative landscape pictures 1 top
tips

Digital Photo 43
shoot a floating Portrait // camera academy
This levitation technique will arm you with bags of essential camera skills which you can use in a wide range of shooting scenarios.
using manual settings to take control of your cameraA shallow depth-of-field will produce an out-of-focus background, and this will in turn really help bring the emphasis onto the model. We’ll use the camera’s Aperture priority mode for the initial setup, but we’ll then switch to Manual and input the settings we’ve measured to take full control of the camera.
lock off your camera for accurate double exposures This technique is all about capturing two shots using the exact same camera settings, as this makes the task of blending the two photos much easier. To do this you’ll need to set up your camera on a tripod, lock of your focus and keep it at the same aperture for both shots, then use it via the Self-timer mode.
how to tidy up your shotsWe’ll show you how to remove the model’s support in Photoshop using Layers and the Eraser tool to create the floating illusion. You may get a flat area on your model from where the support was, but this can be smoothed back into shape with the Liquify filter.
kEY SkiLLS You’LL LEArn righT hErE

Digital Photo 47
essential skills // camera academy
Step 3 review the results
Review the results on screen and check the focus point is pin-sharp by zooming in tight. If the results are blurred then increase the shutter speed to 1/4000sec and try again; you may also need to boost the ISO to compensate for this (see overleaf for more info on ISO).
all about shutter priority mode Setting the camera to Shutter priority mode (S or Tv on the Mode dial) allows you to set the shutter speed while the camera will take care of the aperture automatically to gain a good exposure. But since there’s a greater range of shutter speeds than aperture values, it’s easy to set a shutter speed that’s simply too fast, or too slow, for the camera to expose correctly. If this happens you may find that the aperture value will begin to flash, or the words ‘Lo’ and ‘Hi’ will appear instead. To combat this you’ll need either more light (ie shooting on a sunnier day) or to increase the camera’s sensitivity to light by adjusting the ISO settings to a higher value.
“Shooting with a fast shutter speed will freeze a moving subject, creating the illusion that time has stopped”

~ t h e d i g i ta l p h oto i n t e r v i e w ~ STEP INTO A
SURREAL WORLD
PhotograPhic success while still a student hasn’t gone to the head of miss aniela who constantlY striVes to trY new
techniQues & create Bold iMageswords BY lYnne MaXwell
inspiring images // interView
54 DIgITAL PhOTO
Miss aniela // inspiring images
DIgITAL PhOTO 55
nATALIE DYBISZ wAS steering her way towards a career in writing & journalism when photography came on the scene and took her
not so much of course, but in a rewarding new direction. “I started taking self-portraits on a digital camera and
discovered the immediacy and power of the whole process, manipulating them in Photoshop and using the wonder of the world wide web to share them.”That was back in 2006 when still a student; seven years on and she is an established fine art and commercial photographer with six solo exhibitions, two books and numerous workshops to her name – or rather, the name of Miss Aniela.
“I chose it as an internet username for my images and it stuck, eventually becoming a brand. I kept it for its feminine mystique and being expressive of my own identity (Aniela is her middle name).”
Success, it seems, has come quickly, with Miss Aniela’s surreal use of Photoshop receiving the most attention. She sees her career as dividing into two main phases. The first was from 2006 to 2010 when she gained popularity for her self-portraits. But she realised that wasn’t enough to provide a secure livelihood, even with print and book sales. Since 2011 she has collaborated with her fiancé, Matt Lennard, who acts as an agent for the business and with whom she devised the Fashion Shoot Experience, a workshop on a real fashion shoot.
“I think one has to be careful to separate real success or promise from hype or popularity. I was aware of how easily popularity can blow hot and cold, and was keen not to be a one-hit wonder.”
MOTHERSHIP & IGNITE MARES Left: Shot in London’s oldest church, fused with the sea from a painting by Frank Mason and the boat from a Rembrandt.
Above: Miss Aniela extended the canvas to accommodate the model, who was made significantly taller in Photoshop, and her dress enlarged. These measures made room for the whirlwind trio of horses, lifted from paintings by George Stubbs.
MO
DEL: ESTI R
OSE, D
ESIGN
ERS: B
EYON
D B
UR
LESQU
E & D
ELLA R
EED, STY
LING
: LAU
REN
EVA


Digital Photo 69
create concePt art // photoshop genius
Step 1 Open the pics & resize
To start, open the pictures you want to use, so in Photoshop or Elements go to FileOpen and load up your subject (Bike.jpg from the Start Images folder in our case). Hit Ctrl+A to select the whole image, and Ctrl+C to copy it. You can now close the image.
Now go back to FileOpen and choose Blueprint.jpg, again from the Start Images folder. Hit Ctrl+V to paste the subject on top of the blueprint. After youÕve pasted the subject in, youÕll likely see itÕs too big, so hit Ctrl+T to put it into the Free Transform mode. Once in Free Transform, youÕll see a frame around the edge of the subject image Ð this is called the bounding box. If youÕre in Elements, make sure youÕve ticked Constrain Proportions in the Options bar and if youÕre in Photoshop hold the Shift key, then drag the corner boxes inwards to resize. Do this until the bike is comfortably sitting within the blueprint design. You can also reposition the bike by clicking and dragging it into the middle, then hit Return to set it down.
> This graphic art efect is a great way to finish of almost any shot and works superbly on subjects with bright colours and details.