Dialogue Toolkit 4-6 - UC Davis School of Education
20
Sacramento Science Project http://sasp.ucdavis.edu An Education Partnership • UC Davis • Sacramento State Toolkit for Successful Dialogue in the Common Core Classroom Grades 4 – 6 Judi Kusnick, Sacramento State Prepared for TRUSD September 2013
Transcript of Dialogue Toolkit 4-6 - UC Davis School of Education

Sacramento Science Project http://sasp.ucdavis.edu
An Education Partnership • UC Davis • Sacramento State
Toolkit for Successful Dialogue in the Common Core Classroom
Grades 4 – 6
Judi Kusnick, Sacramento State
Prepared for TRUSD September 2013

Sacramento Area Science Project http://sasp.ucdavis.edu 2
A Framework for Thinking about Dialogue
There are numerous student dialogue techniques for use in the classroom. In instruction we can be strategic about selecting dialogue protocols for specific purposes. One way to increase the strategic aspect of our approach to dialogue is to consider a framework to help guide our technique selection process. In other words, we benefit by having specific goals for student-‐to-‐student dialogue, considering those goals when selecting a technique to employ and thinking about all of this within a framework that recognizes the classroom context.
Here is a frame with four aspects to consider when incorporating student-‐to-‐student dialogue in the classroom.
A. Set the task for talk (What engaging activity or event precedes dialogue?)
B. Regulate the time for talk C. Structure the dialogue interaction D. Attend to the accountability – define the product or goal (oral, written, drawing, other representation, etc.)

Sacramento Area Science Project http://sasp.ucdavis.edu 3
Using Dialogue Protocols Possible Goals for Student Dialogue:
• Eliciting prior knowledge • Practicing vocabulary • Putting ideas on the table • Creating hypotheses or potential explanations • Constructing arguments with evidence • Processing text • Giving students a chance to modify their thinking, express ideas or gain ideas
Choosing a Dialogue Protocol: Be strategic in matching a dialogue protocol to an instructional goal. Different protocols are good for different goals. Here is a breakdown of some dialogue protocols in different categories of use:
Goal Student in groups Students in pairs Eliciting prior knowledge Putting ideas on the table Brainstorming hypotheses or explanations
Say Something Talking Sticks Dialogue Dots Paraphrase Passport
Paired Verbal Fluency Give One, Get One
Constructing arguments with evidence
Talking Sticks Dialogue Dots Paraphrase Passport Four Corners
Structured Think-Pair-Share
Processing text Final Word Say Something Paraphrase Passport Four Corners
Structured Think-Pair-Share Give One, Get One
Review Practice Vocabulary acquisition
Paraphrase Passport
Quiz, Quiz, Trade Walkabout Review Paired Verbal Fluency 3-2-1
Getting students on their feet Four Corners Quiz, Quiz, Trade Walkabout Review Paired Verbal Fluency 3-2-1 Give One, Get One

Sacramento Area Science Project http://sasp.ucdavis.edu 4
Dialogue Stems In many dialogue situations it is often a benefit to provide students with stems for starting their responses. The stems serve as a starting point or focusing tool for the dialogue and assists in keeping student talk on topic. Stems are included with some of the dialogue protocols on the following pages. Here is a general list of dialogue stems organized into categories, with a few stems for general use. Stems need not be tied to a particular protocol and you can mix and match them as the need arises. Expressing an Opinion: I think/believe that… It seems to me that… In my opinion…
Disagreeing: I don’t agree, because… I got a different answer… I see it another way…
Acknowledging Ideas: I agree with (a person) that… My idea is similar to/related to ____’s idea. My idea builds upon ____’s idea that …
Asking for Clarification: What do you mean? Will you explain that again? I have a question about…
Affirming: That’s an interesting idea I hadn’t thought of that I see what you mean
Partner and Group Reporting: We decided/agreed that… We concluded that… Our group sees it differently We had a different approach
Soliciting a Response: What do you think? Do you agree? We haven’t heard from yet. How did you get that answer?
Predicting: I guess/predict/imagine that… Based on….. I infer that… I hypothesize that…
Offering a Suggestion: Maybe we could… What if we… Here’s something we might try…
Individual Reporting: I discovered from ____that… I found out from ____ that… ______pointed out to me that… ______shared with me that….
Paraphrasing: So, you are saying that… In other words, you think… Your thought is that…
Holding the Floor: As I was saying… Finishing my thought… I was trying to say…
Stems for general use: “As I read this I was thinking …” “After doing that I think …” “After reading that I …” “This makes sense to me because …” “This doesn’t make sense to me because…” “One question I have about this is …”

Sacramento Area Science Project http://sasp.ucdavis.edu 5
Seasonal Partners This protocol provides a method for grouping students that can save you time when making transitions into dialogue or other work in your classroom. Seasonal Partners and Clock Partners work in the same way. For Seasonal Partners, students divide a paper into quadrants and select partners so they can pair up later.
It helps to go through the process for students and model it as you proceed. You would say, “Draw a line down the middle of your paper. Next, draw a line across your paper halfway down the page. You now have four quadrants.” Drawing this out on a chart paper while saying the directions helps the process. At this point, model the labeling of the quadrants, beginning with spring, then summer, fall and winter (see below). Next, model how to populate the quadrants with partners’ names, saying, “Find a spring partner, put their name in your spring quadrant and then put your name in their spring quadrant.” Modeling the process helps tremendously. Now tell students, “Do the same with a summer partner, then a fall partner and finally a winter partner.”
Seasonal Partners Clock Partners work much the same way as Seasonal Partners. But in Clock Partners there is a partner for each hour on the clock, so students find one o’clock, two o’clock, … up to 12 o’clock partners. This provides you with many options for pairing students. A particularly creative eighth-‐grade teacher we worked with has her students choose new Seasonal Partners for each unit and uses terms from the science for groupings. For instance, for an astronomy unit her students had galaxy partners (spiral, elliptical, dwarf and lenticular, and for an ecology unit students had producer, consumer, omnivore and carnivore partners. After partners are established you will notice some patterns. Students tend to populate the upper-‐left quadrant in Seasonal Partners with a best friend, and the lower-‐right quadrant tends to be someone they don’t know as well as the partners in the other three quadrants. This pattern holds for the other partnering protocols, with first options going to more familiar classmates and later options to less familiar classmates.
Spring Summer Fall Winter

Sacramento Area Science Project http://sasp.ucdavis.edu 6
Say Something Say Something is a straightforward protocol and is effective in small groups. The Say Something protocol is useful in getting a lot of thinking on a topic out in a short period of time and it is effective in deeply exploring concepts or ideas. Following an experience (science activity, lab, reading, video clip, or lecture, etc.), students (in their groups) take turns saying something about their thoughts on the topic. One student starts off (teachers may designate that person – i.e. the student sitting closest to the door) and makes a comment about the experience, activity, reading, or information while the other group members listen. Then the next group member makes a comment reacting to or adding something to the original comment or adding a new idea. The process proceeds until each group member has had an opportunity to contribute something to the original comment. The intent is to have all comments relate in some way to the topic under consideration as a means of thoroughly exploring ideas and understandings. In Say Something, one person talks at a time, and the chance to “say something” proceeds around the group until all have had an opportunity. Generally, when students respond in Say Something, they do one or more of the following: make an observation or comment, clarify something, make an inference, make a connection or ask a question.
In every classroom there are students who are, for whatever reason, unwilling to share their thinking. One possibility is to offer students the option of saying something such as “I have nothing to add to the topic of – insert the topic here – at this time.” Having them mention the topic helps keep them listening. In setting up the Say Something protocol a useful technique for training the students is to ask, “What would it look like and sound like if we are following the protocol?” The response for what we would see should include things like people sitting in small groups, one person’s mouth moving in each group and others looking at the speaker. The response for what we would hear would include a few voices at any one time and comments about the topic being considered. Here are some useful stems that can be used in the Say Something protocol. Observation/Comment Clarify Inference Connect Question I noticed that … I think that … I saw (heard, smelled) … This is good because … This is hard because … This is confusing because … This makes sense because …
Now I understand … No, I think it means … At first I thought …, but now … I agree with you, and … What this means is …
I predict that … I bet that … Based on these data I think … One thing I think is … I wonder if …
This reminds me of … This process is like … This is similar to … This … makes me think of … It also … This … is like … because …
How did … In what ways is … like … What might happen if … Do you think that … What evidence supports … In other words, are you saying …

Sacramento Area Science Project http://sasp.ucdavis.edu 7
Talking Sticks The Talking Sticks protocol helps even out the contributions in a group, gets more students contributing and moderates the pace of dialogue. We’ve all seen situations where one person dominates a group dialogue. Talking Sticks reduces that type of behavior and allows a greater number of voices to be heard. Using this protocol can help improve listening skills.
The teacher can best determine how long to let Talking Sticks progress in their classroom as different groups or classes can manage different amounts of time in this protocol. Students get better at listening and taking turns as they practice this protocol. We’ve noticed that at first the protocol is awkward, but as time goes on students become more proficient at it.
As with many of the other protocols, it helps to describe what will be seen and heard if the protocol is being correctly followed. You should hear one voice per group at any one time. You should see Talking Sticks being picked and group members being attentive to the speaker.
Talking Sticks Directions In Talking Sticks, each student in the group places his or her pencil/pen in the middle of the table (These are the “talking sticks.” An alternative is to have other items be the talking sticks – one teacher we’ve observed uses colored craft sticks). In order to make a comment on the topic a student must pick up their talking stick. Students may comment while holding their talking stick, but once they are finished, they set their talking stick in front of them and they are not allowed to comment again until all the other group members have had a turn (picked up their talking stick from the center of the group and commented). If a group member does not want to comment, he or she may pick up the talking stick and say, “pass.”

Sacramento Area Science Project http://sasp.ucdavis.edu 8
1
Final Word The Final Word protocol helps groups hear each other, think, and focus on information they have read. It is an excellent protocol for working on listening skills and processing written text. With this protocol it helps to keep groups small – three to five students, and of consistent size across the class. This protocol takes a while to execute as each person in the group will be commenting then listening to all other group members comment.
Again, it helps to talk with the students about what will be heard in the classroom if everyone is following the protocol – i.e. “We should hear one conversational voice from each group at a time and no interruptions or cross-‐talk.” Making these expectations clear helps everyone adhere to the process. Group members can take brief notes or write down their thoughts while others are speaking – this helps support individual writing that may come later.
Final Word Directions
1. Students read the passage, selection or article (often in a Silent Sustained Reading) and while reading they underline, highlight or take notes on two or three statements from the reading that makes them think or makes an impression on them, or that they wonder about.
2. Once everyone in the group is finished reading and underlining or taking notes, one student reads one of his or her underlined statements – no additional comments, they just read the statement.
3. The person sitting to the speaker’s right then makes a comment about the statement that the first student read. The comment has to relate to the original statement and it can be almost anything the statement makes them think about. The other group members listen quietly.
4. After each person finishes their comment, the process proceeds around the group in round robin fashion until it gets back to the person who read the original statement.
5. The first speaker then has the opportunity to say something about the statement and the comments heard from the other group members. This person gets the “Final Word” on their original statement.
6. The process repeats with the second person and so on until everyone in the group has had a “Final Word.”
Stems for use in the Final Word protocol: “After hearing that I wonder …” “It seems that what that statement means is …” “It is interesting that you …”
2

Sacramento Area Science Project http://sasp.ucdavis.edu 9
Paired Verbal Fluency Paired Verbal Fluency is a dialogue protocol that produces an intensive exchange of knowledge between two people in a short amount of time. Like many of the dialogue protocols, it is student centered in that students are the participants in the exchange – teachers are observers. It is of considerable value to make a brief “silent think time” explicit before the talking begins. You can do this before pairing, after pairing or even by having students writing down a few thoughts before pairing. The speaking and listening times in Paired Verbal Fluency (20, 30 and 45 seconds) can be adjusted as needed to meet the capacities of your particular students. When first employing this protocol students will need less time. As students become more proficient and used to sharing their thinking, they tend to speak longer. It is very helpful to have recognizable signals for initiating the switches from partner A to partner B and for the somewhat longer pause between rounds.
Paired Verbal Fluency Directions
The teacher decides on the idea, concept, topic, reading or process to be discussed. Students pair up and are instructed to think about what they know about this topic (or idea, concept, process, reading, etc.).
Designate person A and person B. Have person A raise a hand and reiterate that they will be speaking first. Then have person B raise their hand and remind them that their first task is to listen to their partner (this clarifies the roles and expectations). Round 1: Partner A speaks and partner B listens for 20 seconds. Pause then switch, B speaks and A listens for 20 seconds.
Round 2: Partner A adds to the topic, partner B listens for 30 seconds. Pause then switch, then B adds to the topic and A listens for 30 seconds.
Round 3: Partner A summarizes or adds and partner B listens for 45 seconds. Pause then switch, then B summarizes or adds and A listens for 45seconds.

Sacramento Area Science Project http://sasp.ucdavis.edu 10
Quiz, Quiz, Trade Quiz, Quiz, Trade is an active and engaging technique for review. It allows students to craft questions, check answers and cover recently addressed curriculum.
The teacher designates how many cycles to go through (partners to quiz). It helps to remind students to cover their answer when they read their question to the partner, otherwise they often are showing the answer as they ask the question.
Quiz, Quiz, Trade is also a good technique for working on questioning skills. By collecting and posting questions, teachers can work with the class to differentiate between types of questions – lower order or recall and higher order or questions requiring figuring something out.
Quiz, Quiz, Trade Directions 1. Students write one question about the material on a Post-‐it Note, piece of paper or
index card. They write the answer on the other side (teachers should remind them to use their own knowledge, the book or other resources to help them write a thoughtful question and check their answer).
2. Each student should find a partner.
3. Students ask a question, then wait for an answer. The partner doesn’t give an answer right away.
4. Next, the student’s partner will ask a question. Then each partner tries to answer the other partner’s question.
5. The students share the correct answers with each other – the teacher emphasizes how important it is for each of them to understand the question and answer.
6.The two students exchange follow-‐up questions and then find a new partner.
Repeat Steps 3-‐6 until each student has spoken with the designated number of partners.

Sacramento Area Science Project http://sasp.ucdavis.edu 11
3-‐2-‐1 3-‐2-‐1 is a great activity for review, for getting feedback about student understanding (formative assessment), for getting students out of their seats and for sharing ideas. It is a highly student-‐centered technique and affords a short, concentrated opportunity to verbalize one’s thinking and hear another persons thinking. 3-‐2-‐1 allows students to think about what they know and speak about what they know as well as what they have questions about or something they are connecting to. Additionally, it is a great way to end a class. The opening prompt could be fairly broad. For example, think about – today’s lesson, the experiment the students just completed, the reading, the homework from last night, the video clip just viewed in class or the presentation the students just listened to. Or the prompt can be fairly specific – about the first step in protein synthesis.
As always, consider your students in determining the duration of the protocol or how many times they will share questions and answers. Some teachers can allow more partner switches while others might want to have only one sharing episode. It all depends on your students, their capacities and your instruction.
Doing 3-‐2-‐1 on index cards and collecting them as an exit ticket gives teachers a ready-‐made formative assessment that can inform instruction for the next day. Based on the 3-‐2-‐1 questions and answers, a teacher can decide on things to address as the lesson or unit progresses.
3-‐2-‐1 Directions Think about . Students should write down the following: 3 things that they learned 2 questions they have 1 new idea or connection Students should find a partner and take turns sharing their lists. There is no fixed rule that stipulates that the 3-‐2-‐1 items (learning, questions and connections) have to be exactly that. Teachers could adapt the items to fit their curriculum. So a teacher may go with 3 things learned, 2 things the students already knew and 1 way to apply the new knowledge or some other permutation.
Sacramento Area Science Project http://sasp.ucdavis.edu 12
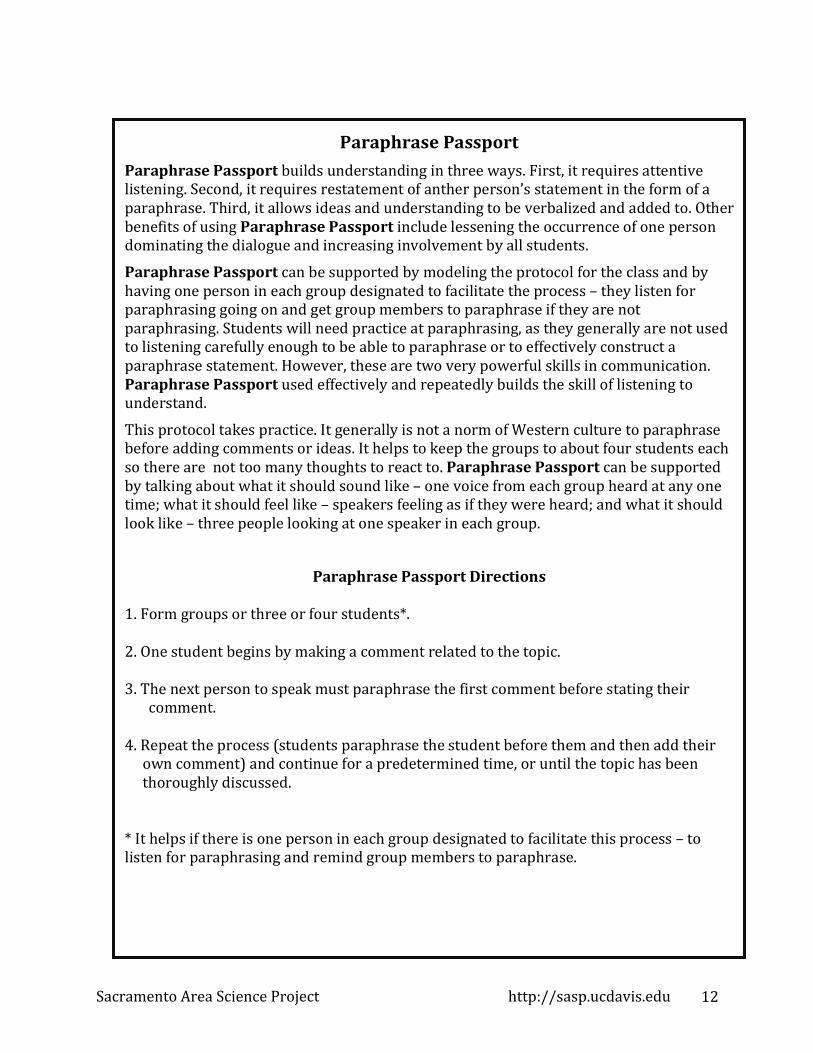
Paraphrase Passport Paraphrase Passport builds understanding in three ways. First, it requires attentive listening. Second, it requires restatement of anther person’s statement in the form of a paraphrase. Third, it allows ideas and understanding to be verbalized and added to. Other benefits of using Paraphrase Passport include lessening the occurrence of one person dominating the dialogue and increasing involvement by all students.
Paraphrase Passport can be supported by modeling the protocol for the class and by having one person in each group designated to facilitate the process – they listen for paraphrasing going on and get group members to paraphrase if they are not paraphrasing. Students will need practice at paraphrasing, as they generally are not used to listening carefully enough to be able to paraphrase or to effectively construct a paraphrase statement. However, these are two very powerful skills in communication. Paraphrase Passport used effectively and repeatedly builds the skill of listening to understand.
This protocol takes practice. It generally is not a norm of Western culture to paraphrase before adding comments or ideas. It helps to keep the groups to about four students each so there are not too many thoughts to react to. Paraphrase Passport can be supported by talking about what it should sound like – one voice from each group heard at any one time; what it should feel like – speakers feeling as if they were heard; and what it should look like – three people looking at one speaker in each group.
Paraphrase Passport Directions
1. Form groups or three or four students*. 2. One student begins by making a comment related to the topic. 3. The next person to speak must paraphrase the first comment before stating their
comment. 4. Repeat the process (students paraphrase the student before them and then add their own comment) and continue for a predetermined time, or until the topic has been thoroughly discussed.
* It helps if there is one person in each group designated to facilitate this process – to listen for paraphrasing and remind group members to paraphrase.

Sacramento Area Science Project http://sasp.ucdavis.edu 13
Structured Think-‐Pair-‐Share
Think-‐Pair-‐Share has been in the teacher’s toolbox for quite some time. It is a good way to get students to explore their thinking and have them generate language. Generating language is a powerful way of deepening understanding. A major goal of science instruction is the mastery of academic language (the language used to navigate, negotiate and make meaning in specific disciplines) and Structured Think-‐Pair-‐Share can be an effective tool in promoting that mastery. Below is a tool for adding structure and written product to Think-‐Pair-‐Share. Using this tool allows teachers to more easily monitor classroom interactions and increase accountability. An added benefit is that students end up with a more usable product. Additionally, the organizer helps cure a common problem with Think-‐Pair-‐Share – the tendency for the think part to be very abbreviated. The organizer slows the process a bit and supports thinking, as well as provides a scaffold for future writing.
Structured Think-‐Pair-‐Share
My name: Partner’s name:
Think – my thoughts or understanding at this time
Pair – what I understand my partner is telling me
Share – our common understanding after talking, what we can share with others or what was most important in our dialogue

Sacramento Area Science Project http://sasp.ucdavis.edu 14
Dialogue Dots The Dialogue Dots protocol is another tools for increasing participation and involvement. It is reminiscent of Talking Sticks and Final Word in that all group members have an opportunity to contribute to the dialogue. Dialogue Dots encourages listening and deeper thinking by moderating the pace of the conversation and ensuring that one person at a time is speaking in each group. There are several variations that can be employed – use stickers or colored markers/colored pencils, or have students actually write out their statements using their unique colored pencil on a share sheet. Teachers can quickly and easily monitor participation in groups by circulating throughout the class and looking at the colored dots, marks or comments.
Dialogue Dots Directions
1. Form groups. Each student in the group is given a sheet of different colored dots – the teacher can also substitute colored markers or colored pencils.
2. Provide an index card, sheet of paper or chart paper for the group. 3. A student starts by making a comment related to the topic and then placing a sticker on the index card or paper.
4. Other group members take turns making comments and placing their sticker on the card or paper until each student in the group has made one comment.
5. Once everyone has made a comment, repeat the process.

Sacramento Area Science Project http://sasp.ucdavis.edu 15
Four Corners The Four Corners protocol affords several beneficial outcomes. First, it gets students up and moving around in a directed manner. Second, it allows for some student-‐to-‐student dialogue on what they think about something. Remember the importance of stance? Third, it has two built-‐in components of accountability – the recording of group thinking on the chart and the extension of writing a paragraph about their reasoning in support of their position. And lastly, it has the built-‐in potential for an entire class dialogue.
Four Corners Directions
1. Hang a sheet of chart paper in each of the room’s four corners. 2. Label the first chart “Strongly Agree,” the second “Agree,” the third “Disagree” and the fourth “Strongly Disagree.”
3. State the issue or controversy and have the students stand in the corner that best reflects their position on the issue.
4. Direct students in each corner to have a brief conversation about their positions. Then have them work as a group to list on the chart paper four or more reasons for their position.
5. Each group then presents their ideas to the class. 6. Organize a debate in which those who strongly agree – make a point by stating one of their arguments.
7. Then those who strongly disagree – can offer a counterpoint from their poster and state the reason for their argument.
8. Next those who agree – can respond by explaining why they agree, but do not strongly agree, with the argument.
9. Finally, those who disagree – can contribute by telling why they disagree, but do not strongly disagree, with the argument.
10. Continue steps six through nine for as many of the remaining statements as you wish.
11. As an extension, each student can use the statements to help them write a paragraph supporting their position.

Sacramento Area Science Project http://sasp.ucdavis.edu 16
Walkabout Review Walkabout Review, as the name implies, is another excellent protocol for reviewing content. It gets students up, moving around and talking to one another about their knowledge and understanding in a structured manner. It has students listen and produce writing, so they are learning in multiple modalities and it allows for multiple perspectives or understandings to be considered.
Teachers can adapt Walkabout Review to have as few or as many partners interviewed as they wish. Teachers can also change the task in each box. In this example they are recollections, organization (how the content might be classified or grouped) and connections being made. To further adapt Walkabout Review, Bloom’s Taxonomy can be used as a source for thinking about other actions to put in the interview boxes.
Walkabout Review Directions
1. Students should have an in-‐depth interview with a partner about a topic, concept, or skill. 2. In the interview, partners should ask what they recall about the topic, concept or skill under consideration. Partners further should ask how they are organizing or categorizing the content and finally, what connections they are making to other knowledge.
3. Have each student fill out one column of the chart per interview. 4. Have each student interview a partner about the topic, concept or skill. 5. Have the students change partners and repeat the process.
Walkabout Review Name: Partner’s Name: Partner’s Name: Partner’s Name: Partner’s Name:
Recollection: Recollection: Recollection: Recollection:
Organization:
Organization:
Organization:
Organization:
Connections:
Connections:
Connections:
Connections:

Sacramento Area Science Project http://sasp.ucdavis.edu 17
Give One, Get One Give One, Get One is a versatile protocol that can be used nearly anywhere in a unit of instruction. If the goal is to reveal initial thinking, it can be used at the beginning of a unit or lesson. If the goal is to check emerging understanding, it can be used during the unit or lesson, or if the goal is review, it can be used at the end of the unit or lesson. Once again, it is a protocol that gets students up, moving and exchanging thinking in a manner that has structure and accountability.
The protocol works on the skills of listening and paraphrasing as well as getting a lot of different perspectives and understandings circulating in the classroom. Teachers can peruse the Give One, Get One papers to assess students’ understanding on a topic.
Give One, Get One Directions
1. Construct the Get One, Give One table. 2. Have your students fill in three thoughts of their own about the concept, topic or activity.
3. Have the students pair off as partners A and B. 4. Partner A shares one of his or her thoughts. Partner B paraphrases partner A’s comment, then adds it to their table.
5. Partner B shares one thought with partner A. Partner A paraphrases partner B’s comment, then adds it to their table.
6. Students then find new partners and repeat steps 3 to 5 with a new thought. 7. The students pair off again and repeat steps 3 to 5 with their final thought.
Give One, Get One Name: My initial thoughts
Paraphrase of my partner’s thoughts

Sacramento Area Science Project http://sasp.ucdavis.edu 18
Odd One Out Science Formative Assessment (Page Keeley)
Odd One Out combines seemingly similar items and challenges students to choose which item in the group does not belong. Students are asked to justify their reasoning for selecting the item that does not fit with the others (Naylor et. al, 2004)
Odd One Out provides an opportunity for students to access knowledge and analyze relationships between items in a group. By thinking about similarities and differences, students are encouraged to use their reasoning skills in a more challenging and engaging way. The technique can be used to stimulate small-‐group dialogue after students have had the chance to think through their own ideas. As student discuss their ideas in a group, they may modify their thinking or come up with ways to further test or research their ideas. Odd One Out can be used at the beginning or instruction to find out what students know, during development of conceptual understanding to examine reasoning, or near the end of instruction to inform the teacher about how well students are reasoning with ideas, concepts and vocabulary.
Which is the Odd One? Why is it the Odd One? Force Inertia Object Friction
Which is the Odd One? Why is it the Odd One? Integer Multiplier Coefficient Factor

Sacramento Area Science Project http://sasp.ucdavis.edu 19
Summary Protocol
Summary Protocol is an effective method for engaging students with text. Benefits of Summary Protocol include group members supporting one another and using dialogue to scaffold the task of making sense and taking notes. In using the protocol, groups of three work best – though there may be times when that needs to be adjusted. The teacher selects an appropriate amount of text for students to summarize based on the skill level in the classroom. It is highly beneficial to model the Summary Protocol process and practice it before students engage in it on their own. Here are the directions for Summary Protocol: • Form groups of three. One person will keep the group on-‐task. • Read one paragraph silently (leader makes sure all group members know where
paragraph starts and ends). Each person reads silently to him or herself, and only when everybody has finished with the paragraph does the group progress to the next step.
• Group discusses the content of the paragraph. All group members should contribute (the leader facilitates this).
• Group comes to consensus about one or two main ideas. • Talk about how to write the main idea(s). • Each group member writes down the main idea(s) on his or her own paper. • Repeat for each paragraph of the reading.
Teachers must be strategic when selecting groups. And they should use their students’ reading abilities to construct the most supportive groups. Likewise, they can best judge the amount, length or level of text that their students can handle. Additionally, Summary Protocol is a technique that can be used strategically to help students move toward more independent reading and summarizing.
When Summary Protocol operates efficiently, observers should see and hear groups alternating between silent reading, group dialogue and group writing (the latter may include some dialogue as well). This pattern should repeat itself for each paragraph in the reading.
The Summary Protocol process generates student notes on the assigned reading. Teachers can use the student work as a formative assessment to inform their instruction. Teachers who have used Summary Protocol notice that when first employing this technique, the students’ summary notes tend to be very similar, but over time the content of the summaries diverge from one another as the students gain skill in interpreting, comprehending and summarizing text.

Sacramento Area Science Project http://sasp.ucdavis.edu 20
Structured Think-‐Pair-‐Share My Name Partner’s Name
Think – my thoughts or understanding at this time –
Pair – what I understand my partner is telling me -‐
Share – our common understanding after talking, what we can share with others or what was most important in our dialogue
Summary Protocol Notes Paragraph 1 –
Paragraph 2 –
Paragraph 3 –
Give One, Get One My Initial thoughts
Paraphrase of my partner’s thoughts