DESKTOP PUBLISHING (DTP) · Adobe Photoshop 2. Harvard graphic 3. Corel page draw 4. Adobe...
25
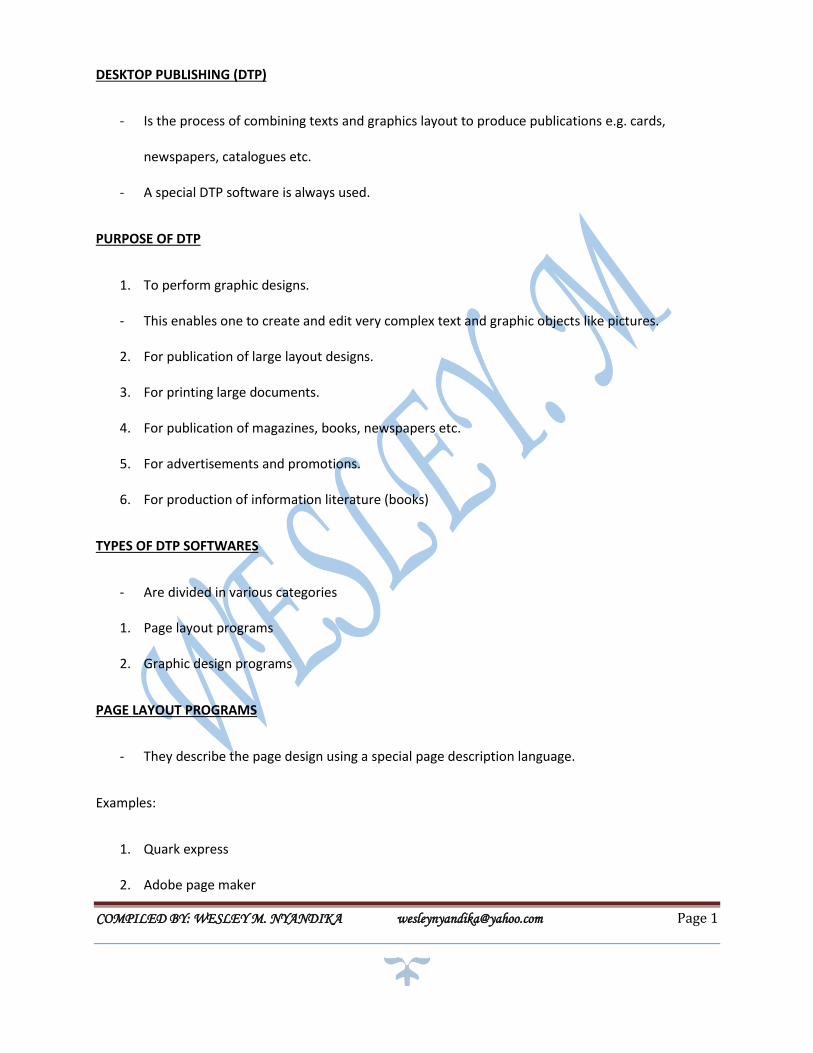
COMPILED BY: WESLEY M. NYANDIKA [email protected] Page 1 DESKTOP PUBLISHING (DTP) - Is the process of combining texts and graphics layout to produce publications e.g. cards, newspapers, catalogues etc. - A special DTP software is always used. PURPOSE OF DTP 1. To perform graphic designs. - This enables one to create and edit very complex text and graphic objects like pictures. 2. For publication of large layout designs. 3. For printing large documents. 4. For publication of magazines, books, newspapers etc. 5. For advertisements and promotions. 6. For production of information literature (books) TYPES OF DTP SOFTWARES - Are divided in various categories 1. Page layout programs 2. Graphic design programs PAGE LAYOUT PROGRAMS - They describe the page design using a special page description language. Examples: 1. Quark express 2. Adobe page maker
Transcript of DESKTOP PUBLISHING (DTP) · Adobe Photoshop 2. Harvard graphic 3. Corel page draw 4. Adobe...
COMPILED BY: WESLEY M. NYANDIKA [email protected] Page 1
DESKTOP PUBLISHING (DTP)
- Is the process of combining texts and graphics layout to produce publications e.g. cards,
newspapers, catalogues etc.
- A special DTP software is always used.
PURPOSE OF DTP
1. To perform graphic designs.
- This enables one to create and edit very complex text and graphic objects like pictures.
2. For publication of large layout designs.
3. For printing large documents.
4. For publication of magazines, books, newspapers etc.
5. For advertisements and promotions.
6. For production of information literature (books)
TYPES OF DTP SOFTWARES
- Are divided in various categories
1. Page layout programs
2. Graphic design programs
PAGE LAYOUT PROGRAMS
- They describe the page design using a special page description language.
Examples:
1. Quark express
2. Adobe page maker

COMPILED BY: WESLEY M. NYANDIKA [email protected] Page 2
3. Adobe frame maker
4. Microsoft publisher
GRAPHIC DESIGN PROGRAMS
Are specifically developed to edit and format graphic like pictures
Examples:
1. Adobe Photoshop
2. Harvard graphic
3. Corel page draw
4. Adobe illustrator
- There are other programs that enable one to paint and illustrate or scan images and paste them
e.g.
1. Fractal design painter
2. ACD canvas
3. Macro media free hand
ADVANTAGES OF DTP
1. Every item on a page is contained in a frame and can be edited and formatted independently
2. Stories can be contained in a single frame or threaded between several frames
3. Frames need not flow in logical sequence. Eg a story on page 1 can be continued on page 3
4. Master pages are used to set a common layout which may be repeated on several pages. E.g.
logo
5. Publications can be printed in a form suitable for commercial printing e.g. using color
publications
COMPILED BY: WESLEY M. NYANDIKA [email protected] Page 3
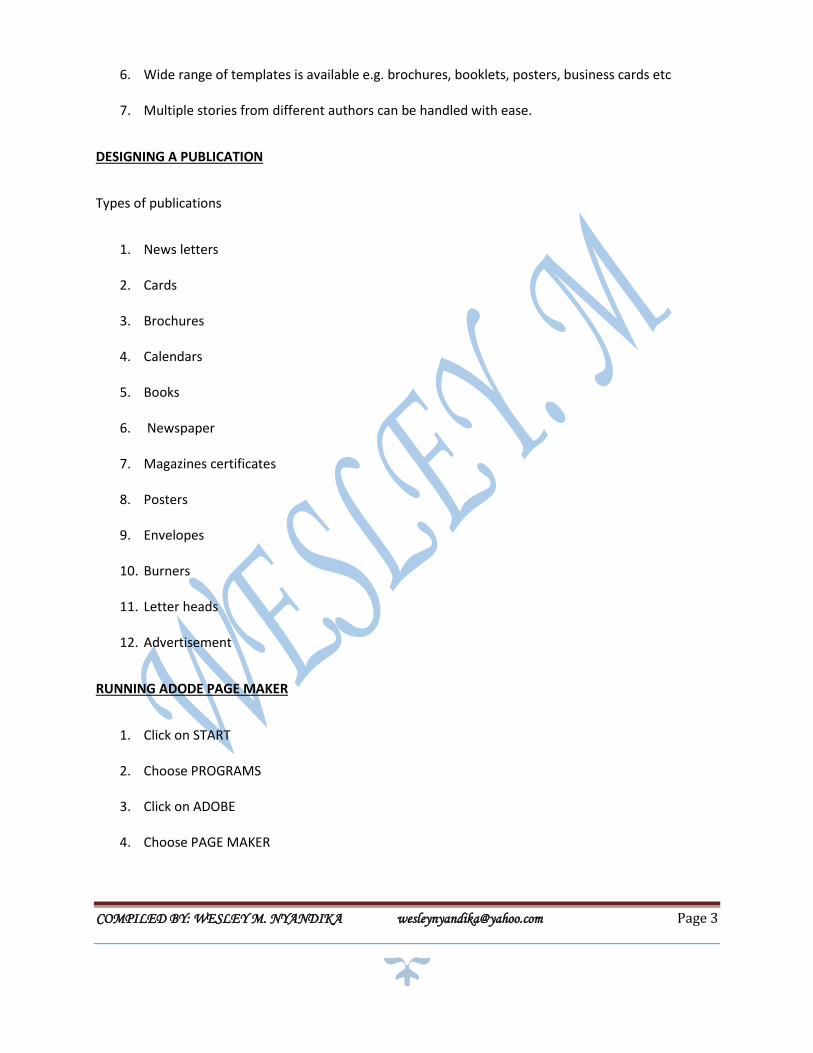
6. Wide range of templates is available e.g. brochures, booklets, posters, business cards etc
7. Multiple stories from different authors can be handled with ease.
DESIGNING A PUBLICATION
Types of publications
1. News letters
2. Cards
3. Brochures
4. Calendars
5. Books
6. Newspaper
7. Magazines certificates
8. Posters
9. Envelopes
10. Burners
11. Letter heads
12. Advertisement
RUNNING ADODE PAGE MAKER
1. Click on START
2. Choose PROGRAMS
3. Click on ADOBE
4. Choose PAGE MAKER
COMPILED BY: WESLEY M. NYANDIKA [email protected] Page 4
5. A document setup dialogue box appears for you to choose types of design or publication setup
options.
- The page maker publication window contains the following
1. Paste board
2. Printable area
3. Tool box
4. Master pages
5. Rulers
6. Control palate
- Paste board – is a blank area where you place graphic and texts before you arrange them in the
printable work area
- Printable area- is where the object or text are placed before printing.
- Tool box- is a set of buttons that contains tools used to create and manipulate the publication.
COMPILED BY: WESLEY M. NYANDIKA [email protected] Page 5
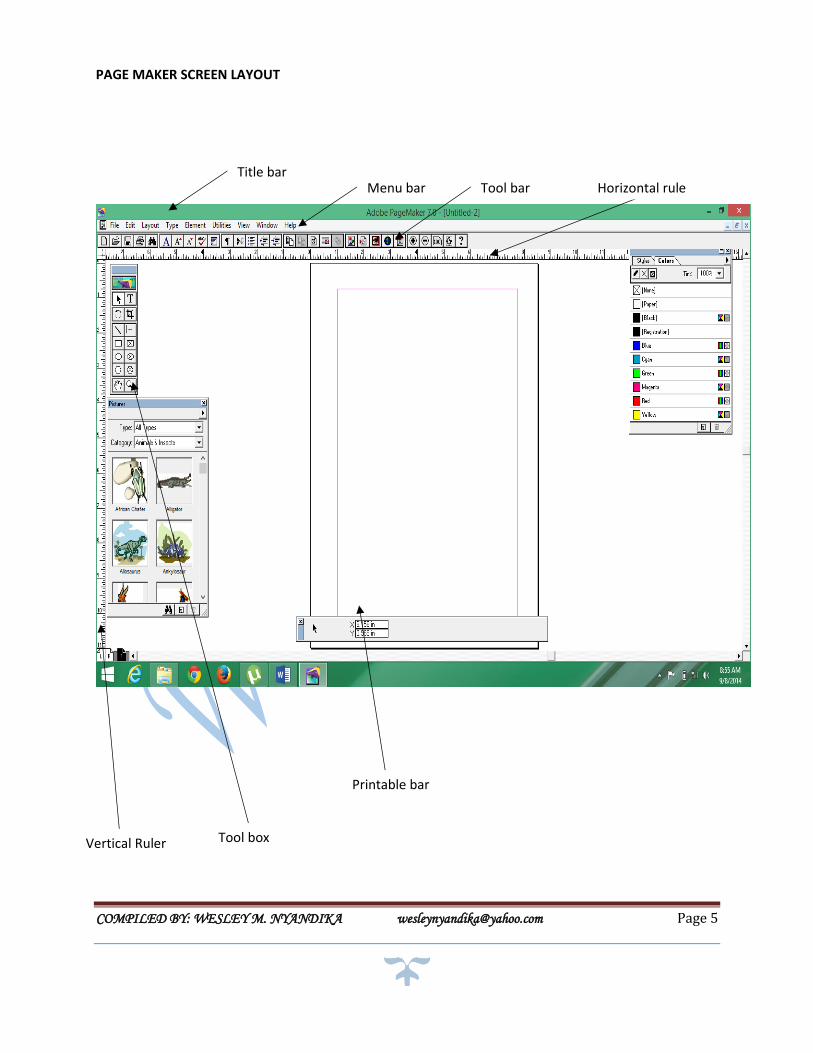
PAGE MAKER SCREEN LAYOUT
Title bar Menu bar Tool bar Horizontal rule
Printable bar
Vertical Ruler Tool box
COMPILED BY: WESLEY M. NYANDIKA [email protected] Page 6
The page maker publication window has the following features:
1. The pasteboard
2. The printable area
3. The tool box
4. Master pages
5. Rulers
6. Control pallate
The pasteboard
It is a large blank area where you place text and graphical objects before arranging them neatly on the
printable work area.
The printable area
An area that looks like a page surrounded by margins on the pasteboard.
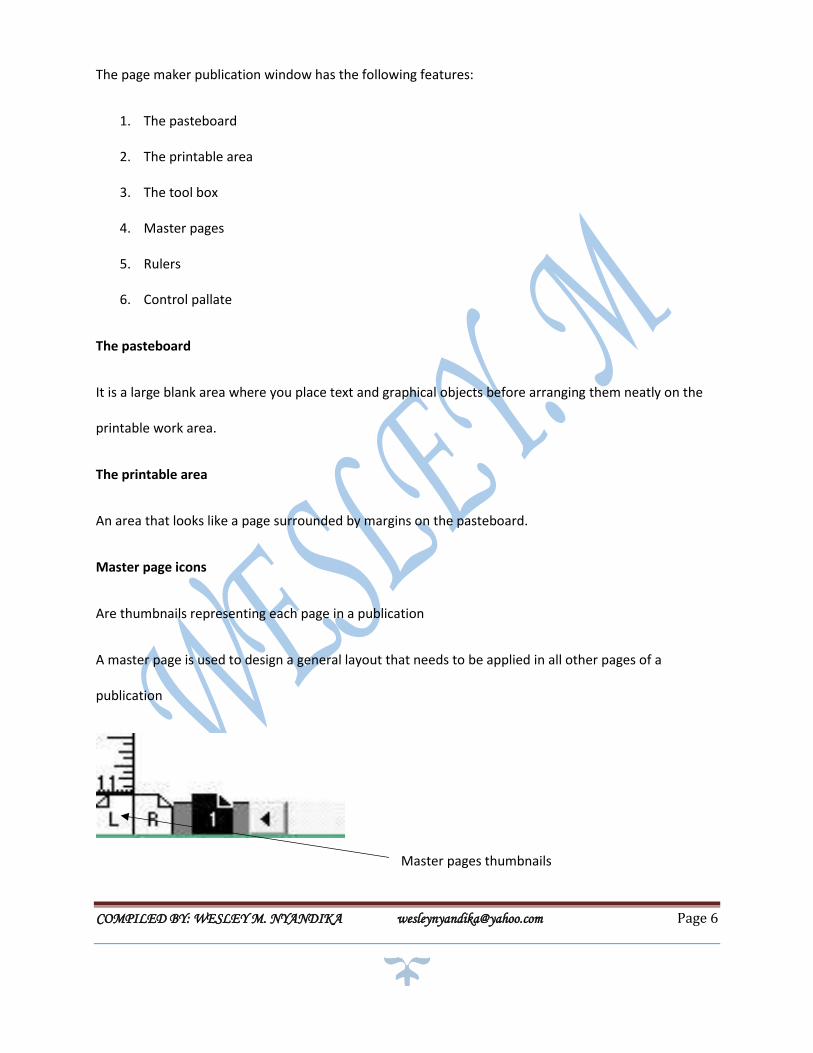
Master page icons
Are thumbnails representing each page in a publication
A master page is used to design a general layout that needs to be applied in all other pages of a
publication
Master pages thumbnails
COMPILED BY: WESLEY M. NYANDIKA [email protected] Page 7
Rulers
They are non-printable lines or guides that ensure that text and graphical objects are in the required
place
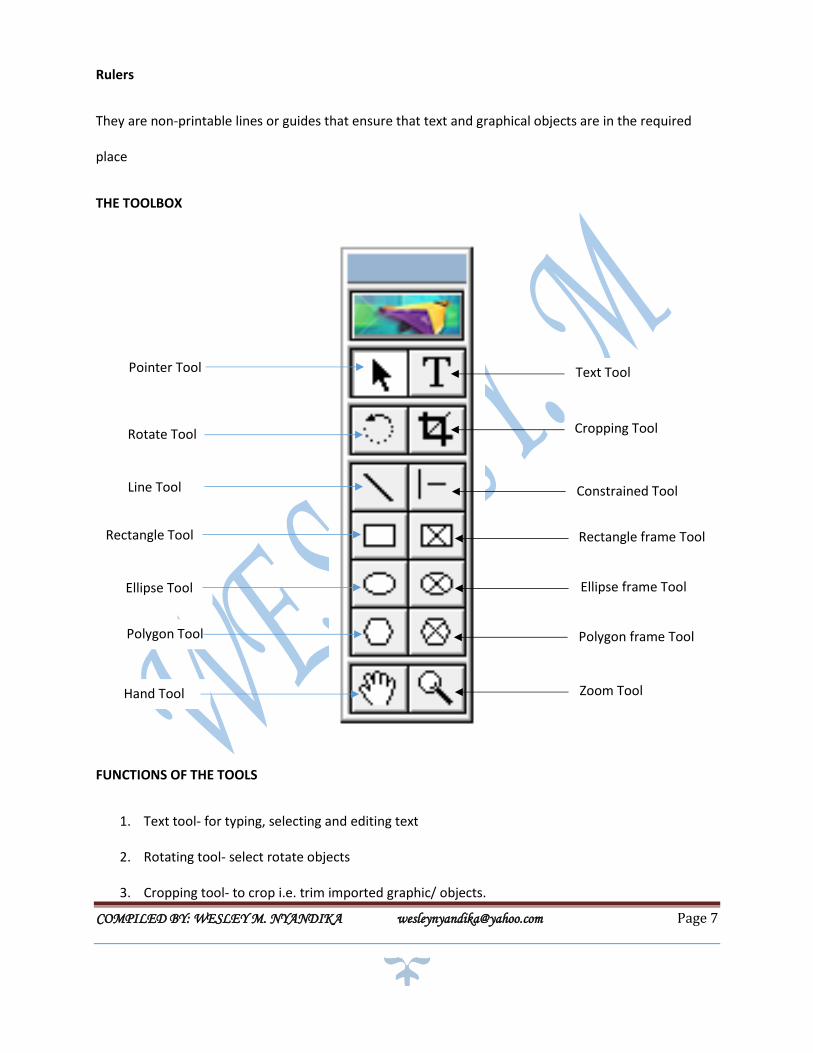
THE TOOLBOX
FUNCTIONS OF THE TOOLS
1. Text tool- for typing, selecting and editing text
2. Rotating tool- select rotate objects
3. Cropping tool- to crop i.e. trim imported graphic/ objects.
Text Tool
Cropping Tool
Constrained Tool
Rectangle frame Tool
Ellipse frame Tool
Polygon frame Tool
Zoom Tool
Pointer Tool
Rotate Tool
Line Tool
Rectangle Tool
Ellipse Tool
Polygon Tool
Hand Tool
COMPILED BY: WESLEY M. NYANDIKA [email protected] Page 8
4. Line tool- draw straight lines in any direction
5. Constrain line- draw vertical or horizontal lines
6. Rectangle tool- draw squares and circles.
7. Ellipse tool- draw ellipse and circles.
8. Rectangle frame- create a rectangular place for text and graphics
9. Ellipse frame- create circular or oral place for text and objects
10. Polygon tool- draw a polygon e.g. triangles, pentagons, stars etc.
11. Polygon frame- draw a polygon place for text and graphics
12. Hand tool- scroll the page or preview
13. Zoom tool- magnify or reduce the area of the page.
Control Pallete
It is a shortcut toolbar mainly having text and paragraph formatting command icon.
In case you launch page maker and the pallete is not displayed, on the window menu, click show control
pallete
SETTING UP A PUBLICATION
- While designing a publication, there are several setup options to be observed
1. Page size
2. Margins
3. Orientation etc.
COMPILED BY: WESLEY M. NYANDIKA [email protected] Page 9
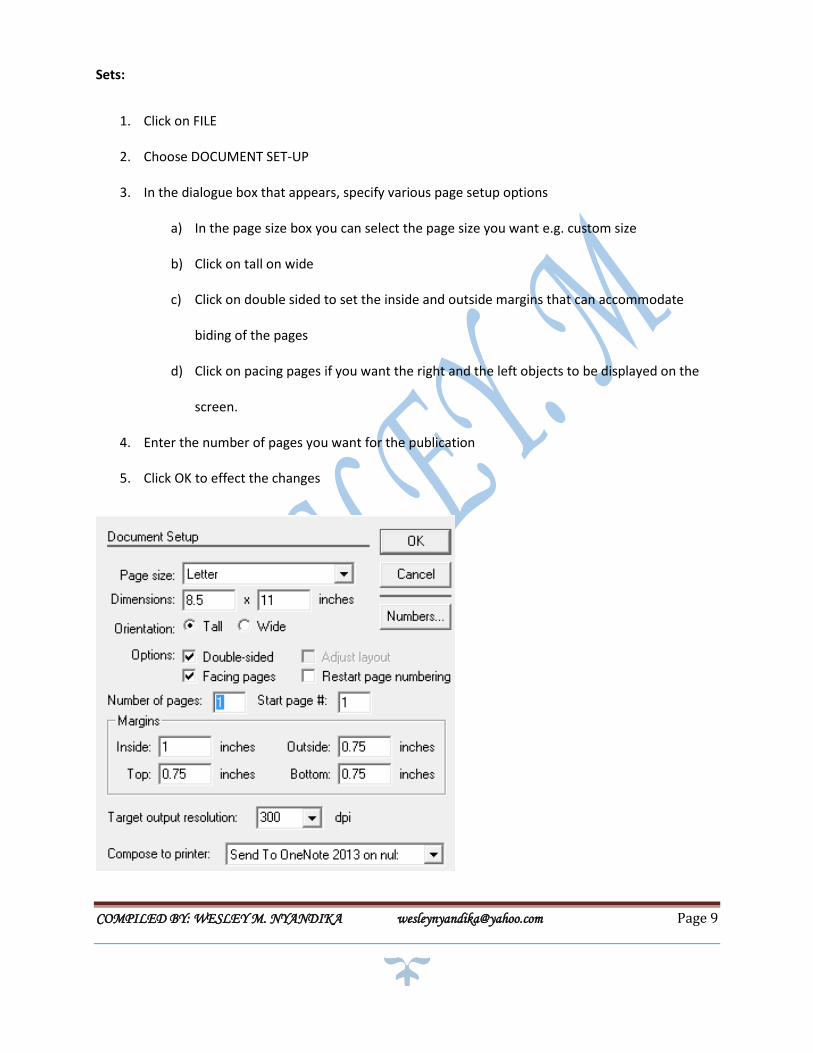
Sets:
1. Click on FILE
2. Choose DOCUMENT SET-UP
3. In the dialogue box that appears, specify various page setup options
a) In the page size box you can select the page size you want e.g. custom size
b) Click on tall on wide
c) Click on double sided to set the inside and outside margins that can accommodate
biding of the pages
d) Click on pacing pages if you want the right and the left objects to be displayed on the
screen.
4. Enter the number of pages you want for the publication
5. Click OK to effect the changes
COMPILED BY: WESLEY M. NYANDIKA [email protected] Page 10
SETTING PUBLICATION MARGINS
-To create margins
1. click on FILE
2. choose DOCUMENT SET-UP
3. in the dialogue box specify
a) for double sided document enter the values for inside and outside margins
For single sided pages set the left and right margins.
b) Enter the value for top and bottom
4. Click on OK.
SAVING A PUBLICATION
1. Click on FILE
2. Choose SAVE AS
3. In the dialogue box that appears specify the name of the publication and location of saving.
4. Click SAVE
MANUPPULATING TEXT AND GRAPHICS IN A PUBLICATION
Manipulating text
- Text can be manipulated in many ways
- 1. Using a text tool
- Using a text frame
COMPILED BY: WESLEY M. NYANDIKA [email protected] Page 11
USING A TEXT TOOL
- To create a text block with the text tool
1. Click on the TEXT TOOL- tool box
- The pointer changes to - beam
2. On an empty area that is the paste board, click or drag a rectangular area to form a text block or
frame
3. Type the text you want.
USING A TEXT FRAME
- Text frame don’t change the height or width as you add or remove text
- To add text into a frame
1. Draw a frame using any of the frame tools that show the shape you want the text block to take
- Select a drawn shape from the ELEMENT MENU, point to FRAME then click CHANGE TO FRAME
2. Perform any of the following:
a) Click on the TEXT TOOL
- Choose FRAME
- Type on FILE
b) Click on FILE
- Choose PLACE
- Double click on the file that contains the text you want to place in the TEXT TOOL
COMPILED BY: WESLEY M. NYANDIKA [email protected] Page 12
MANIPULATING GRAPHIC OBJECTS
- Graphical objects can be manipulated using the tool box drawing tools e.g. ellipse, polygon etc.
- You can draw lines of different shapes.
MOVING AND RESIZING TEXT AND GRAPHICAL OBJECTS
- To move a text or graphical objects
1. Click on the object to select it
2. Position the pointer tool to anywhere inside the object
3. Drag the text or object to a new position
-To resize a text or object
1. Select the text or object with the pointer tool
- Section handles are displayed at corners of text blocks
2. Position the pointer on any of the selection handle and drag to the required size.
EDITTING OF A PUBLICATION
- To edit means making changes to a publication e.g. correcting, spelling, replacing words etc.
- PAGE MAKER has two special editing tools
1. Find and change tool
2. Spelling tool
FINDING AND CHANGE TOOL
- This feature allows one to search for a particular word and replace it with another one.
- To perform this:
COMPILED BY: WESLEY M. NYANDIKA [email protected] Page 13
1. Using the TEXT TOOL select a range to text in which you want to search
2. Click on EDIT
3. Choose EDIT STORY COMMAND
- The publication will open a story window that shows only the text
4. Click on UTILITIES then choose FIND OR CHANGE
5. A dialogue box appears asking you to specify what to find, what you want to change to.
- You can also specify other options e.g. matching cases or the whole word
6. Click on FIND to begin the search
7. Click on FIND NEXT to continue with the search operation
8. Click on CHANGE OR CHANGE ALL to replace the found word or text.
SPELLING CHECKING
This helps one correct the wrongly spelled words
1. Click the insertion pointer anywhere in the publication or select the publication or select the
range to be spell checked.
2. From the STORY EDITOR menu choose utilities then spelling
3. A dialogue box appears for you to specify the scope of the search either as:
(i) In selected text
(ii) A current story only
(iii) In all the stories publication
4. Specify spelling checking option e.g. Alternate spelling which allows you to see the suggested
replacement for the3 misspelled word or show duplicates which displays the repeated word
5. Click on START to begin the spelling checking
6. You can also click on IGNORE to leave the word the way it is
COMPILED BY: WESLEY M. NYANDIKA [email protected] Page 14
FORMATTING A PUBLICATION
- Formatting involves application of special changes or activities to a text.
- Formatting publication may include:-
1. Bolding
2. Font resizing
3. Italizing
4. Column or page formatting
5. Changing case
- The following can be applied on the text or graphics
TEXT AND GRAPHIC FORMATTING
Formatting text can be achieved by use of:-
1. Command from the TYPE menu
2. Control palate
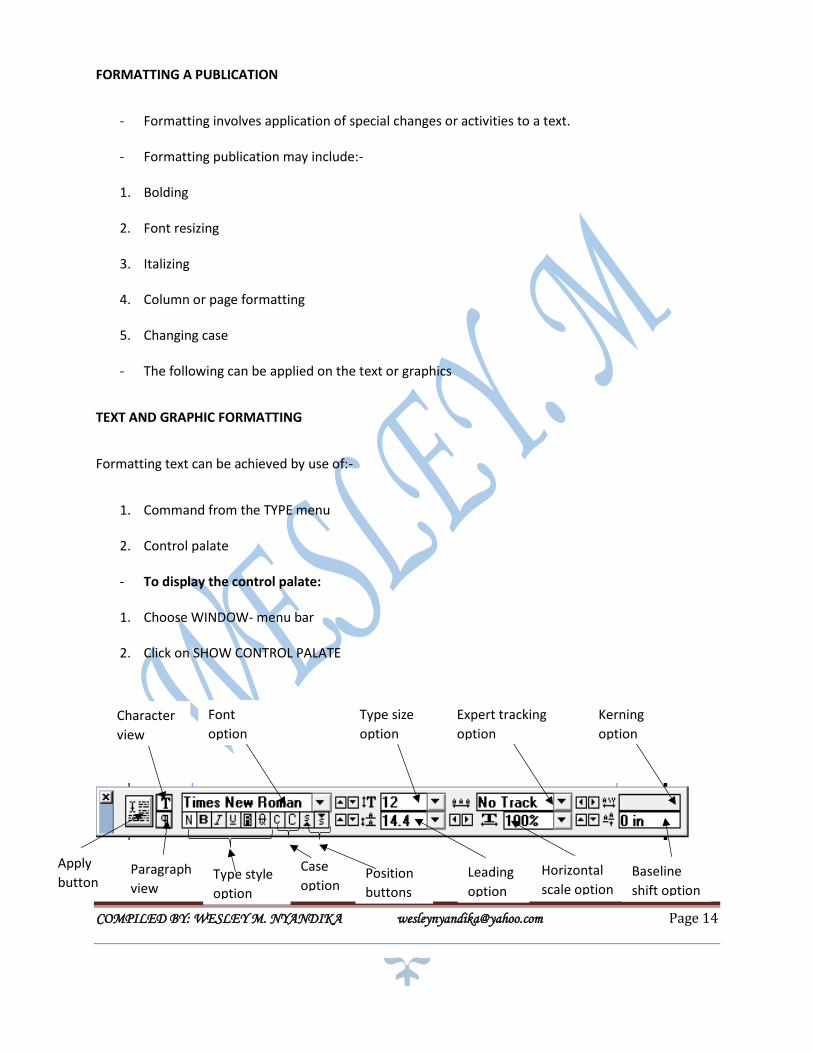
- To display the control palate:
1. Choose WINDOW- menu bar
2. Click on SHOW CONTROL PALATE
Character
view
Font
option
Type size
option
Expert tracking
option
Kerning
option
Apply
button Paragraph
view Type style
option
Case
option Position
buttons
Leading
option
Horizontal
scale option Baseline
shift option
COMPILED BY: WESLEY M. NYANDIKA [email protected] Page 15
- The content of the control palate vary depending on which tool is selected
- Control palate appears in two types
1. Object mode
2. Text mode
- There are two type of text mode:-
1. Character view – this means that you can apply character attributes to selected text. Viewed
when you click on the T tool
2. Paragraph view-
- To format text:-this means you can apply paragraph styles, select alignment options and other
paragraph attributes
1. Using the TEXT TOOL select the text you want to format
2. From the TYPE menu choose the formatting features you want e.g. character command
3. In the character specification dialogue box select attributes such as
- Font size
- Font color
- Bolding
- Font position
- Font type
4. Click on OK.
CHANGING TEXT COLOR
1. Select the text
2. From the Window menu
COMPILED BY: WESLEY M. NYANDIKA [email protected] Page 16
3. Choose SHOW COLORS
4. Select the color you want
CHANGING CAESES
- You can change text case to UPPER, LOWER, TOGGLE, SENTENSE, TITLE e.t.c
- To change case
1. Select the text you want to change
2. Click on UTILITIES
3. Click on PLUG-INS
4. Choose CHANGE CASE
5. In the dialogue box select the case you want to change
6. Click APPLY TP PREVIEW THE CHANGE
7. Click on OK
SUPERSCRIPT/SUBSCRIPT
- Superscript refers to the text positioned slightly higher than the rest of the sentence e.g 15th
- Subscript refers to text positioned slightly below the rest of the sentence e.g
1. Select the text you want to style either as superscript or subscript
2. Choose the TYPE
3. Click on CHARACTER
4. In the dialogue box that appears under the position list box choose either normal, superscript or
subscript
5. Click on OK
COMPILED BY: WESLEY M. NYANDIKA [email protected] Page 17
DROP CAP
- Refers to the first character in a line being dropped by a specified No. of lines
1. Select the character you want to drop
2. Click on UTILITIES
3. Choose PLUG-INS
4. Select DROP CAP
5. In the dialogue box select the number of lines you want the character to drop from the size box
6. Click on APPLY to see the format
7. Click on OK
PARAGRAPH FORMATTING
- Paragraph can either be formatted by use of
1. Control palate
2. Paragraph command from the type menu
- Various activities can be done e.g.:
1. Setting INDENTS AND TABS
- To set tabs using the INDENTS/TAB ruler.
1. the paragraph you want to INDENT
2. From the TYPE menu choose INDENT/ TABS
3. On the TAB rule click on either left, right, center or decimal TAB
4. Drag the new TAB STOP along the ruler
- To INDENT using the paragraph command
1. Click the cursor in a paragraph
2. Click on TYPE
COMPILED BY: WESLEY M. NYANDIKA [email protected] Page 18
3. Select paragraph
4. In the dialogue type in the values for the indent option you want
5. Click on OK
ADDING SPACE ABOVE OR BELOW PARAGRAPH
1. Select the paragraph you want to EDIT
2. Click on TYPE
3. Choose PARAGRAPH
4. In the dialogue box of the paragraph spares specify the value either before or after the
paragraph
PAGE FORMATTING
- It includes
1. Setting columns
2. Page numbering
3. Inserting page and column breakers
4. Adding headers and footers
SETTING COLUMNS
1. Be in the page you want to set the columns
2. Click on LAYOUT
3. Choose COLUMN GUIDES
4. Enter the number of columns you want to enter on the page and the space between columns
5. Click on OK
COMPILED BY: WESLEY M. NYANDIKA [email protected] Page 19
PAGE NUMBERING
- To give a document page numbers:
1. Click on INSERT
2. Choose PAGE NUMBERS
3. In the dialogue box under the position box option specify where you want the page numbers to
be inserted
4. In the alignment box specify where the number should be that is left, right, center, inside or
outside
PAGE/COLUMNS/SECTION BREAKS
- A break is a feature that identifies where a section, column or a page ends and the beginning of
the next page
- To insert a break:
1. Position the cursor in the document where the break is to be
2. Click on INSERT
3. Choose BREAK
4. In the break dialogue box specify either page, selection, column or page break
5. Click on OK
INSERTING HEADERS AND FOOTERS
- To insert a header and footer
1. Click on VIEW
2. Choose HEADER AND FOOTER
3. In the text boxes that appears type a header or footer as specified.

COMPILED BY: WESLEY M. NYANDIKA [email protected] Page 20
TRACKING AND KERNING
- Tracking refers to change of visual denseness or openness of characters in a line
- Kerning is the fixing of particular pairs of letters that are too close or too far apart from each
other
- To apply a track:
1. Select the text you want to TRACK
2. Click on TYPE
3. Choose EXPERT TRACKING
- In the dialogue box choose one of the fire options e.g. no track, loose, tight or very tight
4. Click on OK
- To apply kerning on a pair of characters
1. Select the text you want to kern
2. Click on TYPE
3. Choose EXPERT KERNING
4. In the dialogue box click the appropriate button (slider button) to either make the text tight or
loose
5. Click on OK
- To space a word or a letter
1. Select the paragraph
2. Click on TYPE
3. Choose PARAGRAPH
4. In the paragraph dialogue box click on SPACING
5. Choose either word spacing or letter spacing and type in the new values
COMPILED BY: WESLEY M. NYANDIKA [email protected] Page 21
6. Click on OK
MEASUREMENTS IN DTP
- Can be achieved using rulers on the screen
- You can either use the vertical or the horizontal ruler by dragging the ruler guides.
FORMATTING OF GRAPHICAL OBJECTS
1. Changing fill and stroke of graphics
- To change fill or stoke of an object
1. Select the object
2. Click on ELEMENT
3. Choose FILL AND STROKE
4. Select the type of fill or stroke you want
5. Select the colors for the fill and stroke
- To apply FILL
1. Select the object
2. Click on ELEMENT
3. Choose FILL
4. Select the fill pattern you want
- To apply stoke
1. Select the object
2. Click on ELEMENT
3. Choose STROKE
4. Select the line style you want to apply
COMPILED BY: WESLEY M. NYANDIKA [email protected] Page 22
RE-SHAPING OBJECTS
- To apply rounded corners to rectangles and squares
1. Select the rectangle or square you want to re-shape
2. Click on ELEMENT
3. Choose ROUNDED CORNERS
4. Select the corner style you want
5. Click on OK
- To re-shape polygon:
1. Select the polygon
2. Double click the selected polygon, place holder will be displayed
3. You re-shape the polygon by dragging the shape holders
- To create a star object:
1. Select the polygon you want to re-shape
2. Click on ELEMENT
3. Choose POLYGON SETTINGS
4. In the dialogue box specify the number of sided you want
5. To create a star, enter a value in the star insert box e.g.
6. Click on OK
WRAPPING TEXT AROUND A GRAPHIC
- Publication can be enhanced in various ways e.g. wrapping text around graphical objects
- To wrap text around the object:-
1. Select the object
2. Click on ELEMENT
COMPILED BY: WESLEY M. NYANDIKA [email protected] Page 23
3. Choose TEXT WRAP
4. A dialogue box appears, click on the middle wrap option
5. Specify text flow option
6. Enter the standoff value (distance of the text from each side of the graphic)
7. Click on OK
IMPORTING OF GRAPHICS
- Involves moving an application from one location to another
- To import a graphic
1. Click on the POINTER TOOL
2. Select the frame in which you want to place the object
3. Click on FILE
4. Choose PLACE
5. Select the file you want to place and then click on the OPEN BUTTON
6. Click anywhere in the paste board and the graphic will be placed there
ROTATING AN OBJECT
- Is a activity achieved through operations called transformations
- To rotate an object with the rotating tool
1. Select the object
2. Select the ROTATION TOOL from the tool box and the pointer changes to a star bust
3. Position the star bust at a fixed point or around the center of the object
4. Drag the star bust away from the fixed point in the direction you want to rotate the object
5. Release the mouse button when the object is at the desired position
COMPILED BY: WESLEY M. NYANDIKA [email protected] Page 24
CROPPING AN OBJECT
- Involves cutting off unwanted parts of the graphic especially the edges
- To crop a graphic using the crop tool
1. Select the CROPPING TOOL then the graphic that you want to crop
2. Position the cropping tool so that the place holder shows through the center of the tool
3. Hold down the mouse button to turn the cropping tool into a double sided arrow, drag inwards
until the part of the graphic you want in the publication remains.
PRINTING OF A PUBLICATION
1. Click on FILE
2. Choose PRINT
3. In the dialogue box specify
- The type of printer
- Page orientation
- Number of copies
- Range of pages
4. Click on PRINT
BOOK MARK
- It identifies a location or selection of text that you name identify for future reference. For
example you might use a book mark to identify text that you want to revise at a later time
instead of scrolling through the document to locate the text, you can go to it by using the
bookmark dialogue box.
COMPILED BY: WESLEY M. NYANDIKA [email protected] Page 25
1. Select an item to which you want to assign a book mark, or click where you want to insert the
bookmark
2. On the insert menu, click bookmark
3. Under bookmark name, type or select a name
Bookmark names must begin with a letter and can contain numbers. You can’t include spaces in
a bookmark name however you can use the underscore character to separate words e.g.
“first_heading
4. Click ADD