Designing Databases Using Access. WHAT DO WE MEAN BY "DATABASE DESIGN?" "DATABASE DESIGN IS A...
146
Designing Databases Using Access
-
date post
19-Dec-2015 -
Category
Documents
-
view
226 -
download
4
Transcript of Designing Databases Using Access. WHAT DO WE MEAN BY "DATABASE DESIGN?" "DATABASE DESIGN IS A...
Designing Databases Using Access
WHAT DO WE MEAN BY "DATABASE DESIGN?"
"DATABASE DESIGN IS A PROCESS THAT TAKES A SET OF USER REQUIREMENTS AS INPUT AND PRODUCES DATABASE STRUCTURES CAPABLE OF SUPPORTING THESE REQUIREMENTS AS OUTPUT."

THE 2-STEP DATABASE DESIGN PROCESS
STEP 1: INFORMATION LEVEL DESIGNSTEP 2: PHYSICAL-LEVEL DESIGN

FUNCTIONAL REQUIREMENTS SPECIFIED BY USERS
ALL REPORTS TO BE PRODUCEDALL QUERIES TO BE SUPPORTEDALL OTHER OUTPUTS TO BE SENT TO EXTERNAL
DESTINATIONSALL RESTRICTIONS THAT THE SYSTEM MUST
ENFORCE (EX.: DO NOT DELETE AN EMPLOYEE WHO HAS A PC ASSIGNED)
ALL SYNONYMS USED FOR EACH ATTRIBUTE

FIRST STEPINFORMATION-LEVEL DESIGN
USER REQUIREMENTS ARE IDENTIFIED.A DATABASE IS DESIGNED TO MEET THESE
USER REQUIREMENTS.THIS STEP IS INDEPENDENT OF ANY
INDIVIDUAL DBMS.
USERS VIEWSA USER VIEW IS THE VIEW OF DATA
NECESSARY TO SUPPORT THE OPERATIONS OF A PARTICULAR USER.
FOR EACH USER VIEW, A DATABASE STRUCTURE TO SUPPORT THE VIEW MUST BE DESIGNED, AND THEN MERGED INTO A CUMULATIVE DESIGN.

A DATABASE DESIGN METHODOLOGY (ADAPTED FROM C.
J. DATE)FOR EVERY USER VIEW, DO ALL OF THE
FOLLOWING:
1) REPRESENT THE USER VIEW AS A COLLECTION OF RELATIONS
2) NORMALIZE THESE RELATIONS TO 3NF/BCNF/4NF/DKNF3) IDENTIFY ALL KEYS4) DETERMINE ANY RESTRICTIONS5) REPRESENT IN A DBDL (DATA BASE DEFINITION
LANGUAGE)6) MERGE THE RESULTS OF THE PREVIOUS STEPS INTO THE
DESIGN

ILLUSTRATION OF THE INFORMATION LEVEL
DESIGN METHODOLOGYWE ILLUSTRATE DATE'S
INFORMATION LEVEL DESIGN METHODOLOGY BY BUILDING A MOVIE DATABASE SYSTEM!

INFORMATION-LEVEL DESIGN OF A MOVIE DATABASE - REQUIREMENTS
SUPPOSE WE HAVE THE FOLLOWING REPORTING REQUIREMENTS: USER VIEW (REQUIREMENT) #1 (OF 5 ):FOR EACH DIRECTOR, LIST HIS OR HER
NUMBER, NAME, YEAR BORN, {YEAR DIED}ALSO MAKE DIRNAME A SECONDARY INDEX
Our DBDL statements would be :
DIRECTOR (DIRNUMB, DIRNAME, DIRBORN, DIRDIED)
SK DIRNAME

USER VIEW (REQUIREMENT) #2
FOR EACH MOVIE, LIST NUMBER, TITLE, YEAR, AND TYPE (AND TITLE AS SECONDARY KEY)
MOVIE (MVNUMB, MVTITLE, YEARMADE, MVTYPE)SK MVTITLE

MERGE!RESULT OF 'MERGE WITH PREVIOUS
STEPS IS':
DIRECTOR (DIRNUMB, DIRNAME, DIRBORN, DIRDIED)
SK DIRNAMEMOVIE (MVNUMB, MVTITLE, YEARMADE, MVTYPE)
SK MVTITLE

USER VIEW (REQUIREMENT) #3
FOR EACH MOVIE, LIST NUMBER, TITLE, DIRECTOR NAME/NUM, CRITICS' RATING,MPAA RATING, NUMBER OF AWARDS NOMINATED FOR, NUMBER OF AWARDS WON: MOVIE ( MVNUMB, MVTITLE, DIRNUMB, DIRNAME,
CRITRTNG, MPAARTNG, NUMNOMS, NUMAWRDS) SINCE DIRNUMB ------> DIRNAME, THIS IS NOT 3NF!
DECOMPOSE INTO:DIRECTOR (DIRNUMB, DIRNAME)MOVIE(MVNUMB, MVTITLE, CRITRTNG, MPAARTNG,
NUMNOMS, NUMAWRDS, DIRNUMB)

USER VIEW 3 (CONTINUED - MERGE WITH CUMULATIVE DESIGN)
RESULT OF 'MERGE WITH PREVIOUS STEPS' IS:
DIRECTOR (DIRNUMB, DIRNAME, DIRBORN, DIRDIED)SK DIRNAME
MOVIE(MVNUMB, MVTITLE, YEARMADE, MVTYPE, CRITRTNG, MPAARTNG, NUMNOMS, NUMWARDS, DIRNUMB) SK MVTITLEFK DIRNUMB ----> DIRECTOR

USER VIEW (REQUIREMENT) #4
FOR EACH MOVIE STAR, LIST NUMBER, NAME, BIRTHPLACE, YEAR BORN,{YEAR DIED}
STAR ( STARNUMB, STARNAME, BRTHPLCE, STARBORN, STARDIED)

USER VIEW #4 CONTINUED (MERGE WITH CUMULATIVE
DESIGN)RESULT OF 'MERGE WITH PREVIOUS STEPS' IS:
DIRECTOR (DIRNUMB, DIRNAME, DIRBORN, DIRDIED)SK DIRNAME
MOVIE(MVNUMB, MVTITLE, YEARMADE, MVTYPE, CRITRTNG, MPAARTNG, NUMNOMS, NUMAWRDS, DIRNUMB) SK MVTITLEFK DIRNUMB ----> DIRECTOR
STAR (STARNUMB, STARNAME, BRTHPLCE, STARBORN, STARDIED)

USER VIEW (REQUIREMENT) #5 FOR EACH MOVIE, LIST NUMBER, TITLE, NUMBER/NAME OF
MOVIE STARS IN IT:MOVIE (MVNUMB, MVTITLE, STARNUMB,STARNAME)
{THIS IS NOT 1NF, SO REMOVE REPEATING GROUP AND EXPAND THE PRIMARY KEY}
MOVIE (MVNUMB, MVTITLE, STARNUMB,STARNAME)WE ALSO HAVE FD'S MVNUMB ---->MVTITLE &
STARNUMB ---->STARNAME{NOT IN 2NF, SINCE SOME ATTRIBUTES DEPEND
ON A PORTION OF THE PRIMARY KEY}
MOVIE (MVNUMB, MVTITLE)STAR (STARNUMB, STARNAME)MOVSTAR (MVNUMB, STARNUMB)

BUT THE RELATION MOVSTAR HAS SOME
FOREIGN KEYS WHICH WE MUST SPECIFY
FK MVNUMB -----> MOVIEFK STARNUMB -----> STAR

RESULT OF MERGE FOR USER VIEW #5
DIRECTOR (DIRNUMB, DIRNAME, DIRBORN, DIRDIED)SK DIRNAME
MOVIE (MVNUMB, MVTITLE, YEARMADE, MVTYPE, CRITRTNG, MPAARTNG, NUMNOMS, NUMAWRDS, DIRNUMB)SK MVTITLEFK DIRNUMB ----> DIRECTOR
STAR (STARNUMB, STARNAME, BRTHPLCE, STARBORN, STARDIED)
MOVSTAR (MVNUMB, STARNUMB)FK MVNUMB ----> MOVIEFK STARNUMB ----> STAR
USER VIEW (REQUIREMENT) #6
FOR EACH MOVIE STAR, LIST NUMBER, NAME, NUMBER/NAME OF ALL MOVIES:
WHEW! THIS IS ALREADY IN THE DATABASE!
WE ARE FINISHED!

DATABASE DESIGN GOALS
TAKE USER REQUIREMENTS, PRODUCE DATABASE STRUCTURES TO SUPPORT THESE
USER (FUNCTIONAL) REQUIREMENTS INCLUDE:
ALL REPORTS TO BE PRODUCED ALL INQUIRIES TO BE SUPPORTED ALL DETAILS ON UPDATES TO THE DATABASE ALL CALCULATIONS THAT MUST BE PERFORMED ALL DATA RESTRICTIONS TO BE ENFORCED ALL SYNONYMS USED FOR EACH ATTRIBUTE

USER VIEWS
DEF.: A USER VIEW IS THE VIEW OF THE DATABASE NECESSARY TO SUPPORT THE ACTIVITIES OF A PARTICULAR USER (OR GROUP OF USERS).
FOR EACH USER VIEW, A DATABASE STRUCTURE TO SUPPORT THE VIEW IS DESIGNED, AND THEN MERGED INTO A CUMULATIVE DESIGN.
USER VIEWS ARE SUBDIVISIONS OF THE TOTAL DATABASE REQUIREMENTS.

A DATABASE DESIGN METHODOLOGY (ADAPTED FROM C. J. DATE)
FOR EVERY USER VIEW, DO ALL OF THE FOLLOWING:
REPRESENT THE USER VIEW AS A COLLECTION OF RELATIONS
NORMALIZE THESE RELATIONS TO 3NF/BCNF/4NF/DKNF
IDENTIFY ALL KEYSDETERMINE ANY RESTRICTIONSREPRESENT IN A DBDL (DATA BASE DEFINITION
LANGUAGE)MERGE THE RESULTS OF THE PREVIOUS STEPS
INTO THE DESIGN

REPRESENT EACH USER VIEW AS A COLLECTION OF RELATIONS
DETERMINE ENTITIES INVOLVED AND CREATE A SEPARATE RELATION FOR EACH
DETERMINE THE PRIMARY KEY FOR EACH RELATION
DETERMINE THE ATTRIBUTES FOR EACH OF THE RELATIONS
DETERMINE RELATIONSHIPS AMONG THE RELATIONS

HANDLING THE RELATIONSHIPS AMONG THE
RELATIONSONE-TO-MANY:
INCLUDE THE PRIMARY KEY OF THE "ONE" RELATION AS A FOREIGN KEY IN THE "MANY" RELATION.
EX. - EACH EMPLOYEE IS ASSIGNED TO ONE DEPARTMENT - ONE DEPARTMENT CAN HAVE MANY EMPLOYEES, BUT EACH EMPLOYEE HAS ONLY ONE DEPARTMENT:
DEPT (DEPTNUMB, DEPTNAME, DEPTLOC)EMPLOYEE (EMPNUMB, EMPNAME, EMPADDR,
WAGERATE, DEPTNUMB)

HANDLING A MANY-TO-MANY RELATION
MANY-TO-MANY INCLUDE A NEW RELATION WHOSE PRIMARY KEY
IS THE COMBINATION OF PRIMARY KEYS OF THE ORIGINAL RELATIONS
EX. - EACH EMPLOYEE MAY BE ASSIGNED TO MULTIPLE DEPARTMENTS.
• DEPT (DEPTNUMB, DEPTNAME, DEPTLOC)• EMPLOYEE (EMPNUMB, EMPNAME, EMPADDR,
WAGERATE)• WORKS (EMPNUMB, DEPTNUMB)

TYPES OF KEYS TO IDENTIFY
PRIMARY KEYALTERNATE KEYSSECONDARY KEYS (ATTRIBUTES NEEDED FOR FAST
RETRIEVAL)FOREIGN KEYS (MOST IMPORTANT) –
ATTRIBUTE(S) IN RELATION X REQUIRED TO MATCH THE VALUE OF PRIMARY KEY IN SOME ROW IN RELATION Y, OR BE NULL (REFERENTIAL INTEGRITY)
DEPT (DEPTNUMB, DEPTNAME, DEPTLOC)EMPLOYEE (EMPNUMB, EMPNAME, EMPADDR,
WAGERATE, DEPTNUMB)

ISSUES INVOLVING FOREIGN KEYS
DEPT (DEPTNUMB, DEPTNAME, DEPTLOC)EMPLOYEE (EMPNUMB, EMPNAME, EMPADDR, WAGERATE,
DEPTNUMB)ARE NULLS ALLOWED??? (USUALLY, NULLS NOT ALLOWED FOR
FOREIGN KEYS)SHOULD WE ALLOW UPDATES (CHANGES) TO THE VALUE OF A
PRIMARY KEY WHICH IS REFERENCED BY A FOREIGN KEY IN ANOTHER RELATION? UPDATE RESTRICTED (CHANGES ARE FORBIDDEN) UPDATE CASCADES (CHANGE OK, BUT REFERENCED
FOREIGN KEY CHANGES ALSO) UPDATE NULLIFIES (CHANGE OK, BUT REFERENCED
FOREIGN KEY BECOMES NULL) <THE DEFAULT IS 'UPDATE CASCADES'>

SHOULD WE ALLOW DELETES OF PRIMARY KEYS
REFERENCED BY FOREIGN KEYS?
DEPENDS ON POLICIES OF THE ENTERPRISE DELETE RESTRICTED (FORBIDS A DELETE OF THE
REFERENCED PRIMARY KEY) DELETE CASCADES (DELETE OK, BUT RECORDS
REFERENCING DELETED PRIMARY KEYS DELETED TOO.)
DELETE NULLIFIES (DELETE OK, BUT REFERENCING FOREIGN KEYS BECOME NULL)
<THE DEFAULT IS 'DELETE RESTRICTED'.>

THE DBDL (DATABASE DESIGN LANGUAGE)
Relations, attributes AND primary keys ARE REPRESENTED AS USUAL
Attributes ALLOWED TO BE NULL ARE FOLLOWED BY AN ASTERISK (*)
Alternate Keys ARE LISTED AS AK AND FOLLOWED BY THE AK'S
Secondary Keys ARE LISTED AS SK AND FOLLOWED BY THE SK'S
Foreign Keys ARE LISTED AS FK FOLLOWED BY ATTRIBUTES IN FOREIGN KEYFOREIGN KEY -----> {RELATION IDENTIFIED BY FOREIGN KEY}UPD RSTR (UPDATE RESTRICTED); UPD CSCD (DEFAULT); UPD NLFDLT RSTR (DEFAULT); DLT CSCD, DLT NLF

MERGE THE RESULTS OF PREVIOUS STEPS INTO THE
DESIGNA RELATION WHOSE PRIMARY KEY MATCHES THE
PRIMARY KEY OF A RELATION IN THE CUMULATIVE DESIGN GETS MERGED WITH THAT RELATION
RESULTING RELATION CONSISTS OF (COMMON) PRIMARY KEY OF BOTH RELATIONS UNION OF ATTRIBUTES FROM BOTH RELATIONS
A RELATION WHOSE PRIMARY KEY DOES NOT MATCH THE PRIMARY KEY OF ANY OTHER RELATION IN THE CUMULATIVE DESIGN IS INCLUDED AS IS.

Microsoft AccessAn outstanding software product.
The leading Windows relational DBMS.Power when you need it, with ease of use features.On-Line Help Components
WizardsContext Sensitive Help
Our goal is to use MS Access as a vehicle to illustrate some database design issues with a representative DBMS.
Several versions (creating some pedagogical problems!)Access 1.0, 1.1, 2.0 for Windows 3.XAccess '95, Access '97 and Access 2000, 2002, 2003, XP and 2007

From Will Rogers (famous American humorist)
Which version to choose? "You can please some of the people all of the time,And you can please all of the people some of the time,But, you CANNOT please all of the people all of the time.“
We choose the most recent version of Access: Access 2007, for our presentations, as does our text (Appendix A).NJIT recommends a 2 ghz processor and 2 gig Ram
for Office 2007You can probably get by for projects in IS431 with the less
resource-intensive Access 2003 if you have an older pc.

Downloading Access 2007 from NJIT o If you do not have Access 2007 installed on your
home pc, you may download it and install it ( http://tinyurl.com/y86je8p )If downloading from off-campus, you need to have VPN
installed (from the same website)• Instructions for installing are here:• http://tinyurl.com/y9846ot

Typical Life-Cycle of Activities in Using a Database Management
System
1) Design your relations (Normalization!) ****2) Create the metadata "structure" for each relation (table)
Define attribute (field) names Define physical/semantic characteristics for each attribute
3) Enter Data into a relation (table) <i.e.,"populate" the database> Design Validity Checks for Database Integrity
4) Modify Data in a relation (table), or the table structure(metadata5) View a Relation on Screen, or View in Form mode6) Design Queries for the Database 7) Perform Sorts on Tables8) Design Reports9) Design Customized Applications

Concept MappingFormal Concept MS AccessRelation,Entity Set <===========> TableAttribute <==================> FieldMetadata <===============> StructureIntegrity <===============> ValidationEntity <==============> Row/Record
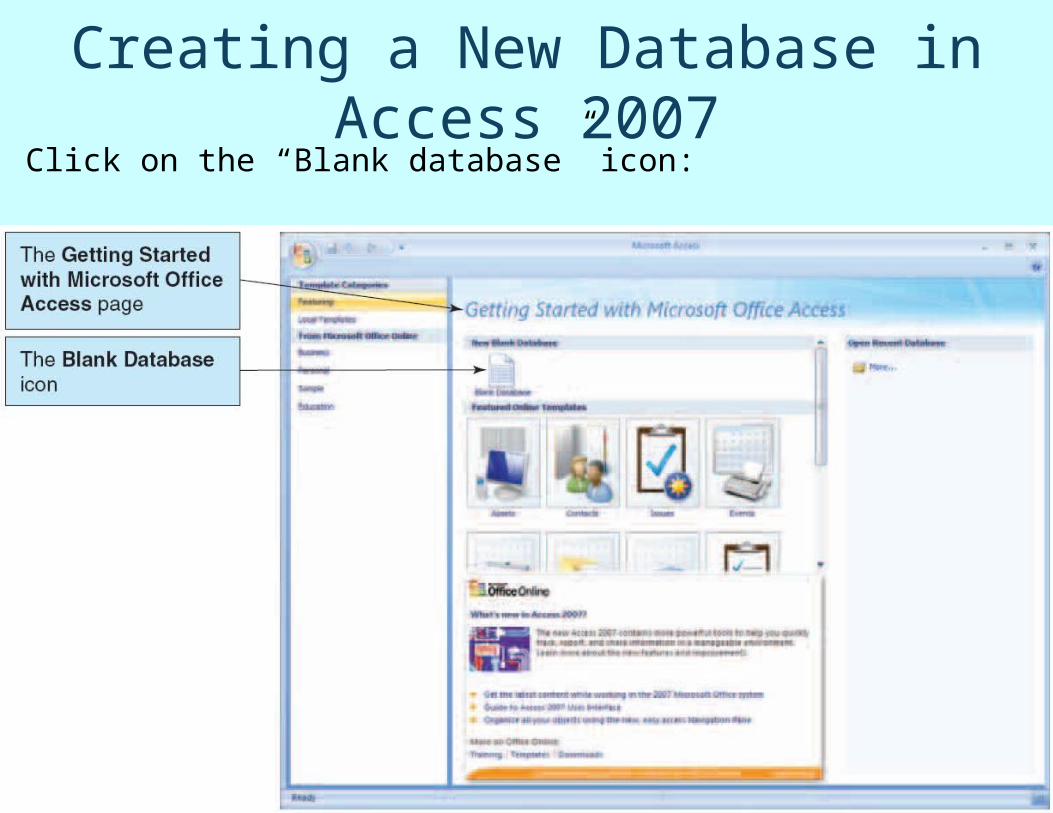
Creating a New Database in Access 2007Click on the “Blank database” icon:

Give a Name to Your Database !

Voila: The New Access Database Has Been Created

We Will Implement the Following Database Schema for Students, their Classes and
Their Grades
o STUDENT (StudentNumber, LastName, FirstName, EmailAddress)
o CLASS (ClassNumber, ClassName, Term, Section)
o GRADE (StudentNumber, ClassNumber, Grade)
In our schema, the entity set names are capitalized, the primary keys (unique identifiers) are underlined, and the foreign keys are italicized.

This is What The 3 Resulting Tables Might Look Like (populated with 4 students)

Primary Keys
o Each table has a primary keyA primary key is one (or more) attributes that uniquely identify
a row.
o Primary keys are underlined in our schema.o The primary key of STUDENT is StudentNumber
Thus, a particular value of StudentNumber, say 2, identifies one and only one row in the STUDENT table.
o The primary key of CLASS is ClassNumber.o But for GRADE, we will need TWO attributes to
uniquely identify a row, so we have a composite primary key (StudentNumber, ClassNumber) , since there is no single attribute which will uniquely identify a row.

Relationships Among Tables
o The StudentNumber attribute in the GRADE table, and the ClassNumber attribute in the GRADE table, create relationship links to the STUDENT and CLASS tables.
StudentNumber and ClassNumber each are foreign keys in the GRADE table (pointing to the primary keys of other tables)
• Aside: StudentNumber and ClassNumber are also part of the composite primary key of GRADE

Creating Tables in Access 2007
1. Click the Create command tab to leave the Datasheet tab and display the
Create command groups.
2. Click the Table Design button, as shown below, and what results is the Table1 tabbed document window displayed in Design view (next slide)

The Resulting Table1 Tabbed Document Window

We Design A Table By Filling In Its Attributes (“Field Names”), Data Types and Descriptions

Selecting the Datatype
We select the “AutoNumber” datatype for StudentNumber, which will automatically give the next sequential integer to each new record, beginning with 1.

The Completed StudentNumber Attribute Definition

Defining the LastName Attribute and Modifying Its Size In Field Properties

Make LastName Required By Clicking the Down Arrow and Choosing “Yes”
The Down Arrow
Choose “Yes”

Making StudentNumber the Primary KeyFirst, click the Row Selector column for StudentNumber, and then click the Primary Key button in the Tools Group
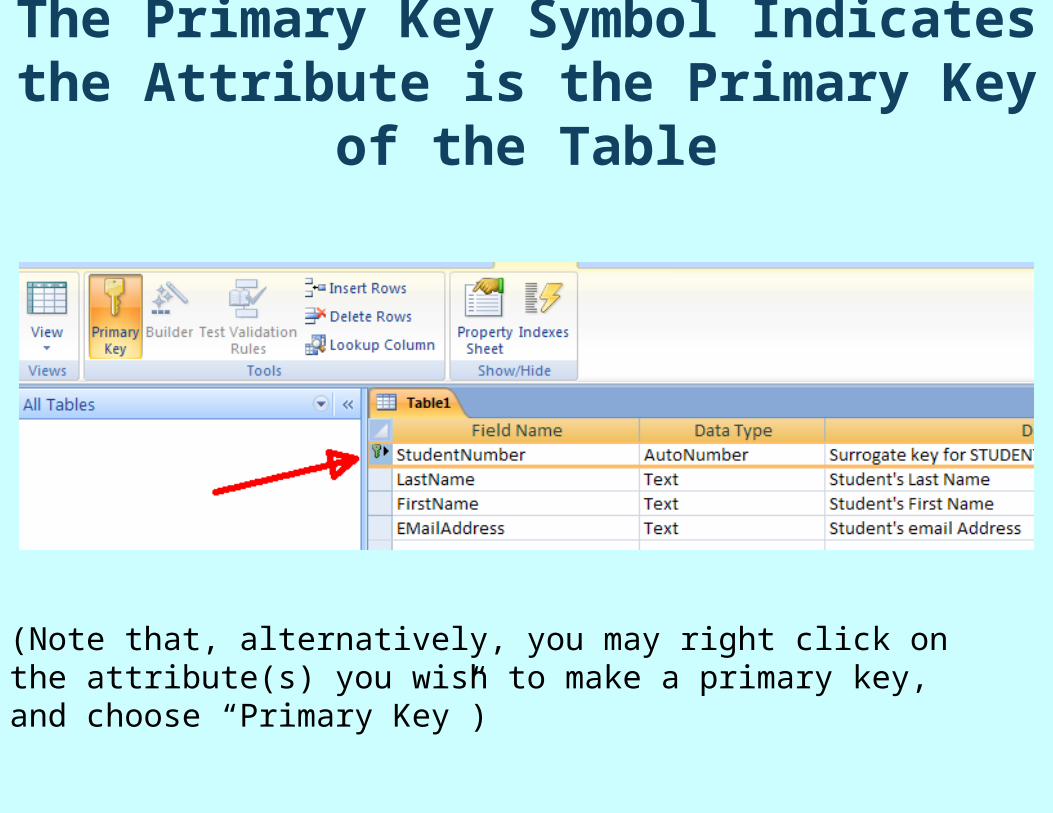
The Primary Key Symbol Indicates the Attribute is the Primary Key of the Table
(Note that, alternatively, you may right click on the attribute(s) you wish to make a primary key, and choose “Primary Key”)

Clicking the “Save” Button in the Quick Access Toolbar, to Save the Table and Give It a Name

The STUDENT Table Is Official !
Click to Close The STUDENT Table

The STUDENT TABLE
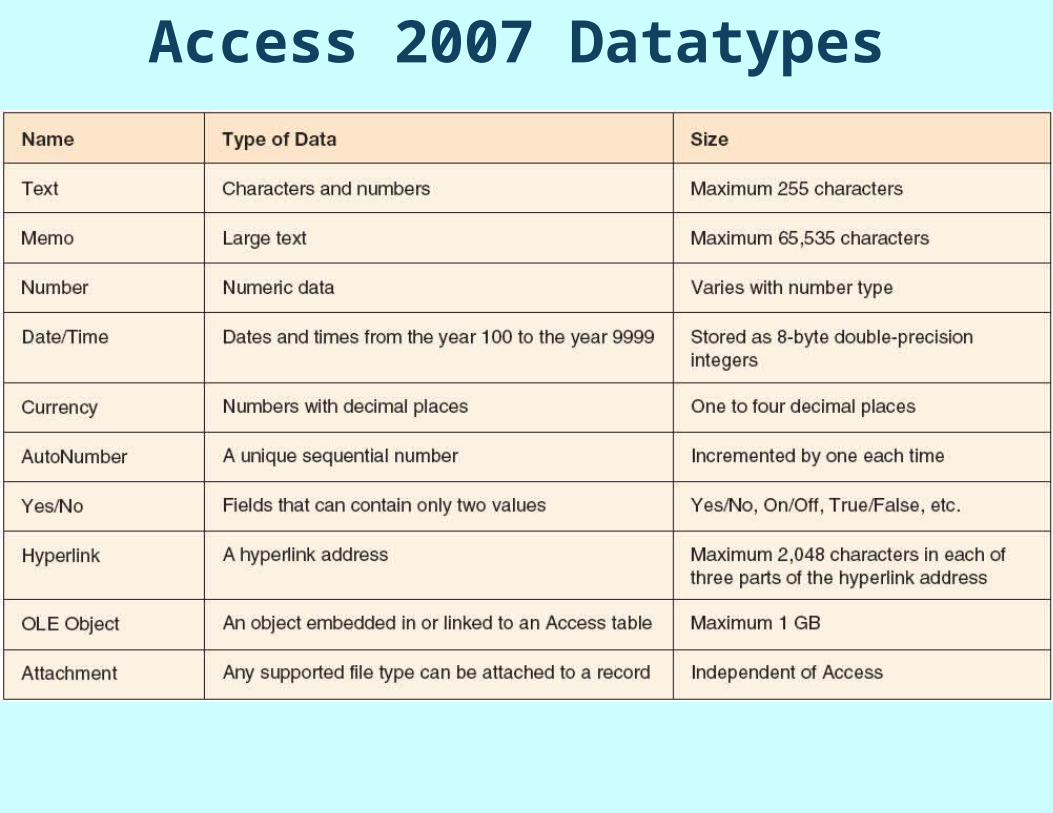
Access 2007 Datatypes
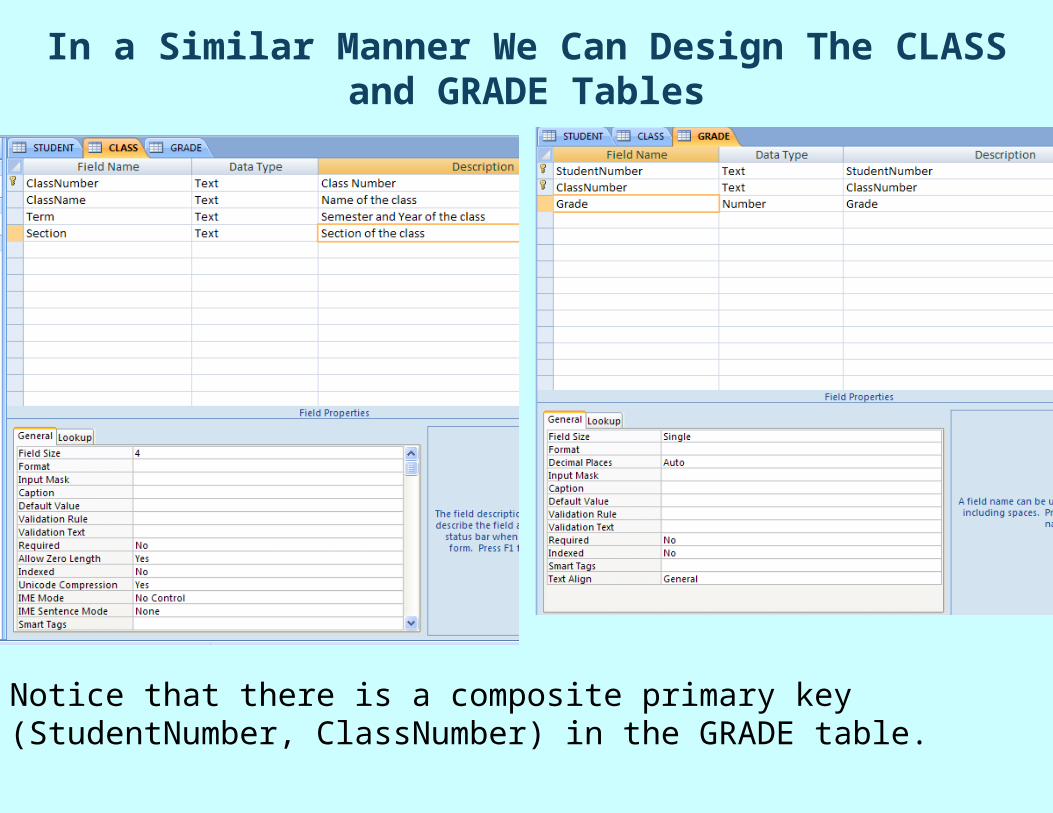
In a Similar Manner We Can Design The CLASS and GRADE Tables
Notice that there is a composite primary key (StudentNumber, ClassNumber) in the GRADE table.

Summary: Adding Objects to Your Database
Your database will consist of object instances (e.g., specific tables, reports, etc.) from the object categories. Your database can consists of any number of object instances from any number of object categories.The Object categories include:
Tables Queries Forms Reports Macros Modules

Summary: Design View: Entering the Attribute Names
Enter the attribute name in the first column."Tab over" to the "Data Type" column.
{Note that you will be in "Design View" while you are creating the structure for each relation, and you then move to "Datasheet View" where you enter and view the data according to the structure (metadata) you have defined.}
Attribute names must be unique in a given relationwill consist of any combination of characters EXCEPT
periods, exclamation marks and square brackets
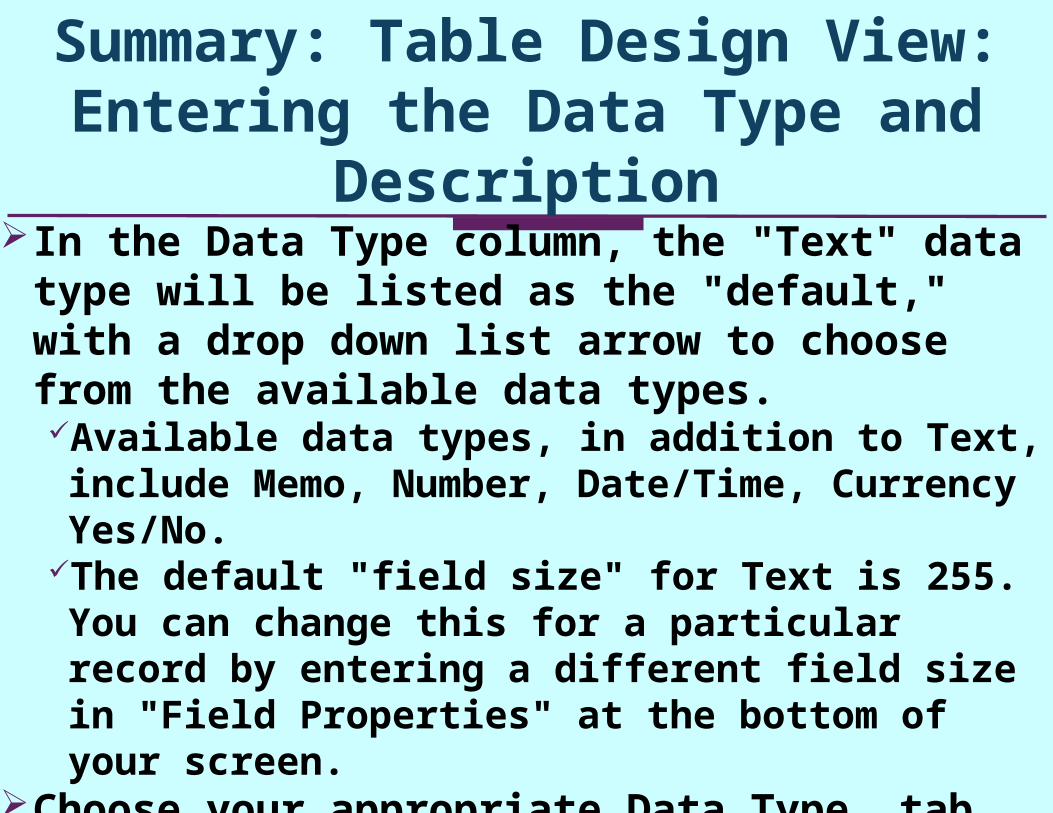
Summary: Table Design View: Entering the Data Type and
DescriptionIn the Data Type column, the "Text" data type will be
listed as the "default," with a drop down list arrow to choose from the available data types.Available data types, in addition to Text, include Memo,
Number, Date/Time, Currency Yes/No.The default "field size" for Text is 255. You can change this
for a particular record by entering a different field size in "Field Properties" at the bottom of your screen.
Choose your appropriate Data Type, tab over to the Description and enter your description of the attribute. Officially, the “Description” is optional, but in IS431, we strive for
excellence in documentation, so we will require a Description for every attribute
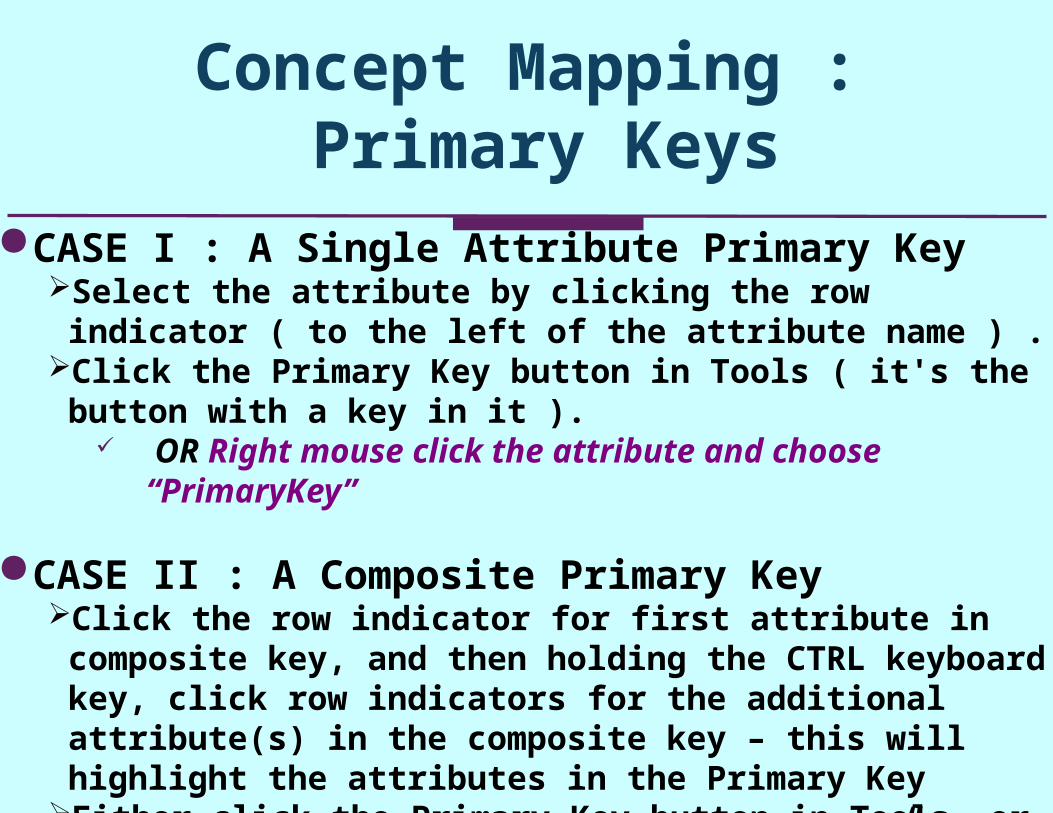
Concept Mapping : Primary Keys
CASE I : A Single Attribute Primary KeySelect the attribute by clicking the row indicator ( to the left of the
attribute name ) .Click the Primary Key button in Tools ( it's the button with a key in
it ). OR Right mouse click the attribute and choose “PrimaryKey”
CASE II : A Composite Primary KeyClick the row indicator for first attribute in composite key, and then
holding the CTRL keyboard key, click row indicators for the additional attribute(s) in the composite key – this will highlight the attributes in the Primary Key
Either click the Primary Key button in Tools, or right mouse click and choose “Primary Key”

Primary Keys in MS Access
A primary key is not 'officially' required by MS Access for a table, but in IS431 we WILL require it.
A Primary Key uniquely identifies each record in a table.MS Access will not allow a user to enter duplicate
values in a primary key field.MS Access will not allow a user to enter a 'null value' in
a primary key field.A primary key will have a Field Property of "Indexed, no
duplicates"So, the records in the table will be sorted by the values
of the Primary Key attribute(s).

Choosing a Primary Key in MS Access
Under normal circumstances, you would choose an existing attribute (or set of attributes) which uniquely identifies each record, to serve as the primary key.
In some situations, you might wish to have ACCESS generate some "ID" type attribute to serve as the primary key.Create an attribute (for instance, AnID) and choose an
Autonumber data type. Access automatically inserts a value in the field as each
new record is created.

"Text" and "Number" Data Types in MS Access
TEXT (up to 255 alphanumeric characters)NUMBER (integer or fractional values, stored in 1, 2, 4
or 8 bytes), with a default field type of "double"DOUBLE: 8 bytes, which implies that you can store
real numbers < | 1.79769313486232 E 308 |SINGLE: 4 bytes, so you can store real
numbers < |3.402823 E 38 |LONG INTEGER: 4 bytes (32 bits) for an integer, so
range is from -2,147,483,648 to 2,147,483,647INTEGER: 2 bytes (16 bits) for an integer, so range is
from -32,768 to 32,767BYTE: 1 byte for an integer, so range is from 0 to 255

Some Additional Data Types in MS Access
MEMO (contains alphanumerics)CURRENCY (for monetary values, uses 8 bytes)
Currency values are accurate to 15 digits on the LHS of decimal point, and 4 digits to the RHS of decimal point.
DATE/TIME (contains date and time values; click on Format in Field Properties and click on drop down arrow to display format choices)
AUTONUMBER (contains an automatically assigned unique numeric value - choice of display formats)
YES/NO (1 bit Boolean values - choice of display formats)

The Table Design is NOT “Carved in Granite”
The structure you created in "Design View" is not "carved in granite" and you may subsequently modify it by returning to "Design View" and changing whatever you wish to change.

Adding Data to Tables
• We can add data to a table by: Using the datasheet view (similar to an Excel spreadsheet), and
enter the data Using a data-entry form Using SQL to enter the data
• In this module, we will focus on using the datasheet view to enter data into our tables
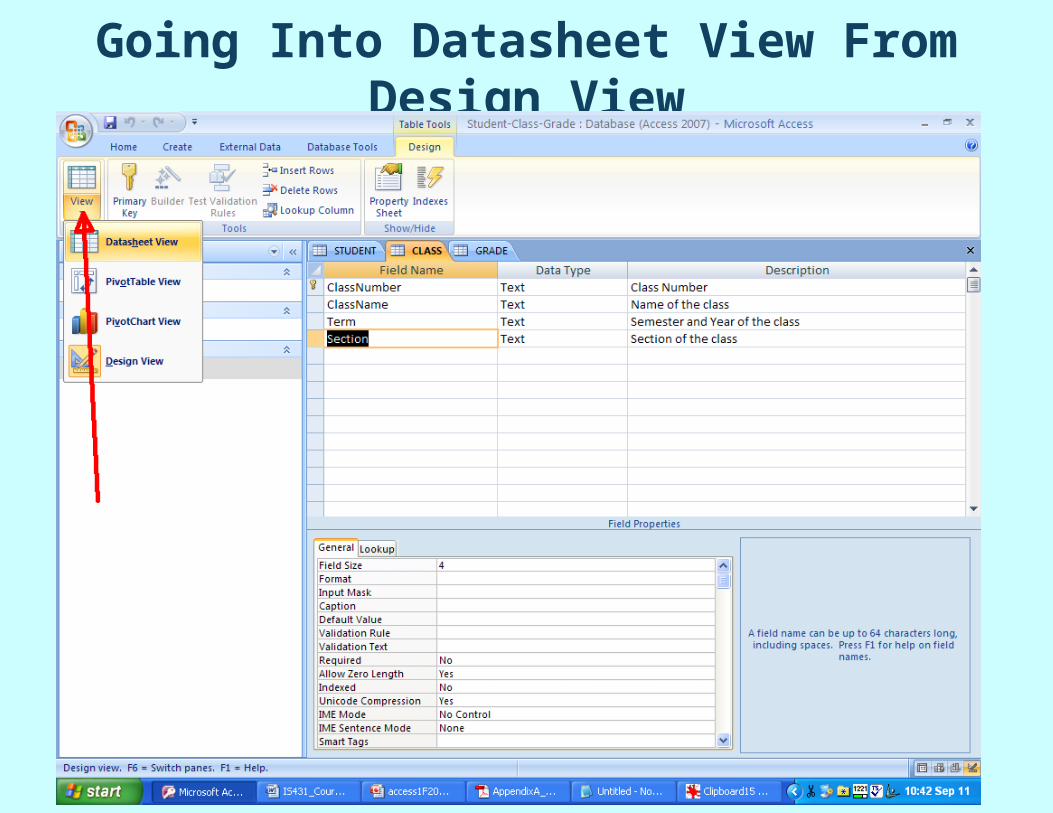
Going Into Datasheet View From Design View

Datasheet View for the CLASS table
Now starts the data entry !

The Populated CLASS Table After Data Entry

Data Integrity Data integrity refers to the accuracy of the data in the database,
i.e., the data should accurately portray the "real world."Our goal is 100% accuracy!
Data integrity problems in databases are often a consequence of data entry errors.
Most DBMS's (such as MS Access) support the concept of Data Integrity with the following:Validation Rules (Designer Specified)Input Masks (Designer Specified)Implementation of the formal concept of Referential IntegrityField Type Checks & Indexes (usually performed by the DBMS)

Designing Validation Rules for Database Integrity
A Validation Rule is a rule you design into a DBMS such that the data entered by a user must precisely satisfy the rule you establish.The DBMS (such as MS Access), will prevent a user from entering data that does not follow your rules, and will display the validation text you prescribed for the rule the user violated.
Validation rules CANNOT guarantee 100% database integrity for data entry, but they will help correct many database entry errors.

Some Validation Rules Within the MS Access DBMS
Required Fields (user cannot leave this field blank)
Range of Values (value entered must be within a particular range)
Default Values (helps prevent data entry fatigue!)Legal Values (you specify what the legal values are
permitted in data entry for a particular attribute)

Validation Rule 1: To Specify a Required Field Which Cannot Be Left Blank on Data Entry
Concept: In Relational Database Design, the attribute(s)
which is (are) the primary key should not be "null" for any entity record.With other (non-key) attributes, we may or may not be
willing to accept "nulls" as attribute values.Concept Mapping With Access:
In Design View, be sure the field is "selected" (if not, click on the row indicator column ).
In Field Properties, click on "Required."Click on the drop-down arrow, and select "Yes" (or,
alternatively, just delete the default "No" and enter "Yes").

Validation Rule 2: To Specify a Valid Range of Values for an Attribute in MS Access
Select the attribute to which the validation rule will apply. In Field Properties, click on "Validation Rule." Enter the appropriate validation expression which expresses
the acceptable values for the attribute, such as: >18000 >= 0 And <=90000 <#1/15/2010# <[AccountBalance]
{ Alternatively, clicking in the Validation Rule Box and then clicking the Build button ( ...) brings you into the Access Expression Builder.}
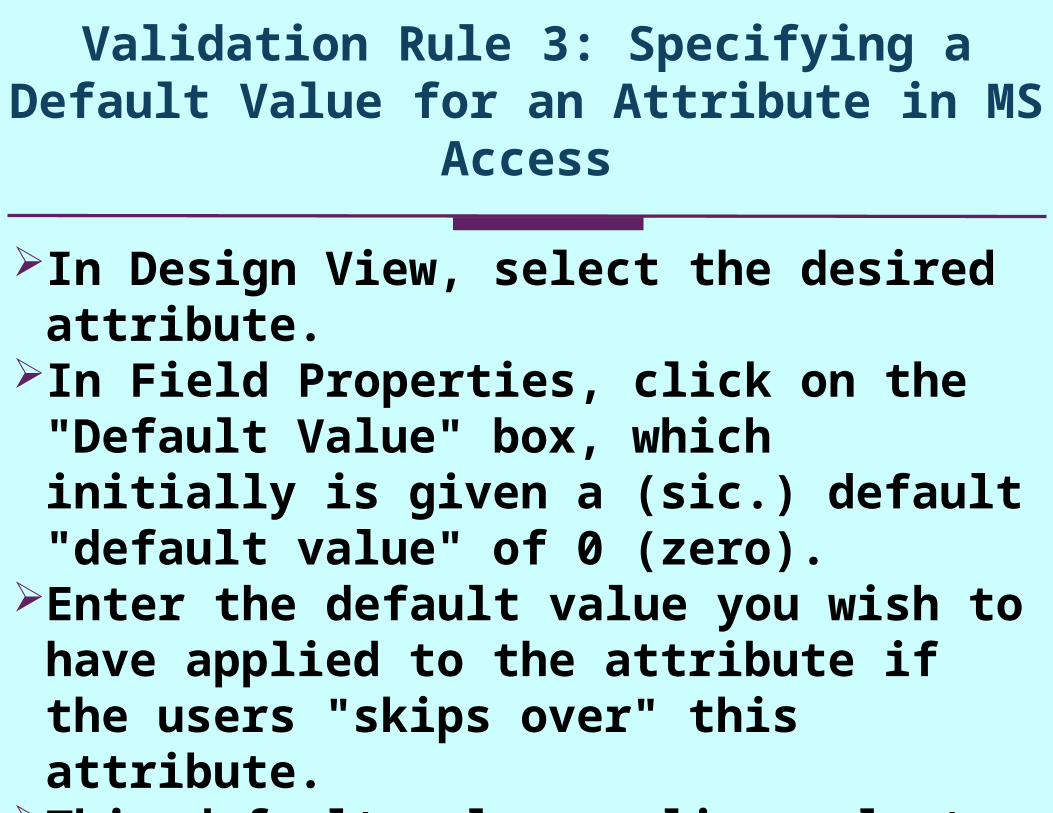
Validation Rule 3: Specifying a Default Value for an Attribute in MS Access
In Design View, select the desired attribute.In Field Properties, click on the "Default Value"
box, which initially is given a (sic.) default "default value" of 0 (zero).
Enter the default value you wish to have applied to the attribute if the users "skips over" this attribute.
This default value applies only to new records, and not to existing records

Validation Rule 4: Specifying a Collection of Legal Values for an Attribute
In Design View, select the attribute to which you wish to apply the collection of legal values.
In Field Properties, click on the "Validation Rule" box.Enter each legal value in quotation marks , separating
each legal value by the word Or, i.e., = "JAN" Or "FEB" Or "MAR"
Then click on "Validation Text" box, and enter the message the user should see if the value the user enters is not one of the legal values you defined.
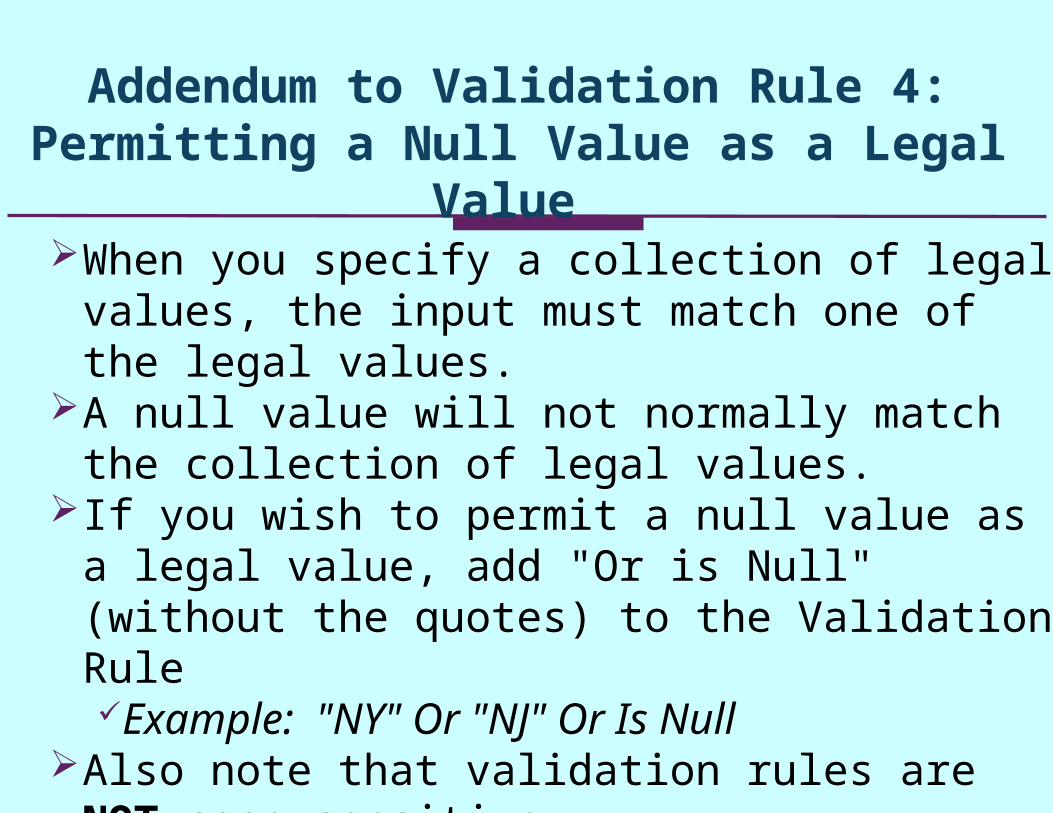
Addendum to Validation Rule 4: Permitting a Null Value as a Legal Value
When you specify a collection of legal values, the input must match one of the legal values.
A null value will not normally match the collection of legal values.
If you wish to permit a null value as a legal value, add "Or is Null" (without the quotes) to the Validation RuleExample: "NY" Or "NJ" Or Is Null
Also note that validation rules are NOT case sensitive.

The "LookUp Wizard Data Type"
You can provide the user with a set of values from which to choose for entering a particular attribute.A means of enhancing data integrity for data input.
In the Design View drop down box for Data Type, choose "LookUp Wizard ..." for the record where you wish to present the user with a 'look-up' of allowable values.

The Wizard will offer you two choices:
A. Enter the LookUp values on your own.
B. Use an existing table for the LookUp values
For Choice B (using data from existing tables), you will be given the tables in the current database, and must select the table which will contain the lookup values.
The "LookUp Wizard Data Type"

Choice A: Entering Your Own LookUp Values in the Lookup Wizard
You provide the set of LookUp values from which the user will select one.The default is to just enter one column of LookUp values.You may also choose to enter data into two columns, and specify which one should be entered into the database (typically, you would place the LookUp value to be placed in the database in column 1, and a more detailed description in column 2).

The "LookUp Wizard Data Type" Continued
TIP: The Table LookUp option will aid the user in data entry by providing a list of the allowable values, BUT, it will not insure integrity for the attribute value because the user will still be able to bypass the drop-down table and enter another value.What to do? Use the concept specified earlier in Validation Rule 4, namely, specify a collection of Legal Values within the Field Properties of the attribute.

Saving the Validation Rules You Established
Don’t forget to SAVE the validation rules you created !!

Input Masks in Access
An input mask is a pattern for which all data entered into the attribute having the particular input mask must adhere to.
Input masks can be combined with Validation Rules and other Field Properties to ensure data integrity for data entry.
An input mask will automatically format data entered no matter how it is initially entered.
Input masks may be used for attributes like phone numbers, social security numbers, zipcodes, and to automatically capitalize names, thus ensuring format consistency between corresponding attribute instances of different entities.

Input Masks With Entry Required
Character Masks For Example A Result
0 (zero) Single digit,+,- 000-00-0000 234-56-9876
L Single Letter LL NJ
A Single Letter,digit AAAAA IS431
& Any char or space &&&&&& SEARS
Access will not allow data entry for the above masks, when the input data does not have the requisite number of characters or proper character type.
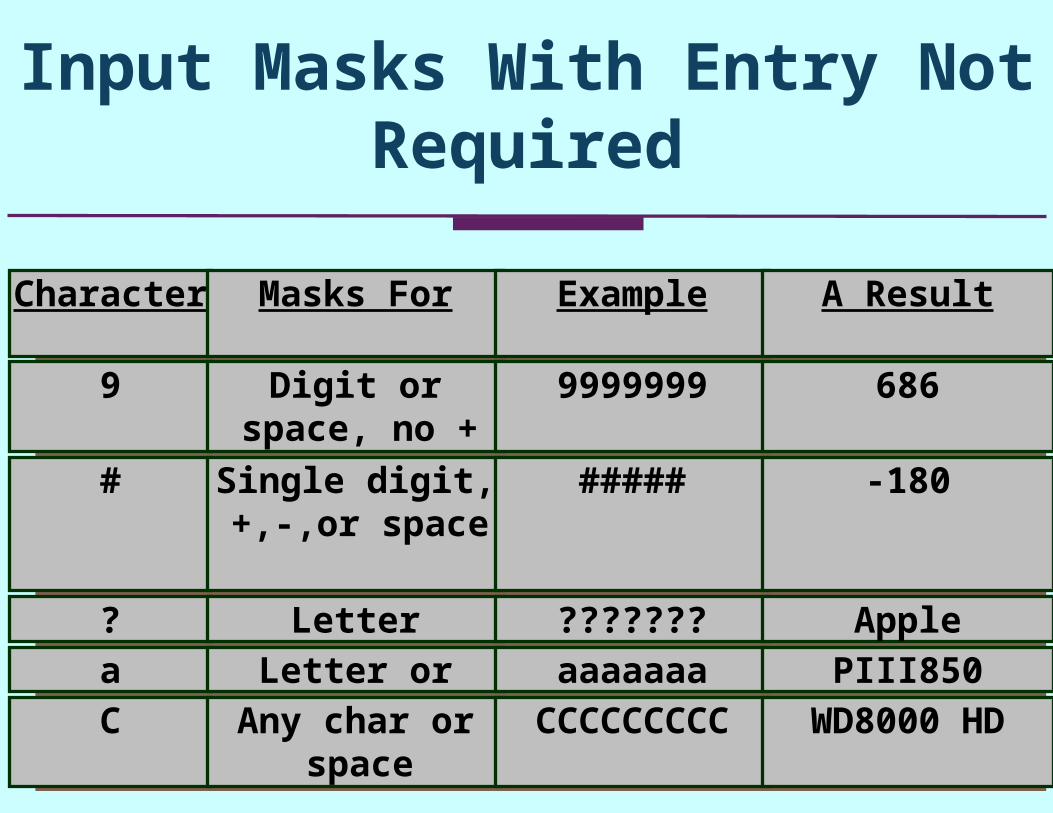
Input Masks With Entry Not Required
Character Masks For Example A Result
9 Digit or space, no + or -,
9999999 686
# Single digit,+,-,or space
##### -180
? Letter ??????? Apple
a Letter or digit aaaaaaa PIII850
C Any char or space
CCCCCCCCC WD8000 HD
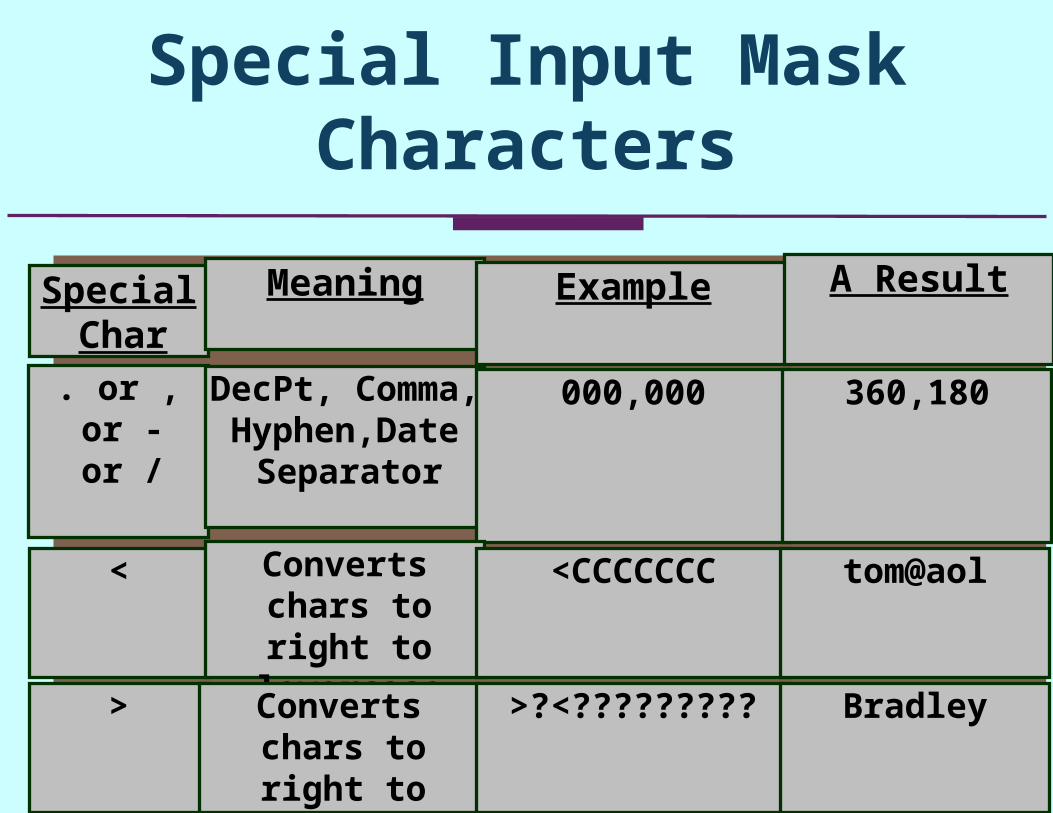
Special Input Mask Characters
Special Char
Meaning Example A Result
. or , or - or /
DecPt, Comma,Hyphen,Date
Separator
000,000 360,180
< Converts chars to right to lowercase
<CCCCCCC tom@aol
> Converts chars to right to uppercase
>?<????????? Bradley

Some Input Mask Illustrations
>L<L???????????????? would be a mask used to take a name of no more than 18 letters entered, with at least two letters in the name, and would capitalize the first letter of the name, and make the remaining letters lower case.
(999)000-0000 would be a mask used to accept a phone number with an optional area code, but required 7-digit phone number

Establishing Table Relationships in MS Access
MS Access requires you to EXPLICTLY specify any relationships you wish to have between relations/tables.The relationships will involve tables/relations where the primary key of one table matches the foreign key in another table.
MS Access uses the database design concept of Referential Integrity, to insure that the attribute values of the foreign key in one participant will match some attribute value for the primary key in the other participant.The database designer must EXPLICITLY request that referential integrity be enforced.

Enforcing Referential Integrity in One to Many RelationshipsWith referential integrity enforced between tables A and
B, then if x is a foreign key attribute in A referencing a primary key y in B, then a value entered for x in data entry MUST match a value of the primary key y in table B.
To ask MS Access to enforce referential integrity between two tables, do the following: Choose “DatabaseTools” from the Quick Access Toolbar,
and then choose “Relationships”

We Will Design a One To Many Relationship Between STUDENT and GRADE (one student has many grades,
but each grade pertains to one student)o In the Show Table dialog box which appears, select the tables to
participate in the relationship, and click the "Add" button.
We select the STUDENT and GRADE tables, and click “Add”

The Two Table Objects (STUDENT and GRADE) in the Relationship Window
We then create a relationship between STUDENT and GRADE tables by dragging a primary key (StudentNumber) from STUDENT and dropping it on top of the corresponding foreign key column (StudentNumber) in Grade. After so creating the relationship, Access brings up the “Edit Relationships” dialogue box.

The Edit Relationships Box
We click the Enforce Referential Integrity check box, and then click the Create button to formally establish the relationship between STUDENT and GRADE.

The One-To Many RelationshipAccess draws a relationship line between the two participating tables, and places an infinity symbol on the line near the “many” side of the relationship, and a “1” near the 1-side of the relationship.

Repeating Similar Steps to Enforce Referential Integrity Between the CLASS
table and the GRADE table

Enforcing Referential Integrity in One to Many Relationships- Continued
Be sure the participants (relations/tables) are CLOSED!
In the Relationships Window, select the attribute to serve as the primary key, and, with the mouse, drag it over to the foreign key attribute in the other table.
In the subsequent Relationships Dialog Box, select "Enforce Referential Integrity" and click "Create".
Close the Relationship Dialog Box and save your changes.
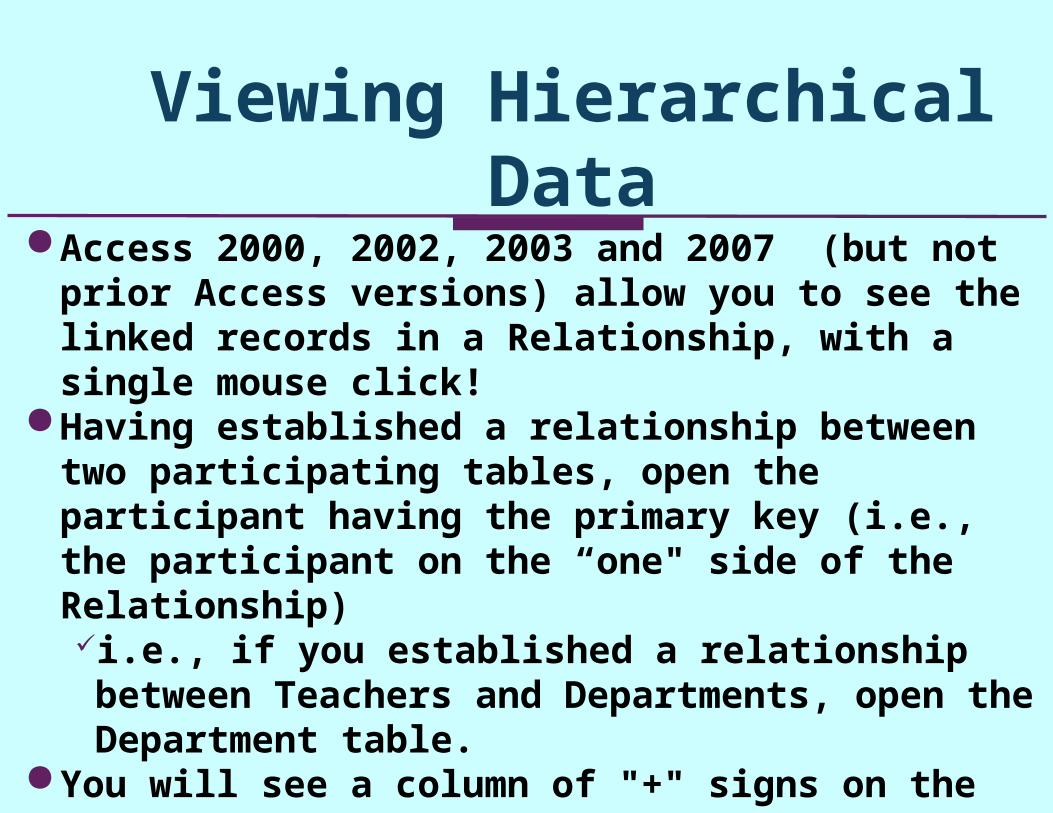
Viewing Hierarchical Data Access 2000, 2002, 2003 and 2007 (but not prior Access
versions) allow you to see the linked records in a Relationship, with a single mouse click!
Having established a relationship between two participating tables, open the participant having the primary key (i.e., the participant on the “one" side of the Relationship)i.e., if you established a relationship between Teachers and
Departments, open the Department table. You will see a column of "+" signs on the left, which, when
clicked for a particular record, will provide a subdatasheet of records from the other participant, whose foreign key references the specific value of this primary key.
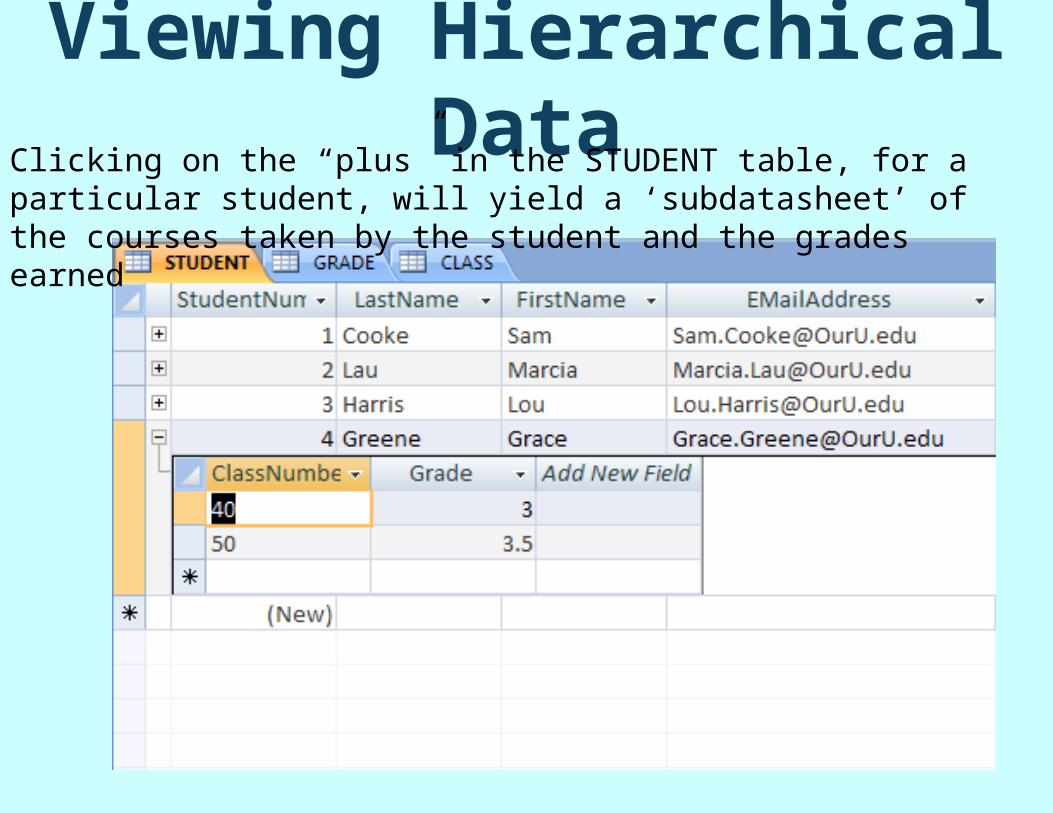
Viewing Hierarchical DataClicking on the “plus” in the STUDENT table, for a particular student, will yield a ‘subdatasheet’ of the courses taken by the student and the grades earned

Viewing Hierarchical Data(Continued)
With the subdatasheet in view, the "+" sign has changed to a "-" sign.Click the "-" sign to remove the subdatasheet from the
view.Nifty, powerful feature: if you add or edit data in the
subdatasheet, it will automatically be entered into the participating related table.So, with the STUDENT table open in Datasheet View, if
you click the "+" sign for a particular STUDENT to get the associated subdatasheet of Courses for this student, you can edit or add course data directly on this subdatasheet!

• Relational Database Queries, and Their Concept Mapping into MS Access's Query By Example (QBE)

First….
o Be sure you have viewed the material on the Relational Algebra
o And be sure you understand the concepts of “project” and “select” and “joins” and (cartesian) productsAccess QBE implements these relational algebra
concepts …

General QBE Topics
A query is associated with a particular table or, in the case of a multi-table query, several tables.
The "workspace" where you create queries is called, in Access, the "Select Query Window.“
The top region of the Select Query Window is where you bring in the tables(s) upon which your query will be based.
The bottom region of the Select Query Window is called the “QBE Grid," and is where you use "Relational Algebra type " concepts to express your query.
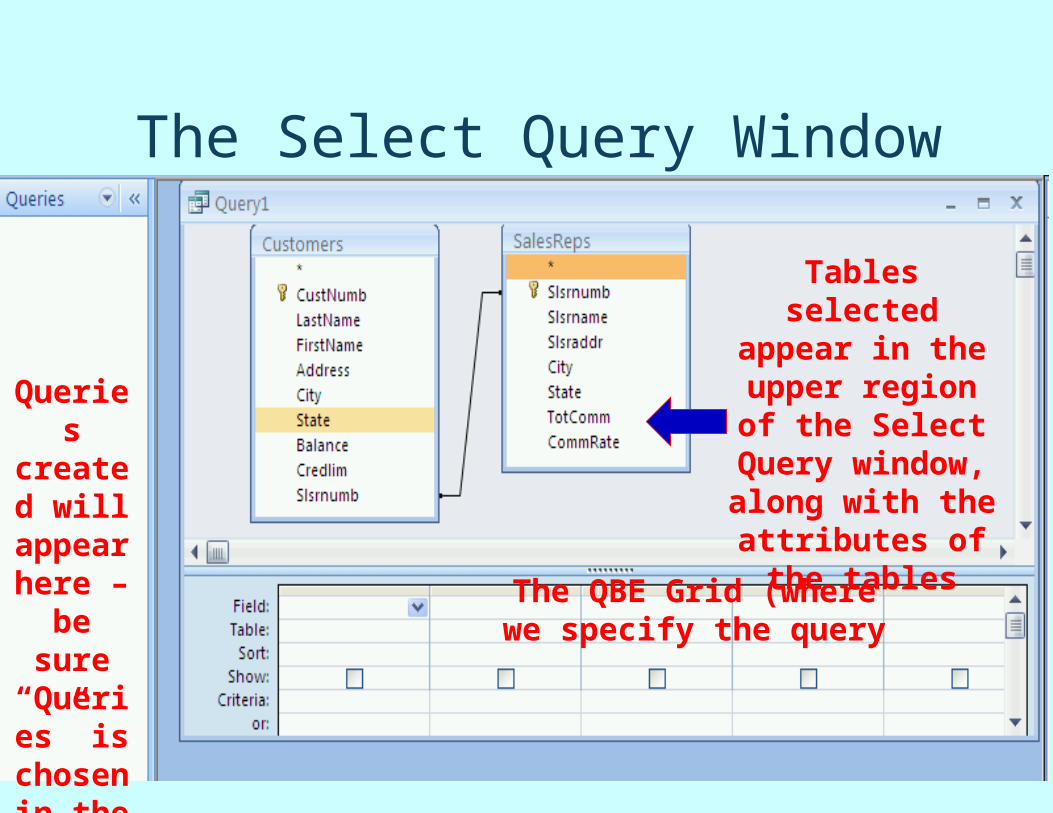
The Select Query Window
The QBE Grid (where we specify the query
Tables selected appear in the
upper region of the Select Query
window, along with the attributes of
the tables
Queries created
will appear
here – be sure
“Queries” is
chosen in the
Navigation pane

How to Obtain the Select Query Window: Overview
Open the database, and click the “Create” tab in the top menu
In the Ribbon, click on the Query Design button,
Then, in the "Add Table" dialogue box, which appears, choose the table(s) which contain the attributes to be used in your query, and then click "CLOSE."

Obtaining the Select Query Windows
o Open the database, and click the “Create” tab in the top menu bar, and then…
Click “Query Design” in the Ribbon
This brings up the “Show Tables” dialogue box, where you choose the tables that you will need in your query for the desired attributes.

The Show Table Dialogue Box (with the Snookie database open)

Selecting the Tables for the Query You Are Designing
From the “Show Tables” dialogue box, select the desired tables which contain the attributes needed for your query design
Suppose, for example, we wish to design a query giving us the customer numbers and the names of their sales representatives in Snookie – in this case, we require both the CUSTOMER table and the SALESREPS table

After Selecting The Requisite Tables and Closing the “Show Tables”
Dialogue Box, We Have
Notice that we cannot view all of the attributes in the selected tables, so we will need to resize the
table objects.
The QBE Grid is partially hidden, and needs to be resized.

So, You May Need To Resize the Select Query Window
You generally would want to maximize this Select Query window.
Click to maximize the Select Query
window

Resizing the RegionsAnd you may wish to resize the regions by either
enlarging the top region (accomplished by dragging down the line separating the two regions), or enlarging the bottom region (the QBE Grid)

Using the Select Query Window
The top region of the Select Query Window will contain the tables (& attributes) used in the query. At any time, additional Tables may be "added" to the top
region by selecting the ShowTable button (or, alternatively, right mouse clicking in the upper region and choosing “Show Table”), then choosing the names of those additional tables which the (revised) query will refer to. When completed, “close” the dialogue box..
The bottom region of the Select Query Window contains the QBE grid.

Concept Mapping: Projecting Attributes
To project an attribute, double click on the attribute name in the table in the upper region. The attribute name will appear in the Field row in the
QBE grid, and the "box" in the "Show" row will be marked. You can also project an attribute by dragging the desired
attribute from the table region into the field row.To "run" a query, click the Run (!) button on the ribbon
(LHS)

Project the Customer Numbers and Their Sales Reps

The Results of the Query (Dynaset)

Returning to Design Viewo To return to the Select Query Window (Design View)
after running a query, click the "Design View" button (it's the one on the extreme left of the ribbon!) and from the drop-down list, choose “Design View”
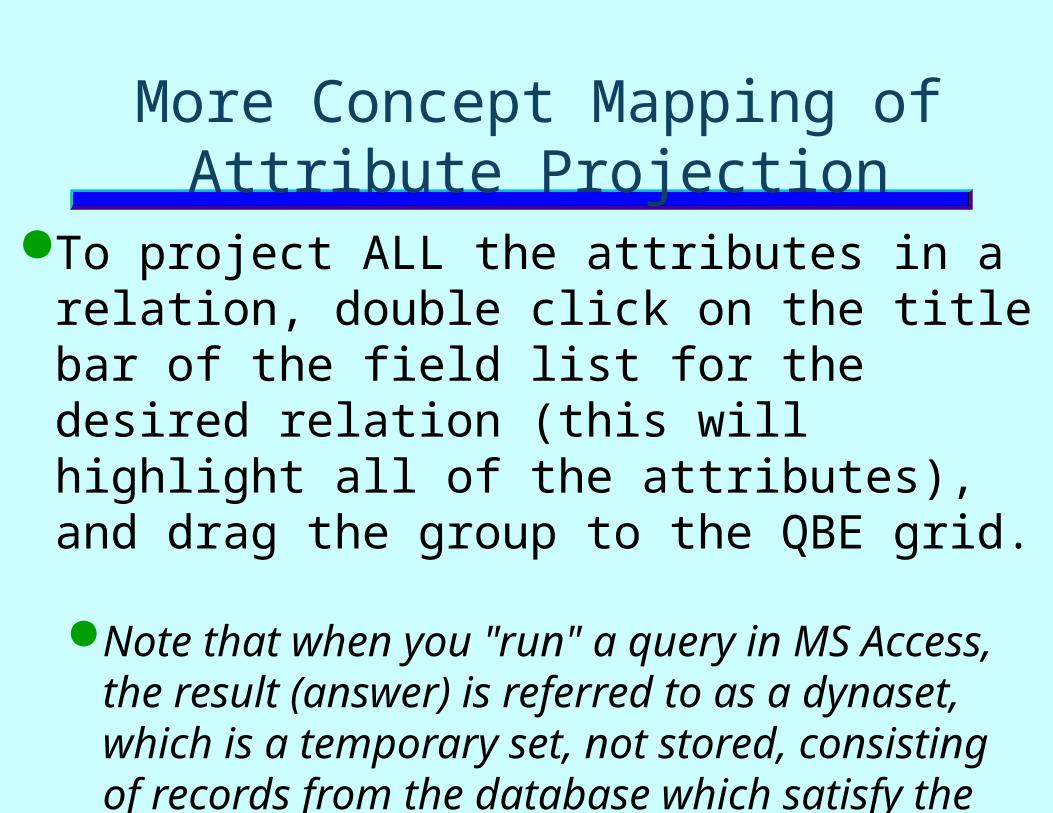
More Concept Mapping of Attribute Projection
To project ALL the attributes in a relation, double click on the title bar of the field list for the desired relation (this will highlight all of the attributes), and drag the group to the QBE grid.
Note that when you "run" a query in MS Access, the result (answer) is referred to as a dynaset, which is a temporary set, not stored, consisting of records from the database which satisfy the query.

Saving a Query
o Click the “Office Button” on the upper LHS
o Choose “Save As” and then“Save the Current database object”
o In the “Save As” dialogue box which follows, provide a meaningful name for your query (and save it as a query type)
o The named query will appear in the Query objects

Management of the QBE Grid
To delete an attribute in the QBE Grid, highlight the attribute and click “Delete Columns” in the ribbon (or, alternatively, highlight the column and click the “Delete” key.)
The Concept Mapping for the "Select" based on a "Predicate" in the Relational Algebra, is the "Criteria" row of the QBE Grid.
Query Design to
project the customers
from NJ and their
SalesReps

Select
o In the Criteria cell you can create QBE expressions, using comparison operators (>, <, =, >=, <=, NOT)
o If your query seeks to "select" based upon some attribute, but not to "project" that attribute, then when you double click on the attribute to get its name in the Field row, click on the Show row to disable the projection.

Using Compound Criteria
A compound criteria means that the query entails more than just a single simple criteria.
If all of the expressed simple criteria must be true in order for the compound criteria to be true, we have an AND criteria. Ex: Age > 20 AND Major = “IS”
If at least one of the expressed simple criteria must be true in order for the compound criteria to be true, we have an OR criteria. Ex: Class = “Senior “ OR GPA > 3.2
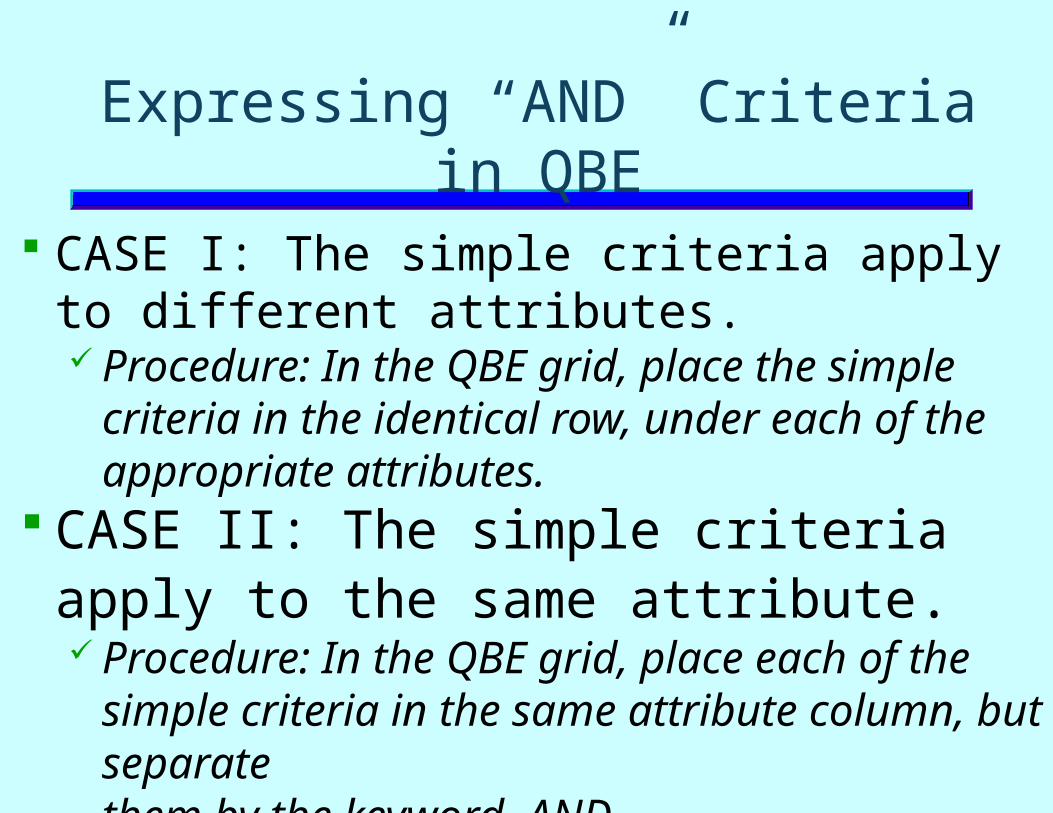
Expressing “AND” Criteria in QBE
CASE I: The simple criteria apply to different attributes. Procedure: In the QBE grid, place the simple criteria
in the identical row, under each of the appropriate attributes.
CASE II: The simple criteria apply to the same attribute. Procedure: In the QBE grid, place each of the simple
criteria in the same attribute column, but separate them by the keyword AND.
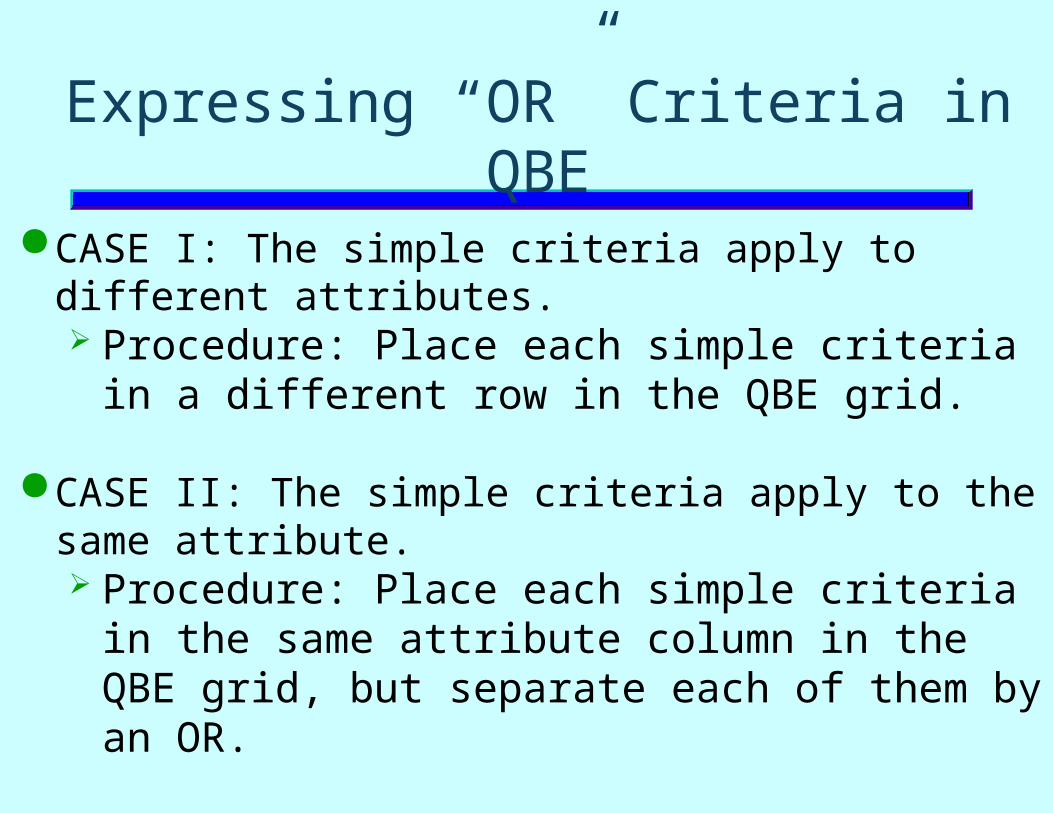
Expressing “OR” Criteria in QBE
CASE I: The simple criteria apply to different attributes. Procedure: Place each simple criteria in a different row
in the QBE grid.
CASE II: The simple criteria apply to the same attribute. Procedure: Place each simple criteria in the same
attribute column in the QBE grid, but separate each of them by an OR.
o Ex: "NJ" OR "NY"
o Can also be expressed as IN( NJ,NY)

Query Sorts
In a query, you might want the "answer" sorted according to either: A single attribute
Example: Sort selected Employees by their last name attribute.
Two attributes Example: Sort selected Customers by their State
attribute, and for those customers residing in the same State, sort them by their City attribute.

Query Sorts on a Single Attribute
The steps are as follows:
Complete the QBE grid to express your query.
Click on the attribute you wish to sort on.
In the “Sort” row of the grid, click on the down arrow which appears, and choose either Ascending or Descending.
Run the Query.

Query Sorts on Two Attributes
The steps are as follows: Complete the QBE grid to express your query.
Click on the row named “Sort” of the major attribute you wish to sort on.
Click on the down arrow which appears, and choose either Ascending or Descending.
Click on the minor attribute you wish to sort on.
The leftmost attribute will be the major attribute!
Click on the down arrow which appears, and choose either Ascending or Descending.
Run the query.

Parameter Queries
For queries which are run often, we can design the query so that frequently changing criteria involving an attribute can be easily specified without having to modify the Criteria row of the QBE grid.
With a created Parameter Query, Access will prompt the user for the attribute parameters when the query is run. Thus, the extra steps of opening the query in Design
View are eliminated.
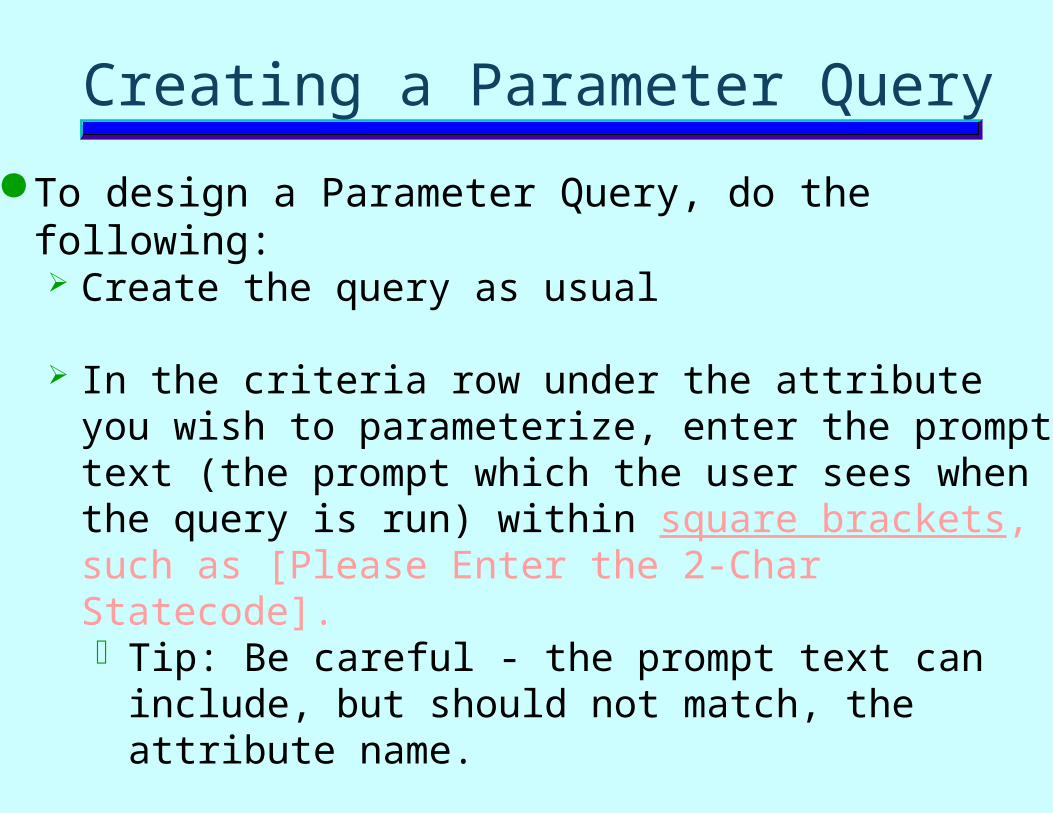
Creating a Parameter Query
To design a Parameter Query, do the following: Create the query as usual
In the criteria row under the attribute you wish to parameterize, enter the prompt text (the prompt which the user sees when the query is run) within square brackets, such as [Please Enter the 2-Char Statecode].o Tip: Be careful - the prompt text can include, but should
not match, the attribute name.
Go to Datasheet View to test the Parameter Query.
Save the Parameter Query as a regular query.

Using a Parameter Query
Select “Queries’ from the Navigator pane on the LHS, and double click the Parameter Query which you wish to run.
Respond to the prompt appropriately

Parameter Query for a Range
We might wish to create a parameter query for a range of values in an attribute.
Example: Create a parameter query to specify a consecutive range of zipcodes.
In the criteria row we would enter the following:Between [Enter the Beginning Zip Code] and
[Enter the ending Zip Code]

Parameter Queries for Multiple Attributes
We might wish to prompt the user for several attributes in a parameter query.
Create a prompt ("parameter") for each attribute. Upon running the query, Access will prompt the user for
each attribute from "Left to Right" as they appear in the QBE Grid.
You can override this default L-R order by just dragging the attributes within the QBE grid to obtain the desired Left to Right order

Changing an Attribute Header Name for the Dynaset
Suppose, for the dynaset, we wish to have something more descriptive than the (perhaps shortened) attribute name originally specified in the table's "design view.“
Select the attribute, press "Home" (to bring the cursor to the front of the field), and then enter the header name you wish to appear, followed by a colon (:).

Have as a Header “Salesrep Name”
The header “Salesrep Name”
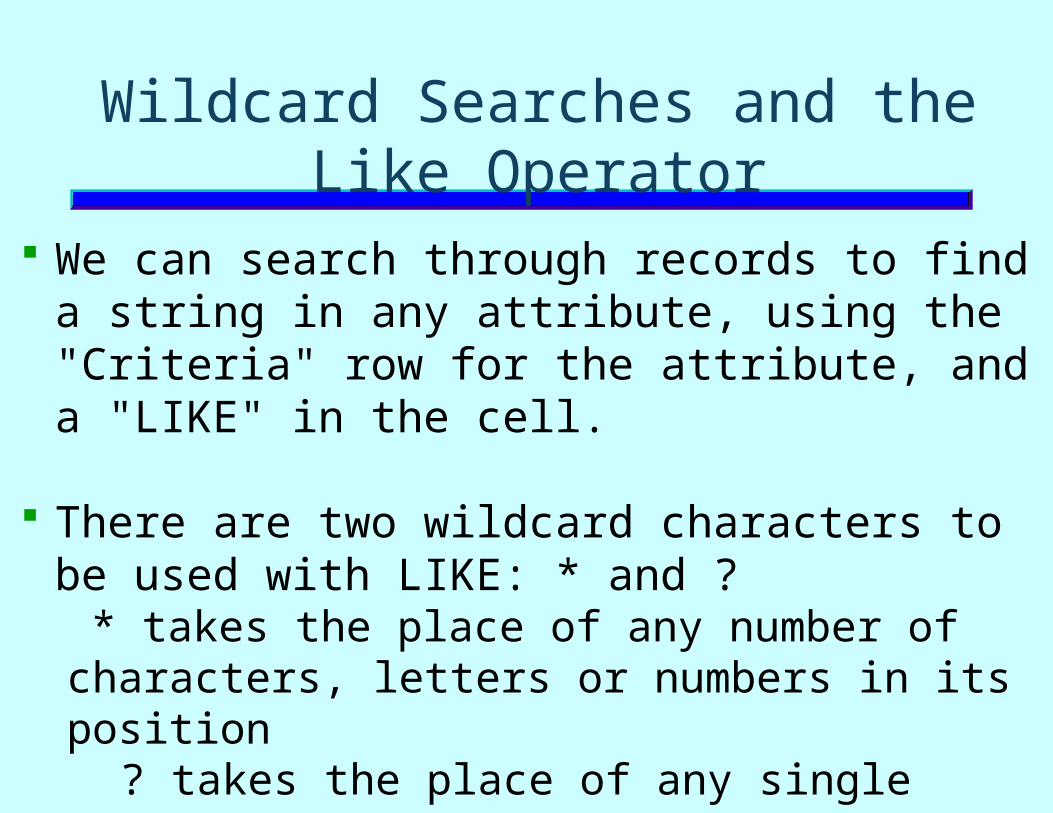
Wildcard Searches and the Like Operator
We can search through records to find a string in any attribute, using the "Criteria" row for the attribute, and a "LIKE" in the cell.
There are two wildcard characters to be used with LIKE: * and ? * takes the place of any number of characters, letters or numbers in its position ? takes the place of any single character, letter or number in the same position in which the question mark is placed

Examples of Wildcard Searches with Like
a) Like */*/2010(in a date attribute)
b) Like 2/*/2010 (in a date attribute)
c) Like 2/?/2010(in a date attribute)
d) Like "* P*" (in a name field with firstname, space and last name)
e) Like "A*" or Like "B*"( in a Company name)
a) Finds all records with a 2010 date
b) Finds all records with any February date in 2010.
c) Finds all Feb. 1 to Feb. 9 records for 2010.
d) Finds all records beginning with a P in last name
e) Finds records of all company names beginning with A or B

Searching for Null Fields
We might wish to issue a query in order to find all records with a blank for a given attribute.
To do so, place the keywords "IS NULL" (without the quotes) in the Criteria row for the attribute you wish to check, and then run the query.
***Often used in database maintenance!***
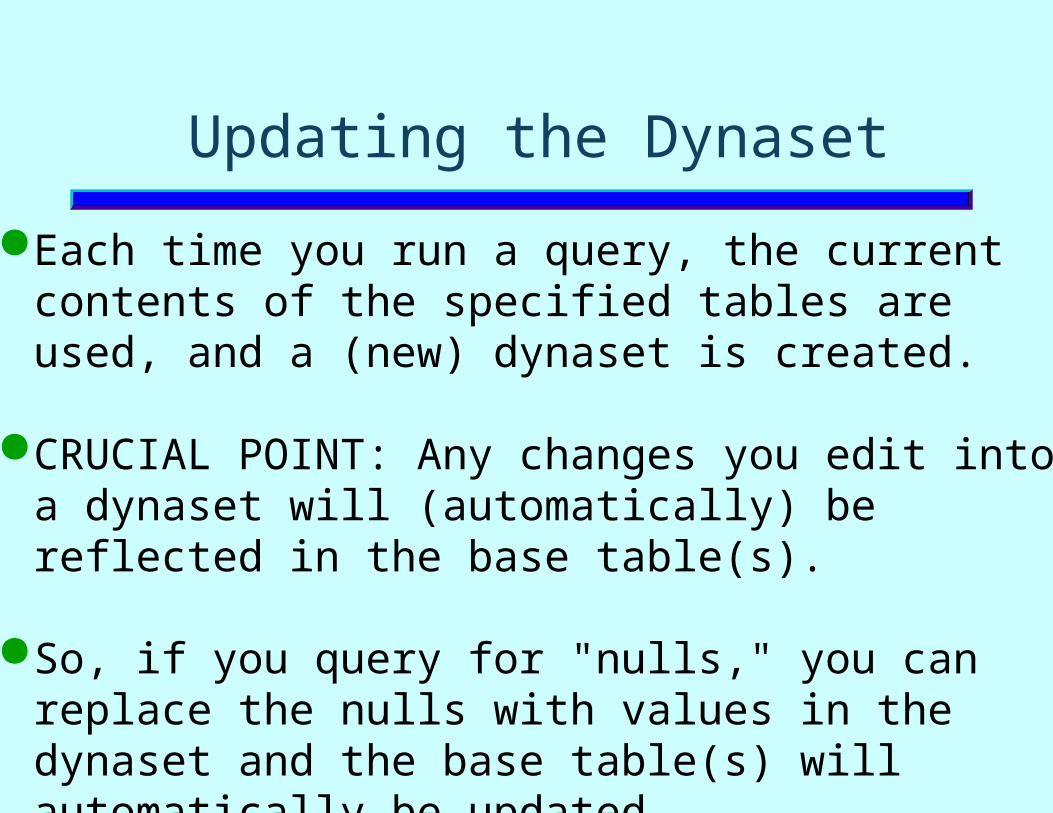
Updating the Dynaset
Each time you run a query, the current contents of the specified tables are used, and a (new) dynaset is created.
CRUCIAL POINT: Any changes you edit into a dynaset will (automatically) be reflected in the base table(s).
So, if you query for "nulls," you can replace the nulls with values in the dynaset and the base table(s) will automatically be updated.

Queries that Require More than 1 Table
We will concept map the equivalent of a JOIN into Access.
Bring all the needed tables to the table region of the Select Query window.

Relationships Can Be Expressed in Access
If no relationship is present between two tables of interest, you may have Access insert a line indicating a relationship between identically named attributes in the two tables (assuming that both have the same data type ( and field length) and one of them is a primary key).
In the top portion of the Select Query Window, point and select an attribute in one table and dragging the pointer to the related attribute in the other table.
If desired, enforce referential integrity by going into "Relationships"

Multi-Table Queries - Continued
Double click on the attributes needed from both tables to express your query.
Use the Criteria row to restrict the records in the join.
Highlight TableNames in the “Show/Hide” ribbon, and you will see in the QBE grid the row called Table and the source table for each attribute
Run the query.

Computed Fields in Queries
A computed field is a field calculated using other attributes and arithmetic operators.
To specify a computed field in a query, do the following:
Think of a meaningful name for your computed field.
In an available field column in the QBE grid, enter ComputedFieldName:expression , where expression will include the names of existing fields enclosed within square brackets, plus arithmetic operators

Computed Fields - Continued
Note that you generally will not have sufficient room in the Field cell to see the entire expression. Do either of the following (have cursor in Field cell): Go into ZOOM mode by
right mouse click and choose ZOOM
Go into EXPRESSION BUILDER by right mouse clicking and choosing BUILD
Enlarge the field by dragging

Built-In Functions for Totals
Access has the following built-in functions, which may be used in queries: AVG MIN MAX SUM COUNT STDEV VAR
These functions can only be used in the Total row of the QBE grid.

Built-In Functions - Continued
With the cursor in an attribute column, right mouse-click and choose “Totals” A "Total" row will appear in the QBE grid.
o Can also enable View Totals by a click on the Totals button ( S ) on the ribbon in “Show/Hide”
In the "Totals" row for the desired attribute, click the down arrow and choose the built-in function you wish to apply to the attribute.
Run the query
Note that you can specify "criteria" in such a way that the function you indicated in "Totals" will be applied only to the records which satisfy the criteria. This is done by choosing the "Where" clause in the drop down arrow box of
the attribute, and using another Column to specify a select condition in the Criteria row.o Note: If the select condition is to also be applied to the desired attribute,
you need to create an additional column in the QBE for the same attribute
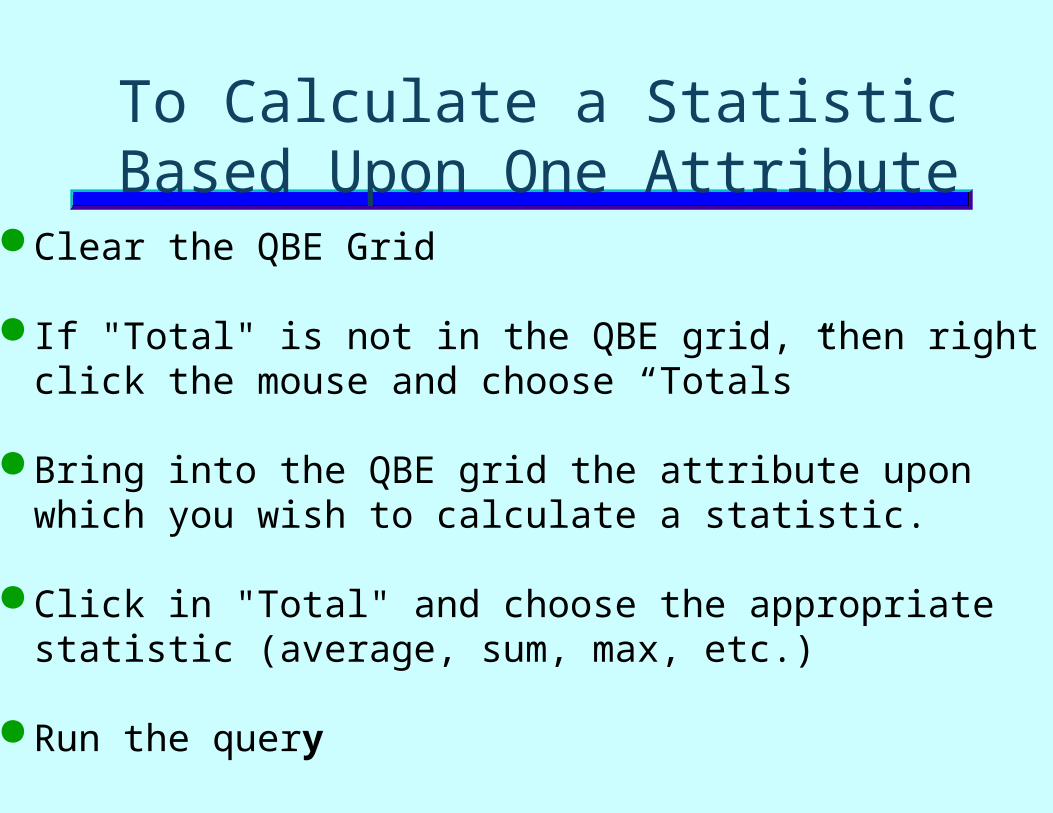
To Calculate a Statistic Based Upon One Attribute
Clear the QBE Grid
If "Total" is not in the QBE grid, then right click the mouse and choose “Totals”
Bring into the QBE grid the attribute upon which you wish to calculate a statistic.
Click in "Total" and choose the appropriate statistic (average, sum, max, etc.)
Run the query

Calculating Statistics Based Upon Groups of Records
A group is a set of records which share some common attribute instance: Example: Students with the same major, customers having the same
SalesRep, etc.
In the "Total" row for the attribute you wish to group by, select "Group By" from the Drop-Down list. Tip: Be certain that there are no "extra" attributes in the QBE grid;
only the "group by" attribute and "statistic" attribute(s) should be present.
Complete the QBE grid with desired statistic(s) placed in the appropriate attribute(s).
Run the query.

Query the Snookie Database to Obtain a Count of How Many Customers Belong
to Each SalesRep
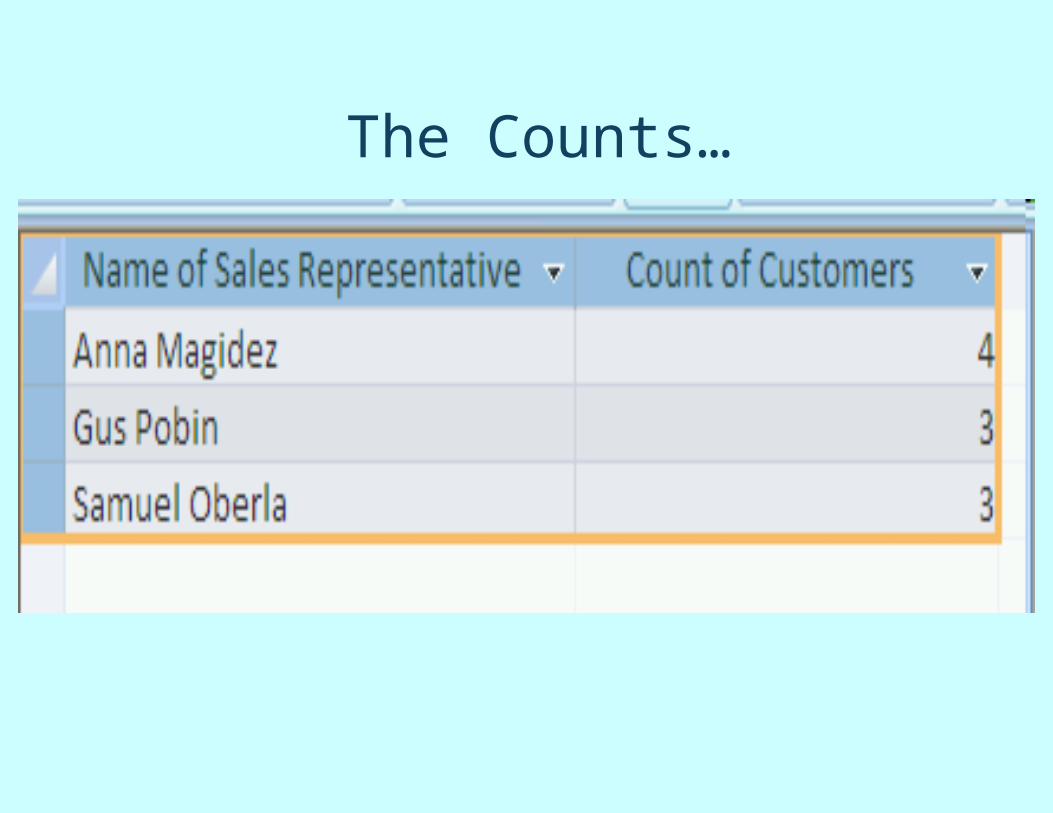
The Counts…