Deploying workloads with Juju and MAAS in Ubuntu 13 -...
28
Deploying workloads with Juju and MAAS in Ubuntu 13.04 A Dell Technical White Paper Kent Baxley Canonical Field Engineer Jose De la Rosa Dell Software Engineer
-
Upload
trinhhuong -
Category
Documents
-
view
222 -
download
2
Transcript of Deploying workloads with Juju and MAAS in Ubuntu 13 -...
Deploying workloads with Juju and MAAS in Ubuntu 13.04
A Dell Technical White Paper
Kent Baxley
Canonical Field Engineer
Jose De la Rosa
Dell Software Engineer

Dell Inc Deploying workloads with Juju and MAAS in Ubuntu 13.04
2
THIS WHITE PAPER IS FOR INFORMATIONAL PURPOSES ONLY, AND MAY CONTAIN TYPOGRAPHICAL
ERRORS AND TECHNICAL INACCURACIES. THE CONTENT IS PROVIDED AS IS, WITHOUT EXPRESS OR
IMPLIED WARRANTIES OF ANY KIND.
© 2013 Dell Inc. All rights reserved. Reproduction of this material in any manner whatsoever without
the express written permission of Dell Inc. is strictly forbidden. For more information, contact Dell.
October 2013
Dell Inc Deploying workloads with Juju and MAAS in Ubuntu 13.04
3
Contents
1. Introduction ........................................................................................................................................ 5
1.1. Purpose of this document ....................................................................................................... 5
1.2. Assumptions & Disclaimers ..................................................................................................... 5
2. MAAS .................................................................................................................................................... 6
2.1. What is MAAS ............................................................................................................................. 6
2.2. Hardware Requirements .......................................................................................................... 7
2.2.1. MAAS server ........................................................................................................................ 7
2.2.2. Nodes ................................................................................................................................... 7
2.3. Installation .................................................................................................................................. 8
2.4. Post-Install Tasks ....................................................................................................................... 8
2.5. Configuring DNS and DHCP services .................................................................................. 11
2.5.1. Using your existing DNS and DHCP services ............................................................. 11
2.5.2. Using MAAS to provide DNS and DHCP services ...................................................... 11
2.6. Provisioning .............................................................................................................................. 12
2.6.1. Enlistment ......................................................................................................................... 12
2.6.2. Accept and Commission ................................................................................................ 13
2.6.3. Deploy ................................................................................................................................ 13
3. Juju ..................................................................................................................................................... 14
3.1. What is Juju .............................................................................................................................. 14
3.2. Installation and configuration ............................................................................................... 14
3.2.1. Juju-core vs. juju ............................................................................................................. 14
3.2.2. Package installation .............................................................................................................. 14
3.2.3. The environments.yaml file ................................................................................................. 15
3.3. Bootstrap node ........................................................................................................................ 15
4. Juju charms ...................................................................................................................................... 17
4.1. Downloading charms ............................................................................................................. 17
4.2. Constraints ................................................................................................................................ 17
4.3. Deploying Wordpress ............................................................................................................. 18

Dell Inc Deploying workloads with Juju and MAAS in Ubuntu 13.04
4
4.4. Deploying Juju-GUI ................................................................................................................ 20
4.5. Deploying OpenStack ............................................................................................................. 21
4.6. Destroying services ................................................................................................................. 23
5. Conclusion ........................................................................................................................................ 25
6. Appendices ....................................................................................................................................... 26
Appendix A - MAAS-cli ....................................................................................................................... 26
Appendix B - References .................................................................................................................... 28

Dell Inc Deploying workloads with Juju and MAAS in Ubuntu 13.04
5
1. Introduction
1.1. Purpose of this document
This whitepaper will show you how to instantly deploy, integrate and scale software services on top
of Dell PowerEdge servers. These software services are provided by Ubuntu Juju charms, which are
deployed to hardware via Ubuntu MAAS (Metal-as-a-Service). We will explain in detail what Juju and
MAAS can do.
The intended audience of this whitepaper is IT system administrators (and any enthusiast with access
to a few servers) who want to quickly deploy Linux-based applications on Dell PowerEdge servers and
automate the configuration steps required for each application.
1.2. Assumptions & Disclaimers
It is assumed that the reader is familiar with Ubuntu Server and with the Linux operating system in
general. You don’t have to be an expert, but past experience will make it a lot easier following this
document. We assume that you are familiar with applications and services such as Wordpress, MySQL
and OpenStack.
It is assumed that the reader is familiar with the concepts of service orchestration and the dynamic
allocation of resources to implement on-demand services. You don’t have to have expertise in cloud
services to follow this whitepaper, but familiarity with such concepts will be very helpful.

Dell Inc Deploying workloads with Juju and MAAS in Ubuntu 13.04
6
2. MAAS
2.1. What is MAAS
Metal-As-A-Service is hardware provisioning software from Canonical intended to quickly
commission and deploy physical servers to run a wide array of software servicer or workloads via Juju
charms (more on Juju in Chapter 3).
Servers can be dynamically associated or connected together to scale up services, and can also be
disconnected to scale down as demand requires it. MAAS treats physical servers as compute
commodities that can be quickly manipulated to meet customer demand, similar to how a cloud
environment creates and removes virtual resources to adjust to computing demands.
Figure 1 – MAAS deployment with a Regional Controller and two Cluster Controllers.

Dell Inc Deploying workloads with Juju and MAAS in Ubuntu 13.04
7
A MAAS deployment consists of one Region Controller, one or more Cluster Controllers, and as many
physical servers as you will require to deploy your applications. Figure 1 (borrowed from
http://maas.ubuntu.com) depicts a MAAS deployment with a Region controller, two Cluster controllers
and 6 servers (nodes) per cluster. The terms ‘servers’ and ‘nodes’ are used interchangeably
throughout this whitepaper.
A Region controller consists of a web user interface, an API, the metadata server for cloud-init and an
optional DNS server.
A Cluster controller is in charge of provisioning and consists of a TFTP server and an optional DHCP
server. It is also responsible for powering servers on and off.
Note that both the DNS and DHCP services are optional because you have the option of using your
own DNS and DHCP services already running in your environment.
2.2. Hardware Requirements
2.2.1. MAAS server
For simplicity purposes, we will do a MAAS deployment with the Region controller and one Cluster
controller (one subnet) on the same machine. Table 1 lists the minimum requirements for the MAAS
server.
Component Minimum
CPU Dual-core or better
Memory 4 GB
Disk Single disk or RAID 1 boot device of 150 GB
Network 2 x 1GB NICs, external internet access for downloading media
Operating System Ubuntu Server 12.04 LTS or higher
Table 1 – Minimum hardware requirements for MAAS server
Canonical does not mention that the MAAS server has to run on bare metal. Even though we see no
reason why you can’t install and run it in a VM, we installed it on a physical machine.
Even though Ubuntu Server 12.04 LTS is what is recommended for enterprise deployments, we used
the most recent Ubuntu Server release as of this writing (13.04).
2.2.2. Nodes
a. In a lab setting used for testing purposes, any server with a minimum dual-core CPU, 4 GB of
memory, 150 GB disk, 1 GB NIC will do. The quantity and specification of PowerEdge servers
that you will need will depend on the type of applications that you intend to use and the loads
you expect.
b. All servers must be equipped with out-of-band management such as an iDRAC or a BMC
controller, as they will be powered on and off via IPMI commands. If using an iDRAC, virtual
media must be set to auto-attached, otherwise the OS provisioning process will fail.
Dell Inc Deploying workloads with Juju and MAAS in Ubuntu 13.04
8
c. All servers must be set to boot from the network. Since servers are provisioned via PXE, they
must always boot from the network. Also, because in this example we only use one Cluster
controller, all servers must be in the same subnet.
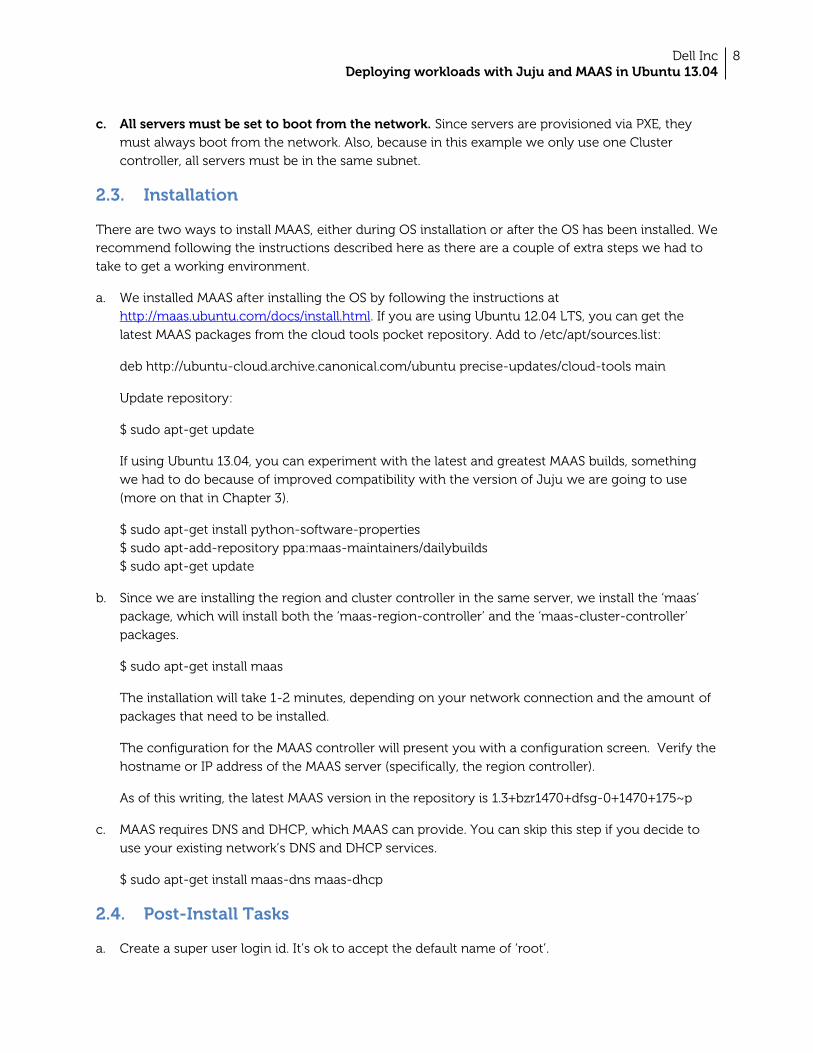
2.3. Installation
There are two ways to install MAAS, either during OS installation or after the OS has been installed. We
recommend following the instructions described here as there are a couple of extra steps we had to
take to get a working environment.
a. We installed MAAS after installing the OS by following the instructions at
http://maas.ubuntu.com/docs/install.html. If you are using Ubuntu 12.04 LTS, you can get the
latest MAAS packages from the cloud tools pocket repository. Add to /etc/apt/sources.list:
deb http://ubuntu-cloud.archive.canonical.com/ubuntu precise-updates/cloud-tools main
Update repository:
$ sudo apt-get update
If using Ubuntu 13.04, you can experiment with the latest and greatest MAAS builds, something
we had to do because of improved compatibility with the version of Juju we are going to use
(more on that in Chapter 3).
$ sudo apt-get install python-software-properties
$ sudo apt-add-repository ppa:maas-maintainers/dailybuilds
$ sudo apt-get update
b. Since we are installing the region and cluster controller in the same server, we install the ‘maas’
package, which will install both the ‘maas-region-controller’ and the ‘maas-cluster-controller’
packages.
$ sudo apt-get install maas
The installation will take 1-2 minutes, depending on your network connection and the amount of
packages that need to be installed.
The configuration for the MAAS controller will present you with a configuration screen. Verify the
hostname or IP address of the MAAS server (specifically, the region controller).
As of this writing, the latest MAAS version in the repository is 1.3+bzr1470+dfsg-0+1470+175~p
c. MAAS requires DNS and DHCP, which MAAS can provide. You can skip this step if you decide to
use your existing network’s DNS and DHCP services.
$ sudo apt-get install maas-dns maas-dhcp
2.4. Post-Install Tasks
a. Create a super user login id. It’s ok to accept the default name of ‘root’.
Dell Inc Deploying workloads with Juju and MAAS in Ubuntu 13.04
9
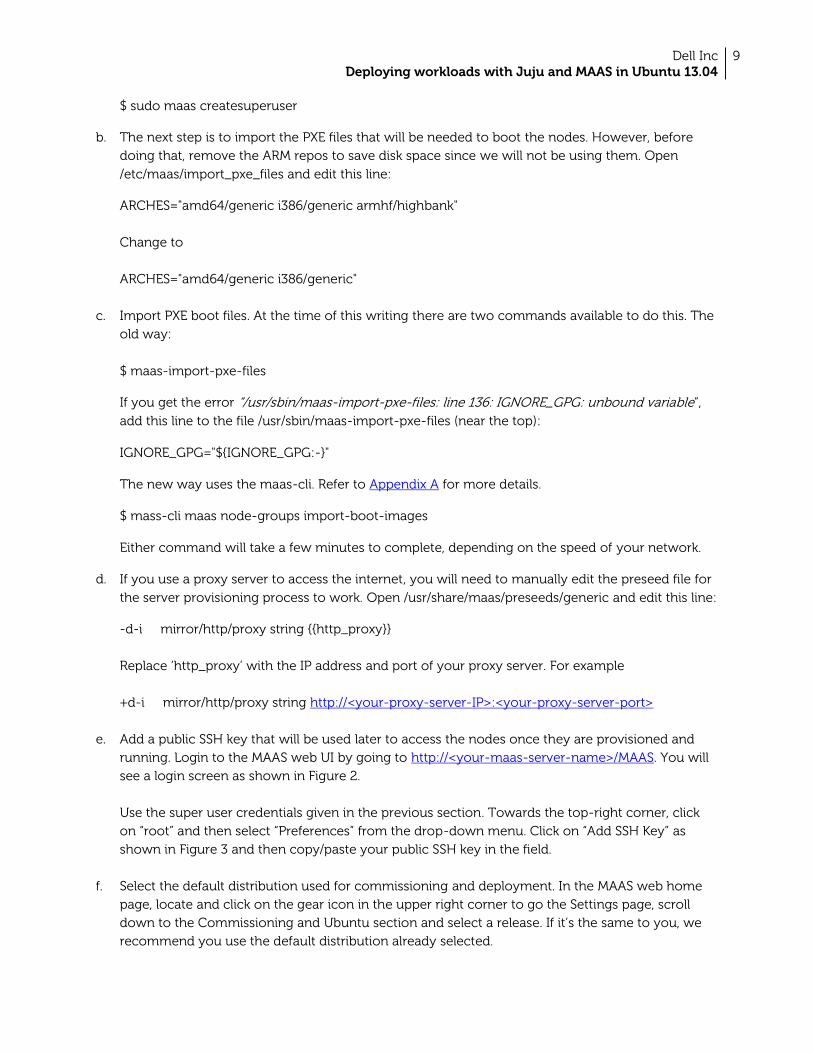
$ sudo maas createsuperuser
b. The next step is to import the PXE files that will be needed to boot the nodes. However, before
doing that, remove the ARM repos to save disk space since we will not be using them. Open
/etc/maas/import_pxe_files and edit this line:
ARCHES="amd64/generic i386/generic armhf/highbank"
Change to
ARCHES="amd64/generic i386/generic"
c. Import PXE boot files. At the time of this writing there are two commands available to do this. The
old way:
$ maas-import-pxe-files
If you get the error “/usr/sbin/maas-import-pxe-files: line 136: IGNORE_GPG: unbound variable”,
add this line to the file /usr/sbin/maas-import-pxe-files (near the top):
IGNORE_GPG="${IGNORE_GPG:-}"
The new way uses the maas-cli. Refer to Appendix A for more details.
$ mass-cli maas node-groups import-boot-images
Either command will take a few minutes to complete, depending on the speed of your network.
d. If you use a proxy server to access the internet, you will need to manually edit the preseed file for
the server provisioning process to work. Open /usr/share/maas/preseeds/generic and edit this line:
-d-i mirror/http/proxy string {{http_proxy}}
Replace ‘http_proxy’ with the IP address and port of your proxy server. For example
+d-i mirror/http/proxy string http://<your-proxy-server-IP>:<your-proxy-server-port>
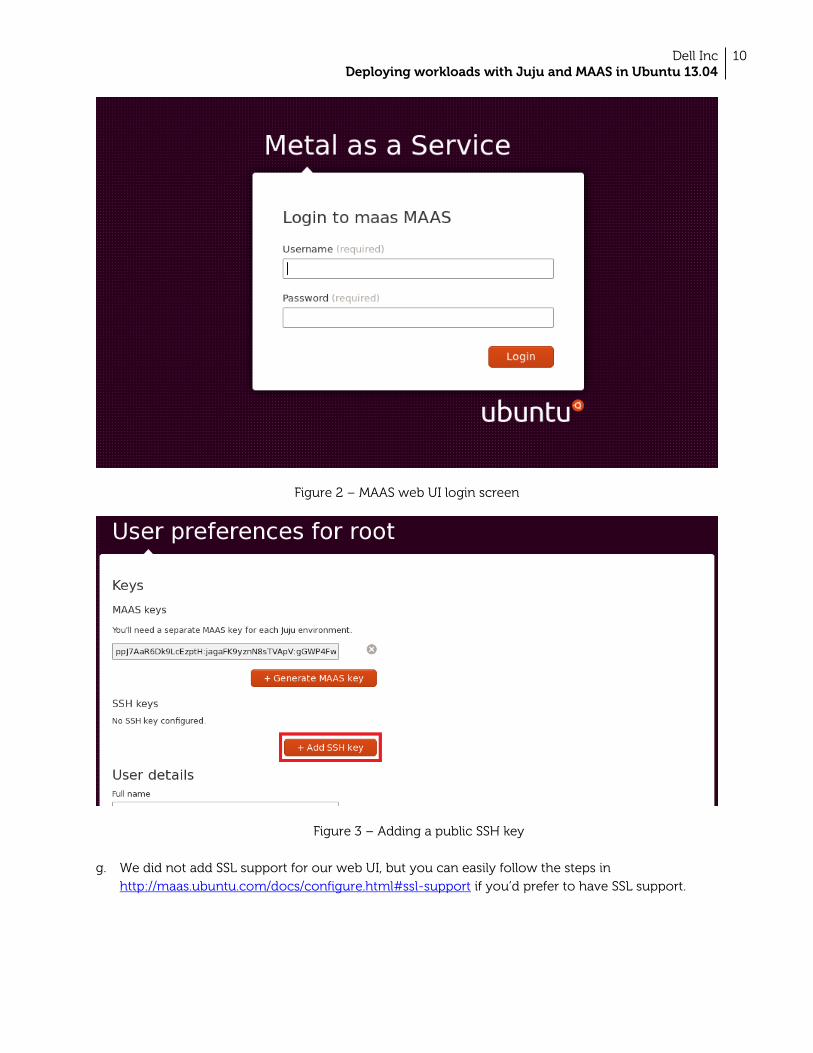
e. Add a public SSH key that will be used later to access the nodes once they are provisioned and
running. Login to the MAAS web UI by going to http://<your-maas-server-name>/MAAS. You will
see a login screen as shown in Figure 2.
Use the super user credentials given in the previous section. Towards the top-right corner, click
on “root” and then select “Preferences” from the drop-down menu. Click on “Add SSH Key” as
shown in Figure 3 and then copy/paste your public SSH key in the field.
f. Select the default distribution used for commissioning and deployment. In the MAAS web home
page, locate and click on the gear icon in the upper right corner to go the Settings page, scroll
down to the Commissioning and Ubuntu section and select a release. If it’s the same to you, we
recommend you use the default distribution already selected.
Dell Inc Deploying workloads with Juju and MAAS in Ubuntu 13.04
10
Figure 2 – MAAS web UI login screen
Figure 3 – Adding a public SSH key
g. We did not add SSL support for our web UI, but you can easily follow the steps in
http://maas.ubuntu.com/docs/configure.html#ssl-support if you’d prefer to have SSL support.

Dell Inc Deploying workloads with Juju and MAAS in Ubuntu 13.04
11
2.5. Configuring DNS and DHCP services
2.5.1. Using your existing DNS and DHCP services
If you choose to use your existing DNS and DHCP services, make sure you follow the guidelines for
manual DHCP configuration:
http://maas.ubuntu.com/docs/configure.html#manual-dhcp
In our lab, we used our existing DHCP server and all we had to do was change the IP address for the
‘next-server’ parameter in our DHCP services configuration file to that of our MAAS server (where
TFTP is running). Be sure to restart the DHCP service for the change to take effect.
2.5.2. Using MAAS to provide DNS and DHCP services
If instead you want to use MAAS to control DNS and DHCP, you can use the MAAS cli (see Appendix A)
to configure these services by following the instructions listed here:
http://maas.ubuntu.com/docs/maascli.html#cli-dhcp
Alternatively, you can use the web UI to configure DNS and DHCP. In the MAAS web home page, click
on the gear icon in the upper right corner of the home page. Next, local the “Cluster Controllers”
section and click the edit icon for your cluster, as indicated with the red square in Figure 4.
Figure 4 – MAAS settings page

Dell Inc Deploying workloads with Juju and MAAS in Ubuntu 13.04
12
Next, in the interface section of the Edit Cluster controller page, click the edit icon for the interface
you wish to use. You may have to add an interface if the one you wish to use isn’t visible. See Figure 5.
Finally, on the Edit Cluster Interface page, select from the ‘Management’ drop-down menu whether
you want the interface to manage DNS and/or DHCP and fill out all the required fields. When done,
click "Save Interface".
If you need to make additional, fine-grained changes to your maas-dns setup, you can manually edit
the files in /usr/share/pyshared/provisioningserver/dns/templates/. Make sure to restart the bind9
service after any changes are made.
Figure 5 – Edit Cluster Controller
2.6. Provisioning
Once we’ve met hardware requirements, completed post-install activities and have MAAS properly
configured, we are ready to start provisioning servers. This process can be broken down into 3 stages:
Enlistment, Commissioning and Deployment.
2.6.1. Enlistment
The enlistment process starts when a server is manually powered on (by pressing the power button or
through the iDRAC) and registers itself with MAAS. When the server boots, it obtains an IP address and
then PXE boots from the Cluster Controller. The server then loads an ephemeral image that runs and
performs an initial discovery process via a preseed fed to cloud-init. The discovery process obtains
basic information such as network interfaces, MAC addresses and the machine’s architecture.
Dell Inc Deploying workloads with Juju and MAAS in Ubuntu 13.04
13
Once this information is gathered, a request to register the machine is made to the MAAS Region
Controller. When done, the server will be listed in MAAS with a ‘Declared’ state.
MAAS creates a ‘maas’ login ID and password in the iDRAC / BMC to power a server on or off. To verify,
click on a server’s FQDN (as shown in Figure 6), then click on “Edit node” and verify the power type
and parameters, which should include an IP address, login and password. The power type should
already be set to ‘IPMI’ and the power parameter driver should be set to ‘auto-detect’. If you have any
issues powering servers, try ‘IPMI 1.5’ for PowerEdge blades or ‘IPMI 2.0’ for PowerEdge rack and
tower servers.
2.6.2. Accept and Commission
Once a server is in the ‘Declared’ state, it must be accepted into MAAS in order for the commissioning
processes to begin and for it to be ready for deployment. The commissioning process is where MAAS
collects hardware information such as the number of CPU cores, memory, disk size, etc. which can be
later used as constraints.
To accept a server, click on a server and then you will see an “Accept & Commission” button. Once
you accept it, it will PXE boot from the MAAS Cluster Controller and will be instructed to run the same
ephemeral image. This time, however, the commissioning process will be instructed to gather more
information about the server, which will be sent back to the MAAS region controller via cloud-init.
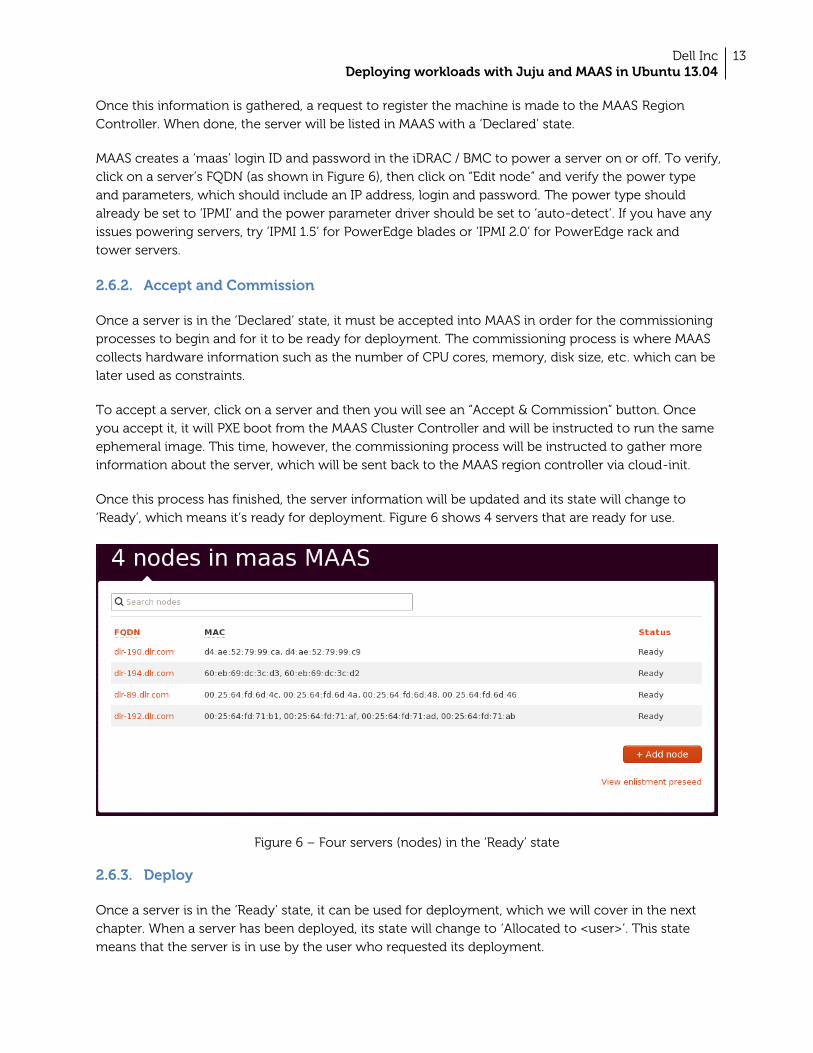
Once this process has finished, the server information will be updated and its state will change to
‘Ready’, which means it’s ready for deployment. Figure 6 shows 4 servers that are ready for use.
Figure 6 – Four servers (nodes) in the ‘Ready’ state
2.6.3. Deploy
Once a server is in the ‘Ready’ state, it can be used for deployment, which we will cover in the next
chapter. When a server has been deployed, its state will change to ‘Allocated to <user>’. This state
means that the server is in use by the user who requested its deployment.
Dell Inc Deploying workloads with Juju and MAAS in Ubuntu 13.04
14
3. Juju
3.1. What is Juju
Juju is software that provides service orchestration and is used to easily and quickly deploy and
manage services using components called ‘charms’.
For example, say you want to deploy a blog web site using the open source Wordpress application.
This can be done in 3 easy steps with Juju:
1. Deploy the Wordpress Juju charm
2. This charm requires a database backend, deploy the MySQL Juju charm.
3. Associate both charms together.
This process illustrates the simplicity involved in deploying a new application in a matter of minutes.
In addition, you can easily scale up or down in one simple step by adding or removing charm units.
Juju charms can be deployed on cloud services such as Amazon Web Services (AWS), Microsoft Azure,
OpenStack and HP Cloud. It can also be used on bare metal using MAAS, which is what we cover in
this whitepaper.
3.2. Installation and configuration
3.2.1. Juju-core vs. juju
Canonical is in the process of transitioning Juju’s programming infrastructure from python to
Google’s Go language. Python’s juju (pyjuju) is installed by specifying the “juju” package, whereas Go’s
juju is installed by specifying the “juju-core” package.
Starting with Ubuntu 13.10, juju-core will become the default Juju installation, and can be installed by
specifying “juju” instead of “juju-core”. In this whitepaper, we use juju-core since that is what Ubuntu
will use by default going forward.
3.2.2. Package installation
For simplicity purposes, we installed the juju packages in the same server where we installed MAAS.
Installation and configuration is simple and fast; you can follow the instructions at
https://juju.ubuntu.com/docs/getting-started.html. However, if you are using Ubuntu 12.04 LTS, you
can get the latest Juju packages from a different repository. Add to /etc/apt/sources.list:
deb http://ubuntu-cloud.archive.canonical.com/ubuntu precise-updates/cloud-tools main
Install package:
$ sudo apt-get update && sudo apt-get install juju-core

Dell Inc Deploying workloads with Juju and MAAS in Ubuntu 13.04
15
3.2.3. The environments.yaml file
We now need to configure Juju to be used with MAAS, which is done by generating and editing the
file ~/.juju/environments.yaml. A template can be generated with ‘juju generate-config’, but you have
to comment out a lot of extra lines that are generated for other providers such as Amazon’s AWS and
HP Cloud. To use with MAAS, this is what our environments.yaml file looks like:
default: maas
environments:
maas:
type: maas
maas-server: 'http://<MAAS-server-IP-address>:80/MAAS/'
maas-oauth: ’ <MAAS-API-Key>'
admin-secret: '<any-arbitrary-string>'
default-series: raring
Table 2 lists the parameters that will be different for your deployment.
Parameter Value
maas-server The URL of your MAAS server. Use an IP address, and be sure to add port 80.
maas-oauth The API key. Refer to Appendix A for instructions on how to extract it.
admin-secret Cleartext string used for API access. Any text string is OK.
default-series Ubuntu release you’re using to deploy charms. We use Ubuntu 13.04, a.k.a. raring.
Table 2 – Parameters to set in environments.yaml
3.3. Bootstrap node
Before you can deploy any Juju charms, you need to deploy a Juju bootstrap node. This node is used
by Juju to deploy and control other services. Table 3 lists the minimum hardware requirements for
the bootstrap node.
Component Minimum Required
CPU Dual-core or better
Memory 4 GB
Disk Single disk or RAID 1 boot device of 150 GB
Network 2 x 1GB NICs, external internet access for downloading media
Table 3 – Minimum hardware requirements for Juju bootstrap node
To launch the bootstrap node, run:
$ juju sync-tools
$ juju bootstrap
You can view a more verbose output by passing the ‘-v’ parameter in the above commands.
If your network is behind a firewall or a proxy server, then run:
$ juju bootstrap --upload-tools

Dell Inc Deploying workloads with Juju and MAAS in Ubuntu 13.04
16
In both instances, we need to copy tools from the Ubuntu repositories into the bootstrap node so that
it can do its job: one of the servers will be powered on automatically (via IPMI), Ubuntu will be
installed (will use the OS release specified in MAAS), the node will bootstrap and it will be configured
accordingly so it’s ready to run your Juju environment.
Dell Inc Deploying workloads with Juju and MAAS in Ubuntu 13.04
17
4. Juju charms
The magic behind Juju is a collection of software components called charms. These are the
encapsulated knowledge of how to properly deploy and configure the services you will want to
deploy on your hardware or on your cloud. Charms make it quick and easy to reliably and repeatedly
deploy services.
4.1. Downloading charms
When deploying charms you can either 1) download them from external repositories as you deploy,
or 2) download them first to a local repository and then point to it as you deploy.
If you are in a network environment where there may be some restrictions on internet access, it is
recommended that you download the charms to a local repository to prevent any network
connectivity issues during deployment. In our case, we downloaded the charms to the same server
where we installed juju (which if you remember from section 3.2.2, is the same server where we
installed MAAS). Charms can be downloaded using the Bazaar version control tool:
Install Bazaar if needed:
$ sudo apt-get install bzr
To see a full list of available charms, go to https://code.launchpad.net/~charmers. To download a
specific charm, run:
$ mkdir /opt/charms/raring; cd /opt/charms/raring
$ bzr branch lp:charms/<charm-name>
For example, to download the ‘mediawiki’ charm, run:
$ bzr branch lp:charms/mediawiki
Alternatively, if you have a direct connection to the internet, you can use:
$ sudo apt-get install charm-tools
$ charm get <charm>
4.2. Constraints
Constraints allow you to have some degree of control over which hardware you wish to deploy
services to. Constraints can be set for environments as well as services.
A simple example of using constraints can be something like this:
$ juju deploy mysql --constraints mem=10G
This tells juju to deploy the mysql charm on a system with at least 10 GB of memory. Juju will attempt
to use the machine with the minimum specified amount of RAM and smallest number of CPUs
available to deploy the charm on.

Dell Inc Deploying workloads with Juju and MAAS in Ubuntu 13.04
18
More details and examples of how to utilize constraints can be found on the Juju documentation site:
https://juju.ubuntu.com/docs/charms-constraints.html
4.3. Deploying Wordpress
The following is an example of how to deploy Wordpress, an open source web-based blogging
application. It is assumed you have bootstrapped your environment (section 3.3) and you have at least
2 servers in the ‘Ready’ state in MAAS to deploy to.
1. Download charms if you haven’t already. Since the Wordpress application requires a database
backend, you will need to download both the wordpress and the mysql charms.
$ mkdir –p /opt/charms/raring; cd /opt/charms/raring
$ bzr branch lp:charms/wordpress
$ bzr branch lp:charms/mysql
2. Deploy charms. Assuming we downloaded the charms to local directory /opt/charms/raring, we
specify the location of the repository in our deploy command:
$ juju deploy –-repository=/opt/charms/raring local:wordpress
$ juju deploy –-repository=/opt/charms/raring local:mysql
The ‘local’ option tells Juju to look for the charm in a local repository.
As mentioned in section 4.2, you can use constraints to have more control over what servers you
deploy charms to. For more details, see https://juju.ubuntu.com/docs/charms-constraints.html
If you go to the MAAS home page, you should see that two servers have changed status from
‘Ready’ to ‘Allocated to root’. The servers will go through a bootstrapping process where they will
boot via PXE, the OS will be installed and then the corresponding application packages will be
installed and configured.
3. Get status:
$ juju status wordpress
$ juju status mysql
For ease of readability, we omit the output here, but the critical parameter to look for is “agent-
state”. While the bootstrapping process is ongoing, agent-state will be “pending”. Check again
after 5-10 minutes (depending on your network connection); when done, agent-state should be
‘started’.
4. Add charm relation. Because wordpress requires a database backend, we need to add a database
relation to it. A charm relation is how juju charms are tied together. Juju takes care of it for us
with one simple command:
$ juju add-relation wordpress mysql
Dell Inc Deploying workloads with Juju and MAAS in Ubuntu 13.04
19
5. Get status:
$ juju status wordpress
environment: maas
machines:
"1":
agent-state: started
agent-version: 1.14.1
dns-name: dlr-112.dlr.com
instance-id: /MAAS/api/1.0/nodes/node-36c1be14-301b-11e3-8f20-5254004c0416/
series: precise
services:
wordpress:
charm: local:precise/wordpress-93
exposed: false
relations:
db:
- mysql
loadbalancer:
- wordpress
units:
wordpress/0:
agent-state: started
agent-version: 1.14.1
machine: "1"
open-ports:
- 80/tcp
public-address: dlr-112.dlr.com
This output provides information about the machine where the service was deployed to and
about the service itself. Pay close attention to the items in bold:
The ‘relations” field denotes relationships to other services. Since we added a relation to a
MySQL service (step 4), we see it listed here.
The ‘agent-state’ field denotes the status of service. When is set to ‘started’, the service is
ready for use.
The ‘public-address’ field denotes the URL where the service can be accessed at.
We omitted the status of the mysql service, but you should see a similar output, with its ‘relations’
field showing a relation to the wordpress service.
6. We now have a working Wordpress deployment. Figure 7 illustrates the welcome screen when
accessing the service via a web browser.
7. For additional configuration options for the Wordpress service, see
https://jujucharms.com/precise/wordpress

Dell Inc Deploying workloads with Juju and MAAS in Ubuntu 13.04
20
Figure 7 – Wordpress welcome screen
4.4. Deploying Juju-GUI
The following is an example of how to deploy Juju-GUI, a graphical tool that allows you to see and
manage charms instead. Because juju-gui has a small footprint and for demonstration purposes, in
this example we’re going to deploy it to the same server as the bootstrap node.
1. Download charm.
$ mkdir –p /opt/charms/raring; cd /opt/charms/raring
$ bzr branch lp:charms/juju-gui
2. Deploy charm. Run:
$ juju deploy --to 0 –-repository=/opt/charms/raring local:juju-gui
The ”--to <machine-id>” parameter tells Juju to deploy the charm to the bootstrap node, which
usually has id 0. You can verify the machine id with the “juju status” command.
Dell Inc Deploying workloads with Juju and MAAS in Ubuntu 13.04
21
3. Get status:
$ juju status juju-gui
environment: maas
machines:
"0":
agent-state: started
agent-version: 1.14.1.1
dns-name: dlr-89.dlr.com
instance-id: /MAAS/api/1.0/nodes/node-1e7ad04e-1657-11e3-9a32-c80aa99e96ca/
series: raring
services:
juju-gui:
charm: local:raring/juju-gui-80
exposed: false
units:
juju-gui/0:
agent-state: started
agent-version: 1.14.1.1
machine: "0"
public-address: dlr-89.dlr.com
4. After a few minutes, the deployment should be complete. You can access the juju-gui site at its
public address, in this case http://dlr-89.dlr.com
5. For full configuration options, see https://jujucharms.com/precise/juju-gui
4.5. Deploying OpenStack
Deploying a basic OpenStack environment is significantly complex because of the large number of
charms required (one for each OpenStack component) and the relationships between them. In this
example we include all the steps we took to get us there, but should only be taken as a reference, not
as a definitive guide.
We are assuming that you are very familiar with OpenStack. This is a very simple example, and some
additional configuration might be needed in your specific environment to get everything working.
Note that Swift was not deployed here.
This setup uses five servers registered to the MAAS server. The services deployed to them will be:
One node running as the juju bootstrap node
One node running nova-cloud-controller, glance, cinder, keystone, openstack-dashboard and
quantum-gateway
One node running ceph
One node running rabbitmq and mysql
One node running nova-compute

Dell Inc Deploying workloads with Juju and MAAS in Ubuntu 13.04
22
1. Download charms
$ mkdir -p /opt/charms/raring; cd /opt/charms/raring
$ for i in mysql rabbitmq-server ceph quantum-gateway glance keystone nova-cloud-controller \
nova-compute cinder openstack-dashboard rabbitmq-server ; do
> bzr branch lp:charms/$i
> done
2. Create a configuration file in your home directory and call it ‘openstack-raring.cfg’. This file will
contain any specific settings for each charm. You can read about these settings in each charm's
config.yaml file. Some of the charms also contain a README that will help explain some of the
settings as well as any other important information. An example configuration file is below:
keystone:
admin-password: 'openstack'
admin-token: 'ubuntutesting'
nova-cloud-controller:
network-manager: 'Quantum'
nova-compute:
config-flags: 'auto_assign_floating_ip=False'
enable-live-migration: 'True'
migration-auth-type: 'ssh'
quantum-gateway:
openstack-origin:distro
ext-port: em2
ceph:
monitor-count: 1
fsid: '6547bd3e-1397-11e2-82e5-53567c8d32dc'
monitor-secret: 'AQCXrnAZwI7KGBAAiPofMKEXKu5bUzoYLVkbQ=='
osd-devices: '/dev/sdb'
osd-reformat: 'yes'
ephemeral-unmount: '/mnt'
cinder:
block-device: 'None'
3. Deploy services:
$ juju deploy --repository=/opt/charms/raring local:mysql
$ juju deploy --to 1 --repository=/opt/charms/raring local:rabbitmq-server
$ juju deploy --config=openstack-raring.cfg --repository=/opt/charms/raring local:keystone
$ juju deploy --to 2 --config=openstack-raring.cfg --repository=/opt/charms/raring local:nova-
cloud-controller
$ juju deploy --to 2 --repository=/opt/charms/raring local:glance
$ juju deploy --to 2 --config=openstack-raring.cfg --repository=/opt/charms/raring local:cinder
$ juju deploy --to 2 --config=openstack-raring.cfg --repository=/opt/charms/raring
local:quantum-gateway

Dell Inc Deploying workloads with Juju and MAAS in Ubuntu 13.04
23
$ juju deploy --to 2 --repository=/opt/charms/raring local:openstack-dashboard
$ juju deploy --config=openstack-raring.cfg --repository=/opt/charms/raring local:ceph
$ juju deploy --config=openstack-raring.cfg --repository=/opt/charms/raring local:nova-compute
These commands deploy the OpenStack charms to four machines. Note the use of juju's ability
to co-locate multiple services onto one machine using the "--to" parameter. In this case, several
services were deployed to machine 2. This is useful if you are limited on the number of machines
you have on hand and you want to install a small cluster for testing or development.
4. When the services are deployed, set up all of the relationships:
$ juju add-relation keystone mysql
$ juju add-relation nova-cloud-controller mysql
$ juju add-relation nova-cloud-controller rabbitmq-server
$ juju add-relation nova-cloud-controller glance
$ juju add-relation nova-cloud-controller keystone
$ juju add-relation nova-compute nova-cloud-controller
$ juju add-relation nova-compute mysql
$ juju add-relation nova-compute rabbitmq-server:amqp
$ juju add-relation nova-compute glance
$ juju add-relation nova-compute ceph
$ juju add-relation quantum-gateway mysql
$ juju add-relation quantum-gateway rabbitmq-server
$ juju add-relation quantum-gateway nova-cloud-controller
$ juju add-relation openstack-dashboard keystone
5. Point your browser to the machine that is running the openstack-dashboard (Horizon) and log in
to the web interface using the openstack password you set in your configuration file. If you are
not sure which system the dashboard is deployed to, you can run the following command and
look for the 'public-address' parameter:
$ juju status openstack-dashboard
6. You can use the Horizon dashboard as well as the command line to complete any post-
deployment tasks, such as setting up networks, uploading images, configuring security groups,
adding users, etc.
7. You can easily scale up your OpenStack environment by adding more nodes. For example, once
you enlist and commission a new node via MAAS, you can then add it as an OpenStack compute
node by running:
$ juju add-unit nova-compute
4.6. Destroying services
When you no longer need a service (charm), you can easily remove it so that you can repurpose the
underlying hardware. After verifying that the service is no longer being used, run this:

Dell Inc Deploying workloads with Juju and MAAS in Ubuntu 13.04
24
$ juju destroy-service <service-name>
The service may take a few moments to shut down. Keep checking with “juju status”. After the service
has been removed, the underlying hardware (machine) is still in use. To release the machine
(assuming no other services are also using it), run this:
$ juju terminate-machine <machine>
If there is another charm deployed to this machine, the above command will fail.
To destroy your entire Juju environment, which includes all services, machines and the bootstrap
node, run this:
$ juju destroy-environment
Because this will destroy everything and return all nodes to the ‘Ready’ state in MAAS, you will be
prompted to confirm the action.

Dell Inc Deploying workloads with Juju and MAAS in Ubuntu 13.04
25
5. Conclusion
Using MAAS and Juju together can provide an easy and powerful way to quickly deploy applications
without having to learn the installation and configuration details for each application. An application
can be deployed in one step and configured with a few simple commands.
Applications can be quickly scaled up or down as requirements change. When an application is no
longer required, it can quickly be disposed of and return the underlying hardware to a common pool
so it can readily be used again.
If you are ready to try MAAS and Juju on Dell PowerEdge or PowerEdge-C servers, contact your Dell
or Canonical sales representatives, we are here to help you.
Dell Inc Deploying workloads with Juju and MAAS in Ubuntu 13.04
26
6. Appendices
Appendix A - MAAS-cli
MAAS provides a CLI command that exposes the APIs that you can then use to script out functionality
or if you simply prefer working with a command console instead of a web UI. The documentation at
http://maas.ubuntu.com/docs/maascli.html#maas-cli-commands provides a fairly complete list of all
available commands, which we will not cover here except for a few useful examples.
Getting the API Key
To be able to run maas-cli commands, you need the API key for your MAAS environment, which can
be easily obtained by logging in to the web UI:
http://maas.ubuntu.com/docs/maascli.html#api-key
All maas-cli commands require a profile name, which defaults to ‘maas’ and is what we will use here.
Logging in
$ maas-cli login <profile> http://<maas-server-name>/MAAS/api/1.0 <api-key>
The command above would then look something like:
$ maas-cli login maas http://maas.dell.com/MAAS/api/1.0 ppJ7AaR6Dk9:jagaFK9yz4FwwQcMWGJ4FF
Listing nodes
Return list of all registered nodes in JSON format:
$ maas-cli maas nodes list
An example output for a node looks like:
{
"status": 4,
"macaddress_set": [
{
"resource_uri": "/MAAS/api/1.0/nodes/node-418b24b6-1658-11e3-9a32-
c80aa99e96ca/macs/60:eb:69:dc:3c:d2/",
"mac_address": "60:eb:69:dc:3c:d2"
},
{
"resource_uri": "/MAAS/api/1.0/nodes/node-418b24b6-1658-11e3-9a32-
c80aa99e96ca/macs/60:eb:69:dc:3c:d3/",
"mac_address": "60:eb:69:dc:3c:d3"
}
],
"netboot": true,

Dell Inc Deploying workloads with Juju and MAAS in Ubuntu 13.04
27
"hostname": "dlr-194.dlr.com",
"power_type": "ipmi",
"system_id": "node-418b24b6-1658-11e3-9a32-c80aa99e96ca",
"architecture": "amd64/generic",
"tag_names": [
"metal"
],
"resource_uri": "/MAAS/api/1.0/nodes/node-418b24b6-1658-11e3-9a32-c80aa99e96ca/"
}
Accepting nodes
To accept all nodes that are in the ‘Declared’ state (so they can be commissioned):
$ maas-cli maas nodes accept-all
Defining nodes power parameters
Specify power parameters to start and shut down servers:
$ maas-cli maas node update <system-id> power_type="ipmi" \
power_parameters_power_address=<ip-address> power_parameters_power_user=<idrac-login> \
power_parameters_power_pass=<idrac-password>;
To get a node’s system-id, list all nodes and extract information from there.
Deleting nodes
If a node is allocated to a user, it must first be released:
$ maas-cli maas node release <system-id>
Then delete it:
$ maas-cli maas node delete <system-id>
To get a node’s system-id, list all nodes and extract information from there.
Dell Inc Deploying workloads with Juju and MAAS in Ubuntu 13.04
28
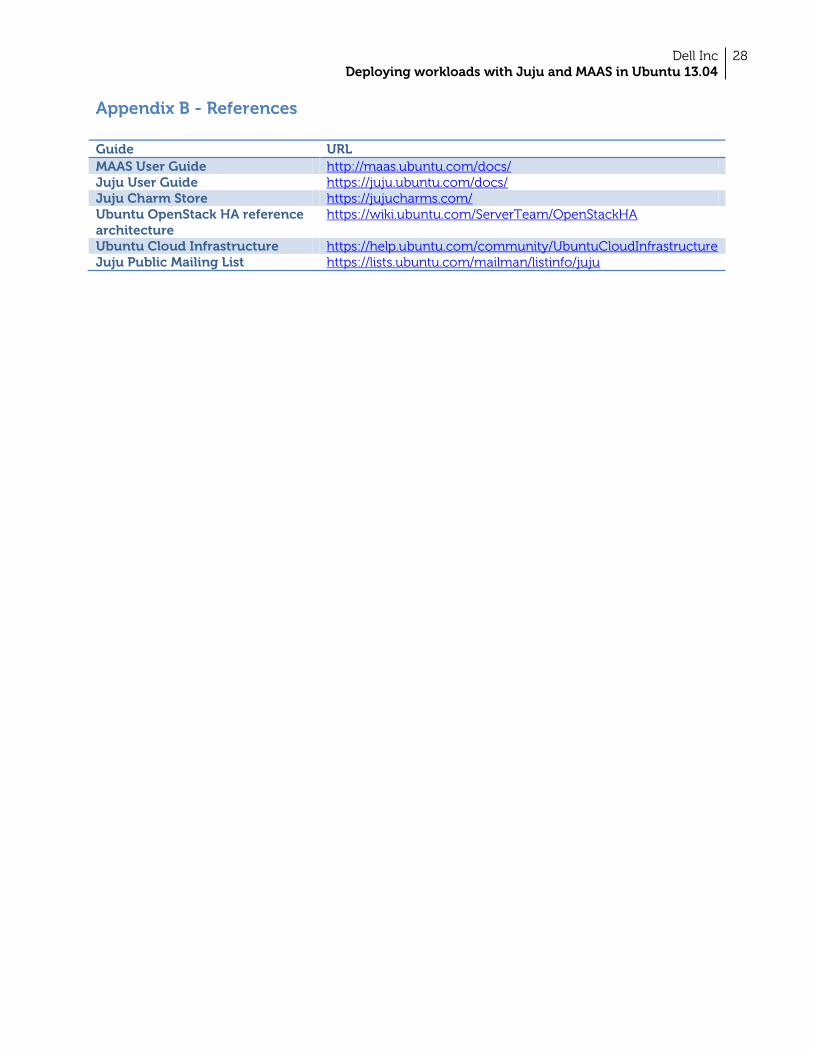
Appendix B - References
Guide URL
MAAS User Guide http://maas.ubuntu.com/docs/ Juju User Guide https://juju.ubuntu.com/docs/ Juju Charm Store https://jujucharms.com/ Ubuntu OpenStack HA reference architecture
https://wiki.ubuntu.com/ServerTeam/OpenStackHA
Ubuntu Cloud Infrastructure https://help.ubuntu.com/community/UbuntuCloudInfrastructure Juju Public Mailing List https://lists.ubuntu.com/mailman/listinfo/juju