DEPARTMENT OF COMPUTER SCIENCE AND ENGG. … · DEPARTMENT OF COMPUTER SCIENCE AND ENGG. CS1253 –...
22
www.allsyllabus.com www.allsyllabus.com DEPARTMENT OF COMPUTER SCIENCE AND ENGG. CS1253 – VISUAL PROGRAMMING UNIT 1 CHAPTER 1 The Windows Environment A History of Windows Windows was announced by Microsoft Corporation in November 1983 (post-Lisa but pre-Macintosh) and was released two years later in November 1985 Windows 2.0 was released in November 1987 Windows 3.0 was introduced on May 22, 1990 Microsoft Windows version 3.1 was released in April 1992 Windows NT, introduced in July 1993 Windows 95 was introduced in August 1995 Windows 98 was released in June 1998 Aspects of Windows Both Windows 98 and Windows NT are 32-bit preemptive multitasking and multithreading graphical operating systems. Windows possesses a graphical user interface (GUI), sometimes also called a "visual interface" or "graphical windowing environment.― All GUIs make use of graphics on a bitmapped video display. Graphics provides better utilization of screen real estate, a visually rich environment for conveying information, and the possibility of a WYSIWYG (what you see is what you get) video display of graphics and formatted text prepared for a printed document. In earlier days, the video display was used solely to echo text that the user typed using the keyboard. In a graphical user interface, the video display itself becomes a source of user input. The video display shows various graphical objects in the form of icons and input devices such as buttons and scroll bars. Using the keyboard (or, more directly, a pointing device such as a mouse), the user can directly manipulate these objects on the screen. Graphics objects can be dragged, buttons can be pushed, and scroll bars can be scrolled The interaction between the user and a program thus becomes more intimate. Rather than the one-way cycle of information from the keyboard to the program to the video display, the user directly interacts with the objects on the display. Users no longer expect to spend long periods of time learning how to use the computer or mastering a new program. Windows helps because all applications have the same fundamental look and feel. The program occupies a window—usually a rectangular area on the screen. Each window is identified by a caption bar. Most program functions are initiated through the program's menus. A user can view the display of information too large to
Transcript of DEPARTMENT OF COMPUTER SCIENCE AND ENGG. … · DEPARTMENT OF COMPUTER SCIENCE AND ENGG. CS1253 –...

www.allsyllabus.com
www.allsyllabus.com
DEPARTMENT OF COMPUTER SCIENCE AND ENGG.
CS1253 – VISUAL PROGRAMMING
UNIT 1
CHAPTER 1
The Windows Environment
A History of Windows
Windows was announced by Microsoft Corporation in November 1983 (post-Lisa but
pre-Macintosh) and was released two years later in November 1985
Windows 2.0 was released in November 1987
Windows 3.0 was introduced on May 22, 1990
Microsoft Windows version 3.1 was released in April 1992
Windows NT, introduced in July 1993
Windows 95 was introduced in August 1995
Windows 98 was released in June 1998
Aspects of Windows
Both Windows 98 and Windows NT are 32-bit preemptive multitasking and
multithreading graphical operating systems. Windows possesses a graphical user
interface (GUI), sometimes also called a "visual interface" or "graphical windowing
environment.―
All GUIs make use of graphics on a bitmapped video display. Graphics provides
better utilization of screen real estate, a visually rich environment for conveying
information, and the possibility of a WYSIWYG (what you see is what you get) video
display of graphics and formatted text prepared for a printed document.
In earlier days, the video display was used solely to echo text that the user typed using
the keyboard. In a graphical user interface, the video display itself becomes a source
of user input. The video display shows various graphical objects in the form of icons
and input devices such as buttons and scroll bars. Using the keyboard (or, more
directly, a pointing device such as a mouse), the user can directly manipulate these
objects on the screen. Graphics objects can be dragged, buttons can be pushed, and
scroll bars can be scrolled
The interaction between the user and a program thus becomes more intimate. Rather
than the one-way cycle of information from the keyboard to the program to the video
display, the user directly interacts with the objects on the display.
Users no longer expect to spend long periods of time learning how to use the
computer or mastering a new program. Windows helps because all applications have
the same fundamental look and feel. The program occupies a window—usually a
rectangular area on the screen.
Each window is identified by a caption bar. Most program functions are initiated
through the program's menus. A user can view the display of information too large to

www.allsyllabus.com
www.allsyllabus.com
fit on a single screen by using scroll bars. Some menu items invoke dialog boxes, into
which the user enters additional information.
One dialog box in particular, that used to open a file, can be found in almost every
large Windows program. This dialog box looks the same (or nearly the same) in all of
these Windows programs, and it is almost always invoked from the same menu
option.
From the programmer's perspective, the consistent user interface results from using
the routines built into Windows for constructing menus and dialog boxes. All menus
have the same keyboard and mouse interface because Windows—rather than the
application program—handles this job.
To facilitate the use of multiple programs, and the exchange of information among
them, Windows supports multitasking. Several Windows programs can be displayed
and running at the same time. Each program occupies a window on the screen. The
user can move the windows around on the screen, change their sizes, switch between
different programs, and transfer data from one program to another.
Earlier versions of Windows used a system of multitasking called "nonpreemptive."
This meant that Windows did not use the system timer to slice processing time
between the various programs running under the system. The programs themselves
had to voluntarily give up control so that other programs could run. Under Windows
NT and Windows 98, multitasking is preemptive and programs themselves can split
into multiple threads of execution that seem to run concurrently.
Programs running in Windows can share routines that are located in other files called
"dynamic-link libraries." Windows includes a mechanism to link the program with the
routines in the dynamic-link libraries at run time. Windows itself is basically a set of
dynamic-link libraries.
Windows is a graphical interface, and Windows programs can make full use of
graphics and formatted text on both the video display and the printer. A graphical
interface not only is more attractive in appearance but also can impart a high level of
information to the user
Programs written for Windows do not directly access the hardware of graphics display
devices such as the screen and printer. Instead, Windows includes a graphics
programming language (called the Graphics Device Interface, or GDI) that allows the
easy display of graphics and formatted text. Windows virtualizes display hardware. A
program written for Windows will run with any video board or any printer for which a
Windows device driver is available. The program does not need to determine what
type of device is attached to the system.
Dynamic Linking
Windows provides a wealth of function calls that an application can take advantage
of, mostly to implement its user interface and display text and graphics on the video
display. These functions are implemented in dynamic-link libraries, or DLLs.
When you run a Windows program, it interfaces to Windows through a process called
"dynamic linking." A Windows .EXE file contains references to the various dynamic-
link libraries it uses and the functions therein. When a Windows program is loaded
www.allsyllabus.com
www.allsyllabus.com
into memory, the calls in the program are resolved to point to the entries of the DLL
functions, which are also loaded into memory if not already there.
When you link a Windows program to produce an executable file, you must link with
special "import libraries" provided with your programming environment. These
import libraries contain the dynamic-link library names and reference information for
all the Windows function calls. The linker uses this information to construct the table
in the .EXE file that Windows uses to resolve calls to Windows functions when
loading the program.
Windows Programming Options
APIs and Memory Models
To a programmer, an operating system is defined by its API. An API encompasses all
the function calls that an application program can make of an operating system, as
well as definitions of associated data types and structures.
Windows NT and Windows 98 are both considered to support the Win32 API.
Language Options
Using C and the native APIs is not the only way to write programs for Windows 98.
However, this approach offers you the best performance, the most power, and the
greatest versatility in exploiting the features of Windows.
Executables are relatively small and don't require external libraries to run (except for
the Windows DLLs themselves, of course).
Visual Basic or Borland Delphi Microsoft
Microsoft Visual C++ with the Microsoft Foundation Class Library (MFC) - MFC
encapsulates many of the messier aspects of Windows programming in a collection of
C++ classes.
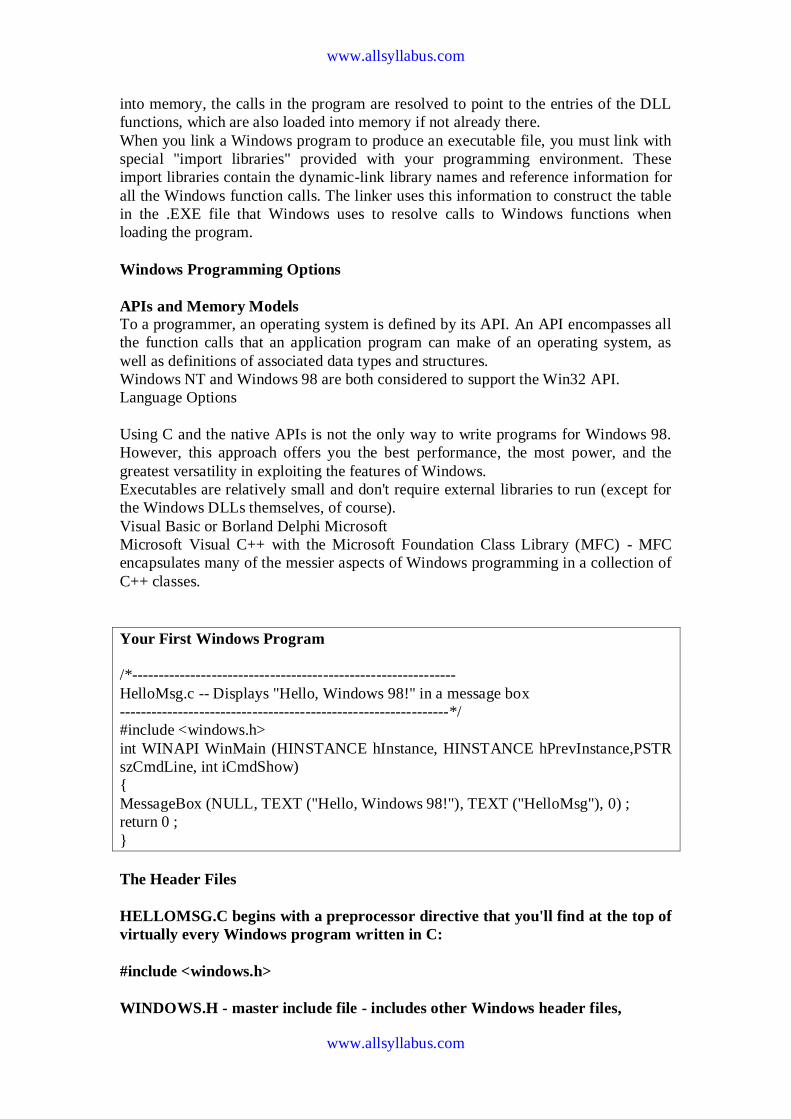
Your First Windows Program
/*-------------------------------------------------------------
HelloMsg.c -- Displays "Hello, Windows 98!" in a message box
--------------------------------------------------------------*/
#include <windows.h>
int WINAPI WinMain (HINSTANCE hInstance, HINSTANCE hPrevInstance,PSTR
szCmdLine, int iCmdShow)
{
MessageBox (NULL, TEXT ("Hello, Windows 98!"), TEXT ("HelloMsg"), 0) ;
return 0 ;
}
The Header Files
HELLOMSG.C begins with a preprocessor directive that you'll find at the top of
virtually every Windows program written in C:
#include <windows.h>
WINDOWS.H - master include file - includes other Windows header files,

www.allsyllabus.com
www.allsyllabus.com
some of which also include other header files.
The most important and most basic of these header files are:
WINDEF.H Basic type definitions.
WINNT.H Type definitions for Unicode support.
WINBASE.H Kernel functions.
WINUSER.H User interface functions.
WINGDI.H Graphics device interface functions.
These header files define all the Windows data types, function calls, data
structures, and constant identifiers.
Program Entry Point
Just as the entry point to a C program is the function main, the entry point to a
Windows program is WinMain, which always appears like this:
int WINAPI WinMain (HINSTANCE hInstance, HINSTANCE hPrevInstance,
PSTR szCmdLine, int iCmdShow)
Hungarian Notation
Prefix Data Type
b BOOL c or ch char
clr COLORREF cx, cy Horizontal or vertical distance dw DWORD h Handle l LONG n int p Pointer sz Zero-terminated string
w WORD wnd CWnd str CString
m_ class member variable
The WinMain function is declared as returning an int. The WINAPI identifier is
defined in WINDEF.H with the statement:
#define WINAPI __stdcall
This statement specifies a calling convention that involves how machine code is
generated to place function call arguments on the stack. Most Windows function calls
are declared as WINAPI.
The first parameter to WinMain is called an "instance handle." - simply a number that
an application uses to identify the program.
The second parameter to WinMain is always NULL (defined as 0).
The third parameter to WinMain is the command line used to run the program.

www.allsyllabus.com
www.allsyllabus.com
The fourth parameter to WinMain indicates how the program should be initially
displayed—either normally or maximized to fill the window, or minimized to be
displayed in the task list bar.
The MessageBox Function
The MessageBox function is designed to display short messages. The little window
that MessageBox displays is actually considered to be a dialog box, although not one
with a lot of versatility.
The first argument to MessageBox is normally a window handle.
The second argument is the text string that appears in the body of the message box,
and
the third argument is the text string that appears in the caption bar of the message box.
In HELLMSG.C, each of these text strings is enclosed in a TEXT macro.
The fourth argument to MessageBox can be a combination of constants beginning
with the prefix MB_ that are defined in WINUSER.H.
You can pick one constant from the first set to indicate what buttons you wish to
appear in the dialog box:
#define MB_OK 0x00000000L
#define MB_OKCANCEL 0x00000001L
#define MB_ABORTRETRYIGNORE 0x00000002L
#define MB_YESNOCANCEL 0x00000003L
#define MB_YESNO 0x00000004L
#define MB_RETRYCANCEL 0x00000005L
Windows Environment
CHAPTER 2
Windows and Messages
Windows
In Windows, the word "window" has a precise meaning. A window is a rectangular
area on the screen that receives user input and displays output in the form of text and
graphics.
The MessageBox function creates a window, but it is a special-purpose window of
limited flexibility. The message box window has a title bar with a close button, an
optional icon, one or more lines of text, and up to four buttons. However, the icons
and buttons must be chosen from a small collection that Windows provides for you.
We can't display graphics in a message box, and we can't add a menu to a message
box. For that we need to create our own windows.
An Architectural Overview
The user sees windows as objects on the screen and interacts directly with them using
the keyboard or the mouse. Interestingly enough, the programmer's perspective is
analogous to the user's perspective.

www.allsyllabus.com
www.allsyllabus.com
The window receives the user input in the form of "messages" to the window. A
window also uses messages to communicate with other windows. Getting a good feel
for messages is an important part of learning how to write programs for Windows.
Every window that a program creates has an associated window procedure. This
window procedure is a function that could be either in the program itself or in a
dynamic-link library. Windows sends a message to a window by calling the window
procedure. The window procedure does some processing based on the message and
then returns control to Windows.
More precisely, a window is always created based on a "window class." The window
class identifies the window procedure that processes messages to the window. The use
of a window class allows multiple windows to be based on the same window class
and hence use the same window procedure. For example, all buttons in all Windows
programs are based on the same window class. This window class is associated with a
window procedure located in a Windows dynamic-link library that processes
messages to all the button windows.
Creating the Window
The window class defines general characteristics of a window, thus allowing the same
window class to be used for creating many different windows.
When you go ahead and create a window by calling CreateWindow, you specify more
detailed information about the window.
Why all the characteristics of a window can't be specified in one shot.
Actually, dividing the information in this way is quite convenient. For example, all
push-button windows are created based on the same window class. The window
procedure associated with this window class is located inside Windows itself, and it is
responsible for processing keyboard and mouse input to the push button and defining
the button's visual appearance on the screen. All push buttons work the same way in
this respect.
But not all push buttons are the same. They almost certainly have different sizes,
different locations on the screen, and different text strings. These latter characteristics
are part of the window definition rather than the window class definition.
Creating the Window
hwnd = CreateWindow (szAppName, // window class name
TEXT ("The Hello Program"), // window caption
WS_OVERLAPPEDWINDOW, // window style
CW_USEDEFAULT, // initial x position
CW_USEDEFAULT, // initial y position
CW_USEDEFAULT, // initial x size
CW_USEDEFAULT, // initial y size
NULL, // parent window handle
NULL, // window menu handle
hInstance, // program instance handle
NULL) ; // creation parameters
Creating the Window –Overlapped window

www.allsyllabus.com
www.allsyllabus.com
It will have a title bar; a system menu button to the left of the title bar; a thick
window-sizing border; and minimize, maximize, and close buttons to the right of the
title bar. - standard style for windows,
In WINUSER.H, this style is a combination of several bit flags:
#define WS_OVERLAPPEDWINDOW
(WS_OVERLAPPED | \
WS_CAPTION | \
WS_SYSMENU | \
WS_THICKFRAME | \
WS_MINIMIZEBOX | \
WS_MAXIMIZEBOX)
By default, Windows positions successive newly created windows at stepped
horizontal and vertical offsets from the upper left corner of the display.
The CreateWindow call returns a handle to the created window. This handle is saved
in the variable hwnd, which is defined to be of type HWND ("handle to a window").
Every window in Windows has a handle. Your program uses the handle to refer to the
window. Many Windows functions require hwnd as an argument so that Windows
knows which window the function applies to. If a program creates many windows,
each has a different handle. The handle to a window is one of the most important
handles that a Windows program handles.
Displaying the Window
After the CreateWindow call returns, the window has been created internally in
Windows.
What this means basically is that Windows has allocated a block of memory to hold
all the information about the window that you specified in the CreateWindow call,
plus some other information, all of which Windows can find later based on the
window handle.
However, the window does not yet appear on the video display. Two more calls are
needed.
ShowWindow (hwnd, iCmdShow) ;
The first argument is the handle to the window just created by CreateWindow.
The second argument is the iCmdShow value passed as a parameter to WinMain. This
determines how the window is to be initially displayed on the screen, whether it's
normal, minimized, or maximized.
The user probably selected a preference when adding the program to the Start menu.
The value you receive from WinMain and pass to ShowWindow is
SW_SHOWNORMAL if the window is displayed normally,
SW_SHOWMAXIMIZED if the window is to be maximized, and
SW_SHOWMINNOACTIVE if the window is just to be displayed in the taskbar.

www.allsyllabus.com
www.allsyllabus.com
The ShowWindow function puts the window on the display. If the second argument to
ShowWindow is SW_SHOWNORMAL, the client area of the window is erased with
the background brush specified in the window class.
UpdateWindow (hwnd) ;
then causes the client area to be painted. It accomplishes this by sending the window
procedure ( the WndProc function in HELLOWIN.C) a WM_PAINT message.
The Message Loop After the UpdateWindow call, the window is fully visible on the video display. The
program must now make itself ready to read keyboard and mouse input from the user.
Windows maintains a "message queue" for each Windows program currently running
under Windows. When an input event occurs, Windows translates the event into a
"message" that it places in the program's message queue.
A program retrieves these messages from the message queue by executing a block of
code known as the "message loop":
while (GetMessage (&msg, NULL, 0, 0))
{
TranslateMessage (&msg) ;
DispatchMessage (&msg) ;
}
The Message Loop (2)
The msg variable is a structure of type MSG, which is defined in the
WINUSER.H header file like this:
typedef struct tagMSG
{
HWND hwnd ;
UINT message ;
WPARAM wParam ;
LPARAM lParam ;
DWORD time ;
POINT pt ;
}
MSG, * PMSG ;
The POINT data type is yet another structure, defined in the WINDEF.H header
file like this:
typedef struct tagPOINT
{
LONG x ;
LONG y ;
}
POINT, * PPOINT;
The Message Loop
TranslateMessage (&msg) ;
Passes the msg structure back to Windows for some keyboard translation.
www.allsyllabus.com
www.allsyllabus.com
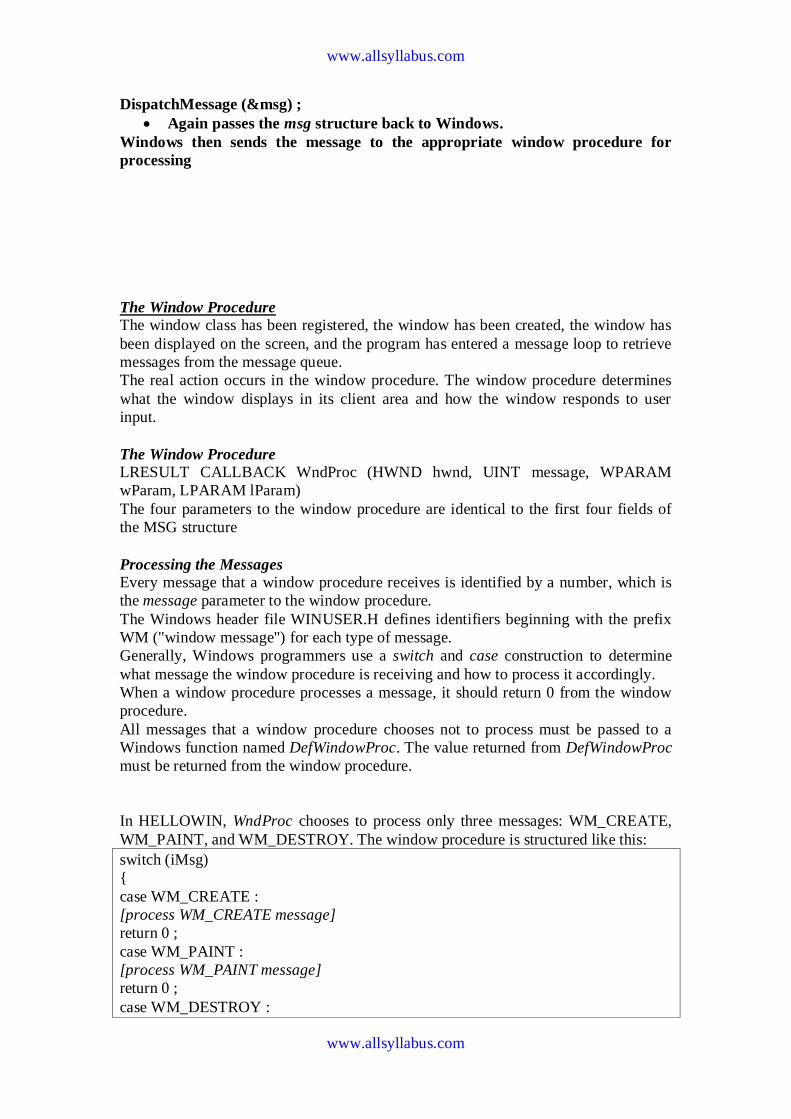
DispatchMessage (&msg) ;
Again passes the msg structure back to Windows.
Windows then sends the message to the appropriate window procedure for
processing
The Window Procedure
The window class has been registered, the window has been created, the window has
been displayed on the screen, and the program has entered a message loop to retrieve
messages from the message queue.
The real action occurs in the window procedure. The window procedure determines
what the window displays in its client area and how the window responds to user
input.
The Window Procedure
LRESULT CALLBACK WndProc (HWND hwnd, UINT message, WPARAM
wParam, LPARAM lParam)
The four parameters to the window procedure are identical to the first four fields of
the MSG structure
Processing the Messages Every message that a window procedure receives is identified by a number, which is
the message parameter to the window procedure.
The Windows header file WINUSER.H defines identifiers beginning with the prefix
WM ("window message") for each type of message.
Generally, Windows programmers use a switch and case construction to determine
what message the window procedure is receiving and how to process it accordingly.
When a window procedure processes a message, it should return 0 from the window
procedure.
All messages that a window procedure chooses not to process must be passed to a
Windows function named DefWindowProc. The value returned from DefWindowProc
must be returned from the window procedure.
In HELLOWIN, WndProc chooses to process only three messages: WM_CREATE,
WM_PAINT, and WM_DESTROY. The window procedure is structured like this:
switch (iMsg)
{
case WM_CREATE :
[process WM_CREATE message]
return 0 ;
case WM_PAINT :
[process WM_PAINT message]
return 0 ;
case WM_DESTROY :

www.allsyllabus.com
www.allsyllabus.com
[process WM_DESTROY message]
return 0 ;
}
return DefWindowProc (hwnd, iMsg, wParam, lParam) ;
It is important to call DefWindowProc for default processing of all messages that your
window procedure does not process. Otherwise behavior regarded as normal, such as
being able to terminate the program, will not work.
WINDOWS PROGRAMMING MODEL

www.allsyllabus.com
www.allsyllabus.com
CHAPTER 3
Text Output
Introduction Client area is the part of the window on which a program is free to draw and deliver
visual information to the user.
You can do almost anything you want with your program's client area—anything, that
is, except assume that it will be a particular size or that the size will remain constant
while your program is running.
When a program displays text or graphics in its client area, it is often said to be
"painting" its client area.
Windows programs can assume little about the size of their client areas or even the
size of text characters. Instead, they must use the facilities that Windows provides to
obtain information about the environment in which the program runs.
Painting and Repainting
In Windows, you can draw text and graphics only in the client area of your window,
and you cannot be assured that what you put will remain there until your program
specifically writes over it.
For instance, the user may move another program's window on the screen so that it
partially covers your application's window. Windows will not attempt to save the area
of your window that the other program covers.When the program is moved away,
Windows will request that your program repaint this portion of your client area.
Windows is a message-driven system. Windows informs applications of various
events by posting messages in the application's message queue or sending messages to
the appropriate window procedure.
Windows informs a window procedure that part of the window's client area needs
painting by posting a WM_PAINT message.
The WM_PAINT Message
Most Windows programs call the function UpdateWindow during initialization in
WinMain shortly before entering the message loop.
Windows takes this opportunity to send the window procedure its first WM_PAINT
message. This message informs the window procedure that the client area must be
painted.
Thereafter, that window procedure should be ready at almost any time to process
additional WM_PAINT messages and even to repaint the entire client area of the
window if necessary.

www.allsyllabus.com
www.allsyllabus.com
A window procedure receives a WM_PAINT message whenever one of the following
events occurs:
A previously hidden area of the window is brought into view when a user moves a
window or uncovers a window.
The user resizes the window (if the window class style has the CS_HREDRAW and
CW_VREDRAW bits set).
The program uses the ScrollWindow or ScrollDC function to scroll part of its client
area.
The program uses the InvalidateRect or InvalidateRgn function to explicitly generate
a WM_PAINT message.
Windows may sometimes post a WM_PAINT message when:
Windows removes a dialog box or message box that was overlaying part of the
window.
A menu is pulled down and then released.
A tool tip is displayed.
In a few cases, Windows always saves the area of the display it overwrites and then
restores it. This is the case whenever:
The mouse cursor is moved across the client area.
An icon is dragged across the client area.
Your program should be structured so that it accumulates all the information
necessary to paint the client area but paints only "on demand"—when Windows sends
the window procedure a WM_PAINT message.
If your program needs to update its client area at some other time, it can force
Windows to generate this WM_PAINT message.
Valid and Invalid Rectangles
Although a window procedure should be prepared to update the entire client area
whenever it receives a WM_PAINT message, it often needs to update only a smaller
area, most often a rectangular area within the client area. This is most obvious when a
dialog box overlies part of the client area. Repainting is required only for the
rectangular area uncovered when the dialog box is removed.
That area is known as an "invalid region" or "update region." The presence of an
invalid region in a client area is what prompts Windows to place a WM_PAINT
message in the application's message queue. Your window procedure receives a
WM_PAINT message only if part of your client area is invalid.
Windows internally maintains a "paint information structure" for each window. This
structure contains, among other information, the coordinates of the smallest rectangle
that encompasses the invalid region. This is known as the "invalid rectangle.―
If another region of the client area becomes invalid before the window procedure
processes a pending WM_PAINT message, Windows calculates a new invalid region
(and a new invalid rectangle) that encompasses both areas and stores this updated
information in the paint information structure.
Windows does not place multiple WM_PAINT messages in the message queue.
A window procedure can invalidate a rectangle in its own client area by calling
InvalidateRect.

www.allsyllabus.com
www.allsyllabus.com
If the message queue already contains a WM_PAINT message, Windows calculates a
new invalid rectangle. Otherwise, it places a WM_PAINT message in the message
queue.
A window procedure can obtain the coordinates of the invalid rectangle when it
receives a WM_PAINT message It can also obtain these coordinates at any other
time by calling GetUpdateRect.
After the window procedure calls BeginPaint during the WM_PAINT message, the
entire client area is validated. A program can also validate any rectangular area within
the client area by calling the ValidateRect function. If this call has the effect of
validating the entire invalid area, then any WM_PAINT message currently in the
queue is removed.
Introduction
The subsystem of Microsoft Windows responsible for displaying graphics on video
displays and printers is known as the Graphics Device Interface (GDI).
GDI is an extremely important part of Windows. Not only do the applications you
write for Windows use GDI for the display of visual information, but Windows itself
uses GDI for the visual display of user interface items such as menus, scroll bars,
icons, and mouse cursors.
The Device Context
When you want to draw on a graphics output device such as the screen or printer, you
must first obtain a handle to a device context (or DC).
In giving your program this handle, Windows is giving you permission to use the
device.
You then include the handle as an argument to the GDI functions to identify to
Windows the device on which you wish to draw.
The device context contains many "attributes" that determine how the GDI functions
work on the device.
These attributes allow GDI functions to have just a few arguments, such as starting
coordinates. The GDI functions do not need arguments for everything else that
Windows needs to display the object on the device.
For example, when you call TextOut, you need specify in the function only the device
context handle, the starting coordinates, the text, and the length of the text.
You don't need to specify the font, the color of the text, the color of the background
behind the text, or the intercharacter spacing.
These are all attributes that are part of the device context.
When you want to change one of these attributes, you call a function that does so.
Subsequent TextOut calls to that device context use the new attribute.
Getting a Device Context Handle
Windows provides several methods for obtaining a device context handle. If you
obtain a video display device context handle while processing a message, you should
release it before exiting the window procedure. After you release the handle, it is no
longer valid.

www.allsyllabus.com
www.allsyllabus.com
The most common method for obtaining a device context handle and then releasing it
involves using the BeginPaint and EndPaint calls when processing the WM_PAINT
message:
hdc = BeginPaint (hwnd, &ps) ;
[other program lines]
EndPaint (hwnd, &ps) ;
Getting a Device Context Handle
Windows programs can also obtain a handle to a device context while processing
messages other than WM_PAINT:
hdc = GetDC (hwnd) ;
[other program lines]
ReleaseDC (hwnd, hdc) ;
Getting a Device Context Handle
The BeginPaint, GetDC, and GetWindowDC calls obtain a device context associated
with a particular window on the video display.
A much more general function for obtaining a handle to a device context is
CreateDC:
hdc = CreateDC (pszDriver, pszDevice, pszOutput, pData) ;
[other program lines]
DeleteDC (hdc) ;
Getting Device Context Information
A device context usually refers to a physical display device such as a video display or
a printer.
Often, you need to obtain information about this device, including the size of the
display, in terms of both pixels and physical dimensions, and its color capabilities.
You can get this information by calling the GetDeviceCap ("get device capabilities")
function:
iValue = GetDeviceCaps (hdc, iIndex) ;
The iIndex argument is one of 29 identifiers defined in the WINGDI.H header file.
For example, the iIndex value of HORZRES causes GetDeviceCaps to return the
width of the device in pixels; a VERTRES argument returns the height of the device
in pixels.
If hdc is a handle to a screen device context, that's the same information you can get
from GetSystemMetrics.
If hdc is a handle to a printer device context, GetDeviceCaps returns the height and
width of the printer display area in pixels.
You can also use GetDeviceCaps to determine the device's capabilities of processing
various types of graphics.
DEVCAPS1 display for a 256-color, 640-by-480 VGA.
The Size of the Device

www.allsyllabus.com
www.allsyllabus.com
The GetDeviceCaps function helps you obtain information regarding the physical size
of the output device, be it the video display or printer.
Within a Windows program you can use the GetDeviceCaps function to obtain the
assumed resolution in dots per inch that the user selected in the Display applet of the
Control Panel
Finding Out About Color
A video display capable of displaying only black pixels and white pixels requires only
one bit of memory per pixel. Color displays require multiple bits per pixels. The more
bits, the more colors; or more specifically, the number of unique simultaneous colors
is equal to 2 to the number of bits per pixel.
iBitsPixel = GetDeviceCaps (hdc, BITSPIXEL) ;
iColors = GetDeviceCaps (hdc, NUMCOLORS) ;
The Device Context Attributes
Saving Device Contexts
Normally when you call GetDC or BeginPaint, Windows gives you a device context
with default values for all the attributes.
Any changes you make to the attributes are lost when the device context is released
with the ReleaseDC or EndPaint call.
If your program needs to use non-default device context attributes, you'll have to
initialize the device context every time you obtain a new device context handle:
Saving Device Contexts
Although this approach is generally satisfactory, you might prefer that changes you
make to the attributes be saved when you release the device context so that they will
be in effect the next time you call GetDC or BeginPaint.
You can accomplish this by including the CS_OWNDC flag as part of the window
class style when you register the window class:
wndclass.style = CS_HREDRAW | CS_VREDRAW | CS_OWNDC ;
Saving Device Contexts
Now each window that you create based on this window class will have its own
private device context that continues to exist when the window is destroyed.
When you use the CS_OWNDC style, you need to initialize the device context
attributes only once, perhaps while processing the WM_CREATE message:
case WM_CREATE: hdc = GetDC (hwnd) ;
[initialize device context attributes]
ReleaseDC (hwnd, hdc) ;
The attributes continue to be valid until you change them.
Saving Device Contexts
In some cases you might want to change certain device context attributes, do some
painting using the changed attributes, and then revert to the original device context.
To simplify this process, you save the state of a device context by calling
www.allsyllabus.com
www.allsyllabus.com
idSaved = SaveDC (hdc) ;
Now you can change some attributes. When you want to return to the device context
as it existed before the SaveDC call, you use
RestoreDC (hdc, idSaved) ;
You can call SaveDC any number of times before you call RestoreDC.
CHAPTER 4
Child Window Controls
Introduction The child window processes mouse and keyboard messages and notifies the parent
window when the child window's state has changed.
In this way, the child window becomes a high-level input device for the parent
window.
It encapsulates a specific functionality with regard to its graphical appearance on the
screen, its response to user input, and its method of notifying another window when
an important input event has occurred.
CChhiilldd WWiinnddooww CCoonnttrroollss PPuusshh BBuuttttoonnss
CChheecckk BBooxxeess
RRaaddiioo BBuuttttoonnss
GGrroouupp BBooxxeess
CCoonnttrroollss aanndd CCoolloorrss
TThhee SSccrroollll BBaarr CCllaassss
TThhee EEddiitt CCllaassss
TThhee LLiissttbbooxx CCllaassss
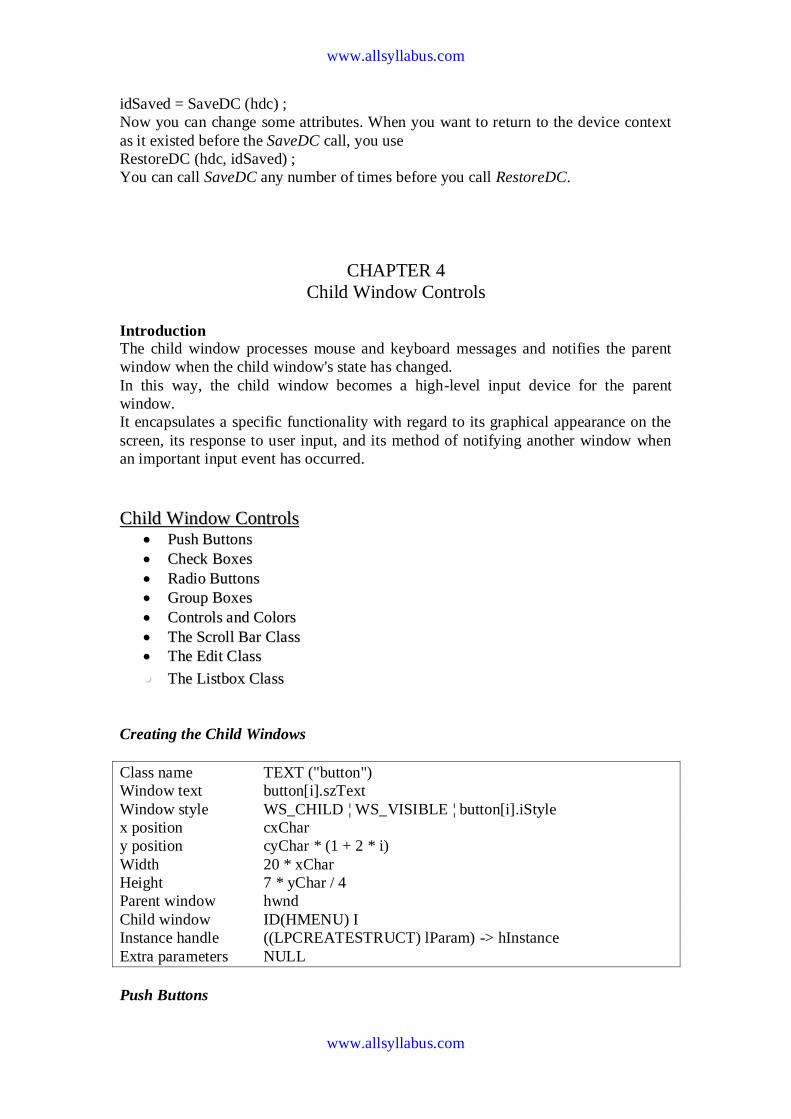
Creating the Child Windows
Class name TEXT ("button")
Window text button[i].szText
Window style WS_CHILD ¦ WS_VISIBLE ¦ button[i].iStyle
x position cxChar
y position cyChar * (1 + 2 * i)
Width 20 * xChar
Height 7 * yChar / 4
Parent window hwnd
Child window ID(HMENU) I
Instance handle ((LPCREATESTRUCT) lParam) -> hInstance
Extra parameters NULL
Push Buttons

www.allsyllabus.com
www.allsyllabus.com
A push button is a rectangle enclosing text specified in the window text parameter of
the CreateWindow call. The rectangle takes up the full height and width of the
dimensions given in the CreateWindow or MoveWindow call. The text is centered
within the rectangle.
Push-button controls are used mostly to trigger an immediate action without retaining
any type of on/off indication.
The two types of push-button controls have window styles called BS_PUSHBUTTON
and BS_DEFPUSHBUTTON.
When used to design dialog boxes, BS_PUSHBUTTON controls and
BS_DEFPUSHBUTTON controls function differently from one another. When used
as child window controls, however, the two types of push buttons function the same
way, although BS_DEFPUSHBUTTON has a heavier outline.
A push button looks best when its height is 7/4 times the height of a text character,
which is what BTNLOOK uses. The push button's width must accommodate at least
the width of the text, plus two additional characters.
When the mouse cursor is inside the push button, pressing the mouse button causes
the button to repaint itself using 3D-style shading to appear as if it's been depressed.
Releasing the mouse button restores the original appearance and sends a
WM_COMMAND message to the parent window with the notification code
BN_CLICKED.
As with the other button types, when a push button has the input focus, a dashed line
surrounds the text and pressing and releasing the Spacebar has the same effect as
pressing and releasing the mouse button.
You can simulate a push-button flash by sending the window a BM_SETSTATE
message.

www.allsyllabus.com
www.allsyllabus.com
This causes the button to be depressed:
SendMessage (hwndButton, BM_SETSTATE, 1, 0) ;
This call causes the button to return to normal:
SendMessage (hwndButton, BM_SETSTATE, 0, 0) ;
Check Boxes
A check box is a square box with text; the text usually appears to the right of the
check box.
If you include the BS_LEFTTEXT style when creating the button, the text appears to
the left; you'll probably want to combine this style with BS_RIGHT to right-justify
the text.
Check boxes are usually incorporated in an application to allow a user to select
options.
The check box commonly functions as a toggle switch: clicking the box once causes a
check mark to appear; clicking again toggles the check mark off.
The two most common styles for a check box are BS_CHECKBOX and
BS_AUTOCHECKBOX.
When you use the BS_CHECKBOX style, you must set the check mark yourself by
sending the control a BM_SETCHECK message. The wParam parameter is set to 1 to
create a check mark and to 0 to remove it.
You can obtain the current check state of the box by sending the control a
BM_GETCHECK message. You might use code like this to toggle the X mark when
processing a WM_COMMAND message from the control:
SendMessage ((HWND) lParam, BM_SETCHECK, (WPARAM)
!SendMessage ((HWND) lParam, BM_GETCHECK, 0, 0), 0) ;
The other two check box styles are BS_3STATE and BS_AUTO3STATE. As their
names indicate, these styles can display a third state as well—a gray color within the
check box—which occurs when you send the control a WM_SETCHECK message
with wParam equal to 2. The gray color indicates to the user that the selection is
indeterminate or irrelevant.
The check box is aligned with the rectangle's left edge and is centered within the top
and bottom dimensions of the rectangle that were specified during the CreateWindow
call. Clicking anywhere within the rectangle causes a WM_COMMAND message to
be sent to the parent. The minimum height for a check box is one character height.
The minimum width is the number of characters in the text, plus two.
Radio Buttons
A radio button is named after the row of buttons that were once quite common on car
radios. Each button on a car radio is set for a different radio station, and only one
button can be pressed at a time. In dialog boxes, groups of radio buttons are
conventionally used to indicate mutually exclusive options. Unlike check boxes, radio

www.allsyllabus.com
www.allsyllabus.com
buttons do not work as toggles—that is, when you click a radio button a second time,
its state remains unchanged.
The radio button looks very much like a check box except that it contains a little circle
rather than a box. A heavy dot within the circle indicates that the radio button has
been checked. The radio button has the window style BS_RADIOBUTTON or
BS_AUTORADIOBUTTON, but the latter is used only in dialog boxes.
Group Boxes
The group box, which has the BS_GROUPBOX style, is an oddity in the button class.
It neither processes mouse or keyboard input nor sends WM_COMMAND messages
to its parent.
The group box is a rectangular outline with its window text at the top. Group boxes
are often used to enclose other button controls.
The Scroll Bar Class
You add window scroll bars to a window by including the identifier WS_VSCROLL
or WS_HSCROLL or both in the window style when creating the window.
You create child window scroll bar controls by using the predefined window class
"scrollbar" and one of the two scroll bar styles SBS_VERT and SBS_HORZ.
Unlike the button controls, scroll bar controls do not send WM_COMMAND
messages to the parent window.
Instead, they send WM_VSCROLL and WM_HSCROLL messages, just like window
scroll bars.
When processing the scroll bar messages, you can differentiate between window
scroll bars and scroll bar controls by the lParam parameter. It will be 0 for window
scroll bars and the scroll bar window handle for scroll bar controls. The high and low
words of the wParam parameter have the same meaning for window scroll bars and
scroll bar controls.
Although window scroll bars have a fixed width, Windows uses the full rectangle
dimensions given in the CreateWindow call to size the scroll bar controls.
You can make long, thin scroll bar controls or short, pudgy scroll bar controls.
You can set the range and position of a scroll bar control with the same calls used for
window scroll bars:
SetScrollRange (hwndScroll, SB_CTL, iMin, iMax, bRedraw) ;
SetScrollPos (hwndScroll, SB_CTL, iPos, bRedraw) ;
SetScrollInfo (hwndScroll, SB_CTL, &si, bRedraw) ;
The difference is that window scroll bars use a handle to the main window as the first
parameter and SB_VERT or SB_HORZ as the second parameter.
The Edit Class
www.allsyllabus.com
www.allsyllabus.com
When you create a child window using the class name "edit," you define a rectangle
based on the x position, y position, width, and height parameters of the CreateWindow
call.
This rectangle contains editable text. When the child window control has the input
focus, you can type text, move the cursor, select portions of text using either the
mouse or the Shift key and a cursor key, delete selected text to the clipboard by
pressing Ctrl-X, copy text by pressing Ctrl-C, and insert text from the clipboard by
pressing Ctrl-V.
One of the simplest uses of edit controls is for single-line entry fields. But edit
controls are not limited to single lines, to use menus, dialog boxes (to load and save
files), and printing.
Create an edit control using "edit" as the window class in the CreateWindow call. The
window style is WS_CHILD, plus several options. As in static child window controls,
the text in edit controls can be left-justified, right-justified, or centered. You specify
this formatting with the window styles ES_LEFT, ES_RIGHT, and ES_CENTER.
By default, an edit control has a single line. You can create a multiline edit control
with the window style ES_MULTILINE.
To create an edit control that automatically scrolls horizontally, you use the style
ES_AUTOHSCROLL. For a multiline edit control, text wordwraps unless you use the
ES_AUTOHSCROLL style, in which case you must press the Enter key to start a new
line. You can also include vertical scrolling in a multiline edit control by using the
style ES_AUTOVSCROLL.
To add scroll bars to the edit control.-use the same window style identifiers as for
nonchild windows: WS_HSCROLL and WS_VSCROLL.
By default, an edit control does not have a border. You can add one by using the style
WS_BORDER.
When you select text in an edit control, Windows displays it in reverse video. When
the edit control loses the input focus, however, the selected text is no longer
highlighted. If you want the selection to be highlighted even when the edit control
does not have the input focus, you can use the style ES_NOHIDESEL.
Style given in the CreateWindow call:
WS_CHILD ¦ WS_VISIBLE ¦ WS_HSCROLL ¦ WS_VSCROLL ¦ WS_BORDER ¦
ES_LEFT ¦ ES_MULTILINE ¦ ES_AUTOHSCROLL ¦ ES_AUTOVSCROLL
www.allsyllabus.com
www.allsyllabus.com
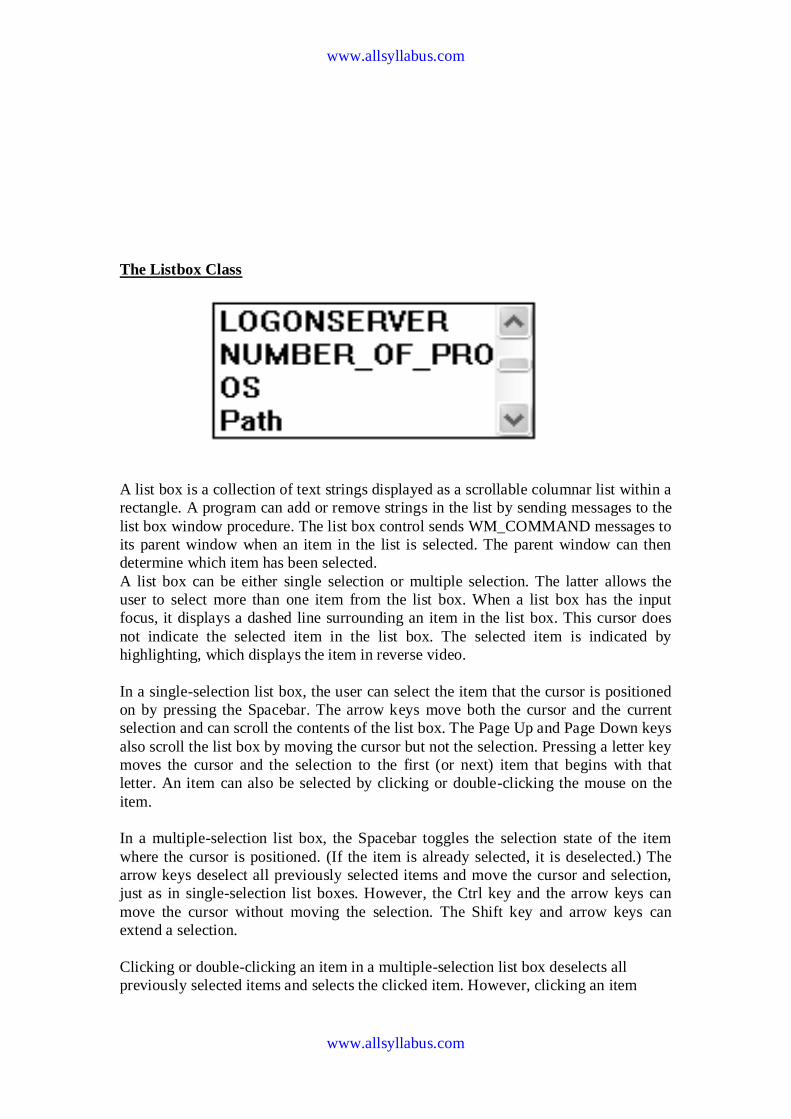
The Listbox Class
A list box is a collection of text strings displayed as a scrollable columnar list within a
rectangle. A program can add or remove strings in the list by sending messages to the
list box window procedure. The list box control sends WM_COMMAND messages to
its parent window when an item in the list is selected. The parent window can then
determine which item has been selected.
A list box can be either single selection or multiple selection. The latter allows the
user to select more than one item from the list box. When a list box has the input
focus, it displays a dashed line surrounding an item in the list box. This cursor does
not indicate the selected item in the list box. The selected item is indicated by
highlighting, which displays the item in reverse video.
In a single-selection list box, the user can select the item that the cursor is positioned
on by pressing the Spacebar. The arrow keys move both the cursor and the current
selection and can scroll the contents of the list box. The Page Up and Page Down keys
also scroll the list box by moving the cursor but not the selection. Pressing a letter key
moves the cursor and the selection to the first (or next) item that begins with that
letter. An item can also be selected by clicking or double-clicking the mouse on the
item.
In a multiple-selection list box, the Spacebar toggles the selection state of the item
where the cursor is positioned. (If the item is already selected, it is deselected.) The
arrow keys deselect all previously selected items and move the cursor and selection,
just as in single-selection list boxes. However, the Ctrl key and the arrow keys can
move the cursor without moving the selection. The Shift key and arrow keys can
extend a selection.
Clicking or double-clicking an item in a multiple-selection list box deselects all
previously selected items and selects the clicked item. However, clicking an item

www.allsyllabus.com
www.allsyllabus.com
while pressing the Shift key toggles the selection state of the item without changing
the selection state of any other item.