Dental Procedures · 2020-03-16 · Dental Implants may be used to replace one or more missing...
58
DENTALELLE TUTORING Dental Procedures Dentalelle Tutoring @ www.dentalelle.com 1
Transcript of Dental Procedures · 2020-03-16 · Dental Implants may be used to replace one or more missing...

D E N T A L E L L E T U T O R I N G
Dental Procedures
Dentalelle Tutoring @ www.dentalelle.com
1

Sealants
Dentalelle Tutoring @ www.dentalelle.com
2

Sealants
A sealant is a protective, plastic coating that can be placed on the occlusal surfaces and buccal/lingual pits of the teeth
Usually done to seal the pits and fissures of the first and second year molars but can be placed on the premolars as well. Ages 6-7 or 11-14.
Dentalelle Tutoring @ www.dentalelle.com
3

Steps for placement of a sealant
Wash the tooth with pumice and water to ensure it is clean
Wash and dry the tooth
Apply your cotton rolls, dry angles, etc. to the area
Apply etch and allow to sit for 10-30 seconds depending on the manufacturers instructions
Wash the etch very well, dry very well. To ensure proper etching has taken place, the tooth must appear a chalky white and if not, re-etch for 10-20 seconds
Dentalelle Tutoring @ www.dentalelle.com
4

Continuation
Apply the sealant material
Run an explorer along the sealant to prevent air bubbles from forming
Light cure for 10-20 seconds
Check sealant with explorer to make sure no voids are present
Use bite paper to check the bite (articulation), if the sealant is high, the Dentist can smooth off with a high speed hand piece
Dentalelle Tutoring @ www.dentalelle.com
5

Recall Appointments
The sealants will need to be reviewed at recare appointments to make sure no voids or pieces of the sealant have come off
The patient and parents must be aware that proper brushing and flossing must still be maintained. A sealant only ‘helps’ prevent decay but will not stop it entirely
Dentalelle Tutoring @ www.dentalelle.com
6
Fillings
Dentalelle Tutoring @ www.dentalelle.com
7

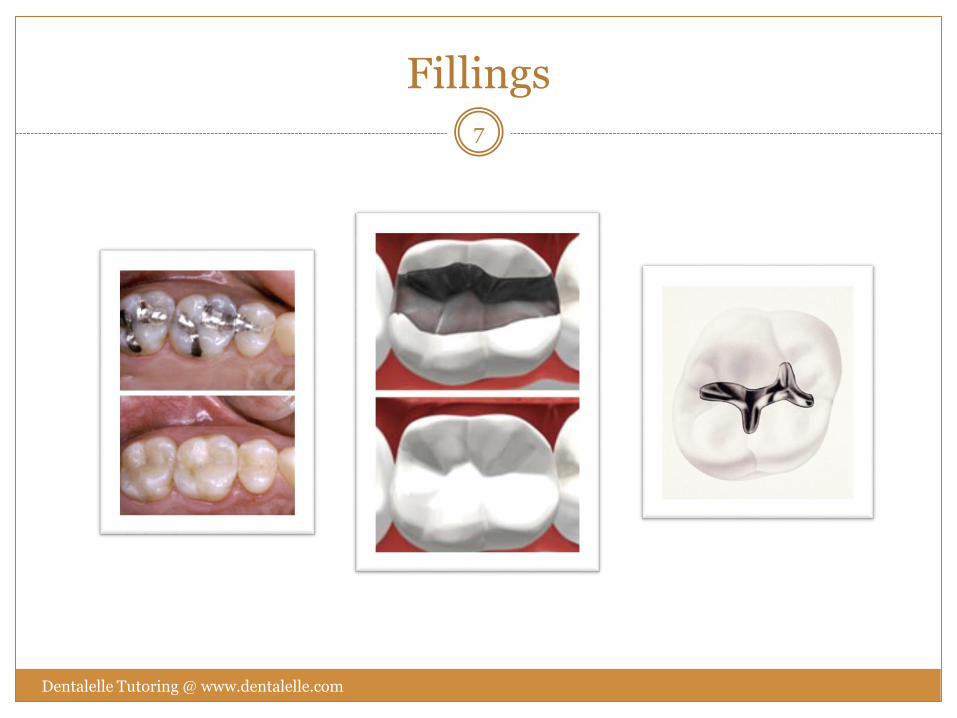
Composite Fillings
Since they bond to the tooth, composite fillings restore most of the original strength of the tooth. Silver weakens the teeth, making them more susceptible to breaking. Since broken teeth are very expensive to restore, composites can save a lot of expense over the long run.
Composite fillings restore the natural appearance of the tooth. Teeth restored with white fillings are less sensitive to hot and cold than teeth
restored with amalgam, if correct techniques are used.
Composites are mercury-free. Mercury in the fillings is viewed by some as being toxic.
Composites require less removal of tooth structure. Especially with new cavities, the size of the hole made for the filling can be dramatically smaller with composites.
Dentalelle Tutoring @ www.dentalelle.com
8

Amalgam Fillings
They are generally less expensive. Composite fillings, if they are done correctly, take about 60% longer, require special expertise and expensive materials, and are more difficult to place, and so they cost considerably more than silver.
General dentists can place amalgam without extra training. Composite requires the use of special bonding technology that many dentists are uncomfortable with.
The proper placement of a white filling requires that the site for the filling be kept totally isolated from saliva while it is being placed. In the very back of the mouth, on some patients, it is difficult to keep the tooth isolated for the duration of the procedure. This can also be uncomfortable for some patients. A silver amalgam filling does not require this strict isolation of the tooth.
The filling by itself is a stronger material, although it weakens the tooth. Silver fillings have a longer history of use than mercury-free fillings, thus
some feel that they are more tried and tested.
Dentalelle Tutoring @ www.dentalelle.com
9

Composite vs Amalgam Fillings
If a patient has a cavity, the cavity must be removed and an amalgam or composite filling placed. Depending on the tooth and the patient, one might be better then the other
The procedure involves: Topical/Local anesthetic Application of the rubber dam Removal of decay using high speed and slow speed handpieces Etch, prime/bond and light cure of the materials Filling material placed and light cured (if composite) The bite is checked with articulating paper and polishing **This is a quick recap of the procedure, please review in your notes
from school the exact procedure – questions will be asked in your next session
Dentalelle Tutoring @ www.dentalelle.com
10
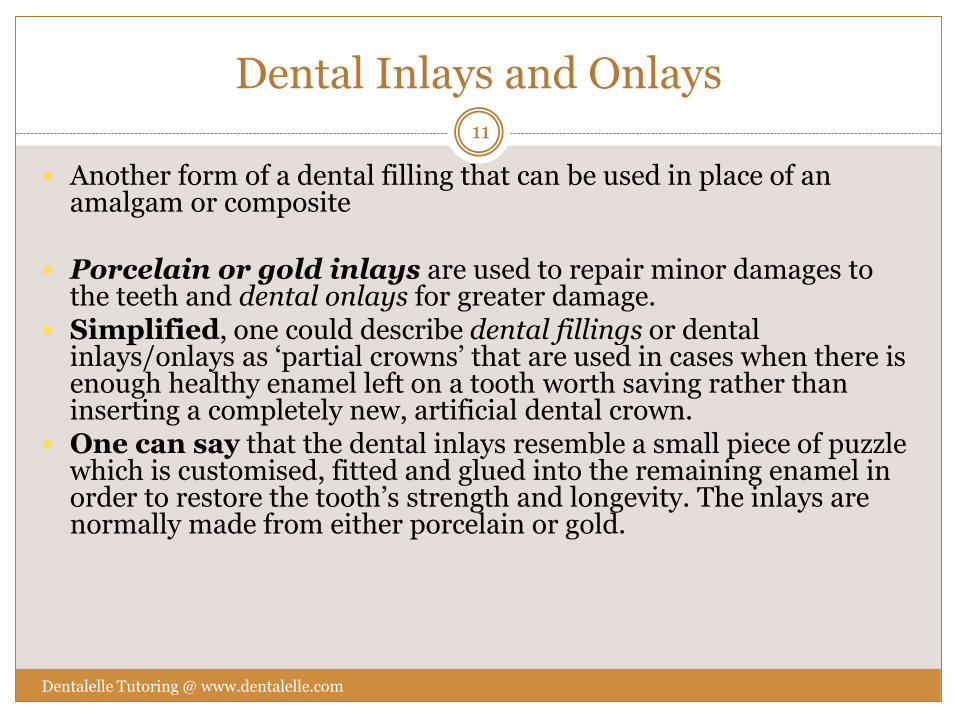
Dental Inlays and Onlays
Another form of a dental filling that can be used in place of an amalgam or composite
Porcelain or gold inlays are used to repair minor damages to the teeth and dental onlays for greater damage.
Simplified, one could describe dental fillings or dental inlays/onlays as ‘partial crowns’ that are used in cases when there is enough healthy enamel left on a tooth worth saving rather than inserting a completely new, artificial dental crown.
One can say that the dental inlays resemble a small piece of puzzle which is customised, fitted and glued into the remaining enamel in order to restore the tooth’s strength and longevity. The inlays are normally made from either porcelain or gold.
Dentalelle Tutoring @ www.dentalelle.com
11

Inlay and Onlay Procedure
To receive dental inlays or dental onlays requires two dentist appointments. During the first one the tooth that is to have the dental inlay is examined and prepared.
Once the tooth is prepared an impression is made and sent to a dental technological laboratory where the porcelain or gold inlay/onlay is made. Finally the dentist will fit you with a temporary dental filling and book a time for your next appointment.
During the second appointment the temporary dental filling is removed. The porcelain or gold inlay/onlay is then tried out to make sure it fits perfectly. Once the fit is how it should be, it is then cemented into place.
Dentalelle Tutoring @ www.dentalelle.com
12

Crown and Bridge Procedure
Dentalelle Tutoring @ www.dentalelle.com
13

Crown and Bridge Procedure
Dentalelle Tutoring @ www.dentalelle.com
14
What are Dental Crowns and Tooth Bridges?Both crowns and most bridges are fixed prosthetic devices.
Crowns and bridges are cemented onto existing teeth or implants, and can only be removed by a dentist.
Crowns are placed on teeth that have very large fillings to begin with and a concern with chipping is apparent, a crown will go over the tooth given it strength
Bridges are in place of a tooth – if a tooth is missing and a space results. Bridges are placed to prevent shifting of the teeth and to maintain the proper bite.
Crowns
Dentalelle Tutoring @ www.dentalelle.com
15
The dentist may recommend a crown to:
Replace a large filling when there isn't enough tooth remaining
Protect a weak tooth from fracturing
Restore a fractured tooth
Attach a bridge
Cover a dental implant
Cover a discolored or poorly shaped tooth
Cover a tooth that has had root canal treatment

Crown and Bridge Procedure
Dentalelle Tutoring @ www.dentalelle.com
16
Before either a crown or a bridge can be made, the tooth (or teeth) must be reduced in size so that the crown or bridge will fit over it properly. Normally a rubber dam is placed for this but after the teeth have been reduced in size, the rubber dam is removed to finish.
After reducing the tooth/teeth, the dentist will take an impression to provide an exact mold for the crown or bridge. If porcelain is to be used, your dentist will determine the correct shade for the crown or bridge to match the color of your existing teeth.
Using this impression, a dental lab then makes your crown or bridge, in the material your dentist specifies. A temporary crown or bridge will be put in place to cover the prepared tooth while the permanent crown or bridge is being made.
When the permanent crown or bridge is ready, the temporary crown or bridge is removed, and the new crown or bridge is cemented over your prepared tooth or teeth. Normally it takes two weeks at the most for a crown or bridge to be made.

Dental Implants
Dentalelle Tutoring @ www.dentalelle.com
17

Dental Implants
Dentalelle Tutoring @ www.dentalelle.com
18
A Dental Implant is a small titanium screw that serves as the replacement for the root portion of a missing natural tooth. It is available in various sizes (both width and height) for different clinical situations.
Dental Implants may be used to replace one or more missing teeth. In case of completely edentulous patients, implants may be used to fix the dentures to the underlying bone. Alternately, implants may be used to provide fixed tooth to edentulous patients without the use of dentures. Needless to say, an implant offers several advantages over conventional treatment options.

Benefits of Implants
Dentalelle Tutoring @ www.dentalelle.com
19
Implant supported teeth are more comfortable than conventional dentures because there is no slipping or movement, because the implants are fixed they feel and function like natural teeth. This eliminates some of the key worries of denture wearers and improves self-confidence.
Dental implants are an alternative to conventional bridgework. They eliminate the need to prepare healthy teeth and do not place additional loads on the teeth supporting the bridge.
When teeth are missing the surrounding bone shrinks. Implants stimulate the bone to be maintained which helps keep shape and structure of the jaw stable.
Contraindications for Implants
Dentalelle Tutoring @ www.dentalelle.com
20
Implants are not for everyone!
There must be enough bone in the area to hold a dental implant or it will fail
A lot of dental surgeons will not perform the implant procedure on a smoker due to the dealing in healing time
Also your diabetic patients, healing is reduced so an implant may not be the best option
For your dental hygienist – plastic scalers can only be used on and around the implant to avoid scratches

Root Canal
Dentalelle Tutoring @ www.dentalelle.com
21

Root Canal
Dentalelle Tutoring @ www.dentalelle.com
22
The root canal procedure can be the most daunting to a new dental assistant, we have outlined some of the basic steps for you:
Think of the procedure in steps, what you will be doing will determine what you will need

Steps
Dentalelle Tutoring @ www.dentalelle.com
23
Anesthesia. Rubber dam application. Making the area aseptic. Access to pulp chamber. Pulp extirpation. Trial radiograph with instrument in place. Calculating exact measurement. Reaming and filing of root canal to measurement. Irrigation. Desiccation. Selecting, sterilizing, and fitting the point. Trial radiograph with point in place. Cementation of point. Sealing of access opening. Final radiograph.
Preparing the canal
Dentalelle Tutoring @ www.dentalelle.com
24
Preparing the Root Canal. In gaining access, provide high and low speed burs. A barbed broach is used for extirpation of the pulp. A monojet syringe or some type of syringe is typically used to irrigate the tooth with sodium hypochlorite. Desiccation or drying of the root canal is done by the use of paper absorbent points: Extra fine, fine, medium, or coarse. The endodontic assistant should set out an assortment of paper points for the dentist. A radiograph with the measured instrument placed in the canal is exposed to determine the exact length of the root canal. The dental assistant then should provide a sequential assortment of reamers and files of increasing size. The beginning size is determined by the dentist. The reamers and files should be provided with rubber stops. A corresponding size point, either silver or gutta-percha, is selected and trial-fitted.
Once the point passes the trial fit, it is ready for cementation. The dental assistant should now be prepared to mix the root canal cement. If the zinc oxide and eugenol technique is used, relatively large portions of powder are added to the liquid and spatulated until a heavy, creamy, nongranular mix is obtained. When the mix is complete, the cement should be drawn up from the mixing slab about 1 inch without separating. This test is done by dabbing the spatula into the mix and drawing it up slowly. The cement is given to the dentist who places it in the canal with a reamer. The point is coated with cement and seated into place.

Filling and Sealing
Dentalelle Tutoring @ www.dentalelle.com
25
Filling and Sealing the Root Canal. When gutta-percha points are used, cotton forceps are used to place the point. Depending on the technique, a plugger, a spreader, or both, are used to condense the gutta-percha in the canal.
In other techniques, both gutta-percha and silver points are used at the same time. A trial radiograph of the root canal filling is taken and, if it is satisfactory, a thick mix of zinc oxide and eugenol or zinc phosphate cement is made and plugged into the access area to completely seal the canal. A number three Ladmore plugger is the instrument of choice for plugging the access opening with the cement.

Other Method
Dentalelle Tutoring @ www.dentalelle.com
26
The sequence of treatment for the multiappointment method of endodontic therapy differs from the single appointment method in that the sequence is interrupted at various stages to allow for drainage of infected material, for changing of medications in the root canal, or to alleviate a lengthy appointment.
Medications commonly used in endodontic techniques include cresatin and camphorated paramonochlorophenol, which are placed in dappen dishes and then placed into the root canal by using paper points or into the pulp chamber by using cotton pellets. The tooth is then sealed and kept sealed until the next appointment.
Continued
Dentalelle Tutoring @ www.dentalelle.com
27
Follow-up Appointments. Upon completion of the treatment by either method, arrangements should be made to recall the patient 6 months later for a follow-up radiograph to determine the success of the treatment. If an abscess forms, the root canal treatment will have to be redone.
Sterilization. Successful endodontics depends greatly upon sterility. Anything placed into the tooth must be sterilized.

Orthodontics
Dentalelle Tutoring @ www.dentalelle.com
28
Orthodontics
Dentalelle Tutoring @ www.dentalelle.com
29
Orthodontics is done by a specialist – additional training is needed. Working as a dental assistant in an orthodontic office is an exciting experience. Often you will be trained on the job for this but it is wise to know the basics for regular practice.
If your patient does not have a ‘Class I’ bite, this will likely need to be corrected.
Acquired malocclusions are caused by: Trauma (including delayed weaning from thumb, finger, or
pacifier sucking) Mouthbreathing (due to enlarged tonsils or adenoids, blocked
nasal passages etc.) Premature loss of baby or adult teeth

Malocclusions
Dentalelle Tutoring @ www.dentalelle.com
30
Regardless of whether malocclusions are inherited or acquired, many of these problems affect not only alignment of the teeth but also facial development and appearance as well.
A poor bite does not DIRECTLY cause tooth decay, or periodontal disease. It may, however, make it difficult to brush and floss properly which increases the likelihood of dental disease.
Although a majority of the population have some type of malocclusion, not all people require or seek orthodontic treatment. For example, with or without a history of orthodontic treatment, 65% of adults develop crowded, crooked lower front teeth. This is a natural result of change over time and does not necessarily require orthodontic treatment.

Symptoms that may require Orthodontics
Dentalelle Tutoring @ www.dentalelle.com
31
Permanent teeth coming in (erupting) out of their normal position;
Problems with biting the cheek or roof of the mouth; or
Difficulty chewing or difficulty aligning teeth;
Facial muscle or jaw pain, or speech difficulties.
Obvious rotations and crowding of the teeth
Remember – LOTS of space, teeth far apart, in a child is a good thing – meaning more room for the permanent teeth to come in

Desensitization of Teeth
Dentalelle Tutoring @ www.dentalelle.com
32
Tooth sensitivity is a very common issue and can happen from a variety of reasons:
Recession – seems to be the main reason, if a patient is brushing too hard over a number of years can result in recession. Using a soft toothbrush is especially important in preventing further recession
Clenching/grinding – if a patient clenches his or her teeth as well as grinding this can result in very sensitive teeth. A nightguard is the only solution to this other than stopping the grinding/clenching.
Erosion – if a patient has been vomiting or eating/drinking acidic foods this can cause erosion resulting in sensitivity. Chronic erosion may no longer be sensitive*

Toothpastes
Dentalelle Tutoring @ www.dentalelle.com
33
Desensitizing toothpastes work by blocking transmission of sensations through the tubules of the dentin layer so that they are unable to reach the nerve. In addition to regular brushing with a desensitizing toothpaste, Discovery Health recommends placing a small amount onto sensitive areas and leaving it overnight. Consistent overnight use should bring some relief within a few weeks.
Duraflor, or a different type of desensitizing agent can be applied directly to the area in the dental office.
Some sensitivity may be caused by vigorous brushing with a hard toothbrush. This can wear away the enamel, exposing the tubules that lead to the tooth's nerve. Harsh brushing can also cause the gums to recede, exposing the roots of the teeth. Although enamel cannot be restored once it is lost, using a soft-bristled toothbrush can prevent the damage from progressing. This will also help with sensitivity.

Fluoride
Dentalelle Tutoring @ www.dentalelle.com
34
Fluoride is found in most toothpastes, but a special rinse or treatment may be used when teeth are sensitive. Fluoride rinses are available over-the-counter, or the dentist can prescribe a stronger rinse or varnish.
The American Dental Association indicates that fluoride strengthens the tooth's protective enamel layer and reduces the transmission of sensations.
Custom trays can be made for the patient to be worn at home with fluoride if the sensitivity is extreme.

Bleaching
Dentalelle Tutoring @ www.dentalelle.com
35

Bleaching (Teeth Whitening)
Dentalelle Tutoring @ www.dentalelle.com
36
Teeth whitening procedures have been performed for over one hundred years. As far back as 1877, procedures involving the use of oxalic acid to whiten teeth were reported. Hydrogen peroxide was introduced as a tooth bleaching agent back in 1884 and in 1918, the use of high-intensity lights in conjunction with the hydrogen peroxide was used to speed up the bleaching process, according to a report by the ADA.
No significant adverse health effects have been associated with the use of dentist-prescribed home use whiteners. Minor side effects from the procedures may include transient mild tooth sensitivity to temperature changes and mucosal irritation. Most side effects associated with the teeth whitening procedures disappear within seven days.

Staining
Dentalelle Tutoring @ www.dentalelle.com
37
Stains can happen both intrinsically and extrinsically. Smoking, coffee, tea, aging, medications, etc., all play a part
A blue/gray hue to the teeth will not whiten well and patients with this hue should be made aware of this.
A yellow/brown stain will likely whiten well to any type of procedure Everyone responds differently in the length of time it takes to see results.
This is why it is important for you to carefully discuss in advance with your dentist what the causes of the discolorations are.
For people with intrinsic staining (from fluorosis, tetracycline staining or tooth trauma inside the pulp), the results may take longer and it may be necessary to have a few sessions, or discuss other options for the more intense stains. Typically these are the streaks or the purplish discolorations that are harder to lighten. Patients with intense streaks in their teeth will find that the intensity fades, however, it is almost impossible to totally remove the streaks, especially using only the home bleaching techniques.

Take-Home Whitening
Dentalelle Tutoring @ www.dentalelle.com
38
This is the most common option and often cheaper than the in-office whitening
Custom trays are made of the teeth using alginate impressions, impressions poured up and whitening trays are made (using a vacuum former for whitening)
The patient comes back to the office and is given instructions for us along with the bleaching syringes required

In-Office Whitening
Dentalelle Tutoring @ www.dentalelle.com
39
This is a popular option to get quick results, often the same bleaching material is used as the take-home whitening but a stronger concentration
A light is often used to speed up the process as well but keep in mind this can lead to additional sensitivity
It is often recommended that the patient brushes with a sensitivity type toothpaste two weeks prior and two weeks after the whitening procedure to limit the sensitivity as much as possible

Extractions
Dentalelle Tutoring @ www.dentalelle.com
40

Extractions
Dentalelle Tutoring @ www.dentalelle.com
41
Why are teeth extracted? If a tooth has been broken or damaged by decay, your dentist will try to fix it with a filling, crown or other treatment. Sometimes, though, there's too much damage for the tooth to be repaired. In this case, the tooth needs to be extracted.
The dental assistants role in this is often to help the dentist during the procedure and provide post-op instructions afterwards

Additional Reasons to Extract
Dentalelle Tutoring @ www.dentalelle.com
42
Some people have extra teeth that block other teeth from coming in. Sometimes baby teeth don't fall out in time to allow the permanent teeth to come in. People getting braces may need teeth extracted to create room for the teeth that are
being moved into place. Infected teeth may need to be extracted. Some teeth may need to be extracted if they could become a source of infection after
an organ transplant. People with organ transplants have a high risk of infection because they must take drugs that decrease or suppress the immune system.
Wisdom teeth, also called third molars, are often extracted either before or after they come in. They commonly come in during the late teens or early 20s. They need to be removed if they are decayed, cause pain or have a cyst or infection. These teeth often get stuck in the jaw (impacted) and do not come in. This can irritate the gum, causing pain and swelling. In this case, the tooth must be removed. If you need all four wisdom teeth removed, they are usually taken out at the same time.

Preparations
Dentalelle Tutoring @ www.dentalelle.com
43
An x-ray of the area will be taken to help plan the best way to remove the tooth.
If the wisdom teeth are being removed, you may need to take a panoramic x-ray. This x-ray takes a picture of all the teeth at once. It can show several things that help to guide an extraction:
The relationship of the wisdom teeth to the other teeth The upper teeth's relationship to the sinuses The lower teeth's relationship to a nerve in the jawbone that
gives feeling to the lower jaw, lower teeth, lower lip and chin. This nerve is called the inferior alveolar nerve.
Any infections, tumors or bone disease that may be present

Antibiotics
Dentalelle Tutoring @ www.dentalelle.com
44
Some doctors prescribe antibiotics to be taken before and after surgery. This practice varies by the dentist or oral surgeon. Antibiotics are more likely to be given if:
An infection at the time of surgery
Due to a weakened immune system
Specific medical conditions are present

Telling your Patient
Dentalelle Tutoring @ www.dentalelle.com
45
You may have intravenous (IV) anesthesia, which can range from conscious sedation to general anesthesia. If so, your doctor will have give you instructions to follow. You should wear clothing with short sleeves or sleeves that can be rolled up easily. This allows access for an IV line to be placed in a vein. Don't eat or drink anything for six or eight hours before the procedure.
If you have a cough, stuffy nose or cold up to a week before the surgery, call your doctor. He or she may want to avoid anesthesia until you are over the cold. If you had nausea and vomiting the night before the procedure, call the doctor's office first thing in the morning. You may need a change in the planned anesthesia or the extraction may have to be rescheduled.
After the extraction, someone will need to drive you home and stay there with you. You will be given post-surgery instructions.

Types of Extractions
Dentalelle Tutoring @ www.dentalelle.com
46
There are two types of extractions: A simple extraction is performed on a tooth that can be seen
in the mouth. General dentists commonly do simple extractions. In a simple extraction, the dentist loosens the tooth with an instrument called an elevator. Then the dentist uses an instrument called a forceps to remove the tooth.
A surgical extraction is a more complex procedure. It is used if a tooth may have broken off at the gum line or has not come into the mouth yet. Surgical extractions commonly are done by oral surgeons. However, they are also done by general dentists. The doctor makes a small incision (cut) into your gum. Sometimes it's necessary to remove some of the bone around the tooth or to cut the tooth in half in order to extract it.

Types
Dentalelle Tutoring @ www.dentalelle.com
47
Most simple extractions can be done using just an injection (a localanesthetic). For a surgical extraction, you will receive a local anesthetic, and you may also have anesthesia through a vein (intravenous). Some people may need general anesthesia. They include patients with specific medical or behavioral conditions and young children.
If you are receiving conscious sedation, you may be given steroids as well as other medicines in your IV line. The steroids help to reduce swelling and keep you pain-free after the procedure.
During a tooth extraction, you can expect to feel pressure, but no pain. If you feel any pain or pinching, tell your doctor.

Post-Op Instructions
Dentalelle Tutoring @ www.dentalelle.com
48
Having a tooth taken out is surgery.. Research has shown that taking nonsteroidal anti-inflammatory drugs (NSAIDs) can greatly decrease pain after a tooth extraction. These drugs include ibuprofen, such as Advil, Motrin and others. Take the dose your doctor recommends, 3 to 4 times a day. Take the first pills before the local anesthesia wears off. Continue taking them for 3 days.
Surgical extractions generally cause more pain after the procedure than simple extractions. The level of discomfort and how long it lasts will depend on how difficult it was to remove the tooth. Your dentist may prescribe pain medicine for a few days and then suggest an NSAID. Most pain disappears after a couple of days.
After an extraction, you'll be asked to bite on a piece of gauze for 20 to 30 minutes. This pressure will allow the blood to clot. You still have a small amount of bleeding for the next 24 hours or so. It should taper off after that. Don't disturb the clot that forms on the wound.

Continued
Dentalelle Tutoring @ www.dentalelle.com
49
You can put ice packs on your face to reduce swelling. Typically, they are left on for 20 minutes at a time and removed for 20 minutes. If your jaw is sore and stiff after the swelling goes away, try warm compresses.
Eat soft and cool foods for a few days. A gentle rinse with warm salt water, started 24 hours after the surgery,
can help to keep the area clean. Use one-half teaspoon of salt in a cup of water. Most swelling and bleeding end within a day or two after the surgery. Initial healing takes at least two weeks.
If you need stitches, your doctor may use the kind that dissolve on their own. This usually takes one to two weeks. Rinsing with warm salt water will help the stitches to dissolve. Some stitches need to be removed by the dentist or surgeon.
You should not smoke, use a straw or spit after surgery. These actions can pull the blood clot out of the hole where the tooth was.

Risks Involved
Dentalelle Tutoring @ www.dentalelle.com
50
A problem called a dry socket develops in about 3% to 4% of all extractions. This occurs when a blood clot doesn't form in the hole or the blood clot breaks off or breaks down too early.
In a dry socket, the underlying bone is exposed to air and food. This can be very painful and can cause a bad odor or taste. Typically dry sockets begin to cause pain the third day after surgery.
Dry socket occurs up to 30% of the time when impacted teeth are removed. It is also more likely after difficult extractions. Smokers and women who take birth control pills are more likely to have a dry socket.
A dry socket needs to be treated with a medicated dressing to stop the pain and encourage the area to heal.
Infection can set in after an extraction. However, you probably won't get an infection if you have a healthy immune system.

Other Problems
Dentalelle Tutoring @ www.dentalelle.com
51
Accidental damage to nearby teeth, such as fracture of fillings or teeth An incomplete extraction, in which a tooth root remains in the jaw — Your
dentist usually removes the root to prevent infection, but occasionally it is less risky to leave a small root tip in place.
A fractured jaw caused by the pressure put on the jaw during extraction —This occurs more often in older people with osteoporosis (thinning) of the jaw bone.
A hole in the sinus during removal of an upper back tooth (molar) — A small hole usually will close up by itself in a few weeks. If not, more surgery may be required.
Soreness in the jaw muscles and/or jaw joint — It may be tough for you to open your mouth wide. This can happen because of the injections, keeping your mouth open and/or lots of pushing on your jaw.
Long-lasting numbness in the lower lip and chin — This is an uncommon problem. It is caused by injury to the inferior alveolar nerve in your lower jaw. Complete healing may take three to six months. In rare cases, the numbness may be permanent.

Calling a Professional
Dentalelle Tutoring @ www.dentalelle.com
52
The swelling gets worse instead of better.
You have fever, chills or redness
You have trouble swallowing
You have uncontrolled bleeding in the area
The area continues to ooze or bleed after the first 24 hours
Your tongue, chin or lip feels numb more than 3 to 4 hours after the procedure
The extraction site becomes very painful -- This may be a sign that you have developed a dry socket.

Tooth Impactions
Dentalelle Tutoring @ www.dentalelle.com
53

Wisdom Teeth
Dentalelle Tutoring @ www.dentalelle.com
54
Wisdom teeth are known as “third molars,” and generally develop in a person between the ages of 17 and 25, although approximately 25% to 35% of the population never develops wisdom teeth. More often than not, however, wisdom teeth need to be extracted because of problems and complications.
Impaction of the Wisdom Teeth The majority of wisdom teeth fall into this category, primarily because there isn’t enough
room in your jaw to accommodate the teeth. A horizontal impaction occurs when the wisdom tooth grows in sideways, approximately ninety degrees in direction from the rest of the teeth.
With a horizontal impaction, the wisdom tooth grows towards the rest of the teeth. A distal impaction occurs when the tooth grows in at approximately a forty-five degree angle, opposite the direction of the other teeth. Finally, vertical impaction occurs when the tooth is growing upright.
Aside from impaction, there are several other problems that can result if these teeth are left in your mouth. Even though the age-old justification for the removal of wisdom teeth is the misalignment or shifting of other teeth in your mouth if wisdom teeth are left to grow, some of these justifications are debatable and up for interpretation. It’s certainly the case that not everyone’s wisdom teeth need to be extracted.

Incision and Drainage
Dentalelle Tutoring @ www.dentalelle.com
55

Surgical Incision and Drainage
Dentalelle Tutoring @ www.dentalelle.com
56
Dr. Reena Talwar says that Surgical incision and drainage is a commonly used technique in oral surgery to treat dental infections which have progressed to oral swellings. If cavities of the teeth are left untreated, they can eventually progress to infections that spread into the jaw bones and later into the surrounding soft tissues. Not only is this process extremely painful for the individual, but it is also extremely dangerous. This is because untreated dental infections which have penetrated into the surrounding tissues can lead to a spreading of the infection to the brain or heart in a short period of time, causing severe illness and potentially death.
The first sign of a dental infection that has penetrated through the jaw bone into the surrounding soft tissues, other than pain, is a noticeable swelling of the individual’s mouth and/or face.
The way in which these types of infections are treated first begins with a complete review of the patient’s medical and dental history. It is crucial for the clinician to know the history of the current infection in order to develop an appropriate treatment plan to treat the infection.

Continuation
Dentalelle Tutoring @ www.dentalelle.com
57
In some situations, the tooth responsible for the infection may be salvaged. This is based on clinical assessment of the tooth and the relative prognosis for treating the infection by retaining the tooth. In most instances however, the tooth in question is often extracted in conjunction with performing the incision and drainage procedure. In this case, the extraction is performed at the same time as the surgical incision and drainage procedure.
The procedure is generally performed in an out patient setting under local anesthetic. For those individuals who are extremely apprehensive, oral and or intravenous sedation can be utilized in conjunction with the local anesthetic.

Infection
Dentalelle Tutoring @ www.dentalelle.com
58
In general, once the region of the infection has been appropriately anesthetized or “frozen”, a small incision/cut is made in the gums at the most prominent point of the oral swelling. The pus (purulence) is then drained and the site is irrigated with sterile saline solution. In certain instances where a significant amount of swelling and pus are present or when the infection has been long standing, the clinician may elect to place a rubber drain to keep the surgical site patent. This allows for any residual drainage of pus to occur and prevents the need for any further surgery at this site. The drain must be removed by the clinician in 24 to 72 hours after placement. The patient is required to follow-up with the clinician on a regular basis during the healing period. The timeline for follow-up is determined by the clinician based on his/her clinical assessment of the patient.
The patients are often placed on antibiotic therapy following the surgical procedure for a period of 7 to 10 days. A prescription for pain medication is also often provided.
Surgical incision and drainage is a routinely performed procedure for locally spreading dental infections which has demonstrated excellent outcome for patients.


![[Dental Implants Cost]](https://static.fdocuments.in/doc/165x107/55638cefd8b42ad2128b4ef9/dental-implants-cost-55849922c2925.jpg)