Defined Brow Tutorial
17
Defined Brow Tutorial
-
Upload
niela-kyle-mba -
Category
Lifestyle
-
view
75 -
download
0
Transcript of Defined Brow Tutorial
Defined Brow Tutorial
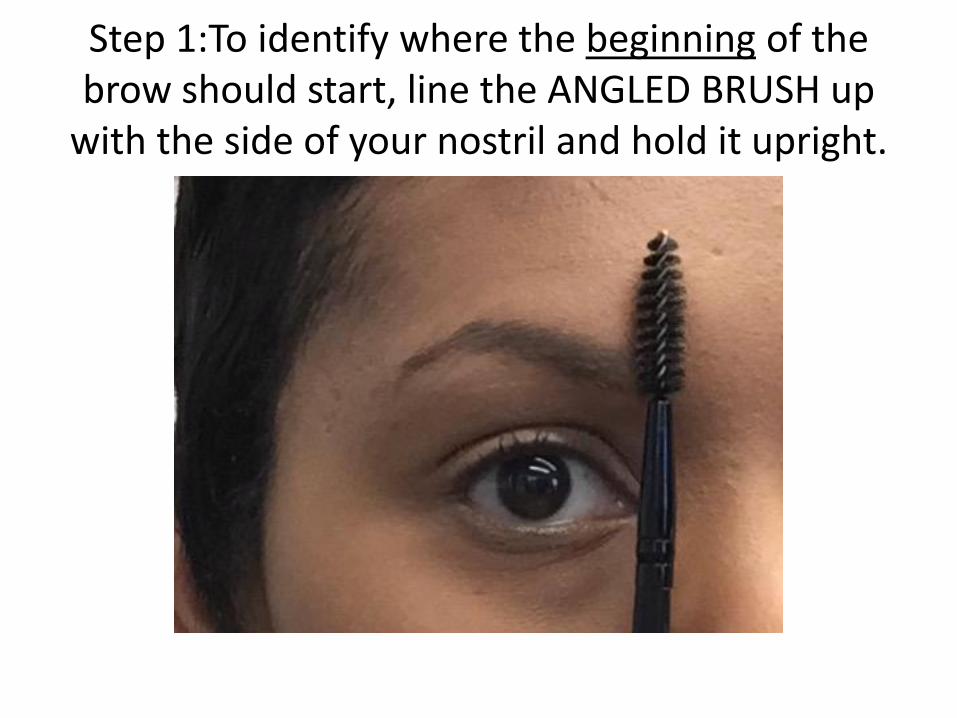
Step 1:To identify where the beginning of the brow should start, line the ANGLED BRUSH up
with the side of your nostril and hold it upright.

Step 2:To identify where the arch should start, line the ANGLED BRUSH
diagonally with the outer edge of your iris.
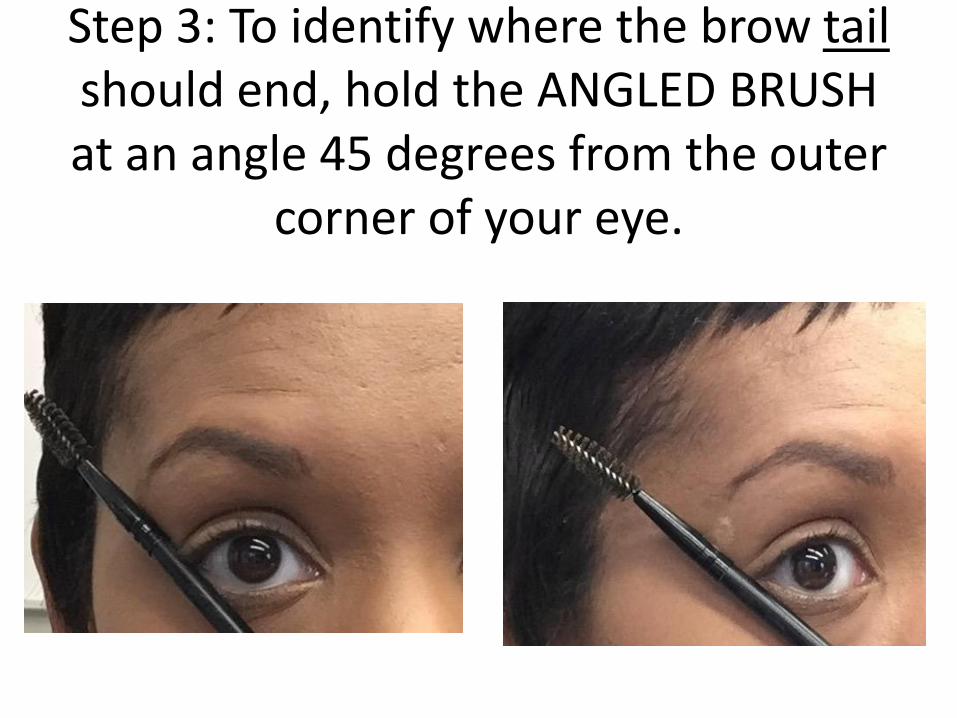
Step 3: To identify where the brow tail should end, hold the ANGLED BRUSH at an angle 45 degrees from the outer
corner of your eye.
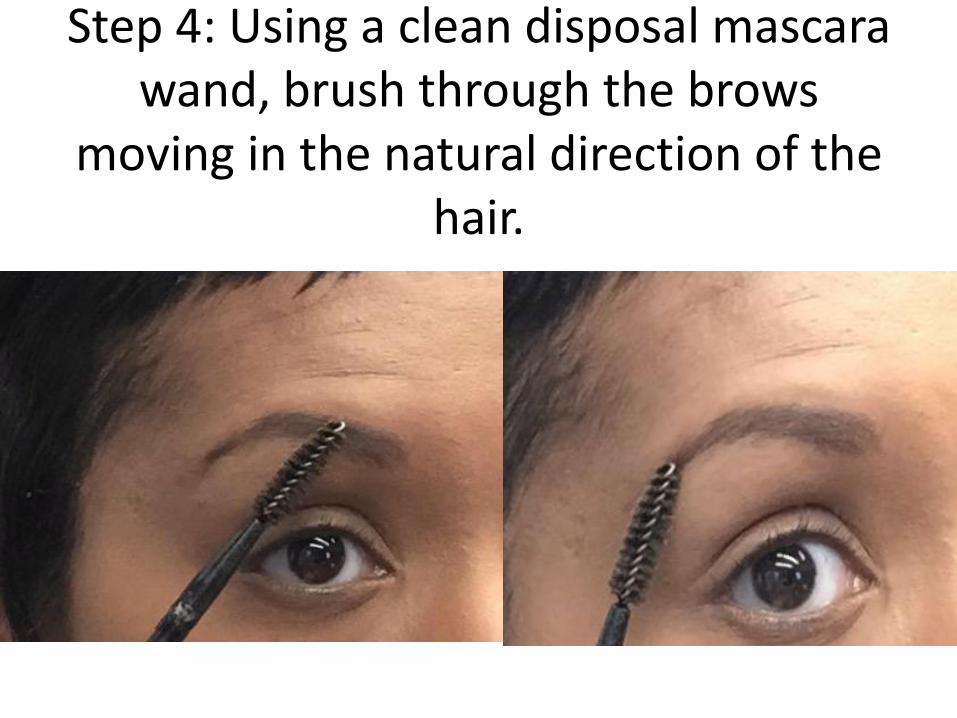
Step 4: Using a clean disposal mascara wand, brush through the brows
moving in the natural direction of the hair.

Step 5: Now, assess whether the client has the following:
-Angular or rounded brow -Full, medium or thin brow
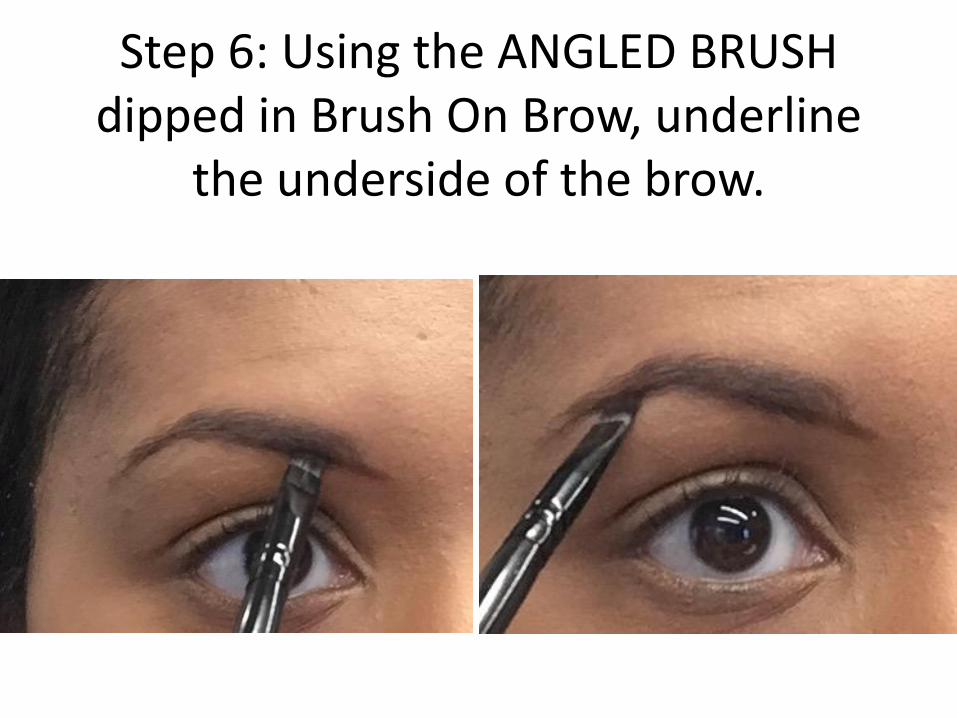
Step 6: Using the ANGLED BRUSH dipped in Brush On Brow, underline
the underside of the brow.
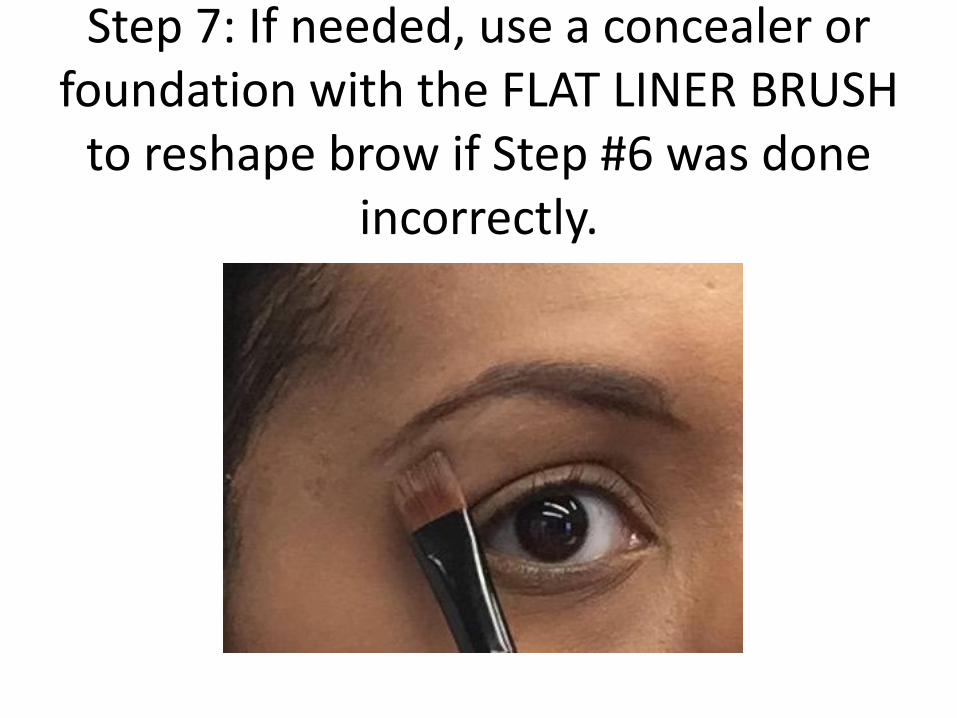
Step 7: If needed, use a concealer or foundation with the FLAT LINER BRUSH
to reshape brow if Step #6 was done incorrectly.
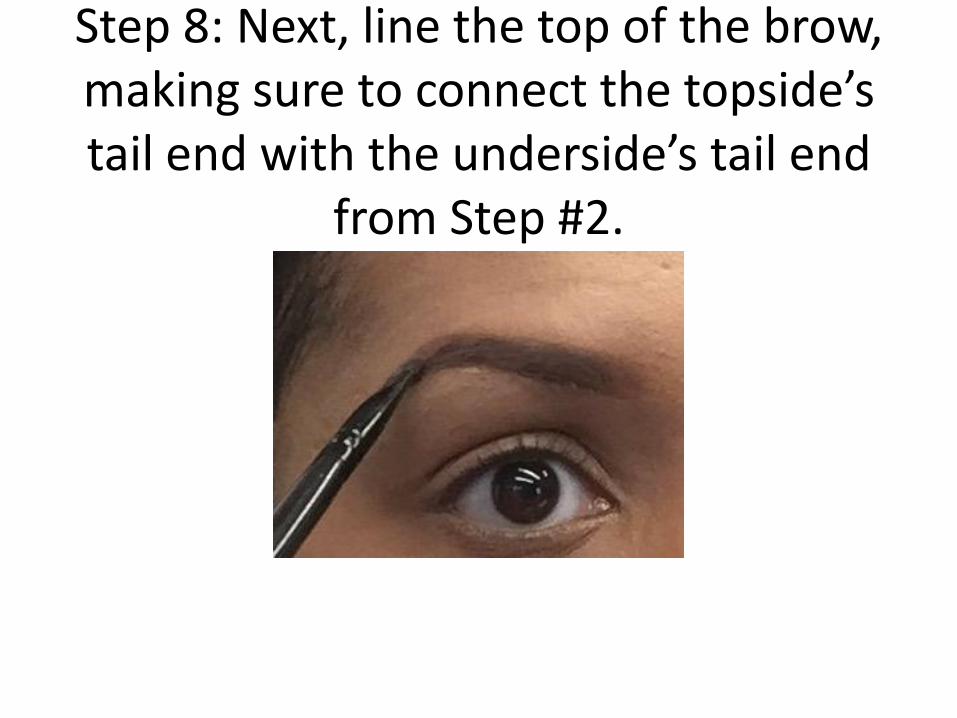
Step 8: Next, line the top of the brow, making sure to connect the topside’s tail end with the underside’s tail end
from Step #2.
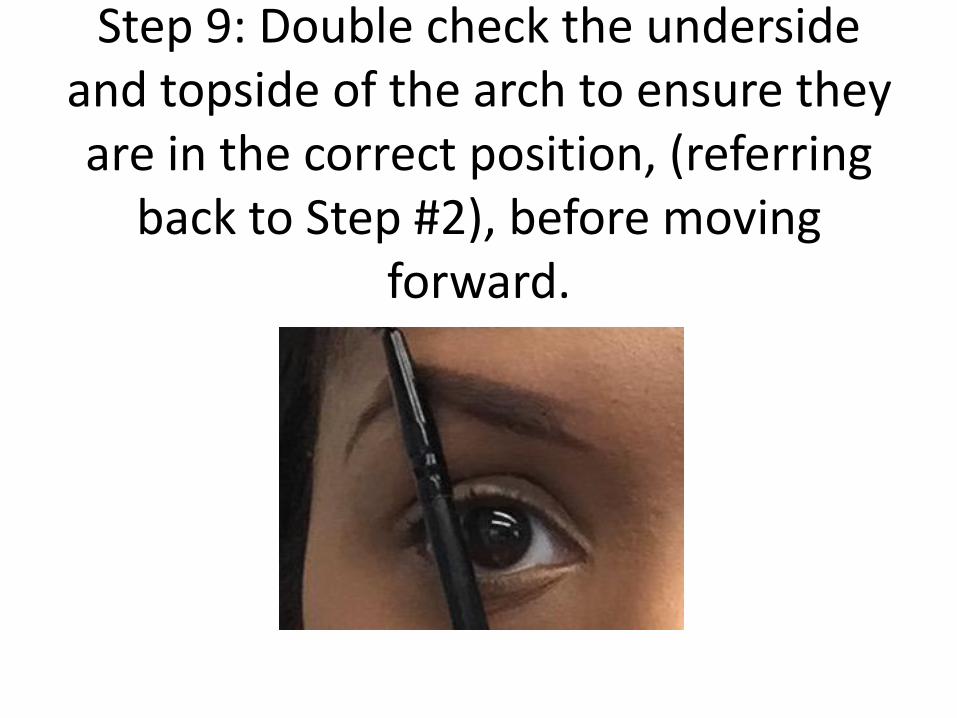
Step 9: Double check the underside and topside of the arch to ensure they are in the correct position, (referring
back to Step #2), before moving forward.
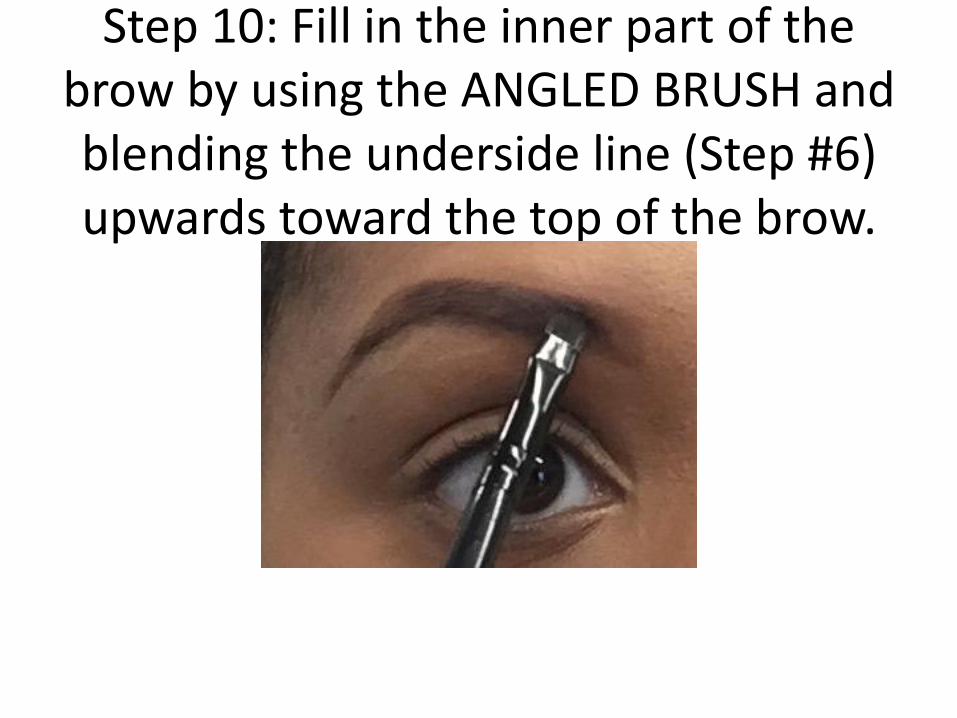
Step 10: Fill in the inner part of the brow by using the ANGLED BRUSH and blending the underside line (Step #6) upwards toward the top of the brow.
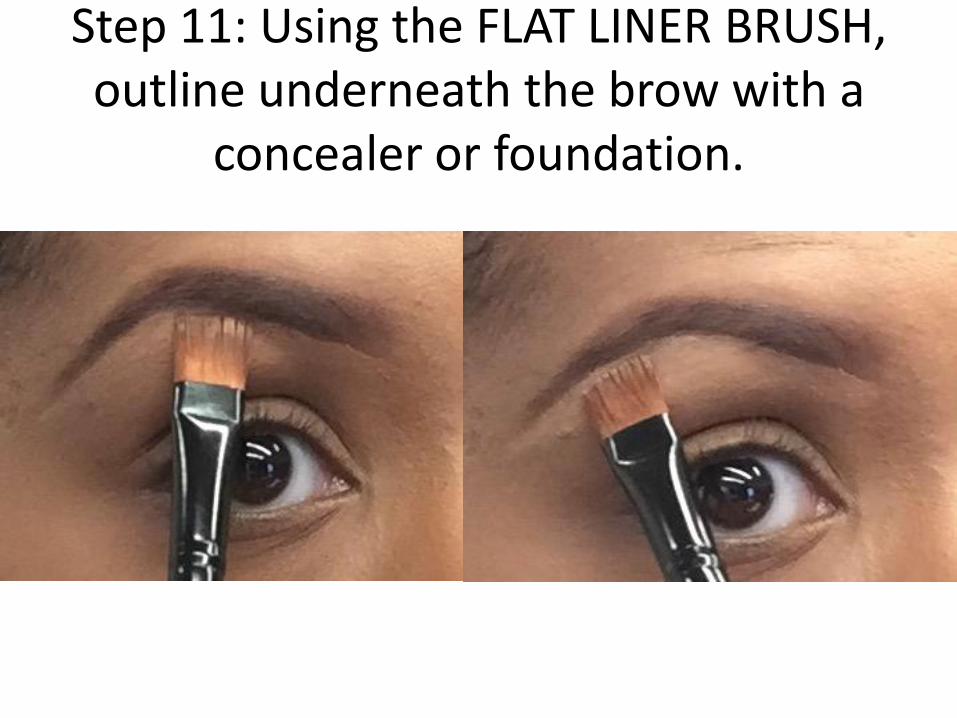
Step 11: Using the FLAT LINER BRUSH, outline underneath the brow with a
concealer or foundation.
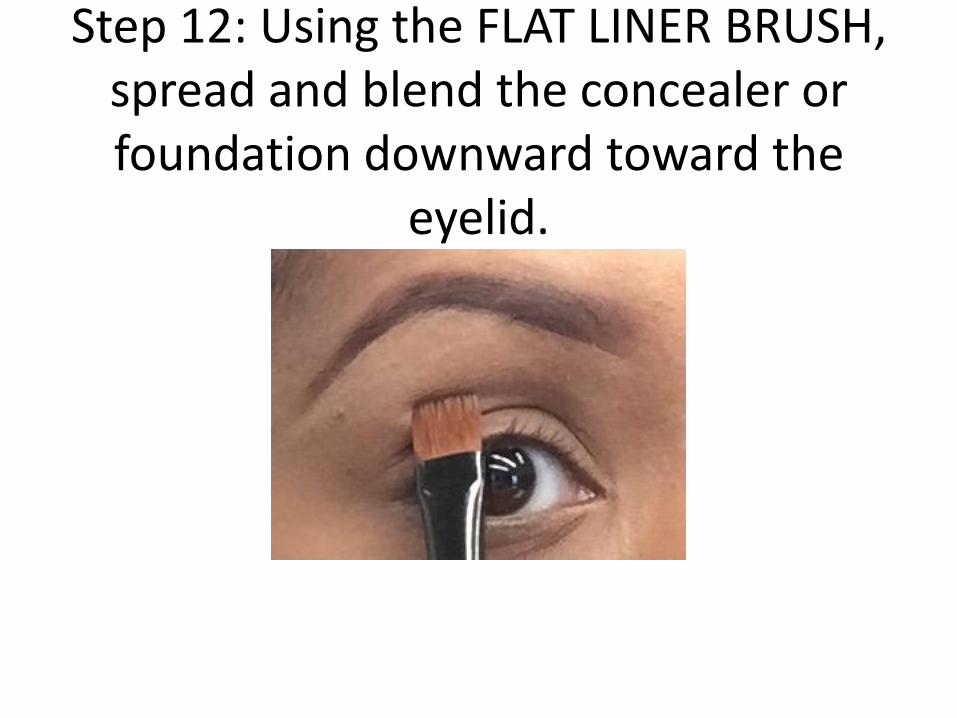
Step 12: Using the FLAT LINER BRUSH, spread and blend the concealer or foundation downward toward the
eyelid.
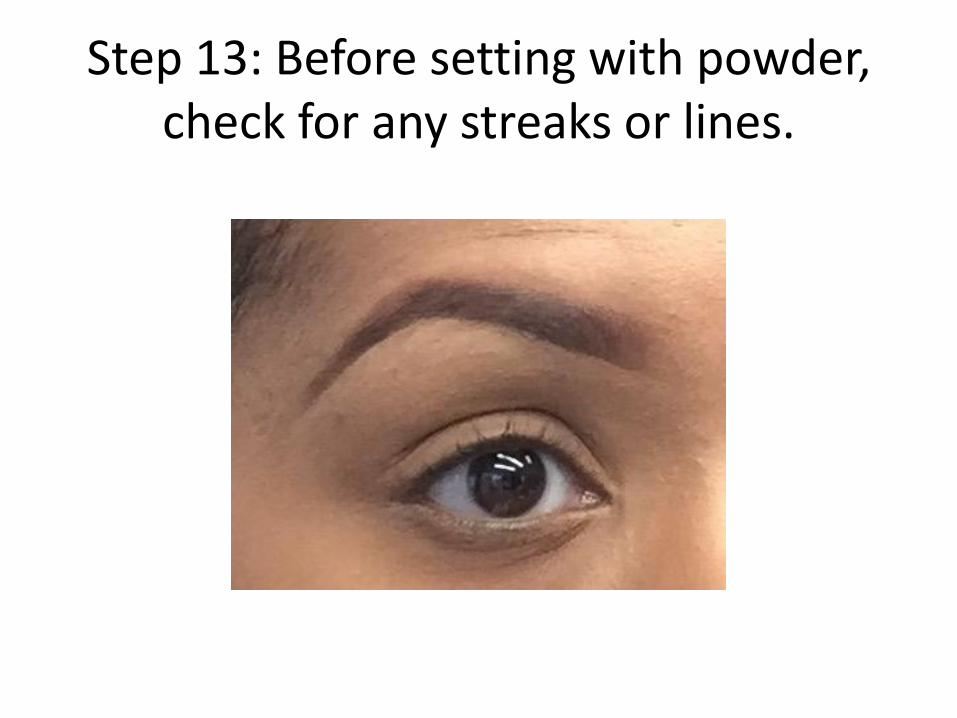
Step 13: Before setting with powder, check for any streaks or lines.
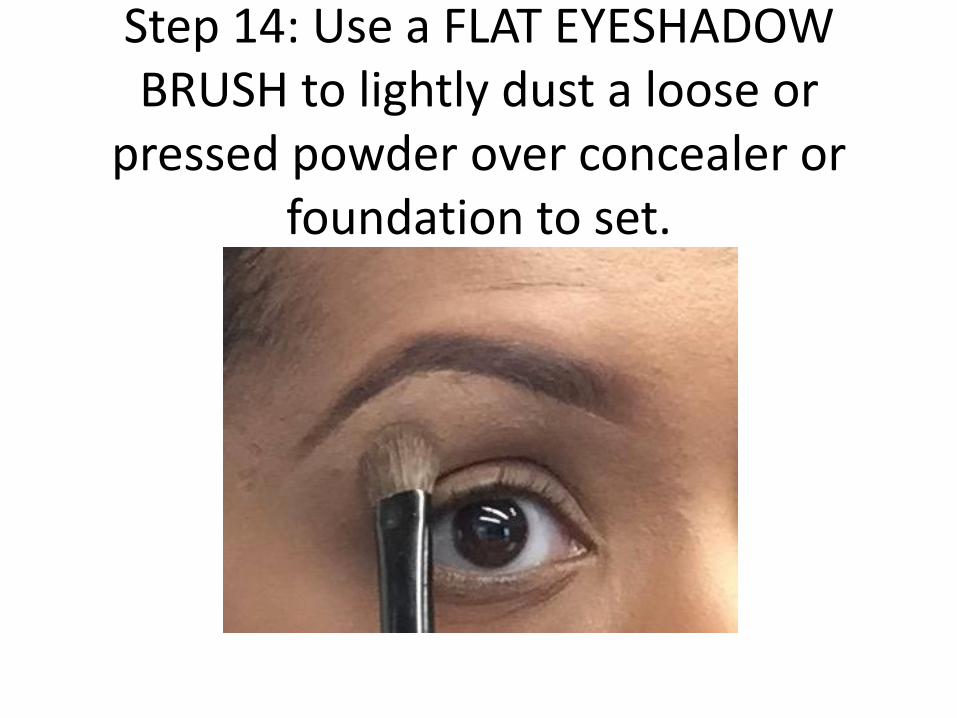
Step 14: Use a FLAT EYESHADOW BRUSH to lightly dust a loose or
pressed powder over concealer or foundation to set.
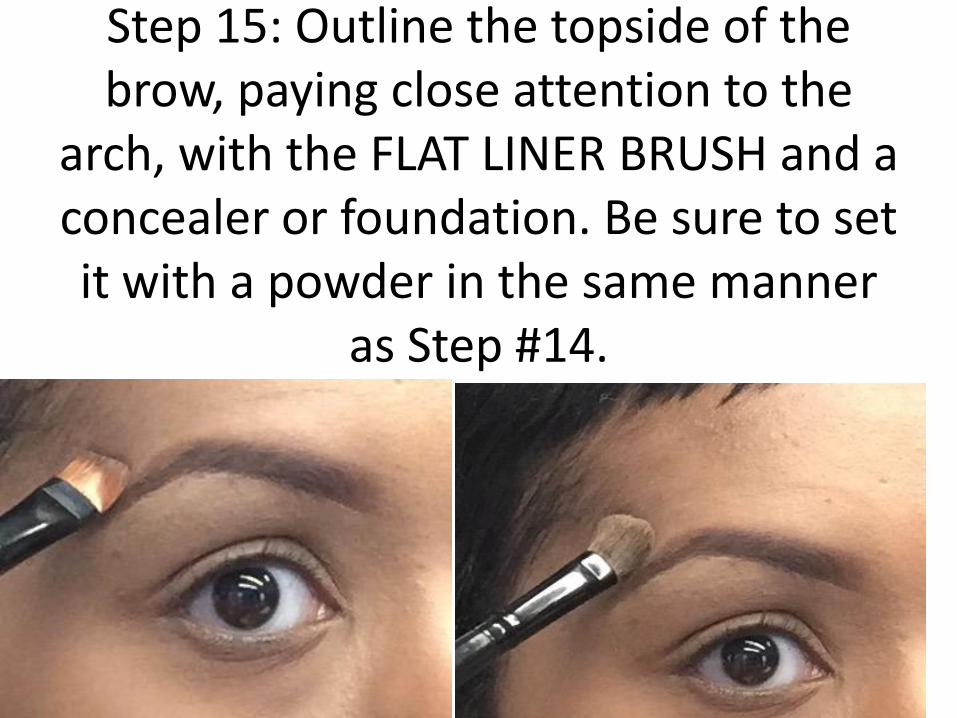
Step 15: Outline the topside of the brow, paying close attention to the
arch, with the FLAT LINER BRUSH and a concealer or foundation. Be sure to set it with a powder in the same manner
as Step #14.
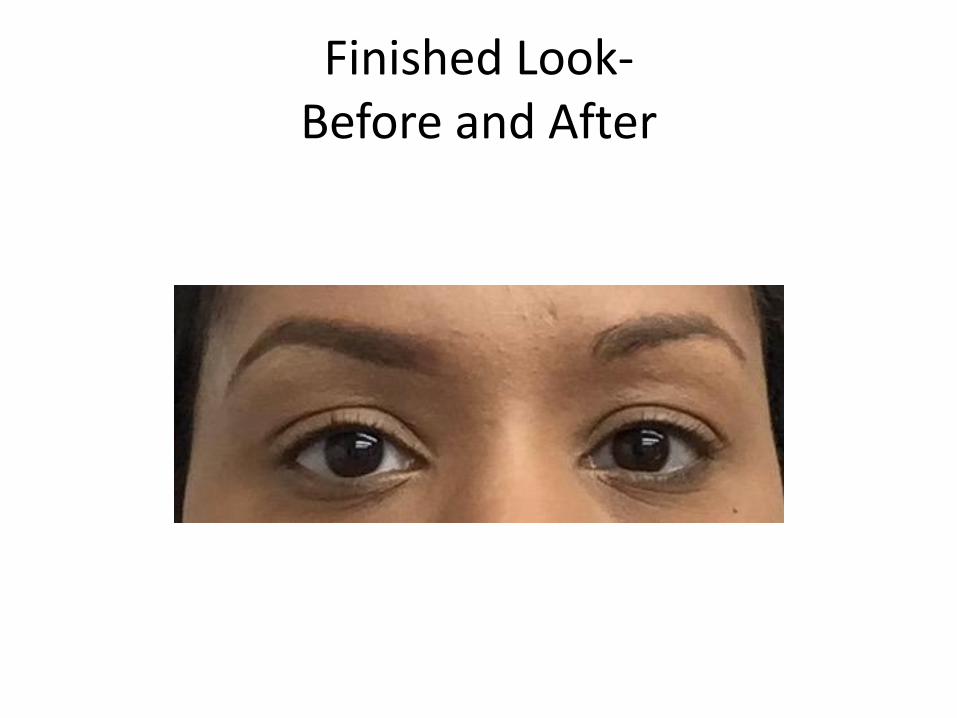
Finished Look- Before and After