DABJ Design and Analysis of Bolted Joints...(improved) after nearly each class Revised into a 3-day...
24
Design and Analysis of Bolted Joints June 2019 Copyright Instar Engineering and Consulting, Inc.• instarengineering.com Materials may be reproduced in complete form only, with header and footer Course Sampler • Help you understand how to design bolted joints that Objectives: Target audience: Structural and mechanical engineers (design and analysis), responsible/cognizant engineers, and others interested in the topic – can withstand mission environments and function as required – are relatively inexpensive and easy to assemble – are trouble-free • Help you understand the mechanics of a preloaded joint and how they relate to failure. • Share methods of analysis and help you understand their applications and limitations. • Help you understand and learn to use NASA-STD-5020A for threaded fastening systems, and provide insight into its development. • Provide a valuable reference and a trail to data sources. DABJ—Design and Analysis of Bolted Joints for Aerospace Engineers 3-day Course—Developed and Taught by Tom Sarafin
Transcript of DABJ Design and Analysis of Bolted Joints...(improved) after nearly each class Revised into a 3-day...
Design and Analysis of Bolted Joints
June 2019 Copyright Instar Engineering and Consulting, Inc.• instarengineering.com Materials may be reproduced in complete form only, with header and footer
Course Sampler
• Help you understand how to design bolted joints that Objectives:
Target audience: Structural and mechanical engineers (design and analysis),
responsible/cognizant engineers, and others interested in
the topic
– can withstand mission environments and function as required
– are relatively inexpensive and easy to assemble
– are trouble-free
• Help you understand the mechanics of a preloaded joint and
how they relate to failure.
• Share methods of analysis and help you understand their
applications and limitations.
• Help you understand and learn to use NASA-STD-5020A for
threaded fastening systems, and provide insight into its
development.
• Provide a valuable reference and a trail to data sources.
DABJ—Design and Analysis of Bolted Joints for Aerospace Engineers
3-day Course—Developed and Taught by Tom Sarafin

Design and Analysis of Bolted Joints
June 2019 Copyright Instar Engineering and Consulting, Inc.• instarengineering.com Materials may be reproduced in complete form only, with header and footer
Course Sampler
DABJ History
First version developed in 1998 at the request of NASA Goddard
– Titled “Design and Analysis of Fastened Joints” (DAFJ); 8-hour course, taught twice in 1998
Expanded into a 2-day course in 1999—Taught 21 times in this format; course materials revised (improved) after nearly each class
Revised into a 3-day course in 2005 at NASA JSC request to include a section on compliance with NSTS 08307—Renamed “Design and Analysis of Bolted Joints” (DABJ)
– This exercise included several meetings with JSC experts; all concluded that NSTS 08307 should be revised or replaced
Helped fuel the NASA-STD-5020 project (new standard for threaded fastening systems), which started in 2007. Tom Sarafin served as one of the core team members for this project.
– Taught 19 times in this format, with periodic revision to capture additional information
Major revision in June 2010 to include a section on analysis criteria per the draft NASA-STD-5020, which was being developed at that time—Taught 10 times between June 2010 and March 2012
Revised in April 2012 to be consistent with the final version of NASA-STD-5020, which was released in March 2012—Taught 40 times, with gradual improvement to the charts over time
Revised in March 2019 to address NASA-STD-5020A (Rev A, released in September 2018)—Taught 3 times through June 2019
Through May 2019, Tom Sarafin has taught this course, in its evolving versions,
a total of 95 times to more than 1800 engineers

Design and Analysis of Bolted Joints
June 2019 Copyright Instar Engineering and Consulting, Inc.• instarengineering.com Materials may be reproduced in complete form only, with header and footer
Course Sampler
Topics by Section Number
Introduction
1. Overview
2. Screw Threads: Evolution and Important
Characteristics
3. Developing a Concept for the Joint
4. Calculating Bolt Loads when Ignoring Preload
5. Failure Modes and Assessment Methods
6. Thread Stripping and Pull-out Strength
7. Selecting Hardware and Detailing the Design
8. Mechanics of a Preloaded Joint Under Applied Tension
9. Fastening System Analysis per NASA-STD-5020A
10. Special Topics
Summary
Design and Analysis of Bolted Joints
June 2019 Copyright Instar Engineering and Consulting, Inc.• instarengineering.com Materials may be reproduced in complete form only, with header and footer
Course Sampler
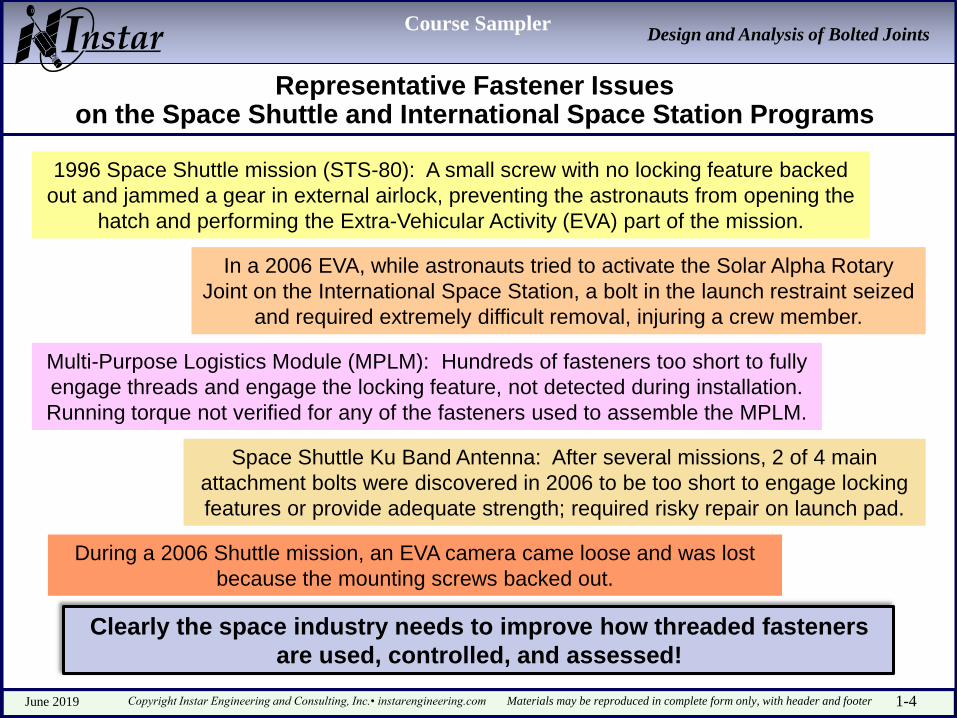
Representative Fastener Issues on the Space Shuttle and International Space Station Programs
1996 Space Shuttle mission (STS-80): A small screw with no locking feature backed
out and jammed a gear in external airlock, preventing the astronauts from opening the
hatch and performing the Extra-Vehicular Activity (EVA) part of the mission.
In a 2006 EVA, while astronauts tried to activate the Solar Alpha Rotary
Joint on the International Space Station, a bolt in the launch restraint seized
and required extremely difficult removal, injuring a crew member.
Multi-Purpose Logistics Module (MPLM): Hundreds of fasteners too short to fully
engage threads and engage the locking feature, not detected during installation.
Running torque not verified for any of the fasteners used to assemble the MPLM.
Space Shuttle Ku Band Antenna: After several missions, 2 of 4 main
attachment bolts were discovered in 2006 to be too short to engage locking
features or provide adequate strength; required risky repair on launch pad.
During a 2006 Shuttle mission, an EVA camera came loose and was lost
because the mounting screws backed out.
Clearly the space industry needs to improve how threaded fasteners
are used, controlled, and assessed!
1-4

Design and Analysis of Bolted Joints
June 2019 Copyright Instar Engineering and Consulting, Inc.• instarengineering.com Materials may be reproduced in complete form only, with header and footer
Course Sampler
Designing a Bolted Joint
1. Identify functional requirements and constraints for the structure being designed.
2. Develop a concept. – Structural configuration and form of construction – Method of attachment: welding, bonding, or fastening – Concept for the joint: configuration, types of fasteners, access for assembly
3. Quantify requirements and identify design considerations for the joint. – Life-cycle environments, design loads, loading cycles, temperatures – Stiffness, allowable permanent deformation, design criteria – Cost, lead time, ease of assembly, schedule
Itera
te a
s n
eeded
Goal: a joint that ...
– functions as needed
throughout its intended
life cycle
– uses affordable and
available hardware
– is easy to assemble and
disassemble
Where discussed
Sec. 1
Sec. 3
Sec. 1
Secs.
3 – 6,
10
Sec. 7
Sec. 7
Secs.
8 & 9
4. Size the joint. – Select bolt pattern – Calculate bolt loads; size bolts – Identify potential failure modes in the
fittings (region of joined members near bolts) and test-substantiated methods of
assessment – Size fittings
5. Select hardware and design details. – Specific bolts, nuts, washers, pins – Edge distance, wrench clearance, hole
size
6. Specify assembly requirements. 1-5

Design and Analysis of Bolted Joints
June 2019 Copyright Instar Engineering and Consulting, Inc.• instarengineering.com Materials may be reproduced in complete form only, with header and footer
Course Sampler
Most Bolted Joints Don’t Work Without Preload!
A high preload ...
– minimizes cyclic loading in the fastener; increases fatigue life
– increases a joint’s stiffness
– keeps shear joints from slipping back and forth within clearance holes; prevents fretting (corrosion resulting from breakdown of protective oxides on surfaces)
– helps maintain alignment
– helps lock the fastener
Tightening the nut or bolt creates a tensile load in the bolt and an equal
clamp load between fittings. It’s the clamp load that’s important.
Two design challenges:
1. Establishing the right preload at assembly
2. Maintaining preload during service
addressed
in Sec. 7
But too high of a preload …
– may cause bolts to fail during installation (combined effects of tension and torsion)
– may cause excessive yielding during installation, using up much of the bolt material’s elongation and leading to greater risk of rupture under applied load
– may crush a clamped brittle material
1-10

Design and Analysis of Bolted Joints
June 2019 Copyright Instar Engineering and Consulting, Inc.• instarengineering.com Materials may be reproduced in complete form only, with header and footer
Course Sampler
Thread Cutting Vs. Thread Rolling
(images from Horstengineering.com)
Image credit: Fastenal.com Image credit: Horstengineering.com
Thread rolling
Cut Rolled after heat treatment
Most procured fasteners have rolled threads
because, although the tooling is more
expensive, the recurring cost is lower.
The dies used for thread rolling have a
radius, and rolled UN threads typically meet
the requirements for UNR (Ref.
Fastenal.com).
Thread cutting
Thread rolling
Material grain comparison
2-7

Design and Analysis of Bolted Joints
June 2019 Copyright Instar Engineering and Consulting, Inc.• instarengineering.com Materials may be reproduced in complete form only, with header and footer
Course Sampler
Goal: A Joint with High, Linear Stiffness but Ductile Failure
High stiffness: keeps the structure’s natural frequencies higher, which usually helps avoid high dynamic loads, and makes structural behavior more predictable
Load
Displacement
0
0
Avoid
Designing to ensure that failure is ductile is hugely
important but often neglected, and is addressed multiple
times in upcoming sections of this course.
The following pages address the goal of high, linear
stiffness.
Linear region.
Keep limit
loads within
this range.
Goal
Ductile failure: signifi-
cant plastic deformation
prior to rupture
But we don’t want the joint to be linear all the way up to rupture.
– If there’s an unanticipated high load or distribution of load (or an energy-limited load), ductility often allows loads to redistribute (or allows the joint to absorb energy) before anything ruptures.
Linear relationship between load and displacement: makes the structure more predictable with linear-elastic analysis (the vast majority of structural analyses, especially loads analysis)
3-10

Design and Analysis of Bolted Joints
June 2019 Copyright Instar Engineering and Consulting, Inc.• instarengineering.com Materials may be reproduced in complete form only, with header and footer
Course Sampler
Calculating Bolt Loads is Often Based Simply on Statics
1000 lb
1000 lb
Case 1: Tensile applied load,
with resultant load vector
centered between bolts
Example: Tension joint with 2 bolts
4.00”
Super-
position
applies
FBD
Ignoring preload …
What’s the peak
bolt load?
1000 lb
1000 lb
1600 in-lb
1600 in-lb
Case 3: Combined loads
4.00”
What’s the peak
bolt load?
Case 2: Applied
moment
4.00”
What’s the peak
bolt load?
1600 in-lb
1600 in-lb
With loads carried only
by the bolts,
4-7

Design and Analysis of Bolted Joints
June 2019 Copyright Instar Engineering and Consulting, Inc.• instarengineering.com Materials may be reproduced in complete form only, with header and footer
Course Sampler
A Bolt that Failed in a Tension Test
The most robust bolt for tensile loading is one made of a material
that has a proportional limit that is no more than about 70% of its
ultimate strength, such as 160-ksi A-286 (Fty = 120 ksi,
proportional limit ≈ 100 ksi). This is not the case with ultra-high-
strength fasteners and 160-ksi titanium fasteners.
These bolts can fail
in a brittle fashion.
Full-diameter body (greater cross-
sectional area than at threads)
The threaded region between the nut and the full-diameter body
is often quite short. Failure exhibits more apparent ductility if
yielding occurs over the length of the full-diameter body before
rupture occurs at the threads.
5-5

Design and Analysis of Bolted Joints
June 2019 Copyright Instar Engineering and Consulting, Inc.• instarengineering.com Materials may be reproduced in complete form only, with header and footer
Course Sampler
Bearing Ultimate Failure for Ductile Materials
The material can undergo very large plastic deformation,
elongating the hole.
Rupture is typically shear tearout.
5-19

Design and Analysis of Bolted Joints
June 2019 Copyright Instar Engineering and Consulting, Inc.• instarengineering.com Materials may be reproduced in complete form only, with header and footer
Course Sampler
When the plates are made of ductile materials,
Design Shear Joints to Be Bearing Critical
Shear-critical joint: one that has a lower margin of safety for fastener shear than for bearing.
– Can have little plastic deformation before ultimate failure.
– The highest-loaded fasteners can fail before the others take their share of load.
– Result: the joint can “unzip”, as each fastener next to a failed one becomes overloaded and then also fails.
Bearing-critical joint: one that has a lower margin of safety for bearing than for fastener shear.
– Bearing failure in ductile materials exhibits more plastic deformation than bolt shear failure, so the bolts share load before the joint fails.
– Bearing failure in composite materials shows little or no deformation prior to rupture because the materials are brittle, so fasteners don’t share load as well.
With metal plates, design the joint to be bearing-critical by
increasing fastener diameter relative to plate thickness.
Even if the joint is bearing-critical, avoid long strings of fasteners in a
splice, such as the one shown on the previous page.
5-30

Design and Analysis of Bolted Joints
June 2019 Copyright Instar Engineering and Consulting, Inc.• instarengineering.com Materials may be reproduced in complete form only, with header and footer
Course Sampler
Class Exercise: Recognizing Potential Failure Modes (Problem 1)
Materials: ductile metals
A. Identify all potential ultimate failure modes of concern.
B. Explain how you would assess those failure modes and obtain corresponding
allowable loads or stresses.
Spherical bearing
C. How would
you improve
the design?
P P
5-33

Design and Analysis of Bolted Joints
June 2019 Copyright Instar Engineering and Consulting, Inc.• instarengineering.com Materials may be reproduced in complete form only, with header and footer
Course Sampler
Examples of Mismatched Hardware
Some combinations in use in space programs (NASA survey results, Dec 2007):
• Acceptable combinations for strength
– But some sizes are dimensionally incompatible—discussion forthcoming.
• For all other combinations listed above, the nut or insert is the weak link. Failure may be
relatively brittle, and the analyst may not think to check anything other than the bolt.
Match your hardware strength-wise!
In analysis, consider the entire fastening system!
Note: Strength mismatch may be okay for
shear joints with reduced preload. But, for
shear joints with oversized holes, we want
high preload!
Dia.
Fastener
spec
Fastener
material
Material
ult tensile
strength,
Ftu (ksi)
Fastener
ult tensile
strength,
Ptu (lb)
Nut or
insert
Nut or
insert
spec
Nut or
insert
material
Nut or
insert ult
strength,
Ptu,nut (lb)
#10 NAS1351 A286 160 3200 Keensert MS51830 Steel 2500
#10 NAS1351 A286 160 3200 Nut MS21043 A286 2460
#10 NAS6703 A286 160 3620 Nut NAS1291 A286 2460
#10 NAS6703 A286 160 3620 Nut NAS1805 A286 4070
3/8 ST12007 MP35N 260 22800 Keensert MS51831 A286 14050
3/8 NAS1953 A286 180 17100 Nut NAS1805 A286 17100
3/8 NAS6705U A286 160 15200 Nut MS21043 A286 11450
7-6

Design and Analysis of Bolted Joints
June 2019 Copyright Instar Engineering and Consulting, Inc.• instarengineering.com Materials may be reproduced in complete form only, with header and footer
Course Sampler
Dimensional Considerations for Floating Fasteners
Washer under head, with
countersink if needed to
accommodate head-to-shank radius
Bolt grip (to start
of runout threads)
≥ 0.75t t
Joint grip
≤ p For shear joints, to have
negligible effect on
bearing strength ≥ 2p
≥ 2p
(to avoid interference with runout
threads; may require more than
one washer under nut)
(to ensure full thread
engagement)
Incomplete lead
threads over
distance up to 2p
p is the thread
pitch
Incomplete runout threads
over distance up to 2p
Slightly modified version of
NASA-STD-5020A Fig. 2
See appendix for dimensional considerations with threaded inserts
7-18

Design and Analysis of Bolted Joints
June 2019 Copyright Instar Engineering and Consulting, Inc.• instarengineering.com Materials may be reproduced in complete form only, with header and footer
Course Sampler
Example of Variation in the Torque-Tension Relationship
(Source: Ref. 30)
#10 NAS1351, UNRF-3A, A-286 screw in an MS21209 corrosion-resistant steel helical coil
insert, with an NAS620C10L washer. No lubricant. Each screw was installed in a fresh insert for
the first cycle. Torque reported is the amount above running torque from the locking feature.
Kmin = 0.17
Kmax = 0.31
Knom = 0.23
Ten screws tested, 3 cycles each, the last cycle to failure
Maximum torque value
for flight assembly
7-32

Design and Analysis of Bolted Joints
June 2019 Copyright Instar Engineering and Consulting, Inc.• instarengineering.com Materials may be reproduced in complete form only, with header and footer
Course Sampler
Class Quiz
A preloaded joint with a single bolt is subject to applied tensile load.
Is it possible for the total tensile load in the bolt to be less than the applied
tensile load?
8-6

Design and Analysis of Bolted Joints
June 2019 Copyright Instar Engineering and Consulting, Inc.• instarengineering.com Materials may be reproduced in complete form only, with header and footer
Course Sampler
Revisiting the Plot of Applied Load vs. Bolt Load
Bolt T
ensile
Load,
Ptb
Applied Tensile Load, Pt
Pp
Slope = nf
tptb PnPP f
The linear model:
Until the joint separates, the
total tensile load in the bolt is
Separation
ttb PP
After separation,
This is the
value
calculated
improperly in
the example.
8-8

Design and Analysis of Bolted Joints
June 2019 Copyright Instar Engineering and Consulting, Inc.• instarengineering.com Materials may be reproduced in complete form only, with header and footer
Course Sampler
Understanding the Load-Introduction Factor
Compressing
Decompressing
Applied load
Correct idealization
Fitting
Clamped material
L Llp
Applied load
Bolt
Compressing
Decompressing
Same as with the washer, load must further compress the fitting material just under the washer in order to go through the washer and into the bolt.
To account for this discrepancy, the computed percentage of applied load by which the bolt load increases is reduced by a
load-introduction factor, n, per Eq. 8.1a.
Without use of such a factor, we would over-predict both the total bolt load
(conservative) and the separation load (unconservative).
The methods described in earlier pages herein for calculating bolt stiffness and clamp stiffness are based on an incorrect idealization.
8-15

Design and Analysis of Bolted Joints
June 2019 Copyright Instar Engineering and Consulting, Inc.• instarengineering.com Materials may be reproduced in complete form only, with header and footer
Course Sampler
Separation Before Rupture
Maximum
preload, Pp-max
Bolt
Tensile
Load, Ptb
Applied Tensile Load, Pt 0 0
Incorrect
allowable applied
load, P′tu (per Eq.
10)
Separation load, P′sep
(per Eq. 11)
Allowable ultimate
load, Ptu-allow
Slope = nf Separation
Slope = 1
Rupture
Correct allowable
applied load = Ptu-allow Fig. 9-6
Ptu
Ptbu per Eq. 8
1allow
tu
tuu
P
PMS
(Eq. 6)
Ptu = design ultimate
tensile load for the bolt
= FSu(FF)(PtL)
9-25

Design and Analysis of Bolted Joints
June 2019 Copyright Instar Engineering and Consulting, Inc.• instarengineering.com Materials may be reproduced in complete form only, with header and footer
Course Sampler
Does Preload Reduce the Strength of a Shear Joint?
Hypothesis: With fasteners made of ductile materials, preload does not interact with applied shear to reduce the strength of a shear joint.
– Plastic deformation in the bolt causes prestress to relax prior to rupture.
Tests at NASA/Goddard in August 2009 (Ref. 51) substantiated this hypothesis :
– Double shear, steel plates, lubricated with dry-film moly-disulphide to minimize friction
– 3/8” 180-ksi A286 through-bolts with nuts in holes sized at 0.386 +0.007/-0.002”
– Tests performed to rupture
5 specimens without preload
5 specimens with extremely high preload (above yield)
Conclusion: Preload does not need to be included in fastener shear analysis.
See NASA-STD-5020 Appendix A.7
9-55
Preloaded joints carried 1.4% less load on average; statistically insignificant
Tests at NASA/Marshall in 2010 (Ref. 42) showed similar results.
– 3/8” 180-ksi A286 bolts
– Tests performed with threads in shear plane and with threads not in shear plane

Design and Analysis of Bolted Joints
June 2019 Copyright Instar Engineering and Consulting, Inc.• instarengineering.com Materials may be reproduced in complete form only, with header and footer
Course Sampler
Interaction: Threads Not In Shear Plane
1
5.1
allow
5.2
allow
tu
tu
su
su
P
P
P
P
For a fastener whose threads are not in the shear plane, the following
interaction criterion applies for combined shear and applied tension:
(Equivalent to NASA-STD-5020A Eq. 20 when
bending stress is omitted)
No need to include
preload in the
interaction check,
based on results of
the Ref. 42 test
Psu = design ultimate shear
load = FF·FSu·PsL
Psu-allow = allowable ultimate
shear load per Eq. 12
Ptu = design ultimate tensile
load = FF·FSu·PtL
Ptu-allow = allowable ultimate
tensile load based on
the tensile stress area
(Eq. 9.1)
Note: The above criterion is more conservative than
the criterion in Ref. 3 (Astronautics Structures
Manual), which uses exponents of 3 for shear and 2
for tension. Tests of A-286 bolts at Marshall Space
Flight Center in 2010 (Ref. 42) showed ultimate failure
at load combinations well below those allowed by the
traditional criterion. Equation 9.1, above, was derived
to match the 2010 test results.
9-57

Design and Analysis of Bolted Joints
June 2019 Copyright Instar Engineering and Consulting, Inc.• instarengineering.com Materials may be reproduced in complete form only, with header and footer
Course Sampler
Special Topic 1: Finite Element Modeling of Bolted Joints
Opening Thoughts, continued
The key thing to remember when modeling a preloaded bolted joint is that the clamp force between fittings (joined parts) creates load paths that are normally much stiffer than the bolt itself.
– Once a bolt is preloaded, it is no longer the main load path.
Under tensile loading, the clamped material can create a load path that is an order of magnitude stiffer than the bolt.
– And, of course, when load reverses and the joint goes into compression, the bolt contributes virtually nothing as a load path.
In shear, a clamped joint carries load in friction, at least until the friction capability is exceeded, and the stiffness of the friction load path is far greater than the shear and bending stiffness of the bolt
The modeling techniques herein are for the purpose of best
representing stiffness of preloaded joints to predict modes of
vibration and load distribution.
At times it’s appropriate to make models for the purpose of predicting
stresses, but those times are not frequent, and they are not
addressed in this section.

Design and Analysis of Bolted Joints
June 2019 Copyright Instar Engineering and Consulting, Inc.• instarengineering.com Materials may be reproduced in complete form only, with header and footer
Course Sampler
Special Topic 1: Finite Element Modeling of Bolted Joints
Load Paths in a Preloaded Joint under Applied Tension
When a tensile load is applied to a preloaded joint, the stiffest load path is the relieving of compression between faying surfaces nearest the tension walls, (dashed red line at right).
As the compression “circle” recedes with gradual gapping, the bolt takes a higher percentage of applied load.
Because we typically design a joint not to gap at limit load or higher, we want to make a model that represents the preloaded (non-gapped) condition.
For linear-elastic analysis, we want the model to represent average stiffness.
Stiffest load
path (but
first to gap)
Portion of
load that
relieves
compression
Load going
through bolt Tension
wall
End
pad
The bolt load path is in parallel with the stiffer load path of clamped material.
Bolt stiffness contributes little to joint stiffness, especially at low levels of
applied load relative to preload.
10-6