Cylinder Head and/or Gasket Replacement Cylinder head...
20
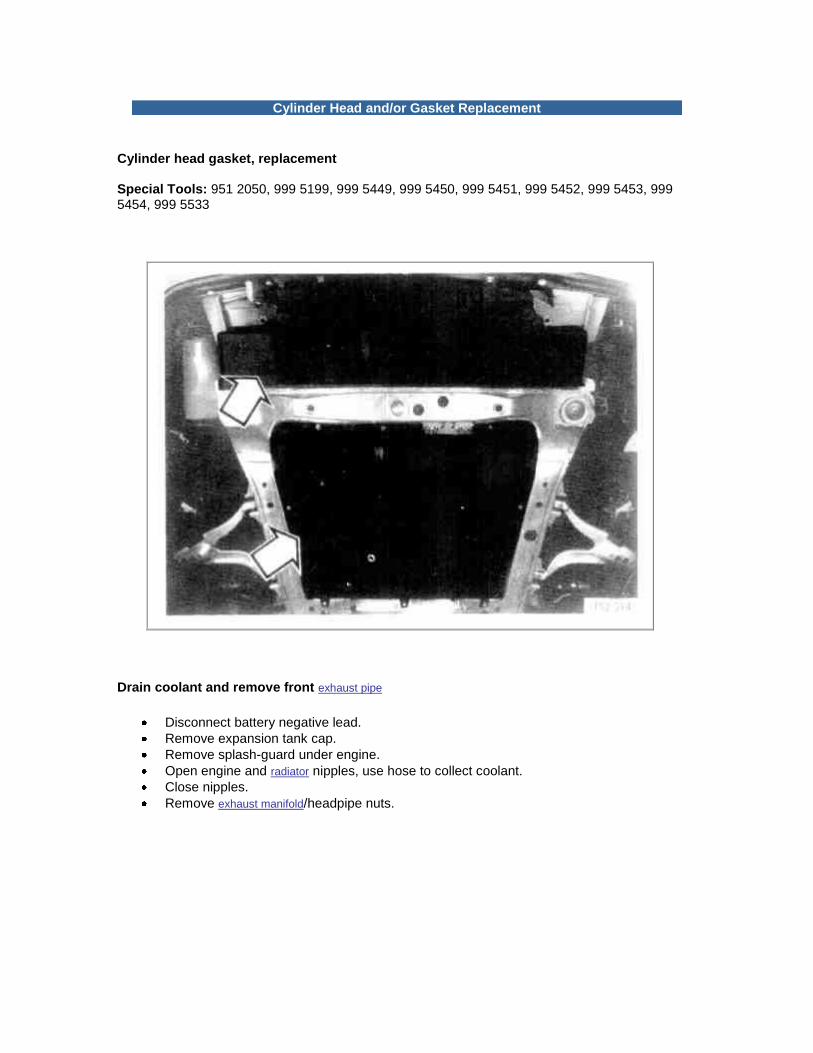
Cylinder Head and/or Gasket Replacement Cylinder head gasket, replacement Special Tools: 951 2050, 999 5199, 999 5449, 999 5450, 999 5451, 999 5452, 999 5453, 999 5454, 999 5533 Drain coolant and remove front exhaust pipe Disconnect battery negative lead. Remove expansion tank cap. Remove splash-guard under engine. Open engine and radiator nipples, use hose to collect coolant. Close nipples. Remove exhaust manifold /headpipe nuts.
Transcript of Cylinder Head and/or Gasket Replacement Cylinder head...
Cylinder Head and/or Gasket Replacement
Cylinder head gasket, replacement Special Tools: 951 2050, 999 5199, 999 5449, 999 5450, 999 5451, 999 5452, 999 5453, 999 5454, 999 5533
Drain coolant and remove front exhaust pipe
Disconnect battery negative lead.
Remove expansion tank cap.
Remove splash-guard under engine.
Open engine and radiator nipples, use hose to collect coolant.
Close nipples.
Remove exhaust manifold/headpipe nuts.

Remove exhaust manifold and fuel distribution manifold Remove:
exhaust manifold, according to operation Check/replacing exhaust system
belt transmission, according to operation Replacing timing belt See: Timing Belt\Service and
Repair
Lift fuel distribution manifold and injectors and put to one side. Use 999 5533 for the injectors. Remove the two ground strips from engine.
NOTE: Take care not to damage injector nozzles and fuel needles.
Remove:
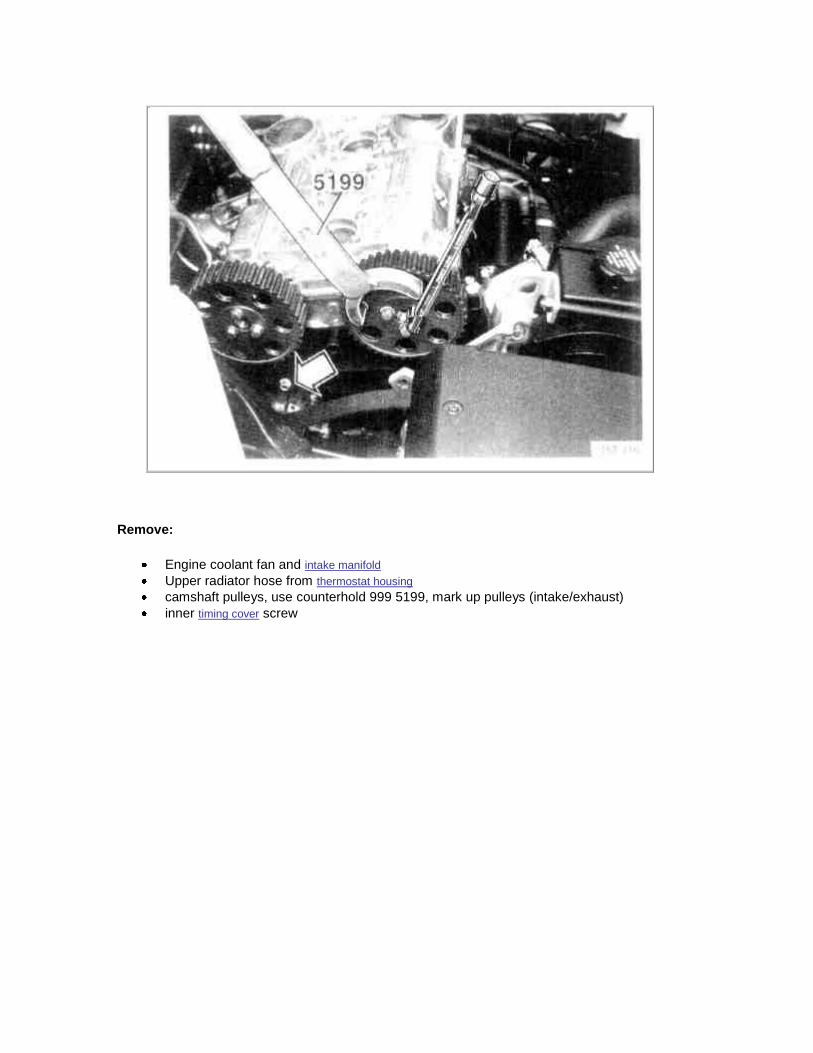
Engine coolant fan and intake manifold
Upper radiator hose from thermostat housing
camshaft pulleys, use counterhold 999 5199, mark up pulleys (intake/exhaust)
inner timing cover screw

Remove rear components
air cleaner (ACL) with hoses
camshaft position (CMP) sensor and trigger wheel
distributor cap, HT leads and rotor
torque control arm with brackets

Remove upper half of cylinder head
Install tool 999 5453 (4-valve engine) or 999 5508 (2-valve engine) to fix the camshafts at the front edge.
Install tool 999 5454 to camshaft housing cover allowing a few mm play.
Slacken off the screws (from outside and in) from the upper half, remove all screws.
Remove the camshaft cover at the stop lugs with tool 999 5670. Start with cylinder 1 and work alternately backward
Open and remove the tools 999 5454 step for step so that parallel movement is ensured when removing the camshaft cover.
Mark up and remove camshafts
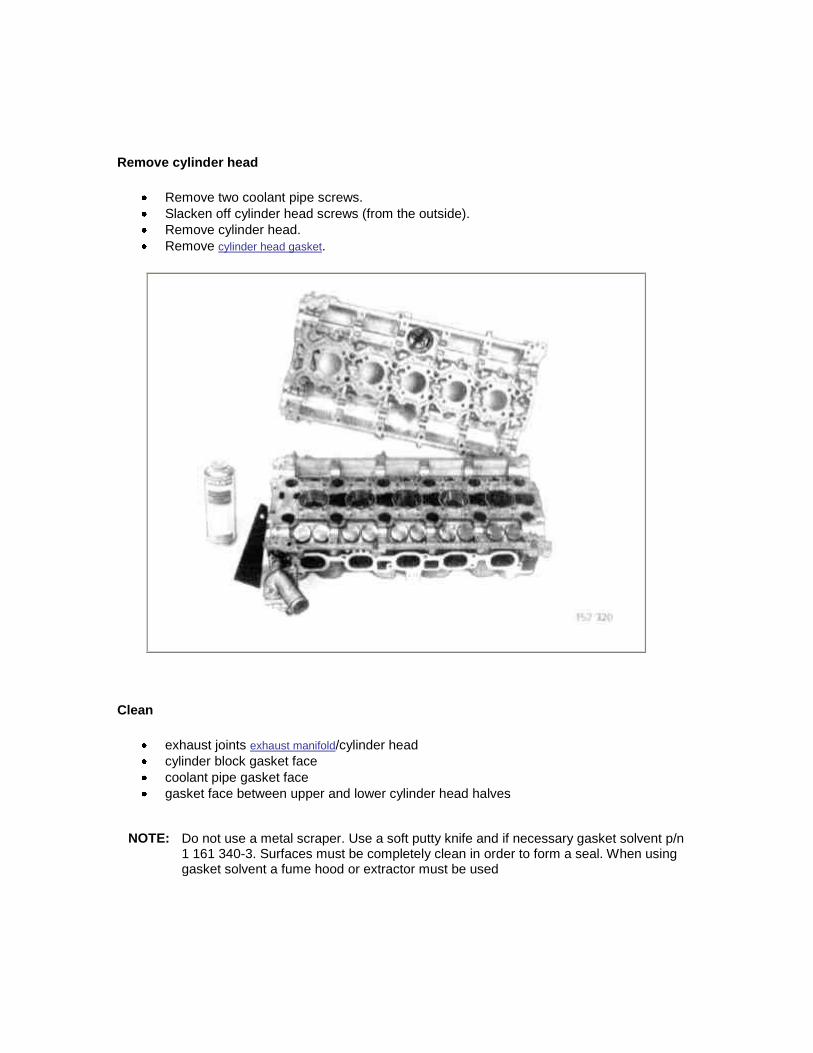
Remove cylinder head
Remove two coolant pipe screws.
Slacken off cylinder head screws (from the outside).
Remove cylinder head.
Remove cylinder head gasket.
Clean
exhaust joints exhaust manifold/cylinder head
cylinder block gasket face
coolant pipe gasket face
gasket face between upper and lower cylinder head halves
NOTE: Do not use a metal scraper. Use a soft putty knife and if necessary gasket solvent p/n 1 161 340-3. Surfaces must be completely clean in order to form a seal. When using gasket solvent a fume hood or extractor must be used
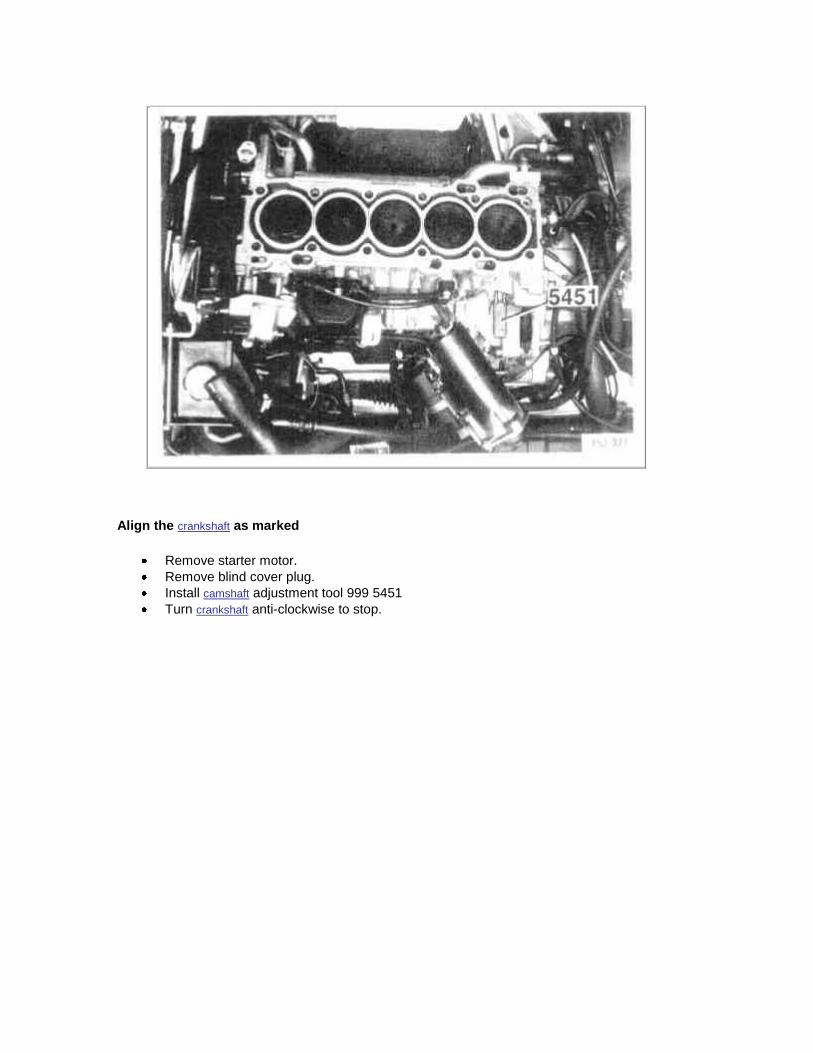
Align the crankshaft as marked
Remove starter motor.
Remove blind cover plug.
Install camshaft adjustment tool 999 5451
Turn crankshaft anti-clockwise to stop.
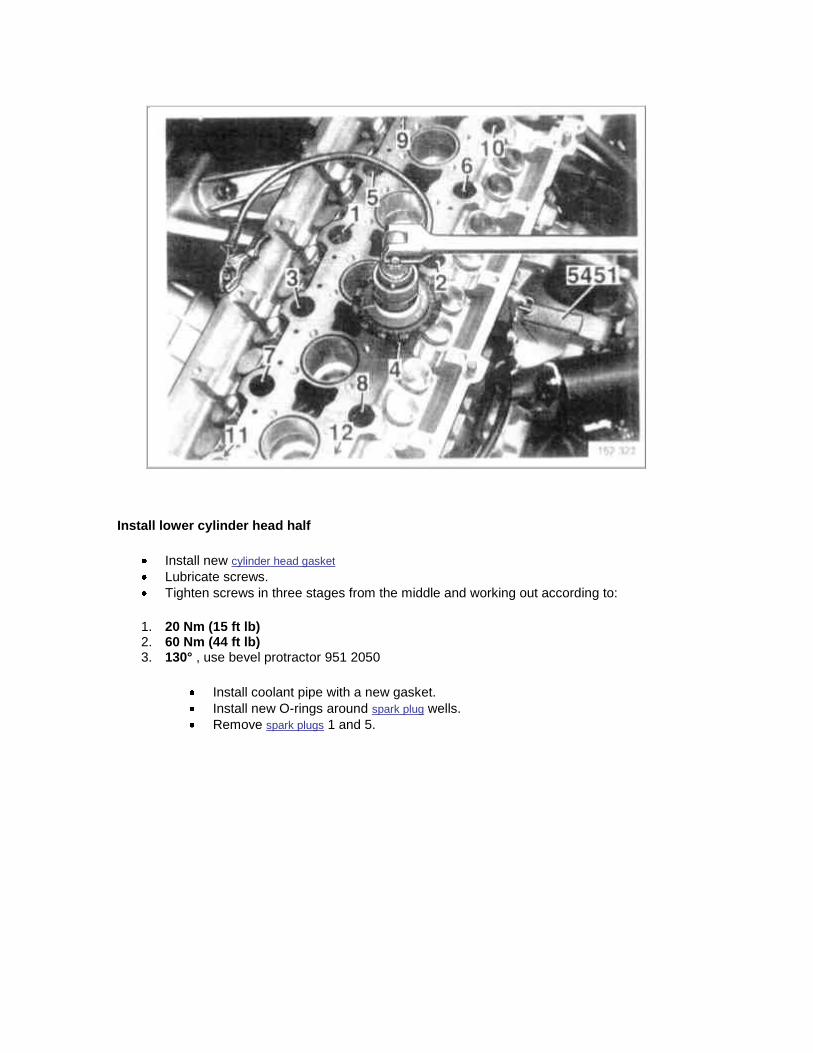
Install lower cylinder head half
Install new cylinder head gasket
Lubricate screws.
Tighten screws in three stages from the middle and working out according to:
1. 20 Nm (15 ft lb) 2. 60 Nm (44 ft lb) 3. 130° , use bevel protractor 951 2050
Install coolant pipe with a new gasket.
Install new O-rings around spark plug wells.
Remove spark plugs 1 and 5.
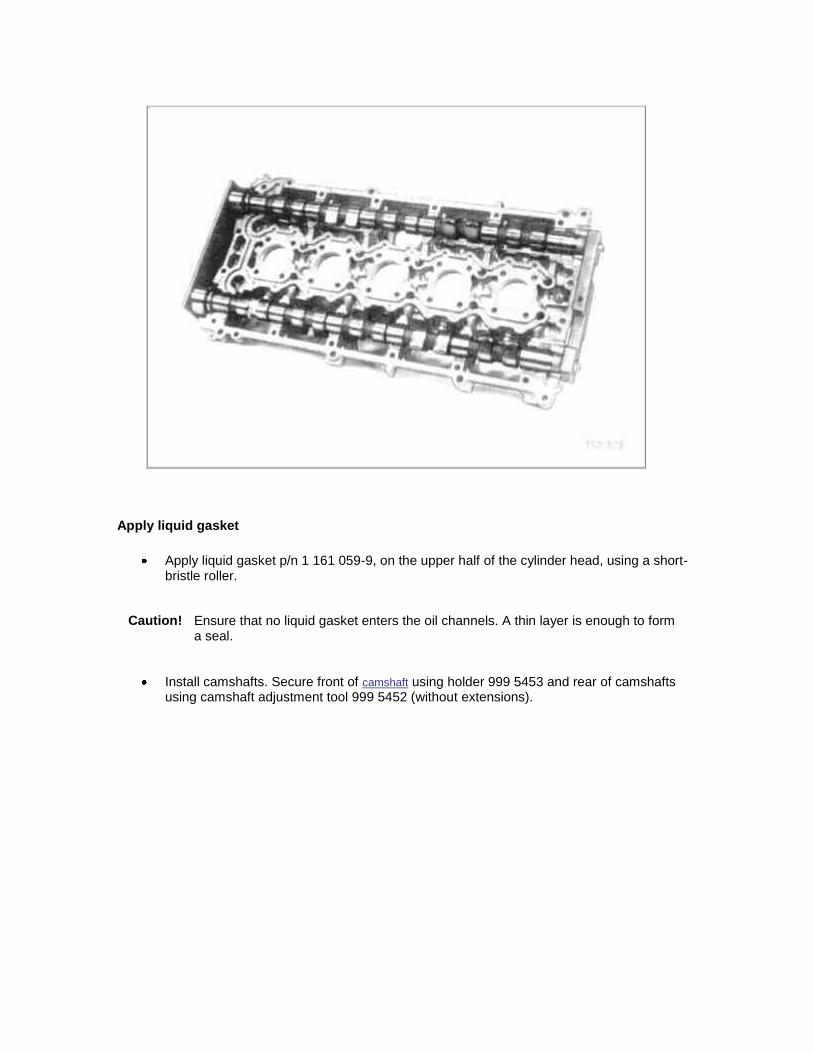
Apply liquid gasket
Apply liquid gasket p/n 1 161 059-9, on the upper half of the cylinder head, using a short-bristle roller.
Caution! Ensure that no liquid gasket enters the oil channels. A thin layer is enough to form a seal.
Install camshafts. Secure front of camshaft using holder 999 5453 and rear of camshafts using camshaft adjustment tool 999 5452 (without extensions).
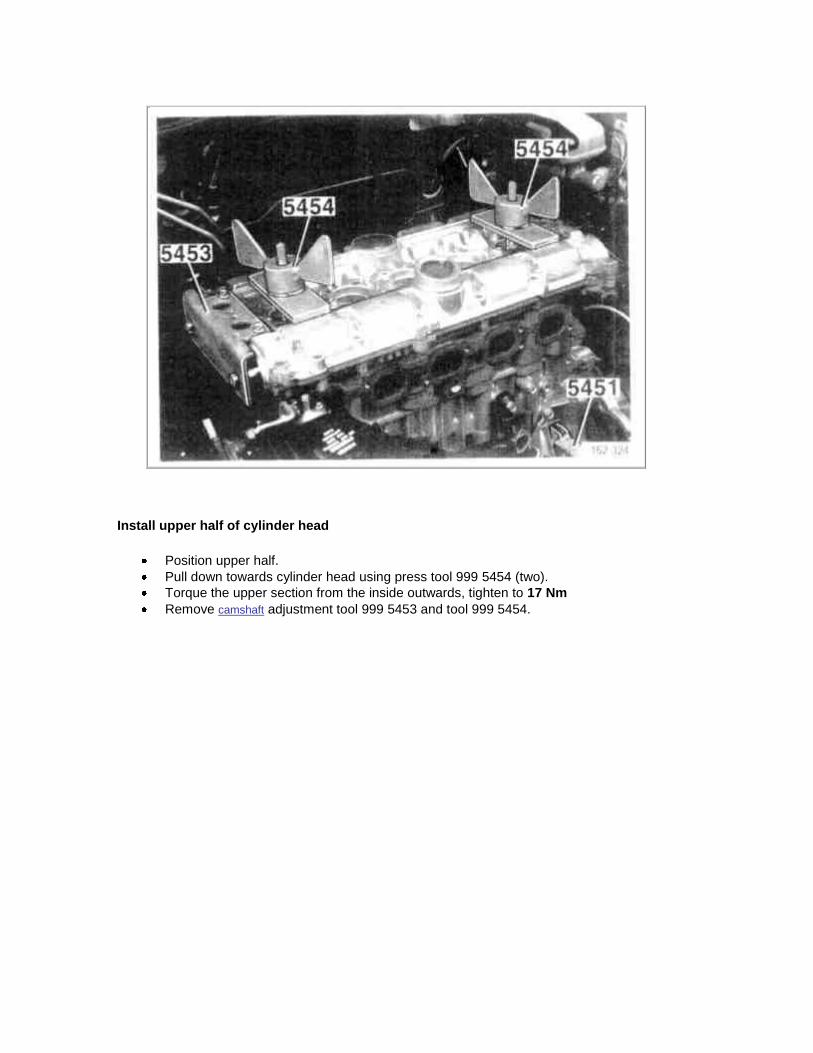
Install upper half of cylinder head
Position upper half.
Pull down towards cylinder head using press tool 999 5454 (two).
Torque the upper section from the inside outwards, tighten to 17 Nm
Remove camshaft adjustment tool 999 5453 and tool 999 5454.

Install front camshaft seals
Use drift 999 5449.
Grease seal.
Tap in seal.
The new version drift tool 999 5449 is made in plastic.
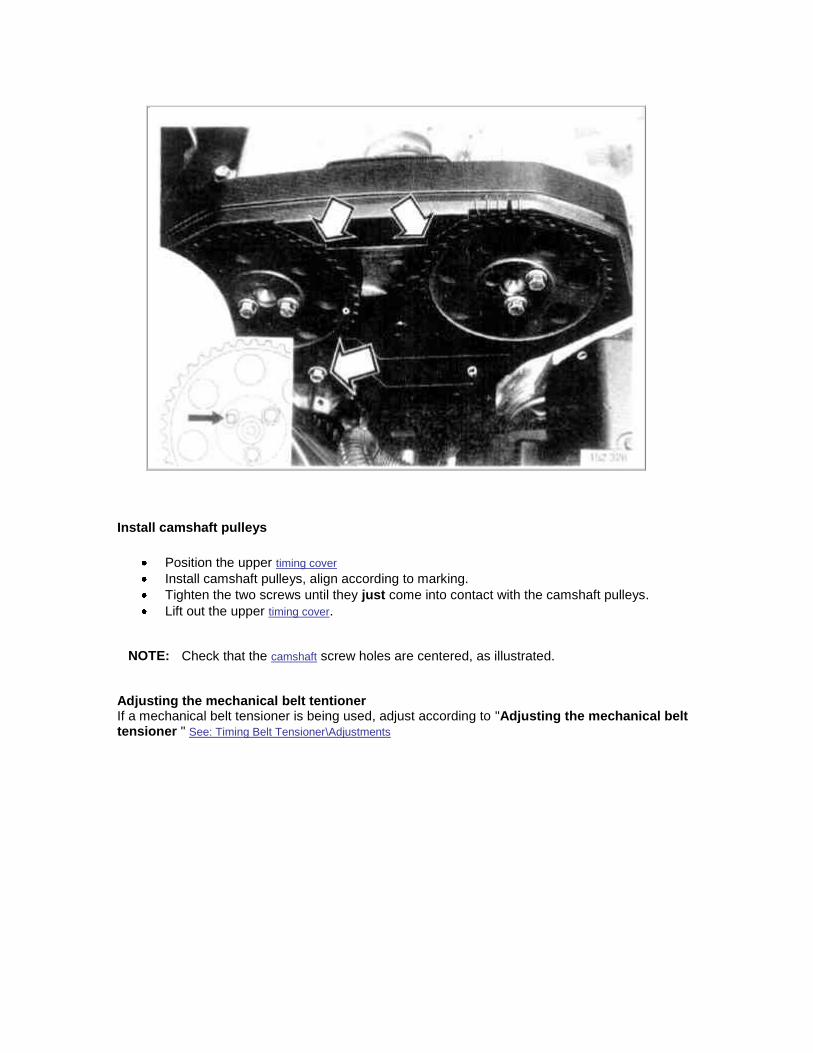
Install camshaft pulleys
Position the upper timing cover
Install camshaft pulleys, align according to marking.
Tighten the two screws until they just come into contact with the camshaft pulleys.
Lift out the upper timing cover.
NOTE: Check that the camshaft screw holes are centered, as illustrated.
Adjusting the mechanical belt tentioner If a mechanical belt tensioner is being used, adjust according to "Adjusting the mechanical belt tensioner " See: Timing Belt Tensioner\Adjustments

Install camshaft belts
Install tension damping unit, tighten to 25 Nm
Place belt over camshaft pulley, around coolant pump and press belt over the tensioner pulley.
Slacken off the two camshaft pulley screws.
Pull the lock pin out of the tensioner/damping unit.
Press hard or knock the belt twice in the direction of arrow (1) and twice in the direction of arrow (2) using a plastic mallet.
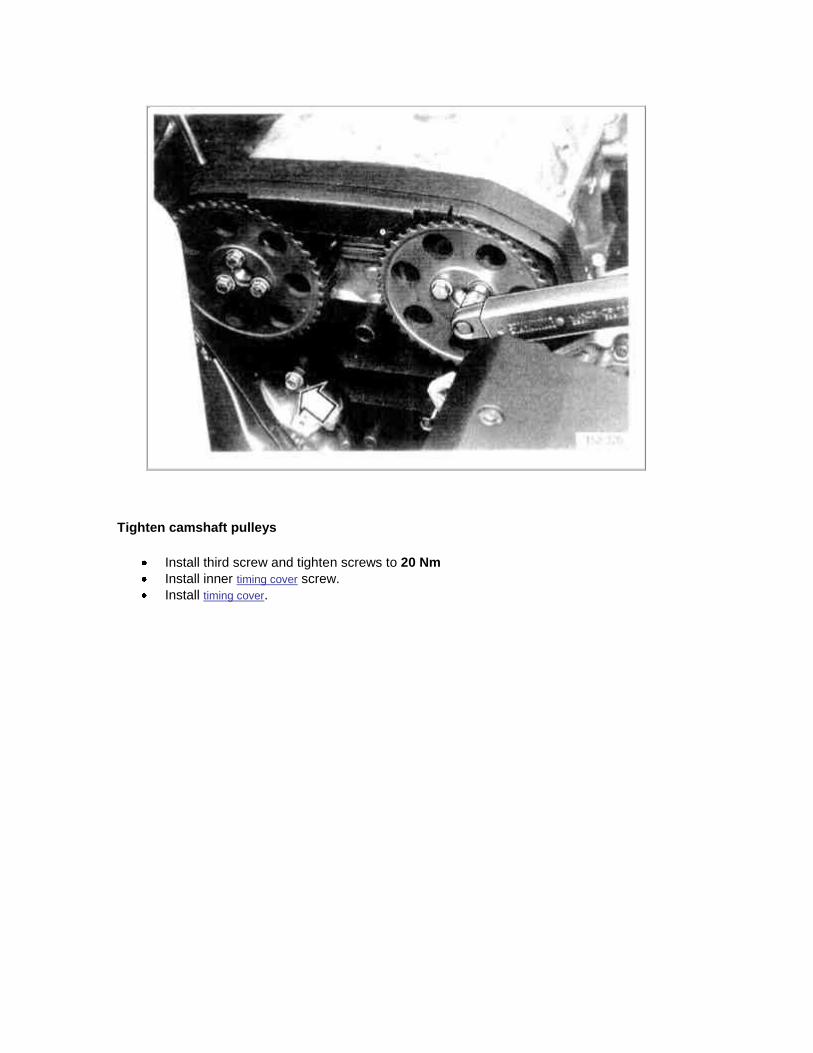
Tighten camshaft pulleys
Install third screw and tighten screws to 20 Nm
Install inner timing cover screw.
Install timing cover.
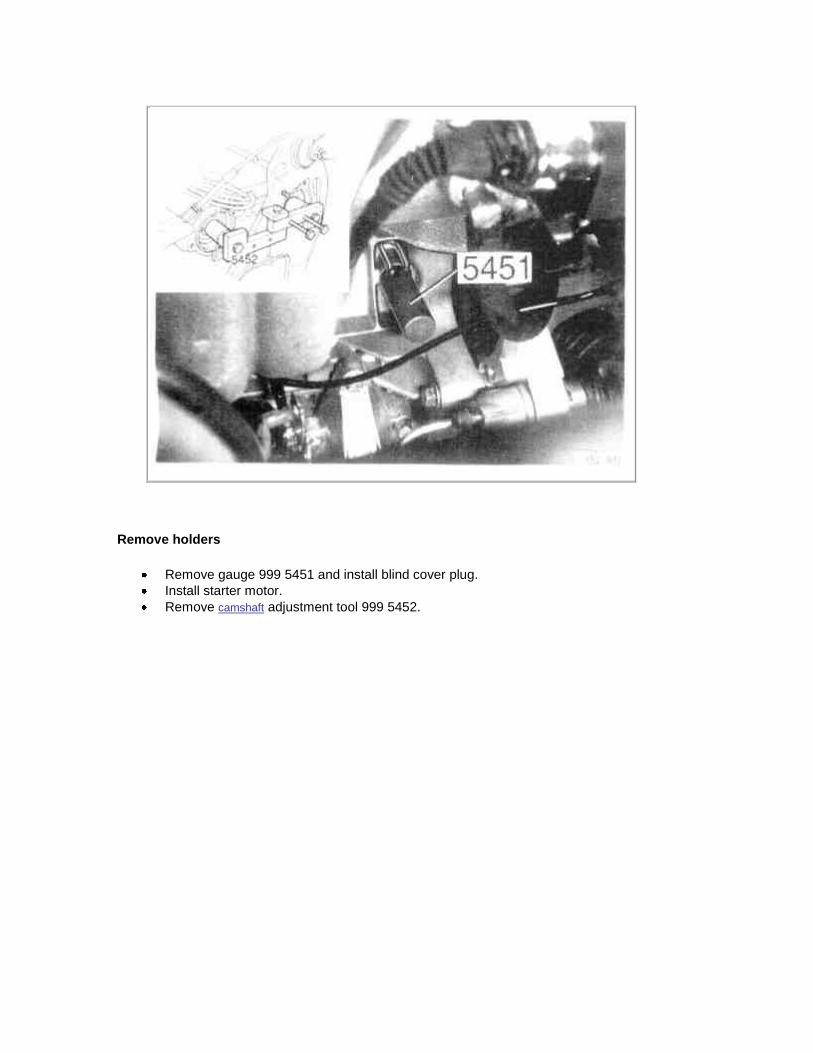
Remove holders
Remove gauge 999 5451 and install blind cover plug.
Install starter motor.
Remove camshaft adjustment tool 999 5452.

Check markings
Turn engine crankshaft two turns.
Check that markings line up on crankshaft and the timing gear pulley.
Install outer timing cover.
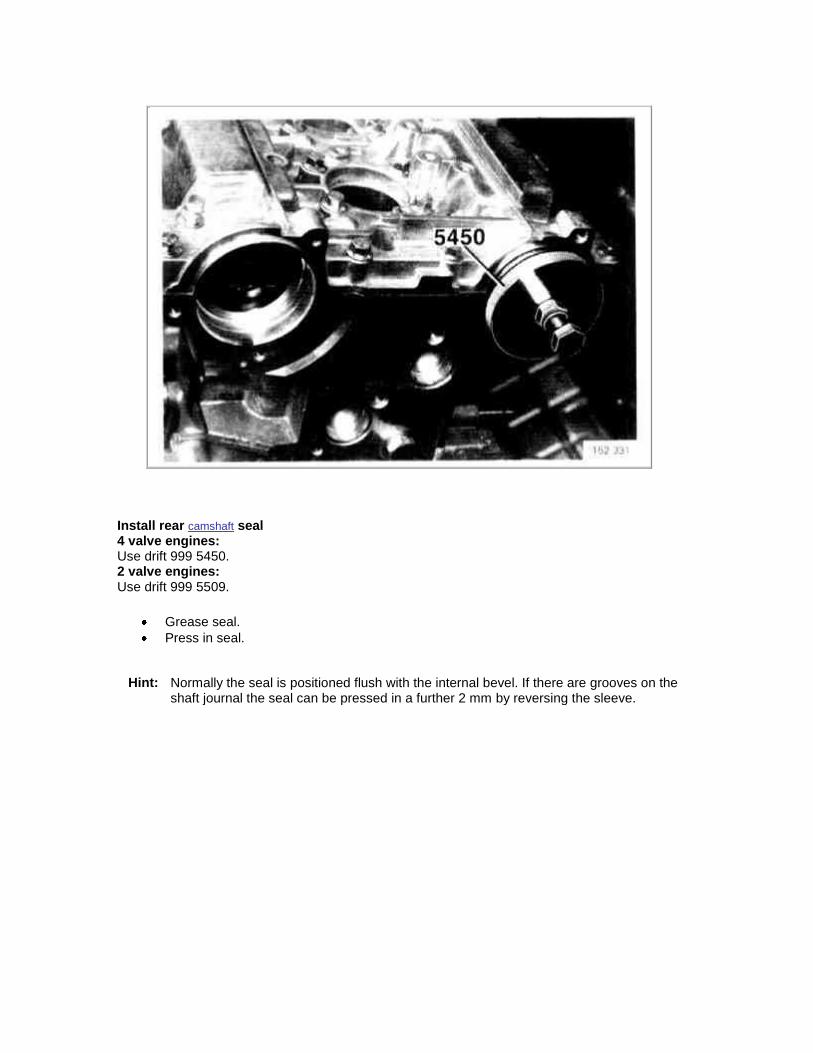
Install rear camshaft seal 4 valve engines: Use drift 999 5450. 2 valve engines: Use drift 999 5509.
Grease seal.
Press in seal.
Hint: Normally the seal is positioned flush with the internal bevel. If there are grooves on the shaft journal the seal can be pressed in a further 2 mm by reversing the sleeve.
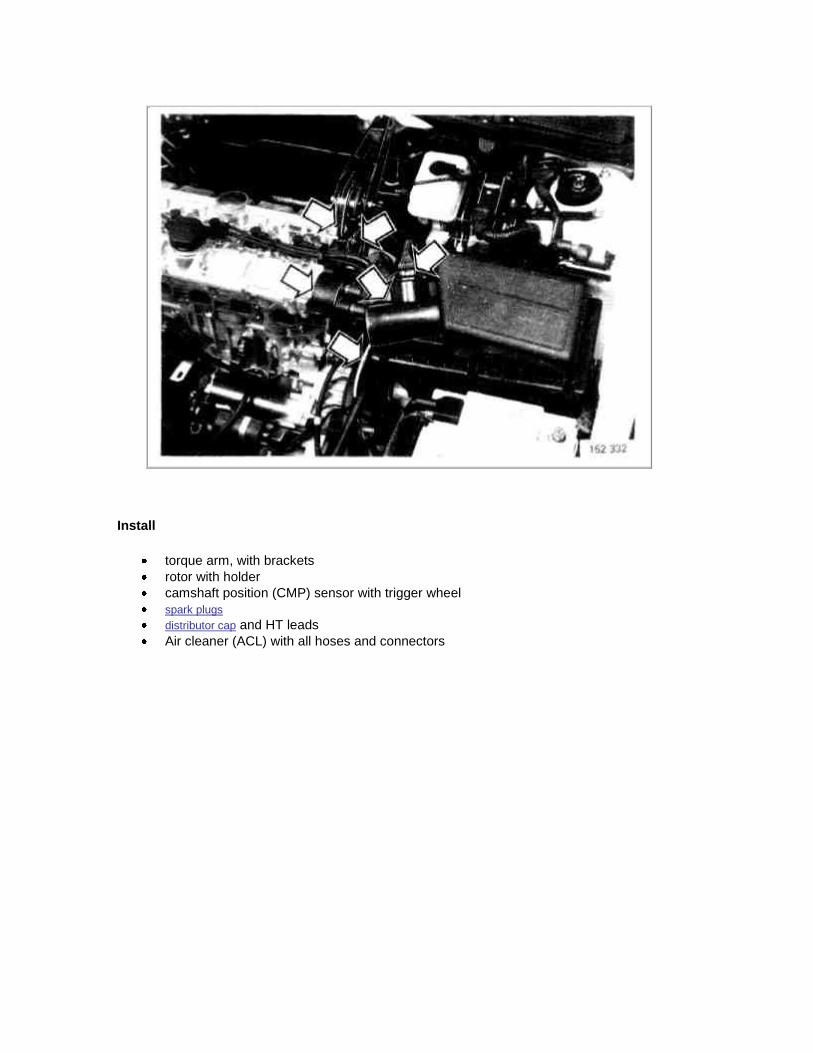
Install
torque arm, with brackets
rotor with holder
camshaft position (CMP) sensor with trigger wheel
spark plugs
distributor cap and HT leads
Air cleaner (ACL) with all hoses and connectors

Install
exhaust manifold according to operation Check/replacing exhaust system
intake manifold and engine cooling fan (FC) according to operation Replacing instake manifold
fuel rail
ground strip on engine
exhaust pipe
splashguard under engine

Top up coolant/Change oil & oil filter
Install battery negative lead
Top up with oil.
Oil capacity including filter 4.75 liters excluding filter 4.25 liters
Fill cooling system.
Run the engine until the thermostat opens and top up if necessary.
Check for leaks.