CubaseNuendo Standard Matrix Profile - Setup and...
12
www.solidstatelogic.com Support. This is SSL. Document Version 1.0 Cubase/Nuendo Standard Matrix Profile Setup and Quick Start Guide Introduction The first part of this tutorial details how to setup Cubase/Nuendo with your SSL Matrix. The second part details the commands assigned to this profile. This tutorial assumes that you have already installed all the necessary Matrix related software on your computer and that there is both a working network and USB connection from your DAW computer to the Matrix. If you have yet to configure this part of your system please refer to the Matrix 2 Owner’s Manual before continuing. Installing the profile The Cubase/Nuendo Standard profile is automatically installed when you update your Matrix console software to V2.0/6 . In addition, it is recommended that you have the latest version of the Matrix remote application installed. Go to the SSL website > Matrix Product page > Downloads to make sure you are up-to-date.
Transcript of CubaseNuendo Standard Matrix Profile - Setup and...
www.solidstatelogic.com
Support. This is SSL.
Document Version 1.0
Cubase/Nuendo Standard Matrix Profile Setup and Quick Start Guide
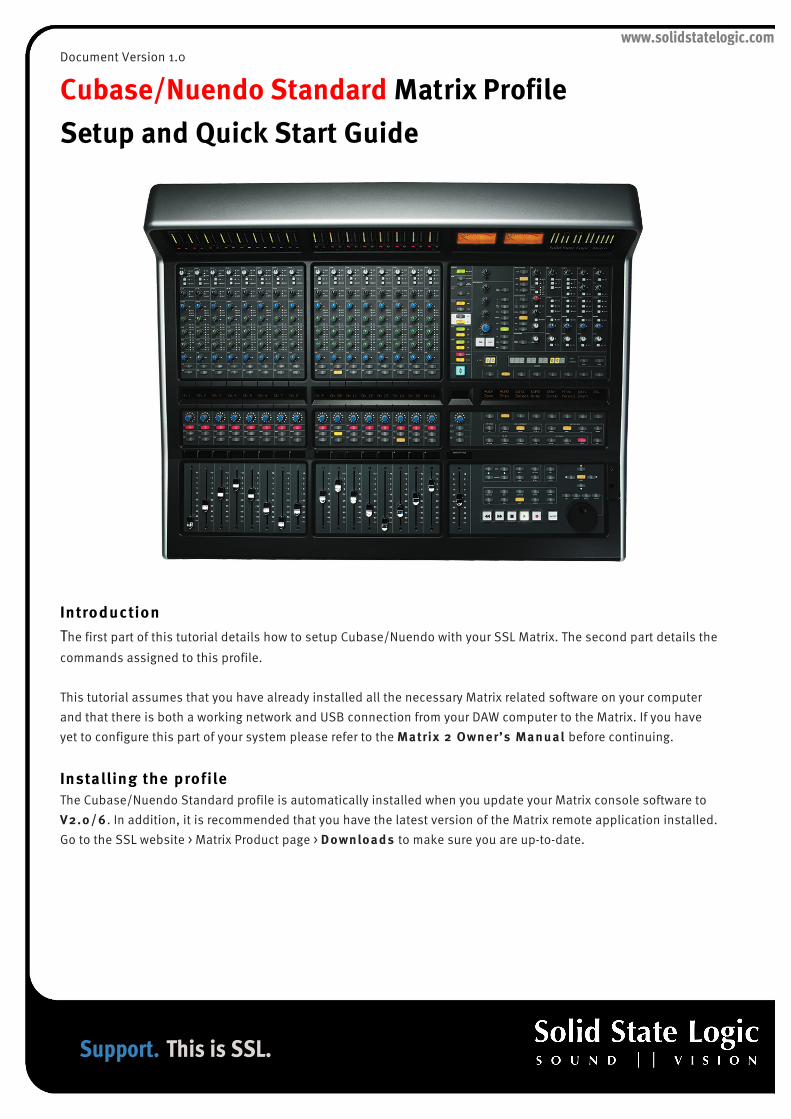
Introduction The first part of this tutorial details how to setup Cubase/Nuendo with your SSL Matrix. The second part details the commands assigned to this profile. This tutorial assumes that you have already installed all the necessary Matrix related software on your computer and that there is both a working network and USB connection from your DAW computer to the Matrix. If you have yet to configure this part of your system please refer to the Matrix 2 Owner’s Manual before continuing.
Installing the profile The Cubase/Nuendo Standard profile is automatically installed when you update your Matrix console software to V2.0/6. In addition, it is recommended that you have the latest version of the Matrix remote application installed. Go to the SSL website > Matrix Product page > Downloads to make sure you are up-to-date.

www.solidstatelogic.com
Support. This is SSL.
Document Version 1.0
ipMIDI Setup Apple Macintosh OSX
1) Close all applications using MIDI 2) Open AudioMidi Setup (MacintoshHD >
Applications > Utilities > Audio MIDI Setup) 3) Open the MIDI Window (Audio MIDI Setup >
Window > Show MIDI Window) 4) Double click the ipMIDI icon 5) Set number of ports to 9 and ensure that
‘Loopback’ is not ticked and then press ‘Apply’
OR
Microsoft Windows OS This setup information covers Windows XP, Vista and Windows 7 and 8 (32+64-bit)
1) Launch the ipMIDI Monitor application (Start > Menu > Programs > ipMIDI)
2) Ensure Ports 1 to 9 are not muted 3) Un-tick ‘Loop Back’ 4) Set ‘Ports after Reboot’ to 9 and ensure that ‘Loopback’ is not
ticked and then press ‘OK’ Note: If you are opening up Ports for the first time, after Rebooting your computer, these will be ‘muted’. Be sure to open ipMIDI back up and untick the muted Ports

www.solidstatelogic.com
Support. This is SSL.
Document Version 1.0
Setting up Cubase/Nuendo
Device Setup Control surfaces are setup in Cubase/Nuendo in the Devices > Device Setup > Remote Devices menu. In this example we will setup Cubase/Nuendo for operation on DAW layer 1 of Matrix.
1) Click the ‘+’ button to add a new device 2) Choose ‘Mackie Control’ 3) Set MIDI Input to ipMIDI Port 2 and then set MIDI Output to ipMIDI Port 2 also and click ‘Apply’
Note: Cubase/Nuendo requires you to setup Port 2 before Port 1 for correct operation 4) Again, click the ‘+’ button to add second Mackie Control 5) Set MIDI Input to ipMIDI Port 1 and then set MIDI Output to ipMIDI Port 1 also and click ‘Apply’ 6) Press ‘OK’ to exit this window
www.solidstatelogic.com
Support. This is SSL.
Document Version 1.0
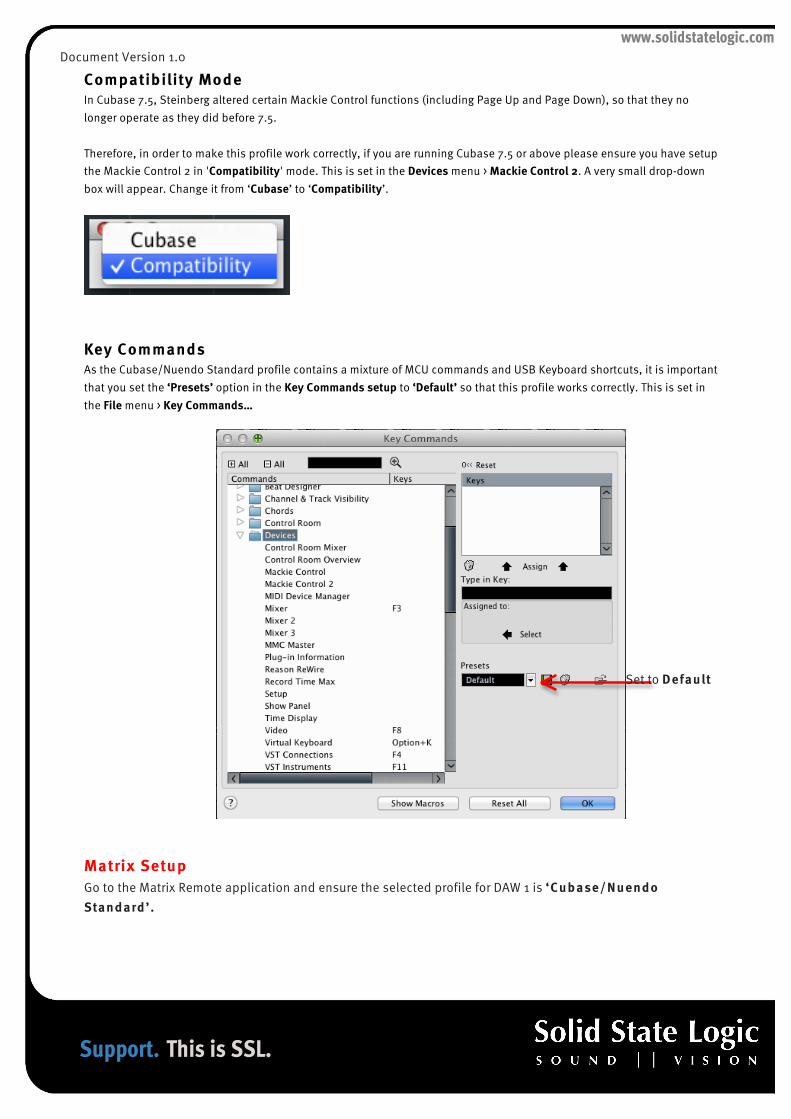
Compatibility Mode In Cubase 7.5, Steinberg altered certain Mackie Control functions (including Page Up and Page Down), so that they no longer operate as they did before 7.5. Therefore, in order to make this profile work correctly, if you are running Cubase 7.5 or above please ensure you have setup the Mackie Control 2 in 'Compatibility' mode. This is set in the Devices menu > Mackie Control 2. A very small drop-down box will appear. Change it from ‘Cubase’ to ‘Compatibility’.
Key Commands As the Cubase/Nuendo Standard profile contains a mixture of MCU commands and USB Keyboard shortcuts, it is important that you set the ‘Presets’ option in the Key Commands setup to ‘Default’ so that this profile works correctly. This is set in the File menu > Key Commands…
Matrix Setup Go to the Matrix Remote application and ensure the selected profile for DAW 1 is ‘Cubase/Nuendo Standard’.
Set to Default

www.solidstatelogic.com
Support. This is SSL.
Document Version 1.0
Default
Above you can see the assignments for Matrix’s Default key set. You are in the Default Key Set when the User 1, User 2, User 3 or User 4 keys are not selected.
AUTO Opens the Automation Submenu EDIT Opens the Edit Submenu DEVICE Opens the Device Submenu PAN** Sets the V-Pots as Pan controls and shows the values SOLDEF Solo Defeat DELETE Deletes selected Regions/Notes/Automation Data ADD Adds Marker at cursor position TRSP Shows/hides transport panel MIXER Shows/hides the Mixer E Opens channels view EQ V-Pots control the channel EQ INSERT V-Pots assign and control plug-ins on the selected track FXSEND V-Pots control Send levels PAGEDN Pages backwards through plugins or other functions with multiple
parameters PAGEUP Pages forwards through plugins or other functions with multiple
parameters
ER SCREENSHOT HERE

www.solidstatelogic.com
Support. This is SSL.
Document Version 1.0
The AUTO Submenu
The image above shows the assignments for the Auto Submenu.
PANEL Shows the Automation Panel READ Set selected track to Read mode WRITE Set selected track to Write mode G-READ Toggles automation Read status for all tracks G-WRIT Toggles automation Write status for all tracks --- Unassigned --- Unassigned --- Unassigned
MATRIX BROWSER SCREENSHOT HERE
www.solidstatelogic.com
Support. This is SSL.
Document Version 1.0
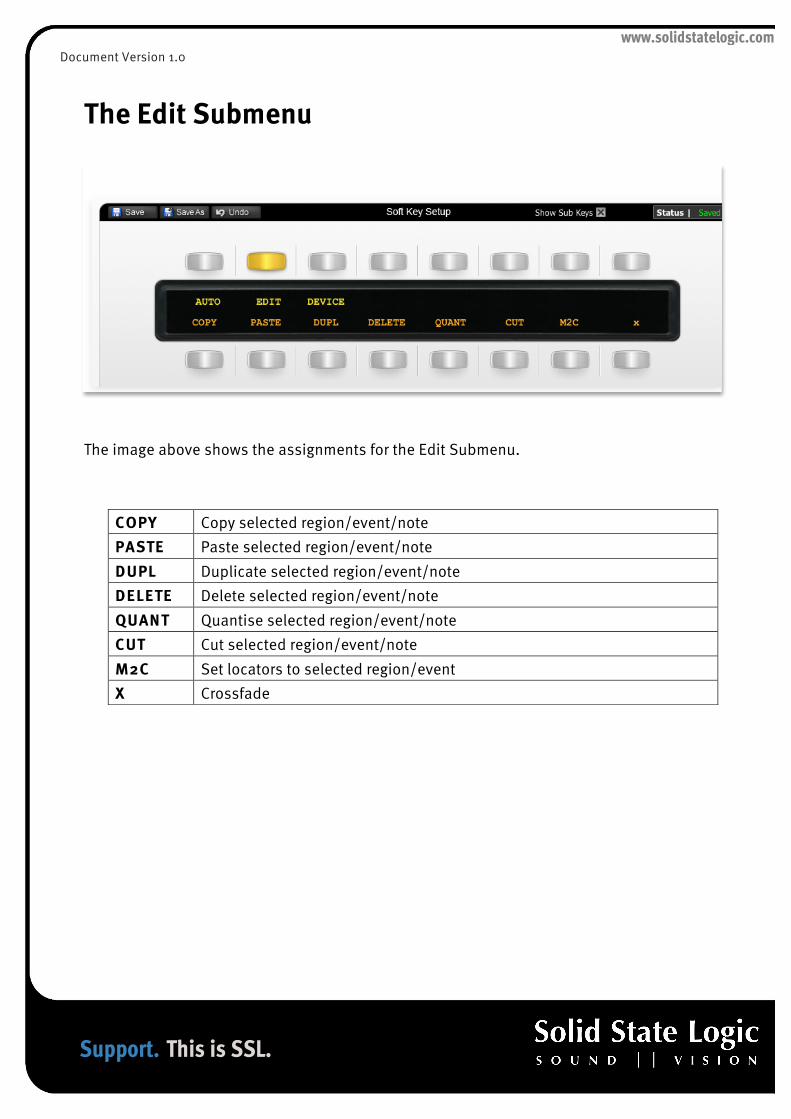
The Edit Submenu
The image above shows the assignments for the Edit Submenu.
COPY Copy selected region/event/note PASTE Paste selected region/event/note DUPL Duplicate selected region/event/note DELETE Delete selected region/event/note QUANT Quantise selected region/event/note CUT Cut selected region/event/note M2C Set locators to selected region/event X Crossfade
www.solidstatelogic.com
Support. This is SSL.
Document Version 1.0
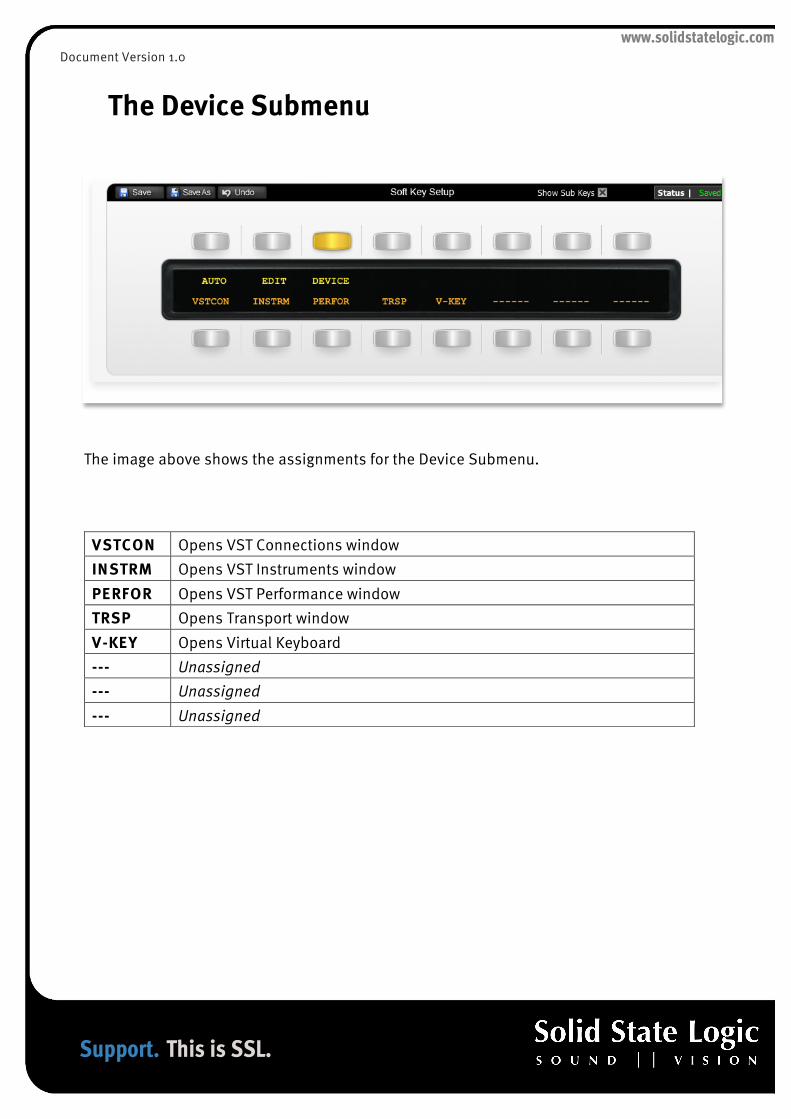
The Device Submenu
The image above shows the assignments for the Device Submenu.
VSTCON Opens VST Connections window INSTRM Opens VST Instruments window PERFOR Opens VST Performance window TRSP Opens Transport window V-KEY Opens Virtual Keyboard --- Unassigned --- Unassigned --- Unassigned
www.solidstatelogic.com
Support. This is SSL.
Document Version 1.0
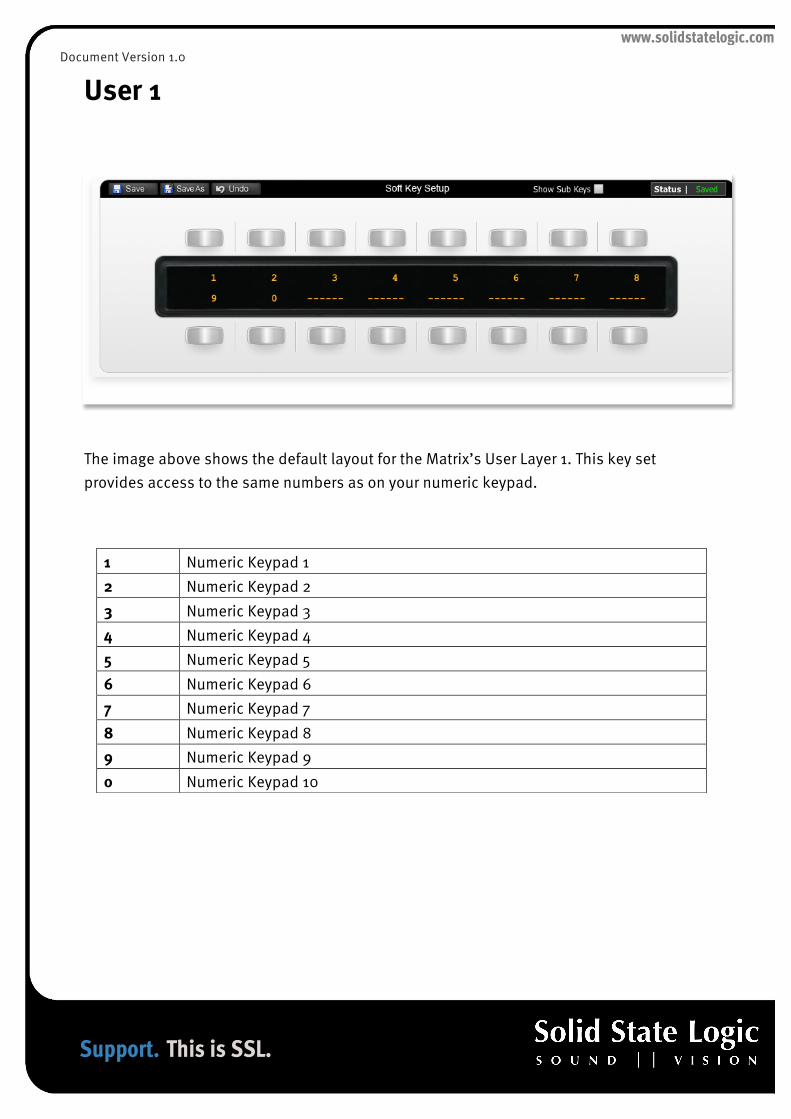
User 1
The image above shows the default layout for the Matrix’s User Layer 1. This key set provides access to the same numbers as on your numeric keypad.
1 Numeric Keypad 1 2 Numeric Keypad 2 3 Numeric Keypad 3 4 Numeric Keypad 4 5 Numeric Keypad 5 6 Numeric Keypad 6 7 Numeric Keypad 7 8 Numeric Keypad 8 9 Numeric Keypad 9 0 Numeric Keypad 10

www.solidstatelogic.com
Support. This is SSL.
Document Version 1.0
Transport / Utilities
The image above shows the assignments for Matrix’s transport/utilities section.
SHIFT Keyboard Shift (follow key state) CTRL Keyboard Ctrl (follow key state) CTRL A Keyboard Ctrl+A ALT Keyboard Alt/Option (follow key state) ESC Keyboard Escape ENTER Keyboard Enter PREV Locate to previous marker NEXT Locate to next marker RTZ Locate to session start RIGHT Locate to session end CYCLE Engage/disengage loop function NUDGE - Unassigned NUDGE + Unassigned SYNC Turn sync on PUNCH Engage/disengage punch-in record mode

www.solidstatelogic.com
Support. This is SSL.
Document Version 1.0
List of MCU Functions The Cubase/Nuendo profile contains a mixture of MCU commands and USB keyboard shortcuts. To help you see how we have renamed the commands, see the table below. BLACK TEXT = MCU command RED TEXT = USB keyboard shortcut
DAW CMD / KEYBOARD SHORTCUT SOFTKEY LABEL (RE-NAMED) - AUTO (Menu) - EDIT (Menu) - DEVICE (Menu) Pan + Name/Value PAN** C CLICK Solo Defeat SOLDEF backspace DELETE Add ADD F2 TRSP Mixer MIXER Edit E EQ EQ Inserts INSERT FX Sends FXSEND Page Down PAGEDN Page Up PAGEUP F6 PANEL Read READ Write WRITE Alt+R G-READ Alt+W G-WRIT Ctrl+C COPY Ctrl+V PASTE Ctrl+D DUPL backspace DELETE

www.solidstatelogic.com
Support. This is SSL.
Document Version 1.0
Q QUANT Alt+X CUT P M2C X X F4 VSTCON F11 INSTRM F12 PERFOR F2 TRSP Alt+K V-KEY Numeric Keypad 1 1 Numeric Keypad 2 2 Numeric Keypad 3 3 Numeric Keypad 4 4 Numeric Keypad 5 5 Numeric Keypad 6 6 Numeric Keypad 7 7 Numeric Keypad 8 8 Numeric Keypad 9 9 Numeric Keypad 0 0 Shift (follow key state) SHIFT Ctrl (follow key state) CTRL Ctrl A CTRL A Alt (follow key state) ALT Esc ESC Enter ENTER Previous PREV Next NEXT , RTZ Right Arrow Key RIGHT Cycle CYCLE Nudge - NUDGE - Nudge + NUDGE + Sync SYNC Punch PUNCH