CSS LAY OUT
38
CSS LAYOUT KYLE | DEVIN | NAVDEEP
Transcript of CSS LAY OUT

CSS LAYOUT
KYLE | DEVIN | NAVDEEP
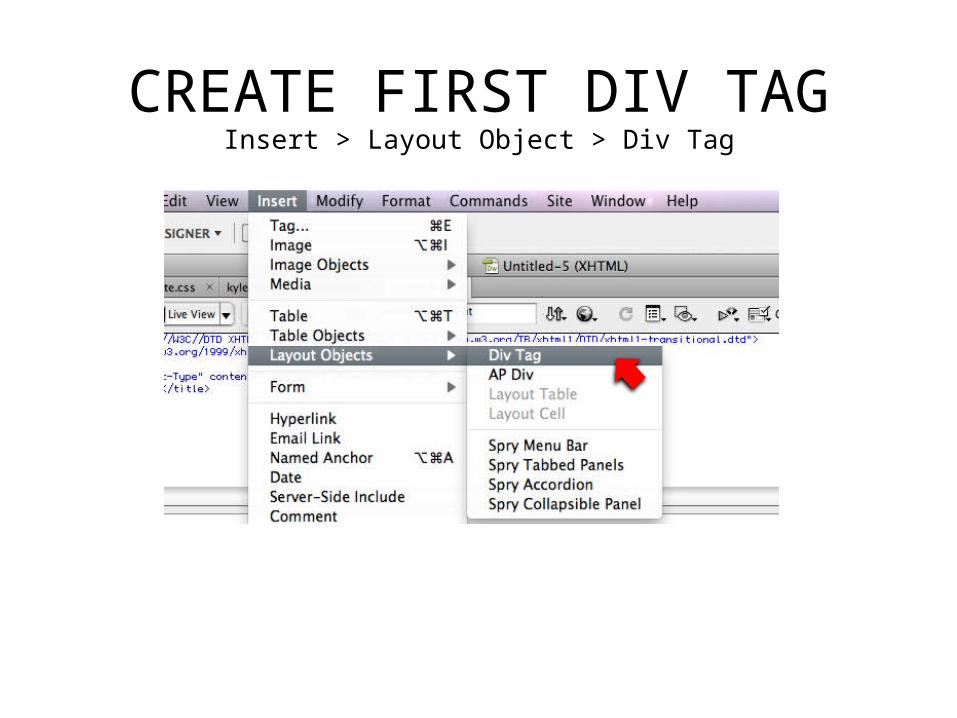
CREATE FIRST DIV TAGInsert > Layout Object > Div Tag

CREATE FIRST DIV TAGNew CSS Style > (Label Div Tag) > (Choose Div Type)
CONTAINER holds all content of web page in place to avoid floating/misplaced divs on varying browsers
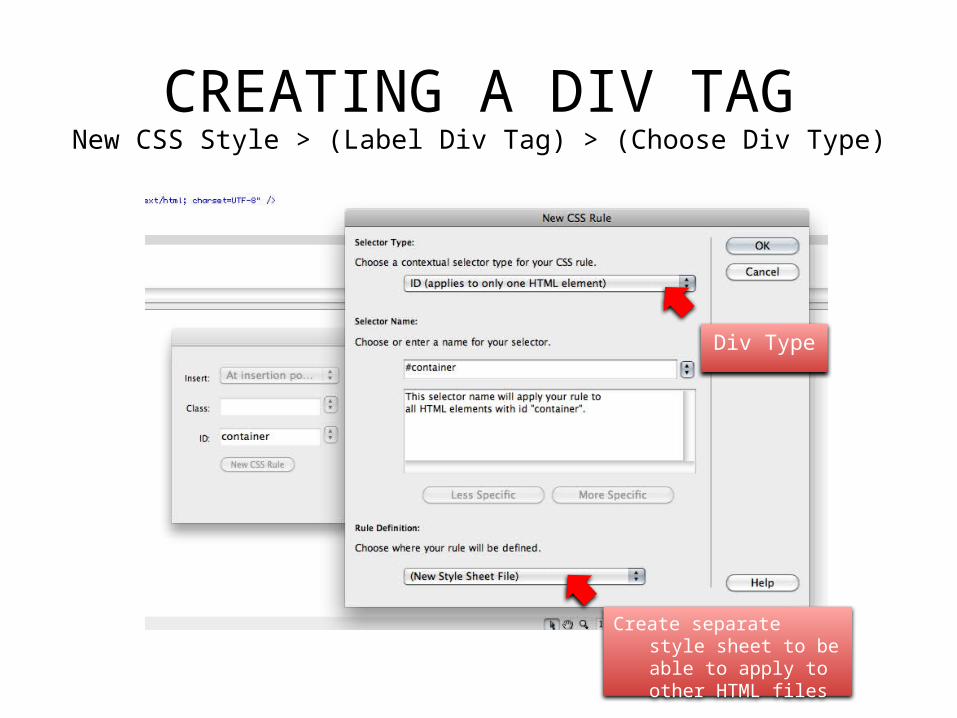
CREATING A DIV TAGNew CSS Style > (Label Div Tag) > (Choose Div Type)
Div Type
Create separate style sheet to be able to apply to other HTML files
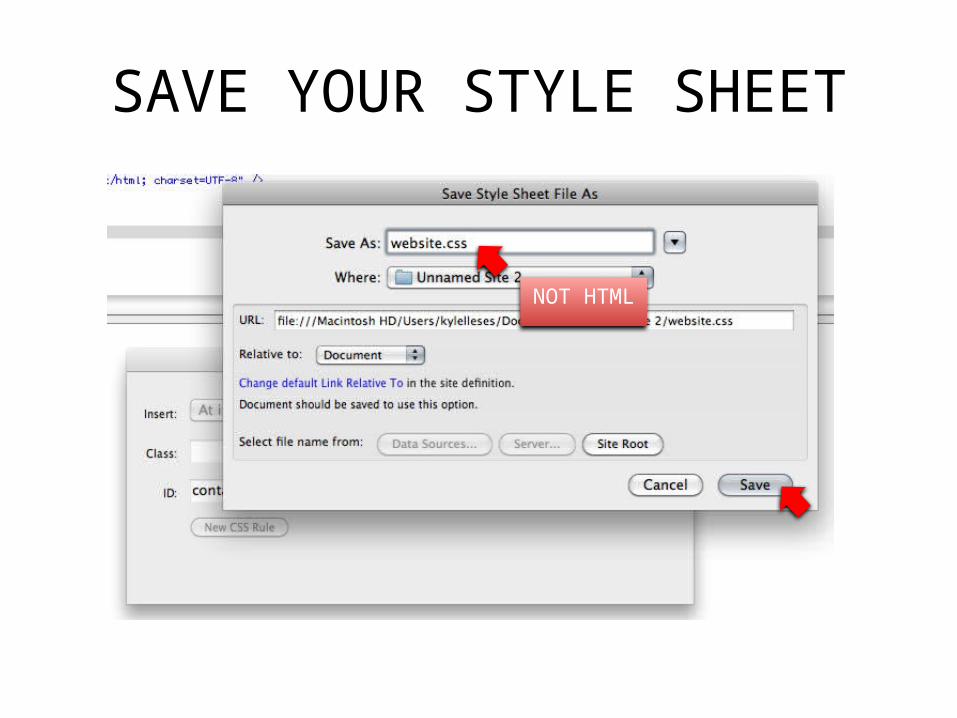
SAVE YOUR STYLE SHEET
NOT HTML
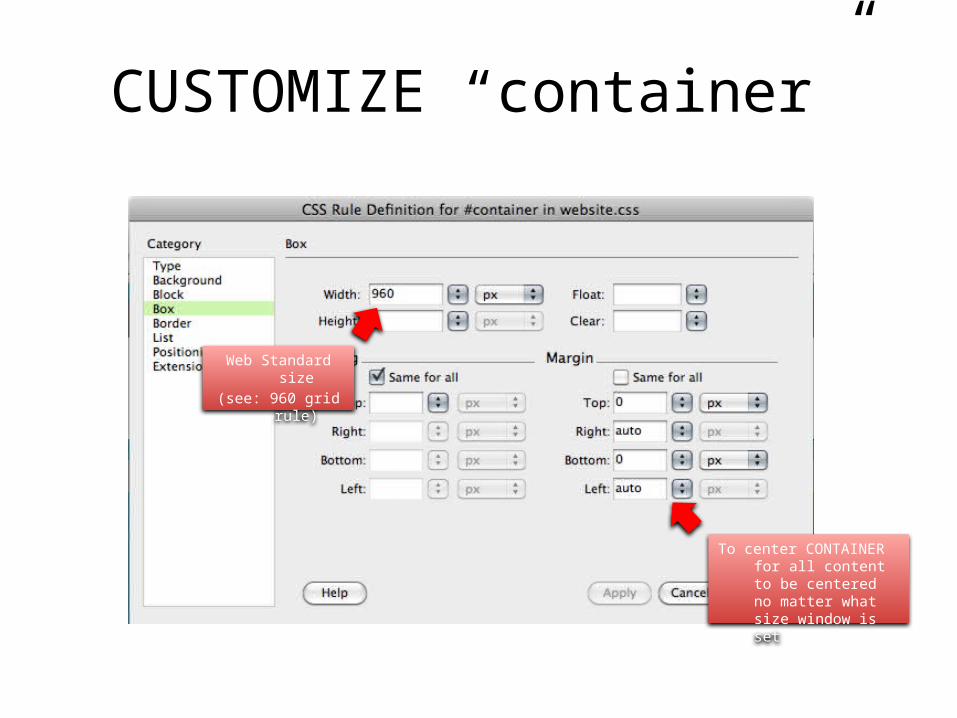
CUSTOMIZE “container”
Web Standard size(see: 960 grid rule)
To center CONTAINER for all content to be centered no matter what size window is set
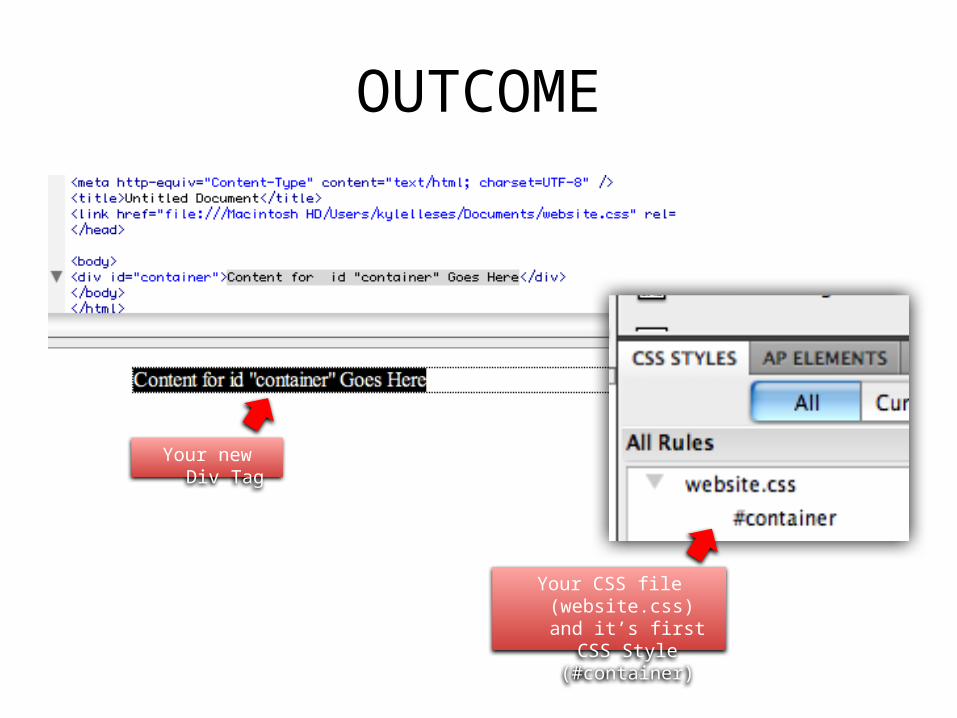
OUTCOME
Your new Div Tag
Your CSS file (website.css) and it’s first CSS Style
(#container)

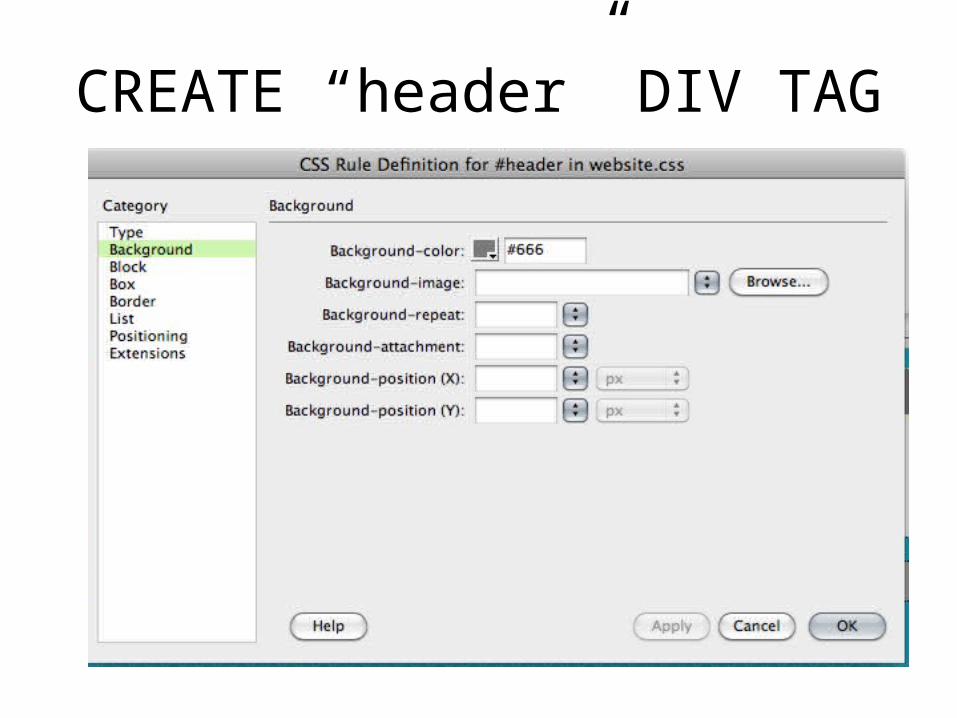
CREATE “header” DIV TAG
Same process but on the same CSS File as container instead
of “New Style Sheet”
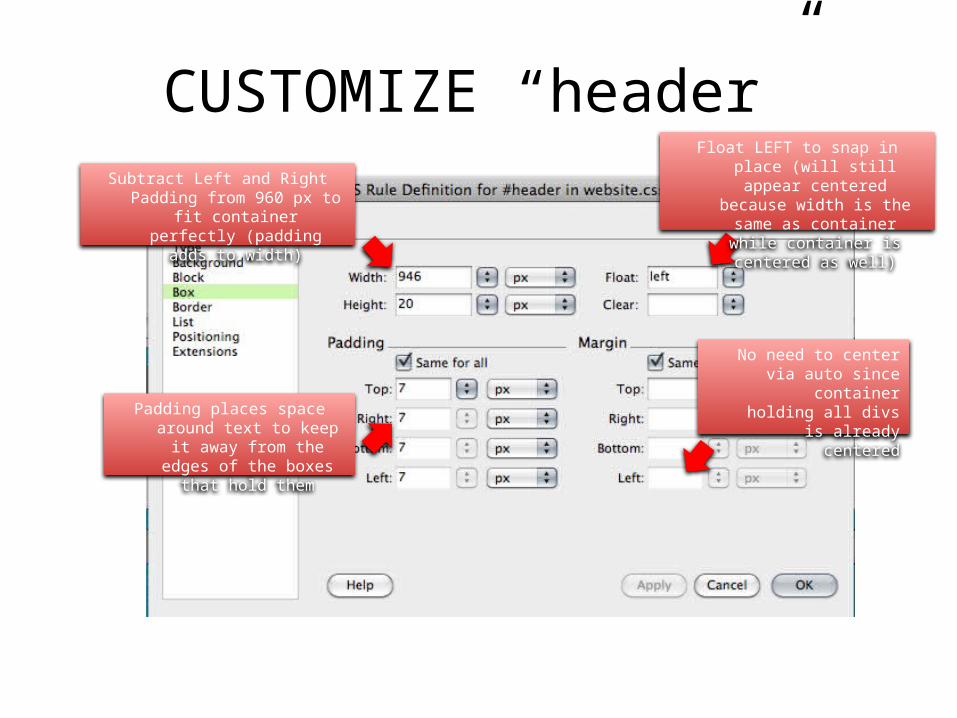
CUSTOMIZE “header”Subtract Left and Right Padding from
960 px to fit container perfectly (padding adds to width)
Float LEFT to snap in place (will still appear centered because width is
the same as container while container is centered as well)
No need to center via auto since container holding
all divs is already centeredPadding places space around text
to keep it away from the edges of the boxes that hold
them

CREATE “header” DIV TAG
CREATE “header” DIV TAG
Create other Div Tags using the same process, customizing each tag with using the following settings:
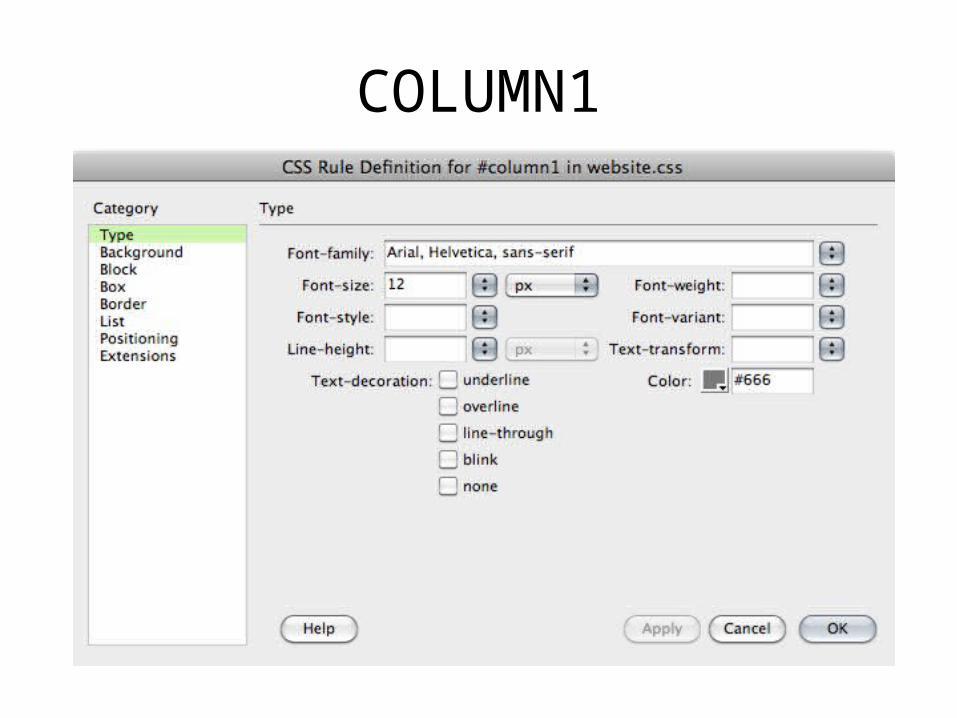
COLUMN1
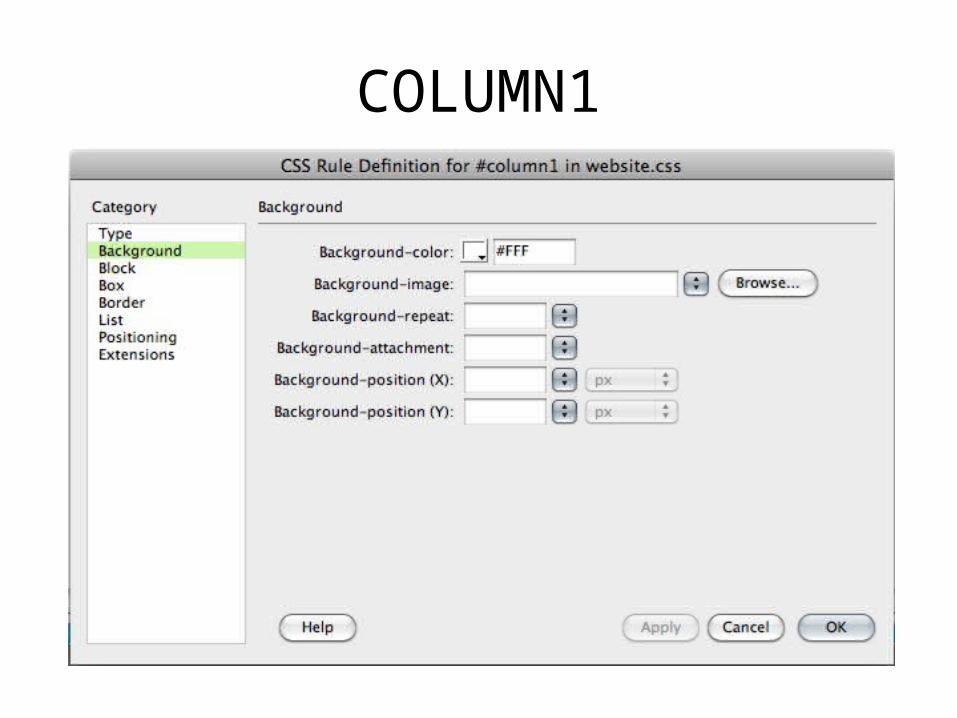
COLUMN1

COLUMN1
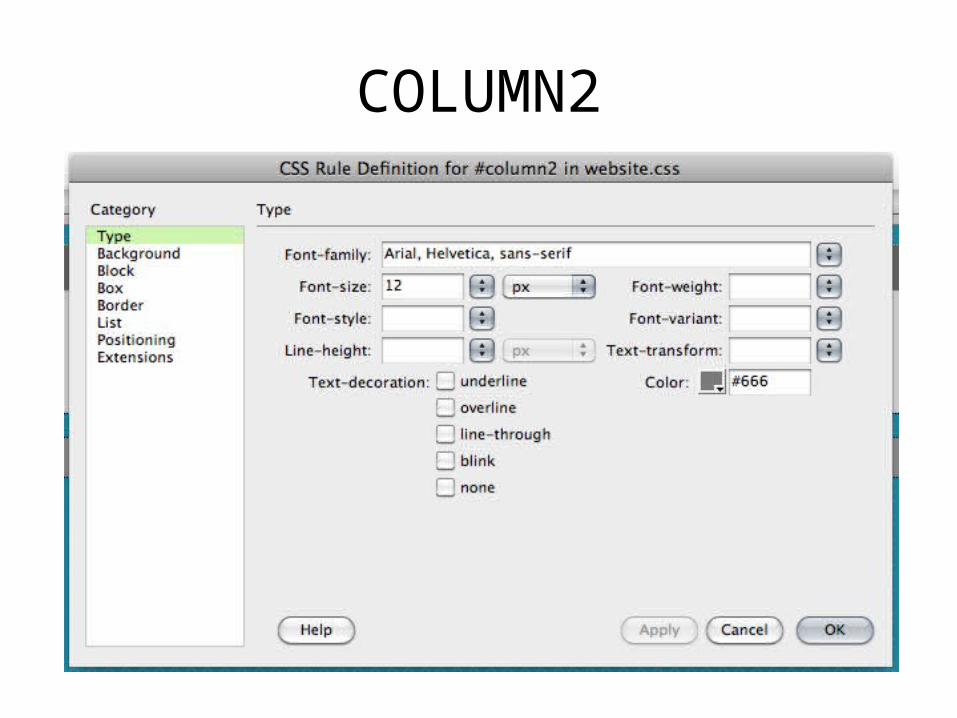
COLUMN2
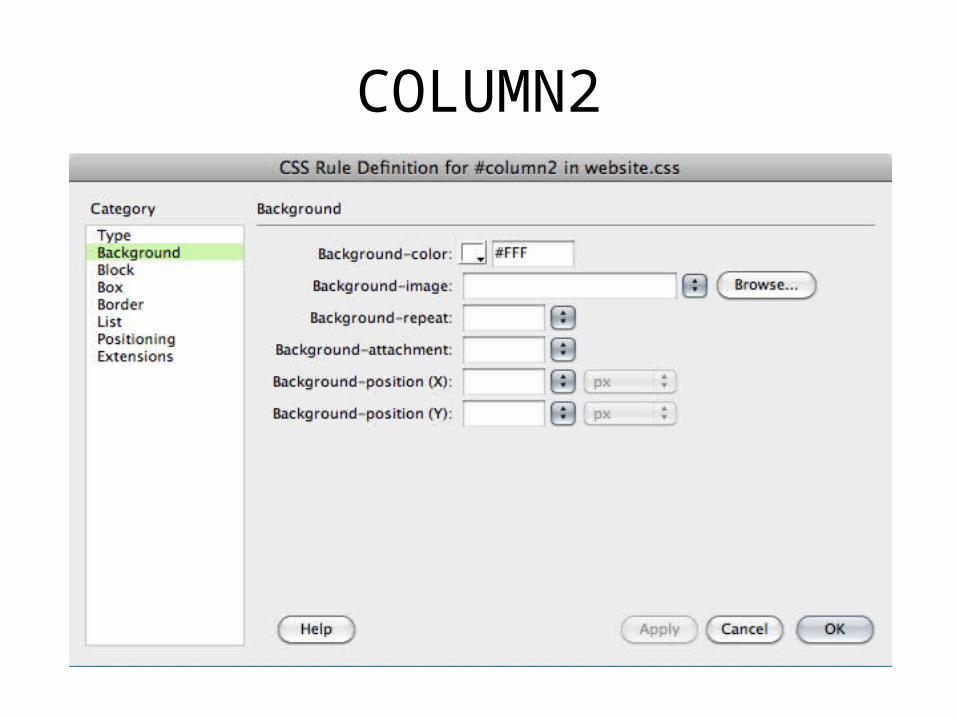
COLUMN2
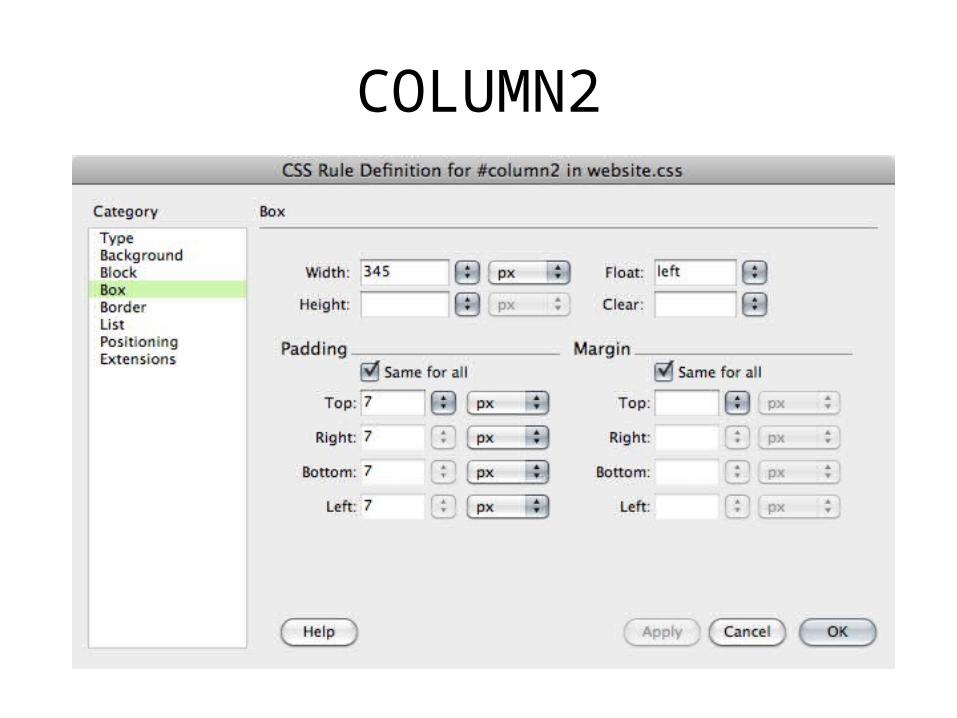
COLUMN2

COLUMN3
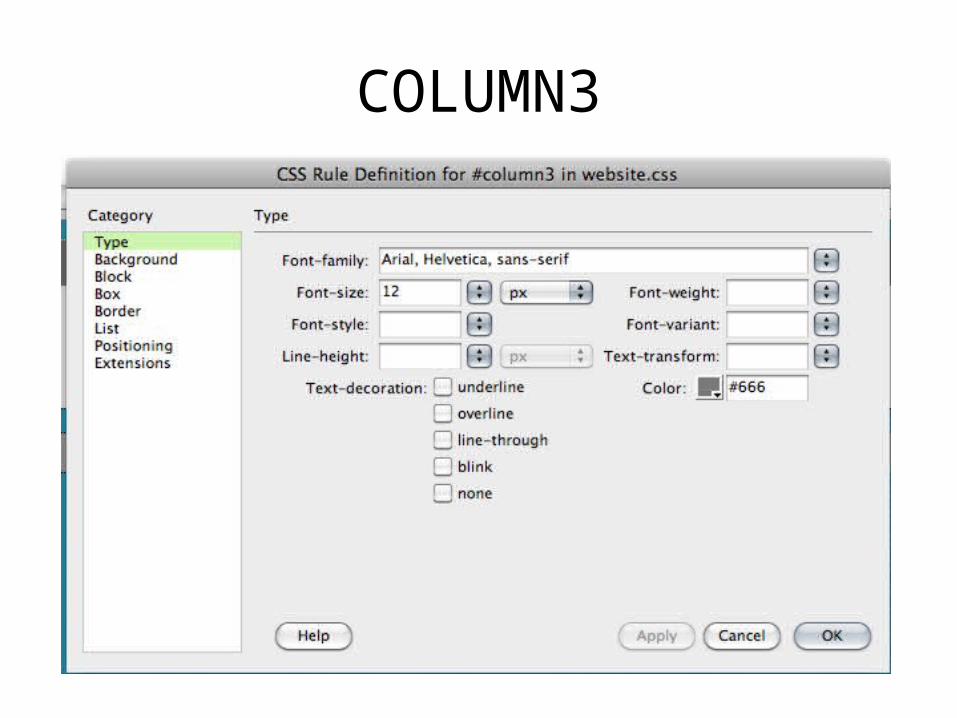
COLUMN3

COLUMN3
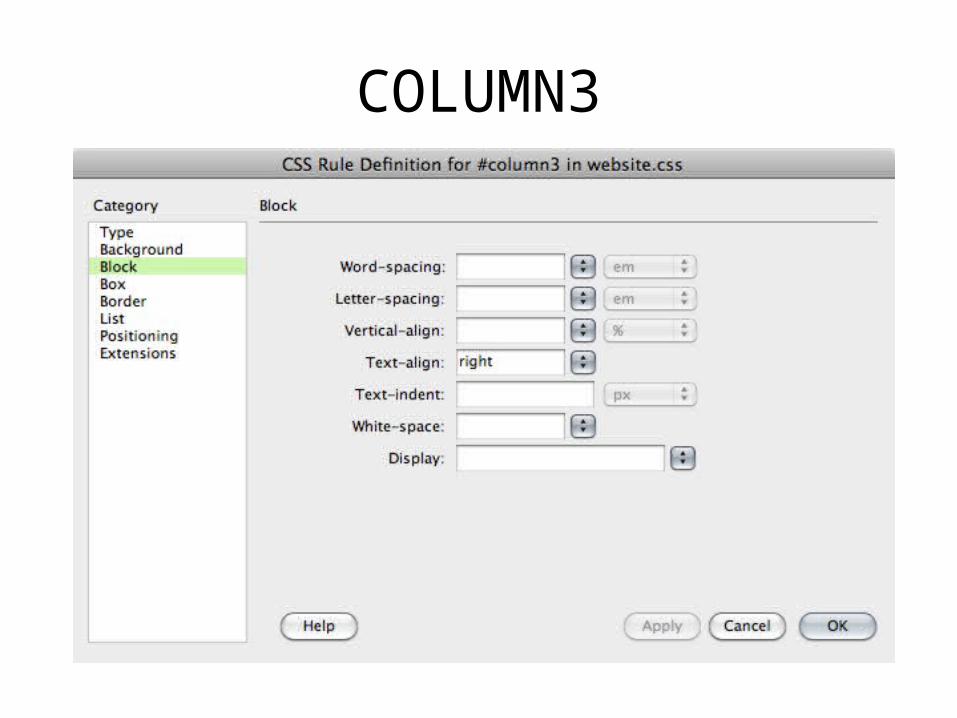
COLUMN3
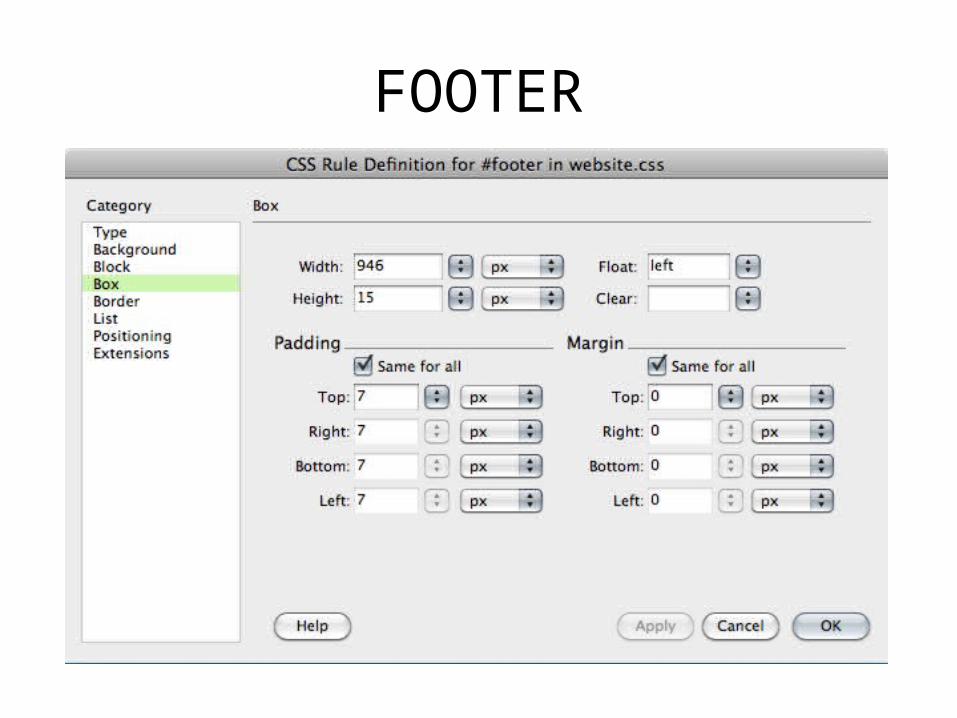
FOOTER
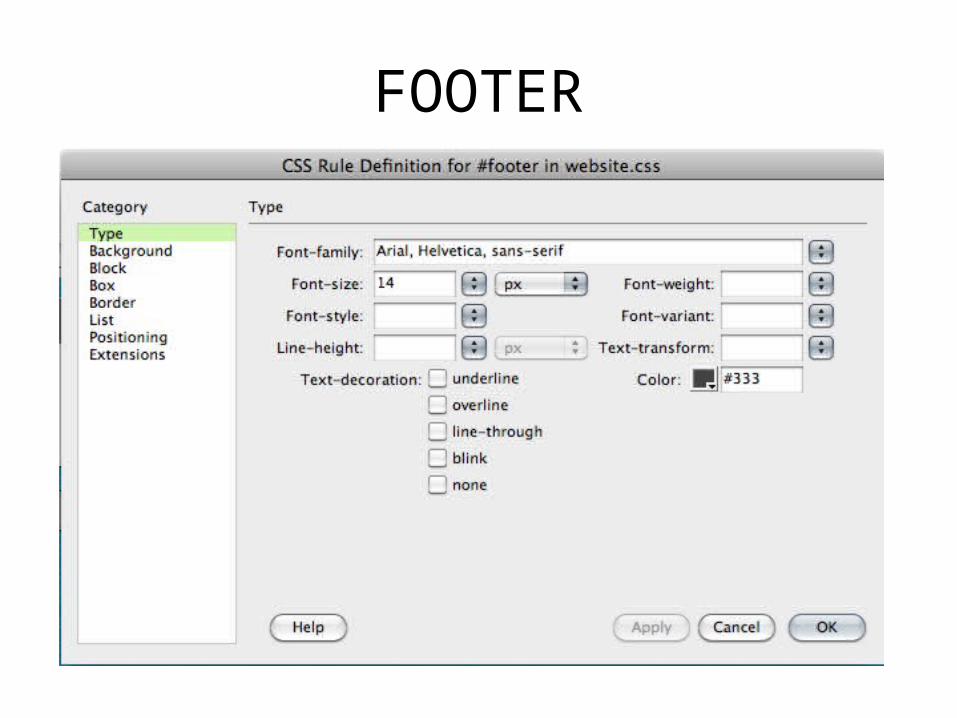
FOOTER

FOOTER

FOOTER

For elements such as the background of the entire page, we need to work with customizing HTML TAGS with CSS:
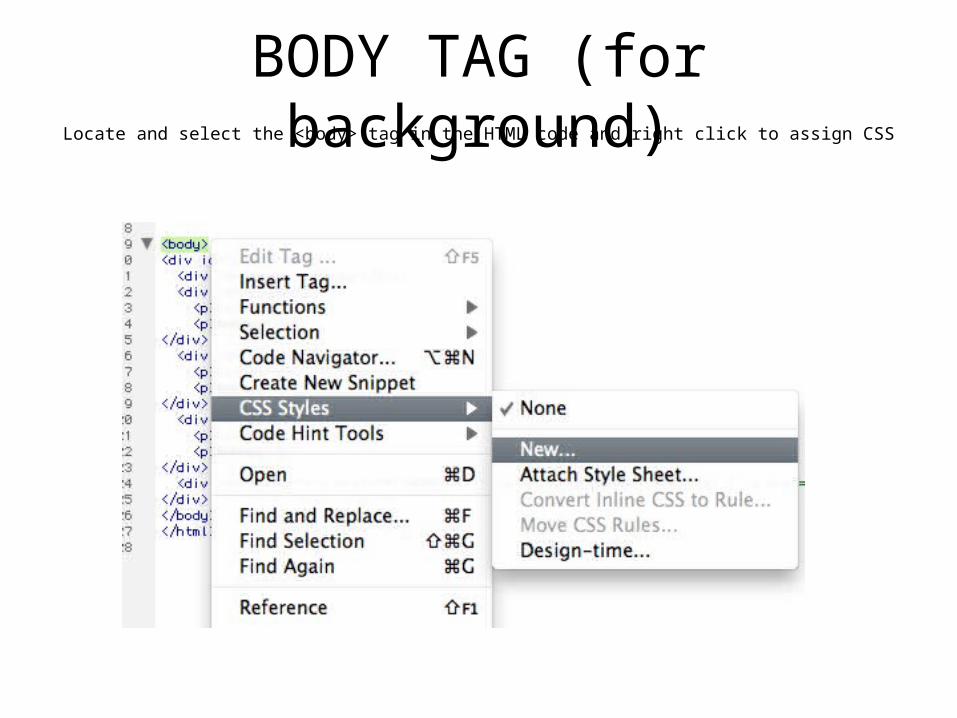
BODY TAG (for background)Locate and select the <body> tag in the HTML code and right click to assign CSS

BODY TAG (for background)
Select TAG as the type instead of ID. ID applies to DIVs, TAG applies to HTML tags present in your code
Simply select BODY from the drop-down list of tags
Still in the same CSS file

BODY TAG (for background)
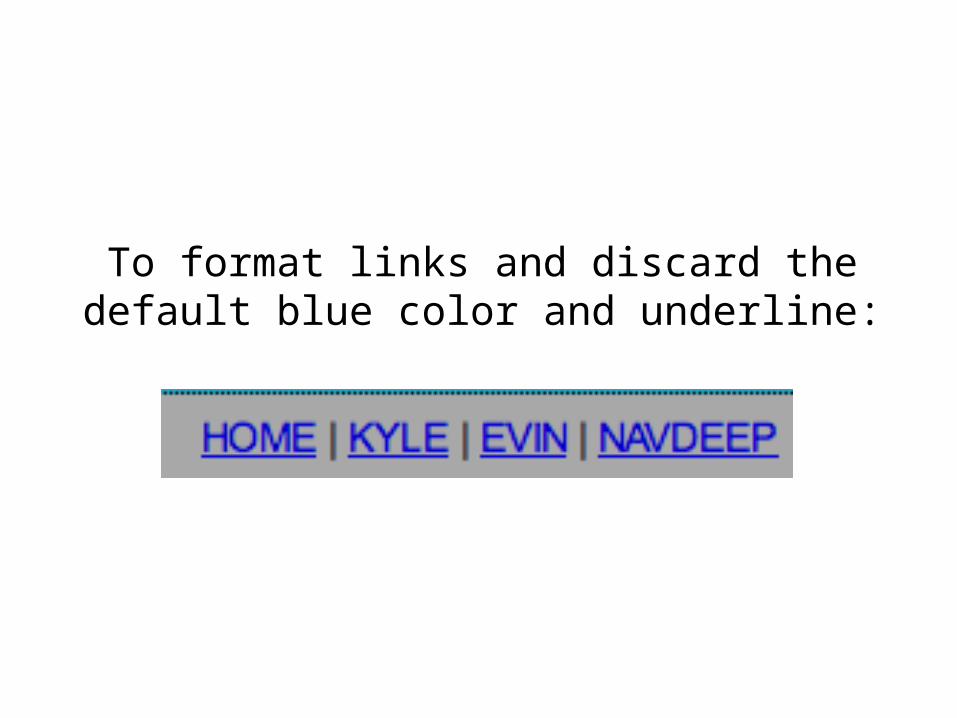
To format links and discard the default blue color and underline:

CUSTOMIZE LINKSLocate and select any of the a tags in the HTML code and right click to assign CSS
(the a tag is the prefix to all link codes)

CUSTOMIZE LINKS
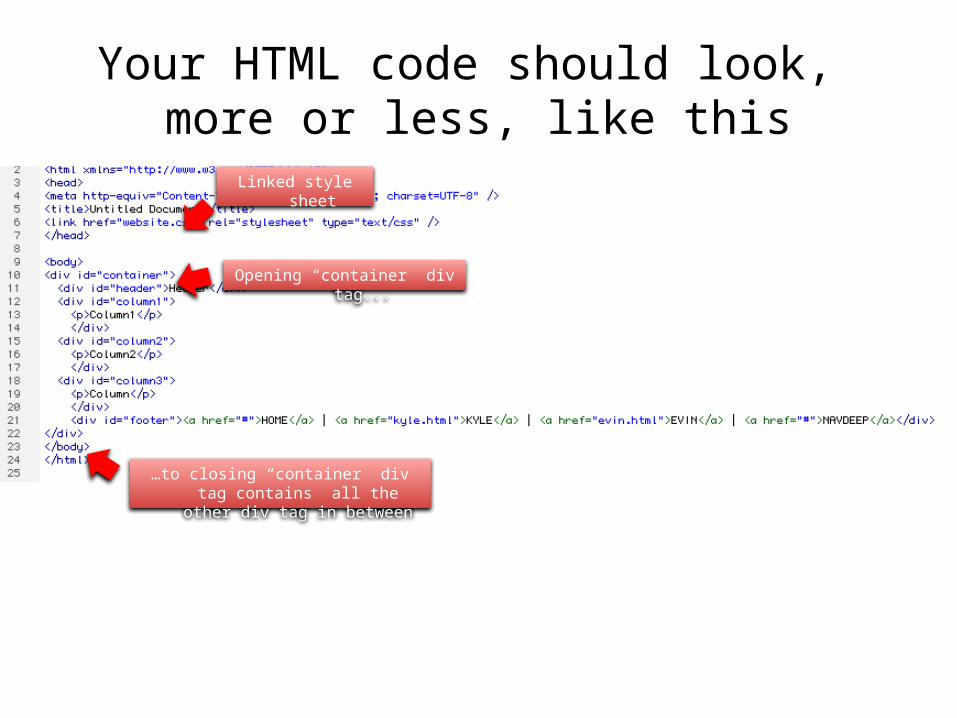
Your HTML code should look, more or less, like this
Linked style sheet
Opening “container” div tag...
…to closing “container” div tag contains all the other div tag in between

Your CSS file should look, more or less, like this

Your CSS file should look, more or less, like this

Your webpage should look, more or less, like this
http://www.vineyardesigns.com/resources/dreamweaver/div_css_site.shtml