CSC9B1: INTRODUCTION TO WINDOWS 7, I XPLORER AND …
27
CSC9B1 – ESSENTIAL SKILLS FOR THE AGE OF INFORMATION INTRODUCTION: WINDOWS 7 AND THE INTERNET COMPUTING SCIENCE & MATHEMATICS PAGE 1 OF 27 CSC9B1: INTRODUCTION TO WINDOWS 7, INTERNET EXPLORER AND SQUIRREL MAIL LEARNING OUTCOMES By the end of this session, students should be able to: • Log on to any Windows PC in the Stirling Local Area Network (LAN). • Manipulate (open, close, drag, resize, scroll) windows. • Organise and find files on the local machine and on network drives. • Work with files and folders (open, close, copy, move). • Use the Windows Start Menu to launch applications. • Use Windows Help Menus. • Understand some basic computer terminology. • Start Internet Explorer. • Identify various parts of the Browser interface and understand their uses. • Navigate around the World Wide Web. • Search effectively for information on the Web. • Access their University email accounts. • Send, receive and organise email using SquirrelMail (the preferred University system). • Download and print lecture notes and slides from the Web. Supporting Documentation • Support and tutorial programs can be found on the machines themselves (as this session will show) • There are many books available in the bookshop on using Windows, and on the Internet. You may want to browse through them and decide what’s best for you. See the course website for our recommendations. Bear in mind the next point… • The library has many books available on using Windows and on the Internet. • The Web has tons of information about itself, available free. • There are local tutorials on Succeed: Library and IT Skills. More Help • The person next to you? • Your tutors. That’s what we’re here for! IMPORTANT STUFF Attendance: You will need to register your attendance so that your checkpoints can be recorded. The procedure for doing this is explained later on in this worksheet. In your own time: This course is designed for students with no previous experience of using computers. In addition to the time spent in class, you are expected to devote sufficient time to become proficient in the topics covered each week. I already know about computers: You’ll probably find the first few sessions really easy then, but the material does get harder! There are always lots of hints and tips you might not know in the worksheets, and you can also get the worksheets from the Internet ahead of time if you want to speed up. Checkpoints: Towards the end of each worksheet you will be asked to demonstrate to a tutor that you have completed a certain task. The tutor will record the fact that you have done so.
Transcript of CSC9B1: INTRODUCTION TO WINDOWS 7, I XPLORER AND …

CSC9B1 – ESSENTIAL SKILLS FOR THE AGE OF INFORMATION INTRODUCTION: WINDOWS 7 AND THE INTERNET
COMPUTING SCIENCE & MATHEMATICS PAGE 1 OF 27
CSC9B1: INTRODUCTION TO WINDOWS 7, INTERNET
EXPLORER AND SQUIRREL MAIL
LEARNING OUTCOMES
By the end of this session, students should be able to:
• Log on to any Windows PC in the Stirling Local Area Network (LAN).
• Manipulate (open, close, drag, resize, scroll) windows.
• Organise and find files on the local machine and on network drives.
• Work with files and folders (open, close, copy, move).
• Use the Windows Start Menu to launch applications.
• Use Windows Help Menus.
• Understand some basic computer terminology.
• Start Internet Explorer.
• Identify various parts of the Browser interface and understand their uses.
• Navigate around the World Wide Web.
• Search effectively for information on the Web.
• Access their University email accounts.
• Send, receive and organise email using SquirrelMail (the preferred University system).
• Download and print lecture notes and slides from the Web.
Supporting Documentation
• Support and tutorial programs can be found on the machines themselves (as this session
will show)
• There are many books available in the bookshop on using Windows, and on the Internet.
You may want to browse through them and decide what’s best for you. See the course
website for our recommendations. Bear in mind the next point…
• The library has many books available on using Windows and on the Internet.
• The Web has tons of information about itself, available free.
• There are local tutorials on Succeed: Library and IT Skills.
More Help
• The person next to you?
• Your tutors. That’s what we’re here for!
IMPORTANT STUFF
Attendance: You will need to register your attendance so that your checkpoints can be
recorded. The procedure for doing this is explained later on in this worksheet.
In your own time: This course is designed for students with no previous experience of
using computers. In addition to the time spent in class, you are expected to devote sufficient time to become proficient in the topics covered each week.
I already know about computers: You’ll probably find the first few sessions really
easy then, but the material does get harder! There are always lots of hints and tips you might not know in the worksheets, and you can also get the worksheets from the Internet ahead of time if you want to speed up.
Checkpoints: Towards the end of each worksheet you will be asked to demonstrate to a tutor
that you have completed a certain task. The tutor will record the fact that you have done so.

CSC9B1 – ESSENTIAL SKILLS FOR THE AGE OF INFORMATION INTRODUCTION: WINDOWS 7 AND THE INTERNET
COMPUTING SCIENCE & MATHEMATICS PAGE 2 OF 27
Should you not reach the end of the worksheet during the class (quite possible and nothing to worry about), then you are expected to finish the work in your own time. You should demonstrate the checkpoint task at your next class.
Help: Don’t be stuck! Ask for help if you need it! Don’t worry about asking ‘silly’ questions.
You are welcome to contact us outside class times. The best way is via email: [email protected].
GETTING STARTED WITH WINDOWS
Part One: Your viewing comfort
Sit in front of the machine and put your hands on the keyboard. Comfy? Adjust the chair
height so your thighs are parallel to the floor. Put the keyboard somewhere that you can reach
without stretching. What about the mouse? You should think about these things every time
you sit down to use a computer: you will spend a lot of time in front of one, and may store up
problems if you don’t sit right. After all, you wouldn’t just get into a car and drive away; you
need to put the seat in the right position first.
Part Two: Basic Computerese
What’s here? Most of the labs are set up with rather similar equipment. There should be a
keyboard, a monitor, a mouse, and the box containing the computer (probably on the floor).
The computer will have a number of other ways of getting data in, possibly including:
• a floppy disk drive (3.5 inch size)
• a CD drive (for reading and writing CDs)
• one or two USB ports for use with flash memory drives, MP3 players, etc..
Universal Serial Bus (USB) is a standard connection for a variety of devices, such as memory
sticks, digital joysticks, scanners, digital speakers, digital camera, PC telephones, etc.
Inside the box is a CPU (Central Processing Unit), a hard disk, which has loads of programs
and data on it, and some other things like memory (RAM) for the machine. That’s it!
The Local Area Network
The computer in front of you has lots of applications and enough computing power to satisfy
your needs. BUT … you also need information, whether that is your own files, from the
Internet, via email … The LAN (Local Area Network) connects the machine in front of you
to the outside world. This is important, because via this wire, you are able to put your work
in the central filestore so that you can access it from any PC on the LAN that you log on to
(e.g. on campus). So, if you do your work on the machine in front of you now and save it
properly you can leave, come back, sit at an entirely different machine, even in a different
room, and use what you’d already saved to work on it again.
Part Three: Logging On
(If you don’t have a user name and password, ask the demonstrator for help.)
'Logging on’ just means telling the machine who you are so that you can access your own
files. Logging on requires a username and a password. The username is unique to you here
in Stirling. It doesn't really matter if other people know your username, but the password is
private to you. Don’t tell anyone else your password. Don’t let anyone else use your username or password. If you give your password to someone else and they do bad things,
we’ll have to assume it was you. You’ll be the one in front of the Discipline Board.
» Enter your user name and password.

CSC9B1 – ESSENTIAL SKILLS FOR THE AGE OF INFORMATION INTRODUCTION: WINDOWS 7 AND THE INTERNET
COMPUTING SCIENCE & MATHEMATICS PAGE 3 OF 27
You should now be successfully logged on. If not, ask for help…
Part Four: Using the Windows Operating System
You may ask: ‘What’s an operating system? When you switch on a computer, the
first thing it does is to load the operating system automatically. It’s the
operating system which, in turn, manages all of the computer resources. It looks
after the mouse, keyboard, monitor, printer and any other devices connected to
your machine. It is also responsible for starting and running software
applications such as web browsers, word processors, databases, spreadsheets,
mp3 players and so on.
When you switch off a computer it forgets almost everything it knows except
for the bit about where to find and load up the operating system, which in turn
knows about finding and loading other applications, and so on.
You may have come across some
operating system names such as DOS,
UNIX, Linux, MacOS, Windows (95,
98, 2000, XP, Vista). In these labs we
use Windows 7.
Having successfully logged on, what
will appear on the screen is called the
desktop. If you get distracted or
irritated by the various sponsor's
messages, you can turn them off (at
least for this session). Ask and we'll
show you how! The set up of the
machines in the labs is always under
development, so don’t worry if it still doesn’t look exactly like this. As long
as it looks mostly like this you’re OK.
Now some terminology:
The bits of the desktop are pretty straightforward. Across the bottom is a broad grey band
called the taskbar.
At the moment you probably have an empty space between the clock and Start. This is a
Good Thing, because you’re not running any programs.
The Start button (at the left on the task bar) is the nerve centre for the Windows
PC. It’s where you go to start programs, basically. It’s also a source of help and a place you
go to shut down the computer.
Typographical note: Whenever you see » at the beginning of a paragraph in
these worksheets, it means this is something for you to do.

CSC9B1 – ESSENTIAL SKILLS FOR THE AGE OF INFORMATION INTRODUCTION: WINDOWS 7 AND THE INTERNET
COMPUTING SCIENCE & MATHEMATICS PAGE 4 OF 27
» Click on the Start button. Alternatively, you could press one of the special Windows keys on
the keyboard.
You don’t need to click twice. You don’t need to hold the mouse button down. A menu will
appear (the Start menu). Some of the menu items have little black arrows beside them,
indicating that there are other sub-menus nesting within this menu item.
» Move the cursor (the mouse) over the word All Programs. This brings up the next menu:
» Explore this menu. Notice that some of the items here also have sub-menus.
» Find the Accessories menu item. From the Accessories Menu select Calculator.
OK. So you have just used the Start menu to start up the Calculator application.
Look at the task bar. You should see a
new button in the task bar. This indicates
that the Calculator program is running.
Windows is a multi-tasking operating system; this means you can run two or more
programs simultaneously. Each program has a separate window, and a button in the task bar.
If one program window is obscured by another, you can click on its button in the task bar to
bring it to the front, so you can see it. Do this now.
» Double-click on the Internet Explorer icon with the left mouse button. (In
fact, unless this guide says otherwise, use the left button exclusively for now.)
An icon is a small pictorial representation of an object (a file, or a folder, or a
document, or a program, or a 'drive'). To start a program, or open a folder, or a file, or to see
the contents of a drive, you can double-click on its icon. There are several icons in the task
bar, and probably quite a few on the desktop too (that’s the bit above the task bar).
Much of the time you don’t need the Start menu to start programs because the most
frequently used programs have their own icons on the desktop. But we can’t put all programs
there because it would get too cluttered.
As with the Calculator, Internet Explorer will start up in its own window (showing the
University web page). There should be a button in the task bar for this too.
Another basic skill of computer use is manipulating windows. Each program window can be
moved around, resized, maximised and minimised and so on. You don’t have to accept what
you’re given.
At the top of the IE window there’s a title bar.
On the right of the title bar there are three buttons:
These buttons will be seen on most of the windows you’ll come across. The left button is the
minimise button. This hides the window so you can see other things on the screen. But the
program is still running on the computer.
Note: When you are asked to select items from menus, you will often be given
an instruction that looks something like menu: submenu: item. For example, the
previous sequence of steps could have been written as
Start: Programs: Accessories: Calculator

CSC9B1 – ESSENTIAL SKILLS FOR THE AGE OF INFORMATION INTRODUCTION: WINDOWS 7 AND THE INTERNET
COMPUTING SCIENCE & MATHEMATICS PAGE 5 OF 27
» Try it. Click on the minimise button for the IE window. The window disappears. But notice
that you can still see its button in the task bar.
» Click on the IE button in the task bar. The window reappears.
The button in the middle is the maximise/restore button. It is used to switch a window
between filling the whole screen or occupying an intermediate size. Each time this button is
pressed, its appearance will change to show what it will do the next time it is pressed.
» Click on it. What happens? Click on it again. What happens this time?
The rightmost button of the three, is the exit (or close) button. It closes the program (stops it
running) and closes the window. Don’t click on it yet.
More generally, you may feel very apprehensive about pressing buttons, and so
on, in case Something Very Bad happens. Once you have gained a bit more
experience, however, you be recklessly pressing buttons all over the place just
to see what they do! What you must do is save your work properly before you
go completely wild.
Resizing and Moving Windows
You can resize a window by using the Resize button at the bottom right of the
window.
» Move the cursor to the resize button of the IE window. Notice that the cursor changes to a
little diagonal double-headed arrow. This is the operating system giving you a hint that
something different from the usual might happen if you click now. Click and drag, and you’ll
notice the window changes its size accordingly. When you release the mouse button the
window stays at the new size.
To move the whole window around just click and drag with the left mouse button inside the
title bar of the window.
Scrollbars
When you resized the window (if not before), scroll bars would have appeared. These let you
move around content which is bigger than the window you are currently using.
Part Five: The Help System
Windows has extensive built-in help system.
» Select Start:Help and Support
A help screen will appear. This is the Help and
Support Centre introductory page.
A cursor is a pointing device. Its position on the screen will tell you what you’re
going to affect if you click or type. It also looks different depending on what
you can do. This is a handy hint in many applications.

CSC9B1 – ESSENTIAL SKILLS FOR THE AGE OF INFORMATION INTRODUCTION: WINDOWS 7 AND THE INTERNET
COMPUTING SCIENCE & MATHEMATICS PAGE 6 OF 27
The Help and Support system is really an
'online' instruction manual. You can work
through it like a textbook, using the topic
links on the left, or you can dip into it like a
dictionary, using the search facility. To
illustrate searching, imagine that you want to
learn about keyboard shortcuts: it’s all very
well having fancy pointing devices, but
sometimes it’s quicker to type a command
than to select something from a menu.
Keyword search » Click inside the search box and type shortcut key for save. Then press the Start searching
button at the right of the box.
This has the effect of starting a search through all of the Help and Support system files to find
occurrences of the words shortcut key for save. The results of this search are displayed for
you to examine. The item Windows Keyboard Shortcuts Overview should be among the
results. Select it to find out more.
ORGANISATION IN WINDOWS
Modern computers can store huge amounts of information. Therefore it’s important to know
where to find things, and how to organise your own work.
» Go back to the desktop again. Close all of your open programs and windows.
One of the icons is the ‘Computer’ icon.
It may be called Computer (hopefully!), or it
may be called something like ‘N0001235…’
This is less helpful - it's the actual number of
the machine that you are sitting in front of.
» Double Click on it.
The window that appears will contain a
number of icons representing various objects
to which your computer has access. Some
CSC9B1 – ESSENTIAL SKILLS FOR THE AGE OF INFORMATION INTRODUCTION: WINDOWS 7 AND THE INTERNET
COMPUTING SCIENCE & MATHEMATICS PAGE 7 OF 27
belong to the actual machine that you are logged on to, while others represent resources
available over the Local Area Network (LAN). Don’t worry if your version is not exactly like
the illustration.
Incidentally, there should now be a button on the task bar representing
Computer. All windows (in this case, a folder window) will have a button in
the task bar – it’s not just for running programs.
Now back to the Computer window. For this module there are two important objects:
1) The H: drive. It will be called something like xyz01 on 'wide\XX\z' (H:) or XX on
Wide (H: drive) 2) The V: drive. It will be called something like Groups on ‘Student Server (Wide)’ (V:
drive)
The term drive (or disk drive) refers to a storage device. You can read data from (and write
data to) a drive. These drives may be part of the actual machine you are using (hard disk),
they may be removable storage devices (floppy, CD, superdisk, zip, memory stick etc.), or
they may be storage devices on a computer somewhere else on the network.
If the machine was your own you’d see a C: drive (it’s the hard disk inside the computer),
and possibly drives for other hard disks and for CD ROMs. This depends a lot on the
configuration (setup) of the machine you’re using. You can’t see the C: drive on the machine
in front of you: it has been hidden. This is for your security, and also ours.
The H: drive (Home File Store)
H:, the drive for central storage. Everyone has a home folder (i.e. disk space on the H: drive),
and the name you see for this will be different from the name everyone else sees. For
example, xyz01 on ‘wide\NN\z’ (H:). The xyz01 bit will be your user name, the \NN bit will
be the last two digits of the year you first registered as a student and the \z bit will be the first
letter of your surname. 'Wide' is simply the name of a part of the central storage system on the
University network.
Your home folder is the only place you’re allowed to save your files. But the good news is
that the system is set up so that whichever lab you’re in, whichever machine you’re on, you’ll
be able to see your home folder. Always save your work in your home folder. That way,
it’s secure – no-one else can see it (they’d need your password, which of course you haven’t
given them). It’s also backed up, so if, for example, the disk you saved your work on gets
lost, stood on or chewed by a dog, you won’t lose the thing you’ve been working on for the
past 6 months.
What does ‘backed up’ mean? Someone somewhere (Systems Administrators) copies
everything that’s on the drive and puts the copy somewhere safe. If something should happen
to the drive, it can be ‘restored’ from the copy. Back-ups are taken at regular intervals (the
length of the interval depends on how important the work is). The most you can lose is what
you did since the last back-up.
Your home folder is also accessible via the Desktop icon which has your
name (probably in the top left corner of the screen) and then in My Documents. Although your home folder is not actually stored on the
machine you are sitting at, it should seem as if it is. To make this illusion
even more convincing, you have the folder My Documents.

CSC9B1 – ESSENTIAL SKILLS FOR THE AGE OF INFORMATION INTRODUCTION: WINDOWS 7 AND THE INTERNET
COMPUTING SCIENCE & MATHEMATICS PAGE 8 OF 27
The V: drive (Groups Folder)
V: is, like H:, a network drive. It is mostly used by course tutors to make material available
for copying by students. There will be files associated with the practical sessions there for you
to copy to your own file space. V: is central too and you can see it from any lab. One
important thing about the V: drive is that you can’t change anything on it.
Another important purpose of the V: drive is that this is where you must register your
attendance at each practical class. You will need to do this at the start of each class. Do it
now (as described below) and take note.
How to Register your Attendance at Practical Sessions » Double-click on the icon labelled
Groups on `Wide' (V:)
» Double-click on the icon labelled
CSC9B1.
» Find the icon labelled Register, and
double-click on it.
You will see a new window inviting
you to register.
» Click to register
Assuming you’re successful:
» Select Continue to quit the registration program
» Now close the CSC9B1 window, and the Groups on `Wide' (V:) window (select the `X' in the
top right of each one)
Note that the program will not accept registrations in other labs, nor outside the scheduled
practical hours. Normally you register attendance right at the beginning of the practical
session. Registration is important, because it provides proof that you attended a class.

CSC9B1 – ESSENTIAL SKILLS FOR THE AGE OF INFORMATION INTRODUCTION: WINDOWS 7 AND THE INTERNET
COMPUTING SCIENCE & MATHEMATICS PAGE 9 OF 27
Remember to do this at the start of each weekly workshop! Although we don’t formally require that you attend every week, it helps us keep track of your engagement with the module. Registration is also necessary in order to record your practical checkpoints (very important!)
Removable Storage
The machines in the labs all have a USB port which can be used with Flash Memory drives
(sometimes called ‘sticks’ or ‘pen drives’). If you have one of these you can plug it into the
USB socket and a Window will open up showing you the contents of the flash drive. These
will come up as drive E: or F: usually.
A Word of Warning: Never, ever rely on a pen drive to store the only copy of a file. Make
sure you’ve saved your work on the central storage facility first. This is particularly
important with pen drives, because you can put so much information on them. These are not
reliable storage devices. Think how ill you’d feel if you lost all of your coursework, those
pictures from Christmas last year, Granny’s birthday party, etc, etc.
OK, back to files and folders now …
Folders inside folders inside folders…
Each week during the course you will save your work as files. You’ll get to
know about different types of files during the module. Just as with a filing
cabinet, you organise your files into some kind of hierarchical structure to
make them easy to find again. In Windows, we group our files into folders.
» If you haven’t already done so, open your H: drive folder in the My Computer window. A new window should appear. There may not be much in
it at the moment, maybe a few things put there when your account was set up. Of course if
you have used your university account before then you will see any files that you have
already created.
You have just navigated to your personal space on the H: drive. This is your Home Folder
(it has your user name). No one else can see it: it is private to you. You should store all your work here. It’s up to you to organise your work. Folders can help. Create a folder
(inside your home folder) for your CSC9B1 coursework.
» Select File: New: Folder (from the File menu). A new folder will appear in the window.
Initially the new folder has been given the name New Folder and this name is highlighted
(reverse video effect). The idea is that you should
be able to name the folder immediately by simply
typing a name of your choice.
» Type the name the folder. Call it CSC9B1.
You can also name a folder any time by clicking once on its original name, waiting a couple
of seconds, then clicking again (slower than a double-click). While the old name is
highlighted, type the new name.
» Open your CSC9B1 folder; it’s empty. Create new folders inside the CSC9B1 folder, one
each for Text and Graphics, Spreadsheets, and PowerPoint. (File:New Folder)
Now you should have three folders inside your CSC9B1 folder, which in turn is inside your
home folder and everything below (inside) your home folder in the file structure is yours,
while everything above (outside) it is not. Why bother with folders? It makes things much
easier to find.

CSC9B1 – ESSENTIAL SKILLS FOR THE AGE OF INFORMATION INTRODUCTION: WINDOWS 7 AND THE INTERNET
COMPUTING SCIENCE & MATHEMATICS PAGE 10 OF 27
Copying and Moving files and folders
In some weeks there will be some prepared materials to help with the workshop for you.
These will be found on the V: drive (also called “Groups on Wide”).
» Organise your desktop so that you have your home folder open, and the V: drive. Arrange the
folders so that you can see (some of) each of them. Close any other open windows.
» In the V: folder, open the CSC9B1 folder. One of the folders there should be called Windows
Workshop. Open it. There will be a single file, called profound. You’re going to copy the file
from the V: drive to your own CSC9B1 folder. Copying and moving files involves dragging
the file to its destination using the mouse. Here's how:
» Click once on the profound file to select it and then drag it over to your CSC9B1 folder.
The fact that you have selected the file should be evident from its appearance.
» With the mouse button still depressed, drag the file (move the mouse, you’ll
see the file move too) to the Text and Graphics window.
» When you let go of the mouse button the file has been copied.
» Actually, we just moved the file, but since the V: drive is another device
elsewhere, Windows copies the file for you.
» Move the file inside your Text and Graphics folder. Note that
this time the file is not copied
because both locations are on the
same drive. Check inside the
Text and Graphics folder to
make sure the file is there.
Sometimes when you move files
around this way the destination
folder may not display the
updated contents immediately.
To force the display of a folder’s
contents to be updated, choose
View: Refresh from the folder
window menus.
» One last thing; you can copy (or move) more than one file at a time. To select more than one
file to be copied or moved, simply click and drag over an area containing the files or folder
you want to select. Then click and hold on one of the files and move them in the usual way
(drag them). They all move together and it should be obvious what is happening from the
display!
Alternatively, use the right-click menus:
1. Right click on the profound file. A menu appears. One of the items is Copy.
(select that).
2. Go to the window where you want the file to be. Right-click in the window, and
select Paste.

CSC9B1 – ESSENTIAL SKILLS FOR THE AGE OF INFORMATION INTRODUCTION: WINDOWS 7 AND THE INTERNET
COMPUTING SCIENCE & MATHEMATICS PAGE 11 OF 27
Deleting
It’s also important to be able to delete files when you’re finished with them. Delete the
profound file in your CSC9B1\Text and Graphics folder. First of all let’s acquire some
screen real estate! I’m assuming that you’ve probably got several windows open and that you
can’t see much, if any, of the desktop.
» Press and hold down the Windows key , near the bottom left of the keyboard and press
the M key. This has the effect of minimising all currently open windows but without
closing them. You could, of course minimise each window one by one if you prefer but this is
a very useful shortcut.
Now that you can see the desktop again, notice the icon for the Recycle Bin , which should be down at the bottom right of the desktop. The Recycle Bin is
where you put things you don’t want anymore. Here at the University,
anything you put in will disappear and never be seen again. (If you were
using your own machine at home, the Recycle Bin would behave just like a
folder in that you could retrieve things placed in it – they don’t get deleted
straight away.)
» Open your CSC9B1\Text and Graphics
folder (just click on the button on the
taskbar). Make sure you can see the Recycle
Bin as well as the folder window. Now drag
the profound file from the CSC9B1 window
to the Recycle Bin and drop it in. You will be
asked to confirm your decision to delete the
file. This is Windows’ way of giving you a
last chance to change your mind.
» Press Yes!
You can delete entire folders in the same manner but be warned: If you delete a folder, you
will be deleting everything contained in that folder including any sub folders.
Alternatively:
1. Right clicking on a file or folder may reveal a menu containing the Delete
option.
2. Alternatively, select a file or folder and look for the Delete button
among the buttons on the Standard Toolbar near the top of the window.

CSC9B1 - IT SKILLS INTRODUCTION: WINDOWS 7 AND THE INTERNET
DEPARTMENT OF COMPUTING SCIENCE & MATHEMATICS PAGE 12 OF 27
You will often find that there are two or more ways of doing the same thing.
This is because users come in many varieties, and with different preferences.
Having alternatives mean we can all choose the way we like best.
INTERNET EXPLORER AND THE WORLD WIDE WEB
So far in CSC9B1 we’ve covered the use of the Windows interface: how to open and close
windows and programs, navigation around files and folders, and so on. The other applications
we’ll cover later, such as Microsoft Word, Excel, PowerPoint etc. work on information that is
local to your machine. But of course, the joys of the Internet mean you can make use
information elsewhere. The applications we’re going to cover next, Internet Explorer and
SquirrelMail, are applications that make full use of the fact that the machines you’re using
are connected to the outside world.
You might want to know a little of the history of the Internet. It’s worthwhile knowing about
how things are, and why. The growth of the World Wide Web has been one of the biggest
revolutions in computer history. There are some useful links on the CSC9B1 course page for
Internet history. And if that doesn’t make sense now, it will once you’ve finished this
workshop.
Using the World Wide Web (which we’ll just call the Web from now on) is actually pretty
straightforward, but needs a special application, called a Web Browser, which lets you
browse the web (or, to put it another way, it’s a special viewer that lets you view web pages).
There are several, but the most popular are Internet Explorer, Netscape Navigator and
Mozilla Firefox. They all do roughly the same type of thing: they display pieces of
information on the Web (which are called web pages) in a graphical fashion. The University
supports Internet Explorer (IE) on its machines so that’s what we’ll use. Other browsers
you might come across are Netscape Navigator, Opera, Mozilla, Lynx etc.
Getting Started with Internet Explorer (IE)
» Start up Internet Explorer.
You should now be at your home page – the University web page.
Screen Layout
You will already be familiar with some of the standard menus at the top of the screen (File,
Edit, View, etc.). Within IE there are additional toolbars at the top of the window, which are
used for navigating around the World Wide Web and for frequently used menu items.
In Windows 7 most of these are disabled by default (not visible). The Address Box is the part
reading http://www.stir.ac.uk/. You can enable more toolbars by right clicking in the title of
the window (the blue bit at the top). A menu should appear, from which you can select the
appropriate choices.

CSC9B1 - IT SKILLS INTRODUCTION: WINDOWS 7 AND THE INTERNET
DEPARTMENT OF COMPUTING SCIENCE & MATHEMATICS PAGE 13 OF 27
Security! Some web sites will ask you to send information. It may only be your email address
but if you are buying online you may be asked to fill in your credit card details, for example.
It is extremely important that such sensitive information cannot be intercepted by malicious
third parties. To prevent this, web sites may use a secure connection to prevent electronic
eavesdropping. IE will colour code (green and red) the address bar and display a locked
padlock next to the address box whenever a secure connection exists. Other browsers may
show a key icon (whole or broken) or a padlock (closed or open) to indicate whether or not
the connection is secure. Some people don't like the idea of sending private information over
the web at all, but you should certainly not think of doing so over an insecure connection.
Most of the window (the document area) will be taken up with the information you’ve
downloaded. If IE can’t display the information, it will try to find a program on your
computer that can. This is sometimes called a helper application or plug-in.
When information is being downloaded over the network (sent to your machine to be looked
at), IE will display status information in the bottom part of the window too.
This may contain messages about what is happening. This is only useful if something is
taking a long time otherwise the messages will pass too quickly to read. Some pages, which
contain lots of images, may provide information about how many items there are to be
downloaded. There may be an additional visual 'download progress' graphic to show, by
means of a bar that fills up as the download progresses.
Format of a Web page
Okay, what you see is a document, or page, of information. The page is displayed by the
browser in a user friendly fashion, so that it looks nice, and you can tell different document
parts from others. Text is displayed nicely formatted and Hypertext links are displayed
sensibly. What does that mean? It means you can see which pieces of text are links to other
web pages, and which are just ordinary text. Browsers display links as pieces of text which
are a different colour (the default colour is blue, but this can be changed) from the main text,
and which are underlined. Often, you will come across web pages where the links are less
obvious, so that the text looks more uniform. Partly this is because we expect to have links all
over the place and partly because there are other ways of showing the viewer where the links
are (for example, rollover effects).
» Move the mouse pointer to the part of the page that says Academic Schools.
The mouse pointer should change into a hand – indicating that this is a link. The status bar of
the browser should be displaying the address of the page to which the link is pointing, in this
case something horrible like http://www.stir.ac.uk/schools/. This feature is useful, because
you can see in advance where the information for this link will be downloaded from.
The address of a page is called a URL (Uniform Resource Locator – why use one simple
word when three complicated ones will do!). All web pages have URLs but not all URLs are
web pages.

CSC9B1 - IT SKILLS INTRODUCTION: WINDOWS 7 AND THE INTERNET
DEPARTMENT OF COMPUTING SCIENCE & MATHEMATICS PAGE 14 OF 27
» Click on the link. A new page, which contains lots of links, is downloaded and displayed.
» Find the link to Computing Science and Mathematics (in the School of Natural Sciences)
and follow it.
Navigate.
» The simplest is just to press the Back button at the top left of the window.
You’ll find yourself back at the previous page. Notice that IE will have changed the colour of
the link you followed (probably to purple). This is to let you know that you have already
visited that link. Any web page may be linked to from several other pages. If you have
visited a page recently, then any links to that page, wherever they may be, should be
displayed in the changed colour. This feature will often prevent you from going round in
circles.
Having gone back to a previous link, you can reverse direction using the
Forward button.
» Click on the Forward Button.
Think of all the web pages you have visited as being links in a chain. Unless
you’re at one end of the chain, you can go to the previous link in either
direction. When you can’t go any farther back, the Back button will have a
different (greyed out) look. This is true in general. You can often tell when
buttons etc. are available by their appearance (enabled or disabled).
Wherever you are on the World Wide Web, choosing Home will always take
you back the where you started, in your case the University home page.
» Click on the Home Button. Alternatively, press Alt+Home.
» Follow some links around for a few minutes to get used to the system if you haven’t used the
World Wide Web much before. Remember, you can’t get lost (or at least you can always get
back home).
» Try this:
From the University home page, as before, follow the links to:
• Academic Schools then …
• Computing Science and Mathematics then …
• Current Student Information then …
• Course Modules then scroll down to …
• CSC9B1…
Welcome to the CSC9B1 home page!
Notice the little downward pointing arrows next to some of the buttons? This
usually means there is a whole other menu hiding in the tool bar. For example,
the one next to the forward button gives a history of web pages visited. Since
you've only been to a couple of places, the list is small, but it’s great when you
want to jump back several pages rather than one at a time.

CSC9B1 - IT SKILLS INTRODUCTION: WINDOWS 7 AND THE INTERNET
DEPARTMENT OF COMPUTING SCIENCE & MATHEMATICS PAGE 15 OF 27
If you have not been here before, spend some time here following the links to other course
related documents. You should pay regular visits to this page for course information.
During the term there will be announcements about assignments and answers to any
Frequently Asked Questions (FAQ) etc. in the News section. More of this later…
Toolbars and Menus
You’ve already seen three of the buttons on the toolbar at the top of the window; the ones
which take you Back, Forward, and Home. What other buttons do we have?
The Refresh button will simply reload the page you’re looking at. . This is useful
because sometimes information may get lost or mangled on the way to your machine.
This is particularly true with pictures. Another reason is that some web pages change
very frequently (e.g. stock market information, football results). Using the Refresh button
will cause the document to be reloaded (i.e. fetched again over the Internet).
The Stop button will stop a download in progress. This can be useful: since some
web pages are very large files and can take a long time to download, you might well
get bored waiting…
The Address Bar also allows easy access to search engines. The default is Google, but you
can change this if you prefer another search engine (see later in this worksheet).
And in the third tool bar as well as Home we have:
The Print button takes you to a standard Print dialog box to print the page you’re
looking at. We’ll cover printing in detail in the Text and Graphics sessions.
The RSS button allows you to access your RSS feeds. What? News agencies and
other dynamic sites offer a service called RSS Feeds or RSS. With RSS Feeds the
website can feed or download information such as top headlines, current travel
discounts, sports scores, and other timely content throughout the day to subscribers. If the
Feed button RSS Feed icon in Internet Explorer lights up, it means that the site offers RSS
feeds. Click the icon to see the feed and, if you want, subscribe to have the feed automatically
sent to your computer.
The Page button offers some options to do with how you view this page (size,
the ability to save the page, and so on).
The Tools button gives you access to various Internet options. Try these out
– see what’s there. You probably don’t need them yet.
There’s more in this bar – we’ll return to it below.

CSC9B1 - IT SKILLS INTRODUCTION: WINDOWS 7 AND THE INTERNET
DEPARTMENT OF COMPUTING SCIENCE & MATHEMATICS PAGE 16 OF 27
Menus
The buttons that you just used do most things you could want with a web page, which is why
they've been made into speed buttons… There are also the familiar menus in the middle.
These allow you to do the same things, and some additional things too.
File and Edit you’ll see on lots of other applications. They do the same sorts of things, no
matter what the application.
The Edit: Find Ctrl+F menu option will open up a dialog box to allow you to search for text
in the page you’re looking at (some web pages can be quite long).
Just type in what you want to
find and press the Find Next
button or press Alt+F.
You can also access this via the
search menu in the command
toolbar.
The View menu allows you to change the way a page is displayed on your screen.
» For example, try choosing View: Text Size: Smallest. This will allow you to see more of the
page in the window. Do you prefer it? If not then change to the text size that you like best.
The View menu also allows you to hide or reveal toolbars and so on, and to look at the
source of a document. The source is the HTML (Hypertext Mark-up Language) code that
makes up the web page. It's not too interesting if you don't want to make web pages up, but if
you do, looking at other page's source code may interest you. For now, though, ignore it.
» Try right-clicking on the Command Bar then choose Customize and Show all text labels.
This should have the effect of adding text labels to some of the buttons (helpful if you forget
what the icons are meant to represent).
» Unfortunately, you will have to customize your IE window each time you log on. This is a
slight inconvenience but it does mean that you will not be stuck with the choices made by the
last person who used the machine.
Opening a web page
Clicking on links isn’t the only way to get around. Using web browsers allows you to open a
page from another location, as long as you know the address (URL) of the page. That’s
partly what the location specifier (address box) is for.
» Select the text inside the location specifier. (Just click somewhere inside it so that it appears
selected )
» Delete it and carefully type in the following address (URL) exactly:
www.cs.stir.ac.uk
Web Addresses: Each machine that has information (web pages) is called a
Web Server, and each of these has a unique address. For example:
www.stir.ac.uk, which is the Web Server (www is commonly used) at stir
(Stirling) in the ac domain (academic community) in the uk. The http part stands
for HyperText Transfer Protocol, which is the way Web Pages are transmitted
around the Internet.

CSC9B1 - IT SKILLS INTRODUCTION: WINDOWS 7 AND THE INTERNET
DEPARTMENT OF COMPUTING SCIENCE & MATHEMATICS PAGE 17 OF 27
Note that you don’t need to type the “http://” part. Most modern browsers are smart
enough to add that for themselves.
» Press return, and wait. The page (CS & M home page) is downloaded and displayed on
screen, just as if you had clicked on a link.
While we’re on the subject, if you’re typing, you
might get it wrong. IE will tell you if it can’t find
the address. If you get a 'page cannot be displayed'
message, then check that you typed the right
address in and try again. Of course, sometimes the
person who created a link will have typed it in
wrong. In that case, you’ll have to try to use your
undoubted skills in figuring out what the address
should be and type that in by hand…
On the Web, things change rapidly, which is one of
its strengths. It’s also a weakness… Sometimes pages disappear completely, sometimes they
just move to different places. If you give IE an address for a page which isn’t where you
thought it was (even if the address is valid), or if a link you click on is what is outdated (the
page doesn’t exist any more), you’ll get a message telling you that the page cannot be found.
These 'Not found/Unavailable' messages will vary depending on the circumstances.
Sneaky Links
» Go to www.cs.stir.ac.uk/intro/floorplan. You know that pictures can be links too. It’s also
possible to use different areas of one picture to link to different pages; this is called an image
map.
This page, maintained by Graham Cochrane who is a Computing Officer in the department, is
an excellent example of such an image map. If you move the mouse around the diagram and
click, you’ll get some information back about the occupant(s) of the room or about its
function.
Favourites
You might want to visit some sites, for example the CSC9B1 home page, again and again.
Imagine how tedious it would be to have to remember the address (URL) and type it in
whenever you wanted to visit that site. To avoid this, IE provides Favorites (US spelling)
sometimes called bookmarks. You can create your own set of favourites to record the sites
you find interesting. The next example shows you how to add a page to your list of favorites.
» Go to the CSC9B1 Home Page. It’s at www.cs.stir.ac.uk/courses/CSC9B1
Play around with this facility. You should find that you can edit the address
without having to retype all of it (by clicking again at the place where you want
to edit). For example, edit the address by removing the letters cs and the dot
following them so that the URL becomes http://www.stir.ac.uk/ and see what
happens when you press the return key! Do try this; it’s important that you
master these simple techniques because the same tricks can be used in all sorts
of applications. Note also that as you type IE has a sort of predictive text,
aimed at guessing which web site you’re entering. If it’s right, you just select it
and you don’t need to type the whole address yourself.

CSC9B1 - IT SKILLS INTRODUCTION: WINDOWS 7 AND THE INTERNET
DEPARTMENT OF COMPUTING SCIENCE & MATHEMATICS PAGE 18 OF 27
» To add this page to your favourites list, simply click the Add to Favorites button on the left of the toolbar.
Now you should find that the
CSC9B1 Home Page has been
added to your Favorites list
(Maybe it's the only thing there at
the moment, or maybe those nice
people at Microsoft have generously provided you with a ready-made list of what they think
your favourites should be!) Just select the favorite that you want to visit again.
Exercise (in your own time)
Once you have added some favourites to your list (you'll probably want to wait until after the
bit about searching the web), organise your favourites into folders and delete any that you
don't want. Select Organise Favorites from the Favorites menu. Note that you can make
new folders, move favorites around, rename favorites (you don’t have to keep the name the
page maker used), and delete favorites and folders (sometimes the most important option).
Searching the Web
It should be fairly clear that the World Wide Web is enormous. Finding what you want is not
always easy; fortunately, there is help. There are several search engines available to help you
look for something you want. Most search engines work in the same way. There is a window
for you to type the keywords in which you are interested. There may also be some radio
buttons or menus which limit the search (by area, or subject), or which force the search
engine to find pages which mention all your keywords (called an ‘and’ search) or any one of
them (called an ‘or’ search). More generally these are referred to as Boolean search.
Google is a no-nonsense, powerful engine, and currently the most popular search engine.
Refining Web Searches
Whatever search engine you use, there are ways of making your search more fruitful. Usually
typing in a short list of keywords is a good start, but this will often produce a large number of
'hits', many of which may be irrelevant. Surprisingly (not!), people who are trying to sell you
things often arrange their web sites to maximise the number of times they are found by search
engines, so the more specific you can be, the more likely you are to get useful results.
» Go to www.google.com.
We’re going to do an
experiment on searching.
» Start by typing
revolutionary in the
search box.
Google is smart and tries
to guess what we’re really
looking for, but stick with
“revolutionary” just now.
Hit return.

CSC9B1 - IT SKILLS INTRODUCTION: WINDOWS 7 AND THE INTERNET
DEPARTMENT OF COMPUTING SCIENCE & MATHEMATICS PAGE 19 OF 27
Google will find around 41 million references to revolutionary.
Now refine the search. We’re actually looking for information on the film “Revolutionary
Road”.
» Modify your search to revolutionary road.
When you hit return you should have fewer hits, around 5 million. Google’s page rank
algorithm is so smart that the official web site for the film should be pretty near the top. One
of Google’s successes is that it tends to produce highly relevant results with uncanny
regularity. Part of this technique is to take the keywords supplied and, having found all the
sites, it will grade them by analysing their relative popularity on the assumption that, if users
have chosen a site frequently, it’s probably a good one!
» What happens if we type the title of the film “revolutionary road” in quotes?
The use of quotes tells Google to look for the exact phrase. You should have about 3 million
hits now.
Part of the problem here is that the title of the film contains reasonably commonly used words
and the phrase itself is used in many other contexts (that’s why I chose it!). Since we only
want sites related to the film, let’s try asking Google to find sites containing the exact phrase
Revolutionary Road and the word movie, like this:
Now we’re down to about 1 million hits. The chances are that the ones that are near the top
of the list will be more relevant.
Another good strategy, for our present task, would be to restrict our hits to sites that contain
the keywords in their title. This would exclude the possibility of picking up pages containing
discussions about films in general where the author might casually mention that (s)he had
“been to see the movie Revolutionary Road and it was pure magic, so it was…’
» Add allintitle: to the start of your search.
How many results now?
Each search engine works differently but whichever one you use will have a section
describing how to do advanced or refined searches. For Google there is a good online guide at
www.googleguide.com. Bear in mind that there are lots of search engines, and they
sometimes give different results, so if you can’t find something with one, try another.
Wikipedia is a good place to find out about search engines
en.wikipedia.org/wiki/Search_engine.
Reverse Searching
Another useful tip is to use reverse searching. Sometimes you visit a page and they have a
list of related links - and you follow these to find more useful stuff. Reverse searching is
when you try to find all the other pages which link to a page you’ve already found. For
example, there is a page about Stirling at www.explore-stirling.com/
» Who links to this page? Type the following into the search box in Google:
link:www.explore-stirling.com/
(the link: part tells it to look for pages with links to the explore-stirling website).
CSC9B1 - IT SKILLS INTRODUCTION: WINDOWS 7 AND THE INTERNET
DEPARTMENT OF COMPUTING SCIENCE & MATHEMATICS PAGE 20 OF 27
Tabbed Browsing
Instead of opening up separate IE windows for new pages, you can bring up a new tab. Try it.
EMAIL!
Everybody's using it. Email has made it possible for all sorts of people to communicate easily,
cheaply and (one of the really nice features of email) without disrupting the daily routines of
the participants. You choose when to send email and you choose when and how to read
email.
What is email?
Email is electronic mail. As a student, you have an email address, unique to you, set up here
at Stirling University. Your email address is of the form: [email protected], where
xyz01 is your username Remember the web addresses? Well, an email address is similar. It's
possible to get an email address at other places, often free, which you can use for life.
Why use it?
It's fast, efficient, and convenient and, for you, free. Do you need other reasons?
But is it secure?
No! Never put into an email message something that you wouldn't be prepared to shout across
a crowded room. There are methods of encrypting messages so that others can't read them,
and if you're interested you could always try to look for email encryption on the Web.
Now let's see how to use your University email account. The email program is called
SquirrelMail.
Using SquirrelMail
IMPORTANT: Many of you will have your own email accounts already on some other system. For the purposes of study, however, it is essential that you learn to use, and keep track of, your Stirling University student email account. The University (staff) will regularly send course related messages to the entire class and it is to your student accounts that these messages will be sent so it will be to your advantage if you check your student email regularly.
You may have come across Hotmail, Outlook Express, Netscape Messenger or any number of
email programs. These are all essentially packages that allow you to read, write and organise
your mail messages. What they will all do is communicate with the machine that collects your
messages and stores them ready for your email client program to download. The University
runs an application called SquirrelMail.
The main advantage of SquirrelMail is that it's a web email client, which means that you can
log in to it wherever you are as long as you have access to the Internet.
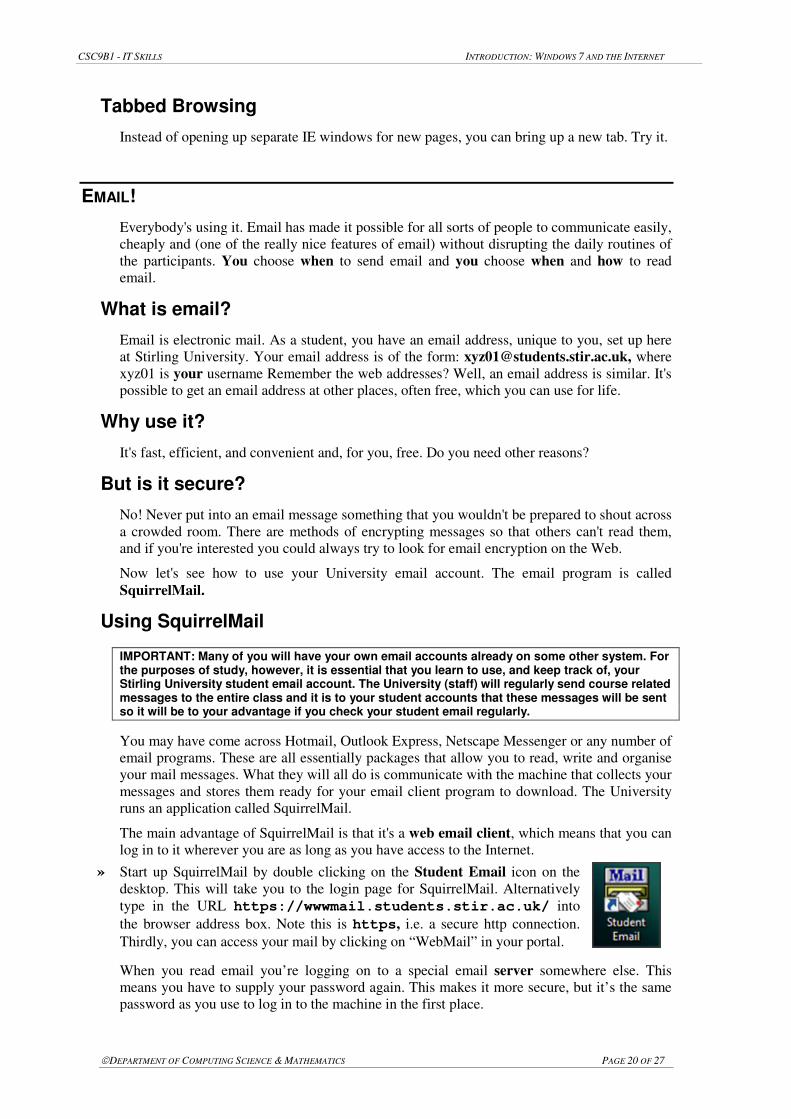
» Start up SquirrelMail by double clicking on the Student Email icon on the
desktop. This will take you to the login page for SquirrelMail. Alternatively
type in the URL https://wwwmail.students.stir.ac.uk/ into
the browser address box. Note this is https, i.e. a secure http connection.
Thirdly, you can access your mail by clicking on “WebMail” in your portal.
When you read email you’re logging on to a special email server somewhere else. This
means you have to supply your password again. This makes it more secure, but it’s the same
password as you use to log in to the machine in the first place.
CSC9B1 - IT SKILLS INTRODUCTION: WINDOWS 7 AND THE INTERNET
DEPARTMENT OF COMPUTING SCIENCE & MATHEMATICS PAGE 21 OF 27
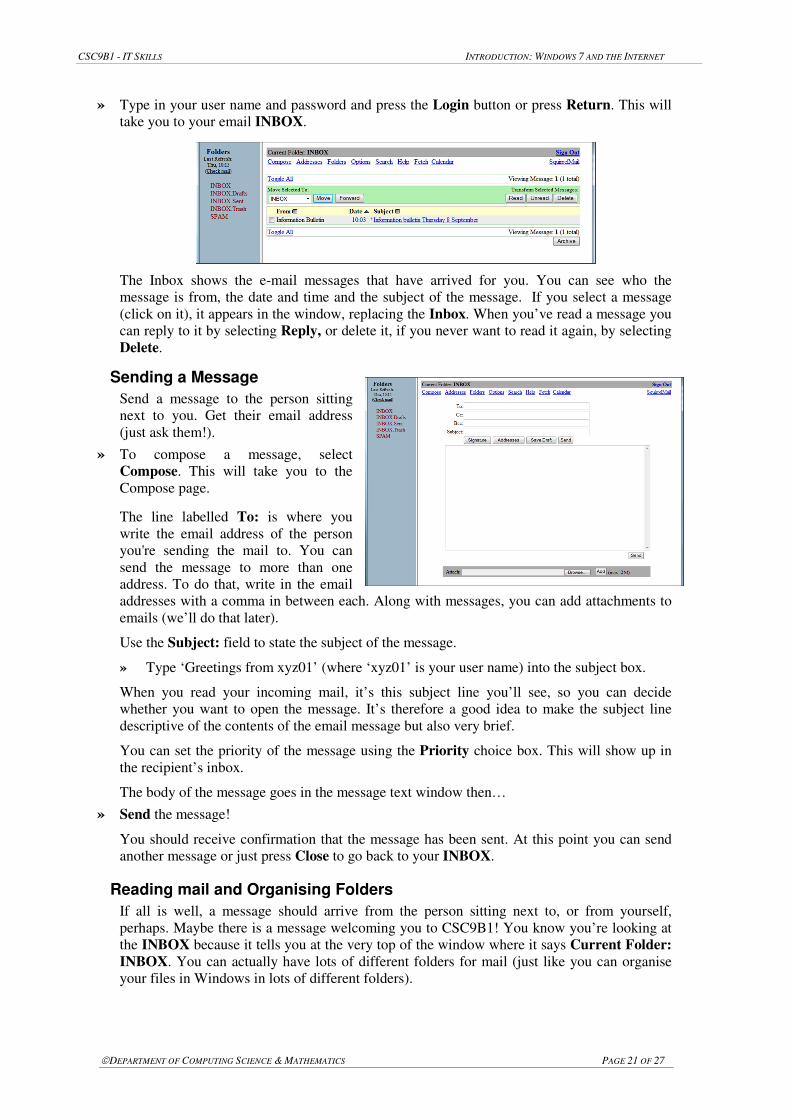
» Type in your user name and password and press the Login button or press Return. This will
take you to your email INBOX.
The Inbox shows the e-mail messages that have arrived for you. You can see who the
message is from, the date and time and the subject of the message. If you select a message
(click on it), it appears in the window, replacing the Inbox. When you’ve read a message you
can reply to it by selecting Reply, or delete it, if you never want to read it again, by selecting
Delete.
Sending a Message
Send a message to the person sitting
next to you. Get their email address
(just ask them!).
» To compose a message, select
Compose. This will take you to the
Compose page.
The line labelled To: is where you
write the email address of the person
you're sending the mail to. You can
send the message to more than one
address. To do that, write in the email
addresses with a comma in between each. Along with messages, you can add attachments to
emails (we’ll do that later).
Use the Subject: field to state the subject of the message.
» Type ‘Greetings from xyz01’ (where ‘xyz01’ is your user name) into the subject box.
When you read your incoming mail, it’s this subject line you’ll see, so you can decide
whether you want to open the message. It’s therefore a good idea to make the subject line
descriptive of the contents of the email message but also very brief.
You can set the priority of the message using the Priority choice box. This will show up in
the recipient’s inbox.
The body of the message goes in the message text window then…
» Send the message!
You should receive confirmation that the message has been sent. At this point you can send
another message or just press Close to go back to your INBOX.
Reading mail and Organising Folders
If all is well, a message should arrive from the person sitting next to, or from yourself,
perhaps. Maybe there is a message welcoming you to CSC9B1! You know you’re looking at
the INBOX because it tells you at the very top of the window where it says Current Folder:
INBOX. You can actually have lots of different folders for mail (just like you can organise
your files in Windows in lots of different folders).

CSC9B1 - IT SKILLS INTRODUCTION: WINDOWS 7 AND THE INTERNET
DEPARTMENT OF COMPUTING SCIENCE & MATHEMATICS PAGE 22 OF 27
» To create a folder, choose Folders.
You'll be asked for a new name for
the folder. Let’s create one for
CSC9B1!
» Type CSC9B1 into the 'Create
Folder' text box and then press the
Create button. Press refresh folder list to see your updated folder
structure.
Once you have created a new
folder you can select any number
of messages and move them to
your new folder by choosing the
folder name from the drop down
list 'Move Selected To'. Having
chosen the folder, press the Move
button and check to confirm that
they have indeed moved!
» Try it with the message you received earlier; move it to your CSC9B1 folder.
To find out what's in any folder, just click on its name in the folder list on the left. You'll
notice that the name of the current folder, shown at the top of the window, has changed. You
should already have a few folders in addition to your Inbox namely Drafts, Sent and Trash.
When you compose new messages, you may want to stop for a while until your inspiration
returns. Choose Save Draft, the message will go into the Drafts folder until you have calmed
down.
Sent automatically records your outgoing email. It’s extremely important that you check this
regularly to delete stuff you don’t really want to keep. Otherwise your whole file space fills
up with email messages and you’ll have no room for the exercises for this class!
Trash is where messages that you have deleted are put automatically. This is quite a useful
feature as it gives you the chance to think again before finally deleting message for all time.
Again, you should clear out this folder periodically. There should be a (purge) option beside
the Trash folder.
Address Books
SquirrelMail, and just about
every other email client
you'll find, has an address
book facility. Frequently
used addresses can be stored
for future use.
To use it, go back to your
INBOX, select Addresses (beside Compose) and fill in the fields. For example, you might
enter:
• Nickname: Carron
• E-mail address: [email protected]
• First name: Carron
• Last name: Shankland
• Additional info: CSC9B1 Co-ordinator
Press Add Address and the screen display will alter to show the updated contents of your
Personal Address Book.

CSC9B1 - IT SKILLS INTRODUCTION: WINDOWS 7 AND THE INTERNET
DEPARTMENT OF COMPUTING SCIENCE & MATHEMATICS PAGE 23 OF 27
Now, every time you want to mail that person, instead of typing in their email address (if you
can remember it) in the ‘To:’ line, you just open the address book, click on their e-mail
address from the list and you're ready to go!
Signatures
It’s common to add a bit to your email message that has your name and address, your web
page address, a funny quote (if you must), and so on. You might have seen some email
messages with this already if you use email a lot. The way to do this (without having to type it
all every time) is to follow the link to Options and then Personal Information.
» Enter your full name. This ensures that message recipients will see that the message comes
from e.g. Carron Shankland and not from [email protected] so it’s more user friendly.
» Leave the Reply To: box empty! It is only used if you want people to reply to a different
address than the one you sent the message from. Some students mistakenly type their name
here but what happens is that the contents of this box get used to create a manufactured email
address which is then used as the reply address and, of course, doesn’t work!
» In the Signature text box you can enter whatever you would like to add to the end of every
message you send, for example:
Carron Shankland
Room 4B62
Computing Science & Mathematics
University of Stirling
Stirling FK9 4LA
To ensure that this information is attached to every message you send, make sure you set the
Signature Options to Use Signature. Alternatively, you can leave the Use Signature option
set to No and press the Signature button in the Compose window before you send the
message.
» Notice at the bottom of the Personal Information page there is a box labelled Mail Forwarding? You can set this up so that any messages arriving at your student email account
will be automatically forwarded to some other email account (for example, you might have a
personal email address). We don’t recommend that you do this because the University uses
your student email to send you important communications (for example, details of tests and
examinations).
» When you have finished setting your personal information, press Submit.
» Send yourself e-mail and check that the text in the signature file is attached to it. Check the
name of the sender!
This is a nice simple way of signing email messages. If you do not want the text to appear on
a particular message, just delete it from the message before you send it!
In Your Own Time
There's a lot more to SquirrelMail than we've covered here, especially the user Options. You
can customise the way you view it; you can search through your messages; you can choose
from a variety of hideous colour themes (Blue Grey is quite nice!) using the Display
Preferences option. The default view is called University of Stirling.
Attachments! You too can send pictures, presentations, other documents by email. What do
you think the Attach button is for in the Compose window?
The help that comes with SquirrelMail is very… well, helpful and well organised. Just press
Help.
CSC9B1 - IT SKILLS INTRODUCTION: WINDOWS 7 AND THE INTERNET
DEPARTMENT OF COMPUTING SCIENCE & MATHEMATICS PAGE 24 OF 27
Email after (or during) University
After you leave the University, you will lose your student email address. To have your own
email address all you need is access to a web browser (which is possible in cyber-cafes (if
nowhere else) if you don’t have access to the Internet!) and you're sorted. The first was
www.hotmail.com and now there are many providers, including Google’s: gmail.com.
SPAM!
Spam is unsolicited e-mail. In recent years it has reached epidemic proportions and is very
difficult to stop. Your University email account is filtered in various ways. Some email will
be tagged as {SPAM?} suggesting that the system thinks the contents are junk mail.
Occasionally attachments may be removed and deleted if the system thinks they may be
infected by a virus. Sadly, no amount of protection is foolproof so, in the interests of all
please be careful when opening messages.
A good piece of advice is to delete any mail that comes from a source that you don’t
recognise without opening it. Often companies will invite you to respond to their approach by
replying that you are not interested so that they can remove you from their mailing lists.
Don’t! This is just their way of checking that you received their first message and they will
inevitably plague you with more.
Here’s what Stirling University Information Services advises:
Never answer junk mail, not even to complain! Lists of e-mail addresses “harvested”
from the Internet are sold as a commodity to “spammers” (the senders of unsolicited
e-mail). A proven “live” address commands a premium in such address lists, so any
reply to the message is likely to increase the chance of you getting more junk mail,
not reduce it!
Netiquette
Netiquette is network etiquette, the do's and don'ts of online communication. Netiquette
covers both common courtesy online and the informal rules of the road of cyberspace. Take a
look at www.albion.com/netiquette/. This page provides links to both summary and detailed
information about Netiquette for your browsing pleasure.
In particular:
• Be polite.
• Don’t write anything when you are annoyed (alternatively, retain the services of a good
libel lawyer!).
• Be brief.
• Always sign your messages.
• Don’t SHOUT!
Don’t assume that email is private.
Checkpoints!
In each worksheet you’ll be asked to demonstrate that you have completed the tasks in that
worksheet. The best plan is to do two worksheets per week, and to keep up to date with
checkpoints. If you don’t complete a worksheet in the lab, then you should try to complete the
work in your own time and demonstrate the checkpoint at the beginning of the following
class. If you feel that you are struggling to keep up, you are welcome to come along to
additional sessions if you wish (see the course schedule for class times). Please do not feel
embarrassed about asking for help as often as you need to. That’s why the tutors are there.

CSC9B1 - IT SKILLS INTRODUCTION: WINDOWS 7 AND THE INTERNET
DEPARTMENT OF COMPUTING SCIENCE & MATHEMATICS PAGE 25 OF 27
Checkpoint
This first checkpoint has three parts, relating to the three main elements of the worksheet. Please get all parts ready before calling a tutor over.
1. Demonstrate to a tutor that you have created a CSC9B1 folder immediately inside your home folder and that it contains folders called Text and Graphics, Spreadsheets and PowerPoint. Show that you can move, copy and delete a file.
2. Use your favourite search engine to find the answers to the following questions, and tell a tutor the answers.
When was the Computer Misuse Act passed, and what does it say about viruses?
Using reverse searching, find a site which links to the Smith Art Gallery official site.
3. Demonstrate to a tutor that you have set up your email signature. You should select Compose as if you were about to compose a new message and let us see that your signature text has been added to the message window.
SOME ODDS AND ENDS
A heartfelt plea
Don't waste the University computer resources using chat rooms or playing games, especially
when the labs are busy! You must give preference to students who want to do course work. If
you can’t find a free machine you are entitled to ask someone to move if they are using the
machine for frivolous purposes. You can always ask a tutor to find a machine for you if
you’re stuck.
Lecture Notes
Many of you will have been given addresses on the web for lecture notes (slides) from other
departments. You can of course read them online, but you might want to print them out so
you can take notes on them. Also, it’s not good for your eyes to be staring at a screen all day!
Many of the lecture slides on the Web here are in Microsoft PowerPoint or Adobe PDF
format. PowerPoint is a Microsoft application used to create presentations, such as… lectures.
It offers you, the reader of these slides, the opportunity to print them out for your
convenience. Now, you might want to save paper, so it offers you the chance to print the
slides out in a sensible fashion, say two, three or six to a page, rather than one per page. This
is a Good Thing because it saves paper, and therefore trees, of course. And here’s how to do
it… PDF files can be opened using Adobe Acrobat Reader, which is available on all the
machines on campus. It’s free, so you can get it at home by downloading it from the Adobe
web site www.adobe.com/products/acrobat/
» First, let’s find a subject that has lecture notes on the web. If you have an address for your
lecture notes, by all means, use that, but if not, try this address:
www.cs.stir.ac.uk/~ces/

CSC9B1 - IT SKILLS INTRODUCTION: WINDOWS 7 AND THE INTERNET
DEPARTMENT OF COMPUTING SCIENCE & MATHEMATICS PAGE 26 OF 27
» Under Teaching there are a couple of Demonstration links just for you. One is a powerpoint
file and the other a pdf file, so you can try them both out.
» Click on the link Demonstration link for downloading of ppt notes.
You’ve got two options. If you choose Open,
then IE should be smart enough to run the slide
show. The other option is to download the file by
choosing Save and then saving it in your home
file space. That way you’ve got your own copy
(that could be useful if you want to look at the
slides or print them out later). Bear in mind
though that you have a limited amount of file
space, and you don’t want to clutter it up.
» Try both options to see how they work.
» Try right-clicking on the link as well. Even more options!
If you click on some document link in IE that it doesn't recognise, it'll tell you. Usually this
happens when the document IE downloads is meant to be viewed with a different application.
You can choose to save the file as usual, and then try to decide which application to use to
view it. Files ending with .ppt for example are meant to be viewed in PowerPoint. We’ll
cover PowerPoint in a later workshop.
And you can print it…
Printing in the labs
To print the document, select Print from the File menu. (If the file has
opened in the browser, there may
be a new toolbar button for print,
in which case you can use that.) A
new window will appear.
You can choose:
• whether to print single or
double sided.
• how many copies to print.
• whether to collate multiple
copies to save you having to
sort them by hand.
(What’s this thing “~”? It’s called a tilde (but a lot of people call it a squiggle or
twiddle). It’s used a lot in www addresses (URLs).
If you do this kind of thing from your computer at home, you should be very
reluctant to open a file directly (viruses make be lurking!). If you trust the site,
then I still recommend that you save the file first, close down any open
applications and disconnect from the Internet before running the file. If you do
this kind of thing a lot, then you really need to think about investing in a good
antivirus program.
CSC9B1 - IT SKILLS INTRODUCTION: WINDOWS 7 AND THE INTERNET
DEPARTMENT OF COMPUTING SCIENCE & MATHEMATICS PAGE 27 OF 27
• to print the odd (or even) numbered pages.
• how many pages per sheet to print.
In particular, the box in the middle left allows you to choose which pages of your document
to print. You can choose to print all the pages or just a selection (e.g. 1,5,8) or a range of
pages (e.g. 1-5) or even a selection of ranges (e.g. 1-4, 8-12).
If you are already familiar with the print set up on campus don’t bother wasting paper or, if
you want to try it out, just print the first page (there may only be one page!), so select Pages
in the Page range pane and type the number 1 in the box adjacent to it. Choose OK, go to a
print station, log on and follow the instructions to print your document.
Where’s the printer then?
The best places are the Student Print Suites in 2A and 2B Cottrell. Printers are located in EIA
and S20a in the Library, and in G10 in Pathfoot.
Go to the Pharos Print Station in the print room/lab.
• Click on the mouse or keyboard to remove the screen-saver. A log on window will
appear.
• Log on with your usual computer username and password.
• A screen will appear which will show you a list of any documents you have sent to the
printer.
• Use the mouse to select the document you wish to print - NB: your document must be
highlighted otherwise the Print button remains greyed out.
• Now select Print.
WHAT NOW?
• Practise, practise, practise!
• I know that some of you will have found this material pretty basic. Many of you will be
required to take this course as a prerequisite for other modules and a few of you may find
this frustrating if you have been using computers for years. The next couple of
workshops will also be pretty basic, but thereafter the material gets more challenging.
Also, there are little handy hints throughout the worksheets that you may not already
know.
• For those of you who are new to computers, it is essential that you become familiar
with the basics covered today as subsequent workshops will depend on the material covered today.
• Use the help system. That’s what it’s there for…
• Whatever you are doing, save your work regularly, just in case there’s a power cut, or a
network failure (these things do happen!).
Logging off
This is pretty straightforward. Open the Start Menu and click the wee arrow to the right of the
Shut Down button. One of the options is Logoff. Select it.
See you next week!