Creative Crafting Easter Edition 2010
46
EASTER 2010 Issue 4 By Crafters for Crafters E v e n m o r e C r a f t P r o j e c t s C o m p e t i t i o n s ! C r a f t e r I n t e r v i e w s
-
Upload
creative-crafting -
Category
Documents
-
view
225 -
download
2
description
Welcome to our 4th Issue. We have an Easter Theme this time. Packed full of our regular craft projects and interviews and with the added bonus of three new writers. We also have competitions and puzzles! Don't miss out!
Transcript of Creative Crafting Easter Edition 2010

EASTER 2010
Issue 4
By Crafters for Crafters
Even more
Craft Projects Competitions!
Crafter
Interview
s

WelcomeCan you believe that we are hereagain? Issue 4 of our magazinealready! This year is really flying by.We are pleased to announce thearrival of three new writers fromthis issue. We are sure that you willlove their pieces and hope that theywill join us again in June. They are:Trevor from Trev’s Carvings,Amy from Amyorangejuice andDianne from Heartmade Gifts.In addition, we also have somecompetitions. Christine from SweetScented Soy has kindly offered togive away the egg cup candles fromher project to a lucky winner. Youcan also win an A5 advert foryourself in our next issue by takingpart in our Easter Egg hunt sodon’t miss out! March has beenquite lean with regard to sales foreveryone so let’s hope that thingschange in the coming months. Weare pleased to see the new Misi sitefinally up and running so goodluck to everyone.http://www.misi.co.ukWe are looking for ways to get ourmagazine into print so if anyoneknows of reasonable printersplease let us know.
Happy Crafting!
This issue of Creative Crafting was brought to you by:
Anna - The Crystal Lady Email - [email protected]
http://www.mysticearth.co.ukhttp://www.radiancecrystals.co.uk
Avril - Sprinkles Sparkles Email - [email protected]
http://www.sprinklessparkles.co.uk
Diane - Peggy’s Knits
http://www.peggysknits.misi.co.uk
Tina - In the Garden
Guest Contributors
Christine - Sweet Scented Soyhttp://www.sweetscentedsoy.misi.co.uk
Mimi - Art by Mimi
InterviewsPete - Bodrighy Wood
http://www.bodrighy.co.uk
Christine - Chocolate Truffle Companyhttp://www.chocolatetrufflecompany.co.uk
Joy - Joyknitt
http://www.joyknitt.misi.co.uk
Cover PhotographSparrow Primitives
http://www.sparrowprimitives.misi.co.uk
Amy - Amyorangejuice
http://www.amyorangejuice.co.uk
Trevor - Trev’s Carvings
https://sites.google.com/site/tl2sculpture
Dianne - Heartmade Gifts
https://www.heartmadegifts.wordpress.com
http://www.misi.co.uk/handmade/artbymimi.html

Creative Thinking Project! 5
Easter Orange Cake 8
Easter Crispies 10
Carve yourself a “Ten MinuteMouse” 12
Bodrighy Wood 16
Knit an Easter Egg Cosy 18
Make and Win a Candle 20
Guide to Knitting Part 4 22
Quick Wordsearch 25
Quick Crossword 26
In the Garden 28
Crystal Magic 31
Recycled Tile Decorations 32
Chocolate Truffle Company 34
Easter Gift Ideas 36
Joyknitt 38
Online Street, Best Picks 40
Budget & Luxury 43
This Months... awards 44
Make a Recycled Tile Decoration
Knit a Creme Egg Cosy
Candle Make and Competition
How to Knit Part 4
Carve a ‘ten minute mouse’
Look out for our new writers!
Page 12
Page 22
Page 20
Page 18
Page 32Creative ThinkingProject
Page 5
3 more craft
Interviews!
Bake an Orange and LemonEaster Cake
Page 8

Win a FREE A5 Advert in our next issue
Join in ourEaster Egg Hunt!
Search through our pages and count how many of our special Easter Eggs you can find.
There are lots of eggs in this issue so make sure that you only count the ones that look likethe example below!
When you think you have found them all, send us an email with the amount and the linkto your store or website.
All entries must be with us by 10th May 2010when we will choose a winner by using the random number generator on random.org
We will work with the winner to produce an A5 Advertisement for themselves in our next issue.
GOOD LUCK!!!
( This one is not part of the count!)
The lucky winner will be announced in the following places.
The Creative Crafting Facebook page
The Creative Crafting Blog
Creative Connections Social Network

Most of them are still works in progress and might remain so for a while … but just creating the list made my Muse happy!
Here are a few examples of those I’ve finished, or very nearly finished, so far:
Daisy Vase and Daisy Photo Holder
Creative Thinking Project!How many ways can I make a Daisy?
Sometimes we all get creative blocks. And sometimes we don’t love the process of creating as much as usual.
When you feel creatively frustrated or drained, a great way to tap into ~ and nurture ~ your creativity is to choose somethingyou adore and see how many different ways you can make one for yourself.
For example, I love daisies!
But you might choose hearts, or geese, or mountains, or words, or garden gnomes, or strawberries, or saxophones …
You can do it with anything you like. If you specialise in one craft, you might like to stick to it, perhaps drawing a tree in asmany different styles as you can, for example. Or using different drawing tools and techniques.
Or you could try as many different crafts as you like. This a great way to try new crafts, because at least one element of it willbe something you are very familiar with. As I am a creative jack-of-all-trades, my daisy collection includes papier-mâché , saltdough, applique, beads, mosaic … and I’d like to try macrame and origami.
Wall Plaque ~ Papier-mâché
Candle Holder ~ Salt Dough
Daisy Fairy ~ Salt Dough
Mosaic Tile ~ Salt Dough
Bag ~ Applique Panel
Specs Case ~ Patchwork
Little Pot of DaisiesBlessings Daisy
Heartmade GiftsHeartmade Gifts
Picture ~ Collage
Wall Hanging ~ Applique/Quilting
Earrings ~ Wire and Beads
Daisy Bath Fizzles
Daisy Candles
Daisy Cookies

I’ve enjoyed making them all, but one of my favourite projects so far has been a simple papier-mâché mobile, easily adaptablein all kinds of ways. So I thought I’d share it with you as a tutorial … my first attempt, so please let me know what does anddoesn’t work for you!
(Daisy) Mobile ~ Papier-mâché
Simple shapes (daisies) cut from cardboard boxes
Torn strips of newspaper
1 cupful of flour
1 cupful of cold water
1 tablespoon of thick wallpaper paste (optional)
Method
Mix the flour and water thoroughly in an empty ice cream tub orsimilar, until the consistency is like thick batter. (You can add wallpaper paste if you have it.) You might need to adjust the amountof water slightly.
Use your fingers or a brush (or a sponge) to coat both sides andthe edges of a cardboard shape with an even layer of the pastemixture. Put this to one side, leaning it edgeways rather than flatonto a surface, so it doesn’t stick too much. Or you can place itacross the corner of your tub.
Heartmade GiftsHeartmade Gifts
Run the paper strips throughthe mixture, using two fingersto get rid of any excess andmake sure both sides are evenlycovered.
Wrap strips around your shape,covering evenly, smoothing outany bubbles and smoothingedges over as you go. I tend todo this without fussing too muchbecause I like my papier-mâchéto look as if it has been madefrom strips of paper. But youcan achieve a very smooth effectwith a little patience. (For anextra fine finish, you can rubYour shapes with sandpaper later,when they are dry and hard.)
You can add as many layers as you like, but leave to dry between every two or threelayers to discourage bubbles. I have used only one layer here, so the daisies are verythin. Dry them by leaving them in a warm, dry place.
I sometimes put mine in the oven, on the lowest setting and leave the door open. Thismakes thin papier-mâché shapes curl, which adds to the effect, depending on whichshape you are making.

Embellishing Shapes
When you have finished all your shapes, paint them if you wish. I actually like leaving the text as it is, sometimes (you coulduse pages from an old book, or a poem, or printed words of your own, to make it extra special), but I have painted thesedaisies with magnolia emulsion.
Instead of painting, you might like to finish them in any number of ways, perhaps covering them in fabric, beads, mirroredmosaic or flower seeds, mix paint with other materials …have fun experimenting!
When you have finished decoratingthem, you can varnish them if you like.Usually, if kept away from dampconditions, papier-mâché will be fine,but a coat of any sealant is never a badthing.
Constructing the Mobile
Using a thick needle, thread them in ones, twos orthrees, onto fine gold thread. Or any colour of thread(or wool, or wire or garden twine …)
Then, depending on how many shapes you choose tomake, hang from one or two wooden skewers (or youcould use dowelling, or twigs, or thick wires.) If usingtwo, tie them together in a cross shape and hang froma nail or hook, allowing space to hang evenly andswing slightly. I found a window nook was perfect!
You can add your shapes, tying the threads to theskewers in any order you wish, adjusting to balanceas you go along, by sliding your threads along theskewers.
I haven’t hung my daisies as a mobile yet, I’mhaving far too much fun messing around with ideasfor the centres! But here’s an example of apapier-mâché mobile with stars instead:
Because papier-mâché is so light, themobile is in almost constant gentlemovement and very soothing to watch,I’m going to do one with lots of brightcolours for my daughter’s first baby,due later this year.
I’ll probably make hearts for Baby Hope,but this project is adaptable to almostanything you might choose.
You could also try getting creative with the way you hang your shapes. Try making a bouncy mobile, using gold wire and somebeads. Thread the beads onto the wire at intervals, securing the bead by wrapping the wire around and back through the beadagain.
Heartmade GiftsHeartmade Gifts
Wrap your beaded wire around a pencil or pen andgently slide it off, producing a spiral.
Attach these to top and bottom of your shape bymaking a small hole with a needle, threading thewire through and twisting to secure.
Use these to hang your shapes as a mobile or justas single shapes:
Try your own creative challenge. Choosesomething you love and ask yourself:How many can I make? Have fun justmaking a list … let your imagination runwild.
Then try and make a few. Start acollection of things that make you smile.
Plus, creating things you love will makeyour Muse sing and dance. All over theplace! :O)
http://heartmadegifts.wordpress.com
Dianne
Heartmade Gifts on Facebook

INGREDIENTS
For the sponge· 150g unsalted butter· 150g caster sugar· 200g selfraising flour· 3eggs· 1 large orange , zest and juiceFor the icing· 1 large lemon , zest and juice· 175g icing sugar· Easter eggs or anything you choose to decorate the cake with.
Perfect if you want something lightand refreshing after all the chocolateat Easter time.
Easter Orange CakeWith Lemon Icing

1. Preheat the oven to 180C/160C fan/ gas 4.
2. Sponge : beat together the butter, caster sugar, flour and eggs until fluffy.
3. Stir in the orange zest and juice then spoon the mixture into a greased and lined cake tin. Bake for about 30 minutes, or until risen and golden and it feels firm to the touch. Leave the cake to cool in the tin for 5-10 minutes, then take it out, peel off the paper and leave to cool on a wire rack.
4. For the Icing: beat the icing sugar, lemon zest and juice together to make a smooth icing. Spread the icing over the top of the cake and let it drizzle down the sides. Leave to set. Decorate with the other lemon zest and Easter.
INSTRUCTIONS
If you have a favourite recipe that you that you would like toshare, please send it to:
This recipe was provided byDiane from ‘Peggy’s Knits’
http://www.peggysknits.misi.co.uk
INGREDIENTS
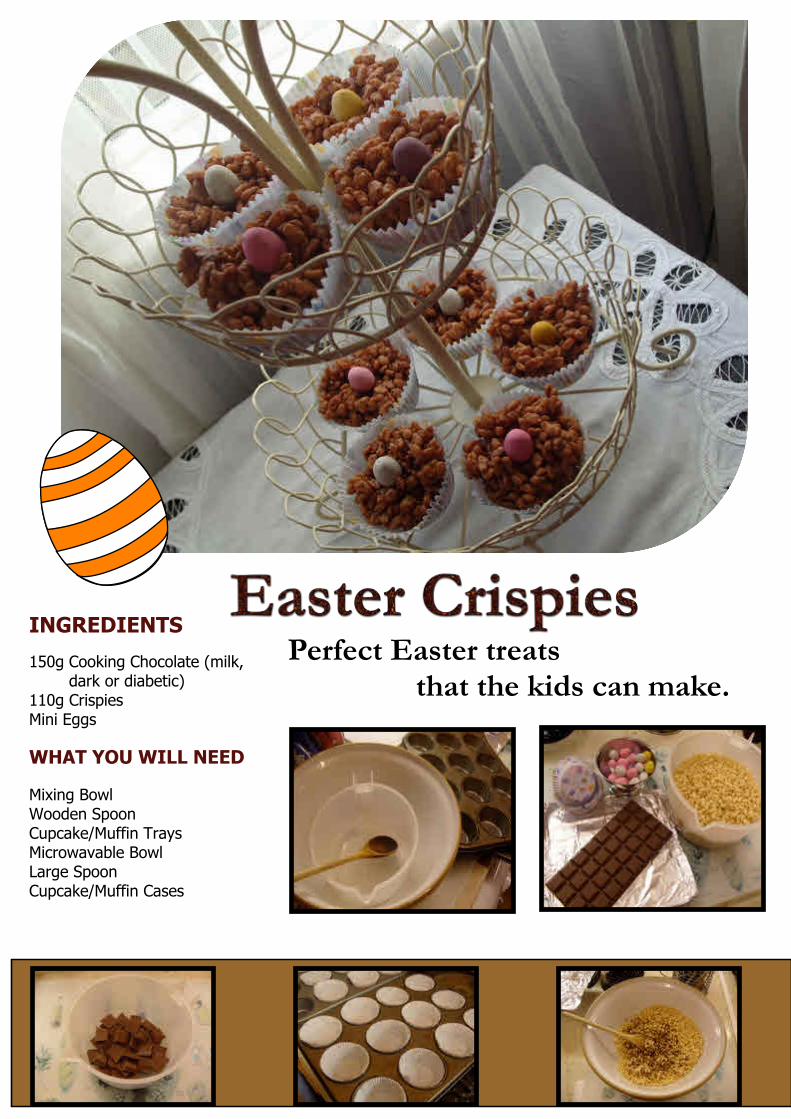
150g Cooking Chocolate (milk,dark or diabetic)
110g CrispiesMini Eggs
WHAT YOU WILL NEED
Mixing BowlWooden SpoonCupcake/Muffin TraysMicrowavable BowlLarge SpoonCupcake/Muffin Cases
Perfect Easter treatsthat the kids can make.

Step 1 - Break chocolate down into chunks andplace into the microwavable bowl. Putin the microwave and melt thechocolate down for 40 seconds, stir,and repeat until melted.
Step 2 - While the chocolate is melting, put thebaking cases in the trays.
Step 3 - Add the crispies to the bowl and addthe melted chocolate, stirring carefullywith a wooden spoon, trying not tobreak up the crispies.
Step 4 - Make sure all the crispies are wellcovered in the chocolate.
Step 5 - With a large spoon, spoon the mixtureinto the baking cases.
Step 6 - Before cooling in the fridge, add achocolate mini egg to the centre ofeach cake. Place trays in the fridgeovernight to harden off.
Step 7 - Enjoy!
INSTRUCTIONSThis recipe was provided bySprinks from ‘Sprinkles Sparkles’

I’ve been carving now for a bit more than 30 years, I supposeit started the same way a lot of people carve, when I was ascout. Part of the proficiency badge scheme involved carvingthings like tent pegs. I suppose I haven’t looked back since then.I guess I should tell you that I started out having a passion forsharpening knives rather than cutting up bits of wood, but thenthat would make me sound like some kind of psycho so I won’tsay that.
Anyway, the kind of carving I like best is what most peoplewould call whittling. I like to hold a piece of wood in one handand a knife in the other, put the two together and hopefully Icome up with something that people like. I have made manyknives over the years and in fact my favourite carving knives areones I have made myself. The knives on the right are a selectionof those I use most often. The top one and the third from topare the only ones I did not make.
When I carve I like to work quickly so that I can try out newshapes, if they don’t come out right then they get thrownin the bin. The wood I use varies according to what I haveavailable, at the moment I have a fair bit of oak because we’vebeen doing some work around the house and I’ve got some off-cuts left but the piece I’m going to use today is actually aspecies I don’t recognise, it was a little piece given to me duringa trip to Australia. As you can see, I like to use small pieces of
wood. I never like to be without a knife and a pieceof wood and often when I walk throughthe woods I’ll pick up a likely looking stick and carvesomething in the end. Mice are a favourite of mineand that is exactly what I’m going to show you how tocarve today. I call it my “Ten minute mouse” becausethat is how long it takes me to get something thatpeople recognise as a mouse, today’s carving willtake longer though because we are going to make abit more effort to get it looking not to bad. Anywayhere goes.
What you need:Basically all you need to carve something is a knife with a sharp blade (the woodcarvers out therewill cringe when I suggest that even a “Stanley knife” will do the job, as long as it has a newblade in it) and a piece of wood. For today’s piece you will also need a saw, any saw. The wooddoes make a bit of difference and ideally you will want a piece of what is referred to as“hardwood”, there is of course a vast range of hard and softwoods in the world and the correctchoice will only really come with practice. A good idea as a newcomer to the hobby is to use Limewhich is easy to carve and gives a reasonable finish, personally I like a bit of fruit wood so if youare pruning your apple tree or pear tree then that would be great. As a good rule of thumb tryand stick your thumbnail into it, if you can just dent it with your thumbnail without your nailsinking into it then it’s probably about right.You might also want to wrap some sticking plaster around the thumb of your dominant hand, ifyou are right handed then your right thumb, left handed, left thumb.
Carve yourself a “Ten Minute Mouse”

I’ve arranged the instructions into step by step stages each with a photo so you can see howthings should look as we go along.
Step 1: The piece of wood needsto be square, this one is approx20mm x 20mm and about 50mmlong. Mark a line all round the woodapprox 20mm from the end.
Step 2: Make what is called a stopcut all around the pencil line. Thisis a cut made straight intothe wood and will mark the bot-tom of the mouse.
Step 3: Choose one corner of thewood which will be the mouse’snose.
Step 4: Use a slicing cut to rounddown the “throat” of the mouse, asyour knife gets to the “stop” cutyou will find out why it’s calledthat. The trick here is thin slivers,don’t try to chop out dirty greatlumps.
Step 5: Use the same slicing cut toround the back of the mouse’shead.
Step 6: Use four more stop cuts to mark the fronts and backs of the mouse’s ears. In thephoto to the left you can clearly see the rounded back of the mouse’s head.Step 7: Use slicing cuts to shape the top sides of the nose, using the stop cuts at the frontsof the ears to mark the ends.
Step 1 Step 2
Step 4a Step 4b
Step 5a Step 5b
Step 6a Step 6b Step 6c
Step 7a Step 7b Step 7c

Step 8: Use slicing cuts to round off theback of the head, you are aiming for adome shape and ideally this should belower than the eartops but there’s noneed to be too particular yet.
Step 9: Cut down between the ears and“join” up the top of the nose to the topof the head, the idea is to make a nicesmooth slope down the nose and overthe back of the head.Step 10: Use stop cuts to mark out theshape of the ears and add definition tothe head shape.
Step 11: Cut in under the ears and shapedown the sides of the head.
Step 12: Using a combination of stop cuts and slicing cutsshape around the ears and start to shape the ears themselves.
Step 8a
Step 8b
Step 8c
Step 9 Step 10aStep 10b
Step 11a Step 11b Step 11c
Step 11d
Step 12a
Step 12b
Step 12c

Step 13: Work all around themouse smoothing down thesharp corners and getting theshape just the way you want it.
Step 14: Round down the baseof the body all the way round.
Step 15: Use a saw to cut the mouse off his block.
Step 16: Round off the base of the Mouse, the bigger the curve, the fatter your mouse willlook, of course it will also be more difficult for him to stand straight.
At this point the carving is finished and you have a little sketch of a mouse. You might wantto paint it, varnish it, polish it or just leave it as it is. You might want to stick a leather tailon him or you might not.This is a very rough little carving but you can always carry on carving until you are happy withit, you might even want to use a bit of sandpaper to smooth it off as well.
Trevor Leedham
https://sites.google.com/site/tl2sculpture/
You can find more of mywork at my web- site,feel free to get in touchif you are interested in acommission or if youwant to do more carvingand want help or advice.
Step 13a Step 13b
Step 14a Step 14b
Step 15a Step 15b Step 16a Step 16b

I am older than I want to be though the advantage is that I atleast have experience. I live in the middle of Cornwall surroundedby fields and hedges where a lot of my source material comesfrom. I was born here and though I have left a few times for work,I have always come back, this time hopefully for good. I amfortunate to be married to a woman who is as craft mad as me soour house seems to always have either bits of material or wool, orshavings on the floor. We get through vacuum cleaners likenobodies business. I am self employed as a wood turner since beingmade redundant and am endeavouring to find the best market. Atpresent about 70% of my work is for other crafters and so I amspecialising a bit in tools, equipment etc for them.
I have been involved in craft work all my life having been brought upby a grandmother whose motto was “why buy if you can make”.Some of my earliest memories are sitting around a table making rugsor holding my arms out while she unravelled a jumper to wash thewool to reuse. I got into wood crafts at school where I was luckyenough to be allowed to play on the lathe both in woodwork lessonsand in breaks. I was hooked. I was in the Merchant Navy for 12years where I used to do a lot of fancy knotwork for fun as well assome canvas sewing, that and having rather a lot of children (6)tended to put paid to some of my obsession with wood but we stillkept on crafting at home whether it was simply making pom pomsor making our own Christmas cards and decorations. Making toysfor them such as stilts, go carts etc was the most wood working Imanaged. Since the children have grown up and left home I havebeen able to indulge my addiction focusing on my first love ofwood turning.
I have to say wood as it is so full of surprises. You can never be surewhat you will find as you start turning it especially as much of thewood I use is locally sourced and usually still green. I do like fabricsas well though I do not do much with them myself. I think the tactilecharacteristics of any material are a large part of the attraction for me.
It’s probably a bowl I made from a crotch oflaburnum (where several branches jointogether at the trunk) as it was one of thosesurprise pieces that could so easily have beena disaster but it all came together.
Cherry Wood Vase
Mortar & Pestle
Laburnum Crotch Bowl

This is probably a box I have up for sale at the moment made ofhawthorn from the local hedgerows. It’s only a small thing but itappeals to me personally. It can be seen here
I don’t think I have a favourite colour. In nature i.e. wood, allcolours seem to be right no matter how gaudy or dull they are.
I do a lot of browsing on the net looking at pottery, glasswareetc for shapes. In my own craft of wood turning the artists likeCindy Drozda and Nikos Siragas are very much the type of thingI would like to emulate thought here are so many fantasticturners around to study and learn from it is difficult to pinpointany one.
I tend to source wood myself as much as possible. Other materialsI try and get from a fellow turner who also stocks most of thematerials I use. I am a born scrounger though so get things Ineed from anywhere and everywhere. For example I havebasically a lifetime’s supply of natural beeswax polish that I gotfrom someone who had closed down a business. Oils, I often usea supermarket cheap brand. Works just as well and is far cheaper.
For a long time I was working in isolation when I lived on Exmoor andI had a couple of turners on a forum who were massively helpful. Wehave met up a few times and they are truly great people, very openwith their knowledge and good advice.
That’s hard to answer as there are some amazing creations to be found onall three. If I have to choose one it would probably be this one
which is the shop of a wood carver.Something I would love to be able to do but don’t have the patience.Cindy Drozda also now has an Etsy shop and would come a close second
Hawthorn Box
Crochet Hooks
Petite Yew Goblet
www.bodrighy.co.uk
www.bodrighy.etsy.com
http://www.misi.co.uk/store_info.php?user_id=2682
http://www.folksy.com/shops/bodrighy
Probably this one as the owner, FredWindman has such a quirky sense of humour as well as being a very giftedcraftsman. Some of his work is really off the wall but very clever.

PatternCast on 21stsKnit 5 rowsStocking stitch for 18 rowsk2tog Knit to endp2tog purl to endRepeat the last two rowsOn the next 6 rows, decrease one stitch at eachend of every row. 5stsCast off
Make a second egg cosy side in the same way asabove.
Making UpSew the egg cosy sides together and add any embellishments that youwish. You can also add stripes and do this is any colour you choose.
Knit yourself...
An Easter Egg Cosy...This is a great pattern for anyone wanting to make something
for Easter.Great to keep or give away and you can be as
creative as you want to.Add flowers, beads, ribbons or anything you wish.
What you will need
4ply yarn3.5mm needlesEmbellishments of your choice
Easter Egg andChocolate Egg Cosies
from around Misi
Boringegg...
Funky Hat for Easter£2.50
Kims Creative Crafts
Cheerful Chicken Egg Cosy£2.50
Vicky’s Felt Decoration
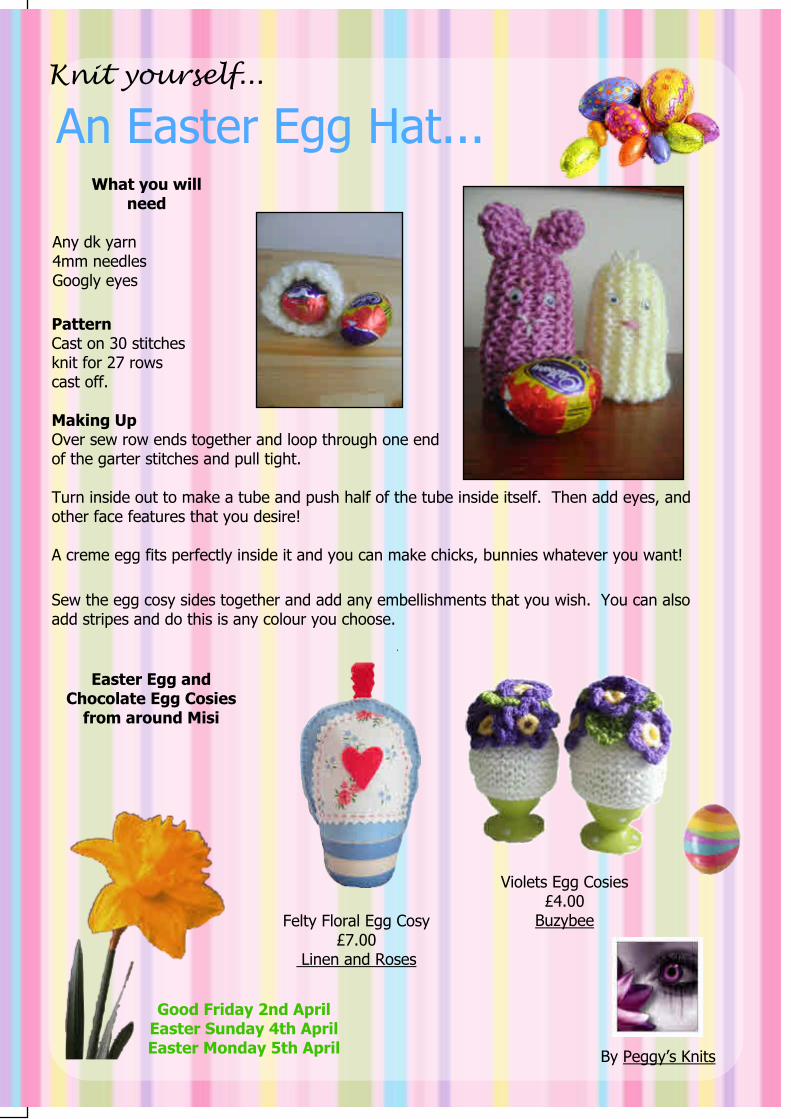
PatternCast on 30 stitchesknit for 27 rowscast off.
Making UpOver sew row ends together and loop through one endof the garter stitches and pull tight.
Turn inside out to make a tube and push half of the tube inside itself. Then add eyes, andother face features that you desire!
A creme egg fits perfectly inside it and you can make chicks, bunnies whatever you want!
Sew the egg cosy sides together and add any embellishments that you wish. You can alsoadd stripes and do this is any colour you choose.
What you will need
Any dk yarn4mm needlesGoogly eyes
Easter Egg andChocolate Egg Cosies
from around Misi
By Peggy’s Knits
Good Friday 2nd AprilEaster Sunday 4th AprilEaster Monday 5th April
Knit yourself...
An Easter Egg Hat...
Felty Floral Egg Cosy£7.00
Linen and Roses
Violets Egg Cosies£4.00
Buzybee

What you will need:An old saucepan and Pyrex jug to use as a double boilerA thermometer for checking temperature of waxDigital ScalesSoy WaxDye chips (to colour wax)Fragrance oilsPre tabbed wicksHot glue gun or sticky dotsOld spoon to stir in dye and fragrance oilsWooden skewers tied together with elastic bandsOld newspaper to cover work area.
Our guest maker this month is the lovelyChristine from Sweet Scented Soy.
She has kindly agreed to show us the insightof making some gorgeous Easter egg
soy candles!
1. Fill your old saucepan aboutthird full of water .
2. In the Pyrex jug place yourweighed soy wax. To make 5egg cups you will need 150grams of wax.
3. While the wax is slowlymelting you can prepare theegg cups. Take a pre tabbedwick and apply some heatedglue to the base of the wicksustainer and then place in thecentre of each egg cup.
Win Win Win
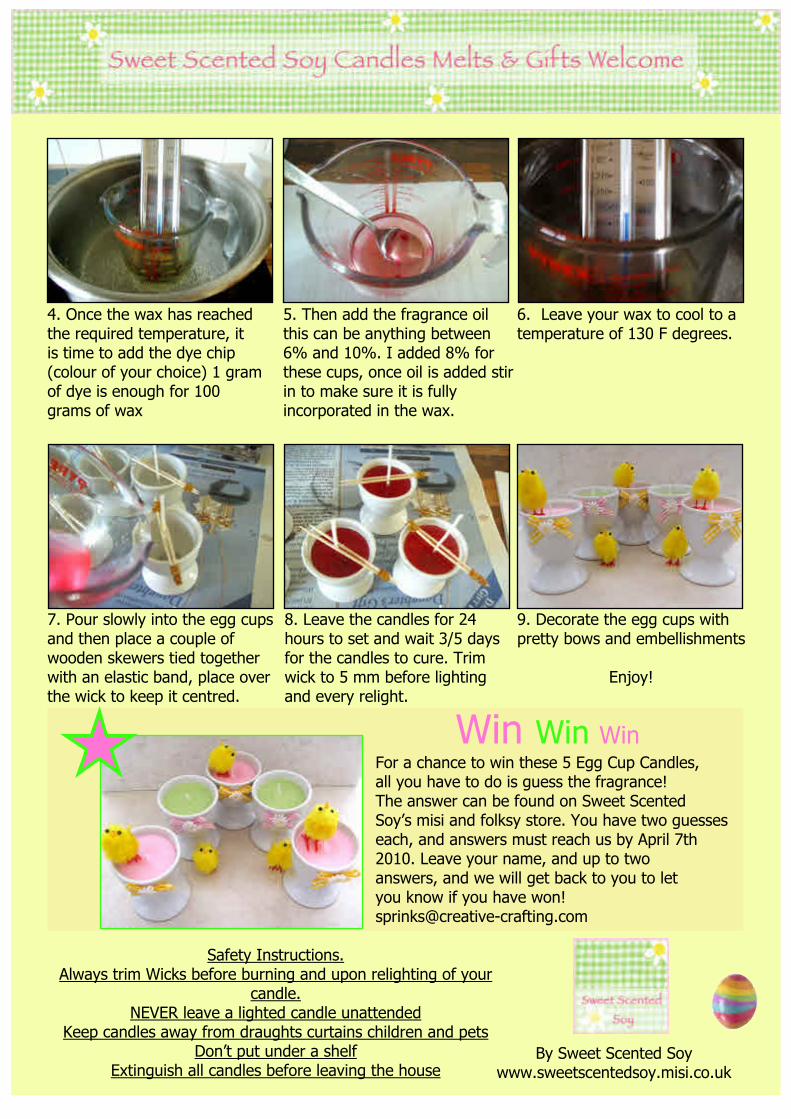
4. Once the wax has reachedthe required temperature, itis time to add the dye chip(colour of your choice) 1 gramof dye is enough for 100grams of wax
5. Then add the fragrance oilthis can be anything between6% and 10%. I added 8% forthese cups, once oil is added stirin to make sure it is fullyincorporated in the wax.
6. Leave your wax to cool to atemperature of 130 F degrees.
7. Pour slowly into the egg cupsand then place a couple ofwooden skewers tied togetherwith an elastic band, place overthe wick to keep it centred.
8. Leave the candles for 24hours to set and wait 3/5 daysfor the candles to cure. Trimwick to 5 mm before lightingand every relight.
9. Decorate the egg cups withpretty bows and embellishments
Enjoy!
By Sweet Scented Soywww.sweetscentedsoy.misi.co.uk
Safety Instructions.Always trim Wicks before burning and upon relighting of your
candle.NEVER leave a lighted candle unattended
Keep candles away from draughts curtains children and petsDon’t put under a shelf
Extinguish all candles before leaving the house
For a chance to win these 5 Egg Cup Candles,all you have to do is guess the fragrance!The answer can be found on Sweet ScentedSoy’s misi and folksy store. You have two guesseseach, and answers must reach us by April 7th2010. Leave your name, and up to twoanswers, and we will get back to you to letyou know if you have [email protected]
Win Win Win

Guide toStarting Knitting
Part 4
This issue we are looking at how to add embellishments to your finished knitted item.There are so many that you can add and this is the fun and really creative part of knitting.
A few are beads, buttons, ribbon, pom poms, tassels just to name a few of them.
To add beads to your knitting can really make something quite plain look amazing.Here is a few ways that it can be done.
Stringing Beads onto YarnStringing beads onto yarn before knitting is an easy way to have beads at the readywhen you want to use them in your knitting projects. Just string the beads on the yarn,moving them down as you knit, then place a bead wherever you want.
Knitting with Pre strung BeadsKnitting with beads is easy when you string the beads ontothe yarn before you get started.
How to Add Beads to Knitting as You GoPre stringing is a common way to add beads to knitting, but if you decide you want toadd beads in the middle of a knitting project, you can still do so with the aid of a teenytiny crochet hook.
You can also add buttons,ribbons, etc but this will beembellishments that will beadded after you have finishedyour item and usually sewnon, although you could usefabric glue to fix them on.
By Peggy’s Knits
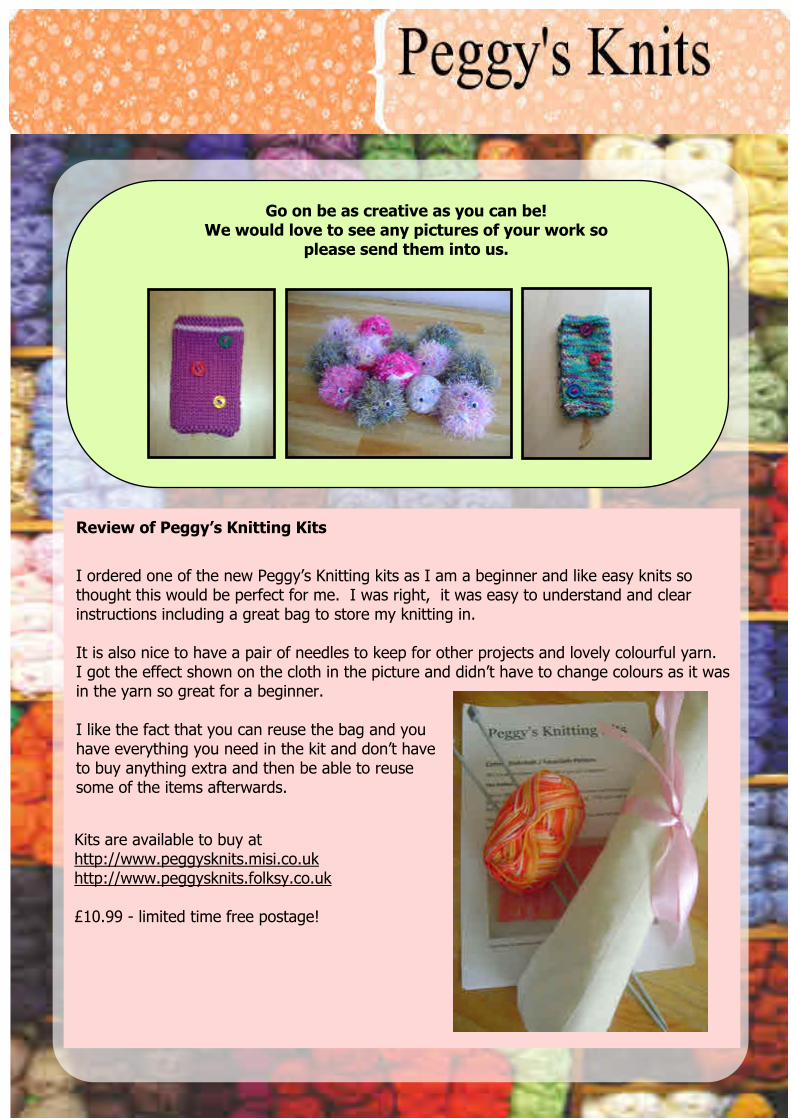
Go on be as creative as you can be!We would love to see any pictures of your work so
please send them into us.
Review of Peggy’s Knitting Kits
I ordered one of the new Peggy’s Knitting kits as I am a beginner and like easy knits sothought this would be perfect for me. I was right, it was easy to understand and clearinstructions including a great bag to store my knitting in.
It is also nice to have a pair of needles to keep for other projects and lovely colourful yarn.I got the effect shown on the cloth in the picture and didn’t have to change colours as it wasin the yarn so great for a beginner.
I like the fact that you can reuse the bag and youhave everything you need in the kit and don’t haveto buy anything extra and then be able to reusesome of the items afterwards.
Kits are available to buy athttp://www.peggysknits.misi.co.ukhttp://www.peggysknits.folksy.co.uk
£10.99 - limited time free postage!

Bespoke Bridal and Occasion Jewellery
Beading and Jewellery Supplies
http://www.radiancecrystals.co.uk
Made with love and care.
Quality Knitted Items
http://www.peggysknits.misi.co.uk

GAMESThe Knitting Wordsearch !
All words are in here somewhere!
This page is printer friendly
Answers in Issue 5! Out June 1st 2010
PURLNEEDLESTITCHBUTTON HOLESLEEVE
JUMPERKNITPATTERNTAPE MEASUREWOOL

GAMESThe Knitting Crossword!
Every answer to this crossword is knitting related.
This page is printer friendly
Answers in Issue 5! Out June 1st 2010
ACROSS
1. Make fabric by fastening loops of yarn (8 letters)3. Guide to constructing (7 letters)4. Fleece, coat of sheep (4 letters)9. Part of garment that covers the arms (6 letters)10. Make smaller (8 letters)12. Giving elasticity to knitted garments (7 letters)13. Joined by sewing together (4 letters)14. Needlework pattern ornamental (5 letters)
DOWN
1. Thin rods of metal of plastic (8 - 6 letters)2. To remove knitting from needles (4 - 3 letters)3. Knitting stitch producing ridge (4 letters)5. Pattern in knitting that looks twisted (5 letters)6. Close fitting knitted jumper (6 letters)7. Continuous twisted thread (4 letters)8. Type of knitwear from the islands (4 letters)11. Loop edging - raised knot (5 letters)

Visit our magazine website!!!
Read our latest issue.
Browse our site for articles and extra information.
Enjoy our previous issues.
Shop handmade in our boutiques.
••••
http://www.creative-crafting.com

in the Garden
Hi! I’m Tina,Well hello, I am so pleased that you have taken thetime to visit with me again in The Garden.So first things first, get comfy, put the kettle on, wellyes maybe a biscuit or two, but remember we must notover indulge.
I am back now in merry old England, survived theplane flight, and am so happy to be back again inThe Garden.
Spring looks like being a little later this year, but evenmore beautiful after a hard winter. The birds aresinging their little hearts out, and the flowers show thepromise of the beauty to come. The bulbs, which Iplanted last November as you can see, are coming upwell. The photo of the Camellia is beautiful but a lot ofthe flowers were damaged by the weather, but theyare still a joy.
I had a wonderful surprise! My herbs have survived
the winter. The Rosemary usually does but this year
I have Thyme, Sage, Chives and both kinds of parsley,
and they look so healthy, what a bonus.
The pruning of the buddleia and the fuchsia I left a
little later this year, but it is now completed. I do
this as I find if left, the bushes end up growing tall
with the flowers all at the top. But if you want them
as a tall hedge then you can leave them, they seem
to be happy either way, and the more of these
wonderful plants you have the more butterflies, bees,
Hover-flies, and many other insects which do so much
good in The Garden. The roses have also been
pruned, not the ramblers though as I did those after
they finished flowering.

As you can see I have been able to
photograph my mascot Charlie and
friends. Well yes, I know it is a silly
hat, but then Cacti do not have good
dress sense, and don’t you think he
looks happy.
Here is something I do, it is not in the gardening books,and I would not expect it on Gardeners World, but whenI prune the shrubs and roses, I plant the prunings. Idiscovered this when using the prunings of buddleia andfuchsia to support spring bulbs, they rooted, so I tried itwith rose prunings and it worked, not every time though,win some lose some. This is just something I do, I do notgive gardening advice ever, leave that to the experts, andI just enjoy chatting with you about my passion, TheGarden.
Now let me see, what else have
I done? Well, pulled the odd
weed, I am joking, these things
survive no matter what the
weather. I do realise that a weed
is just a flower in the wrong place
and they do get to do as they like in
at least three quarters of The Garden,
but they can be thugs and in a few
areas they are discouraged.
Here is a photo of the stream. This flows through a
very boggy area, and I mean boggy, which my better
half is making his project. I will keep you informed as
to his progress, as it will not be easy. I just hope that
I do not have to haul him out of the mud too often.
Well, Easter is coming up, so maybe you can spend
some time in your garden, or patio, or have a walk
in the country and enjoy the joy of spring. The
weather, well, who knows, but if it does rain try to
think that the trees and plants need it. Well yes, I
understand that will be hard.
I hope you enjoyed your visit to The Garden, and I
do look forward to chatting with my old friends and
the new readers again soon.
Your Green fingered Friend,
Tina
in the Garden

Beautiful Jewellery to help you through life!
energizing
de-stress
revitalize
courage
confidence
love
arthritis
pain
Allergies
fear
amethyst
bloodstone
carnelian
moonstone
garnet
peridot
hematite
lapis lazuli
labradorite
quartz
MYSTIC EARTH
http://www.mysticearth.co.uk
Join our friendly Social NetworkAnd make lots of new Crafting Friends.
Become part of a wonderful Community
* Upload photos and videos to promote your creations.
* Customise your own Profile page’
* Become part of our Forum’
* Start a blog.
* Spend time in our Chat Room and attend Chat Events..
http://www.creative-connections.ning.com

Mother Nature has provided us with wonderfulHealing Gemstones and Minerals.
CarnelianFor this Issue, discover the beauty of
SiO2+(Fe,O,OH)
‘Love Lies Bleeding’Steampunk Necklace
Tree of life with Carnelian MoonPendant
Rising from the Flames Pendant
$25
‘Scrumptious’ Carnelian Bracelet
If you would likemore information about
Crystal Healing Jewellery,you can contact
The Crystal Lady at:
http://www.mysticearth.co.ukor visit
In the middle ages, Carnelian was assigned a blood-staunching and anger-calming effect.The Egyptians also used it as a protective stone for the dead.
Mentally - Courage, Emotionally lifting, energizing.
Physically - works with: Organs. Stimulating the absorption of vitamins, nutrientsand minerals in the small intestine. Alleviates rheumatism, arthritis and stimulates the metabolism.
Chakra - Base, Sacral.
£20
£30
$30
Shades of Carnelian Necklace
£35
Silver Carnelian Cluster Ring
£10
Crystal Magic
Click the shop nameto visit the store
Recycled Tile Decorations
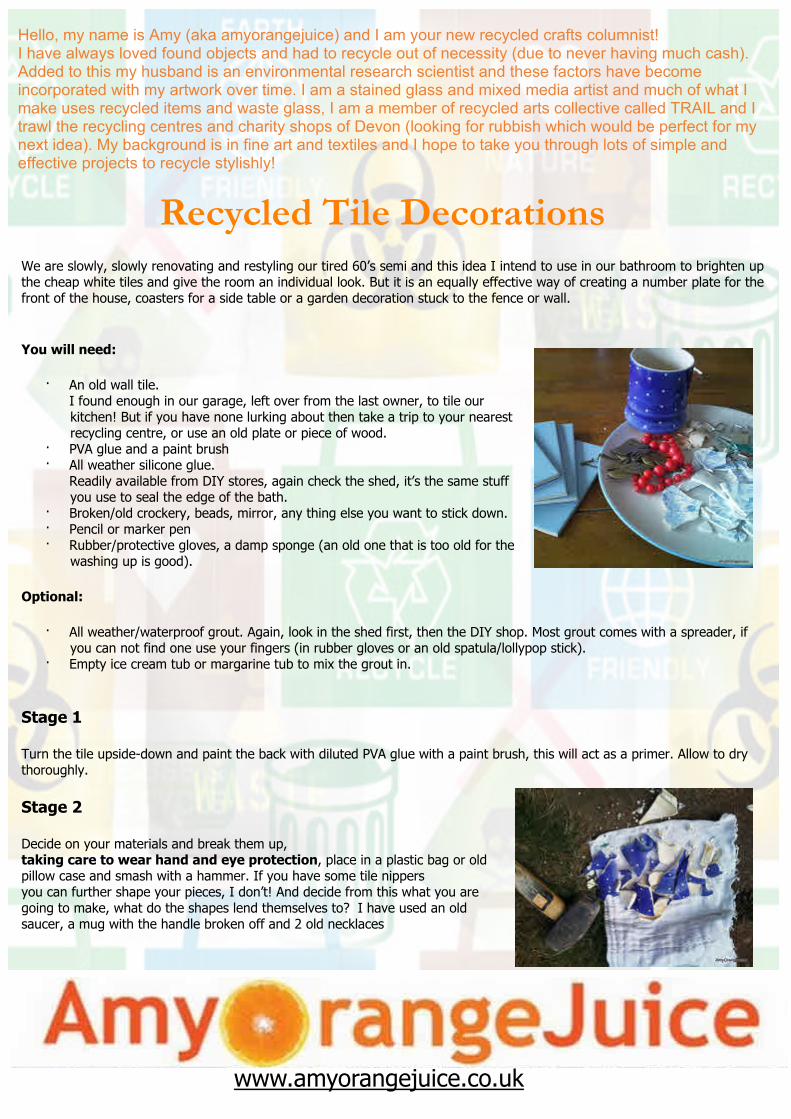
Hello, my name is Amy (aka amyorangejuice) and I am your new recycled crafts columnist!I have always loved found objects and had to recycle out of necessity (due to never having much cash).Added to this my husband is an environmental research scientist and these factors have becomeincorporated with my artwork over time. I am a stained glass and mixed media artist and much of what Imake uses recycled items and waste glass, I am a member of recycled arts collective called TRAIL and Itrawl the recycling centres and charity shops of Devon (looking for rubbish which would be perfect for mynext idea). My background is in fine art and textiles and I hope to take you through lots of simple andeffective projects to recycle stylishly!
We are slowly, slowly renovating and restyling our tired 60’s semi and this idea I intend to use in our bathroom to brighten upthe cheap white tiles and give the room an individual look. But it is an equally effective way of creating a number plate for thefront of the house, coasters for a side table or a garden decoration stuck to the fence or wall.
You will need:
· An old wall tile.I found enough in our garage, left over from the last owner, to tile ourkitchen! But if you have none lurking about then take a trip to your nearestrecycling centre, or use an old plate or piece of wood.
· PVA glue and a paint brush· All weather silicone glue.
Readily available from DIY stores, again check the shed, it’s the same stuffyou use to seal the edge of the bath.
· Broken/old crockery, beads, mirror, any thing else you want to stick down.· Pencil or marker pen· Rubber/protective gloves, a damp sponge (an old one that is too old for the
washing up is good).
Optional:
· All weather/waterproof grout. Again, look in the shed first, then the DIY shop. Most grout comes with a spreader, ifyou can not find one use your fingers (in rubber gloves or an old spatula/lollypop stick).
· Empty ice cream tub or margarine tub to mix the grout in.
Stage 1
Turn the tile upside-down and paint the back with diluted PVA glue with a paint brush, this will act as a primer. Allow to drythoroughly.
Stage 2
Decide on your materials and break them up,taking care to wear hand and eye protection, place in a plastic bag or oldpillow case and smash with a hammer. If you have some tile nippersyou can further shape your pieces, I don’t! And decide from this what you aregoing to make, what do the shapes lend themselves to? I have used an oldsaucer, a mug with the handle broken off and 2 old necklaces
www.amyorangejuice.co.uk

Stage 3
Draw a design the same size and your tile and copy onto the tile with themarker pen. I have done a simple abstract design, allowing the string ofbeads to act as a border between my other materials. Simple geometricdesigns also work particularly well. These make very effective housenumbers and simple flowers look great too.
Stage 4
Arrange and stick your chosen items with silicone glue and allow to dry.This is where I have left my piece, I am pleased with the effect and beads arehard to grout around, however, if you want to grout your tile then I havedescribed how below. Make sure there is enough glue on each piece bydipping them in the adhesive; you will know you have enough becauseit will squidge out from under the piece when pushed down onto the surface.However, you don’t want so much glue that it is covering the piece, if thishappens wipe gently with a damp cloth before it dries.
Stage 5 (optional)
Mix up a small amount of grout in the empty plastic container and grout thespaces between the items. Leave the grout for 15 minutes and then gentlywipe off the excess with the old sponge and leave to dry. To colour the groutadd a small amount of acrylic paint to the grout and mix well.
Stage 6
Stick you tile where you want it to go and admire your handiwork whilsthaving reduced your carbon foot print!
www.amyorangejuice.co.uk

WARNING!!!! This interview may give you severe chocolate cravings!
My name is Christine and I’m the owner of theChocolate Truffle Co, based in Chelmsford, Essex. I’m married
and have three children. Before chocolate I used to enjoy dancingand classical music. Now I have the radio on 24/7 listening toclassical fm while flying about the kitchenmaking chocolate.
I’ve been making chocolate for over three years and have taught myselfmainly through trial and error. It took me nearly six months to make adecent chocolate truffle. I actually started making chocolates over 20years ago when I left college. When I was young, free and single I ranan outside catering company with some friends. Our premises werebased above a pet shop in Shenfield. EHO’s never seemed to get out oftheir offices in those days! My Mum and Dad actually ran the pet shopand used to take orders and phone us every time a new order camethrough. In those days we didn’t know anything about chocolate andthere was nothing fancy like organic or ethical chocolate. Just milk orwhite and possibly dark! Before my days of catering I was hooked onknitting and I’d even classify myself as a bit of a seamstress. I can stillmake my own curtains but haven’t picked up a knitting needle in angerfor years as chocolate making has taken over.
Surprisingly chocolate is not my favourite materialto work with as it is so temperamental being affected
by heat, humidity and time. It can just be plain awkward andhas taken me a while to become accustomed to! In terms ofchocolate I’d have to say my most pleasing products are my bars asI can produce an endless range of flavours.
I’m particularly pleased with my Chocolate Truffle Tower which isideal for special functions and weddings. I’d been investigating howthis could be done having seen this in South Africa when a customeractually pointed me in the right direction. The tower is made frompolystyrene and is cut to size by a sculptor who producers models forsome of the biggest films sets you’ve ever seen! This particulartower holds about 145 truffles but any size is possible. Imaginedoing one for a 1,000 truffles.
CHOCOLATETRUFFLE Co.
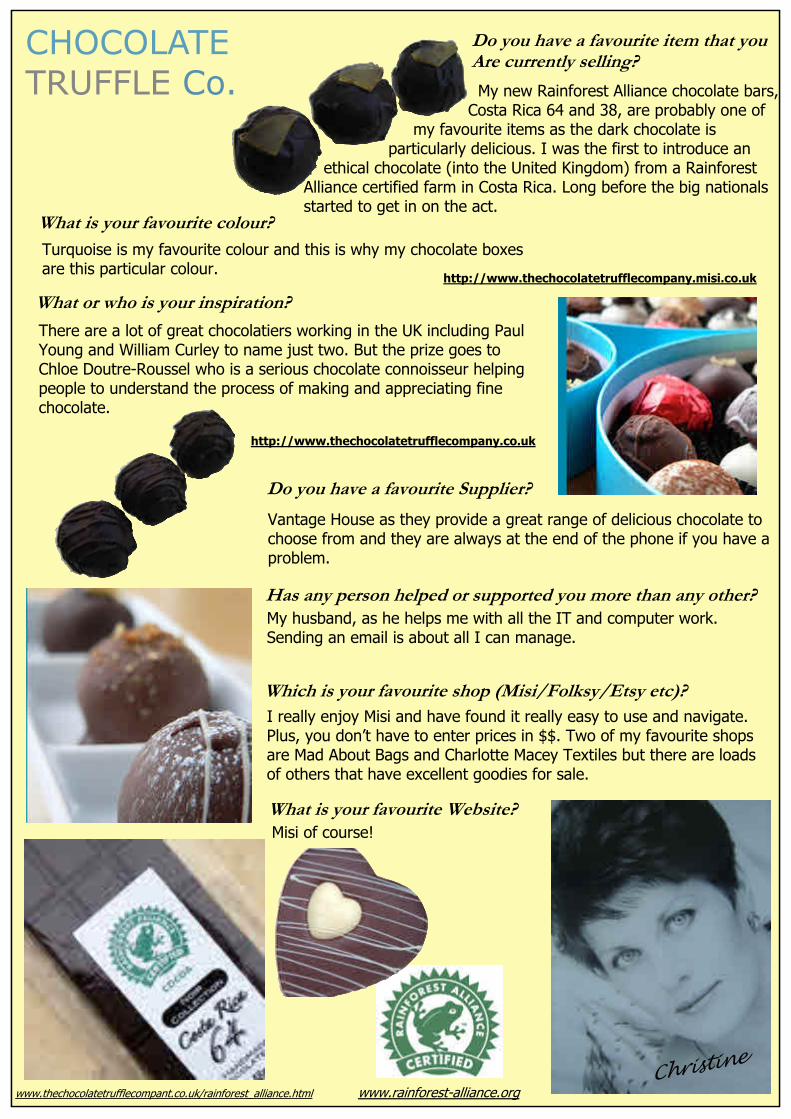
My new Rainforest Alliance chocolate bars,Costa Rica 64 and 38, are probably one of
my favourite items as the dark chocolate isparticularly delicious. I was the first to introduce an
ethical chocolate (into the United Kingdom) from a RainforestAlliance certified farm in Costa Rica. Long before the big nationalsstarted to get in on the act.
Turquoise is my favourite colour and this is why my chocolate boxesare this particular colour.
There are a lot of great chocolatiers working in the UK including PaulYoung and William Curley to name just two. But the prize goes toChloe Doutre-Roussel who is a serious chocolate connoisseur helpingpeople to understand the process of making and appreciating finechocolate.
Vantage House as they provide a great range of delicious chocolate tochoose from and they are always at the end of the phone if you have aproblem.
My husband, as he helps me with all the IT and computer work.Sending an email is about all I can manage.
I really enjoy Misi and have found it really easy to use and navigate.Plus, you don’t have to enter prices in $$. Two of my favourite shopsare Mad About Bags and Charlotte Macey Textiles but there are loadsof others that have excellent goodies for sale.
Misi of course!
CHOCOLATETRUFFLE Co.
http://www.thechocolatetrufflecompany.co.uk
http://www.thechocolatetrufflecompany.misi.co.uk

Its Easter!!! What can wefind that isn’t chocolate?
If like me you would dearly love lots ofchocolate but really shouldn’t... Thisselection of handcrafted goodies couldbe for you.
Decorated Easter Basket
£14
Easter Animals Finger Puppets
£9.99
Ceramic Easter Egg
£6.99
Embroidered Childrens Apron
£11.50 Speckled Egg Earrings
£4.50
Easter Wash cloths & socks
£12.99
Easter Bunny Bag
£4
Chick in an Egg Surprise
£14Click on shop
name to visit store
All prices correct at time of print

Felt Cookie Set
£6
Easter Egg Decorations
£4.50
Easter Chicks Candle
£6
Easter Bunny Bag
£6
Happy Easter Bunting
£9.95
These beautiful items were discovered by
The Crystal Lady
£8
This is only a small selection of the beautifullymade items on offer. Lot of clever ideas havebeen brought to life. See what you can find!Good places to start hunting are:http://www.misi.co.ukhttp://www.folksy.com
Easter Creme Egg Cosy
£1.20
Easter Bunny Doll
£18
Easter Sock BunniesBy Widget & Friends
http://www.mysticearth.co.uk
http://www.radiancecrystals.co.uk
HAPPY EASTER!

I am almost 62, married with four grown-up sons andtwo grandsons. my husband and I recently relocated toDevizes in Wiltshire, from the outer London part of Surrey.I am a self-employed Phoenix Trader and my husband is aregistered home worker for BT. We are currently renovatingour house and garden and enjoying the wonderfulcountryside around us.
I have always been knitting, for as long as I can remember, mymum taught me to knit when I was about 5 years old
I love all the wonderful colours, textures and mixtures of theyarns that are available these days. When I first started weonly had real wool, which of course I still love.
My very favourite thing I have ever made was a blacksweater with a very complicated round pattern in black,grey and white, knitted on 4 needles around the top ofthe front, back and both sleeves. I made it about 25years ago, and sadly no photograph of it exists to thebest of my knowledge.
Most of the things I knit are for winter, hats, scarves,gloves etc, so I don’t have a great deal in my shop atthe moment. I really love the pink stripy vest/tank topthat is currently for sale in my MISI shop
Blue
http://www.misi.co.uk/gifts/23333/black_and_violet_striped_beret.html
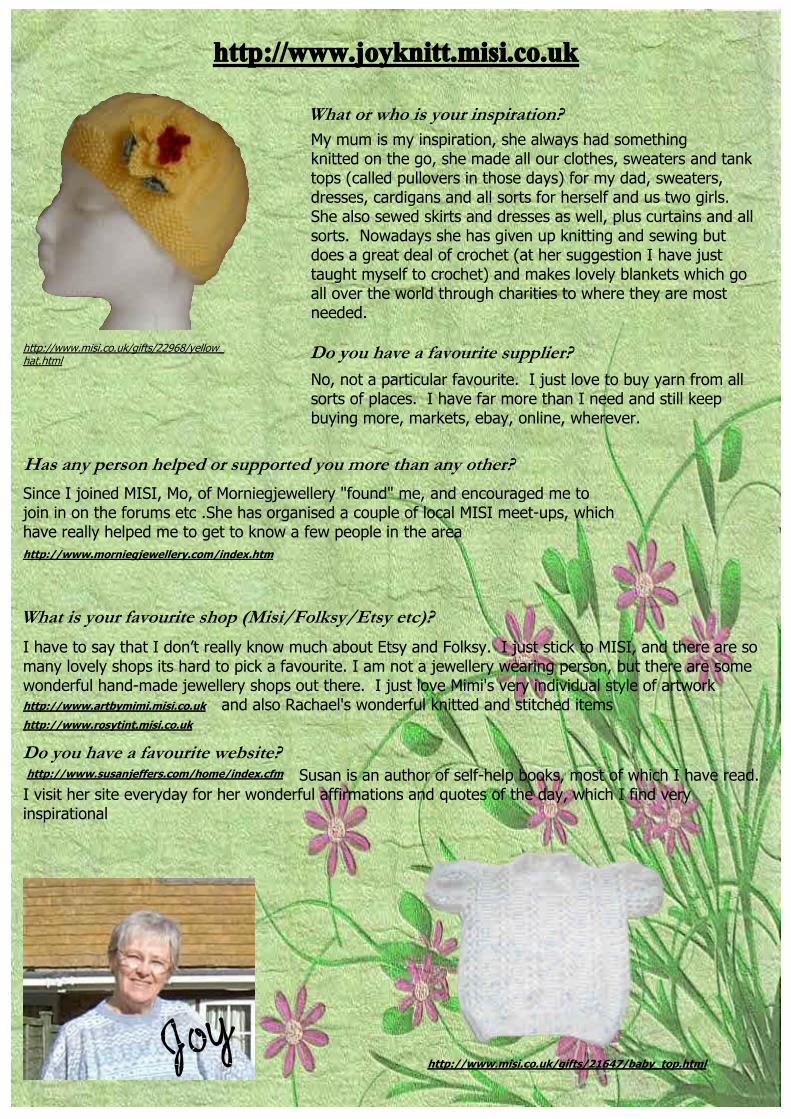
My mum is my inspiration, she always had somethingknitted on the go, she made all our clothes, sweaters and tanktops (called pullovers in those days) for my dad, sweaters,dresses, cardigans and all sorts for herself and us two girls.She also sewed skirts and dresses as well, plus curtains and allsorts. Nowadays she has given up knitting and sewing butdoes a great deal of crochet (at her suggestion I have justtaught myself to crochet) and makes lovely blankets which goall over the world through charities to where they are mostneeded.
No, not a particular favourite. I just love to buy yarn from allsorts of places. I have far more than I need and still keepbuying more, markets, ebay, online, wherever.
Since I joined MISI, Mo, of Morniegjewellery "found" me, and encouraged me tojoin in on the forums etc .She has organised a couple of local MISI meet-ups, whichhave really helped me to get to know a few people in the area
I have to say that I don’t really know much about Etsy and Folksy. I just stick to MISI, and there are somany lovely shops its hard to pick a favourite. I am not a jewellery wearing person, but there are somewonderful hand-made jewellery shops out there. I just love Mimi's very individual style of artwork
and also Rachael's wonderful knitted and stitched items
Susan is an author of self-help books, most of which I have read.I visit her site everyday for her wonderful affirmations and quotes of the day, which I find veryinspirational
http://www.joyknitt.misi.co.uk

Favourite finds from around the crafting community, picked fromeveryone's favourite online craft community web sites.
This months focus is on Easter.Click on the shops name to take you to their store!
Easter Plant Plot Card£3.50
Crinkled
Chicken/Hen hairclip,brooch or magnet
£1.95Gingy Snapz Felt Creations
The Crème Egg candle£7.50 inc p&p
Cherry Blossom Candles
Amigurumi EasterYellow Chick
£9.75 inc p&pCute Designs
Organic Cotton PrimroseMary Jane Baby Shoes
£10.00Betty and Todd
Little Chick£8.00
The Seven Seas
Misi
Easter Egg Basket Minitote Handbag
£5.00Mad About Bags
Folksy
Wow Thank You!
Easter daffodil hair grip£1.99
Culture Closet
Easter Bunting£11.50 inc p&pZigzag Bunting
All prices are correct as to going to print
Online Street

Favourite finds from around the crafting community, picked fromeveryone's favourite online craft community web sites.
This months focus is on Easter.Click on the shops name to take you to their store!
Lady Bug Easter Basket$22.00
Baby Made Boutique
Etsy
Artfire
Easter Bunny Pin with Carrot£4.62
Button Willoe
Clever Bunnies Stud Earrings€8.90
Innerland
DaWanda
Easter Spring Pillow Funand Decorative Throw Pillow
$12.99Must Love Home Decor
Cute Chicken Felt CellPhone/Bag Charm
€4.20Lily Handmade
Chocolate Lollipop -Easter Egg
£7.98The Bon Bon Babe
Peter Rabbit Beaded CharmBracelet$28.00
Just Bead it Design
4 Easter Bunny Cards£3.63
She’s Batty Designs
2 Egg-Cup in Olive WoodEgg Cup€12.50
Alentejoazul
All prices are correct as to going to print
Best Picks

By artbymimiwww.artbymimi.misi.co.uk
Mimi
The Misi Awards is most importantly just a bit of fun.
Misi (Make It Sell It) has been running now for just over a year and its sense of communityis one of its most important strengths.
The Misi Awards is a great way of getting to know each other and also each other’s shops,making a perfectly good excuse to take time having a nose around the many shopsavailable here on Misi.
It is also a great way to give a little boost to those who have either worked hard on theirshops and products or even just for making you smile.
Each award is given to those with the most votes, selected by fellow Misians.
Although voting has now closed, we say thank you to everyone that has taken part invoting.
Winners will be announced soon on Misi, and will be listed in the next issue ofCreative Crafting Magazine in June!
We hope you have fun choosing whom you think deserves a reward/s.
Good luck!

Budget & LuxuryUnder £10 Above £10
Set of 4 Egg Cosies£18.00
Charlotte Macey
Easter Chick£2.00
Rhubarb Gardens
Easter Bunny Tea Cosy£35.00
Caroline Watts Embroidery
Happy Easter –Easter Card 2 £3.50
Little SilverleafHARE Glass Art Animal Plate
£52.00Animal Glass
Cute Lil Happy EasterCupcake $1.00
gigglebot
Filigree GourmetBrownie Favors $44.40
thecatsmeowfavors
Chickadee Chick Studs - Surgical Steel €3.00
VeryVintage
Tunic dress * spring * size 1-2years€29.99
Ra-Mi-Fashion-Dreams
Polymer Clay EasterBunny Figurine £9.98
sartavia
Easter Greetings Wreath£19.95
WreathsandMoreDecor
All prices are correct as to going to print
Mini Jute Easter Egg Bag£4.00
BeenBags

awardsThis months Blog of the Month Award goes to Debbiefrom Hennie’s Nimble Needles blog called - The Hen Coop.Debbie, or Hennie, as everyone knows her as, is raising moneyfor the charity, the Sunflower Trust Fund. Debbie isknitting away, raising money and awareness for epilepsy.You can read more about it here at her blog -http://nimbleneedles-hennie.blogspot.com/
This months Shop of the Month Award goes toSarah Waterhouse Hand Printed Textiles from Folksy.
Sarah makes printed accessories and home textiles, that areenvironmentally friendly and hand printed using water basedinks on unbleached cottons or organic fabrics.All of Sarah’s fabrics designs are original designs by herself.Check out her store here:http://www.folksy.com/shops/plainjanetextiles
This monthsLady of the Monthis Summer Glau.
Picked by Ben, SprinklesSparkles’s best friend.
This monthsMan of the Monthis ‘The Hamster’Richard Hammond!
Picked by Tasha fromMadamSalami.www.madamsalami.com
Image fromimg151.imageshack.us/img151/9306/xdelight002.jpg
This months Item of the Month goes to Charlotte Maceyfor her Set of 4 Egg Cosies. Charlotte’s description of heregg cosies is:Wonderful set of 4 hand made egg cosies, eachindividually made in the Cotswolds. This set containsone of each of Charlotte's egg cosy designs. With 4designs for your family members to choose from,everyone can have cosy eggs this Easter! * hand wash only
Set of 4 Egg Cosies£18.00
Charlotte Macey
image fromhttp://www.femalefirst.co.uk/image-library/port/376/r/richard-hammond-1109.jpg

The next Issue ofIssue no. 1
Autumn 2009
Happy Halloween
Knitting ~ Sewing ~ Beading ~ Baking ~ Crochet ~ Recycling
Whatever your craft, join us and learn, create, discover.
Make new friends and have a good time.
Will be availableto view from
1st June 2010
We offer very reasonably pricedadvertising both in the magazine and on the website.
If you would like to promote your business to our large readercirculation please contact:
Our 3rd Issue has had over 62,000 views
Remember - they are permanently on view unlike printed adverts
If you would like to submit an article or have an idea that youthink our readers will enjoy,
please contact us at:
By Crafters for Crafters
Issue 3
Valentines/Mothers D
ay 2010
Handcrafted
Wedding
Special
Valentine &
Mothers Day
Projects
Have you
been
featured?
By
EASTER 2010
Issue 4

Join us again on1st June 2010
Happy Crafting!
Join us again on1st June 2010
Happy Crafting!