Creating Vagrant Machines for Distribution of Software...
18
Creating Vagrant Machines for Distribution of Software Environments Hans Petter Langtangen 1,2 Anders E. Johansen 1 1 Center for Biomedical Computing, Simula Research Laboratory 2 Department of Informatics, University of Oslo Dec 8, 2014 Scientific software soon gets very complicated to install because packages build on numerous other packages, some of which may be hard to compile and link successfully on a system. Those who frequently need to make sure their target audience (consisting typically of students, collaborators, or customers) has a certain set of packages installed on their system, run into a serious problem when few in the target audience have the competence, interest, and patience to install all the packages on their computer with its particular version of the operating system. There are many working solutions to this problem: • Long technical installation descriptions that in practice require considerable experience with compiling and linking software packages. • Ready-made, easy-to-install files for particular platforms, e.g., Debian packages (.deb files) for Linux systems like Ubuntu, .dmg bundles for Mac, or .exe files for Windows. It can still be quite some work for a user to install the right combination of many packages, although each package gets installed by a double click. • Virtual machines, such as VirtualBox, Parallels, and VMWare Fusion, can run a particular operating system and thereby take advantage of the most easy-to-use platform from an installation perspective. In particular, one can run Ubuntu or other Debian-based Linux systems and use the apt-get install and pip install commands to make installation of packages and their dependencies trivial. A Vagrant machine 1 is essentially a wrapper around VirtualBox which makes it very easy to build, distribute, and use a virtual machine. The present document 1 http://www.vagrantup.com/
Transcript of Creating Vagrant Machines for Distribution of Software...
Creating Vagrant Machines forDistribution of Software Environments
Hans Petter Langtangen1,2
Anders E. Johansen1
1Center for Biomedical Computing, Simula Research Laboratory2Department of Informatics, University of Oslo
Dec 8, 2014
Scientific software soon gets very complicated to install because packagesbuild on numerous other packages, some of which may be hard to compile andlink successfully on a system. Those who frequently need to make sure theirtarget audience (consisting typically of students, collaborators, or customers)has a certain set of packages installed on their system, run into a serious problemwhen few in the target audience have the competence, interest, and patienceto install all the packages on their computer with its particular version of theoperating system.
There are many working solutions to this problem:
• Long technical installation descriptions that in practice require considerableexperience with compiling and linking software packages.
• Ready-made, easy-to-install files for particular platforms, e.g., Debianpackages (.deb files) for Linux systems like Ubuntu, .dmg bundles for Mac,or .exe files for Windows. It can still be quite some work for a user toinstall the right combination of many packages, although each packagegets installed by a double click.
• Virtual machines, such as VirtualBox, Parallels, and VMWare Fusion,can run a particular operating system and thereby take advantage of themost easy-to-use platform from an installation perspective. In particular,one can run Ubuntu or other Debian-based Linux systems and use theapt-get install and pip install commands to make installation ofpackages and their dependencies trivial.
A Vagrant machine1 is essentially a wrapper around VirtualBox which makes itvery easy to build, distribute, and use a virtual machine. The present document
1http://www.vagrantup.com/

describes how to create and operate a Vagrant machine. The target audienceof the document is scientists who wants to spend a minimum of efforts onoffering or using a complete computing environment with much sophisticated,hard-to-install mathematical software.
By host we mean the operating system used to build or run a Vagrant machine.Operating system commands issued on the host have a prompt Terminal> whilecommands issued in the Vagrant machine feature the prompt Machine>.
1 Problem settingWe shall work with a specific example: creating a computing environmentfor the participants in a course on computational X, where X is any scienceor engineering subject such as chemistry, physics, quantum mechanics, fluiddynamics, oceanography, and so forth. The challenge with courses featuringheavy computations is two-fold:
1. to minimize the amount of time the audience spends on installation issuesand
2. to minimize the teacher’s hassle with all types of operating systems thatmight be present on the laptops in the audience.
An attractive solution to this minimization problem is to create a Vagrantmachine, which is simply a file with a virtual ready-made computer that anyonein the audience can easily download and use on any Windows or Mac computer.
Another advantage is that all users of a Vagrant machine have exactly thesame computing environment (unless they modify the machine). The teachercan then easily debug a user problem inside the teacher’s own Vagrant machine.And anything that the teacher demonstrates on her computer works out of thebox on the participants’ computers.
Different types of Vagrant machines can be made for different types of coursesor purposes. For example, a research project can set up a software environmentfor its project members, as a Vagrant machine, to ensure that the environmentis conserved for the future, which is a key principle for replicable science. Usersmay have many Vagrant machines on their computers and switch between thesecomputing environments.
2

1.1 Contents of the Vagrant machineThe Vagrant machine needs to have an operating system. Here we choose Ubuntuof two main reasons:
1. software on Ubuntu can be trivially installed as Debian packages
2. the Debian software repository is at the time of this writing the richestrepository for pre-built mathematical software.
We remark that the user of the machine will mainly work with files and directorieson the host system (Mac or Windows) and only use the Ubuntu system to runcomputations.
To be specific, the sample computing environment to be illustrated hereconsists of a Python-based ecosystem for scientific computing. Examples onbasic software includes
• Text editors: emacs, vim, gedit
• Compilers: gcc, g++, gfortran
• Numerical libraries: ATLAS
• Python packages: numpy, scipy, sympy, matplotlib, ScientificPython
Most of these packages are in Debian and trivially installed by a sudo apt-get install packagenamecommand, but the Python packages are often more conveniently installed intheir latest version by a pip install packagename command. A few Pythonpackages must be installed directly from the source code, via downloading fol-lowed by the sudo python setup.py install command, if they do not existin Debian, or if they are not supported by pip install, or if one needs todownload the latest development version. The example will in detail illustratethe various cases.
Much more sophisticated packages than those listed above, for instancePETSc2 and FEniCS3, may be very challenging to build from scratch, but
2http://www.mcs.anl.gov/petsc/3http://fenicsproject.org
3
as long as Debian versions are offered (which is the case with PETSc andFEniCS), installation on a Debian-based system like Ubuntu is still just a trivialapt-get install command.
In the Vagrant machine, we create two directories:
• ~/bin for executable programs and scripts
• ~/srclib for Python packages installed from source code
We also include two useful files:
• A small, but illustrative ~/.bashrc4 file for setting up the Linux system.
• ~/.rsyncexclude5 for excluding certain files when running rsync forcopying files between machines, or between machines and external disks ormemory sticks.
1.2 Installing the necessary software for using VagrantBefore going into details on how to utilize Vagrant, you need to have it on yourhost system.
VirtualBox. Download and install VirtualBox6. Choose the version accordingto the operating system on the host. For example, if you want to build or runVagrant machines under Mac OS X, choose VirtualBox x.y.z for OS X hosts,where x.y.z is the version number of VirtualBox. Double click the downloaded.dmg file to install Vagrant. Those who work on a Windows machines will selectVirtualBox x.y.z for Windows hosts, which downloads an .exe file which can justbe double clicked to perform the installation.
Installing VirtualBox on Ubuntu and other Linux systems can be challenging.Here is a recipe. Start with
Terminal> sudo apt-cache search virtualbox
to find a package virtualbox-X, where X denotes a particular version number(e.g., 4.2). Then copy and paste the following commands into the terminalwindow:
Terminal> wget -q \http://download.virtualbox.org/virtualbox/debian/oracle_vbox.asc \-O- | sudo apt-key add -
Terminal> sudo sh -c ’echo \"deb http://download.virtualbox.org/virtualbox/debian precise contrib" \>> /etc/apt/sources.list’
Terminal> sudo apt-get updateTerminal> sudo apt-get install virtualbox-X
4https://github.com/hplgit/vagrantbox/tree/master/doc/src/vagrant/src-vagrant/.bashrc5https://github.com/hplgit/vagrantbox/tree/master/doc/src/vagrant/src-vagrant/.rsyncexclude6https://www.virtualbox.org/wiki/Downloads
4

(Recall to replace X by the appropriate version number.) You may need to runsudo apt-get -f install and upgrade packages. It is easier to work withVirtualBox on Mac or Windows if you run into trouble with Ubuntu.
We recommend to install VirtualBox as shown above on Ubuntu rather thandownloading a particular .deb file (Debian package) from the VirtualBox site7,because the apt-get install approach above makes it easier to explicitly getall the packages that VirtualBox depends on.
Vagrant. Download and install Vagrant8. Choose the latest version and theinstallation file corresponding to the host’s operating system (where you installedVirtualBox). On a Mac, you select the Vagrant-x.y.z.dmg file (x.y.z denotesthe version of the software), on Windows the Vagrant_x.y.z.msi file is therelevant choice. On Ubuntu, select vagrant_x.y.z_*.deb and install it bysudo dpkg -i vagrant_x.y.z_*.deb.
On Windows and Mac OS X, the vagrant command is automatically availableafter installation (because the directory where the vagrant executable resides isplaced in your PATH environment variable). This is true for many Linux systemstoo, otherwise you must add the relevant directory where the vagrant programwas installed (say /opt/vagrant/bin) to your PATH variable.
Cygwin (only on Windows). Windows computers do not feature an sshclient and an X server by default, which are needed in scientific applications.Therefore, we recommend to install Cygwin9 or the enhanced tool Babun10,which is a pre-configured version of Cygwin. Babun and Cygwin give easy accessto an ssh-client and an X-server on Windows computers. Actually, Babun orCygwin extends Windows with a complete Unix environment. The home pagesof both projects have detailed installation instructions.
Only the minimal base packages from the Cygwin distribution are installedby default. This means that you need to manually select the ’X11’ categoryduring installation to install Cygwin’s X11 server. Notice that downloadingCygwin might take one or more hours, depending on the speed of your network.
Once installed, we need to add Cygwin’s ssh client to our PATH. Cygwin is bydefault installed to C:\cygwin, so the command is set PATH=%PATH%;C:\cygwin\bin.
2 Creating the Vagrant machineIn this section we explain how to select an operating system for the Vagrantmachine, how to install pre-compiled binary packages, how to install (Python)packages from source code, and how to configure the machine.
7https://www.virtualbox.org/wiki/Downloads8http://downloads.vagrantup.com/9http://cygwin.com/install.html
10https://github.com/babun/babun
5
2.1 Choice of operating system typeThe first step of building a Vagrant machine is to choose a plain version of anoperating system to base the machine on. This is called a base box. A lot ofpre-made base boxes for various versions of operating systems are available athttp://www.vagrantbox.es. (If, for some reason, you want to build a base boxwith another operating system, there are instructions11 for that.) Let us decideon adopting Ubuntu precise 64, which we find down on the list. This is a versionof Ubuntu 12.04 (precise refers to the official Ubuntu name Precise Pangolinfor version 12.04). Click on Copy to copy the URL. You have now two choices:
1. you can build and distribute a complete virtual machine, or
2. the user can download a box and then automatically install a list ofprescribed packages in the box.
The former approach, called a complete Vagrant machine in the following, resultsin one big file containing the machine. The latter approach, referred to as aVagrant machine specification results in very small text files to be distributed tothe users.
The advantage of a complete Vagrant machine is that users can download onebig file and they immediately have an operative machine. You are also guaranteedthat all users have identical environments. An empty Vagrant machine is easyto distribute, but the disadvantage is that a user’s initialization of the machinetakes (very) long time since a lot of packages must be downloaded and installed.Something can go wrong with the installation. It may also happen that differentusers get slightly different environments because they run the installation processof their machines at different times.
2.2 Downloading a base box to create a complete Vagrantmachine
Paste the copied URL of the chosen box in a new browser tab. This actionshould automatically download a file precise64.box. Say you store this file ina directory ~/vagrant. Go to this directory and run
Terminal> vagrant box add mybox precise64.boxTerminal> vagrant init myboxTerminal> vagrant up
The result is now an initialized Vagrant machine mybox which you can log into.The vagrant directory where these commands are run is known as the projectdirectory in the Vagrant documentation12.
11http://docs-v1.vagrantup.com/v1/docs/base_boxes.html12http://docs.vagrantup.com/v2/
6

2.3 Making an empty Vagrant machineMake some directory (say) ~/vagrant, move to this directory, and type
Terminal> vagrant init
This command creates a Vagrantfile. Invoke the file in a text editor andreplace the line config.vm.box = "base" by the URL to the base box and addanother line config.ssh.forward_x11 = true to enable X11 graphics. TheVagrantfile looks something like
Vagrant.configure("2") do |config|# All Vagrant configuration is done here. The most common configuration# options are documented and commented below. For a complete reference,# please see the online documentation at vagrantup.com.
# Every Vagrant virtual environment requires a box to build off of.config.vm.box = http://files.vagrantup.com/precise64.boxconfig.ssh.forward_x11 = true...
end
2.4 Installing packages in a complete Vagrant machineThis section assumes that you want to build and distribute a complete Vagrantmachine as defined above. There is not much installed yet on the mybox machine,but this is an Ubuntu system where we can very easily install what we want viasudo apt-get install or pip install commands, or by downloading sourcecode and performing manual installation. Section 2.6 describes a type of filefor listing packages and Unix commands, with an associated tool deb2sh.py forautomatic generation of installation scripts. Using these utilities, it is close totrivial to create a rich computing environment.
Creating files. Make sure you are logged out of the Vagrant machine (Ctrl-D)and located in the project directory on the host. Download default versions13 ofsome key files: deb2sh.py, debpkg_minimal.txt, .bashrc, and .rsyncexclude.Just click on the files, choose the Raw version, and right-click to save each fileto the project directory. Read about the former two files in Section 2.6 and thelatter two in Section 2.7. Edit the files to your users’ needs. Then run
Terminal> python deb2sh.py debpkg_minimal.txt
to produce a Bash script install_minimal.sh and an equivalent Python scriptinstall_minimal.py. Make sure you run all the commands in the projectdirectory (~/vagrant).
You may alternatively download the more comprehensive debpkg.txt14 pack-age list and use that file as a starting point. Running deb2sh.py debpkg.txtwill produce the scripts install.sh and install.py.
13https://github.com/hplgit/vagrantbox/tree/master/doc/src/vagrant/src-vagrant14https://github.com/hplgit/vagrantbox/tree/master/doc/src/vagrant/debpkg.txt
7

Installing files and packages. When you have edited the above files accord-ing to your users’ needs, you are ready to log into the Vagrant machine, copyfiles to the machine and run the installation. The project directory is visible as/vagrant inside the Vagrant machine (see Section 3.4 for more details). Therelevant login command is vagrant ssh, here followed by two copy commands:
Terminal> vagrant sshMachine> cp /vagrant/.bashrc .Machine> cp /vagrant/.rsyncexclude .
Now you can run the (lengthy) installation process by
Machine> bash /vagrant/install_minimal.sh
or
Machine> python /vagrant/install_minimal.py
If something goes wrong with the installation, edit the script on the host system(invoke /vagrant/install_minimal.sh in an editor) and rerun the installationcommand inside the Vagrant machine.
You may want to include the installation scripts in the box so that users cansee exactly what has been installed and rerun installation commands if necessary(e.g., at a later stage to update the software).
Machine> cp /vagrant/install_minimal.sh .Machine> cp /vagrant/install_minimal.py .
Enabling X11 graphics. It is recommended that you test graphics programsand check that they display the graphics on the host appropriately. To this end,you need to enable X11 graphics on the host by editing the file Vagrantfile in theproject directory so that it includes the line config.ssh.forward_x11 = true:
Vagrant::Config.run do |config|...# Enable X11config.ssh.forward_x11 = true...
end
To get X11 graphics to work, you must also start X11 on the host: run Applica-tions - Utilities - X11 on a Mac, or invoke Start - All Programs - Cygwin-X -XWin Server on Windows.
A simple application just to test X11 is to run xterm from the Vagrantmachine. A terminal window will pop up on the host.
8

Packaging a new box. When everything is copied to the box, installed, andtested, we need to package the installed virtual environment into a box in orderto distribute it to other users. Log out of the machine and finalize the machineby running the vagrant package command in the project directory:
Terminal> vagrant package --output course.box \--vagrantfile Vagrantfile
The settings in Vagrantfile are now packed with the box. In particular, if X11graphics has been enabled in Vagrantfile as described above, you have a fullyfunctioning Ubuntu machine in course.box that will work seamlessly with X11graphics on the host. Users can just do
Terminal> vagrant box add course course.boxTerminal> vagrant init courseTerminal> vagrant upTerminal> vagrant ssh
A real machine (containing what is listed earlier, plus the FEniCS15 software)can be downloaded from Google Drive at http://goo.gl/ta977B (note the filesize: 3.8Gb!).
2.5 Installing packages in an empty Vagrant machineAn empty Vagrant machine is distributed to users as a bundle of Vagrantfileand an installation script. Read Section 2.6 and make a Bash installation script.
You may want to distribute .bashrc and .rsyncexlude files too, as describedin Section 2.7, but that is easiest done by letting the installation script downloadthe files from site where they are available. Relevant lines may be
$ cd $HOME$ wget http://tinyurl.com/m88bljf/.bashrc$ wget http://tinyurl.com/m88bljf/.rsyncexclude
To ensure that the user’s initialization process of the machine invokes aninstallation of the desired packages, you need to add a line to Vagrantfile thatruns the Bash script. Say the name of the script is install_minimal.sh. Therelevant line is shown below:
Vagrant.configure("2") do |config|...# Run installationconfig.vm.provision :shell, :path => "install_minimal.sh"...
end
Users must now have the files Vagrantfile and install_minimal.sh tocreate a complete Vagrant machine on their computers.
15http://fenicsproject.org
9

2.6 Scripts for installing ready-made packagesWe have developed a little tool where one can list the desired Debian or Pythonpackages in a computing environment in a file with default name debkpg.txt.This file may also contain plain Unix commands for doing other types of instal-lation, like pip install, or cloning of source code repositories with subsequentexecution of a setup.py file. Concrete examples are listed below.
A little Python script deb2sh.py16 reads the installation specification in somefile debpkg_minimal.txt17 and creates a Bash script install_minimal.sh18
and an equivalent Python script install_minimal.py19 for running all thenecessary operating system commands to install all the packages in the correctorder. The script aborts if any package cannot be installed successfully. Theproblem must then be fixed, or the package must in worst case be removed (justcomment out the install line(s) in the Bash or Python script). The script canthereafter be rerun again.
The following is an extract of packages as they are listed in the mentioneddebpkg_minimal.txt file:# Minimal installation for a Python ecosystem# for scientific computing
# Editorsemacs python-mode gedit vim ispell
# Compilersgcc g++ gawk f2c gfortranautoconf automake autotools-dev
# Numerical librarieslibatlas-base-dev libsuitesparse-dev
# Pythonidlepython-pippython-dev# Matplotlib requires libfreetype-dev libpng-dev# (otherwise pip install matplotlib does not work)libfreetype6-dev libpng-devpip install numpypip install sympy#pip install matplotlib # pip may fail for matplotlibpython-matplotlibpip install scipy
# ScientificPython must be installed from source$ if [ ! -d srclib ]; then mkdir srclib; fi$ cd srclib$ hg clone https://bitbucket.org/khinsen/scientificpython$ cd scientificpython$ sudo python setup.py install$ cd ../..
The syntax has four elements:16https://github.com/hplgit/vagrantbox/tree/master/doc/src/vagrant/src-vagrant/deb2sh.py17https://github.com/hplgit/vagrantbox/tree/master/doc/src/vagrant/src-vagrant/debpkg_minimal.txt18https://github.com/hplgit/vagrantbox/tree/master/doc/src/vagrant/src-vagrant/install_minimal.sh19https://github.com/hplgit/vagrantbox/tree/master/doc/src/vagrant/src-vagrant/install_minimal.py
10

1. comment lines are just copied to the Bash and Python installation scripts,
2. lines starting with $ are plain Unix commands and run by the installationscripts,
3. lines starting with pip install lists packages to be installed with pip,while
4. all other non-blank lines are supposed to list the name of Debian packagesto be installed by sudo apt-get install commands.
The examples above show all four line types. Observe in particular how we canfreely add Unix commands to download ScientificPython from its Bitbucketrepo (done in the srclib subdirectory) and install the package manually byrunning setup.py the usual way.
Some examples on lines in the automatically generated install_minimal.shscript are
#!/bin/bash# Automatically generated script. Based on debpkg.txt.
function apt_install {sudo apt-get -y install $1if [ $? -ne 0 ]; then
echo "could not install $1 - abort"exit 1
fi}
function pip_install {for p in $@; do
sudo pip install $pif [ $? -ne 0 ]; then
echo "could not install $p - abort"exit 1
fidone
}
function unix_command {$@if [ $? -ne 0 ]; then
echo "could not run $@ - abort"exit 1
fi}
sudo apt-get update --fix-missing
# Minimal installation for a Python ecosystem# for scientific computing
# Editorsapt_install python-mode gedit vim ispell...pip_install numpypip_install sympy
11

apt_install scipy...# ScientificPython must be installed from sourceunix_command if [ ! -d srclib ]; then mkdir srclib; fiunix_command cd srclibunix_command hg clone https://bitbucket.org/khinsen/scientificpythonunix_command cd scientificpythonunix_command sudo python setup.py install
Notice.• Installation commands may fail. Therefore we have made separatefunctions for doing the apt-get and pip install commands. Wetest the value of the environment variable $? after the installation ofa package: a successful installation implies value of 0, while valuesdifferent from 0 mean that something went wrong. We then abortthe script with exit 1.
• The apt-get install command will prompt the user for questionsfor every package, but here we use the option -y to automaticallyrely on default answers, i.e., accepting yes to all questions.
The corresponding lines in the equivalent, automatically generated install.pyfile look as follows.
import commands, sys
def system(cmd):"""Run system command cmd."""failure, output = commands.getstatusoutput(cmd)if failure:
print ’Command\n %s\nfailed.’ % cmdprint outputsys.exit(1)
system(’sudo apt-get update --fix-missing’)
system(’sudo apt-get -y install python-mode gedit vim ispell’)...system(’pip install numpy’)system(’pip install sympy’)system(’sudo apt-get -y install scipy’)...system(’if [ ! -d srclib ]; then mkdir srclib; fi’)system(’cd srclib’)sytem(’hg clone https://bitbucket.org/khinsen/scientificpython’)system(’ cd scientificpython’)system(’sudo python setup.py install’)
The Python script does not test the Unix environment variable $?, but the firstreturn value from the getstatusoutput function acts as the value of $?.
12
We can use the Bash or Python script to easily automate installation ofpackages in the Vagrant machine. More powerful, industry standard tools forsetting up complete software environments are Chef20 and Puppet21.
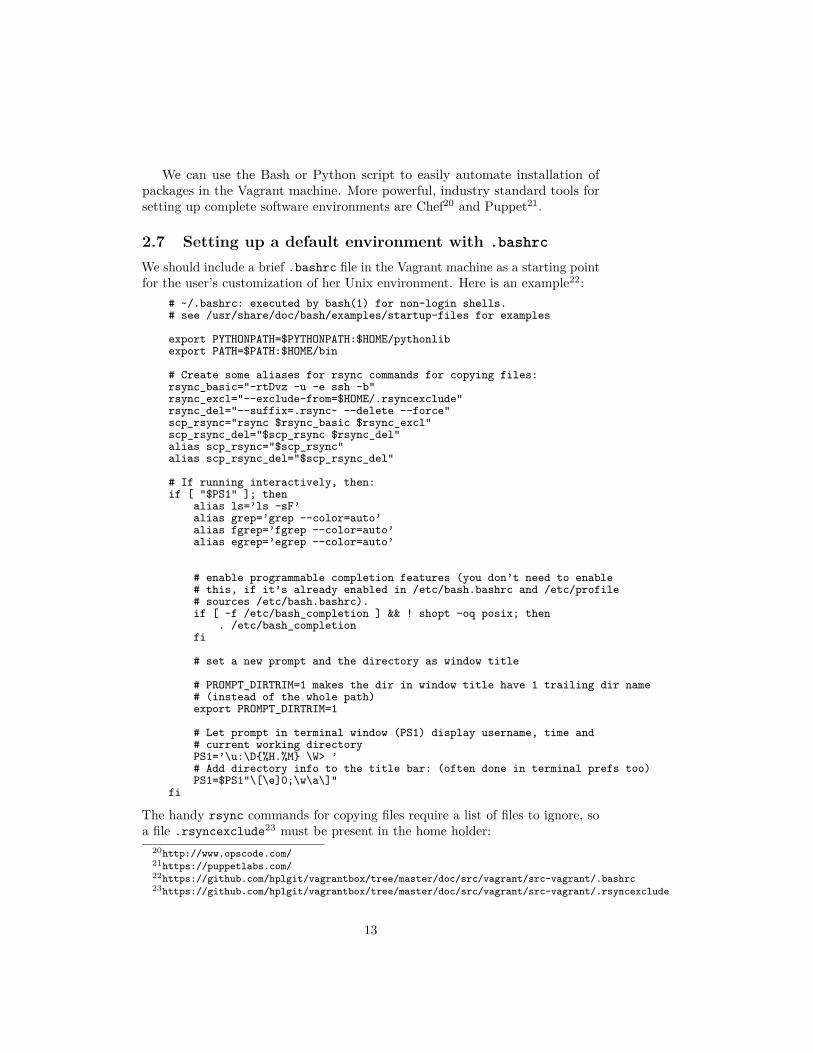
2.7 Setting up a default environment with .bashrc
We should include a brief .bashrc file in the Vagrant machine as a starting pointfor the user’s customization of her Unix environment. Here is an example22:
# ~/.bashrc: executed by bash(1) for non-login shells.# see /usr/share/doc/bash/examples/startup-files for examples
export PYTHONPATH=$PYTHONPATH:$HOME/pythonlibexport PATH=$PATH:$HOME/bin
# Create some aliases for rsync commands for copying files:rsync_basic="-rtDvz -u -e ssh -b"rsync_excl="--exclude-from=$HOME/.rsyncexclude"rsync_del="--suffix=.rsync~ --delete --force"scp_rsync="rsync $rsync_basic $rsync_excl"scp_rsync_del="$scp_rsync $rsync_del"alias scp_rsync="$scp_rsync"alias scp_rsync_del="$scp_rsync_del"
# If running interactively, then:if [ "$PS1" ]; then
alias ls=’ls -sF’alias grep=’grep --color=auto’alias fgrep=’fgrep --color=auto’alias egrep=’egrep --color=auto’
# enable programmable completion features (you don’t need to enable# this, if it’s already enabled in /etc/bash.bashrc and /etc/profile# sources /etc/bash.bashrc).if [ -f /etc/bash_completion ] && ! shopt -oq posix; then
. /etc/bash_completionfi
# set a new prompt and the directory as window title
# PROMPT_DIRTRIM=1 makes the dir in window title have 1 trailing dir name# (instead of the whole path)export PROMPT_DIRTRIM=1
# Let prompt in terminal window (PS1) display username, time and# current working directoryPS1=’\u:\D{%H.%M} \W> ’# Add directory info to the title bar: (often done in terminal prefs too)PS1=$PS1"\[\e]0;\w\a\]"
fi
The handy rsync commands for copying files require a list of files to ignore, soa file .rsyncexclude23 must be present in the home holder:
20http://www.opscode.com/21https://puppetlabs.com/22https://github.com/hplgit/vagrantbox/tree/master/doc/src/vagrant/src-vagrant/.bashrc23https://github.com/hplgit/vagrantbox/tree/master/doc/src/vagrant/src-vagrant/.rsyncexclude
13

.#**.rsync~*.a*.o*.so*~.*~*.log*.dvi*.aux*.oldtmp_**_tmp**.tmptmp.*.tmp**.tar*.tar.gz*.tgz*.pyc
3 Operating the Vagrant machineFor a user, the initialization of a new machine depends on whether it is a completeVagrant machine or an empty Vagrant machine.
Important.
On a Windows computer, always operate the Vagrant machine from Cyg-win’s terminal, which has both an ssh-client and an X-server. The terminalcan be started from Start - All Programs - Cygwin-X - XWin Server.
3.1 Operating a complete Vagrant machineThe Vagrant machine course.box, created as described in Section 2.4, can nowbe distributed to users. A user must do the following steps.
Step 1. Install VirtualBox and Vagrant as described in Section 1.2.
Step 2. Create a directory vagrant and move course.box to this directory.We also recommend to make a subdirectory projects where all files and di-rectories to be used from the Vagrant machine reside. You edit files in thevagrant/projects directory tree on the host.
Step 3. Run the these commands from the vagrant directory:
Terminal> vagrant box add course course.boxTerminal> vagrant init course
14

Step 4. Start X11 on the host: run Applications - Utilities - X11 on a Mac, orStart - All Programs - Cygwin-X - XWin Server on Windows.
Step 5. Start (boot) the Vagrant machine:
Terminal> vagrant up
Step 5. Log in on the machine:
Terminal> vagrant ssh
Log out with Ctrl-D as usual in Unix terminal windows.
3.2 Operating an empty Vagrant machineThe user has the files Vagrantfile and some installation script, say install_minimal.shas described in Section 2.5. The user should make some directory vagrant, copyVagrantfile and install_minimal.sh to this directory, and from this directoryrun
Terminal> vagrant upTerminal> vagrant ssh
The first command takes a long time to execute since it runs the installationscript. Log out with Ctrl-D.
3.3 Working with an initialized Vagrant machineThe daily work with the Vagrant machine is very easy. Simply go to the vagrantdirectory where the machine resides and run
Terminal> vagrant upTerminal> vagrant ssh
You are now inside the machine and can reach files on the host from /vagrant/projects(see the next section for more details). Log out with Ctrl-D and in again withvagrant ssh. Create and edit files on the host in ~/vagrant/projects and itssubdirectories.
Before closing a laptop or shutting it down, it is recommended to log out ofthe Vagrant machine and run vagrant suspend.
3.4 Shared directoriesInside the Vagrant machine, /vagrant is a directory shared with the user’s filesystem. More precisely, /vagrant points to the project directory where the fileVagrantfile resides and where the vagrant up command was run (~/vagrantif you have followed the specific directory naming suggested in this document).If users of the Vagrant machine keeps all their files relevant for the machine inthe project directory and its subdirectories, all these directories will be shared
15

between the machine and the user’s file system. Normally, this feature is enoughfor efficient communication of files between the Vagrant machine’s file systemand the user’s file system. One can also set up other shared directories, see theVagrant documentation for Synced Directories24.
Since the Vagrant machine shares directories with the host system, users cansafely edit files in the shared directories with their favorite editor on the hostsystem. The Vagrant machine will have immediate access to the files.
Here is a typical example. Assume that vagrant up and vagrant ssh wererun in a directory myubuntu. On the host, create a subdirectory src of myubuntu.Start an editor and type in the following Python program in a file test1.py:
import numpy as npimport matplotlib.pyplot as pltx = np.linspace(0, 3, 11)y = np.exp(-x)plt.plot(x, y)plt.show()
This program will show X11 graphics on your host machine. If this machineruns the Linux operating system, everything is fine, but if this is a Mac orWindows machine, X11 must be started as described in Step 4 of the installationinstructions. If that is necessary, log out, start X11, log in again (vagrant ssh).
Run the test1.py program:
Terminal> cd /vagrantTerminal> cd srcTerminal> python test1.py
A plot of the curve y = e−x should now be seen on the screen.
3.5 TroubleshootingTroubleshooting: shared directory is invisible. It may happen that the/vagrant directory seems empty inside the Vagrant machine. Two steps will fixthis problem. First, run
Machine> sudo /etc/init.d/vboxadd setup
inside the Vagrant machine. Second, log out and run
Terminal> sudo vagrant reload
outside the Vagrant machine. Then do vagrant ssh and take an ls /vagrantto see that the files in the project directory (e.g., Vagrantfile and the Vagrantbox) are visible.
24http://docs.vagrantup.com/v2/synced-directories/basic_usage.html
16

Troubleshooting: "couldn’t connect to display ...". This error messagepoints to the problem that X11 graphics on the Vagrant machine cannot be shownon the host’s screen. Inserting the line config.ssh.forward_x11 = true in thefile Vagrantfile in the project directory and starting X11 on the host are thetwo steps that will fix the problem. Unless you build a Vagrant box, the editingof Vagrantfile should not be required as a ready-made box was packaged withX11 forwarding (cf. the vagrant package command in Section 2.4). To startX11 on Mac, run Applications - Utilities - X11, while on Windows, go to Start- All Programs - Cygwin-X - XWin Server. Log out of the Vagrant machine(Ctrl-D) and in again (vagrant ssh).
Troubleshooting: Internet is not reachable. A test if Internet is reachableis to run a ping command inside the machine, e.g.,
Machine> ping us.ubuntu.archive.com
A hanging command indicates that Internet is not reachable. Log out of the box,run vagrant reload, and vagrant ssh. Try the ping command again.
3.6 Stopping the Vagrant machineThere are three ways to stop the virtual Vagrant machine from the host (i.e.,you must be logged out by Ctrl-D from the machine):
• vagrant suspend sends the machine to sleep mode. Waking it up is donewith vagrant up.
• vagrant halt shuts off the machine. To start it again, a full boot withvagrant up is needed.
• The machine can be removed forever by vagrant destroy.
3.7 Placing the Vagrant machine in the cloudThere are numerous free file hosting sites where a Vagrant machine can be storedand shared with others. We have found Google Drive to be a viable solution. Itis free, can handle large enough files, and has flexible functionality for sharingthe machine with others. A potential problem with Google Drive, Sky Drive, orDropbox is that other computers connected to the account start to downloadthe big Vagrant machines. To prevent such actions, click on the Google Driveicon on all machines that synchronize the account and deselect the directorywhere you store the Vagrant machine(s).
3.8 Using VMWare FusionNot written yet.
17
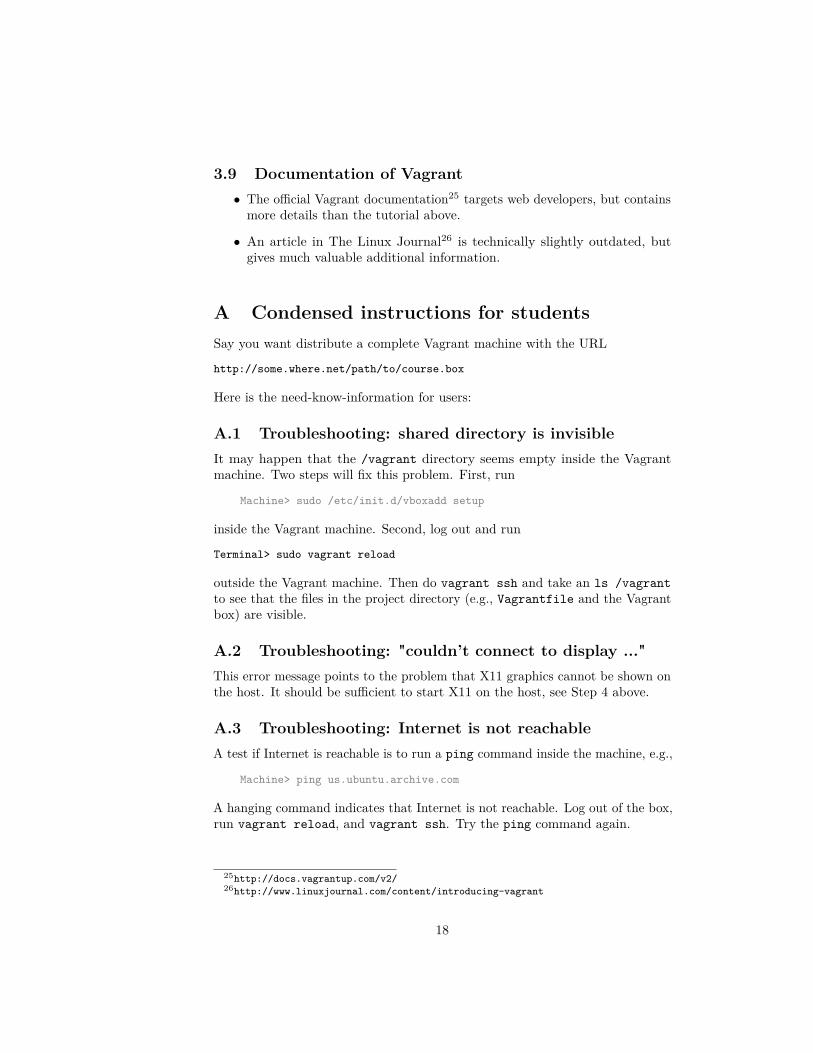
3.9 Documentation of Vagrant• The official Vagrant documentation25 targets web developers, but containsmore details than the tutorial above.
• An article in The Linux Journal26 is technically slightly outdated, butgives much valuable additional information.
A Condensed instructions for studentsSay you want distribute a complete Vagrant machine with the URL
http://some.where.net/path/to/course.box
Here is the need-know-information for users:
A.1 Troubleshooting: shared directory is invisibleIt may happen that the /vagrant directory seems empty inside the Vagrantmachine. Two steps will fix this problem. First, run
Machine> sudo /etc/init.d/vboxadd setup
inside the Vagrant machine. Second, log out and run
Terminal> sudo vagrant reload
outside the Vagrant machine. Then do vagrant ssh and take an ls /vagrantto see that the files in the project directory (e.g., Vagrantfile and the Vagrantbox) are visible.
A.2 Troubleshooting: "couldn’t connect to display ..."This error message points to the problem that X11 graphics cannot be shown onthe host. It should be sufficient to start X11 on the host, see Step 4 above.
A.3 Troubleshooting: Internet is not reachableA test if Internet is reachable is to run a ping command inside the machine, e.g.,
Machine> ping us.ubuntu.archive.com
A hanging command indicates that Internet is not reachable. Log out of the box,run vagrant reload, and vagrant ssh. Try the ping command again.
25http://docs.vagrantup.com/v2/26http://www.linuxjournal.com/content/introducing-vagrant
18