Create a Photo Slideshow - Roxio...Create a Photo Slideshow The Roxio Slideshow Assistant, part of...
9
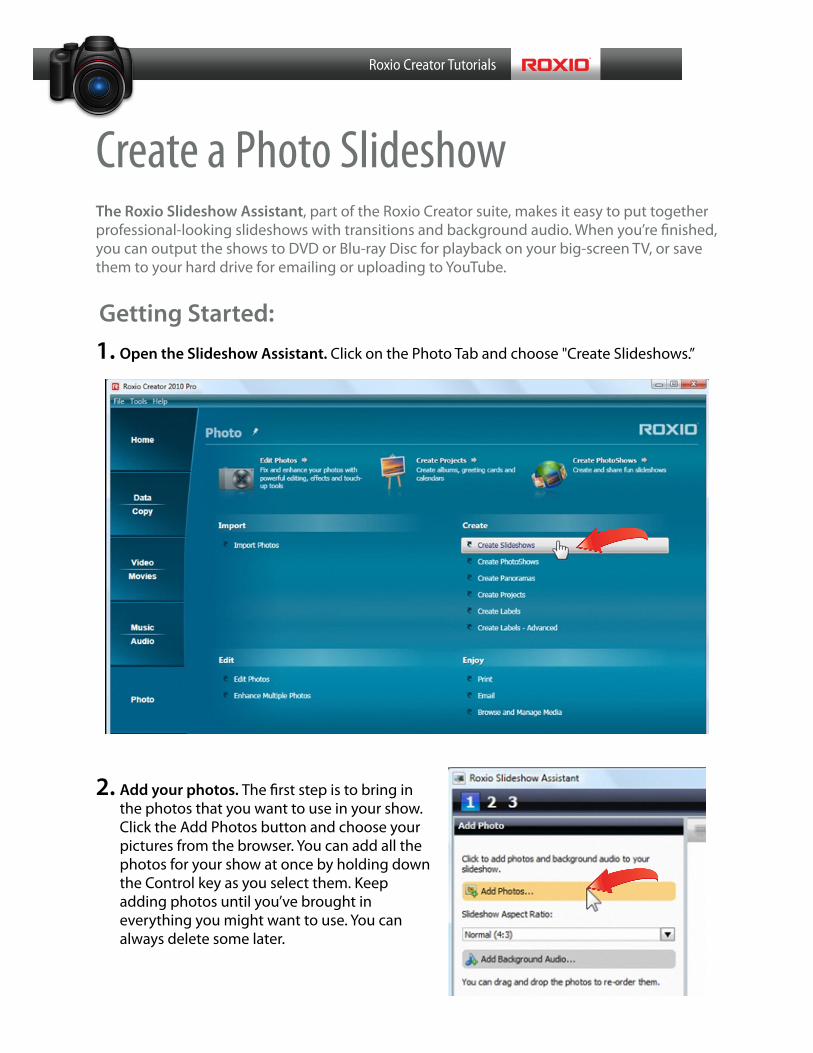
Create a Photo Slideshow The Roxio Slideshow Assistant, part of the Roxio Creator suite, makes it easy to put together professional-looking slideshows with transitions and background audio. When you’re nished, you can output the shows to DVD or Blu-ray Disc for playback on your big-screen TV, or save them to your hard drive for emailing or uploading to YouTube. Getting Started: 1. Open the Slideshow Assistant. Click on the Photo Tab and choose "Create Slideshows.” 2. Add your photos. The rst step is to bring in the photos that you want to use in your show. Click the Add Photos button and choose your pictures from the browser. You can add all the photos for your show at once by holding down the Control key as you select them. Keep adding photos until you’ve brought in everything you might want to use. You can always delete some later.
Transcript of Create a Photo Slideshow - Roxio...Create a Photo Slideshow The Roxio Slideshow Assistant, part of...
Create a Photo SlideshowThe Roxio Slideshow Assistant, part of the Roxio Creator suite, makes it easy to put together professional-looking slideshows with transitions and background audio. When you’re !nished, you can output the shows to DVD or Blu-ray Disc for playback on your big-screen TV, or save them to your hard drive for emailing or uploading to YouTube.
Getting Started: 1. Open the Slideshow Assistant. Click on the Photo Tab and choose "Create Slideshows.”
2. Add your photos. The !rst step is to bring in the photos that you want to use in your show. Click the Add Photos button and choose your pictures from the browser. You can add all the photos for your show at once by holding down the Control key as you select them. Keep adding photos until you’ve brought in everything you might want to use. You can always delete some later.
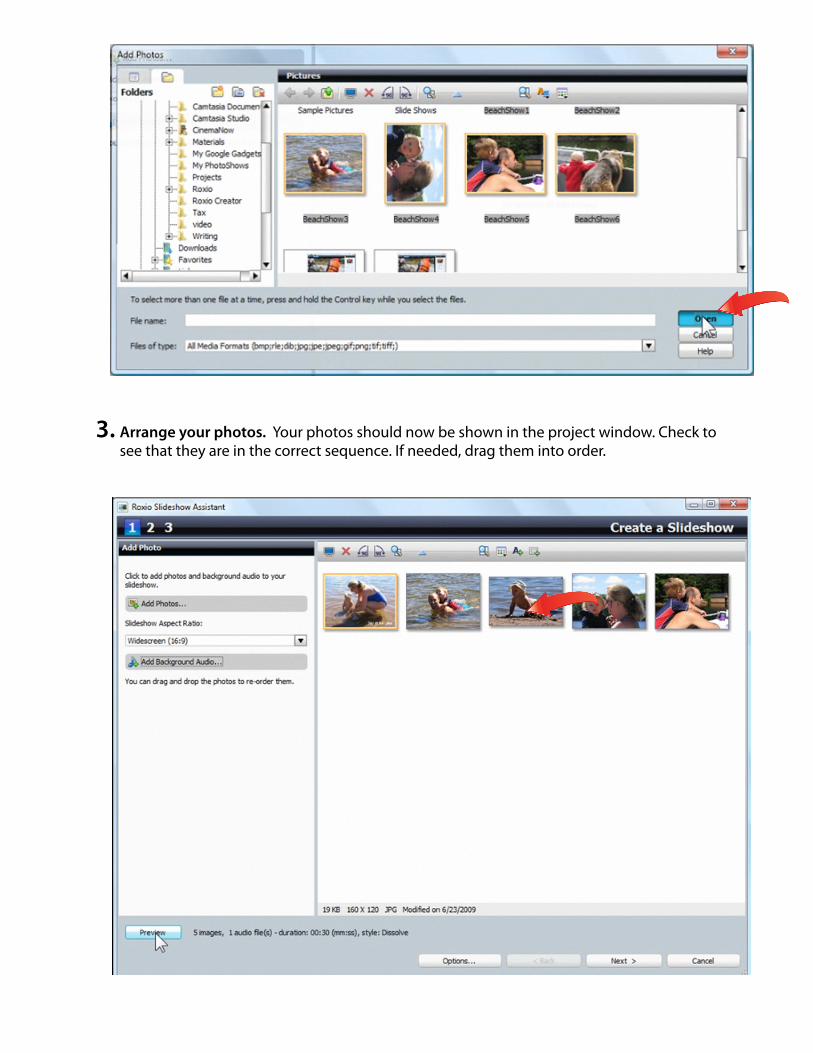
3. Arrange your photos. Your photos should now be shown in the project window. Check to see that they are in the correct sequence. If needed, drag them into order.
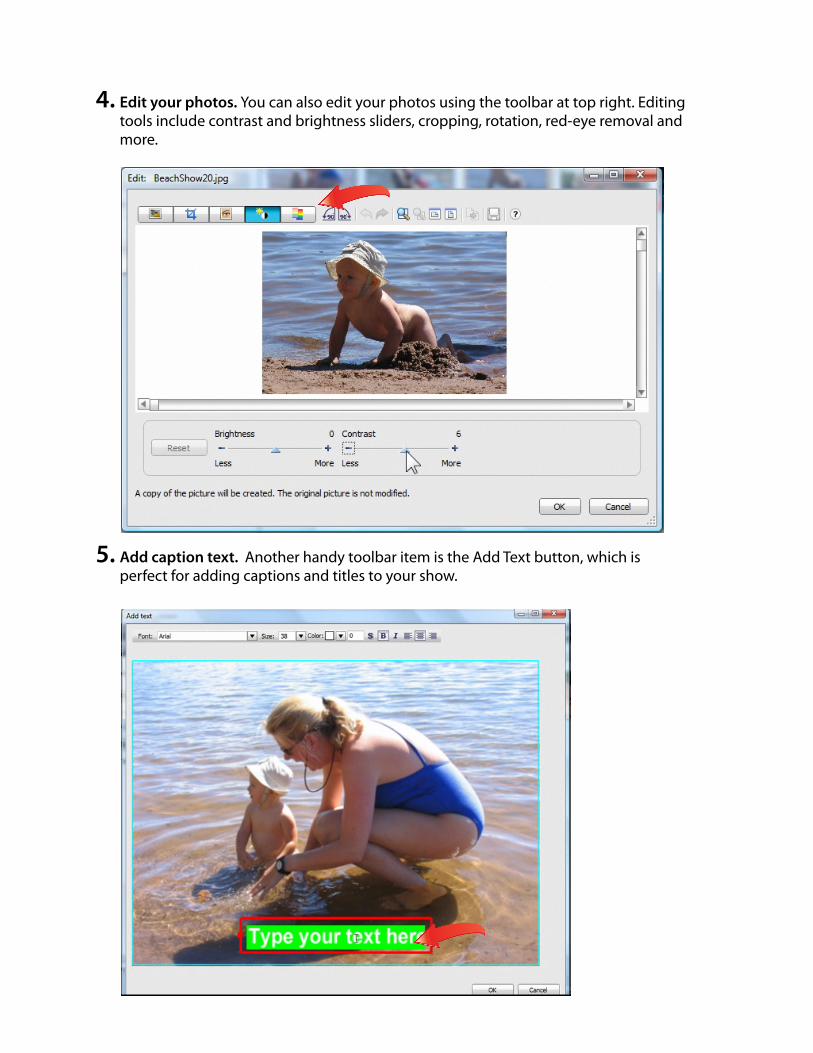
4. Edit your photos. You can also edit your photos using the toolbar at top right. Editing tools include contrast and brightness sliders, cropping, rotation, red-eye removal and more.
5. Add caption text. Another handy toolbar item is the Add Text button, which is perfect for adding captions and titles to your show.
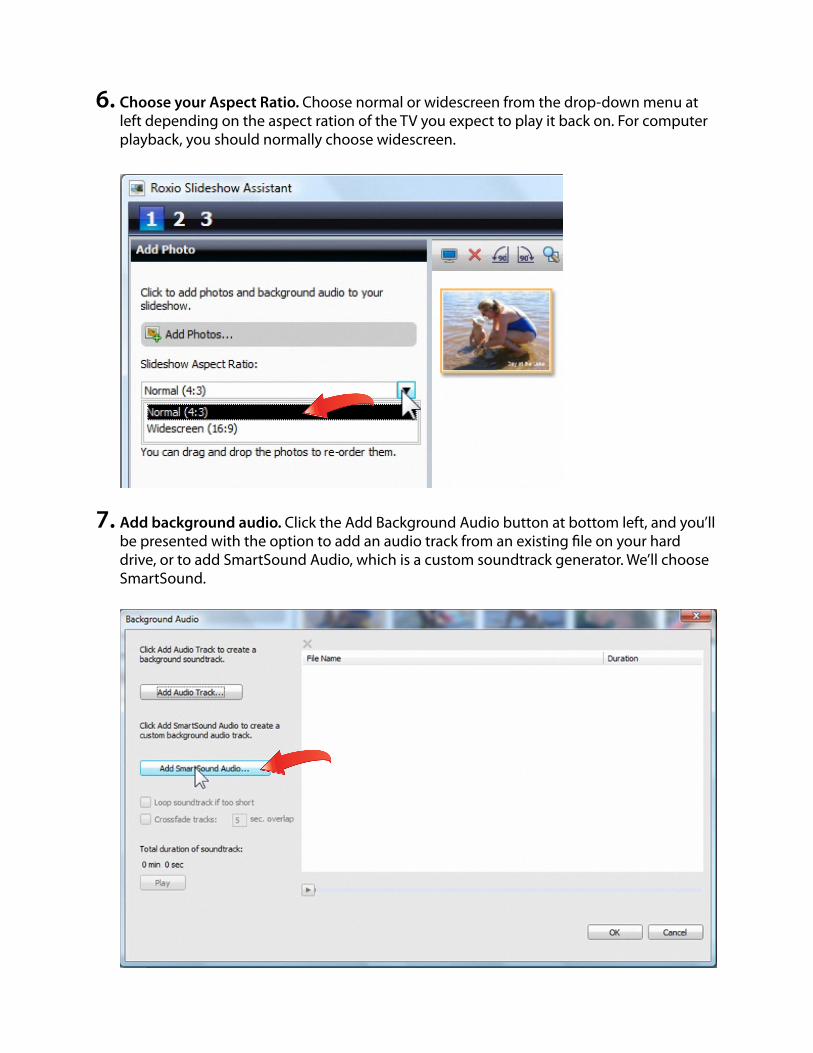
6. Choose your Aspect Ratio. Choose normal or widescreen from the drop-down menu at left depending on the aspect ration of the TV you expect to play it back on. For computer playback, you should normally choose widescreen.
7. Add background audio. Click the Add Background Audio button at bottom left, and you’ll be presented with the option to add an audio track from an existing !le on your hard drive, or to add SmartSound Audio, which is a custom soundtrack generator. We’ll choose SmartSound.
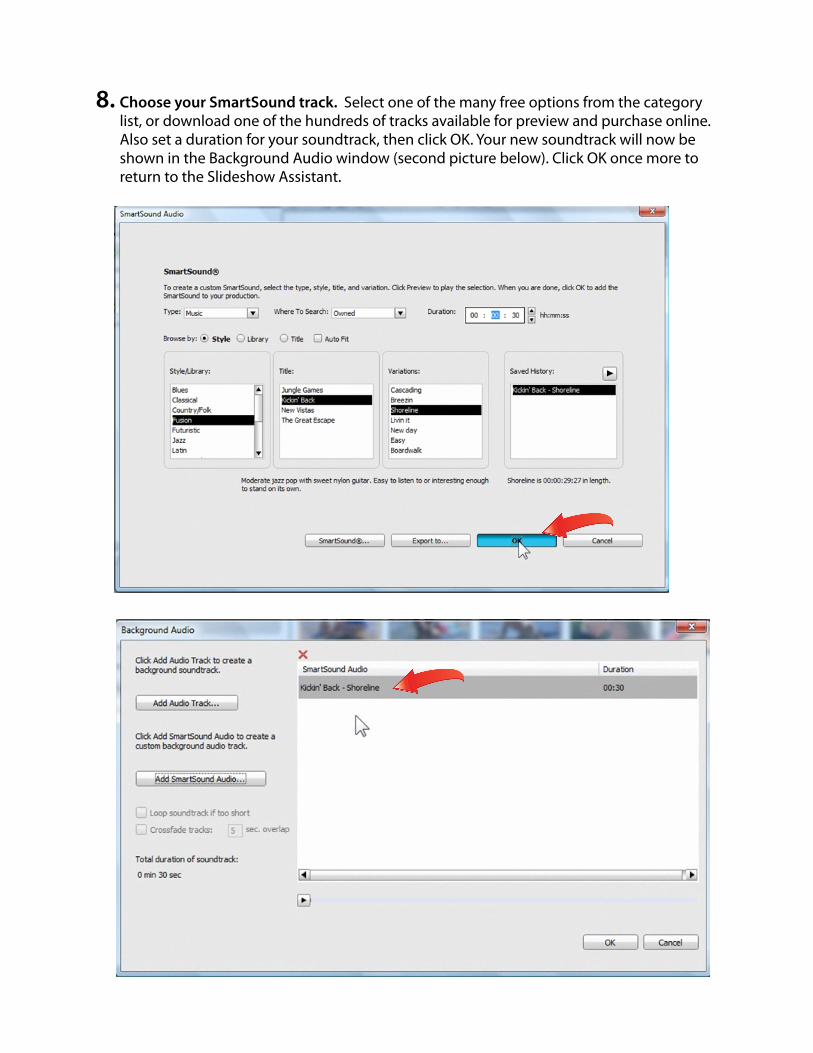
8. Choose your SmartSound track. Select one of the many free options from the category list, or download one of the hundreds of tracks available for preview and purchase online. Also set a duration for your soundtrack, then click OK. Your new soundtrack will now be shown in the Background Audio window (second picture below). Click OK once more to return to the Slideshow Assistant.
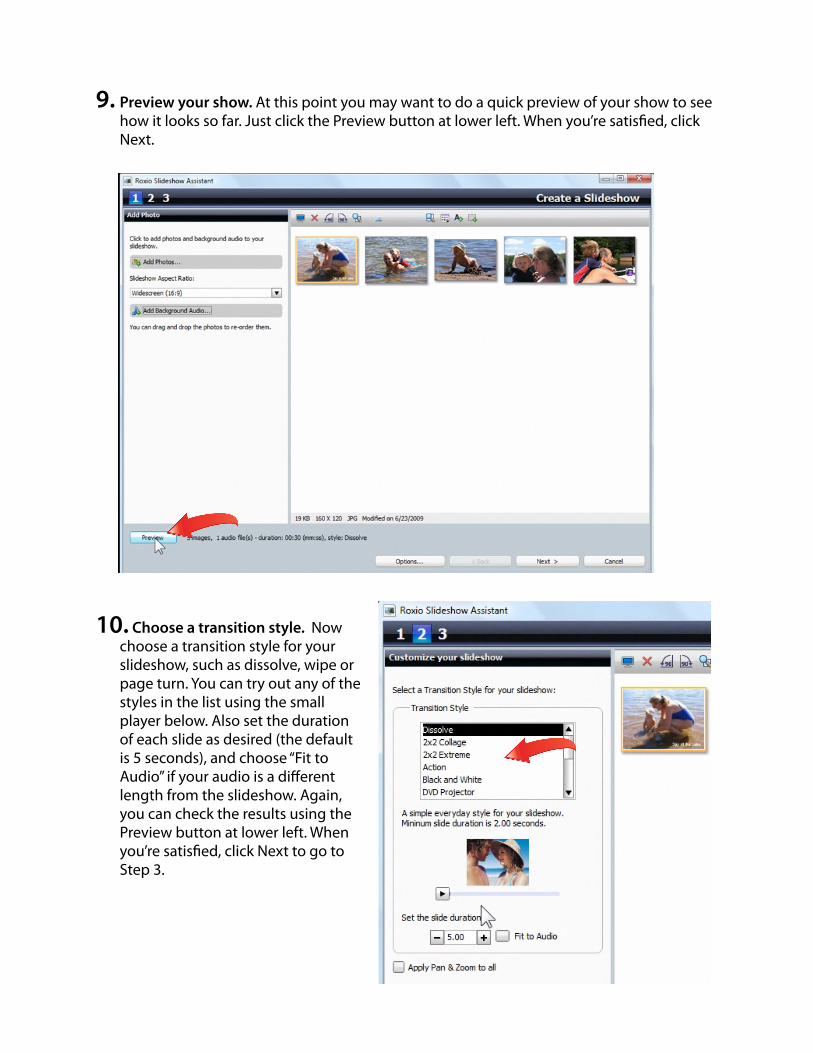
9. Preview your show. At this point you may want to do a quick preview of your show to see how it looks so far. Just click the Preview button at lower left. When you’re satis!ed, click Next.
10. Choose a transition style. Now choose a transition style for your slideshow, such as dissolve, wipe or page turn. You can try out any of the styles in the list using the small player below. Also set the duration of each slide as desired (the default is 5 seconds), and choose “Fit to Audio” if your audio is a different length from the slideshow. Again, you can check the results using the Preview button at lower left. When you’re satis!ed, click Next to go to Step 3.
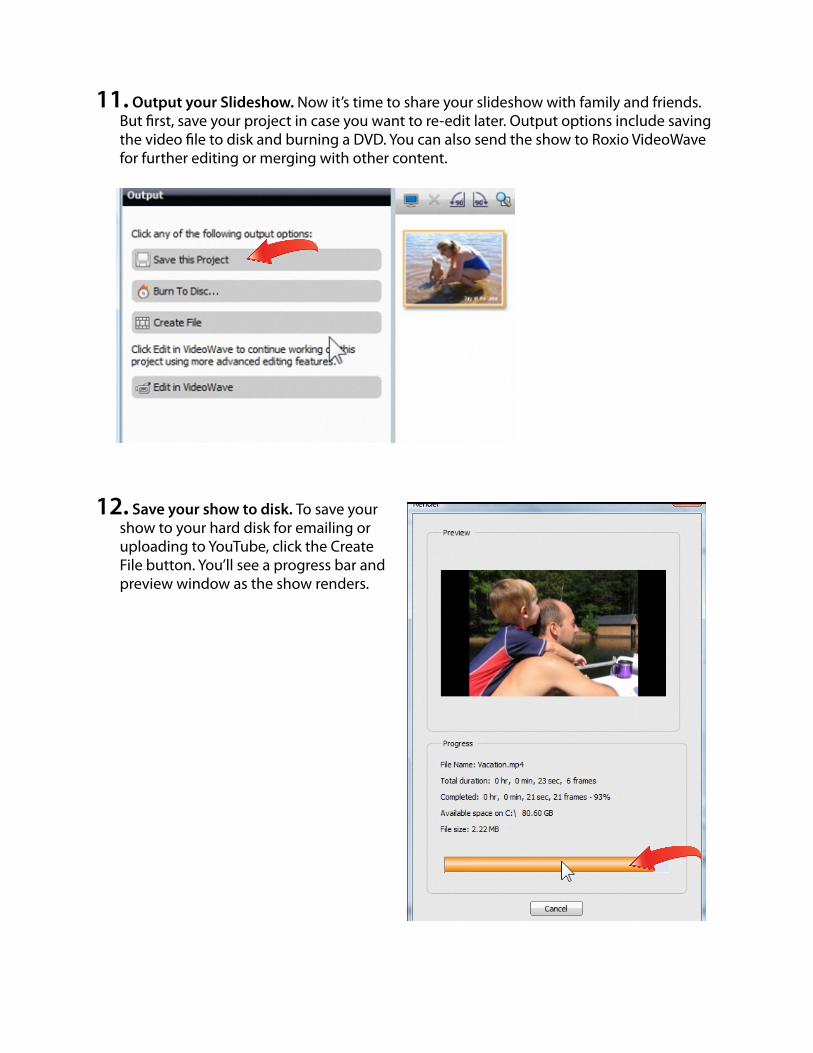
11. Output your Slideshow. Now it’s time to share your slideshow with family and friends. But !rst, save your project in case you want to re-edit later. Output options include saving the video !le to disk and burning a DVD. You can also send the show to Roxio VideoWave for further editing or merging with other content.
12. Save your show to disk. To save your show to your hard disk for emailing or uploading to YouTube, click the Create File button. You’ll see a progress bar and preview window as the show renders.
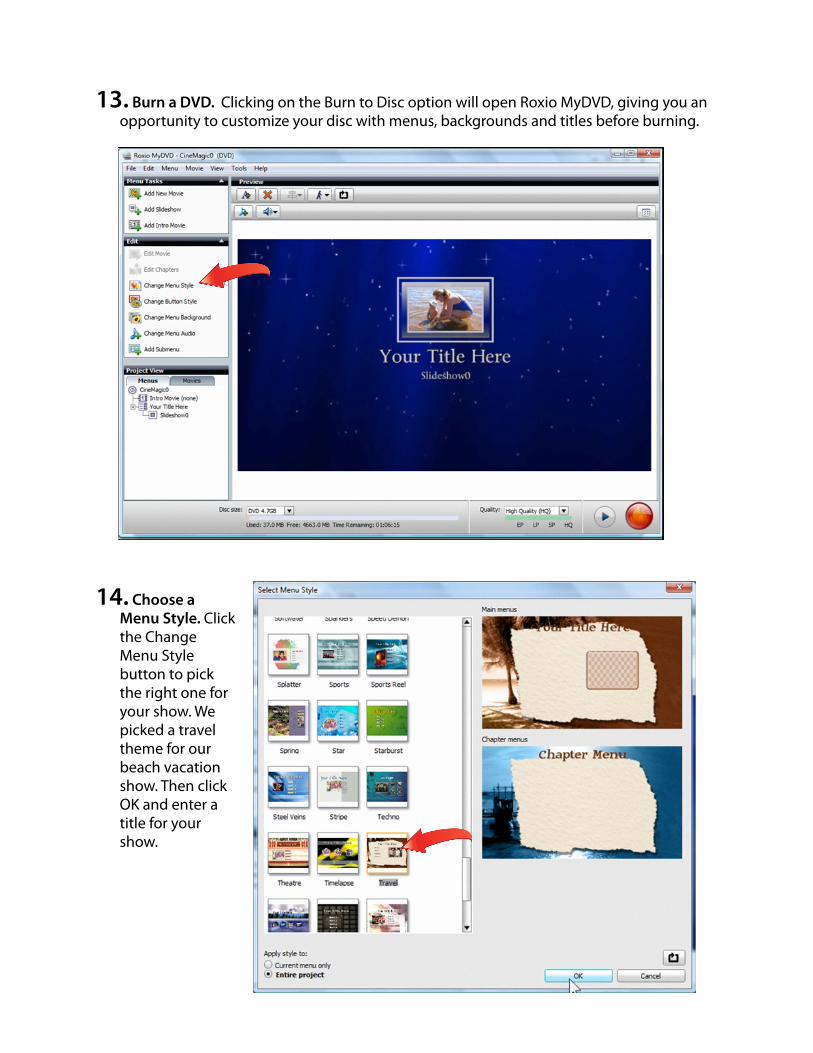
13. Burn a DVD. Clicking on the Burn to Disc option will open Roxio MyDVD, giving you an opportunity to customize your disc with menus, backgrounds and titles before burning.
14. Choose a Menu Style. Click the Change Menu Style button to pick the right one for your show. We picked a travel theme for our beach vacation show. Then click OK and enter a title for your show.
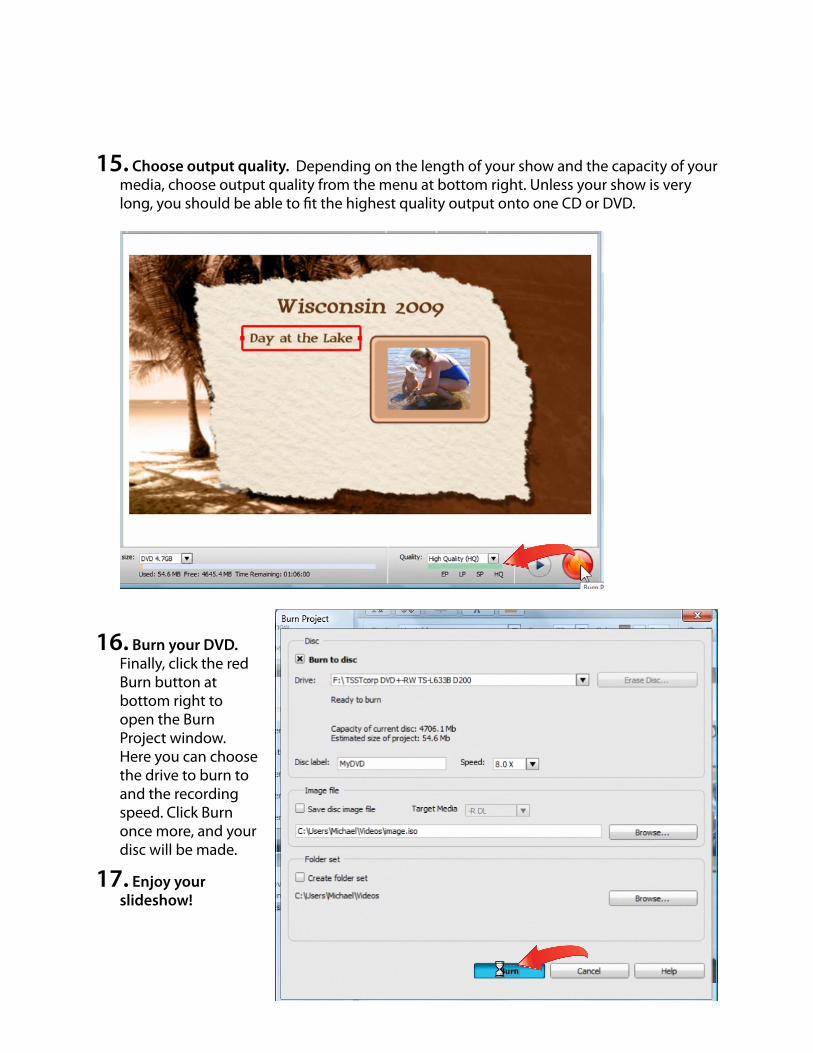
15. Choose output quality. Depending on the length of your show and the capacity of your media, choose output quality from the menu at bottom right. Unless your show is very long, you should be able to !t the highest quality output onto one CD or DVD.
16. Burn your DVD. Finally, click the red Burn button at bottom right to open the Burn Project window. Here you can choose the drive to burn to and the recording speed. Click Burn once more, and your disc will be made.
17. Enjoy your slideshow!