Create a New Year’s Eve Invitation - Corel Corporation · Create a New Year’s Eve Invitation...
5
There’s no better way to ring in the New Year than with a party! You can make this year’s party extra special by creating your own invitations. With Paint Shop Pro Studio it’s so easy to create these invites, you can use all the time and money you save to cook up some extra goodies for your party. Best of all, once you see how fun it is to create your own invitations you can make them for any party you throw. Create a New Year’s Eve Invitation What you’ll need: Paint Shop ™ Pro ® Studio When you complete this tutorial, you’ll be able to: Add a new background color to an image Use Picture Frames Use Text Create a fun invitation www.jasc.com
-
Upload
vuongnguyet -
Category
Documents
-
view
218 -
download
0
Transcript of Create a New Year’s Eve Invitation - Corel Corporation · Create a New Year’s Eve Invitation...
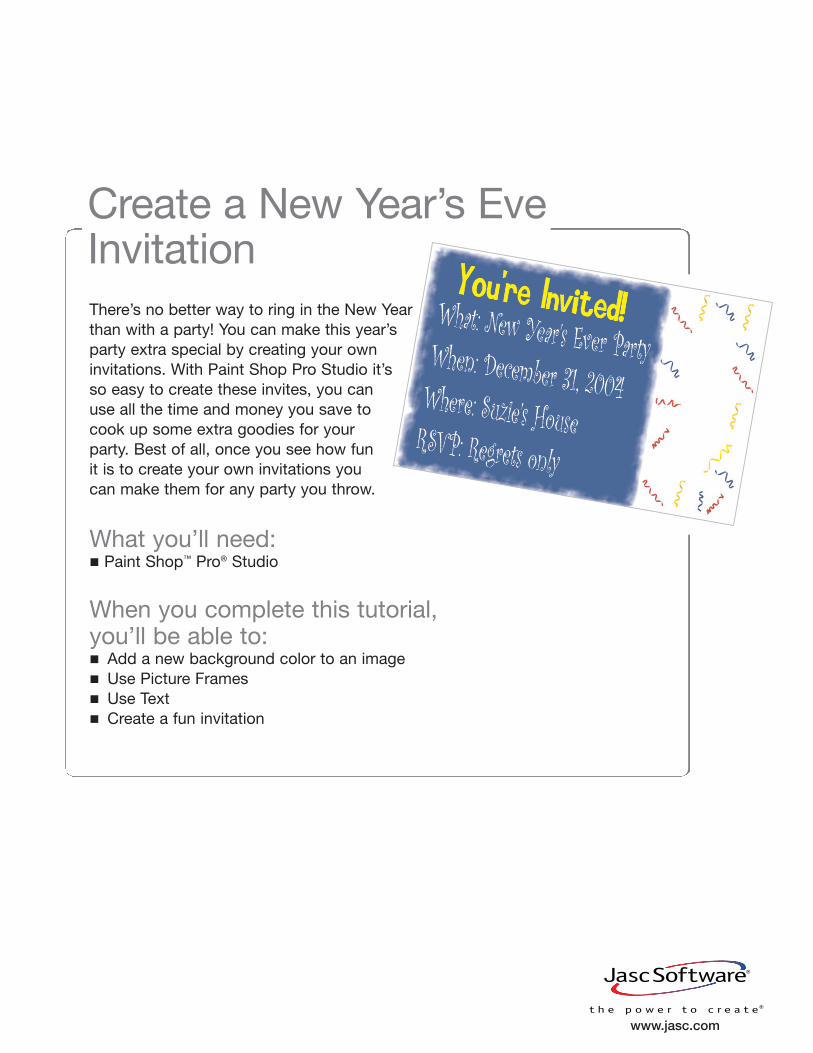
There’s no better way to ring in the New Yearthan with a party! You can make this year’sparty extra special by creating your owninvitations. With Paint Shop Pro Studio it’sso easy to create these invites, you can use all the time and money you save tocook up some extra goodies for yourparty. Best of all, once you see how fun it is to create your own invitations youcan make them for any party you throw.
Create a New Year’s EveInvitation
What you’ll need:� Paint Shop™ Pro® Studio
When you complete this tutorial, you’ll be able to:� Add a new background color to an image� Use Picture Frames� Use Text� Create a fun invitation
www.jasc.com
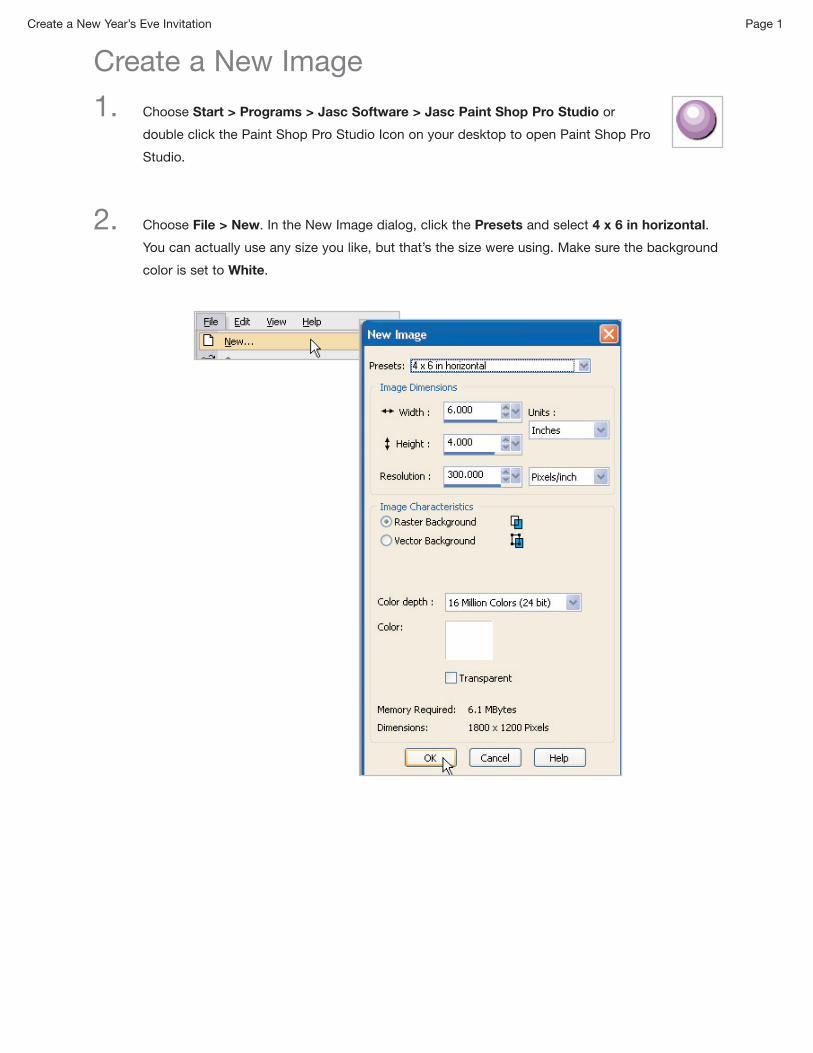
Create a New Year’s Eve Invitation Page 1
Create a New Image
1. Choose Start > Programs > Jasc Software > Jasc Paint Shop Pro Studio or
double click the Paint Shop Pro Studio Icon on your desktop to open Paint Shop Pro
Studio.
2. Choose File > New. In the New Image dialog, click the Presets and select 4 x 6 in horizontal.
You can actually use any size you like, but that’s the size were using. Make sure the background
color is set to White.
Create a New Year’s Eve Invitation Page 2
Add a Background Color
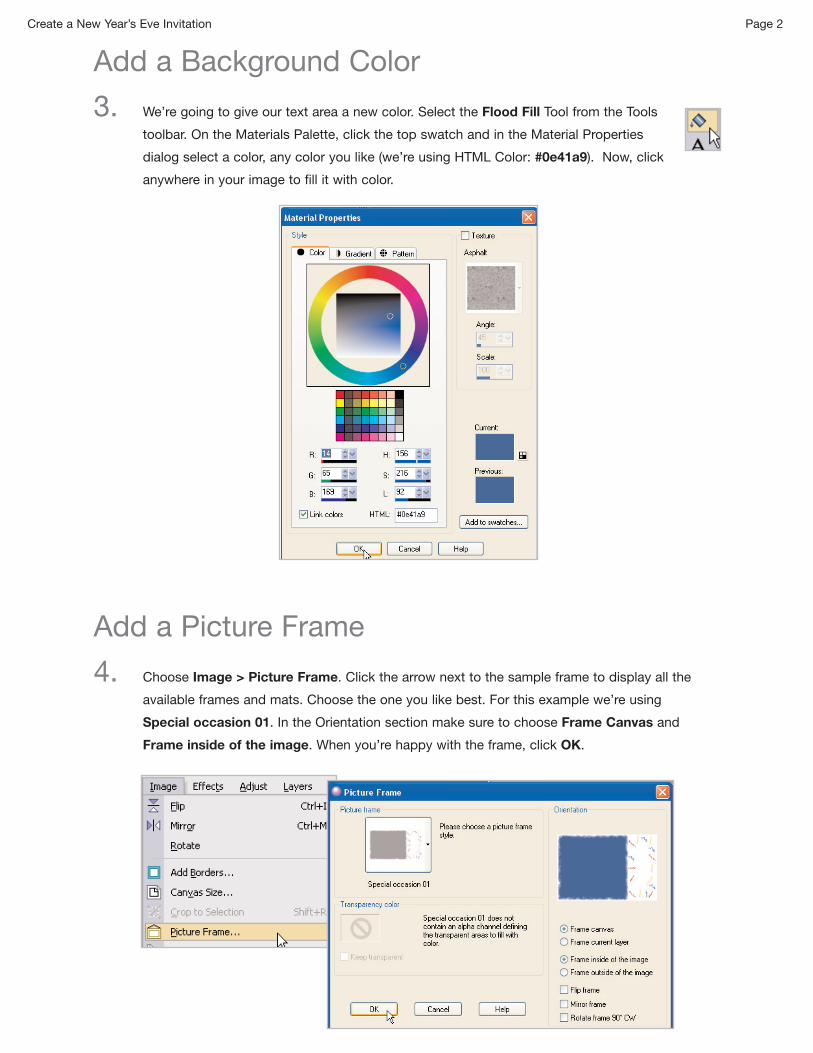
3. We’re going to give our text area a new color. Select the Flood Fill Tool from the Tools
toolbar. On the Materials Palette, click the top swatch and in the Material Properties
dialog select a color, any color you like (we’re using HTML Color: #0e41a9). Now, click
anywhere in your image to fill it with color.
Add a Picture Frame
4. Choose Image > Picture Frame. Click the arrow next to the sample frame to display all the
available frames and mats. Choose the one you like best. For this example we’re using
Special occasion 01. In the Orientation section make sure to choose Frame Canvas and
Frame inside of the image. When you’re happy with the frame, click OK.
Create a New Year’s Eve Invitation Page 3
Add Text
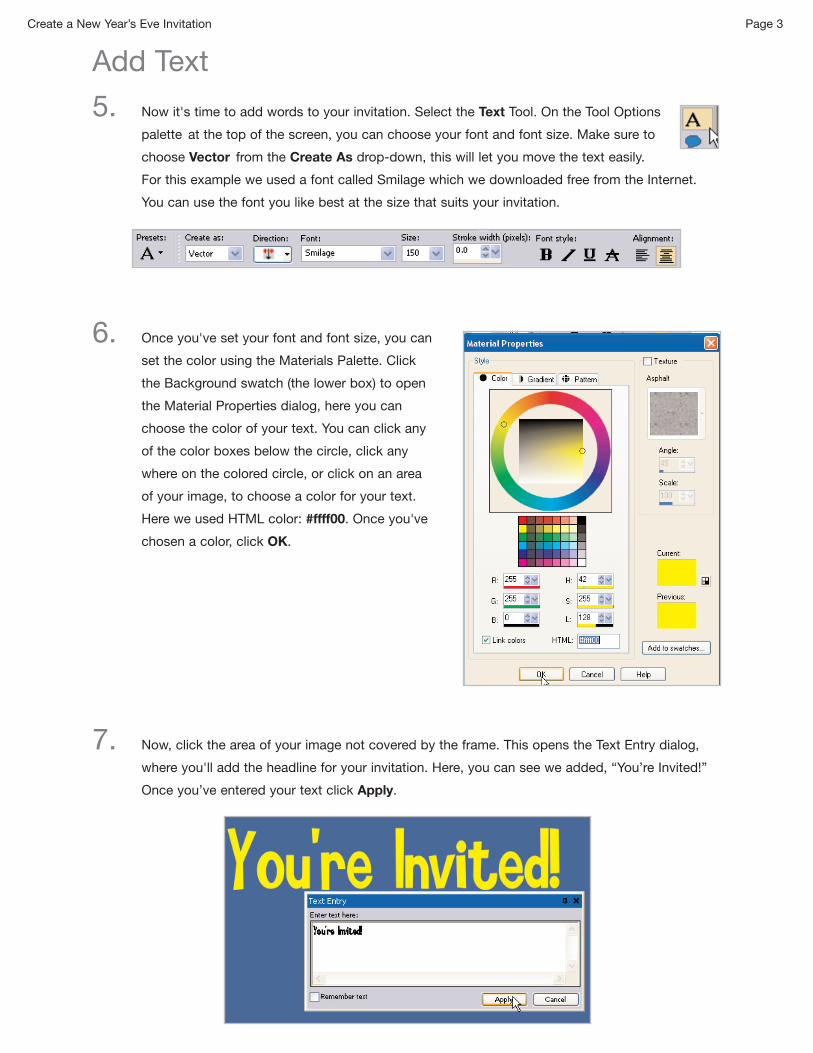
5. Now it's time to add words to your invitation. Select the Text Tool. On the Tool Options
palette at the top of the screen, you can choose your font and font size. Make sure to
choose Vector from the Create As drop-down, this will let you move the text easily.
For this example we used a font called Smilage which we downloaded free from the Internet.
You can use the font you like best at the size that suits your invitation.
6. Once you've set your font and font size, you can
set the color using the Materials Palette. Click
the Background swatch (the lower box) to open
the Material Properties dialog, here you can
choose the color of your text. You can click any
of the color boxes below the circle, click any
where on the colored circle, or click on an area
of your image, to choose a color for your text.
Here we used HTML color: #ffff00. Once you've
chosen a color, click OK.
7. Now, click the area of your image not covered by the frame. This opens the Text Entry dialog,
where you'll add the headline for your invitation. Here, you can see we added, “You’re Invited!”
Once you’ve entered your text click Apply.
Create a New Year’s Eve Invitation Page 4
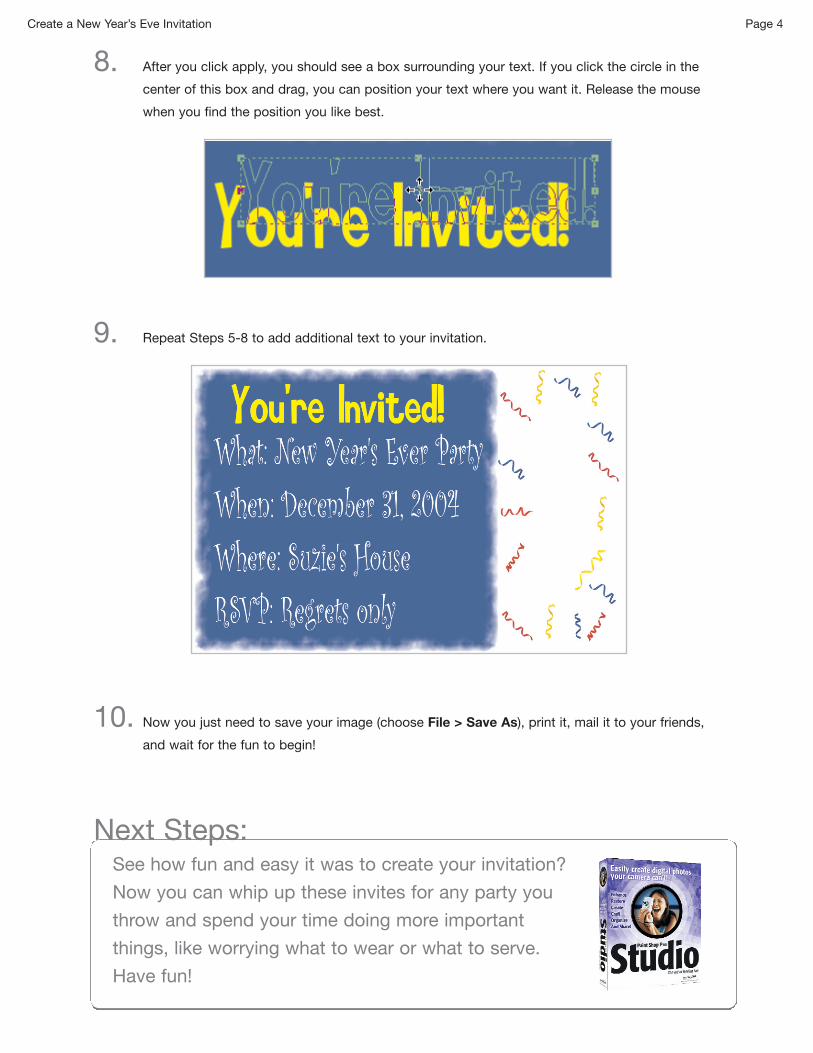
8. After you click apply, you should see a box surrounding your text. If you click the circle in the
center of this box and drag, you can position your text where you want it. Release the mouse
when you find the position you like best.
9. Repeat Steps 5-8 to add additional text to your invitation.
10. Now you just need to save your image (choose File > Save As), print it, mail it to your friends,
and wait for the fun to begin!
Next Steps:See how fun and easy it was to create your invitation?
Now you can whip up these invites for any party you
throw and spend your time doing more important
things, like worrying what to wear or what to serve.
Have fun!