Core Connect® I - CenturyLink
7
Core Connect ® I Business Class Data & Voice QUICK START GUIDE
Transcript of Core Connect® I - CenturyLink

Core Connect® IBusiness Class Data & Voice
QUICK START GUIDE

Welcome to Core Connect
* CenturyLink™ High-Speed Internet network reliability based on current network availability statistics. Individual experiences will vary.
This guide is designed to help you get your new services up and running quickly. If you have any questions whatsoever, we’re here to help! Call 1 800-238-5100, and if you haven’t done so already, please take advantage of your FREE Application Activation session (see Step 2 below to schedule your appointment).
Your CORE CONNECT® 1 package includes simply everything you need for affordable business-class connectivity. UNLIMITED VOICE
• Your phone line• Unlimited Local and
Domestic Long Distance• Business Voice Mail• Choice of 15 calling features
you can activate anytime
PAGES
8-11
DISCOUNTS & EXTRAS• Discounts on Internet
speed upgrades and additional phone lines
• Free Activation Session with the technical support team
DATA SERVICES• Domain names, Microsoft Exchange e-mail, webmail,
calendars and more• Website tools and hosting• Domain name registration• Online data backup• Internet security tools and filters• Fax over E-mail
PAGES
4-7
HIGH-SPEED INTERNET• Speeds up to 7 Mbps included,
upgradeable to 40 Mbps (in some areas).
• 99.9% network reliability*• 24x7 technical support
PAGE
3
CENTURYLINK™ HIGH-SPEED INTERNET IS THE KEY TO YOUR CONNECTIONS
If you have not already had a CenturyLink technician install your service, and want to do it yourself:
• To connect your service, look for installation instructions in the kit you receive in the mail.
• Follow the step-by-step instructions.
• You will be asked to set up a master user name ([email protected]) and password that you’ll use later. You’ll also need to make note of the CenturyLink ID that’s associated with your modem.
• If you are transferring service from another provider or using a non-CenturyLink modem, the CD will give you a phone number to call for high-speed Internet assistance.
Core Connect 1 includes a standard speed tier of up to 7 Mbps. Need more speed? Call us to upgrade to up to 40 Mbps (in select areas).
LEARN HOW TO SET UP AND USE YOUR DATA SERVICES
During this complimentary telephone consultation, a member of our Technology Support Team will guide you through the setup of all the Data Services included with Core Connect. Whether you’re tech-savvy or not, this session is the easiest way to get everything set up properly for the unique needs of your business. If you were not scheduled for an Application Activation when you placed your order, we recommend you do so now.
• Please visit http://schedule.centurylinkbusinessemail.com to schedule your appointment online.
• You will need to be online at your computer for the appointment, which will take about one hour. You and the consultant will walk through each step together, right on your computer screen.
1CONNECT YOUR
HIGH-SPEED INTERNET SERVICE
2SCHEDULE YOUR
FREE APPLICATION ACTIVATION
Let’s get started:
1 800-238-5100 / centurylink.com/bizwelcome Core Connect 1 Quick Start Guide 3
Two vanity Exchange mailboxes that use your domain name ([email protected]) are included. Additional vanity addresses are $8.95 each.
The functionality of Microsoft Outlook allows you to have synchronized e-mail, shared calendars and contacts no matter where you are or what computer you’re using. If you don’t want to use Outlook for your e-mail, call us for help in setting that up.
Ten generic Web Mail addresses ([email protected]) are included. Assign them however you wish. Access Web Mail anytime, anywhere, as long as you have an Internet connection and a browser.
Data Services• LogintotheSiteControlgatewayathttp://www.centurylinkoffice.net
• Use the master e-mail address set up during your high-speed Internet installation ([email protected]) and its case-sensitive password.
• At the Portal screen, please review the terms of use listed. Click the two boxes to agree, then Continue.
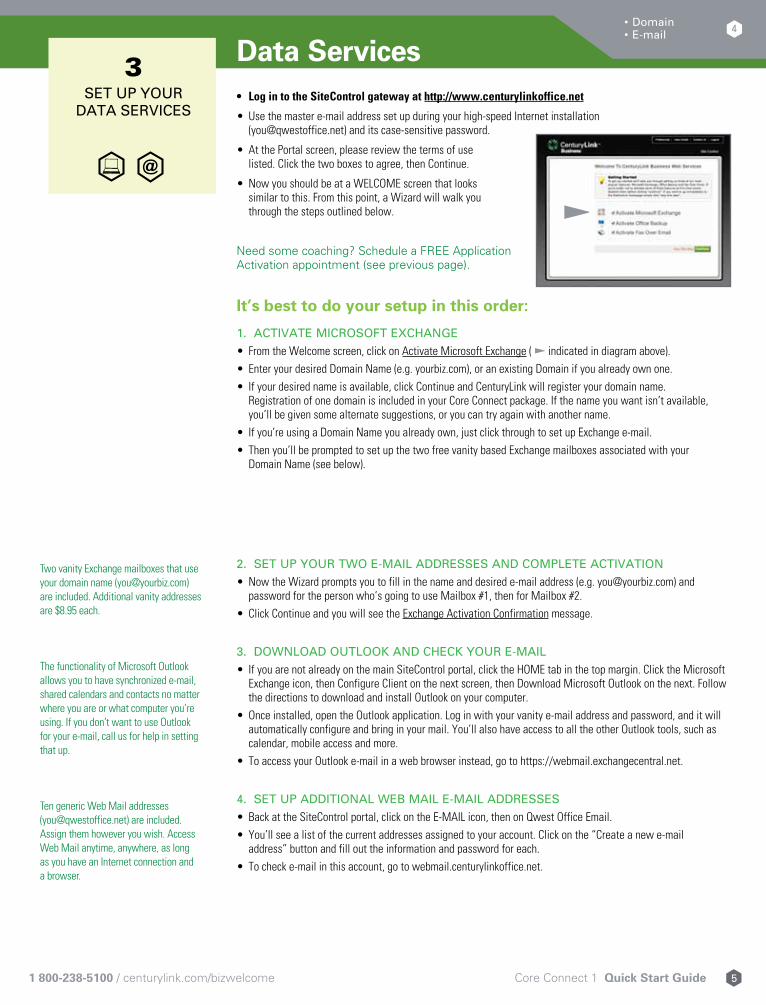
• Now you should be at a WELCOME screen that looks similar to this. From this point, a Wizard will walk you through the steps outlined below.
Need some coaching? Schedule a FREE Application Activation appointment (see previous page).
It’s best to do your setup in this order:
1. ACTIVATE MICROSOFT EXCHANGE• From the Welcome screen, click on Activate Microsoft Exchange ( l indicated in diagram above).
• Enter your desired Domain Name (e.g. yourbiz.com), or an existing Domain if you already own one.
• If your desired name is available, click Continue and CenturyLink will register your domain name. Registration of one domain is included in your Core Connect package. If the name you want isn’t available, you’ll be given some alternate suggestions, or you can try again with another name.
• If you’re using a Domain Name you already own, just click through to set up Exchange e-mail.
• Then you’ll be prompted to set up the two free vanity based Exchange mailboxes associated with your Domain Name (see below).
2. SET UP YOUR TWO E-MAIL ADDRESSES AND COMPLETE ACTIVATION• Now the Wizard prompts you to fill in the name and desired e-mail address (e.g. [email protected]) and
password for the person who’s going to use Mailbox #1, then for Mailbox #2.
• Click Continue and you will see the Exchange Activation Confirmation message.
3. DOWNLOAD OUTLOOK AND CHECK YOUR E-MAIL• If you are not already on the main SiteControl portal, click the HOME tab in the top margin. Click the Microsoft
Exchange icon, then Configure Client on the next screen, then Download Microsoft Outlook on the next. Follow the directions to download and install Outlook on your computer.
• Once installed, open the Outlook application. Log in with your vanity e-mail address and password, and it will automatically configure and bring in your mail. You’ll also have access to all the other Outlook tools, such as calendar, mobile access and more.
• To access your Outlook e-mail in a web browser instead, go to https://webmail.exchangecentral.net.
4. SET UP ADDITIONAL WEB MAIL E-MAIL ADDRESSES • Back at the SiteControl portal, click on the E-MAIL icon, then on Qwest Office Email.
• You’ll see a list of the current addresses assigned to your account. Click on the “Create a new e-mail address” button and fill out the information and password for each.
• To check e-mail in this account, go to webmail.centurylinkoffice.net.
3SET UP YOUR
DATA SERVICES
1 800-238-5100 / centurylink.com/bizwelcome Core Connect 1 Quick Start Guide 5
4•Domain•E-mail
l
Backup your important data to a remote location online. Retrieve and restore files at any time. Your package includes one user with up to 2GB storage capacity.
Schedule a convenient time (such as after hours) when backup can run automatically and then shut down your computer.
Send up to 20 outgoing 8.5 x 11” pages a month from your computer — no fax machine or extra phone line required!
Core Connect includes hosting for a 10-page site with up to 5GB of storage. Already paying to have a site hosted elsewhere? Ask how to transfer the hosting to your Core Connect account and save. Advanced web tools such as databases, FTP access and more are also available in the Website section.
Do not use the Domain Name tab to set up your primary domain name or you could be charged for it! Go to Step 1 on page 4 and use the Microsoft Exchange tab to receive the domain name registration that’s included in your package.
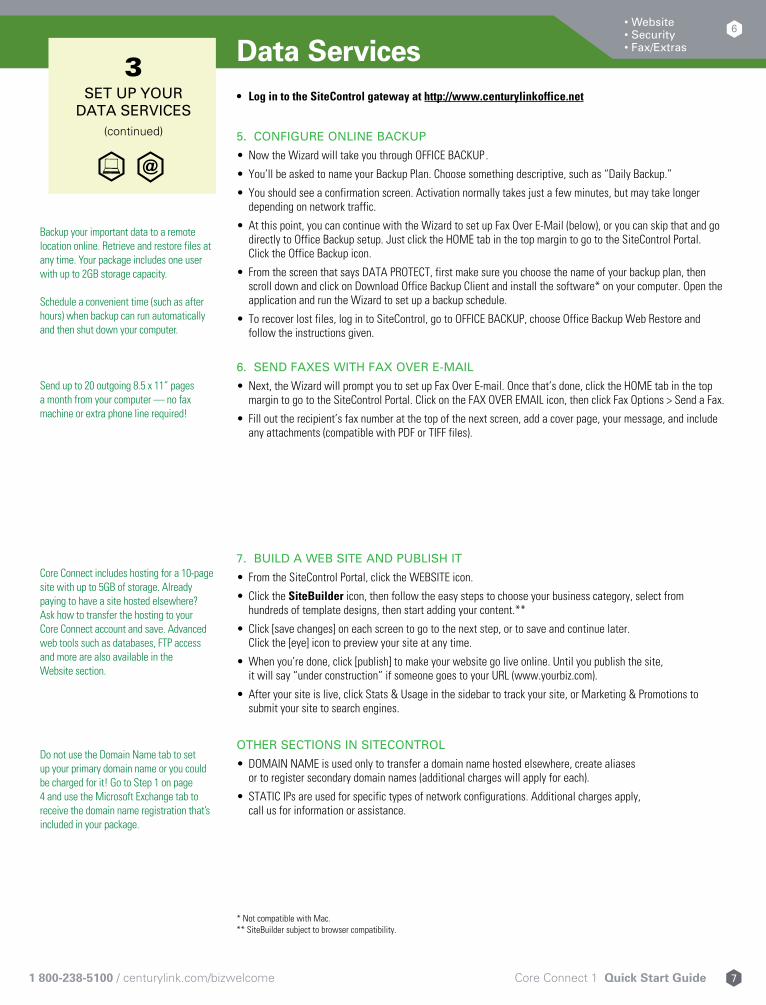
Data Services• LogintotheSiteControlgatewayathttp://www.centurylinkoffice.net
5. CONFIGURE ONLINE BACKUP
• Now the Wizard will take you through OFFICE BACKUP.
• You’ll be asked to name your Backup Plan. Choose something descriptive, such as “Daily Backup.”
• You should see a confirmation screen. Activation normally takes just a few minutes, but may take longer depending on network traffic.
• At this point, you can continue with the Wizard to set up Fax Over E-Mail (below), or you can skip that and go directly to Office Backup setup. Just click the HOME tab in the top margin to go to the SiteControl Portal. Click the Office Backup icon.
• From the screen that says DATA PROTECT, first make sure you choose the name of your backup plan, then scroll down and click on Download Office Backup Client and install the software* on your computer. Open the application and run the Wizard to set up a backup schedule.
• To recover lost files, log in to SiteControl, go to OFFICE BACKUP, choose Office Backup Web Restore and follow the instructions given.
6. SEND FAXES WITH FAX OVER E-MAIL
• Next, the Wizard will prompt you to set up Fax Over E-mail. Once that’s done, click the HOME tab in the top margin to go to the SiteControl Portal. Click on the FAX OVER EMAIL icon, then click Fax Options > Send a Fax.
• Fill out the recipient’s fax number at the top of the next screen, add a cover page, your message, and include any attachments (compatible with PDF or TIFF files).
7. BUILD A WEB SITE AND PUBLISH IT
• From the SiteControl Portal, click the WEBSITE icon.
• Click the SiteBuilder icon, then follow the easy steps to choose your business category, select from hundreds of template designs, then start adding your content.**
• Click [save changes] on each screen to go to the next step, or to save and continue later. Click the [eye] icon to preview your site at any time.
• When you’re done, click [publish] to make your website go live online. Until you publish the site, it will say “under construction” if someone goes to your URL (www.yourbiz.com).
• After your site is live, click Stats & Usage in the sidebar to track your site, or Marketing & Promotions to submit your site to search engines.
OTHER SECTIONS IN SITECONTROL
• DOMAIN NAME is used only to transfer a domain name hosted elsewhere, create aliases or to register secondary domain names (additional charges will apply for each).
• STATIC IPs are used for specific types of network configurations. Additional charges apply, call us for information or assistance.
* Not compatible with Mac.** SiteBuilder subject to browser compatibility.
3SET UP YOUR
DATA SERVICES(continued)
1 800-238-5100 / centurylink.com/bizwelcome Core Connect 1 Quick Start Guide 7
6•Website•Security•Fax/Extras

Business Voice ServicesYour Core Connect package includes your telephone line, unlimited local and nationwide long-distance calls, and your choice of up to 15 calling features. Add or change features anytime at no additional charge.
This Quick Start Guide includes brief instructions for the features our customers choose most often. To download in-depth instructions for all CenturyLink features, go to centurylink.com/userguides.
BUSINESS VOICE MAIL
You must set up your voice mailbox before you can receive or listen to messages.
• From your business phone, press *98* or call the Retrieval Number shown on your welcome letter. Voice prompts will lead you through the following steps.
• Create your own Password, as a 4-15 digit number.
• Record a name to identify your Mailbox.
• Choose a Standard Greeting with your phone number or name, or record your own.
Tolistentoyourmessages:
• Call your voice mailbox (see left).
• You’ll hear how many messages you have. Follow the prompts to listen to your messages. You must erase, save or skip each one before the next message will play.
• For more complete instructions and more advanced features, refer to the separate Business Voice Mail guide enclosed, or find it at centurylink.com/userguides in the Calling Features section.
* *98 message retrieval may not be available in all areas.
CALLER IDSee who’s calling before you pick up the phone. Your phone display shows the caller’s listed name and number after the first complete ring (if available). Caller ID includes Anonymous Call Rejection to reject calls from people who block their numbers. To turn it on:• Press *77, then hang up. Your phone won’t even ring if someone calls from a blocked line.• Blocked callers hear a recording that tells them that you do not accept anonymous calls.• To turn off Anonymous Call Rejection and allow all calls to come through, press *87.
CALL FORWARDINGWhen you want all of your incoming calls to go to a different phone number:• Pick up the receiver and press *72. You must be using the phone at your business. • When the normal dial tone resumes, dial the number you want your calls forwarded to.** • When answered, hang up. If it’s busy, or no one answers, repeat the first two steps.• To turn off Call Forwarding, press *73.
TosetupRemoteAccessForwarding:• Call the Update Center (see page 11), choose Remote Access Forwarding from the Main Menu and follow the
prompts to enter the number** to which calls will be forwarded. • To turn off Remote Access Forwarding, call the Update Center again and follow the prompts.** Long-distance charges will apply for calls forwarded from your office to a long-distance number.
CALL WAITING• When another call is coming in, you’ll hear a special tone, and/or you’ll see the second caller’s name on
Caller ID. To answer the second call, press . Press again to switch back.
TotemporarilyturnoffCallWaitingwhenyoudon’twanttobeinterrupted:• Before you dial: press *70 and listen for three brief tones, then a normal dial tone.• During a call: press , listen for a normal dial tone, then press *70, then again
to continue talking. Call Waiting will be restored when you hang up.
4SET UP VOICE MAIL
AND PHONE FEATURES
Three ways to access your mailbox:
From your business phone only:
• Call *98
From any touch-tone phone:
• Call your own phone number, press 7 when the greeting starts
• Call your Retrieval Number
When Unknown, Unavailable or Out of Area is displayed, it means the call is from an area where Caller ID is not available. Private or Anonymous indicate that the caller has blocked the number.
Call Forwarding can only be turned on from your business phone. If you are frequently away, and want to be able to turn forwarding on and off from any touch-tone phone, choose Remote Access Forwarding instead.
A short ring on your phone each time a call is forwarded reminds you Call Forwarding is on. You will not be able to answer calls at your business while it is.
1 800-238-5100 / centurylink.com/bizwelcome Core Connect 1 Quick Start Guide 9
8•VoiceMail•Calling Features

Any of these calling features are available as part of your phone plan. Change or add features anytime at no additional charge.
SELECTIVECALLWAITING/IDWhen you need to know only when certain callers are waiting, choose Selective Call Waiting/ID. Call the Update Center (see below) to set up your list of up to 25 phone numbers for your privileged callers.
LAST CALL RETURNTo find out the number who just called, press *69. Press 1 to automatically redial the number. Blocked numbers are not available.
CENTURYLINK 411TM DIRECTORY ASSISTANCEDial 411 to locate a phone number and/or address in the U.S. and Canada. Two requests per call, six calls per month included.
If you often use pay-per-use features such as Last Call Return and Directory Assistance, include them in your package and save.
CALL TRANSFERTo redirect a call to another number, click the receiver button or and listen for a new dial tone. Dial the other number, and when it’s answered, either hang up or stay on the line to announce the call. If the number is busy, unanswered, or the wrong number, press the button twice (pausing between) to return to the original call.
CUSTOM RINGINGIdentify certain incoming calls with a unique ring pattern. Call us to set this up.
DIAL LOCK®
Control your phone usage by blocking outgoing calls to long-distance numbers, pay-per-call (900) and international numbers. Go to the Update Center (see below) to set up or change your blocking parameters whenever you wish. You may also set up privileged bypass codes for certain callers.
UNISTAR®
Repairs to your inside telephone wire and jacks, handled by a skilled CenturyLink technician — at no extra cost to you. For service, call 1 800-573-1311.
UNLIMITED CALLINGYour best-in-class telephone service includes unlimited* local and nationwide long-distance calls. Economical long-distance plans for other countries and optional toll free service are available. Call for details.
Need more phone lines? Add more unlimited voice lines at a special Core Connect price.
Download in-depth instructions for all Business Voice Services at centurylink.com/userguides.
* Plus taxes, surcharges and fees, certain restrictions apply. Refer to separate sheet enclosed with this guide.
•VoiceFeatures•LongDistance•HintsMore Business Voice Services
10
CALLING THE CENTURYLINK UPDATE CENTER
Some calling features must be set up in the Update Center before you can use them.
• Call *78 from your business phone.
• The first time you call, enter the temporary security code 1234, then follow the prompts to set up your own code.
For your protection, the temporary code expires in 30 days. If you do not set up your permanent code within that time, call us to have the temporary security code reset.
• Once you set up a security code in the Update Center, you can use the same code for any CenturyLink feature on your account.
• After your security code is set, reach the Update Center either by calling *78 from your business phone or 1 888-(Your Area Code)-8052** from any phone.
• From the Main Menu, listen for the prompts and choose the feature you want to manage.
USING THE FLASH COMMAND
When the instructions say , you can use either the Flash key on your phone, or you can quickly press and release the switchhook instead — that’s the receiver or “hang up” button. Make sure you hear three short tones, followed by a continuous dial tone before proceeding to the next step.
** In Minnesota area codes 763 & 952, call 1 888-612-8052. In Iowa area code 641, call 1 888-515-8052. In Arizona area code 928, call 1 888-520-8052. In Oregon area code 971, call 1 888-503-8052. In Oregon area code 458, call 1 888-541-8052.
QUICK REFERENCE
Your CenturyLink calling features are easy to use with these simple commands and your touch-tone phone. Activate DeactivateAnonymous Call Rejection *77 *87
Call Forwarding *72 *73
Call Transfer --
Cancel Call Waiting -- *70
Last Call Return *69 *89
3-Way Calling --
Update Center *78 *78
Voice Mail Access *98 --
Helpful Hints
Flash =Switchhook
1 800-238-5100 / centurylink.com/bizwelcome Core Connect 1 Quick Start Guide 11
ResourcesMANAGE YOUR DATA SERVICES
www.centurylinkoffice.net
SCHEDULE AN ACTIVATION APPLICATION APPOINTMENT
schedule.centurylinkbusinessemail.com
MORE HELP AND TUTORIALS FOR SITECONTROL
help.centurylinkoffice.com
BUSINESS VOICE SERVICES USER GUIDES
centurylink.com/userguides
MANAGE YOUR CENTURYLINK ACCOUNT ONLINE
centurylink.com/sbcontrol
CUSTOMER ASSISTANCE
1 800-238-5100
24/7TECHSUPPORT
1 800-573-1311
©2011 CenturyLink, Inc. All rights reserved. All marks are the property of their respective owners. 8/11
High-Speed Internet Setup ......................3Application Activation..............................3Data Services Microsoft Exchange/Outlook ...............4 Domain Name Registration .................4 E-mail and Webmail ............................5 Online Backup ......................................6 Fax Over E-mail ....................................6 Build a Website ...................................7Business Voice Services Business Voice Mail ............................8 Caller ID ...............................................9 Call Forwarding....................................9 Call Waiting .........................................9 Other Voice Services .........................10Helpful Hints Update Center....................................11 Quick Reference.................................11
1 800-238-5100 / centurylink.com/bizwelcome Core Connect 1 Quick Start Guide 12