Copyright*byKnits4Kids2011*knits4kids.com/wp-content/uploads/2011/12/Star.pdf · ·...
5
Copyright by Knits4Kids 2011 StarShaped Baby Vest This pattern is a part of the most gorgeous free pattern collection from the international multilingual portal http://knits4kids.com . Knits4Kids is a platform for those looking for something special and unique and wants to spend money on the yarn and not on the patterns!!! This pattern is universal: you can make any size, adjust width/length without many computations; you can make a jacket, a tunic, a coat, a dress, a vest, etc. (see photos on the next pages). Material: for a 912 month old baby jacket (photo above) the total of 150 to 200 g of cotton yarn (50g=120m, such as Catania Cotton). You need 9 matching colors, like on the photo or any others you find. Crochet hook 3, one button. If you do not have 9 colors, you can use 3 or 4 by repeating them. The vest is worked as one piece from the top (neck opening) towards the bottom. The finished vest is added a row of picot along all edges.
Transcript of Copyright*byKnits4Kids2011*knits4kids.com/wp-content/uploads/2011/12/Star.pdf · ·...
Copyright by Knits4Kids 2011
Star-Shaped Baby Vest
This pattern is a part of the most gorgeous free pattern collection from the international multilingual portal http://knits4kids.com .
Knits4Kids is a platform for those looking for something special and unique and wants to spend money on the yarn and not on the patterns!!!
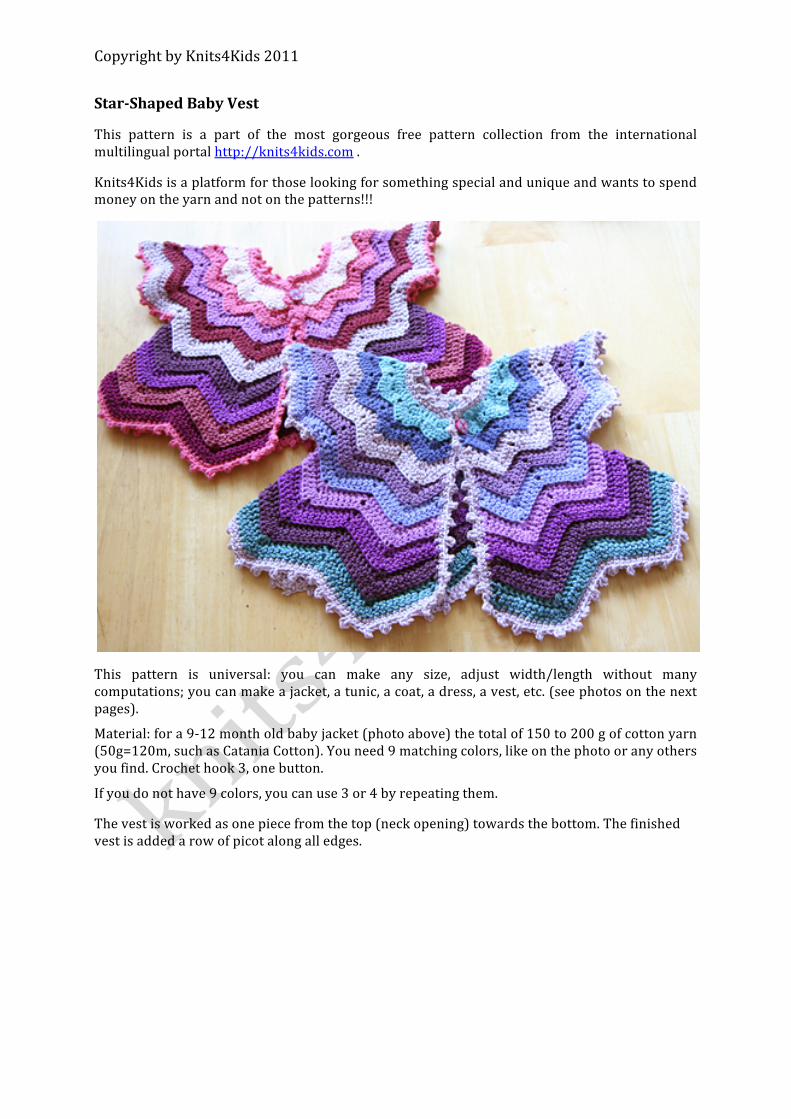
This pattern is universal: you can make any size, adjust width/length without many computations; you can make a jacket, a tunic, a coat, a dress, a vest, etc. (see photos on the next pages).
Material: for a 9-‐12 month old baby jacket (photo above) the total of 150 to 200 g of cotton yarn (50g=120m, such as Catania Cotton). You need 9 matching colors, like on the photo or any others you find. Crochet hook 3, one button.
If you do not have 9 colors, you can use 3 or 4 by repeating them.
The vest is worked as one piece from the top (neck opening) towards the bottom. The finished vest is added a row of picot along all edges.
Copyright by Knits4Kids 2011
Copyright by Knits4Kids 2011
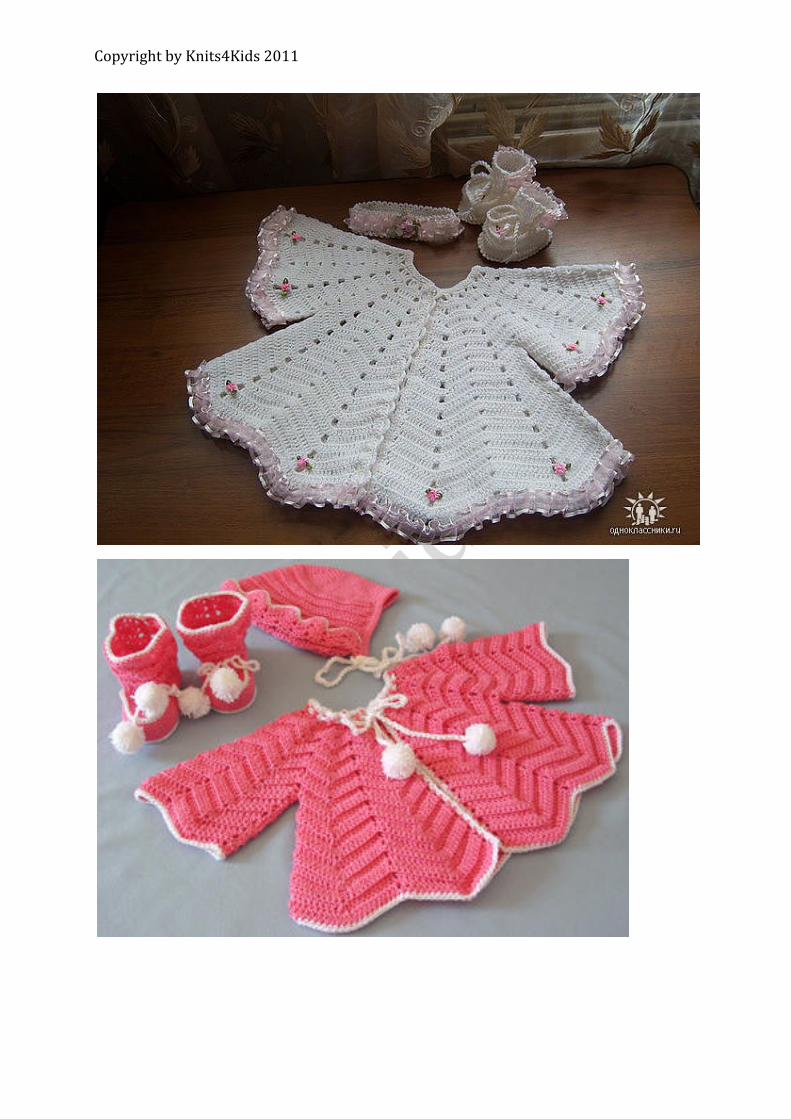
To get the right size, measure the desired total length of the neck opening, make a gauge of 10 dc and calculate how many stitches you need to chain for the first row. Since the vest consists of 14 corner patterns, round this number up to a number dividable by 14 without rest. So, a valid number could be 42, 56, 70, 84, etc.
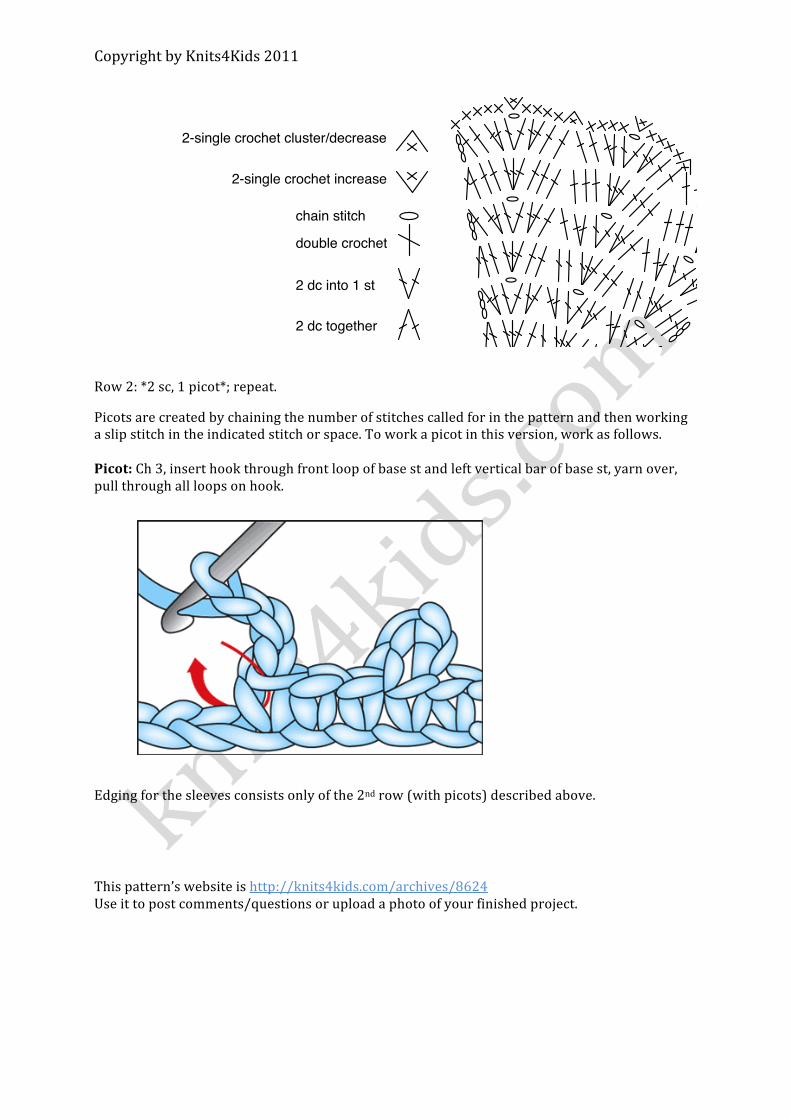
chain stitch
double crochet
2 dc into 1 st
2 dc together
Copyright by Knits4Kids 2011
The chart above shows the main pattern (3 repetitions). You need 14 repetitions (2x2 for 2 front parts + 4 for the back plus 2x3 for the sleeves.
With the 1st color, chain the desired number (suppose 56). Each row is started by ch3 and is finished be 2 dc together, as shown on the chart.
Each color is used for 2 rows, row 1 facing the front and row 2 facing the back of the work.
If you have 56 st in total, you have 4 st per each of the 14 corner patterns, so you can proceed according to row 1 of the chart.
If you have 84 st in total, you have 6 st per each of the 14 corner patterns, so your first row would bet he 3rd row of the chart.
If you have 70 st in total, you have 5 st per each of the 14 corner patterns, so your first row would bet he 2nd row of the chart.
Make 2 rows and fasten off.
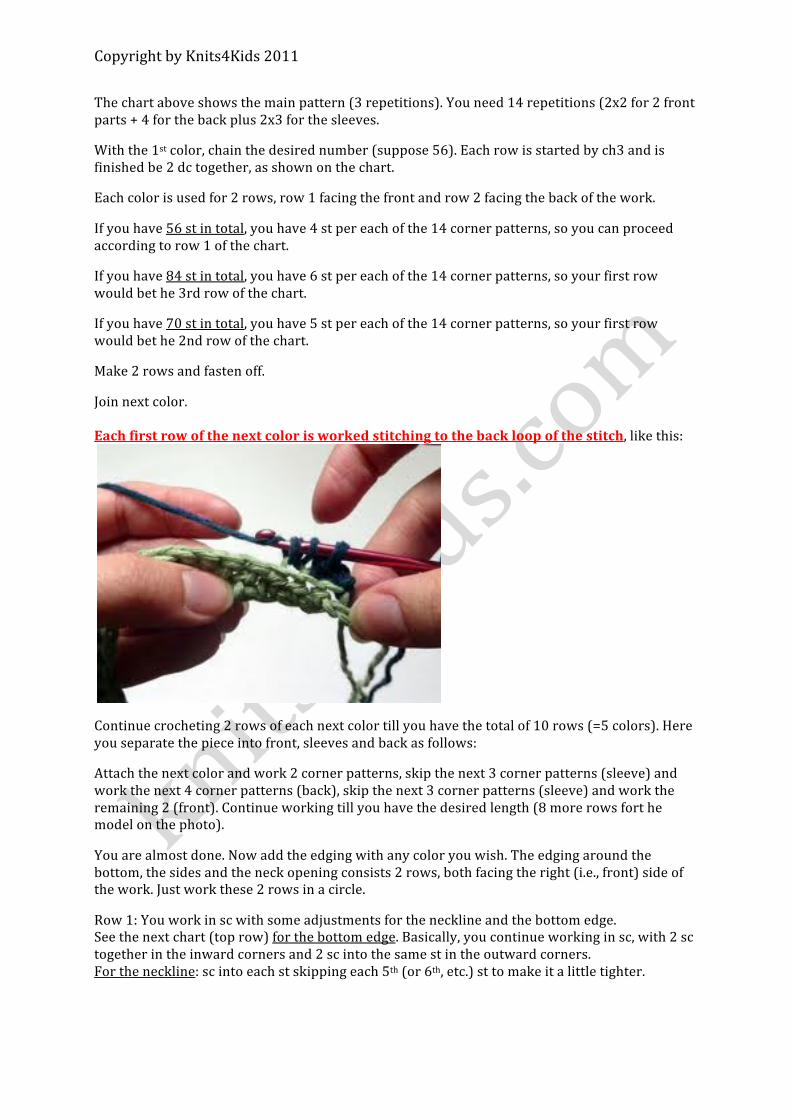
Join next color. Each first row of the next color is worked stitching to the back loop of the stitch, like this:
Continue crocheting 2 rows of each next color till you have the total of 10 rows (=5 colors). Here you separate the piece into front, sleeves and back as follows:
Attach the next color and work 2 corner patterns, skip the next 3 corner patterns (sleeve) and work the next 4 corner patterns (back), skip the next 3 corner patterns (sleeve) and work the remaining 2 (front). Continue working till you have the desired length (8 more rows fort he model on the photo).
You are almost done. Now add the edging with any color you wish. The edging around the bottom, the sides and the neck opening consists 2 rows, both facing the right (i.e., front) side of the work. Just work these 2 rows in a circle.
Row 1: You work in sc with some adjustments for the neckline and the bottom edge. See the next chart (top row) for the bottom edge. Basically, you continue working in sc, with 2 sc together in the inward corners and 2 sc into the same st in the outward corners. For the neckline: sc into each st skipping each 5th (or 6th, etc.) st to make it a little tighter.
Copyright by Knits4Kids 2011
Row 2: *2 sc, 1 picot*; repeat.
Picots are created by chaining the number of stitches called for in the pattern and then working a slip stitch in the indicated stitch or space. To work a picot in this version, work as follows. Picot: Ch 3, insert hook through front loop of base st and left vertical bar of base st, yarn over, pull through all loops on hook.
Edging for the sleeves consists only of the 2nd row (with picots) described above.
This pattern’s website is http://knits4kids.com/archives/8624 Use it to post comments/questions or upload a photo of your finished project.
chain stitch
double crochet
2 dc into 1 st
2 dc together
2-single crochet cluster/decrease
2-single crochet increase